| Reports - Physical Inventory | ||||||||||||||||
|
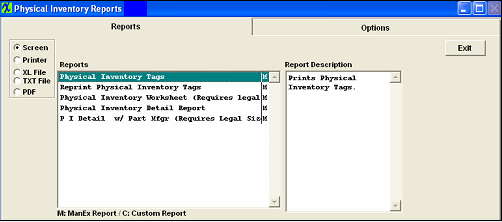
To obtain the Inventory reports, select the Print button from the ManEx action buttons at the top of the screen.
The following screen will appear:
TAGS:
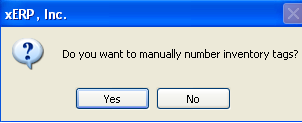
If you selected Manual Inventory Tags from this screen:
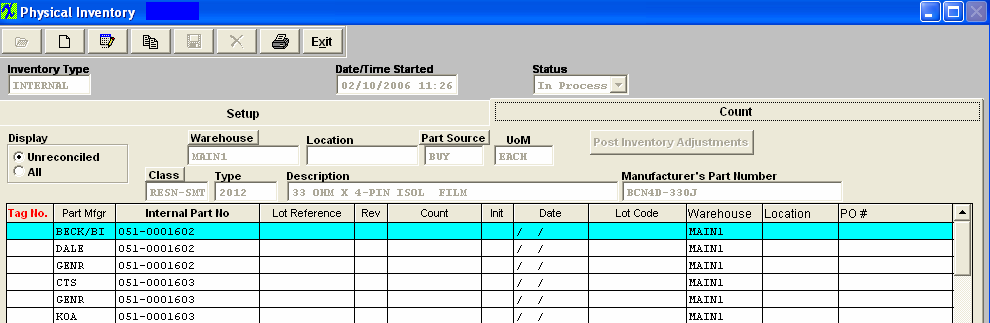
Depress the Count tab. The following screen will appear:
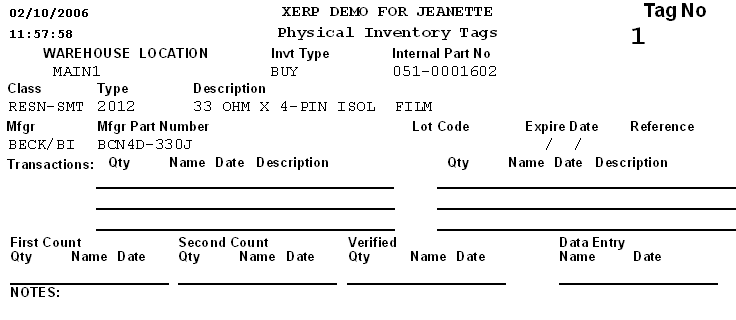
Depress the Edit button. Type in your password. Manually type in the Tag No. for each item. The system will automatically re-order the tags in numerical order. Physical Inventory Tags
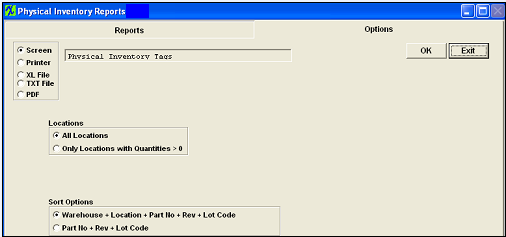
When you have finished, depress the Print button. The following screen will appear: Select Physical Inventory Tags. Depress the Options tab. The following screen will appear: Choose between All Locations and Only Locations with Quantities > 0.Choose the sort options, either Warehouse + Location + Part Number + Rev + Lot Code or Part No + Rev + Lot Code. The tags will print 3 each on 8 ½ X 11 paper. If the Inventory type is consigned, the Customer’s part number will print. If you did not select manual inventory tag numbering: A box will appear on the screen to Enter Starting Tag No: The Printed tags will appear as follows:
Below we have attached blank Inventory Tags <<blank IT.doc>> and <<blank IT.pdf>> that may be used if for some reason NO tags were printed for parts that may have inventory but are NOT being displayed in the Physical Inventory listing, etc. NOTE: These are only intended to be used if user happens to find product that was not on the physical Inventory list for some reason. Reprint Physical Inventory Tags
Select the Reprint Physical Inventory Tags, depress the Options tab and the following screen will appear: Enter Tag Number Range to Print. Depress the OK button The tags will print 3 each on 8 ½ X 11 paper. If the Inventory type is consigned, the Customer’s part number will print. Physical Inventory Worksheet
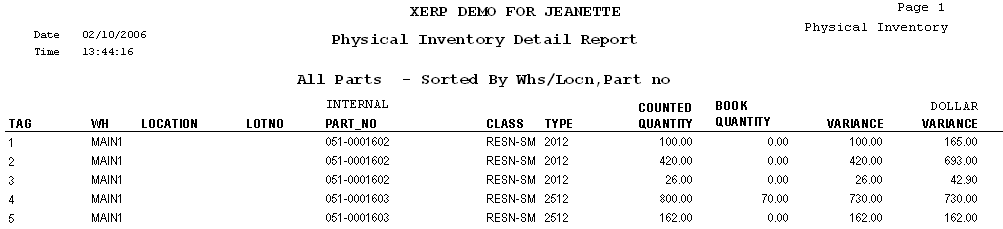
The report will appear as follows: 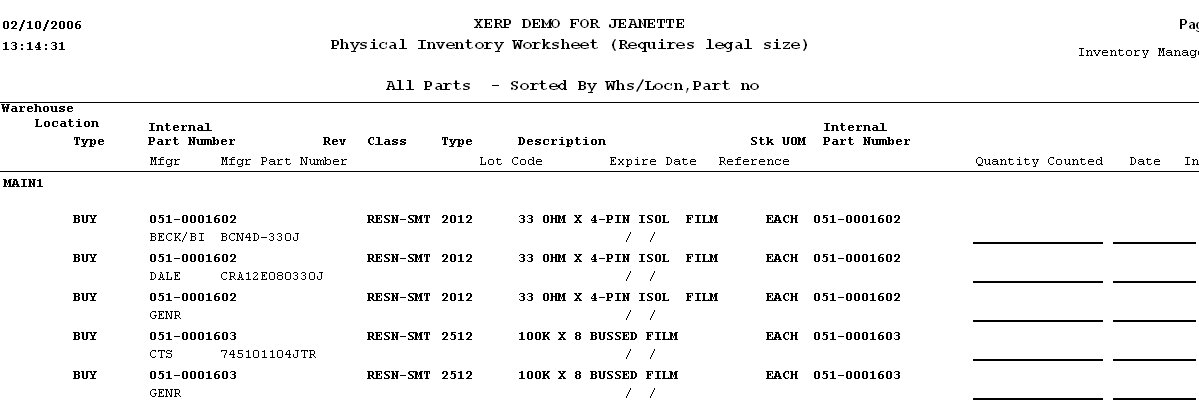 Physical Inventory Detail Report
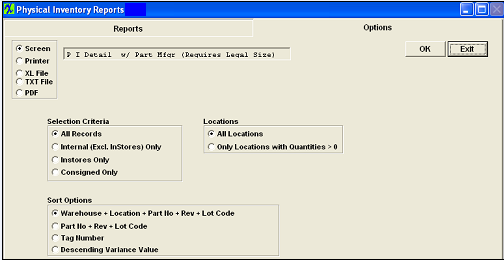
Select Physical Inventory Detail Report, depress the Option tab, and the following screen will appear: Click on the appropriate radial selection criteria. Choose one of the following: All Records, Internal (excluding In stores), In Stores or Consigned. If the Inventory type is consigned, the Customer’s part number will print. Click on the appropriate radial for Locations selection. Choose between All Locations or only Locations with Quantities greater than zero. Click on the appropriate radial for Sort Options.Choose between (Warehouse, Location, Part Number, Revision number and Lot Code), (Part Number, Revision Number and Lot Code) or by (Tag Number). Depress the OK button Note that this report is designed to be printed after the count has taken place and been reconciled. The report will appear as follows:
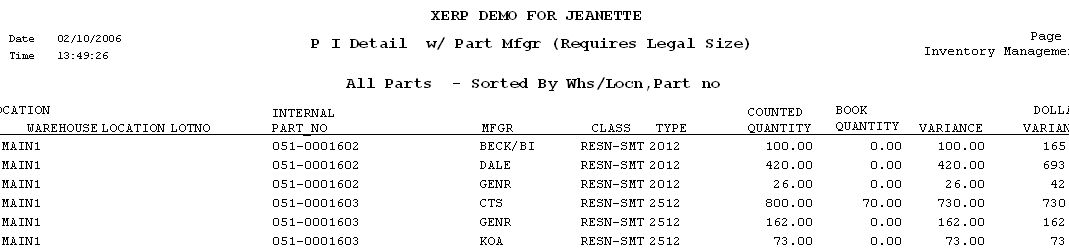
PI Detail w/Part Mfgr Report
The report will appear as follows:
|