1. SQL Backup Options
1.1. Scheduling Backup Job

Backup maintenance suggestions:

  • Configure/Schedule a Backup Job within SQL Manager on a nightly basis.  
  • Then it would be up to System Administrator to maintain and cycle through the backups created.  
  • For example:  you might go through and just keep a Rolling weeks worth of backups available, each day you could go and purge off the oldest backup (which would be approx 1 week old). 
  • In addition to the rolling weeks worth of backup we would also suggest picking maybe the 1st of every month and keep those backups on a permanent basis or a Rolling Year or Rolling 6 months.  This could come in handy down the road if some major situation occurs or some clients even refer back to those monthly backups and use them for accounting evaluations.  


 Download the attached script  <<BackupScript2>> at the end of this article.

Copy the script that you have made the changes to. 
 
 In the Object Explorer pane, under the SQL Server Agent node, right click Jobs and select New job from the context menu:  
 Name the New Job . . . this example we used ManexLiveBackup  
 Select Steps and select New  
 Name the Step. . . in this example we used "RunBackupScript"

Select the Database

and Paste in the script from first step above.
 
 Select Schedule and then New  
 Name the Schedule  . . in this example we named it "DailyManexBackup"

Select the Frequency

Select the Time 

Etc . . . 


Depress OK and confirm that the Daily backup has been generated in the file path you specified.  


1.2. Manual SQL Backup Script
Attached is a SQL query that can be used to quickly backup a selected SQL database.

1. Open backup script attached below

2. Copy the file path of where you want your back up to go. Here is my example below

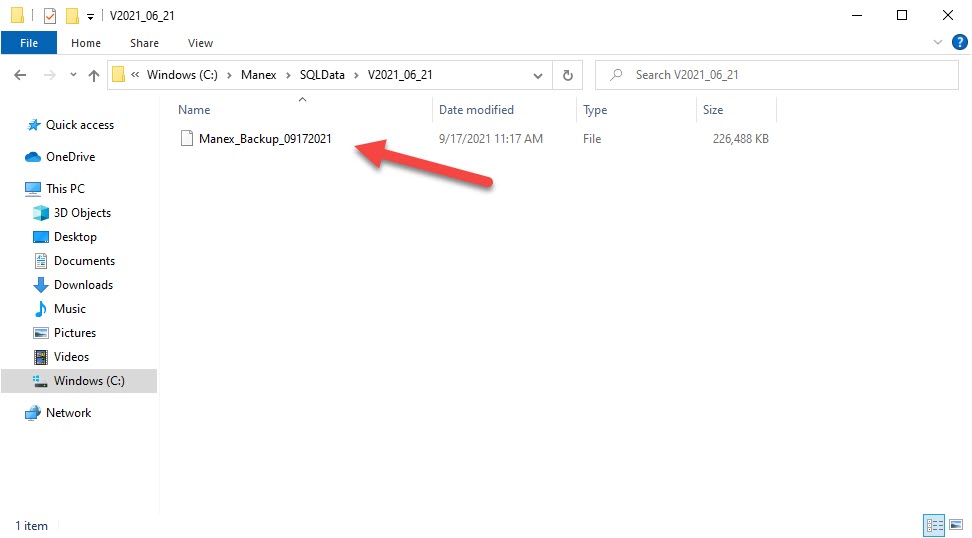
C:\Manex\SQLData\v2021_06_21\


3. On the script you are going to paste your file path and then add what you are going to name it.

Also make sure it’s pointed to the correct database that you want to backup.
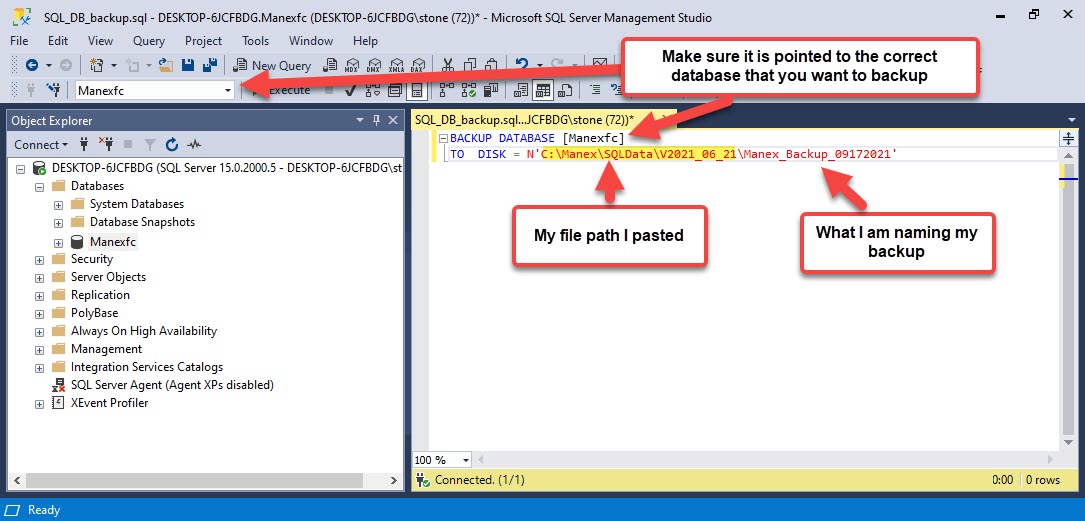

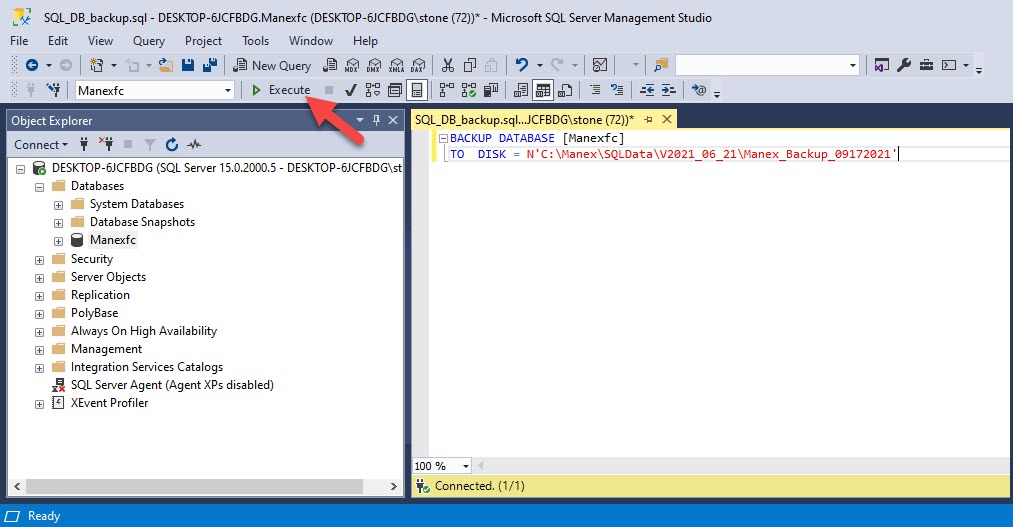
4. Then execute

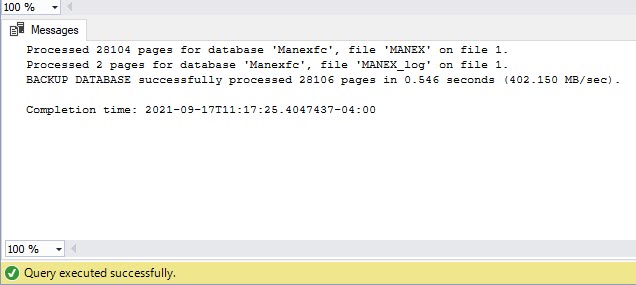
5. You should get an " Query executed successfully" at the bottom

6. You should be able to open that folder listed in the file path and find your back up. See my example below


IF you were to upload your backup to CRM, you will need to make it into a zip file first.

(make sure you have 7zip download)

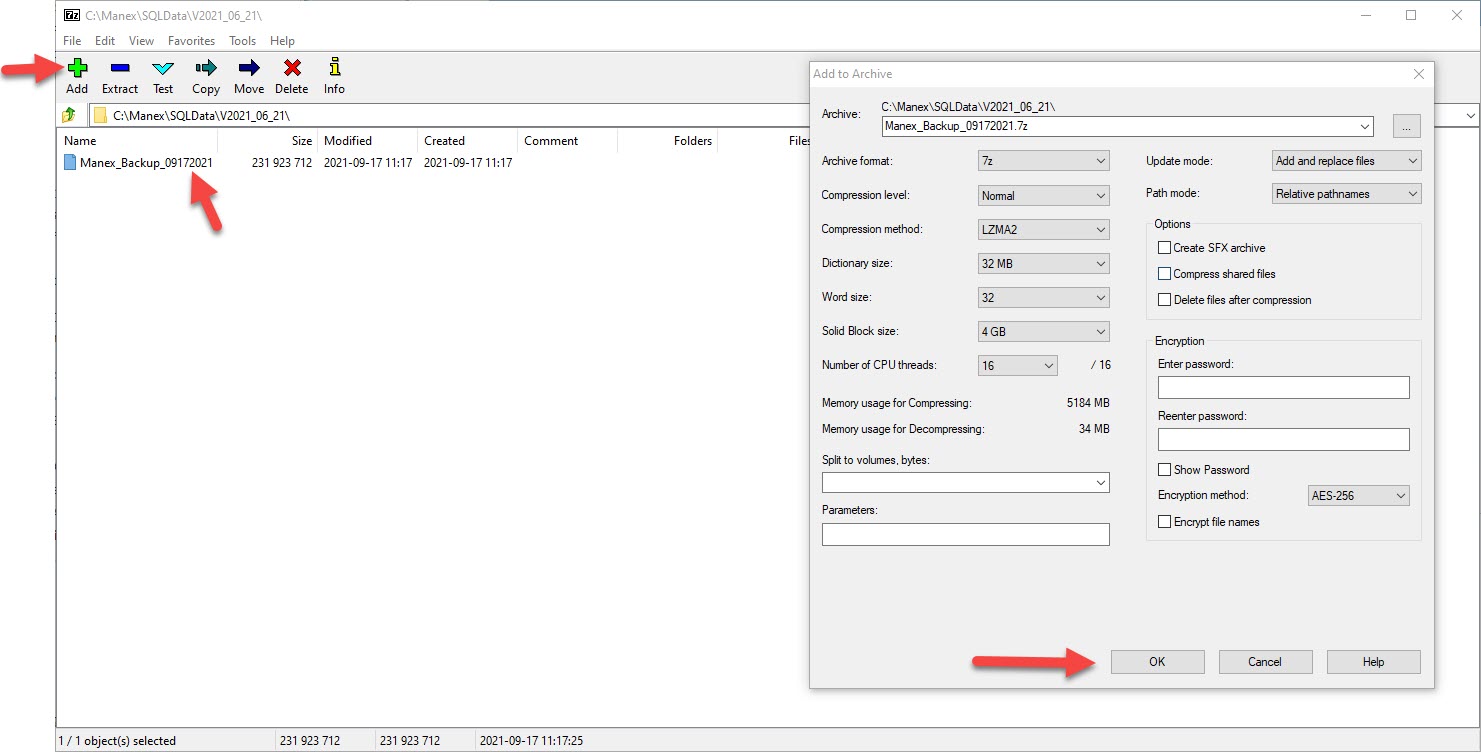
  1. Open 7zip and find your back up.
  2. Then once you find you backup on 7zip you can right click on the backup and choose add to “filename.7z”

  3. This will compress it to zip file and you can upload that to CRM.


1.3. Creating split backup files with SQL Server Management Studio

Creating split backup files with SQL Server Management Studio

To create split backup files with SQL Server Management Studio, perform the following steps:

  1. Open the Object Explorer, expand the Databases node, and right click on the database that needs to be backed up. From the dropdown menu select Tasks, and click on the Back up… option.

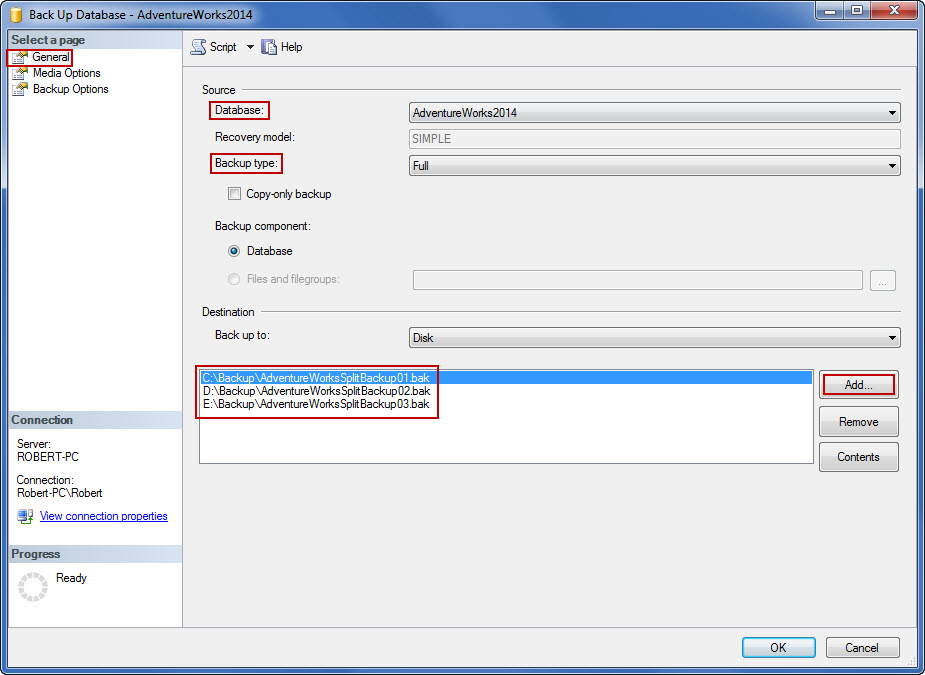
  2. In the General tab, specify the database that is used for the backup and the backup type (full or differential). To specify multiple backup paths, click Add… button.

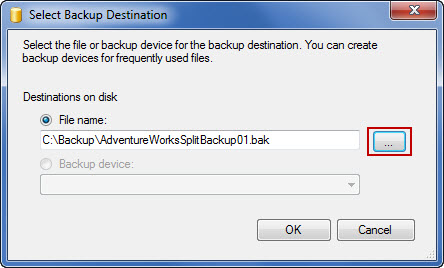
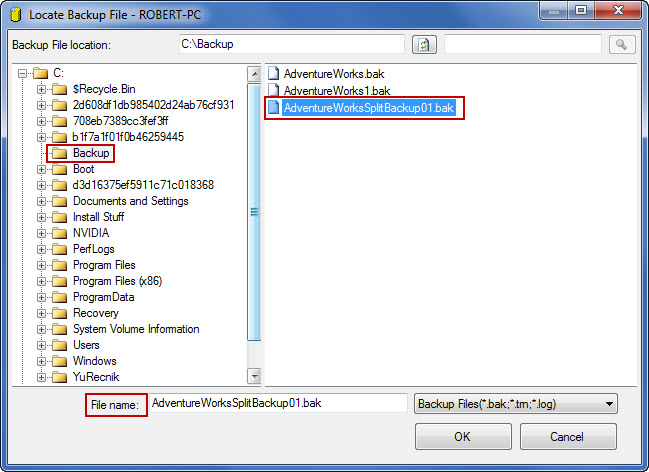
  3. Set the backup destination by typing the path and the backup filename, or browse for the backup folder by using the browse button on the right. Click OK when done. Repeat the step until all destinations are set. The list of backup paths is displayed on the bottom of the page.

  4. By clicking OK button on the lower right, the backup process starts. The success message is displayed when backup process completes.

To restore the database from split backup files with SQL Server Management Studio:

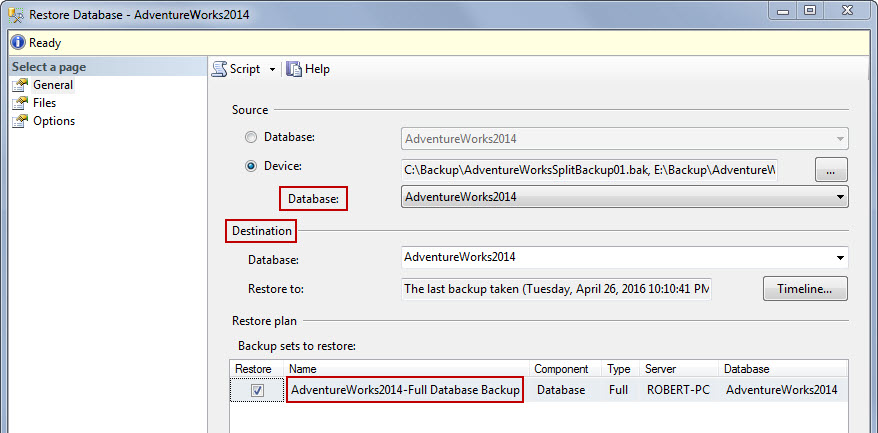
  1. Open the object explorer, right click on Databases node, and select Restore Database…

  2. In General tab, mark Device radio button, and browse for the backup files with browse button on the right.

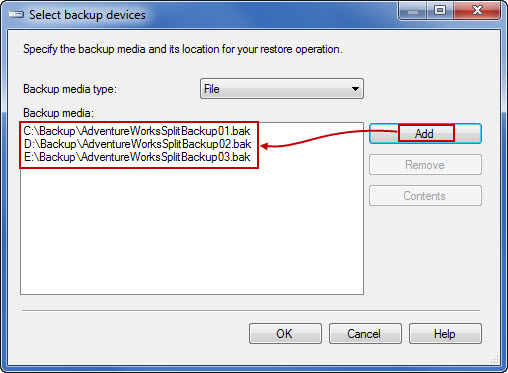
  3. In Select backup devices window, click Add.

  4. Browse for the backup files in the folder tree, or enter the backup path and file name manually. Click OK when done. Repeat the step until all of the backup files are listed, and click OK when finished.

  5. Program loads all file paths, and displays the name, type and the destination of the database that is about to be restored. To complete the restore process, click OK.