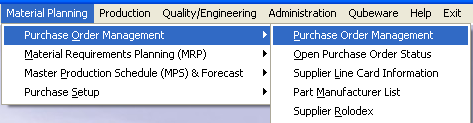
| 1. How To ........ for In-Plant Store |
| 1.1. Set-Up for an In-Store PO |
Find a part or product that exists within Inventory Control Mgmt. Setup an In-Store Warehouse for part. Setup up a contract with a supplier(s) within the Supplier Contract Management module. For all other Prerequisites see Article #5575.
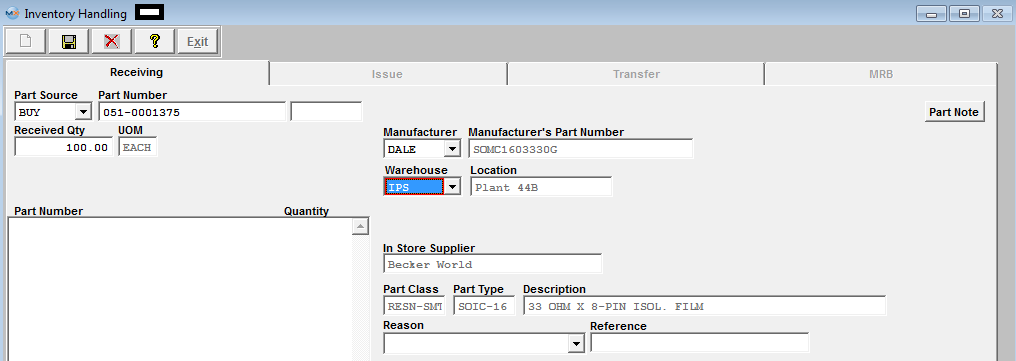
Create an Inventory Receipt in the system for the In-Store location using the Inventory Handling module. Since the Receipt was made to a In-Store location there will be no Accounting transaction created at this time.
Or Upload parts to the In-Store warehouse using the IPS Upload module. At this time the following Accounting Inventory Issue Transactions will be created within the system.
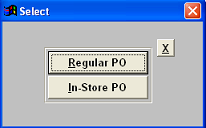
 The next Step is to Create the In-Store PO .
|

| 1.2. Creating an In-Store PO | ||||
The following screen will appear:
The following screen will appear. Sort By: Supplier or Part Number by clicking on the appropriate radial. If you Sort By Part Number, an entry box will appear, type in the Part Number and the Revision character, if applicable. 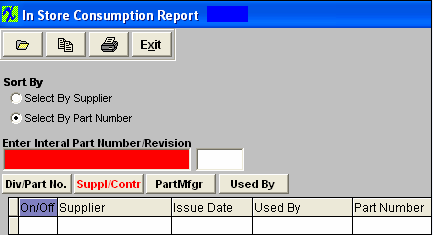 If you Sort By Supplier, the following screen will appear, highlight the supplier of choice.Depress the > button. If you want all of the Suppliers, depress the >> button. 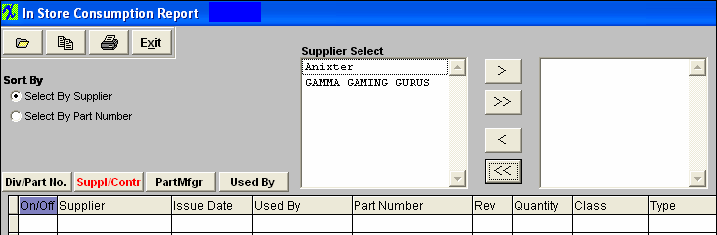 Depress the Find Record button to find records according to the selection. The bottom of the screen will populate. You may sort by Div/PartNo., Supply/Contr, Part Mfgr, or Used By; by depressing the appropriate button. 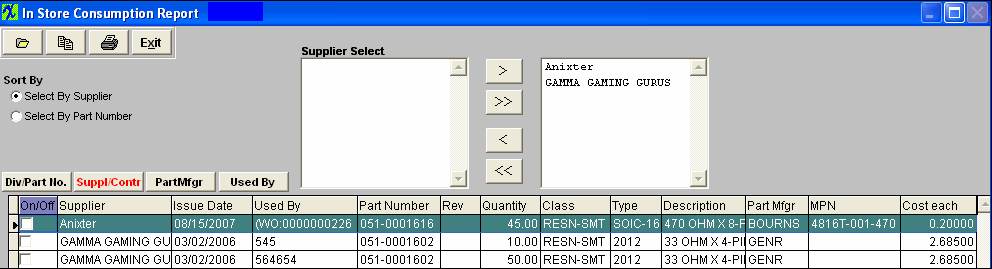 Depress the On/Off button to check all of the selections. Or, check them individually. Depress the Copy button. This will create a list of Purchase Orders for In Store Items, which will go directly to the default printer. The temporary purchase order number will appear on the report.
NOTE: If user has contract pricing already
setup for example: Up to qty of 5 = $1.00, Up to qty of
100 = $0.94, Up to qty of 101 = $0.95. When the in-store
 Depress the Exit button. This will create the IPS PO. Depress exit button again and it will pull up the IPS record created. The system will NOT allow the user to edit an IPS PO.
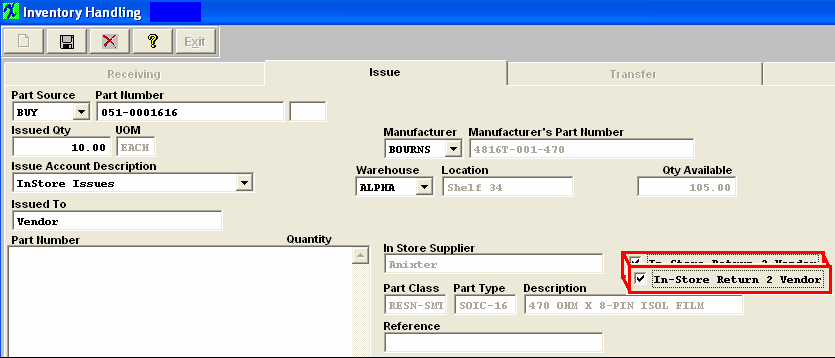
Note: In-Store PO's group the parts by Contract number per Supplier. For further detail see Article #3438 . 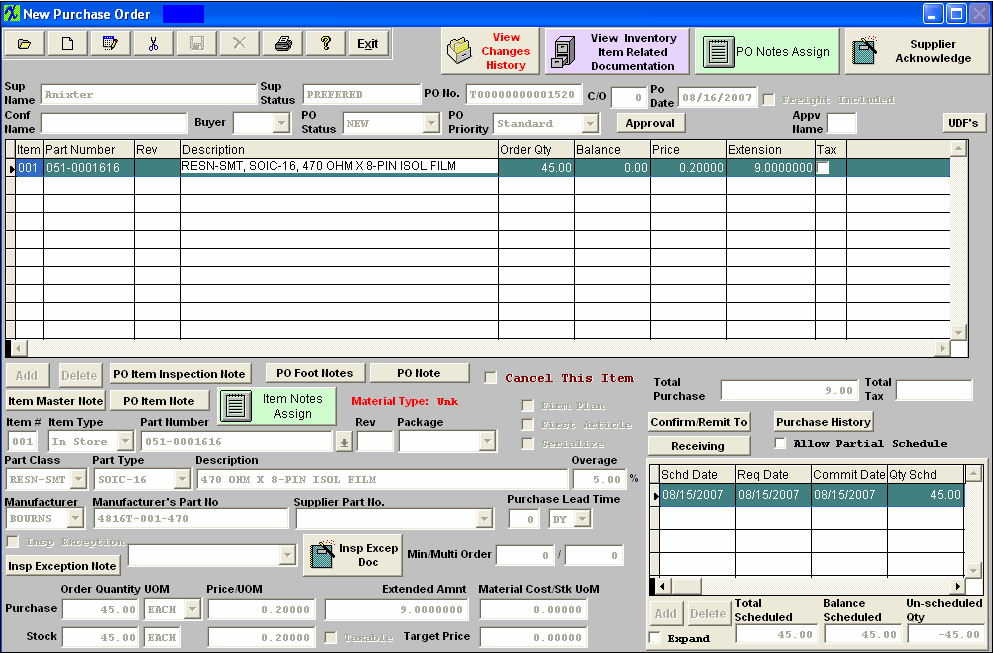 The user will then need to review the IPS PO created and approve the purchase order. Pressing the APPROVAL button in the Purchase Order module will ask for the user’s password. The user must enter a password that has been authorized to approve the dollar amount of the order. Entry of an authorized password and approval inactivates the 1st approval button and places the initials of the person approving the order next to the approval button. If the user is requiring two approvals, the process is repeated for the second approval. Once the PO has received it's final approval a Purchase Order number will be assinged and the PO Status marked as closed. At this point the normal Un-Reconciled Receipt account transaction will be created within the system. Then from this point on the Accounting transaction follow the normal flow through the system. Returning In-Plant Inventory to Supplier If the user has in-store items, which they want to return to Vendor without any impact on accounting or
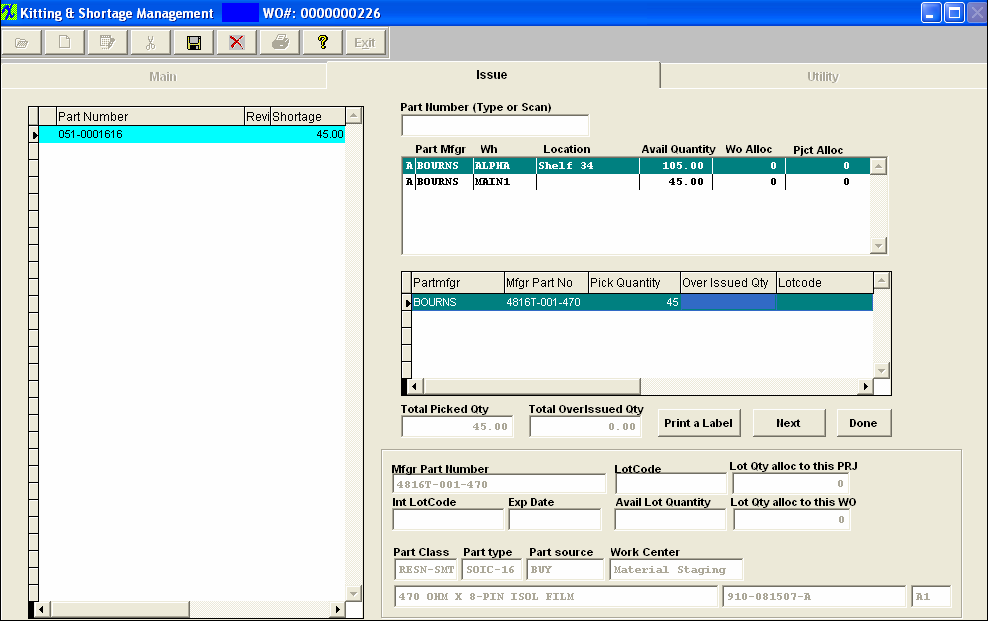
Depress the Issue tab. Depress the Add record button. Enter Part Source, Part Number, Issued Qty, Issue Account Description, Issued To, Mfgr, then select the In-Store warehouse. Check the "In-Store Return 2 Vendor" box. (Note: This box will only be visible if the In-Store warehouse is selected). If this box is checked no purchase order will be created and there will be no impact on accounting.
Depress the Save button to Save the changes, depress the Abandon changes button to abandon changes.
|