| Enter the Defect Data Information for the DPMO by Employee Report | ||||
In order to have the "DPMO by Employee" report create valid data, the user must be sure to enter the opportunities for defects (PPM) in the Work Order Traveler Setup and the employee must inspect the board and be assigned to the defects. The "DPMO by Employee" report only gathers data if BOTH "Inspected By" and "Emp" are the same user, and the PPM is setup. See Article #3156 for further detail on DPMO. The following steps need to be followed to collect and track defects per employee. All data must be Entered in the Quality Inspection Entry and Defect Information screens, with in the Shop Floor Tracking Module. Entering a Defect Code Entry to a Work Order for the "DPMO by Employee" report
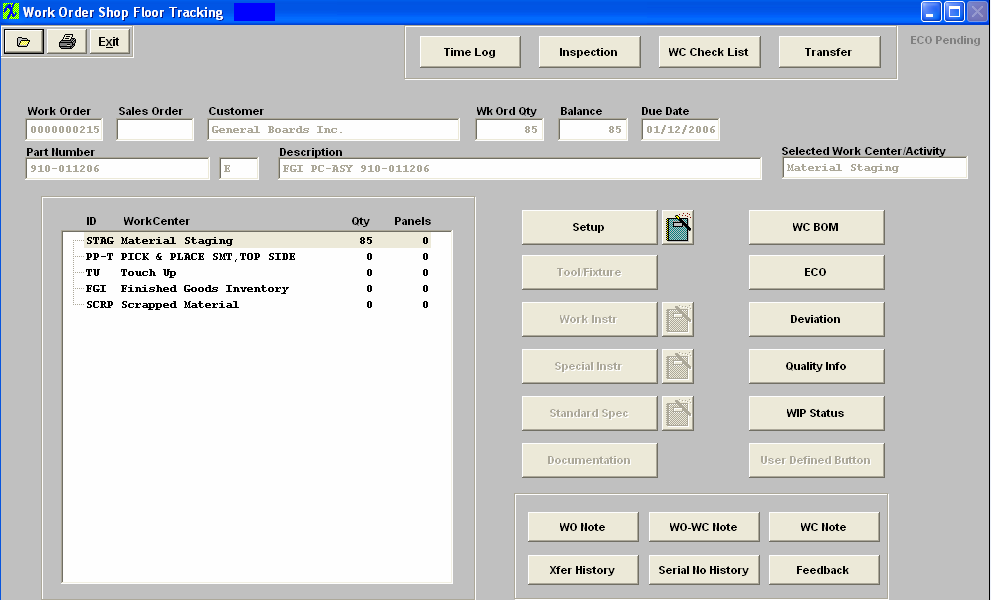
Depress the "Inspection" button located at the top of the screen. The following screen will appear:
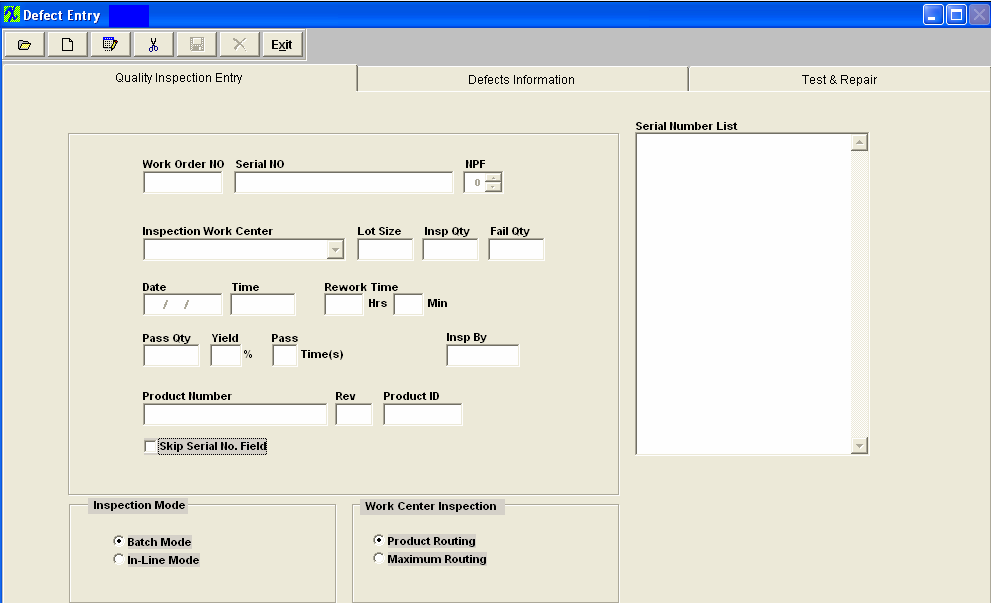
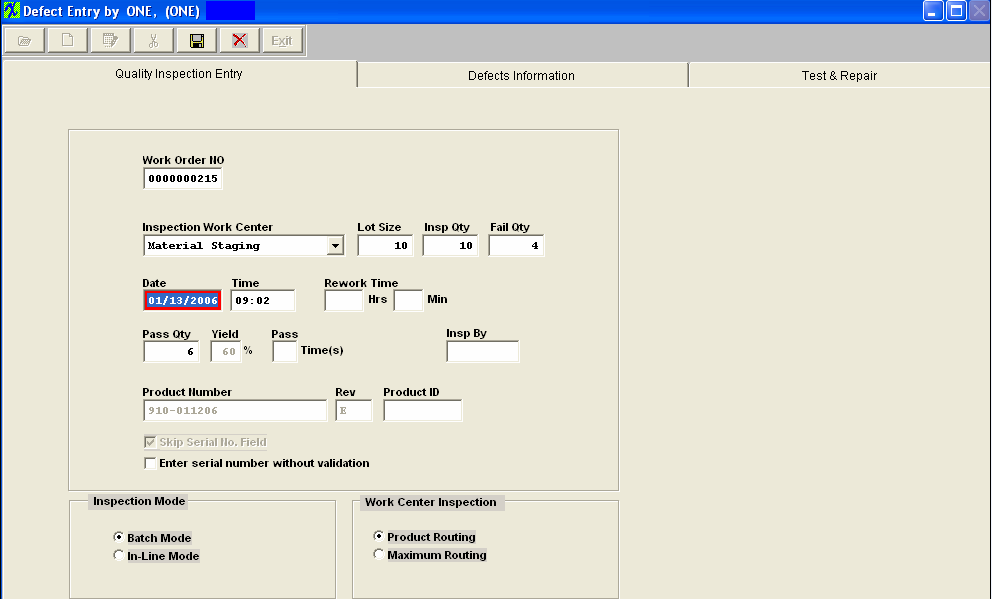
Entering Quality Inspection Data The first information tab records information about the work order. This includes lot size, failures, inspection quality, date, etc. Depress the Add action button. Enter the password of the Employee that has inspected the product and will be assigned to the defects. Example: If user "ONE" is going to be assigned to the defect(s) then you must enter user "ONE"'s password. Check the Skip Serial No. Field (if not applicable). Enter the Work Order number, choose the Inspection Work Center from the pulldown, enter Lot Size inspected, Inspected Qty, and Failed Qty. The Date, Time, Pass Qty, and Yeild % will default in.
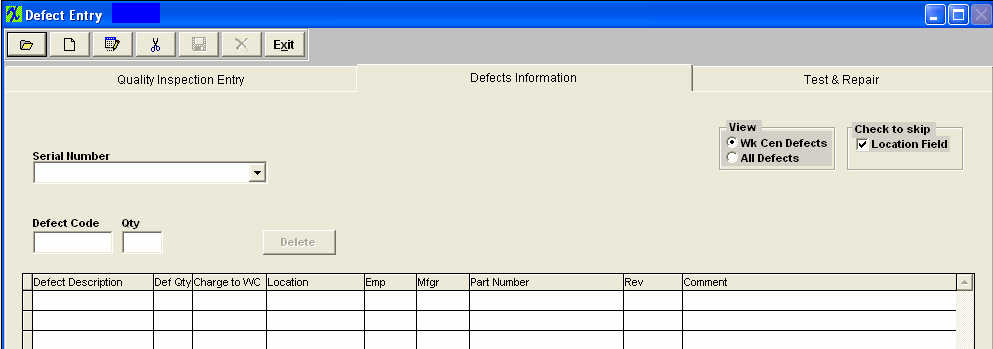
Depress the Defects Information tab and the following screen will appear:
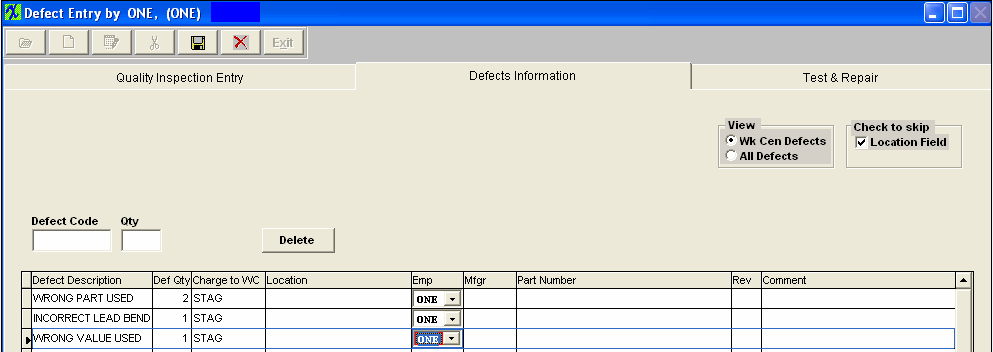
The user may then enter a defect code by manually typing in the code, or by scanning a bar-code menu, or by double clicking on the field to review a list of defect codes. The list displayed will depend on which view is selected. If Work Center Defects is chosen, only those defects associated with the work center (as established in the Quality Defect Codes setup) will be displayed. If All Defects is chosen, then every defect entered in the Quality Defect Codes setup will be displayed. The user may select one or more defects from the list by holding down the Control Key while clicking on the defects to be selected. After completing the selection of the defects involved with the current inspection, clicking on the OK button loads the selected defects into the defect information screen. Although Manex will enter a Charge To Work Center code based on the work center entered or the location of the part, the user may modify the originating work center by clicking on the field and selecting another work center from the list. The user may (optionally) then enter in the location (reference designator) where the defect was observed. The user then must choose the Emp from the pull down, which would be "ONE", because it needs to be the same user that has been entered in the "Inspected By". The user is allowed to enter other user's name on Defect detail page in the "Emp" column. But when the "DPMO by Employee" report is run, it will not display the records assigned to the different users. The system will check the BOM to be sure that the location entered here matches locations entered on the Bill of Materials. When a valid location is entered, then system searches the Bill of Material to find manufacturers approved for the product, and displays a list of the approved manufacturers for the user to identify which manufacturer was associated with the defect observed. The user double-clicks on the manufacturer's name for the defective part, and the manufacturers name is placed in the defect information screen. Manex defaults the number of defects to one item, but the user may overwrite the quantity with an observed quantity greater than one. The user may also enter a brief comment about the defect, for future reference. The completed screen should appear as follows:
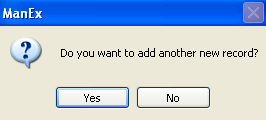
Depress the Save record action button to save changes or the Abandon changes action button to abandon changes. If you depress the Save record action button, the following message will appear:
If you want to add another defect record for the same user "ONE" then depress YES, if you want to add a defect record for a different user (Example user "TWO"), then you must depress NO. Depress the Add record action button and enter user "TWO"s password and continue to enter the defect information. When the user has completed the defect information, he/she may review the "DPMO by Employee" report Article #815, or may click on the Test & Repair page, to enter more information about the part. The Test & Repair is actually a separate OPTIONAL module, but has been included into the Defect Entry screen for ease of use for the operators. Please see the Test & Repair Management (T&R) article for more information.
|

