| 1. How To |
| 1.1. Find a BOM Import that has Already Been Started |
Login to the WebManEx and Select Product Data Management Select Import and the following screen will be displayed
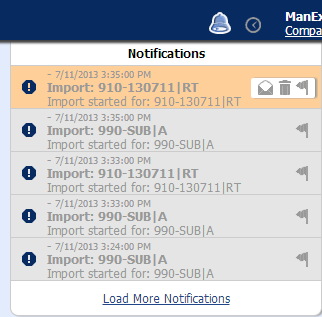
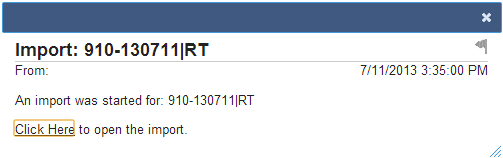
 Click on the Bell symbol (with the number 4 by it) up in the right hand corner and a list of Notifications will be displayed of all the Import Started:
 Highlight the Import of interest and the following screen will be displayed:
 Depress "Click Here" and the import will be displayed on screen:
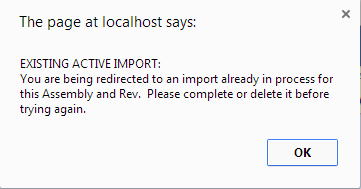
 If you attempted to create a new import for the exact same assembly and rev that already exists in the Notifications. The following message will be displayed.
This is to prevent users from accidentally working on multiple versions of the same record and wondering why their last changes weren't sticking, we automatically redirect you to the existing active import. Once you transfer the bom, you can start a new one for the same bom. Or, you can change the part number or rev in order for it to be treated as a new import. Or, you can delete the current active record to start fresh. NOTE: The import in process will NOT exist in the desktop. You must first transfer it in order to see the parts and changes. The "EXISTING ACTIVE IMPORT" is just an import that you can finish and transfer in order to see it in the desktop.
|
| 1.2. Import BOM |
User MUST first download a blank template and enter the BOM information into the template.
System will look at the Item Number and Description to determine whether it is a different part, if the Item Number and description match then the Shaded parts do NOT have to be populated. The information from the previous lines will be used, when creating the BOM import. If the assynum, assyrev, and assydesc fields are all blank on the first line item, system will use the File Name as the Assembly Number. for further detail see Article 5490. Once the template has been completed with all the BOM information, save the file. Login to the WebManEx and Select Product Data Management Select Import and the following screen will be displayed
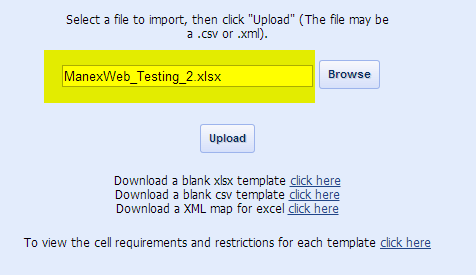
Enter the file name in the field or depress the "Browse" button to locate the file to import.
Once the file has been selected it will be displayed in the Field as displayed below:
Depress the "Upload Button" If you attempted to create a new import for the exact same assembly and rev that already exists in the Notifications. The following message will be displayed.
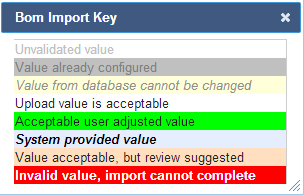
This is to prevent users from accidentally working on multiple versions of the same record and wondering why their last changes weren't sticking, we automatically redirect you to the existing active import. Once you transfer the bom, you can start a new one for the same bom. Or, you can change the part number or rev in order for it to be treated as a new import. Or, you can delete the current active record to start fresh. NOTE: The import in process will NOT exist in the desktop. You must first transfer it in order to see the parts and changes. The "EXISTING ACTIVE IMPORT" is just an import that you can finish and transfer in order to see it in the desktop. Depress the "Upload" button and the data will be Uploaded into the following screen and Validated.  During the Validated processes if the system finds errors these fields will be shaded in Red indicating that these fields have missing or incorrect information.
Click on an item and all the detail for that item will be displayed. User may make changes/corrections to any of the Part Information, Ref Desg, Manufacturer, Manufacturer Part Numbers, and Material Types. The fields shaded in Red indicates that the information is incorrect or missing and must be corrected before the import process can take place.
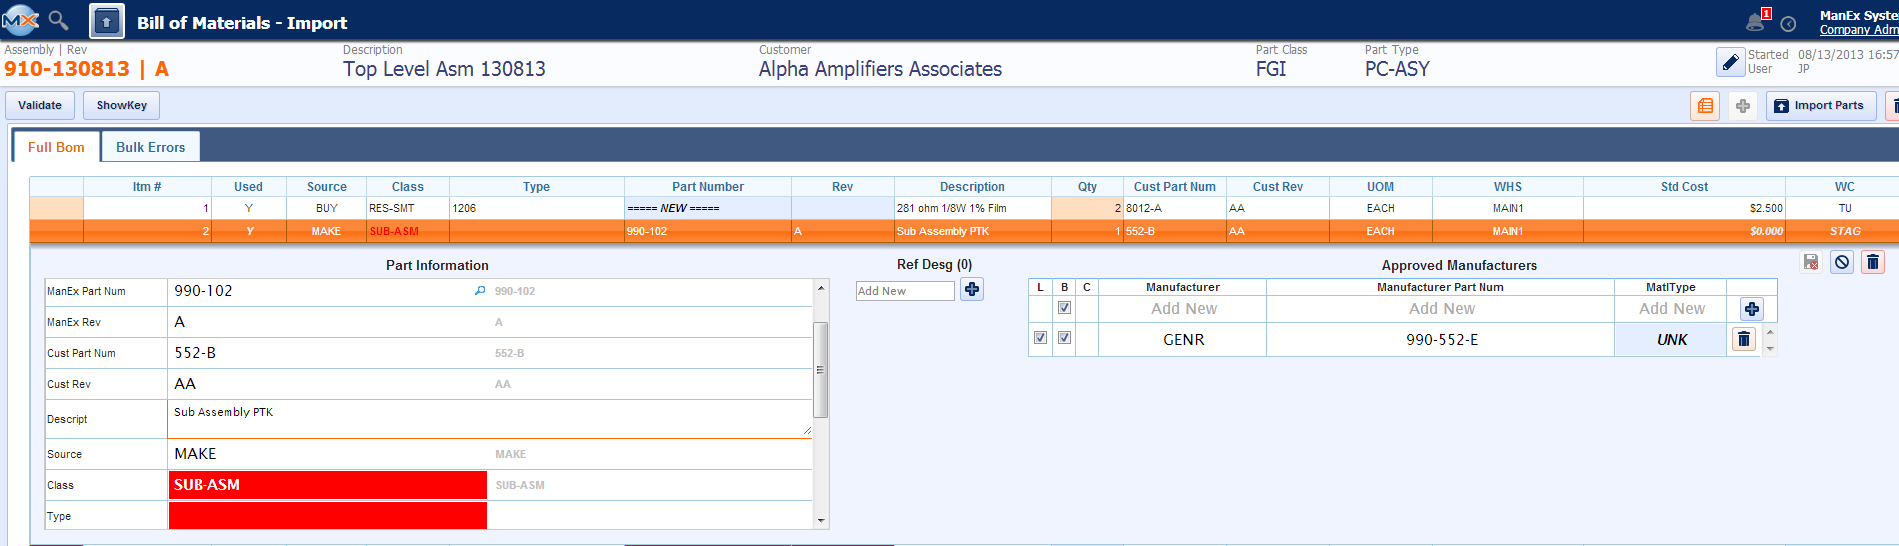 The data to the right on the Part Information screen that is light gray is what was imported from the template.
The Class and Type will have a pull down to select from:
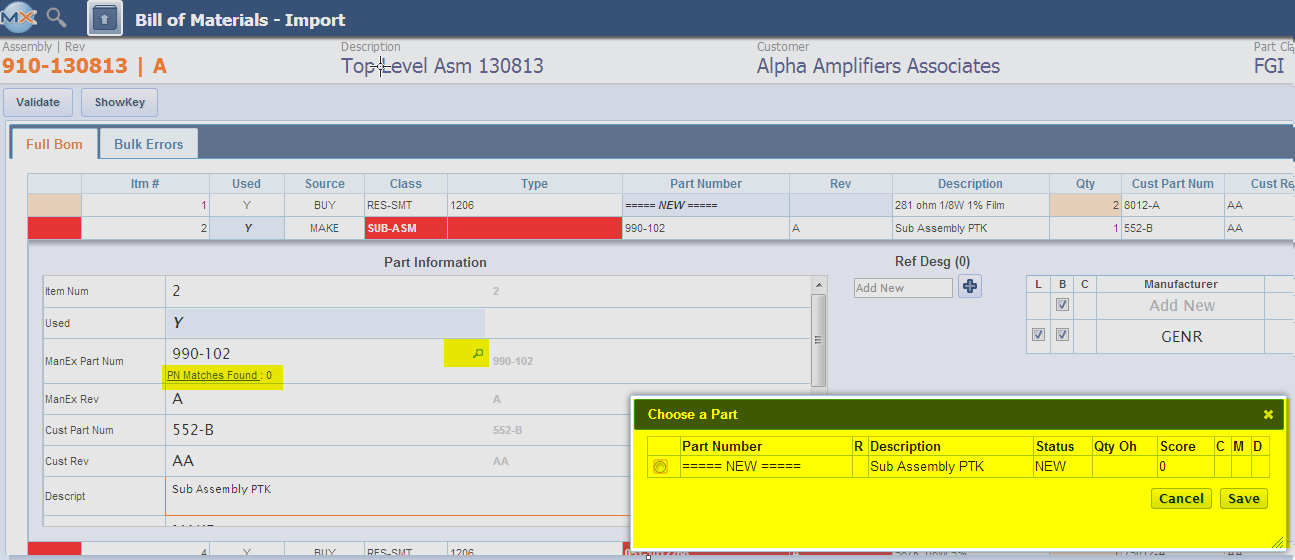
 Clicking on the magnifying glass to the right of the ManEx Part Number will do a search to located any existing parts that are similar to the one entered:
 NOTE: If user has Inventory Part Numbering setup to MANUAL, user has the option to enter a part number in the ManEx Part Num field, or if a ManEx part number exists for the part being imported user may use the existing ManEx part number, but if user does NOT want to use the existing ManEx PN, they MUST select "NEW" and then enter in the part number they want to use. If they have Inventory Part Numbering setup to AUTO then they MUST select an existing PN or have "NEW" in this field, and a part number will be assigned to this part upon import.
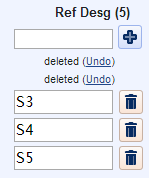
User may add Reference Designators by clicking on the (+). The number of Ref Desg needed for this part will be displayed in (). To remove an existing reference designator click on the (garbage can symbol) to the right of the desg you want to remove, click on the (Undo) to restore the reference designator you removed.
You need to save changes before you can add additional reference designators if you do not (Undo) any of the ones you deleted. If a user adds more ref desg then required at time of upload it will only use the number of ref desg required starting from the top of the list down.
To add a New Mfgr, depress the (+) button on the right and new fields will be displayed in green:
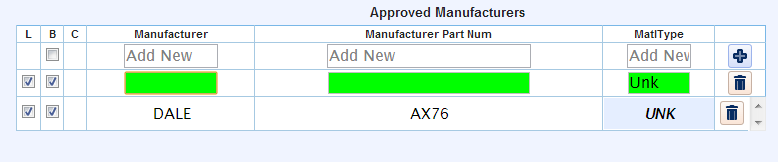 Enter Mfgr, Mfgr PN, and select a new MatlType or leave the default (Unk). Once all the changes have been completed and there are no more fields shaded in RED, depress the "Save & Exit" button, "Cancel" button, or "Delete" button.
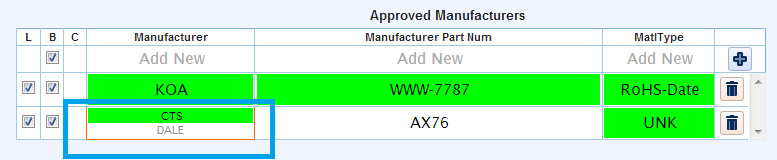
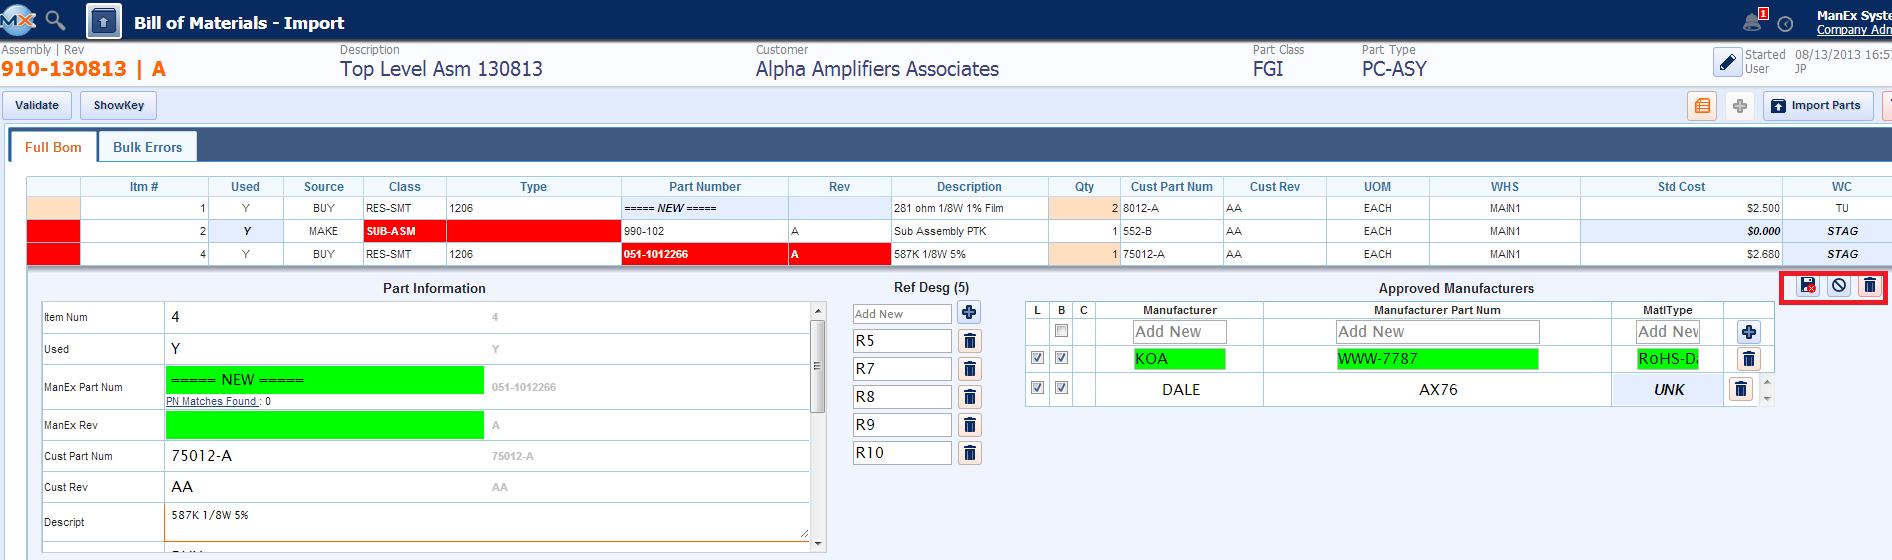 If users changes the Manufacturer or Manufacturer Part Num then hovers over that field the Mfgr or Mfgr PN originally uploaded will be displayed in gray and the new Mfgr or Mfgr PN will be displayed in black and will be bordered in RED on three sides as displayed below.
 Select the "Validate" button to validate all changes.
Once all the data is correct, user then may select the "Import Parts" button to load the BOM into the ManEx system.
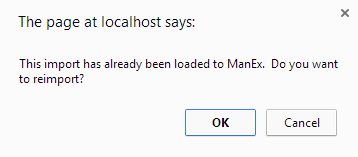
 If the BOM has already been loaded to ManEx user will receive the following message giving the user the option to reimport this BOM.
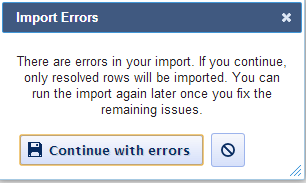
 If user is trying to Import Parts with Errors the following message will be displayed, giving the user the option to continue with errors or cancel import:
 Once the BOM has been loaded to ManEx the Header will turn from White to Gray as displayed below:

|