| 1. Time Log Management |
| 1.1. Introduction |
|
ADDRESS {rootURL} TimeLog
NOTE: {rootURL} is the URL you use to access web ManEx
AVAILABLE ACTIONS From this screen, the user can:
|
| 1.2. Fields and Definitions |
Start Date - A date you want the Time Log data to start
End Date - A date you want the Time Log data to end
Filter by User - Enter the employee's name you want to see their time log data
Get Results Button - Depress this button to have the results display on screen.
Original Date In - The Original Date the employee logged in for the shift or for the job.
Date In - The Date the employee logged in for the shift or for the job.
In Init - The workers Identification as entered in Security Setup.
Original Date Out - The Original Date the employee logged out of the shift or out of the job.
Date Out - The date the employee logged out of the shift or out of the job.
Out Init - The workers Identification as entered in Security Setup.
Time Used - The difference between Time In and Time Out. Calculates total time logged in Job.
Job - The Job/Work Order Number.
WC - The Work Center or Department the employee is assigned to in Security Setup.
OT - This is hours worked outside of normal hours based on the user setup. (This can be hours in a shift, hours in a day, or hours in the week)
Comment - Any comments added.
Holiday - A check in this box indicates that this is a Holiday Delete - A check in this box indicates that this time log has been deleted.
|
| 1.3. How To |
|
Login to the WebManEx and Select Production
Select Time Log Management and the following screen will be displayed:
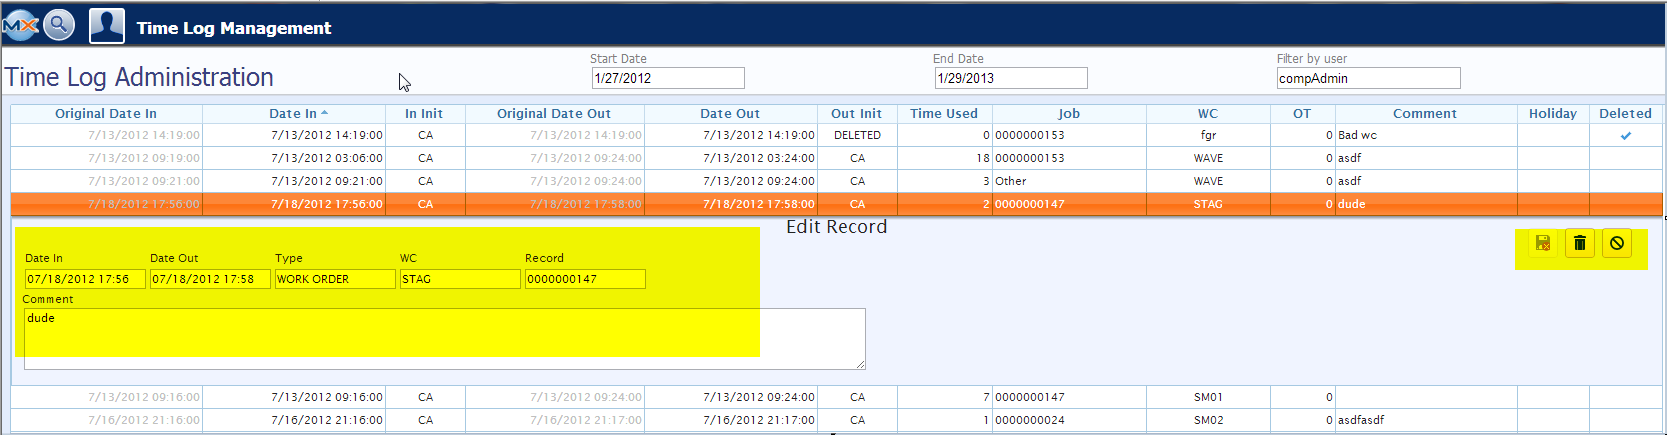
Enter in a Start Date, End Date and User. Depress the Get Results button. The following screen will display all the Time Log for a user, WO, Job, etc.
 User may drill down to edit the Time Log Data entered. User may edit the Date In, Date Out, Type, WC, and/or Record data, or add Comments. Once the changes have been made they may use the Icons to the right of the screen to Save and Exit, Delete, or Cancel.
 |