| How to Add Users |
Login to MANEX Cloud and find the Setup group. Select User Administration
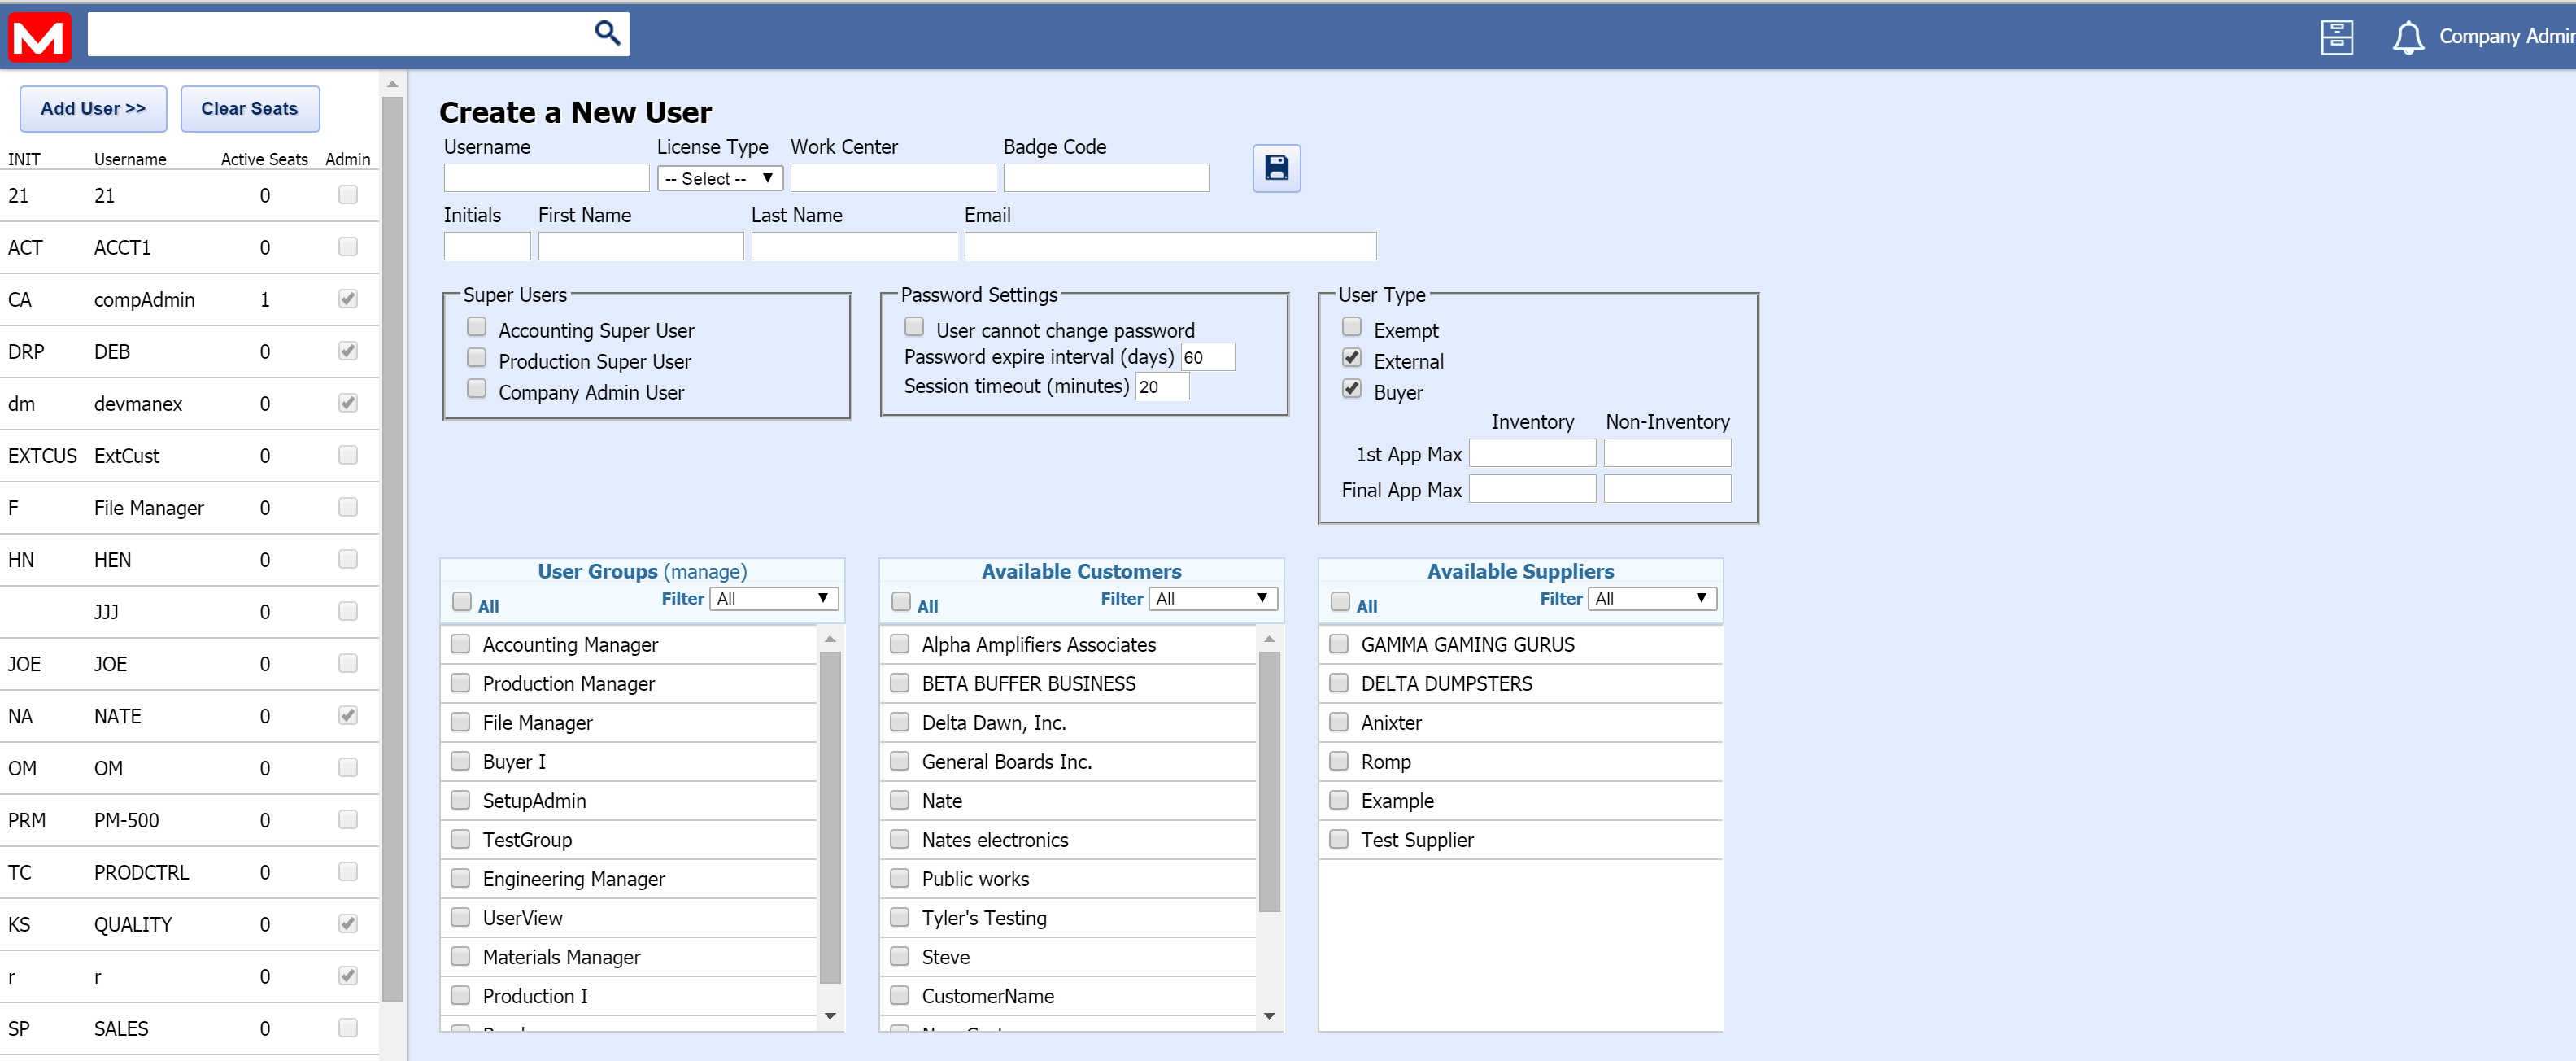
Select the "Add User" button and the following screen will be displayed:
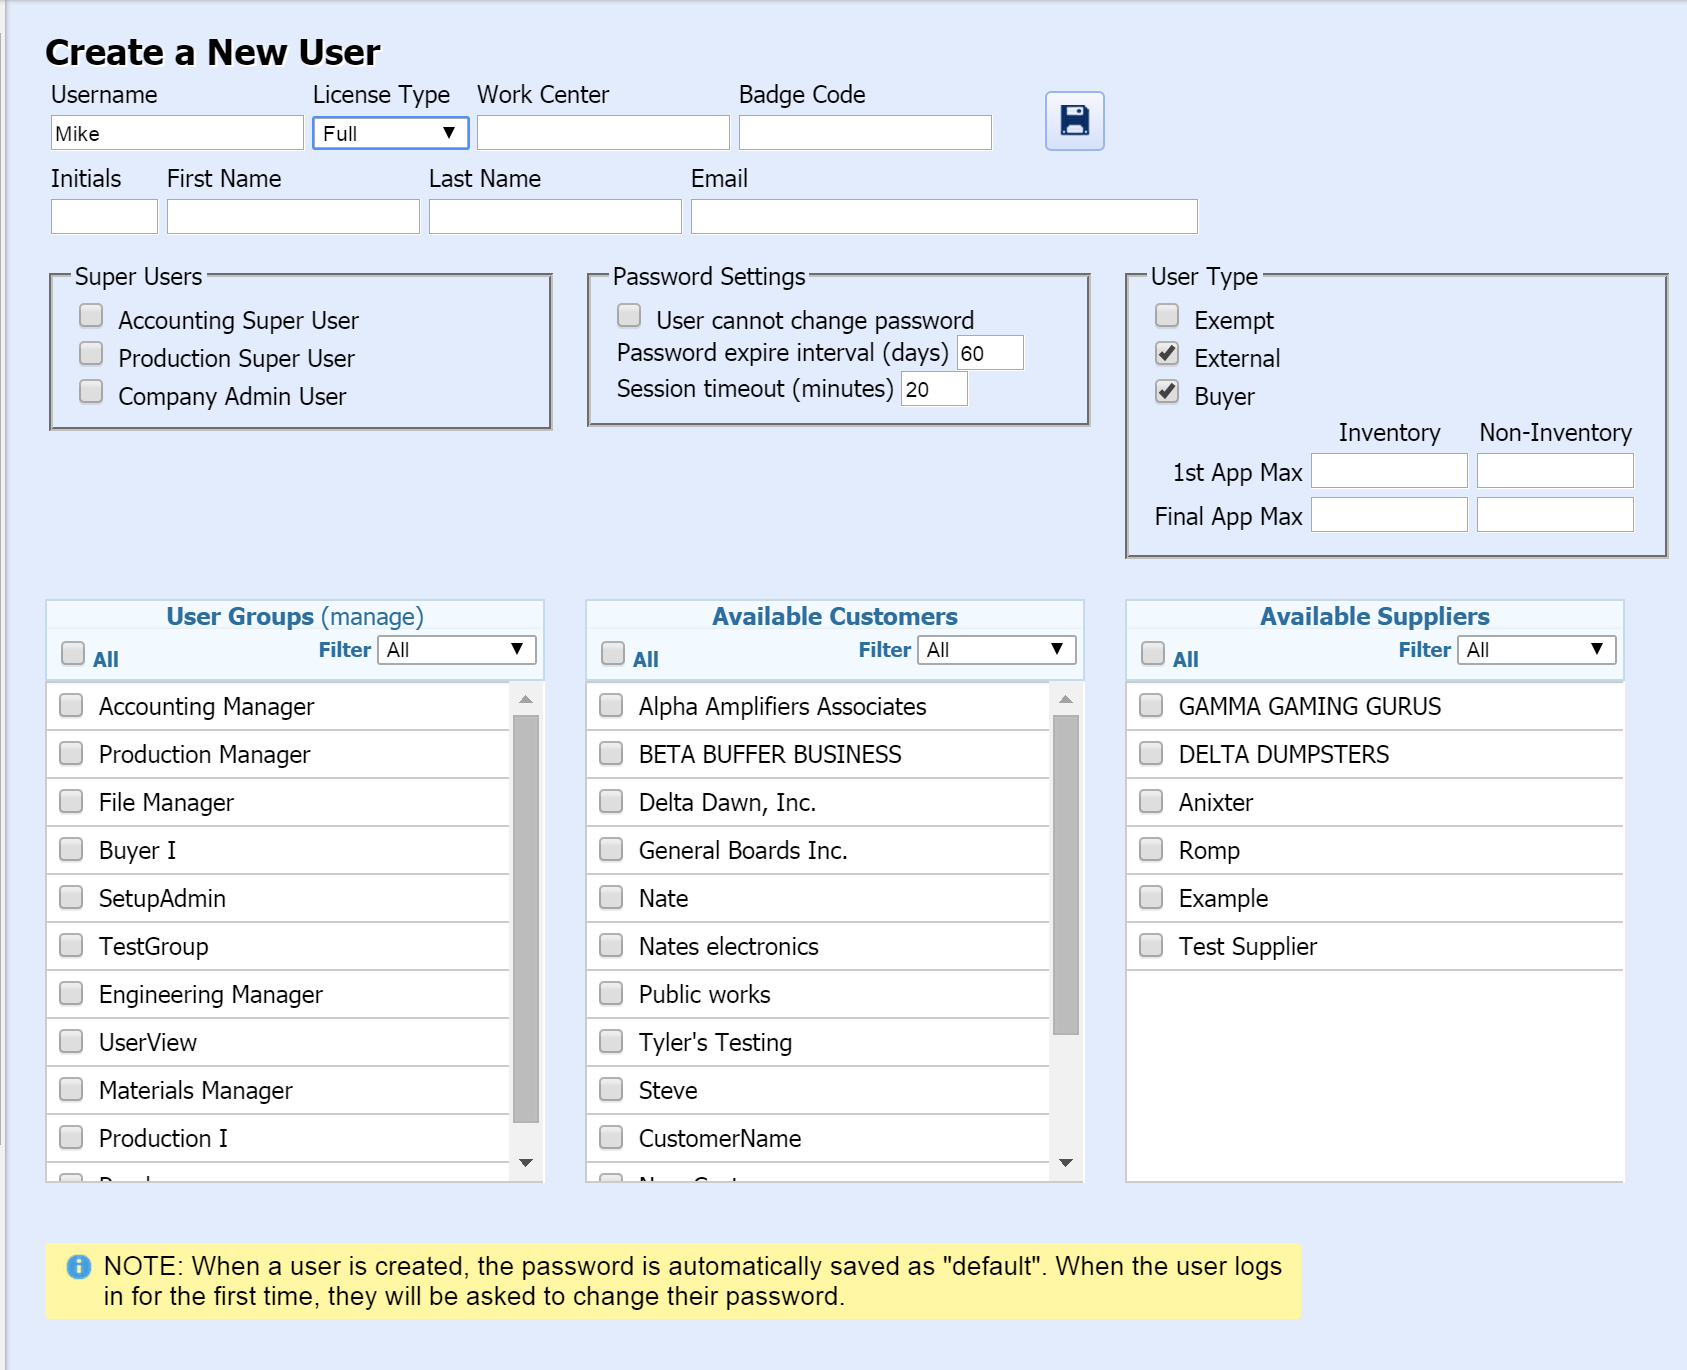
Enter a User Name and Select the License Type from the pull down selection. You can also fill out any other available details at this point:
NOTE:The system will remove access to ALL other modules and screens when the user is assigned to a production user license. Then, when the user logs in, their session will go under the production license and consume the production license seats. Users assigned to the production user license can be granted access to anything accessible from the Shop Floor Tracking Screen. This means in the security setup all options will be hidden except for: Shop Floor Tracking, Shop Floor Tracking by Bar-Code, Time & Attendance, Statistical Quality Control, and PDM. Of course, companies will have to own the module in order to be able to grant access. The following is a list of Roles that will be permitted if a user has a license type of Production. When the admin selects the groups for the user, all the related roles are assigned. Then, when the user logs in, it checks the license type and strips out all roles not on that list (if not a Full license type). "BOM_View","BOM_Print", "CAR_View", "CONTACTS_View","CUSTOMER_View", "ECO_View", "KIT_View", "ROUTING_View", "DFCTENTR_Add","DFCTENTR_Edit","DFCTENTR_Delete","DFCTENTR_View", "SHOPFLBC_View","SHOPFLBC_Add","SHOPFLBC_Edit","SHOPFLBC_Delete","SHOPFLBC_Print","SHOPFLBC_Price","SHOPFLBC_Setup", "SHOPFLWC_View","SHOPFLWC_Add","SHOPFLWC_Edit","SHOPFLWC_Delete","SHOPFLWC_Print","SHOPFLWC_Price","SHOPFLWC_Setup", "SHOPFLWO_View","SHOPFLWO_Add","SHOPFLWO_Edit","SHOPFLWO_Delete","SHOPFLWO_Print","SHOPFLWO_Price","SHOPFLWO_Setup", "TIMELOG_Add","TIMELOG_Delete","TIMELOG_Edit","TIMELOG_View", "WO_View", "WRKCAPCT_View", "WRKINSTR_View" Enter a Work Center (if applicable), enter the users Initials, First Name, Last Name, Email (if applicable), and check any boxes that pertain to this user: 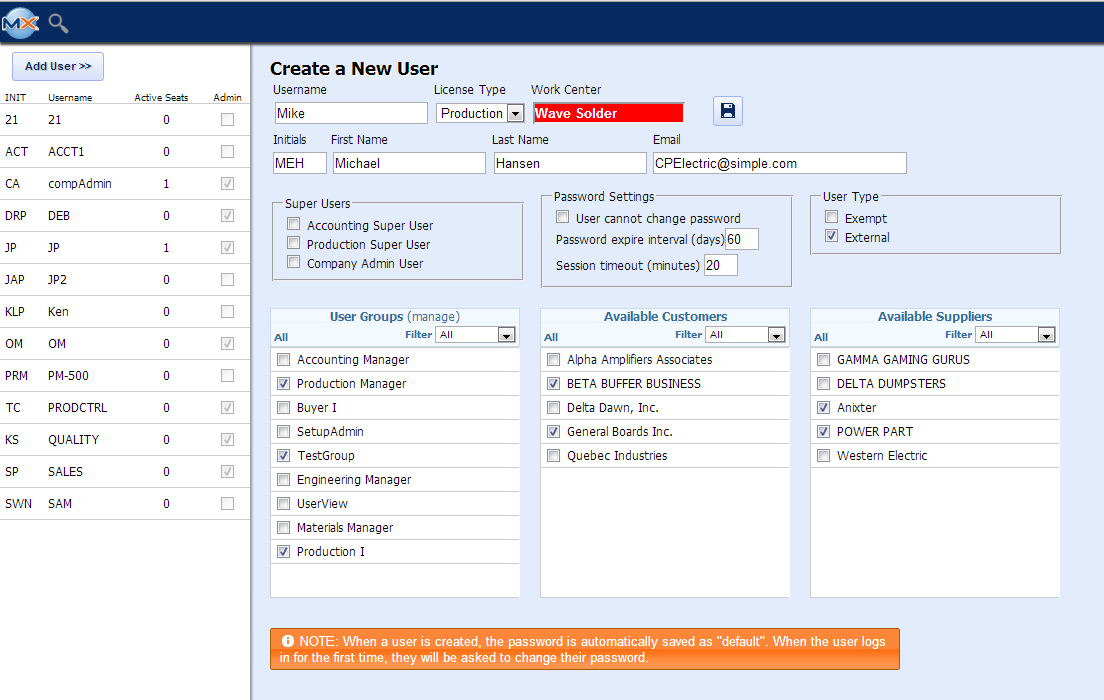 Super Users: Checking these boxes will override the license Type rights. If the Accounting Super User box is checked this user will have full rights to all Accounting modules, if the Production Super User box is checked this user will have full rights to all Productions modules, if the Company Admin User box is check this user will have full rights to all Accounting and Production modules. Email Address: If users want to allow for duplicate email addresses for their users (e.g. they want all production users to connect to the same email address), then they need to make this change in the web.config file <membership defaultProvider="CustomizedMembershipProvider"> <providers> <clear /> <add name="CustomizedMembershipProvider" type="System.Web.Security.SqlMembershipProvider" connectionStringName="eManEx" maxInvalidPasswordAttempts="10" minRequiredPasswordLength="5" minRequiredNonalphanumericCharacters="0" requiresQuestionAndAnswer="false" enablePasswordRetrieval="true" passwordFormat="Encrypted" applicationName="Manex" requiresUniqueEmail="false" /> </providers> </membership> Depress the "Add User" icon to add the new user. NOTE: That when a user is created, the password is automatically saved as "default". So, when the user logs in for the first time, they will be asked to change their password. 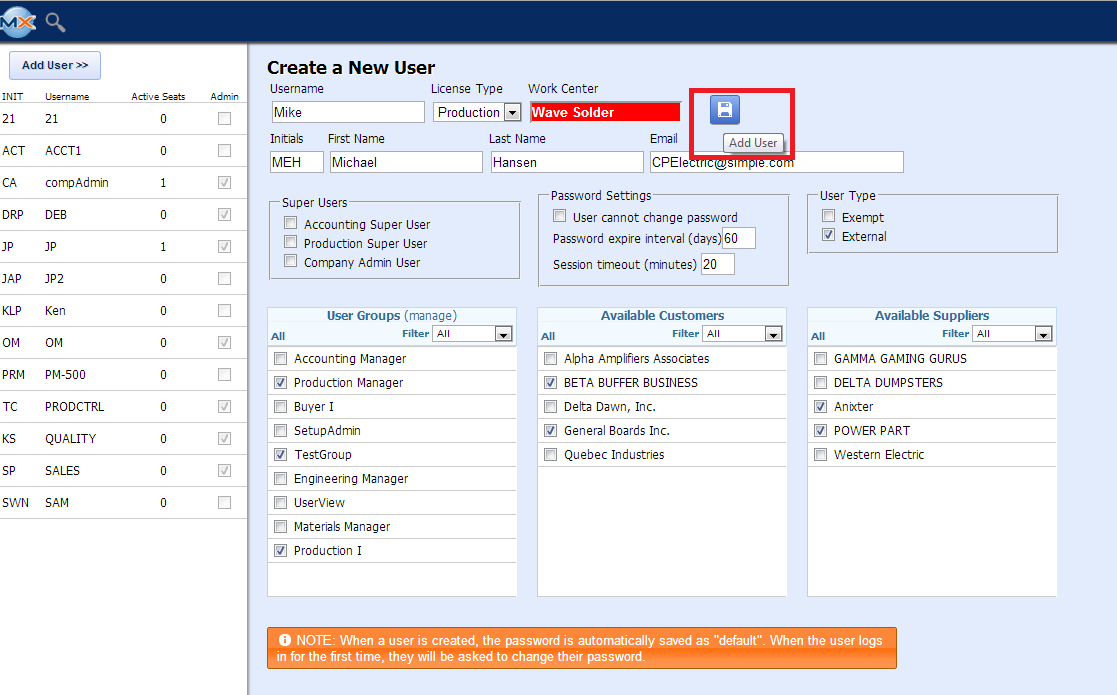
If there was a problem found a warning will be displayed at the top of the page and the field will be displayed in RED, as displayed below: 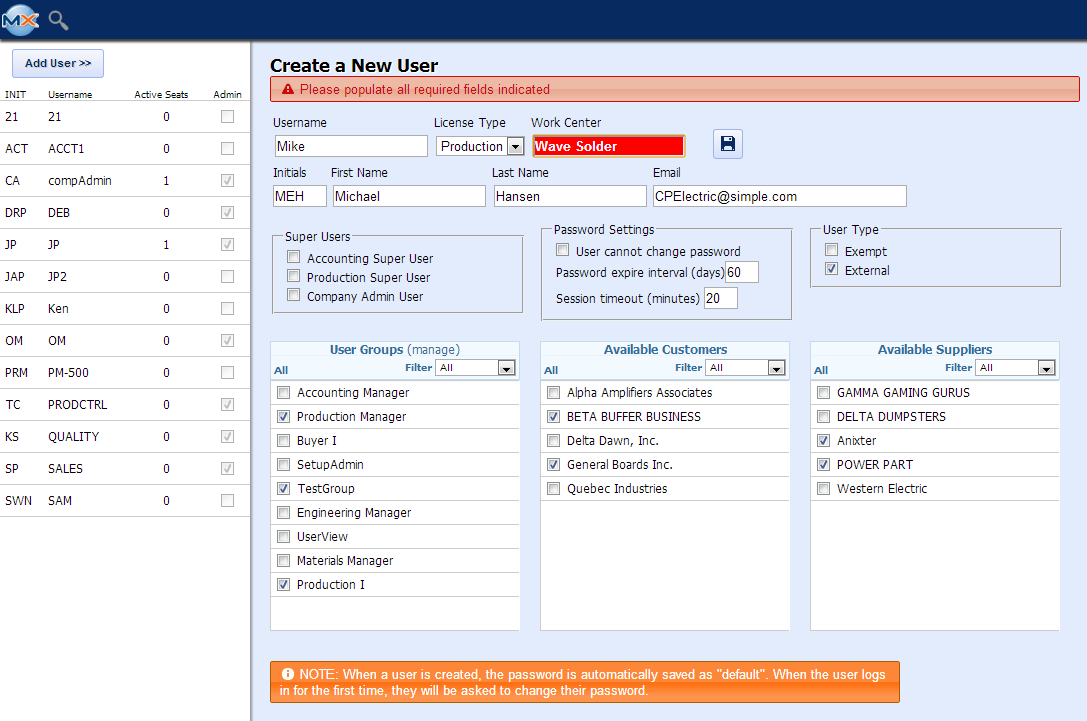
Once the problem has been fixed a noticed will be displayed at the top of the page that the "User was added successfully"
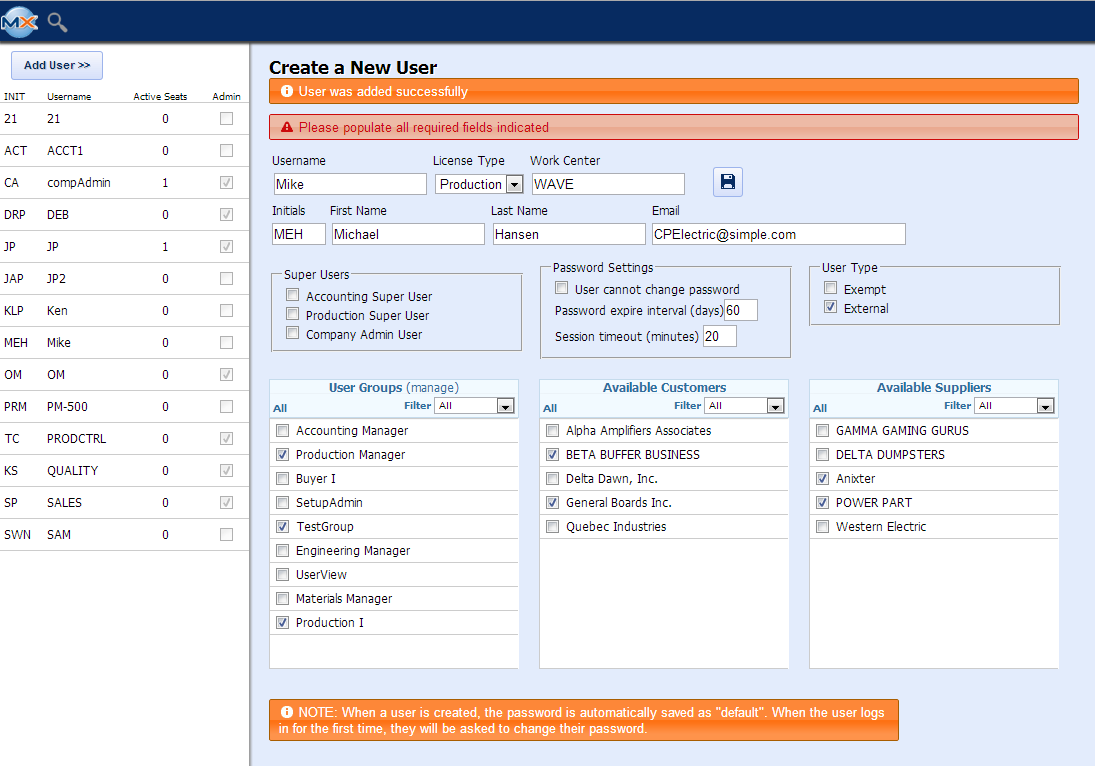 NOTE: That when a user is created, the password is automatically saved as "default". So, when the user logs in for the first time, they will be asked to change their password.
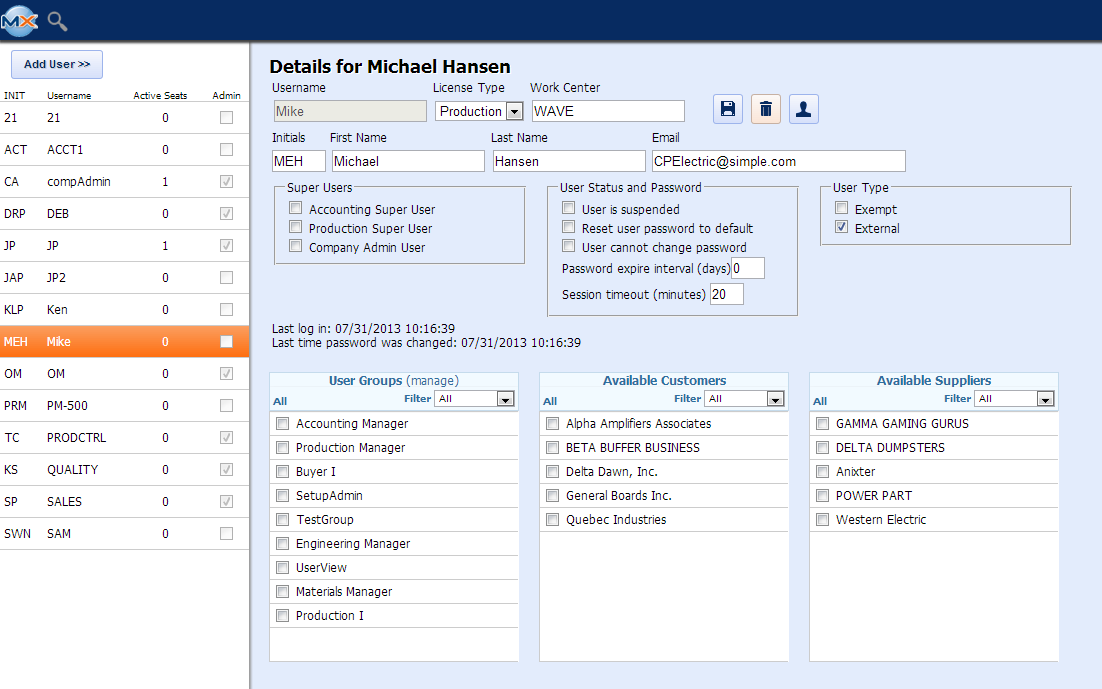
Highlight user on left and the following screen will display all the detail for this user only.
 |