| 1. MX |
| 1.1. Installation of SQLManex(Server install) |
| 1.1.1. Prerequisites |
Before MX can be installed Windows IIS7 feature must be Turned on. For more details on setting up Windows IIS7 See Article #5673.
In order to run the latest MX, you MUST have asp.net 4.5 installed. You can download it here (if you don't already have it): http://www.microsoft.com/ When ready proceed to step # 1 Install ManexService on your Server |
| 1.1.2. Step#1-Install ManexService on your Server |
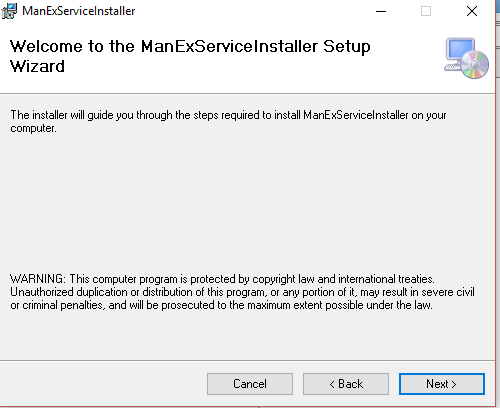
The Manexservice file is installed as a Windows service that runs background tasks such as verifying system license information and monitoring and sending system messages. Also it is required for emailing reports from MX Once the latest Manexservice file is provided to you from Manex you will need to unzip the .MSI and .EXE files from the zip file. You will need to run the .EXE not .MSI. 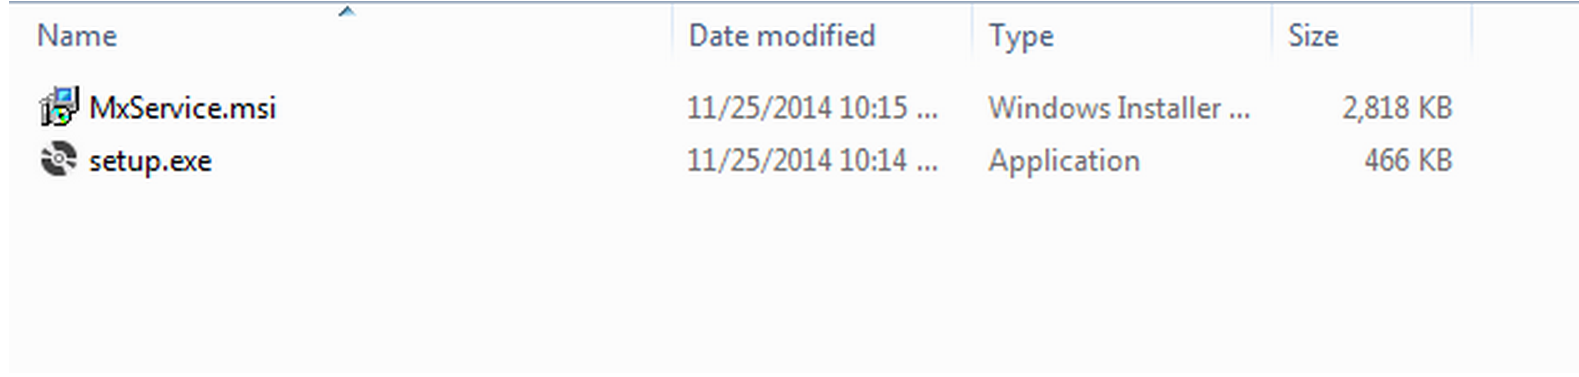
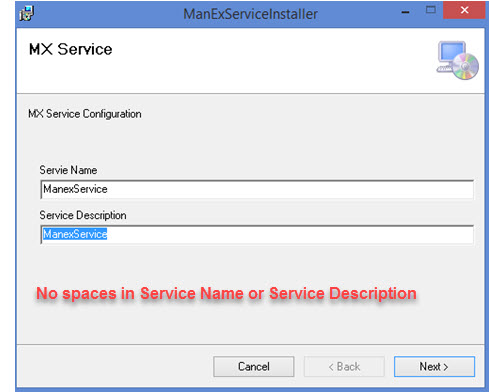
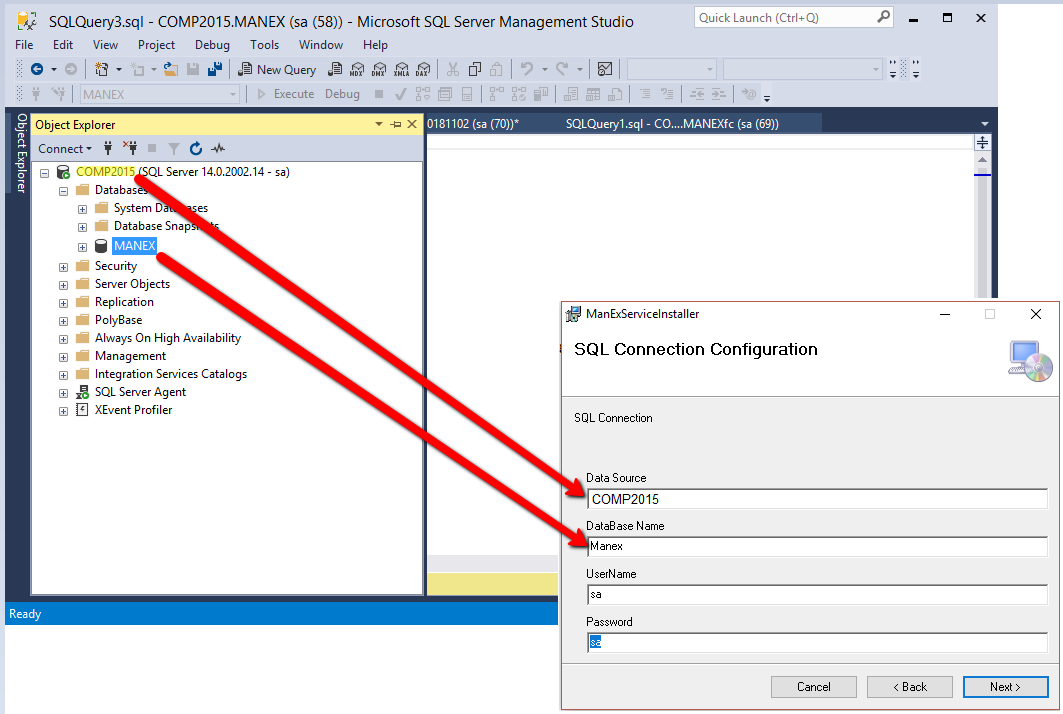
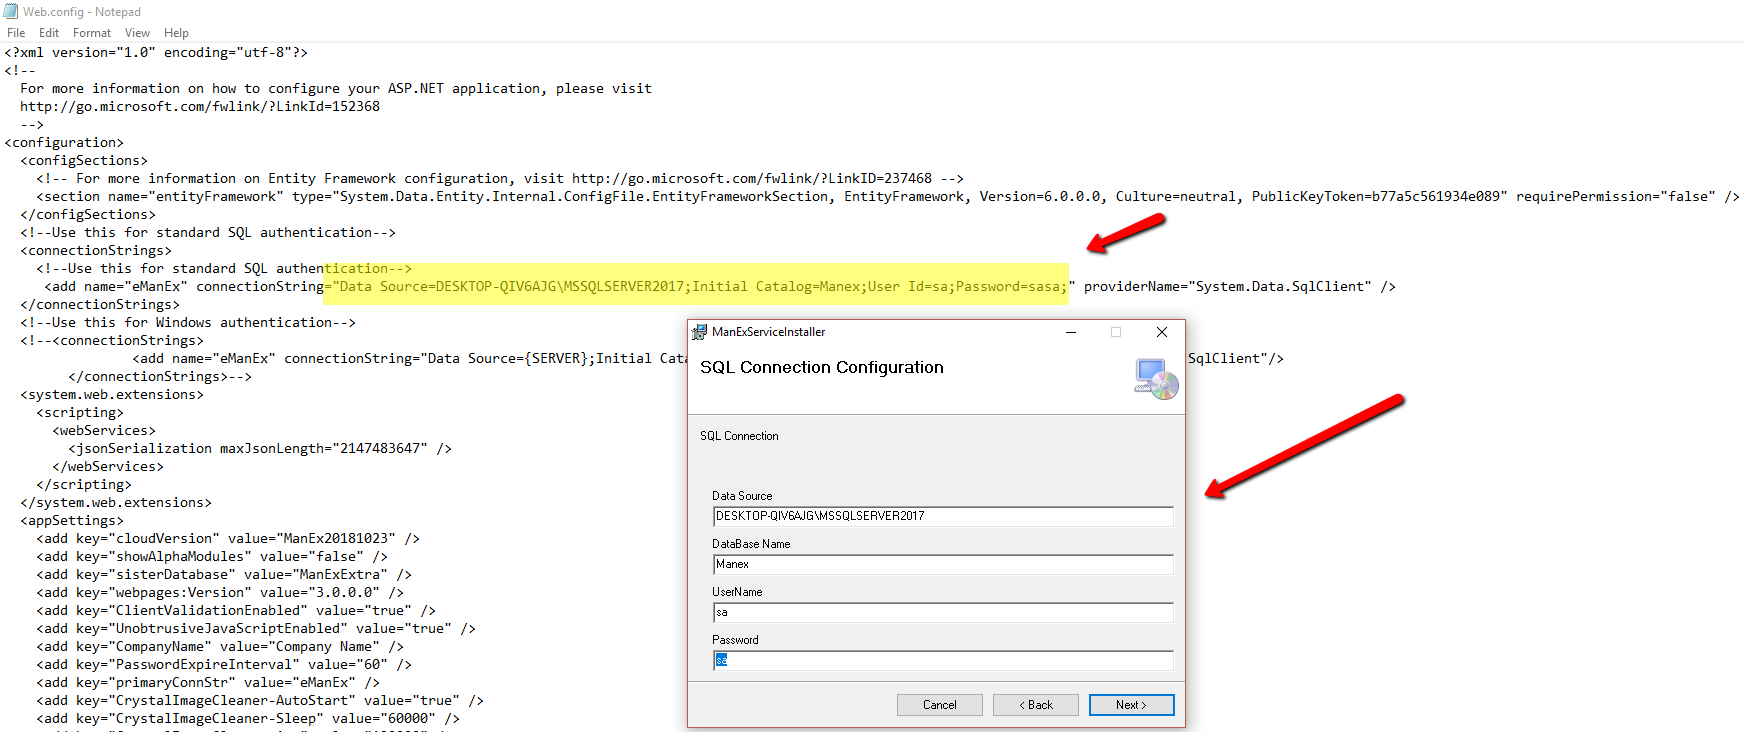
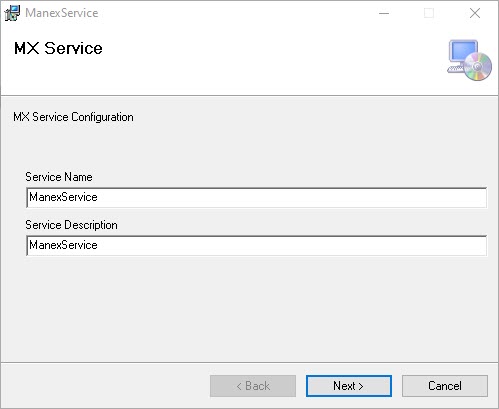
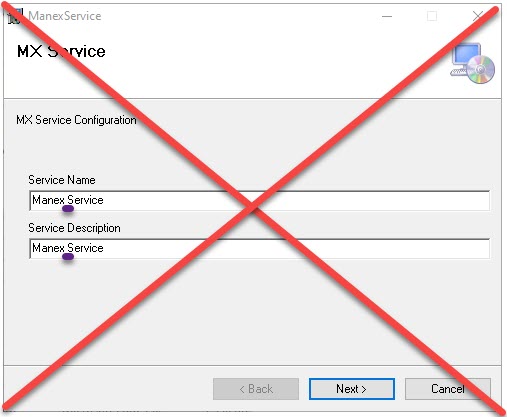
You will then want to name your Service and provide a description. See my example below. Then Click Next You then need to fill in your Data Source, Database Name, Username and Password.
This is connection information to SQL Data. Data Source: is the Connection to your Sql Server Name Database Name: is the name that you assigned to the database within SQL Manager UserName and Password: would be the user name and password that you use to access the database via SQL Manager.
If you don't know this information and you happen to previously installed Manex on your system. You could reference the Web.config file in your ManexCloud directory. It would look similar to the below.
Click Next
You can decide if install is for just you or everyone and install location. Click Next 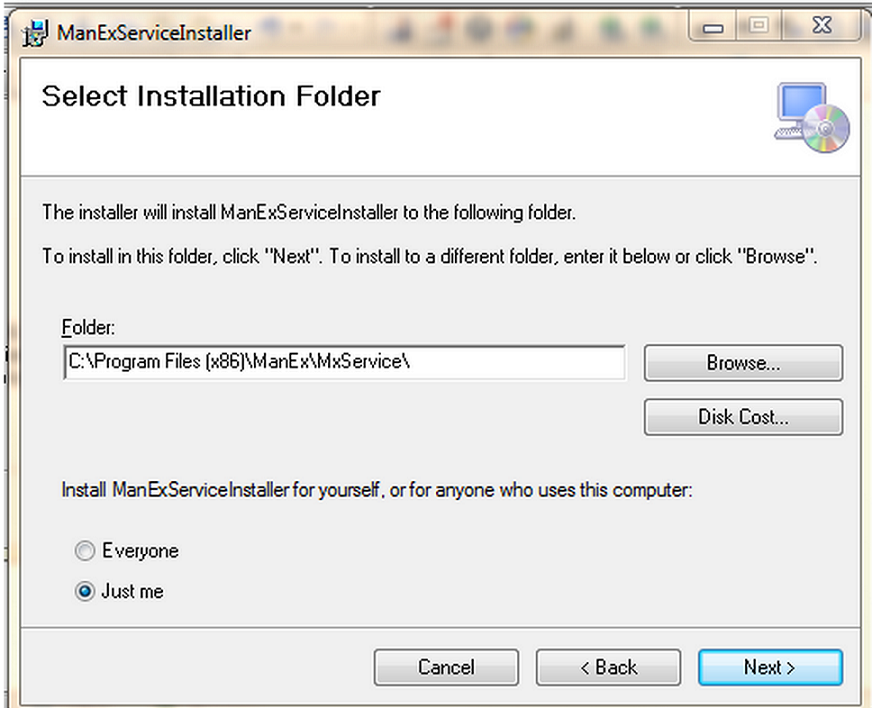
Click Next 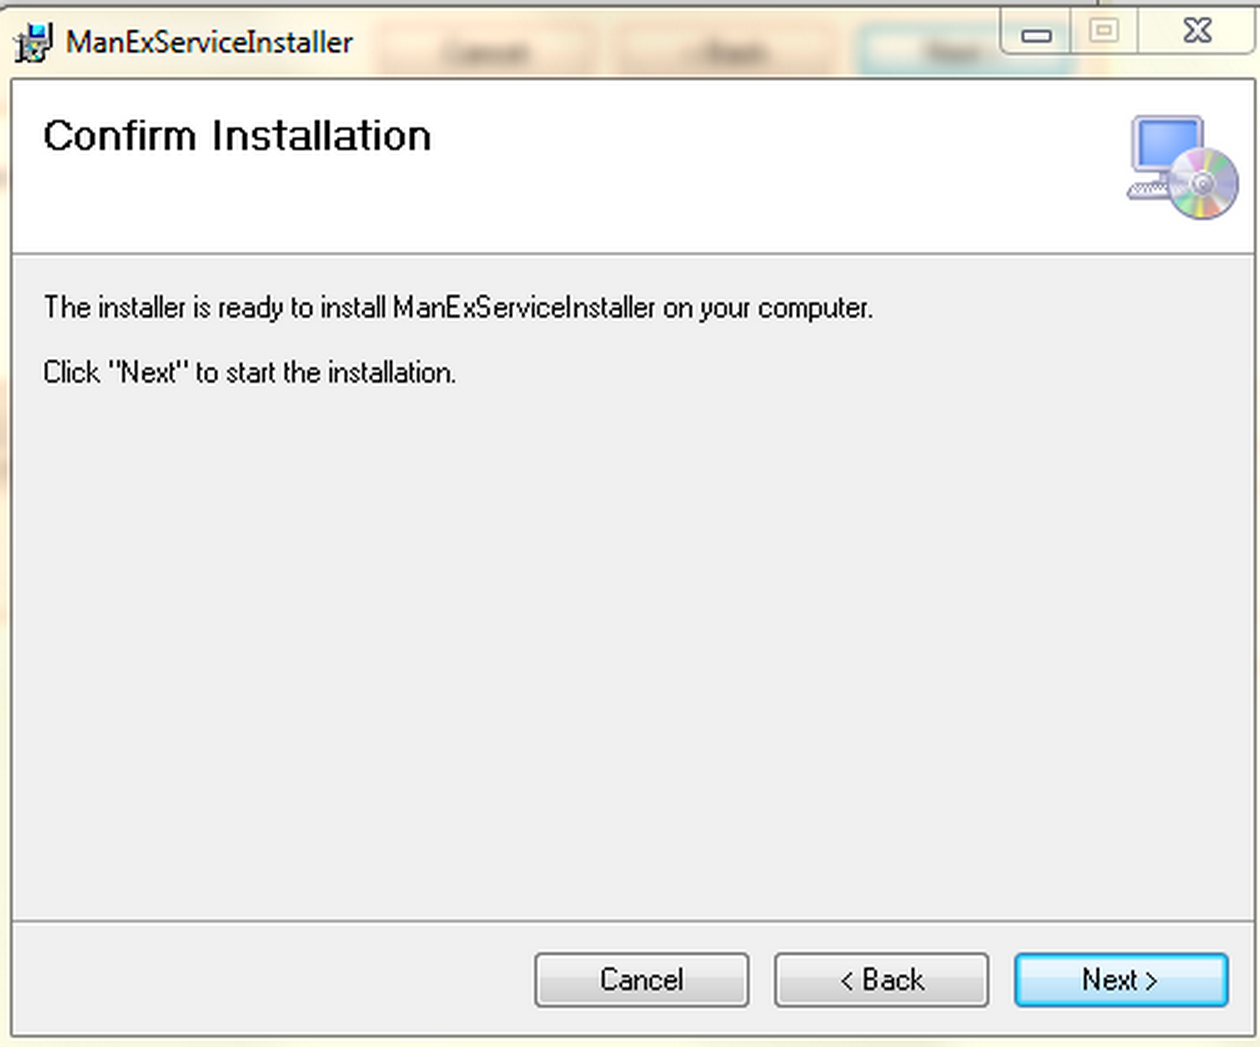
 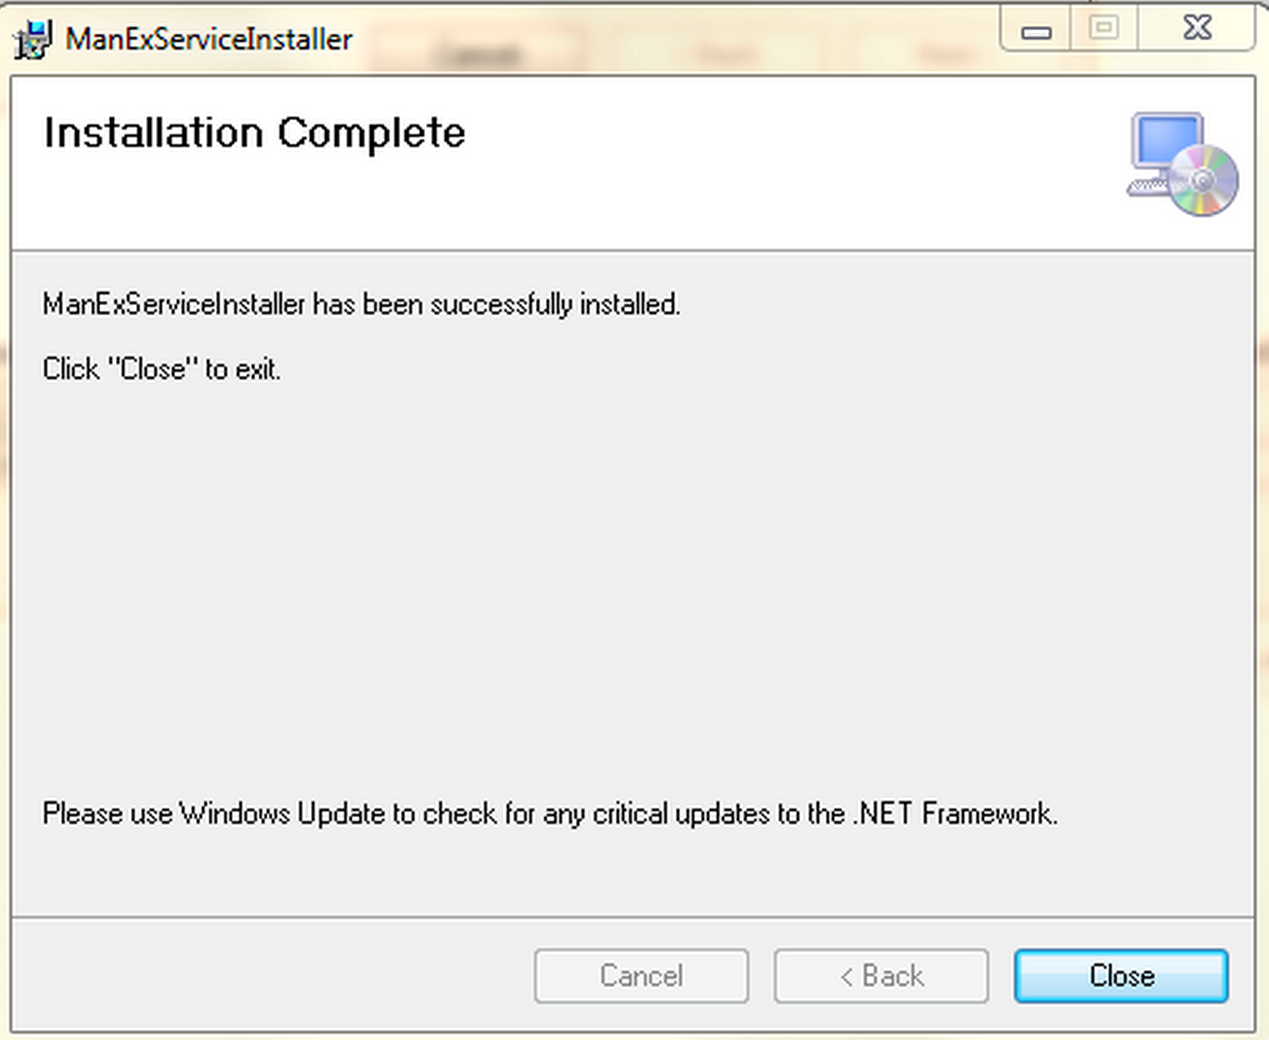
Hit Close You will then need to check your connection string in the ManExService.exe.config file located in the {Program Files} or {Program Files (x86)}/ManEx/MxService folder. 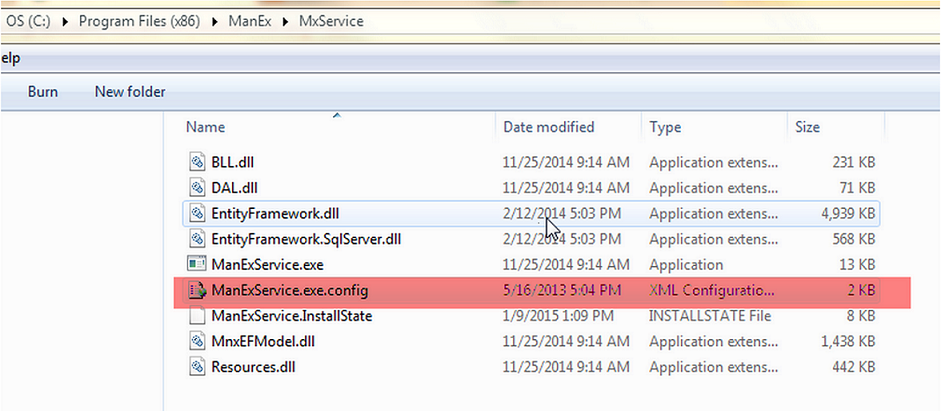
Open the config file with note pad or your default editor. Check to make sure your Connection String matches your SQL Server Connection. If it doesn't, you can modify the highlighted connection string to match your SQL server connection (note you may want to open file as admin user to make sure you have rights to save in the same directory.) As you can see in the example below, my connection string matches my SQL Server Connection from the above screenshots.
Save and close the file.
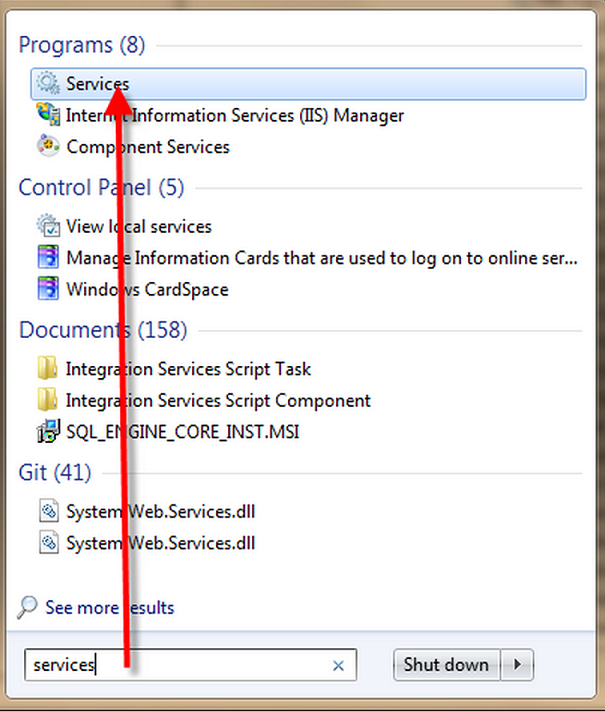
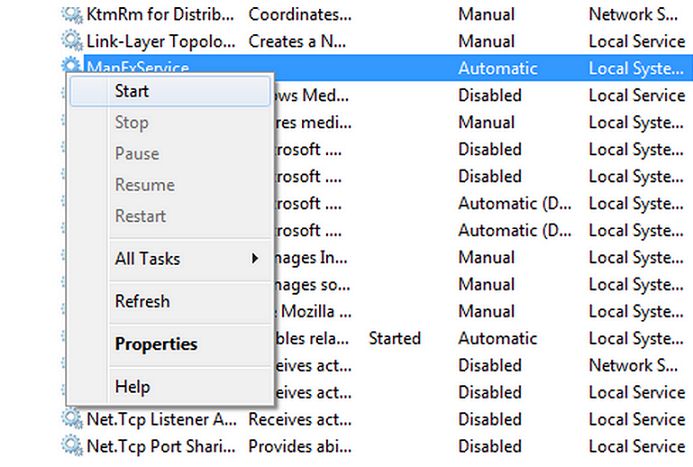
Now you can go to Windows services and start the service. Make sure it is set to automatically start but with "delayed start" as it requires SQL service to be started prior to it being able to start in Windows.
Should show started
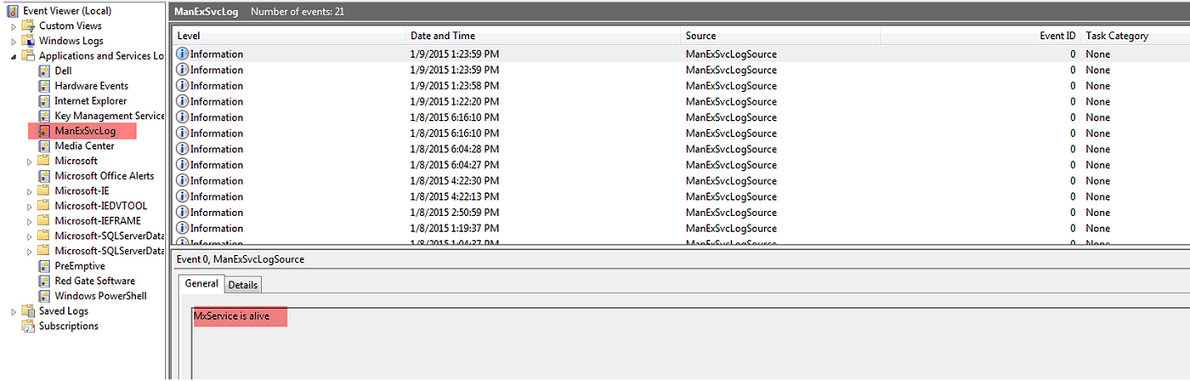
You can also verify in event viewer the Manexservice log should show that Mxservice is alive.
If you happen to have additional database such as a 2nd company data file on the same server and require to have a 2nd instance of the Manex service installed Please follow instructions here: Install 2nd Instance of Manex Service
When ready proceed to Step #2: Turn On Internet Information Services (IIS) Windows Feature on your Web Server |


| 1.1.3. #1.1 Install a 2nd instance of the Manex service |
If you happen to have additional database such as a 2nd company data file on the same server and require to have a 2nd instance of the Manex service installed you will need to download the New Manex Service here NewManexService.7z Please see video instructions here. New Manex Service Instructions Very similar to the instructions for the standard Manexservice with a few additional features. |
| 1.1.4. Step#2-Turn On Internet Information Services (IIS) Windows Feature on your Web Server |
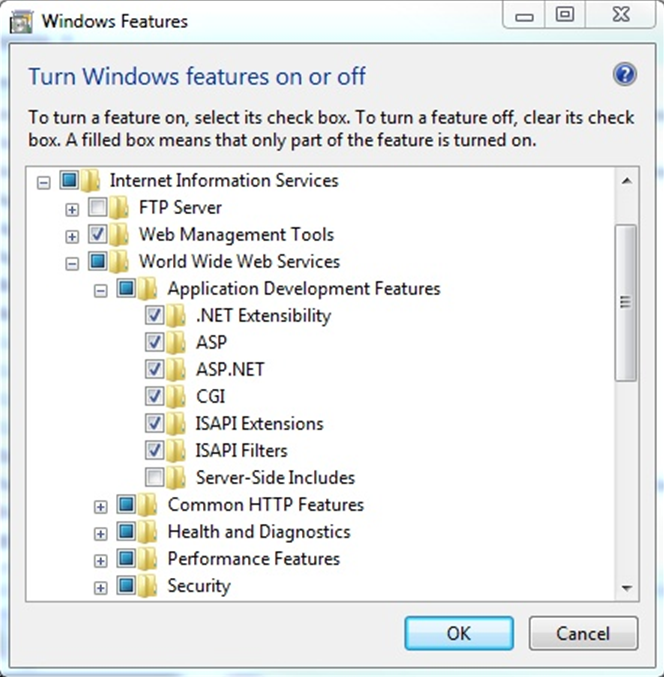
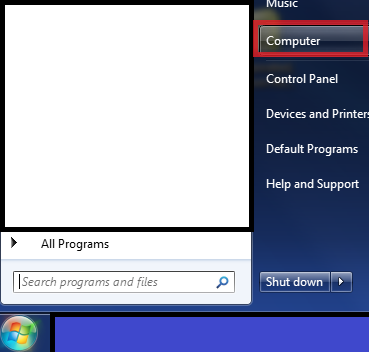
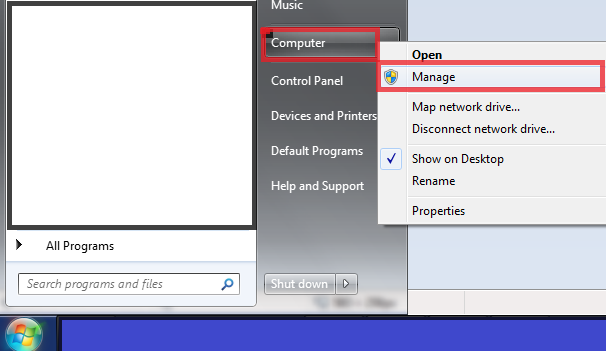
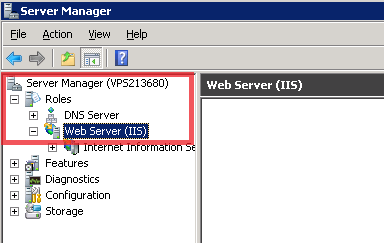
Internet Information Services (IIS, formerly Internet Information Server) is an extensible web server created by Microsoft for use with Windows NT family.[2] IIS supports HTTP, HTTPS, FTP, FTPS, SMTP andNNTP. It has been an integral part of the Windows NT family since Windows NT 4.0, though it may be absent from some editions (e.g. Windows XP Home edition). IIS is not turned on by default when Windows is installed. The IIS Manager is accessed through the Microsoft Management Console or Administrative Tools in the Control Panel. IIS7 or newer version needs to be turned on in order for MANEX Cloud to work. Turning on IIS7 or newer version is a simple process and can be done by clicking a few selections in the control panel. 1. Go to Start>Control Panel->Programs->Programs and Features-> on the left-hand side click on Turn Windows features on or off. 2. In the ‘Windows Features’ box that comes up, click the Internet Information Service box and then expand the node. 3. Check the Web management Tools box. 4. Expand World Wide Web Services, and expand Application Development and make sure to select the following features:
5. Click OK to save changes and install IIS7 with the ASP.NET feature turned on. 6. Once the installation completes, you’ll want to test the IIS7 web server to make sure it is working correctly by opening up your internet browner and going to http://localhost. If you see the IIS welcome page, you know that the installation of IIS7 was successful.
See more at: http://www.gotknowhow.com/articles/how-to-install-iis7-and-enable-aspnet#sthash.djspllSv.dpuf When ready proceed to step # 3 Install ManexCloud application
If you don't already have ASPNET 4.5 you can download it here: ASPNET 4.5 |
| 1.1.5. Step#3-Install MX application |
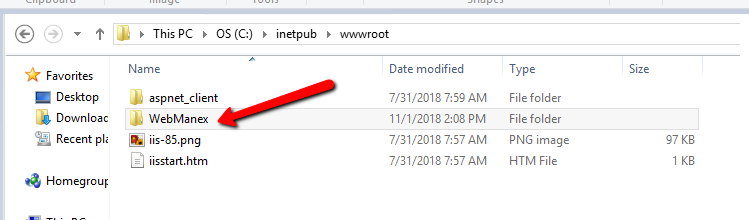
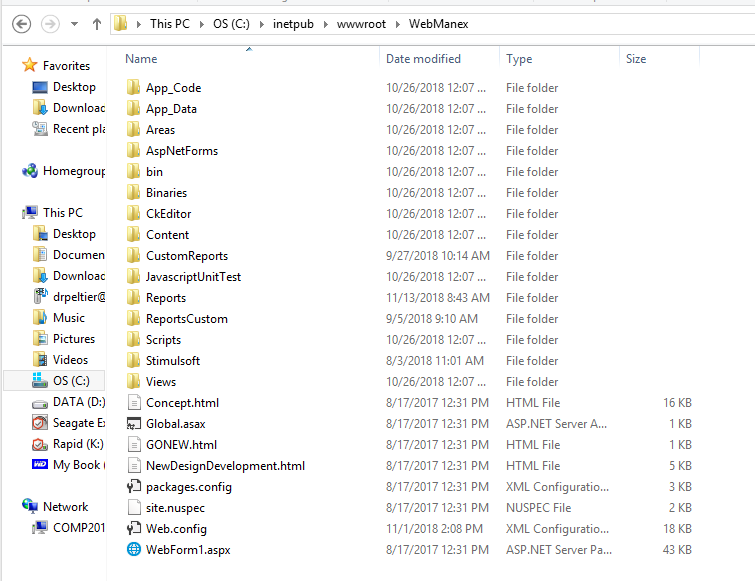
Test test test test We recommend installing manexWeb as a subdirectory in the inetpub/wwwroot directory which is the default location Windows uses for IIS webservers and by default. This should also have the correct security rights granted for IIS use by users. This folder is typically found under the C: drive/Inetpub/wwwroot directory as shown below. Then create a folder called WebManex(or a name of your choosing) Then simply extract or place the contents within ManexQB . . . zip file provided to you completely into the WebManex directory. It should look like the below example. |
| 1.1.6. Step#4-Web Configuration Setup |
After you unzip the MX application folder provided by Manex into your C://inetpub folder as described in the article: Install MX Application,you must set up the Web.config file so the application can connect to your SQL database. Do not use an older Webconfig File from a previous MX version. You must use the matching config file with the same version of MX to avoid possible errors. Each time you update MX you will have to re-add the connection string information as displayed in image below. Note: SQL Manex Client server and MX are only compatible with SQL 2008 R2 and newer but we highly recommend SQL Server 2014 to take advantage of all features. Open the Web.config file and find the entry for: <add name="eManEx" connectionString="Data Source={SERVER/INSTANCE};Initial Catalog=ManEx;User Id={USER};Password={PASSWORD};" />
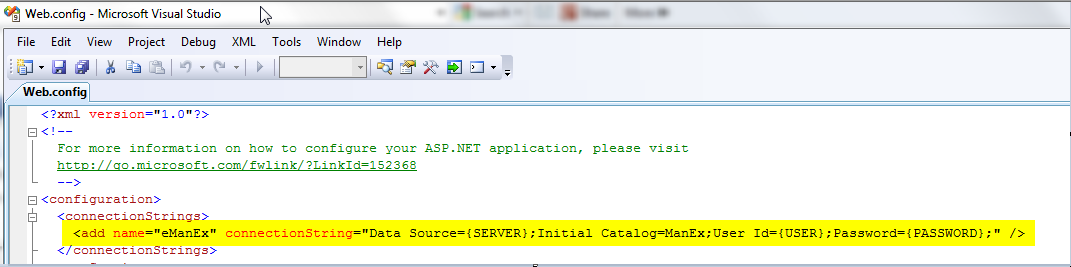 Change this entry with the required connection information for your SQL data base. Typically it will have the same values used in your ManEx .ini file used to connect the desktop application. The modified string should look something like this: <add name="eManEx" connectionString="Data Source=555.555.555.555;Initial Catalog=ManEx;User Id=manexUser;Password=thisIsmypassword;" /> After you modify the settings, save the file and connect to your site. You will need to do the same thing for the ManExService.exe.config file in the {Program Files}/ManEx/MxService folder for the ManEx Service installed on your server.
NOTE: In order to access MX form desktop web report and User defined buttons in modules the Company Root URL must be setup within the System Appearance module and user must be linked to web within the System Security Module.
When ready proceed to step # 5 Choose option to Set up MX as a Sub Domain or Stand-Alone Website |
| 1.1.7. Step#5- Choose option to Set up MX as a Sub Domain or Stand-Alone Website |
| 1.1.7.1. Prerequisites |
User MUST have the ManexCloud files installed on the web server in an accessible directory. For further information on where to setup the ManexCloud see Article #5628. |
| 1.1.7.2. How To Set Up ManEx as a Sub Domain or Stand-Alone Website | ||||||||||
If you do NOT have IIS (Information Installation Services), installed on your System the following link will help you install it:
Steps to setup sub-domain site under main website
You would right click on your main website and add application.
1. Alias Name: You can name this whatever you want. 2. Application Pool: You click select and it will pull up a list of available application pools. (Note you must use .net 4.5 or higher for the latest ManexCloud. If 4.5 is not in list go to the application pools in IIS module right click and add the application pool. Some servers will only list ASPnet 4.0 App pools even though 4.5 is installed. This is ok. Also note if setting up multiple sites like for a test system it is always good idea to use different app pools so as too not overload the App Pool resources. If no option is there then you have to download ASP. Net 4.5 from this link and install it. Note a reboot might be required to complete the installation. If you see ASP.Net 4.5 is installed in the Windows installed program files list you may need to run a windows repair on the installation and reboot again to repair it.
Once selected click ok.
You also have to make sure that the application pool you are using that the Managed Pipeline Mode is set as Integrated. Again note if setting up multiple sites like for a test system it is always good idea to use different app pools so as too not overload the App Pool resources.
3. Physical path: Click select button and it will open up a screen to select the ManexCloud installation folder to browse too. Select the path as Inetpub/wwwroot/ManexCloud(see image below) Once selected click ok.
4. Connect as: Select the connect as it will open a screen that gives option to connect as specific user or use application user(pass-through authentication) 5. Most users use the specific user option. Click on the set button to enter the user credentials. 6. Typically this would be an admin password that allows full access to IIS features as well as the physical path of the ManexCloud application in the Inetpub/wwwroot directory. Once user name and password are entered click ok twice to return to basic settings screen.
7. Click on test settings to verify you receive two green checks on authentication and authorization. If you don’t then the user credentials entered do not have the correct permissions setup. Check with your admin to verify security rights. 8. You don’t have to check off the enable pre-load as we do not use this feature currently. Click ok to finish the setup of the sub-domain website.
Steps to setup stand alone website
To setup of stand alone website. Click on sites then right click to add new site. You will see the below pop up. You will perform most of the same steps as above for the sub-domain website.
Few differences here are choosing the bindings for your connection. IP address and port(make sure port is open on firewall and port is not same as any other hosted website) as well as using a host name if you desire. Once done hit ok and it will start your new ManexCloud website.
Right click on site you created and select manage and browse. Note the URL address as this will be how you get to the site manually. If it just shows local host you will want to know the exact IP to give to users connecting through the network or through a web portal to be available to access the site.
It will bring you to the login screen.
When ready proceed to Step #6: Email Setup for MX Reports
|
| 1.1.8. Step#6-Email setup for MX reports |
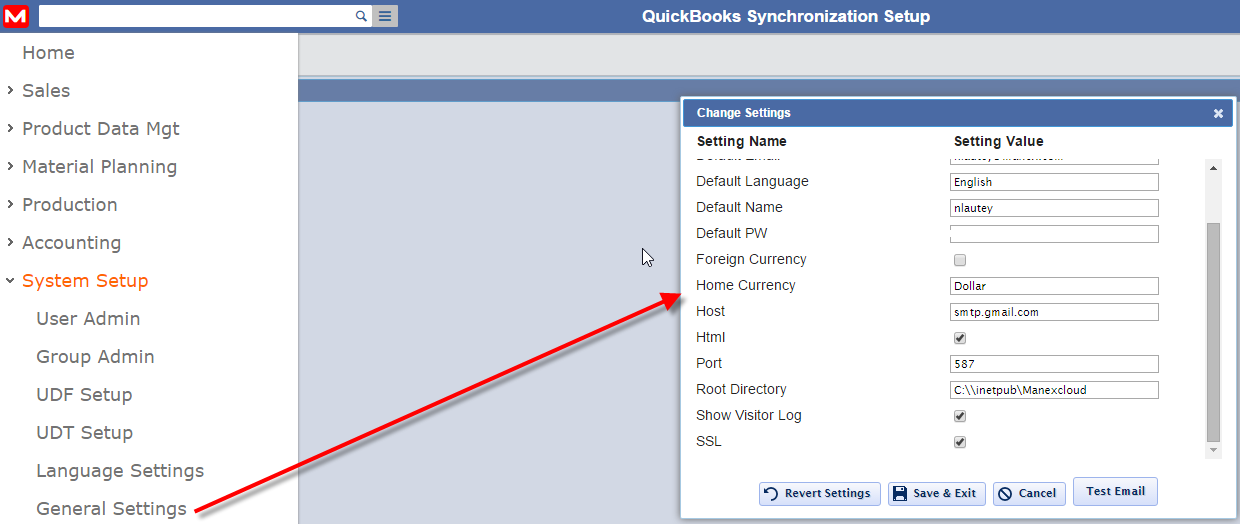
In order to be able to send emails via the MX you have to setup the SMTP settings in the general settings module as shown below. Make sure it matches settings you may be currently using for your SMTP mail clients. Also not you need to fill in the root directory which should be the Manexcloud directory you setup under the inetpub folder on server.
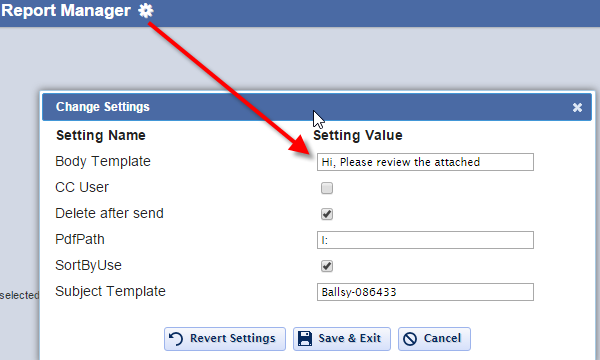
Another field you will want to change from the default is the Body template. There is default HTML code being used in this field which will default onto all emails sent out of Manexcloud. You can put in {CONTENT} as shown below in image then the body of email will use whatever is populated into Report Manager body template field(find this by going into any reports section and clicking cogwheel icon next to word report manager). If left blank body of email will be blank.
|

| 1.2. Multi-Location Sync(OPTIONAL Module) |
Multilocation Synchronization allows you to share data between different installations/locations of the Manex application without user intervention in real time. Please see attached documentation for a guide on how to setup. Note this is an optional module that you need to purchase.Manex_MultiLocation_Synchronization_User_Guide_Document_V1.0.docx.docx
|
| 1.3. Add Custom Quickview (test) |
Custom quick views can be added to the reports section of MANEX Cloud using a SQL Query. This query is provided as an attachment to this article. At the top of the SQL Query is a group of fields where the new Report Quickview is set up.
The red '' is where the information about the new quickview is entered. An example being 'Test Quickview Add'. The explanation about what each field represents is detailed in green to the right side of the red fields. Once all of the red fields are set up as desired the query can be executed, once executed the new quickview report will be added to the reports list. You can find the new quickview either by scrolling through the reports manager or entering the name of the new quickview in the search bar.
Note: If you are using a custom SP have to have the below parameter no matter what because it is a requirement. You can see in the below image where it needs to be added in your custom stored procedure.
@userId uniqueidentifier=null
|


| 1.4. Introduction to MX |
What is MX?MX is our web based application delivering a world-class ERP solution to web enabled devices. You can now take the power of MANEX ERP wherever you go and access your MANEX database from any device such as a Windows, OSX, ChromeOS, Android and iOS tablet or smartphone. Additionally, MANEX Cloud makes it easier than ever for companies to collaborate with Customers, Suppliers, and Sales Reps. MX is a completely new MANEX system utilizing an MS’s .NET and web portal’s user interface in conjunction with the MANEX SQL database. We are working towards an end goal of converting all of the client server modules to MX with a purpose of having all modules/features available in MX in one location and it will eventually be the primary way to Access the MANEX modules. Benefits of MXMX takes the MANEX ERP experience to the next level, allowing for increased access to important apps and features from a variety of devices and operating systems. MX features time tracking, BOM import, and other important apps. Most importantly it features an extensive tutorial and self training help system, designed to make learning how to use the MANEX Cloud system fast and easy. All of this comes in a well designed, intuitive interface. MX revamps the reports system, allowing you to create customizable reports to fit your specific needs. The internet based MX also opens opportunity to access the Cloud Apps and feature from both Windows and Mac, and remotely, if desired. You can also allow your customers access to your MX site to view details like Sales Order status. These features are completely customizable. MX also allows for viewing on mobile devices such as tablets and smartphones. In order to Use the Mx the Company Root URL must be setup within the System Appearance module, user must be linked to web within the System Security Module, and The Mx Software MUST be registered (See Article 5649 for further detail on How to Register the Software). |
 icon at the top left hand corner of the screen will list the MANEX modules available. At the bottom of the menu is a link to the MANEX website.
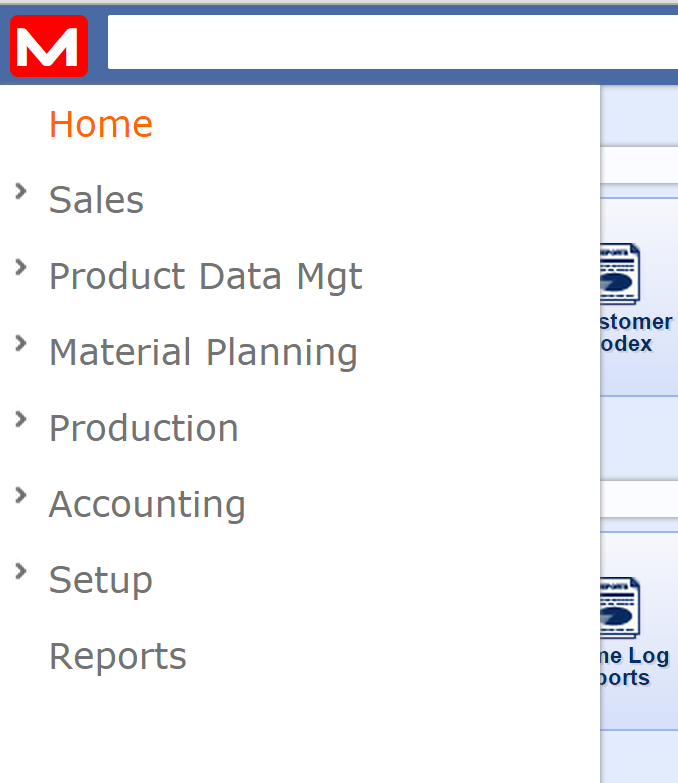
 will open up the filter options for the search. Once opened the filters can be selected from the drop-down menus presented.


 Icon will open the time clock window, allowing you to clock into a Job or Work Order.
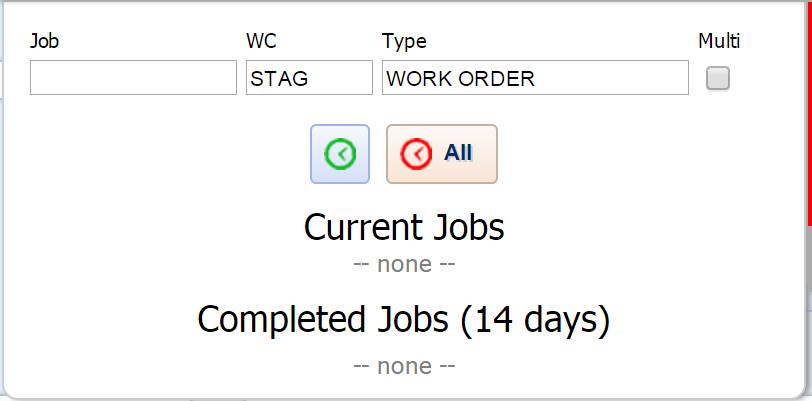

| 1.4.2. MX APIs |
The most exciting feature of MX is it’s inclusion of functional APIs (Application Programming Interface). APIs allow you to create your own Applications and internal custom programs which can then be connected to MANEX to extend MANEX’s functionality allowing for real time interaction with the MANEX SQL database. API also allows you to use other third party software Applications alongside MX. This opens a new level of freedom for you and your company. For info on API’s currently available in MX please review the following article API Details. |
| 1.5. Setup Security/Utilities |
| 1.5.1. User Administration |
| 1.5.1.1. Introduction |
|
SECURITY SETUP - USERS IMPORTANT NOTE: Converted dbf databases will have their current users entered as ManexCloud users. However, their passwords will need to be reset and the admin may have to populate additional fields. ADDRESS
{rootURL}/Admin/Users NOTE: {rootURL} is the URL you use to access ManexCloud
AVAILABLE ACTIONS From this screen, the system admin can:
|
| 1.5.1.2. Fields and Definitions |
 IMPORTANT FIELDS
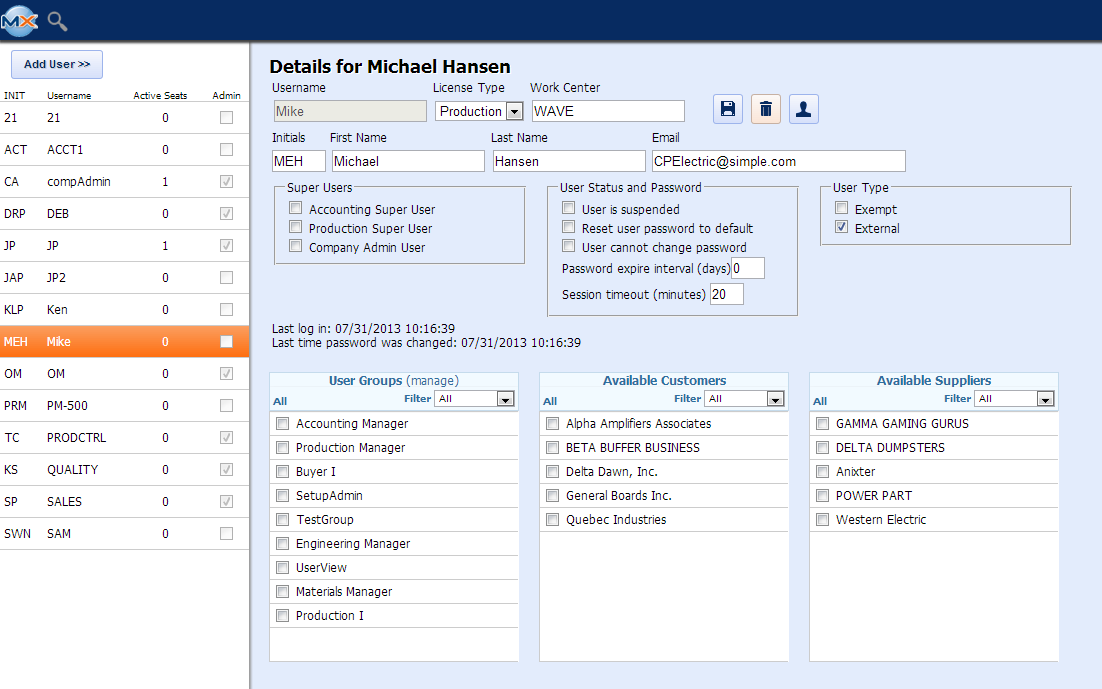
**Available Customers/ Suppliers Section : For example 'External' users are generally restricted to certain customers/suppliers. As you can see in the screenshot below this 'External' user only has access to those selected Customers and Suppliers. These same restrictions can be applied to 'Internal' users, if you wanted them to only have access to certain Customers/ Suppliers.
'Internal' users generally have access to all Customers and Suppliers at all times. In this case, we recommend not checking any Customer and/or Supplier. Leaving everything unchecked, gives the user access to all Customers/Suppliers, including new ones added. As soon as you select one or multiple Customer/ Supplier that will then restrict access to only those selected.
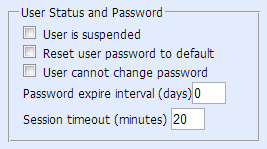
Once a user has been setup and thy have signed in and changed their password from the "default", the "Password Settings" screen (as shown above) will be changed to the following "User Status and Password" screen, where two more boxes are added giving the options to Suspend the user or Reset the users password to default.
 The following is a list of roles that will be permitted if a user has a license type of Production: "BOM_View","BOM_Print", "CAR_View", "CONTACTS_View","CUSTOMER_View", "ECO_View", "KIT_View", "ROUTING_View", "DFCTENTR_Add","DFCTENTR_Edit","DFCTENTR_Delete","DFCTENTR_View", "SHOPFLBC_View","SHOPFLBC_Add","SHOPFLBC_Edit","SHOPFLBC_Delete","SHOPFLBC_Print","SHOPFLBC_Price","SHOPFLBC_Setup", "SHOPFLWC_View","SHOPFLWC_Add","SHOPFLWC_Edit","SHOPFLWC_Delete","SHOPFLWC_Print","SHOPFLWC_Price","SHOPFLWC_Setup", "SHOPFLWO_View","SHOPFLWO_Add","SHOPFLWO_Edit","SHOPFLWO_Delete","SHOPFLWO_Print","SHOPFLWO_Price","SHOPFLWO_Setup", "TIMELOG_Add","TIMELOG_Delete","TIMELOG_Edit","TIMELOG_View", "WO_View", "WRKCAPCT_View", "WRKINSTR_View" .
|


| 1.5.1.3. How To for User Administration |
| 1.5.1.3.1. How to Add Users |
Login to MANEX Cloud and find the Setup group. Select User Administration
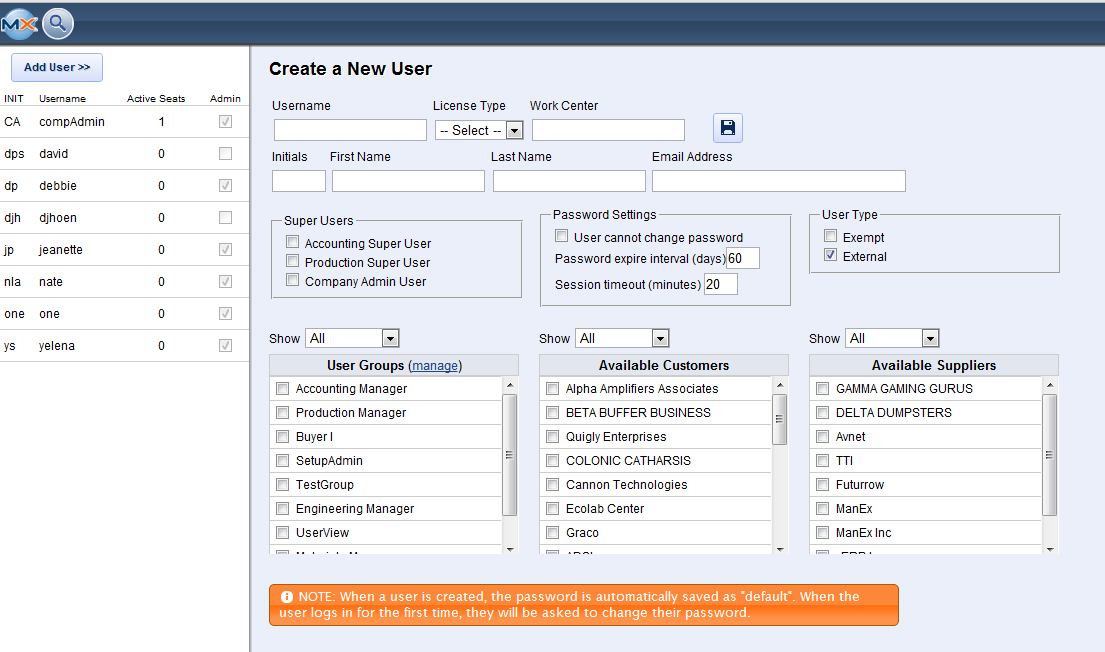
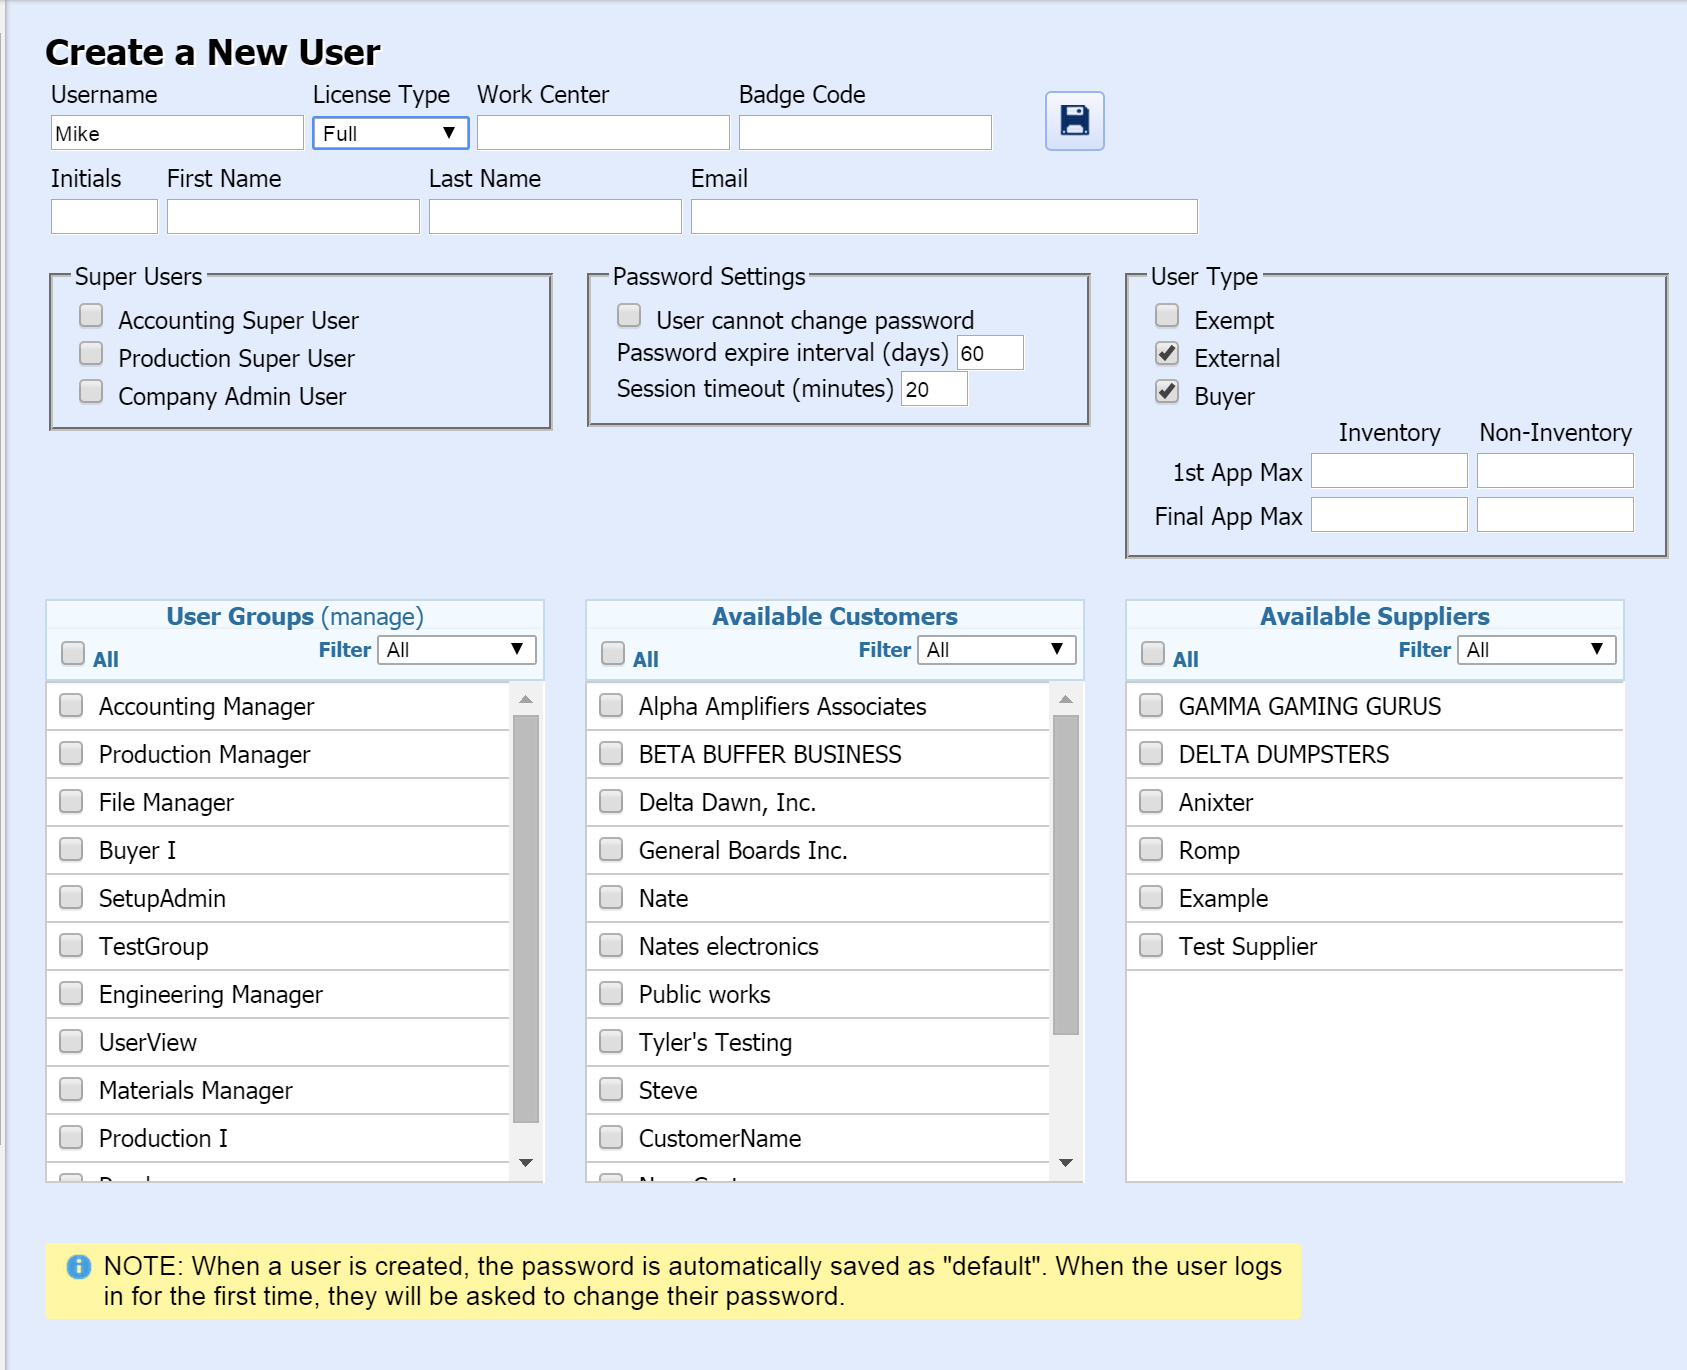
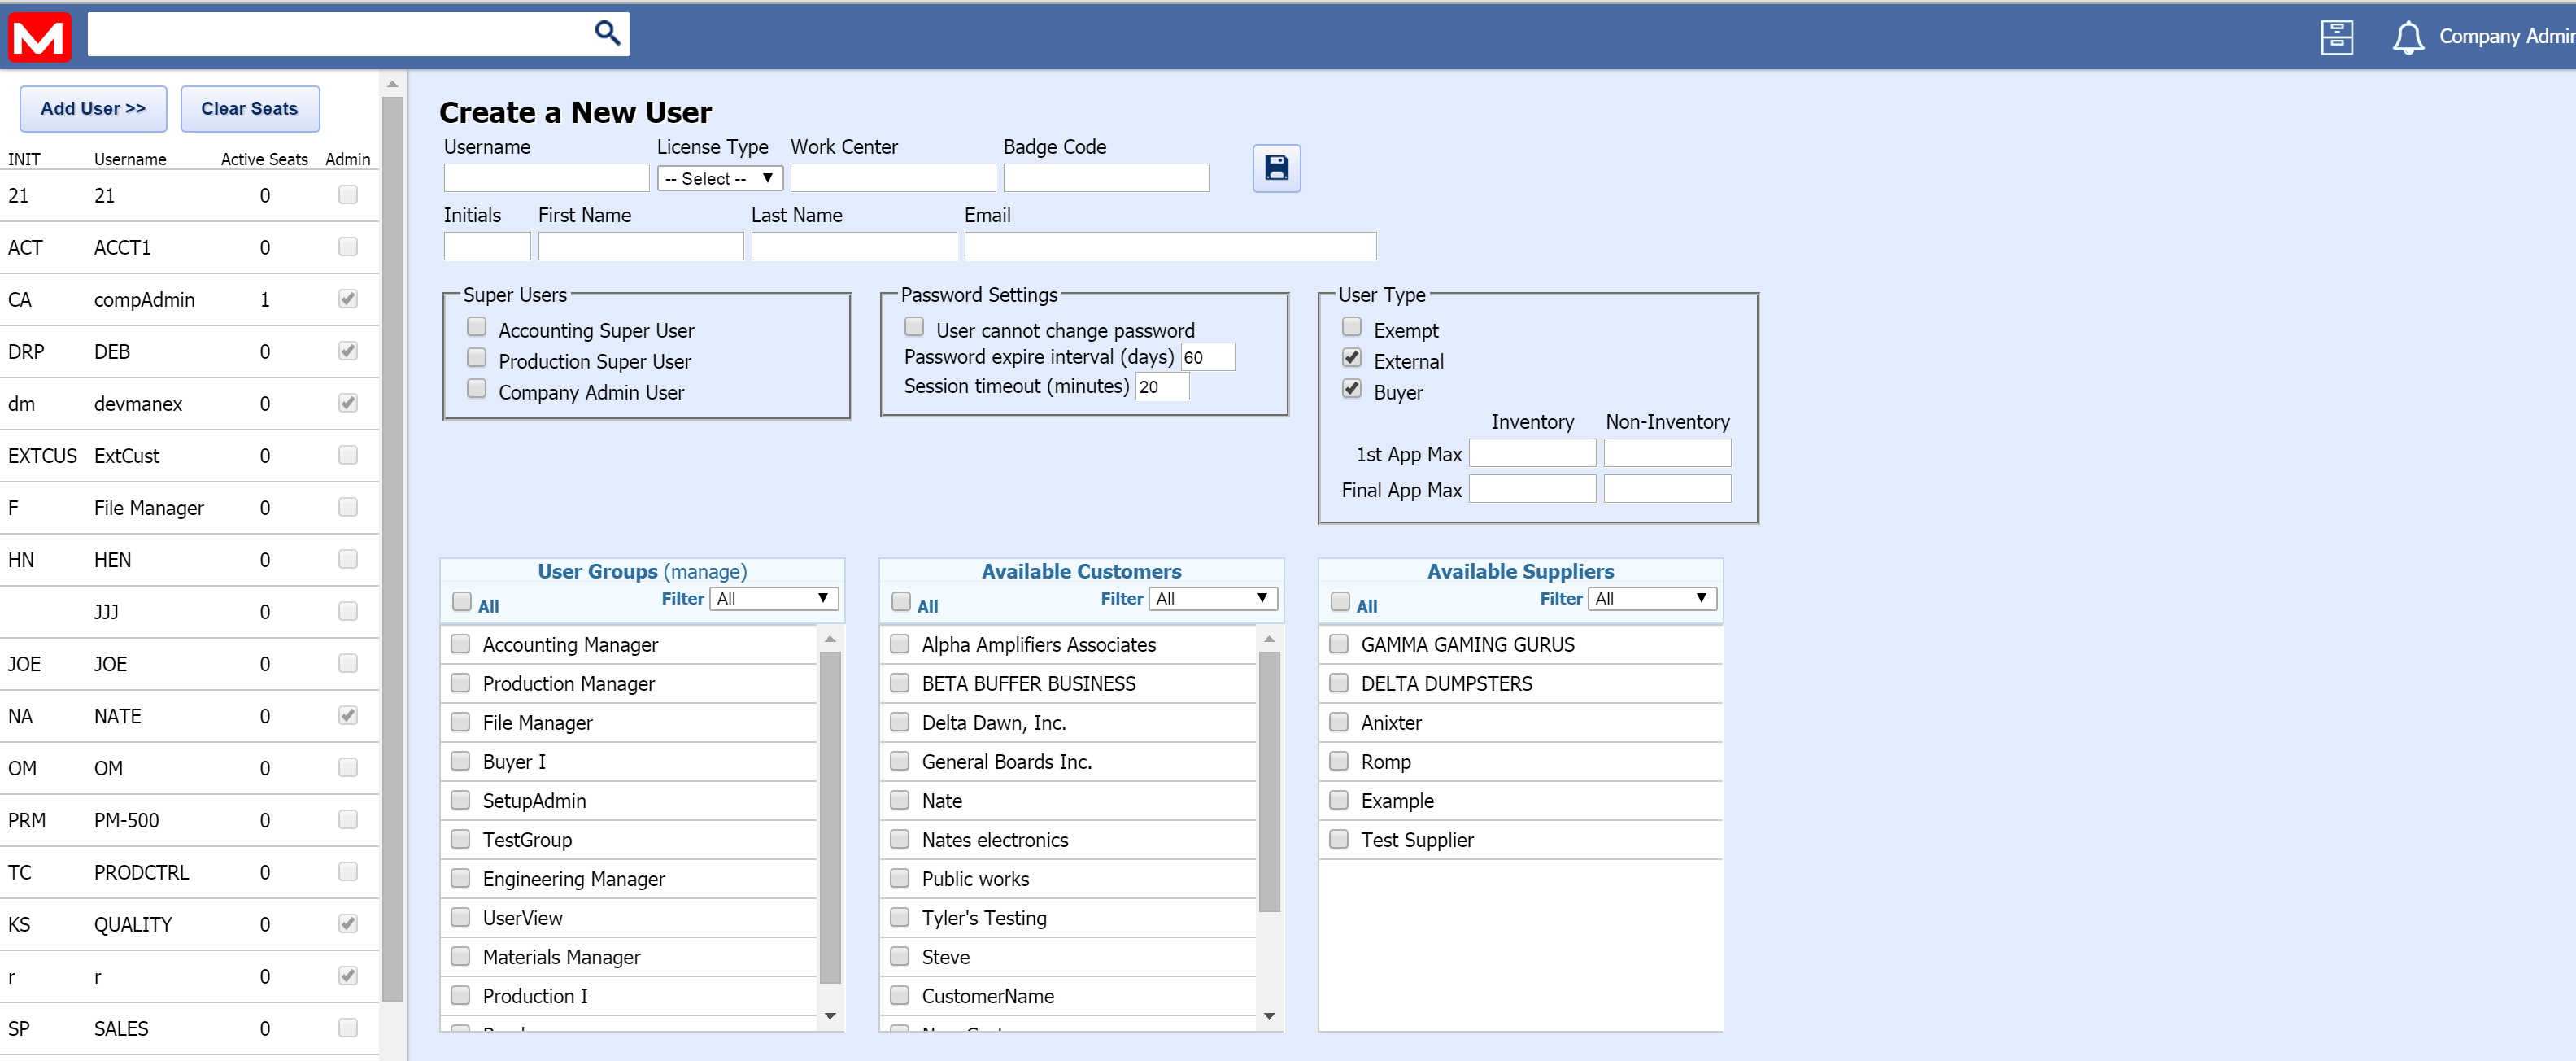
Select the "Add User" button and the following screen will be displayed:
Enter a User Name and Select the License Type from the pull down selection. You can also fill out any other available details at this point:
NOTE:The system will remove access to ALL other modules and screens when the user is assigned to a production user license. Then, when the user logs in, their session will go under the production license and consume the production license seats. Users assigned to the production user license can be granted access to anything accessible from the Shop Floor Tracking Screen. This means in the security setup all options will be hidden except for: Shop Floor Tracking, Shop Floor Tracking by Bar-Code, Time & Attendance, Statistical Quality Control, and PDM. Of course, companies will have to own the module in order to be able to grant access. The following is a list of Roles that will be permitted if a user has a license type of Production. When the admin selects the groups for the user, all the related roles are assigned. Then, when the user logs in, it checks the license type and strips out all roles not on that list (if not a Full license type). "BOM_View","BOM_Print", "CAR_View", "CONTACTS_View","CUSTOMER_View", "ECO_View", "KIT_View", "ROUTING_View", "DFCTENTR_Add","DFCTENTR_Edit","DFCTENTR_Delete","DFCTENTR_View", "SHOPFLBC_View","SHOPFLBC_Add","SHOPFLBC_Edit","SHOPFLBC_Delete","SHOPFLBC_Print","SHOPFLBC_Price","SHOPFLBC_Setup", "SHOPFLWC_View","SHOPFLWC_Add","SHOPFLWC_Edit","SHOPFLWC_Delete","SHOPFLWC_Print","SHOPFLWC_Price","SHOPFLWC_Setup", "SHOPFLWO_View","SHOPFLWO_Add","SHOPFLWO_Edit","SHOPFLWO_Delete","SHOPFLWO_Print","SHOPFLWO_Price","SHOPFLWO_Setup", "TIMELOG_Add","TIMELOG_Delete","TIMELOG_Edit","TIMELOG_View", "WO_View", "WRKCAPCT_View", "WRKINSTR_View" Enter a Work Center (if applicable), enter the users Initials, First Name, Last Name, Email (if applicable), and check any boxes that pertain to this user: 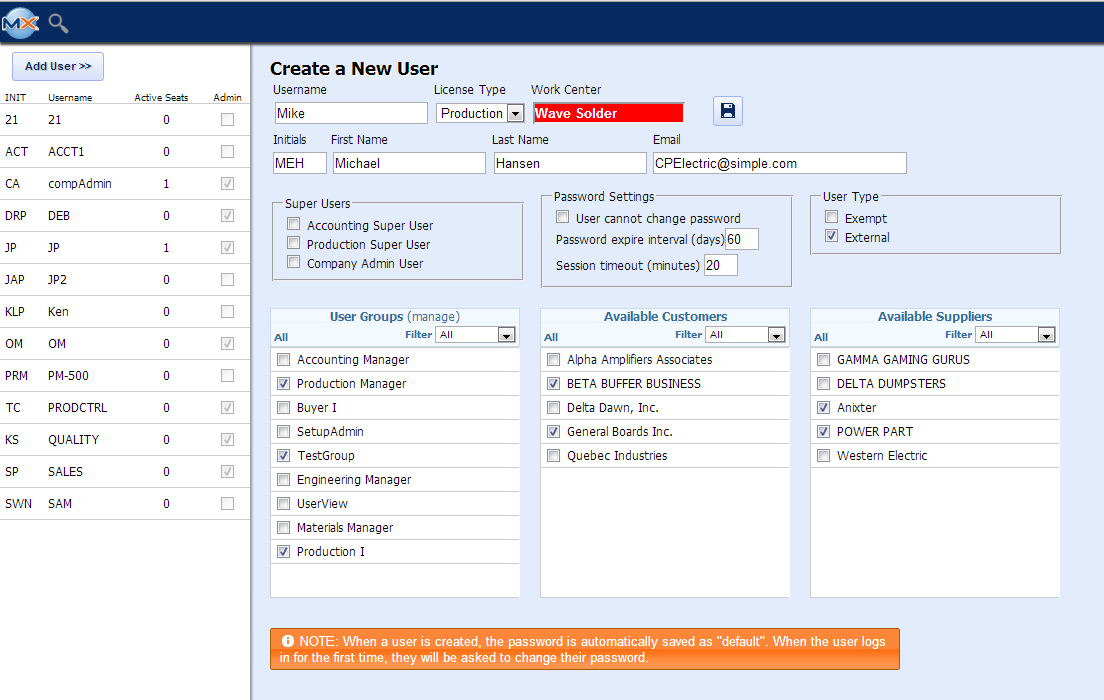 Super Users: Checking these boxes will override the license Type rights. If the Accounting Super User box is checked this user will have full rights to all Accounting modules, if the Production Super User box is checked this user will have full rights to all Productions modules, if the Company Admin User box is check this user will have full rights to all Accounting and Production modules. Email Address: If users want to allow for duplicate email addresses for their users (e.g. they want all production users to connect to the same email address), then they need to make this change in the web.config file <membership defaultProvider="CustomizedMembershipProvider"> <providers> <clear /> <add name="CustomizedMembershipProvider" type="System.Web.Security.SqlMembershipProvider" connectionStringName="eManEx" maxInvalidPasswordAttempts="10" minRequiredPasswordLength="5" minRequiredNonalphanumericCharacters="0" requiresQuestionAndAnswer="false" enablePasswordRetrieval="true" passwordFormat="Encrypted" applicationName="Manex" requiresUniqueEmail="false" /> </providers> </membership> Depress the "Add User" icon to add the new user. NOTE: That when a user is created, the password is automatically saved as "default". So, when the user logs in for the first time, they will be asked to change their password. 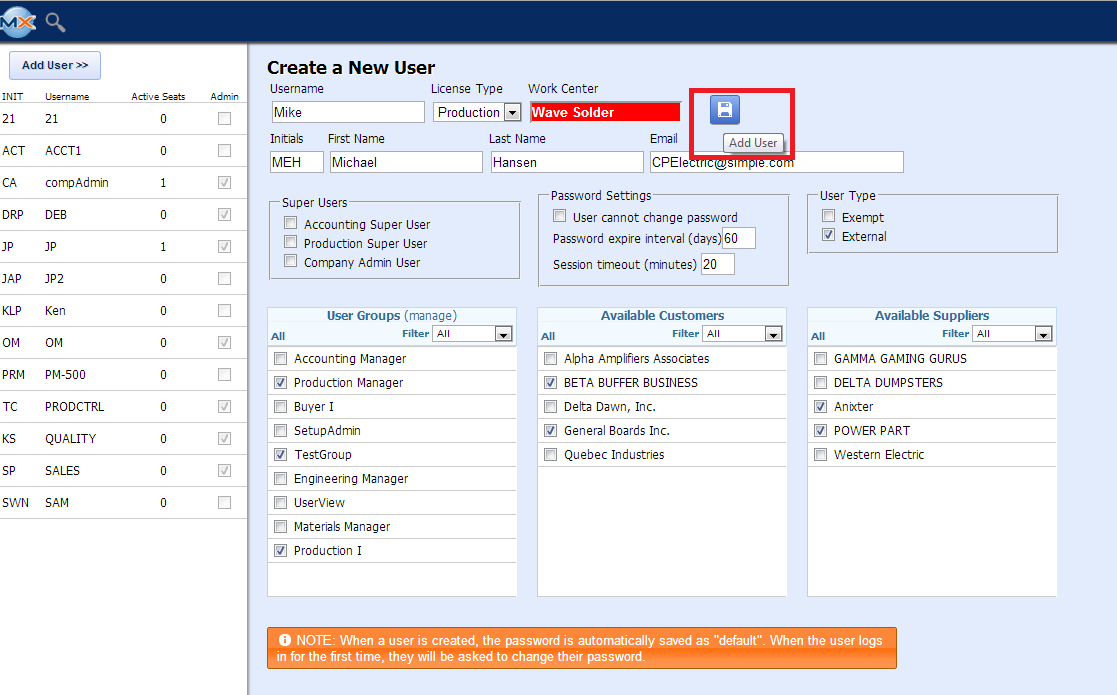
If there was a problem found a warning will be displayed at the top of the page and the field will be displayed in RED, as displayed below: 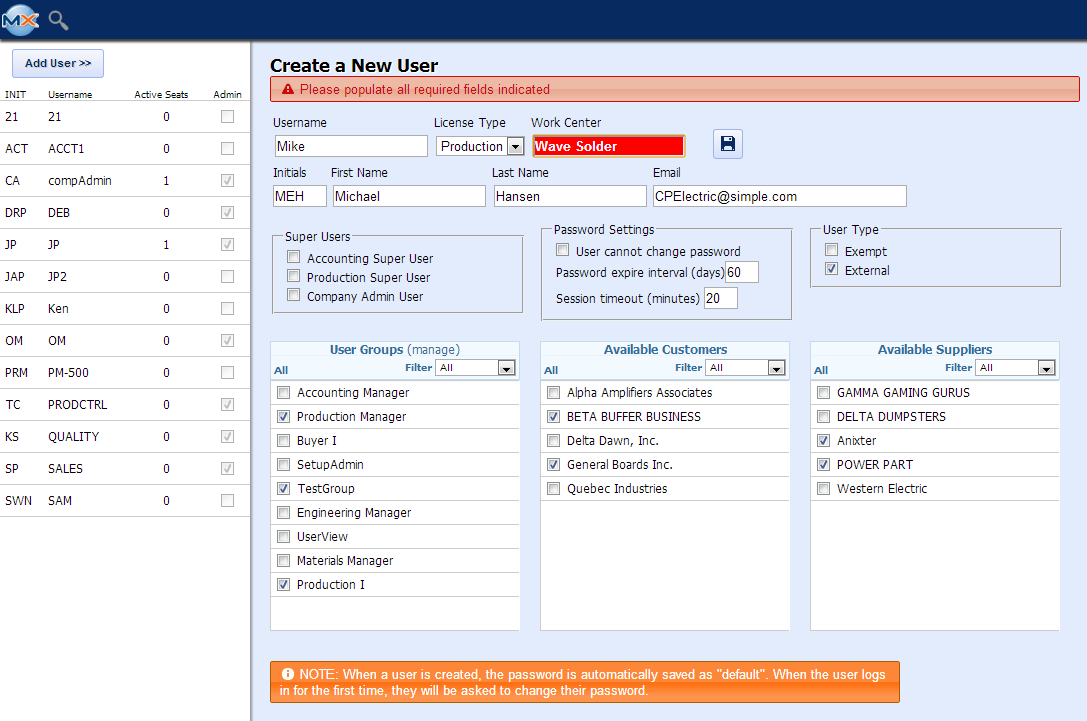
Once the problem has been fixed a noticed will be displayed at the top of the page that the "User was added successfully"
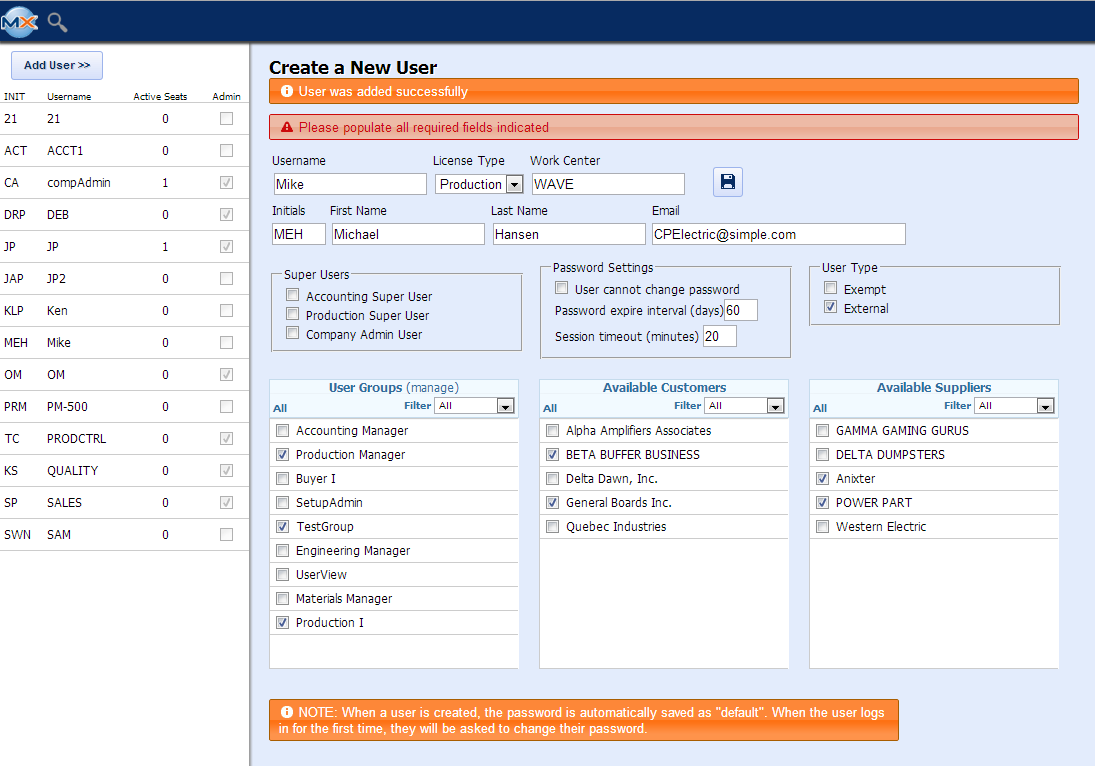 NOTE: That when a user is created, the password is automatically saved as "default". So, when the user logs in for the first time, they will be asked to change their password.
Highlight user on left and the following screen will display all the detail for this user only.
 |
| 1.5.1.3.2. How to Edit or Delete Users | ||
Login to the WebManEx and Select Setup
Select User Administration
 Highlight the User of Interest (to the left) to View the Details for that specific User. Within this screen there are options to Save Changes, Delete the User or View Users Roles
This screen also contains four function Buttons:
Super Users:
NOTE: The system will remove access to ALL other modules and screens when the user is assigned to a production user license. Then, when the user logs in, their session will go under the production license and consume the production license seats. Users assigned to the production user license can be granted access to anything accessible from the Shop Floor Tracking Screen. This means in the security setup all options will be hidden except for: Shop Floor Tracking, Shop Floor Tracking by Bar-Code, Time & Attendance, Statistical Quality Control, and PDM. Of course, companies will have to own the module in order to be able to grant access. Email Address:
If users want to allow for duplicate email addresses for
their users (e.g. they want all production users to connect to the same email
address), then they need to make this change in the web.config file:
<membership
defaultProvider="CustomizedMembershipProvider">
<providers> <clear /> <add name="CustomizedMembershipProvider" type="System.Web.Security.SqlMembershipProvider" connectionStringName="eManEx" maxInvalidPasswordAttempts="10" minRequiredPasswordLength="5" minRequiredNonalphanumericCharacters="0" requiresQuestionAndAnswer="false" enablePasswordRetrieval="true" passwordFormat="Encrypted" applicationName="Manex" requiresUniqueEmail="false" /> </providers> </membership> Depress the "Save Changes" icon to save any changes that were made.
Depress the "Delete this User" icon to remove this user from the list.
|

 - Save all changes to user.
  - Delete this user.
  - View this user's roles.
 - End this user's session.
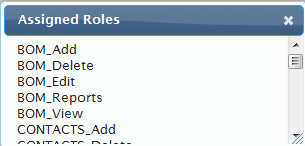
| 1.5.2. Group Administration |
| 1.5.2.1. Introduction |
|
SECURITY SETUP - GROUPS ADDRESS {rootURL}/Admin/Groups
NOTE: {rootURL} is the URL you use to access web ManEx
AVAILABLE ACTIONS From this screen, the system admin can:
SPECIAL SETUP INFO If the user is a system admin, or has group edit permissions, they will be able to show group setup from the user tools menu. This will add a lock icon to each restricted button/field on the current form. Clicking the icon will display the required role and which groups have that role assigned. The user will be able to modify the group from there to ensure uses have the access they need. |
| 1.5.2.2. Fields and Definitions |
 IMPORTANT FIELDS Each listed role has the following sections:
NOTE: Not all modules honor these roles at this time, but that functionality will be added over time. Establishing the groups and permissions will help create a smoother transition as those features are released. Groups should be very specific and grant access accordingly. For example, the admin may not want to grant inventory receiving permission to the Purchasing Manager group, even if the purchasing manager is responsible for receiving. Instead, they may want to create a group for "Receiving Manager" and assign that group to the user. This way if they later hire a Receiving Manager they can grant access to the new user by simply selecting that group, and remove receiving permissions from the Purchasing Manager by simply removing the Receiving group. There are no limits on the number of groups and assigned users. |
| 1.5.2.3. How To for Group Administration |
| 1.5.2.3.1. Add or Edit a Group |
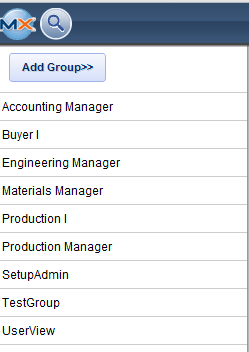
Enter WebManEx and Select Setup
Select Group Administration
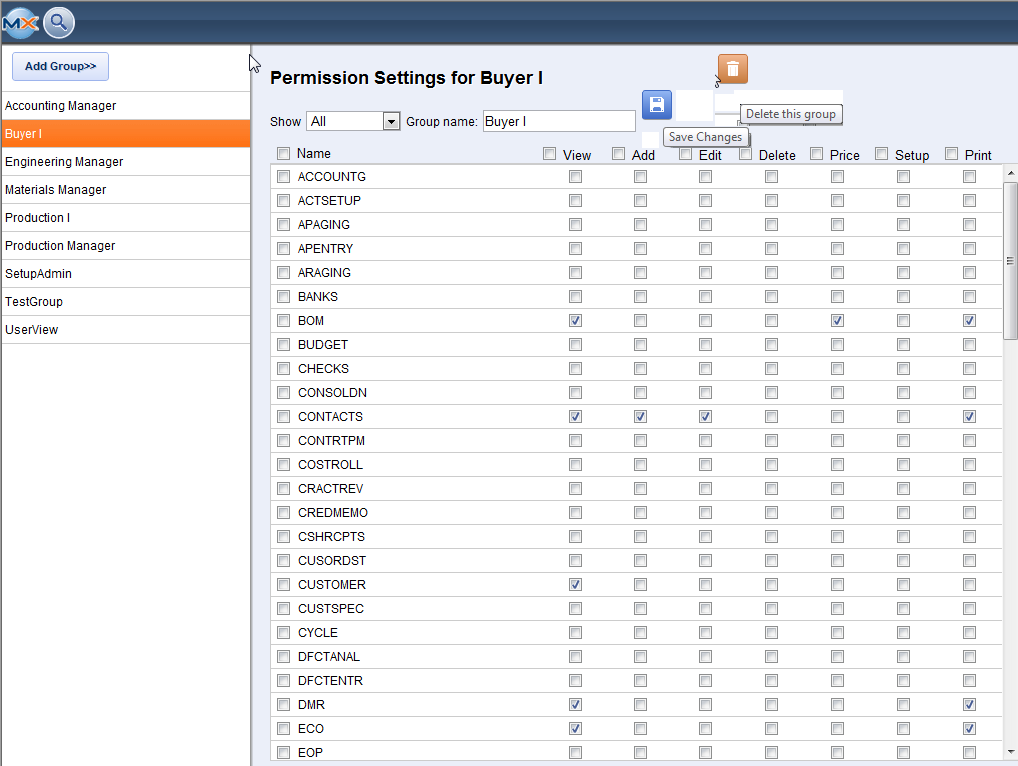
 Highlight a Group and the following screen will appear, displaying the Permission Settings for this specific Group
With in this screen you can Add a Group, Change the Groups Permission Settings, or Delete a Group.
|
| 1.5.3. Setup New Workstation |
| 1.5.3.1. Introduction |
|
SETUP - New Workstation ADDRESS
{rootURL}NewWorkstation NOTE: {rootURL} is the URL you use to access web ManEx
AVAILABLE ACTIONS From this screen, the user can:
|
| 1.5.3.2. Fields and Definitions |
 1. Encrypt Values - When data is inserted into the database it can be encrypted using an encryption password supplied by the user. When the data is retrieved, the same password must be supplied to decrypt the data.
2. SQL Address - Your Domain Name.
3. Database Name - The database name is a string which somehow describes the identity of the database to which this database object is or has been connected.
4. Work Station Id - The workstation ID and computer name are the same. For newer PC's this information can be located in the lower right hand corner on the Microsoft Windows Screen which contains your icons. If it is a public workstation, the workstation ID is located in the upper right hand corner. If you have an older PC or you can't find this information:
Follow these instructions
5. User Name – The userid identifies you to the computer. Userids are typically some form of your name. (Your last name, for example). A userid must be unique throughout the computer system. This allows the computer to distinguish between you and some other person.
6. Password - To prevent other people from using your account via your userid, you are required to have a password. A password allows you and only you to access the computer system through your userid. It basically proves to the computer system that you are who you say you are. So it should be obvious that you DO NOT GIVE YOUR PASSWORD TO ANYONE!!!
|
| 1.5.3.3. How To |
|
Login to the WebManEx and Select Sales
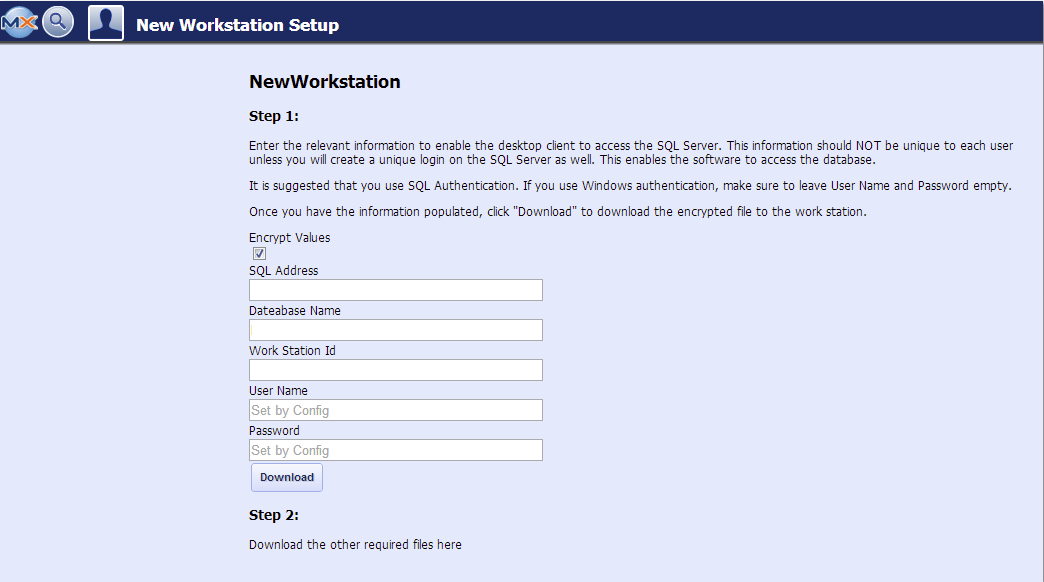
Select Setup New Workstation and the following screen will be displayed:
Select use Encrypt Values or not, then enter your SQL Address, Database Name, Work Station ID, User Name, and Password.
1. Encrypt Values - When data is inserted into the database it can be encrypted using an encryption password supplied by the user. When the data is retrieved, the same password must be supplied to decrypt the data.
2. SQL Address - Your Domain Name.
3. Database Name - The database name is a string which somehow describes the identity of the database to which this database object is or has been connected.
4. Work Station Id - The workstation ID and computer name are the same. For newer PC's this information can be located in the lower right hand corner on the Microsoft Windows Screen which contains your icons. If it is a public workstation, the workstation ID is located in the upper right hand corner. If you have an older PC or you can't find this information:
Follow these instructions
5. User Name – The userid identifies you to the computer. Userids are typically some form of your name. (Your last name, for example). A userid must be unique throughout the computer system. This allows the computer to distinguish between you and some other person.
6. Password - To prevent other people from using your account via your userid, you are required to have a password. A password allows you and only you to access the computer system through your userid. It basically proves to the computer system that you are who you say you are. So it should be obvious that you DO NOT GIVE YOUR PASSWORD TO ANYONE!!!
|
| 1.5.4. User Defined Fields |
| 1.5.4.1. Introduction for User Defined Fields |
|
SETUP - USER Defined Fields
ADDRESS
{rootURL}UDF Setup
NOTE: {rootURL} is the URL you use to access web ManEx
AVAILABLE ACTIONS From this screen, the user can:
|
| 1.5.4.2. Fields and Definitions for User Defined Fields |
 Section: These are the modules or sections you want to add/Setup new User Defined fields to.
Name - Name of the Field
Default Value - The Value entered if applicable
Required - Check this box if it is a required field
Data Type - Field Type
Max Length - Length of Field
List Generation - Generation List
|
| 1.5.4.3. How To ....for User Defined Fields |
| 1.5.4.3.1. Setup User Defined Fields |
Enter WebManEx and Select Setup
Select User Defined Fields
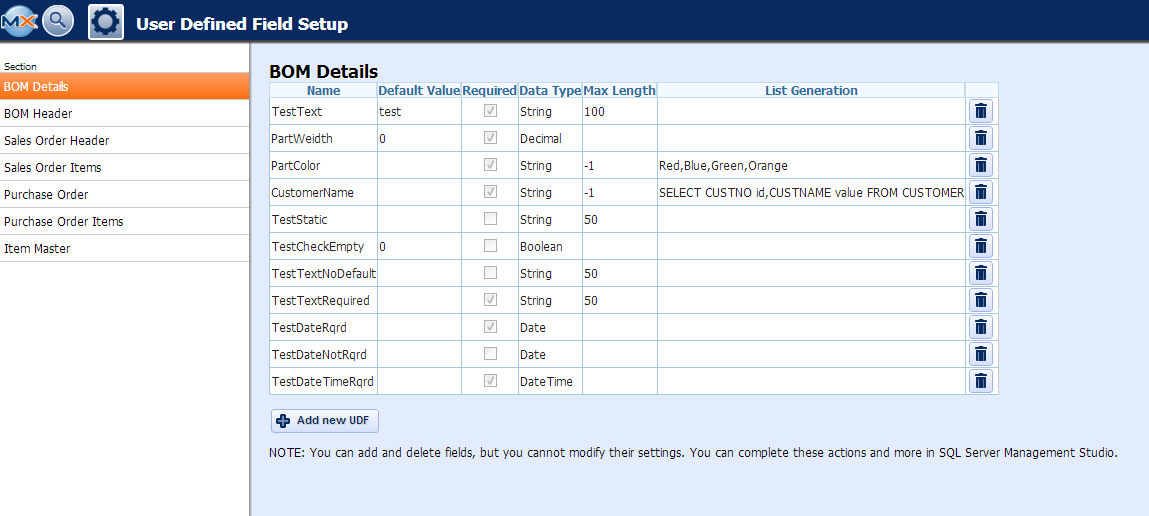
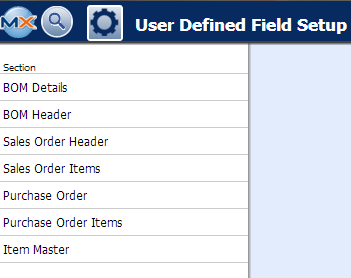 Highlight a Section and the following screen will appear (Note: this screen will be different depending on what Section is selected), displaying the UDF.
With in this screen you can Add and delete fields, but you CANNOT modify their settings.
Depress the "Add new UDF" and the following screen will be displayed:
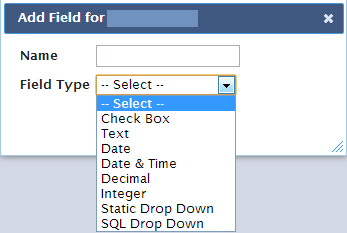 Enter in a Name and select the Field Type from the drop down list, once the Field Type is selected, user will be able to add the Default Value, check the Required box, and add Max Length, if applicable.
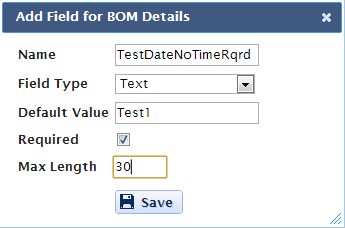 Once this is all complete user can select Save.
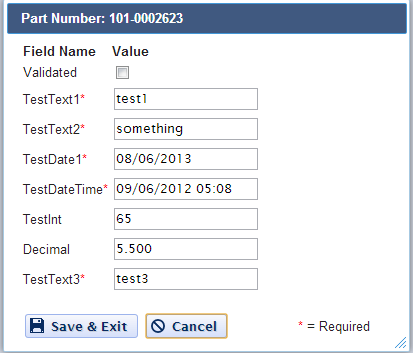
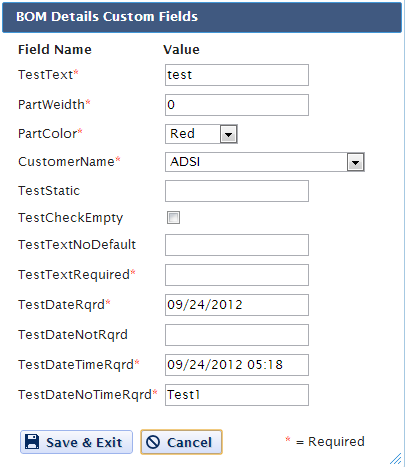
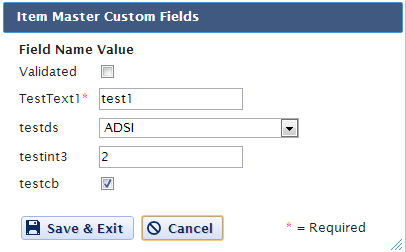
The User Defined Fields can then be linked to Inventory PN, Purchase Order, Customer, Packing List, Invoice, Sales Order, and Bill of Material by selecting a record in the ManEx Desktop, and selecting the UD action button (as displayed below).
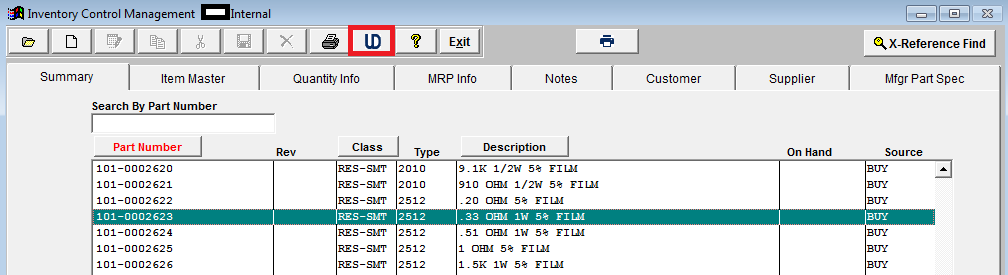 The UDF for that section will then be displayed, and user can make changes (if applicable), Save & Exit or Cancel.
 |
| 1.5.5. License & Registration |
| 1.5.5.1. Prerequisites for the License & Registration |
| 1.5.5.2. Introduction for the License & Registration |
| 1.5.5.3. Fields & Definitions for the License & Registration |

|
| 1.5.5.4. How To ..... for License & Registration |
| 1.5.5.4.1. Register Software |
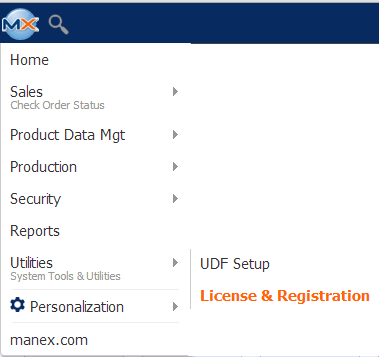
Select Utilities/License & Registration
 The following screen will be displayed:
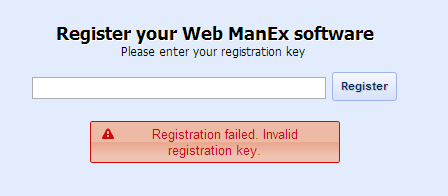
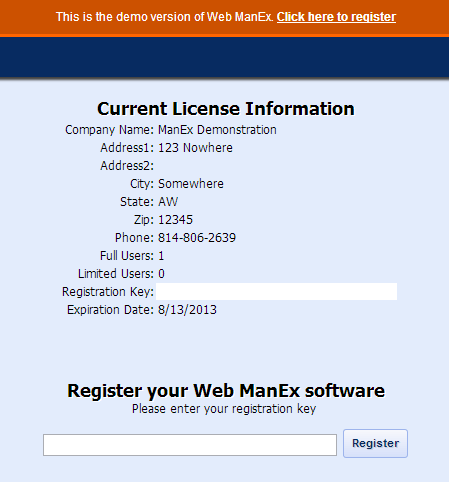 Enter the Registration Key provided by ManEx Support Team and depress the "Register" button;
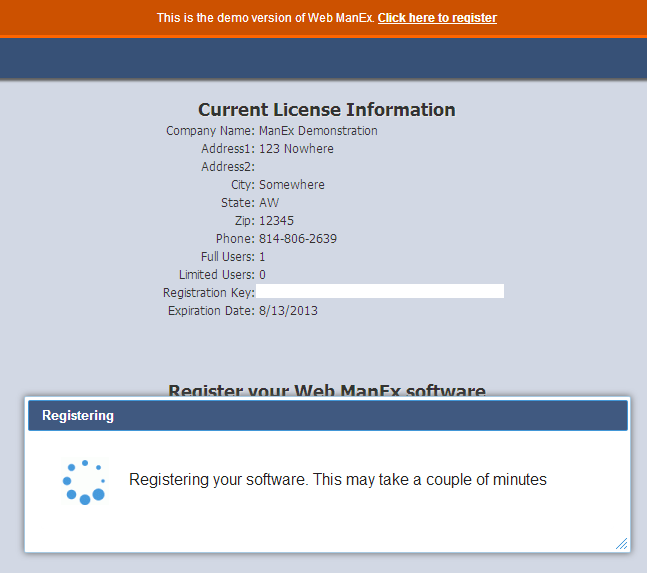 If the registration key entered is incorrect the following message will be displayed:
 Once software has been register the following screen will be displayed and user may start using the WebManEx.
|
| 1.6. Product Data Management |
| 1.6.1. Bill of Material |
| 1.6.1.1. Introduction |
|
ADDRESS {rootURL} orders
NOTE: {rootURL} is the URL you use to access web ManEx
AVAILABLE ACTIONS From this screen, the user can:
|
| 1.6.1.2. Fields and Definitions |
Bill of Material - Standard
 Itm# - The item number assigned to the components in the BOM.
Part Number - The components internal Manex part number
Rev - The Part Number Revision for the component. A component may exist under multiple revisions. Each Rev. is considered a unique part number and may co-exist with other Revs. or replace other Revs
Source - The sources of the assembly components. Select Make, Buy, Consigned or Phantom
Description - The Item Master description of the component part.
Cust Rev - The Part Number Revision for the component. A component may exist under multiple revisions. Each Rev. is considered a unique part number and may co-exist with other Revs. or replace other Revs
Class - The Part Class of the component part as assigned in the Item Master
Type - The Part Type of the component part as assigned in the Item Master
Quantity - The quantity of the component part used in the assembly. This qty does NOT compensate for setup and run losses; The Setup % and Run Qty fields in the Item Master screen cover production losses
UOM - The stocking/kitting unit of measure for the part
Work Center - The work center identified in the routing for the assembly at which the part is needed. Kitting of the part by work center will use this information to determine which parts are to be kitted for each work center
Offset - Production offset is a BoM item level field that allows users to control delivery dates in relation to the starting date of the work order. By using this field, the user may move the material requirement date by the specified number of days in either direction
Used - Identifies the part as requiring kitting from the storeroom. Typical Non-kitted items include chemicals and adhesives that are re-issued when they run low but are included on the BOM for costing or reference
Effectively - This is the date that the part is added and/or removed from the BOM and the demands will be displayed in MRP. MRP picks up all the records with an effective date earlier or equal to current date, and all NULL/BLANK effective dates
Obsolete - The date the part is no longer required on the BOM for new work orders and the demands will NOT be displayed in MRP
Bill of Material - Purchasing
 Part Number - The components internal Manex part number
Rev - The Part Number Revision for the component. A component may exist under multiple revisions. Each Rev. is considered a unique part number and may co-exist with other Revs. or replace other Revs
Total Qty - The quantity of the component part used in the assembly. This qty does NOT compensate for setup and run losses; The Setup % and Run Qty fields in the Item Master screen cover production losses
# Items - The item number assigned to the components in the BOM
Cust Part Num - The number the customer uses to identify the part.
Cust Rev - The Part Number Revision for the component. A component may exist under multiple revisions. Each Rev. is considered a unique part number and may co-exist with other Revs. or replace other Revs
Class - The Part Class of the component part as assigned in the Item Master
Type - The Part Type of the component part as assigned in the Item Master
Description - The Item Master description of the component part
UOM - The stocking/kitting unit of measure for the part
Standard Cost - The STANDARD COST of an item is a calculated value determined by the sum of individual costs. These individual costs may be in any combination of the Material, Labor, Overhead, Other and User Defined costs
MatlType - AVL Material Type Code. LF, LF-Date, LF-Mark, LF-P/N, RoHS, RoHS-Date, RoHS-Mark, RoHS-P/N, and Unk are the AVL Material types that are hard-coded into the system.
LF (Lead-Free), RoHS (the restriction of the use of certain hazardous substances in electrical and electronic equipment) or (In general, RoHS requirements include limitations on other heavy metals in addition to being lead free. But many companies may not meet the full requirements of RoHS, but still want to identify the material as Lead Free(, and Unk (Unknown) are the Inventory Material Types that are hard-coded into the system. Then sometimes the user wishes to identify a date code, marking or part number which designates that the part has switched from unknown to LF or RoHS, and that is what the additional modifier is for. Bill of Material - Exploded
 Itm # - The item numbers assigned to the components in the BOM
Source - The sources of the assembly components. Select Make, Buy, Consigned or Phantom
View Part No - The components internal Manex part number. Depressing this button will display BOM Details, Item Master Custom Fields, AVL Configurations, and Ref Designators for selected part
View Rev - The Part Number Revision for the component. A component may exist under multiple revisions. Each Rev. is considered a unique part number and may co-exist with other Revs. or replace other Revs
Class - The Part Class of the component part as assigned in the Item Master
Type - The Part Type of the component part as assigned in the Item Master
Description - The Item Master description of the component part
Work Center - The work center identified in the routing for the assembly at which the part is needed. Kitting of the part by work center will use this information to determine which parts are to be kitted for each work center
Line Note -
Offset Days - - Production offset is a BoM item level field that allows users to control delivery dates in relation to the starting date of the work order. By using this field, the user may move the material requirement date by the specified number of days in either direction
Obsolete - The date the part is no longer required on the BOM for new work orders and the demands will NOT be displayed in MRP
Effective - -This is the date that the part is added and/or removed from the BOM and the demands will be displayed in MRP. MRP picks up all the records with an effective date earlier or equal to current date, and all NULL/BLANK effective dates
Used - Identifies the part as requiring kitting from the storeroom. Typical Non-kitted items include chemicals and adhesives that are re-issued when they run low but are included on the BOM for costing or reference
PN Note - Depressing this button will display BOM Details, Item Master Custom Fields, AVL Configurations, and Ref Designators for selected part
UOM - The stocking/kitting unit of measure for the part.
Scrap - This amount is added to the exact quantity used on an assembly to provide an overage to cover losses during running due to predictable machine and human losses
Setup Scrap - Setup losses may be added to the BOM requirement and Run Scrap for an item.For instance, an auto-insertion machine may use extra parts for alignment checks
Standard Cost - The STANDARD COST of an item is a calculated value determined by the sum of individual costs. These individual costs may be in any combination of the Material, Labor, Overhead, Other and User Defined costs.
Bill of Material - Sourcing
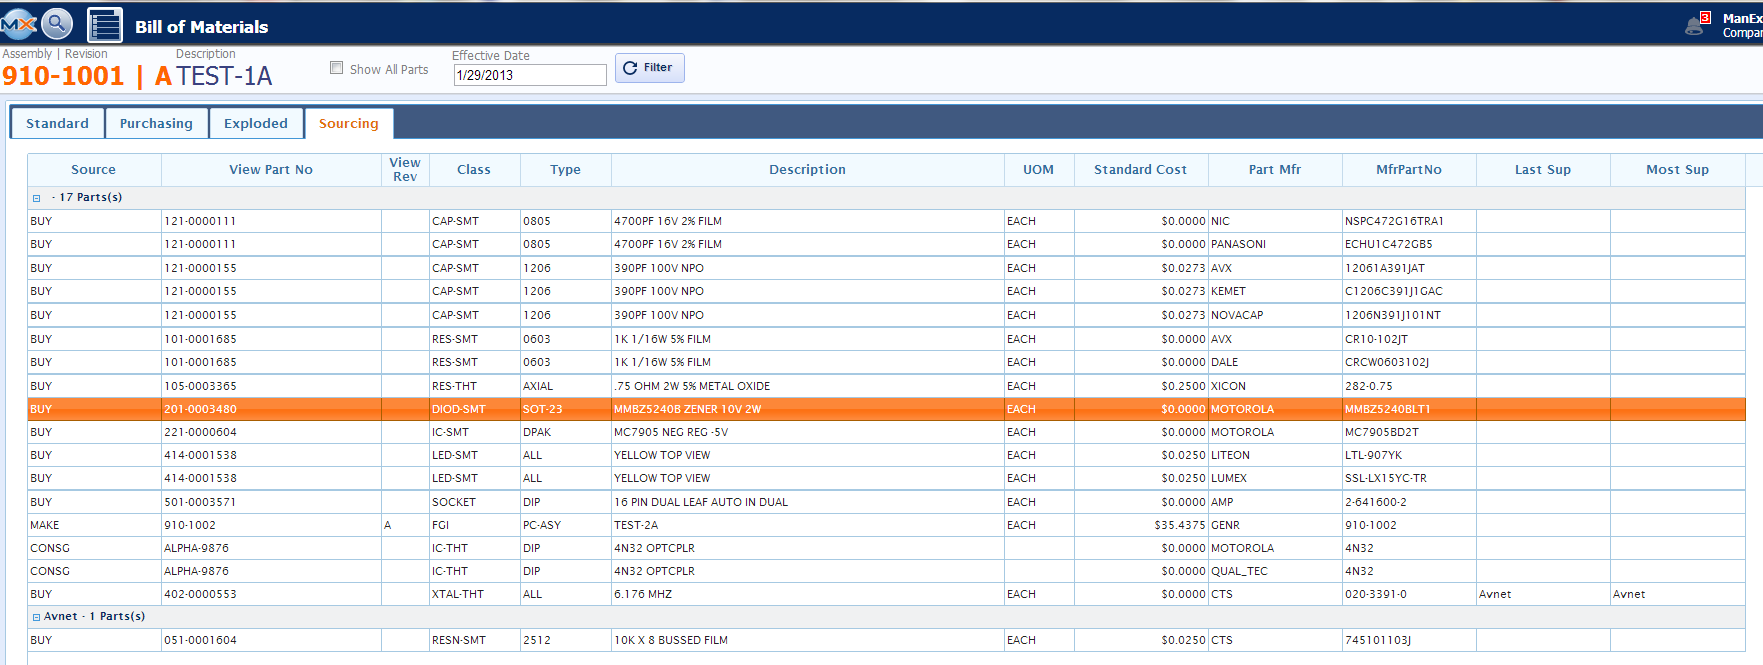 Source - The sources of the assembly components. Select Make, Buy, Consigned or Phantom
View Part No - The components internal Manex part number. Depressing this button will display BOM Details, Item Master Custom Fields, AVL Configurations, and Ref Designators for selected part
View Rev - The Part Number Revision for the component. A component may exist under multiple revisions. Each Rev. is considered a unique part number and may co-exist with other Revs. or replace other Revs
Class - The Part Class of the component part as assigned in the Item Master
Type - The Part Type of the component part as assigned in the Item Master
Description - The Item Master description of the component part
UOM - The stocking/kitting unit of measure for the part
Standard Cost - The STANDARD COST of an item is a calculated value determined by the sum of individual costs. These individual costs may be in any combination of the Material, Labor, Overhead, Other and User Defined costs.
Part Mfr - Is the name of the manufacturer of this part
MfrPartNo - Displays the Mfg. Part Number for an existing highlighted Mfg
Last Sup - Last Supplier used.
Most Sup - Supplier Most Used.
|
| 1.6.1.3. How To |
| 1.6.1.3.1. Find and View a Bill of Material | ||||
Login to the WebManEx and Select Product Data Management
Select the Bill of Materials Icon and the following find screen will be displayed:
Select Bill of Material from this screen and ALL then depress the "Go" button and a Listing of Part Numbers will be displayed:
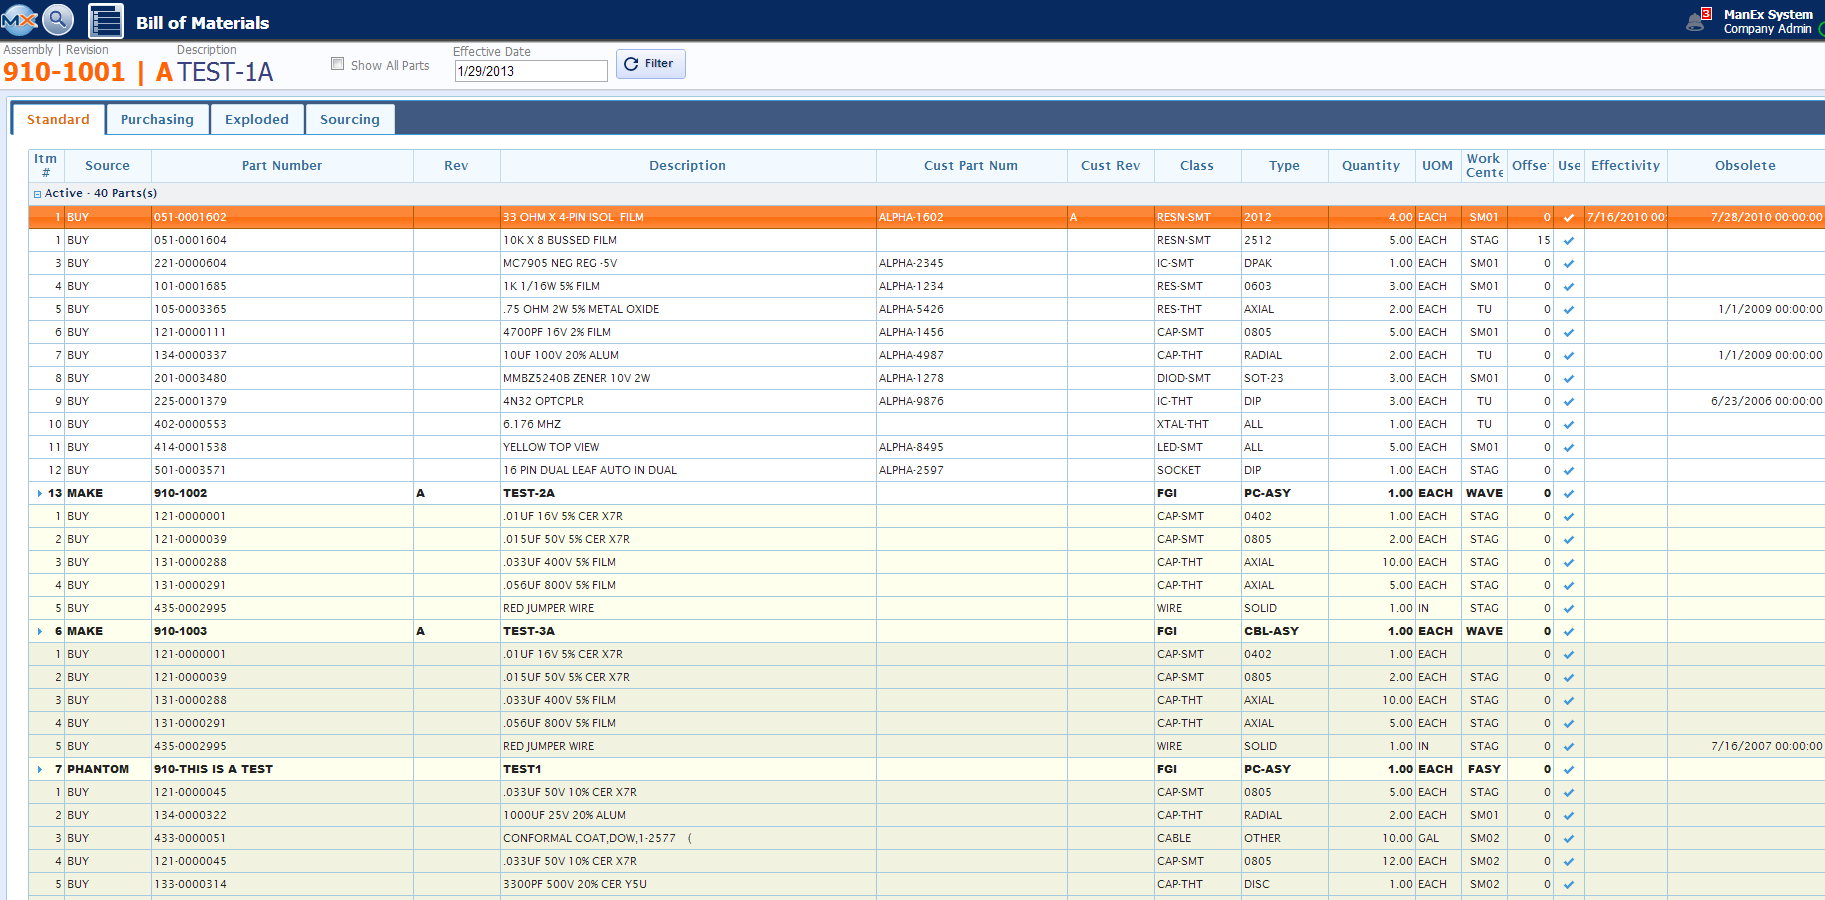
 Double Click on a Part Number and the Bill of Material for this Part will be displayed. This screen will display all Active parts, Buy, Consigned, Make, and Phantoms.
User may drill down to see more detail per part by:
There are four tabs available. Each tab will display different information for the items listed in this Bill of Material.
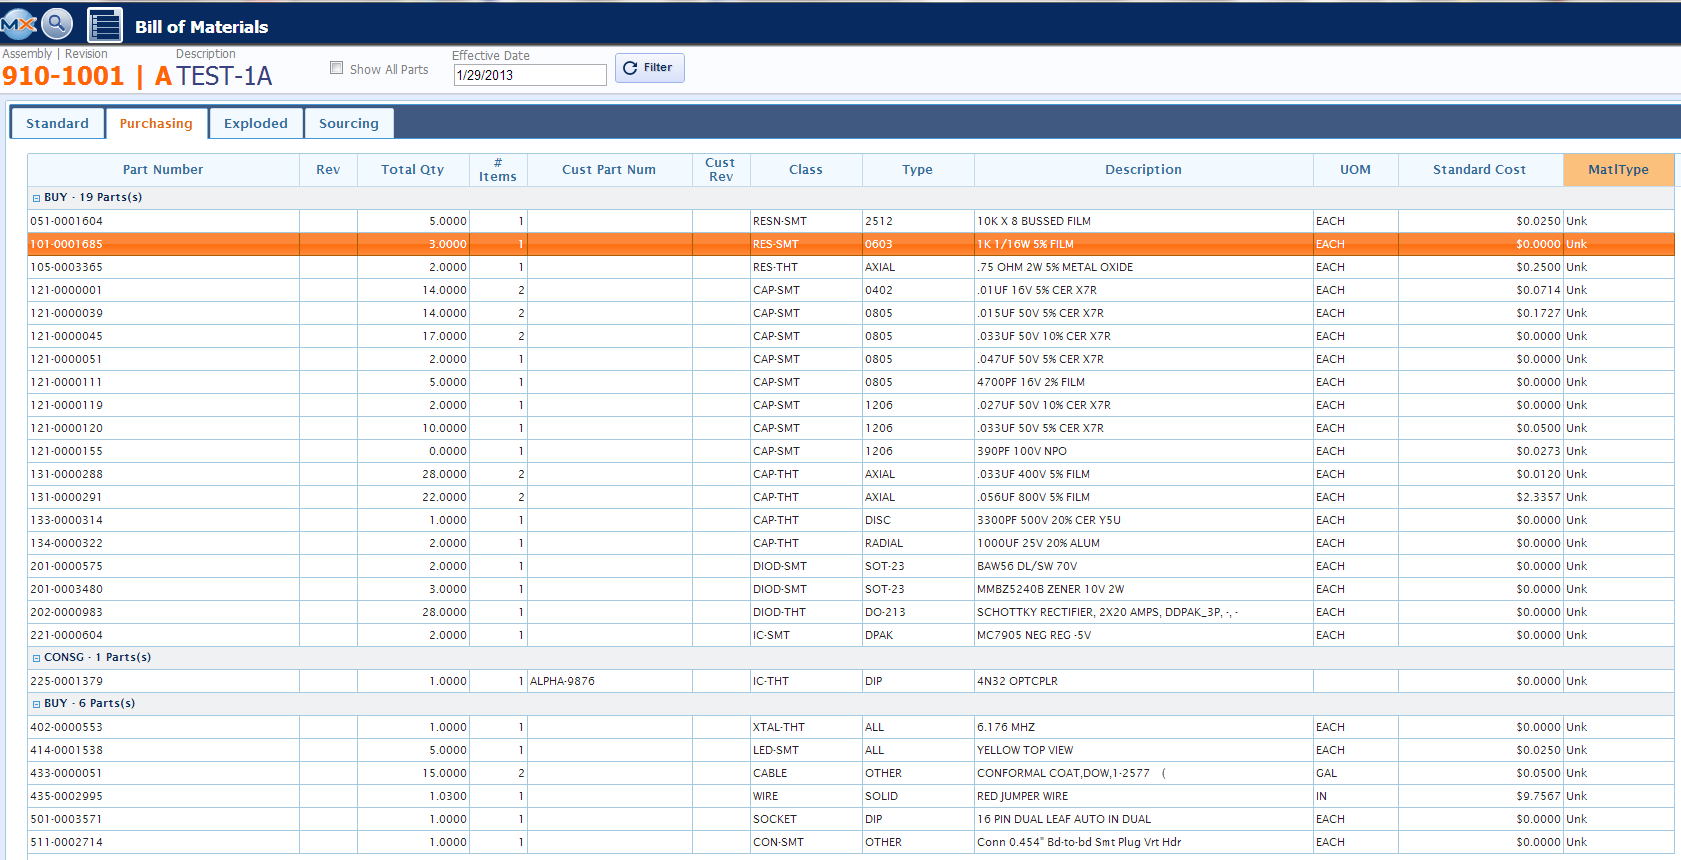
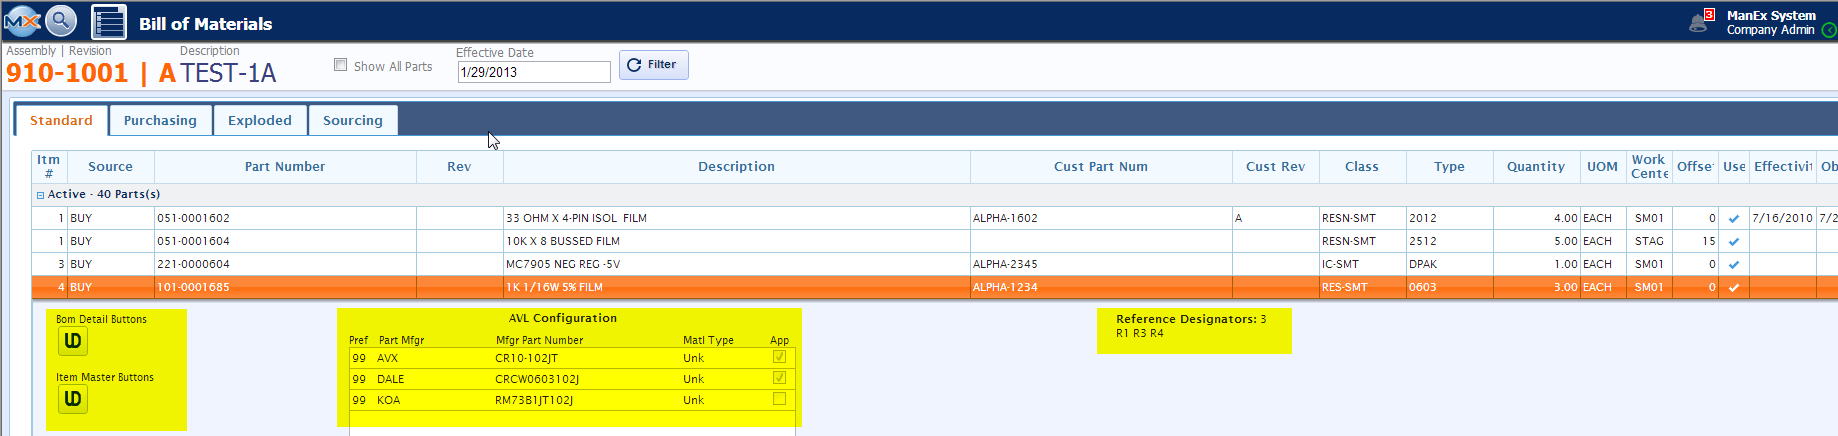
The first tab is the Standard Tab - this tab will display all the active parts for this BOM, the Item #, Source, Part Number, Rev, Description, Cust Part Num, Reg, Class, Type, Qty per assembly, UOM, Work Centers, Offset days (if applicable), If used in kit, Effectively, and Obsolete Dates. The second tab is the Purchasing Tab - this tab displays the Buy and Consgined parts listed on the BOM, Part Number, Total Qty per assembly, Item #, Customer Part Number (if applicable), Class, Type, Description, UOM, Standard Cost, and Matl Type.
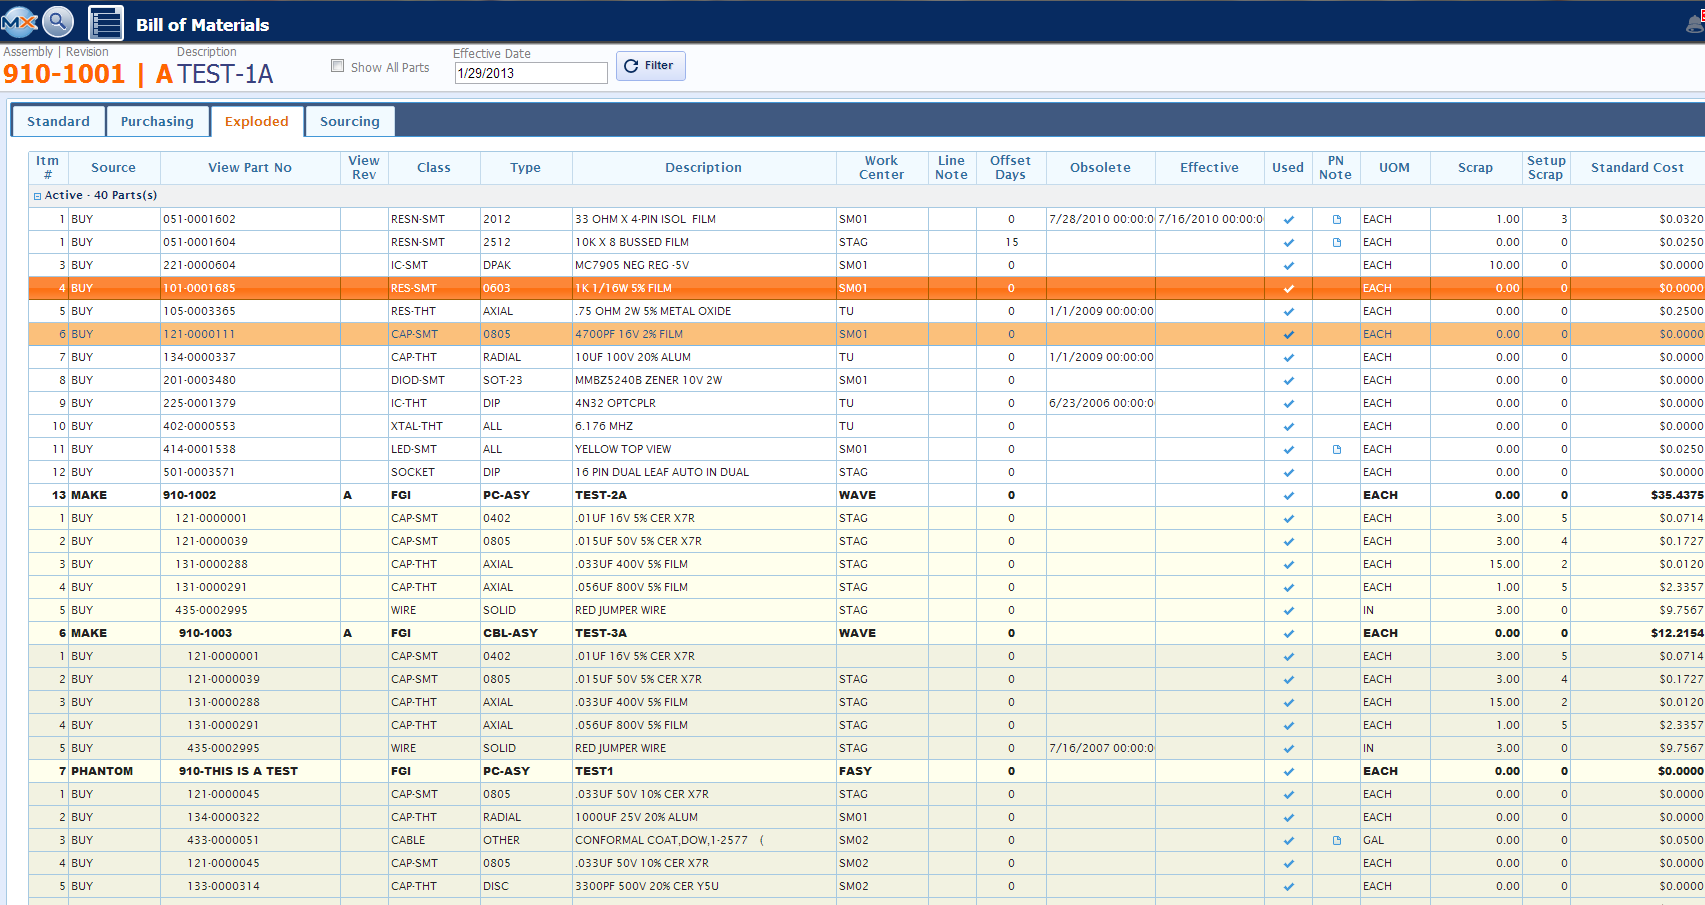
The third tab is the Exploded Tab - this tab will explode out any Sub Assemblies, Make or Phantom Assemblies listed on the original BOM, along with the Part Numbers, Class, Type, Description, Work Center, Line Notes, Offset Days, Obsolete and Effective dates, Used on BOM, PN Notes, UOM, Scrap and Setup Scrap and Standard Cost.
The fourth tab is the Sourcing Tab - This tab will display the Buy and Consigned parts or parts that will be sourced out to Suppliers. This tab will list the Source, Part Number, Class, Type, Description, UOM, Standard Cost, Part Mfgr and Mfgr Part No, Last Supplier used and Supplier Most used.
On any of the tabs if user want to view more detail for a specific part, such as the AVL information, or Reference Designators,or add any BOM or Item Master Detail:
All standard grid customizations apply. See related Article for more information. |
| 1.6.2. BOM Reports |
| 1.6.2.1. BOM Report FAQ |
|
| 1.6.2.1.1. Why am I seeing a difference in total cost on the "BOM indented and costed report" in SQL compared to the VFP version? |
Q:Why am I seeing a difference in total cost on the "BOM indented and costed report" in SQL compared to the VFP version? A: In VFP the report used to include the Std Cost value for the Make/Buy itself and then also explode out the components for Make/Buy sub-assembly (which was incorrect) In SQL the report will take the std cost for the Make/Buy and not include the components. |
| 1.6.2.2. Introduction |
|
ADDRESS {rootURL} BOM
NOTE: {rootURL} is the URL you use to access web ManEx
From this screen, the user can:
|
| 1.6.2.3. How To |
All Reports are found within the Report Manager and are basically viewed the same. See Article 5477 for further detail on Reports.
|
| 1.6.3. BOM Import |
| 1.6.3.1. Prerequisites |
To import a BOM, one of the templates below must be used.
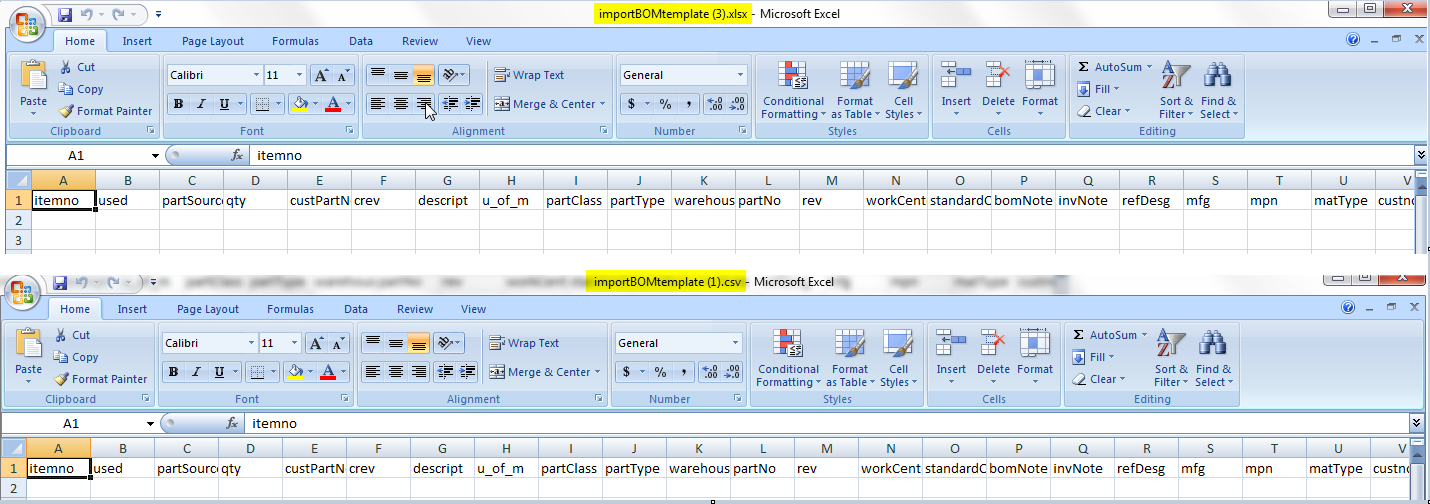 It is okay if you have blank lines, but they should be subsequent lines of the same assembly, NOT the first line item no. First priority is the assynum and rev columns in the spreadsheet,. If you populate that data, in the first item number it will use that as the import record assembly number. NOTE: If you are entering parts for different customers on the same spreadsheet you MUST enter different assynum and/or rev to distinguish between customer parts. If assynum is same it will override customer number and use prior customer linked to that assembly number.
If the assynum and rev columns are blank in the first item no (as in item 1 in this bom) THEN the import will use the file name as the assembly number, then, if the rest of the line items have data that is the same, the system will put it on another import record with the listed number.
Font size: We made it larger so it is easier to read and use on things like a tablet. However, if your screen size is small it may appear too large. |
| 1.6.3.2. Introduction |
|
ADDRESS {rootURL} BOM
NOTE: {rootURL} is the URL you use to access web ManEx
AVAILABLE ACTIONS From this screen, the user can:
|
| 1.6.3.3. Fields and Definitions |
| 1.6.3.3.1. BOM Import Templates | |||||||||||||||||||||||||||||||||||||||||||||||||||||||||||||||||||||||||||||||||||
|
| 1.6.3.3.2. Import Screen |

|
| 1.6.3.3.3. Upload Screen | ||||||||||||||||||||||||||||||||||||||||||||||||||||||||||||||||||||||||||||
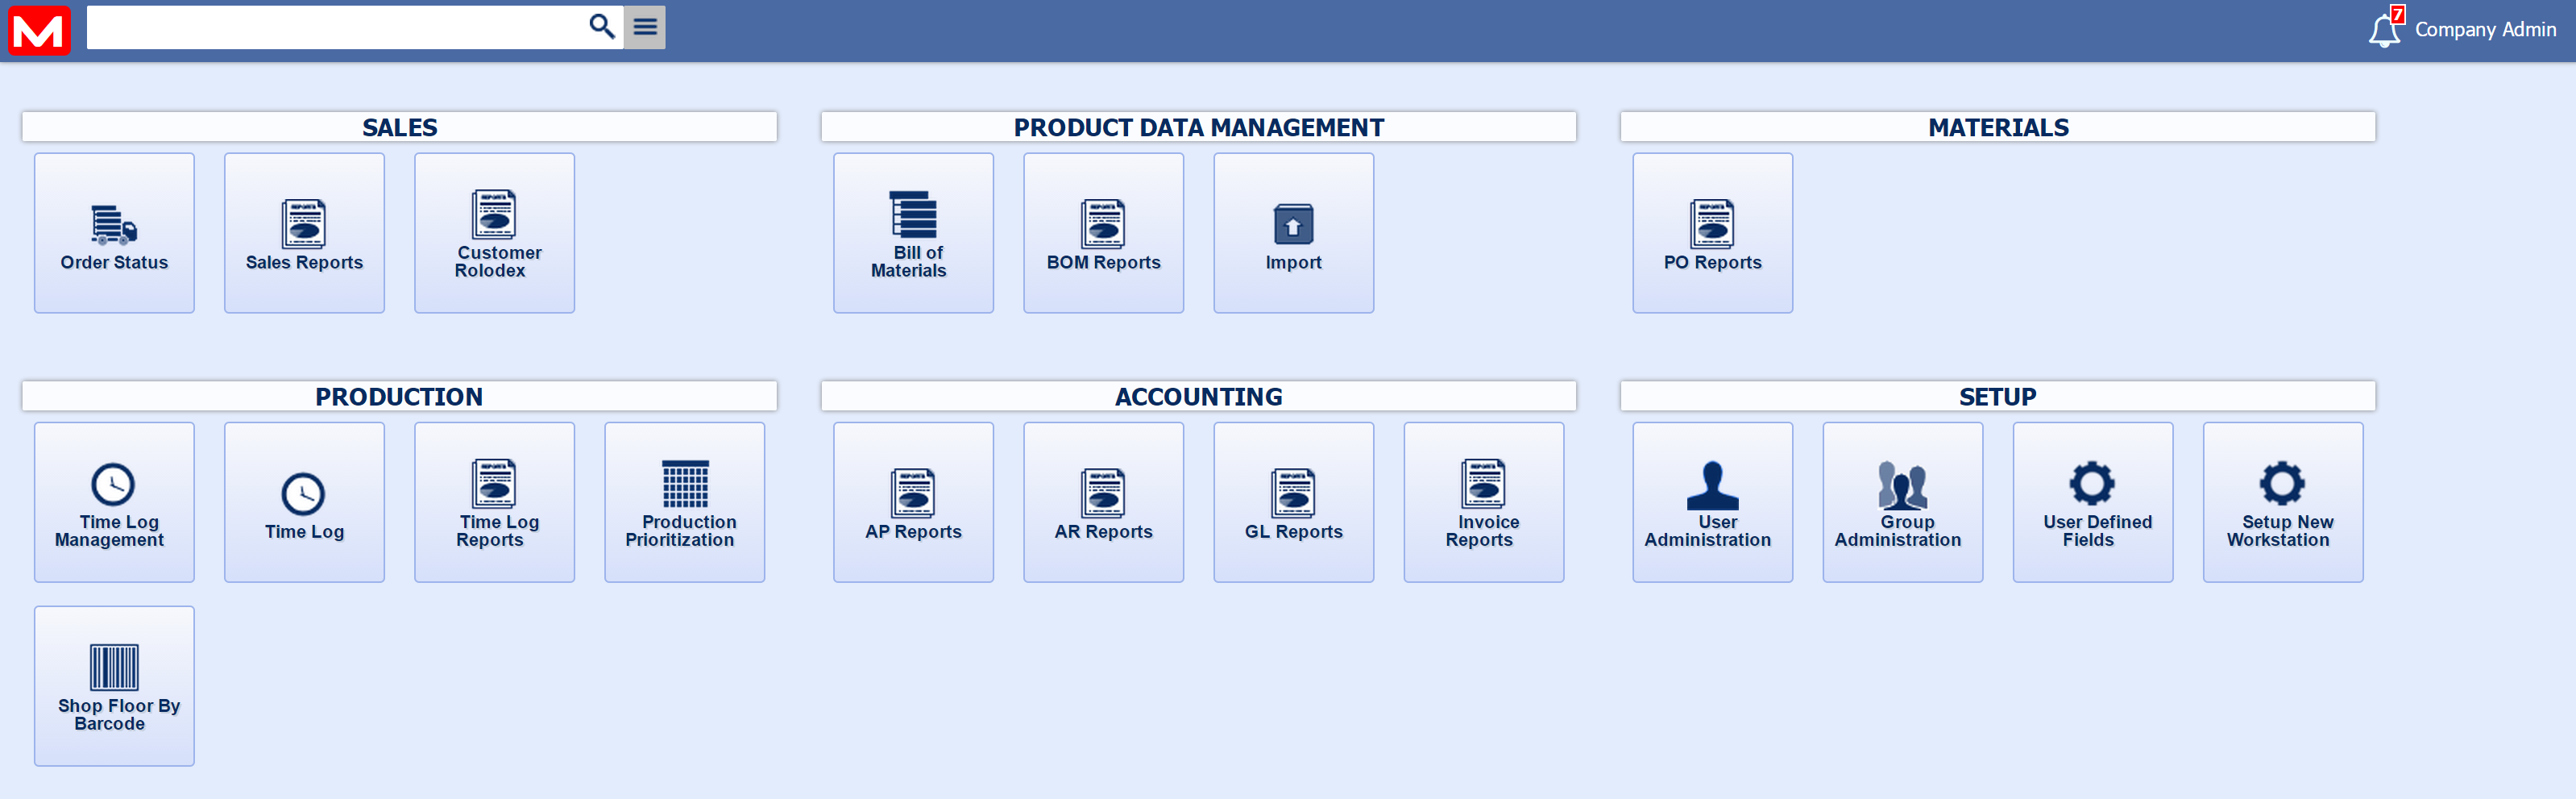
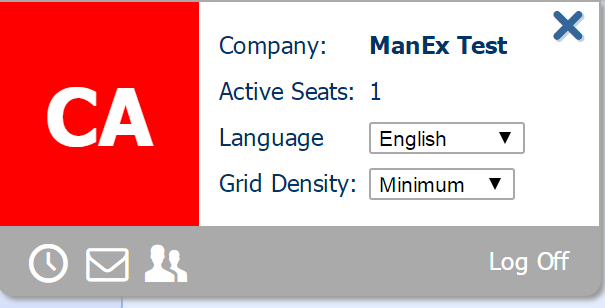
This header will be displayed throughout the WebManEx. For further detail on the header icons see Article #5292.
Depressing the "MX" icon
at the top left hand corner of the screen will list the ManEx modules available.
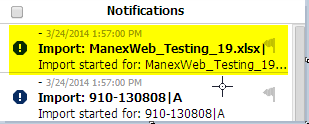
Depressing the "Magnifying Glass" Icon at the top left hand corner of the screen will give the user all the different option to find a record. Depressing on the "Up Arrow" Icon will give the user the opportunity to Change from "New" or "Reports". Depressing on the "Bell" Icon will display a list of BOM Imports that have been started. Depressing the "Clock" Icon will allow you to clock into a Job or Work Order.
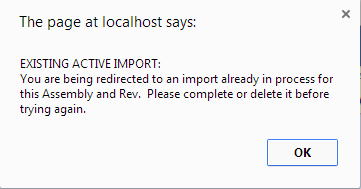
If you attempted to create a new import for the exact same assembly and rev that already exists in the Notifications. The following message will be displayed.
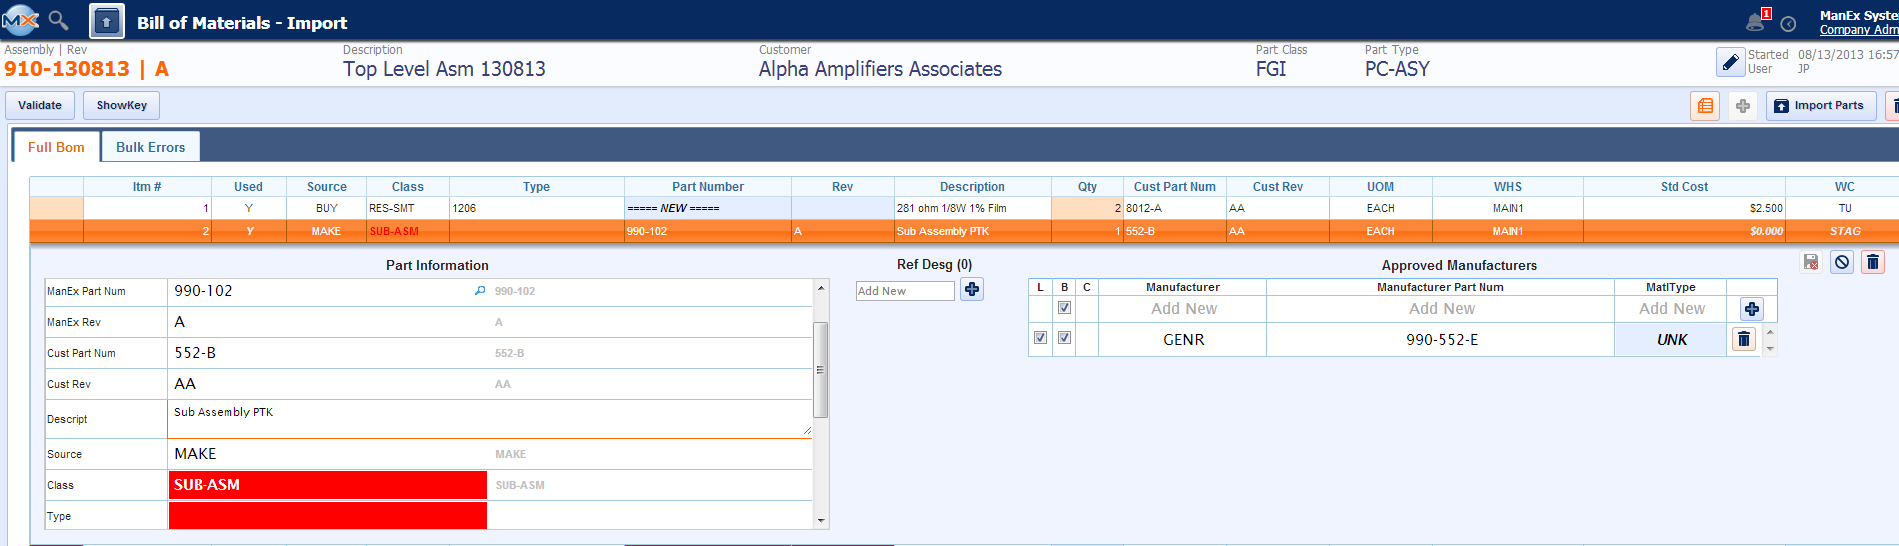
This is to prevent users from accidentally working on multiple versions of the same record and wondering why their last changes weren't sticking, we automatically redirect you to the existing active import. Once you transfer the bom, you can start a new one for the same bom. Or, you can change the part number or rev in order for it to be treated as a new import. Or, you can delete the current active record to start fresh. NOTE: The import in process will NOT exist in the desktop. You must first transfer it in order to see the parts and changes. The "EXISTING ACTIVE IMPORT" is just an import that you can finish and transfer in order to see it in the desktop.  This header will display the Assembly/Rev.; Description; Customer; Part Class; Part Type; for the BOM Upload, along with the Date/Time the Upload was started and the initials of the user that started the upload.
This header has the following action icons:
Select the "Validate" button and the Validation screen will appear validating the information entered.
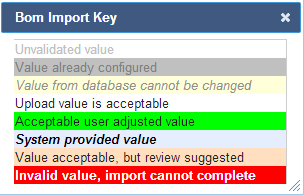
Note: During the Validated processes if the system finds errors these fields will be shaded in Red indicating that these fields have missing or incorrect information. Select the "ShowKey" This screen will display what the field colors stand for:
  The Red Note Pad (to the right) will display notes pertaining to this BOM Import and allow user to add or edit the notes.
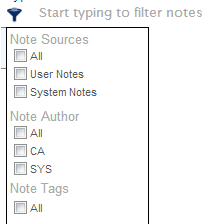
 Depress the Filter in the left hand corner of the screen to change how the notes are being filtered:
 Flag - on top left of note screen is to Flag the Note.
Clipboard - on top left of note screen is to copy Note to Clipboard.
Tag - on top left of note screen is to Add a Tag to Note.
Trash Can - on top right of note screen is to Delete Note.
Pencil - on top right of note screen is to Edit Note.
Plus Sign - on top right of note screen is to Add new Note.
The "Plus sign" on the top right of BOM Import header is to add a new item to BOM Import.
The "Import Parts" button on top right of BOM Import header is to import BOM to desktop.
The "Trash Can" on the top right of BOM Import header is to delete BOM Import completely.

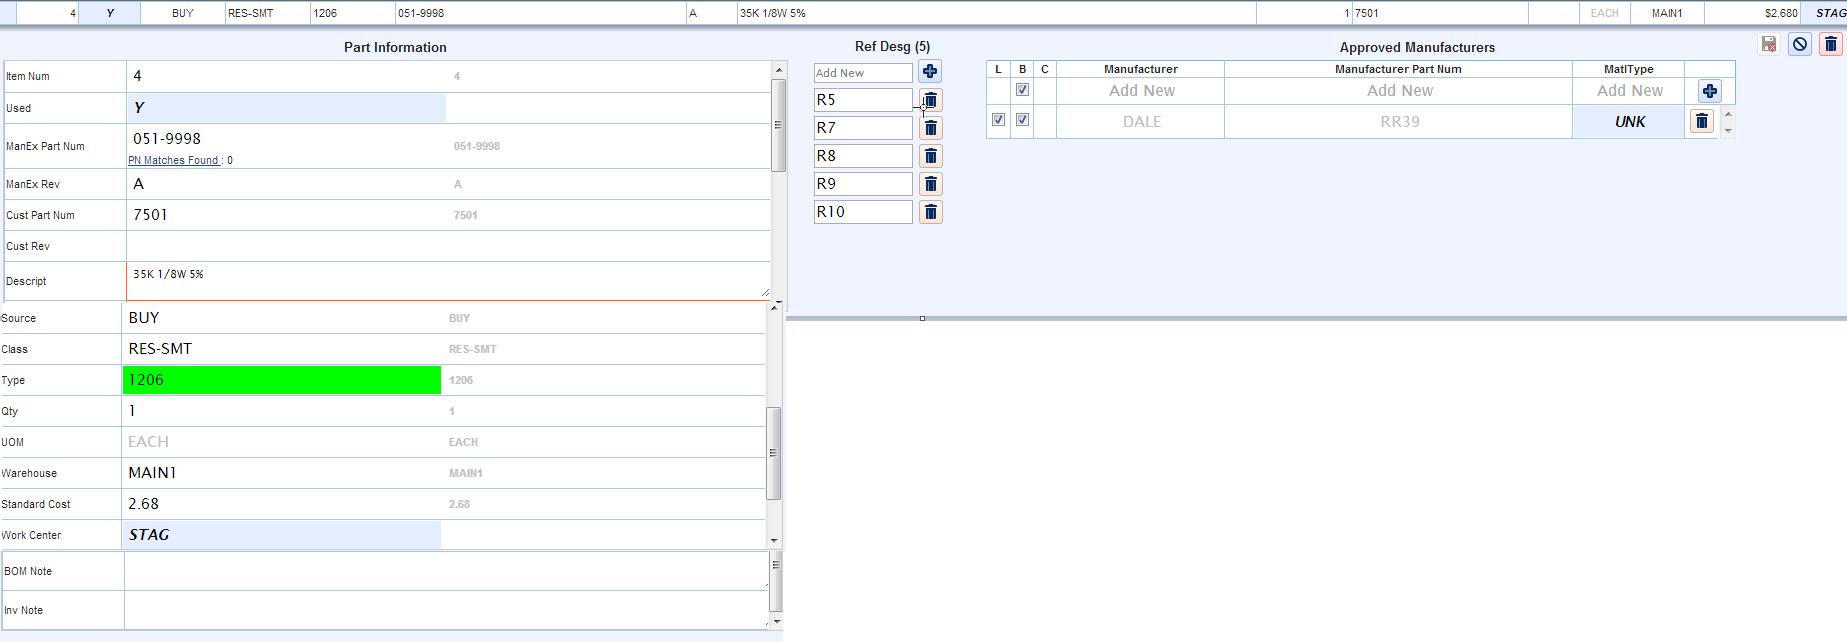 Part Information
Note: The data to the right in gray is the data that was imported originally.
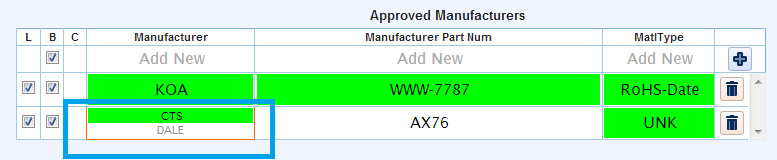
Approved Manufacturers
|

| 1.6.3.4. How To |
| 1.6.3.4.1. Find a BOM Import that has Already Been Started |
Login to the WebManEx and Select Product Data Management Select Import and the following screen will be displayed
Click on the Bell symbol (with the number 4 by it) up in the right hand corner and a list of Notifications will be displayed of all the Import Started:
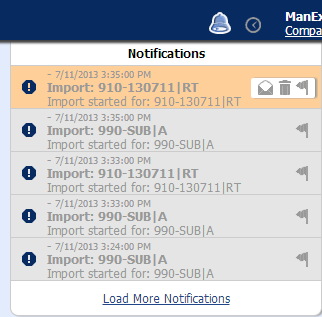 Highlight the Import of interest and the following screen will be displayed:
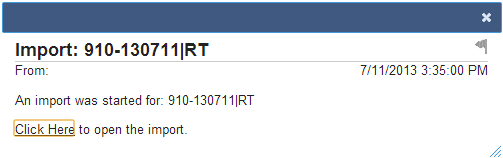 Depress "Click Here" and the import will be displayed on screen:
 If you attempted to create a new import for the exact same assembly and rev that already exists in the Notifications. The following message will be displayed.
This is to prevent users from accidentally working on multiple versions of the same record and wondering why their last changes weren't sticking, we automatically redirect you to the existing active import. Once you transfer the bom, you can start a new one for the same bom. Or, you can change the part number or rev in order for it to be treated as a new import. Or, you can delete the current active record to start fresh. NOTE: The import in process will NOT exist in the desktop. You must first transfer it in order to see the parts and changes. The "EXISTING ACTIVE IMPORT" is just an import that you can finish and transfer in order to see it in the desktop.
|
| 1.6.3.4.2. Import BOM |
User MUST first download a blank template and enter the BOM information into the template.
System will look at the Item Number and Description to determine whether it is a different part, if the Item Number and description match then the Shaded parts do NOT have to be populated. The information from the previous lines will be used, when creating the BOM import. If the assynum, assyrev, and assydesc fields are all blank on the first line item, system will use the File Name as the Assembly Number. for further detail see Article 5490. Once the template has been completed with all the BOM information, save the file. Login to the WebManEx and Select Product Data Management Select Import and the following screen will be displayed
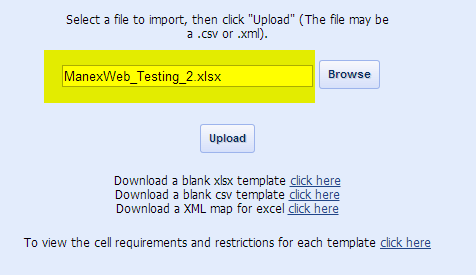
Enter the file name in the field or depress the "Browse" button to locate the file to import.
Once the file has been selected it will be displayed in the Field as displayed below:
Depress the "Upload Button" If you attempted to create a new import for the exact same assembly and rev that already exists in the Notifications. The following message will be displayed.
This is to prevent users from accidentally working on multiple versions of the same record and wondering why their last changes weren't sticking, we automatically redirect you to the existing active import. Once you transfer the bom, you can start a new one for the same bom. Or, you can change the part number or rev in order for it to be treated as a new import. Or, you can delete the current active record to start fresh. NOTE: The import in process will NOT exist in the desktop. You must first transfer it in order to see the parts and changes. The "EXISTING ACTIVE IMPORT" is just an import that you can finish and transfer in order to see it in the desktop. Depress the "Upload" button and the data will be Uploaded into the following screen and Validated.  During the Validated processes if the system finds errors these fields will be shaded in Red indicating that these fields have missing or incorrect information.
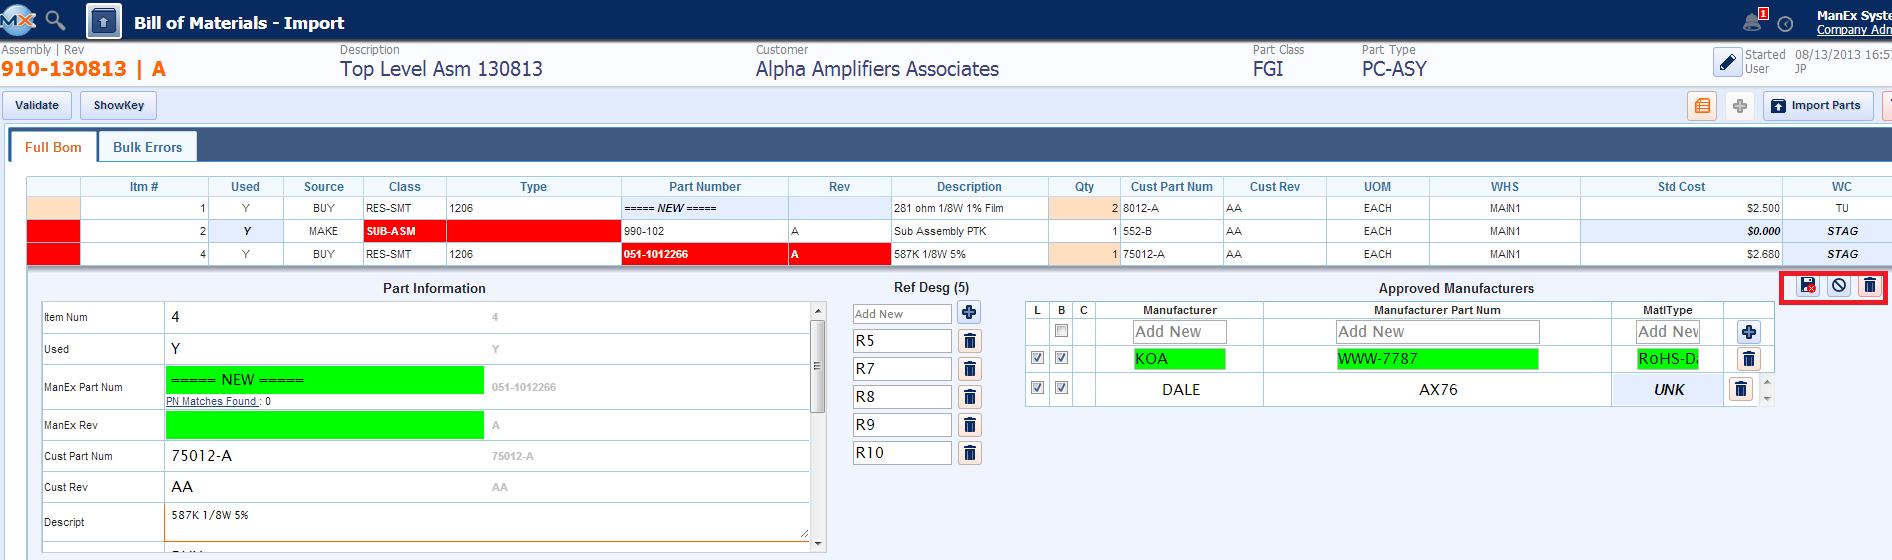
Click on an item and all the detail for that item will be displayed. User may make changes/corrections to any of the Part Information, Ref Desg, Manufacturer, Manufacturer Part Numbers, and Material Types. The fields shaded in Red indicates that the information is incorrect or missing and must be corrected before the import process can take place.
 The data to the right on the Part Information screen that is light gray is what was imported from the template.
The Class and Type will have a pull down to select from:
 Clicking on the magnifying glass to the right of the ManEx Part Number will do a search to located any existing parts that are similar to the one entered:
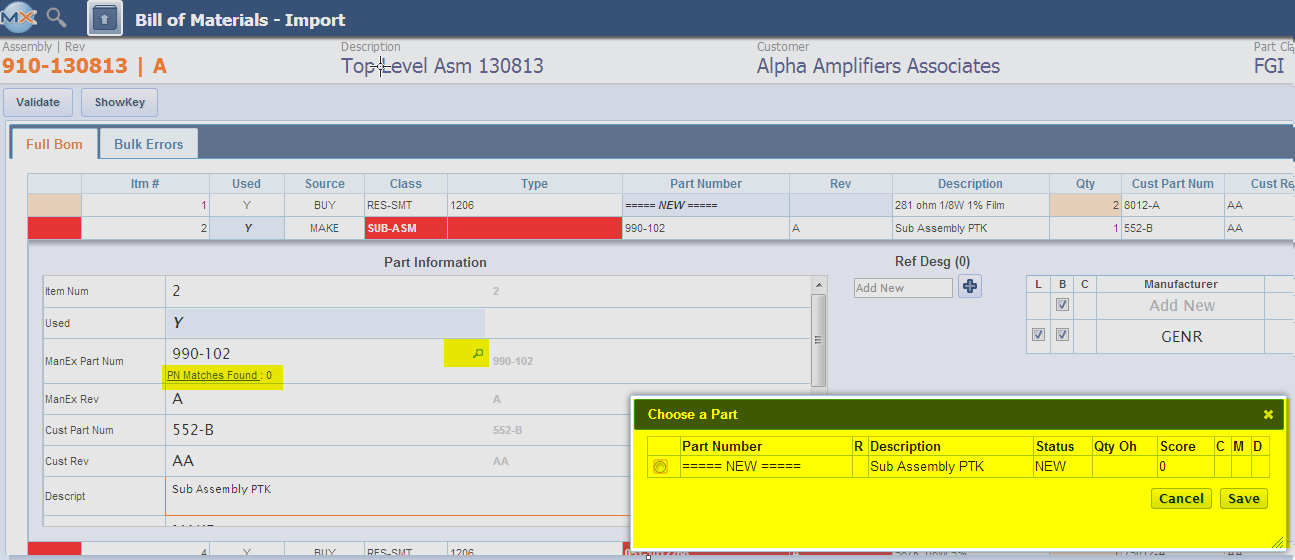 NOTE: If user has Inventory Part Numbering setup to MANUAL, user has the option to enter a part number in the ManEx Part Num field, or if a ManEx part number exists for the part being imported user may use the existing ManEx part number, but if user does NOT want to use the existing ManEx PN, they MUST select "NEW" and then enter in the part number they want to use. If they have Inventory Part Numbering setup to AUTO then they MUST select an existing PN or have "NEW" in this field, and a part number will be assigned to this part upon import.
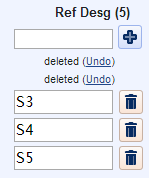
User may add Reference Designators by clicking on the (+). The number of Ref Desg needed for this part will be displayed in (). To remove an existing reference designator click on the (garbage can symbol) to the right of the desg you want to remove, click on the (Undo) to restore the reference designator you removed.
You need to save changes before you can add additional reference designators if you do not (Undo) any of the ones you deleted. If a user adds more ref desg then required at time of upload it will only use the number of ref desg required starting from the top of the list down.
To add a New Mfgr, depress the (+) button on the right and new fields will be displayed in green:
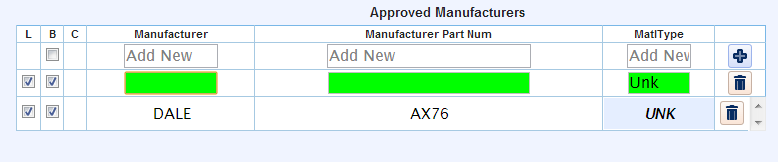 Enter Mfgr, Mfgr PN, and select a new MatlType or leave the default (Unk). Once all the changes have been completed and there are no more fields shaded in RED, depress the "Save & Exit" button, "Cancel" button, or "Delete" button.
 If users changes the Manufacturer or Manufacturer Part Num then hovers over that field the Mfgr or Mfgr PN originally uploaded will be displayed in gray and the new Mfgr or Mfgr PN will be displayed in black and will be bordered in RED on three sides as displayed below.
 Select the "Validate" button to validate all changes.
Once all the data is correct, user then may select the "Import Parts" button to load the BOM into the ManEx system.
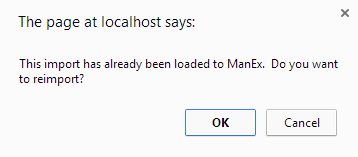
 If the BOM has already been loaded to ManEx user will receive the following message giving the user the option to reimport this BOM.
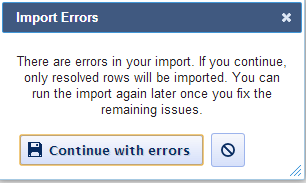
 If user is trying to Import Parts with Errors the following message will be displayed, giving the user the option to continue with errors or cancel import:
 Once the BOM has been loaded to ManEx the Header will turn from White to Gray as displayed below:

|


| 1.6.3.5. Limitations to the Reference Designators |
| 1.6.3.6. Limitations to the Different Import Template Types |
Assembly Info
Template TypesThe following explains the different limitations to the different Import Template Types that are available in the WebManEx
.XML Map for Excel:
.CSV Template:
.XLSX Template:
.XLS:
|
| 1.6.3.7. BOM Import - FAQ |
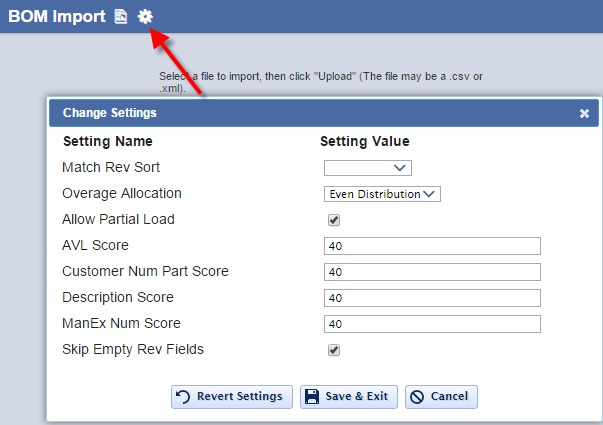
| 1.6.3.7.1. What do the BOM import settings do? | ||
 |
| 1.6.3.7.2. How do I Remove Duplicate AVL's? |
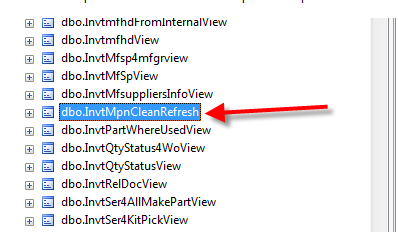
| If a user sees duplicate AVL's in the BOM import list of parts then it means somehow they were able to get a duplicate manufacturer in the database. We have a built in SP (dbo.InvtMpnCleanRefresh) to clear that.
It is attached to this article as well.
|
| 1.6.3.7.3. Receiving primary Key violation error upon import. What does it mean? |
Upon import you may be presented with something similar to the error in image below. Typically means on your import template for this BOM you have the same Manufacturer and MPN combination listed more than once when creating a brand new part. Typically won't see this when system matches to existing part #'s.
|

| 1.6.3.8. BOM Import Settings | ||
 |
| 1.7. Material Planning |
| 1.7.1. Purchase Order |
| 1.8. Production |
| 1.8.1. Time Log Management |
| 1.8.1.1. Introduction |
|
ADDRESS {rootURL} TimeLog
NOTE: {rootURL} is the URL you use to access web ManEx
AVAILABLE ACTIONS From this screen, the user can:
|
| 1.8.1.2. Fields and Definitions |
Start Date - A date you want the Time Log data to start
End Date - A date you want the Time Log data to end
Filter by User - Enter the employee's name you want to see their time log data
Get Results Button - Depress this button to have the results display on screen.
Original Date In - The Original Date the employee logged in for the shift or for the job.
Date In - The Date the employee logged in for the shift or for the job.
In Init - The workers Identification as entered in Security Setup.
Original Date Out - The Original Date the employee logged out of the shift or out of the job.
Date Out - The date the employee logged out of the shift or out of the job.
Out Init - The workers Identification as entered in Security Setup.
Time Used - The difference between Time In and Time Out. Calculates total time logged in Job.
Job - The Job/Work Order Number.
WC - The Work Center or Department the employee is assigned to in Security Setup.
OT - This is hours worked outside of normal hours based on the user setup. (This can be hours in a shift, hours in a day, or hours in the week)
Comment - Any comments added.
Holiday - A check in this box indicates that this is a Holiday Delete - A check in this box indicates that this time log has been deleted.
|
| 1.8.1.3. How To |
|
Login to the WebManEx and Select Production
Select Time Log Management and the following screen will be displayed:
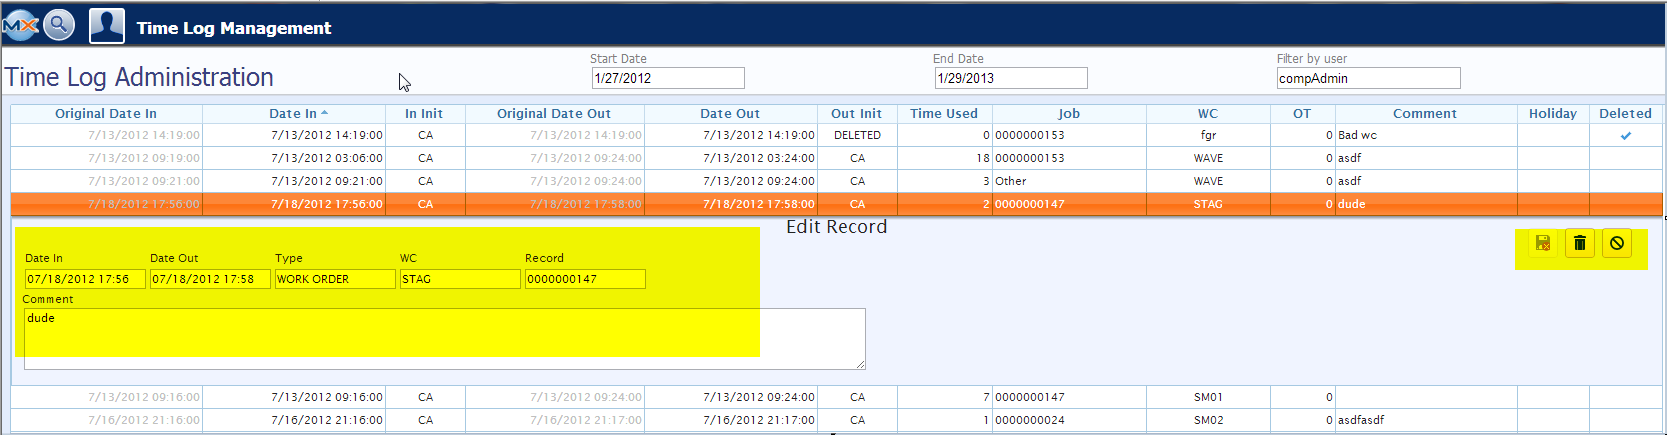
Enter in a Start Date, End Date and User. Depress the Get Results button. The following screen will display all the Time Log for a user, WO, Job, etc.
 User may drill down to edit the Time Log Data entered. User may edit the Date In, Date Out, Type, WC, and/or Record data, or add Comments. Once the changes have been made they may use the Icons to the right of the screen to Save and Exit, Delete, or Cancel.
 |
| 1.8.2. Time Log |
| 1.8.2.1. Introduction |
|
ADDRESS {rootURL} TimeLog
NOTE: {rootURL} is the URL you use to access web ManEx
AVAILABLE ACTIONS From this screen, the user can:
|
| 1.8.2.2. Fields and Definitions |
Username - Enter Username that has been setup in the Security module. (If Badge Code is used this field can be left blank)
$$Password - Enter Password that has been setup in the Security module. (If Badge Code is used this field can be left blank)
Login button - Depress this button to Login.
Job- Work order number. WC-Work Center from though Product routing. Type- Setup in time and attendance setup module see this article Time and Attendance Types. Could be Day in Day out, Work Order In Work Order Out, Job In Job Out, etc.... Multi- Checked off if user will be logging into multiple jobs at same time.
|
 used to log into the job or record
  used to log off all
 | 1.8.2.3. How To |
| Launch Manexcloud from the desktop Shop Floor Tracking By Work Order module
Browser on workstation should open to below screen. If WO was already open in the desktop Shop Floor module that WO should be defaulted into the Job Field. Job field needs to be populated if Type is set to Job in Job Out or WO In WO out. If logging in just to record daily hours not specific to any WO(Job) then you do not have to populate the Job field. Work Center(WC) always needs to be populated in order to record the time. For daily hours not specific to a Job it does not matter which Work Center is chosen. For actual jobs the user will want to track his or her time in a specific Work center If logging into multiple WO's at same time user needs to make sure that the multi check box is enable for every login. Once filled out click on green Time clock button to log the time. The Red time clock button can be used to log out of all jobs user is currently logged into.
If logging in manually from Browser and not desktop you will see a section called Production on your home page. There you can see Time log module.
Select Time Log and the following screen will be displayed:
User has the option to either enter their Username and Password or Badge Code. Once this information has been enter, you must depress the "LOGIN" button and the following screen will be displayed.
Job field needs to be populated if Type is set to Job in Job Out or WO In WO out. If logging in just to record daily hours not specific to any WO(Job) then you do not have to populate the Job field. Work Center(WC) always needs to be populated in order to record the time. For daily hours not specific to a Job it does not matter which Work Center is chosen. For actual jobs the user will want to track his or her time in a specific Work center. If logging into multiple WO's at same time user needs to make sure that the multi check box is enable for every login. Once filled out click on green Time clock button to log the time. The Red time clock button can be used to log out of all jobs user is currently logged into 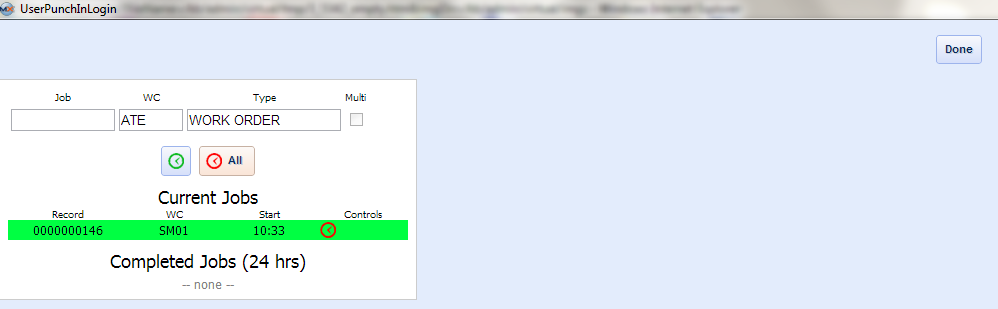 |

| 1.8.3. Product Prioritization |
| 1.8.3.1. Fields and Definitions |
Use Full Calendar for the Calendar Controls.
Month View will display Work Order Count and Capacity Color.
Drag and Drop Scheduling is needed to adjust the start date.
Screen refreshes list of Work Center every 30 seconds (if user does not touch the screen)
 Fields and Definitions
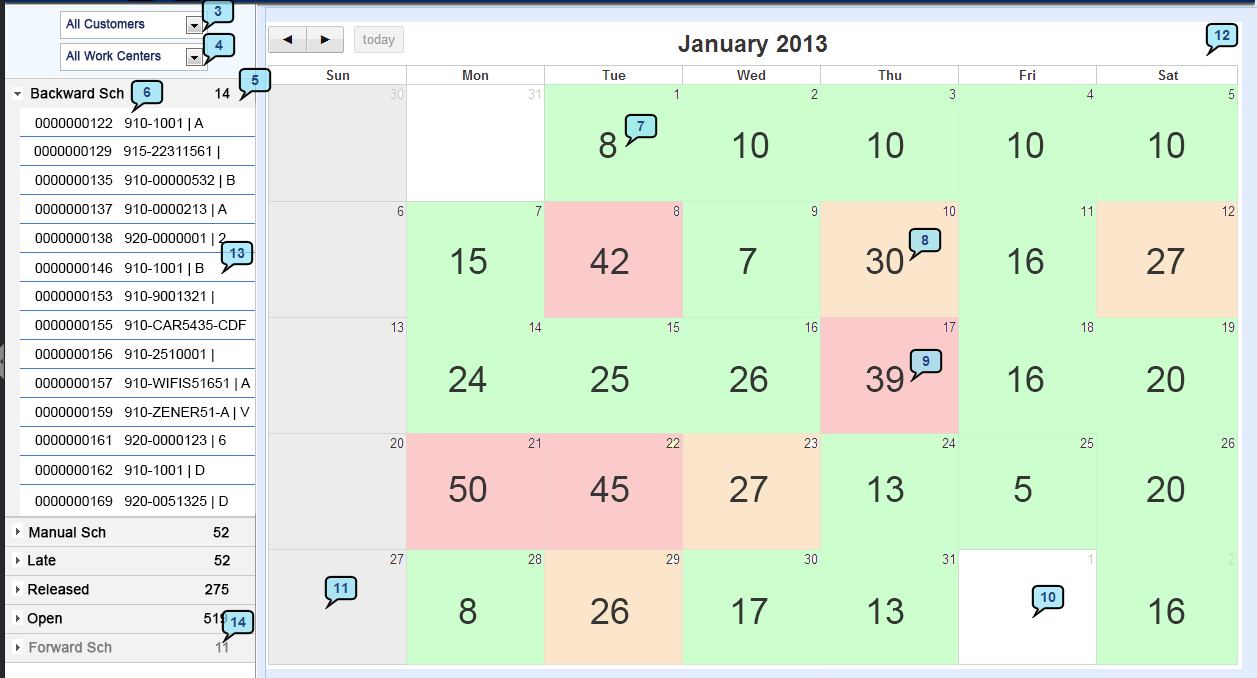
3 - Customer Selection - Select All or a specific customer from the pull down and the calendar data will update accordingly.
4 - Work Center Selection - Select All or a specific Work Center from the pull down and the calendar data will update accordingly.
5 - Work Order Accordion - Grouped records of Work Order; Backward Scheduled (auto scheduled) ; Manual Scheduled - user adjusted; Behind - Due Date and Complete Date have not passed, but a WC should have been completed by now, but has not; Late by Due Date - The WO due date has passed and the job is not finished; Late by Sch Date - The scheduled complete date has passed and the job is not finished; Released - Kit released is true; Open - All open WO.
6 - Accordion Details - Group Header displays title and record count; Record displays WO number, part number/Rev.
7 - Day Details - Green color indicates that All WC for that date are under capacity. Count shows total WO in production for that date.
8 - Day Details - Orange color indicates at least one WC is nearing the capacity limit and NO WC is over the capacity.
9 - Day Details - Red color indicates at least one WC is over capacity.
10 - Day Details - White indicates that nothing is scheduled for that date.
11 - Day Details - Grey indicates an non-working date.
12 - Calendar Data
13 - Record Selected Details - Click to expand and see the details and clicks again to revert to calendar view and hide the details.
14 - Category View - If no records belong to the group a 0 will be displayed.
|
| 1.8.3.2. How To .... |
| 1.8.3.3. Product Prioritization FAQ |
| 1.8.3.3.1. How to account for Programming in Scheduling? |
Q: For example: they have Programming or NRE that is associated with the first time they run a product through their system. They want to know from the scheduling point of view how the system will account for the time that it takes for this Programming? A: I don’t believe that we have a method to account for these onetime Programming times. Right now our scheduling so more like prioritizing.
|
| 1.8.4. Time Log Reports |
| 1.8.4.1. Introduction |
|
ADDRESS {rootURL} Reports/View/Type
NOTE: {rootURL} is the URL you use to access web ManEx
AVAILABLE ACTIONS From this screen, the user can:
|
| 1.8.4.2. How To |
All Reports are found within the Report Manager and are basically viewed the same. See Article 5477 for further detail on Reports.
|
| 1.9. Report Manager |
| 1.9.1. Introduction to MX Reports |
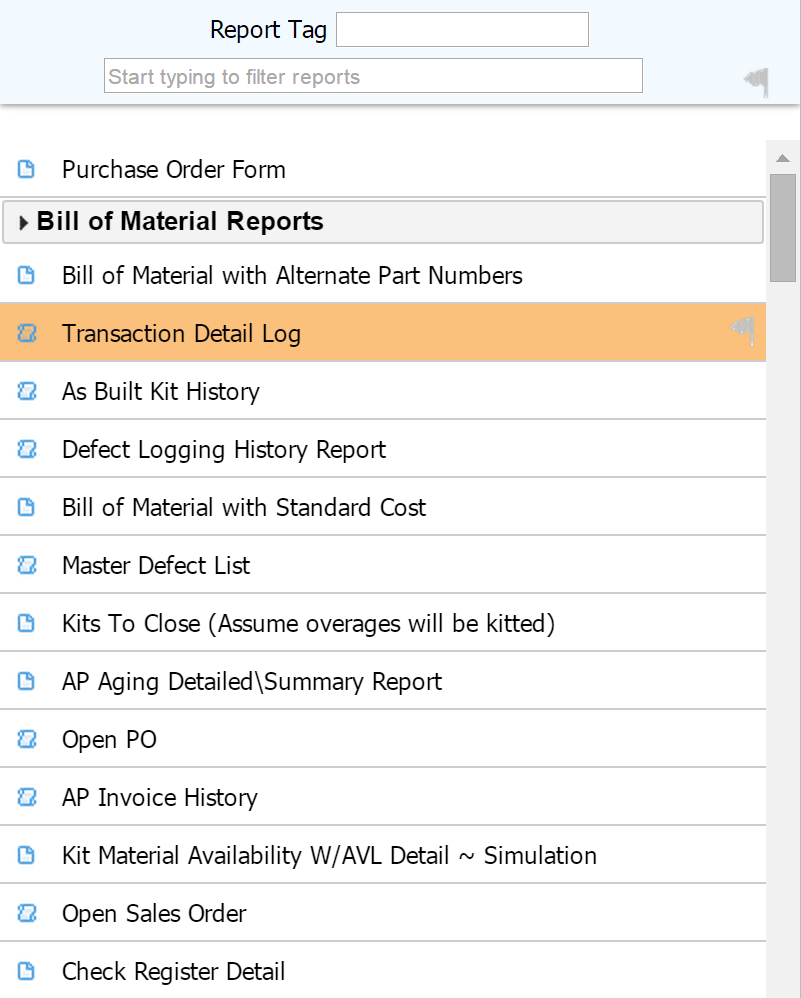
Login to the MAX and the following screen will be displayed: 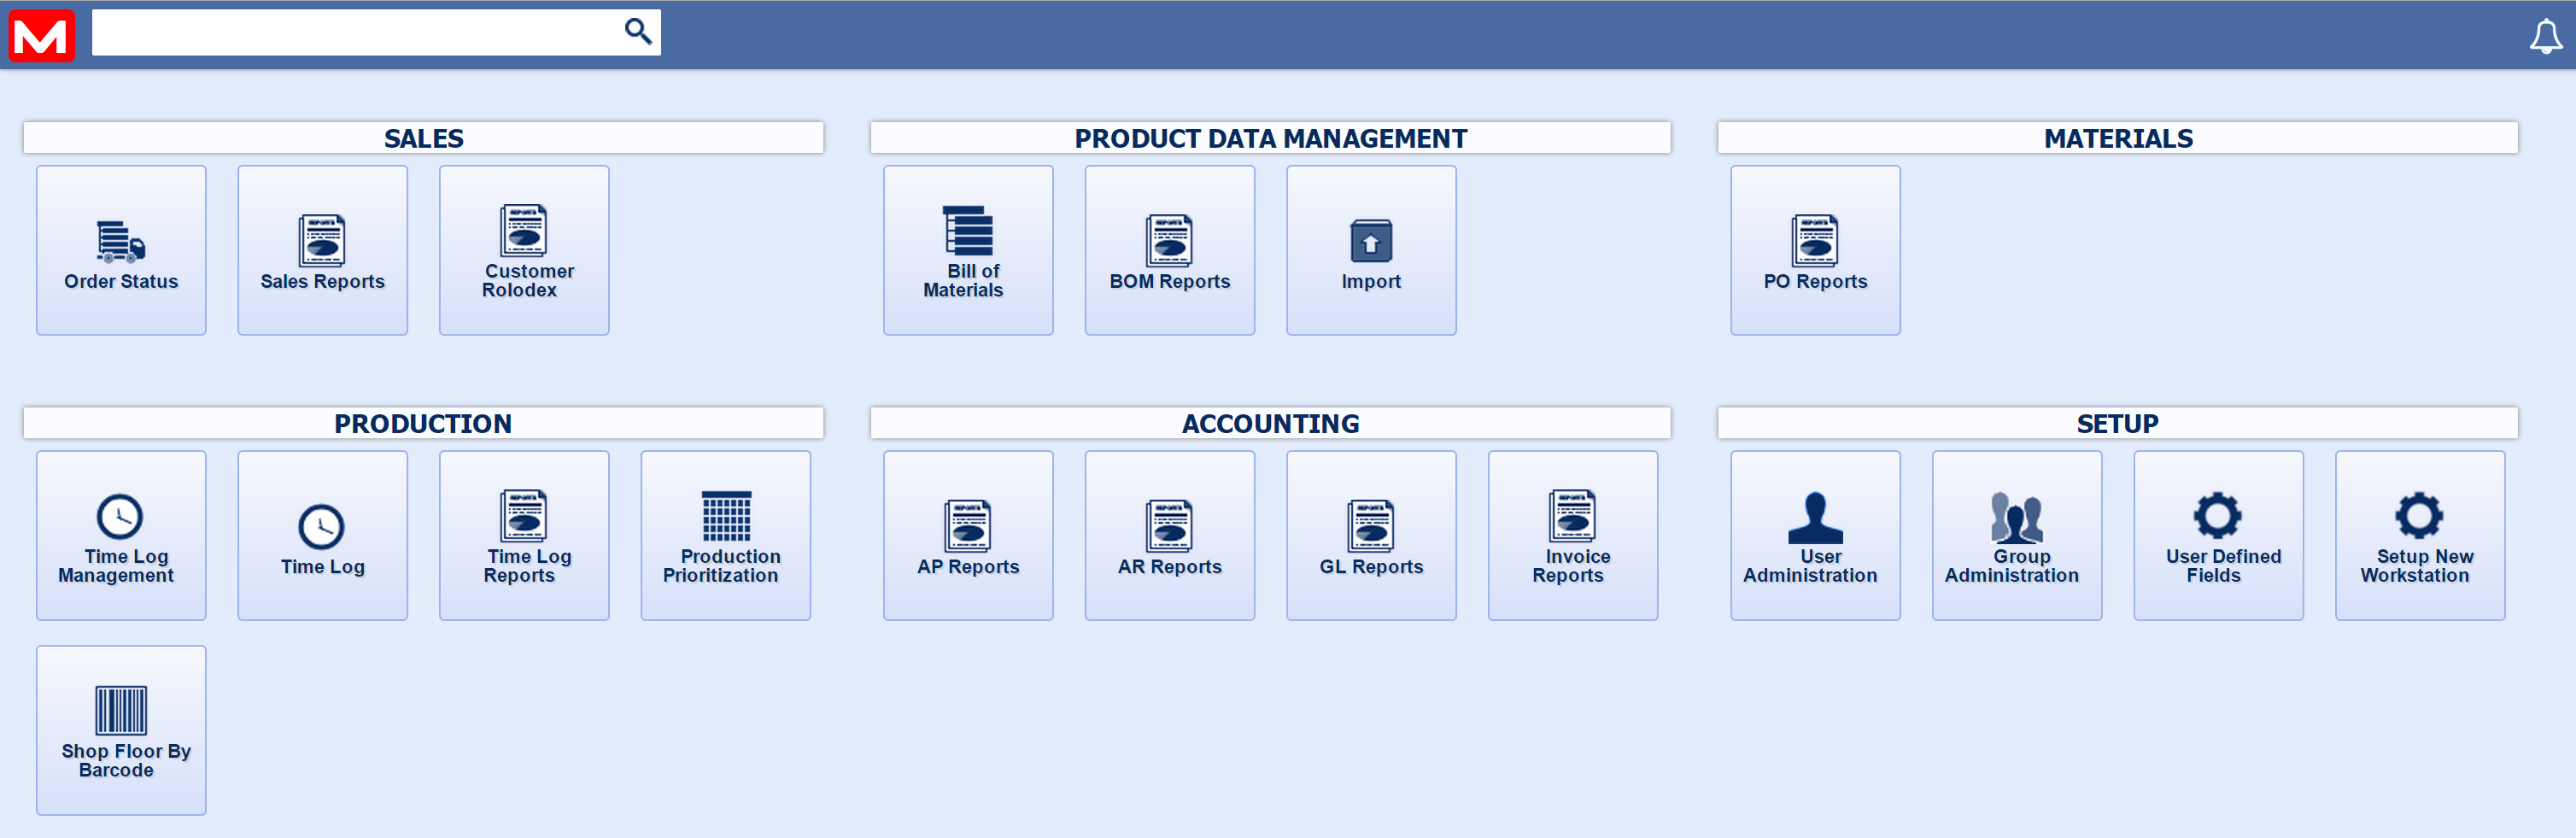 Note: If user is accessing the reports from the desktop this screen will not be displayed, they will be directed right to the reports Select Any of the Report Icons (Sales Reports, BOM Reports, etc) and a variation of the following screen will be displayed. This screen will vary depending on the report icon selected as selecting the report from the main screen icons will automatically apply a tag filter to the report window.
The report manager can also be opened by clicking the MANEX Icon
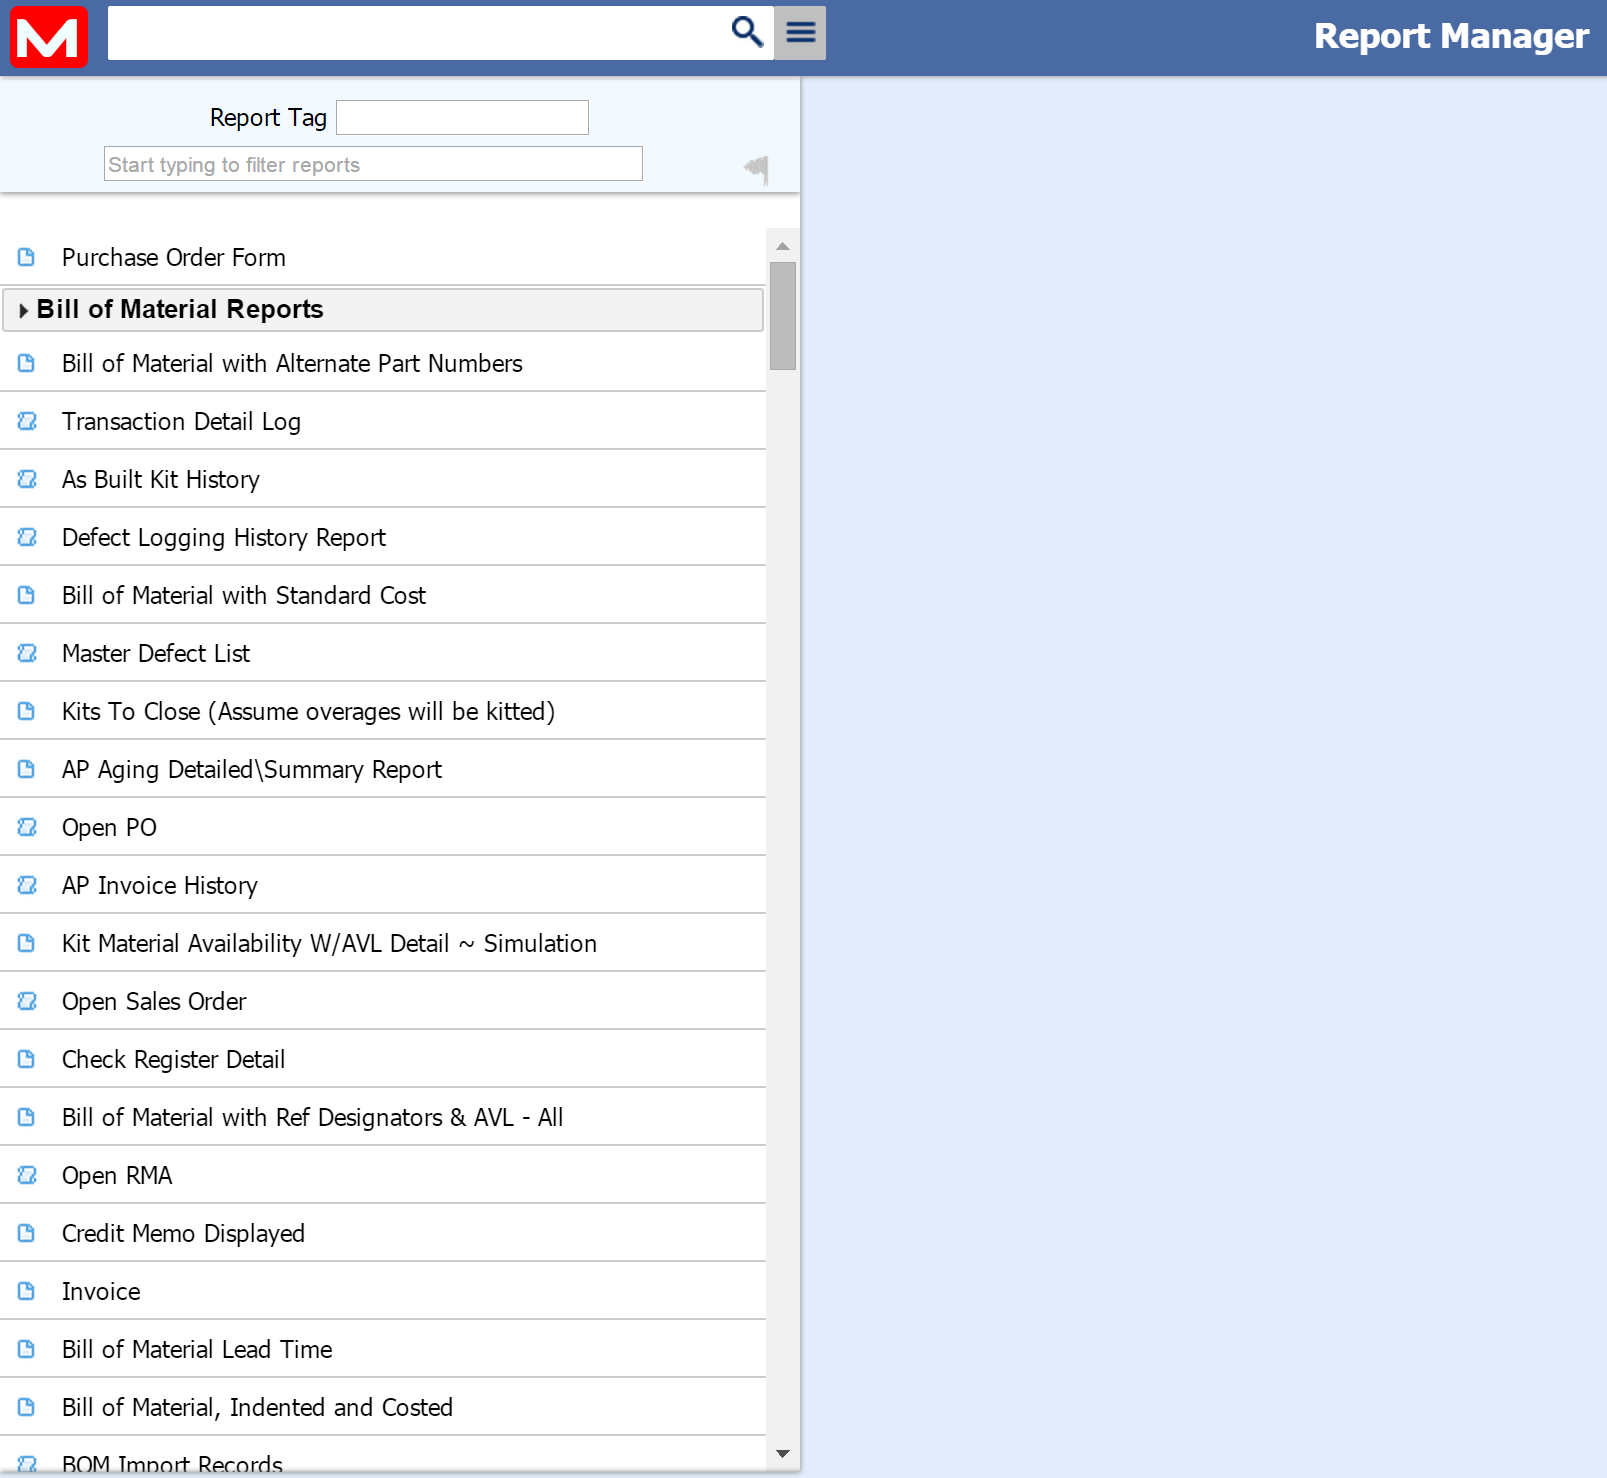
This opens an expanded reports window that contains all of the system's reports. The report window includes two filters to narrow down the shown report results.
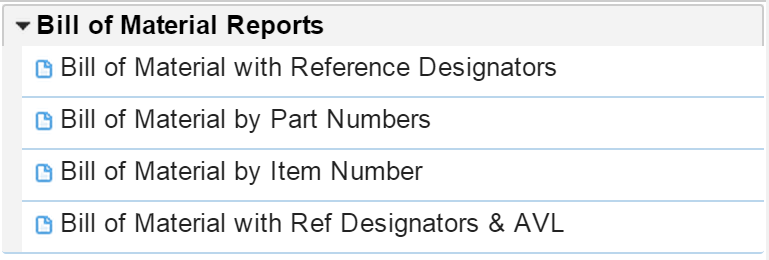
A report title with an arrow next to it indicates that there are sub-reports related to the title. Clicking the title will open a drop-down selection of the sub-reports.
After the desired report is selected the report preview screen will be displayed. From this screen the details of the report can be altered in order to view only the desired report details.
Once the report options are set as desired the report can be viewed in several ways.
At the bottom of the quickview screen is a collection of controls that allow the user to change the
|

 in the top left of the main screen and selecting Reports from the dropdown list.
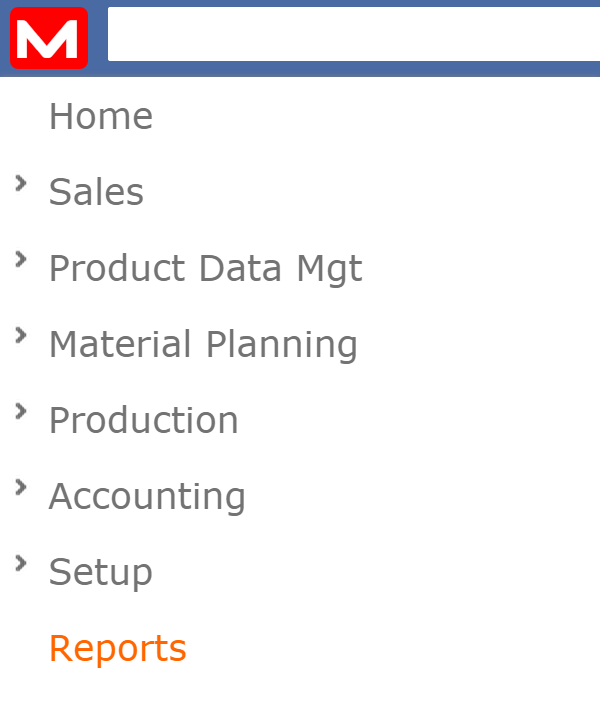

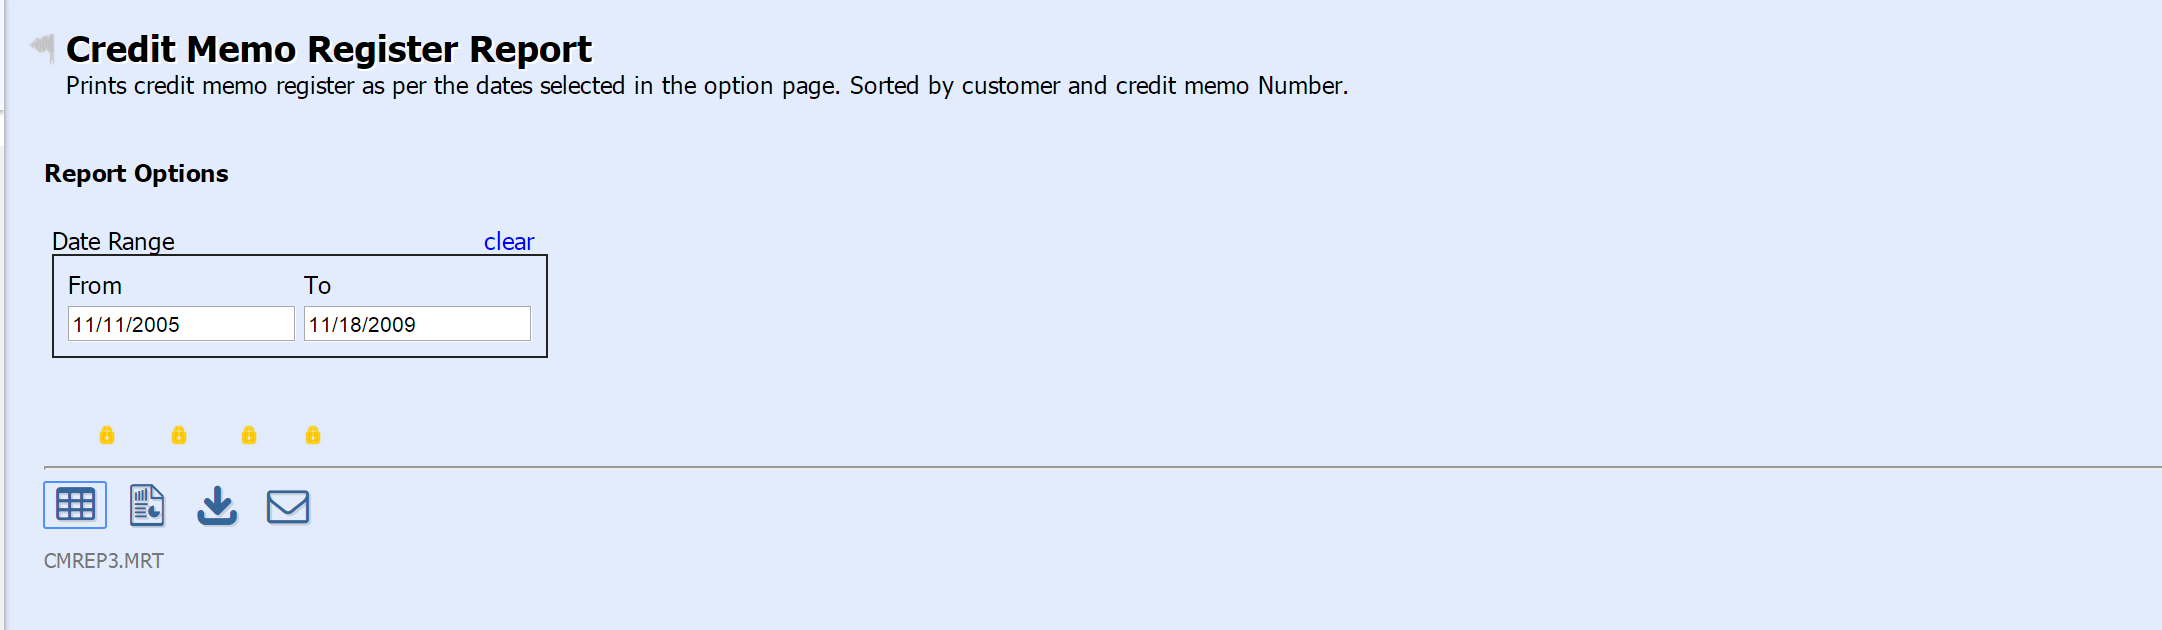
 - This Icon opens a quickview of the report. The Quickview allows for the details of the report to be viewed in a simple layout for easy data checking.

 - This Icon opens the Full Report. The Full Report organizes the data of the report neatly and formats it for printing.
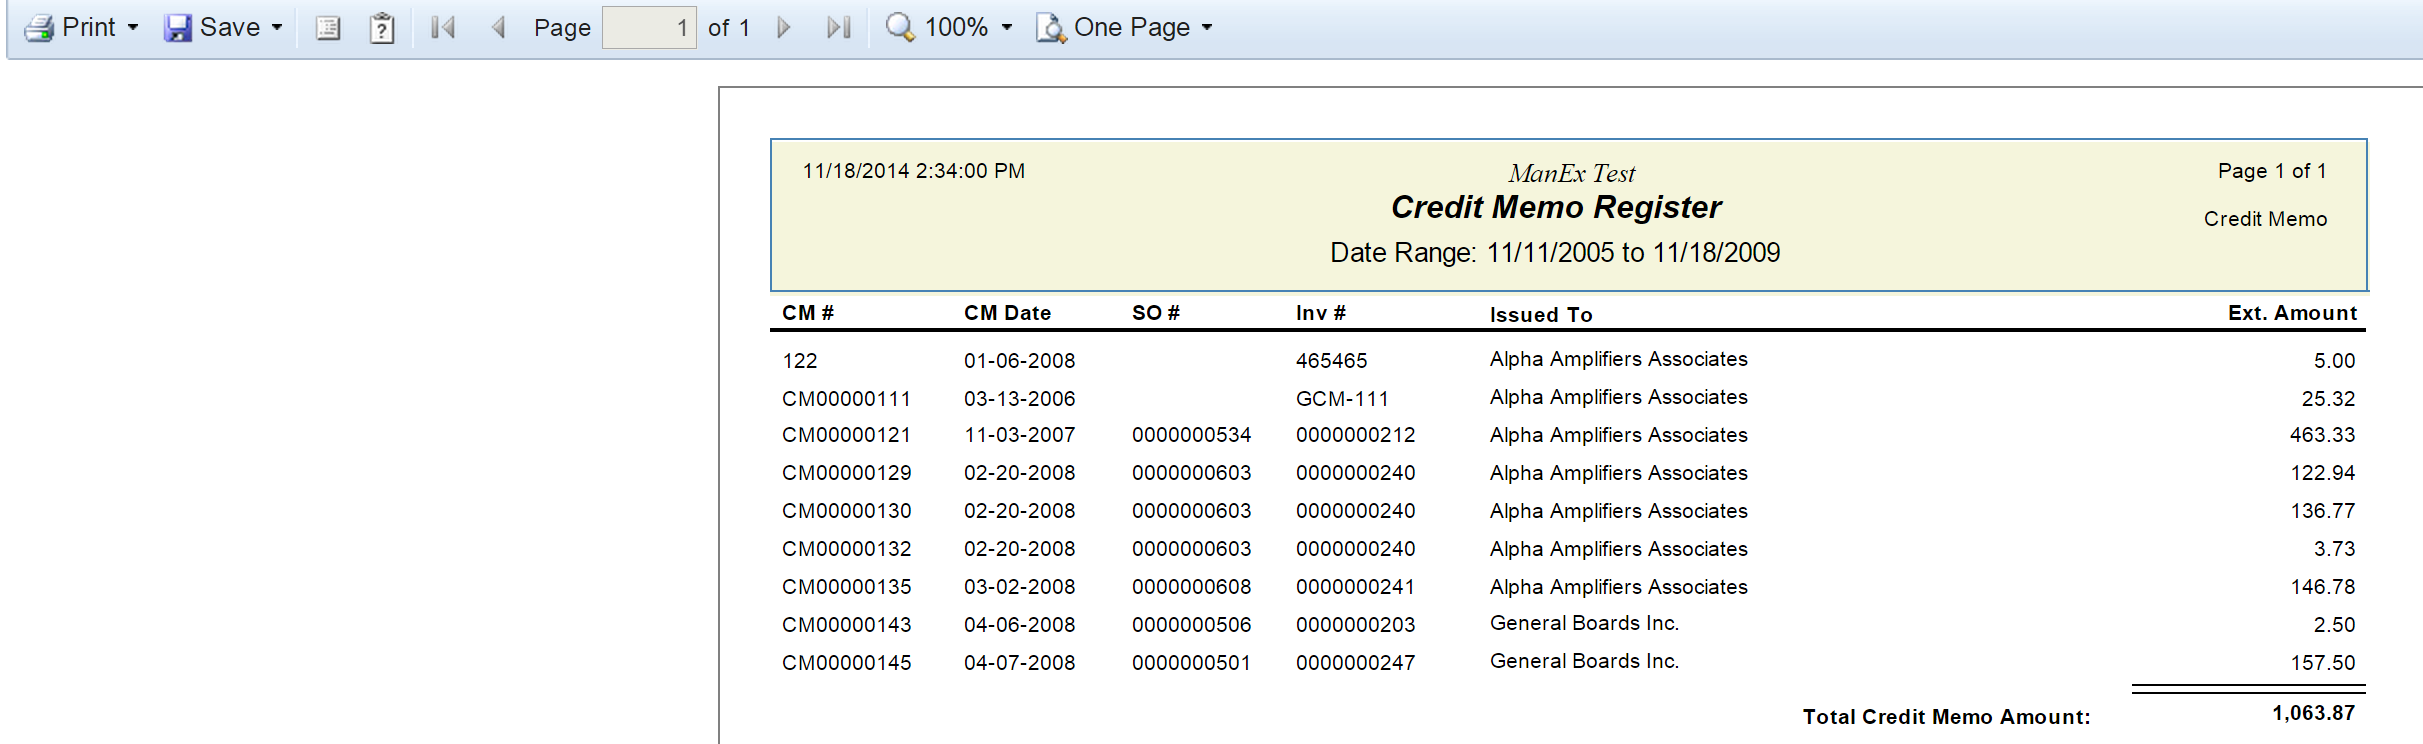
 - This Icon Downloads the Data and exports it to an Excel Spreadsheet. This allows the data to be easily moved from the MANEX system to a different system or allow the data to be modified outside the MANEX system if necessary.
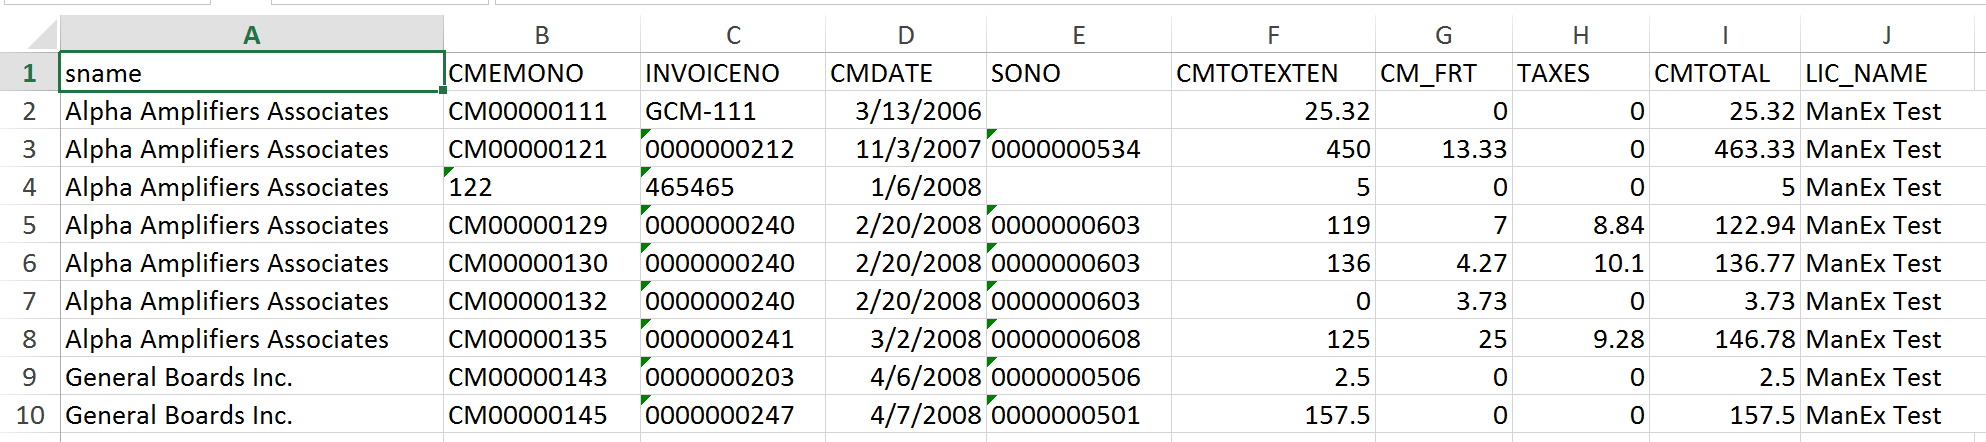
| 1.9.2. Accounting Reports |
| 1.9.2.1. Security For Variance Reports |
Prerequisites to view the Variance Reports on ManexCloud
|


| 1.9.2.2. Bank Reconciliation |
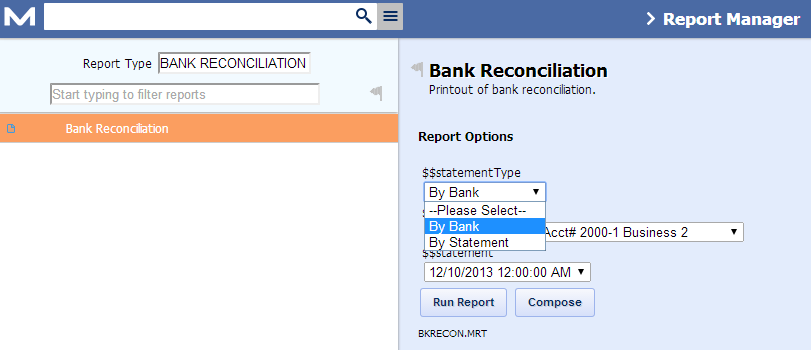
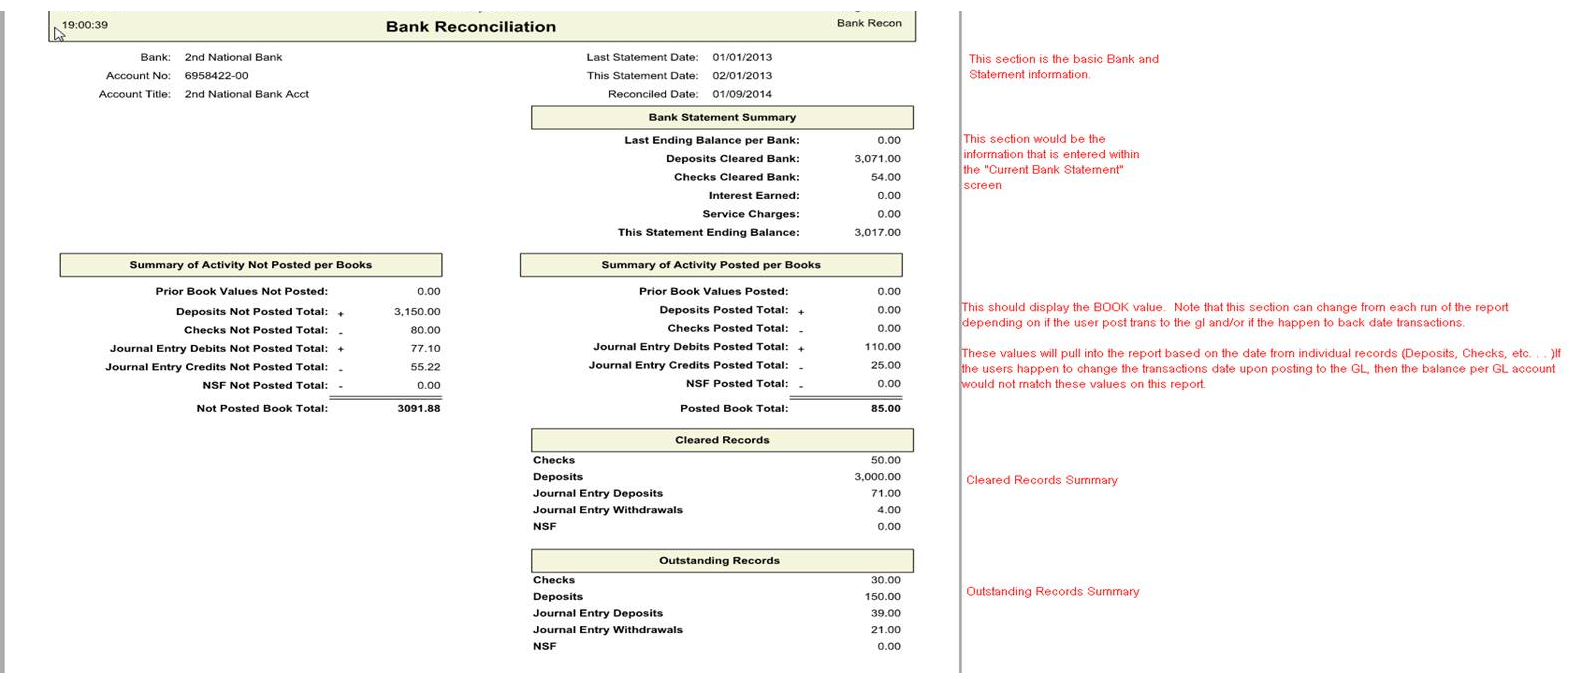 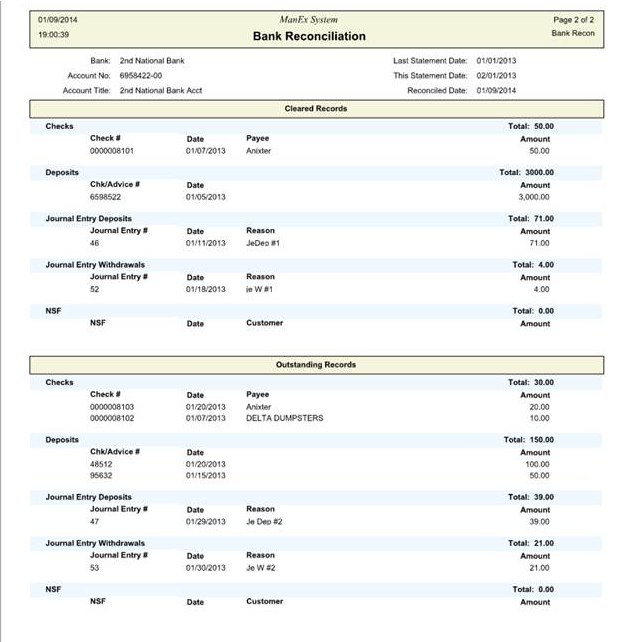 |
| 1.9.3. Quick View Reports |
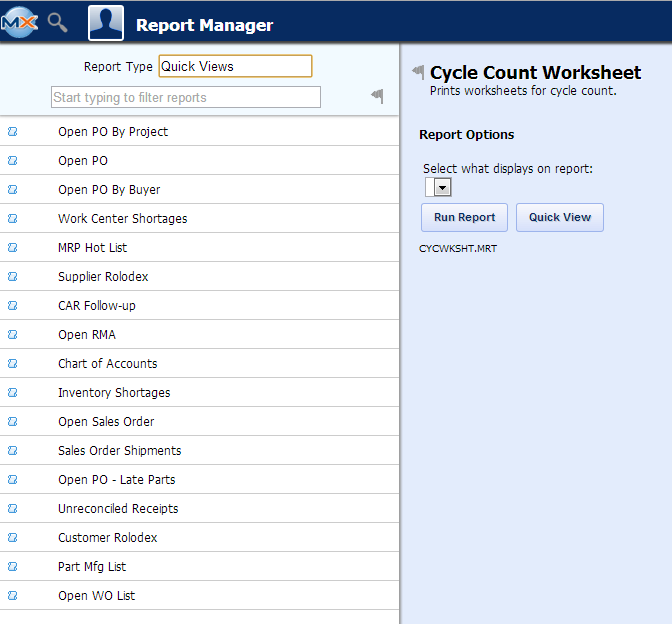
To obtain the Quick View Reports within the Web, Login to WebManEx or select the WEB Print button from the ManEx action buttons at the top of the screen. For further detail on How the Reports work within the Web refer to Article #5477. Note: In order to access the Reports within the Web the Company Root URL must be setup within the System Appearance module and user must be linked to web within the System Security Module. Select the Report Type: QUICK VIEW - A List of Reports will be displayed that are available on the Web for QUICK VIEW
|
| 1.10. Tool Box |
| 1.10.1. Item Master Attributes Bulk Change | ||||||||||||||||||||||||||||||||||||||||||||||||||||||||||||||||||||||||||||||||||||||||||||||||||||
The Item Master Attributes Bulk Change, will allow you to update various item master information through a template upload. Requirements:
Here is a list of attributes you can update:
You can first download a blank template, right off Item Master Attribute Bulk Change screen.
Once you have the template filled up, proceed to the screen "browse" to the template and click "upload" after selecting the file.
If it uploads successfully you will get the below message.
If there are any exceptions during the upload process, you will get an error message up top and a excel sheet with the exceptions will generate and download to your computer. Here is an example of an error I had. I had Cert_req= 1 but I did not put a Cert_Type.
Notes:
|


| 1.11. MX FAQ's |
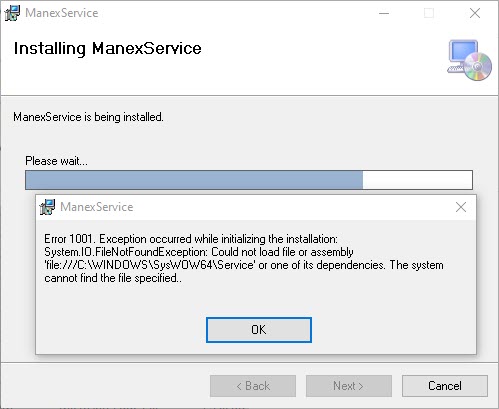
| 1.11.1. Error 1001. Exception occurred while initializing the installation |
Issue: While attempting to install Manex Service, the user receives the following error Correct Example: |
| 1.11.2. Error: Unable to create the store directory. (Exception from HRESULT: 0x80131468) |
When trying to export a report to Excel and user receives an error stating : Unable to create the store directory. (Exception from HRESULT: 0x80131468)
The error is likely seen when trying to export a large amount of data. Example: Detailed GL Cross-Tabbed Report w/References
However if you were to run these parameters, with a smaller date range it would then work. Detailed GL Cross-Tabbed Report w/References
Try changing the below setting in the IIS App Pool.

|


| 1.11.3. Object reference error on Manexcloud |
Some users may see this error in different Manexcloud modules like time clock, BOM import, etc... First thing to try is clear browser cache. If issue is not resolved then contact Manex Support for further help.
|

| 1.11.4. Error: Store must be open for this operation |
In Manexcloud , when exporting to Excel and you receive the below error: Store must be open for this operation.
In the application pool, turn the Load User Profile to 'True'
When this option is set to False ( the profile is not loaded ) your application will use the c:\windows\temp folder as its temporary directory. If you have other application pools even they will use the same c:\windows\temp folder. If you set the option to load the user profile the temporary directory will be now change to use the profile’s temporary folder C:\Users\apppooluserid\AppData\Local\Temp. If the profile is loaded you also have access to all the custom environment variables for that user.
|


| 1.11.5. Custom Store Procedure/Tables Cannot reside within Manex Database |
We have found that you have many custom procedures, views and/or tables within our (Manex) database. Some of these Procedures start with " ". . . . or " " . . . but other's do not have any type of label or indicator for us to tell if this is a custom file or not. The issue with placing these Custom Procedures, Views, Etc. . . directly within the Manex Database is that any of our updates and/or conversions will go through and find any procedure, View, Table, etc . . that we (Manex) did not create and/or need and automatically remove them from the database. This means that you will potentially lose all of these custom items you have created directly within the Manex Database. You need to make sure that all custom procedures, views, tables, etc . . are created and saved within a database outside of MANEX. You can create the procedures to link to and use the Manex database, but they can not reside within the Manex database itself. We suggest that you work with IT on moving these out of Manex database and let us know if you have any questions.
|
| 1.11.6. What if I see a Collation error when running reports? |
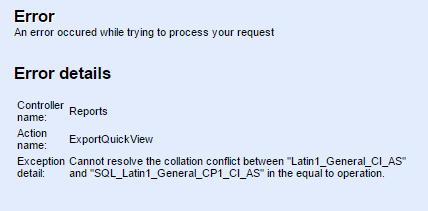
Q: What if I see a Collation error when running reports? A: If you are getting the below error in the image, your server has a different collation than we use by default. For clarity, this is caused because we are using a temp table and the server has a different collation method. As long as the server has the same collation, It is fine. This article explains how to change it:
|
| 1.11.7. Why am I seeing a Authentication Required pop up when accessing MX? |
|
Q: Why am I seeing a Authentication Required pop up when accessing MX reports and some section? A: This is typically due to using windows authentication and that is what causes authentication required form to pop-up if someone outside the domain is trying to access it.
As long as your a domain member on a local network, IIS uses the credentials of the person logged in to the workstation and will not prompt. The problem you see is a browser issue, not an IIS one. IE or other browsers won't pass credentials to a site unless it's in the intranet security zone or the same domain. IP addresses aren't a domain or machine name so IE or other browsers sees them as internet zone and won't pass credentials. To fix this, add the IP address to the intranet zone in your browser security tab. Another option is under directory security tab in IIS Click Edit & Enable Anonymous access option
|

| 1.11.8. ManexCloud Report Permissions |
Q:How do I find out what web reports belong to what permission groups?
A:You can run this T-SQL to find which roles will grant access to a report. DECLARE @reportTitle VARCHAR(MAX) = 'Debit Memo'
DECLARE @rptId varchar(MAX),@pGroup varchar(MAX)
SELECT @rptId = rptID,@pGroup = paramGroup FROM [MnxReports] WHERE rptTitle LIKE '%'+ @reportTitle +'%'
SELECT rptId,rptTitle,rptTitleLong,
DECLARE @rTags varchar(10)
SELECT @rTags=fksTagId FROM [MnxReportTags] WHERE [rptId]=@rptId
SELECT RoleName FROM [aspnet_Roles] WHERE roleId IN (SELECT fkRoleId FROM [aspmnx_RoleSystemTags] WHERE fksTagId=@rTags)
Simply change the 'Debit Memo' to the title of the report you want.
|
| 1.11.9. Default WebSite/ManEx Http Error 403.14 |
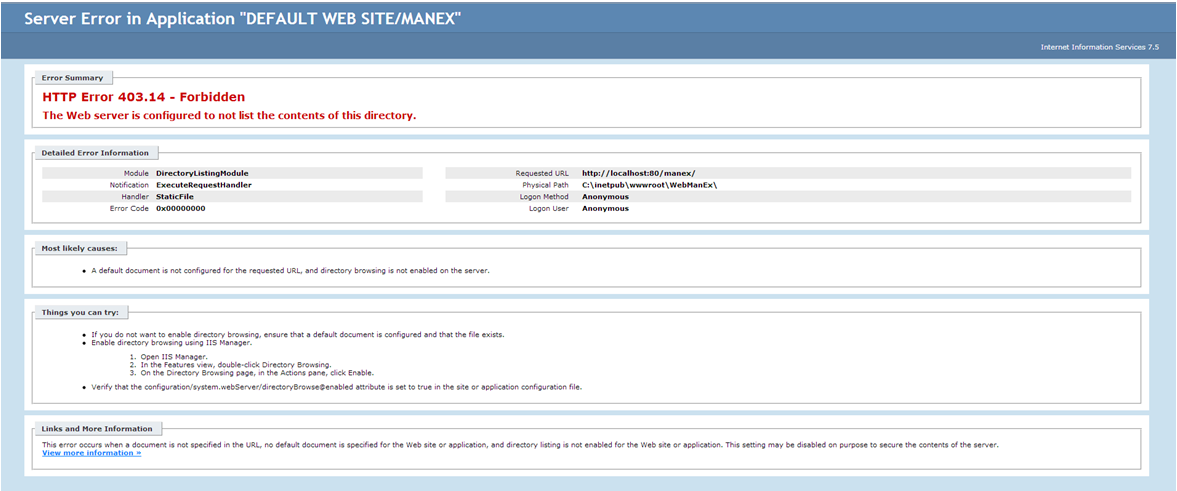
This error occurs when a document is not specified in the URL, no default document is specified for the Web site or application, and directory listing is not enabled for the Web site or application. This setting may be disabled on purpose to secure the contents of the server.
The cause of the problem is that not all aspnet features have been installed or registered. The user must make sure that the needed aspnet features were checked in (turn windows features on and off) and that they ran aspnet_regiis.exe as an admin in the v4 folder (C:\WINDOWS\Microsoft.Net\Framework\v4.0.30319\aspnet_regiis.exe).
 |
| 1.11.10. How to Correct the Date Format when Exporting a Report to Excel |
When Exporting a Report to Excel the Dates are being displayed in the wrong Format
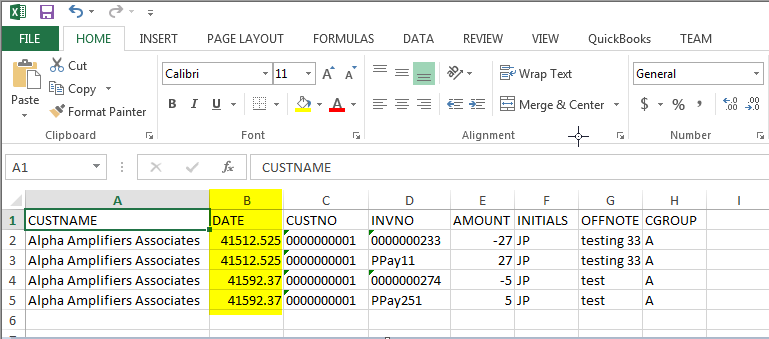 Highlight the Column or Cells
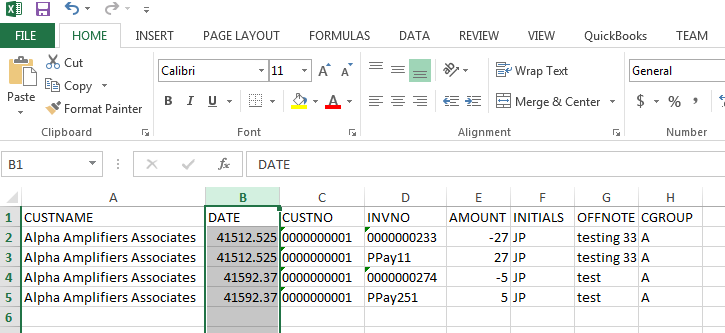 Then depress the Ctrl + Shift
+ 3, this will correct the date format
 |
| 1.11.11. Load Report Failed Error When Running a CR over the Web |
If users see this message when trying to run a Crystal Report over the web:
CrystalDecisions.Shared.CrystalReportsException: Load report failed. ---> System.Runtime.InteropServices.COMException: Unsupported Operation. A document processed by the JRC engine cannot be opened in the C++ stack. at CrystalDecisions.ReportAppServer.ClientDoc.ReportClientDocumentClass.Open(Object&
DocumentPath, Int32 Options) at CrystalDecisions.ReportAppServer.ReportClientDocumentWrapper.Open(Object& DocumentPath, Int32 Options) at CrystalDecisions.ReportAppServer.ReportClientDocumentWrapper.EnsureDocumentIsOpened() --- End of inner exception stack trace --- at CrystalDecisions.ReportAppServer.ReportClientDocumentWrapper.EnsureDocumentIsOpened() at CrystalDecisions.CrystalReports.Engine.ReportDocument.Load(String filename, OpenReportMethod openMethod, Int16 parentJob) at CrystalDecisions.CrystalReports.Engine.ReportDocument.Load(String filename) at site.AspNetForms.ReportViewer.Page_Load(Object sender, EventArgs e) The key portion of the warning is: "A document processed by the JRC engine cannot be opened in the C++ stack."
It means it cannot locate the required file. They should check the Reports folder in webManEx for the file listed below the "Run Report" button in the report manager.
|
| 1.11.12. Mapping of Reports to Roles |
When setting up groups for access to various reports in ManEx, aspmnx RoleSystemTags connects the group roles with the report tags.
If you run the following statement this will show all tags connected with each role: select r.rolename,t.tagname from aspnet_roles r inner
join aspmnx_RoleSystemTags rt on r.roleId = rt.fkroleid inner join
mnxsystemtags t on rt.fkstagid = t.stagid
|
| 1.11.13. Error Source: Event Log Error |
If user is getting the following Event Error Log message, it means that the ManEx Event Log is full of messages.
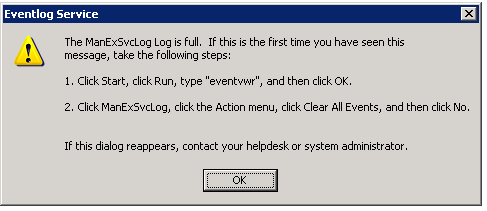 To minimize the event logs from filling up with messages. Go
into the C/program files and find the Manex folder/manexservice folder and
modify the config file and add the connection string used to access SQL server. This should match the connection string your using in the Webmanex config
file. For further information see Article #5480.
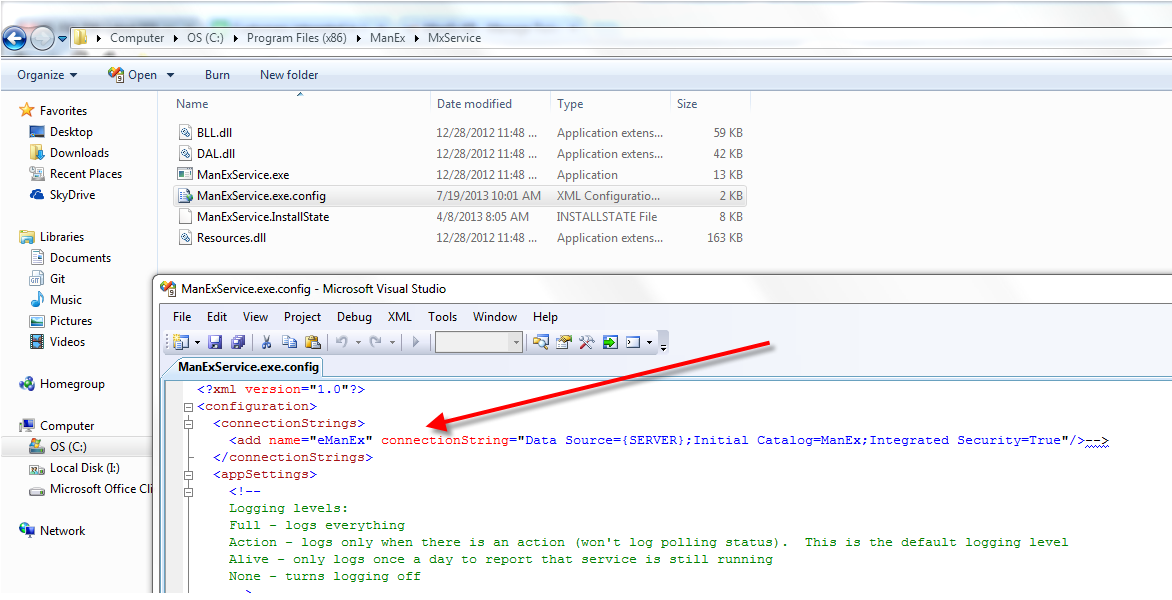 |
| 1.11.14. Why is Undefined being Displayed in Some Fields on the AP Aging Summary Quick View Report? |
|
Problem: Why when I attempt to
run the AP Aging Summary QuickView, the Supplier and Phone are showing as undefined.
 Resolution: Try clicking the "Reset" button at the bottom. If user has altered the grid at all (even change the column widths) it saves their changes
and applies that in the future. If the auto correct doesn't fix the
problem, they just need to reset to default and reconfigure with the latest.
|
| 1.11.15. Why isn't WebManEx Accessible from the Workstations? |
| ISSUE: WebManex is accessible from the server but not workstations.
RESOLUTION: It is a firewall issue on server where WebmanEx
directories reside. So in such case you will need to open the correct port in the Windows
Firewall on the server.
How to configure it to open a port for inbound traffic: To access the firewall: Press Start -> Type in "Firewall" -> Click on "Windows Firewall With Advanced Security" You need to configure an inbound traffic rule, like so: 1. Right click "Inbound Rules" , 2. On the left pane Choose "New Rule" 3. Choose "Port" 4. Under "Specific ports" enter your port number (8080) 5. Continue with "Next" until the end of the wizard, naming the rule when asked. Check if your port is now accessible - you might need to
restart the Windows Firewall service (under "Services").
|
| 1.11.16. Why does the system require email address to be populated? |
You might have some users that currently do not have emaill addresses within your company but the MX user setup screen is requiring that this be populated. It is stressed that you create email addresses for all of the users so that you can get the full use out of the systems Triggers, notifications, etc. . . .
Without this in place then you would have to resort to manually telling them this information rather than streamlining the process a bit by utilizing our Triggers and notifications. |
| 1.11.17. Unable to install Manex Services |
If user happen to get a message during the installation of the service
"This advertised application will not be installed because it might be unsafe. Contact your administrator to change the installation user interface option of the package to basic"
Possible solution: from the command window (run cmd.exe in widows) run
msiexec /i <fullpath>/mxservice.msi /qb or MsiExec.exe /I <fullpath>/mxservice.msi REINSTALLMODE=voums REINSTALL=ALL
|