| 1. How To ..... for MRP |
| 1.1. Find a Material Requirements Planning (MRP) Record | ||||||||||||||||||||||||||
The following screen will be displayed:
Tips on Using the Material Requirements Planning Find Screen Selection of at least one parameter will reduce the time to retrieve the information. The Find by Parent BOM is specific down to the Revision level. If no information is selected in a Find operation, all part numbers with MRP actions will be displayed.
Pressing the Find action Button displays the following sequences: 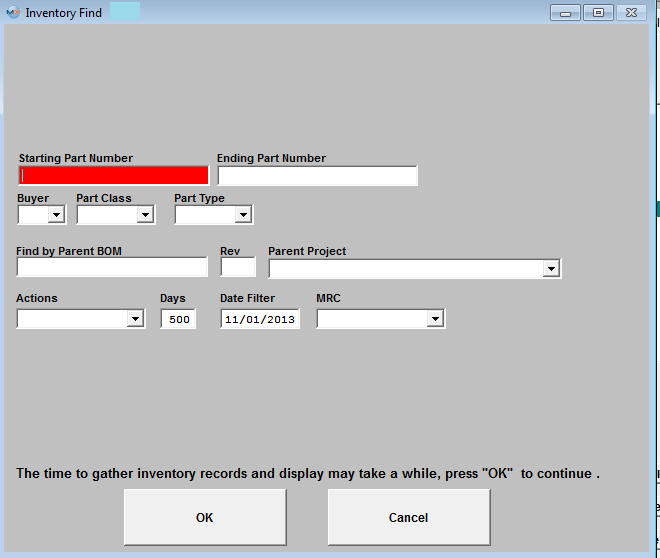 Definition of Material Requirements Planning Find Fields:
Starting Part Number and an Ending Part Number Select Buyer from the pull down menu. If you want ALL buyers, leave this area blank. Assigned Buyer will bring up all items assigned to that particular Inventory Buyer within the Inventory Control Management module. The Buyer assignment is setup in Part Class and Type System Setup Defaults or in the Inventory Control Management module/Item Master tab. If you selected a Class, depressing on the down arrow will bring up a list of Types within that Class. Select the Part Type within the Class selected. If you want all of the Types within the Class, leave this field blank. Revision of Parent BOM. If applicable this MUST be entered to located the exact Parent BOM. The "Find by Parent BOM" is specific down to the Revision level. If the exact part number and revison of the Parent BOM is not correct user will receive the following message: Select the action from the pull down. There are the various Material Requirements Planning actions, which the user may filter on such as: All Actions, All Purchase Order Actions, All Work Order Actions, Pull-Ins, Push-Outs, Release Purchase Orders, Release Work Orders, Cancel Purchase Orders, and Cancel Work Orders. Type in the number of days (from the current date), changes the Date Filter accordingly. This is a short-cut to the horizon date. The horizon date for the Material Requirements Planning actions. Parts with actions beyond this date are excluded from the report. The filtered information will populate the Material Requirements Planning Actions screen, as displayed below:
|

| 1.2. Add (Generate) A Material Requirements Planning (MRP) | ||||
Add (Run) a Material Requirements Planning
MRP runs through a large number of tables and records to compile its calculations, and provides a snapshot of suggested actions at the same time it is ran. If users are changing things during this process it could definitely cause some strange outcome. To prevent this situation we strongly suggest that you use the Nightly MRP trigger. (Refer to Article #416 for more detail on trigger setup).
If you find the need to re-run MRP during the production work day then we suggest that you notify all departments that MRP is going to be ran and ask them to remain out of the system until the MRP run is complete. This will help assure that the most accurate MRP run is possible. Then follow the procedure below:
The following Screen will be displayed:
To run a new Material Requirements Planning (MRP) manually, depress the Add action button (Generate MRP), and enter your password. The run percentage will be displayed on the header as displayed below:
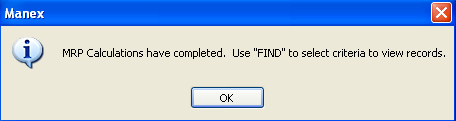
 The time it takes MRP to run is dependent on a number of factors. Here is a list of items that affect the processing time: Once the MRP run is completed and was successful, user will receive the following message:
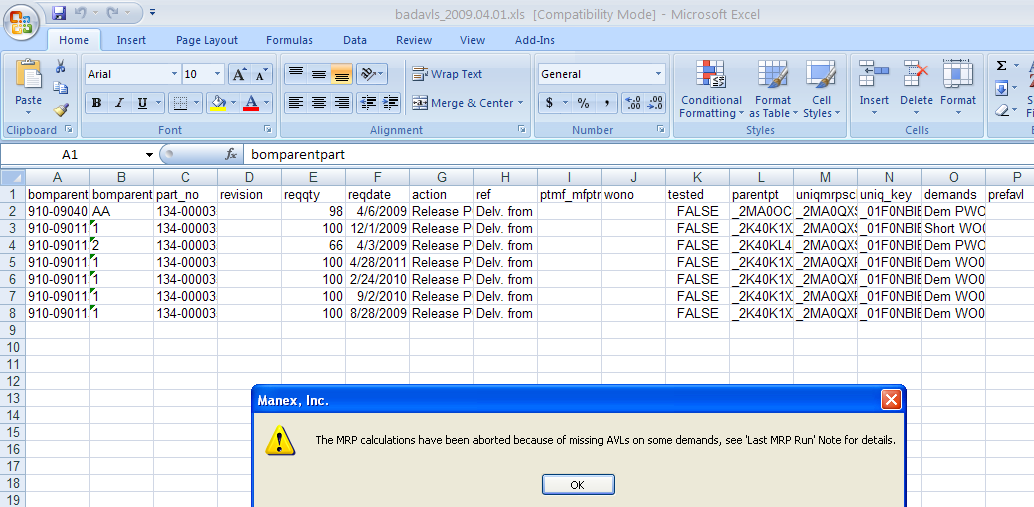
Depress the OK button. The Material Requirements Planning Date at the top right hand side of the screen will change.  If the MRP run was NOT successful due to AVL issues (missing, or exists but is marked as "Do Not Purchase and/or Kit, etc) the following message wil be displayed on screen indicating that MRP will NOT be able to continue until the BOM and/or part records have been correct. Then in addtion to the message an XLS file will be generated and placed in the ManEx Main Directory. This XLS file will contain the records that the user will need to review and address. If an XLS file is generated multiple times a day the system will add "_N" to the name of the XL file, where "N" is the dequence number. For example if MRP is run today three times without fixing a problem or a new problem is generated, the generated files will have names; badavls_2009.03.31_1.xls, badavls_2009.03.31_2.xls, badavls_2009.03.31_3.xls, unless one or all of the files were removed. The user will have the option of viewing the XL file now or later. NOTE: These XL files will need to be manually removed from the ManEx Main Directory.
 If the user selects "No" the user will receive the following message and they may review the XL file placed in the ManEx Main Directory.
 If user selects "Yes" an XL file (similar to the one shown below) will be displayed on screen and also placed in the ManEx Main Directory for later review:
 The date displayed in the "Last Successful MRP Run" will NOT change. The "Last MRP Run" button located in RED at the top of the screen will be displayed in a larger font if MRP run failed due to an AVL issue and there will be brief comment expaining what issues the MRP run encountered. This will allow any user that might not have seen the xls spreadsheet to be aware of what had taken place on the last attempt to run MRP.
 Double click on the "Last MRP Run" button and similar information will be displayed:
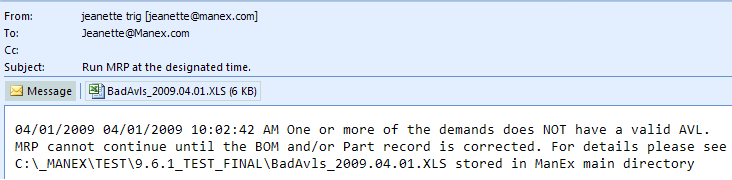
 NOTE: If MRP runs from Trigger, and MRP run was NOT successful due to AVL issues an XLS file will be generated and placed in the ManEx Main Directory for review and also be attached to the e-mail sent, informing user that the MRP run was NOT COMPLETED (similar to the one shown below). Upon opening the MRP screen the "Last MRP Run" button will be displayed in a larger font and will have information about the file as displayed above.
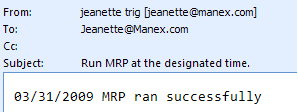
 If MRP runs Successfully from Trigger the e-mail sent will be similar to this:
 |
| 1.3. Drilling Down In MRP |
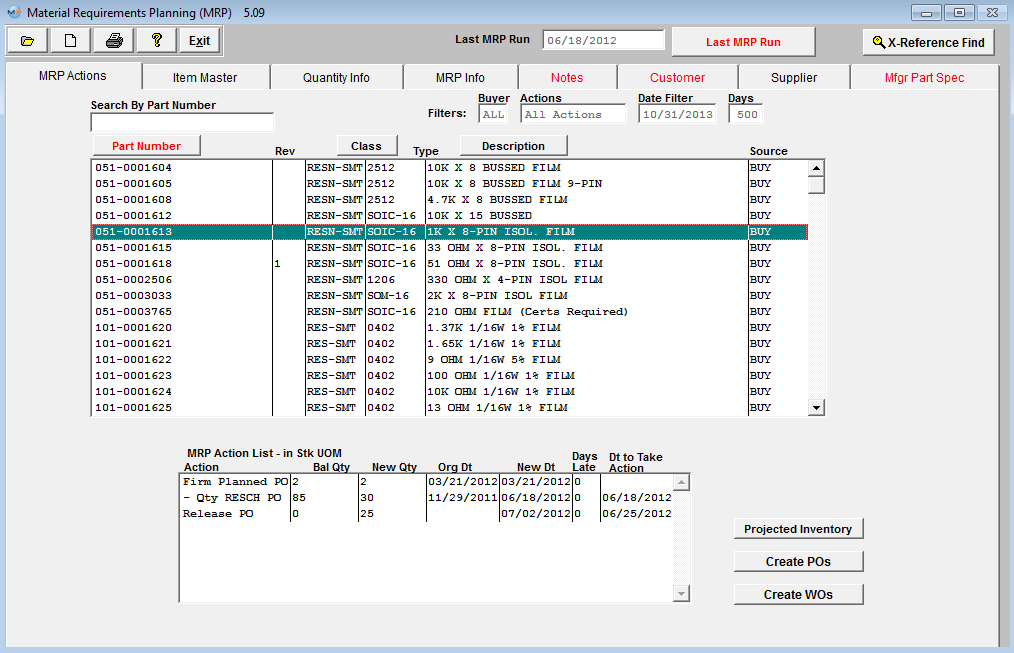
There are several drill downs within the MRP screen. Highlight a Buy or Make Part number of interest on the MRP main screen:
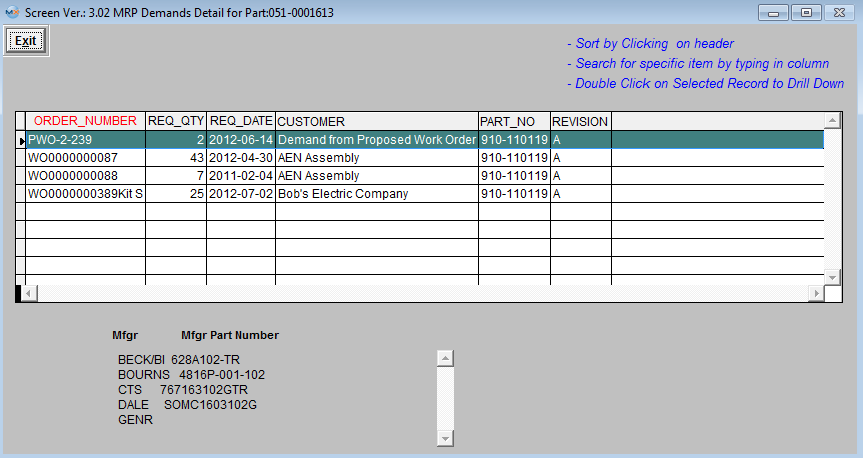
Double click on the highlighted buy part number 051-0001613 and the user can see the assembly of the proposed work order. Highlight the Proposed Work Order Number and the Approved AVL's will be listed per the BOM.
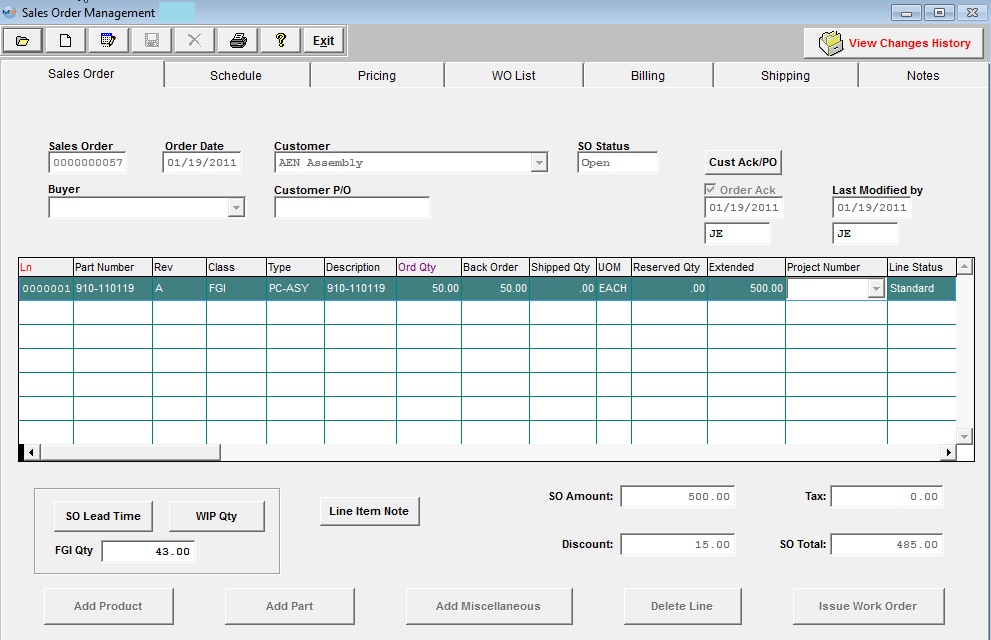
If the User double clicks on the PWO-2-239 (Proposed Work Order) the Sales Order, the assembly, required qty, and Customer will be displayed.: 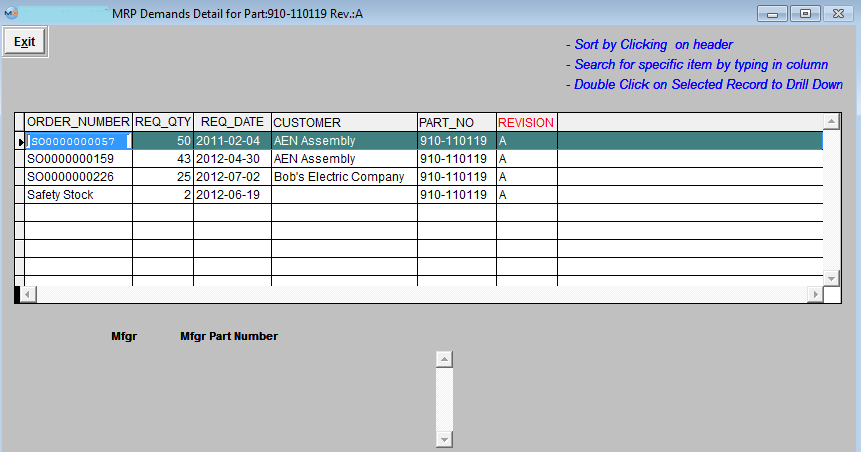 Highlight and double click on the SO0000000057 and the Original Sales Order will display.
Another Drill down located within the MRP Actions screen - is by highlighting one of the actions located in the MRP Action List-in Stk UOM box: 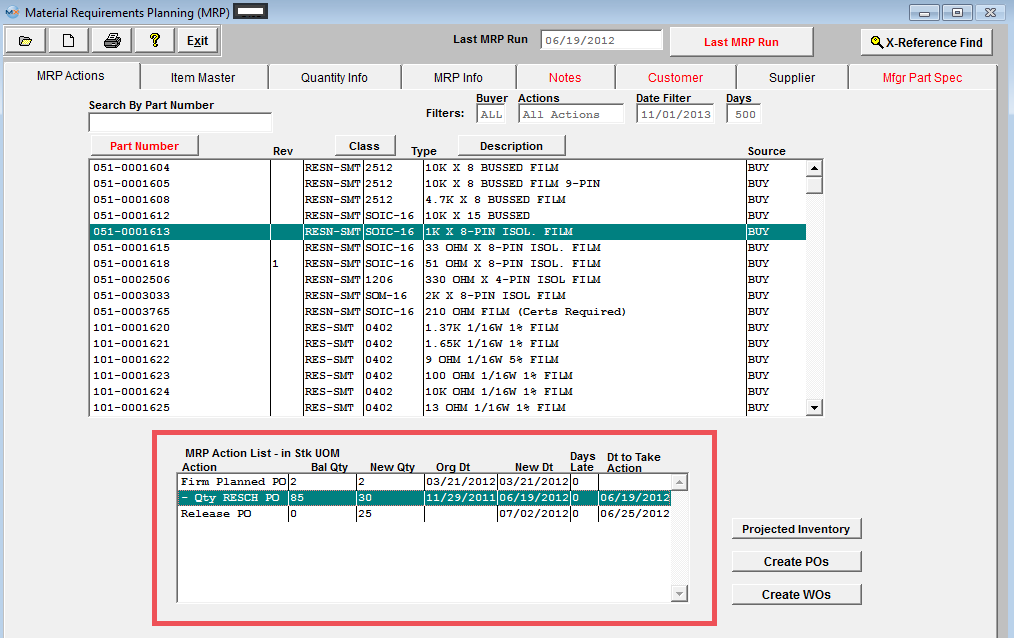 Double Click on the PO, WO, SO, etc of interest and the following screen will be displayed: All the Drill Down screens may be used to Sort, Search, or keep drilling down to actual PO, SO, WO, etc.
 Depress the 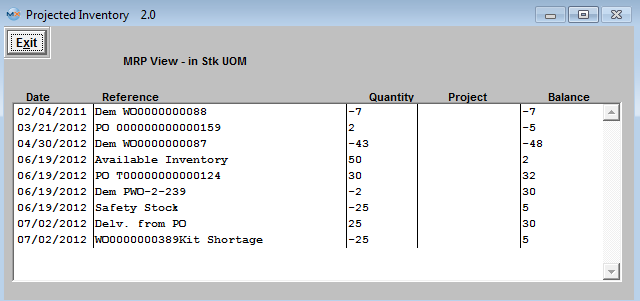 Within this screen you may highlight any of the Reference items and drill down to the original Sales Order, Inventory Level, Purchase Order, etc.
|
| 1.4. Create POs from MRP Action List | ||||
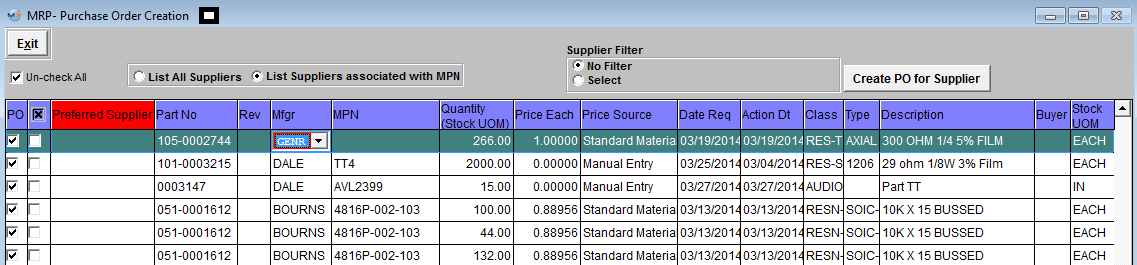
The following screen will be displayed:
Note: To start creating POs from the MRP action list, make sure you have run MRP creating a fresh MRP action list, and user must have "ADD" rights to the PO module in Security setup.
Find an MRP record.
Highlight a part number of interest and depress the Create POs button in the bottom right hand corner, enter user password (user must have "ADD" rights to the PO module), and a list of Release PO suggestions based on the MRP filter that was applied and displayed within the MRP screen will appear. This will allow the buyers to auto created purchase order records based on what MRP is suggesting (mfgr, mfgr pn, etc...)
User may view records by selecting All Suppliers or only Suppliers assigned to the MPN in the ICM module. User may also use the Supplier filter to view records for one supplier at a time.
User may manually select the records to have POs created by placing a check in the box in the PO column. If no supplier is defaulted in the Preferred Supplier column from the ICM module, user may check item in the "x" column, select a supplier from the pull-down and receive the following message:
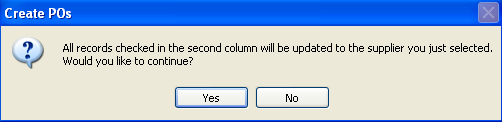 Depress "Yes" to continue and user will receive the following message:
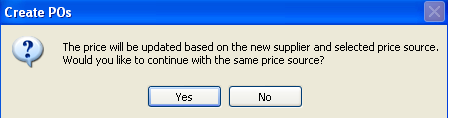 Depress "Yes" and all the records that have the check box to the left of the "Preferred Supplier" column checked will be updated with the selected supplier.
The Cost Each is defaulted in based on the "Price Source" column (which is setup in the Purchase Setup module). The standard Material Price and the Target Price defaults in from the Inventory Control Mgmt module. The Contract Price is defaulted in from the Supplier Contract Mgmt module. The Quote Price is defaulted in from the Quotation & Estimating module. The quote MUST be approved. If the part is on more than one quote the system will use the price from the most recent quote. The Mfgr and Supplier listed on the Auto PO screen must match the Mfgr and Supplier that was selected on the quote. The Last Purchase Price and Last Purchase Price for a Supplier will only be listed if they are within the last 6 months, if not then zero dollars will be displayed. Manual Entry allows user to manually enter in a cost each.
NOTE: The Auto PO screen will only find existing parts entered in the "Material 1" screen. There is no way to identify parts from "Material 2" screen. There is no connection between part entered in the quote module "Material 2" screen and the part before it becomes an Inventory part in ManEx until after the "Transfer".
All coulmns in the grid are sortable. To sort on the specific column click the header of the column. By default the items are sorted by "Preferred Supplier" column (red color of the header indicates that the data sored by the values in the column). Part No and Rev columns are both sorted by Part No and Rev vaules. If the cursor is in Part No, Mfgr,or MPN columns and the user begins to type the information, the interactive search will be performed and the record pointer will be moved to the appropriate record.
Once user has selected the records, they can depress the "Create PO for Supplier" button and PO's will be created (one for each supplier).
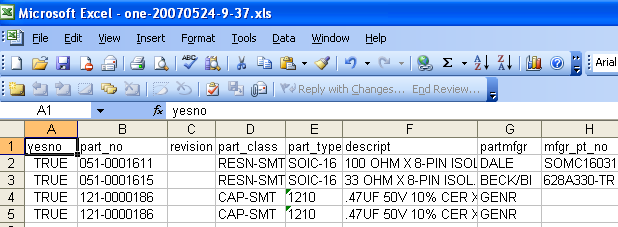
Once the POs have been created an xls report will be generated in the Manex local directory for review. The XL file name is based on the user initials plus the date and time the file is created. For Example if the file created has a name "ONE-20070524-9-37.xls" "ONE" - this is the user's initials; "20070524" - is the date when file was created (YYYYMMDD); "9-37" is the time (Hours-Min) when file was created, so this file was created at 09:37 am.
 User has the option of opening the created excel file by depressing Yes or No.
 |