| 1. How To ..... for Physical Inventory |
| 1.1. Setup a Physical Inventory | ||||
|
The following screen will be displayed:
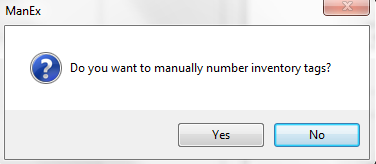
Depress Ok and the following options screen will appear:
Selecting “Yes” will allow the user to manually number the inventory tags, item by item. Selecting “No” causes the system to automatically number the tags. Please refer to the Tags and Work Sheets instructions. The following screen will appear:
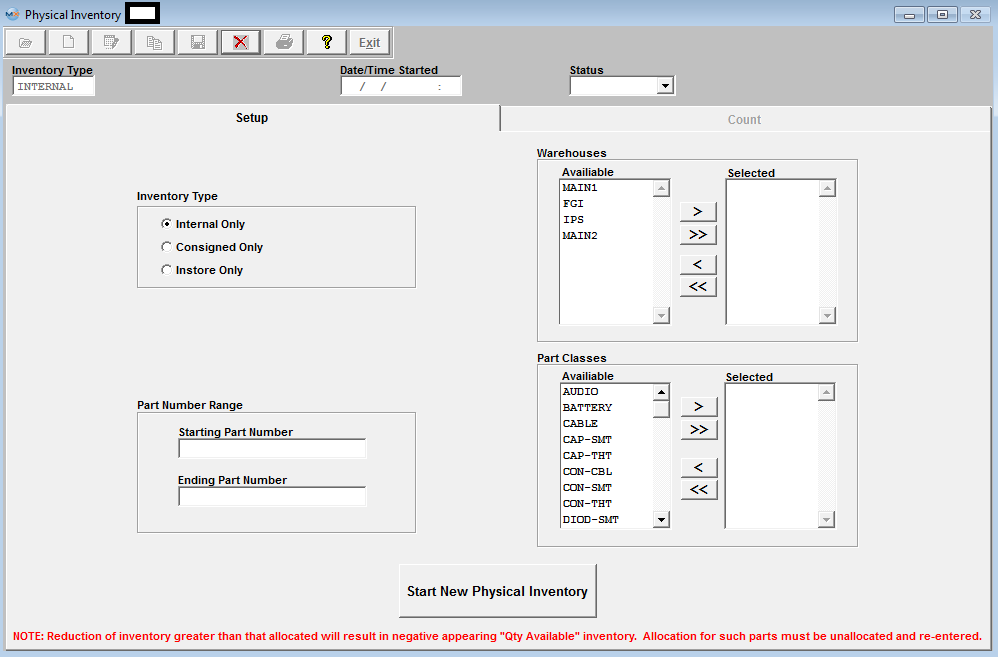
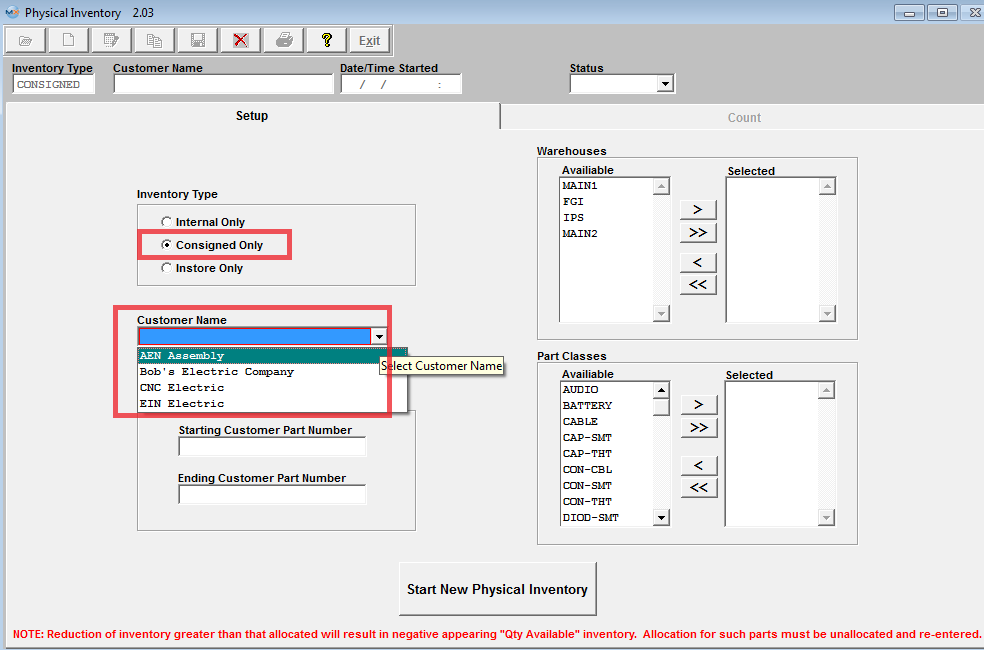
Select the Inventory type by clicking on the appropriate radial. Select from Internal, Consigned or In Store Inventory. Internal inventory represents user-owned inventory. Consigned inventory is owned by the user’s Customer. In Stores inventory is owned by the Supplier. In-Store purchasing overview: In-Store is the situation where the Supplier has placed raw materials in the user’s warehouse. The raw materials still are owned by the Supplier. When the user is ready to use the Supplier’s raw materials, he/she issues an In-Store Purchase Order. For In-Store POs, the user may select by Supplier or by Part Number. Then the user may find records according to the selection. Once found, the user may create a PO for the In-Store Consumption. In-Store Purchasing also includes receiving. If you select the Inventory Type to be Consigned, a list of customers will appear:
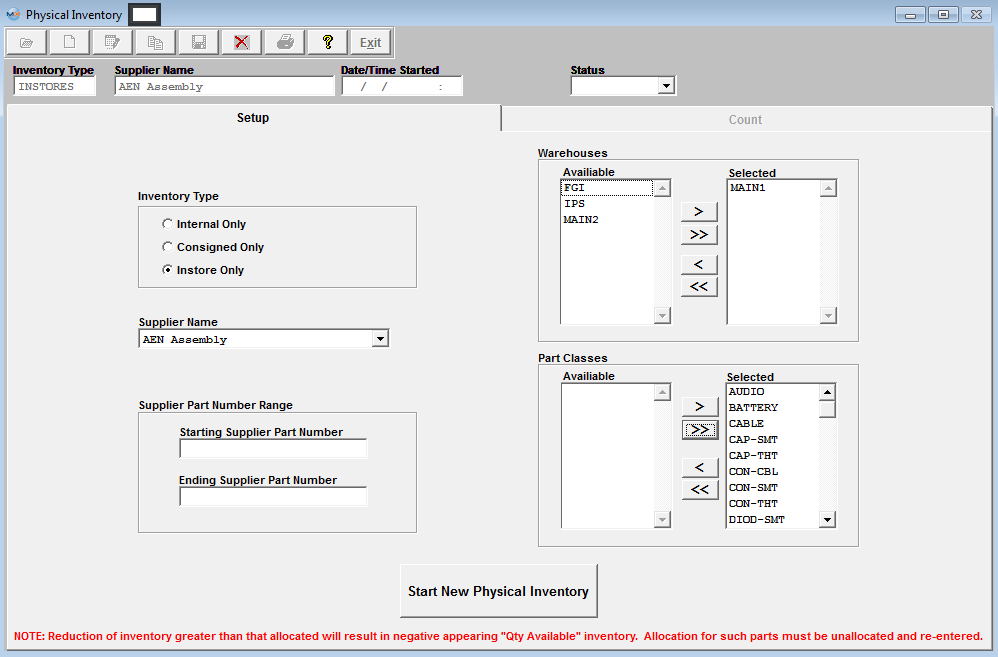
Select the Customer. If you select In store Inventory, a list of Suppliers will appear:
Select the supplier. Select the warehouses to be counted by highlighting a warehouse and depressing the > button. If you want to count all warehouses, depress the >> button. To select part number range, enter the starting part number and the ending part number. To select the part classes, highlight the class desired and depress the > button. For all of the part classes, depress the >> button. A view of the screen would be as follows:
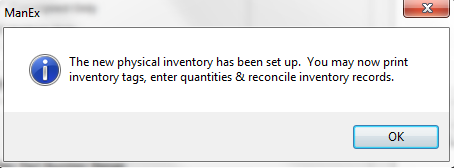
Depress the button to Start New Physical Inventory. A message will appear on the screen:
Depress the OK button. Information is transfered to the Count Tab. Important Caution: The user must finish the Physical Inventory completely before the system is enhanced.
|

| 1.2. Finding a Physical Inventory | ||||
|
The following screen will be displayed:
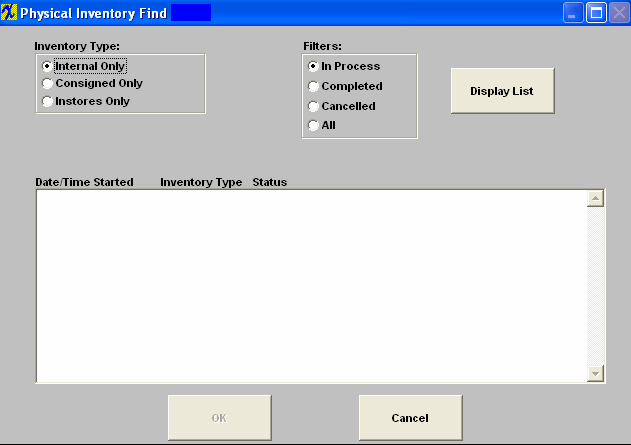
Depress the Find action button. The following screen will be displayed:
Decide upon the Inventory Type that you want to find. Select from Internal Only, Consigned Only or Instores Only by clicking on the appropriate radio. Then choose the appropriate filter, either In Process, Completed, Cancelled or All by clicking on the appropriate radio. Depress the Display List button once the selections are made. The information at the bottom of the screen will display Date/Time Started, Inventory Type and Status. If you select Consigned, you’ll be prompted for the Customer name. If you select Instores, you will be prompted for the Supplier name. Once you’ve found the Inventory you’re seeking, the information will populate the Count tab screen, as follows:
|
| 1.3. Record a Physical Count |
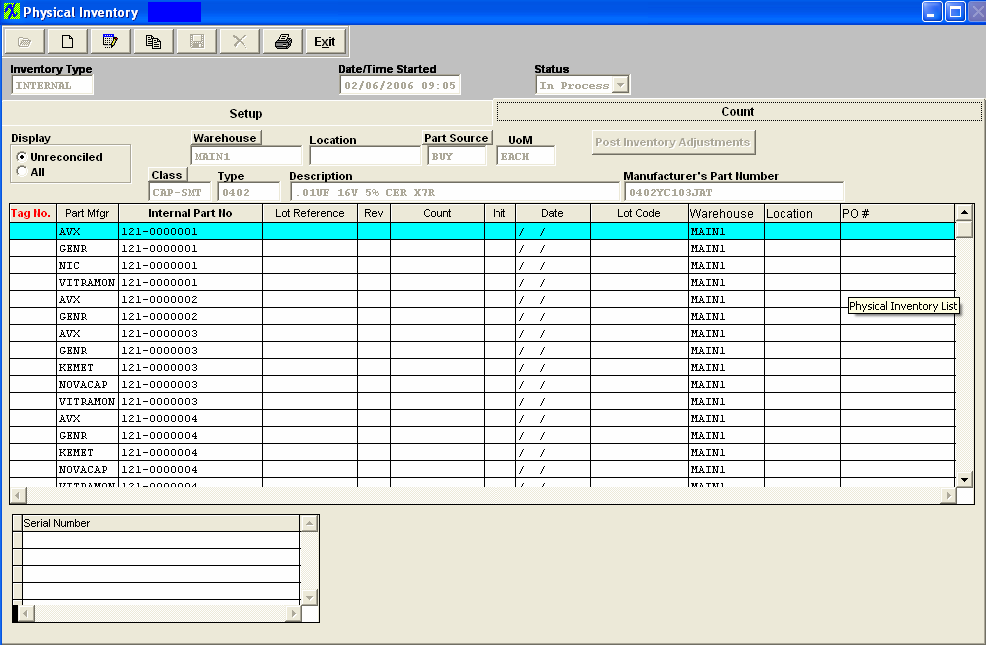
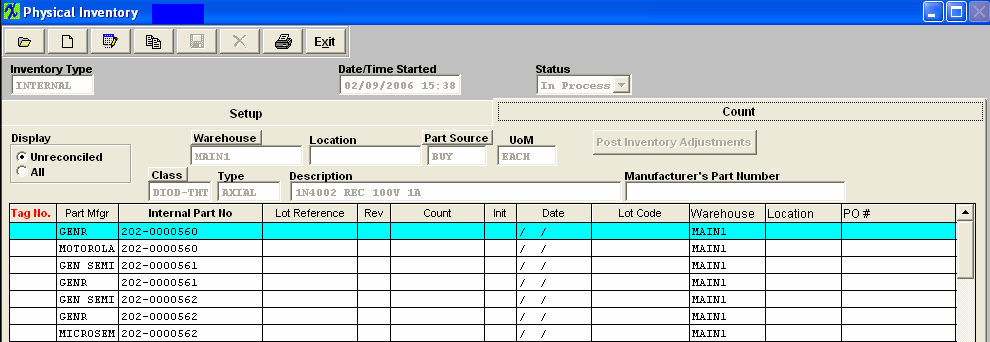
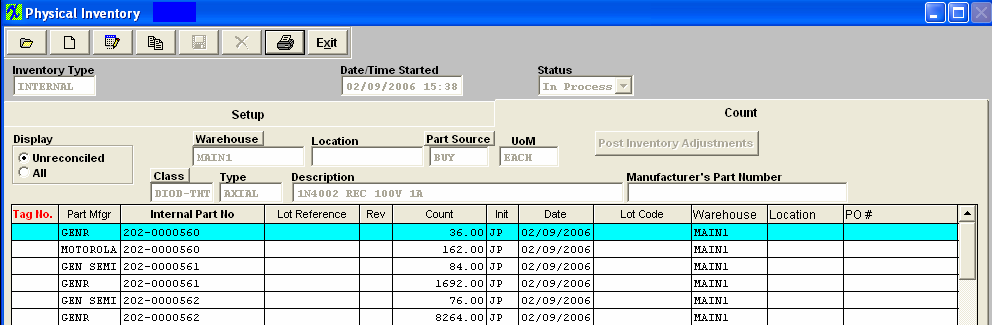
Find an In-Process Physical Inventory. The following information will appear in the Count tab screen.
Depress the Edit action button. Type in your password. To sort by warehouse, depress the Warehouse button. To sort by Class, depress the Class button. To sort by part source, depress the Part Source button. You will also be able to sort by tag number or part number by depressing on the heading. Enter the final count from the tag or the worksheet. The system will capture the initials from your password. The system will enter the date.
All warehouses and location will be listed for the internal part pulled forward for a count, with the exception of quantities that are in WO-WIP, these quantities are not included in the Physical Inventory. At this time user may move parts from one warehouse/location to another if needed by entering the count that resides in that location/warehouse. User are not allowed to add new items to the PI inventory listing, due to the fact that the count could phycially already be in process. If we allow you to keep adding and deleteing records from the count it might cause issues for what is already in process.
Also, ManEx does not allow user to edit a lot code for inventory items once they have been accepted into the system. ManEx does not allow you to change the Lot Code information anywhere within the system once received. Once in the system we have to maintain that lot code with those records through out the system, to have good Lot Control.
The screen would appear as follows:
|
| 1.4. Reconcile the Physical Count |
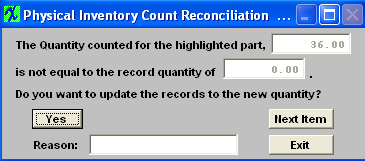
When the recording is complete, depress the Reconcile button (as highlighted below). Enter your password. This will reconcile the inventory.
If the inventory count does not match the system on hand quantity, the following screen will appear:
If you want to update the records for the counted quantity, depress the Yes button. Type in the reason in the Reason box. If you want to skip over the record, depress the Next Item button. Note, however, that you can’t update the quantity on hand until all of the inventory items are reconciled. Once all of the counts are reconciled, the detail will disappear from the screen. |

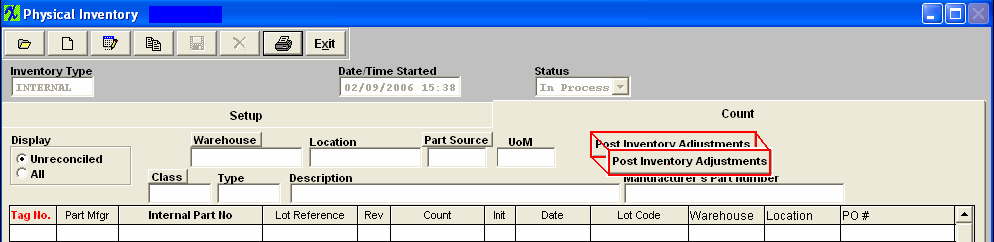
| 1.5. Update the Inventory Master for Inventory on Hand |
Once you’ve reconciled the inventory and printed and reviewed the Physical Inventory Detail Report, you may update the Inventory Master for the Inventory on hand. Depress the Count tab. Depress the Post Inventory Adjustments button. Note: this action requires a supervisor’s password or specific "Post Inventory Adjustments" authorization in the Security module.
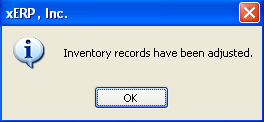
All of the reconciled count numbers will update the quantity on hand in the Inventory Master. The status will change to Posted. The following message will appear:
Additionally, the requisite journal entries for any variances will forward into the accounting module. Note that journal entries will not be created in the following circumstances: Consigned stock or In Store additions. |