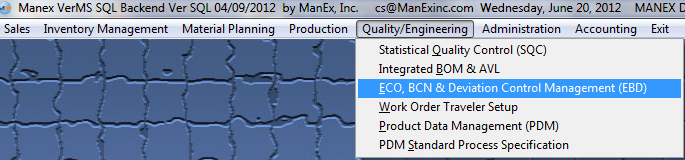
| 1. ECO, BCN & Deviation Control Management (EBD) (OPTIONAL Module) |
| 1.1. Prerequisites - EBD |
ManEx’s standard module configuration allows most users to accomplish their daily tasks. For those users wanting to get more from ManEx by leveraging the total solutions, this is one of the optional modules available for purchase. To place an order or to learn more about this specific module or any of the other optional modules please contact us at http://manex.com\contactus.aspx After activation, "Engineering Change Order" access for each user must be setup in the ManEx System Security module. Users with “Supervisor Rights” will automatically have access.
The product to be revised must be setup in the Inventory Control Mgmt. Any new parts to be added must exist in the Inventory Control Mgmt. A Bill of Materials must exist for the product being revised. |
| 1.2. Introduction - EBD |
This module allows users to document the source (internal or customer), the purpose, the details, and the impact of the change. The module can apply the changes to new and existing jobs, and ensure that production is aware of the change and is using the latest information.
This module allows users to document the changes using one of the following three approaches: "ECO" = An ECO records Engineering changes for assemblies when there is a Revision or Part Number change. There can be changes to the Bill of Materials components and/or quantity, to the materials cost, labor cost, whether or not there is a serial number required and to the description. The user can enter whether existing WIP or FGI items are to be scrapped or modified. Once all of the engineering changes are entered, the ECO needs to be approved by the the approvals (as specified in the ECO setup module). Once the approvals are entered, the user may Update the following records: Inventory Master, Product Routing, Product Data Management and Bill of Materials.NOTE: These records will ONLY be updated if the Revision or Part Number has been changed. "DEVIATION" = A Deviation creates a record that someone approved the change in the process for individual work order(s). Such as using a different part, leaving a part off, or perform a special additional step in the process, etc. When a Deviation is created within this module no records are updated or changed. It is a document for reference only. The user may print the deviation and it will list the work orders selected to be updated. Deviations have an expiration date so users will know that their customer or management allowed the modification for a limited period of time.
"BCN" = When "BCN" type is selected, the user can change all part information just like ECO, but user won't be able to create a new product number/rev, or click any "copy" checkboxes on "Update/Create records" page. WO and SO lists will also not be available for selections. When the "Update All Records" button is clicked, the BOM of the product number will be updated just as if the BOM was changed in BOM module. This feature will track any changes to the BOM through the system. |
| 1.3. Fields & Definitions - EBD |
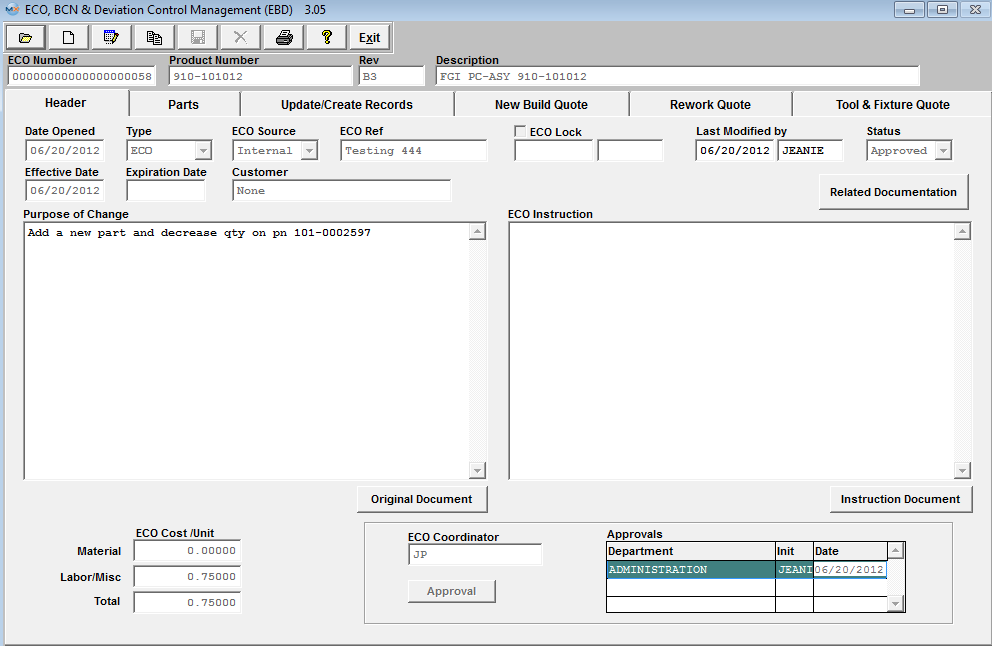
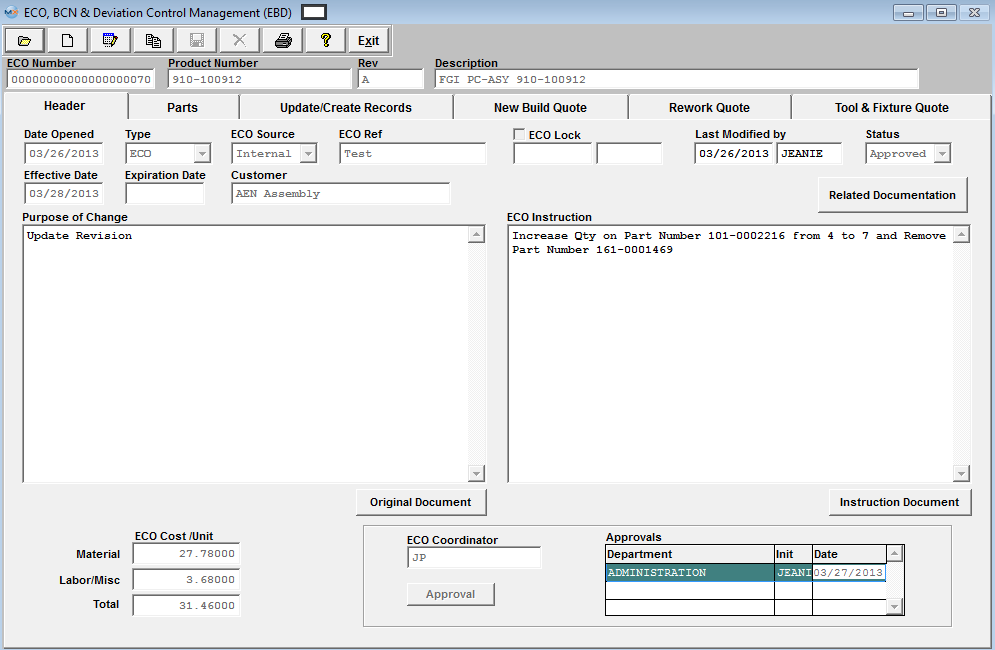
| 1.3.1. Header Tab | |||||||||||||||||||||||||||||||||||||||||||||||
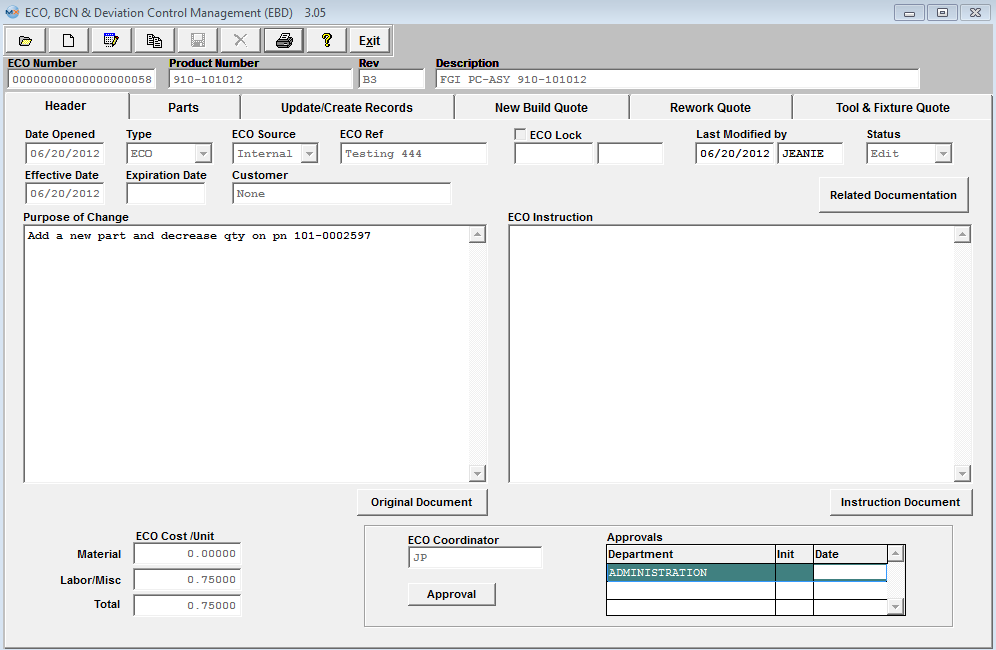 Header Tab Field Definitions
|

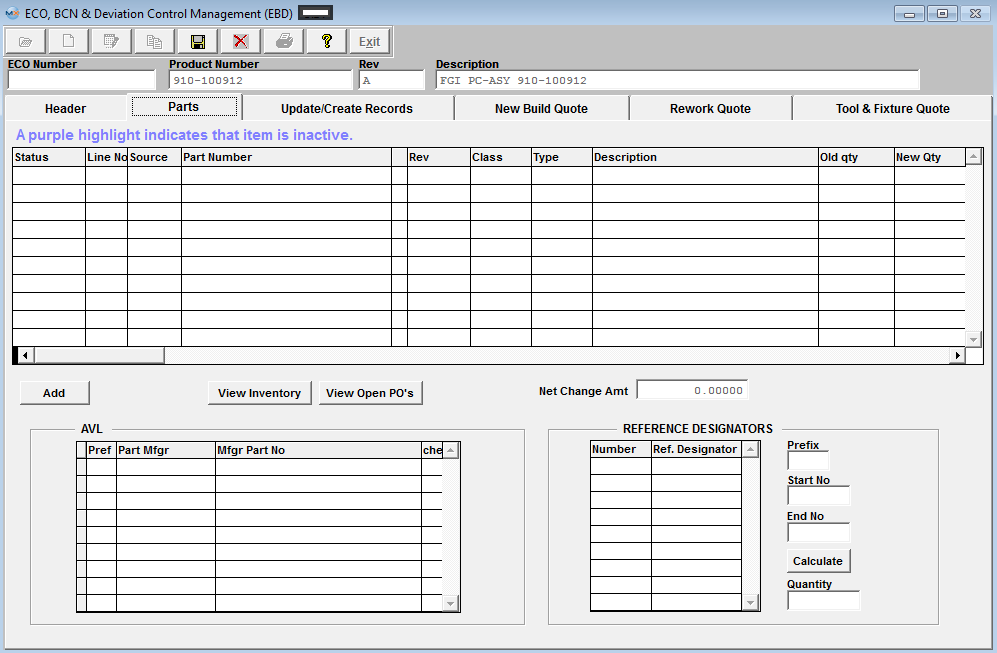
| 1.3.2. Parts Tab | ||||||||||||||||||||||||||||||||||||||||||||||||||||||||||||||||||
|
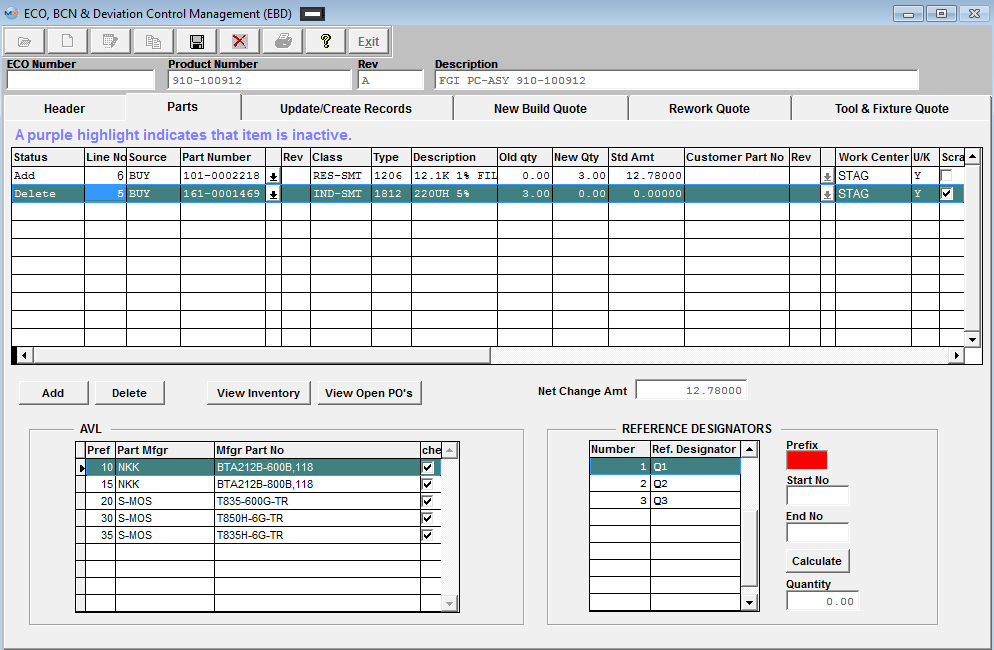
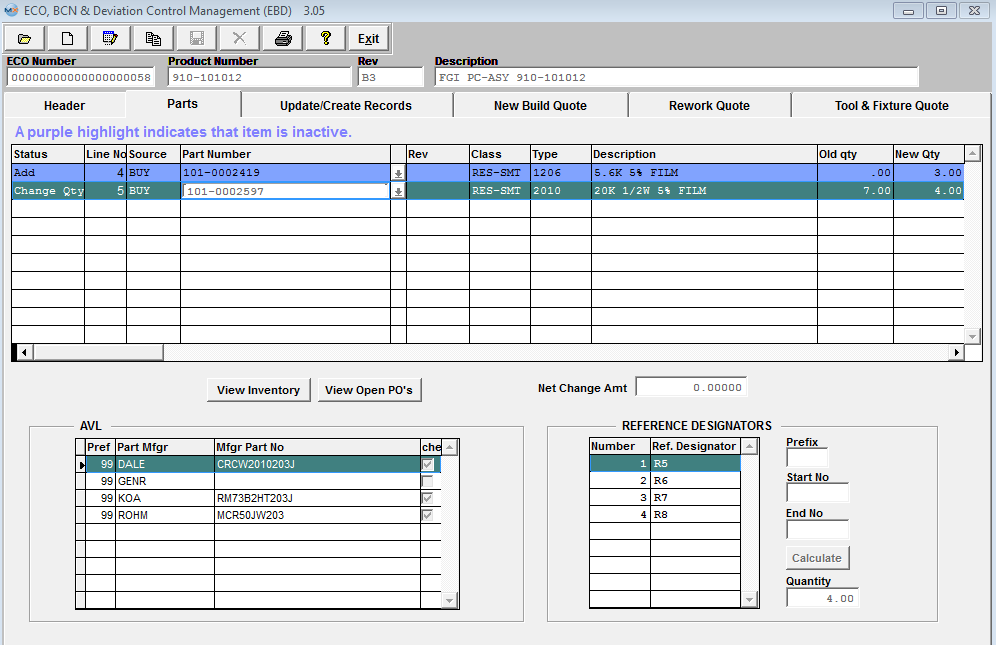 Parts Tab Field Definitions - The Parts tab displays any additional changes or deletions of Bill of Material Components. If the part added has a status of "Inactive" within the Inventory Control Management, it will be highlighted in purple as an indicator to the user that this item is inactive at this time. If the user chooses to leave the inactive part on the ECO, that part number record status will automatically be changed to Active upon the "Update Records" button being depressed, so user will not have inactive parts listed on the BOM. The user will receive a warning that an XLS file has been created for reivew.
|

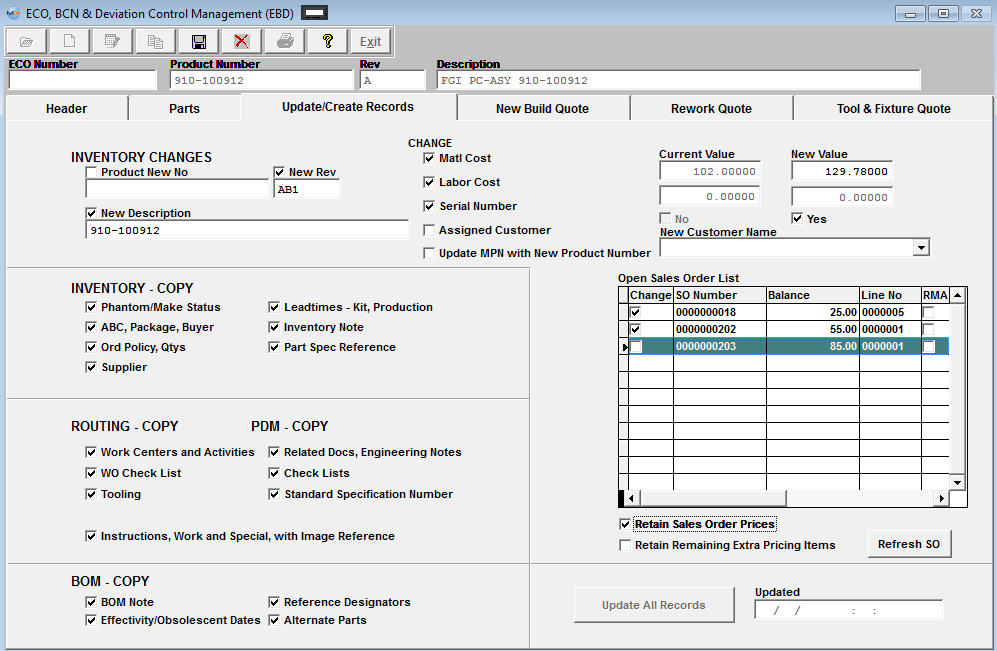
| 1.3.3. Update/Create Records Tab | ||||||||||||||||||||||||||||||||
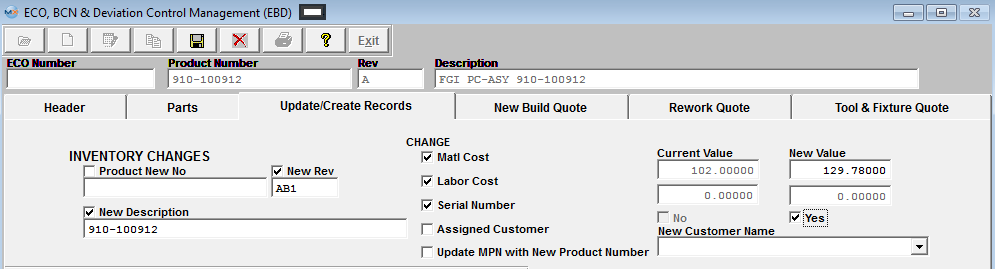
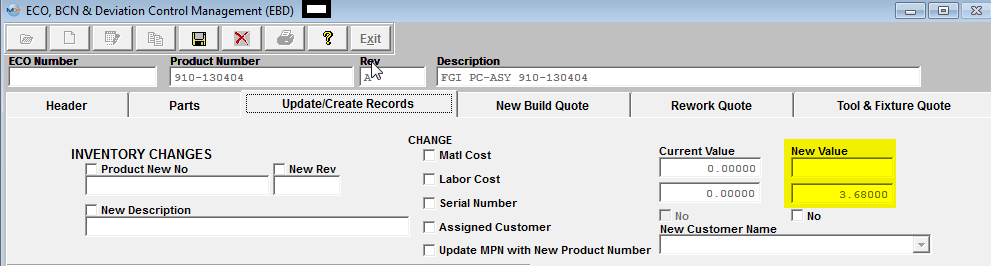
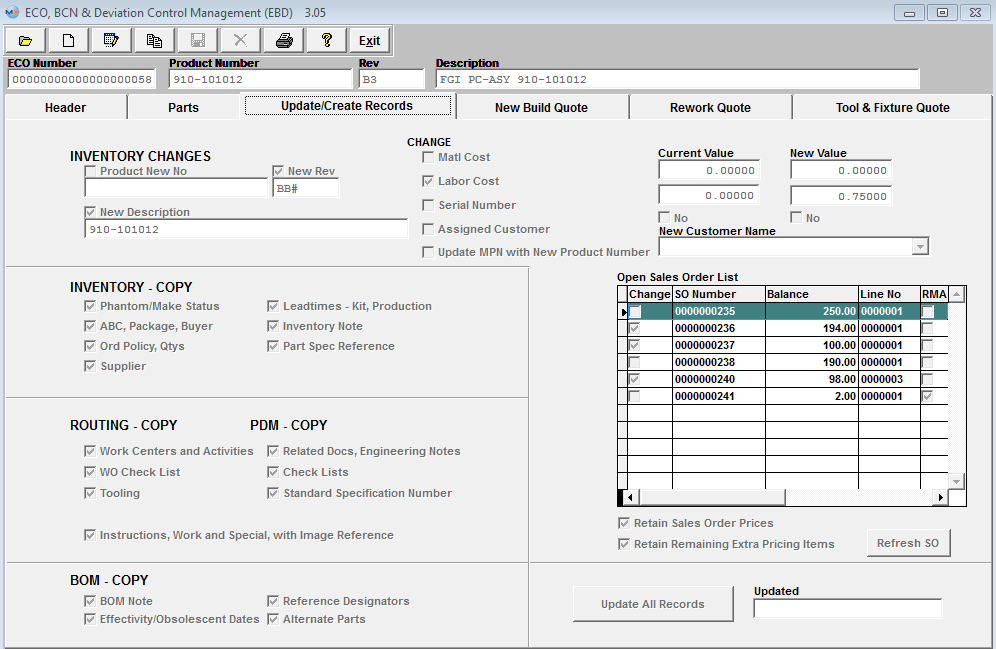 Update/Create Records Tab Field Definitions - This tab displays the revised product number, description, changes in Standard Cost, Labor Cost, whether serial number is required and updates for Engineering Change Orders only. Note: This tab is not available for Deviations or BCN. Inventory Changes section:
Change section:
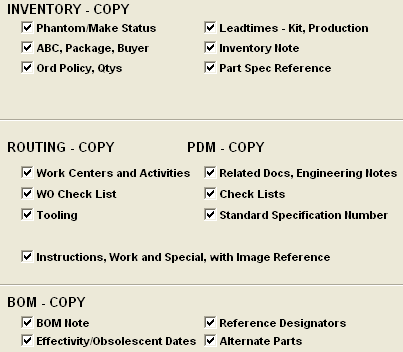
The rest of this screen comes up with all of the boxes checked for copying the revisions into the Inventory Master, Production Routing, Product Data Management and Bill of Materials. If the user does not want the assembly copied, the box will be unchecked. |


| 1.3.4. New Build Quote Tab | ||||||||||
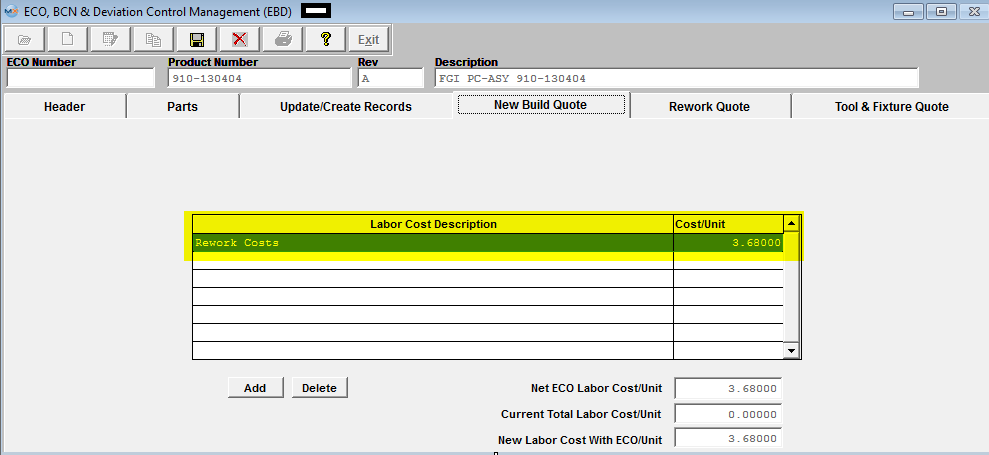
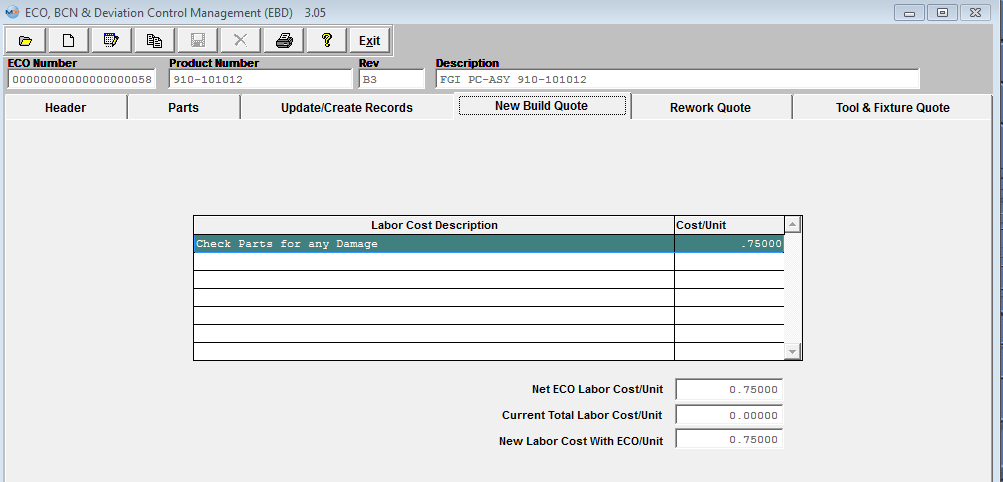 New Build Quote Tab Field Defintions - This tab desplays Labor Costs associated with the build of the new product number and revision and calculates the New labor Cost associated with each new unit.
|
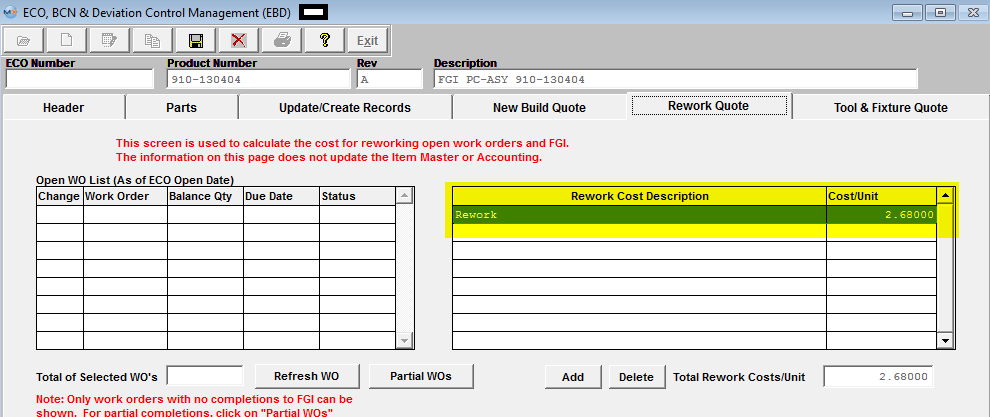
| 1.3.5. Rework Quote Tab | ||||||||||||||||||||||||||||||||||||||||||||||||
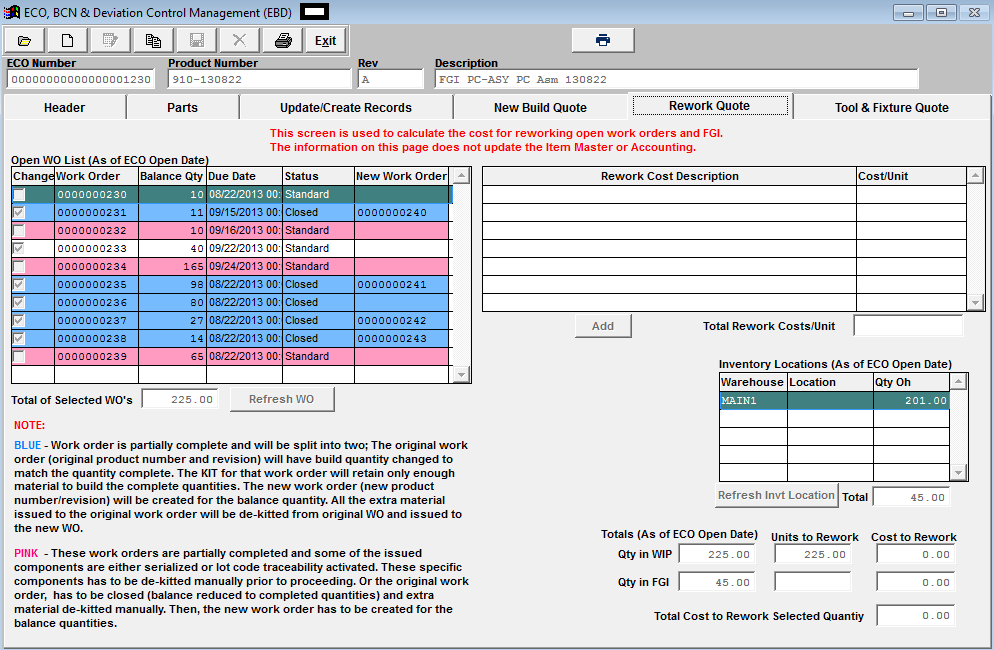
 Rework Quote tab Field Definitions - The Rework Quote tab details any Rework Costs due to reworking the existing quantity in Work In Process and/or Finished Goods Inventory. Open Work Order List (As of ECO Open Date) window: Note: The value of the "as of" is that it can affect the quote pricing and allows customers to better get that information.
Rework Cost Description window:
Inventory Locations (As of ECO Open Date) window: Note: The value of the "as of" is that it can affect the quote pricing and allows customers to better get that information.
The window at the bottom right hand side of the tab will display the total costs associated with the rework. Note that these costs DO NOT forward into either the Inventory Control Item Master nor the Accounting records.They are not associated with any new products which will be manufactured after the update to the latest revision, but pertain only to the costs associated with reworking either existing WIP or Finished Goods. Totals (As of ECO Open Date): Note: The value of the "as of" is that it can affect the quote pricing and allows customers to better get that information
Units to Rework:
Cost to Rework:
|


| 1.3.6. Tool & Fixture Quote | ||||||||||||
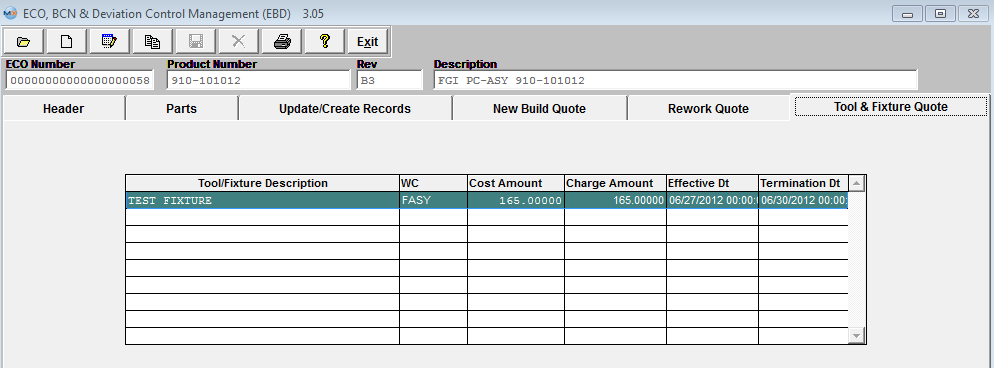 Tool & Fixture Quote Field Definitions - Once the ECO record has been approved and updated within the system. This Tool/Fixture information will then be carried forward into the PDM and Routing Setup modules.
This is the description information loaded from the System setup/Tooling Setup for selection. This is the Work Center location the tool/fixture is designated to. Original Cost of the Tool/Fixture The amounted that is planned to be charged for the Tool/Fixture Date that the Tool/Fixture becomes effective. Date that the Tool/Fixture will be terminated. |
| 1.4. How To .... for EBD |
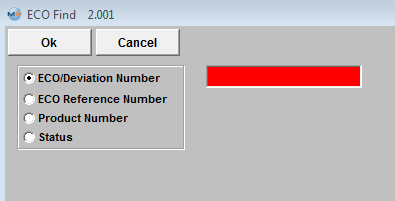
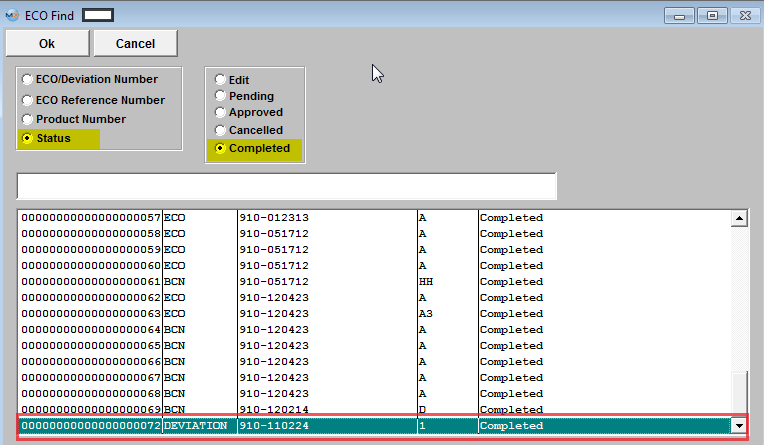
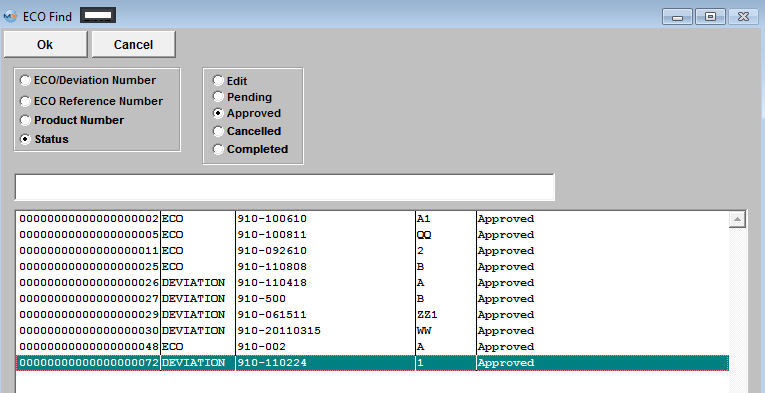
| 1.4.1. Find An Engineering Change Order(ECO), BOM Change Notice(BCN), or Deviation | ||||||||||||
|
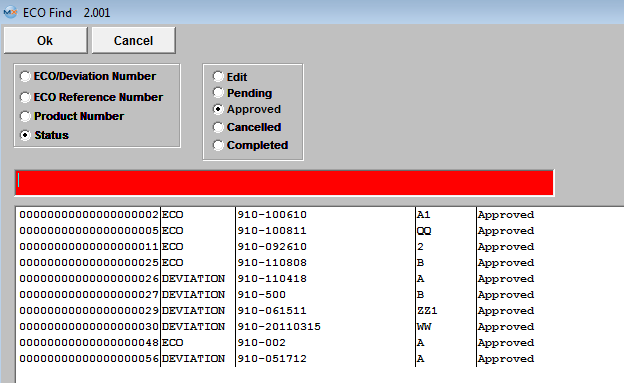
The following screen will be displayed:
Information regarding the ECO, BCN, or deviation, will appear.
|


| 1.4.2. Edit an ECO, BCN or Deviation |
Find an existing ECO, BCN or Deviation. The information will populate the screen.
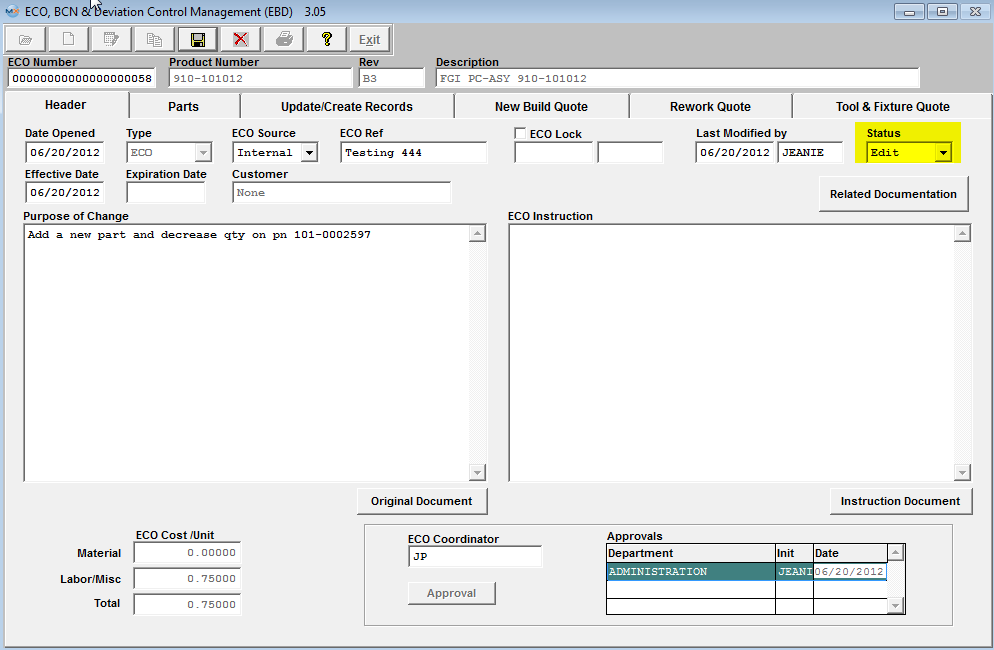
Depress the Edit record action button. Status will change to Edit.
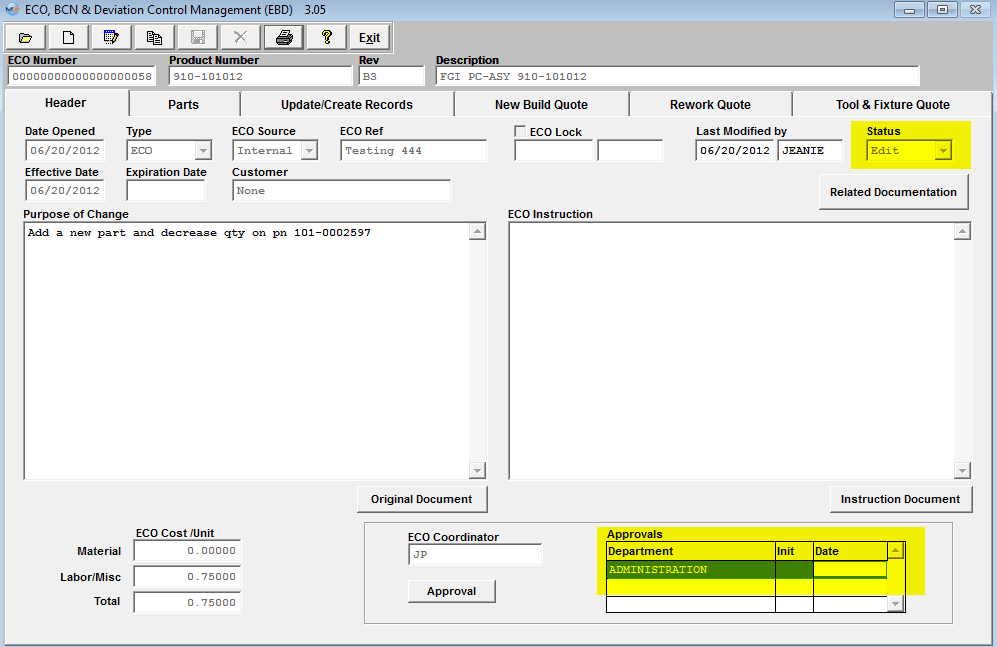
Once the necessary changes have been completed depress the Save record action button to Save changes, or depress the Abandon changes action button to abandon changes. If the Save record action button is depressed, changes will be saved. The following screen will appear. NOTE: The Approvals will be removed and the ECO changes will need to be re-approved.
The changes will need to be Approved, before the ECO status will change back to Approved.
|
| 1.4.3. Adding A New ECO, BCN, or Deviation | ||||||||||||||||||||||||||||||||||||||||||||||||||||||||||||
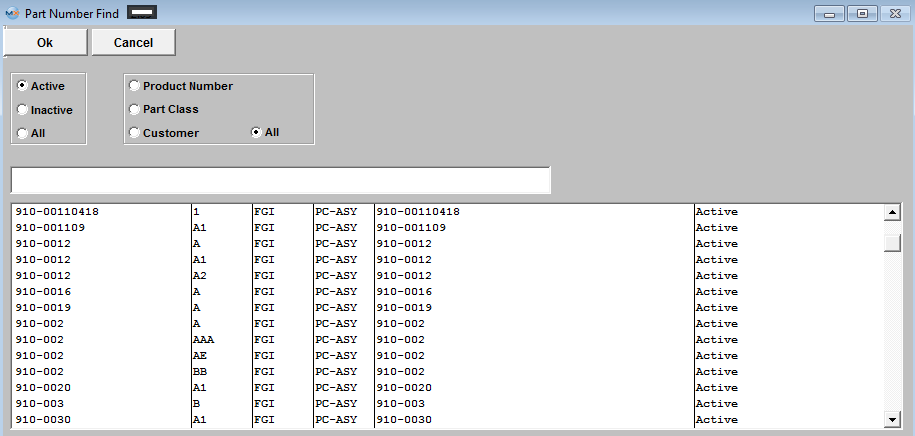
The following screen will be displayed:
Information pertaining to that part number will appear on the screen, as follows: 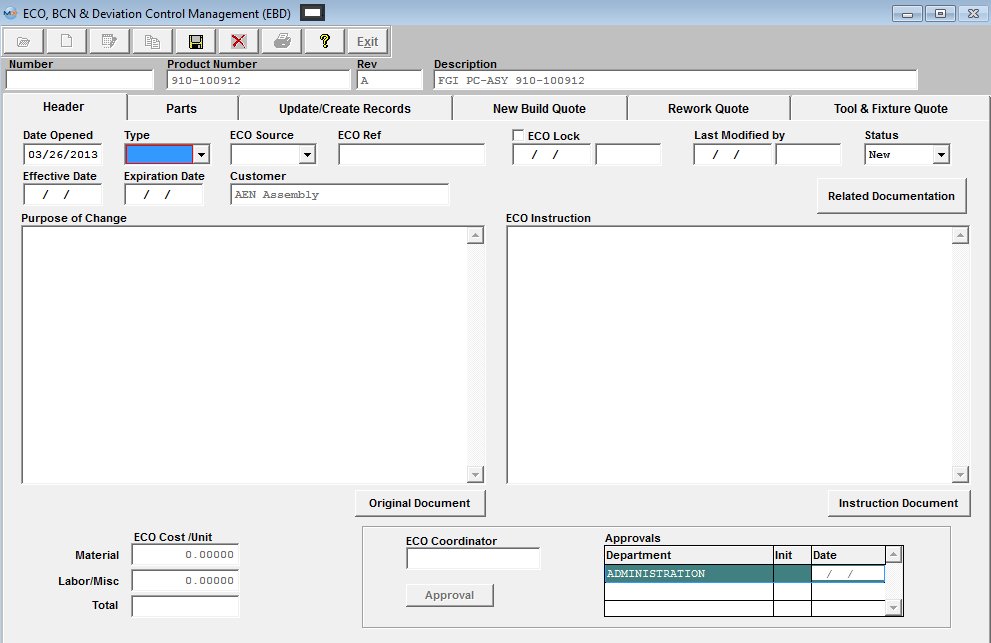
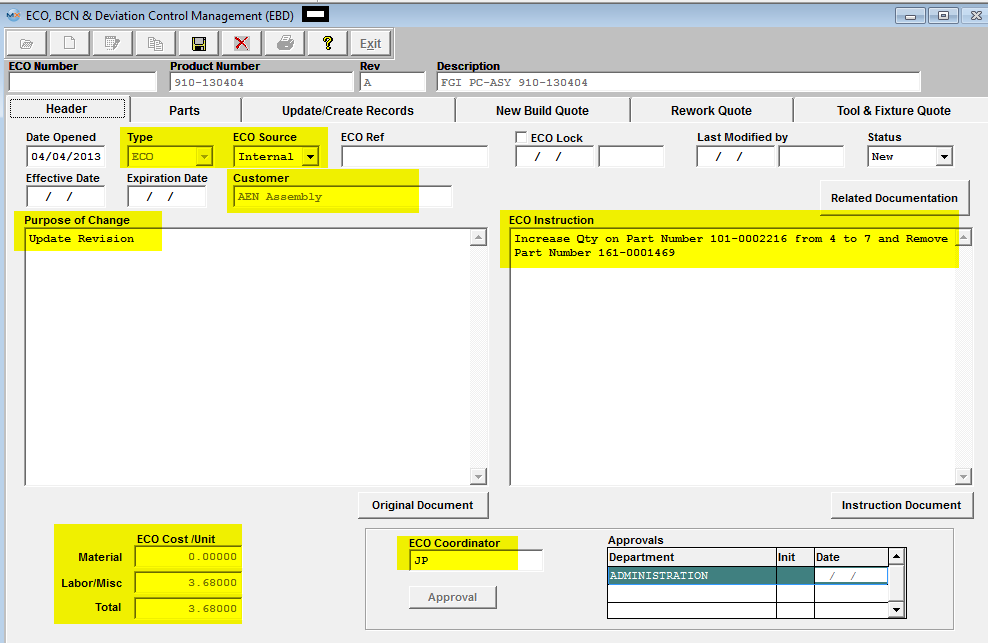
Enter in the ECO Reference, Effective Date. (Note: This date MUST be prior to the WO Due Date to be applied), Expiration Date if applicable (this field is only enabled when creating a Deviation), enter in the purpose of the change and Description of change, and name of the ECO Coordinator.
The screen will appear as follows: 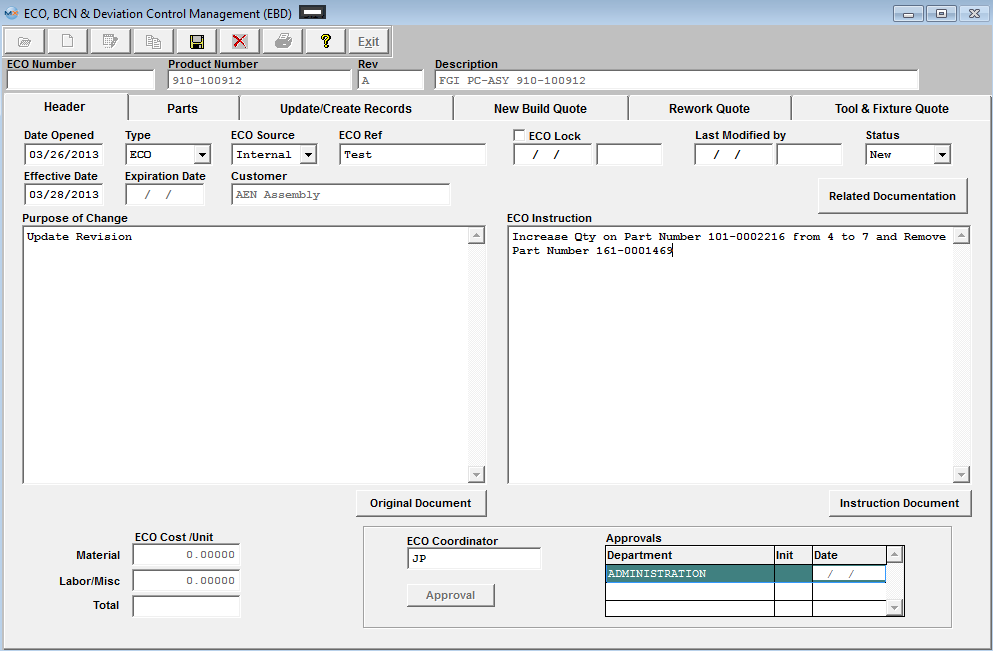 PARTS TAB Enter the Parts screen
To record an ADD to an ECO record Depress the Add Button.
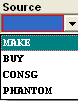
The system will then default to the Status field. Depress the down arrow next to the Status field. The following choices will appear. Select Add from the Status listing. Enter in the new Line No that it will be listed as on the BOM.
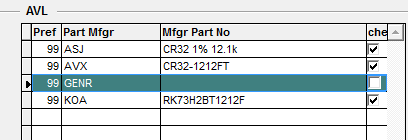
Enter in the Part Number, and the Revision number, Type, Class, Description, and AVL information will update automatically. If the part added has a status of "Inactive" within the Inventory Control Management, it will be highlighted in purple as an indicator to the user that this item is inactive at this time. If the user chooses to leave the inactive part on the ECO, that part number record status will automatically be changed to Active upon the "Update Records" button being depressed, so user will not have inactive parts listed on the BOM. The user will receive a warning that an XLS file has been created for reivew. Enter in the new quantity to be used in the assembly, and Customer Part Number and Rev. if applicable. 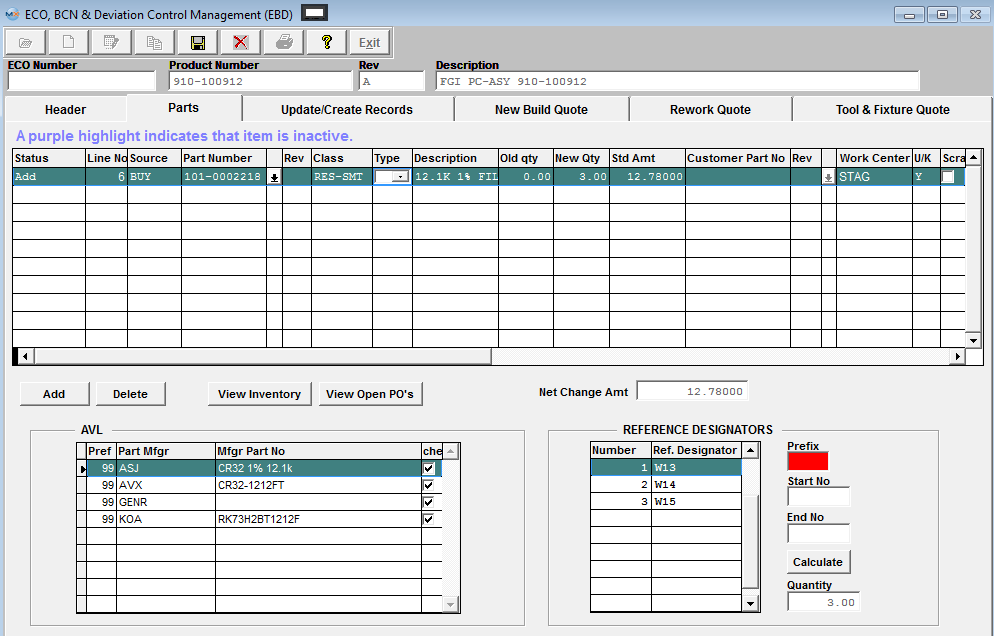
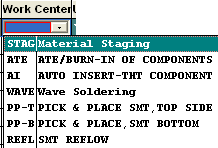
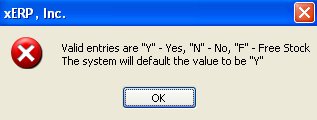
Scroll over to the right and select the Work Center by clicking within the Work Center field. The following selection screen will appear. The system will default into the U/K field, for the component to be included in the kit. You have the option to change this entry to one of the following Yes, No, or Free Stock.
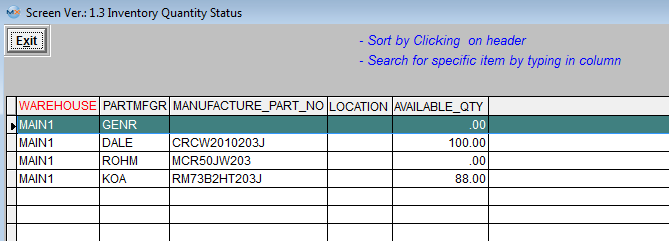
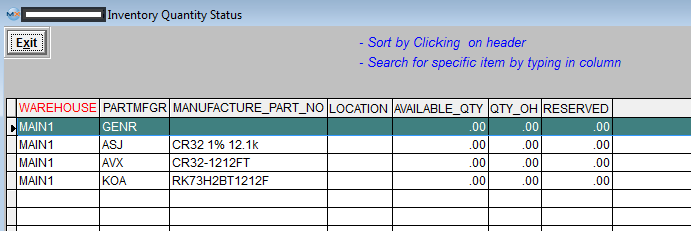
You will then be able to view the Inventory Locations for the highlight part number, by depressing the
To record a DELETE to an ECO Depress the Add Button.
The system will then default to the Status field. Depress the down arrow next to the Status field. The following choices will appear. Select Delete from the Status listing. Enter in the Bill of Material line Item, that you wish to have removed from the BOM. The screen will then update with the information pertaining to that item. Leave the New Quantity as zero. If you do NOT want the part scrapped, scroll to the right and remove the check mark from the Scrap Item field. (Note: This field is for internal reference only, it does NOT affect any other modules). To record a CHANGE to an ECO Depress the Add Button.
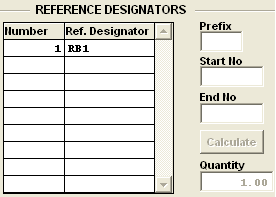
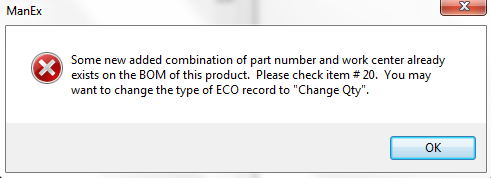
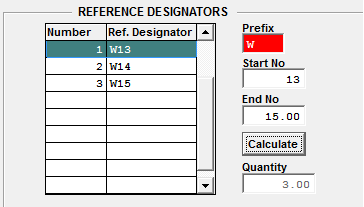
The system will then default to the Status field. Depress the down arrow next to the Status field. The following choices will appear. Select Change Qty from the Status listing. Enter in the Bill of Material line Item, that you wish to have changed on the BOM. The screen will then update with the information pertaining to that item.  Enter in the new quantity. Update the Reference Designator information. In the U/K field, change to if you do not want the change to be used in the kit. If you do NOT want the item scrapped, remove the check mark from the Scrap Item box (Note: This field is for internal reference only, it does NOT affect any other modules).
To change the Work Center where the component is added, depress the down arrow next to the Work Center field. The following selection screen will be displayed: Make your selection. UPDATE/CREATE RECORDS TAB Enter the Update Records screens.(Note: that if the type was selected as Deviation within the Header screen, then the Update Records screen will be grayed out and unavailable for selection) Inventory Changes Section:
Check the applicable box and then Enter in a new product number, revision number, or new description, if desired.
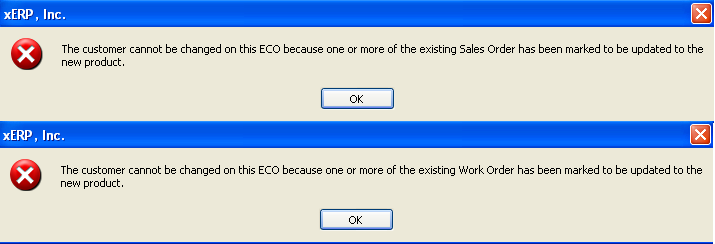
NOTE: For the purpose of many users wanting to create several ECOs for the same product number without really updating the records (meaning creating a new part in inventory) Manex will allow you to save and approve the ECO even if they have not selected to create a new Part or Rev within the system. Upon depressing the Update Records button the system will check to see if New Product No or New Rev has been marked, if left blank then the system will just update the status of the ECO to Complete without creating a new product number in the system.
NOTE: When product is changed through ECO module the Material Type will be carried fwd to the next/new Product/Rev that is being generated at the part level, but will not carry fwd the material type at the AVL level. The system will default in "UNK" as the Material Type for the AVL Level.
To update the Material Cost, then check mark the box next to Matl Cost. The new Value field will update based on the changes made within Parts screen. To update the Labor Cost, then check mark the box next to Labor Cost. The New Value field will update based on the changes made within the New Build Quote screen. To require a serial number, then check mark the box next to Serial # Required. Then go to the box under the New Value column it will remain NO until checked then it will update to YES.
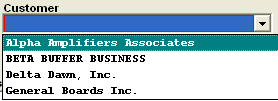
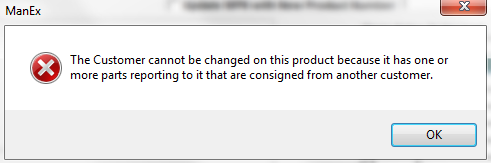
In the ECO process of modifying or adding Parts to the ECO, there is a field which contains the Customer Part number, if available. At the present time, this field is empty and non-editable for changing or deleting a part from the BOM. But if the user wishes to add a part, they may do so by entering in either the internal part number or the customer part number in the customer part number field, and the program will locate the corresponding internal part number and enter it. The search is based on the customer part number entered AND the customer associated with the BOM from which the ECO was originated. Because Manex allows users the ability to use the ECO module to create New Part Numbers via the ECO process, and even assign a new customer to the new part number, we must limit the customer information to that of the original customer, as we cannot determine at what point the reference should change customers, or even if it should. Furthermore, if the user does elect to create a new part number for a new customer, items unchecked on the AVL will transfer to the new bom (if checked on the update sheet). However, there may be a conflict between the AVL of the original customer and the AVL of the new customer, so the user is urged to verify the AVL content of a new bom for a new customer created with this module. COPY SECTIONS:
OPEN SALES ORDER LIST:
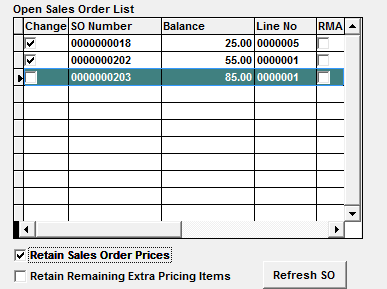
The Open Sales Order List will include all open Sales Orders including the ones that are flagged as "Admin Hold" and//or "Mfgr Hold", and any open RMAs against this product. Note: If there have been NO items shipped against the sales order selected then the system will just replace the existing product with the new product and/or revision within the Sales Order. If there have been shipments made against the item the old line item will have the Ord Qty updated to equal the total Shipped and the status changed to Closed. A new line item will have been created for the new Product/Rev for the remaining balance that was left on the original item. If you do NOT want the price changes to affect the sales order prices check the "Retain Sales Order Prices" box. If you would like to retain any extra charges against the line item check the "Retain Remaining Extra Pricing Items" box. Refresh SO button has been provided so the user can refresh the Sales Order list to check for any new SO created in the system since the ECO was first created. The completed screen will appear as follows:
 NEW BUILD QUOTE TAB Enter the New Build Quote screen. To add a new Labor Cost associated with the new revision, depress Add the button. Type in the Labor Cost Description. Type in the new revision cost per unit. Continue to Add as required. The completed screen will appears as follows: 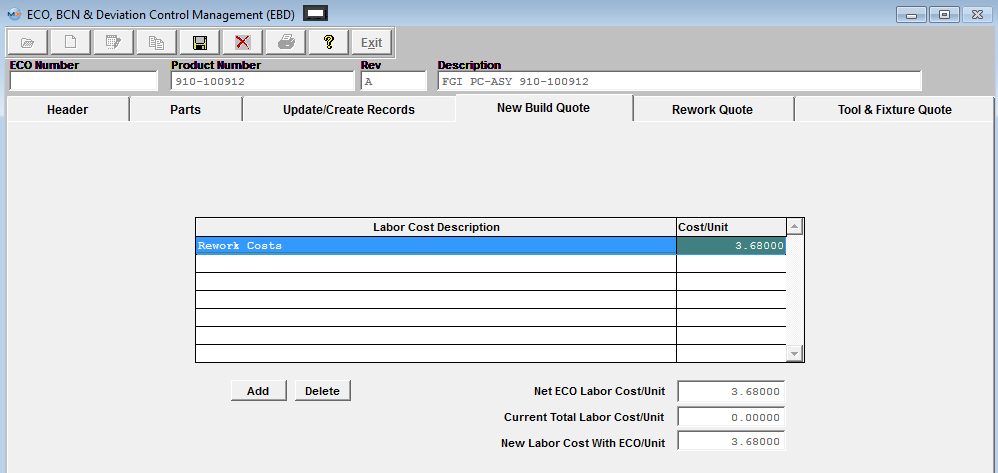 REWORK QUOTE TAB Enter the Rework Quote screen. In the Open WO List (As of ECO Open Date), check mark within the Change box column if you want the WO to be changed/reworked. The WO's checked will only be changed/reworked when creating an ECO. They will not be changed/reworked when creating a deviation. (This field is for reference only when creating a deviation).
You will receive the following message, as you check each box:
 Depress the OK button to continue. If Work Order is shaded in WHITE - that means that this Work Order has no qty in FGI so the system will automatically update the Work Order to the New Revision. If a kit is in process for the Work Order selected user MUST depress the "Update Kit" button within the kitting module after the ECO is approved for any part changes to be reflected. NOTE: When the ECO takes place and the WO record is updated SFT losses the transfer history for the old revision and starts over with only xfer history for the new revision from that point on. See Article #3401 for further detail. If Work Order is shaded in BLUE - this means that this Work Order is partially completed and will be split into two Work Orders: The system will change the original Work Order (original product number and revision) build qty to match the qty completed and close this Work Order. The KIT for that work order will retain only enough material to build the completed quantities. The system will then create a new work order for new product number/revision for the balance quantity. All the extra material issued to the original work order will be de-kitted from original Work Order and issued to the new Work Order. If Work Order is shaded in PINK - These Work Orders are partially completed and some of the issued components are either serialized or lot code traceability activated. These specific components have to be de-kitted manually prior to proceeding. Or the original Work Order, has to be closed (balance reduced to completed quantities) and extra material de-kitted manually. Then, the new Work Order has to be created for the balance quantities. If needed, you have the option to refresh the Work Order listing to see if any new Work Orders have been created for this product since this ECO was originally opened, by depressing the "Refresh WO" button. To add costs solely associated with the rework of open Work Orders and/or Finished Goods Inventory, depress the Add button under the Rework Cost Description window. Type in the Rework Cost Description and the related cost per unit. The Inventory Locations (As of ECO Open Date), will default in and is for reference only. The Totals (As of ECO Open Date) will default in displaying the quantity in WIP and the quantity in FGI. The Units to Rework and the Cost to Rework will update automatically. If any new Work Order's were created they will be displayed in the "New Work Order" field for reference:
TOOL & FIXTURE QUOTE TAB To add new Tool/Fixture Information, depress the Add button below the section.
Add the Tool/Fixture information from the pull down.
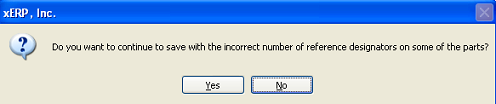
Fill in the cost amount, Charge Amount, Effective Date, and Termination Date. Once the ECO record has been approved and updated within the system, this Tool/Fixture information will be carried forward into the PDM and Routing Setup modules. The completed screen will appears as follows: 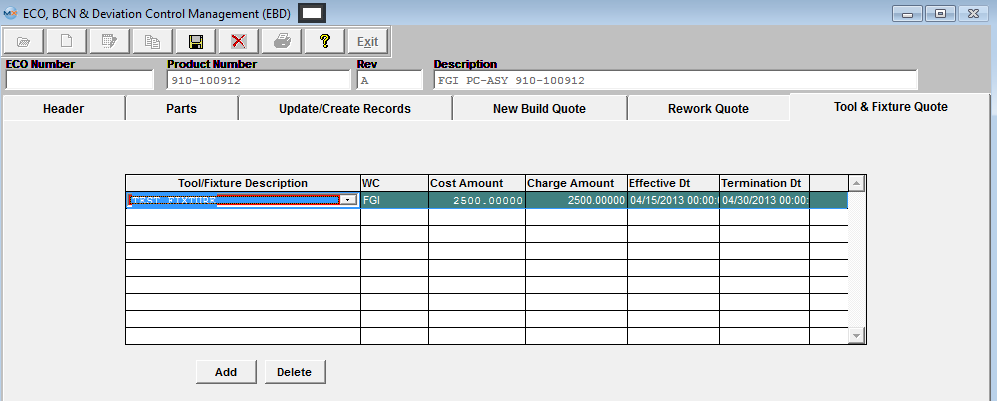 Depress the Header tab. Note that the ECO Cost/Unit columns have updated at the bottom left hand side of the screen: Upon Saving the user may be given a message if one or more of the parts do not have the same number of reference designators as the new quantity within the ECO, or BCN. This is giving the users the option to print out a report to list these item or not.  If Yes is selected the report, ECO Report Incorrect number of reference designators will go directly to the default printer and the next message will be displayed.
The user now has the option to cancel out of the save or continue. The user should go back to the reference designators section for the part listed in the report and change the number of designators to equal the quantity required.
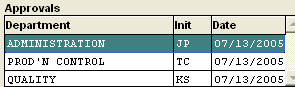
The Approval button will be available. Depress the Approval button. You will be prompted for the appropriate department password. Continue this process until all of the departmental approvals have been entered, as displayed: Once all of the Approvals have been fulfilled then within the Update Records tab the “Update All Records" button will become available. Depress the Update All Records button. The records you selected will update. The ECO or BCN will now show with the following Updated time stamp.
Note: For a new revision, P/N, etc., go into the Inventory Master and if desired, update for the Warehouse location in the Quantity Information tab (the system will copy the warehouse information from original Product selected). Also, update for Mfgr Part Spec.
Overview: The difference between the ECO and the Deviation is: A Deviation is a method to document and approve a temporary change from the normal operation until an ECO is created to replace the Deviation, it is only a record that someone approved a change in some method for a work order(s). That is the reason the Deviation has an Expiration Date field in the main page and it will not update any active modules, part number change, rev change, description change or anything else. Whereas, ECO is a permanent change and change the part number, or rev or description, or standard cost, or anything thing else including updating any or all active files. The basic procedure of processing a Deviation follow basically the same rules as a Regular ECO except for the Update Records button is disabled.
Enter the ECO module. Depress the Add Record action button Select the desired product number. Then for the Type Select Deviation Once Deviation has been selected as the Type, continue on and enter in the remaining Deviation information as explained in the Adding ECO section above. Note: For a Deviation you MUST make sure you complete the expiration date so users know that it is for a limited period of time. If this field is left blank the deviation will NOT be displayed in the SFT module. 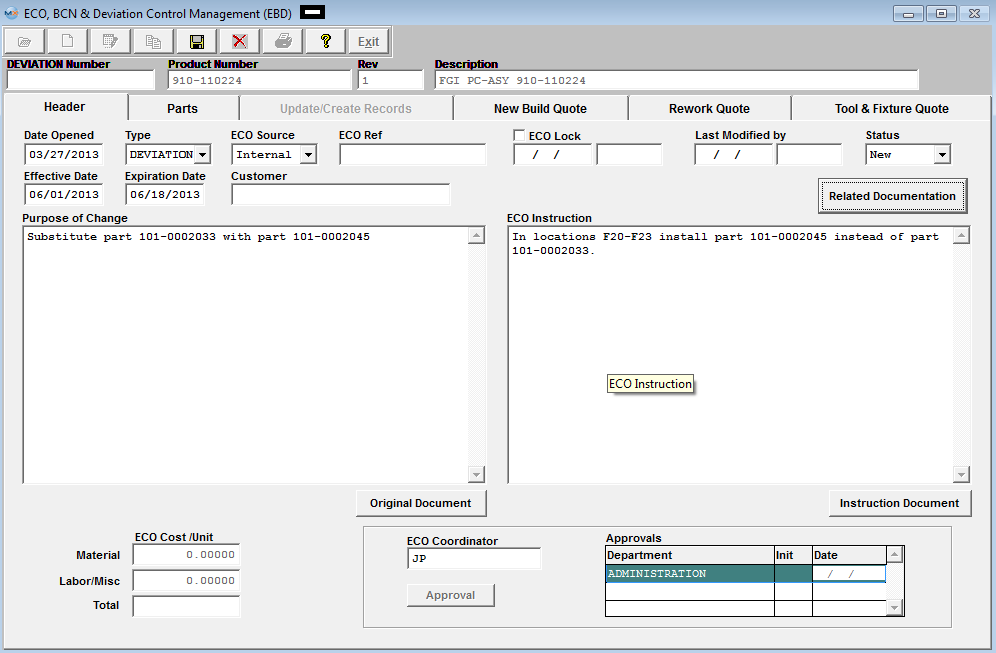 Note: The Update Create Records tab will remain grayed out and unavailable for any Deviation records entered within the system. Once the Deviation has been completed the normal list of Approvals need to be entered. The status of the Deviation record will update to Approved.
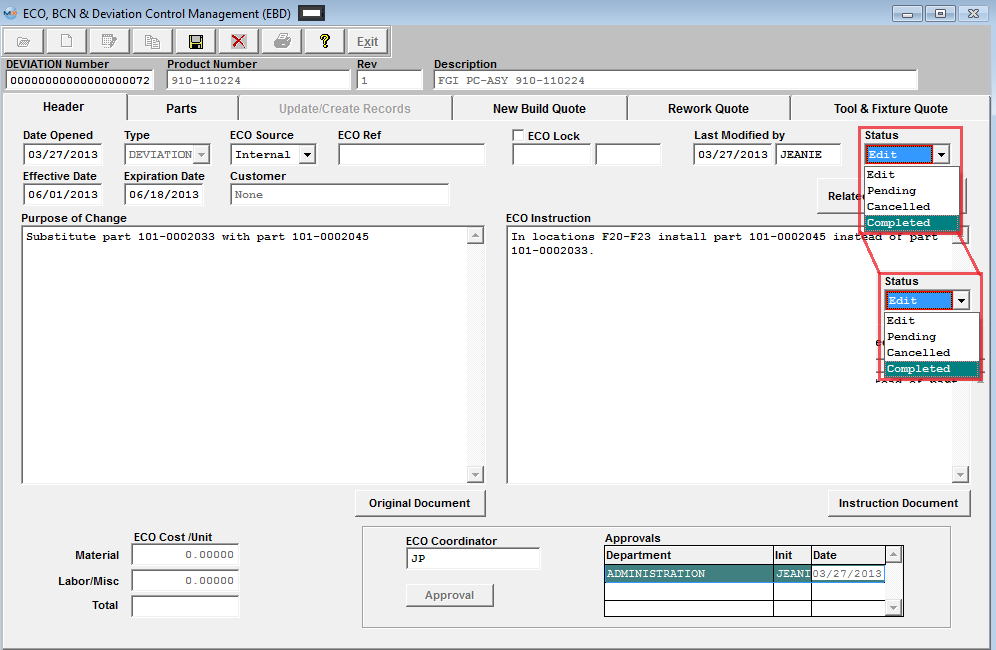
Changing the status of a Deviation from Approved to Completed. The Status of a Deviation will remain as Approved in the system until the users manually changes the status to Completed. Once the status of a deviation has been changed from Approved to Completed it will no longer appear in the SFT (Shop Floor Tracking) module.
Depress the Edit record action button. Click on the down arrow next to the Status field, the following selections will be available for Deviations.
Change the status to Completed. Depress the Save record action button to save the changes the changes, or depress the Abandon changes action button.
The Deviation will now show in the Status listing of Completed Records.
 |


 cell
cell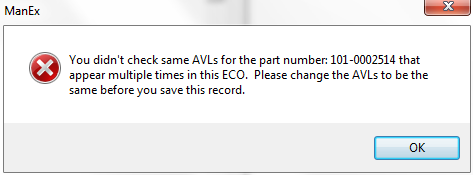


| 1.4.4. Copying An Engineering Change Order |
Enter the ECO module. Find an existing ECO record within the system. 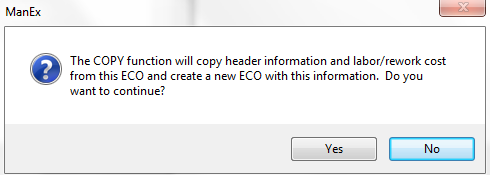 Select Yes, enter your password. Then the next message will be displayed:
 The following selection will appear:
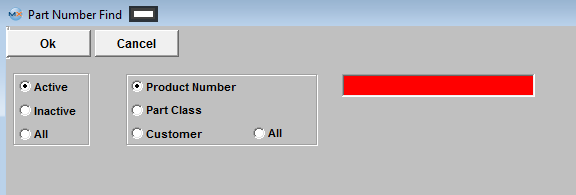 Once you have selected the desired product number the following will be displayed:
 The following information will be copied fwd from the original ECO to the new ECO record.
Header Information
 Update/Create Records Information
 New Build Quote Information
 Rework Quote Information
|
| 1.5. Reports - EBD | ||
|
To
obtain the ECO Reports within the Web, select the WEB Print button from the ManEx action
buttons at the top of the screen. For further detail on How the Reports work
within the Web refer to Article #5477. Note: In order to access the Reports within the Web the Company Root URL must be setup within the System Appearance module and user must be linked to web within the System Security Module.
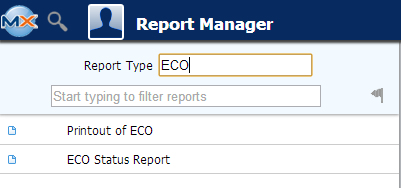
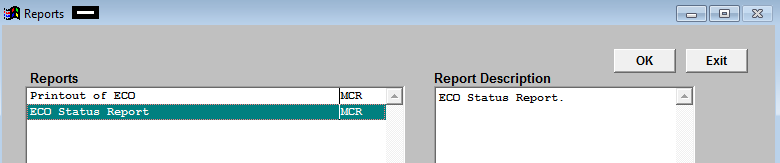
Select the Report Type: ECO - A List of Reports will be displayed that are available on the Web for ECO
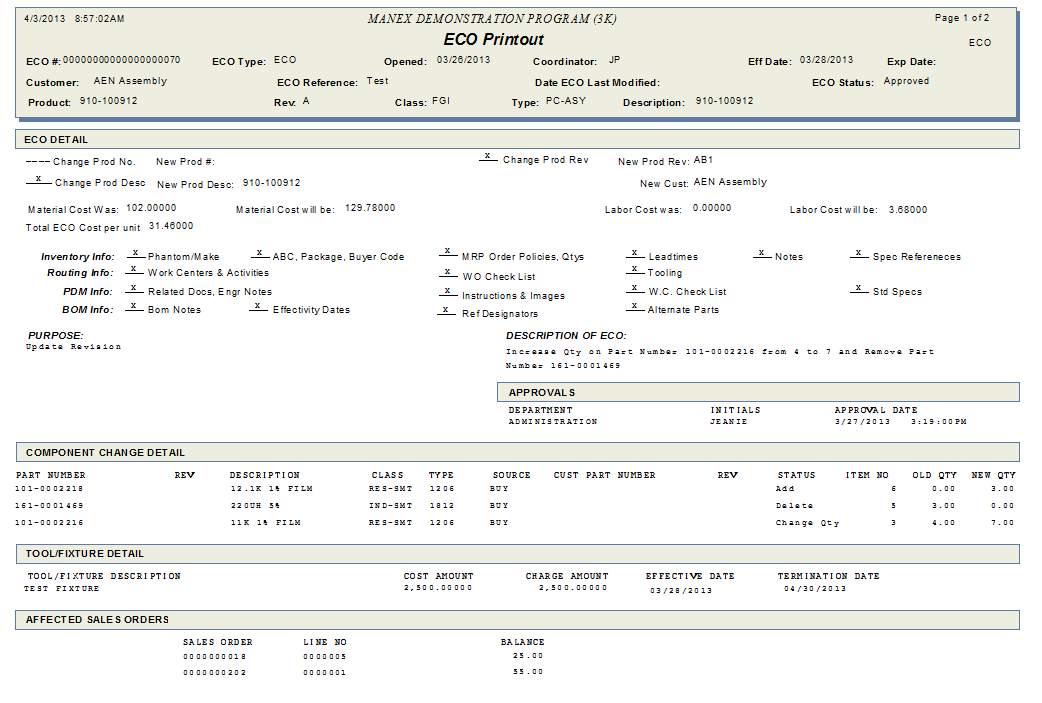
PRINT OUT OF ECO REPORT Select the Printout of ECO report and then depress the OK button and the following screen will be displayed: 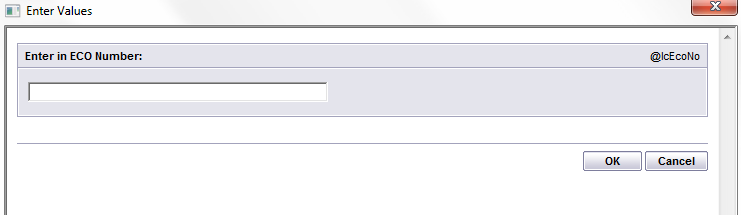 The ECO record that is open within the ECO module will default in – but the user does have the option to enter in a different ECO # record if desired. The ECO Printout Report will appear as follows:
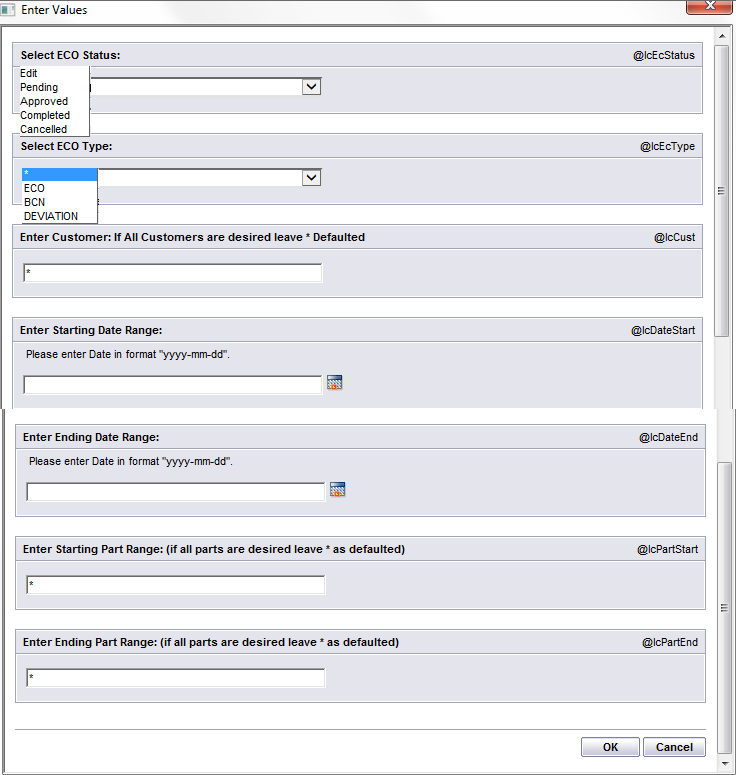
ECO STATUS REPORT If you highlight the ECO Status Report and then depress the OK button and the following screen will be displayed:
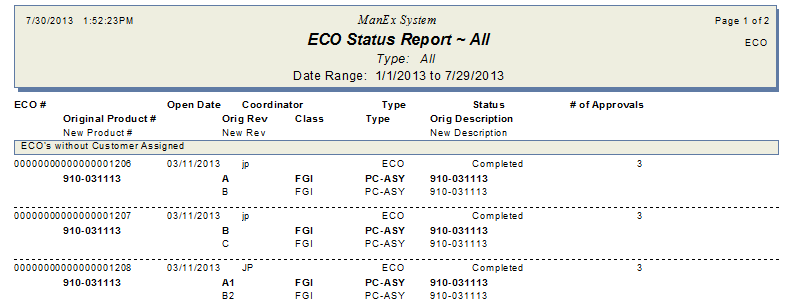
Select the ECO Status and ECO Type by pressing on the down arrow next to the window. Highlight the desired status. Enter the Customer: (If All Customer are desired leave * as default) NOTE: You MUST enter a Customer or have the default (*) for this report to work. If the ECO record does NOT have a Customer selected, then it will NOT appear on this report. Enter Starting Date Range and Ending Date Range in "yyyy-mm-dd" format Enter Starting Part Range and Ending Part Range: (If all parts are desired leave * as default) Depress the OK button. The following ECO Status Report will appear as follows:
|
| 1.6. FAQs- EBD |
| Facts and Questions for the ECO, BCN & Deviation Control Mgmt (EBD) Module |