| 1. Journal Entries |
| 1.1. Journal Entries Introduction |
| Journal Entries are used to adjust Account Balances and to enter Transactions that do not flow from the standard accounts receivable, accounts payable or inventory activity portions of the program.
The ‘Journal Entries’ menu selection brings up a subsidiary menu displaying the 4 journal entry types and activities supported by the ManEx system: General Journal Entries , Standard Journal Entries , Recurring Entry Setup and Automatic Distribution Setup .
Journal Entries are entries made to Adjust Account Balances on a one time or recurring basis. Journal Entry is a straight forward process in which the affected Accounts are selected and debited or credited according to the nature of the transaction desired.
|
| 1.2. General Journal Entries |
| 1.2.1. Prerequisites for the General Journal Entry |
Users MUST have full rights to the "All Journal Activities" in Accounting Security . Users with “Accounting Security Supervisor” rights will automatically have access. |
| 1.2.2. Introduction for the General Journal Entry |
General Journal Entries are to be used to setup opening balances for General Ledger or to account for Payroll entry. Opening balances for New Bank Accounts MUST be setup in the Bank Setup module. |
| 1.2.3. Fields & Definitions for the General Journal Entry | ||||||||||||||||||||||||||||||
General Journal Entries field definitions
The Journal Number is generated by the system for reference purposes and is reflected in a number of reports including the "Posted Transaction Reports" and the "Detail General Ledger (cross-tabbed) Report". |
| 1.2.4. How To ..... for General Journal Entries |
| 1.2.4.1. Find a Journal Entry | ||||||
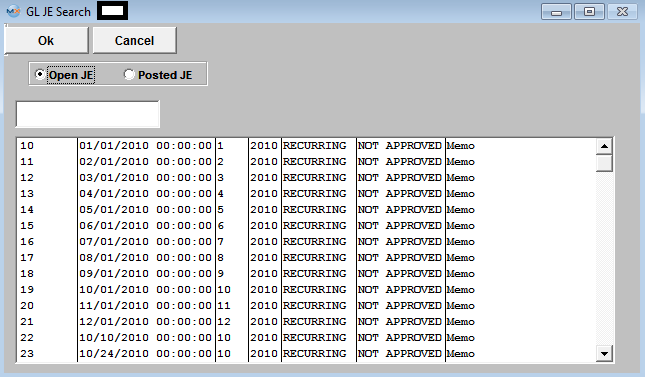
Enter the SQLMANEX.EXE (within the ManEx root directory) The following screen will be displayed:
When first entering the General Journal Entry area the ‘Find’, ‘Add’, ‘Generate RE/FY Closing’ and ‘Exit’ icons will be available for selection.
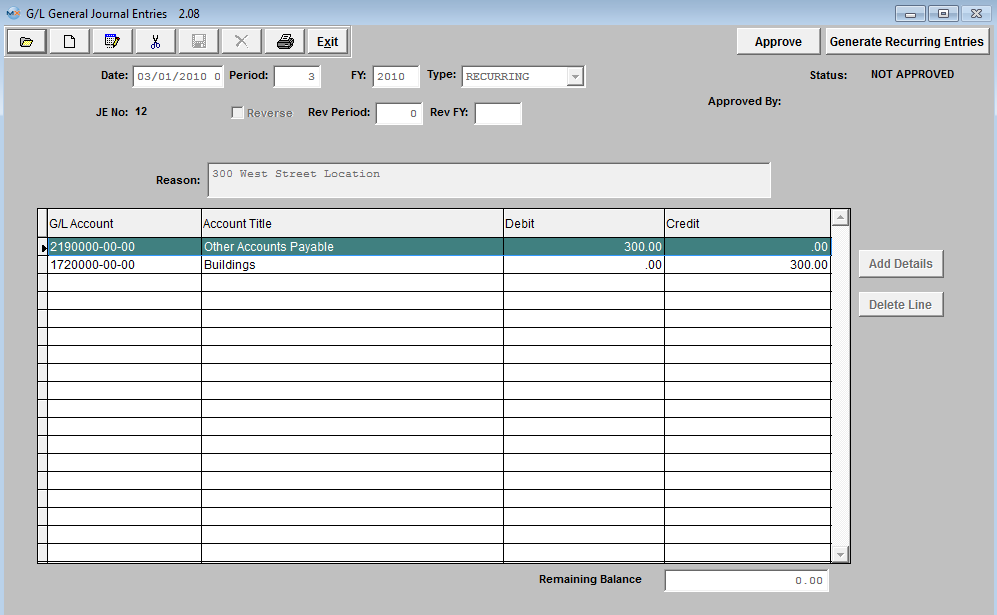
Selecting the desired entry will populate the screen as follows:
|

| 1.2.4.2. Add a Journal Entry | ||||||||
|
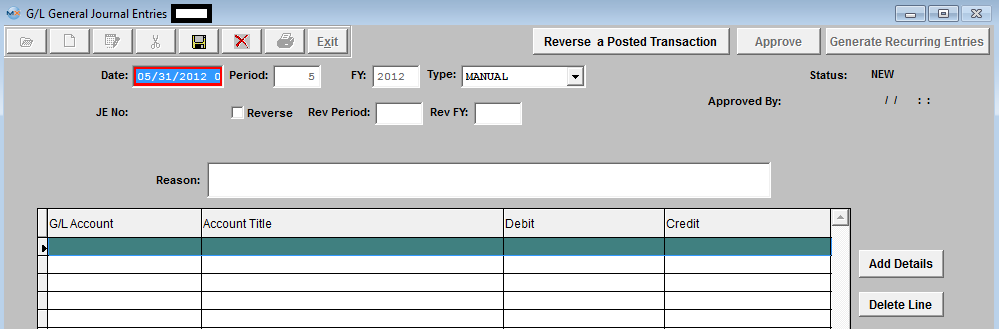
The following Screen will be displayed:
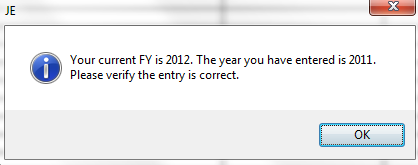
Depress the Add record action button. The first field (DATE) will default to the last day of the previous fiscal month, but can be changed to any date desired. The date as entered will be the Transaction Date of record so care must be taken to enter a date that lies within the Period you wish to affect with this Entry.
The ability to post a transaction outside of the current period is affected by the General Ledger Post Default setup, whether postings are allowed in previous periods and fiscal years and future periods.
The TYPE field is a pop up but will default properly to MANUAL when in Add mode. Other types such as STANDARD may be selected within display, if appropriate. STATUS will display ‘NEW’ when adding and will display the appropriate status when displaying a previously added but NOT APPROVED entry and well as an entry that has been POSTED. REVERSE refers to whether this is should be a Reversing Entry. A Reversing Entry is one that cancels itself out upon the Closing of the Period in which it is posted. The Reverse field will default as Unchecked and may be changed if the Transaction is of an appropriate type. REASON is a required field and some text must be entered to allow a successful save of a Journal Entry. Use the TAB key to exit the Reason Field.
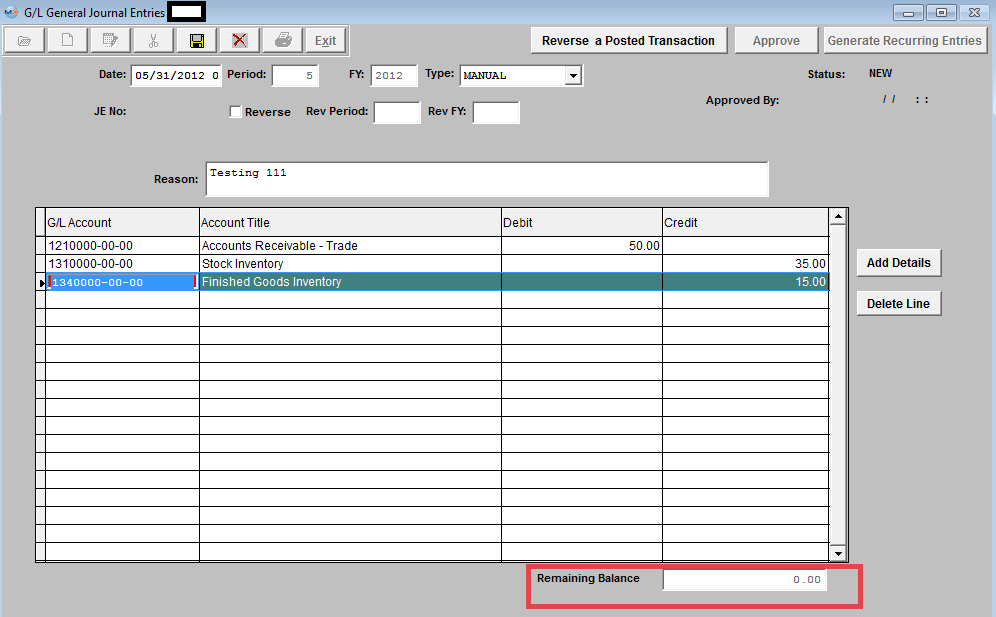
The actual data entry occurs in the middle section. Once you tab out of the Reason Field the system will default to the first GL Account Number to be entered. The user must enter a G/L Account directly by typing in the account number. The system will default to the nearest G/L Account match as you type. Then once you hit the Enter/Tab key the system will default in the Account Title Information. Then enter the Debit or Credit Amount.
Depress the "Add Details" button to add another G/L Account.
Enter the Debits and Credits until the Remaining Balance at the bottom of the screen equals 0.00.
 The Abandon changes action button is available at all times during an add operation. The Save record action button will also show as available but will not allow you to save the record until the entire General Journal Entry is in balance (debits = credits). Once the Entry is in Balance, the system will allow you to save the Journal Entry. A General Journal Number will then be assigned to the Transaction. 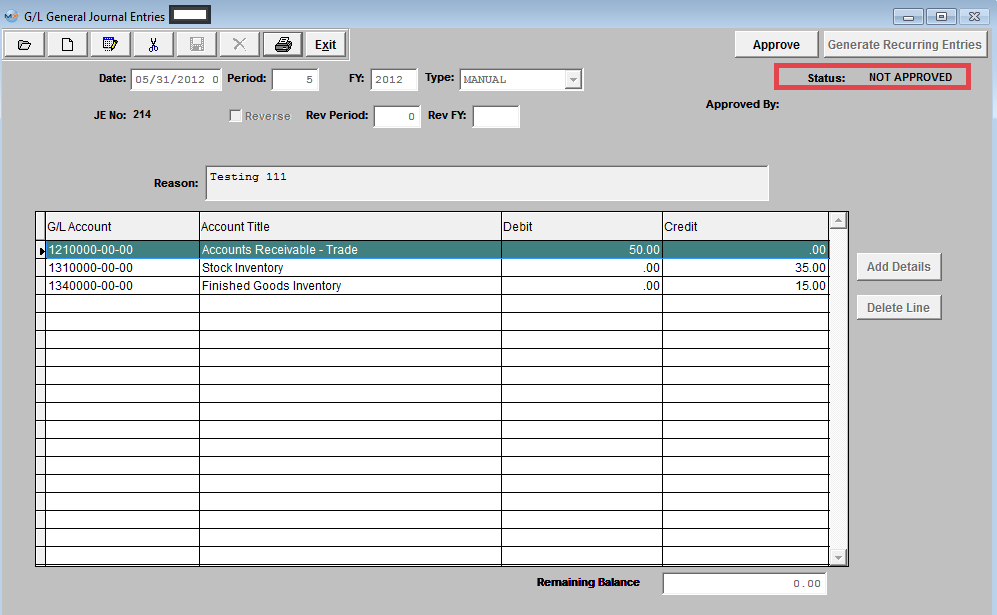 Journal Entry must be approved before it may be posted. After checking for accuracy, approve a Journal Entry by selecting the ‘Approve’ button and enter an authorized administrative password.
The JE Status will then be changed to Approved. 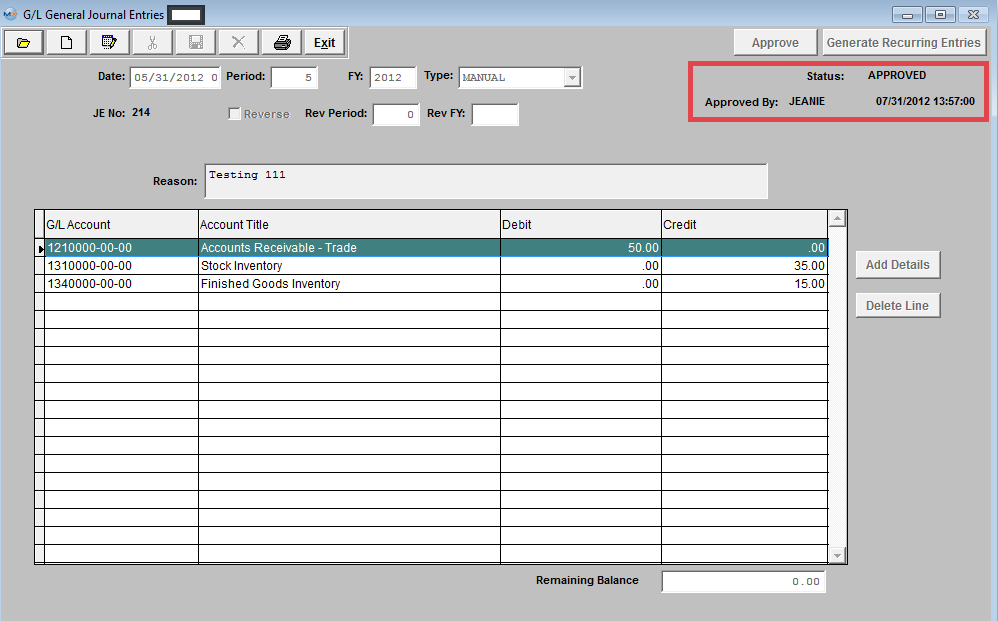 | ||||||||
| 1.2.4.3. Edit a Journal Entry |
|
Find a Journal Entry you want to Edit. NOTE: The user may edit a ‘NOT APPROVED’ Journal Entry. Once an entry has been ‘APPROVED’ however, another Journal Entry must be entered to clear or reverse it.
The JE will populate the screen: All fields are editable. When changes have been completed, depress the Save record action button to save changes or depress the Abandon changes action button to abondaon changes. In order to save the transaction, both DEBITS and CREDITS must equal. The user may generate two types of entries with the ‘Generate RE/FY Closing’ (Generate Recurring entries/ Fiscal Year Closing) button selection.
The first type, Recurring Entries, must be defined under the Recurring Entry Setup module prior to being available as a recurring type. The second type of entry is a special kind of Fiscal Year End Closing Entry, which may be generated after all adjustments have been made for a period but before the actual Period Close Closing Entries zero out the income and expense items for the period and transfer the balance to the Balance Sheet's Retained Earnings. It is important that an entry be created to Close the Income and Expense to the Balance Sheet at the end of each Fiscal Year Period Close. Without such an entry the Balance Sheet will be out of balance by the amount of profit (or loss) incurred, because such an entry was last posted to the Equity Accounts. Such a transfer and closing should not affect reprint of Income Statements for Prior Periods but a Posting to a Prior Period will affect the Balance Sheet / Income Statement for the affected period. A General Journal Entry must be generated to close those Prior Period income and expense items to Retained Earnings if the company chose to allow posting to prior periods. Journal Entry must be approved before it may be posted. After checking for accuracy, approve a Journal Entry by selecting the ‘Approve’ button and enter an authorized administrative password.
|
| 1.2.4.4. Reverse a Journal Entry | ||||
|
The following Screen will be displayed:
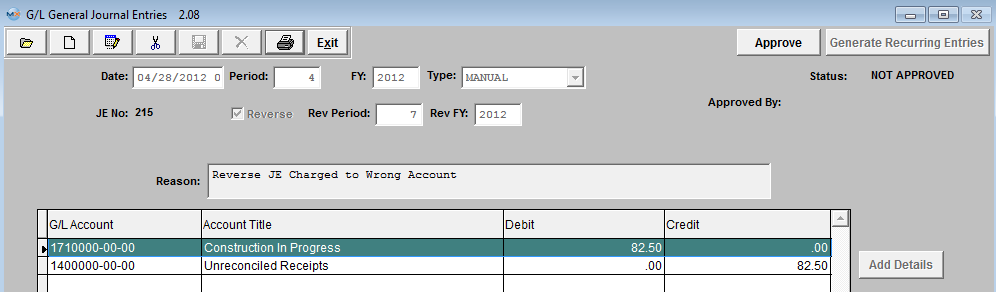
Depress the Add button and Create a JE Transaction in Period (4), but user would like this JE reversed in a future period. So, they will need to check the "Reverse" box and have it set to reverse in period (7) of 2012. A Reversing Entry is one that cancels itself out upon the Closing of the Period in which it is posted.
 Approve the Entry and it will forward to the GL Release and Posting Screen.
 The JE #20 was properly released and posted in Period (4) of 2012.
 Current Accounting Period 7 of 2012
 Upon entering the JE Find screen you can see that the system automatically created the reversing JE waiting for approval.
 Approve the Entry and it will forward to the GL Release and Posting Screen.
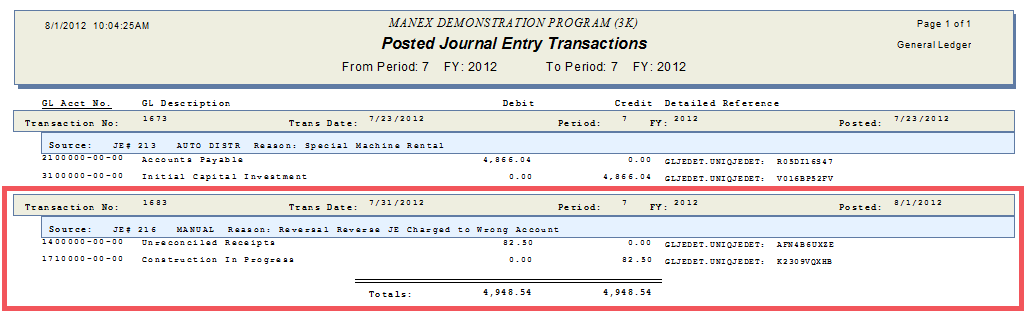
Print out the Posted Journal Entry Report, as displayed:
 |
| 1.2.4.5. Reverse a Posted Transaction | ||||
|
The following Screen will be displayed: Depress the Add record action button, enter your password and the "Reverse a Posted Transaction" button becomes available: 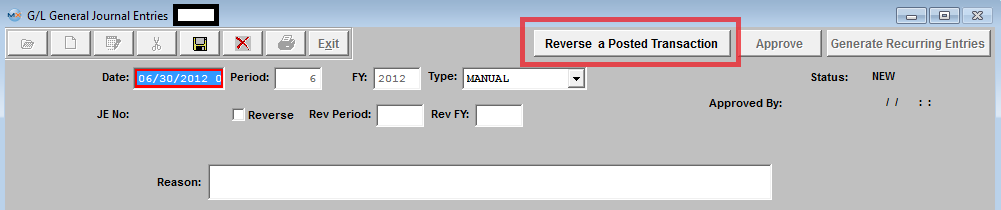 Depress the "Reverse a Posted Transaction" button and the following warning will appear:
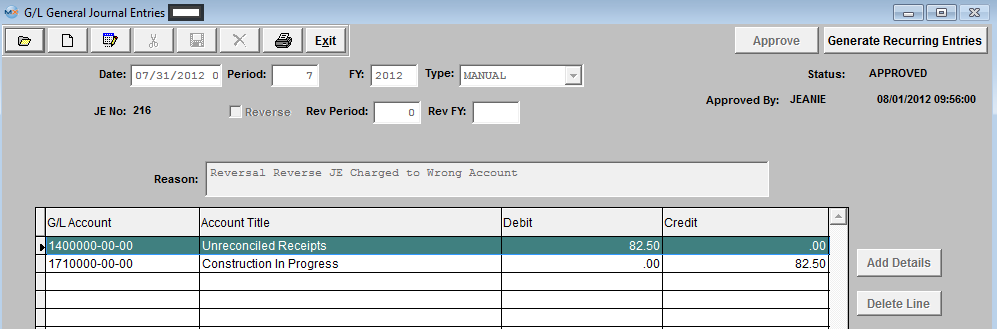
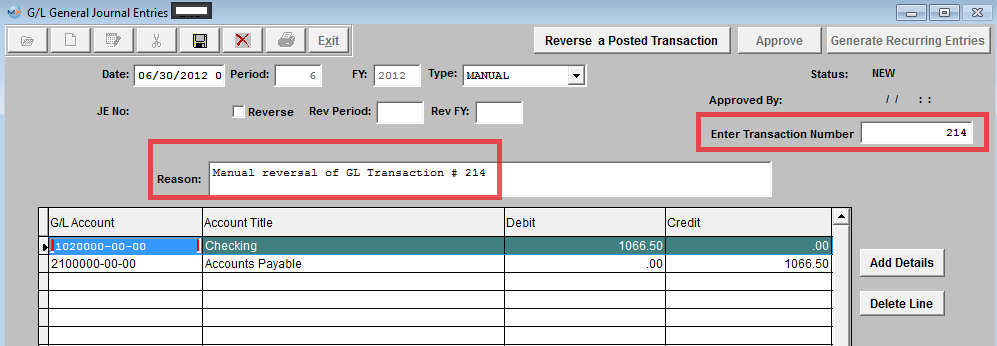
Depress OK. Enter the number of the transaction you want to reverse into the field shown below and the info will poplulate the screen, the Reason will default in as a "Manual reversal of GL Transaction ___": Note: User can reverse any posted Transaction from any Prior Period or FY. The Same Transaction can be reversed more than once also.
 Once the Entry is Approved, it will forward to the GL Posting Screen. 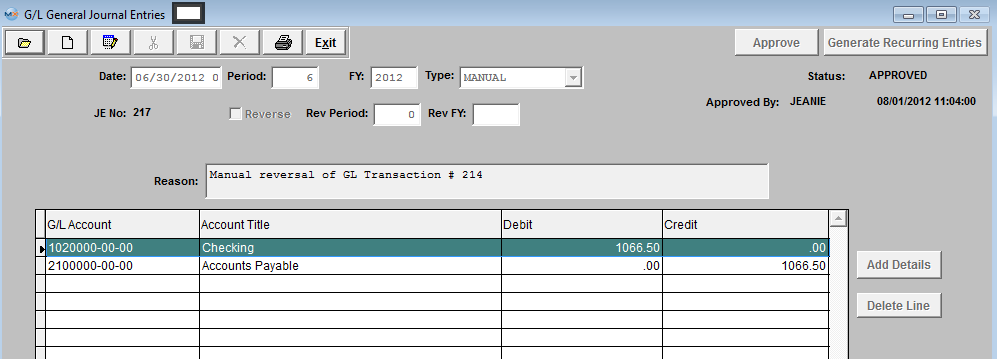 Release and Post within the GL Release and Post screen. Print out the Posted Journal Entry Report, as displayed: The reason displayed will display as a Manual reversal and reference the Transaction number reversed.  |
| 1.2.4.6. Generate RE/FY Closing |
| 1.2.4.6.1. Introduction for Generate RE/FY Closing |
The user may generate two types of entries with the ‘Generate RE/FY Closing’ (Generate Recurring entries/ Fiscal Year Closing) button selection. The first type, Recurring Entries, must be defined under the Recurring Entry Setup module prior to being available as a recurring type. The second type of entry is a special kind of FISCAL YEAR END CLOSING ENTRY, which may be generated after all adjustments have been made for a period but before the actual Period Close Closing Entries zero out the income and expense items for the period and transfer the balance to the Balance Sheet's Retained Earnings. It is important that an entry be created to Close the Income and Expense to the Balance Sheet at the end of each Fiscal Year Period Close. Without such an entry the Balance Sheet will be out of balance by the amount of profit (or loss) incurred, because such an entry was last posted to the Equity Accounts. Such a transfer and closing should not affect reprint of Income Statements for Prior Periods but a Posting to a Prior Period will affect the Balance Sheet / Income Statement for the affected period. A General Journal Entry must be generated to close those Prior Period income and expense items to Retained Earnings if the company chose to allow posting to prior periods. User may Generate the RE/FY Closing in the G/L General Journal Entry module, or in the End of FY Closing module. |
| 1.2.4.6.2. Generate Recurring Entries | ||||
The following screen will be displayed:
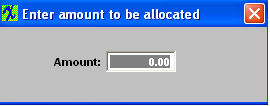
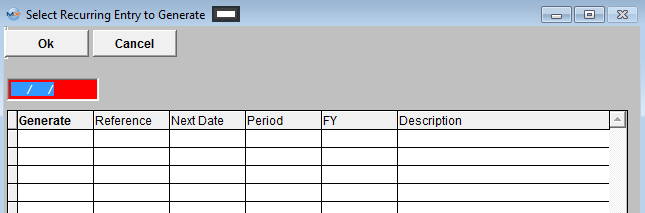
Depress the "Generate Recurring Entries" button and the following screen appears:
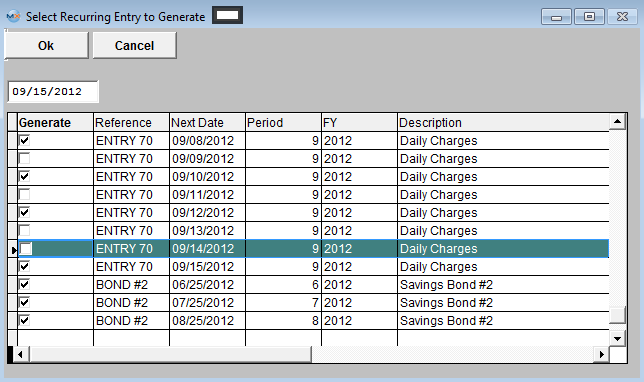
Enter in an Ending Date and all Recurring Entries due on or before this date will be listed:
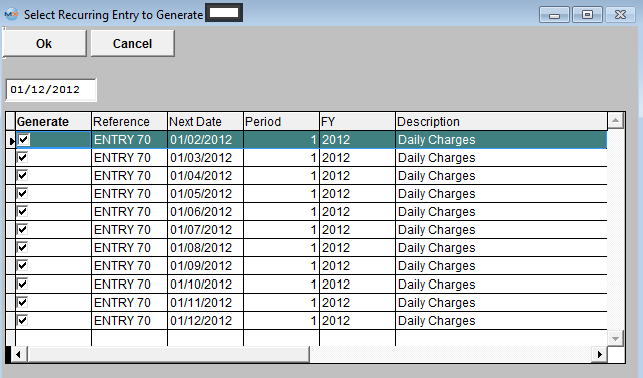 Depress OK and the following message will appear:
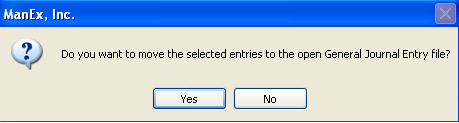 If user selects "Yes" to continue the following message will be displayed:
 The last generated entry will be displayed on the General Journal Entry screen fro approval
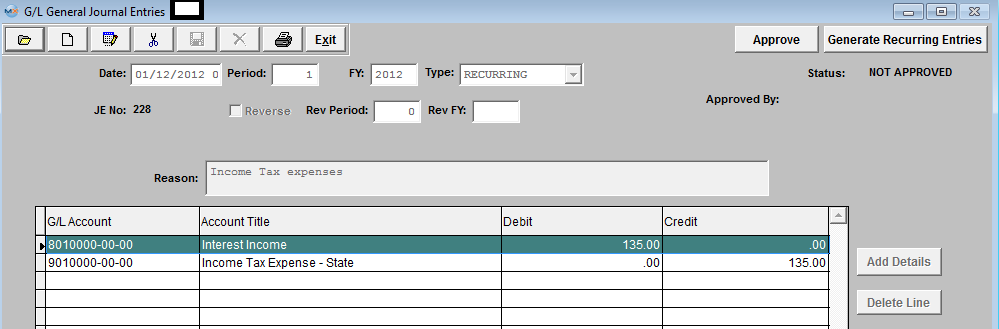 The rest of the Recurring Entries that were generated will be listed in the Open JE screen with a status of NOT APPROVED
 |
| 1.3. Standard Journal Entry Setup |
| 1.3.1. Prerequisites for the Standard Journal Entry |
Users MUST have full rights to the "All Journal Activities" in Accounting Security . Users with “Accounting Security Supervisor” rights will automatically have access. |
| 1.3.2. Introduction for a Standard Journal Entry |
Standard Journal Entries allow the user to set up a “canned” entry that may be used to avoid repetitive entry and save time. A Standard Journal Entry is generated once a month on either a fixed amount or a percentage from one expense account to another and will be generated until they are deleted. A good example would be rent. Say the rent was $10,000 per month and you want to distribute a fixed amount to various departments each month. You would make a Standard Journal entry crediting the general rent account for $10,000 and debit Manufacturing $5000, Admin $2500, and Sales $2500, or you could make it a percentage distributions with 50% going to Mfg, 25% to Admin, and 25% to Sales.
|
| 1.3.3. Fields & Definitions for the Standard Journal Entry | ||||||||||||||||||||
Standard Journal Entries field definitions
|
| 1.3.4. How To ...... |
| 1.3.4.1. Find a Standard Journal Entry | ||||
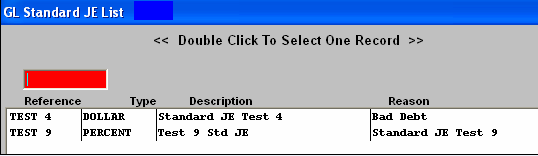
The following screen will be displayed: Depress the Find button, The following listing will be displayed:
 Select the Standard Journal Entry you are seeking, by either highlighting and double clicking on the Standard Journal Entry, or entering the JE Reference number in the Red Box. The following will be displayed on the screen:
 |

| 1.3.4.2. Add a Standard Journal Entry Setup | ||||
Enter a REFERENCE. This is a required field and represents a unique key to differentiate this entry from another that the user must enter. Some mnemonic is helpful to ease location of the record when reviewing entries with the ‘Find’ selection.
Enter the DESCRIPTION. This field allows the user more room to be descriptive about this Journal Entry then is available within the Reference field.
Choose the TYPE. This is a required field and may be either a dollar amount or a percentage. Fixed Dollar Entries may be modified when generated in the General Journal Entry screen, or distributed by Percentage (to distribute overhead to departments for instance).
Enter a REASON. This field must be entered and will be copied along with the specific detail of the Standard Journal Entry. The actual data entry occurs in the middle section. Once you tab out of the Reason Field the system will default to the first GL Account Number to be entered. The user must enter a G/L Account directly by typing in the account number. The system will default to the nearest G/L Account match as you type. Then once you hit the Enter/Tab key the system will default in the Account Title Information. Then enter the Debit or Credit Amount. Depress the "Add Details" button to add another G/L Account. 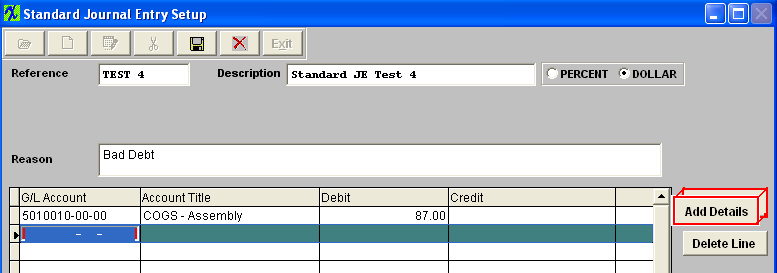 Enter the Debits and Credits until the Remaining Balance at the bottom of the screen equals 0.00. When entering a Percentage Distribution, the percentage must total 100 on each side of the transaction.
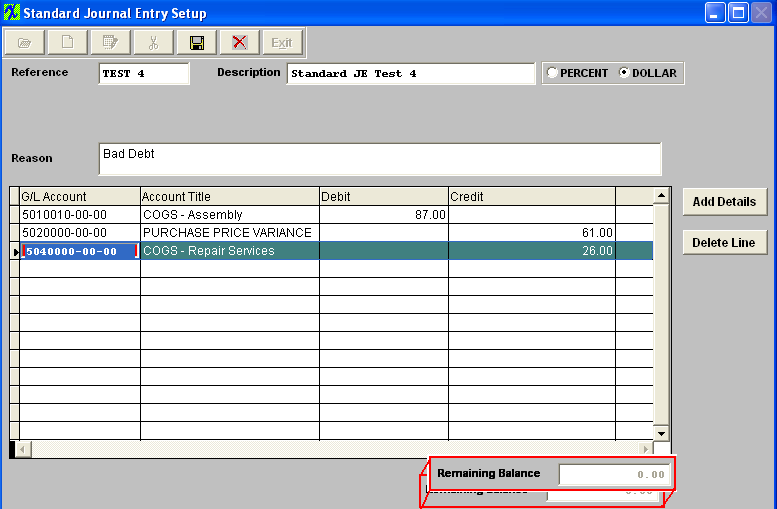 The Abandon changes action button is available at all times during an add operation. The Save record button will also show as available but will not allow you to save the record until the entier Standard Journal Entry is in balance (debits = credits). Once the Entry is in Balance, the system will allow you to save the Standard Entry.
 |
| 1.3.4.3. Post a Standard Journal Entry | ||||||||
The following screen will be displayed: Depress the ADD button. Depress the down arrow at the right side of the Type window. The following selection will appear: 
The entry will appear:
 Depress the Save button, the Status changes from "NEW" to "NOT APPROVED" and the Approve button becomes active. Here you may edit the Standard General Jornal Entry by selecting the Edit button or delete the Standard General Journal Entry by selecting the Delete button. Note: Once the Standard General Journal Entry has been ‘Approved’ you will no longer be able to edit or delete the record. 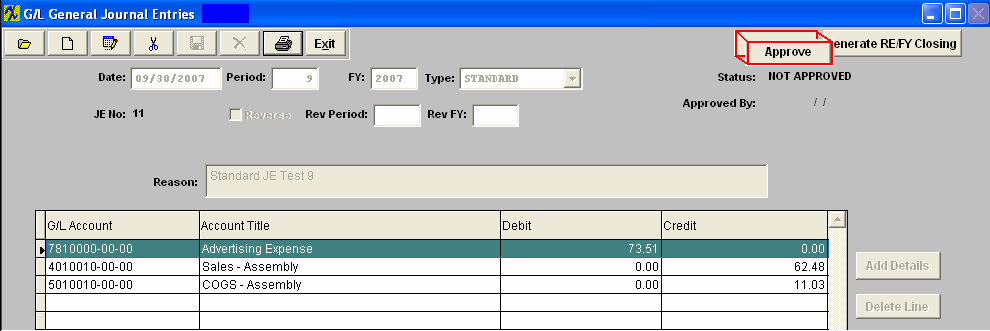 Depress the Approve button. You’ll be prompted for an authorized password. The Status will be changed to "APPROVED", and can now be posted to the General Ledger. 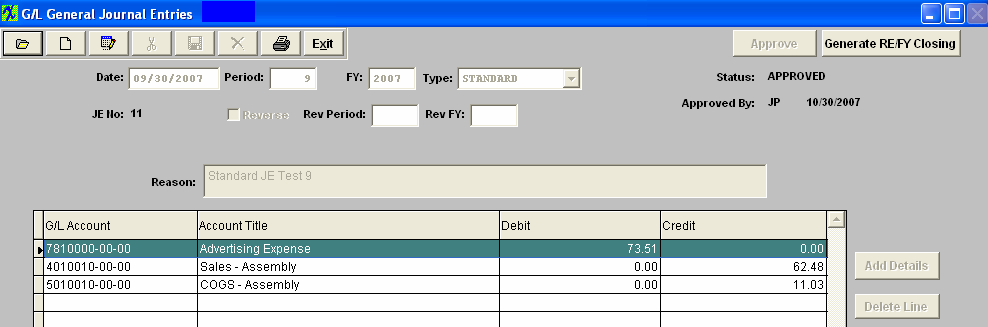 |
| 1.4. Recurring Entry Setup |
| 1.4.1. Prerequisites for Recurring Entry Setup |
Users MUST have full rights to the "All Journal Activities" in Accounting Security . Users with “Accounting Security Supervisor” rights will automatically have access. |
| 1.4.2. Introduction for Recurring Entry |
Recurring Entries are similar to Standard Journal Entries but are interval based. The user can set Recurring Journal Entries to generate every x number of days or periods and save time and effort by avoiding reentering the same posting over and over again. A good example would be an accured interest on a bond. If you have outstanding bonds of $1,000,000 at 6% that will be paid off in one year, so each month for 12 months you would have to accrue the interest liability. In this case you would set up a Recurring Entry to debit the interest expense for $5000, and credit the liability account "Accured Interest Expense" for the same amount. |
| 1.4.3. Fields & Definitions for Recurring Entry Setup | ||||||||||||||||||||||||||
. |
| 1.4.4. How To ...... |
| 1.4.4.1. Find a Recurring Entry Setup | ||||||
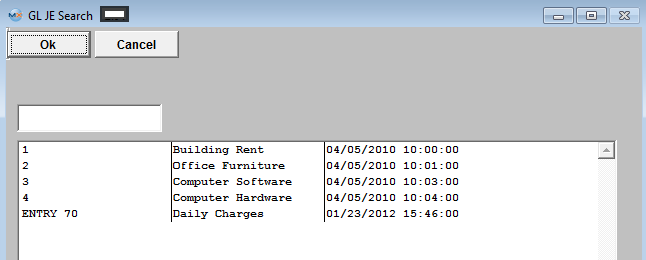
The following screen will be displayed:
Once selected the record information will appear on screen:
 |

| 1.4.4.2. Add a Recurring Entry Setup | ||||
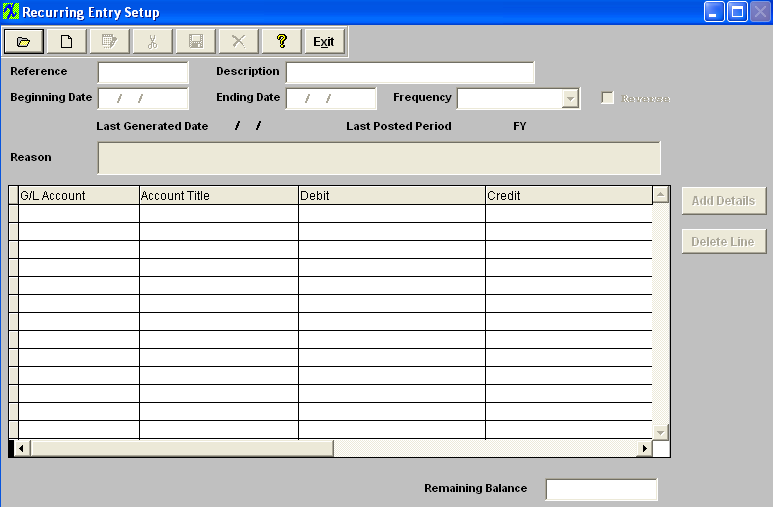
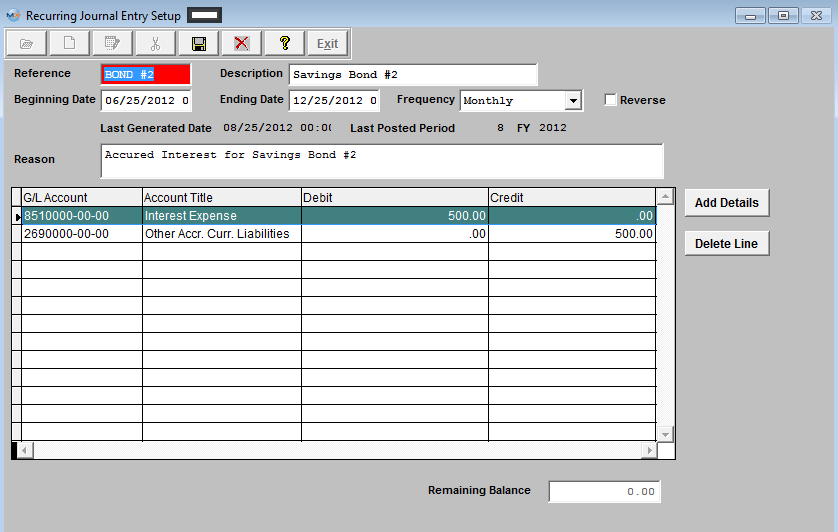
The following screen will be displayed: Selecting the ADD record button will allow the user to enter information about a New Recurring Entry. Enter a unique Reference to this entry, Description, Beginning Date, and Ending Date. Depress the down arrow on the right of the Frequency field and select the desired frequency.
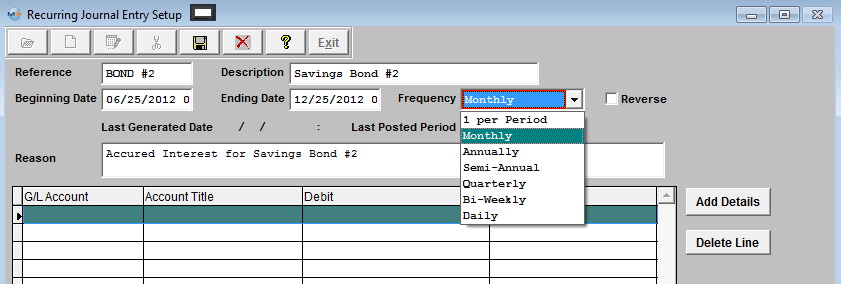 If a reversed entry check the Reverse entry box. Enter a default reason for the generated entry.
The actual data entry occurs in the middle section. Once you tab out of the Reason Field the system will default to the first GL Account Number to be entered. The user must enter a G/L Account directly by typing in the account number. The system will default to the nearest G/L Account match as you type. Then once you hit the Enter/Tab key the system will default in the Account Title Information. Then enter the Debit or Credit Amount. 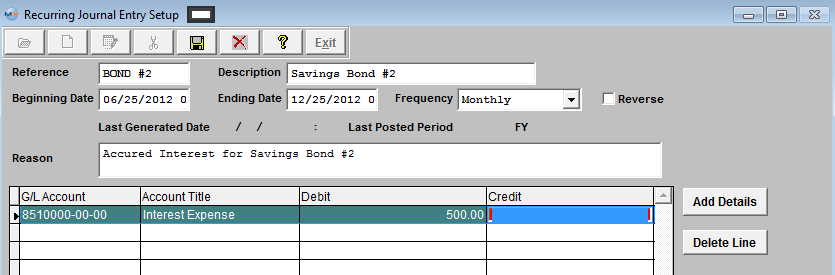 Depress the "Add Details" button to add another G/L Account. Enter the Debits and Credits until the Remaining Balance at the bottom of the screen equals 0.00.
 The user may choose to delete a line in the template by selecting the appropriate line and depressing the ‘Delete Line’ button. The Abandon changes action button is available at all times during an add operation. The Save record button will also show as available but will not allow you to save the record until the entier Recurring Entry Setup is in balance (debits = credits). Once the Entry is in Balance, the system will allow you to save the Recurring Entry.
|
| 1.4.4.3. Post a Recurring Entry Setup | ||||||||||||
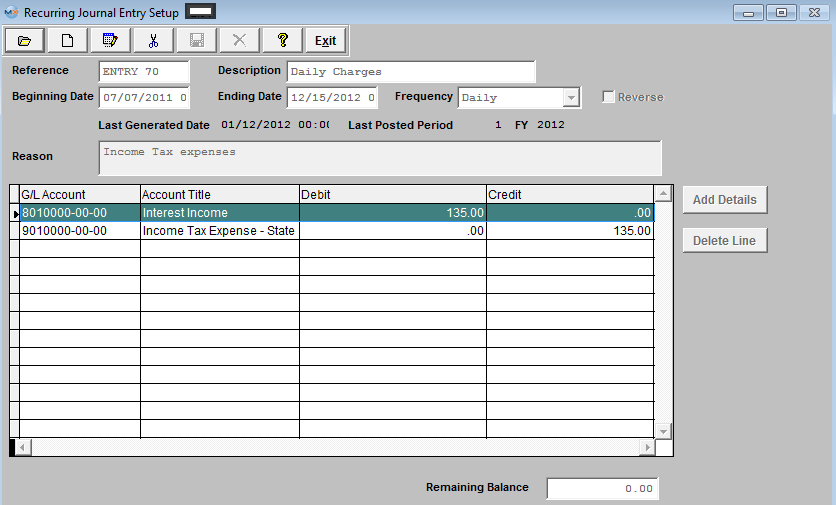
The following screen will be displayed:
The Last generated entry will display on screen as follows: Here you may edit the Recurring General Journal Entry by selecting the Edit button or delete the Recurring General Journal Entry by selecting the Delete button. Note: Once the Recurring General Journal Entry has been ‘Approved’ you will no longer be able to edit or delete the record. 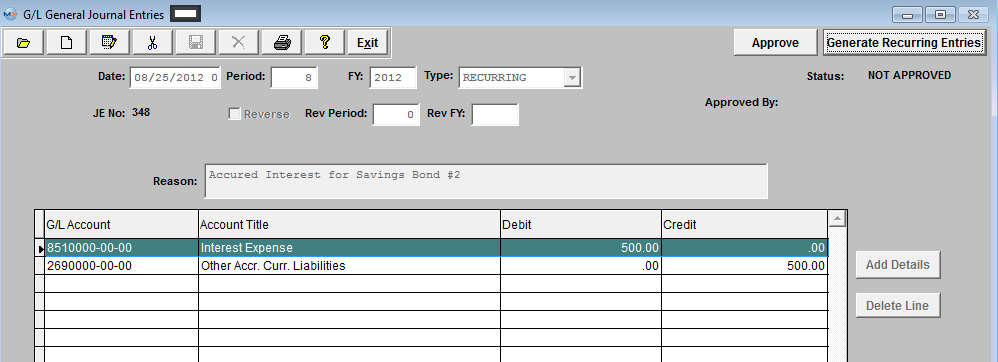 Or Depress the Find Record button, and select the appropriate Open Recurring Journal Entry from the list. 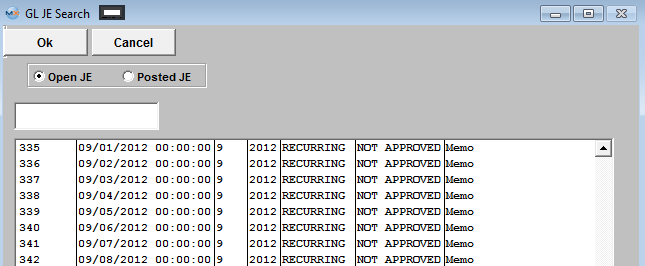 Depress the Approve button. You’ll be prompted for an authorized password. The Status will be changed to "APPROVED", and can now be posted to the General Ledger. 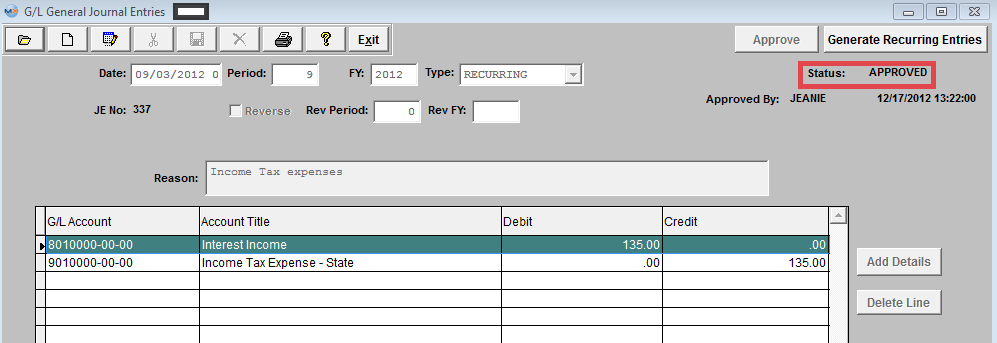 |
| 1.4.4.4. Edit a Recurring Entry Setup |
|
Remember that DEBITS must equal CREDITS in order to save.
|
| 1.5. Automatic Distribution Setup |
| 1.5.1. Prerequisites for Automatic Distribution Setup |
Users MUST have full rights to the "All Journal Activities" in Accounting Security . Users with “Accounting Security Supervisor” rights will automatically have access. |
| 1.5.2. Introduction for Automatic Distribution Setup |
Automatic Distributions are used to distribute expenses from one expense account to others after all other transactions have been posted for the month. A good example would be promotional expense. When they write checks the amount of the check is distributed to one account, say "Promotional General", then at the end of the month the total activity in that account for the month is distrubuted to various departments, say Manufacturing 50%, Admin 30%, Sales 20%. So after the automatic distributions have been posted, the "Promotional General" account has a zero balance for the month's activity and the various accounts have their proportional amount of the expense.
Automatic Distributions may be reviewed at period close. |
| 1.5.3. Fields & Definitions for Automatic Distribution Setup | ||||||||||||||||
|
| 1.5.4. How To ...... for Automatic Distribution Setup |
| 1.5.4.1. Find an Automatic Distribution Setup | ||||
The following screen will appear:
Once selected the record information will appear on screen:
 |


| 1.5.4.2. Add an Automatic Distribution Setup | ||
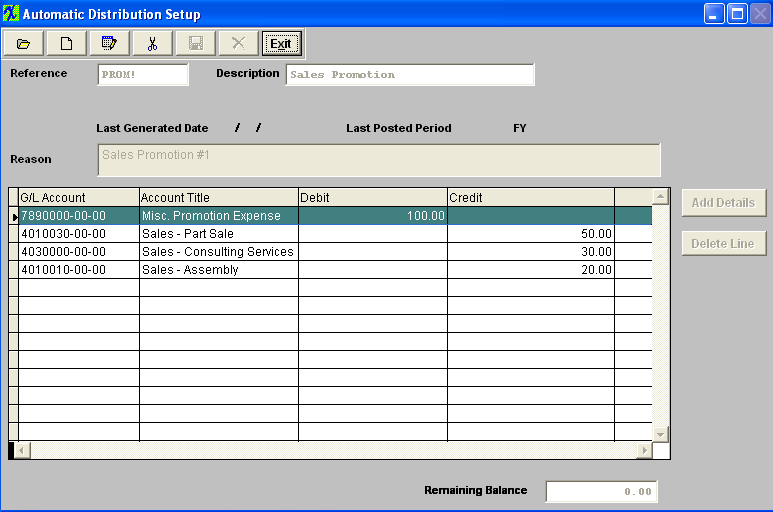
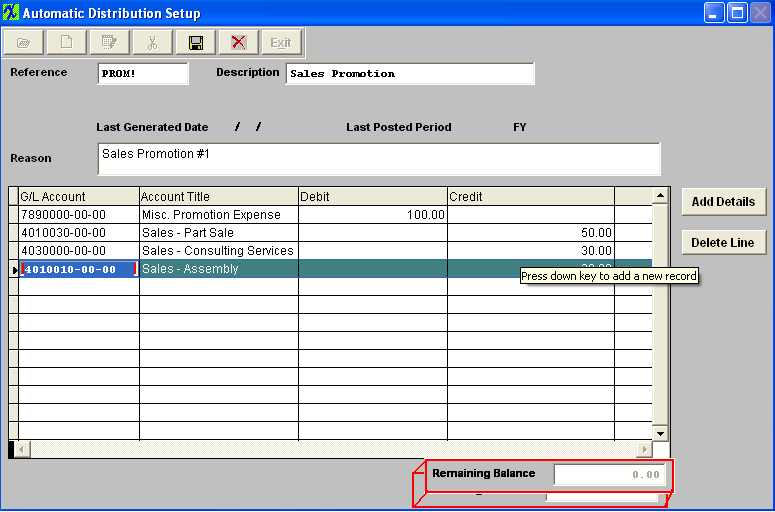
The following screen will appear: Selecting the ADD record button will allow the user to enter information about a New Automatic Distribution Entry. Enter a unique Reference to this entry, Description, and a default reason for the generated entry.
The actual data entry occurs in the middle section. Once you tab out of the Reason Field the system will default to the first GL Account Number to be entered. The user must enter a G/L Account directly by typing in the account number. The system will default to the nearest G/L Account match as you type. Then once you hit the Enter/Tab key the system will default in the Account Title Information. Then enter the Debit or Credit Amount. Depress the "Add Details" button to add another G/L Account. The user may choose to delete a line in the template by selecting the appropriate line and depressing the ‘Delete Line’ button.  Enter the Debits and Credits until the Remaining Balance at the bottom of the screen equals 0.00.
 The Abandon changes action button is available at all times during an add operation. The Save record button will also show as available but will not allow you to save the record until the entier Automatic Distribution Setup is in balance (debits = credits). Once the Entry is in Balance, the system will allow you to save the Automatic Distribution Entry.
|
| 1.5.4.3. Edit an Automatic Distribution Setup |
Find an Existing Automatic Distribution Entry
Now you may edit the Automatic Distribution Entry by selecting the Edit button. Remember that DEBITS must equal CREDITS in order to save.
|
| 1.6. Multi-Currency Feature |
| We have "Create JE in" currency options when a user adds a new record. Here are the explanation of each type, (I use "TC" for Transaction Currency, "FC" for Functional Currency, and "PC for Presentation currency in below explanation) "Both Currencies" - User selects a transaction currency, and user can enter debit and credit in any currency and the system will convert the values to another two currencies. All three currency columns are enabled for user to enter. But if the JE record is from "Currency Transfer" module, the TC debit/credit columns are disabled, because there is "manual functional currency entry" checkbox in currency transfer, and we don't want the user to enter new values in transaction currency columns and mess up the functional currency fields. "Functional Currency" - User selects a transaction currency. Default transaction currency is functional currency, and user can change to different currency. User can enter either functional currency or transaction currency columns, the program will convert one currency fields to another currency fields. Presentation currency columns are disabled, and save 0 and won't be converted from TC or FC. This is for a situation that user only wants to enter JE for functional currency and doesn't want to enter for presentation currency. "Presentation Currency" - User selects a transaction currency. Default transaction currency is presentation currency, and user can change to different currency. User can enter either presentation currency or transaction currency columns, the program will convert one currency fields to another currency fields. Functional currency columns are disabled, and save 0 and won't be converted from TC or PC. This is for a situation that user only wants to enter JE for presentation currency and doesn't want to affect functional currency. |