| 1. Fields & Definitions for Kitting & Shortage |
| 1.1. Main Tab | ||||||||||||||||||||||||||||||||||||||||||||||||||||||||||||||||||||
Main Screen Field Definitions
KITSTATUS ( character field) may be empty, or one of the following: Kit Closed, Kit Process, Rework. If the KIT MANAGEMENT screen has been opened, and any material issued to the kit, the condition of this field will be changed from empty to Kit Process. This field is NOT dependant on the KIT field, but by the logic described in Article #2679 , and cannot be changed unless the kit is released. Component Section
DIRECTIVE BUTTONS The following buttons are displayed on the Kitting Main screen
 |


| 1.1.1. Kit Status Logic |
Status of Kit: Released is a term that means the work order has moved from the initial input condition, where it is possible to check on details of the work order and to utilize a check list to indicate certain functions (established in the setup) have been completed (e.g., necessary documents have been received, shortages have been resolved, tooling is available, etc.). An unreleased work order cannot be kitted, nor moved on the shop floor. KIT (a logic field) means that the work order has been released for production to work on it. This includes kitting and SFT. It means that in the WO screen, the user has clicked on the “Work Order Released” checkbox. Or, this box is automatically checked when all of the items on a work order check list have been completed. It does not mean that the work order or the kit have been started. Until this box is checked, no kitting nor SFT activities can begin. OPENCLOS ( character field) is the status, or condition of the work order. This condition is required to initiate a work order. These conditions must be one of the following: Archived, Cancel, Closed, Firm Plann, Rework, ReworkFirm, Standard. Every work order must have one of these conditions.
|
| 1.2. Issue Tab | ||||||||||||||||||||||||||||||||||||||||||||||||||||||||||||||
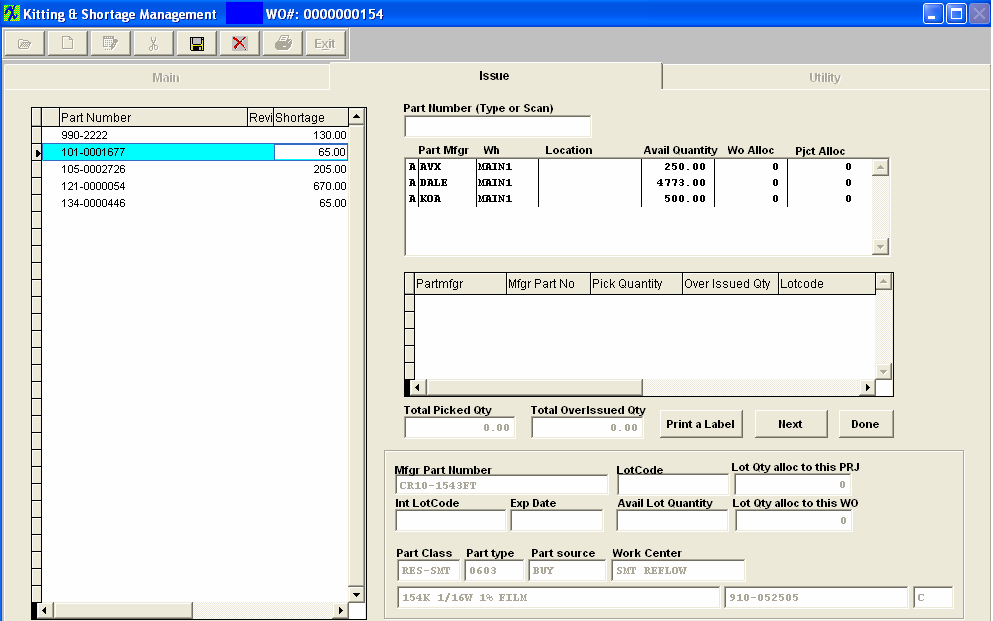
Issue Screen Fields KIT STATUS SECTION
INVENTORY STATUS SECTION
PICKED STATUS SECTION
The quantity of the highlighted part already picked. Below that is the part number of the completed assembly. The "Next" button should be used with the top "part number (type or scan)" field. When user types (or scans) the part number the user wants to issue, the cursor on the left list will move to the right part number record, then user can issue it. After the user is done, click the "Next" button, the system will save the issued record, and the cursor will move to top "part number" field again for user to enter whatever part number the user wants to issue next. It doesn't mean the "next one" record in sequence. LOT CODE INFORMATION
ADDITIONAL PART INFORMATION
|


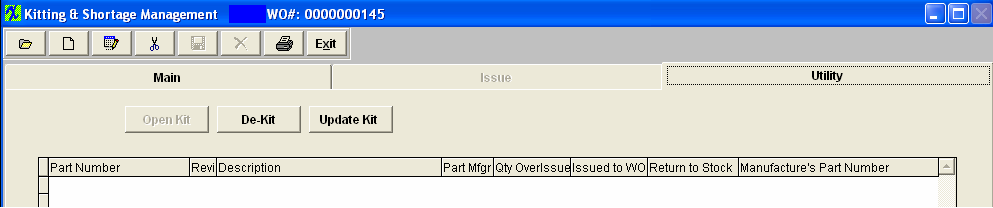
| 1.3. Utility Tab | ||
The Utility Tab has four functions:
1. Close Kit - This section is used to close the kit from further transactions. Once closed, no further parts may be issued to or from the work order. 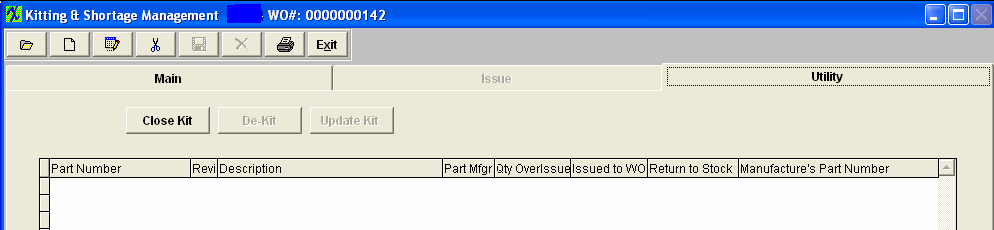 Once the Close Kit button has been depress the following screen will appear, this screen will list all over-issues for disposition, it defaults all items to have the over-issue qty returned to stock. If the users wants to return all to stock they just have to click the OK button. If they want to assign all the over-issue to the Work Order (kit) they can do so by depressing the "Issue All to Kit" button.
The act of closing the kit sets up the material variance entry for the Accounting module if more parts or less parts than called for by the Bill of Materials were actually used. Note: Only an accounting password can close the kit. The manufacturing variance is based on what should have been kitted according to the BOM for the work order. Under issues, overissues and alternate parts are considered as variances. If a part is allocated to a Work Order or a Project (linked to the work order), when the KIT over-issues to WO-WIP location. Once the WO is closed, and user chooses to return stock, the WO allocation will be cleared, but the Project allocations will be retained and carry back to stock as still allocated to that project. What are the actions that would cause a work order to appear on the “Kits to Close” report? The action that causes a work order to appear on the Kits to Close report is when the Work order is closed. (In the Shop floor tracking module, the units are transferred to the Finished Goods work center). There is no longer a balance due on the order but the work order has not yet had the kit closed. There are two aspects of closing a work order activity – 1, closing the work order; and 2, closing the kit. The work order closes when all of the scheduled parts are either in finished goods or scrap. This happens automatically when the last transfer is made in the shop floor tracking module. The kit closing is a manual function. It is separate, because even though the work order may be closed, somebody may not have completed kitting all the parts to the work order, nor moved all of the over-issue out of the work order. These actions are prompted for when the kit is closed. The user may close the kit without addressing the open issues, but if that happens, each will become a variance within accounting. Unfilled shortages will become a positive variance and overissued parts will become a negative variance. (Important Note: For those instances where the user didn’t issue the parts to the work order initially, but completed the work order in shop floor tracking and then closed the kit, there will be a very large positive variance created because the system will assume that the cost of the components = zero.) Therefore, do not close a kit if it was never pulled. 2. Re-open kit - If the user wishes, he/she may re-open the kit once it has been closed. Note: Only an accounting password can re-open the kit.
4. Update Kit - The Update Kit button will update the work order with any BOM changes.
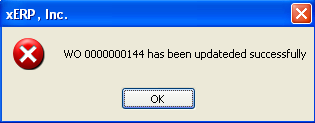
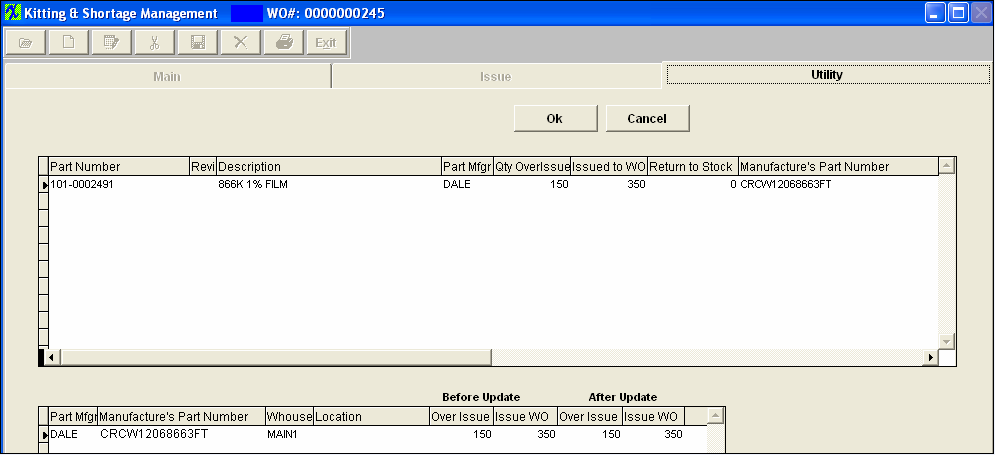
Depress the Update Kit button. Type in your password. You will receive a confirmation message. If the changes to the BOM reflect inventory parts that require dispositioning the following screen will appear:
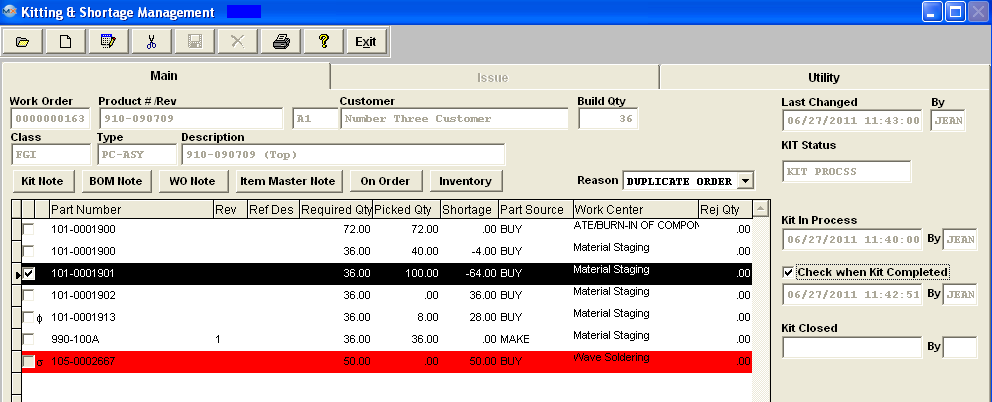
Highlight the item. The system will default in the issued qty into the Issue WO field. If you wish to issue the parts directly to the cost of the Work Order then you can leave the qty in Issue WO. Depressing the OK button will then issue and cost those parts to the kit. If you wish to return those part back to inventory you will change the Issue WO qty to 0 and then you will see the Return to Stock qty adjust. That amount in the Return to Stock will be the amount that will be returned back to stock as available inventory. If there is an Over Issue Quantity found during the update kit, user will receive a message to remind the user that there was an Over-issue qty found, and to make any needed changes to those quantities to "Return to Stock". (If you wish to return those part back to inventory you will change the Over Issue qty to 0 (bottom screen) and then you will see the Return to Stock qty adjust (top screen)). That amount in the Return to Stock will be the amount that will be returned back to stock as available inventory. If not the over-issued qty will remain as an overissue - and upon completion of the update kit the parts will be issued to the WO (costed to the kit) and accounted for as a Mfgr Variance upon closing. If a part is allocated to a Work Order or a Project (linked to the work order), when the KIT over-issues to WO-WIP location. Once the WO is closed, and user chooses to return stock, the WO allocation will be cleared, but the Project allocations will be retained and carry back to stock as still allocated to that project. Depress the OK button and you will receive a confirmation message. For any new parts added to the BOM, they will appear as shortages. You need to make sure to pull them to the kit. If any of the quantities per within the BOM were increased, you’ll have to also pull additional amounts, which will now show as shortages to the Work Order: In the example below, part number 105-0002726 was just added to the BOM and must now be pulled. Additionally, part number 101-0001633 had the quantity per on the BOM increased and now the shortage must be pulled. 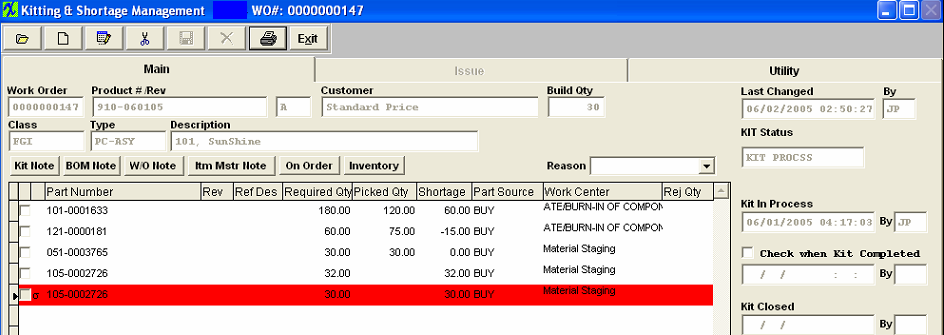
|