| 1. How To ..... for Kitting & Shortage |
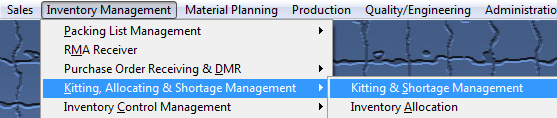
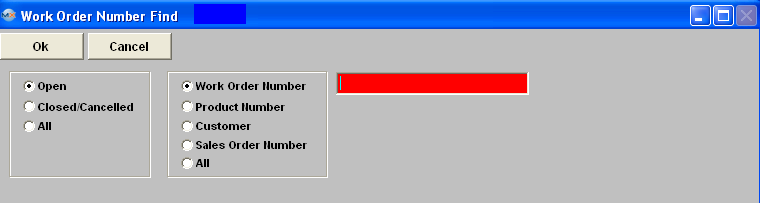
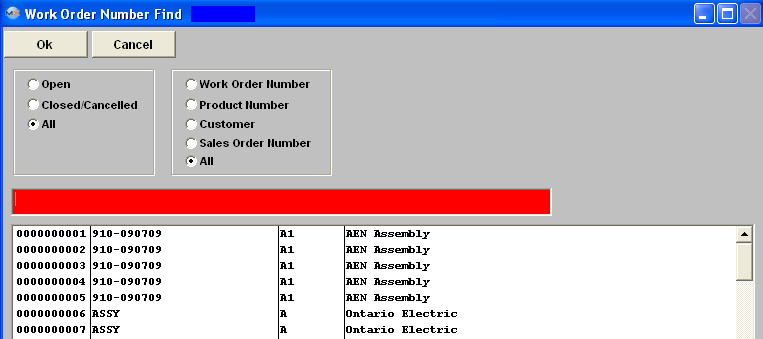
| 1.1. Finding a Work Order Record | ||||||||
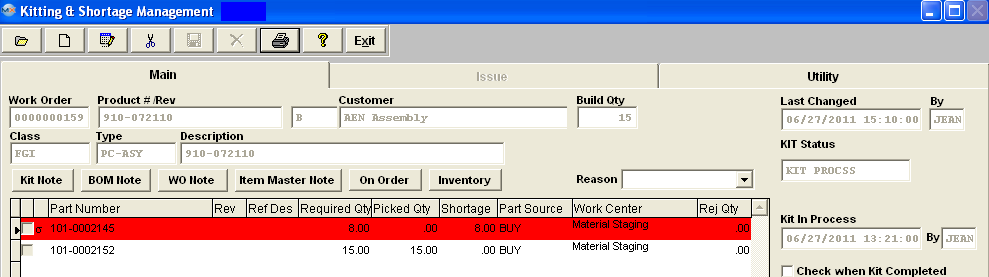
The following screen will be displayed:
|
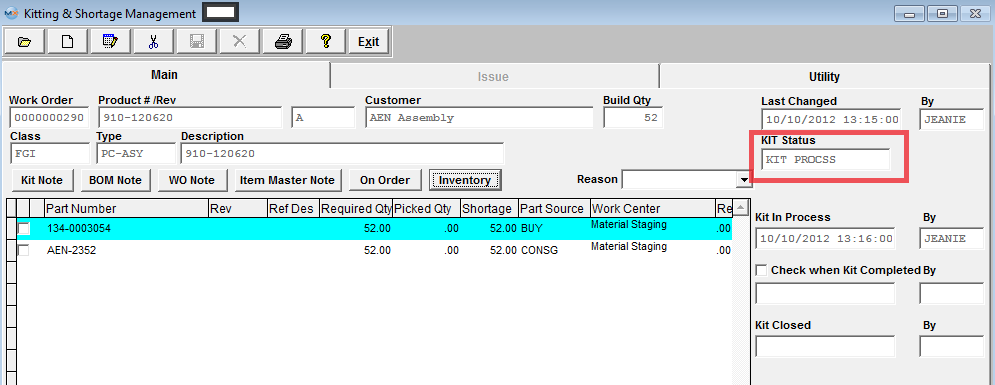
| 1.2. Issue Parts to Kit | ||||||||||||||||||||||||||||
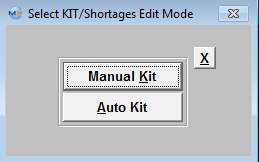
The following screen will be displayed:
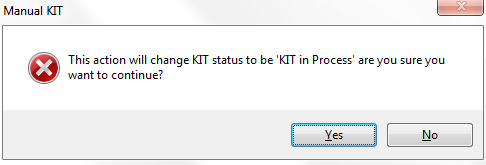
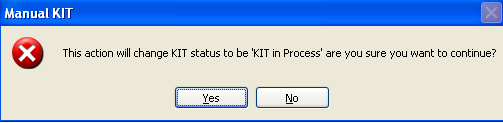
MANUAL KIT
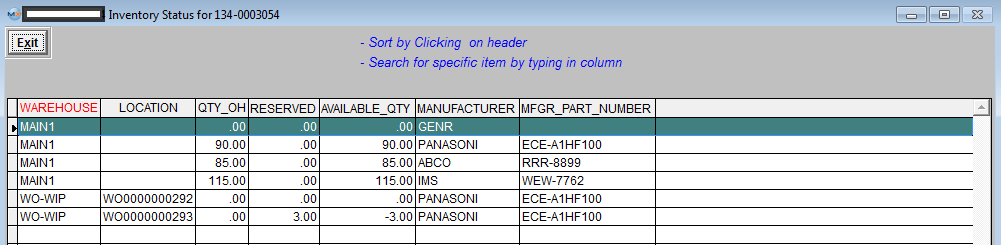
 If you would like to see if there is part availability for the highlighted part number before going to the next step depress the "Inventory" button.
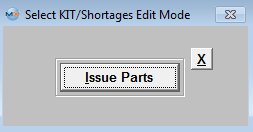
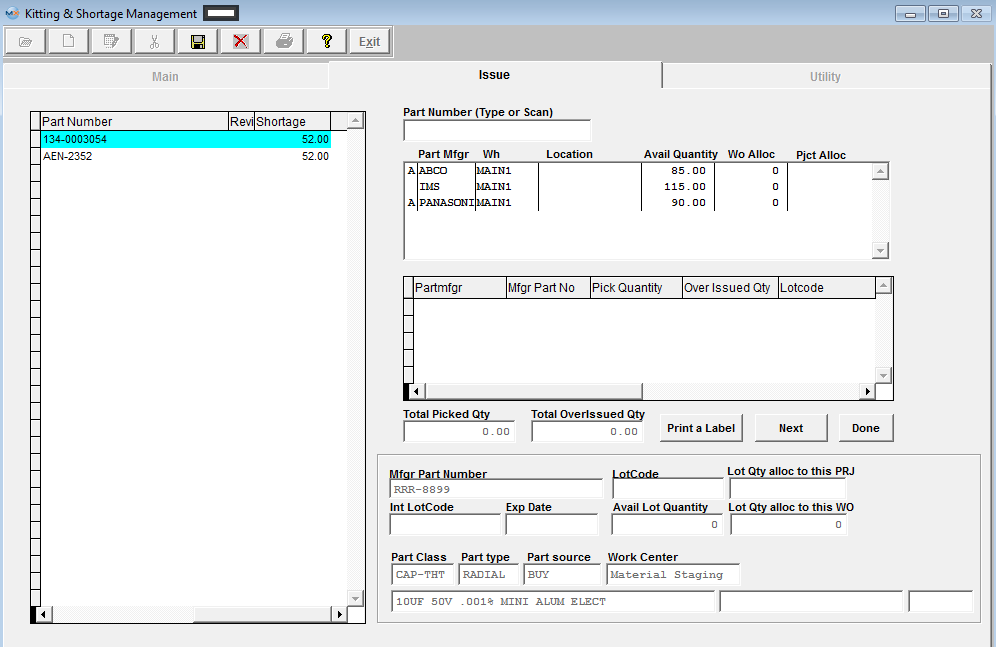
Depress the Edit action button again and the following selection will appear: Depress the Issue Parts button to continue or X to cancel. If you depress the Issue Parts button and enter in a password the Issue Tab screen is displayed: This screen is divided into four operational sections.
The user first selects a part from the kit status section. Place the cursor on a part manufucturer in the inventory status screen and drag it to the Picked Status section in the center of the right side of the screen. To drag, place the cursor on the line indicating an available quantity. Do not remove your finger from the mouse. While you are in the process of dragging, you will see an outline of a hand holding a document. Pull the cursor down to the Pick quantity section. To drop, remove your finger from the mouse. Those manufacturers approved for the bill of material will have the manufacturer preceded with an A. When inventory from the Inventory Status section is dragged to the Picked Status section, the quantity required for the work order is subtracted from the original quantity in inventory. If there is insufficient quantity in inventory, an additional lot may be dragged to the picked status section. If the quantity of parts needed is less than the quantity in inventory, only the quantity needed will be transferred. While still in the Pick Status, the user may modify the quantities being picked. Increasing the quantity that is required for the kit (if there is more available in inventory) will place the extra parts in the overissued qty column. The shortage column will display the over-issues as negative shortages. By reducing the quantity, the remainder of the parts will be returned to inventory. If not returned to Inventory, unused parts in the overissued inventory will continue to be considered as available for use by MRP actions. Other kits may be kitted using these parts. To change the amount Picked, place the cursor on the amount picked. A white box will display. Type the revised amount picked in the white box and depress the Enter key.
REAL TIME KITTING FEATURE When you first enter the ISSUE screen and if you just continue through and Drag & Drop items as described above all of the transactions will be saved to the system upon depressing the Save Record Icon. But as soon as you depress the Next button the system will begin to save the records immediately and the Save and Cancel icons will became inactive. This has been added so our users can begin real-time kitting and since intended for a wireless network connection we need to save individual pulled records instead of the entire kit pull save. Below is a description of how this feature is intended to operate:
This will then bring them back to the Main Kitting screen.
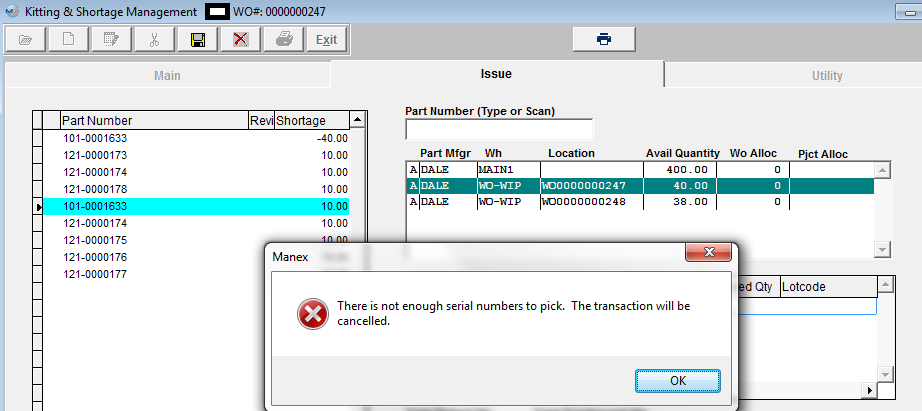
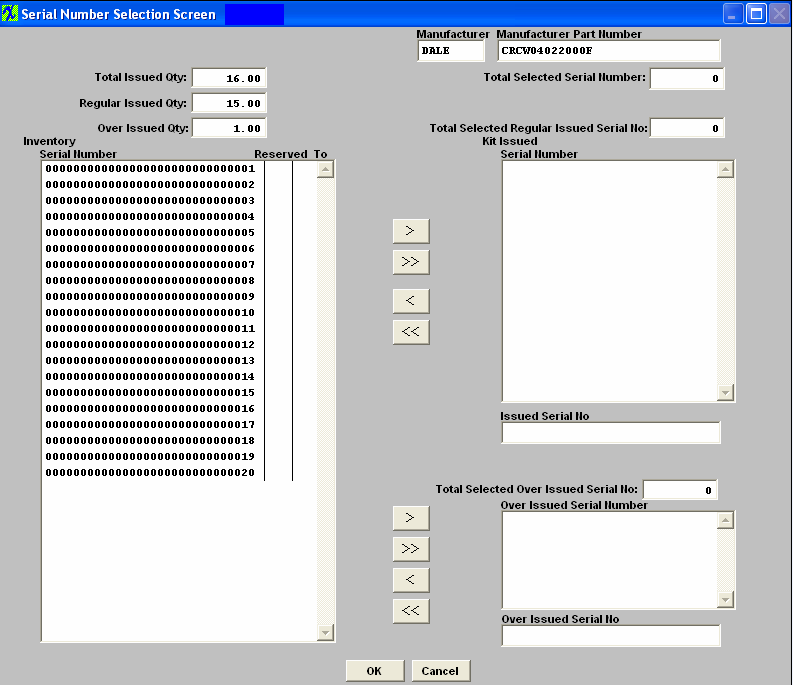
ENTER SERIAL NUMBERS If the Part Number highlighted in the left column, is a serialized part, highlight the Available Quantity. Drag and drop into the Pick Quantity space (as described above). The quantity will appear as 0 in pick quantity. Click on pick quantity and manually fill in quantity. The following screen will appear: All serial numbers for this part number will appear in the left hand column. Highlight the serial numbers you want used for this work order click on the > arrows. They will appear in the right hand column. If you overissued you must highlight the serial numbers for the overissued quantity click on the > arrows and they will appear in the bottom right hand screen. Once the serial numbers that are to be used for this work order appear in the right hand column depress the OK button. Depress the ‘DONE’ Button or ‘Save’ button. The completed Main tab screen appears as below: 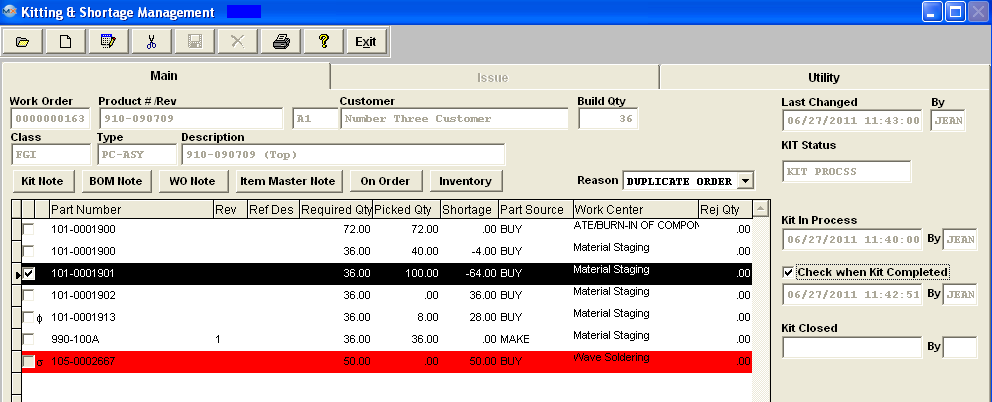 NOTE: MRP is designed to calculate from the Kit Shortage and not from the Lead times once the parts have been pulled to the kit and the kit status is changed to "Kit in Process". Once the parts have been pulled to the kit, the systems is assuming that the shortages are needed by the WO due date, rather than the Production lead time, so MRP then calculates using the due date of the WO as the date the materials must be on hand, MRP no longer takes the production lead time into consideration.
This message will be displayed if the user has over-issued to one item, then trying to issue to 2nd item (same part number) from the over-issued SN of first item. The system filters out those SN that are over-issued to the same work order and same part number (might be different kit item) when the program is preparing the SN selection list. In this case user should decrease the over-issued SN from first item, and it will be available for 2nd item.
 AUTO KIT
If the Bill of Material does not have any components that are kitted, then no kitting will be done. Kitting Preference Hierarchy When Kitting Manex picks Approved AVL's and in numeric sequence. (1 before 2, 2 before 3, etc.) "99" is the default preference number, if no preferences are entered, then other un-controllable factors affect which is picked first. If the user wants to have a specific warehouse picked first, then they are to enter a preference number such as "1" in the preference field within the Quantity Info screen within Inventory Control Mgmt
If the part is a lot coded part, auto kit considers
the lot code expiration date. The auto
kit sequence should be allocation first then non allocation. If a part has allocation but with a later
expiration date, it still should be picked first than the non-allocation parts
with an earlier expiration date.
COMPLETING KIT
|


| 1.3. Add a Line Item Shortage | ||||||||||||
|
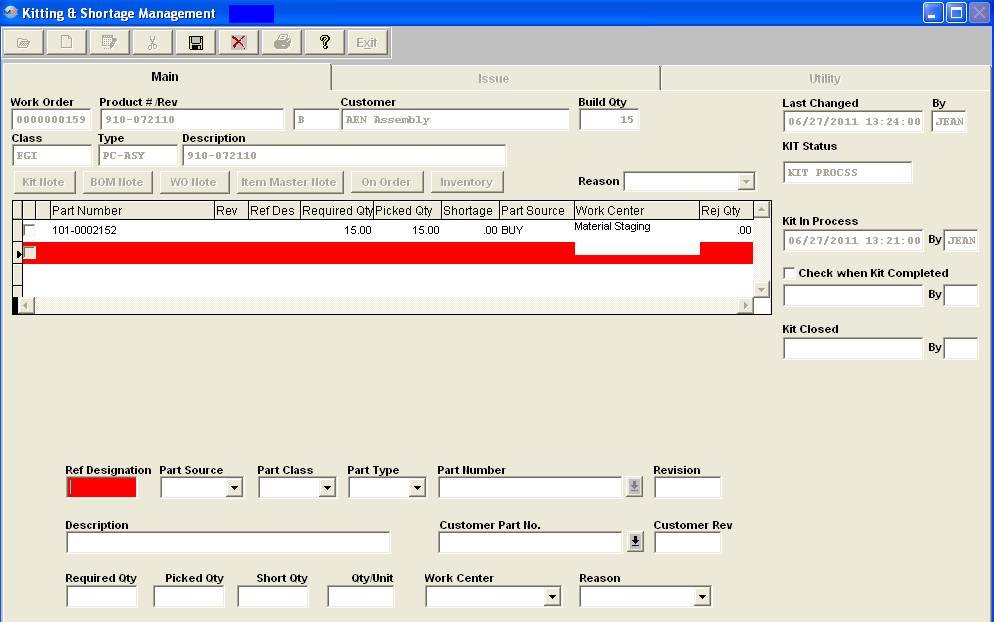
Shortages other than those resulting from an incomplete kit are considered Line Shortages. Line shortages may be a result of poor yield on a part, and additional parts are required, or because one or more additional parts are needed for the work order beyond those described in the bill of materials. Line shortages may be created because of alternate parts, special engineering evaluations, or for any reason that the user decides to enter in the system setup. For Miscellaneous Shortages, (this selection may be used to issue non-inventory items to kit). (See further detail below). If you select Add Line Shortages, you will be prompted for your password and then the following screen will be displayed: (NOTE: If line shortages are added and issued to rework WOs, the kit status will update to “REWORK”). True "Phantoms" cannot be added as a line item shortage to a kit.
NOTE: The Line item shortages are considered as in the WIP account all the way through until the Kit is closed within the Kitting module. Upon Closing the kit within the Kitting module the Line Item Shortages are then costed out and credited out of WIP account and debited in the Mfgr Variance account. So the “Inventory WIP Valuation Report” by Work Order by Standard Cost does not deduct those line item shortages as the product is moved into FGI. See Article #1777 for further detail. The part information for the shortage is entered. The part must be a part defined in the Inventory Control Item Master. Select Part Source, Part Class, Part Type, Part Number from the respective drop down lists. Enter the Short Quantity and the Required Qty will default in then enter the the Quantity per Unit. Select a Work Center from the drop down. Note: Shortages recorded by Ref Designator are case sensitive.
 “Ignore Shortage” box: If you want to remove the component from the shortage reports and MRP, check the box at the left of the part number. Note that the box for checking KITTED shortages only works with those items that are kitted based on the BOM for the assembly. Checking the boxes means that the part on the BOM will NOT be considered for MRP purposes, and NOT show up on shortage lists. This is the only way you can get a part on the BOM, off of the shortage list. Line shortages, however, can be edited to make them larger or completed. The user should NOT create a line shortage, then try to check the “ignore shortage” box. A line shortage is either short or not. If it is not short for this particular work order, then check the box to take it off of the shortage list. Add a Miscellaneous Shortage If you select Add a Miscellaneous Shortage you will be prompted for your password, and then the following screen will be displayed: 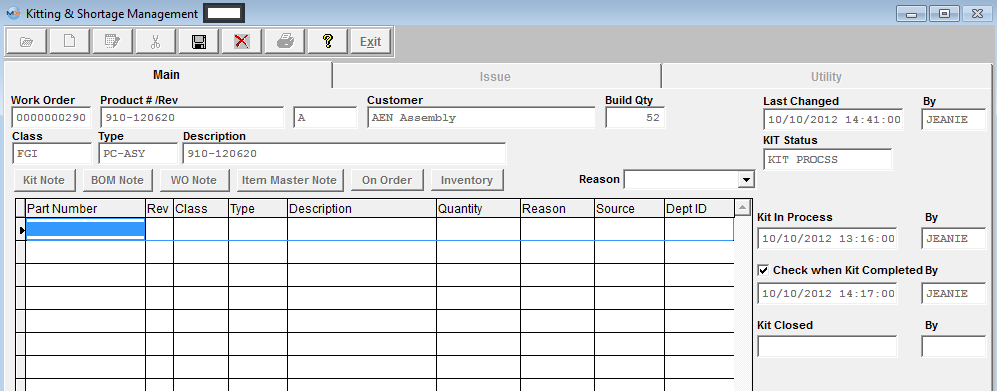
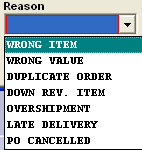
Enter in the Part Number, Revision and Description. Select Source, Class, Type, Department, Reason from the respective Drop Down lists. Enter in the Quantity and Quantity/Unit. Continue in this fashion until all entries are made. Depress the Save button.
Issue or Edit a Line Item Shortage
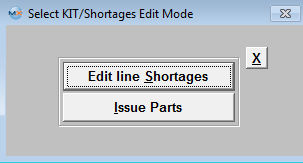
Pressing the Edit Button (after finding a work order) displays the following selection choices: If user selects "Edit line Shortages", you will be prompted for your password and then you will have the opportunity to change Quantity, Quantity/Unit or Work Center Selection for an existing line item shortage.
This field is intended for the user to enter in the qty needed for the shortage and the system will make the needed adjustments based off from that qty. For Example: if the user originally added a line item shortage for a qty of 5, and picked a total of 7 to the kit. (Production has no way of knowing how many were pulled to the kit originally, so a week later they come back to the stockroom, and request 4 more). The stockroom will then edit the line item shortage at this time the qty will display a -2.00, stockroom will issue 4 more by entering a qty of 4, the system will make the adjustments based off from that qty, so the Required qty will then become 11. NOTE: You can only reduce the shortage qty if there are no issues against it. If the complete shortage qty has been issued, and user depress the Edit line Shortage button and the qty field is "0" and user enters a qty in the qty field the system will interpret this as an additional qty. To change a qty that has already been issued user would need to un-issue the complete qty and then go back and change the shortage qty. System will not allow user to enter a negative qty.
Depress the Save button when changes are completed. If user selects " Issue Parts" enters their password, they may follow the steps outlined in Article #904.
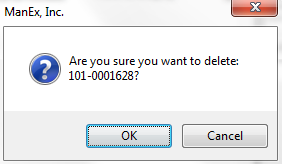
Add a Line Shortage to a Rework Work Order Overview of a Rework Order When a rework order is created via the RMA Receiver module (Please refer to the Return Material Authorization Management manual), there is no demand created for any parts on the BOM for the product of the work order. But, demand will be created for any line shortages established for the work order. There should be a line shortage created for the assembly being reworked, so the product can be issued to the work order. When the work order has the kit closed, the manufacturing variance is created that is the difference between the standard cost of the parts issued to the work order and the standard cost of the sum of all of the BOM components. If there is no BOM for the product, but if the assembly has a standard cost assigned to it, the following will happen: There will be a favorable variance to the wip (the difference between the standard cost of the product and the standard cost of the sum of the materials on the BOM) Assembly Standard cost – zero BOM cost. The kit close will have an unfavorable variance created for accounting which will be the sum of the standard cost of the components issued to the work order. The kit close will offset the line shortages pulled. To add a line shortage to a rework work order, follow the same procedures as finding the work order, as detailed above. Depress the Add button to add a new line shortage. Type in your password. Then follow the procedures to add and pull a line shortage as detailed above. Upon completion, you will see a message at the top right hand side of the screen that inventory files are being updated. Then the part information in the lower part of the screen will turn blank. Exit the kitting module and then proceed to the shop floor tracking module to complete the rework order. The Delete button is used to remove line shortages BEFORE the parts has been pulled to the kit for that line item. Find the Work Order containing the line shortage, using the find procedures. After selecting the delete button, the user is asked for an authorized password. Then the user selects the item to be deleted. Highlight the line item containing a rho symbol (? ) at the far left of the part number.
If the parts HAVE been pulled to the kit for the line item shortage, user MUST de-kit or return picked qty to stock before the line shortage can be deleted.
The item will still be displayed with a Required Qty of 0.
 |

| 1.4. Update Kit | ||
The Update Kit button will update the work order with any BOM changes. Note: This button MUST be depressed after an ECO approval for any part changes to be reflected if the Work Order due date proceeds the effectivity date of the ECO.
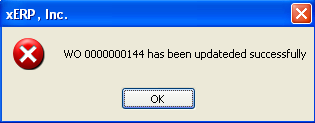
Depress the Update Kit button. Type in your password. You will receive a confirmation message. If the changes to the BOM reflect inventory parts that require dispositioning the following screen will appear:
 Note: If parts are being displayed for dispositioning even though NO changes to quantities were made it may be due to the fact that the work centers were changed and upon completion of the update kit the parts will be issued to the WO (costed to the kit) and accounted for as a Mfgr Variance.
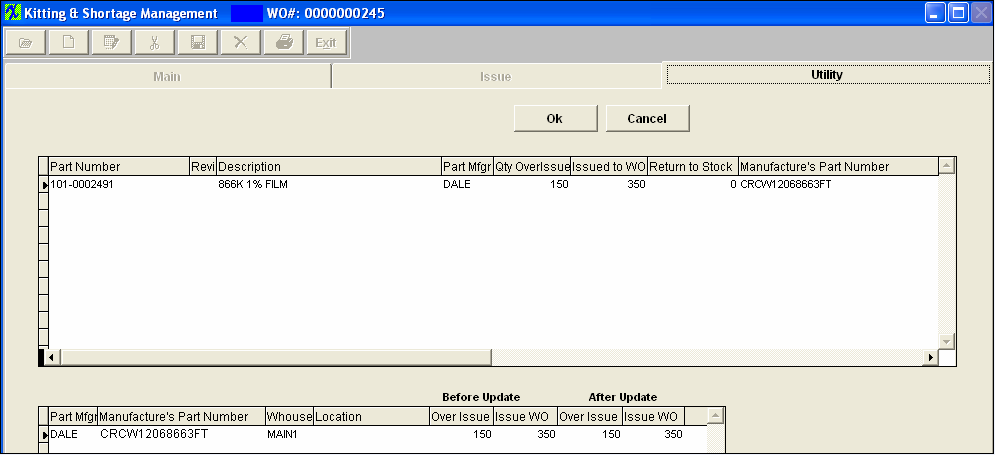
Highlight the item. The system will default in the issued qty into the Issue WO field (bottom screen). If you wish to issue all the parts directly to the cost of the Work Order then you can leave the qty in Issue WO and Over Issue. Depressing the OK button will then issue and cost all those parts to the kit. If you wish to return those part back to inventory you will change the Issue WO qty to 0 (bottom screen) and then you will see the Return to Stock qty adjust (top screen). That amount in the Return to Stock will be the amount that will be returned back to stock as available inventory.
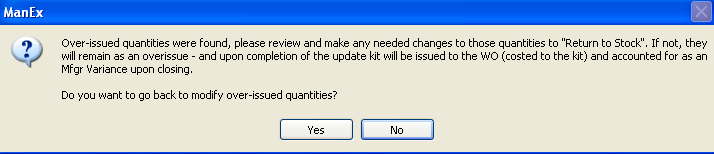
If there is an Over Issue Quantity found during the update kit, user will receive the following message to remind the user that there was an Over-issue qty found, and to make any needed changes to those quantities to "Return to Stock". (If you wish to return those part back to inventory you will change the Over Issue qty to 0 (bottom screen) and then you will see the Return to Stock qty adjust (top screen)). That amount in the Return to Stock will be the amount that will be returned back to stock as available inventory. If not the over-issued qty will remain as an overissue - and upon completion of the update kit the parts will be issued to the WO (costed to the kit) and accounted for as a Mfgr Variance upon closing.
 If the over-issued quantity or quantity in WO-WIP has been allocated to other work orders/projects, then the user will receive the following message and the kit will not update until the allocatiions have been cleared.
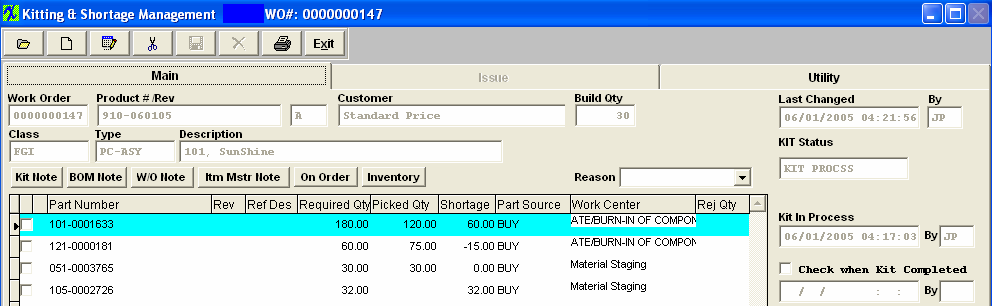
 For any new parts added to the BOM, they will appear as shortages, and user will need to make sure to pull them to the kit. If any of the quantities per within the BOM were increased, you will have to also pull additional amounts, which will now show as shortages to the Work Order. If user changes a Work Center on a BOM and depress the Update kit button, the system will treat this part as a new item, and will appear as shortages and user will need to make sure and pull them to the kit. In the example below, part number 105-0002726 was just added to the BOM and must now be pulled. Additionally, part number 101-0001633 had the quantity per on the BOM increased and now the shortage must be pulled.
|
| 1.5. De-Kit |
|
The act of de-kitting will return all of the previously picked parts to inventory. If a part is allocated to a Work Order or a Project (linked to the work order), once the part is issued to the WO (not over-issue) the allocation will be removed, only the allocation for over-issue parts can be kept. The system will NOT allow you to de-kit with product in finished goods. Note: If the "Remove location with this warehouse from the Inventory when qty on hand gets to "0" box is checked in the Warehouse Setup , and the work order is de-kitted, the warehouse will be reactivated and parts will be returned to that same warehouse. When De-Kitting parts issued from an In-Store warehouse, the parts will NOT be returned to the In-Store warehouse. The parts will be returned to Stock and the In-Store PO will still need to be created. 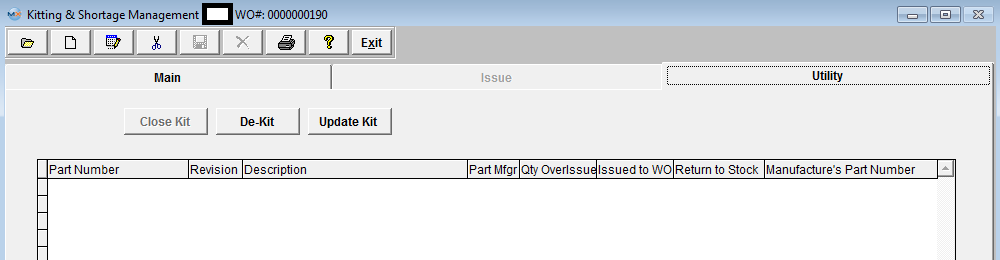
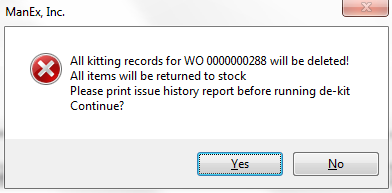
Depress the De-Kit button and the following message will be displayed:
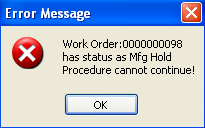
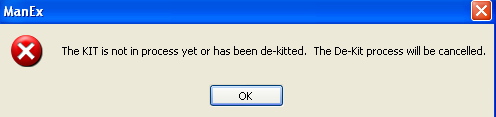
 If the over-issued quantity or quantity in WO-WIP has been allocated to other work orders/projects, then the user will receive the following message and the kit will not Dekit until the allocatiions have been cleared.  If the kit is NOT in process yet or has been de-kitted already, the following message will appear on screen and will cancel the de-kit.
 . |
| 1.6. Return Over-Issue | ||||
There are two methods of returning an over issue: Method 1:
This method allows users to return the unused over-issued parts back to Inventory BEFORE the Work Order has been completed (reached the Finished Goods Inventory Work Center in Production).
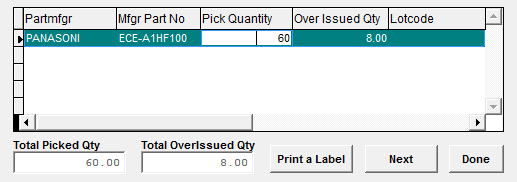
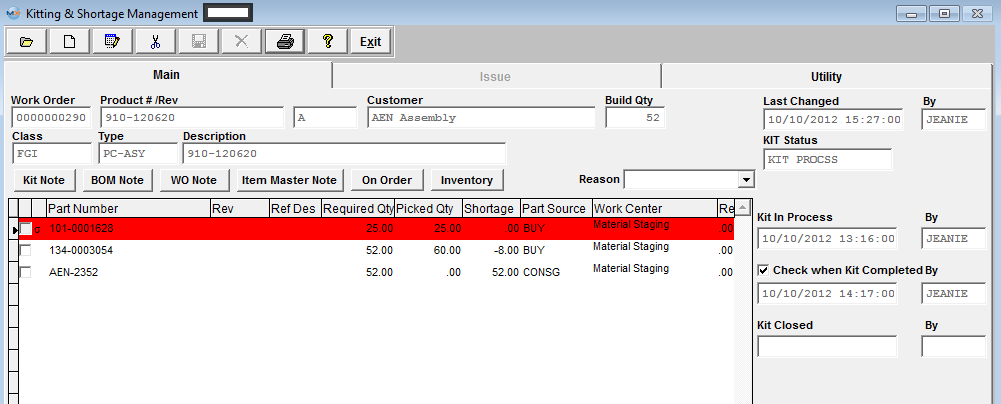
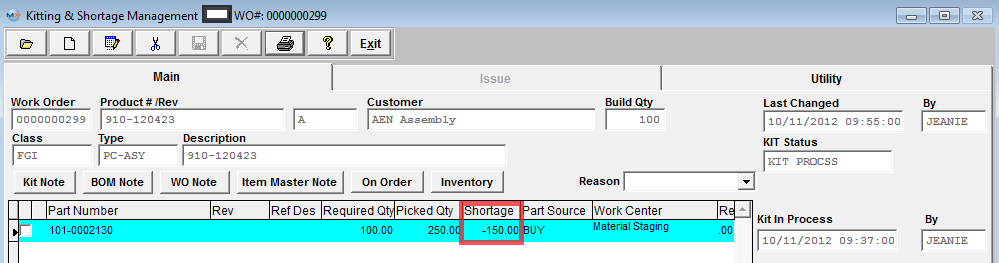
Using the Finding a Kitting & Shortage procedure, find the Work Order with the over-issue. You will note that the shortage column contains a negative amount, as shown in the screen below: 
Depress the Save action button. The difference between the original over-issue and the actual over-issue will be returned to inventory. The inventory records will update and the appropriate accounting entry removing the part from WIP will also be made. (If the parts in WO-WIP have been allocated to another work order/project user will NOT be able to return the over-issue qty using this method). NOTE: If parts have been pulled from an In-Store location and there is an over-issue qty the over-issued qty will be returned to the In-Store location. Method 2:
This method gives the user the option to Return parts to Stock/Inventory or Issue parts to kit once the assembly has been completed and reaches the Work Center for Finished Goods Inventory, and the Work Order Status is Closed. For example: the user has a reel of 250 parts and he/she doesn't want to count out 100 parts for the Work Order so they issue the complete reel of 250 to the WO, which will cause an over-issue of 150 parts.
 Using the Finding a Kitting & Shortage procedure, find the Work Order with the over-issue.
3. If then you want the un-used overissue returned to stock (The Warehouse that the parts were pulled from will be displayed - MAIN1, In-Store, etc), depress the OK button. Notice that the over issue has disappeared from the Main tab, as shown in the screen below: (If the user does not want the un-used over-issues returned to Raw Materials Inventory, he/she edits the Quantity Transfer Amount at the bottom right hand side of the screen. The user may transfer 0 quantity or any amount up to the amount of the over-issue). 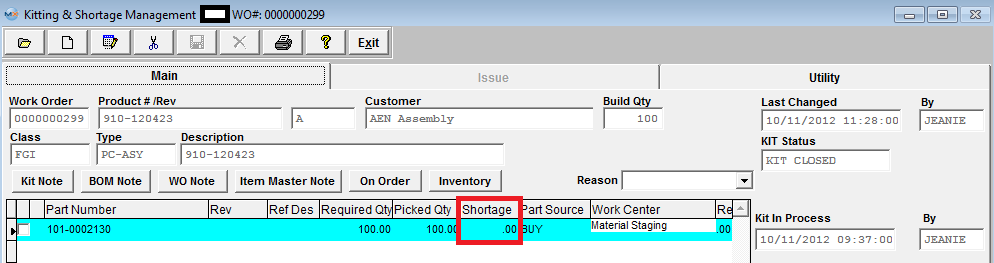 Once the above steps are completed, the "Qty Transfer" parts are returned to their warehouse location, WIP is relieved, the Quantity on Hand in Raw Materials Inventory is increased in the Inventory Item Master and the appropriate accounting entries are generated. Lot Coded Parts - If parts have been issued from different Lot Codes with over-issued qty, those over-issued parts are moved to "WO-WIP" location, and the system saves what lots they come from, when the Kit is closed, the system locates all the WO-WIP locations and lot information, and returns it back to the original lot, if the lot is deleted (due to the lot qty is 0), is will re-create it.
Allocated Parts - If a part in WO-WIP is allocated to other work orders/projects, and user chooses to return back to stock, the program will unallocate from the work orders WO-WIP, return to the original location and then re-allocate to the original locatiion, if user chooses to issue to work order the program will remove the allocation and cost it to the work order.
|


| 1.7. Close Kit |
This section is used to close the kit from further transactions. Once closed, no further parts may be issued to or from the work order.
NOTE: User MUST have full rights to the Kitting & Shortage Management module within Security to be able to close a kit.
NOTE: It is very important to close out all kits. Kits need to be closed manually so the user can choose whether the over-issues are to be returned to stock, or charged to the work order. If kits are not closed users are likely to have a huge manufacturing variance, or very inaccurate inventory records, and MRP will think that the over-issues are available to meet demand, when they might not actually be available. 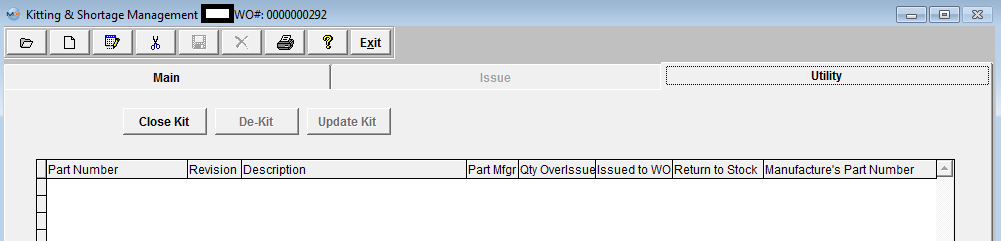 Once the Close Kit button has been depress the following screen will appear, this screen will list all over-issues for disposition, it defaults all items to have the over-issue qty returned to stock. If the user choose to return all inventory to stock they just have to click the "OK" button. If they choose to assign all the over-issued qty to the Work Order (kit) they can do so by depressing the "Issue All to Kit" button, and the pick qty will increase to include the overissued qty. So, if the users decide to re-open the kit, they have the option to return the material back to inventory if they choose.
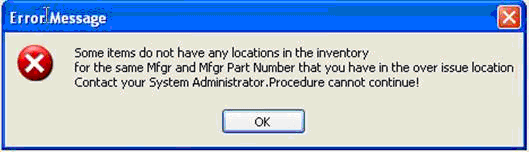
When the close kit has been depressed, if NO locations are available for the parts return, the system will display all deleted locations (which will be displayed in purple color background) for that part mfgr for user to select from. If the item has available locations, even if it is not the original one, the system will just display those available locations, it will NOT display deleted locations. The system will list all the available locations for the same manufacturer but not "WIP","WO-WIP" and "MRB" locations for user to return. User can return overissued qty's to another location but that location must exist in the inventory for that part. Users are NOT allowed to create new locations through the kitting module. NOTE: If the user REDUCES the Build Qty on a Work Order that will change the WO status to "CLOSED", upon closing the kit the system will take the original quantity pulled to the kit and automatically cost the different to the kit without giving any option to the user. If the user does NOT wish to have the extra parts automatically costed to the kit upon closing they will need to change the WO status from "CLOSED" to "STANDARD", return to the Kitting module and "UPDATE" the kit, then return to the WO module and edit/save the record without making any changes – the Status will automatically update to Closed. See attached word document <<PS_961_090427.docx>> for an example.  The act of closing the kit sets up the material variance entry for the accounting module if more parts or less parts than called for by the Kit for the Bill of Materials and actually used.
The manufacturing variance is based on what should have been kitted according to the BOM extension for kitting for the work order. Under issues, overissues and alternate parts are considered as variances.
The BOM may contain components which may have a scrap percentage associated with them. When the standard cost is calculated for such a BOM, and if the extended quantity calculated for scrap percentage for a component is fractional, the fraction of a cost is used in the determination of the standard cost. (For example,if a component had a scrap percentage of 3%, and the BOM calls for 50 components per assembly, the cost is determined based on 51.5 components. However, when kitting the assembly, it isn't possible to issue 51.5 components, so it is rounded to 52 components. Then when the assembly is removed from WIP, and the kit is closed, the WIP is credited for the value of the assembly, which includes the price based on 51.5 components. That leaves the cost of 1/2 of the affected component left in WIP. The rounding variance tracks down these differences and also removes the remaining cost of 1/2 component. The Line item shortages are considered as in the WIP account all the way through until the Kit is closed within the Kitting module. Upon Closing the kit within the Kitting module the Line Item Shortages are then costed out and credited out of WIP account and debited in the Mfgr Variance account. So the “Inventory WIP Valuation Report” by Work Order by Standard Cost does not deduct those line item shortages as the product is moved into FGI. For further detail see Article #3053 . 1. If no G/L account number has been established for the rounding variance user will receive the following message and a G/L account number will need to be established for the rounding variance in Inventory Setup before user can continue. 
The Kit Closing Procedure will separate out the manufacturing variance, rounding variance, and the changes to WIP values.
If a part is allocated to a Work Order or a Project (linked to the work order), when the KIT over-issues to WO-WIP location. Once the WO is closed, and user chooses to return stock, the WO allocation will be cleared, but the Project allocations will be retained and carry back to stock as still allocated to that project. If Lot Coded parts have been over-issued to the kit those over-issued parts are moved to "WO-WIP" location and the system will save what lots they were pulled from. When the Kit is closed, the kit finds all the" WO-WIP" locations and lot information, and returns the parts back to the original lot. If the lot is deleted (due to the lot qty is 0), the system will re-create that lot. When closing a kit see Article #1777 for further detail on how Line Item Shortages are handled.
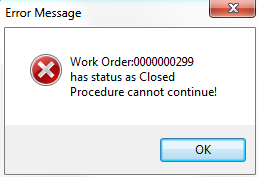
Upon attempting to close a kit, some users may report this type of message that was presented to them. This more than likely indicates that parts that have been used on the kit are currently in an active Cycle Count or Physical Inventory. Make sure that Cycle Count or Physical Inventory have been posted to Inventory and then attempt to close the kit again.
 What are the actions that would cause a work order to appear on the “Kits to Close” report? The action that causes a work order to appear on the Kits to Close report is when the Work order is closed. (In the Shop floor tracking module, the units are transferred to the Finished Goods work center). There is no longer a balance due on the order but the work order has not yet had the kit closed.
There are two aspects of closing a work order activity – 1, closing the work order; and 2, closing the kit. The work order closes when all of the scheduled parts are either in finished goods or scrap. This happens automatically when the last transfer is made in the shop floor tracking module. The kit closing is a manual function. It is separate, because even though the work order may be closed, somebody may not have completed kitting all the parts to the work order, nor moved all of the over-issue out of the work order. These actions are prompted for when the kit is closed. The user may close the kit without addressing the open issues, but if that happens, each will become a variance within accounting. Unfilled shortages will become a positive variance and overissued parts will become a negative variance. It is good practice to have someone in accounting and/or inventory review the Kit to Close report and clear them out. |
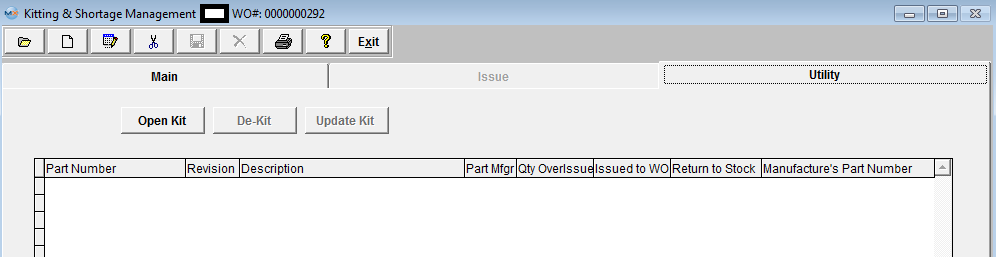
| 1.8. Re-Open Kit |
Re-open kit - If the user wishes, he/she may re-open the kit once it has been closed. Note: User MUST have full rights to the Kitting and Shortage Mgmt module within Production Security along with full right the the ALL Release to GL and ALL Posting to GL modules within Acct Security.
 If a closed kit contains parts with multiple Lot Code pick records against it and then later is re-opened the Kit Pick Lot Qty should still match the inventory Lot Qty when re-opened. If a closed kit contains overissued qty's the user can select to return the overissued qty to stock.
When re-opening of a Rework Kit it should only pull forward items from the original kit for Rework, not all the items from the BOM.
|