| 1. How To ..... for BOM & AVL |
| 1.1. Find a BOM | ||||||||||
When the screen first opens, the user is limited to only three of the eleven action buttons shown: Find an assembly, run a Report or Exit. Assemblies having Bills of Material will display the components in the Body (Detail Window) below. Selection of one of the components in the window will cause detail information for that item to be displayed if any other BOM screen Tab is selected. Use the Add icon to add components to the BOM of a displayed assembly. Use Edit to change or add Header information. Use the Delete icon to Delete the entire BOM ONLY (See Deletions section). Note: Go to the Item Detail screen to delete only one item from the BOM. Find a Bill of MaterialTo view an existing BOM or to find an existing Make Source Item (Product, Assembly, Subassembly or Phantom) under which to build a BOM.
Click on the Find an existing record Action Button.
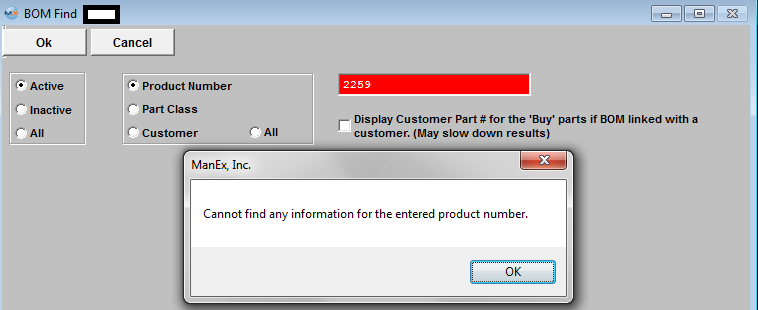
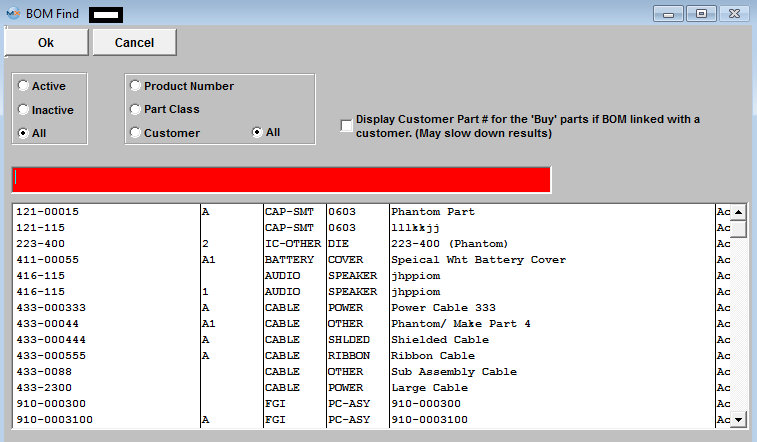
Find an Existing BOM by Product Number
BOM Search Results After finding the Part Number through either the Class Code, Customer, or directly by the Part Number, the BOM Main screen appears, populated with any parts already entered for the BOM of the assembly selected. If no parts have been added to the assembly, the Body (Detail Window) is blank. When BOM is found and displayed the order will be by "Item #". User can re-sort list by clicking on a header that is in Bold that header will display in red. The lines that are inactive will be highlighted in purple. When double clicking on an item, system will take you to the detail page.
User may find a part using the Reference Designator Lookup, by typing a reference designator into the text box it will auto fill the information, when done entering you can press “Enter” or click on the search button next to it and the record pointer in the grid will advance to the part if found.
The Header Information fields across the upper half of the screen are populated from the item master and from keyed-in assembly data. The fields in the Body (Detail Window) show information about the components included in the assembly.
|
| 1.2. Adding BOM Header Information | ||||||
A BOM Header is created by the system when a Make Item is added to the Inventory Control Mgt Item Master and Saved. When the user wishes to create a BOM by adding Line Items to the header, the existing Header is used. The Header identifies the assembly or product and its revision level, shows the status and after creation, allows Viewing BOM components by Current, All, or Selected Effective Dates. Depress the Find button. See Article #571 for Find procedures.
To enter a BOM Note depress the BOM Note button. Depress the Edit button. Enter in the note. Depress the Save button. Depress the Exit button. If you want set up scrap to be considered in Standard Cost calculation, check the Setup Stcrp box. If you want a standard build to be considered in Standard Cost calculation, enter the quantity. See Article 2504 for information on how this affects the Std Cost. Depress the Save button. |
| 1.3. Adding BOM Line Items & BOM Copy |
Bills of Material may be built up using one of three methods:
|
| 1.3.1. Drag & Drop Procedure | ||||||||||||||||
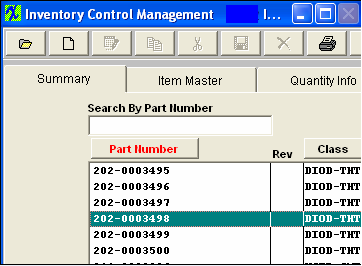
1. Procedure for Drag & Dropping The Drag and Drop Operation allows the user to select components in the Summary screen of Inventory Control Management and drag the items into the Integrated Bill of Material & AVL Main screen to add them as line items in the BOM. Use this procedure as an alternative to Manually Adding Line Items to a BOM. Open the Inventory Control Mgt. Summary screen and use Find to display the desired components.
Size the Inventory Control display by placing the cursor on the far right hand side of the display. Wait until it turns into an arrow. Holding the mouse button down, move it to the left until just the following displays:
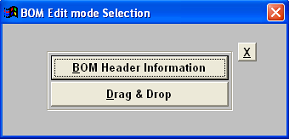
The following selection screen will appear: Choose Drag and Drop. The following message will appear: Move the cursor to the Inventory window. Highlight the desired component. Use the left mouse button to select an item in the Inventory Control Management screen. Release the left mouse button. RIGHT click on the mouse button and CONTINUING TO HOLD THE RIGHT MOUSE BUTTON DOWN, move the mouse cursor over to the BOM screen. Release the right mouse button. Note: When you drop (release the mouse button), be sure that you have the cursor over the white area,. Drag each component into the BOM in Line Item # sequence. Enter the quantity of the part per assembly when prompted. Select the Work Center. Type in the prefix for the Reference Designator. Type in the Reference Designator Start Number. Depress the Calculate button. The Number and Reference Designator Fields will fill in. 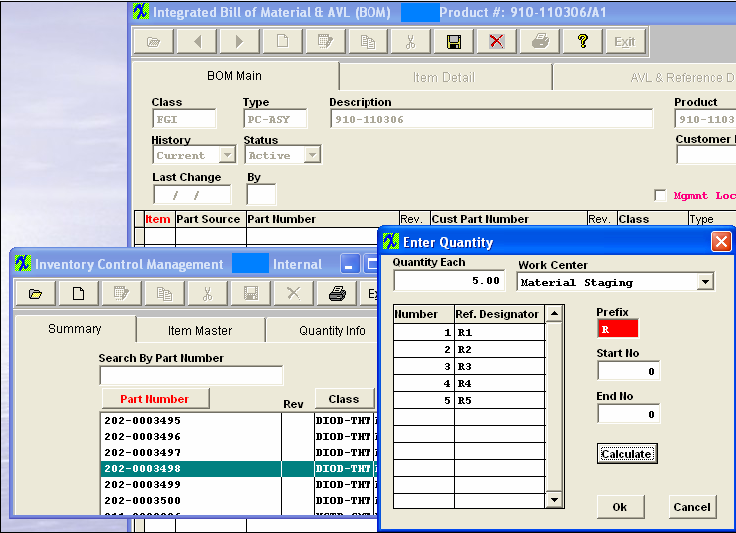 Click on the X button to close the screen. Depress the Save button in the BOM screen when finished dragging and dropping.
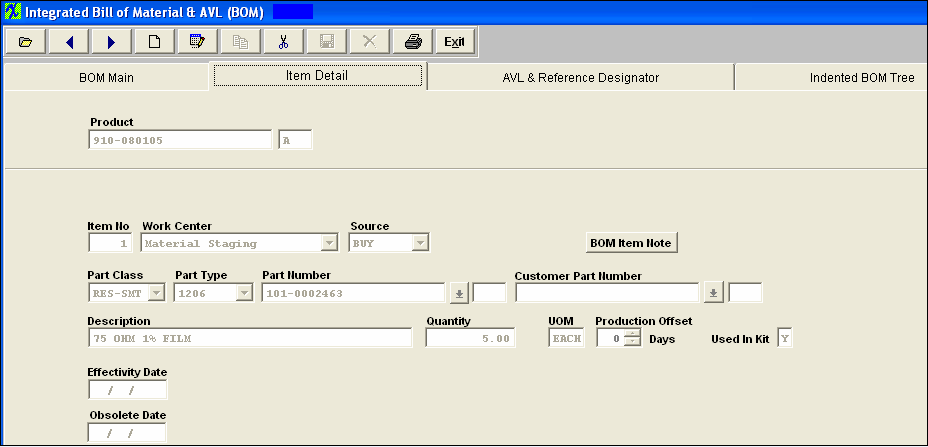
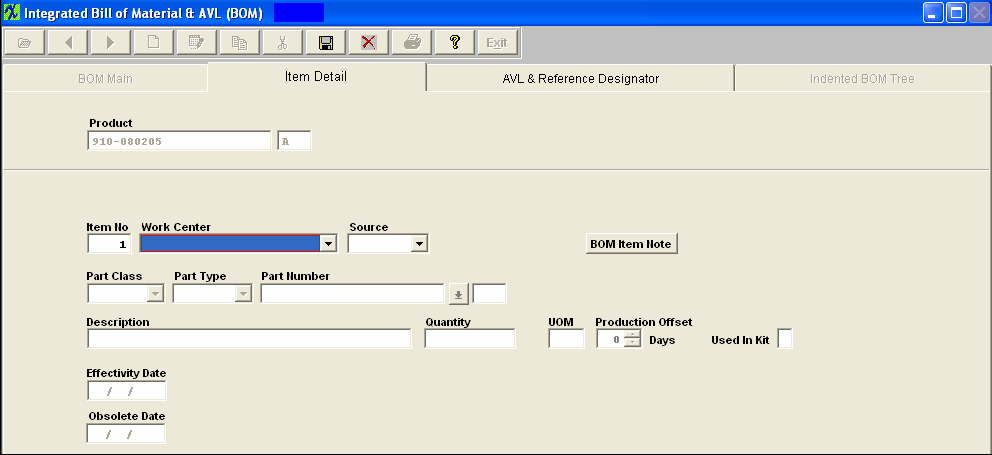
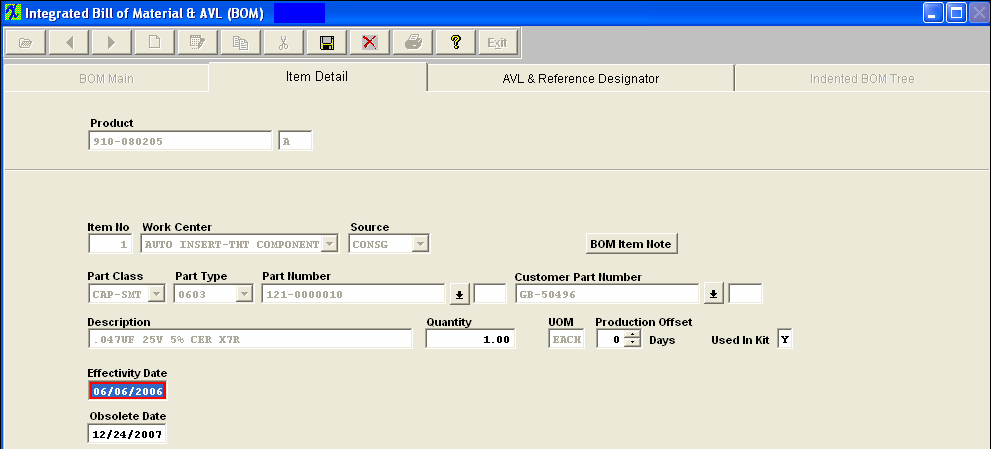
Depress the Item Detail tab in the BOM module. The following screen will appear:
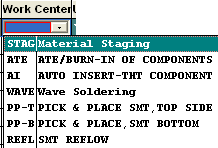
Review the detail. If you want to make any changes, depress the Edit button while this screen is open. Type in your password. You may change Item Number, Work Center, Quantity, Production Offset days, Used in Kit, and may add Effectivity Date and Obsolete Date. Depress the Save button. All the AVL's will default in as approved and require the user to deselect as desired. If no AVL's are approved a popup will appear forcing the user to approve at least one AVL.
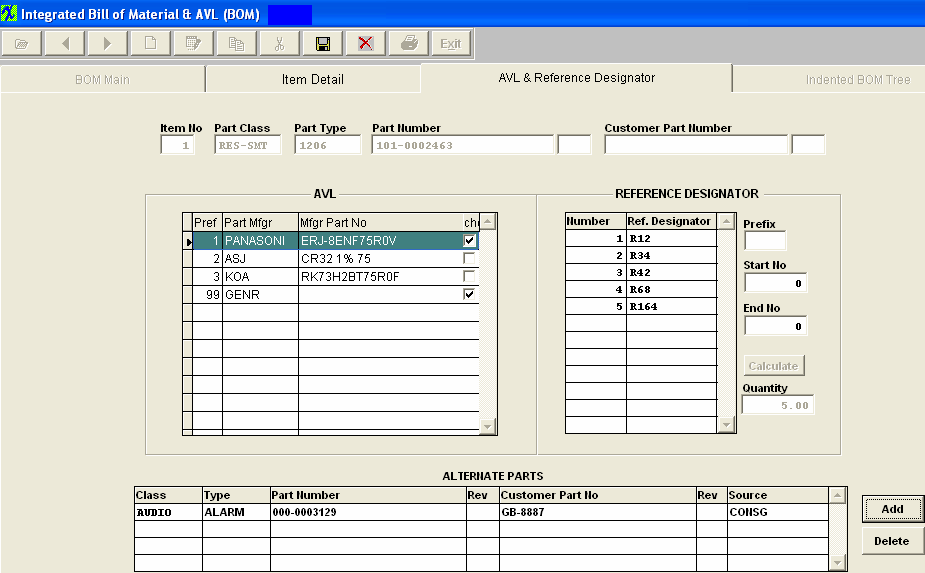
When the BOM for the assembly has a customer assigned to it, then ManEx will pull the approved AVL's from the customer side NOT the internal side. For example: Part “XYZ” may have several AVL’s and several different customers linked to it. Each customer may approve different AVL’s. So when the part is linked to a specific customer’s BOM only the AVL’s linked to that customer part will be displayed on the BOM as approved. The AVL screen looks at the accepted AVL’s for that customer on the “consigned” or “Customer” side of each part whether it was added to the BOM as a “BUY”, “MAKE” or “Consigned”. If no customer is assigned to the BOM then the AVL’s will be pulled from the internal side. NOTE: If "GENR" is approved on the BOM MRP will consider any inventory for that part even if the AVL is NOT approved on the BOM. For further detail refer to Article #2560 . If you want to add alternate parts, depress the AVL and Reference Designator tab. Depress the Edit button. Enter your password. Depress the Add button next to the alternate parts section of the screen.
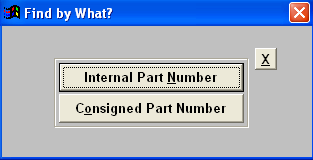
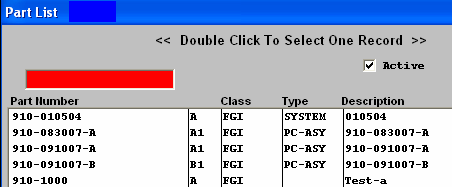
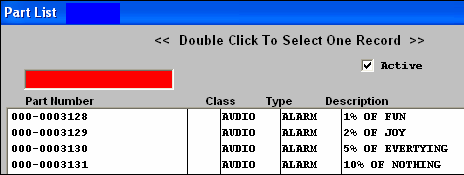
If you select Internal Part Number, a list of all Internal part numbers will appear: Type the internal part number in the red box or highlight and double click to select.
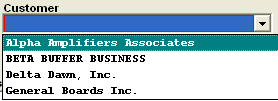
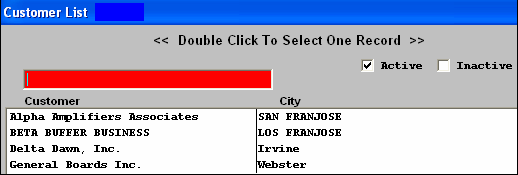
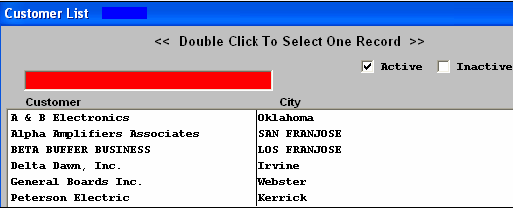
If you select Consigned Part Number, a Customer List will appear: Type the customer into the red box or highlight and double click
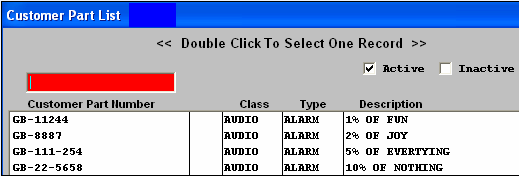
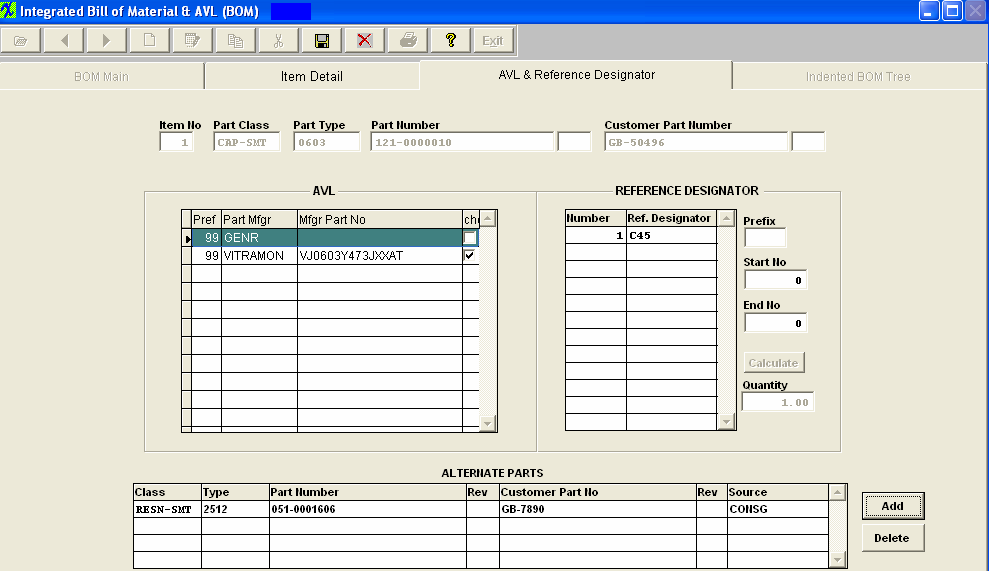
A list of all of that customers parts will appear: Type in the customer part number or highlight the item and double click to access. : Information regarding the alternate part will display in the bottom section, as displayed below
Depress the Save button. |
| 1.3.2. Manual Entry | ||||||||||||||||||||
Procedure for Manually Adding Line ItemsUse this procedure as an alternative to Drag and Dropping from the Inventory Summary screen. Open the Integrated Bill of Material & AVL BOM Main screen and Find desired Header.
To add a component, click on the Add Record button, enter password.
The item detail screen will appear:
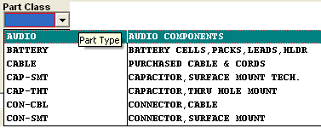
Then select Source (Make, Buy, Consigned or Phantom), from the drop down menu: When building a BOM and you enter the source as a “Phantom”, then when entering the part number that is a “Make/Phantom”, the source changes to a Make” part. The reason the source field shows at all is to limit the number of part numbers that are available to choose from. But you can enter any valid part number and the source will change to the source of the part number entered. So, yes, the source of the sub-assemblies will show as a “Make” part, even though they are actually “Make/Phantom” parts. The details of the BOM will also show they are “Make/Phantoms”. We allow nested phantoms, of either the “PHANTOM” or the “Make/Phantom” variety. In kitting, we have the code to blow down through the first level of make/phantoms, so that the parts included in the first sub-assembly level down are listed as kit requirements. We have extended this further so that if there are Make/Phantom parts in the first sub-assembly level, those also break down to the components in the second sub-assembly level. This process extends as long as there are “Make/Phantoms” in the indented BOM. Either enter the item number by typing it directly into the Part Number field or select Part Class and Part Type, as illustrated below:
Select the Part Class. Select the Part Type. Depress the down arrow next to the Part Number box. A list of all of the inventory parts within the selected Class and Type will appear. Type the Part Number into the Red box or highlight and double click to select. If the item is a Consigned Item, enter either the Customer part number OR the Internal Part number, in the respective fields If you added an internal part and if there is a matching Customer part number in the Inventory Customer screen, it will automatically appear as soon as the internal inventory part is selected. Conversely, if you typed in a customer part number, the internal part number information will automatically appear. Enter the Quantity of the item required for each assembly produced. (Note: Extra parts for setup or run losses should be added in the Inventory Control Mgt. Item Master Run Scrap % or Setup Scrap Qty. field, not in the Bill of Material.) Enter the production offset days by toggling on the up and down buttons. If the component is to be pulled in the kit, leave the Y in the Kit box.If not, remove it. Enter the effectivity and obsolete dates, if desired.
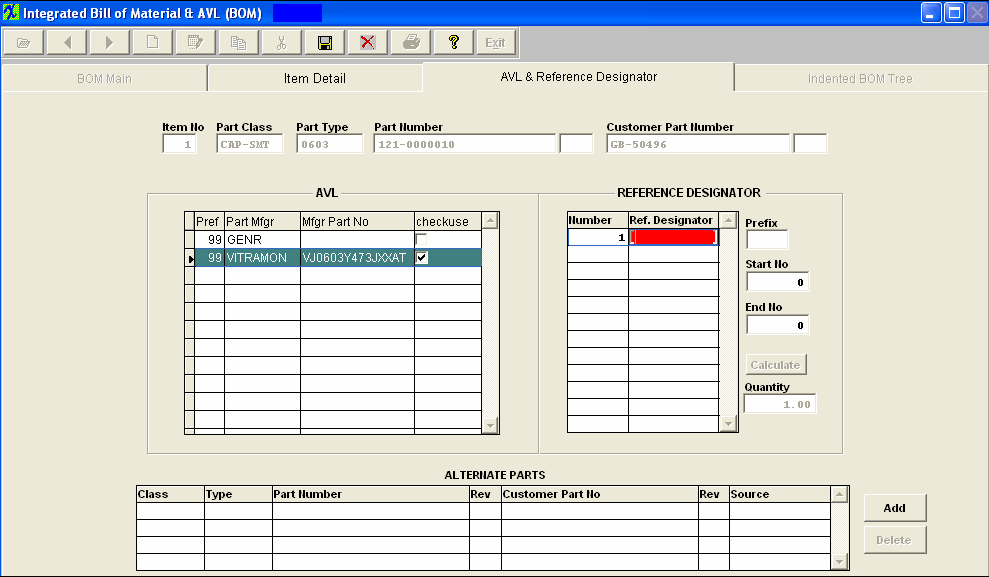
Depress the AVL & Reference Designator tab
All the AVL's will default in as approved and require the user to deselect as desired. If no AVL's are approved a popup will appear forcing the user to approve at least one AVL.
When the BOM for the assembly has a customer assigned to it, then ManEx will pull the approved AVL's from the customer side NOT the internal side. For example: Part “XYZ” may have several AVL’s and several different customers linked to it. Each customer may approve different AVL’s. So when the part is linked to a specific customer’s BOM only the AVL’s linked to that customer part will be displayed on the BOM as approved. The AVL screen looks at the accepted AVL’s for that customer on the “consigned” or “Customer” side of each part whether it was added to the BOM as a “BUY”, “MAKE” or “Consigned”. If no customer is assigned to the BOM then the AVL’s will be pulled from the internal side. NOTE: If "GENR" is approved on the BOM MRP will consider any inventory for that part even if the AVL is NOT approved on the BOM. For further detail refer to Article #2560 . Enter the Ref designators manually in the table or enter the prefix letter, Start No and End No and depress the Calculate button to auto-number.
If you want to add alternate parts, depress the AVL and Reference Designator tab. Depress the Add button next to the alternate parts section of the screen.
If you select Internal Part Number, a list of all Internal part numbers will appear: Type the internal part number in the red box or highlight and double click to select.
If you select Consigned Part Number, a Customer List will appear: Type the customer into the red box or highlight and double click
A list of all of that customers parts will appear: Type in the customer part number or highlight the item and double click to access. : Information regarding the alternate part will display in the bottom section, as displayed below.
Once user has completed entering all information for line item number, depress the Save button.
|
| 1.3.3. Copy an Existing BOM | ||
Procedure for Copying from an Existing BOM A new assembly may have a BOM applied to it by copying the bill of material from an existing assembly. To simplify changing a Bill of Material, while maintaining the original version of the assembly, users can copy the parts list into a new assembly and make changes as needed.
Depress the Copy button and enter the user’s password will prompt the user for the existing bill of materials from which to copy the components. The user may find the existing assembly from which to copy either by part number or by part class.
MANEX will populate the new assembly with all of the part information from the existing assembly, except for parts belonging to a customer. Those items will have to be added manually. The filled in BOM is displayed below:
Depress the Edit button to add the customer name and any other needed changes, in any of the screens. The user can then either Save the new assembly with all of the components, or Cancel the operation. Approved AVL's will be retained when copying BOM's except for one exception: Buy part has 3 AVL's and customer A is associated with buy part and also has 3 AVL's, Create BOM for Customer A add buy part all 3 AVL's will be listed, approved only one of the AVL's on BOM A. Create new product changing Rev. to B. Copy BOM A to B. (BOM B has no customer assigned). All AVL's will copy over and all will be checked. |
| 1.4. Bill Of Material Deletions |
The Delete button takes on dual meanings. If the user is in the BOM Main Tab when the button is pushed, the button will delete ALL items on the BOM. You will be prompted for your password. The following message will appear:
If there are open work orders for the assembly, then the user is presented with a prompt advising that the bom cannot be deleted while open orders exist, as displayed below:
If the user is in the Item Detail Information Tab when the button is pushed, the button will delete only the item highlighted. You will be prompted for your password. The following message will appear:
|
| 1.5. Procedure For Editing Line Item Details |
Use this procedure to edit Line Item details after entering BOM Header information and Line Item Part Numbers and Quantities per assembly manually, using drag and drop, or copying. Click on the Item Detail tab. Depress the Edit button and enter password. 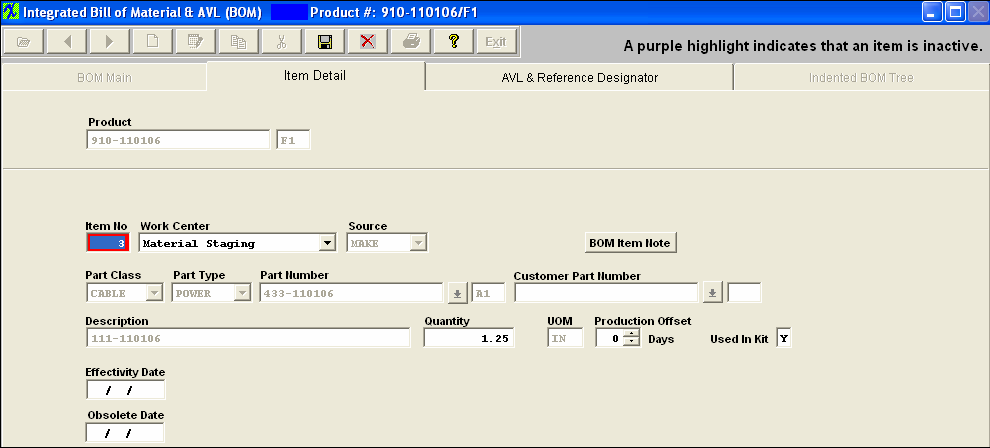 NOTE: If users choose to use effective and obsolete dates in place of proper revision control, you must be absolutely certain that they do not take effect at any point after production begins and before the WO is closed. If this isn't properly managed, you will get the variances. While some may be minor and positive variances may partially offset negative variances, you CANNOT rely on this and you WILL have discrepancies.
The best approach is to always roll the revision when there is a change to an assembly that will affect the value in any way. This becomes even more important if you have WOs open long after the due date and it has had additional changes to the configuration. See Article #5055 for further detail.
The Item number, Work Center, Qty, Production Offset, Used in Kit, Effective Date, and Obsolete Date can be edited on this screen. The Production Offset would be edited, If an item is to be kitted to a Work Center that will not be reached by the Work Order until X days later, enter X days in the Production Offset to allow kitting to that Center X days later. NOTE: This will affect the MRP demands until the kit status has been changed to "KIT IN PROCESS". Once the kit status has been changed to "Kit in Process" the parts now become a kit shortage, and the system will calculate from the WO due date or production lead time and NOT from the production offset. Enter Effectivity Date for the line item to be used in the BOM. (Note: Prior to Effectivity Date or after Obsolete Date, the line item will not appear on the Current BOM view nor will it appear on a Pick List to Kit the Assembly.) Edit the "Used in Kit" by selecting Y (Yes) for Used in Kit unless the item is not to be issued when a kit is pulled. Select P (Phantom) to cause a Make subassembly to be treated as a Phantom when kitted. Select N (No) if the item is provided to the Line by some other means than kitting. (Note: Chemicals and adhesives are typical not-kitted items that are referenced on the BOM for costing or specification but issued to the production floor on a bulk replenishment basis.) If you depress the AVL & Reference Designator tab the Ref designators can be edited manually in the table OR Enter the Prefix letter, Start No and End No and click on the Calculate button to auto-number. Here is where you will also check the approved AVL's and uncheck the AVL's that are NOT approved for this BOM. NOTE: If "GENR" is approved on the BOM MRP will consider any inventory for that part even if the AVL is NOT approved on the BOM. When adding new AVL's to the item master, if you do not want the BOM's automatically updated be sure that the "Disable Automatic BOM AVL update" is Enabled. See article #1477 for more information. You may also Add or Delete Alternate Parts by depressing the Add or Delete button near the Alternate Parts to select alternative part numbers for the Line Item currently being edited in the BOM. This table is in the BOM screen because alternate part usage is always dependent upon the application and hence is BOM specific. (Note: Use the Quantity Info screen and AVL window to show alternate manufacturers; the alternate part window is only for items with a different internal part number (such as faster or tighter tolerance parts) that can be used on a temporary deviation when there is no choice.) Once you have completed the changes, depress the Save button and BOM will be updated.
Note: If the Leveling of Make items is in process then the users will not be able to Add/Edit a BOM, even if the user is already in modifucation mode of the BOM, the user will not be allowed to save the changes until the leveling process is complete. This is due to the fact that the affected records in leveling of Make Parts is large and complex, the saving time to commit the whole changes to inventory tables does take a large amount of time, so we do not want users making modifications to the BOM when the process is still leveling, so we have added a flag that the users will see within the BOM module.
|
| 1.6. Bill of Material (BOM) Used in Kit Option and how it affects Kitting & MRP |
Within the Bill of Material module the users have the option to mark each item loaded to the BOM as Used in Kit Y, N or F. Y = Yes, this part is used in the Kit and will be considered fro MRP demands and appear within the Kitting module Qty Pick screen. Once the parts have been issued to the kit the system will automatically decrement it from inventory upon WO complete. N = No, this part is NOT used in the kit, but it will be considered by MRP for demands but will NOT appear in the Kit module Qty Pick screen. This item will still be displayed on the Kit Pick Worksheet but it will have the “N” next to the item so users will know that it is not used in the kit. Example: you would use this option for Documentation. NOTE: Keep in mind that this item will be picked by the users on the floor but it will not be relieved from inventory in any way through the Kitting module. Users have to go make and manually adjust the inventory qty’s for this type of item.
MRP includes items with "N" flag in "used in kit" for Purchase Order Actions. The flag does not mean don't buy it, but instead, it means don't kit it. The part is still needed, or it wouldn't be on the BOM. Or the quantity would be zero. This feature is usually used by Users who have bulk stock on the floor, and the assemblers pull the parts out of floor stock. But there still remains the requirement to get the parts in house so they can be put into floor stock. F = Floor, this would be used for an item that is not kept in the Stock room but is physically stored out on the Floor in production. “F” items will also be considered by MRP for demands, but will NOT be displayed on Kit Module Qty Pick Screen or the Shortage report. This item will still be displayed on the Kit Pick Worksheet but it will have the “F” next to the item to indicate to the users that it is located on the Floor. NOTE: Keep in mind that this item will be picked by the users on the floor but it will not be relieved from inventory in any way through the Kitting module. Users have to go make and manually adjust the inventory qty’s for this type of item.
|
| 1.7. Bill of Material Setup Scrap Checkbox |
Within the Bill of Material Module you will see a Setup Scrap check box and a Standard Build field. If you wish for the setup scrap qty’s to be included in the Kitting and MRP calculations, Standard Cost Adjustments, etc. . . you need to make sure that the BOM has the Setup Scrp box marked. Then upon checking this box the system will default in the Standard Build qty to 1 (just because it can not be blank) It is recommend that you change the Standard Build qty to the desired average build qty for the product (the Standard Build will affect how the system will calculate Standard Cost Adjustments, etc. . . within the system)
|
| 1.8. Make a Obsolete Part Available on a BOM |
Find an existing BOM
 Depress the pulldown next to the History and Select BOM History, all parts will be displayed, including the parts that have been obsoleted.
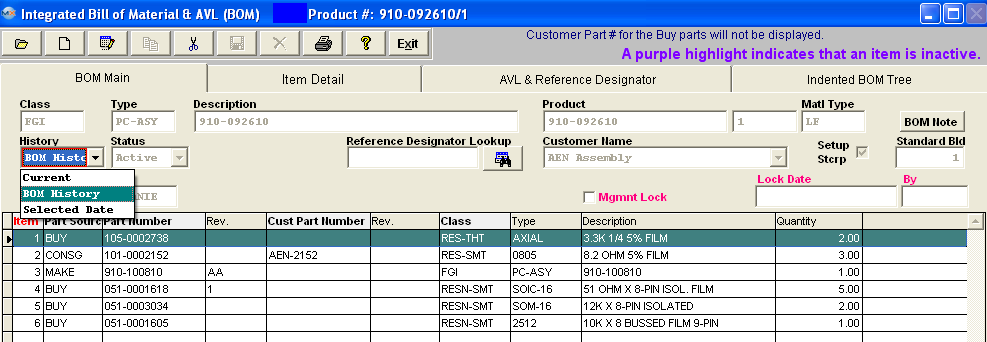 Highlight the part that has been obsoleted and enter the item detail screen, depress the edit button and remove the obsolete date or change it to a later date.
 Now the part is available to use.
 |
| 1.9. Link User Defined Fields to a BOM |
| The User Defined fields MUST be setup within Web ManEx. For further detail see Article #5454.
The User Defined Fields can
then be linked to a Bill of Material by selecting a record in the ManEx
Desktop, and selecting the UD action button (as displayed below).
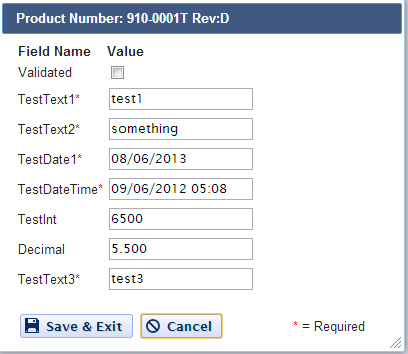
The UDF for that section will then be displayed, and user can make changes (if applicable), Save & Exit or Cancel.
|


