| 1. Integrated BOM & AVL |
| 1.1. Prerequisties for BOM & AVL |
Prerequistes
After activation, "Bill of Material and AVL" access for each user must be setup in the ManEx System Security module. Users with “Supervisor Rights” will automatically have access. Part number for Assembly, Product or Subassembly must exist in the Inventory Control Mgmt module. Part numbers for Components and Subassemblies must exist in the Inventory Control Mgmt module.
Customer Part numbers for Consigned Parts to be added to the BOM must exist in the Inventory Control Mgmt module.
Manufacturer’s Part numbers and Customer’s AVL selections must be setup in the Inventory Control Mgmt module.
Optional Data
Component Costs (Standard, Budgeted or Quoted) for manual calculation of the Standard cost of the Assembly. Note that if the Accounting Module is installed, the cost information must be filled out.
|
| 1.2. Introduction for BOM & AVL |
The Integrated Bill of Material and AVL Module allows the user to create, modify, copy, inactivate or delete Bills of Material (BOM’s).BOM’s are the master documents that define what material goes into a product. Item numbers (Product, assembly, subassembly or component) used in BOM’s link the BOM’s to the data that is entered and maintained in the Inventory Control Management- Item Master and Quantity Info screens. Most of the basic data fields (class, type, description, revision, unit of measure, warehouse and order policy) remain the same whenever an item is used in a BOM. Only the data fields that are maintained in the BOM Module, such as the reference designators, kit-to Work Center and quantity per assembly may be changed from one BOM to the next.BOM’s are used to kit components and subassemblies for Work Orders and to drive demand for Material Requirements Planning.
See Article #2560 to view how Inventory, BOM's and AVL's are connected within the ManEx system.
NOTE: If users choose to use effective and obsolete dates in place of proper revision control, you must be absolutely certain that they do not take effect at any point after production begins and before the WO is closed. If this isn't properly managed, you will get the variances. While some may be minor and positive variances may partially offset negative variances, you CANNOT rely on this and you WILL have discrepancies.
The best approach is to always roll the revision when there is a change to an assembly that will affect the value in any way. This becomes even more important if you have WOs open long after the due date and it has had additional changes to the configuration. See Article #5055 for further details.
Definitions
Indented Bill of Material: The Top-down breakdown of the structure of a product. In an indented BOM listing, every subassembly and component is indented one level from the assembly or subassembly into which it goes. Parent and Child Relationships in BOM’s: Each product “parent” has an indented list of “child” components and subassemblies that go into it. Each child item is indented under its parent and may in turn have child components indented under it. Accepted Manufacturer List (AML): The AML is the list of manufacturer part numbers entered in the Inventory Control Mgt.- Quantity Info screen. A manufacturer must first be set up in the Inventory Control Mgt./ Part Manufacturer Setup before its approved part number can be added. Accepted Vendor List (AVL): AVL’s show which manufacturers are approved or qualified for use for a particular customer’s product line or individual product. Only manufacturer part numbers that have been entered in the AML for a particular item can be selected or deleted from the AVL for a customer. A customer’s Approved Vendor List of manufacturers for each internal part is maintained in that customer’s Consigned Inventory record for that part. Consigned Inventory AVL Record: When a Customer part number is assigned in the Inventory Control Mgt.- Customer Reference screen, a Consigned Inventory Record is generated for that item and customer. The Quantity Info screen for the Consigned Customer part number is where the Customer’s AVL is maintained.
Q. Do I have to go into the Inventory Control Management module and assign a customer to the part number? A. Only if the user wants the cross-reference to the customer part number to show for internal parts on the BOM. This field will show up if a BOM Assembly is attached to a specific customer. Anti-AVL: Normally the AVL for each customer applies to all of their product BOM’s. However, if a customer wishes to disqualify a manufacturer from use in one particular BOM, removing a check-mark from the Anti-AVL field may be used to keep the otherwise approved manufacturer from being used on specific BOM’s. Generic and Manufacturer Preferences: A Generic (Genr) manufacturer means that any manufacturer’s part can be used.Generic is generated by the system as the default manufacturer if no other is specified. If specific manufacturers are listed for a part, preferences for use in an Internal or in a Customer’s product may be entered. Preferences are entered in the Inventory Control Mgt.- Quantity Info screen as 1 for 1st, 2 for 2nd, etc. next to the manufacturer. FunctionsBills of Material serves many functions in the manufacturing environment. They are central to all manufacturing operations and are used for everything from product specification to quotation document. BOM’s are key to material requirements planning, kit organization, product structure, and configuration control. Material Requirements Planning (MRP): The BOM is the master plan for building product. An indented BOM from the product top level down to the lowest level component provides the entire material picture for a product. Its quantity and manufacturer preferences are used to kit materials for production to assemble. Its linkage to Item Master Purchase and Production Lead Times and Work Center offsets are used by the MRP to determine which parts to purchase or make and when to provide them. By listing multiple manufacturers and alternate part numbers, the BOM can be used to manage work order shortages. Kitting by Work Center: Selection of a Work Center for each BOM Line Item causes that item to be kitted with other parts for that Work Center. Grouping of the parts needed for the first Work Center helps determine when to start a work order and eliminates the need for sorting out needed parts at each Work Center. Also if parts are not kitted until needed for later work centers, they need not be purchased or made until closer to the time they are actually needed. Production Offset: This time difference between the start of the kit for the first Work Center and the kitting for the Work Center where the part is needed is called Production Offset and can be entered for each line item in the BOM. For example, mechanical parts and chassis parts may not be needed until the work order reaches the final assembly work center. By identifying those parts as Final Assembly parts and entering “x” number of days of Production Offset, the parts will not be scheduled for delivery by the MRP nor need they be kitted for “x” days later than the rest of the Work Order. An entry in this field will displace the due date required by the amount of offset established in the BOM. If the user wanted a part or assembly to be ready on the third week of an order that took 4 weeks, then the user would enter a 3 week offset, and the MRP module would suggest ordering the parts three weeks later than otherwise. Please refer to the Material Requirements Planning Management manual. Engineering Change Control: BOM’s are unique by their revision number and as such are used to control changes to the structure or components in a product. By creating a new Revision level of the BOM with an Effective Date the next day after the Obsolete Date for the old BOM Revision, the user can drive changes in material requirements, kitting and work orders. Or if the new BOM Revision level is to co-exist with the down-rev. Revision, the new BOM is just activated without obsoleting the old BOM. With BOM Revision control, several revisions may exist with different definitions for each. BOM Notes may be used to record Engineering Changes for tracking purposes in the absence of a formal ECO system or documentation. Reference Designators: Unique reference or insertion designations can be assigned in the BOM as guides for placement, assembly, repair or data recording for Statistical Quality Control (SQC).
Note: If the Leveling of Make items is in process then the users will not be able to Add/Edit a BOM, even if the user is already in modification mode of the BOM, the user will not be allowed to save the changes until the leveling process is complete. This is due to the fact that the affected records in leveling of Make Parts is large and complex, the saving time to commit the whole changes to inventory tables does take a large amount of time, so we do not want users making modifications to the BOM when the process is still leveling, so we have added a flag that the users will see within the BOM module.
|
| 1.3. Fields & Definitions for BOM & AVL |
| 1.3.1. Bill Of Material Main Screen | |||||||||||||||||||||||||||||||||||||||||||||||||||||||||
This is the screen that appears when opening the module. The product number is displayed in the Bill of Material Module screen header as a reference. The product information will remain on screen while viewing other sections of the BOM module. BOM Main may be used to view, edit, add or delete a Bill of Material. BOM Header information is displayed for any item located after a FIND. If any Line Items have been added to an assembly in the BOM Header, they will be displayed in the Detail Window below. The lines that are inactive will be highlighted in purple. Selection of a Line Item in the Detail Window will cause the other BOM screens to be populated with default and/or added information for that Line Item. Start with this screen to add a new BOM, edit an existing BOM, add a new Line Item or change detail information for existing Line Items.  The Header Information fields across the upper half of the screen are populated from the item master and from keyed-in assembly data. The fields in the Body (Detail Window) show information about the components included in the assembly. BOM Main Field Definitions
COMPONENT INFORMATION (Displayed in the Body (Detail Window)
|
| 1.3.2. Item Detail Information Tab | ||||||||||||||||||||||||||||||||||||||
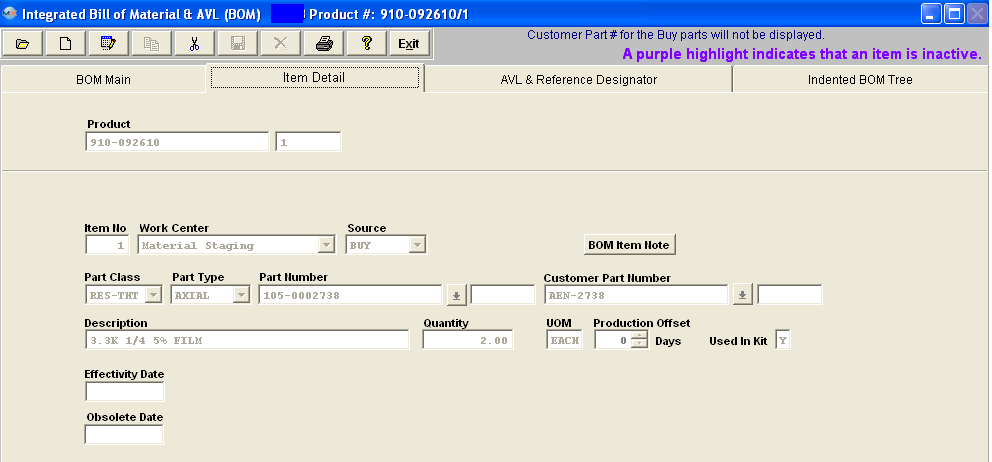
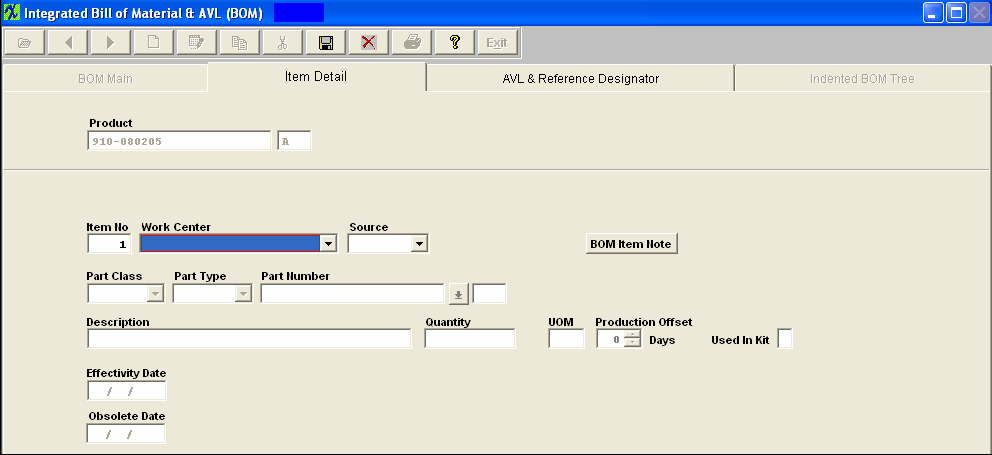
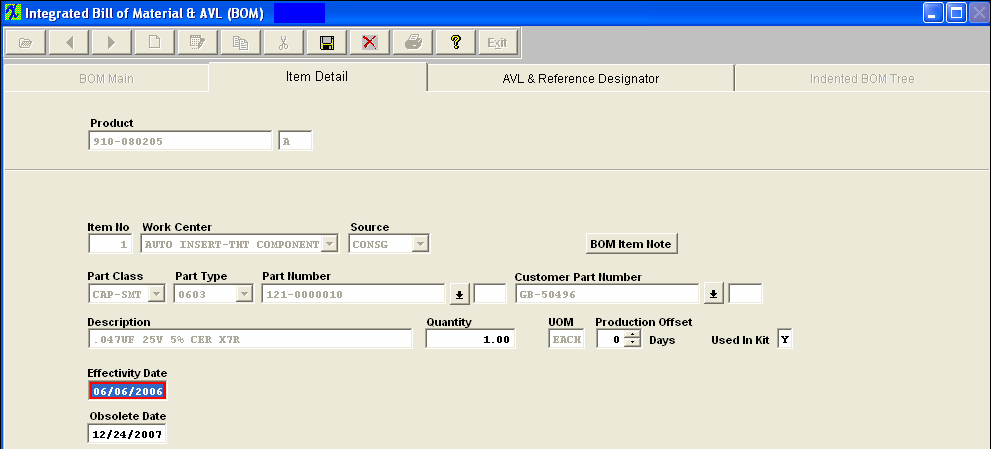
When the user has displayed component parts on the BOM Main screen, and has highlighted one of the parts, pressing on the Item Detail Tab will display information about that component part.
The first row of Header information repeats the assembly Product information. The remaining fields describe Detail information about the component part.
COMPONENT INFORMATION
DIRECTIVE BUTTON The following button is displayed on the BOM Item Detail screen:
|
| 1.3.3. AVL And Reference Designator Tab | ||||||||||||||||||||||||||||||||||||||||
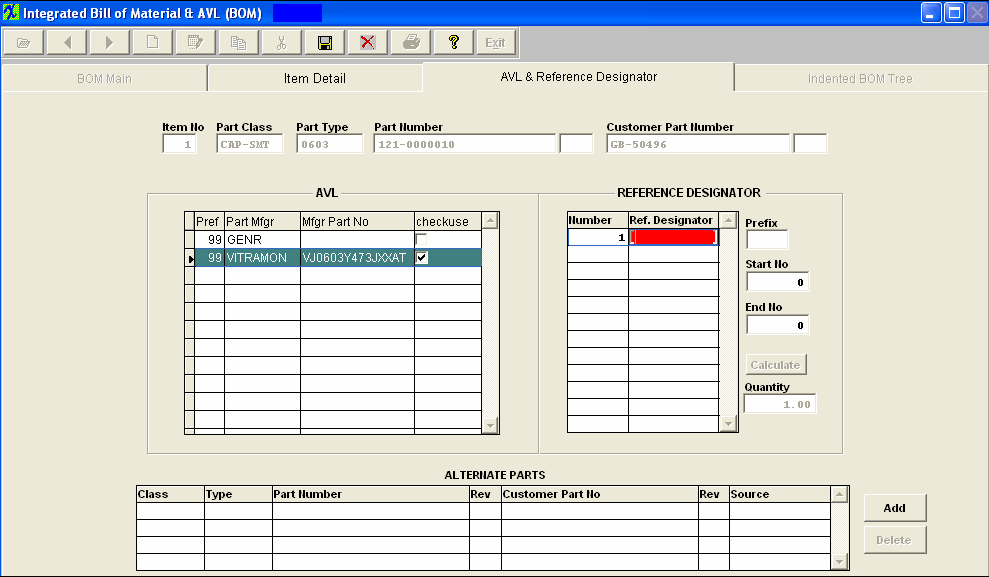
When the user has displayed component parts on the summary screen, and has highlighted one of the parts, pressing on the AVL & REF Tab will display Part Manufacturer and Reference Designation information about the component part.
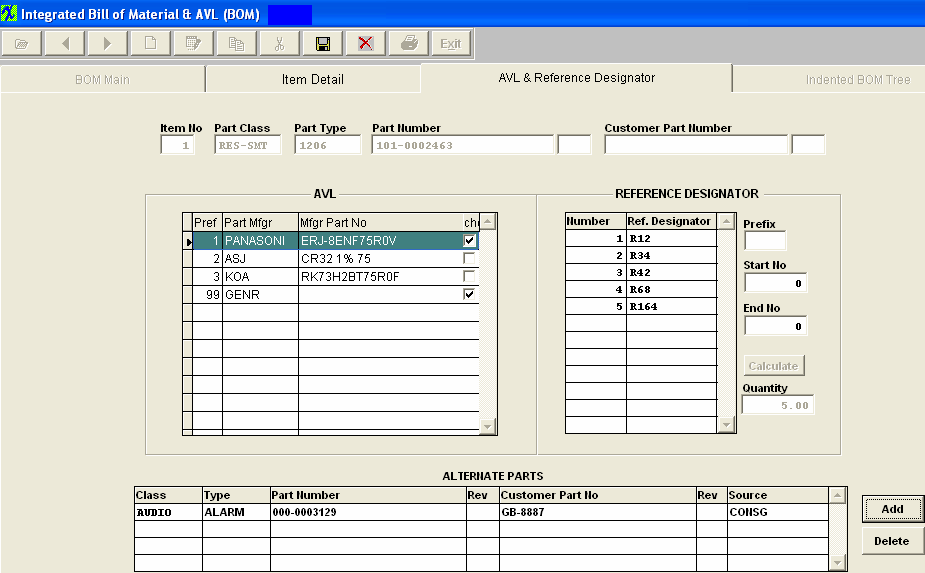
The first row of Information displays the selected detail part information.The Customer Part Number will be displayed if entered in the Item Master. The Left Center portion of the screen displays the Approved Vendors List (AVL). These manufacturers and their part numbers have been selected and designated as approved sources for this particular BOM assembly. When the BOM for the assembly has a customer assigned to it, then Manex will pull the approved AVL's from the customer side NOT the Internal side. If no customer is assigned to the BOM then the AVL’s will be pulled from the internal side. For further detail see Article #2560 . NOTE: If "GENR" is approved on the BOM MRP will consider any inventory for that part even if the AVL is not approved on the BOM.
The left hand column displays the preference order, as assigned in Inventory Control Management.
The right hand column box must be checked for the Kit to issue the part to the Work Order. (At least one AVL must be selected as approved within the BOM module before save will be allowed).
The Right Center portion of the screen displays the reference designators assigned to the component. These fields are optional, but must be completed if reference designator information is to be used in the quality defect collection information. (The ref designators are case sensitive). The bottom portion of the screen is available to list alternate parts that may be used in the absence of the primary part. However, these alternate parts are not listed on kit lists, and are only displayed on this screen. On the BOM, Manex provides a place for users to identify “Alternate Part” for each part called out in the BOM. However, this is for information and cross reference ONLY and there is no connection with the MRP, Purchasing or Kitting, etc. modules. The concept here is that if the engineers want to include alternate (not preferred, and not on AVL) parts for the possibility that in case purchasing can’t get the original parts called for by MRP, they could look up the alternate part on the BOM, and then order that part. However, to get the part into the kit, they will have to add the alternate part as a line shortage to the Work Order, and also check the “ignore shortage” for the part(s) originally required and short on the Work Order. Then MRP will work as needed, and the kit will show the alternate part as a (line) shortage until filled. Incidentally, creating the line shortage and checking the ignore shortage for the original part will result in an MRP directive (the next time it is run) to buy the alternate (line shortage) part. Please refer to the Material Requirements Planning and the Kitting, Allocating & Shortage Management modules. AVL & Ref Designator Field Definitions COMPONENT INFORMATION
The Part Class of the component part. The Part Type of the component part. The component part number. Customer Part Number The customer part number as entered in the Item Master. The Revision number of the customer’s part number. AVL INFORMATION
The order of preference number. An approved manufacturer for the component on the current BOM. NOTE: When the BOM for the assembly has a customer assigned to it, then Manex will pull the approved AVL's from the customer side NOT the Internal side. If no customer is assigned to the BOM then the AVL’s will be pulled from the internal side. For further detail see Article #2560 . The commercial part number. This box must be checked for kitting to pull the component. NOTE: If "GENR" is approved on the BOM MRP will consider any inventory for that part even if the AVL is not approved on the BOM. (At least one AVL must be selected as approved within the BOM module before save will be allowed). REFERENCE DESIGNATOR INFORMATION
The sequential number assigned to each occurrence of the component on the assembly. The assigned location for each occurrence of the part. (The ref designators are case sensitive). If the user wishes to fill in the reference designators automatically, then the start number will be the beginning number in the sequence of reference designators assigned. If the user wishes to fill in the reference designators automatically, then the end number will be the last number in the sequence of reference designators assigned. The quantity of components used in the assembly. ALTERNATE PART INFORMATION These items are the same as previously described. DIRECTIVE BUTTONS
Pressing the Add button in the ALTERNATE area will allow the user to add additional item master part numbers as approved alternates. Pressing the Delete button in the ALTERNATE area will allow the user to remove item master part numbers as approved alternates. |
| 1.3.4. Indented BOM Tree Tab |
When the user has displayed component parts on the BOM Main screen, and has highlighted one of the parts, pressing on the Indented BOM Tree tab will display the components with additional information about a make part components.
The first row of data reminds the user of the assembly information.
The bottom portion of the screen displays the components of this assembly. If there is a plus sign to the left of a listed component, click on the plus sign and the components of the listed components will also appear. 
|
| 1.4. How To ..... for BOM & AVL |
| 1.4.1. Find a BOM | ||||||||||
When the screen first opens, the user is limited to only three of the eleven action buttons shown: Find an assembly, run a Report or Exit. Assemblies having Bills of Material will display the components in the Body (Detail Window) below. Selection of one of the components in the window will cause detail information for that item to be displayed if any other BOM screen Tab is selected. Use the Add icon to add components to the BOM of a displayed assembly. Use Edit to change or add Header information. Use the Delete icon to Delete the entire BOM ONLY (See Deletions section). Note: Go to the Item Detail screen to delete only one item from the BOM. Find a Bill of MaterialTo view an existing BOM or to find an existing Make Source Item (Product, Assembly, Subassembly or Phantom) under which to build a BOM.
Click on the Find an existing record Action Button.
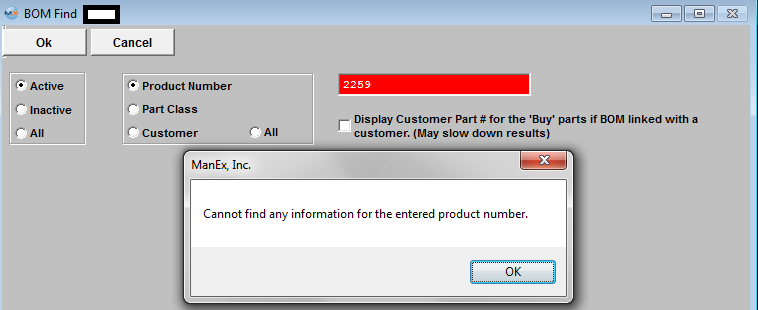
Find an Existing BOM by Product Number
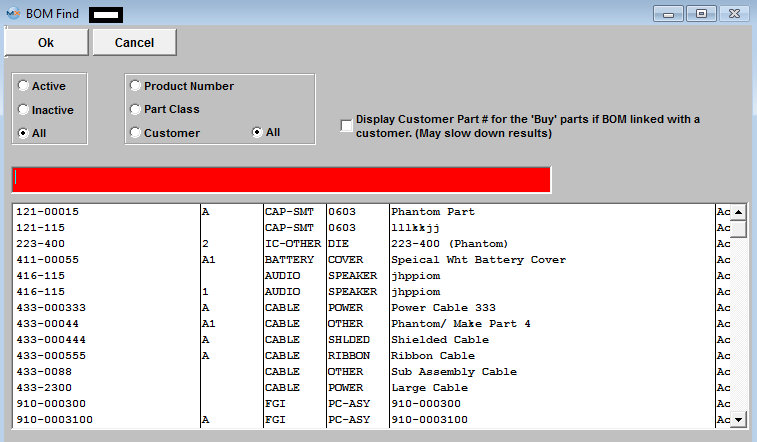
BOM Search Results After finding the Part Number through either the Class Code, Customer, or directly by the Part Number, the BOM Main screen appears, populated with any parts already entered for the BOM of the assembly selected. If no parts have been added to the assembly, the Body (Detail Window) is blank. When BOM is found and displayed the order will be by "Item #". User can re-sort list by clicking on a header that is in Bold that header will display in red. The lines that are inactive will be highlighted in purple. When double clicking on an item, system will take you to the detail page.
User may find a part using the Reference Designator Lookup, by typing a reference designator into the text box it will auto fill the information, when done entering you can press “Enter” or click on the search button next to it and the record pointer in the grid will advance to the part if found.
The Header Information fields across the upper half of the screen are populated from the item master and from keyed-in assembly data. The fields in the Body (Detail Window) show information about the components included in the assembly.
|
| 1.4.2. Adding BOM Header Information | ||||||
A BOM Header is created by the system when a Make Item is added to the Inventory Control Mgt Item Master and Saved. When the user wishes to create a BOM by adding Line Items to the header, the existing Header is used. The Header identifies the assembly or product and its revision level, shows the status and after creation, allows Viewing BOM components by Current, All, or Selected Effective Dates. Depress the Find button. See Article #571 for Find procedures.
To enter a BOM Note depress the BOM Note button. Depress the Edit button. Enter in the note. Depress the Save button. Depress the Exit button. If you want set up scrap to be considered in Standard Cost calculation, check the Setup Stcrp box. If you want a standard build to be considered in Standard Cost calculation, enter the quantity. See Article 2504 for information on how this affects the Std Cost. Depress the Save button. |
| 1.4.3. Adding BOM Line Items & BOM Copy |
Bills of Material may be built up using one of three methods:
|
| 1.4.3.1. Drag & Drop Procedure | ||||||||||||||||
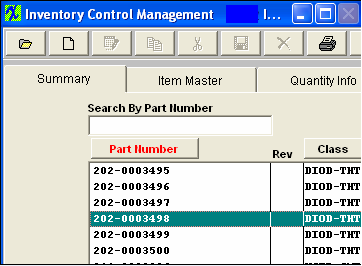
1. Procedure for Drag & Dropping The Drag and Drop Operation allows the user to select components in the Summary screen of Inventory Control Management and drag the items into the Integrated Bill of Material & AVL Main screen to add them as line items in the BOM. Use this procedure as an alternative to Manually Adding Line Items to a BOM. Open the Inventory Control Mgt. Summary screen and use Find to display the desired components.
Size the Inventory Control display by placing the cursor on the far right hand side of the display. Wait until it turns into an arrow. Holding the mouse button down, move it to the left until just the following displays:
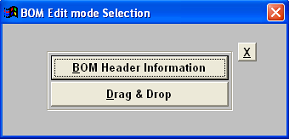
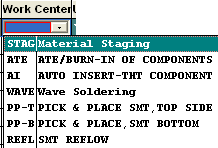
The following selection screen will appear: Choose Drag and Drop. The following message will appear: Move the cursor to the Inventory window. Highlight the desired component. Use the left mouse button to select an item in the Inventory Control Management screen. Release the left mouse button. RIGHT click on the mouse button and CONTINUING TO HOLD THE RIGHT MOUSE BUTTON DOWN, move the mouse cursor over to the BOM screen. Release the right mouse button. Note: When you drop (release the mouse button), be sure that you have the cursor over the white area,. Drag each component into the BOM in Line Item # sequence. Enter the quantity of the part per assembly when prompted. Select the Work Center. Type in the prefix for the Reference Designator. Type in the Reference Designator Start Number. Depress the Calculate button. The Number and Reference Designator Fields will fill in. 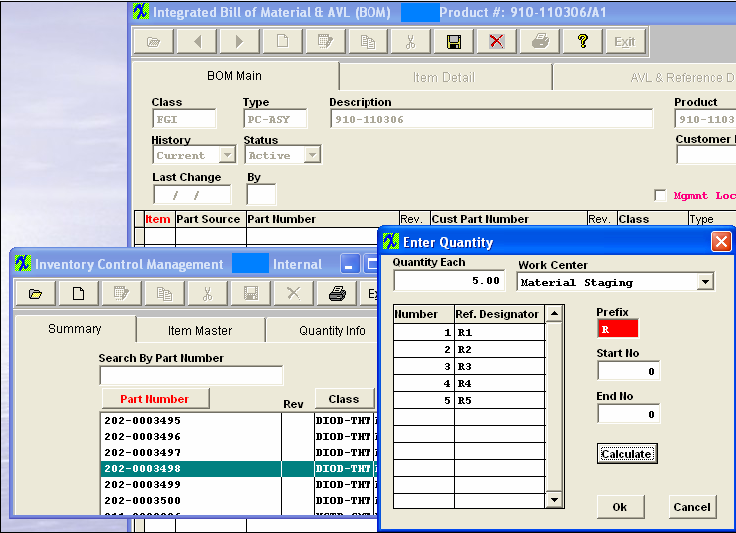 Click on the X button to close the screen. Depress the Save button in the BOM screen when finished dragging and dropping.
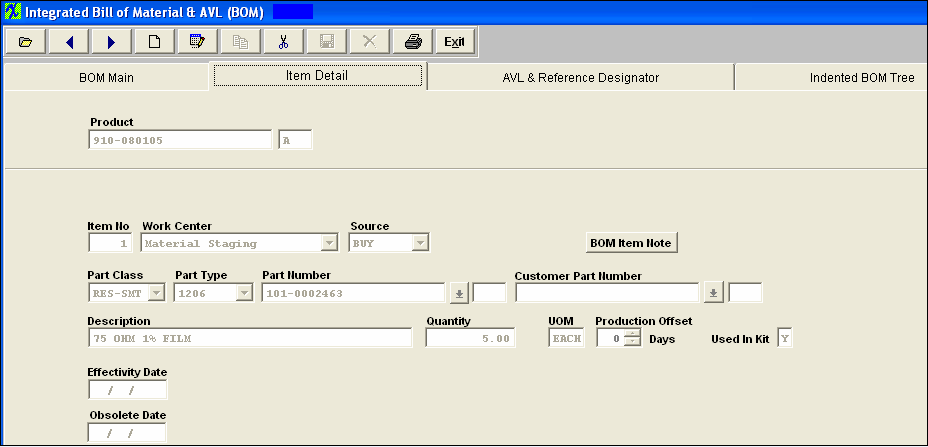
Depress the Item Detail tab in the BOM module. The following screen will appear:
Review the detail. If you want to make any changes, depress the Edit button while this screen is open. Type in your password. You may change Item Number, Work Center, Quantity, Production Offset days, Used in Kit, and may add Effectivity Date and Obsolete Date. Depress the Save button. All the AVL's will default in as approved and require the user to deselect as desired. If no AVL's are approved a popup will appear forcing the user to approve at least one AVL.
When the BOM for the assembly has a customer assigned to it, then ManEx will pull the approved AVL's from the customer side NOT the internal side. For example: Part “XYZ” may have several AVL’s and several different customers linked to it. Each customer may approve different AVL’s. So when the part is linked to a specific customer’s BOM only the AVL’s linked to that customer part will be displayed on the BOM as approved. The AVL screen looks at the accepted AVL’s for that customer on the “consigned” or “Customer” side of each part whether it was added to the BOM as a “BUY”, “MAKE” or “Consigned”. If no customer is assigned to the BOM then the AVL’s will be pulled from the internal side. NOTE: If "GENR" is approved on the BOM MRP will consider any inventory for that part even if the AVL is NOT approved on the BOM. For further detail refer to Article #2560 . If you want to add alternate parts, depress the AVL and Reference Designator tab. Depress the Edit button. Enter your password. Depress the Add button next to the alternate parts section of the screen.
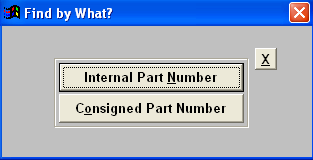
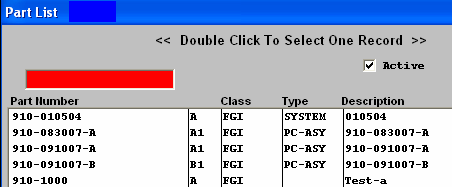
If you select Internal Part Number, a list of all Internal part numbers will appear: Type the internal part number in the red box or highlight and double click to select.
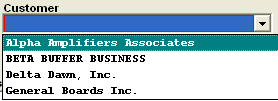
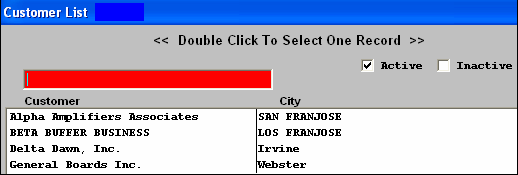
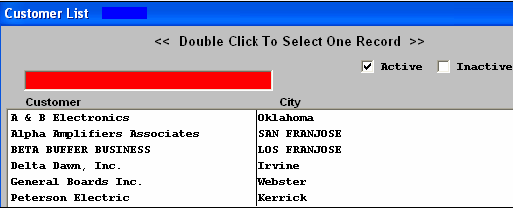
If you select Consigned Part Number, a Customer List will appear: Type the customer into the red box or highlight and double click
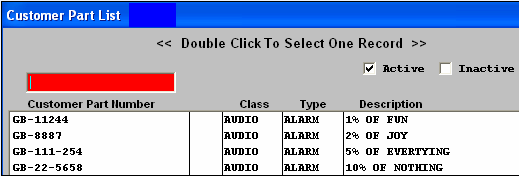
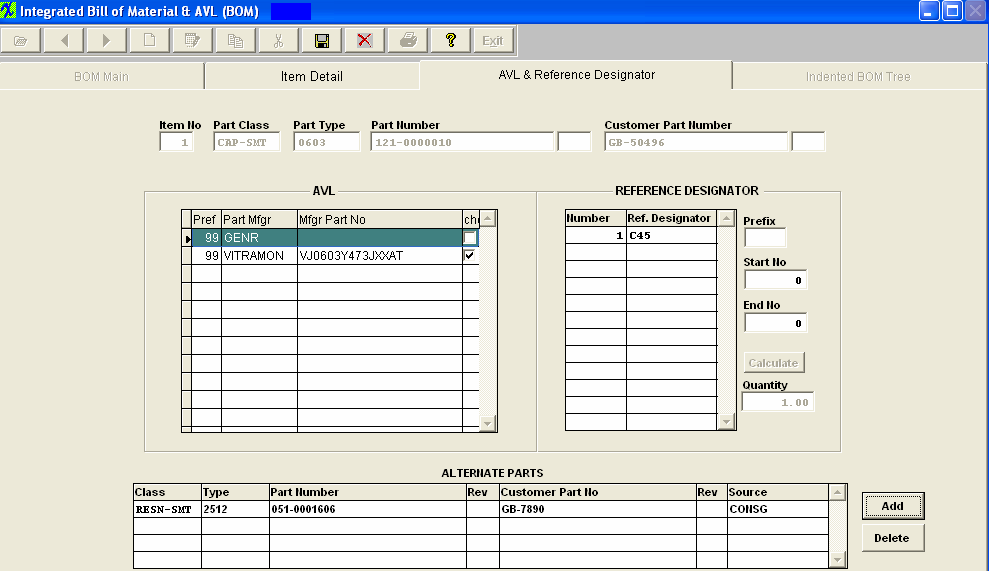
A list of all of that customers parts will appear: Type in the customer part number or highlight the item and double click to access. : Information regarding the alternate part will display in the bottom section, as displayed below
Depress the Save button. |
| 1.4.3.2. Manual Entry | ||||||||||||||||||||
Procedure for Manually Adding Line ItemsUse this procedure as an alternative to Drag and Dropping from the Inventory Summary screen. Open the Integrated Bill of Material & AVL BOM Main screen and Find desired Header.
To add a component, click on the Add Record button, enter password.
The item detail screen will appear:
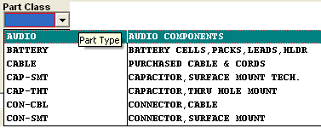
Then select Source (Make, Buy, Consigned or Phantom), from the drop down menu: When building a BOM and you enter the source as a “Phantom”, then when entering the part number that is a “Make/Phantom”, the source changes to a Make” part. The reason the source field shows at all is to limit the number of part numbers that are available to choose from. But you can enter any valid part number and the source will change to the source of the part number entered. So, yes, the source of the sub-assemblies will show as a “Make” part, even though they are actually “Make/Phantom” parts. The details of the BOM will also show they are “Make/Phantoms”. We allow nested phantoms, of either the “PHANTOM” or the “Make/Phantom” variety. In kitting, we have the code to blow down through the first level of make/phantoms, so that the parts included in the first sub-assembly level down are listed as kit requirements. We have extended this further so that if there are Make/Phantom parts in the first sub-assembly level, those also break down to the components in the second sub-assembly level. This process extends as long as there are “Make/Phantoms” in the indented BOM. Either enter the item number by typing it directly into the Part Number field or select Part Class and Part Type, as illustrated below:
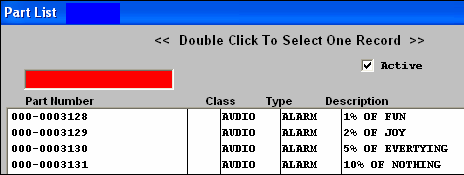
Select the Part Class. Select the Part Type. Depress the down arrow next to the Part Number box. A list of all of the inventory parts within the selected Class and Type will appear. Type the Part Number into the Red box or highlight and double click to select. If the item is a Consigned Item, enter either the Customer part number OR the Internal Part number, in the respective fields If you added an internal part and if there is a matching Customer part number in the Inventory Customer screen, it will automatically appear as soon as the internal inventory part is selected. Conversely, if you typed in a customer part number, the internal part number information will automatically appear. Enter the Quantity of the item required for each assembly produced. (Note: Extra parts for setup or run losses should be added in the Inventory Control Mgt. Item Master Run Scrap % or Setup Scrap Qty. field, not in the Bill of Material.) Enter the production offset days by toggling on the up and down buttons. If the component is to be pulled in the kit, leave the Y in the Kit box.If not, remove it. Enter the effectivity and obsolete dates, if desired.
Depress the AVL & Reference Designator tab
All the AVL's will default in as approved and require the user to deselect as desired. If no AVL's are approved a popup will appear forcing the user to approve at least one AVL.
When the BOM for the assembly has a customer assigned to it, then ManEx will pull the approved AVL's from the customer side NOT the internal side. For example: Part “XYZ” may have several AVL’s and several different customers linked to it. Each customer may approve different AVL’s. So when the part is linked to a specific customer’s BOM only the AVL’s linked to that customer part will be displayed on the BOM as approved. The AVL screen looks at the accepted AVL’s for that customer on the “consigned” or “Customer” side of each part whether it was added to the BOM as a “BUY”, “MAKE” or “Consigned”. If no customer is assigned to the BOM then the AVL’s will be pulled from the internal side. NOTE: If "GENR" is approved on the BOM MRP will consider any inventory for that part even if the AVL is NOT approved on the BOM. For further detail refer to Article #2560 . Enter the Ref designators manually in the table or enter the prefix letter, Start No and End No and depress the Calculate button to auto-number.
If you want to add alternate parts, depress the AVL and Reference Designator tab. Depress the Add button next to the alternate parts section of the screen.
If you select Internal Part Number, a list of all Internal part numbers will appear: Type the internal part number in the red box or highlight and double click to select.
If you select Consigned Part Number, a Customer List will appear: Type the customer into the red box or highlight and double click
A list of all of that customers parts will appear: Type in the customer part number or highlight the item and double click to access. : Information regarding the alternate part will display in the bottom section, as displayed below.
Once user has completed entering all information for line item number, depress the Save button.
|
| 1.4.3.3. Copy an Existing BOM | ||
Procedure for Copying from an Existing BOM A new assembly may have a BOM applied to it by copying the bill of material from an existing assembly. To simplify changing a Bill of Material, while maintaining the original version of the assembly, users can copy the parts list into a new assembly and make changes as needed.
Depress the Copy button and enter the user’s password will prompt the user for the existing bill of materials from which to copy the components. The user may find the existing assembly from which to copy either by part number or by part class.
MANEX will populate the new assembly with all of the part information from the existing assembly, except for parts belonging to a customer. Those items will have to be added manually. The filled in BOM is displayed below:
Depress the Edit button to add the customer name and any other needed changes, in any of the screens. The user can then either Save the new assembly with all of the components, or Cancel the operation. Approved AVL's will be retained when copying BOM's except for one exception: Buy part has 3 AVL's and customer A is associated with buy part and also has 3 AVL's, Create BOM for Customer A add buy part all 3 AVL's will be listed, approved only one of the AVL's on BOM A. Create new product changing Rev. to B. Copy BOM A to B. (BOM B has no customer assigned). All AVL's will copy over and all will be checked. |
| 1.4.4. Bill Of Material Deletions |
The Delete button takes on dual meanings. If the user is in the BOM Main Tab when the button is pushed, the button will delete ALL items on the BOM. You will be prompted for your password. The following message will appear:
If there are open work orders for the assembly, then the user is presented with a prompt advising that the bom cannot be deleted while open orders exist, as displayed below:
If the user is in the Item Detail Information Tab when the button is pushed, the button will delete only the item highlighted. You will be prompted for your password. The following message will appear:
|
| 1.4.5. Procedure For Editing Line Item Details |
Use this procedure to edit Line Item details after entering BOM Header information and Line Item Part Numbers and Quantities per assembly manually, using drag and drop, or copying. Click on the Item Detail tab. Depress the Edit button and enter password. 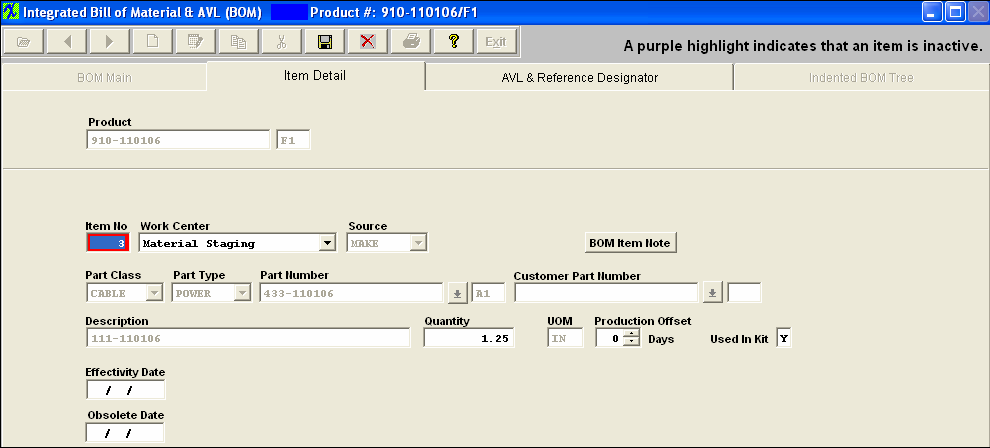 NOTE: If users choose to use effective and obsolete dates in place of proper revision control, you must be absolutely certain that they do not take effect at any point after production begins and before the WO is closed. If this isn't properly managed, you will get the variances. While some may be minor and positive variances may partially offset negative variances, you CANNOT rely on this and you WILL have discrepancies.
The best approach is to always roll the revision when there is a change to an assembly that will affect the value in any way. This becomes even more important if you have WOs open long after the due date and it has had additional changes to the configuration. See Article #5055 for further detail.
The Item number, Work Center, Qty, Production Offset, Used in Kit, Effective Date, and Obsolete Date can be edited on this screen. The Production Offset would be edited, If an item is to be kitted to a Work Center that will not be reached by the Work Order until X days later, enter X days in the Production Offset to allow kitting to that Center X days later. NOTE: This will affect the MRP demands until the kit status has been changed to "KIT IN PROCESS". Once the kit status has been changed to "Kit in Process" the parts now become a kit shortage, and the system will calculate from the WO due date or production lead time and NOT from the production offset. Enter Effectivity Date for the line item to be used in the BOM. (Note: Prior to Effectivity Date or after Obsolete Date, the line item will not appear on the Current BOM view nor will it appear on a Pick List to Kit the Assembly.) Edit the "Used in Kit" by selecting Y (Yes) for Used in Kit unless the item is not to be issued when a kit is pulled. Select P (Phantom) to cause a Make subassembly to be treated as a Phantom when kitted. Select N (No) if the item is provided to the Line by some other means than kitting. (Note: Chemicals and adhesives are typical not-kitted items that are referenced on the BOM for costing or specification but issued to the production floor on a bulk replenishment basis.) If you depress the AVL & Reference Designator tab the Ref designators can be edited manually in the table OR Enter the Prefix letter, Start No and End No and click on the Calculate button to auto-number. Here is where you will also check the approved AVL's and uncheck the AVL's that are NOT approved for this BOM. NOTE: If "GENR" is approved on the BOM MRP will consider any inventory for that part even if the AVL is NOT approved on the BOM. When adding new AVL's to the item master, if you do not want the BOM's automatically updated be sure that the "Disable Automatic BOM AVL update" is Enabled. See article #1477 for more information. You may also Add or Delete Alternate Parts by depressing the Add or Delete button near the Alternate Parts to select alternative part numbers for the Line Item currently being edited in the BOM. This table is in the BOM screen because alternate part usage is always dependent upon the application and hence is BOM specific. (Note: Use the Quantity Info screen and AVL window to show alternate manufacturers; the alternate part window is only for items with a different internal part number (such as faster or tighter tolerance parts) that can be used on a temporary deviation when there is no choice.) Once you have completed the changes, depress the Save button and BOM will be updated.
Note: If the Leveling of Make items is in process then the users will not be able to Add/Edit a BOM, even if the user is already in modifucation mode of the BOM, the user will not be allowed to save the changes until the leveling process is complete. This is due to the fact that the affected records in leveling of Make Parts is large and complex, the saving time to commit the whole changes to inventory tables does take a large amount of time, so we do not want users making modifications to the BOM when the process is still leveling, so we have added a flag that the users will see within the BOM module.
|
| 1.4.6. Bill of Material (BOM) Used in Kit Option and how it affects Kitting & MRP |
Within the Bill of Material module the users have the option to mark each item loaded to the BOM as Used in Kit Y, N or F. Y = Yes, this part is used in the Kit and will be considered fro MRP demands and appear within the Kitting module Qty Pick screen. Once the parts have been issued to the kit the system will automatically decrement it from inventory upon WO complete. N = No, this part is NOT used in the kit, but it will be considered by MRP for demands but will NOT appear in the Kit module Qty Pick screen. This item will still be displayed on the Kit Pick Worksheet but it will have the “N” next to the item so users will know that it is not used in the kit. Example: you would use this option for Documentation. NOTE: Keep in mind that this item will be picked by the users on the floor but it will not be relieved from inventory in any way through the Kitting module. Users have to go make and manually adjust the inventory qty’s for this type of item.
MRP includes items with "N" flag in "used in kit" for Purchase Order Actions. The flag does not mean don't buy it, but instead, it means don't kit it. The part is still needed, or it wouldn't be on the BOM. Or the quantity would be zero. This feature is usually used by Users who have bulk stock on the floor, and the assemblers pull the parts out of floor stock. But there still remains the requirement to get the parts in house so they can be put into floor stock. F = Floor, this would be used for an item that is not kept in the Stock room but is physically stored out on the Floor in production. “F” items will also be considered by MRP for demands, but will NOT be displayed on Kit Module Qty Pick Screen or the Shortage report. This item will still be displayed on the Kit Pick Worksheet but it will have the “F” next to the item to indicate to the users that it is located on the Floor. NOTE: Keep in mind that this item will be picked by the users on the floor but it will not be relieved from inventory in any way through the Kitting module. Users have to go make and manually adjust the inventory qty’s for this type of item.
|
| 1.4.7. Bill of Material Setup Scrap Checkbox |
Within the Bill of Material Module you will see a Setup Scrap check box and a Standard Build field. If you wish for the setup scrap qty’s to be included in the Kitting and MRP calculations, Standard Cost Adjustments, etc. . . you need to make sure that the BOM has the Setup Scrp box marked. Then upon checking this box the system will default in the Standard Build qty to 1 (just because it can not be blank) It is recommend that you change the Standard Build qty to the desired average build qty for the product (the Standard Build will affect how the system will calculate Standard Cost Adjustments, etc. . . within the system)
|
| 1.4.8. Make a Obsolete Part Available on a BOM |
Find an existing BOM
 Depress the pulldown next to the History and Select BOM History, all parts will be displayed, including the parts that have been obsoleted.
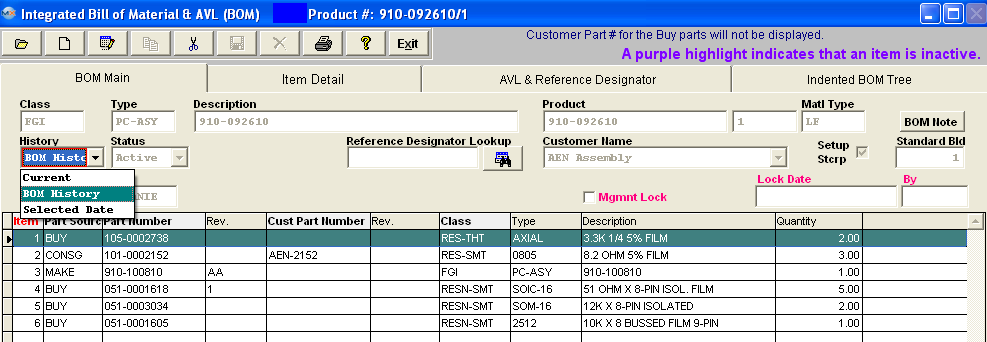 Highlight the part that has been obsoleted and enter the item detail screen, depress the edit button and remove the obsolete date or change it to a later date.
 Now the part is available to use.
 |
| 1.4.9. Link User Defined Fields to a BOM |
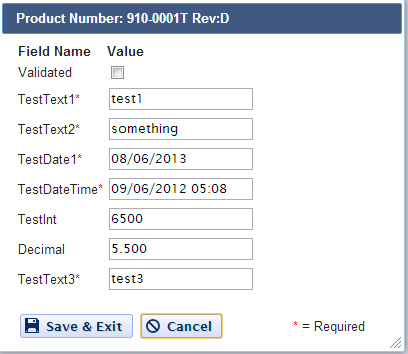
| The User Defined fields MUST be setup within Web ManEx. For further detail see Article #5454.
The User Defined Fields can
then be linked to a Bill of Material by selecting a record in the ManEx
Desktop, and selecting the UD action button (as displayed below).
The UDF for that section will then be displayed, and user can make changes (if applicable), Save & Exit or Cancel.
|
| 1.5. Reports - BOM & AVL | ||||||||||||||
To display or print a Report for a BOM, first find the BOM. (See Article #4795).
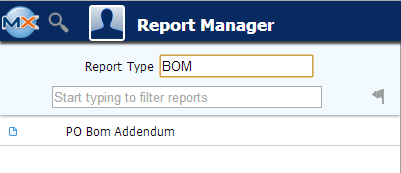
To obtain the Bill of Material Reports within the Web, select the WEB Print button from the ManEx action buttons at the top of the screen. For further detail on How the Reports work within the Web refer to Article #5477. (Note: The only BOM Report available on the WEB right now is the PO BOM Addendum) Note: In order to access the Reports within the Web the Company Root URL must be setup within the System Appearance module and user must be linked to web within the System Security Module. Select
the Report Type: BOM - A List of Reports will be displayed that are
available on the Web for BOM
To obtain the Bill of Material Reports within the desktop, select the Print button from the ManEx action buttons at the top of the screen.
The
following reports screen will display a list of reports that are available on
the ManEx Desktop:
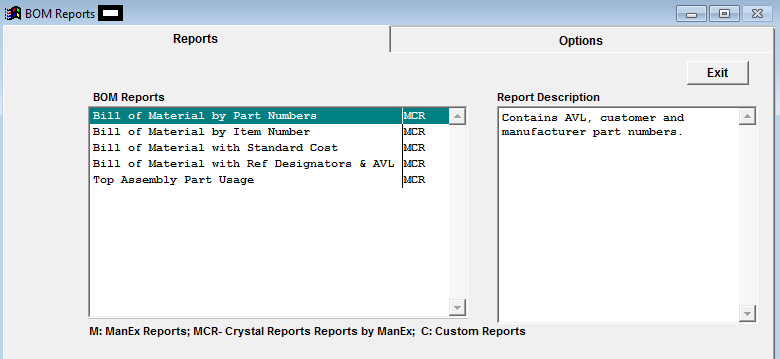 Highlight the report desired and click on the Option tab. (The BOM reports will indicate in the Source column if the item is setup as Make/Buy or Make/Phantom, along with Consigned or Buy).
BILL OF MATERIAL by Part Numbers
Depress the OK button.
The BOM displayed on screen will print as follows. (The two PN's boxed in Red are parts that have been exploded out for Sub-Assembiles)

BILL OF MATERIAL BY ITEM NUMBERS
Depress the OK button.
The BOM displayed on screen will print as follows: (The parts in the Red boxes are parts that have been exploded out) 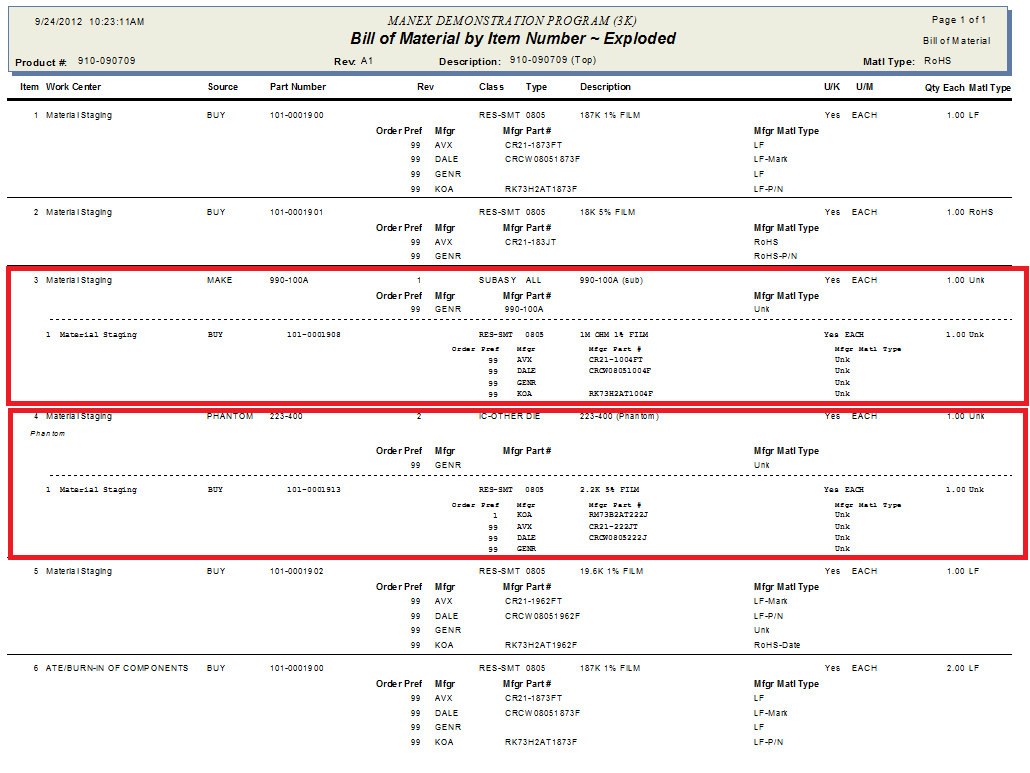
BILL OF MATERIAL WITH STANDARD COST
Note: This report takes into consideration the Std Bld Qty when calculating the setup scrap. You might find the cost calculated in SFT is different from the calculation shown on this report due to, that if the part UOM is "EACH" and the part has scrap % the code will round it up to next inter number.
a) For the PHANTOM parts in this report the standard cost calculated is based on their components (SUM of component's qty * component standard cost). Once the standard cost is calculated for the PHANTOM part, the report will treat the PHANTOM part as a single entity on the top assembly BOM and proceed as it was a BUY part with the std cost already entered.
b) If one of the component parts is a MAKE (not MAKE_BUY) and HAVE components assigned to it, the report will NOT show std cost of the parts itself, it will only show std cost of its subcomponents.
c) If one of the component parts is a MAKE (not MAKE_BUY) and does NOT HAVE parts assigned to it the report will show std cost of the part itself. d) If one of the component part is a MAKE and MAKE_BUY the report will show price for the part itself and will show 0.00 costs for the subcomponents.
e) If one of the component part is a MAKE and a Phantom/Make the report will NOT display the std price for this part because the report will show the cost of this parts components.
Note: This report will only display the costs for ACTIVE parts and subassemblies as of the date of the report and will NOT include any parts that may have been identified as inactive either in the item master or in the obsolete date of the part on the BOM.
The values displayed should be in sync with the Cost Roll Up values. The following may be why the Standard Cost Roll is different from the Cost BOM Reports.
a) On the costed BOM Report for a Make/Buy assembly we display the value of the BOM in the costed report, but that total is NOT used in subsequent rollups to higher levels only the standard cost is. b) In Kit Default Setup , user can "Exclude Scrap and Setup Scrap" in Kitting, MRP, and Cost Rollup, and this will override the "Setup Stcrp" box in the BOM. Therefore, if user checks "Setup Stcrp" checkbox along with a Standard Bld qty in BOM header, but has the checkbox checked in Kit Default Setup to "Exclude Scrap and Setup Scrap" for Cost Roll, the Cost Roll will NOT calculate the Setup Scrap cost, but this report will always calculate the Setup Scrap cost and this will cause unfavorable Configuration Variances. For further detail on how Excluding Scrap and Setup Scrap values will affect the variances see Articles #3067, #3053, and #3320 .
The BOM displayed on screen will print as follows: This report ALWAYS includes ALL the parts (including the items flagged as "N" for Used in kit) 
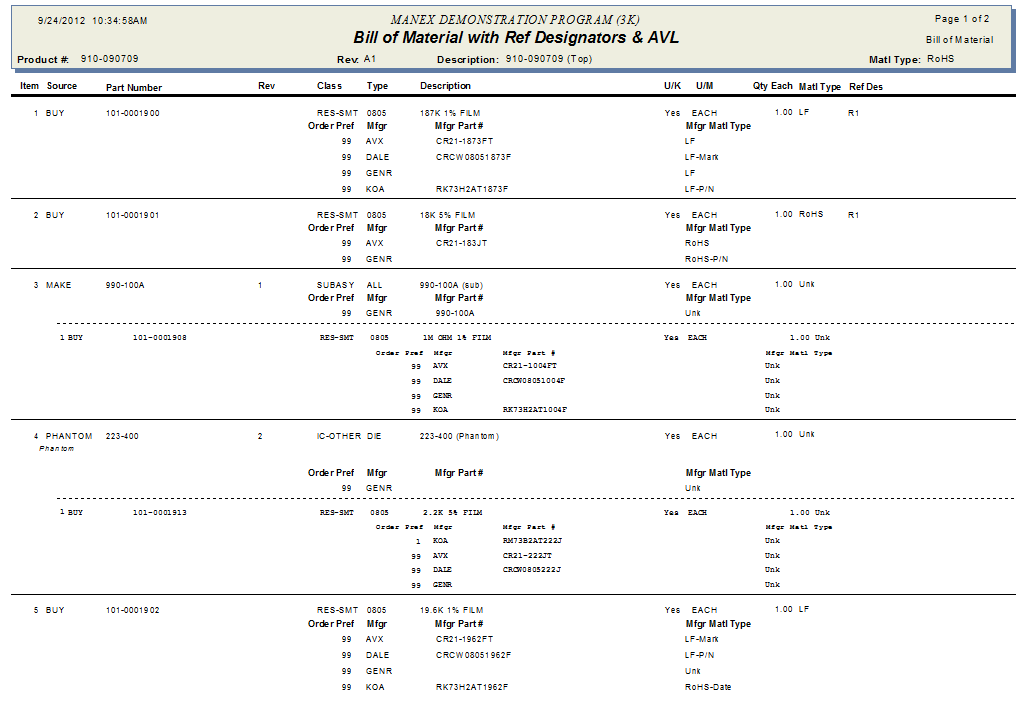
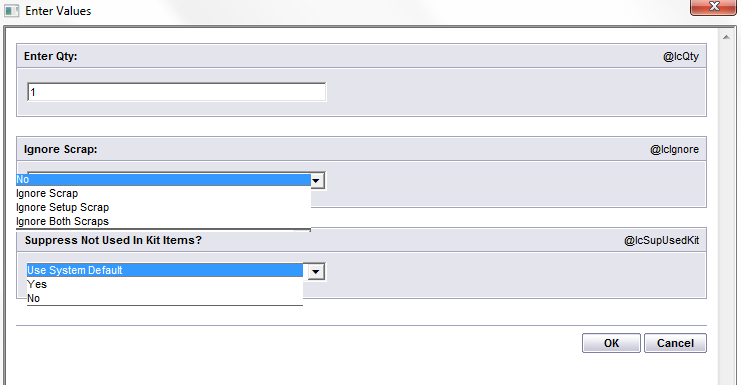
BILL OF MATERIALS WITH REFERENCE DESIGNATORS & AVL
If the user selects 'YES' the display will show as follows. Keep in mind not all of the field could be displayed on this page size, but upon export all fields will be displayed.
 Select the Export option
 The followng screen will be displayed, Select format 'Excel - Data only' 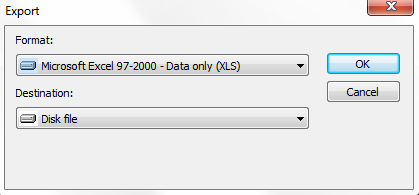 The following screen will be displayed, within the option section be sure to select to include the Header Info 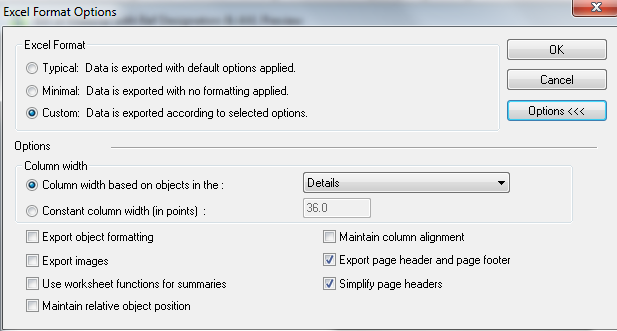 Select file name and destination
 XLS results should look very similar to the VFP XLS dumps we have as displayed below
 If user selects "No' to export report to XLS file The BOM displayed on screen will print as follows:
TOP ASSEMBLY PART USAGE
The following report is printed:
|
| 1.6. FAQs - BOM & AVL |
| Facts and Questions for the Bill of Material (BOM) Module |


