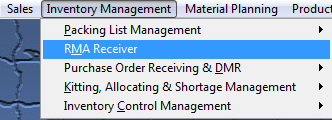
| Add an Return Material Authorization Receiver | ||||
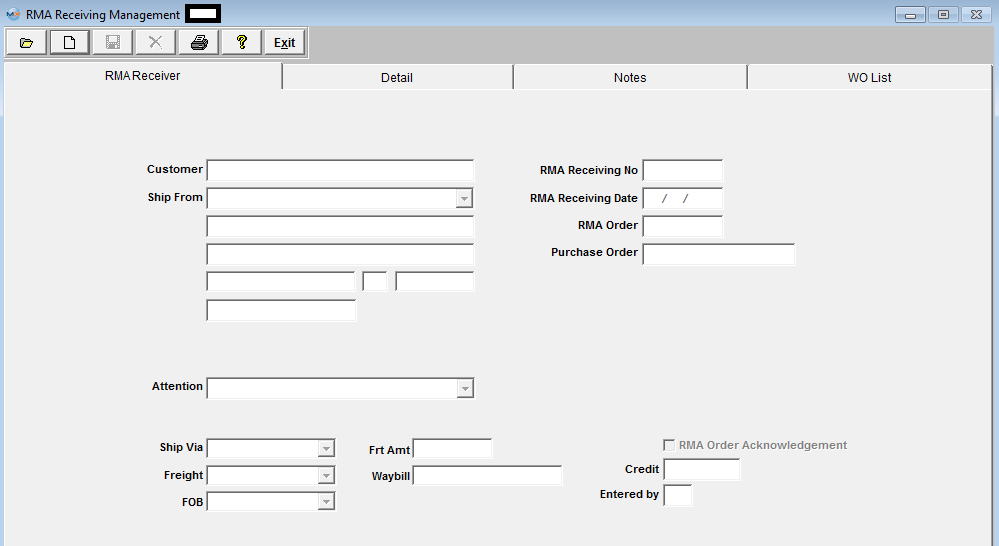
The following screen will be displayed:
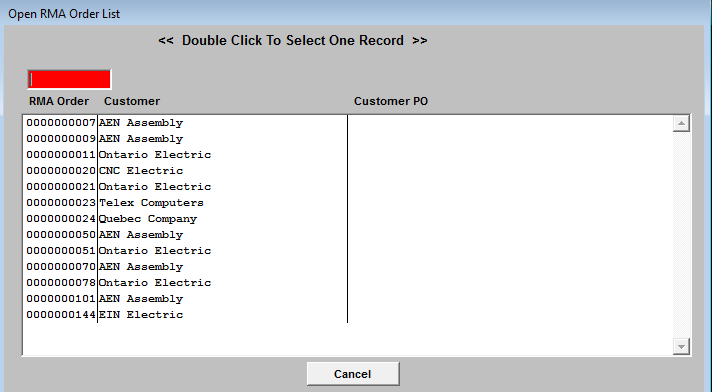
To add a new RMA Receiver, depress the Add record action button. The following selection list will be displayed:
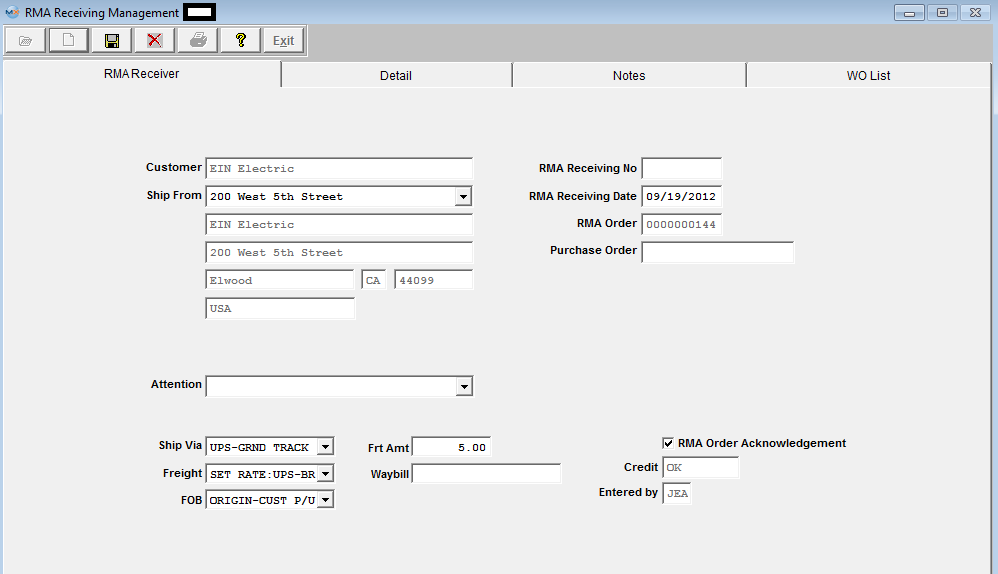
Enter the RMA Order Number into the red box or highlight your choice and double click. Information from the RMA Management module will be displayed once you enter your password, as shown below:
RMA Receiving Tab Depress the down arrow to select the appropriate ship from address. Edit the RMA Receiving Date, if desired. Depress the down arrow to select the appropriate customer contact, Ship Via, Freight, or FOB. Enter the amount of freight, if desired. Enter the number of the Waybill, if desired. All other fields will be defaulted in.
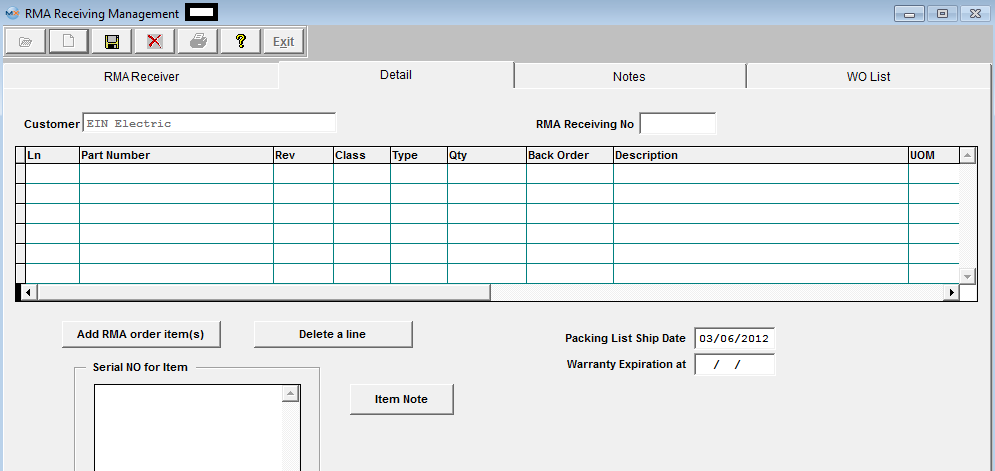
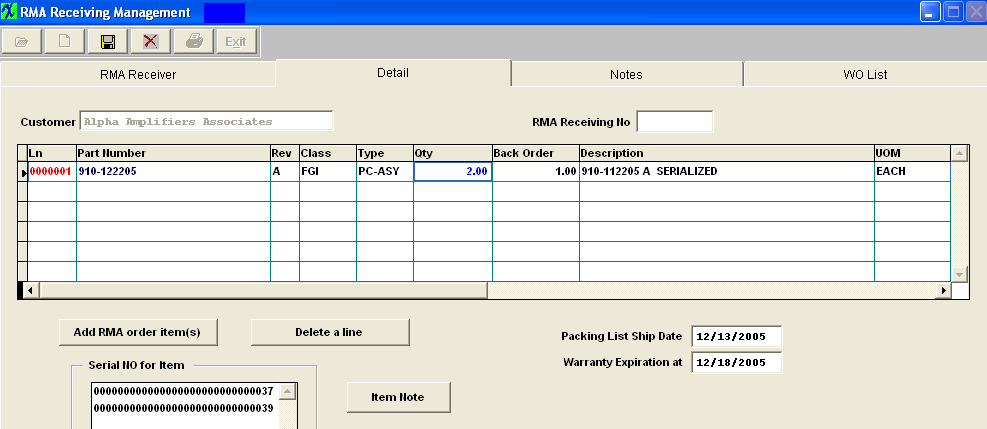
Depress the RMA Receiver Detail Tab. The following screen will be displayed: Depress the Add RMA order item(s) button. A list of products, etc. pertaining to the RMA selected will appear:
Highlight the selection and then depress the OK button. The cursor will go to the Quantity field. Enter the quantity being received.
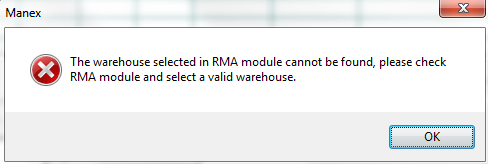
If the warehouse selected in RMA module is not found (deleted or in cycle count/physical inventory), the user will receive the following message and will not be able to continue until this issue has been resolved.
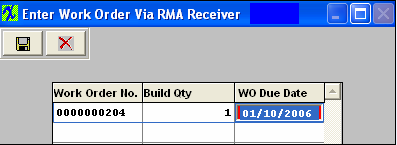
 The following Work Order screen will appear:
NOTE: Work Orders originated from an RMA Receiver will have "ReworkFirm" Job Status and users will NOT be allowed to change the Job Status. Since the material issued to the RMA is likely to be a defective assembly, or requires re-inspection, the work order must be completed by either transferring the material to FGI or to scrap to close the work order. Therefore, an RMA work order cannot be cancelled. Also, users will NOT be allowed to edit or change the Bld qty because when product is brought into the system with an RMA Receiver it is then automatically issued as itself to the kit at that time.
You may change the Work Order due date. NOTE: The Work Order due dates from the RMA Receiver are generated automatically based on the date the RMA was created. This date may need to be reviewed and adjusted to match the RMA scheduled ship date. MRP will not instruct you to reschedule a rework firm work order, so it is important to make sure all dates match. Depress the Save record action button.
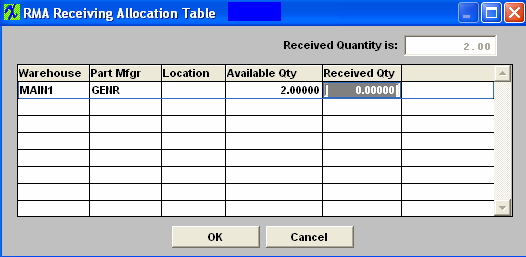
If the returned material contained serial numbers, the following screen will appear displaying the available qty:
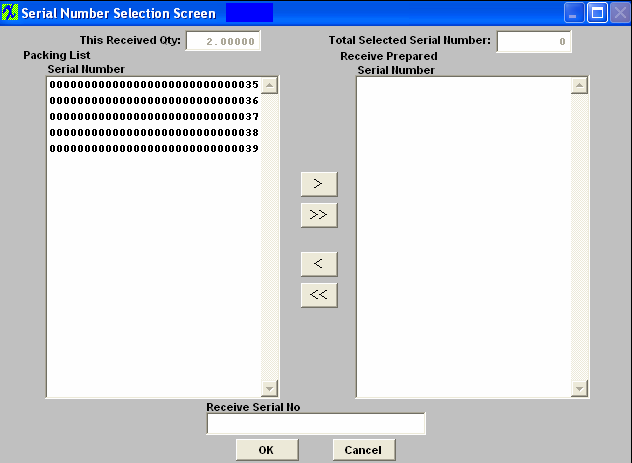
Enter the Received Qty and depress the OK button, and the following screen will appear:
Enter the Serial Number to be received into the Receiver Serial No box. Or, select the Serial Number(s) being returned by highlighting and depressing the > button. For multiple serial numbers, hold the CTRL key down while highlighting. If you want to include all Serial Numbers, depress the >> button. Depress the OK button. The Serial Number Entry box will update. Rework Work Order Serial Numbers When a Rework Work order is established for a serialized product, the user may select existing serial numbers that are in inventory (finished goods) that are to be reworked. Rework Work Orders will not accept new serial numbers. When a serial number is placed in the Rework Work Order, the serial number must exist in finished goods, and the number of serial numbers transferred to the Work Order must equal the quantity of assemblies for the Work Order. The part number for the serial number that is moved into the Rework Work Order does not need to be the same part number and revision as the Work Order. Thus, if a user wants to upgrade part number 123 rev A to part number 123 rev B, they can transfer the parts to the Work Order and identify the serial number transferred. Parts may also be changed to a new part number: Example:part number 123 rev A can be placed in a Rework Work Order for part number 234 rev C. The only condition is that the quantity and number of serial numbers must match. You may enter an item Note, if desired. The completed screen will look like this:
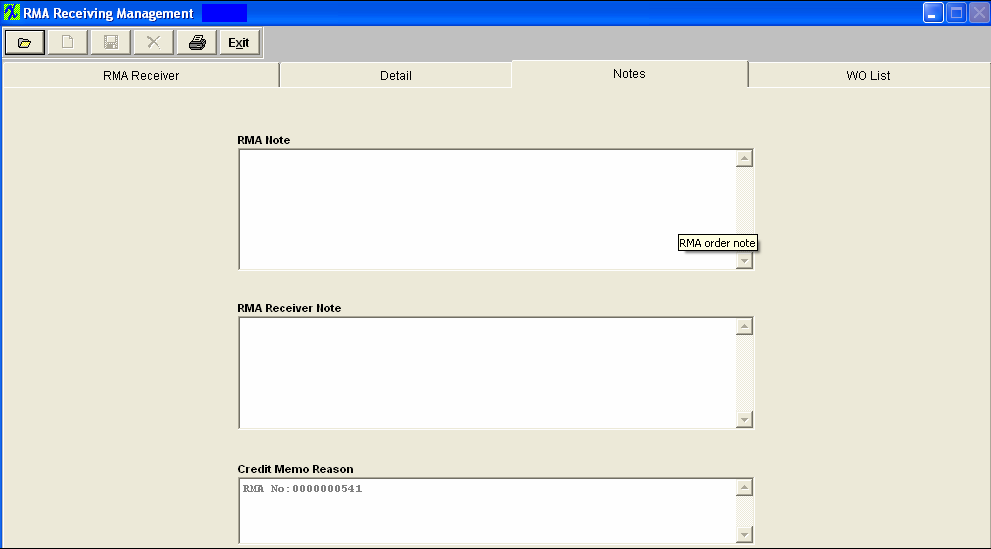
Depressing the Note tab will bring up the following screen:
The credit memo reason will display as referencing the RMA number. You may add to the Credit Memo Reason, if you wish. You may add an RMA note or an RMA Receiver Note, if desired. When RMA is complete. Depress the Save record action button to save changes, or depress the Abandon changes button. If you depress the Save record action button, the following message will appear:
To continue the save, depress the Yes button. Selecting the WO list tab will bring up the following:
 You may not change anything on this screen. Note: The user can not kit a Rework Work Order. The user may only pull the shortage. Please refer to the Kitting, Allocating & Shortage Management article. Note: If the RMA line number for the negative (returning) item is placed on administrative hold, then receiving will not be able to receive in the parts until it is cleared. Credit Memo The Credit Memo is not created until the returned material is actually RECEIVED in the RMA Receiving module. There is no financial involvement UNTIL the parts are received back. Regarding the matter of advising accounting that a Credit Memo has been created, the system will send an e-mail to the appointed recipient when the RMA is received if a trigger is setup to do so.
|
