| 1. Return Material Authorization (RMA) Receiver |
| 1.1. Prerequisites for RMA Receiver | ||
After activation, "RMA Management" access for each user must be setup in the ManEx System Security module. Users with “Supervisor Rights” will automatically have access.
|
| 1.2. Introduction for RMA Receiver |
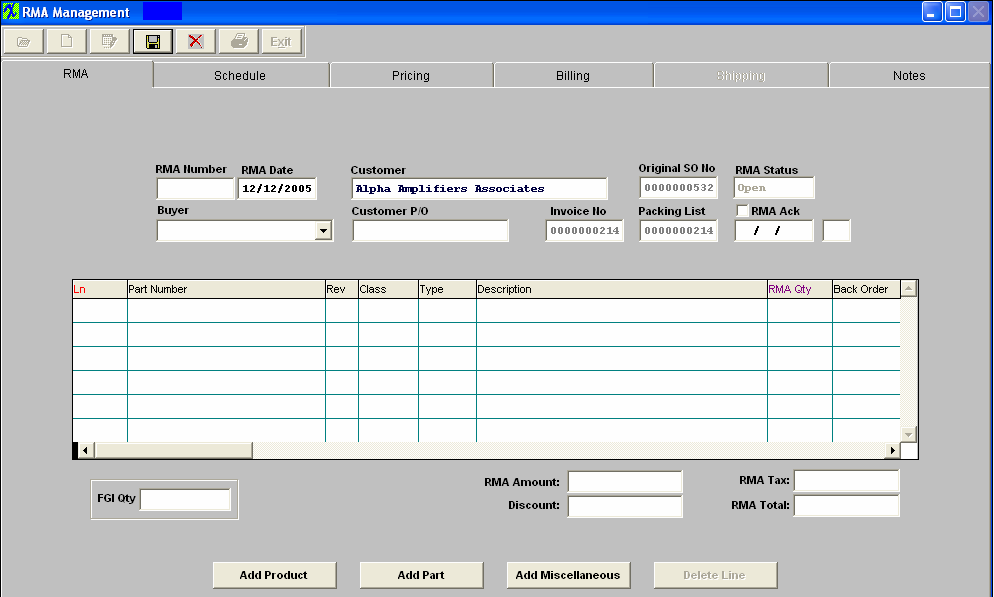
The Return Material Authorization module notifies receiving to expect a return from a customer. Once the material is received back from the Customer, this module is used to record the receipt, create the Re-Work Work Order, adds the product into the work order, and the applicable Credit Memo. Once the RMA is received, a Credit Memo automatically forwards to the Accounting Accounts Receivable Credit Memo module, if a dollar amount was entered for the return. When the re-work/replacement is ready to re-ship, a Packing List and Invoice can be created. Note: When an RMA is created, both the pending receipt of the items from the customer and the subsequent shipment of replacement product to the customer are entered. Reference is made to the original Sales Order and Invoice only to allow the Credit Memo (when created) to have a place to apply the credit. Utilizing this approach, the user is free to set different schedules for receiving and/or shipping the material without affecting the original Sales Order. It also allows the user to place different prices or costs on the line items. For example, it may be that full credit is issued on the RMA receipt, but extra charges apply on the reshipment because of non-warranty issues. Or the user may wish to have a “no-credit, no-charge” RMA policy where items are received and reshipped with no General Ledger affects. Or, the receipts may be at no credit, but the return shipment includes only the rework charges. Because of the variety of possibilities, trying to incorporate any of these actions into the original Sales order would make it really difficult to maintain data about the costs associated with the order. This also permits the user to develop reports for on-time shipments, and shipping/scheduling quality.
To review how an RMA impacts MRP see Article #2507.
NOTE: If you do not follow this procedure to bring material back into your plant, your rework work orders do not have the value of the original product placed in WIP, and therefore when completing your rework work orders, there will be a huge variance created because there were no items placed in WIP (except for a few replacement parts), yet the product is moved from WIP to FGI at standard cost. When you use the RMA module these accounts balance out, with the variance being only those items added to the work order.
|
| 1.3. Fields and Definitions for RMA Receiver |
| 1.3.1. RMA Receiver Tab | ||||||||||||||||||||||||||||||
RMA Receiver Tab Field Definitions
|
Customer
|
This is the name of the Customer who returned the material.
|
RMA Receiving Number
|
This is the unique number assigned to the RMA Receiver.
|
Ship From
|
This is the Customer’s address from which the material was returned.
|
RMA Receiving Date
|
This is the date the user’s Receiving Department received the returned material.
|
RMA Order Number
|
This is the RMA Order Number assigned in the RMA Management module.See above.
|
Purchase Order
|
The was the customer’s original purchase order number for the original Sales Order.
|
Attention
|
This is the contact name at the Customer.
|
Ship Via
|
This is the original carrier for the original Sales Order.
|
Freight Amount
|
This is the freight originally charged the customer on the original Sales Order.
|
RMA Order Acknowledgement
|
This box is checked in the RMA Management module, as explained above.
|
Freight
|
This is the freight arrangement per the original Sales Order.
|
Waybill
|
This is the Waybill number pertaining to the original Sales Order.
|
Credit
|
This is the Customer’s Credit Status with the user.
|
FOB
|
This is the original FOB terms pertaining to the original Sales Order.
|
Entered By
|
These are the user’s initials authorizing the material return in the RMA Management module. |
| 1.3.2. Detail Tab | ||||||||||||||||||||||||||||||||||
RMA Receiver Detail Tab Field Definitions
|
|
Customer |
This is the name of the Customer who returned the material |
|
RMA Receiving Number |
This is the unique number assigned to the RMA Receiver. |
|
Ln |
The line number of the Return Material Authorization or the line member of the order to be re-worked/replaced and returned to the customer. |
|
Part Number |
The user’s internal number for the part or assembly. |
|
Rev |
The revision number pertaining to the Part Number. |
|
Class |
The user’s classification covering the Part Number. |
|
Type |
The type within the classification covering the Part Number. |
|
Qty |
It’s the amount of the original order which the customer is returning. See Article #1240 for more detail on why the system will not allow user to enter in a fraction of a number, and an alternative. |
|
Back Order |
The amount of product still expected to be returned by the customer. |
|
Description |
The user’s description covering the Part Number. |
|
UOM |
The unit of measure pertaining to the product. |
|
|
This button allows the user to add items from the RMA Management module. |
|
|
This button allows the user to delete the highlighted line. |
|
Packing List Ship Date |
The date the Original Packing list was created. |
|
Warranty Expiration |
The date the warranty originally extended to the customer expires. |
|
Serial Number Entry |
The serial numbers pertaining to the items returned. |
|
|
The note pertaining to the Part Number as entered in the Inventory Master. |


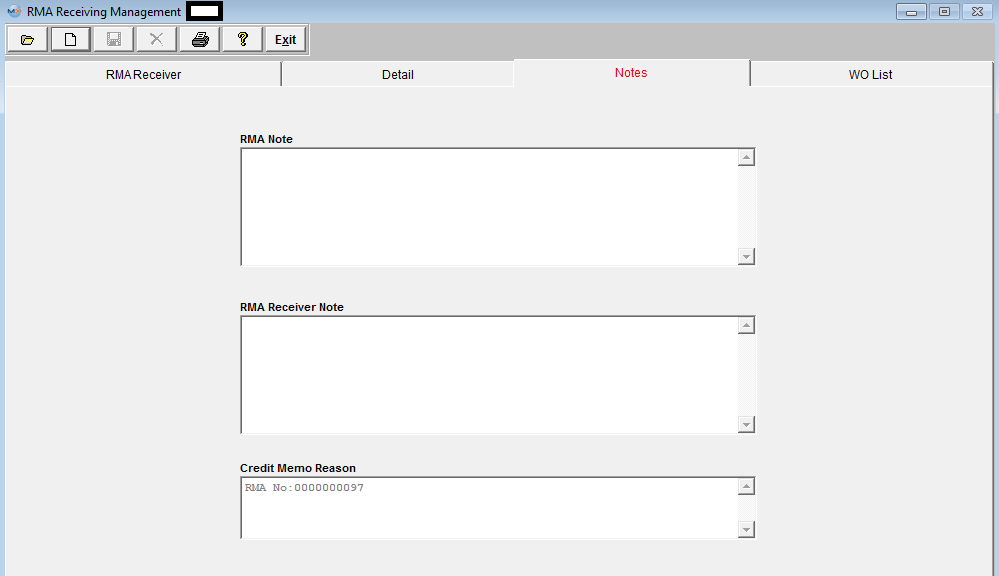
| 1.3.3. Notes Tab | ||||||
RMA Receiver Notes Tab Field Definitions
|
RMA Note
|
This is the internal note used by the user regarding the Return Material Authorization as entered in the RMA Management module. RMA Receiver Note |
|
This is a note that will be displayed on the RMA Packing List.
|
Credit Memo Reason
|
This is the note created when the Credit Memo was created. |
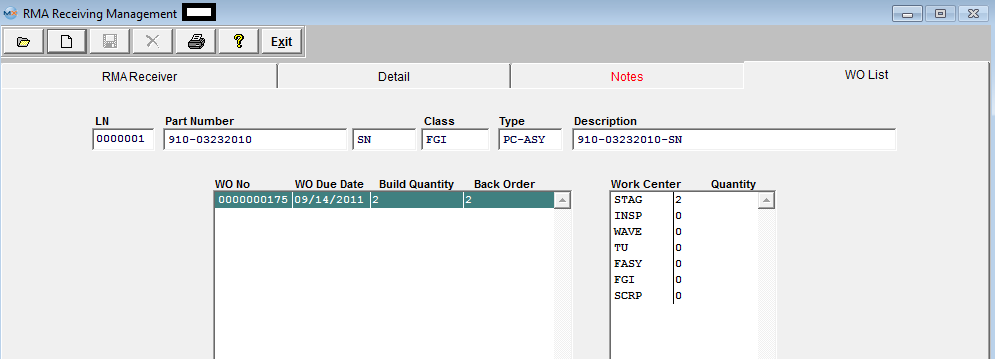
| 1.3.4. WO List Tab | ||||||||||||||||||||||||
RMA Receiver Work Order List TabIf the RMA Management module called for a re-work or replacement in addition to authorization of the return of material, the system will have created a Work Order. Information regarding any such Work Order will appear in this tab. RMA Receivng Work Order List Tab Field Definitions
|
| 1.3.5. Overview Regarding Return Material Authorization Accounting |
No Journal Entry is created in the RMA module, however the system was collecting the JE components from that module as follows: Assume that the original sale was for 10 units @ $100.00 each, with a standard cost of $80.00 each and freight charged the customer of $15.00. At the time the user selects the original Invoice number in the Return Material Authorization module, the system “remembers” the original accounting entry that was created at the time the original Invoice was printed, which was: Debit Accounts Receivable – Trade $1,015.00 Debit Cost of Goods Sold $800.00 Credit Sales $1,000.00 Credit Finished Goods Inventory $800.00 Credit Freight Income $15.00
When the user enters the “return quantity” (the one entered as a negative quantity), the system will remember that the original cost of sales was $80.00 per unit.
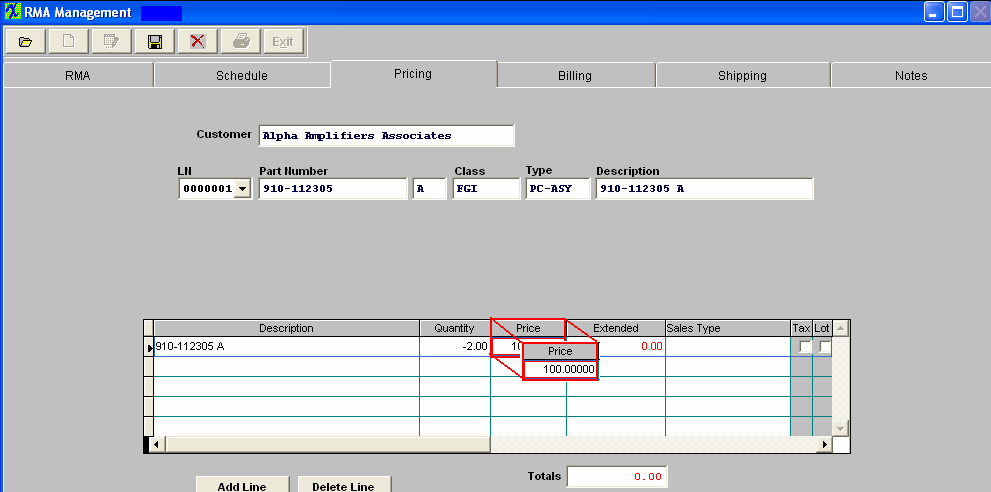
The user then enters the pricing on the item to be returned on the Pricing page of the RMA module.
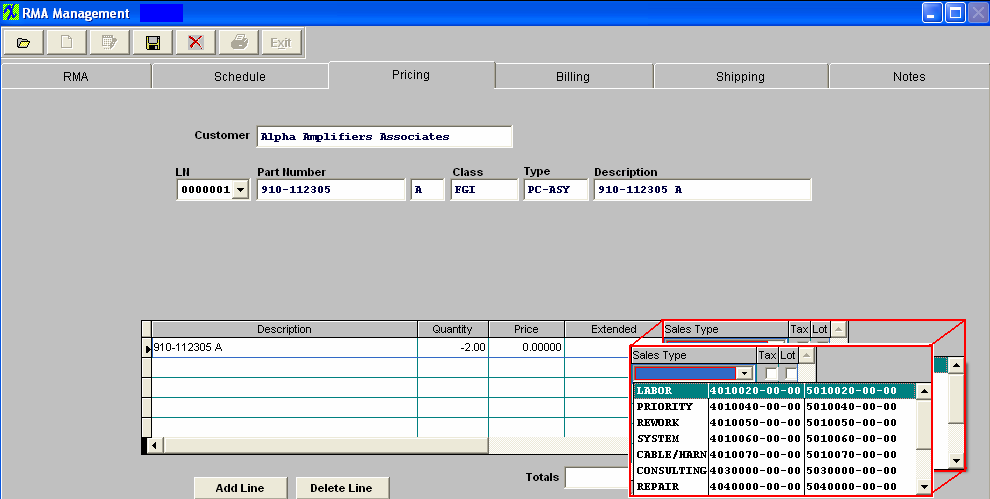
The pricing entered can be any amount up to the amount of the original pricing of $100.00 per unit. And so the journal entry component for the debit to the sales account is 2X $100.00 = $200.00, in this example. The user selects the sales and cost of goods general ledger accounts to be used per the Sales Type column:
And so, the sales account number selected will be debited for $200.00 once the journal entry is created, upon the actual receipt of the returned item.And the related Cost of Goods sold account will be credited for the $160.00. If the return is to be reworked and then returned back to the customer, the user creates a second line item on the RMA using a positive quantity which is in actuality creating the RMA Sales Order and an eventual invoice upon shipment. The journal entry and the applicable Credit Memo for the returnis created in this Return Material Authorization Receiving module.On this screen, the user indicates the amount of freight to be credited, such as a pro rata 2/10 of $15.00, or $3.00, for example:
After the user types in the quantity received on the Detail page and depresses the Save button, several things happen all at once: The Journal Entry is created as follows and forwards to the Release to General Ledger module: Debit Sales $200.00 Debit WIP $160.00 Debit Freight $3.00 Credit Accounts Receivable $203.00 Credit COGS $160.00
Once the Rework Work order is released, the user may opt to go into kitting and add line shortages which will be included in the Material Variance once the Kit is closed.Please refer to the Kitting and Shortage Management manual. From this point forward, the accounting is the same as for a regular order. |

| 1.4. How To .... for RMA Receiver |
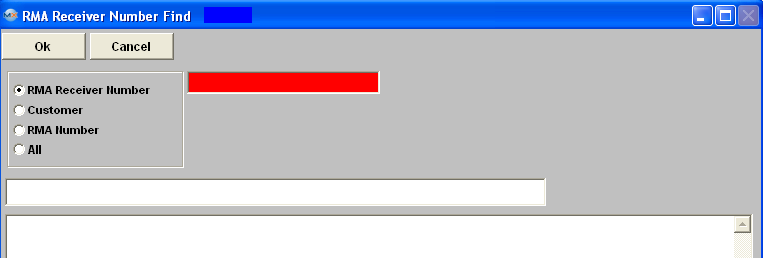
| 1.4.1. Find a Return Material Authorization Receiver | ||||||||
|
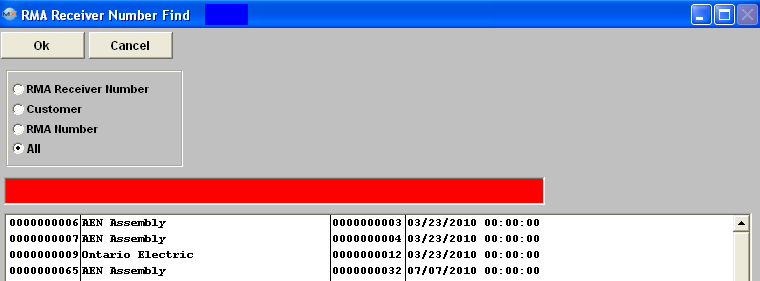
The following screen will be displayed:
Once the Find operation has been completed, the found RMA Receiver will populate the screen.
 |
| 1.4.2. Add an Return Material Authorization Receiver | ||||
The following screen will be displayed:
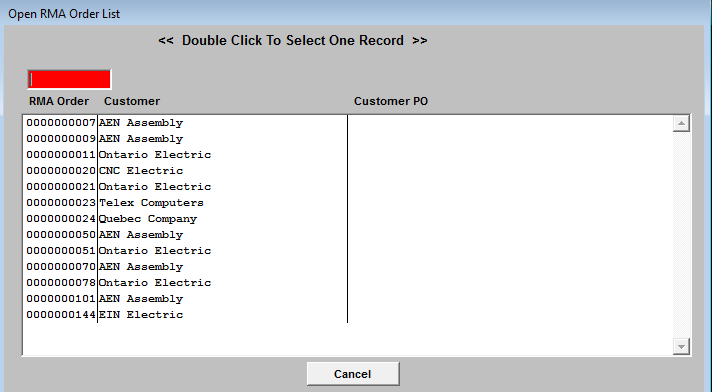
To add a new RMA Receiver, depress the Add record action button. The following selection list will be displayed:
Enter the RMA Order Number into the red box or highlight your choice and double click. Information from the RMA Management module will be displayed once you enter your password, as shown below:
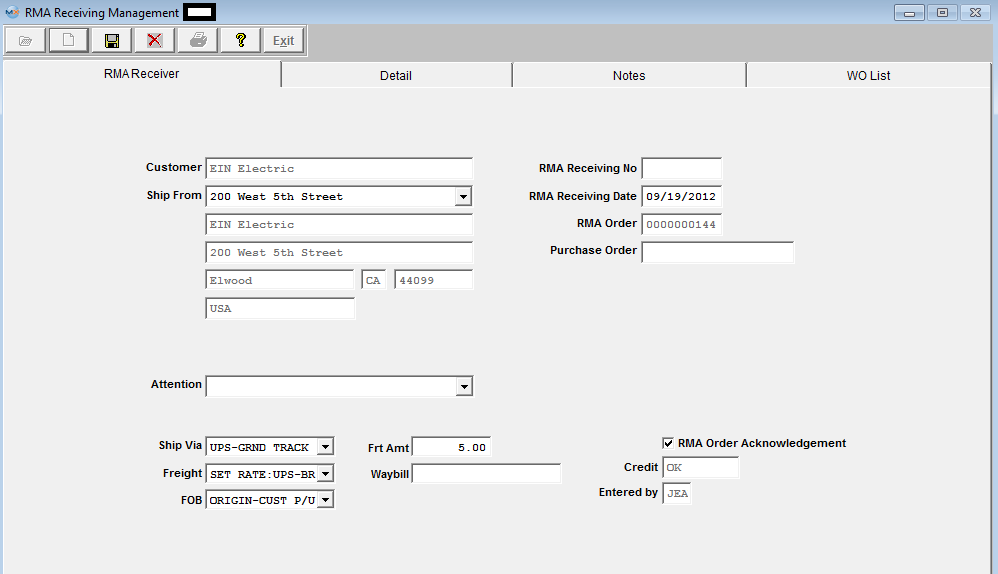
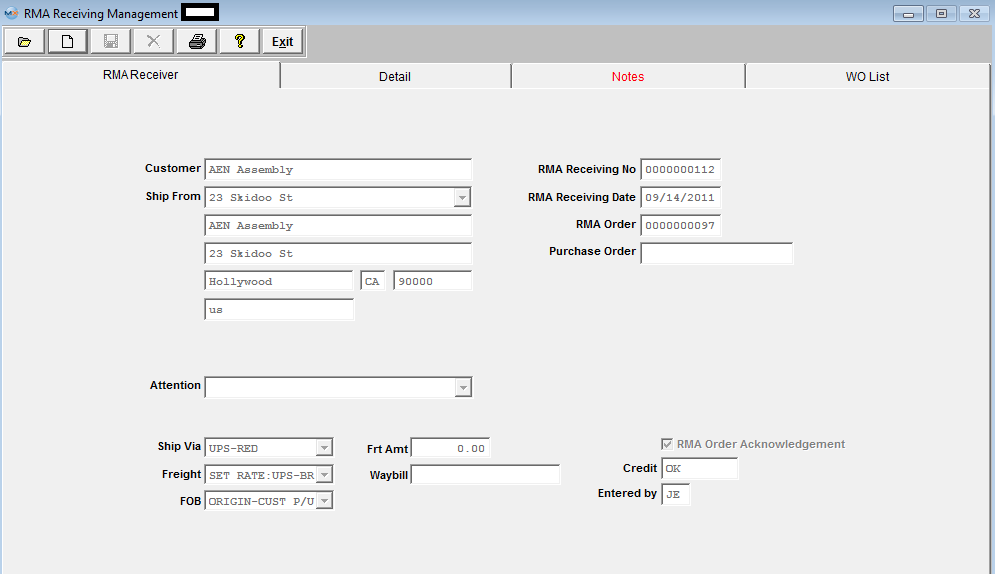
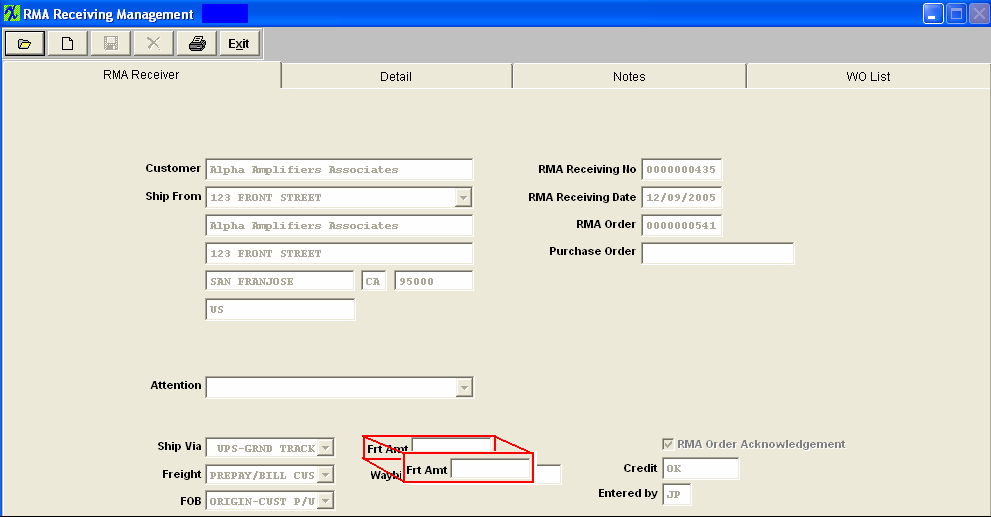
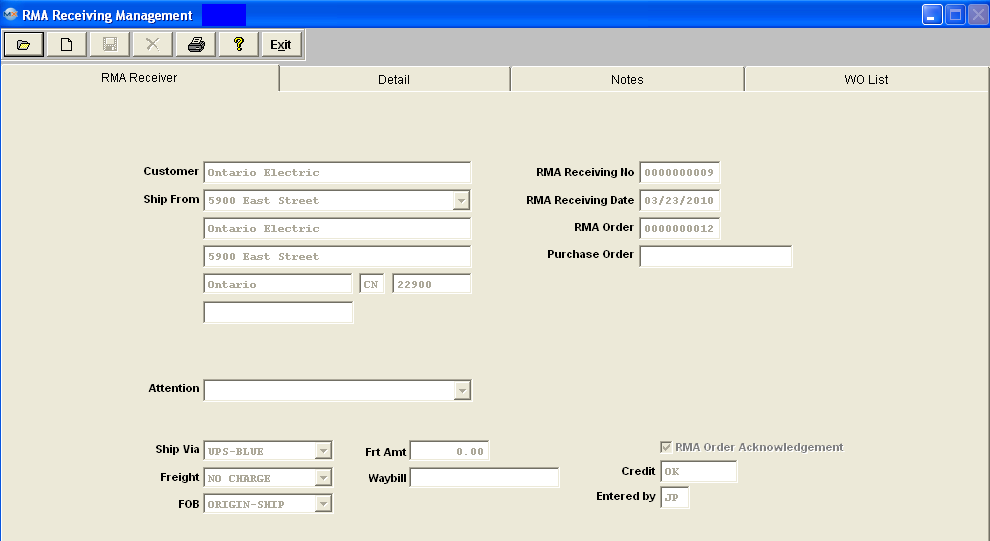
RMA Receiving Tab Depress the down arrow to select the appropriate ship from address. Edit the RMA Receiving Date, if desired. Depress the down arrow to select the appropriate customer contact, Ship Via, Freight, or FOB. Enter the amount of freight, if desired. Enter the number of the Waybill, if desired. All other fields will be defaulted in.
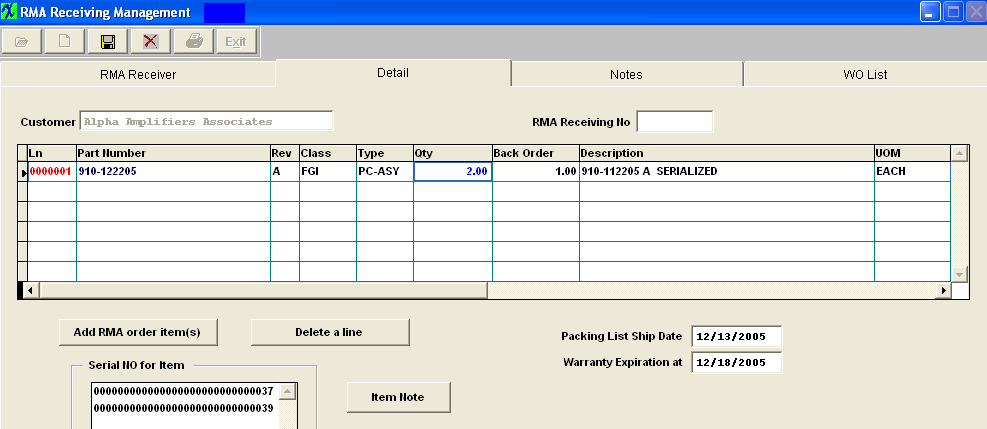
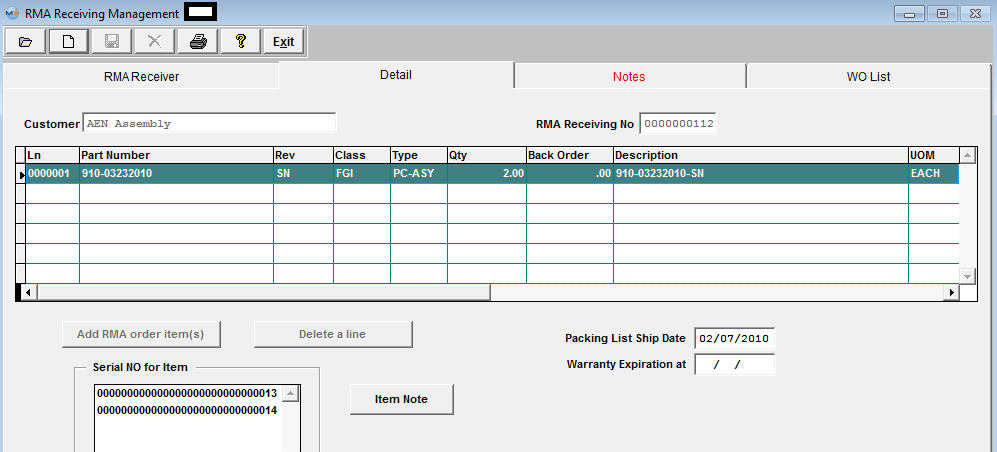
Depress the RMA Receiver Detail Tab. The following screen will be displayed: Depress the Add RMA order item(s) button. A list of products, etc. pertaining to the RMA selected will appear:
Highlight the selection and then depress the OK button. The cursor will go to the Quantity field. Enter the quantity being received.
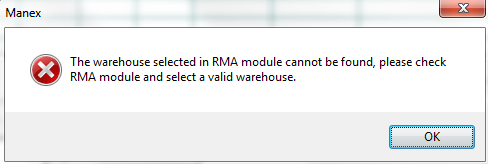
If the warehouse selected in RMA module is not found (deleted or in cycle count/physical inventory), the user will receive the following message and will not be able to continue until this issue has been resolved.
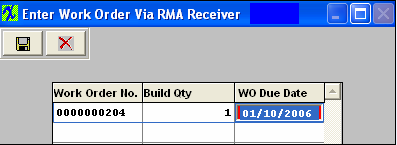
 The following Work Order screen will appear:
NOTE: Work Orders originated from an RMA Receiver will have "ReworkFirm" Job Status and users will NOT be allowed to change the Job Status. Since the material issued to the RMA is likely to be a defective assembly, or requires re-inspection, the work order must be completed by either transferring the material to FGI or to scrap to close the work order. Therefore, an RMA work order cannot be cancelled. Also, users will NOT be allowed to edit or change the Bld qty because when product is brought into the system with an RMA Receiver it is then automatically issued as itself to the kit at that time.
You may change the Work Order due date. NOTE: The Work Order due dates from the RMA Receiver are generated automatically based on the date the RMA was created. This date may need to be reviewed and adjusted to match the RMA scheduled ship date. MRP will not instruct you to reschedule a rework firm work order, so it is important to make sure all dates match. Depress the Save record action button.
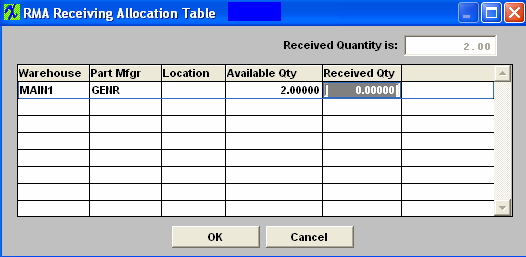
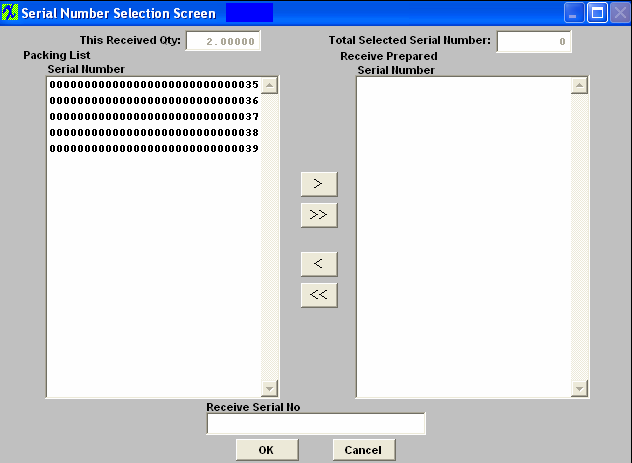
If the returned material contained serial numbers, the following screen will appear displaying the available qty:
Enter the Received Qty and depress the OK button, and the following screen will appear:
Enter the Serial Number to be received into the Receiver Serial No box. Or, select the Serial Number(s) being returned by highlighting and depressing the > button. For multiple serial numbers, hold the CTRL key down while highlighting. If you want to include all Serial Numbers, depress the >> button. Depress the OK button. The Serial Number Entry box will update. Rework Work Order Serial Numbers When a Rework Work order is established for a serialized product, the user may select existing serial numbers that are in inventory (finished goods) that are to be reworked. Rework Work Orders will not accept new serial numbers. When a serial number is placed in the Rework Work Order, the serial number must exist in finished goods, and the number of serial numbers transferred to the Work Order must equal the quantity of assemblies for the Work Order. The part number for the serial number that is moved into the Rework Work Order does not need to be the same part number and revision as the Work Order. Thus, if a user wants to upgrade part number 123 rev A to part number 123 rev B, they can transfer the parts to the Work Order and identify the serial number transferred. Parts may also be changed to a new part number: Example:part number 123 rev A can be placed in a Rework Work Order for part number 234 rev C. The only condition is that the quantity and number of serial numbers must match. You may enter an item Note, if desired. The completed screen will look like this:
Depressing the Note tab will bring up the following screen:
The credit memo reason will display as referencing the RMA number. You may add to the Credit Memo Reason, if you wish. You may add an RMA note or an RMA Receiver Note, if desired. When RMA is complete. Depress the Save record action button to save changes, or depress the Abandon changes button. If you depress the Save record action button, the following message will appear:
To continue the save, depress the Yes button. Selecting the WO list tab will bring up the following:
 You may not change anything on this screen. Note: The user can not kit a Rework Work Order. The user may only pull the shortage. Please refer to the Kitting, Allocating & Shortage Management article. Note: If the RMA line number for the negative (returning) item is placed on administrative hold, then receiving will not be able to receive in the parts until it is cleared. Credit Memo The Credit Memo is not created until the returned material is actually RECEIVED in the RMA Receiving module. There is no financial involvement UNTIL the parts are received back. Regarding the matter of advising accounting that a Credit Memo has been created, the system will send an e-mail to the appointed recipient when the RMA is received if a trigger is setup to do so.
|