| 1. Purchase Order Management |
| 1.1. Purchase Order Management |
| 1.1.1. Prerequisties - PO Mgmt |
After activation, "Purchase Order Management" access for each user must be setup in the ManEx System Security module. Users with “Supervisor Rights” will automatically have access.
|
Supplier
|
The Supplier must be setup in the Supplier Information module. |
| Part number in Item Master |
The part number must exist for a product or part in the ICM module. |
| AVL |
The Manufacturer Names must have been set up in Part Manufacturer Setup module. |
| Buyer Codes |
The Buyer codes must be established in the Inventory Buyer Setup module. |
| Purchasing Approvals |
A list of employees and their approval authorizations must exist in Purchase Setup module. |
Optional Prerequisites for Entering a New PURCHASING
|
| 1.1.2. Introduction for PO Mgmt |
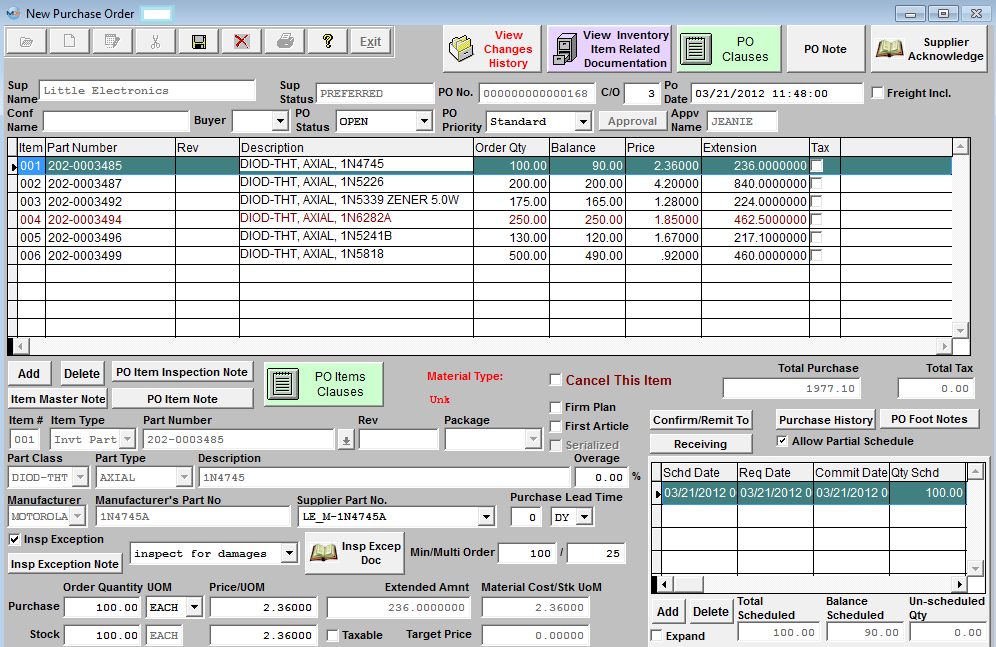
The PURCHASING Module is the place where all procurement is done. This module allows the user to add purchase orders to the system, and to add items to each purchase order. Edit functions are available both at the purchase order level and at the item level.
The process begins by selecting a Regular PO or an In-Store PO, then selecting a supplier for the order. The supplier is selected from a list of suppliers established in the Supplier Information module.
After selecting a supplier, the user may enter orders for various types of material. Inventory material is ordered to be placed in on hand inventory and used in the making of product. The user may also select MRO parts, parts which are not kept in inventory, but are expensed as they are purchased and distributed to the requester when they are received. (MRO parts may be defined in the item master and kept in inventory, if desired.) There is also a selection for Services.
The user may add a new part by selecting the part class and type, then choosing from a part matching that criteria, or go directly to the part number edit box and enter the part number without visiting the class and type box.
The buyer may have entered a specific manufacturer of the item, providing that the manufacturer and the part number have been entered in the inventory item master. If there is only one manufacturer, that manufacturer will be the default manufacturer entered in the purchase order.
If the user is adding an inventory item to the order, the system will add in the details from the item master once the part number is established.
Purchased items may have the delivery schedule established for one or more deliveries. The delivery date entered in the purchase order is meant to be the date the material lands on the user’s dock.
The user may enter either the stocking quantities based on the stocking unit of measure or the purchasing quantities, based on the purchase unit of measure. If the units of measure are different, the user must have defined the relationship between the different units in the Unit of Measure Conversion. Entering one quantity will automatically calculate and enter the other quantity.
The user enters the unit price and whether or not the item is taxable. If it is taxable, the tax percentage will be supplied based on the data entered in the Tax &Shipping Mode tab. The system will display the extended amount of the item on the order based on the quantity and price. Note: If the Tax Information has not been filled in, the Purchase Order will NOT calculate any sales tax. Therefore, it is important that the user set this up properly.
The user may define the quantity that may be received over the amount of the order by entering an overage percentage. This will allow incoming receiving to accept quantities up to the amount of overage specified for the order.
The user may enter specific notes about the item on the purchase order, to be printed on the order. They may also view and edit any item master notes that may exist for the part, and may also view the procurement history for the part.
Once entered, all orders require an approval. The approval authority established in the Purchase Order Authorization tab is used to determine whether or not an individual may approve an order. It is possible to allow two approvals to orders, and to set different approval limits for each of them.
Orders will be identified as temporary orders until approved, after which they will have a permanent number assigned.
Change orders to purchase orders must also be approved in the same manner. Once an order is changed, it cannot be printed or acted upon until it is approved again.
Details about the remittance, delivery point, billing etc. will be completed with Supplier default information, and may be reviewed for the order if necessary.
In-Store purchasing overview: In-Store is the situation where the Supplier has placed raw materials in the user’s warehouse. The Supplier still owns the raw materials. When the user is ready to use the Supplier’s raw materials, he/she issues an In-Store Purchase Order. For In-Store POs, the user may select by Supplier or by Part Number. Then the user may find records according to the selection. Once found, the user may create a PO for the In-Store Consumption. In-Store Purchasing also includes receiving.
|
| 1.1.3. Fields & Definitions - PO Mgmt | 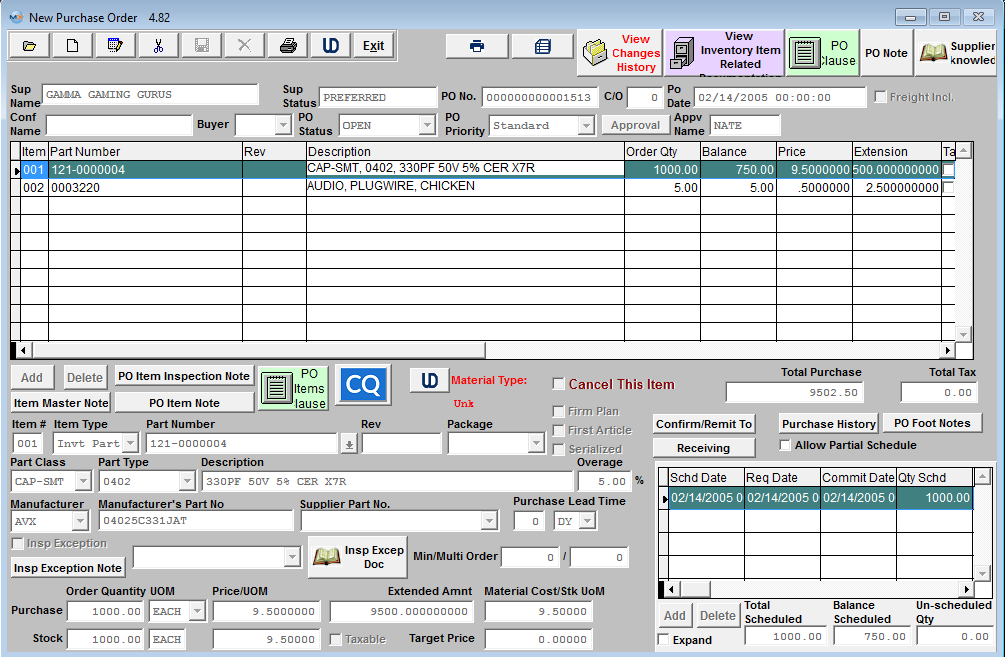
| Sup Name |
The supplier or vendor with whom the order was placed. |
| Sup Status |
The status of the Supplier, whether Approved, Inactive, etc. |
| PO Number |
The Purchase Order number of the order. If PO Numbering is set to Auto (in Number System Setup ) the system automatically places a "T" in the PO number to flag it as a temporary number. Then upon approval the system auto finds and replaces that "T" with a "0". Note: If PO Numbering is set to manual, users enters a PO number manually using a "T", then changes the numbering to Auto, if this PO is edited and approved the "T" will be changed to "0". The system has no way of knowing that the <st1:place w:st="on">PO was manual numbered before the change.
|
| CO |
The Change Order revision status of the order. This field can be automatically increased upon approval or controlled by the user and is only changed if the user manually assigns a Change Order number. (This is setup in the System Setup/Material/Purchase Order Setup module). Change Order History is tracked under the View Changes History screen automatically. NOTE: If auto assign the next change order will be referenced in the change history but the PO change order will not increase until PO has been approved. If not auto assigned the change order will be referenced to what ever change order user enters.
|
| Po Date |
The date the purchase order was created. |
| Freight Included |
If this box is checked, the vendor has agreed to pay the freight. "Freight Included" will be added to the print out of the PO form and will be displayed in PO Reconciliation module for reference. If this box is not checked "Freight Not Included" will be displayed on PO Reconciliation module. |
| Conf Name |
The contact at the supplier who confirmed the purchase order. |
| Buyer |
The initials of the buyer for the order. |
| PO Status |
The status of the purchase order. Indicates if the order is new, being edited, is open, closed or cancelled. |
| PO Priority |
The status of the purchase order.Indicate if the order is standard, priority, or hot. |
|
|
When the purchase order is approved, the "T" in the Purchase Order number will be replaced with a "0" and the initials of the person who approved the order will be displayed. (Note: The PO must be approved before being able to create a PO Dock receiver). |
| Final Approval |
When two approvals are required, and both are granted, the initials of the second person approving the purchase order will be displayed in this field. |
Purchase Order Items
| Item |
The purchase order item number of an item being purchased. |
| Part Number |
The part number of the item being purchased. NOTE: User has the option to drill down to view the inventory record info for a part by double clicking on the part number. |
| Rev |
The revision of the part number being purchased. |
| Description |
The Description of the part number. |
| Order Qty |
The quantity of parts being ordered. See Article #1240 for more detail on why the system will not allow user to enter in a fraction of a number, and an alternative. |
| Balance |
The un-received balance of the item. |
| Price |
The agreed upon price for the items being ordered. |
| Extension |
The extension of the price and quantity. |
| Tax |
Indicates whether or not the item is taxable. |
 |
This will allow user to cancel an individual item on a PO. Since the system does not allow you to delete a line item that has had any kind of transaction, we needed a way for users to cancel individual line items without having to cancel the entire order within the system. If any parts have been accepted, it cannot be cancelled. Once a part has any receipts the user cannot delete the line, so if they reject the total received qty they can cancel the line to prevent it from affecting the PO, or PO history for the other line items. If they do not want to reject the entire qty then their only option is to reduce the balance qty to the accepted qty. Cancelled line items will be excluded from the Purchase Order reports within the module.
|
|
|
The total amount of all items on the purchase order (excluding taxes). |
| Total Tax |
The total tax amount of all items on the purchase order. |
Detail Definitions
| Item # |
The purchase order item number of an item being viewed. |
| Item Type |
The type of inventory being purchased (Inventory, MRO, or Services). These are hard coded into the system and cannot be changed or edited in anyway. Inventory is for a part that exists in the ICM module. MRO stands for Management Required Options. Generally this is used for supplies, purchases. Services items are for those instances where the assembly is outsourced. |
|
Part Number
|
The internal part number of the item being purchased. |
|
Rev
|
The revision of the part number. |
|
Package
|
The packaging method used to package the parts.
|
| Material Type |
The material type (per AVL level) will be displayed in Red once user selects the mfgr and mfrg PN. |
| Firm Plan |
If this box is checked, the MRP module will NOT try to override the purchasing decision. For example: If the need is for 100 parts per month for the next six months. But the user makes a decision to block order 600 parts and marks the PO as Firm Planned. Without any Firm Plan command, the MRP module would instruct the user to cancel the PO for 600 quantity and re-issue for 6 separate purchases of 100 each. But since the PO is marked as Firm Planned this tells MRP that the purchasing decision was intentional and NOT to override. So MRP will work around this PO
|
|
|
If this box is checked, this part requires a first article inspection and the users will be required to check off the First Article Done box within PO receiving (This information is usually defaulted from the ICM module, but can be edited within the PO module also).
|
|
|
If this box is checked, the user will be required to enter serial numbers at time of Purchase Order Receipt and Inspection. (This information is defaulted from the ICM module).
|
|
Allow Partial Schedule
|
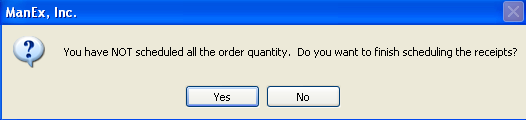
If user wants this box to be checked at all times they must set the default as checked within the System Setup/Materila/Purchase Order Setup module, and user can change it any time while in the PO module. If user wants to be able to save a partial schedule on a one to one basis they will have the default setup as unchecked within the System Setup/Materila/Purchase Order Setup module. If un-checked user will receive the popup warning them that they have not scheduled all the order qty and ask if they want to finish scheduling the order qty, upon saving a PO with only a partial schedule. If the box is checked the system will not ask any questions when saving a po with only partial schedule. (Note: MRP will NOT acknowledge qty's that are not scheduled).
|
|
Part Class
|
The Part Class of the part number.
|
|
Part Type
|
The Part Type of the part number.
|
|
Description
|
The Description of the part type.
|
|
Overage
|
The percentage of parts allowed to be received over the ordered quantity.
|
|
Manufacturer
|
The manufacturer for the part.
|
|
Manufacturer Part Number
|
The commercial part number.
|
|
Supplier Part No.
|
If the Mfgr AVL has a Supplier and Supplier PN associated within the ICM module, the Supplier PN will be displayed in this field as additional reference.
|
|
Purchase Lead Time
|
The time between the Supplier receipt of the PO and receipt at the users dock.
|
|
Insp Exception
|
Checking this box will allow the receiver to receive the parts for this Purchase Order Only without inspection. Upon checking this box the Insp Exception Note Field and the Insp Excep Doc will become available for use and then user must then select an Insp Exception Type from the pull down screen. User MUST have special rights within the Security module or supervisor rights to edit this field.
|
 |
The Insp Exception box MUST be checked for this field to become available. This information will then be displayed within the PO Receiving as reference information to the users that are processing the Receipts through the system. |
|
|
The Insp Exception box MUST be checked for this field to become available. This will allow users to attached documents. This information will then be displayed within the PO Receiving as reference information to the users that are processing the Receipts through the system.
|
|
Min/Multi Order
|
The Min/Multi order quantities are defaulted in from the Inventory Control module (MRP Info tab) to display the minimum quantity that must be ordered for this part and the increments this part must be purchased in. (If this information is edited within the Purchase Order Module, it will be updated to the ICM module upon saving). For Example: if the Min order qty is 500 and the order multi is 100 and the order is for 515, then the order will need to be rounded up to 600.
|
|
Purchase Order Qty
|
The quantity of parts being ordered based on the purchasing units of measure.
|
|
UOM
|
The Purchased unit of measure. (May be different than stocking unit of measure).
|
|
Price/UOM
|
The agreed upon unit price for the items being ordered.
|
|
Extended Amt
|
The extension of the price and quantity.
|
|
Standard Cost/Stock UOM
|
This field displays the Standard MATERIAL Cost. (This is defaulted in from the ICM module, if no standard material cost is found in the ICM module the user will be allowed to enter in a standard material cost at the time of purchase). For a BUY part, this is the value against which PPV should be calculated, and the value the user should expect to pay for the part.
|
|
Stock/Order Qty
|
The quantity of parts ordered based on the stocking unit of measure.
|
|
Stock UOM
|
The stocking unit of measure.
|
| Stock Price/UOM |
The stocking price.
|
|
Taxable
|
Indicates whether or not the item is taxable.
|
|
Target Price
|
The target price is a reference for the buyers to use. (This information is defaulted from the ICM module).
|
Directive Buttons
The following buttons are displayed on the Purchase Order Screen.
After a purchase order is created or edited, it must be approved before it can be printed and issued to a supplier. Certain employees may be granted authority to approve purchases up to a certain total dollar value. Those authorized personnel may approve purchase orders under that amount. If only one signature is required, the order will be finalized and released. If it is a new order, and automatic PO numbering is enabled, Manex will assign the next available number to the order. The action is taken by clicking on the Approval button and responding with an authorized password.
If two signatures are required in order to release a purchase order, then a second person with approval authority for the amount of the order must approve the order, by clicking on the Final Approval button and responding with an authorized password.
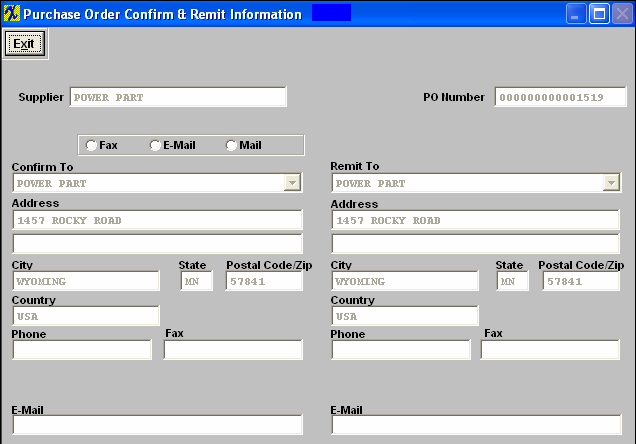
Confirm/Remit Screen Field Definitions
| Supplier |
The supplier or vendor with whom the order was placed. |
| PO Number |
The Purchase Order number of the order. New purchase orders that have not been approved will display a temporary number until approved. |
| Fax, eMail, Mail |
How to communicate with the supplier. |
CONFIRM TO
| Confirm To |
The name of the supplier. |
|
Address, City, State, Postal Code, Country
|
The address of the supplier to which the order is sent. |
| Phone, Fax |
How to communicate with the supplier. |
| E-Mail |
Email address enter within the Supplier Setup module. |
REMIT TO
| Remit To |
The name of the supplier or their agent. |
| Address, City, State, Postal Code, Country |
The address of the supplier to which the payment is sent. |
| Phone, Fax |
How to communicate with the supplier accounting department. |
| E-Mail |
Email address enter within the Supplier Setup module. |
 |
When the user has displayed a purchase order with items on the Purchase Order screen, pressing on the Receiving button will display information about where the supplier is to ship the material on the purchase order, and the terms and conditions of the order.
|
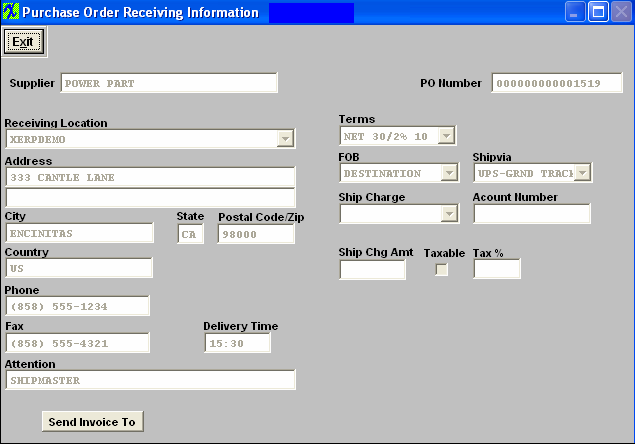
Receiving Screen Field Definitions
|
|
The supplier or vendor with whom the order was placed. |
|
|
The Purchase Order number of the order. New purchase orders that have not been approved will display a temporary number until approved. |
|
|
The company and address to which the order is to be shipped. |
|
|
The terms of the purchase order. |
|
|
The FOB point for the order. |
|
|
The preferred shipping carrier for the order. |
|
|
How the freight costs are to be paid. |
|
|
If needed, the freight company account number for the carrier to charge. |
|
|
The shipping charge cost for the order. This is referenced on Purchase Order Forms Only. These amounts wIll not be carried over to the PO Reconcilliation. |
|
|
Indicates if the freight charges are taxable. This is referenced on Purchase Order Forms Only. These amounts wIll not be carried over to the PO Reconcilliation. |
|
|
The tax rate for the shipping charges. This is referenced on Purchase Order Forms Only. These amounts wIll not be carried over to the PO Reconcilliation. |
|
|
The preferred delivery time for receipts. |
|
|
The name of the person to whom the shipment is directed. |
DIRECTIVE BUTTONS
 |
When the user has displayed a purchase order with items on the Purchase Order screen, pressing on the Send Invoice To button will display the billing information for the supplier. This button is displayed on the Purchase Order Receiving Information screen |
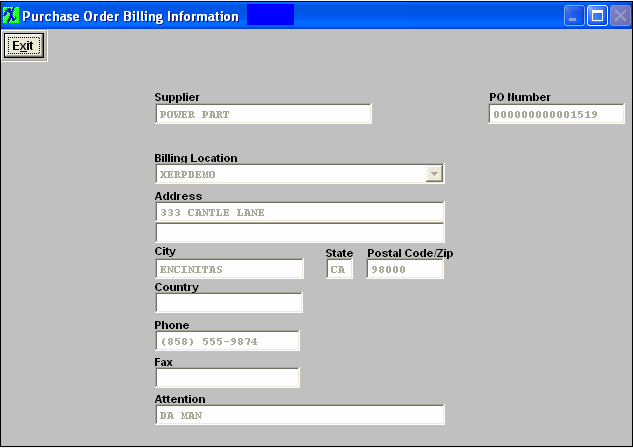
Send Invoice To Screen Field Definitions
|
|
The supplier or vendor with whom the order was placed. |
|
|
The Purchase Order number of the order. New purchase orders that have not been approved will display a temporary number until approved. |
|
|
The users company and address to which the order is to be billed. |
 |
Depressing the Purchase History button will display the purchase history for that line item. The user may sort by Clicking on any of the Headers, and Search for specific items by typing in the column. Note: If an order has status “EDITING” it will not be displayed on the history list. Once the order is approved and the status is changed to "Open" or "Closed" the order will then be displayed on the purchase history list. |

 |
When the user has displayed a purchase order with items on the Purchase Order screen, and has highlighted one of the line items, checking the Expand box will display the schedule information about the item being purchased. |

 |
When the user has finished viewing the schedule information about the item, the user may check the Shrink box and the schedule information will shrink down. |
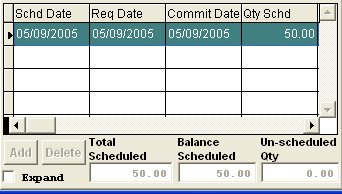
Schedule Field Definitions
|
|
The date the material is due to land on the users dock. This is the date MRP uses. |
|
|
This is the internally required or desired date. It is not used for the supplier or MRP. |
| Commit Date |
The commit date is a reference field for the buyer. |
|
|
The quantity scheduled for the due date. |
|
|
This will display the balance left to receive from the Qty scheduled. |
|
|
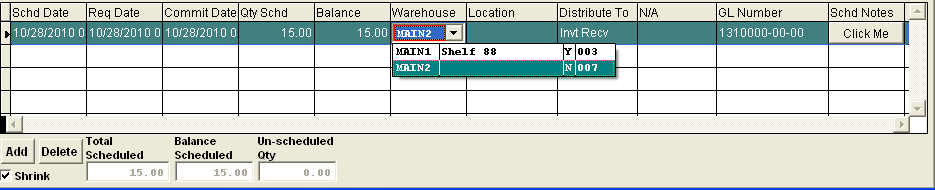
The User can choose the Warehouse from the pulldown or leave it blank. The Y next to the Warehouse location indicates that, that Warehouse is set-up in the AVL. The N next to the Warehouse location indicates that, that Warehouse is not set-up in the AVL. If the warehouse field is left blank then the warehouse can then be assigned at PO Receiving Management. Once the record has been saved within the PO Receiving this information will then be updated within the Inventory Control Management under the Qty info screen. |
|
|
The Location field will update automatically from the Inventory Control Management module. The user can edit this field in the scheduling detail. This will not change the location in the Inventory Control Management module under the quantity info screen. |
|
|
This is classification of the distribution of the item when received, either to regular Inventory Receiving or to Allocate to Special Work Order or Project |
|
|
This Field is for future use, it is non-applicable at this time. |
|
|
The General Ledger number where the purchase order will post. These GL numbers are defaulted in from the Purchase Setup under the MRO Receiving Setup. |
|
|
|
Depressing on the  button will bring up a screen where the user can enter in specific notes that pertain to that one schedule, item, and date. Type in the note. Depress the Save button. Exit button will bring up a screen where the user can enter in specific notes that pertain to that one schedule, item, and date. Type in the note. Depress the Save button. Exit |
 |
When Creating a new PO or Editing an existing PO this button will be enable. Depressing this button will allow the user to add additional scheduled deliveries. |
 |
When Creating a new PO or Editing a existing PO this button will be enabled. Highlight a scheduled delivery then depressing this button will delete that delivery from this screen. |
|
|
This field will display the total qty scheduled for the highlighted item. |
|
|
This field will display the Balance left to receive from the qty scheduled for the highlighted item. |
|
|
This field will display the qty un-scheduled for the highlighted item. |
|
| 1.1.4. How To ..... for PO Mgmt |
| 1.1.4.1. Find a Purchase Order |
|
Enter the SQLMANEX.EXE (within the ManEx root directory)
This action will then prompt the user for a password
|
 |
|
The following screen will be displayed, select Material Planning/Purchase Order Management/Purchase Order Management
|
 |
The following screen will be displayed:
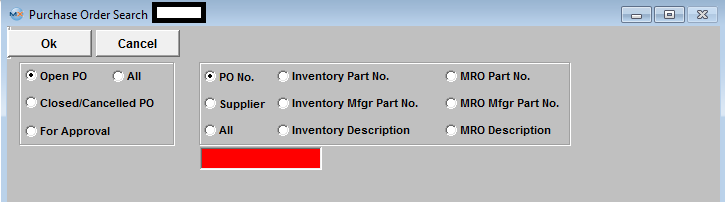
1. Depress the Find Record icon. The following screen will be displayed.
2. On the left hand side of the screen, select the desired Filter: by selecting the appropriate radio button - Open PO, All, Closed/Cancelled PO, For Approval, or ALL.
3. Once you’ve made your “Filter” choice, determine the "Find by" search method by choosing between PO Number, Inventory Part Number, MRO Part Number, Supplier, Inventory Manufacturer Part Number, MRO Manufacturer Part Number, All, Inventory Description, or MRO Description.
If you do not know the exact number, Customer, etc you may enter in a partial number, letter, etc, then once you depress the enter key the system will pull up the matching record onto the screen or a list of all Purchase Orders that contain the partial number, letter, etc. entered, to select from.
|
 |
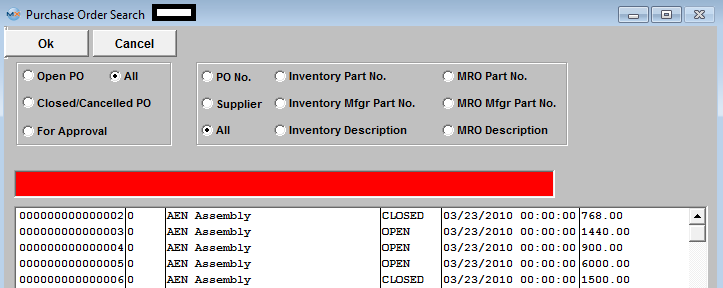
| 4a. For example, a selection on the left for an Open PO, and a selection of ALL on the right will produce the following screen, listing all open purchase orders.
|
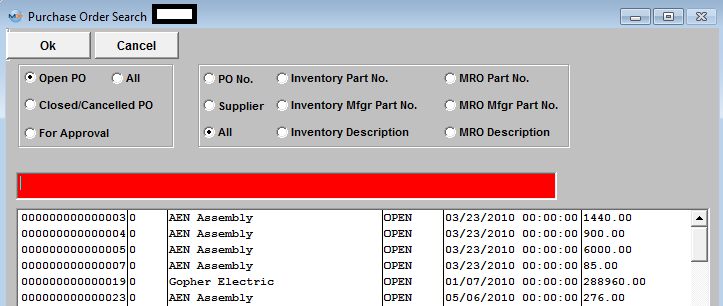 |
| 4b. A selection on the left for All and a selection of All on the right will produce a list of all purchase orders, open, closed, etc. |
 |
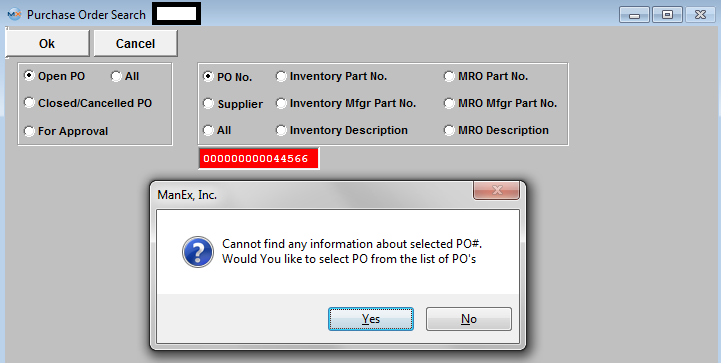
If you enter information in the Red Box and the system cannot find any information, users will receive the following message and if they select "YES" a list of Open PO will be displayed.
The rest of the right hand selections are essentially the same as for those illustrated above.
|
 |
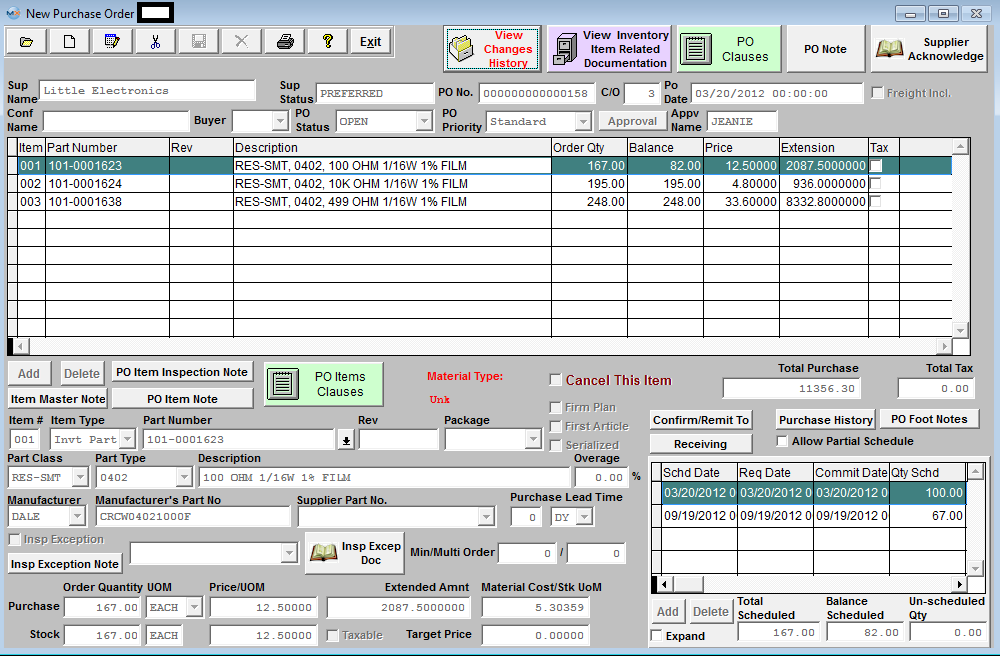
5. After finding the Purchase Order, the Purchase Order screen will be displayed, populated with any parts on order.
|
| 1.1.4.2. Add A Purchase Order |
|
Enter the SQLMANEX.EXE (within the ManEx root directory)
This action will then prompt the user for a password
|
|
The following screen will be displayed, select Material Planning/Purchase Order Management/Purchase Order Management
|
|
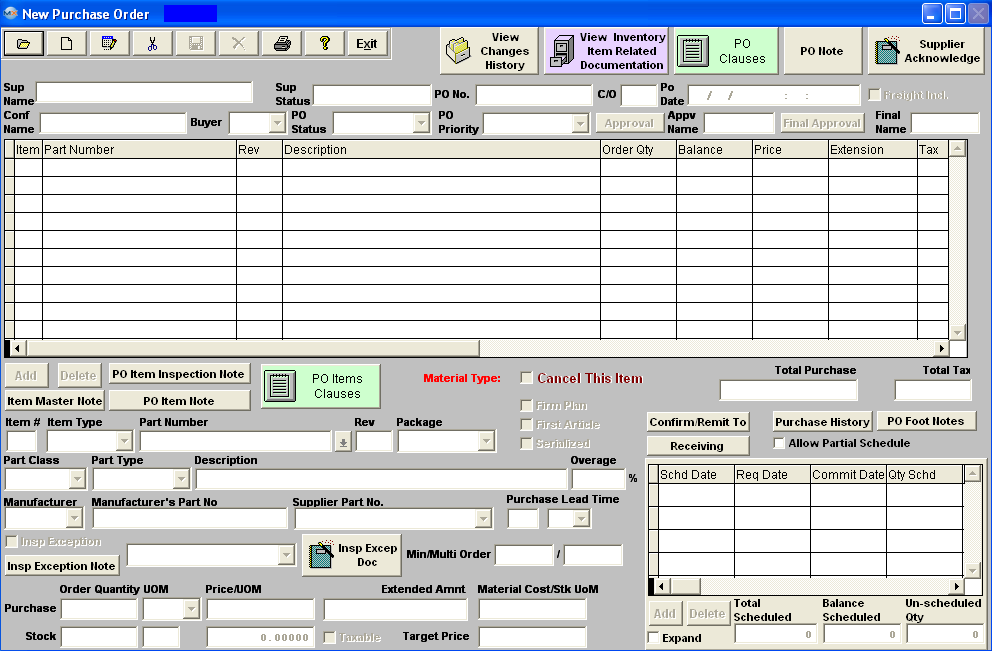
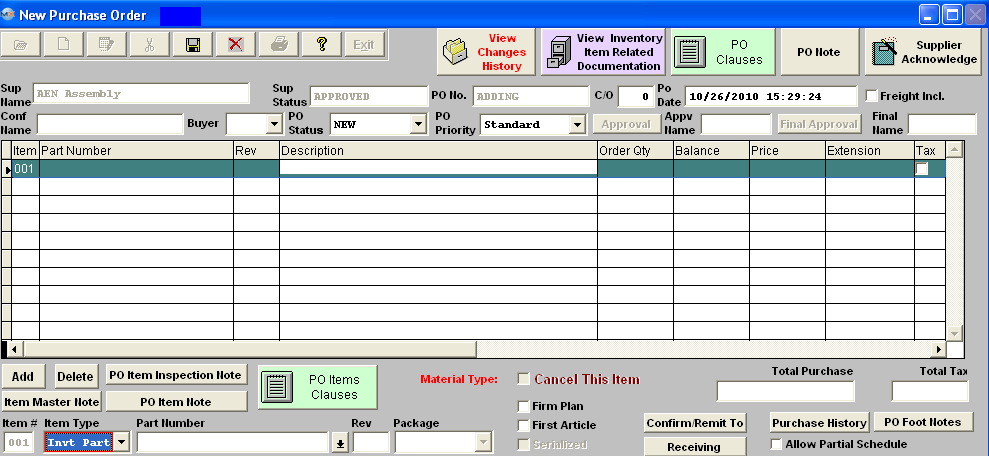
The following screen will be displayed:
Depress the Add Record Button (in the Purchase Order Tab screen) displays the following sequences:
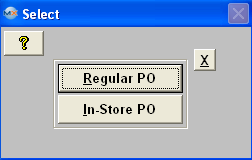
The first step is to Select Regular PO or In-Store PO
|
 |
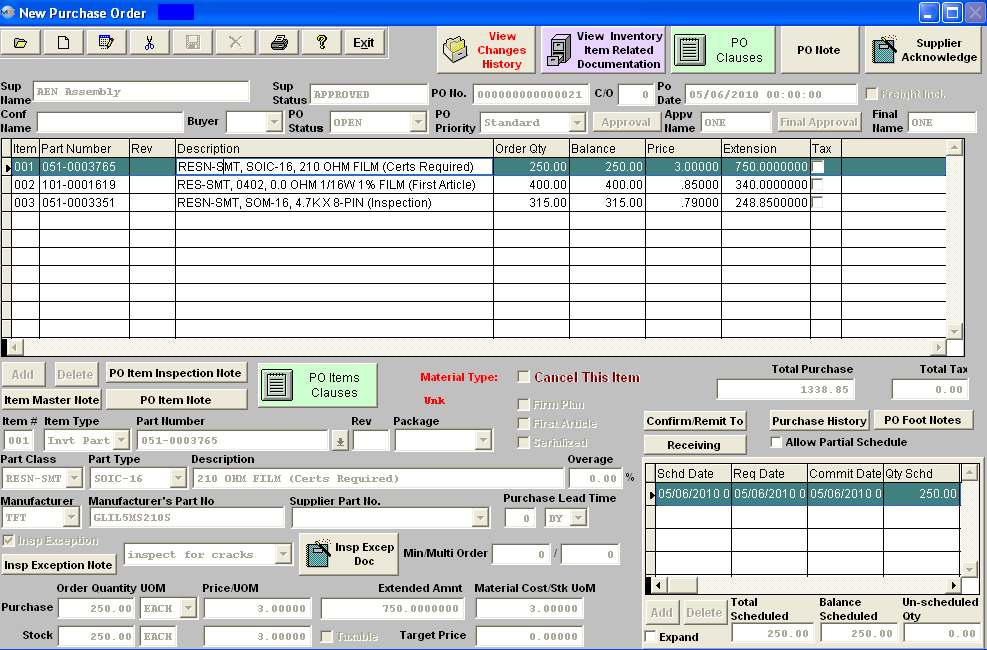
After selecting "Regular PO" user will be prompted for their password and the following screen will be displayed:
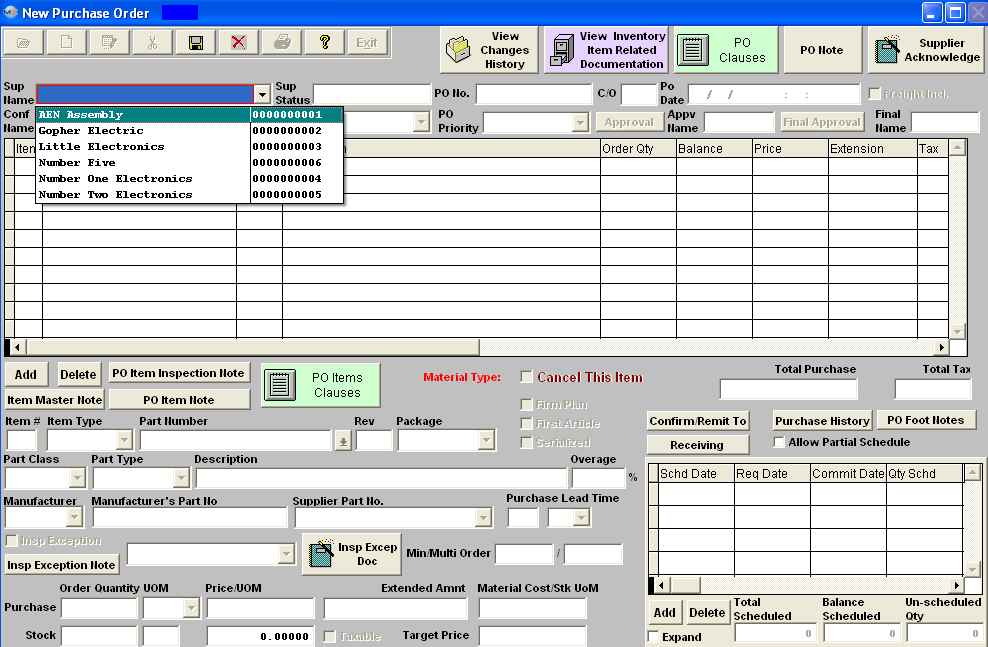
The user must first select the Supplier from the Pull down, and all the head information will default in:
Entering Item Detail Information
|
The user must first select the Item Type to be entered as a line item. Item types include Inventory Parts (parts to be delivered to on hand inventory), MRO (expensed items) or Services .
|
 |
|
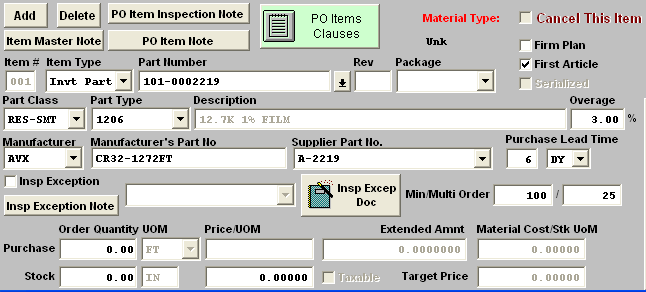
| 1.1.4.2.1. Inventory Part | Selecting Inventory Parts as the item type, the user may jump directly to the part number box (click on it) and enter a part number. Or, the user may step through the Part Classes and Part Types to narrow the focus and then select a part from the desired part type. Once a part number from Inventory has been entered, ManEx completes the boxes associated with the item master.
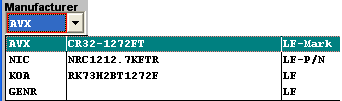
| If more than one manufacturer exists for the part, the user may click on the down-arrow next to the manufacturer edit box and select the appropriate manufacturer for the order. The Material type will be displayed in the pulldown next to the Mfg. and Mfgr. PN. |
 |
|
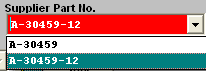
If more than one supplier part number exists for the part, the user may click on the down-arrow next to the supplier part no. edit box and select the appropriate supplier part no. for the order.
The system will look for the preferred supplier part number and if found will show it as a display. At this time the user can leave the part number as is or select a different one if available. After a user will save the PO, the supplier part number will be saved and next time you will see the selected suppler part number when viewing the same PO.
No history will be saved because this field is for the information only.
|
 |
| Firm Plan |
If this box is checked, the MRP module will not try to override the purchasing decision. For Example: The user makes a decision to block order 600 parts, but the need is only for 100 parts per month for the next six months. Without the Firm Plan command, the MRP module would tell the user to cancel the PO for 600 quantity and re-issue for 6 separate purchases of 100 each. With the Firm Plan command, this tells MRP that the purchasing decision was intentional. (Please refer to the Material Requirements Planning article).
|
| First Article |
This box will be checked if set-up in the Inventory Control Management Module. You may uncheck it or check it if user has been instructed that it may be changed for this item only. This information will be carried forward to the PO Receiving screen for reference. |
| Serialized |
This box will be checked if set-up in the Inventory Control Management Module and will not be editable within the Purchase Order Management. This indicates to the user that this BUY part has been marked as Serialized and any product coming in or out of the system will require serial number tracking. |
The user may edit or add a percentage amount of extra material that will be allowed to be shipped against the order. By entering a percentage in the OVERAGE field, receiving will be allowed to receive extra parts up to the limit imposed in this field.
The user may also edit or add in purchasing lead time and min/mult order quantities through the Purchase Order Management module. Once the record has been saved this information will then be updated within the Inventory Control Management under the MRP Info screen.
The user may check the box for Inspection Exception and select from the Inspection Exception Pulldown (which is established in the Inspection Exception Setup module). The user will then also be allowed to enter any Inspection Exception Notes and/or Load Insp Excep doc that pertain to that PO line item. This information will then be displayed within the PO Receiving as reference information to the users that are processing the Receipts through the system.
The user is then prompted for the purchase order quantity of parts to be ordered. The user may enter either the Purchase Quantity or the Stocking Quantity, and ManEx will complete the other field based on the purchase/stocking unit of measure and conversion field.
NOTE: When creating a PO for an item with different purchasing and stocking UoMs, be sure to enter the MRP suggestion into the Stocking qty field rather than the purchasing qty field. The system will automatically convert the stocking unit into the purchasing unit for the purchase order qty.
For example if the buyer is creating a PO for an item that is used by inches but sold by the foot, the user would enter qty of 36 into the stocking qty field and the PO would automatically convert it to 3 feet in the purchasing qty field (as shown in the example below). So the supplier deals in feet, but ManEx deals in inches. The conversion between the two are established in the Unit of Measure & Conversion module.
Then the unit price is entered (Price Each). The extended amount is shown, calculated by extending the quantity by price. If the inventory part that you are creating a line item for currently has a standard cost of 0.00 within inventory control the system will prompt the user with the following message, giving the user the option to assign the purchase price to be the standard cost for this item.
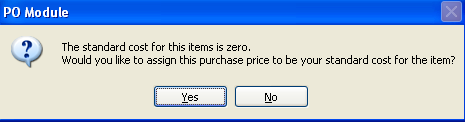
This can not be controlled by the Security level due to the fact that it is better practice to have a $$ assigned to the ICM record before the Purchase Order Receipt is accepted into the system. Otherwise you will have stock that is not valued properly, accounting records that will not be correct, etc. . . . So this is why ManEx allows any Purchase Order user to populate the STD cost field for that record with the purchase $ that you are loading. BUT . . Once a Std Cost is associated with the ICM record - the users within Purchase Order Management should no longer be able to change that value through the PO module.
The user may then indicate that the items are taxable by clicking on the Taxable check box.
The Stock/BOM field will update automatically based upon the conversion table defined in setup. The completed screen should appear as follows:
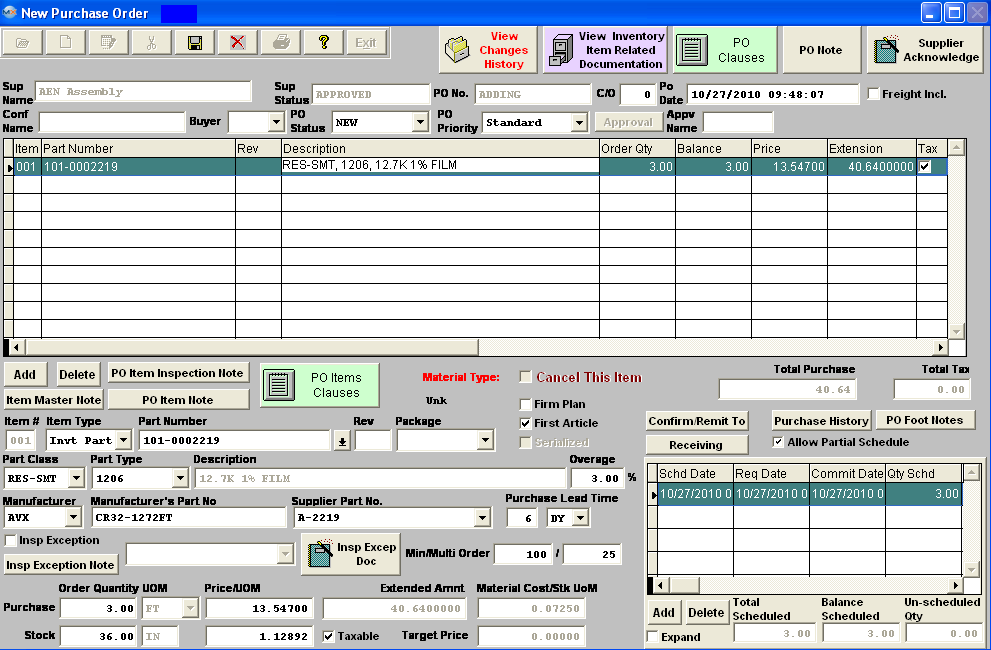
Before saving the order you will need to check the expand box and enter the Schedule detail information.
There are situations when the users will either not enter a schedule or enter a partial schedule at time of creating PO. If the scheduled qty does not match the order qty or the "Allow Partial Schedule" box is unchecked, upon depressing the Save button the following message will be displayed. This gives the user the option to stop the save process and return to the item and schedule or continue on and save without scheduling. Some users may not know an exact date for scheduling at the time of the PO creation and just create the PO to get the part on order. Then upon the supplier response add the scheduled dates to the PO at a later time. This is why we do not enforce the scheduling at the time of the PO creation.
If the "Allow Partial Schedule" box is checked upon saving the PO without a schedule or a partial schedule this message will not be displayed.
Entering Schedule Detail Information
The item will schedule automatically by adding the lead time to todays date and schedule the entire order amount. (Note: MRP will NOT acknowledge qty's that are NOT scheduled).
At this time the user has the option to change the Schd date/Req date/commit date information and also the Qty Schd.
Note: If user is NOT following MRP suggestions when creating POs they need to keep in mind inspection time when entering a schedule for a PO.
|
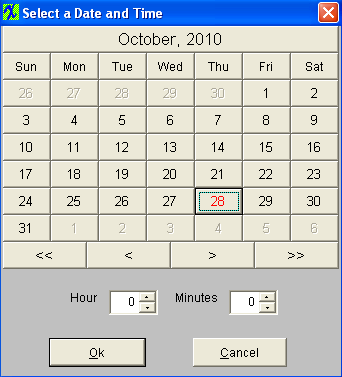
If the user wants to modify the automatic scheduled date, they can either manually adjust the Date information by highlighting the field and typing in the new date, or place the cursor in the Due Date field.Type in a ?. A calendar will appear.
Depress the desired delivery date.To advance into the next month, depress the > button.
|
 |
Schedule Field Definitions
| Schd Date |
The date the material is due to land on the users dock. This is the date MRP uses. |
| Req Date |
This is the internally required or desired date. It is not used for the supplier or MRP. |
| Commit Date |
The commit date is a reference field for the buyer. |
| Qty Schd |
The quantity scheduled for the due date. |
| Warehouse |
The User can choose the Warehouse from the pulldown or leave it blank. The "Y" next to the Warehouse indicates that, that Warehouse is set-up in the AVL. The "N" next to the Warehouse indicates that, that Warehouse is NOT set-up in the AVL. If the warehouse field is left blank the user will receive the following message
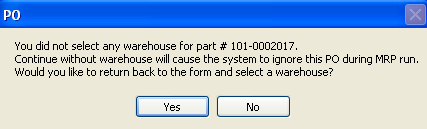
upon saving the record and the user has the option to go back and add the warehouse at this time or leave it blank and assign it at PO Receiving Management. Once the record has been saved within the PO Receiving this information will then be updated within the Inventory Control Management under the Qty info screen.
|
| Location |
The Location field will update automatically from the Inventory Control Management module. The user can only edit this field in the scheduling detail if the "Allow Auto Create Location at Receiving" is checked within the ICM module. |
| Distribute To |
This is classification of the distribution of the item when received, either to regular Inventory Receiving or to Allocate to Special Work Order or Project |
| GL Number |
The General Ledger number where the purchase order will post. |
| Schd Notes |
Depressing on the button will bring up a screen where the user can enter in specific notes that pertain to that one schedule, item, and date. Enter in the note. Depress the Save button. Exit. |
Pressing the Save button at the top of the screen saves the order and item(s) entered, and assigns a temporary number to the order. After adding items to the purchase order and saving them, the Purchase Order will display all items added to the order.
The user may use the scroll bars at the right and bottom of the items listed to scroll over additional information.
The user may modify the column widths in the current view by placing the cursor on the right border of the column in the column header, and pressing the left mouse button. Moving the border while holding the mouse button then releasing at the new location resizes the columns.
|
| 1.1.4.2.1.1. Allocate to Special Work Order or Project | Introduction
Inventory Allocation is used to allocate (reserve) quantities of existing items in stock or future Purchase Order deliveries to a Work Order or Project Number. This allocation prevents issuing the quantity reserved to any other use except the Work Order or Project Number specified. Purchase Order Line Item allocations may be removed prior to receipt of the parts by editing the Purchase Order. After receipt of parts allocated by Purchase Order, the allocation may only be removed after the parts are in stock, by using the Inventory Allocation module.
ALLOCATION OF PURCHASE ORDER DELIVERIES
Allocating a PO Line Item is used to make sure that the item will be reserved for a particular Work Order or Project Number when it is received. PO line item allocation is generally used when allocating to a Work Order or Project Number for which the items are not available in stock. Line Shortages of items NOT on the BOM, which are NOT in stock, are an example of typical PO Line Item Allocations. To allocate Purchase Order Line Item Deliveries to a Work Order or Project Number:
- A Work Order or Project Number must be open for the product.
- The Item to be allocated must be entered in the Inventory Control Item Master.
- The quantity allocated must equal the quantity ordered. ie. The total quantity ordered on a line item may be allocated to multiple Work Orders or Project Numbers through the schedule screen.
PROCEDURES
To Allocate a PO Line Item to a Work Order or Project Number:
- Allocate to a new or existing PO.
- Select the desired PO in Article #4557
- Highlight the line item you want to allocate.
- (If it is an existing PO) Depress the Edit action button.
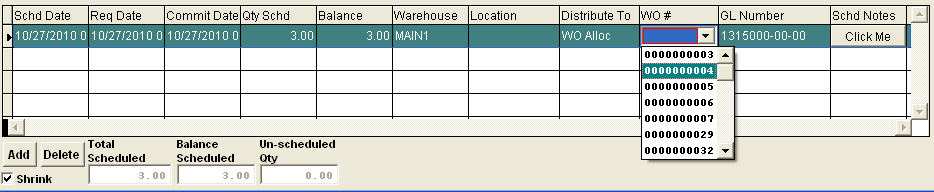
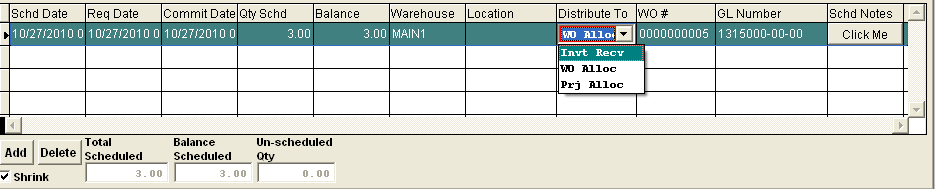
- Expand the Schedule Screen, tab and click on the "Distribute to" field.
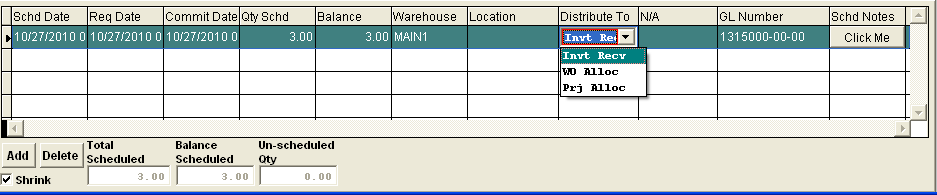
- Select WO Alloc or Prj Alloc, enter the Work Order number or Project number to allocate to in the WO # field or Project # field.
- Follow normal PO Mgmt procedures to save and approve.
NOTE:The user may wish to allocate a line item to multiple Work Orders and/or Project Numbers. In the schedule for an item, the user can create as many schedule lines as required. Each schedule line can have a different allocation. If the user had a requirement for 5 Work Orders and/or Project Numbers of 100 parts for each Work Order and/or Project Number, the user would add a line to the PO for 500 parts, then in the schedule, the user can add a line for each Work Order and/or ProjectNumber to which the parts are allocated. The schedule dates can be the same or different. The supplier will see only the total quantity required by the schedule date and is not bothered with the individual allocations.
To Un-allocate a PO Line Item that has not yet been Dock Received:
- Select the desired PO in Article #4557
- Highlight the line item you want to un-allocate.
- Depress the Edit action button.
- Expand the Schedule Screen, tab or click on the "Distribute to" field.
- Select Inv Recv.
- Follow normal PO Mgmt procedures to save and approve.
To Un-allocate a PO Line Item that has already been Dock Received:
-
-
|
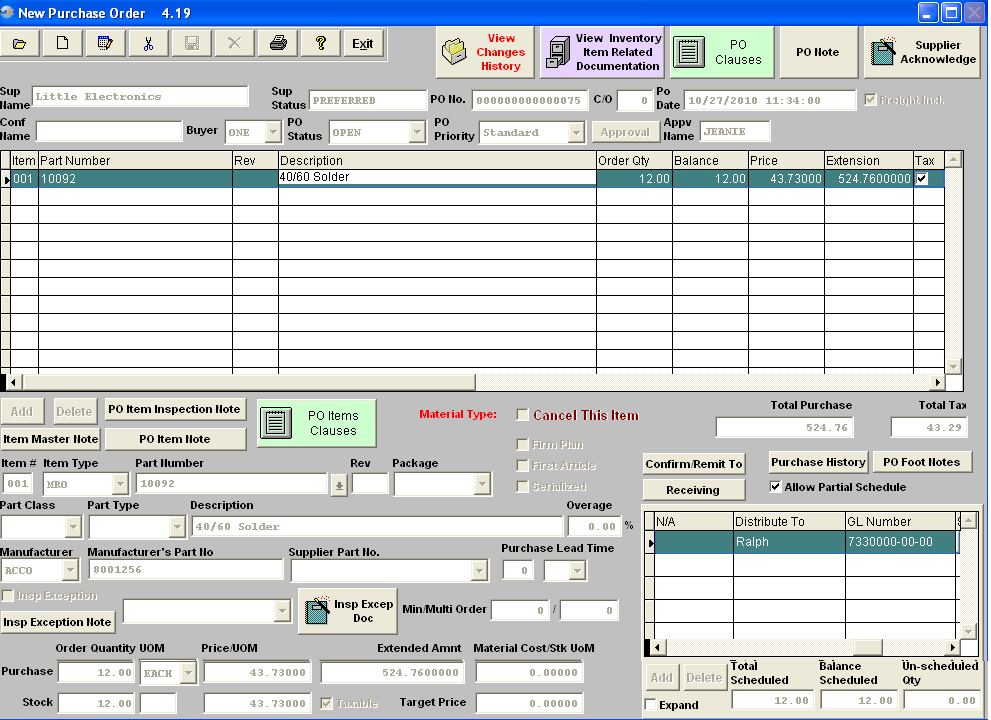
| 1.1.4.2.2. MRO Items | MRO stands for Management Required Options. Generally this is used for supplies, etc. purchases.
After selecting the Item Type to be "MRO"
If the MRO item is included in inventory
a. The user may jump directly to the part number box (click on it) and enter a part number. Or, the user may step through the Part Classes and Part Types to narrow
the focus and then select a part from the desired part type.
b. Fill in the quantity and unit price.
If the MRO item is NOT included in inventory
a. The user may enter in a part number manually (or leave blank) and then jump to the description field and enter the description.
The finished screen should look like the screen displayed:
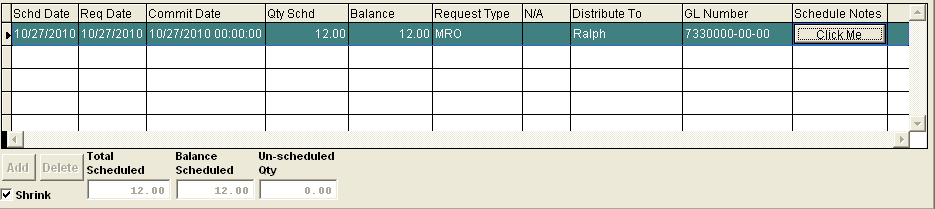
- Check the Expand box in the Schedule screen.
- Enter schedule dates and quantity scheduled.
- Type in the title or name of the person requesting the item in the “Distribute To” field.
- Enter or Select a General Ledger account number in the GL Number field. These GL numbers are defaulted in from the Purchase Setup module.
The completed Schedule screen will appear as follows:
- At the conclusion of entry for the item, the user may depress the Save record action button or the Abandon record action button.
- User must then Approve the Purchase order.
|
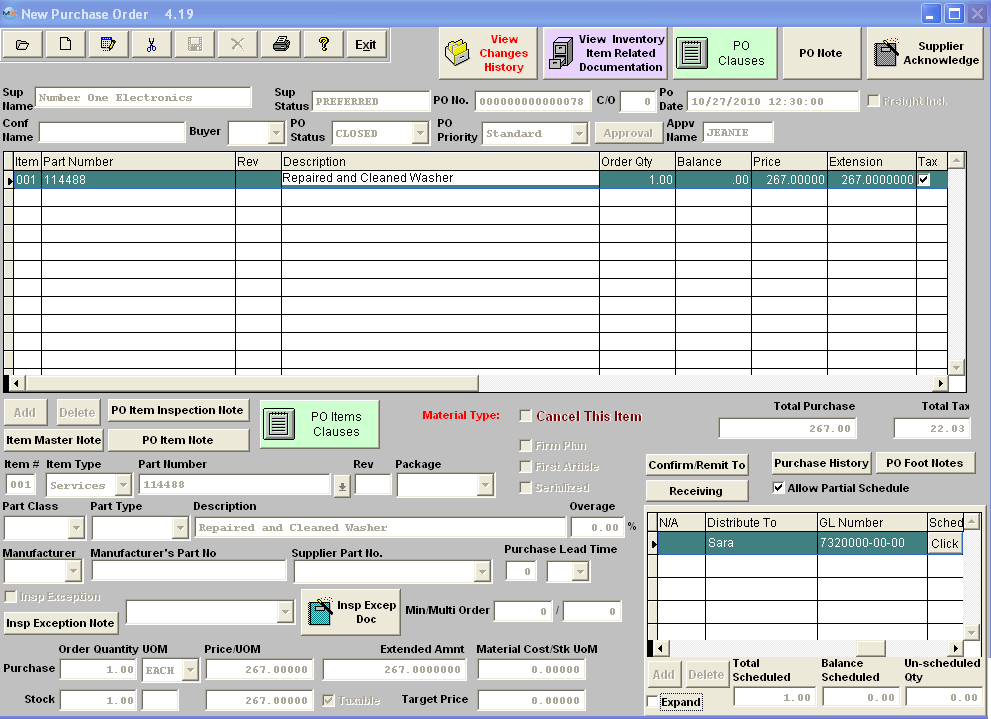
| 1.1.4.2.3. Service Items | Service items are for those instances where the assembly is outsourced.
After selecting the Item Type to be "Service"
- The user may enter a Part number manually (or leave blank) and then go to the description field and enter the description.
- Fill in the quantity and unit price.
The finished screen should look like the screen displayed:
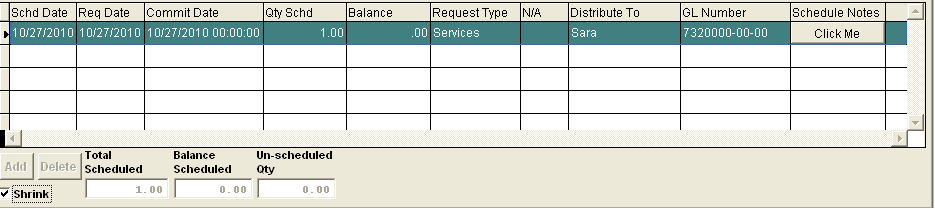
- Check the Expand box in the Schedule screen.
- Enter schedule dates and quantity scheduled.
- Type in the title or name of the person requesting the item in the “Distribute To” field.
- Enter or select a General Ledger account number in the GL Number field. These GL numbers are defaulted in from the Purchase Setup module.
The completed Schedule screen will appear as follows:
- At the conclusion of entry for the item, the user may depress the Save record action button or the Abandon changes action button.
- User must then Approve the Purchase Order. Upon Approval the PO Status will change from Open to Closed.
|
| 1.1.4.3. Edit, Cancel, or Close a Line Item or Purchase Order | Find the Purchase Order that you would like to edit.
Pressing the Edit record action button in the Purchase Order screen will allow the user to modify all the following information:
- The Confirmation Name, Buyer, PO Priority, Supplier Ack., check or uncheck Freight Included box.
- The Status field will only be enabled in the edit mode for users with approval rights. User MUST have approval rights to Modify the PO Status.
- Order quantity and unit price, min/multi qty, purchase lead time, overage amount, Firm Plan or First Article.
- Add or Deletion of a Line Item
- By depressing the Add button allows the user to add additional items to the PO.
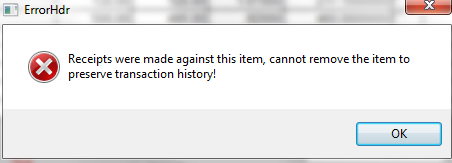
- By depressing the Delete button you can delete an existing line Item from the PO, only if there have been no receipts against the line item. If there have been receipts against the line item user will receive the following warning and will not be able to delete the line item.
- If there have been no receipts agains the line item, highlight the line item that you wish to delete, then depress the Delete button.
- The user will be asked to validate the deletion before proceeding.
- If you select OK the item will be deleted from the order. Once a line item has been deleted from the Purchase Order user will loose all links and will NOT be able to restore the item.
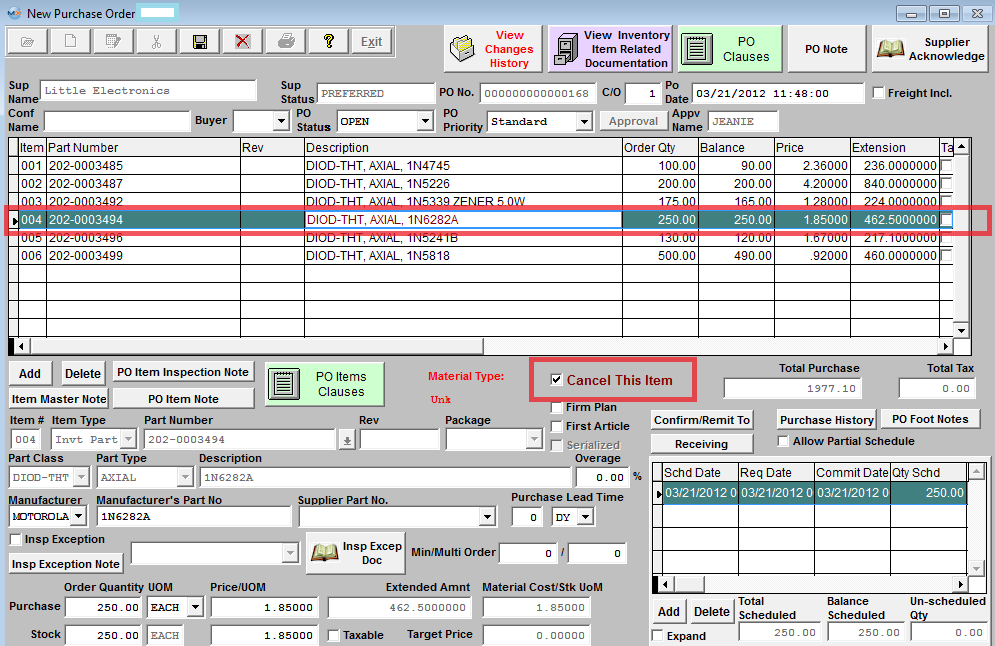
A user can Cancel a line item rather than deleting the line item from the PO by checking the "Cancel this Item" box.
-
This will allow user to cancel an individual item on a PO. Since the system does not allow you to delete a line item that has had any kind of transaction, we needed a way for users to cancel individual line items without having to cancel the entire order within the system. If any parts have been accepted, it cannot be cancelled. Once a part has any receipts the user cannot delete the line, so if they reject the total received qty they can cancel the line to prevent it from affecting the PO, or PO history for the other line items. If they do not want to reject the entire qty then their only option is to reduce the balance qty to the accepted qty. Cancelled line items will be excluded from the Purchase Order reports within the module. A line item that has been cancelled will be displayed in Red. A cancelled line item will be able to be restored by unchecking the "Cancel this Item" box.
- Information about the terms, FOB, Ship Via, Ship Charge, and Account number, Ship Charge Amount, whether taxable, the tax %
- Schd Date, Requested Date, Commit Date, Quantity Scheduled, Warehouse, Location, Distribute To and Schd Notes.
- Modify or add any information in the Item Master Notes, PO Item Notes, PO Notes, and PO Foot Notes. (Depending on how the user has System Setup/Material/Purchase Setup module marked depends on whether user can edit the notes without going into edit mode on the PO record. If the "Require approvals for Date changes and Notes" is marked as "Yes" then it will force the users to first put the PO in edit mode before they will be allowed to edit any notes and the note changes will be recorded in the "View Changes History" screen. But if it is marked "No" then the notes become editable without the actual record in Edit mode and the note changes will NOT be recorded in the "View Changes History" screen).
Depress the Save record action button after you have finished with editing the record. The user will then need to approve the order. If user has the "Auto Assign new Change Order # Upon Approval" box checked within the System Setup/Material/Purchase Setup module, the reminder will NOT be issued and CO# field becomes NOT editable. When the user approves the change the Change Order number will be automatically increased. If user has the "Auto Assign New Change Order # Upon Approval" box unchecked within the System Setup/Material/Purchase Setup module when user makes changes the CO# will stay the same, the system will prompt the reminder, and user may manually assign a change order number if applicable.

There are situations when an item may not have a schedule or may have a partial schedule. If the "Allow Partial Schedule" box is unchecked within the System Setup/Material/Purchase Setup module, user will receive the following popup warning when editing and saving that line item or any other line item on that same purchase order. If the box is checked the system will not ask any questions when saving a po with only partial schedule. (Note: MRP will NOT acknowledge qty's that are not scheduled).
NOTE: If the "Auto Assign new Change Order # Upon Approval" box is checked, and PO is new and the user goes into the "Edit" mode prior to approval, no changes will be made to the CO# on screen or in the "View Changes History" screen. If PO has been approved and the user goes into the "Edit" mode the next CO# will be referenced in the "View Changes History" screen but will NOT increase on screen until PO has been approved. If the user goes to the "Edit" mode more than once before approving the change the CO# will only increase once in the "View Changes History" screen.
NOTE: If users enter a PO number manually using a "T", then changes the numbering to Auto, and later edits and approves this PO the "T" will be changed to "0". The system has no way of knowing that the PO was manual numbered before the change.
If multiple users are editing the same PO and the PO has not been approved yet, so it still has a temp # and the 1st users approves the PO, while the 2nd user is still making their changes, when the 2nd user goes to exit and save their changes they will receive the following message:

Manex tracks all revisions of a Purchase Order and each receipt against each revision of the order. The system will NOT allow any changes to a Purchase Order which has parts in Dock Receiving that have not yet been processed in the Purchase Order Receiving & Inspection module. Cancel a Purchase Order
Find the Purchase Order you want to cancel. Press the Edit record action button in the Purchase Order screen this will allow the user to change the PO status from Open to Cancel. Note: User MUST have approval rights to Modify the PO Status.
Closing out a Purchase Order
At times, the user may wish to close out a PO to suppliers who have either shipped short or overages of ordered components. For example, say a user has a Purchase Order for 100 components. 100 units are received with 5 rejections. (See the DMR procedures). This would show the Purchase Order showing a quantity of 5 for a balance. What if the user informs the supplier that they do not want the last 5 pieces.
In the above set of circumstances, the user will be allowed to change the ORIGINAL order quantity by removing the rejected quantity via the DMR procedure. When the Received quantity PLUS the DMR quantity is LESS than the order quantity, the user will be allowed to decrease the order quantity by that many. Original Order 100; Received quantity 100; Rejected quantity 5. Returned to supplier via DMR 5. At this point, the user may reduce the quantity ordered, AND the accompanying amount scheduled to 95. This action will close out the Purchase Order.
The user must depress the Edit button. Change the Purchase Order Quantity, then change the Quantity Scheduled so that the total of the schedule dates exactly equals the new quantity. Depress the Save button. Approve the PO and the PO status will change to close.
|
| 1.1.4.4. Approve a Purchase Order |
|
Enter the SQLMANEX.EXE (within the ManEx root directory)
This action will then prompt the user for a password
|
|
The following screen will be displayed, select Material Planning/Purchase Order Management/Purchase Order Management
|
|
The following screen will be displayed:
Depress the Find record button and follow the Find a PO procedures to find a PO for Approval.
Approve PO
Pressing the Approval button in the Purchase Order module will ask for the user’s password. The user must enter a password that has been authorized (within the Purchase Setup module) to approve the dollar amount of the order.
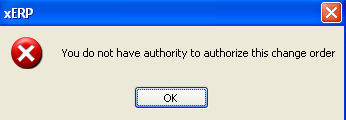
| Entry of an un-authorized password will receive the following message:
|
 |
Entry of an authorized password and approval will inactivate the 1st approval button and place the initials of the person approving the order next to the approval button , (If in the Purchase Setup , the company has selected to allow one approval of purchase orders). Then upon approval the temporary Purchase Order number will be replaced with a permanent PO number (replacing the "T" with a "0").
If in the Purchase Setup , the company has selected requiring two approvals, then the process must be repeated for the second approval, and the temporary Purchase Order number will be replaced with a permanent PO number (replacing the "T" with a "0") once both approval are granted.
Note: That if the Purchase Order is an Service or In-store order, once the PO has received it’s final approval the temporary Purchase Order number will be replaced with a permanent PO number (replacing the "T" with a "0") and the PO Status marked as closed.
If the user has elected to use manual purchase order number,the screen will prompt the user for an order number to be applied to the purchase order. Note: If users enter a PO number manually using a "T", then changes the numbering to Auto, and later edits and approves this PO the "T" will be changed to "0". The system has no way of knowing that the PO was manual numbered before the change.
|
| 1.1.4.4.1. Load Supplier Acknowledgement |
To attached or Load a Supplier Acknowledge document to a PO
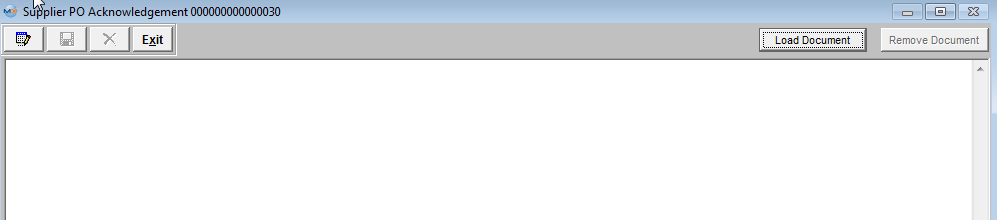
Depress the "Supplier Acknowledge" button and the following screen will appear:
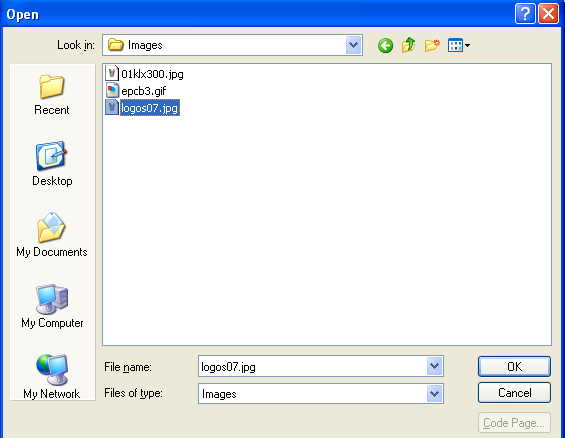
To load images or documents, depress the "Load Document" button, up in the right hand corner of the screen. A browser screen will appear similar to the one below:
Find and highlight the desired Image file, as illustrated.
Once the file name appears, depress the Ok button.
Note: that the user can also load other document types by changing the File of Type to ALL
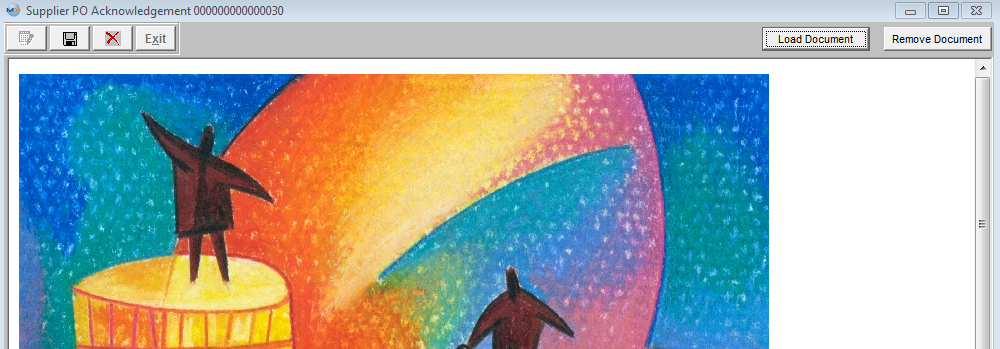
The file will appear in the screen as displayed:
Depress the Save action button to save the changes or depress the Abandon changes action button to abandon changes. Exit will bring the user back to the Purchase Order Management module and the Supplier Acknowledge button will be displayed in Red as shown below.
|
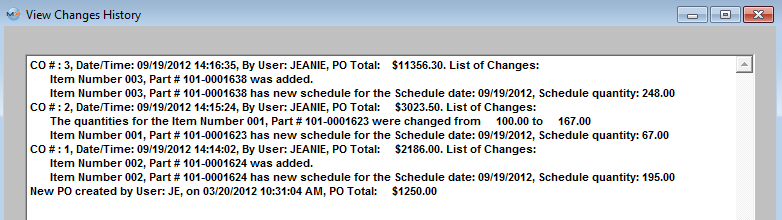
| 1.1.4.5. Copy "View Change History" Notes | Find the Purchase Order you want to Copy the "View Changes History" notes on.
Depress the "View Changes History" button, When in the “Change PO history” screen, click on the vertical scroll (on your keyboard), you will see the cursor appeared on the top inside the window with the text.
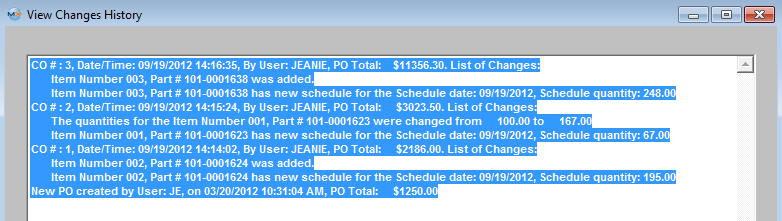
Depress the "CTRL" button + the vertical scroll buttons to highlight the information you wish to copy;
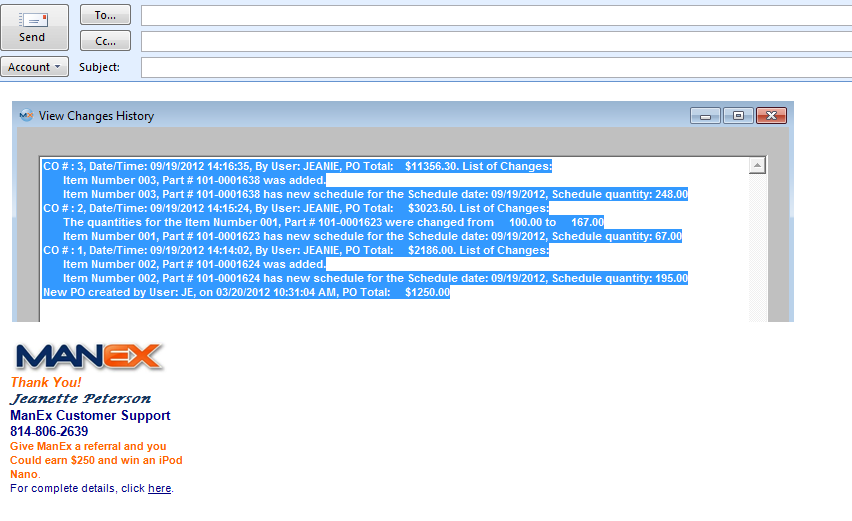
Depress the "CTRL + C" to copy, then paste to a document, e-mail, etc....
|
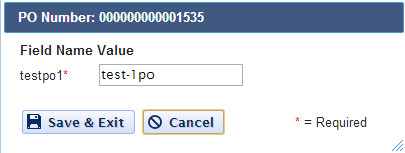
| 1.1.4.6. Link User Defined Fields to a Purchase Order | | The User Defined fields MUST be setup within Web ManEx. For further detail see Article #5454.
The User Defined Fields can
then be linked to Purchase Order or a Purchase Order Item.
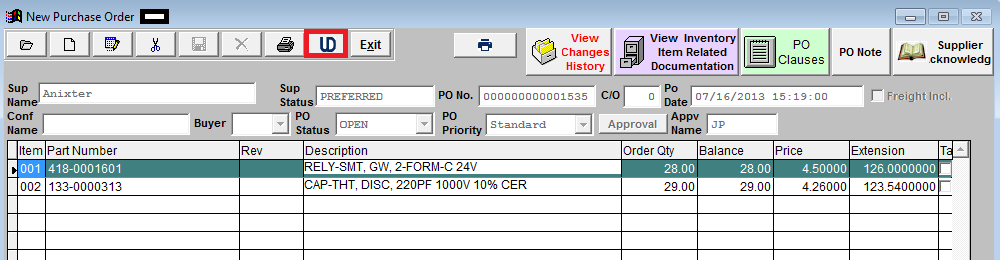
To link a UDF to a PO select a record in the ManEx
Desktop, and select the UD action button (as displayed below).
The UDF for that section will
then be displayed, and user can make changes (if applicable), Save & Exit or
Cancel.
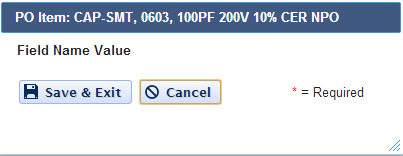
To link a UDF to a Line Item
on the PO select the line item, then select the UD action button that is
located in the PO body (as displayed below)
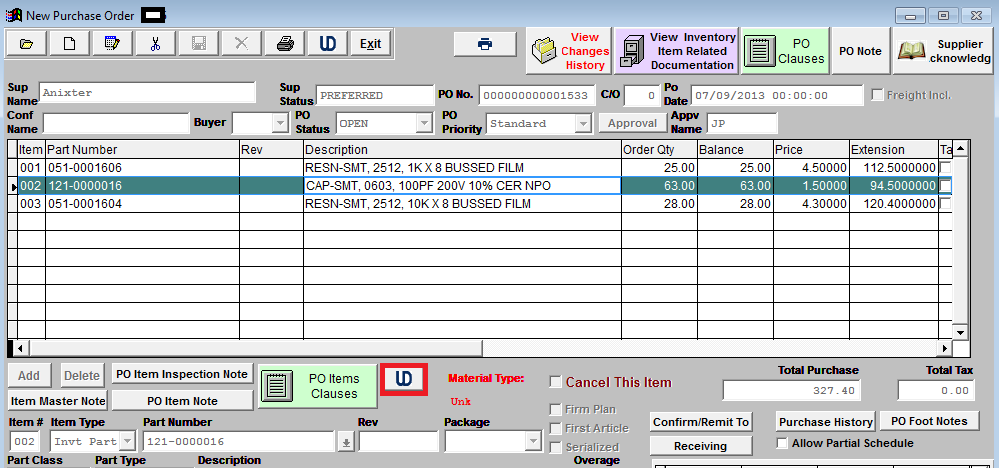
The UDF for that section will then be displayed, and user can make changes (if applicable), Save & Exit or Cancel.
|
| 1.1.5. Reports - PO Mgmt |
To obtain the Purchse Order Reports within the Web, select the WEB Print button from the ManEx action buttons at the top of the screen. For further detail on How the Reports work within the Web refer to Article #5477.
Note: In order to access the Reports within the Web the Company Root URL must be setup within the System Appearance module and user must be linked to web within the System Security Module
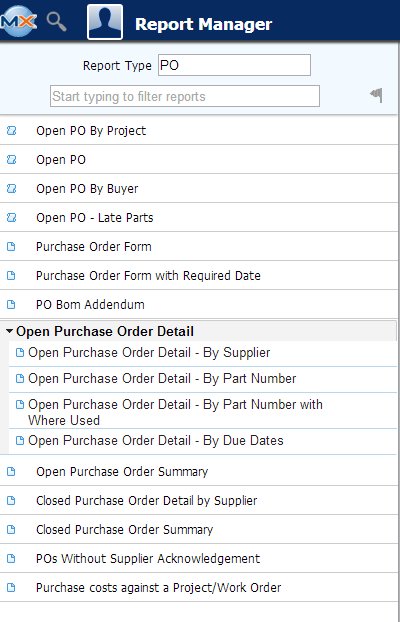
Select the Report Type: PO - A List of Reports will be displayed that are available on the Web
for PO
To obtain the Purchase Order Reports within the desktop, select the Print button from the ManEx action buttons at the top of the screen.
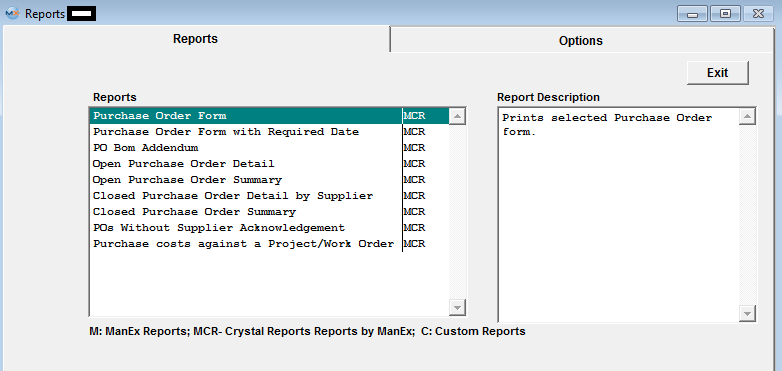
The following reports screen
will display a list of reports that are available on the ManEx Desktop:
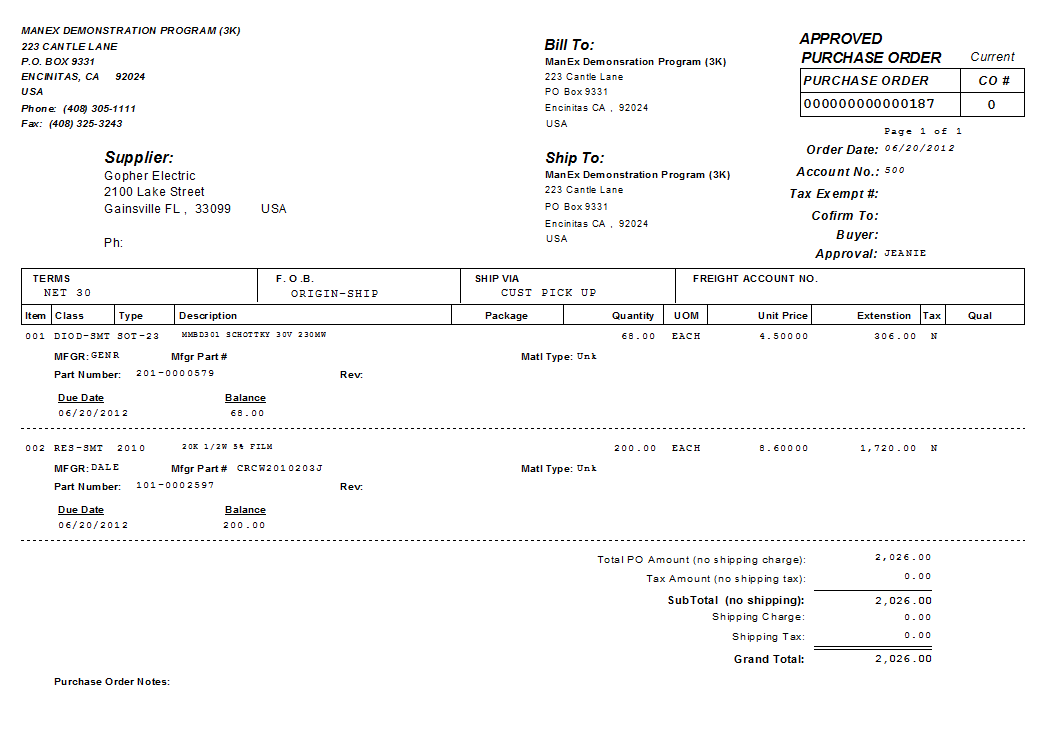
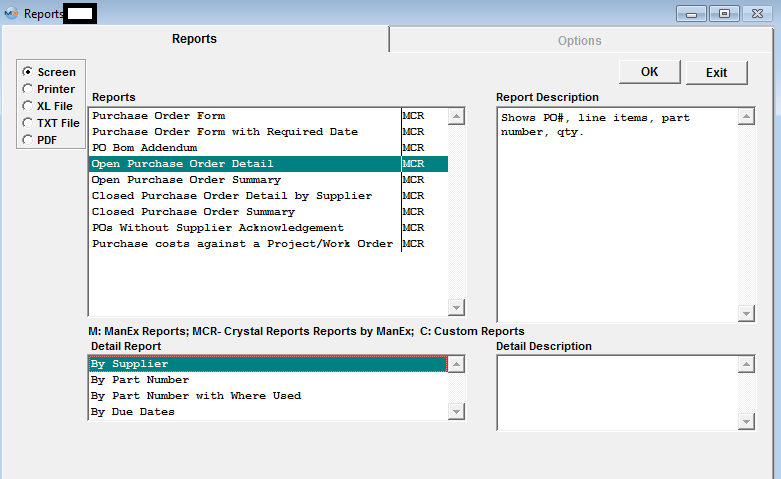
PURCHASE ORDER FORM report
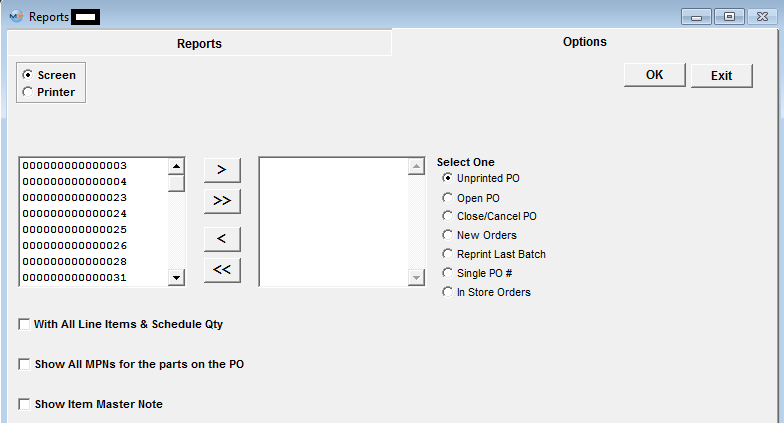
Select Purchase Order Form and depress the Option tab and the following screen will be displayed:
If you want all line items & scheduled quantities to print, check that box.
Select one of the following options: Unprinted PO, Open PO, Close/Cancel PO, New Orders, Reprint Last Batch, Single PO #, In Store Orders by clicking on the radial.
NOTE: Depending on which one of these options you select will depend on what will be displayed on the report. For Example: If User selects Open/Active the report will have "APPROVED" at the top of the report (as displayed below) and prints out the Purchase Order form AFTER some receiving has occurred against that PO, then ONLY the un-received still open amounts will print on this form. Any line items COMPLETELY RECEIVED or CANCELED will NOT display on the PO form. If User selects Close/Cancel PO the report will have "CLOSED" at the top of the report and will display the original scheduled balance.
Highlight the PO of interest and depress the > button. To select all POs, depress the >> button.
Check the "Show All MPNs for the Parts on the PO" box if you want all MPNs listed on the report.
Check the "Show Item Master Note" box if you would like the Item master notes to be displayed on the report.
Check the "Print BOM Addendum for all "MAKE" parts on the Selected PO" When the users add a Make/Buy part to a Suppliers PO, and checks this option the system will then print a "BOM Indented with AVL" report as an addendum to the PO form. Each BOM will be printed as a separate report and will reference PO and item on the PO. If the AVL on the approve vendor list for any of the items on the BOM happens to be checked as "disallow to buy" this AVL will not be included within the addendum to the PO.
Depress the OK button
When this report is printed is will display the Approval status of the order, it will also display the Supplier Part Number if entered in the ICM module.
-
If purchase order status is "NEW" report will print "NOT APPROVED"
-
If purchase order status is "OPEN" and has been approved, report will display "APPROVED"
-
If purchase order status is "EDITING" meaning order was once approved but now in edit status, the report will display "EDITING PENDING APPROVAL"
|
 |
The following report will be displayed:
NOTE: If the user prints out the Purchase Order form AFTER some receiving has occurred against that PO, then ONLY the un-received still open amounts will print on this form. Any line items COMPLETELY RECEIVED or CANCELED will NOT display on the PO form.
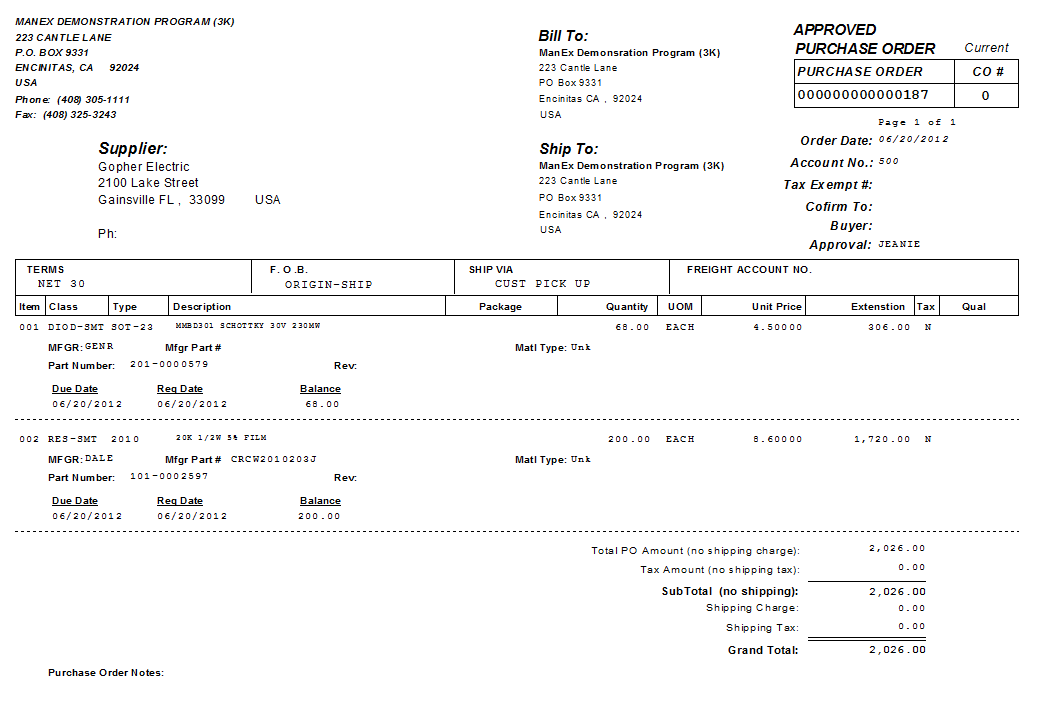
PURCHASE ORDER FORM with REQUIRED DATE report
This report is exactly the same as the Purchase Order Form report above, except that this report will also show the Required Date information.
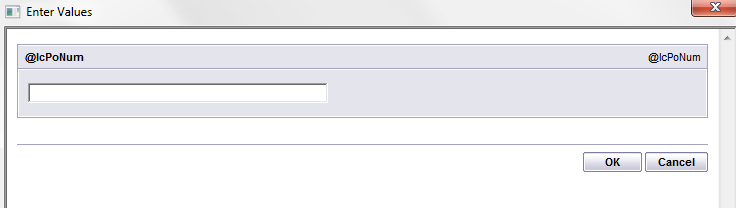
User must first enter in a Purchase order Number. Note: If the status is "New" the PO number will still have the "T" in front of it, so the users will be required to enter in the entire PO Number.
Then select "Y" (yes) or "N" (no) to display All Line Items and Schedule Qty's, All MPN's for the parts on the PO, and Show Item Master Notes to print on report. These selections are all defaulted to "N" but can be changed.
Depress the OK button.
This report will display the Supplier Part Number if entered in the ICM module.
|
|
The following report will be displayed:
PO BOM ADDENDUM report
Check the "Print BOM Addendum for all "MAKE" parts on the Selected PO" When the users add a Make/Buy part to a Suppliers PO, and checks this option the system will then print a "BOM Indented with AVL" report as an addendum to the PO form. Each BOM will be printed as a separate report and will reference PO and item on the PO. If the AVL on the approve vendor list for any of the items on the BOM happens to be checked as "disallow to buy" this AVL will not be included within the addendum to the PO.
|
Enter the desired Purchase Order Number.
Note: If the status is "New" the PO number will still have the "T" in front of it, so the users will be required to enter in the entire PO Number.
Depress OK.
|
 |
The following report will be printed.
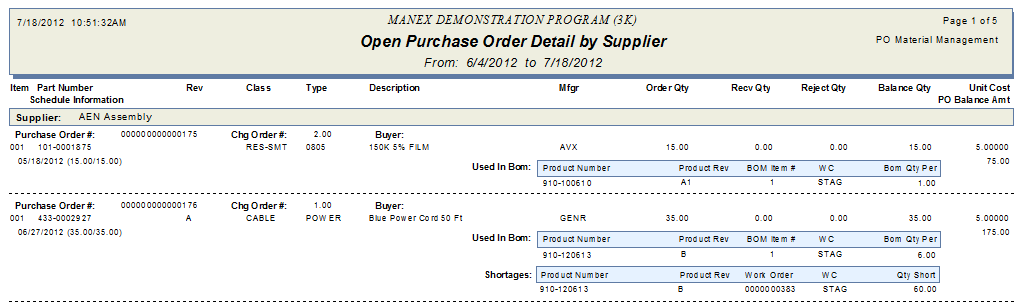
OPEN PURCHASE ORDER DETAIL report
|
At the bottom of the screen, highlight the Detail Report, By Supplier, By Part Number, By Part Number with Where Used or By Due Dates.
Note: If you select ANY of the Detail selects other than “By Supplier” then you can click directly on the OK button and ALL open PO's will be displayed.
The “Open Purchase Order Detail” report shows only items that still have balance. So if you have an open PO with three items and only one of those items have a balance the report will only show the one item with the balance.
|
 |
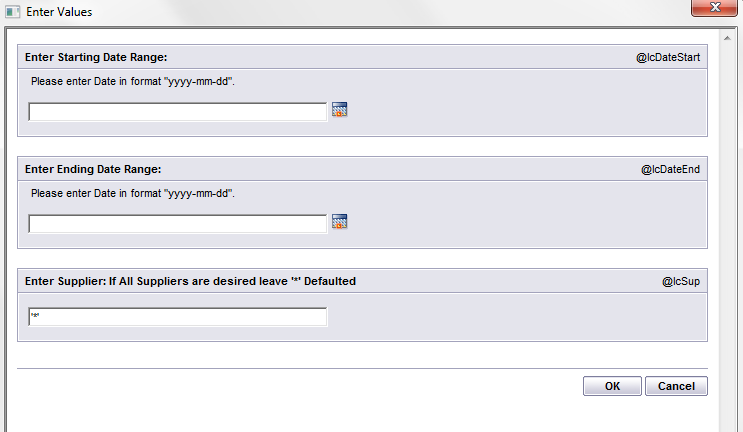
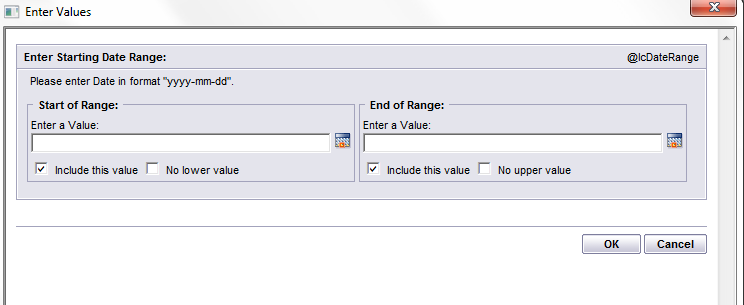
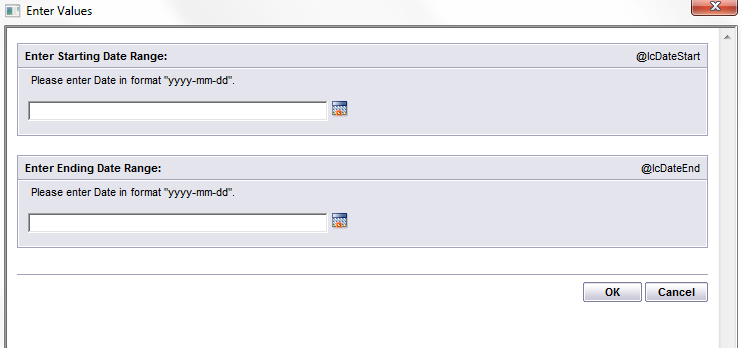
| If user selects “By Supplier”, the Values screen will be displayed for further options.
Enter the desired Date Range to filter the search more.
Enter a Supplier of interest between the single quotes. If All Suppliers are desired leave '*' Defaulted
Depress the OK button.
|
 |
The following report will be displayed:
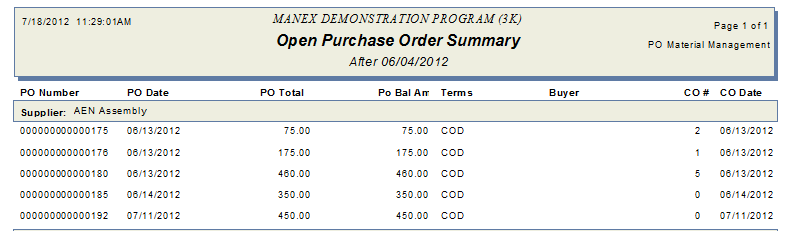
OPEN PURCHASE ORDER SUMMARY report
|
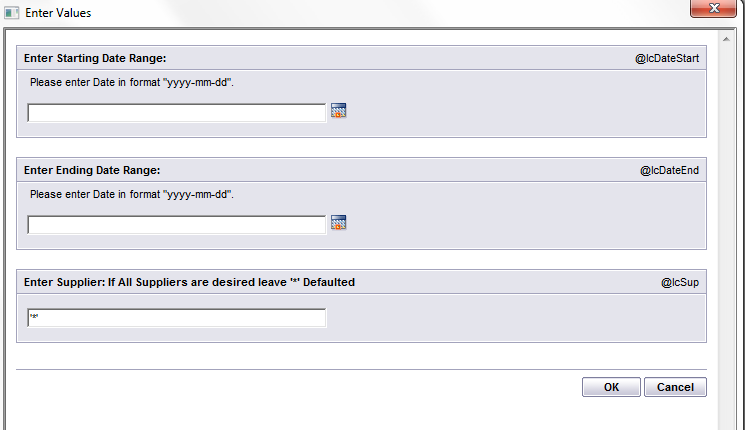
Enter in the desired Date Range.
Depress the OK button.
The “Summary” report shows all open orders based on the status of the PO. If the open PO has no items with balance left the "Open Purchase Order Detail" report will not show this PO at all, but the "Open Purchase Order Summary "report will.
|
 |
The following report will be displayed
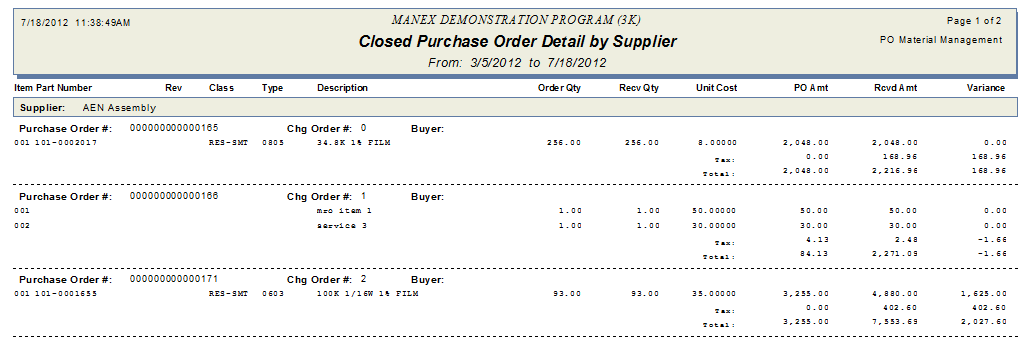
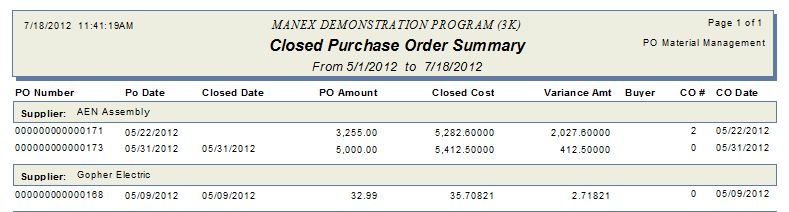
CLOSED PURCHASE ORDER DETAIL BY SUPPLIER report
|
Enter in the desired Date Range.
Enter a Supplier, If All Suppliers are desired leave '*' Defaulted.
Depress the OK button.
|
 |
The following report will be displayed
CLOSED PURCHASE ORDER SUMMARY report
|
Enter in the desired Date Range.
Depress the OK button.
|
 |
The following report will be displayed
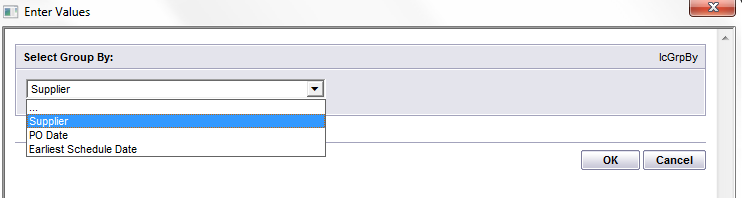
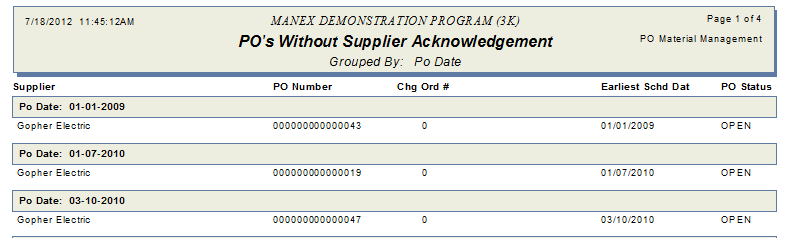
POs WITHOUT SUPPLIER ACKNOWLEDGEMENT report
|
Select one of the Group By options: Supplier, PO Date, Earliest Schedule Date
Depress the OK button.
|
 |
The following report will be displayed
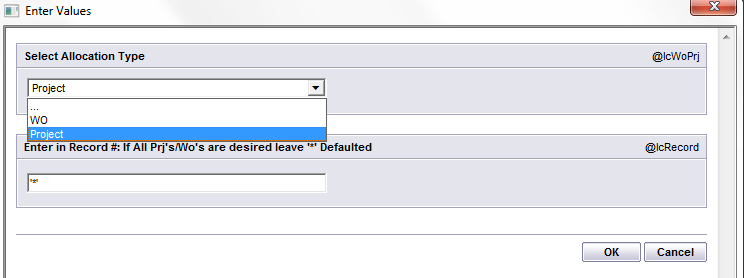
PURCHASE COSTS against a PROJECT/WORK ORDER report
|
Select Project # or Work Order
Enter a Record # or If All Prj's/Wo's are desired leave '*' Defaulted
Depress the OK button.
|
 |
The following report will be displayed

|
| 1.1.6. FAQs - PO Mgmt | | Facts and Questions for the Purchase Order Module |
| 1.1.7. ManEx Minutes (PO) |
| 1.2. Supplier Line Card Information |
|
Enter the SQLMANEX.EXE (within the ManEx root directory)
This action will then prompt the user for a password
|
|
The following screen will be displayed, select Material Planning/Purchase Order Management/Supplier Line Card Information
Note: After activation, "Supplier Information" access for each user must be setup in the ManEx System Security module. Users with “Supervisor Rights” will automatically have access.
|
 |
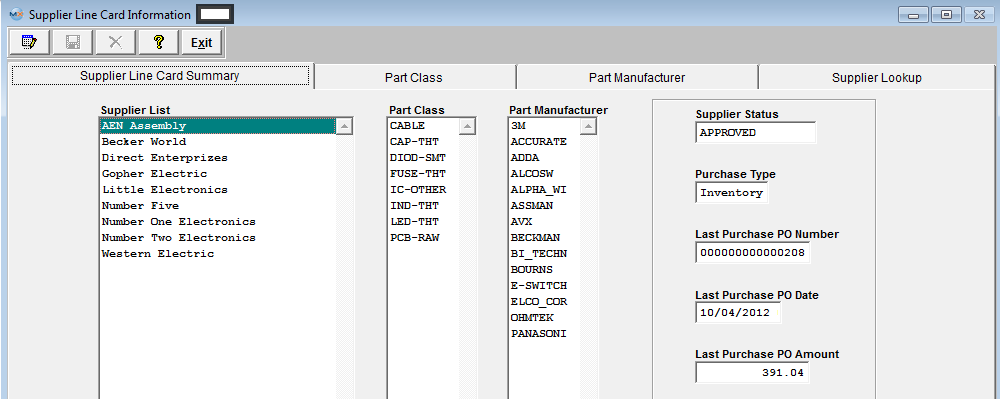
The following screen will be displayed. The Supplier Status, and Purchase Type are defaulted in from the Supplier Information module.
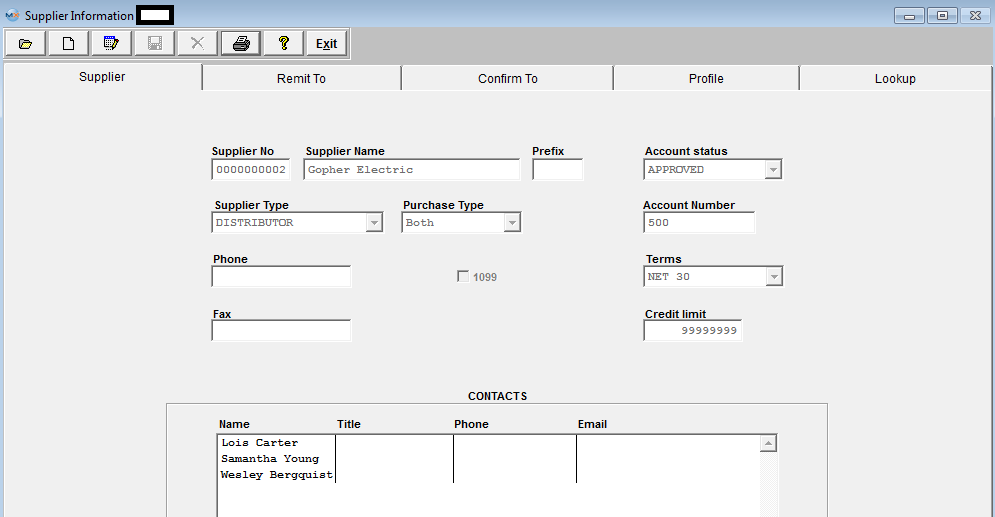
The user has the option to drill down to the Supplier level to View Supplier Information by double clicking on the Supplier name and the screen below will be displayed.
The user also has the option to drill down to the PO level and view the last Purchase Order by double clicking in the "Last Purchase PO Number" field.
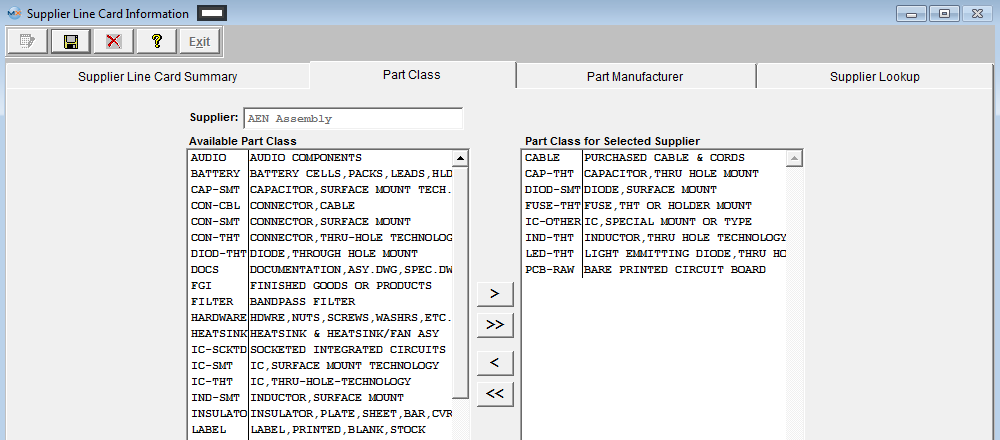
To Add a Class to a Supplier, highlight the desired supplier. Depress the Edit action button.
Then enter the Part Class tab. The following screen will be displayed:
Highlight the desired Part Class. Depress the > button. The selected Class will then populate the selection box to the right.
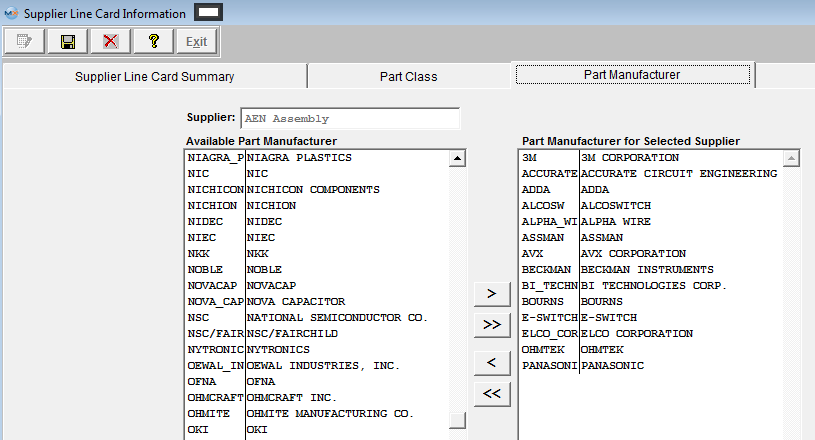
Depress the Part Manufacturer tab.The following screen will be displayed:
Highlight the desired Part Manufacturer.Depress the > button. The selected Manufacturer will then populate the selection box to the right.
Depress the Save record action button.
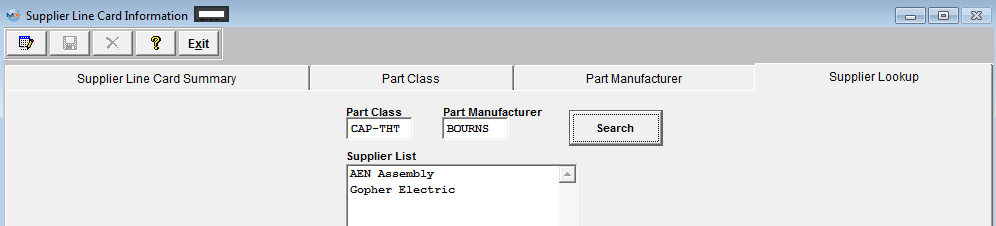
Depress the Supplier Lookup tab. The following screen will be displayed:
Enter the Part Class and the Part manufacturer. Depress the Search button. The name of the associated Supplier(s) will appear in the Supplier List section.
|
| 1.3. Upload New Purchase Orders |
| 1.3.1. Prerequisites for New PO Upload | |
After activation, "PO Import" access for each user must be setup in the ManEx System Security module. Users with “Supervisor Rights” will automatically have access.
User has to complete the required fields in the PoUploadTemplate.xlt in the xlfiles directory to create <st1:place w:st="on">PO upload XL file.
If user wants the system to automatically approve all the POs uploaded the "Auto Approve PO when importing from XL" box must be checked in the Purchase Setup module. If this is NOT checked in the Purchase Setup module then all the POs will be uploaded as "NEW" and users will be required to approve within the Purchase Order Management module. |
| 1.3.2. Introduction for New PO Upload | This module gives our users the capability to take electronic files provided by the suppliers from quote and availability of items, copy and paste that information into the ManEx PO Upload template format. Users will have the flexibility to load a large PO into the system all at once, or upload multiple purchase orders for different suppliers at once, etc. During the upload process the system will find any problems with the template, the user will be prompted and exception XL files will be created within the POExceptionXL directory for the users to review and disposition.
|
| 1.3.3. Fields and Definitions for New PO Upload |
| 1.3.3.1. PO Upload Template | 
| Ponum |
Required field: If Auto PO numbering is setup: Even though user has the PO's set to auto, you can NOT upload a PO without something in this column. Something has to be entered in this column so the system can distinguish one po line item from another PO line item on a different PO. If there is no data in this column the program will think the rest of the spreadsheet is also blank. PO Upload will group per change in Ponum field (it will then use the Ponum field as a reference to change) when uploaded user will receive a message that the PO number entered in XL spreadsheet will be overwritten by a system generated number ... and give you the option to continue the upload or abort. If manual PO numbering is setup: PO Upload will group per change in Ponum field (it will then use the Ponum field as a reference to change) when uploaded system will use PO numbers entered in XL spreadsheet. |
| Supname |
Required field. Existing Supplier Name in ManEx System. If it does not exist the user will be prompted and an exception XL file will be created in the POExceptionXL directory on the server. |
| Terms |
Optional: If left blank it will take the default from the supplier setup. User may manually enter in a supplier term that does not match the Supplier Setup information, but must exist within the System Setup. |
| Buyer |
Optional: Buyer entered must Exist in System Setup. If it does not exist the user will be prompted and an exception XL file will be created in the POExceptionXL directory on the server. |
| Shipping Charge |
Optional: If left blank it will take the default from the Receiving & Billing Information setup. User may manually enter in a Shipping Charge that does not match the Receiving & Billing Info Setup information, but must exist within the System Setup. |
| Shipping Tax |
Optional If left blank it will take the default from the Receiving & Billing Information setup. User may manually enter in a Shipping Charge that does not match the Receiving & Billing Info Setup information, but must exist within the System Setup . |
| Shipping Charge |
Optional: (Example: "PREPAY & BILL", "NO-CHARGE", etc) |
| FOB |
Optional: If left blank it will take the default from the Receiving & Billing Information setup. User may manually enter in a FOB that does not match the Receiving & Billing Info Setup information, but must exist within the System Setup. |
| Ship Via |
Optional: If left blank it will take the default from the Receiving & Billing Information setup. User may manually enter in a ship Via that does not match the Receiving & Billing Info Setup information, but must exist within the System Setup. |
| Include Freight Cost? |
Optional: Can enter Y or N or leave blank |
| PO Line Item Number |
Required field |
| MRO or Invt Part |
Required field |
| Part Number |
Required field: If entering Inventory Part Number, it must exist in ManEx. If it does not exist the user will be prompted and an exception XL file will be created in the POExceptionXL directory on the server. |
| Part Revision |
Required field |
| Package |
Optional: This gives the user to enter in a package type that exists in System Setup. If this column is left blank the "Package" field in the PO will be populated with the default in System Setup. If the user enters a package type that does NOT exists in the system setup, the use will receive a prompt and the XL file will be created for them to review. They will also have a choice to continue and fill the missing package information from inventory or cancel and fix the XL file. |
| Cost each Purchasing Unit |
Required field |
| Tax-pct |
Optional: If left blank it will take the default from the supplier setup. User may manually enter in a Tax-pct that does not match the Supplier Setup information, but must exist within the System Setup. |
| Manufacturer |
Required field: Manufacturer must exist in ManEx and match the ICM AVL for the part that is being uploaded. If it does not exist the user will be prompted and an exception XL file will be created in the POExceptionXL directory on the server. |
| Manufacturer Part Number |
Required field: Manufacturer Part Number must exist in ManEx and match the ICM AVL for the part that is being uploaded. If it does not exist the user will be prompted and an exception XL file will be created in the POExceptionXL directory on the server. |
| Firm PO? |
Optional |
| First Article |
Default from Item Master |
| Inspection Exception? |
Optional |
| Exception |
Optional |
| Date Required |
Required field: You can have a order qty of 1000 and have 200 scheduled out of 5 different days. |
| Quantity Required (Purchase Unit of Measure) |
Required field: Purchase Unit of Measure must exist in System Setup. If it does not exist the user will be prompted and an exception XL file will be created in the POExceptionXL directory on the server. |
| Warehouse |
Required field: (if Invt Part) Warehouse must exist in ManEx and match the ICM AVL for the part that is being uploaded. If it does not exist the user will be prompted and an exception XL file will be created in the POExceptionXL directory on the server. |
| Warehouse Location |
Optional: (if warehouse entered)
If Auto Location Creation is not Enabled in system setup:
• And template has a WHSE that does exist on the ICM AVL for that part the upload will complete
• And the template has a Location that does exist on the ICM for that part the upload will complete
If Auto Location Creation is enabled
• And template has a Whse that does not exist on the ICM for that part, the upload will continue AS LONG AS that WHSE exist within your Whse setup.
• And template has a Location that does not exist on the ICM. The upload will complete.
|
| Allocated to WO Number |
Optional: The system will do a check to make sure that the WO number exists within the ManEx System. If it does not exist the user will be prompted and an exception XL file will be created in the POExceptionXL directory on the server. |
| Allocated to Project Number |
Optional: The system will do a check to make sure that the Prj number exists within the ManEx System. If it does not exist the user will be prompted and an exception XL file will be created in the POExceptionXL directory on the server. |
| Requestor if MRO |
Required field: (if MRO item) If this field is not populated the user will be prompted and an exception XL file will be created in the POExceptionXL directory on the server. |
| GL Number |
Required field: (if MRO item) The system will do a check on the GL number to make sure that it not only exists in the Accounting setup, but also has to exist on the MRO Purchase GL number section within the Purchase Setup module. If it does not exist the user will be prompted and an exception XL file will be created in the POExceptionXL directory on the server. |
|
| 1.3.4. How To ....... for New PO Upload |
| 1.3.4.1. Add - Upload a New PO |
Enter Material Planning/Purchase Order Management/Upload New Purchase Orders
NOTE: If user wants the system to automatically approve all the POs uploaded the "Auto Approve PO when importing from XL" box must be checked in the Purchase Setup module. If this is not checked in the Purchase Setup module then all the POs will be uploaded as "NEW" and users will be required to approve within the Purchase Order Management module.
|

|
|
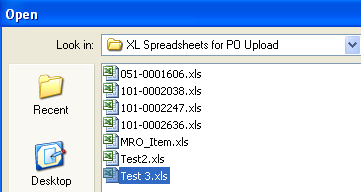
Locate XL File to Upload
|
 |
|
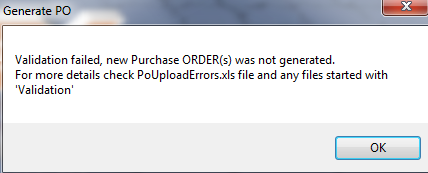
If the system finds any problems with template the user will be prompted the following message and PoUploadErrors.xls file and a Validation.xls file will be created in the PoExceptionXL folder within the ManEx directory.
|
|
|
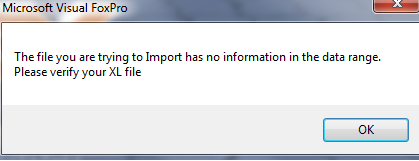
If any of the information is missing from the required fields in the first row of the XL file, user will receive the following message.
Depress OK and user will receive the message (shown below) that the "PO Upload was not complete" and system will abort.
Note: Even though user has the PO numbering set to auto, you can NOT upload a PO without something in the Ponum column and all other required fields. Something has to be entered in this column along with all other required fields so the system can distinguish one po line item from another PO line item on a different PO. If there is no data in this column or the other required fields the program will think the rest of the spreadsheet is also blank. PO Upload will group per change in Ponum field (it will then use the Ponum field as a reference to change) when uploaded user will receive a message that the PO number entered in XL spreadsheet will be overwritten by a system generated number ... and give you the option to continue the upload or abort (as shown below). If manual PO numbering is setup and Auto Approve: PO Upload will group per change in Ponum field (it will then use the Ponum field as a reference to change) when uploaded system will use PO numbers entered in XL spreadsheet. If manual PO numbering is setup but Auto Approve is NOT selected then PO upload will assign a temporary PO number until <st1:place w:st="on">PO is approved manually. At that time you will be prompted for the manual <st1:place w:st="on">PO number.
|
|
| The user will be prompted the following message that the PO Upload was not complete and system will abort. |
 |
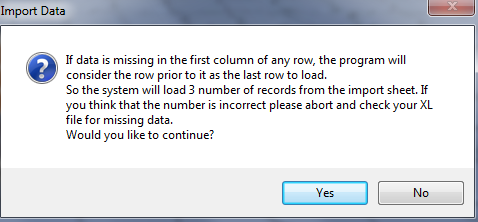
If system does NOT find any problems with the template the following message will appear: This message is for user to verify the number of records being loaded from the import sheet. User may depress "YES" to continue the upload or "NO" to abort the upload.
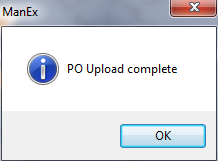
| If you depress Yes to Continue the user will be prompted the following message that the PO Upload complete. |
|
| If you depress No to Abort Upload the user will be prompted the following message that the PO Upload was not complete. |
|
|
| 1.4. Upload PO Items Additions |
| 1.4.1. Prerequisites for PO Upload Addtions |
After activation, "PO Import" access for each user must be setup in the ManEx System Security module. Users with “Supervisor Rghts” will automatically have access.
User has to complete the PoItemsAddTemplate.xlt in the xlfiles directory to create <st1:place w:st="on">PO Items Deletions upload XL file.
If user wants the system to automatically approve all the POs after the "Upload PO Items Additions" the "Auto Approve PO when importing from XL" box must be checked in the Purchase Setup module. If this is not checked in the Purchase Setup module then all the POs will be updated with the PO Items Additions and the PO status will be changed to "EDITING" and users will be required to approve the PO within the Purchase Order Management module.
If user wants the system to automatically assign a new change order number upon upload after approval the "Auto Assign New Change Order # Upon Approval" box must be checked in the Purchase Setup module. If this is not checked in the Purchase Setup module then upon upload user will receive a popup window giving them the option of updating the change order # after the upload or not. |
| 1.4.2. Introduction for PO Upload Additions | This module will allow users to upload additional items to an existing PO.
|
| 1.4.3. Fields and Definitions for PO Upload Addtions |
| 1.4.3.1. Upload PO Items Additons | 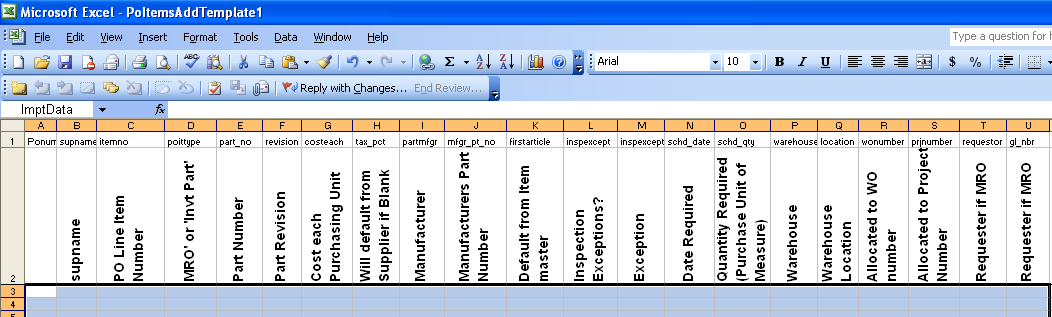
| Ponum |
Required field Enter existing PO number, user wants to add items to. |
| Supname |
Required field Supplier Name on existing PO in ManEx System. If it does not exist the user will be prompted and an exception XL file will be created in the POExceptionXL directory on the server. |
| PO Line Item Number |
Required field Assign a line item number to the item that is being added (cannot be a duplicate) |
| MRO or Invt Part |
Required field Must enter "MRO" or "Invt Part" cannot enter just "Invt or Inventory" must be "Invt Part" |
| Part Number |
Required field: If enterning Inventory Part Number, it must exist in ManEx. If it does not exist the user will be prompted and an exception XL file will be created in the POExceptionXL directory on the server. |
| Part Revision |
Required field If a revision exists |
| Cost each Purchasing Unit |
Required field Enter a Cost each |
| Tax-pct |
Optional: If left blank it will take the default from the supplier setup. User may manually enter in a Tax-pct that does not match the Supplier Setup information, but must exist within the System Setup. |
| Manufacturer |
Required field: Manufacturer must exist in ManEx and match the ICM AVL for the part that is being uploaded. If it does not exist the user will be prompted and an exception XL file will be created in the POExceptionXL directory on the server. |
| Manufacturer Part Number |
Required field: Manufacturer Part Number must exist in ManEx and match the ICM AVL for the part that is being uploaded. If it does not exist the user will be prompted and an exception XL file will be created in the POExceptionXL directory on the server. |
| First Article |
Default from Item Master |
| Inspection Exception? |
Optional |
| Exception |
Optional |
| Date Required |
Required field: You can have a order qty of 1000 and have 200 scheduled out of 5 different days. |
| Quantity Required (Purchase Unit of Measure) |
Required field: Purchase Unit of Measure must exist in System Setup. If it does not exist the user will be prompted and an exception XL file will be created in the POExceptionXL directory on the server. |
| Warehouse |
Required field: (if Invt Part) Warehouse must exist in ManEx and match the ICM AVL for the part that is being uploaded. If it does not exist the user will be prompted and an exception XL file will be created in the POExceptionXL directory on the server. |
| Warehouse Location |
Optional: (if warehouse entered)
If Auto Location Creation is not Enabled in system setup:
• And template has a WHSE that does exist on the ICM AVL for that part the upload will complete
• And the template has a Location that does exist on the ICM for that part the upload will complete
If Auto Location Creation is enabled
• And template has a Whse that does not exist on the ICM for that part, the upload will continue AS LONG AS that WHSE exist within your Whse setup.
• And template has a Location that does not exist on the ICM. The upload will complete.
|
| Allocated to WO Number |
Optional: The system will do a check to make sure that the WO number exists within the ManEx System. If it does not exist the user will be prompted and an exception XL file will be created in the POExceptionXL directory on the server. |
| Allocated to Project Number |
Optional: The system will do a check to make sure that the Prj number exists within the ManEx System. If it does not exist the user will be prompted and an exception XL file will be created in the POExceptionXL directory on the server. |
| Requestor if MRO |
Required field: (if MRO item) If this field is not populated the user will be prompted and an exception XL file will be created in the POExceptionXL directory on the server. |
| GL Number |
Required field: (if MRO item) The system will do a check on the GL number to make sure that it not only exists in the Accounting setup, but also has to exist on the MRO Purchase GL number section within the Purchase Setup module. If it does not exist the user will be prompted and an exception XL file will be created in the POExceptionXL directory on the server. |
|
| 1.4.4. How To ............. for PO Upload Additions |
| 1.4.4.1. Add - Upload PO Items Additions |
Enter Material Planning/Purchase Order Management/Upload PO Items Additions
NOTE: If user wants the system to automatically approve all the POs after the uploaded is complete the "Auto Approve PO when importing from XL" box must be checked in the Purchase Setup module. If this is not checked in the Purchase Setup module then users will be required to approve within the Purchase Order Management module.
|

|
|
Locate XL File to Upload
|
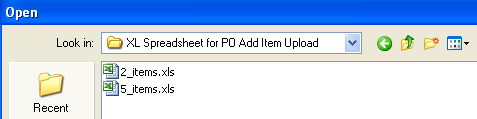 |
|
If the system finds any problems with template the user will be prompted the following message and exception XL file will be created in the PO Exception XL directory on the server.
Depress OK and user will receive the message (shown below) that the "PO Upload was not complete" and system will abort.
|
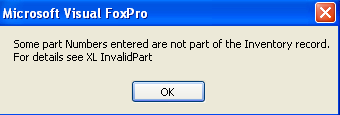 |
|
If any of the information is missing from the required fields in the first row of the XL file, user will receive the following message.
Depress OK and user will receive the message (shown below) that the "PO Upload was not complete" and system will abort.
|
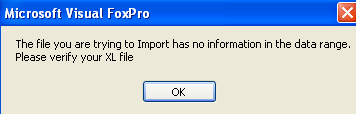 |
| If part being uploaded has the "Disallow this part from Purchasing" box checked within the Inventory Control Mgmt module, this message will be displayed and PO upload will not complete. |
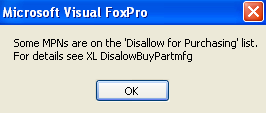 |
| The user will be prompted the following message that the PO Upload was not complete and system will abort. |
 |
If system does not find any problems with the template and system is setup to Auto create PO Numbers the following message will appear: This message is for user to verify the number of recorrds being loaded from the import sheet. User may depress "YES" to continue the upload or "NO" to abort the upload.
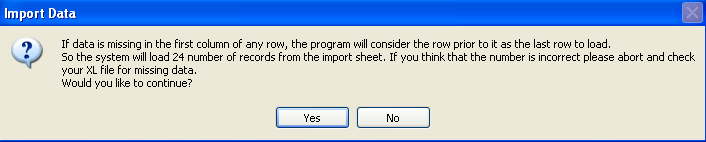
| If you depress Yes to Continue the user will be prompted the following message that the PO Upload complete. |
 |
| If you depress No to Abort Upload the user will be prompted the following message that the PO Upload was not complete. |
|
|
|