| Add Check Returns | ||||
|
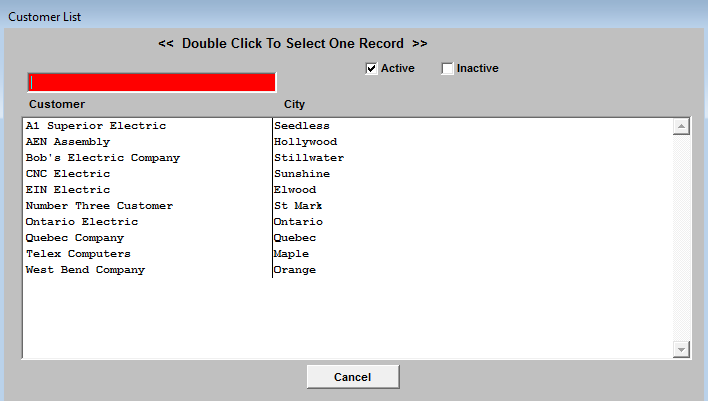
The following Screen will be displayed:
Depress the Add Record icon will then prompt the user to enter a Customer Name. The user may enter the Customer Name in the red search box, or move the cursor to the selected Customer and double click on the line. By default, only active Customers are shown, but if the user wishes to see inactive Customers, then clicking on the Inactive box will display both types of Customers.
Selecting a Customer will then cause a list of checks in the date range from that Customer to be displayed.
The user should then select the Check being returned by double clicking on the line. After the appropriate Check is selected, the original screen is populated with the data. The user may then enter a note about the Returned Check, if desired. Depress the Return Check Note. Depress the Edit button. Type in the note. Depress the Save button. Depress the Exit button.
Upon validating that the information is accurate, the user may Save the Returned Check record or the user may Abandon the operation. Saving the record credits the Bank Account and reverses any Cash Receipt transactions associated with the Returned Check.
|