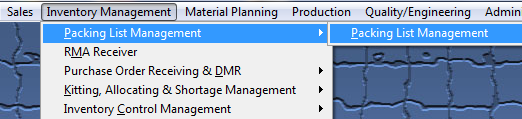
| 1. How To ..... for Packing List Mgmt |
| 1.1. Find an Existing Packing List | ||||||||
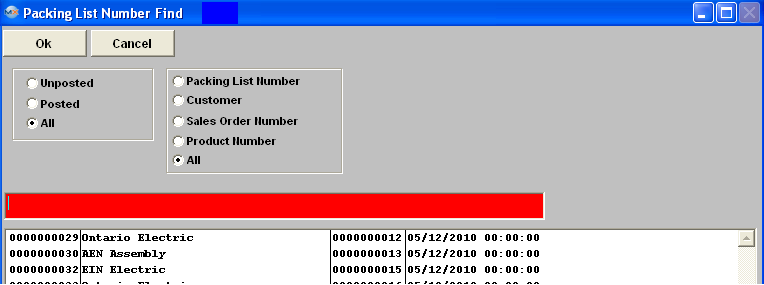
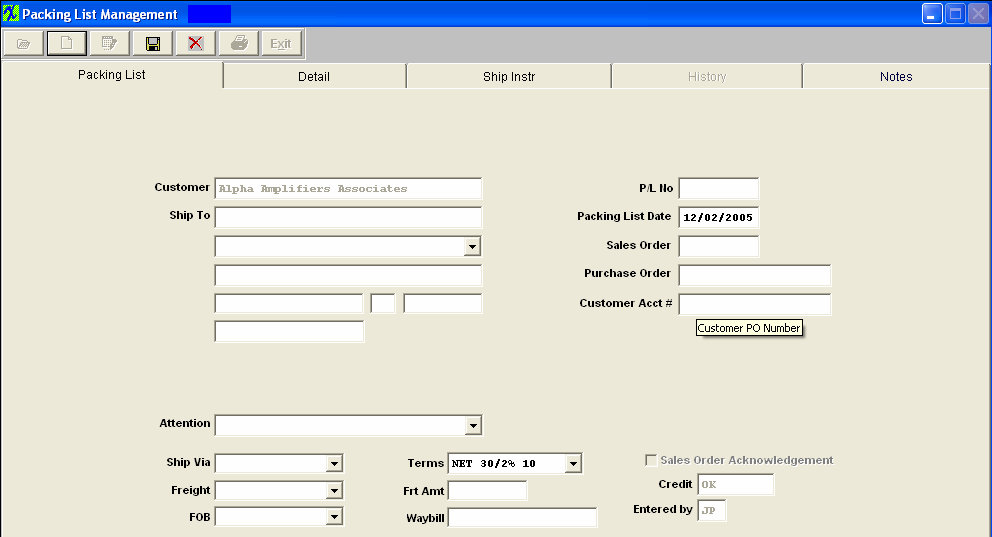
The following screen will be displayed.
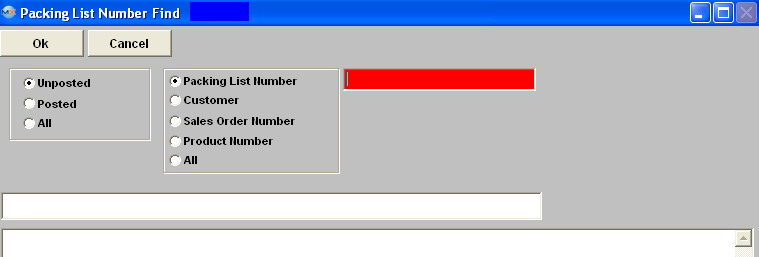
Depress the Find action button. The following selection screen will be displayed.
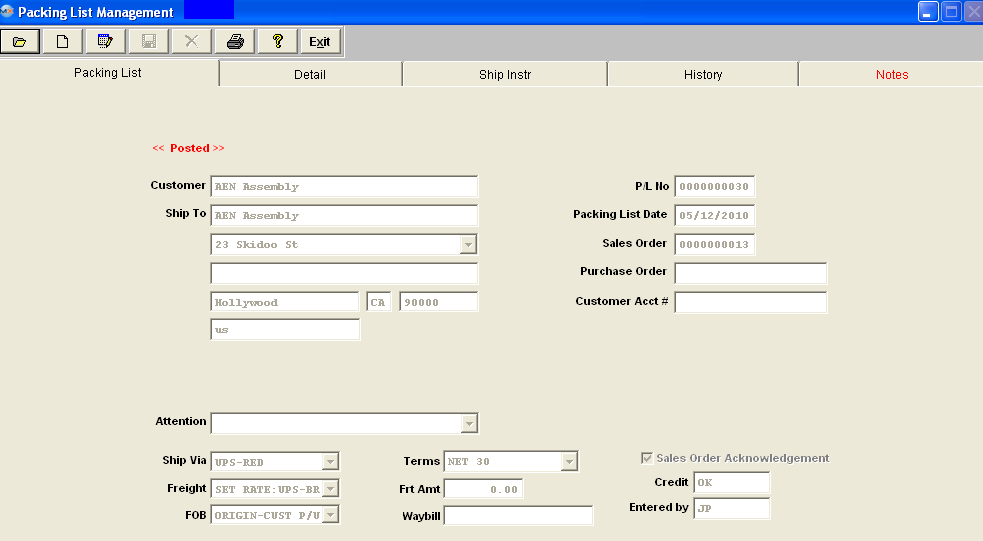
If user selects ANY of the Filters and Find by All - a screen will appear listing all the Packing List filtered by the selection, in numberical order, along with the Customer name. Once you have made your choice, the information will be displayed as follows
 |

| 1.2. Add a New Packing List | ||||||||||||||||
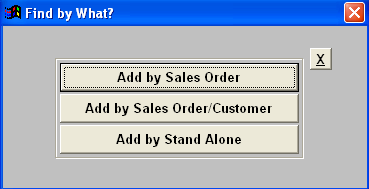
The following screen will be displayed. Pressing the Add Button displays the following sequences:
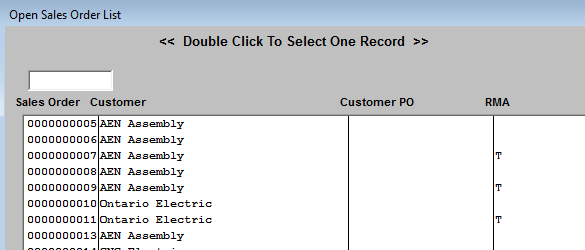
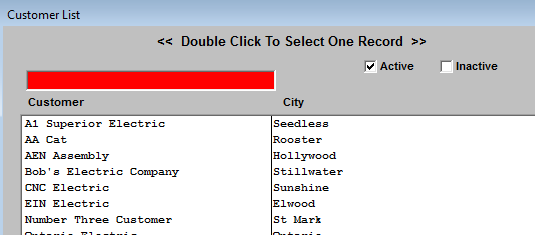
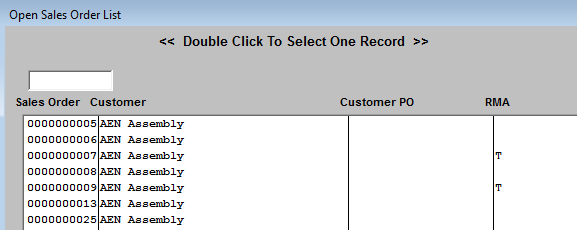
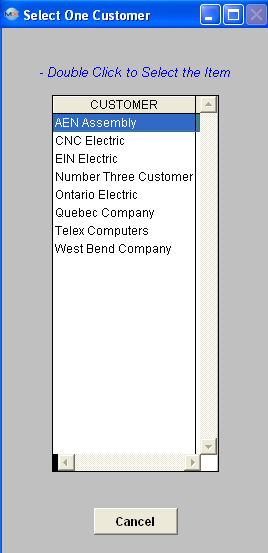
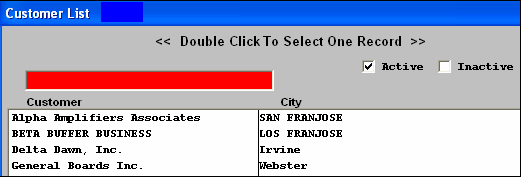
If the user elects to add by Sales Order, a screen appears listing Open Sales Orders in numerical order, along with the Customer Name, Customer PO, and if applicable a "T" under the RMA coulmn. The user selects the Sales Order number by either entering it into the box, or scrolling down the list and clicking on the selected order. If the user elects to add by Sales Order/Customer, a screen appears listing Customers. Select Active or Inactive Customers by checking the appropriate box. The user selects the customer by either entering it into the red box, or scrolling down the list and clicking on the selected Customer. Then a list of all of the selected Customer Sales orders are shown in numerical order, along with the Customer Name, Customer PO, and a "T" for an RMA (If applicable). The user selects the Sales Order by either entering it into the box, or scrolling down the list and clicking on the selected order. If the user elects to add by Stand Alone, a screen appears listing all Customers. The user selects the customer by scrolling down the list and clicking on the selected Customer. See procedures below to Add a Stand Alone Packing List (Manual Invoice). Once the Sales Order selection has been made, the Packing List screen is popluated with the appropriate data based on the default shipping destination established for the customer selected:
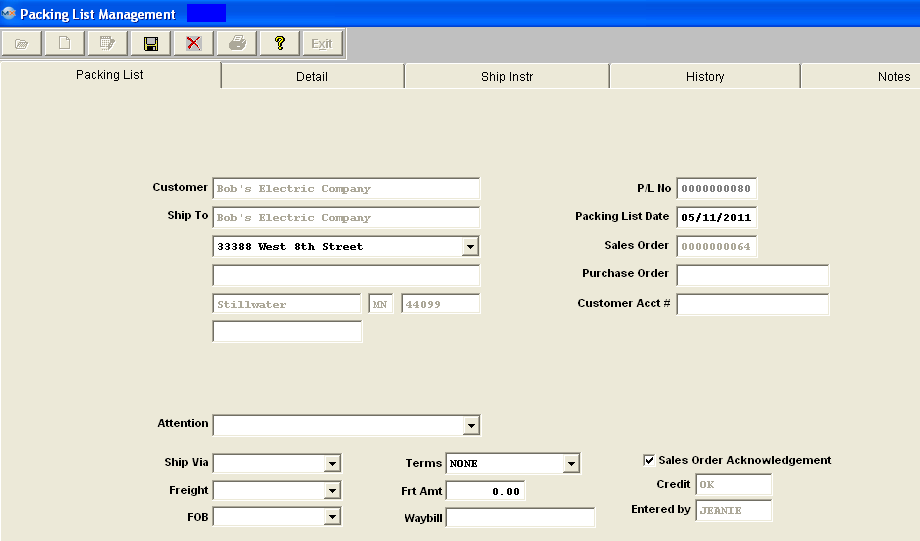
If Manual is selected for Packing List numbers in Number System Setup user will need to enter P/L No. If the customer has multiple ship-to addresses established, then pressing on the down-arrow button to the right of the field will display alternate shipping destinations. Selecting an alternate shipping destination will cause the default values shown on the screen to change and match those of the selected destination. Move cursor to the Frt Amt (Freight Amount) field. The user may then enter the amount of the freight charges for the shipment. (These may also be entered during the invoicing, if the freight amounts are not yet known). The user may also enter the Waybill number. This is the tracking number used by the freight carrier to identify and track (and bill) the shipment. The Ship Via, Freight and FOB fields are populated with the default information from the customer ship-to files, but the user may select alternate actions by pressing on the down-arrow on the right side of the field. (The choices shown at this point must have been established in the System Setup/Sales)
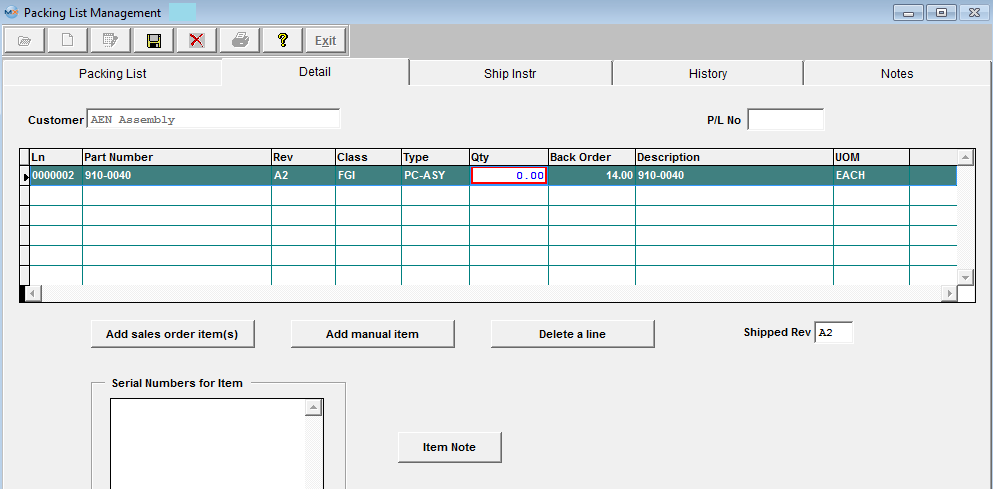
After completing the Packing List information screen, the user clicks on the Detail Tab
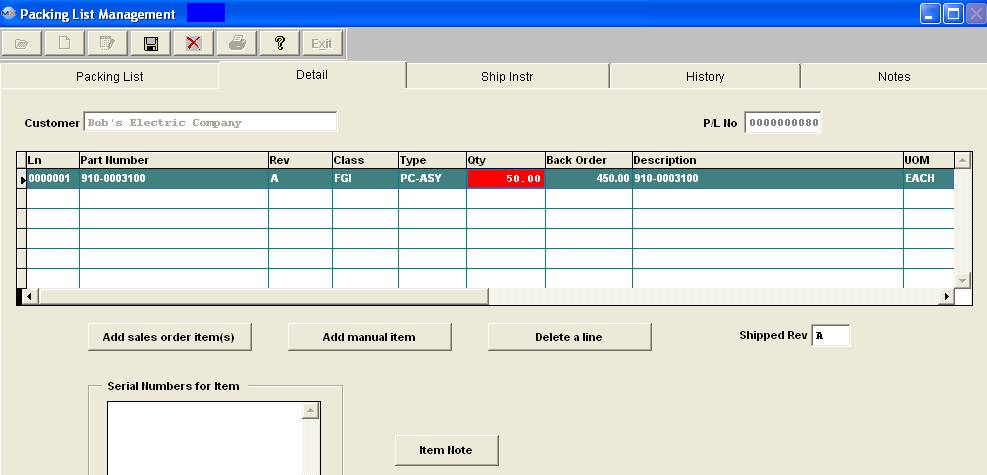
In this screen, the user defines the material to be shipped. The user may choose from one of the directive buttons to proceed: If the user has selected the Add Sales Order Item(s) option, and user receives the following message, it may be due to the status of the line item on the SO. If the line item Status on the Sales order is Admin Hold or Mfgr Hold you will receive this message when creating the PL.
 If the user has selected the Add Sales Order Item(s) option, the following screen will appear: Note: Each item defined on the Sales Order will be displayed on this list for user to select from. The user can highlight and add one item at a time, or highlight and add more than one at a time. If the sales order has many lines and only a few are NOT being shipped, the user can add them all, and delete the lines that do not apply. 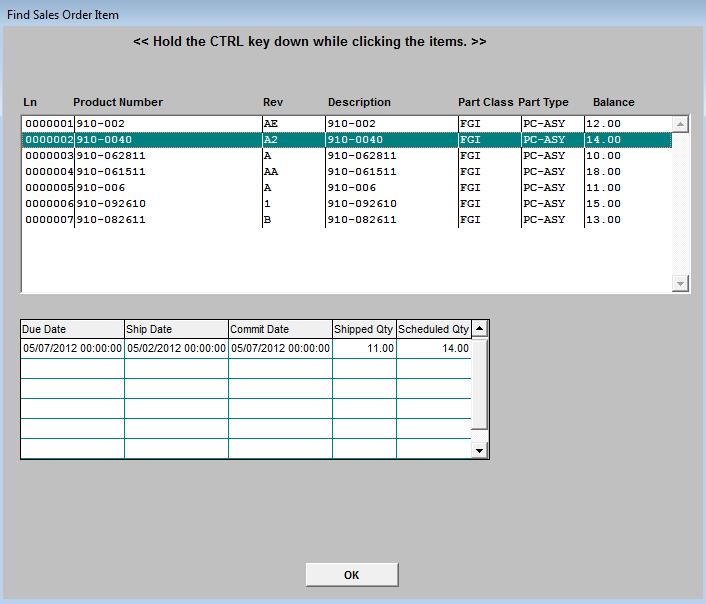 Highlight the appropriate Sales Order line item. Depress the OK button and the sales order line item(s) will populate the detail screen.
The user then completes the quantity column with the amount of product shipped for this packing list.
The following message will appear if the part requires a certificate and the "Done" box has NOT be checked. The packing list will NOT be allowed to be saved until checking off the certificate required "Done" box.
 The following message will appear if the user is attempting to ship product out of FGI that was not originally transfered into FGI from a Work order that was associated to that Sales order. This is just a warning that you will be releaving stock that was transfered into FGI from a Work order that was associated to a different Sales order, and is asking the user if they are sure that is what they want to do? It does not hurt anything to answer yes, the only thing that might happen later down the road is the product that you had transfered into FGI from a different sales order has already been shipped against this Sales order or packing list.
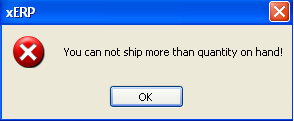
 Depress the Yes button. If the user attempts to ship a product with no or not enough available inventory, ManEx advises the user and prompts to cancel the transaction.
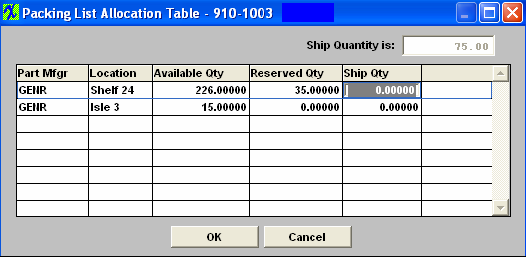
TIP Users may modify the appearance of the columns on the spread sheet by click and holding on the column header description, and slide the description to the right or left, then releasing the mouse button. The width of the columns may also be modified by click and holding on the right edge of the column header and sliding the border right or left. As the user completes a quantity shipped, ManEx produces an inventory allocation table displaying the available and reserved inventory on hand for the product being shipped if there is more than one location. If the Sales Order allocated product for this order, the quantity will be shown in the Reserved Qty column.
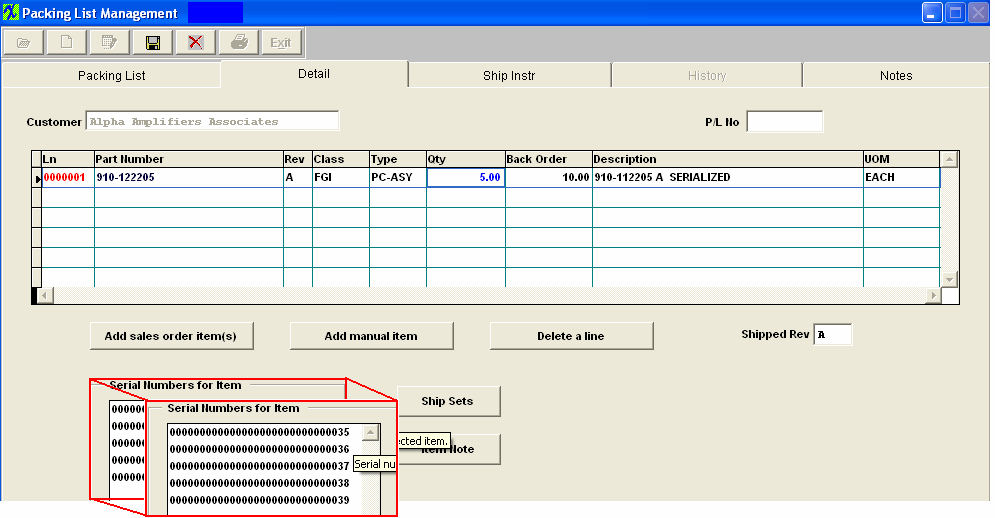
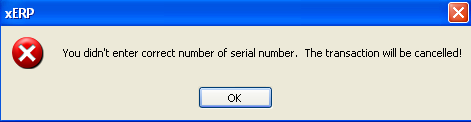
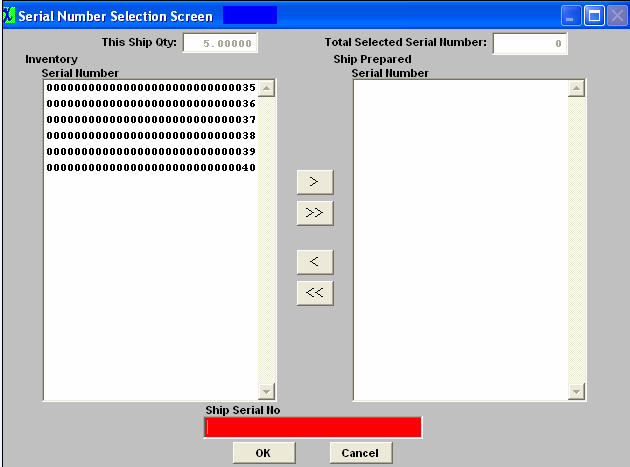
Enter Ship Qty. If the product and the work order were identified as requiring serial numbers and there are no products available in inventory with the appropriate serial numbers, the following message will display:
Depress the OK button. The transaction will be cancelled. If the product and the work order were identified as requiring serial numbers and there is product available in inventory the following screen will display:
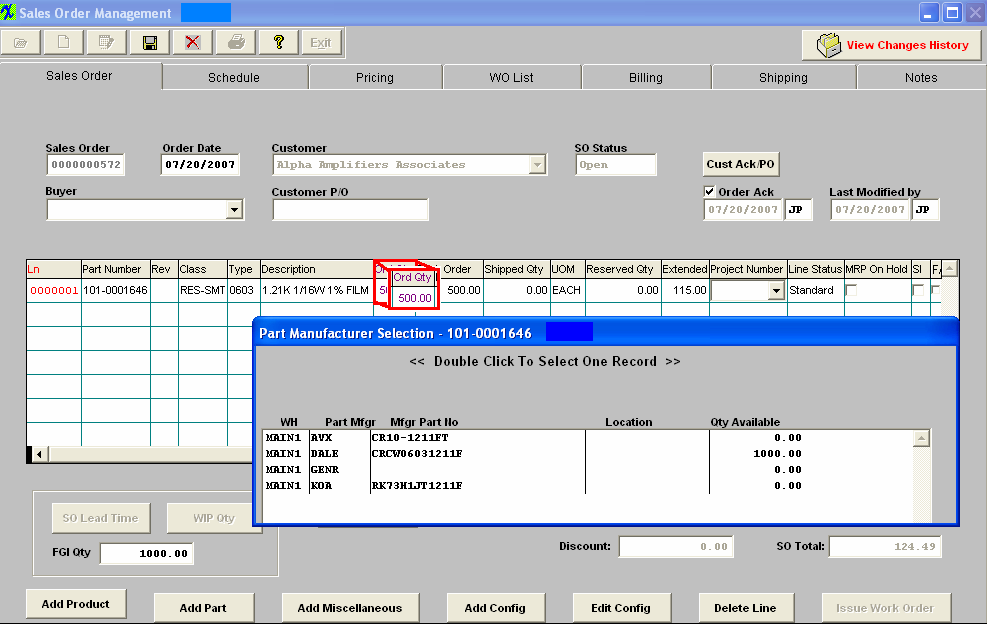
If user receives the following message when trying to ship out parts:
 The user may return to the SO, depress the Edit button and double click on the Order Qty field. The available MFGRs will be listed and the users can make the needed changes.
 Return to the Packing List module and the record can then be processed.
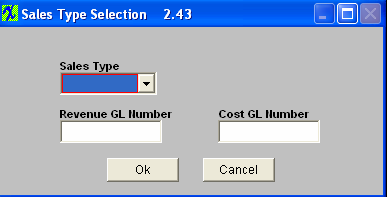
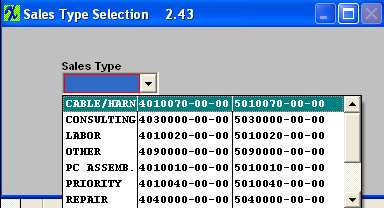
Depress the down arrow for Sales Type and the following list will appear:
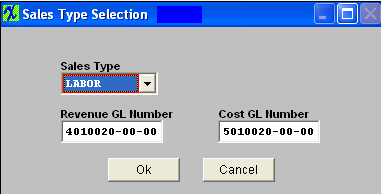
Highlight and click on the Sales Type of Interest and the following screen will appear:
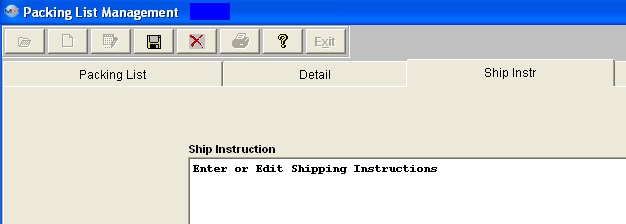
The Revenue GL number and the Cost GL number will update. Note: When creating Stand Alone Invoices users should not select the same GL account number that is entered in the Actsetup for the Account Receivables. IF you do, then the resulting transaction will debit and credit both the sane GL account number. Depress the OK button. The user will be prompted for Quantity, Back Order amount, Description and Units of Measure. The user may enter notes of any length for a line item by highlighting the appropriate line item and then selecting the Item Note. If the user wishes to establish shipping instructions, then pressing on the screen tab Ship Inst will bring up the following screen. These notes will appear on all Packing Lists created for the same Sales Order.
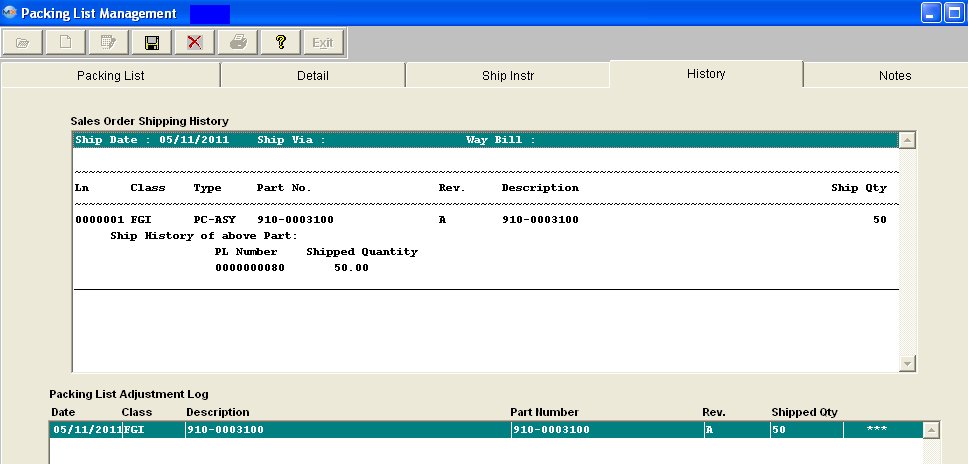
Tabbing on the History tab will bring up the following:
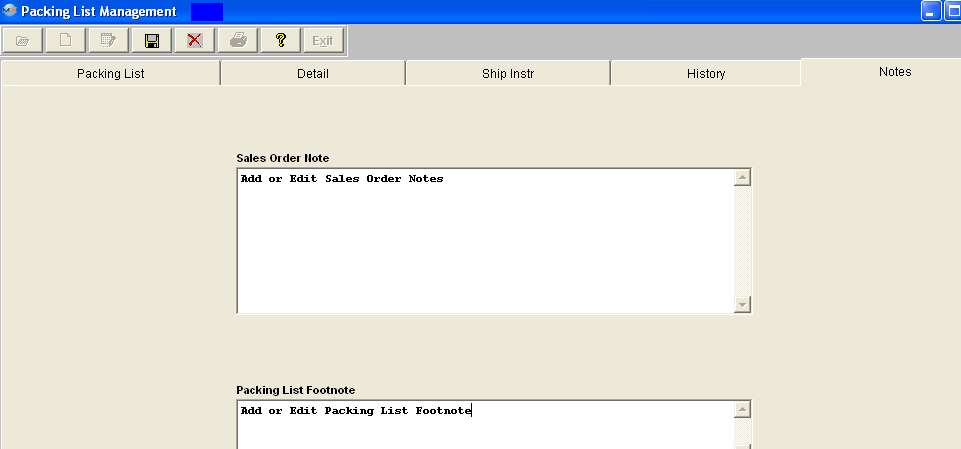
This will give you the Shipping History of the Part highlighted in the Detail screen. In addition to special notes to the shipping department, tabbing to the Notes screen, there are two additional areas for notes: the Sales Order Notes, and the Packing List Footnotes. The Sales Order Notes will be maintained in the ManEx system for review by other users and will be displayed on all the Packing Lists created for the same Sales Order, and the Packing List Footnotes will be added to the packing list when printed.
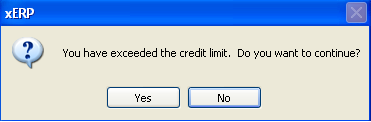
When the user has completed all of the information needed for the packing list, the information must be saved. Note: The Packing List MUST be printed for the shipping information to advance to Invoice Administration. If the user has set the system setup to Manual Invoice numbering, then ManEx will prompt for the invoice number to be used for the packing list. If automatic numbering is used in the setup, then ManEx will supply the invoice number, and close the screen. Hold for Credit Limit If the user has elected "Enforce Credit Limit at Shipment" feature in AAccounting Setup/Accounts Receivable Defaults, the following message will appear if a non-supervisor attempts to ship:
 The program gets the total Accounts Receivable (AR Aging) + Not Posted Invoice (invoice not printed out of the Admin/Invoice module) + Open SO Amounts. Compares it to the Credit Limit setup in the Customer Information module. This is based on having the "Include Open Orders for Credit Approvals for Shipping" option checked, (within the Print PL/Invoice setup module) (if you do not want to include open Sales Orders you would want to uncheck this option) and the "Enforce Credit Limit at Shipment" option checked, (within the Sales-A/R setup module)(uncheck this option if you do not want to Enforce the Credit Limit at Shipment). Make sure that these options are marked properly to get the results you are expecting.Depress the OK button, and enter a supervisor password or a password for a user with rights within the Security module, that has the ability to approve the credit limit exceed message. The following warning will appear:
To continue, select "Yes" to abandon select "No". Add a Stand Alone Packing List Add by Stand Alone procedure is the ONLY way that a manual invoice can be created.
If the user elects to add by Stand Alone, a screen appears listing Customers. The user selects the customer by either entering it into the red box, or scrolling down the list and clicking on the selected Customer. Decide between Active or Inactive customer by checking the appropriate box. Type in the Customer name or highlight the customer and double click to select. Once the customer is selected, you will be prompted for your password. The following screen will appear:
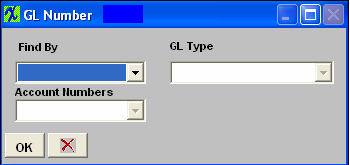
Go to the Detail Tab, and select Add manual item, the user will be prompted for the Credit G/L Number:
Depress the down arrow, s elect to Find By either Account Type or Account Numbers.If you select by Account Type, the GL Type box will be enabled. Depress the down arrow next to the GL Type box and a list of accounts will appear. Select the desired GL Type. Once the GL Type is selected the Account number box will be enabled. Depress the down arrow next to the Account Numbers box, and only the G/L accounts within that range will appear. Select the desired GL account number. If you select by Account Numbers, the Account Numbers box will be enabled. Depress the down arrow next to the Account Numbers box, and the list of ALL of the G/L Account numbers will appear. Select the desired G/L account number. The user will be prompted for Quantity, Back Order amount, Description and Units of Measure. Finish the process as detailed above. Note: The user may edit a Packing List up until the time it is released to Invoice. Once the Packing List has been "Released to Invoice" no edits are allowed.
|


| 1.3. Edit an Existing Packing List | ||||
The following screen will be displayed: Find a Packing List. (Note: The Packing List will be editable if the Invoice has NOT been Released to A/R, once the Invoice has been Released to A/R the Packing List is no longer available). Depress the Edit Action button. All fields available for editing will be enabled for modification. Packing List tab - The Ship to address, Attention, Ship Via, Freight, FOB, Terms, Freight Amount, Way Bill number and the Packing List date may be edited.
 Detail tab - The user may change the qty, delete the line item, add a manual item or add an Item Note.
 Ship Instructions - The user may add/edit shipping instructions. These shipping instructions will be displayed on all the Packing Lists created for the same Sales Order.
 History tab - This screen is not editable
 Notes tab - The user may add/edit Sales Order notes and/or Packing List Footnotes. The Sales Order notes will be displayed on all the Packing Lists created for the same Sales order.
At the conclusion of the modification process, the user may either press the Save button to save the changes or press the Cancel button to cancel changes. The user may then re-print the Packing List.
|
| 1.4. Link User Defined Fields to a Packing List |
| The User Defined fields MUST be setup within Web ManEx. For further detail see Article #5454.
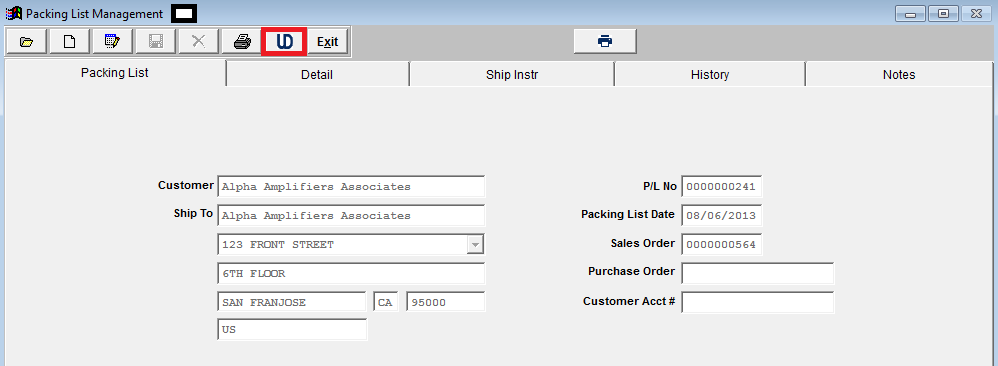
To link a UDF to a Packing List select a record in the ManEx Desktop, and select the UD action button (as displayed below).
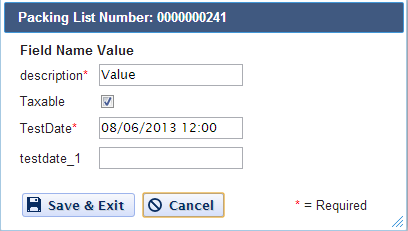
The UDF for that section will then be displayed, and user can make changes (if applicable), Save & Exit or Cancel.
|