| 1. Accounts Receivable Bank Deposit |
| 1.1. Prerequisites for the A/R Bank Deposit | ||||
Users MUST have full rights to the "Cash Receipts" in Accounting Security . Users with “Accounting Security Supervisor” rights will automatically have access.
|
| 1.2. Introduction for the A/R Bank Deposits |
The accounts receivable Bank Deposits section provides the ability to receive payments against outstanding invoice, Prepayments for orders and miscellaneous receipts that may be applied to a selected general ledger account.
To receive Cash Receipts that do not apply to a specific Customer account we suggest creating an "Other" Bank Deposit, within the system. This will allow user to select the desired GL account number and upon saving the "Other" Bank Deposit that amount is not populated to the AR Aging at all but will still increase your Bank Balance amount. For example: if it is a vendor refund, they can either credit AP, or Inventory (or Misc Receipts). If it is payment by an employee to reimburse for a purchase, they can credit the original account used for the purchase. To record a Bank Transfer see Article #3190 . The system does NOT allow the user to enter in a positive amount against an existing Prepayment or Credit Memo. |
| 1.3. Fields & Definitions for the A/R Bank Deposits |
| 1.3.1. A/R Receipt Summary Tab | ||||||||||||||||||||||||||
A/R Receipt Summary Tab Field Definitions
|
| 1.3.2. Check/Advice Detail Tab | ||||||||||||||||||||||||||||||||||
 Check/Advice Detail Field Definitions
|


| 1.4. How To ...... for the A/R Bank Deposits |
| 1.4.1. Add an AR Bank Deposit | ||||
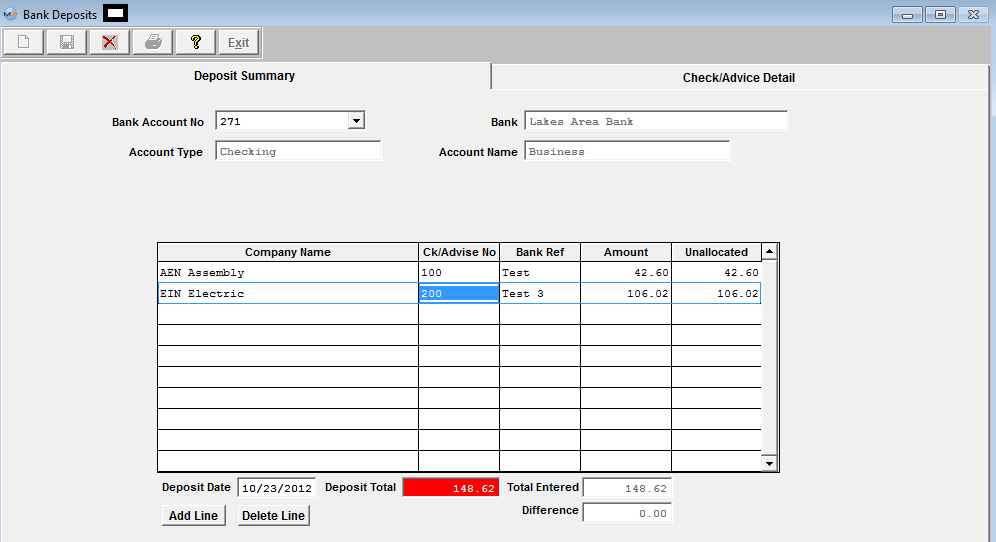
The following screen will be displayed: Depress the Add record icon. The prompt will activate the account number field, and the user enters the Bank Account to which the deposit is being made. Clicking on the down-arrow displays all Bank Accounts entered in the Bank Accounts Setup, and the user selects one by moving the cursor to the correct account and pressing the enter key.

Once the account is selected, the Account Type, the Bank, and the Account Name information will be displayed for the selected account.
The Deposit Date will default to the current date, but may be edited as required.
The user enters the total amount of the deposit at the bottom of the screen, and ManEx will track the total of the Deposits as they are entered and the difference from the total amount.
The Add Line button will then be displayed allowing the user to enter information about the Deposit.
After pressing the Add Line button, the prompt is placed on the Company Name and the Delete Line button is enabled. Clicking on the down-arrow next to the Company name field lists the names of all of the companies from which the deposit might be received.
After entering the Company Name, the user enters the Check/Advise Number, the Bank Reference Number and the amount of the Check. The unallocated amount will be automatically entered, and the Check/Advice Detail screen tab becomes enabled.
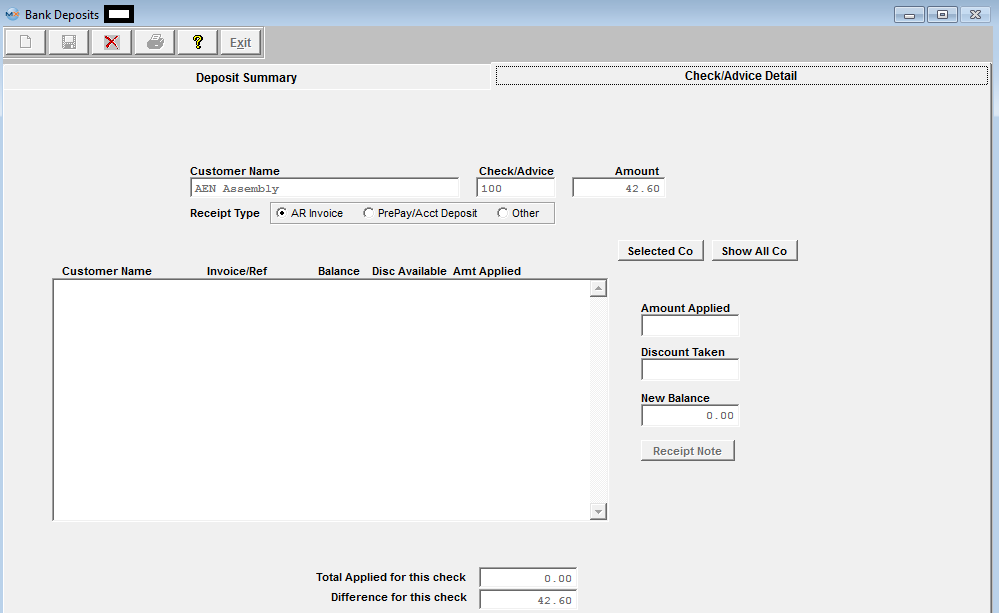
CHECK/ADVICE DETAIL Selecting a line by highlighting on the initial screen and pressing the Check/Advice Detail tab displays the screen on which the cash is to be applied for the Check selected. The system does NOT allow the user to enter in a positive amount against an existing Prepayment or Credit Memo.
To Add "AR Invoice" refer to Article #4437
To Add "PrePay/Acct Deposit" refer to Article #4438
To Add "Other" AR Cash Receipts refer to Article #4439 |


| 1.4.2. Add an AR Inv Payments |
AR Invoice payments For AR Invoice Payments, follow the process for the AR Bank Deposits, then within the Check/Advice Detail screen, Select the AR Invoice radio button, the user may elect to show open invoices for the selected Customer by depressing the "Selected Co" button, or elect to show all open invoices by depressing the "Show All Co" button.  Once the open invoices are displayed, the Deposit may be applied to an open invoice by selecting an invoice and pressing the left arrow key (>) to move the invoice to the applied area. Pressing the double left arrow (>>) will move all invoices to the application area. After selecting invoice(s) to which the payment is to be applied, pressing the DONE button returns the user to a screen in which the amounts may be applied to each invoice. 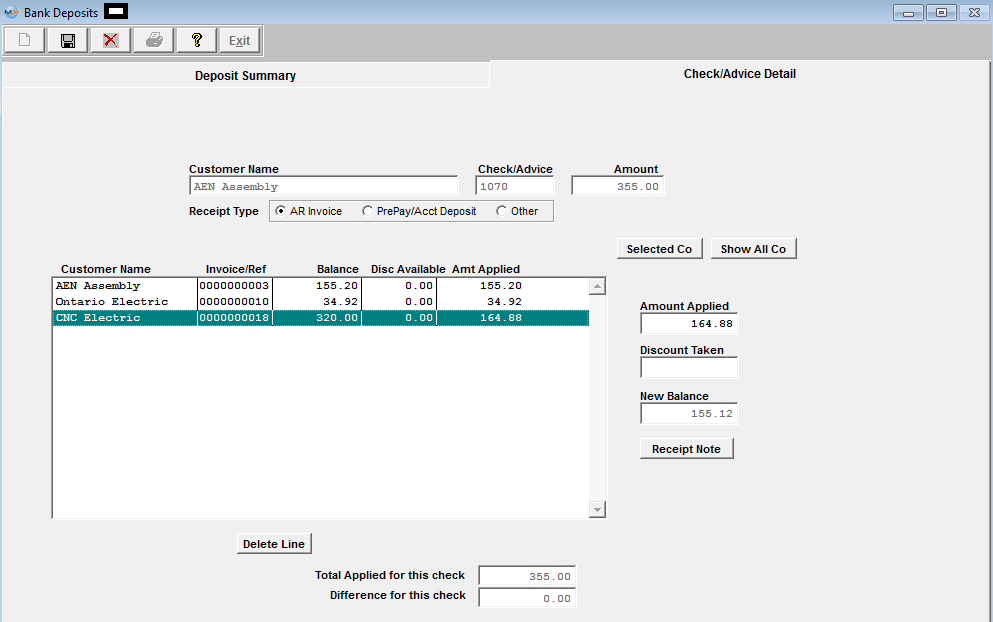 The user selects the invoice to be applied and enters the amount of the deposit to be applied to the invoice. Important Note: At this point, the user MUST depress the Enter key. When the invoice is selected to which the payment is applied, the user must continue to apply the Check to open invoice until the entire check is totally applied. If the Customer has taken an allowed discount, the amount of the discount may be entered by placing the cursor in the discount field and entering that amount. When exiting the Discount field, the amount applied will be reduced by the amount of the Discount automatically. The user may continue entering Deposits until the total of the entries matches the total deposit entered, and the Difference field displays 0.00. If the customer issued a check creating an overpayment see Article #4443 to account for the overpayment.
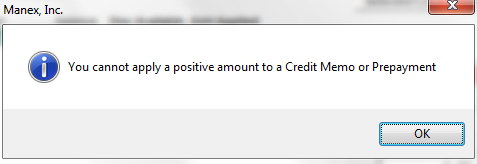
The system does NOT allow the user to enter in a positive amount against an existing Prepayment or Credit Memo.
If user attempts to add an AR Bank Deposit to a Credit Memo or Prepayment they will receive the following message:
 |
| 1.4.3. Add a PrePay/Account Deposit |
Prepay/Account Deposit If a Customer has prepaid an invoice, follow the process for the AR Bank Deposits, then within the Check/Advice Detail screen, Select the Prepay/Acct Deposit to make the allocation. After selecting the PrePay/Acct Deposit radio button, a Reference Number field is displayed, and a Reference Number must be entered. The name of the Customer selected appears in the application area, and the user enters the amount received as Prepayment in the Amount Received field.
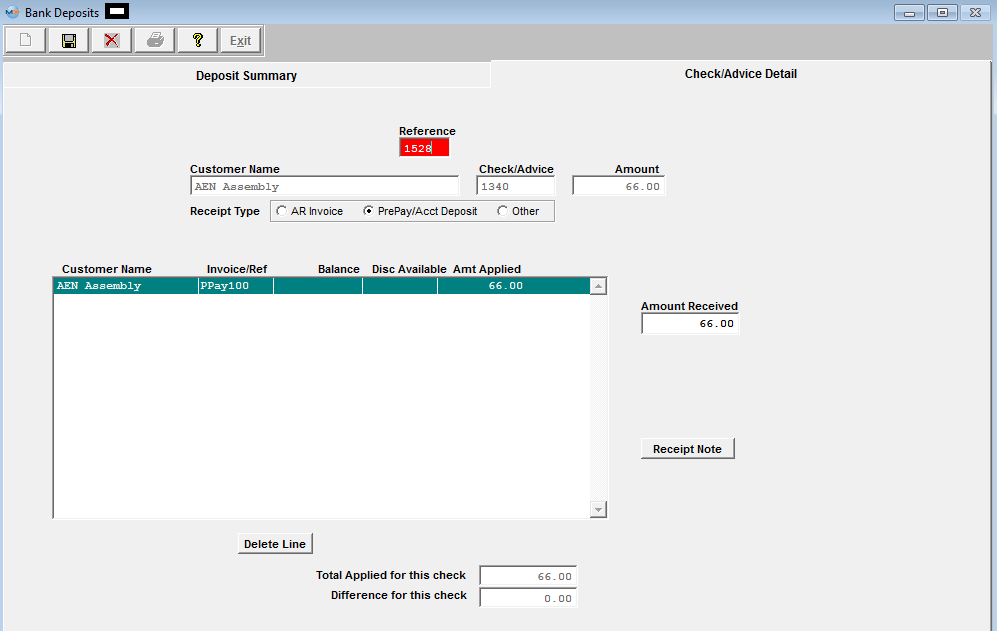 The Invoice/Ref field will be completed with the Reference Number, prefixed with “PPay” for future reference. The Pre-Pay amount will credit the G/L account default as set up in Accounting Setup. This is normally A/R Trade Receivables since the Prepayment will appear as a credit on the A/R Aging. To offset this payment against another open invoice, you will need to create an A/R Offset . NOTE: The system will NOT allow the user to enter in a positive amount against an existing Prepayment. |
| 1.4.4. Add Other A/R Bank Deposits |
Other
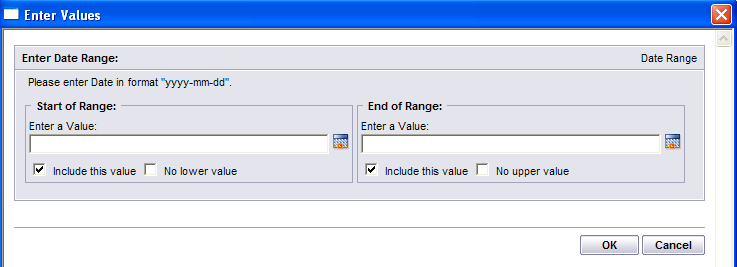
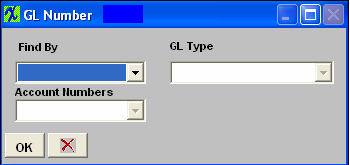
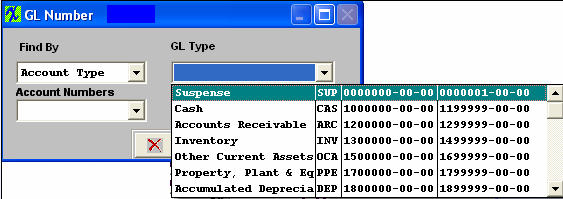
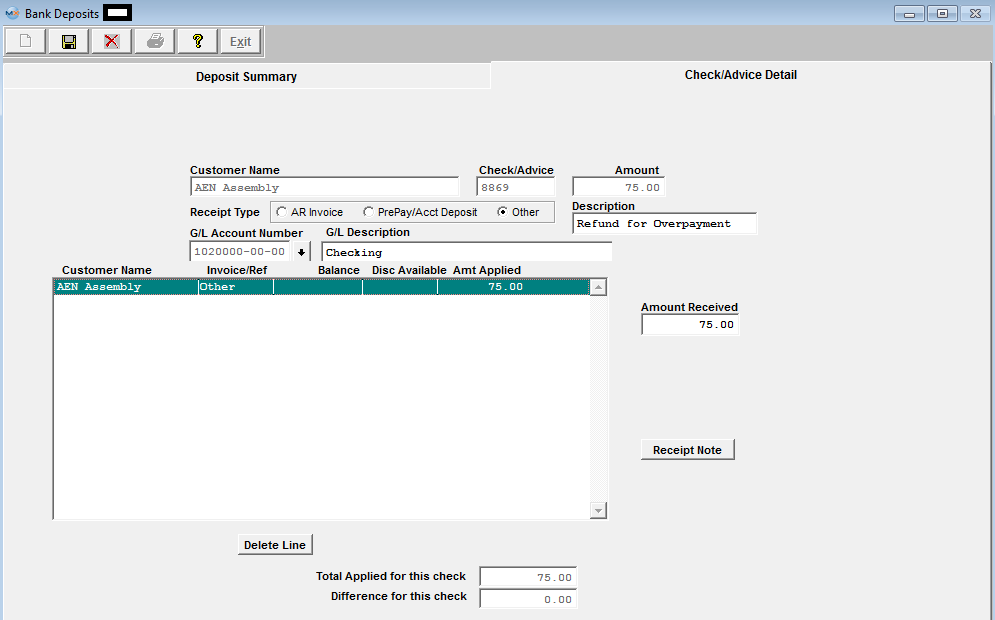 The user must then enter a General Ledger Number against which to apply the receipts, and finally, the amount of the receipt to be applied to the category. The GL number may be entered directly into the field or through the process of looking up by category. To look up by category, place the cursor in the G/L Account Number box and depress the enter key. The following selection will display: Depress the Find By down arrow and the following selection will appear: Select to find by Account Type or Account Numbers. If you select Account Type, the following will display:
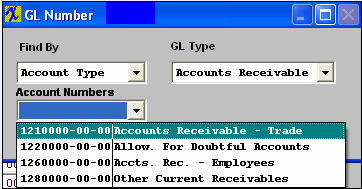
Use the down arrow to find the General Ledger Type. Once the GL Type is selected, all of the General Ledger accounts within that type will display:
Select the General Ledger Account of interest. Type in the Amount Received. If desired, a Receipt Note may be attached to the receipt for later reference by pressing the Receipt Note button. Depress the Edit button. Type in the message. Depress the Save Button. Depress the Exit button. At the bottom of the screen, the total applied and remainder to be applied will be calculated as deposits are applied to one or more invoice. The user may continue entering Checks and then applying them until the total of the entries matches the total deposit entered, and the Difference field displays 0.00. When the total applied matches the total amount of the Deposit for each Customer, and the total Check Receipts match the total Deposit Amount, then the save button becomes activated, and the user may save or cancel the transaction.
|
| 1.4.5. Account for Overpayment from Customer |
Customer (Number Three Customer) has two invoices due: Inv #100 for the amount of $1470.00 and Inv #120 for the amount of $19.49 being displayed in AR Aging
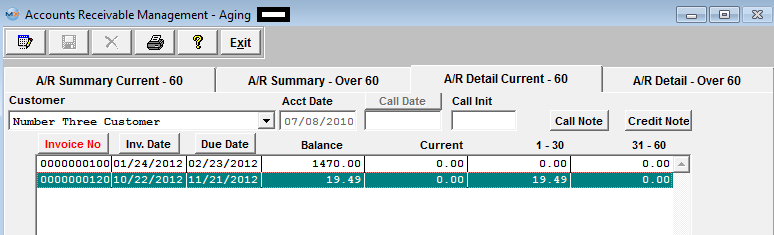 Customer issues a check for $50.00, apply $19.49 against Invoice #120, which leaves a difference of $30.51. 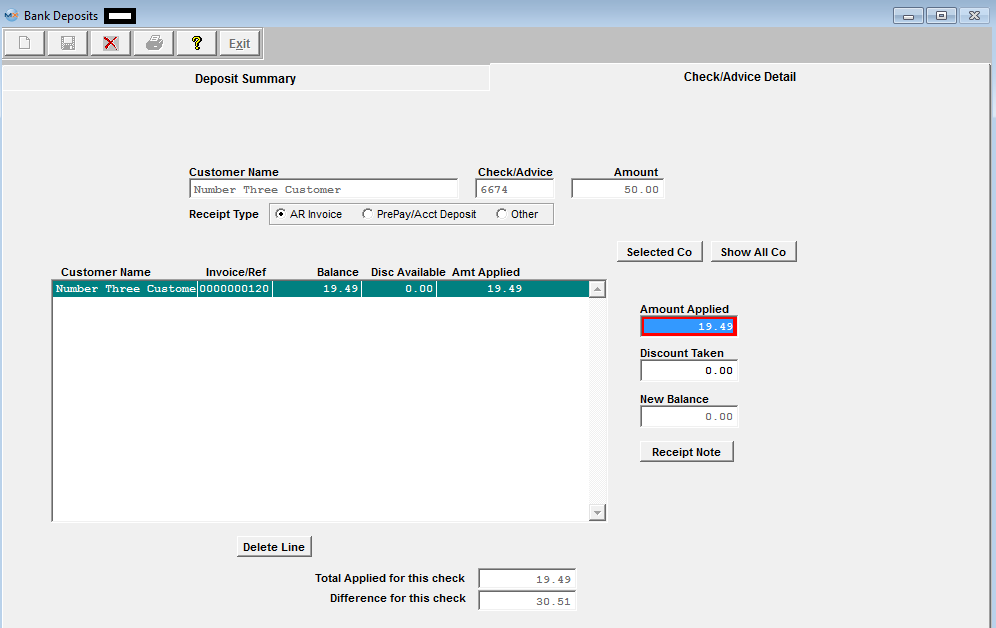 Depress the PrePay/Acct Deposit enter a Reference and apply the difference of $30.51 against the Prepay. 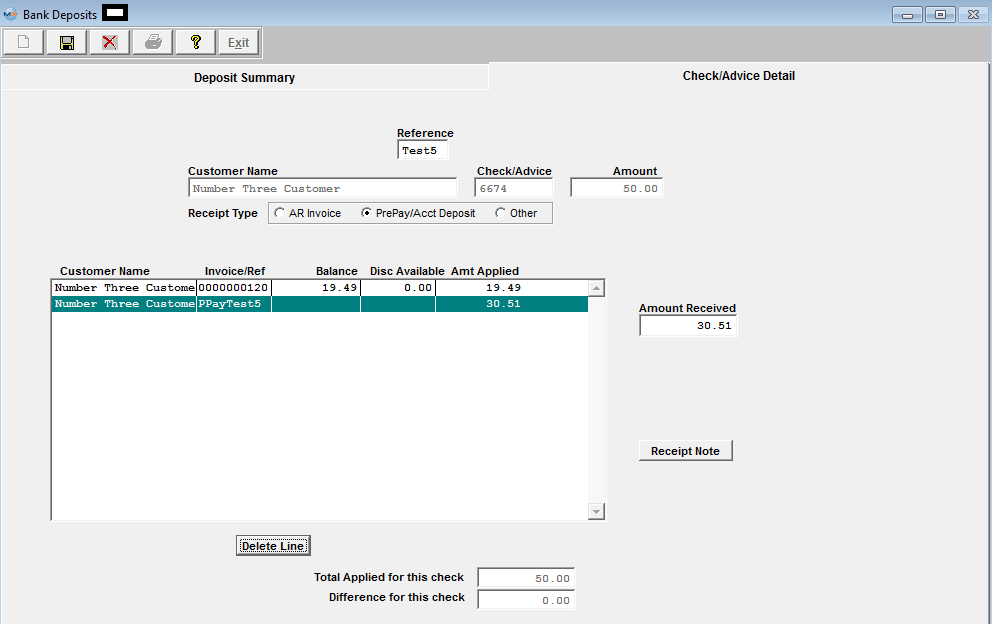 View the AR Receipt Detail Information and the overPayment is being properly displayed  AR Aging updated correctly 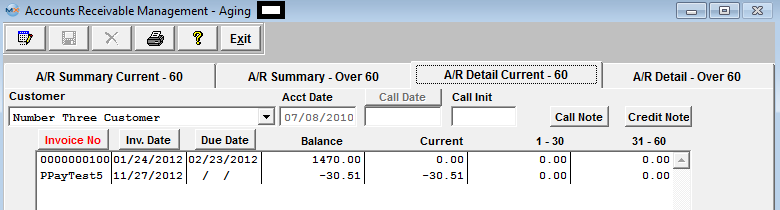 The customer later issues another check for the amt of $400.00 to be applied to Invoice #100 and they also want to apply the OverPayment of $30.51 to Invoice #100. Below shows that the system also allows me to apply the overPayment to Invoice #100 (you simply have to double-click on the PrepayTest5 record first and then double-click on the invoice to get the values to apply properly) 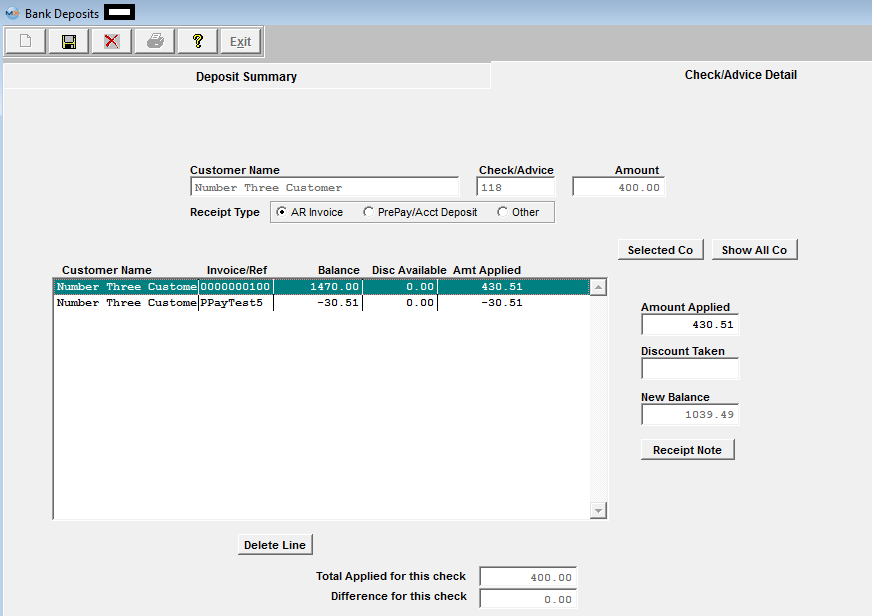 View the AR Receipt Detail Information and the PPayTest5 of $30.51 is applied to Inv #100 properly along with the Check for the amount of $400.00 for a total applied of $430.51. 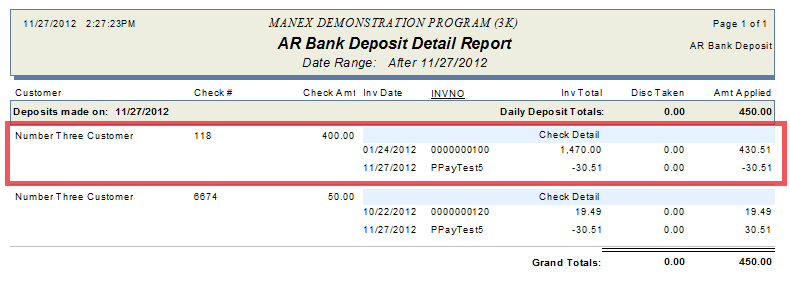 AR Aging updated correctly with Invoice #100 having a balance due of $1039.49. 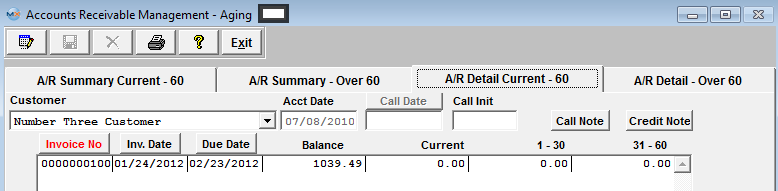 |
| 1.4.6. Apply a Prepayment or Credit Memo against an Invoice |
If the customer issues a check for the amt of $400.00 to be applied to Invoice #100 and they also want to apply the OverPayment of $30.51 to Invoice #100. Below shows that the system allows me to apply the overPayment to Invoice #100 (you simply have to double-click on the PrepayTest5 record first and then double-click on the invoice to get the values to apply properly) View the AR Receipt Detail Information and the PPayTest5 of $30.51 is applied to Inv #100 properly along with the Check for the amount of $400.00 for a total applied of $430.51. AR Aging updated correctly with Invoice #100 having a balance due of $1039.49. The system works the same when applying a Credit Memo to an Invoice. AR Aging displaying a Credit Memo # CM0000115 and Invoice #0000000103. 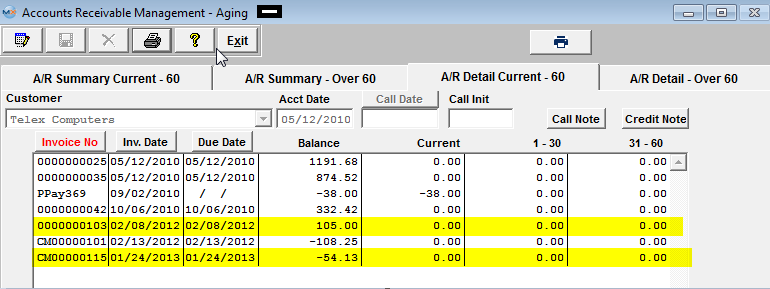 Customer wants to apply the Credit of $54.13 against Invoice #103, so they only send a check for the amount of $50.87. 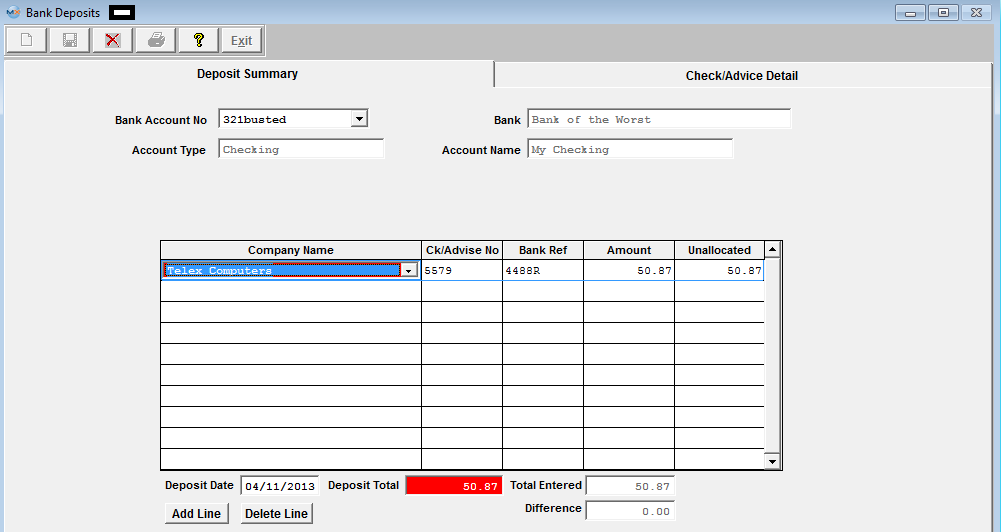 Select the Credit Memo and the Invoice from the Check/Advice Detail  Depress "Done" takes you to the next screen. Here user may double click on the CM0000115 to apply the amount to the Invoice 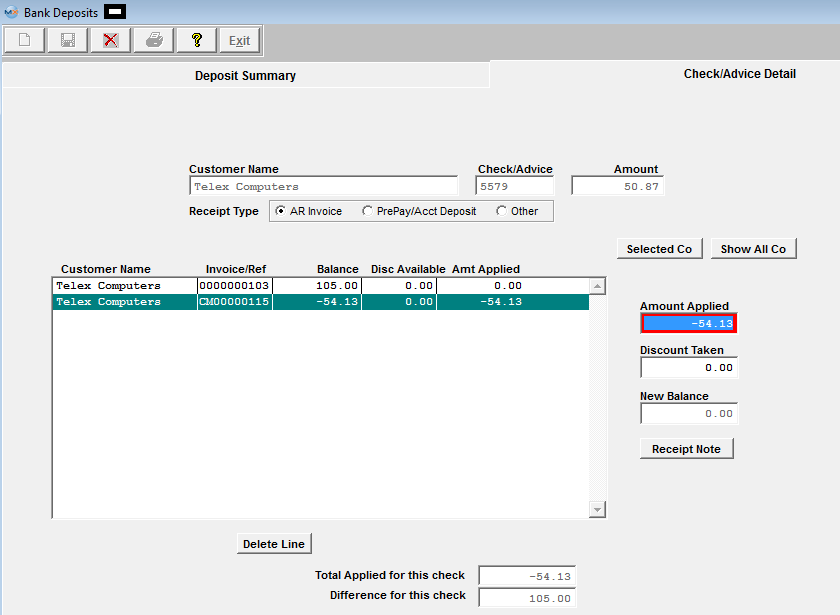 Then enter the amount Applied to Invoice  Save Record and both the Credit Memo #CM0000115 and Invoice #0000000103 have been cleared from the AR Aging 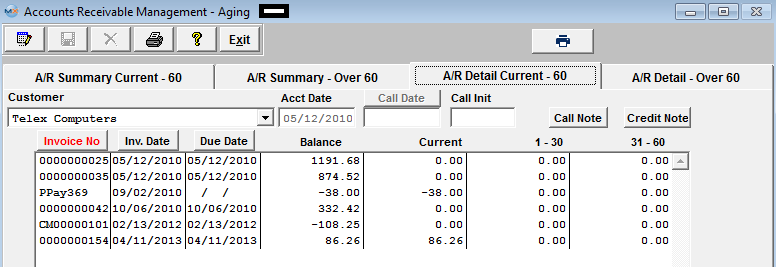 If user attempts to apply a deposit to a Credit Memo or Prepayment they will receive the following message: |
| 1.5. Reports for the A/R Bank Deposits | ||||||||
To obtain the AR Cash Receipt Reports within the Web, select the WEB Print button from the ManEx action buttons at the top
of the screen. For further detail on How the Reports work
within the Web refer to Article #5477. Note: In order to access the Reports within the Web the Company Root URL must be setup within the System Appearance module and user must be linked to web within the System Security Module.
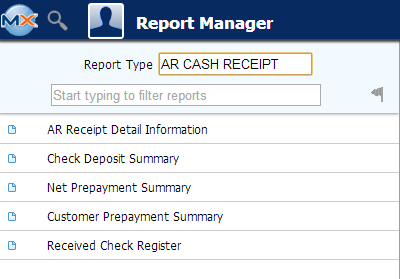
Select
the Report Type: AR CASH RECEIPT - A List of Reports will be displayed that are
available on the Web for AR CASH RECEIPT
To obtain the AR Cash Receipts Reports, select the Print button from the ManEx action buttons at the top of the screen.
The following reports screen will display a list of reports that are available on the ManEx Desktop:  Highlight the report. Depress the OK button. A/R Receipt Detail Information
The following report will be displayed: 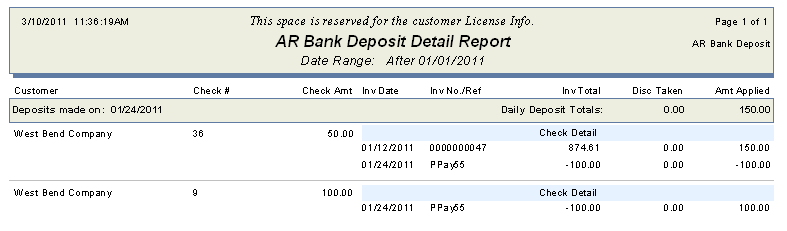 Check Deposit Summary
The following report will be displayed: 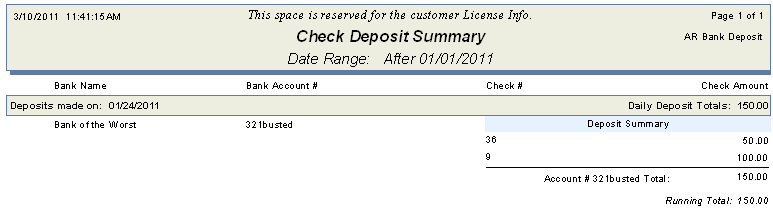 Net Prepayment Summary Highlight the Net Prepayment Summary Report. Depress the OK button. The following report will be displayed:
Customer Prepayment Summary
The following report will be displayed: 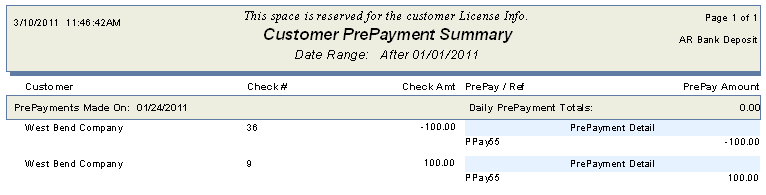 Received Check Register:
The following report will be displayed:
|