| 1. General Ledger Divisions/Departments |
| 1.1. Prerequisities for the G/L Divisions/Departments |
Complete the attached worksheet and "Mark as Completed RoadMap Section C Item 2-c" before continuing the setup.
See Article #4342 for the prerequisites required.
|
| 1.2. Introduction for the GL Divisions/Departments |
This section is to setup the Divisions and Departments if you are going to be using more than one independent ManEx system. For example one for the Main Company and one or more subsidiaries. There is a Consolidation system which must be Division 00. The Main Company would be Division 01, the Subsidiaries, Division 02, 03, etc. This information MUST be setup before using the GL Consolidation Export and GL Consolidation Import modules. This section is to setup Divisions and Departments to be used with account numbers. If desired, account numbers can be assigned to each department with multiple divisions. This also can be used as a means of tracking Non Recurring Expense charges or rework charges by assigning an account number to a Non Recurring Expense or Rework department. This will aid in account tracking in revenue analysis. |
| 1.3. Fields and Definitions for GL Divisions |
| 1.4. How To ...... |
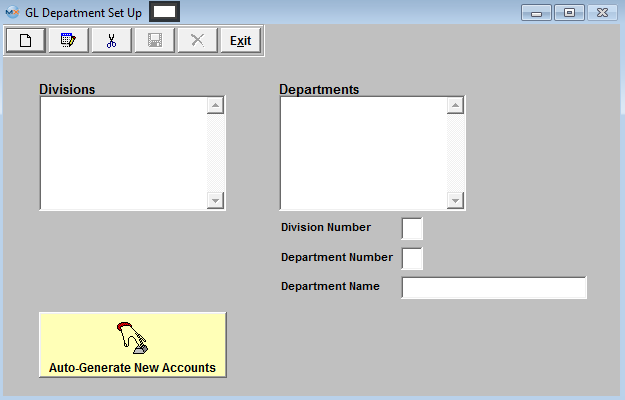
| 1.4.1. Setup the GL Divisions for Headquarters | ||||
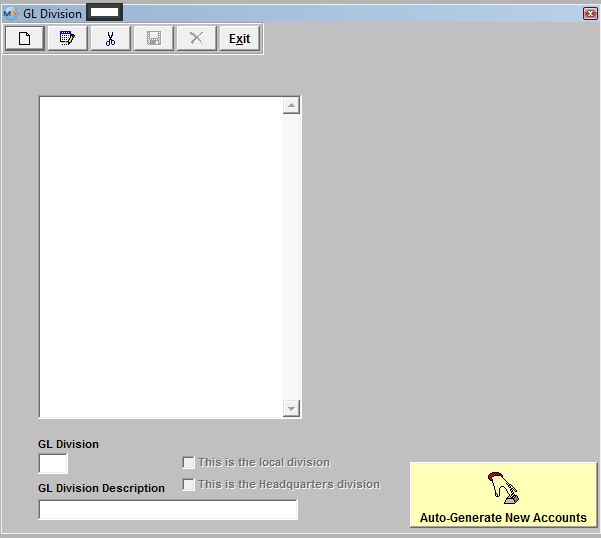
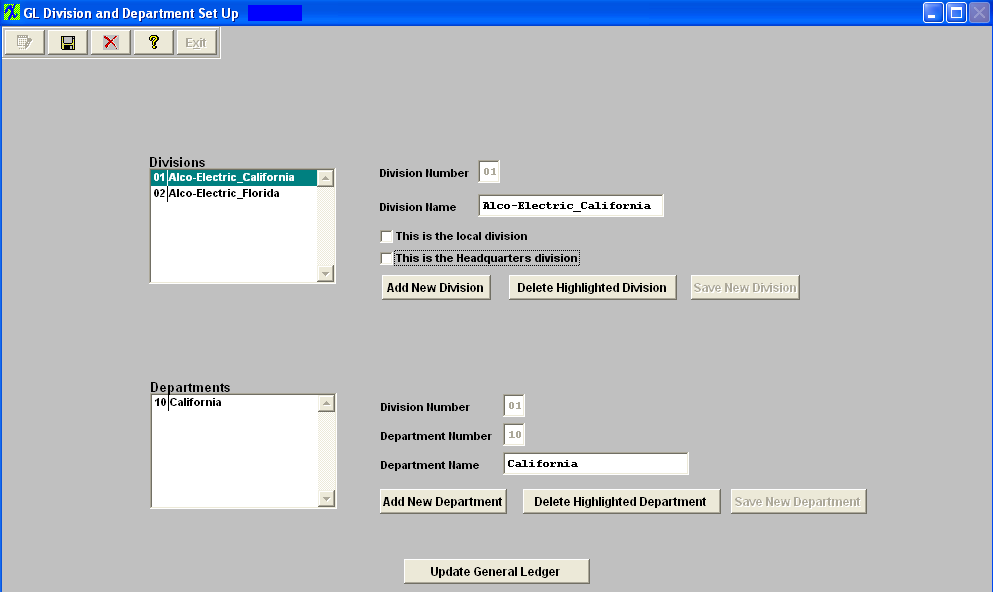
The following screen will be displayed:
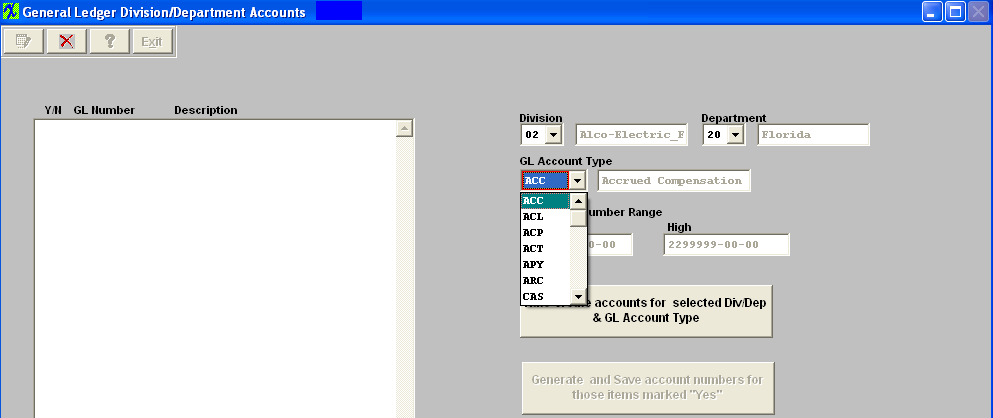
 To setup the Headquarters ManEx System: First add the Headquarters Division. Depress the Edit button and the "Add New Division" button will become editable. Depress the "Add New Division" button Enter a Division Number (other than '00') and a Division Name in the fields provided. When setting up the Headquarters Division you MUST check both the "This is the local division" and "This is the Headquarters division" boxes. Depress the "Save New Division" button. To add a department depress the "Add New Department" button. The Division number will default in, user then can enter in a Department Number and a Department Name in the fields provided. There can be as many as 99 divisions. Each Division can have up to 99 departments. 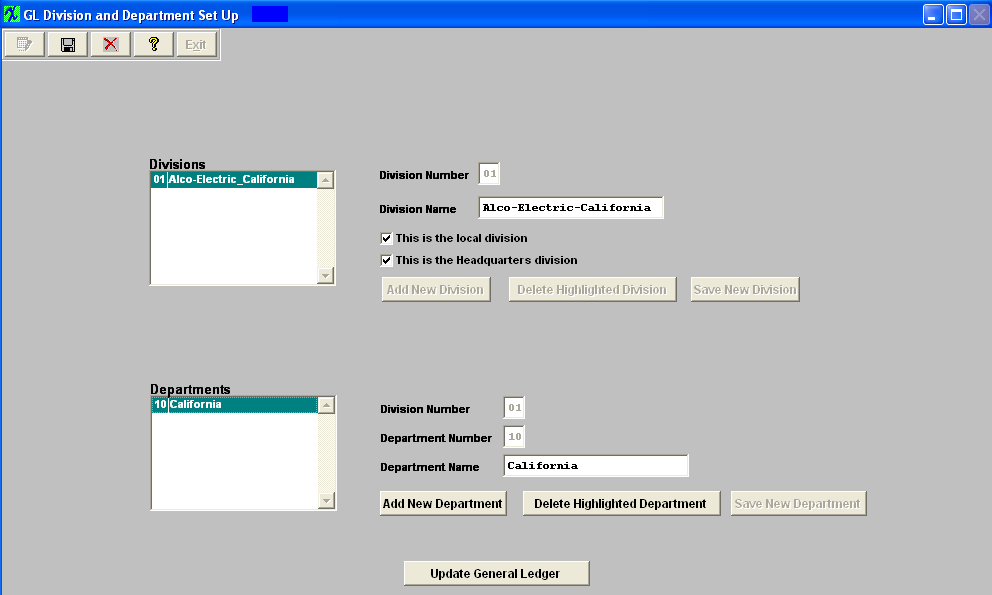 Depress the "Save New Department" button. The depress the Save button at the top of the screen. To add the Secondary divisions to the Headquarters ManEx System depress the Edit button and the "Add New Division" button will become editable. Depress the "Add New Division" button Enter a Division Number (other than '00' or the division number setup for the headquarters division) and a Division Name in the fields provided, when setting up the Secondary division to the Headquarters ManEx System you do NOT check either of the "This is the local division" or "This is the Headquarters division" boxes . Depress the "Save New Division" button. To add a department depress the "Add New Department" button. The Division number will default in and user may then enter a Department Number and a Department Name.  After one or more divisions have been added, the user may EDIT a division, or ADD a Department to a division. The division capability is intended to be used in conjunction with multi plant / division operations. It can also be used without Multi plant / division module, however. There can be as many as 99 divisions. Each Division can have up to 99 departments. Now user will need to "Update the General Ledger" information for the Headquarters Division number 01 and for the Secondary Divisions 02, 03, etc. Highlight the Headquarters Divison and depress the "Update General Ledger" button located at the bottom of the screen: 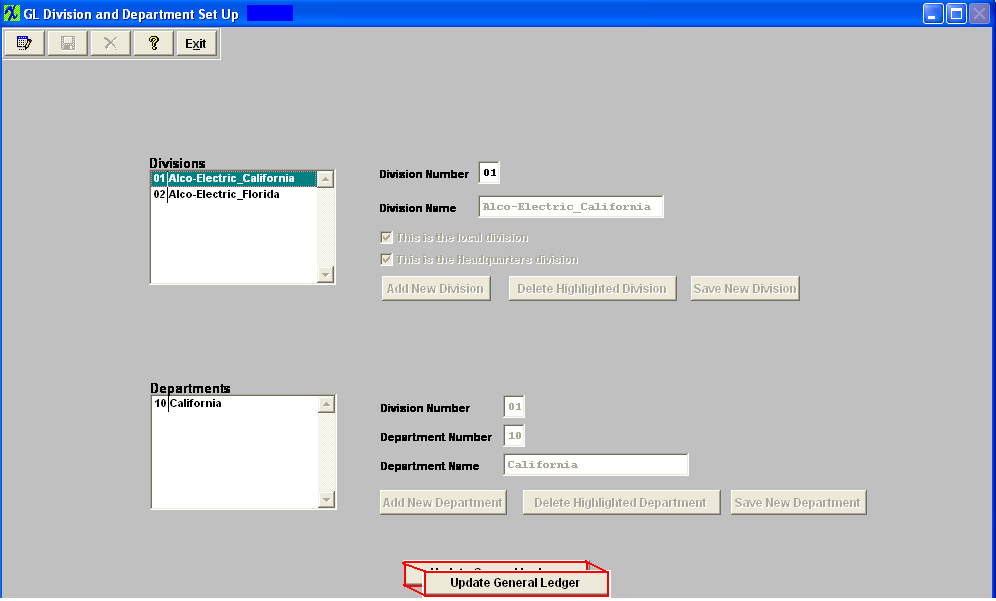 The following screen will appear: Depress the Edit button, select the Division, Department, and the GL Account Type from the pull downs.
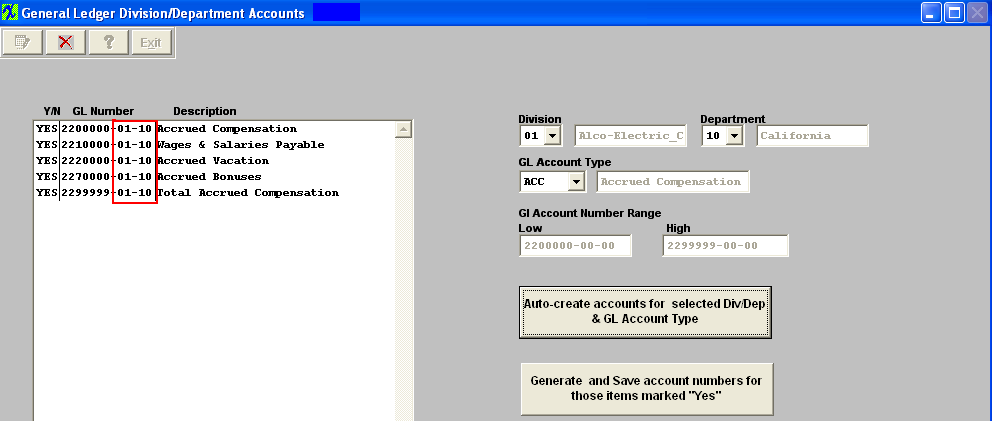
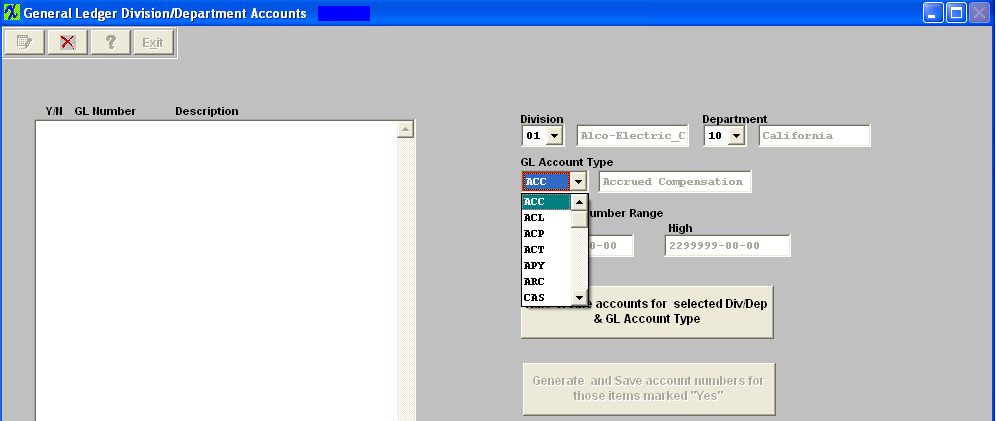 Once these items have been selected user may then depress the "Auto-create accounts for selected Div/Dep & GL Account Type" button, and the following screen will appear: 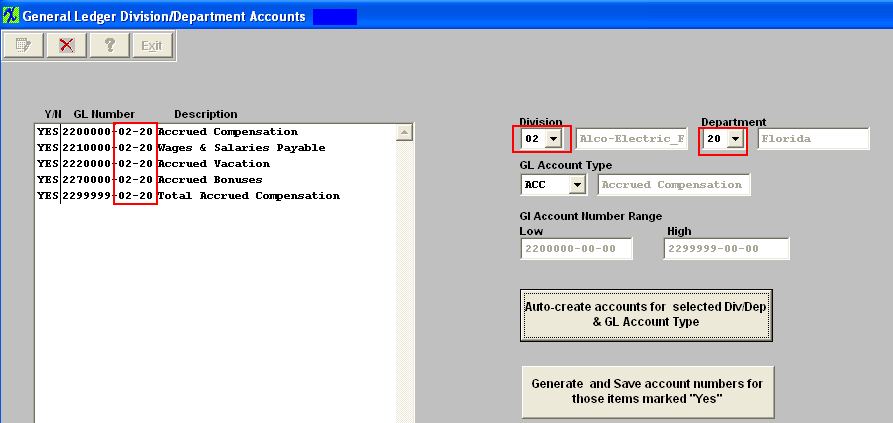 All of the accounts to be generated will appear on the screen for the new Divison and Department. If there are some accounts you want to exclude, turn the selection to “No”.
Note: You will want to exclude all Titles, Headings, Totals and Closing accounts, leaving only the Posting accounts. (Otherwise you will have duplicate titles, etc. on the reports.)
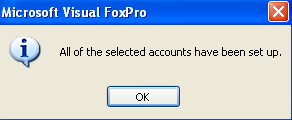
Depress the Abandon changes button to abandon the changes. Depress the "Generate and Save account numbers for those items marked "Yes" and the following message will be displayed:
 Continue the above steps, starting with "Auto Create Accounts ..." until ALL of the accounts have been created for all the New Divisions and/or New Departments. If the accounts have not been setup in the GL or the accounts for the department have been generated the following prompt will be displayed:
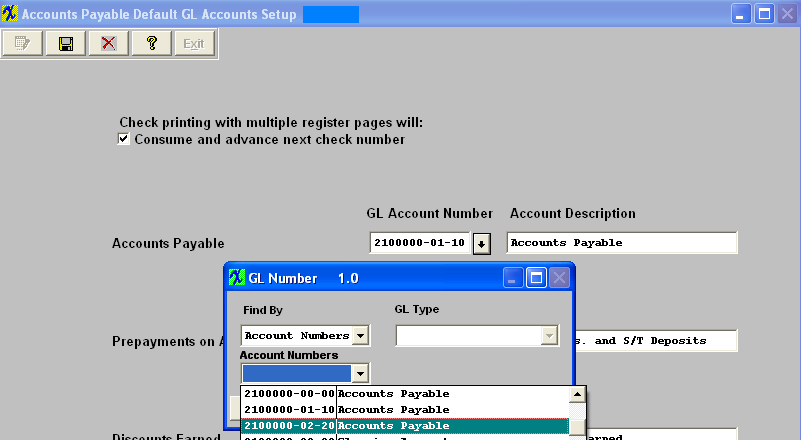
 User MUST then update AP accounts, with the correct account number for the Headquarter ManEx system.
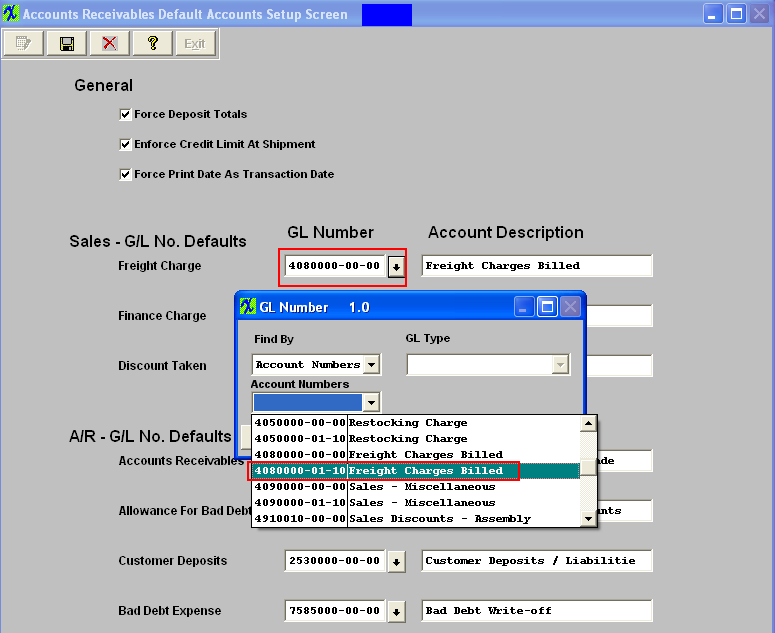
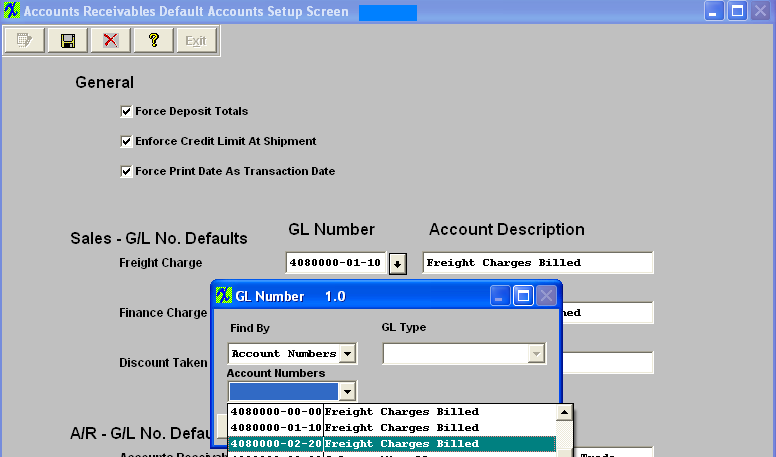
 AR Accounts
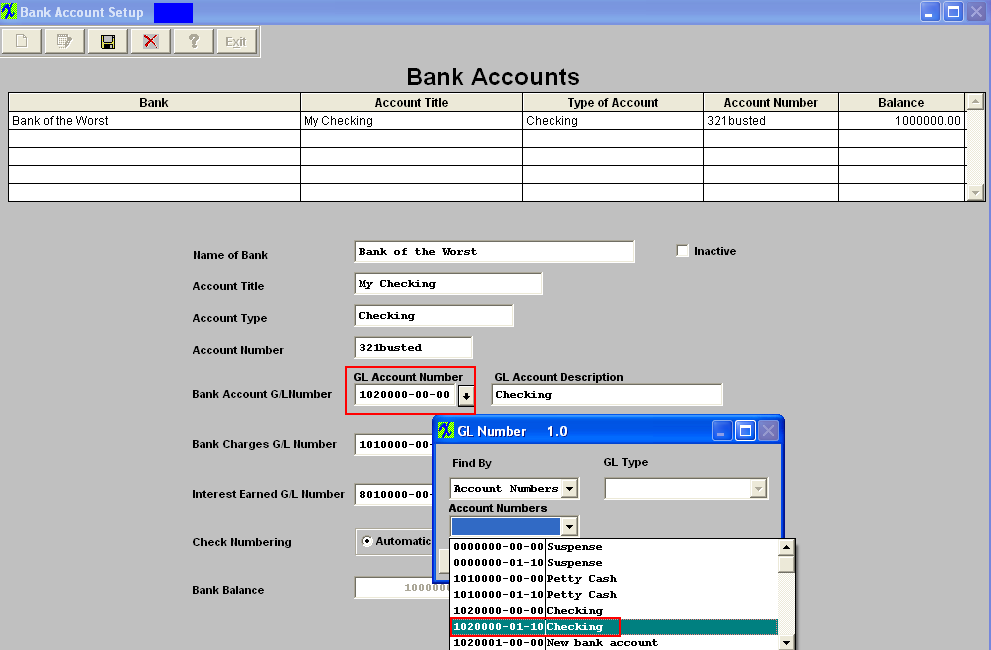
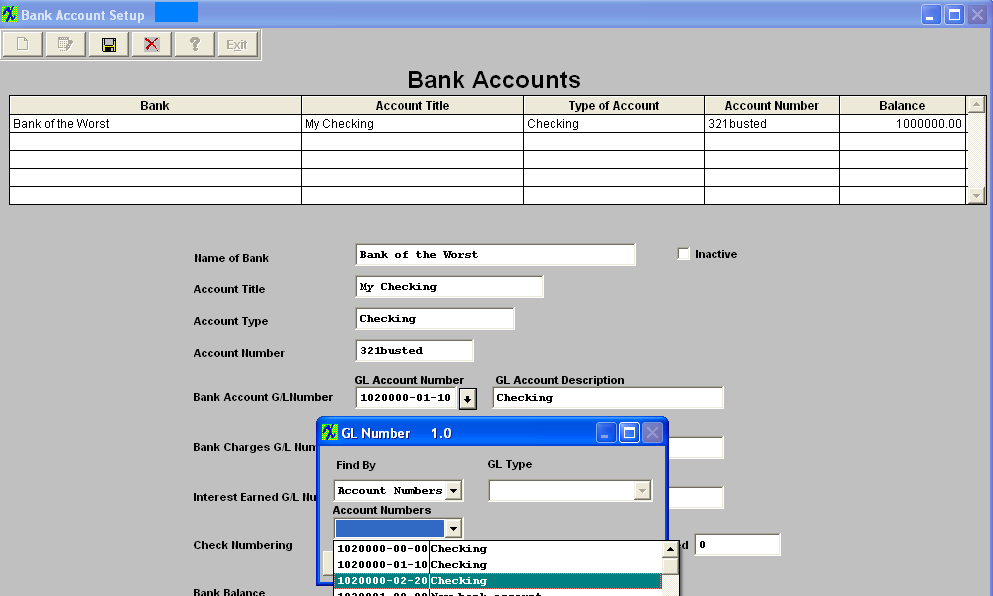
 Bank Accounts
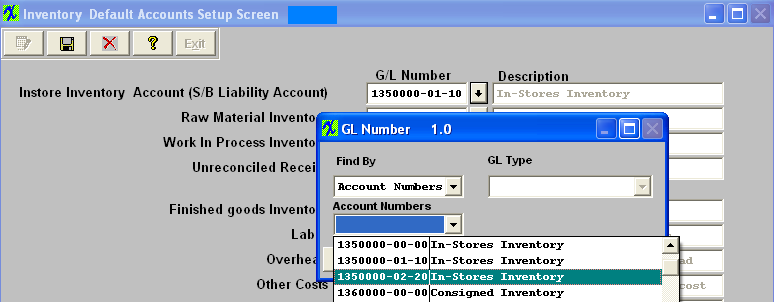
 Inventory Default Accounts
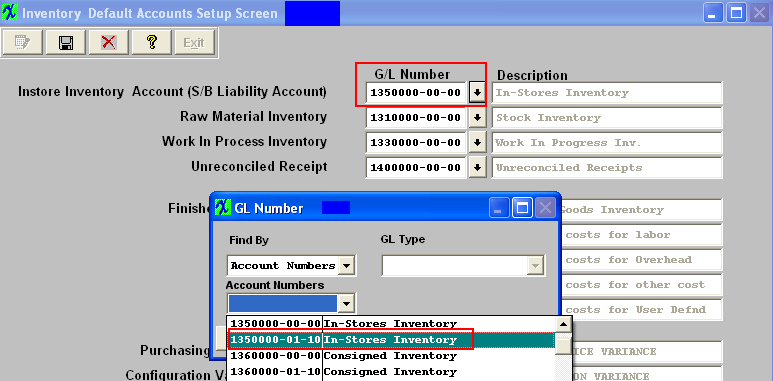 After completing this section: Print the Chart of Accounts to be sure that all of the accounts desired were added. There should be account numbers xxxxxxx-00-00 for all of the accounts. Then there should be account numbers xxxxxxx-01-xx for all of the accounts created for the Headquarters division and xxxxxxx-02-xx for all of the accounts created for the Secondary divisions, etc.
 Where Used: This Setup is required to be completed prior to establishing a Chart of Accounts.
«Mark as Completed in RoadMap Section C Item 2-c» |
| 1.4.2. Setup the GL Departments for Secondary Divisions | ||||
To setup the Secondary ManEx System you can follow the steps in Article #288 along with the steps described below.
The following screen will be displayed:
 First add the Headquarters Division. Depress the Edit button and the "Add New Division" button will become editable. Depress the "Add New Division" button Enter the Division Number and name for the Headquarters division in the fields provided. When setting up the Headquarters Division in the Secondary ManEx System "This is the local division" or "This is the Headquarters division" boxes are NOT to be checked.
Depress the "Save New Division" button. To add a department depress the "Add New Department" button. The Division number will default in, user then can enter in a Department Number and a Department Name in the fields provided. There can be as many as 99 divisions. Each Division can have up to 99 departments. Depress the "Save New Department" button. The depress the Save button at the top of the screen.
 To add the Secondary division to the Secondary ManEx System depress the Edit button and the "Add New Division" button will become editable. Depress the "Add New Division" button Enter a Division Number (other than '00' or the division number setup for the headquarters division) and a Division Name in the fields provided, when setting up the Secondary division to the Secondary ManEx System the "This is the local division" box MUST be checked. Depress the "Save New Division" button. After one or more divisions have been added, the user may EDIT a division, or ADD a Department to a division. The division capability is intended to be used in conjunction with multi plant / division operations. It can also be used without Multi plant / division module, however. There can be as many as 99 divisions. Each Division can have up to 99 departments.
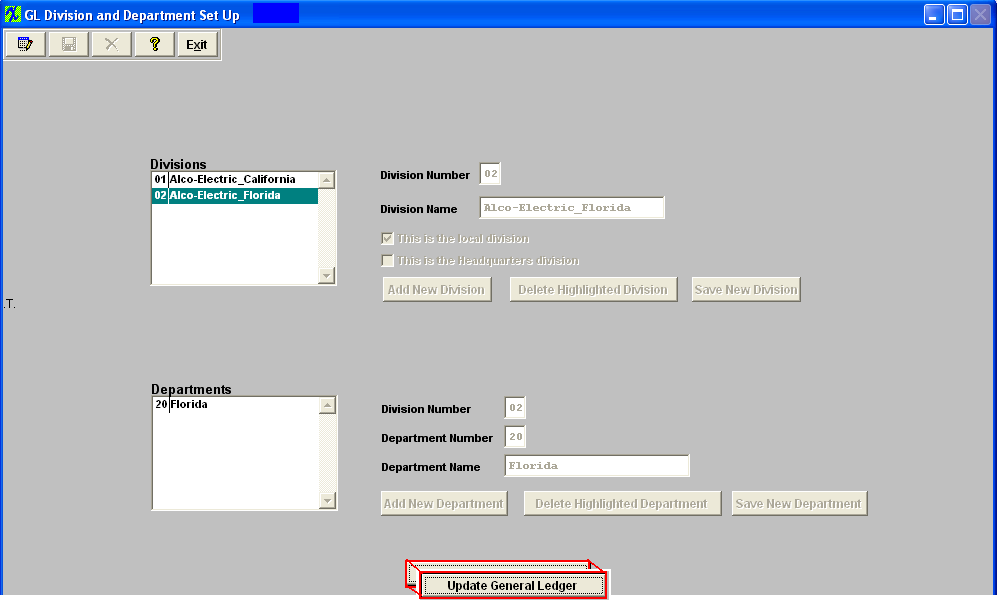
Highlight the Secondary Division and Check the "This is the local division" box. This box MUST be checked when setting up the Secondary division in the Secondary ManEx System. 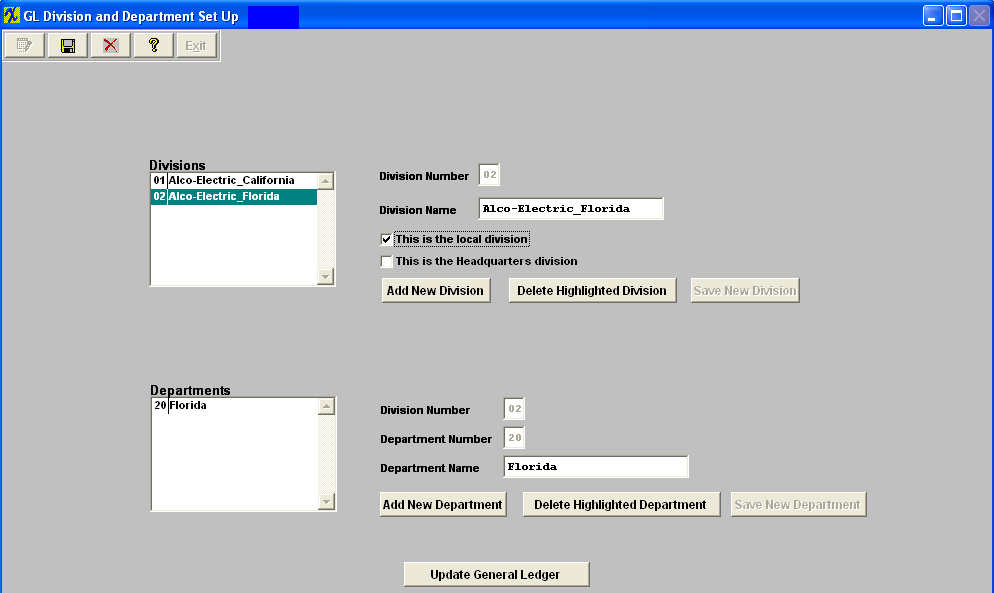 User will need to "Update the General Ledger" information for the Secondary Divisions 02, 03, etc. Highlight the Secondary Divison and depress the "Update General Ledger" button located at the bottom of the screen.
 Depress the Edit button, select the Division, Department, and the GL Account Type from the pull downs. Depress the Edit button, select the Division, Department, and the GL Account Type from the pull downs.
 Once these items have been selected user may then depress the "Auto-create accounts for selected Div/Dep & GL Account Type" button, and the following screen will appear:
 All of the accounts to be generated will appear on the screen for the new Divison and Department. If there are some accounts you want to exclude, turn the selection to “No”. Note: You will want to exclude all Titles, Headings, Totals and Closing accounts, leaving only the Posting accounts. (Otherwise you will have duplicate titles, etc. on the reports.) Depress the Abandon changes button to abandon the changes.
Depress the "Generate and Save account numbers for those items marked "Yes" and the following message will be displayed:
Continue the above steps, starting with "Auto Create Accounts ..." until ALL of the accounts have been created for all the New Divisions and/or New Departments. If the accounts have not been setup in the GL or the accounts for the department have been generated the following prompt will be displayed:
User MUST then update AP accounts, with the correct account number for the Secondary ManEx system.
 AR Accounts
 Bank Accounts
 Inventory Default Accounts
 After completing this section: Print the Chart of Accounts to be sure that all of the accounts desired were added. There should be account numbers xxxxxxx-00-00 for all of the accounts. Then there should be account numbers xxxxxxx-01-xx for all of the accounts created for the Headquarters division and xxxxxxx-02-xx for all of the accounts created for the Secondary divisions, etc.
Where Used: This Setup is required to be completed prior to establishing a Chart of Accounts.
«Mark as Completed in RoadMap Section C Item 2-c» |
