| 1.1. Prerequisites for AP Recurring Entries |
Users MUST have full rights to the "Manual AP Entry" in Accounting Security . Users with “Accounting Security Supervisor” rights will automatically have access. |
| 1.2. Introduction for AP Recurring Entries | The Recurring Payables selection provides the ability to set up a payment to a supplier on the frequency of your choosing and for the number of payments you determine. This module is also used to release recurring payables into the Accounts Payable Aging module.
|
| 1.3. Fields & Definitions for AP Recurring Entries |
| 1.3.1. Maintain Recurring AP Entry | |
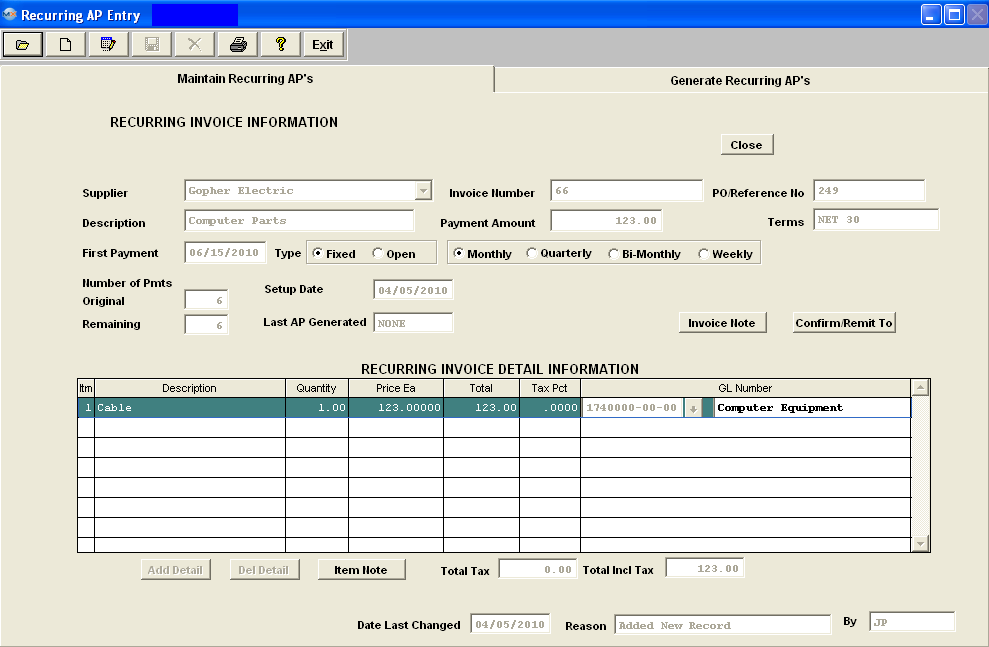
Maintain Recurring AP’s tab Field Definitions
RECURRING INVOICE INFORMATION
 |
To Close the highlighted Recurring AP record |
|
Supplier
|
Supplier Name
|
|
Invoice Number
|
The Invoice No
|
|
PO/Reference No
|
The PO number or other reference.
|
|
Description
|
The description of the recurring payable. |
|
Payment Amount
|
The amount of the recurring payment for each payment made.
|
| Terms |
Payment Terms |
| First Payment |
The date the 1st recurring payment is scheduled to be made. |
|
Type
|
The type of recurring payment, either Fixed (a definite number of payments) or Open (number of payments is indefinite).
|
|
Frequency
|
The payment interval, either monthly, quarterly, Bi-monthly, or Weekly
|
|
Number of Pmts - Orginal
|
The Original Number of payments (if Type is defined as Fixed).
|
|
Number of Pmts - Remaining
|
The number of payments remaining (if Type is defined as Fixed).
|
|
Setup Date
|
The date the Recurring AP was Setup. |
|
Last AP Generated
|
The last scheduled payment date which was generated via the Generate Recurring AP’s tab.
|
 |
If lit in red, there is a note regarding the highlighted item.
|
 |
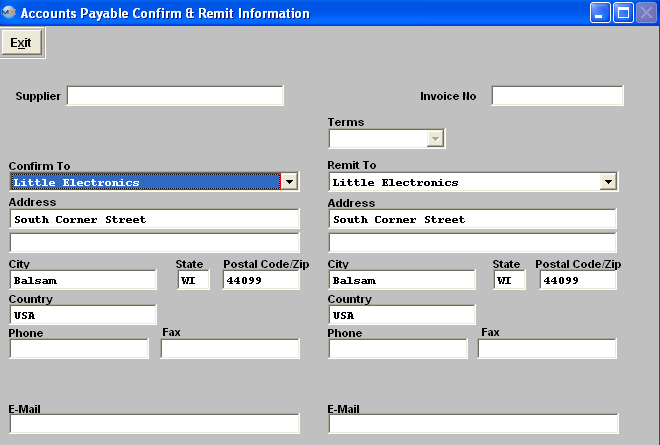
This screen will display the confirm and remit to address for the supplier.
|
RECURRING INVOICE DETAIL INFORMATION
|
Itm
|
The item number on the Invoice
|
|
Description
|
The description for that line item on the Invoice.
|
|
Quantity
|
The Qty for that line item from the Invoice. We allow a fraction of a whole number in the qty within this module, because user may need to create a manual invoice for something that is measured in inches, feet, etc. Or another example is an invoice for 1.75 hours of work on something.
|
|
Price Ea
|
Price each for that line item from Invoice.
|
|
Total
|
Total Price for that line item from invoice.
|
|
Tax PCT
|
Tax that was charged for that line item from invoice.
|
|
GL Number
|
The General Ledger Account number where the payment will be charged.
|
 |
Depress this button to Add another item |
 |
Depress this button to Delete a highlighted item |
 |
If lit in red, a note exists regarding the highlighted item
|
|
Total Tax
|
This is the total of the sales tax on all of the line items.
|
|
Total Incl Tax
|
This is the grand total of the invoice due the supplier.
|
|
Date Last Changed
|
The last date on any changes made to the Recurring AP record.
|
|
Changed By
|
The users initials from the last change to the Recurring AP record.
|
|
Reason
|
The reason for the Recurring AP record.
|
|
| 1.3.2. Generate Recurring AP Entry |
This screen is used to generate the Recurring Accounts Payable and set them up for payment by transferring them into the A/P Aging module.
Generate Recurring AP’s tab Field Definitions
|
Ending Date
|
This field is to determine through which date the user wants to generate recurring payables.
|
 |
Depressing this button will bring the ungenerated Recurring Payables through the Ending Date into the screen.
|
 |
If lit in RED, the item note button will display the note for the recurring payable highlighted.
|
 |
Depressing this button will cause the selected recurring payables to forward into the A/P Aging module.
Note: If you skip selecting one or more payments and select a later payment for same recurring AP for transfer to AP, the earlier payments will not be generated in the later sessions and will be lost.
|
|
Sel
|
If this column is checked, the recurring payable will be selected for Transfer to Accounts Payable Aging module.
|
|
Supplier Name
|
The name of the supplier for the recurring payable.
|
|
Pmt Amount
|
The amount of the payment to the supplier.
|
|
Due Date
|
The scheduled due date for the recurring payable.
|
|
Type
|
The recurring payable type, either Fixed (a definite number of payments) or Open (a variable number of payments).
|
|
Frequency
|
The interval of payment, either Monthly, Quarterly, Bi-monthly, or Weekly.
|
|
Description
|
The description of the recurring payable.
|
|
PO/Reference
|
The PO or other reference for the recurring payable.
|
|
Invoice No
|
The supplier assigned number for this recurring invoice.
|
|
| 1.4. How To ..... for AP Recurring Entries |
| 1.4.1. Find a Recurring AP Entries | |
|
Enter the SQLMANEX.EXE (within the ManEx root directory)
This action will then prompt the user for a password
|
 |
|
The following screen will be displayed, select Accounting/Accounts Payable/ AP Recurring Entry
|
 |
The following screen will be displayed:
|
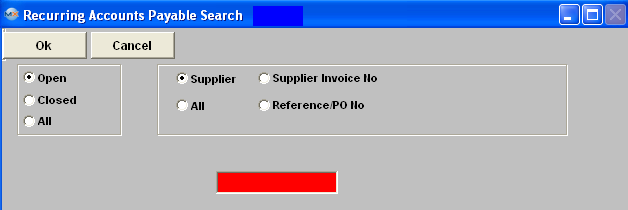
Depress the Find recond action button, the following screen will appear:
Select the desired Filter: by selecting the appropriate radio button– Open, Closed or All.
Select the desired Find: by selecting the appropriate radio button – Supplier Name, Supplier Invoice No., All, or Reference/PO No.
Enter the information into the red box, depress the enter key and the information will populate the screen.
|
 |
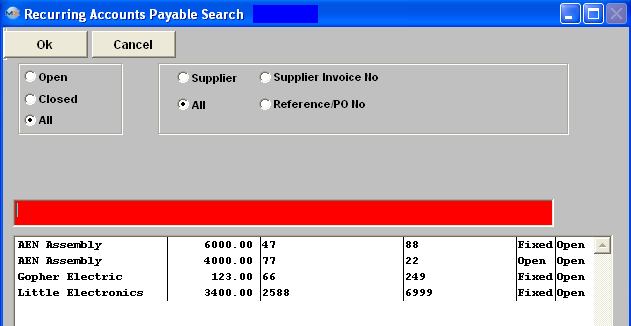
If user selects ANY of the Filters and Find by All - a screen will appear listing all the AP Recurring Entries per the filter selected, alphabetically by Supplier name, Payment amount, Invoice number, PO/Reference number, Type, and AP Recurring status.
The user has the option to view the AP Recurring Entries by either entering the Invoice number into the red box, or scrolling down the list, highlighting the desired record and double click on it.
|
 |
Filter:
| Open |
Recurring AP Entries that are open |
| Closed |
Recurring AP Entries that are closed |
| All |
All Records |
Sort By:
| Supplier |
Must Enter in The Supplier Name |
| Supplier Invoice No |
Each Supplier Invoice Number |
| All |
All Records |
| Reference/PO No |
Enter Reference No or PO No |
Once the selection is made, the screen will update with data from the selection:
|
| 1.4.2. Add a Recurring Payment |
|
Enter the SQLMANEX.EXE (within the ManEx root directory)
This action will then prompt the user for a password
|
 |
| The following screen will be displayed, select Accounting/ Accounts Payable/Manual A/P Entries |
 |
The following screen will be displayed:
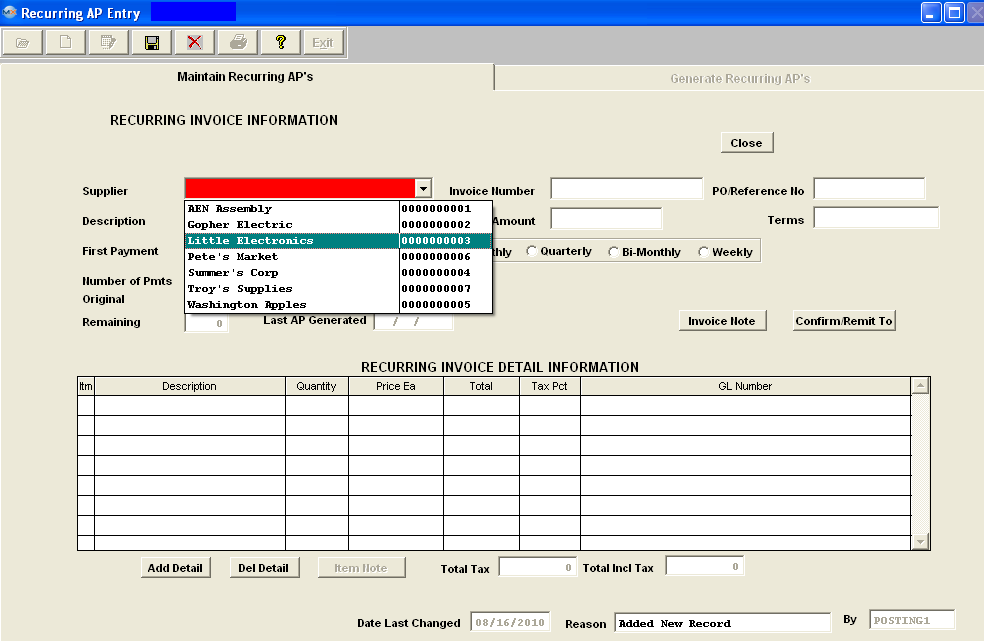
Depress the Add button at the top of the screen. Enter in your password. Depress the down arrow in the Supplier Name column. Select the Supplier from the drop down screen.
Complete the header information; Invoice Number, PO/Reference No, Description, Payment Amount, (Terms are defaulted in from Supplier info)
|
Enter the date of the First Payment.
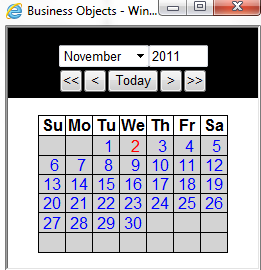
If user would like to use the calendar to select the date they can double click on the 1st Payment field and the following Calendar popup will appear.
|
 |
Select the Type (Fixed - is for a definite number of payments, Open - is for an indefinite number of payments)
Select the frequency; Monthly, Quarterly, BiMonthly, or Weekly. If the Recurring Payable is for a Fixed number of payments enter the Original Number of Pmts.
Once all the Header Information is complete depress the "Add Detail" button located at the bottom of the screen.
Enter the Item Number, Description, Quantity, Price Each, Tax Pct.Type (if applicable) and the General Ledger Number. Note: The "Total Incl Tax" must equal the "Payment Amount" before the system will allow record to be saved.
|
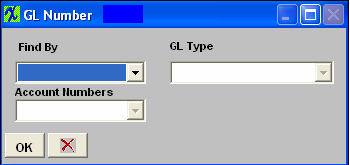
If you want to select the General Ledger Number, double click in that field.
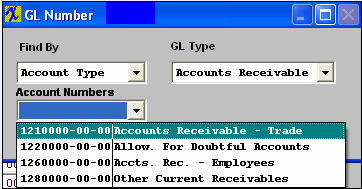
The following screen will appear:
|
 |
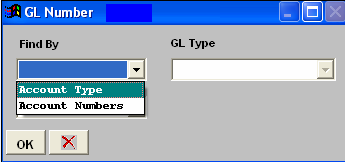
| Depress the arrow next to the Find By Field. Select to find by Account Type or Account Numbers. |
 |
|
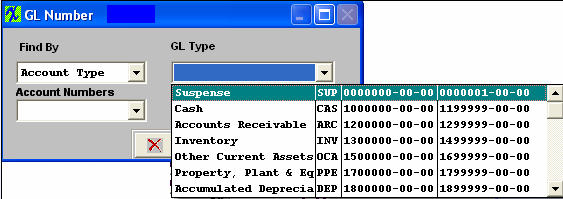
If you select Account Type, the following list will appear:
Select the GL Type from the pulldown.
|
 |
|
Select the desired GL Account Number from the pulldown. Depress the OK button.
|
 |
If you want to add an Item Note, depress the "Invoice Note" button, enter the note, and depress the Save button.
If you want to view or edit the CONFIRM and REMIT TO addresses, depress the "Confirm/Remit To" button. The following screen will be available:
You may select or change the TERMS by depressing the down arrow next to the Terms field and selecting the desired terms for the recurring invoice.
You may select or change the CONFIRM TO or REMIT TO address for the vendor by depressing the down arrow next to that field. Select the desired address for the recurring invoice.
Depress the Save button at the top of the screen and user will receive the following message:
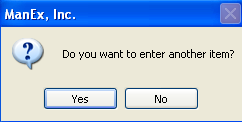 .
Note: If the two total amounts do not exactly match user will receive the following message:
|
| 1.4.3. Edit a Recurring AP Entry |
|
Enter the SQLMANEX.EXE (within the ManEx root directory)
This action will then prompt the user for a password
|
 |
The following screen will be displayed, select Accounting/Accounts Payable/AP Recurring Entry
|
 |
The following screen will be displayed:
Using the Find Procedures to find a Recurring AP Entry Record. Depress the Edit button and enter in your password.
Note: If there has been ANY transfer from Recurring to A/P Aging, the user will NOT be allowed to Edit or Delete. Instead, use the Close button to set the recurring to Inactive.
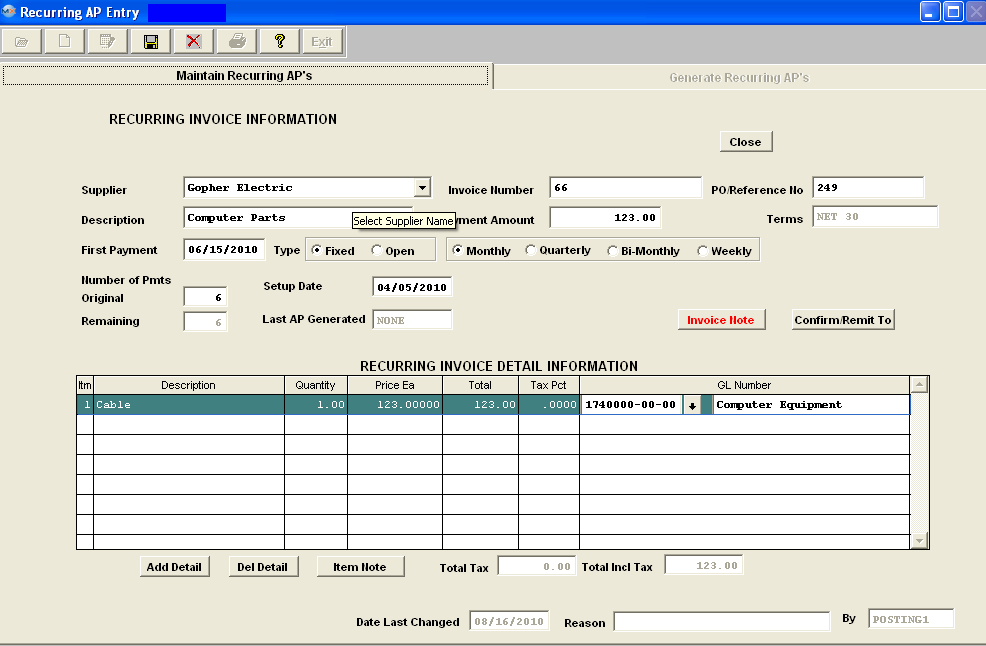
Make the desired changes. Enter in the Reason for the change. If you try to Save record without entering a the Reason you will receive the following message:
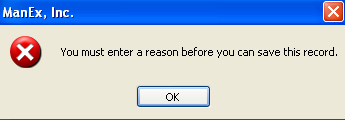
If you change any of the amounts, make sure that the "Payment Amount" field and the "Total Incl Tax" fields are equal. Note: If you change the Detail Total pricing, you MUST also change the Payment Amount at the top of the screen. If the two totals do NOT match user will receive the following message:

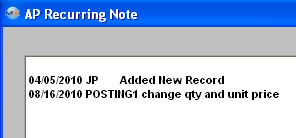
The user may add notes to both the Invoice Notes and the Item Notes. Depress the Edit button. Depress the Note button. Depress the Edit button. Type in the note.Depress the Save button. Depress the Exit button. The note button will light up in red.
The user may also change information in the Confirm/Remit To screen. Depress the Edit button. Depress the Confirm/Remit To button. The following screen will appear:
The user may change the TERMS by depressing the down arrow next to the Terms field and selecting a new term.
The user may also change the CONFIRM TO address or the REMIT TO address by depressing the arrows next to those fields and selecting a new address. Once the edited changes are complete, depress the Save button.
For future finds, the most recent edited change reason will display. If there was more than one edited change, depress the Invoice Note button to see all of the changes.
|
| 1.4.4. Delete a Recurring AP Entry |
|
Enter the SQLMANEX.EXE (within the ManEx root directory)
This action will then prompt the user for a password
|
 |
|
The following screen will be displayed, select Accounting/Accounts Payable/AP Recurring Entry
|
 |
The following screen will be dispalyed:
enter your password, you will receive the following warning:
Depress the Yes button to complete the deletion.
Note: Upon Deletion the system will then completely remove the original transaction for the Recurring AP Entry.
|
| 1.4.5. Generate a Recurring Payable |
|
Enter the SQLMANEX.EXE (within the ManEx root directory)
This action will then prompt the user for a password
|
 |
|
The following screen will be displayed, select Accounting/Accounts Payable/Manual A/P Entries
|
 |
The following screen will be displayed:
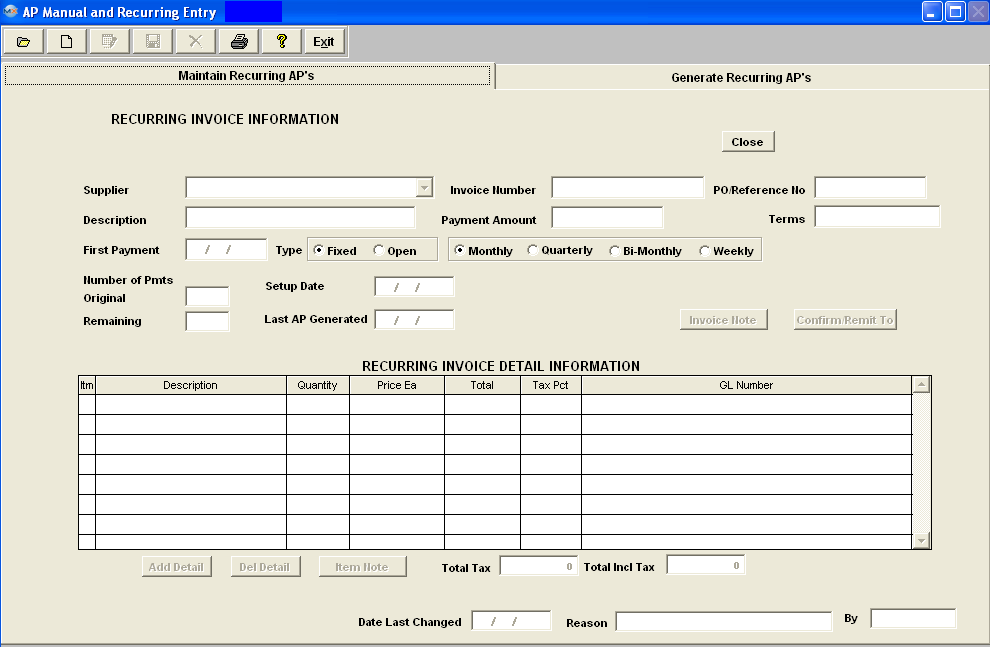
Enter the Generate Recurring AP's tab
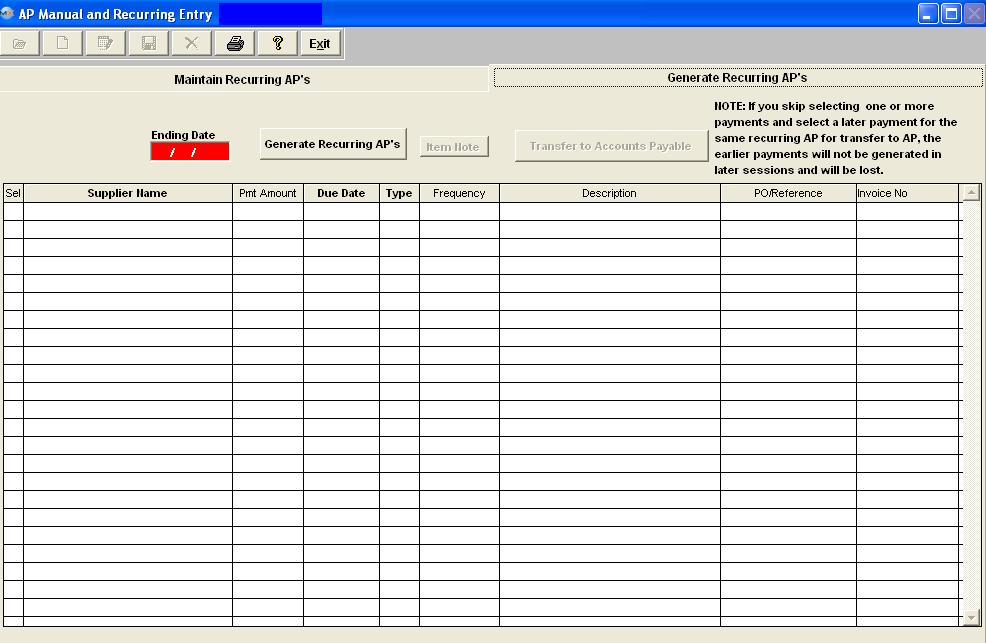
Enter in an Ending Date through which you wish the Recurring Payables to generate. Depress the "Generate Recurring AP's" button. Enter in your password. The ungenerated recurring payables through the Ending Date will populate the screen.
Go down the Select column and check any Recurring Payable, which you want to transfer to Account Payable Aging module. Once you have made your selection(s) depress the "Transfer to Accounts Payable" button.
NOTE: If the users skip selecting one or more payments and select a later payment for the same recurring AP for transfer to AP, the earlier payments will NOT be generated in later sessions and WILL BE LOST.
|
| 1.5. Reports for Recurring AP Entry | |
To obtain the AP Recurring Payable Reports within the Web, select the WEB Print button from the ManEx action buttons at the top
of the screen. For further detail on How the Reports work
within the Web refer to Article #5477.
Note: In order to access the Reports
within the Web the Company Root URL must be setup within the System Appearance module and user must be linked to web within the System Security Module.

Select
the Report Type: AP RECURRING - A List of Reports will be displayed that are
available on the Web for AP RECURRING
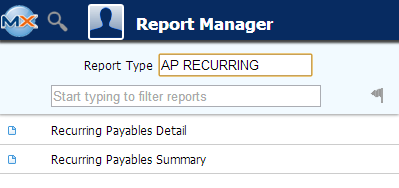
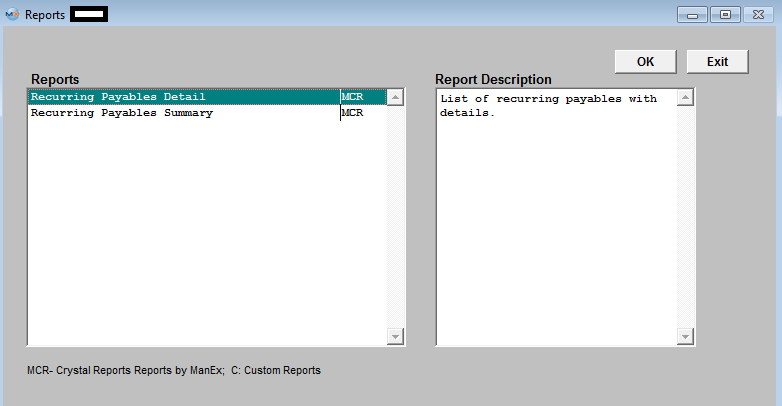
To obtain the AP Recurring Payable reports, select the Print button from the ManEx action buttons at the top of the screen.
The
following reports screen will display a list of reports that are available on
the ManEx Desktop:
Highlight the report. Depress the OK button.
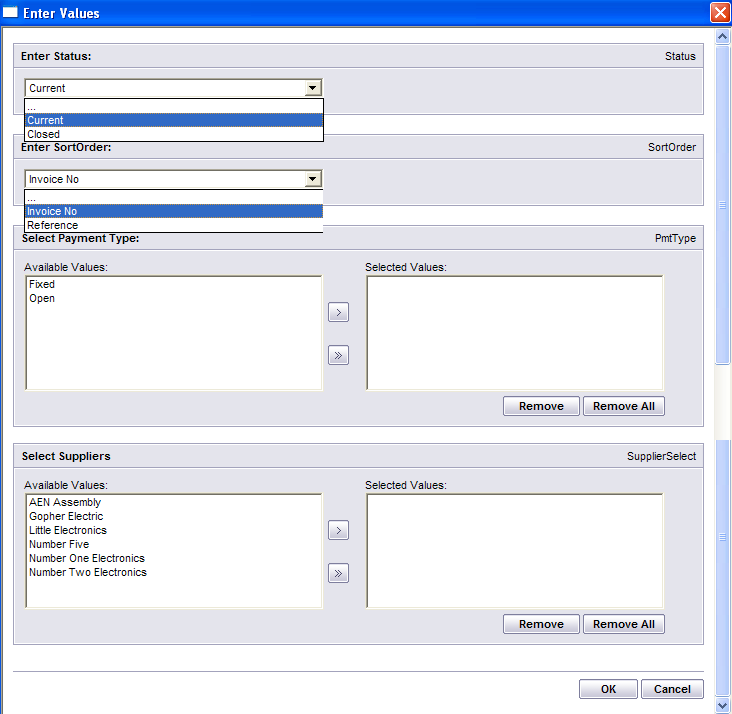
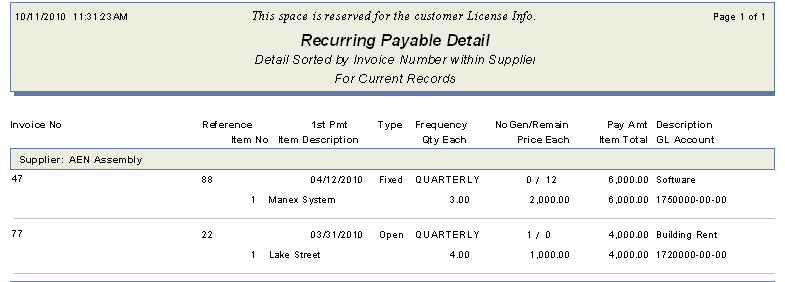
Recurring Payables Detail
|
Select the desired Status: Current or Closed.
Select the Sort Order: Invoice No or Reference.
Select the applicable Payment Type and depress the > button. To select both depress the >> button.
Select the applicable Supplier(S) and depress the > button. If you want all of the Suppliers, depress the >> button.
Then depress the OK button.
|
 |
The following report will be displayed:
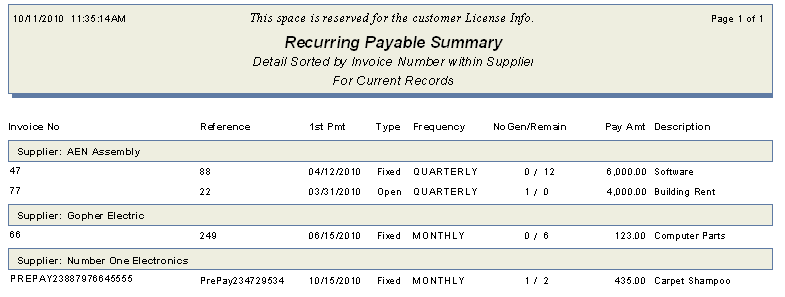
Recurring Payable Summary
Select the desired Status: Current or Closed,
Select the Sort Order: Invoice No or Reference
Select the applicable Payment Type, and depress the > button. To select both depress the >> button.
Select the applicable Supplier(S) and depress the > button. If you want all of the Suppliers, depress the >> button.
Then depress the OK button.
|
 |
The following report will be displayed:
|
|





 .
. 


