| 1. Purchase Setup |
| 1.1. Supplier Information |
| 1.1.1. Prerequisites - Supplier Information | ||||||||||
After activation, "Supplier Information" access for each user must be setup in the ManEx System Security module. Users with “Supervisor Rights” will automatically have access.
|
| 1.1.2. Introduction for Supplier Infomration |
The Supplier Module is used to enter the details about Suppliers. This information is used to prepare purchase orders and receivers, as well as establish defaults to be used when new purchase orders are created for a supplier. A supplier may have more than one remit-to address, if there are different divisions for the supplier with different accounting departments. One supplier remit-to address will be identified as the default address to be used in the creation of new purchase orders. One supplier confirm-to address will be identified as the default address in new purchase orders. Also, terms and conditions identified in these screens will be used as defaults for purchasing, receiving and accounting. The user has the opportunity to modify the default information at the time a new purchase order is created. The Receiving and Billing Information is the user’s addresses which will print on the Purchase Order. |
| 1.1.3. Fields & Definitions for Supplier Information |
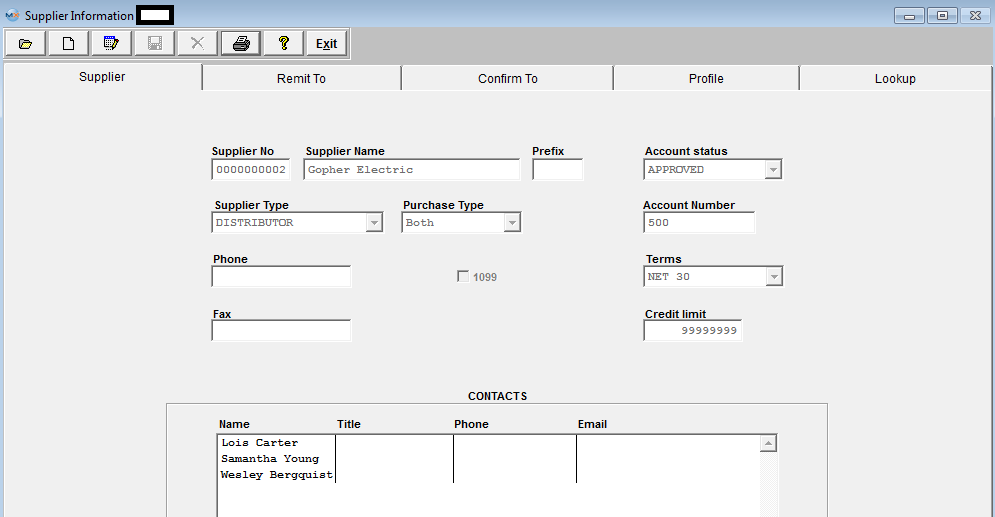
| 1.1.3.1. Supplier Tab | ||||||||||||||||||||||||||||||||
Supplier Information tab field definitions
CONTACTS
|
| 1.1.3.2. Remit To Tab | ||||||||||||||||
 Remit To tab field definitions
The name of the check payee. The mailing address where the remittance will be sent. How to contact the remittance address personnel. The contact at the remittance address.
|
| 1.1.3.2.1. Supplier e-Bank Information | ||||||||||||||||||||||||||||||||||||||||||||||||
Information populated here would be the Supplier's banking information
|

| 1.1.3.3. Confirm To Tab | ||||||||||||||||
 Confirm To tab field definitions
|
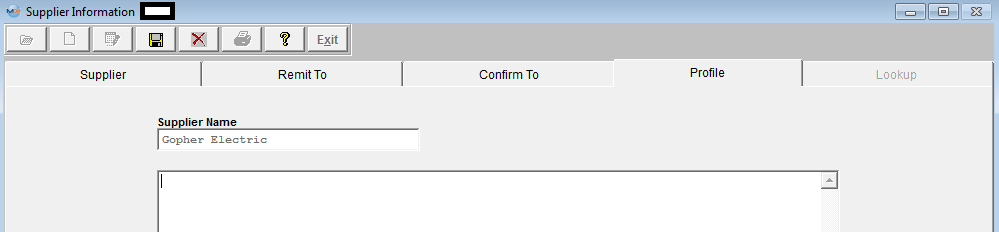
| 1.1.3.4. Profile Tab |
This tab is available for the user to make notes/comments about the Supplier.
|
| 1.1.4. How To .... for Supplier Information |
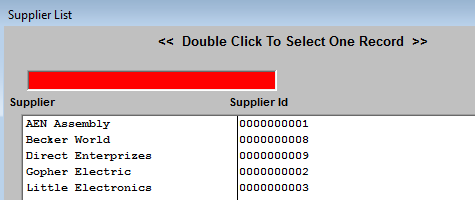
| 1.1.4.1. Find Supplier Information | ||||||
The following screen will be displayed:
|
| 1.1.4.2. Add Supplier Information | ||||||||||||||||||||||||
|
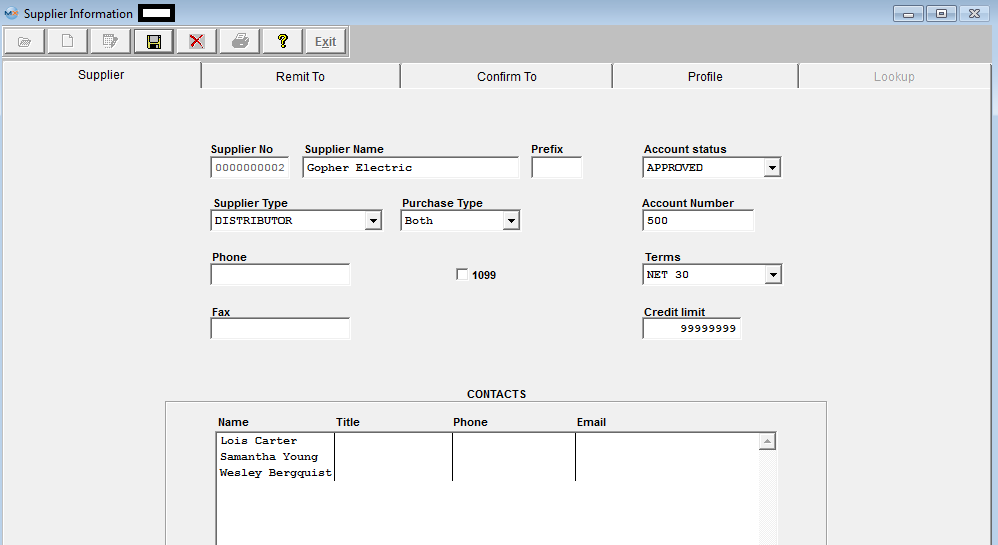
The following screen will be displayed:
To ADD a new Supplier, the user selects the Add action button, enter password, this enables the fields on the screen for data entry.
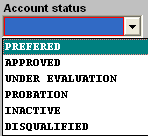
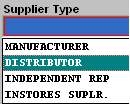
Enter the following fields: The Supplier Number assigned to the Supplier. If automatic numbering assignment was selected in Number System Setup, it will be completed when the data is saved. If manual, it must be entered. The Supplier Name. A Prefix if desired.
Enter the user’s Account Number with the Supplier. Enter the Phone Number of the Supplier. Check the box nex to (1099) if the Supplier is to receive a 1099.
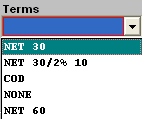
The Terms the Supplier has for the user, such as Net 30, 2% 10, COD, etc..... Select from the pull down: Enter the Fax Number of the Supplier.
Enter the Credit Limit established by the Supplier for the user.
When this screen is viewed for an existing Supplier, Contacts entered in the Contacts Module will show for this Supplier. This field is NOT editable from this module.
After completing the Supplier information screen, the user may tab (clicks on the next) to the Remit To screen.
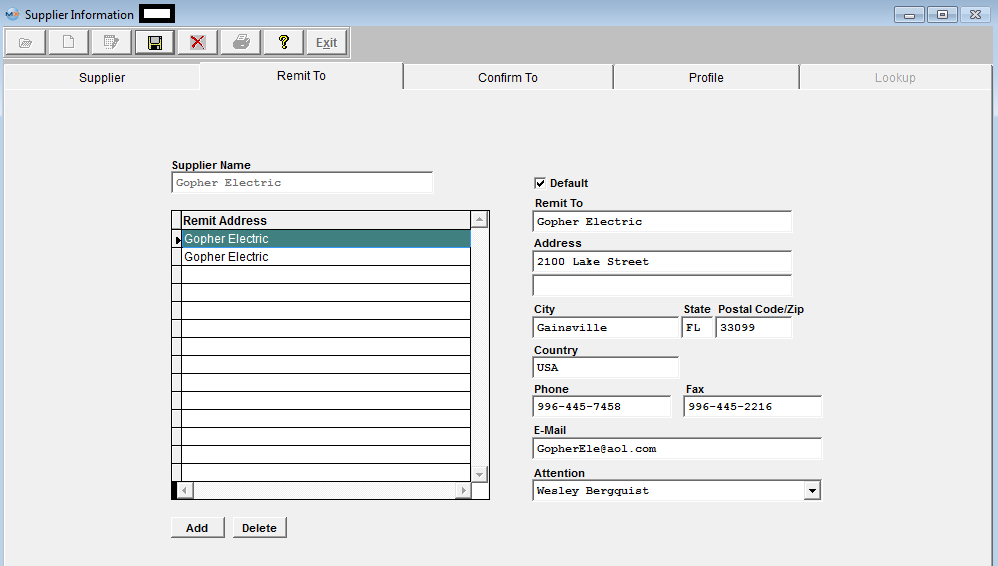
In this screen, the user defines the Supplier information for payment purposes. The Supplier Remit-To Directive buttons will now be active:
Enter information as follows: The name of the Supplier, Defaulted from the first screen, but may be over-written. A list of Remit-To addresses created for the Supplier, from which to choose for editing data. The name of the organization to which payment is to be sent. (It may be a different division.) Enter the Supplier Remit-To Address (may use two lines). Enter the City, State and Zip Code for the Supplier Remit-to Address.
Enter the Supplier Country.
Enter the phone number at the Supplier’s Remit-to Address.
Enter the Fax Number of the Supplier’ Remit-to Address.
Enter the e-mail address of the Supplier Remit-to Address.
The Contact Name at the Remit-to address (if established in the Contacts Module). After completing the Remit To information screen, the user may tab (clicks on the next) to the Confirm-To screen.
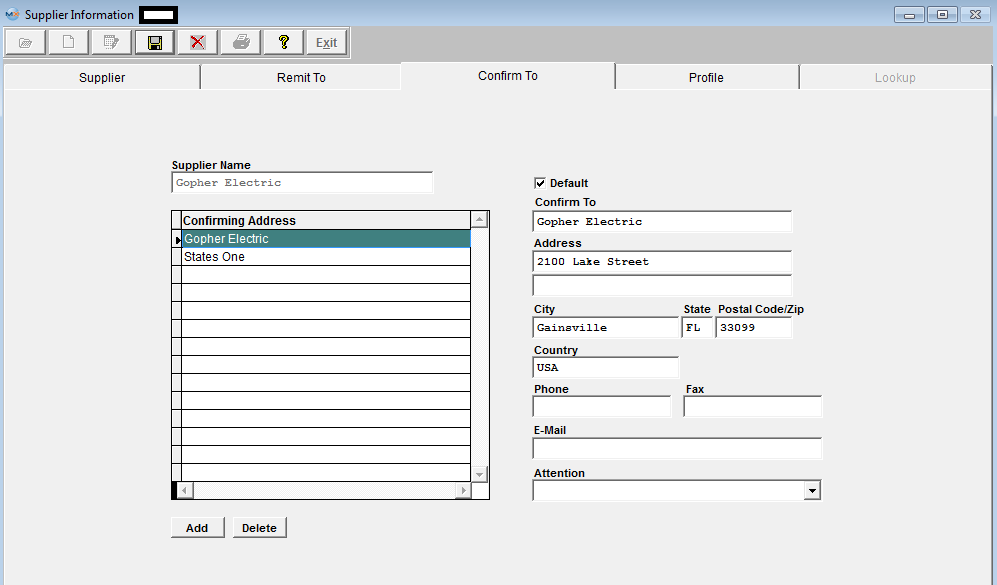
In this screen, the user defines the Supplier information for ordering purposes. This screen and fields are identical to the Remit-to screen, except that the information will be used for the mailing address of the Supplier. Pressing the Add action button will automatically fill the information from the Remit-to screen, if it has been completed. All data may be edited and saved, or new data may be added to the database. Note: There must be a default Confirm To address. After completing the Confirm-To screen, the user may tab (clicks on the next) to the Profile screen.
In this screen, the user defines the Supplier Profile notes for internal purposes. This screen is a memo field that may be used to record Supplier company information. Once all of the data entry is complete. Depress the Save action button. You will be asked if you want to create another Supplier. |


| 1.1.4.3. Edit Supplier Information |
Depress the Edit action button. All fields on the Supplier tab will be enabled for modification.
 All fields on the Remit To tab will be enabled for modification.
Note: The system will keep the address information (on existing PO's) that was actually selected at the time the PO was created. If you add a new Supplier Remit To address and mark the new address as the Default. The previously created PO's will still carry the original Remit to (ManEx cannot assume that the user wants to change all Remit To's across the board for already created and approved PO's). The user will be required to edit each PO that the change affects and update the Remit to with the new default (any new PO's created will properly take the new default).
The Invoices created through the PO Reconciliation module also carry the original Remit to Address information. Any invoice that already was created and remains on your AP Aging will need to be edited through the Manual AP Entry screen. IF it was already released to the GL at that time, I don’t think that the Edit feature would be available. If you are unable to edit the Remit to information via the Manual AP Entry, then you can control the Remit to information that will print on the AP Check, by creating a Manual check through the Check Maintenance screen.
If you completely delete a Remit To address any previously created PO's will no longer have a Remit to address to refer to, therefore the remit to information on existing PO's will be blank. The AP check module prints the checks per the Remit To information that is associated with each PO, so the address printed on the check will also be blank. So, each PO that still has invoices residing within the AP Aging, will have to be edited and the Remit To information will have to be updated with the new address, if a Remit To address is deleted. We would suggest that the person making changes to the Remit To Address information is careful before deleting one from the system. You have to make sure that any record that has already been associated with that record has been processed through the system, and/or updated with the new address information.
All fields on the Confirm To tab will be enabled for modification.
All fields on the Profile tab will be enabled for modification.
 |
| 1.1.5. Reports - Supplier Information | ||||
|
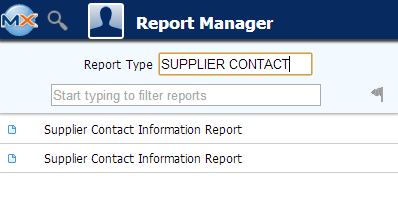
To obtain the Supplier Information Reports within the Web, select the WEB Print button from the ManEx action buttons at the top of the screen. For further detail on How the Reports work within the Web refer to Article #5477. Note: In order to access the Reports within the Web the Company Root URL must be setup within the System Appearance module and user must be linked to web within the System Security Module
Select the Report Type: SUPPLIER OR SUPPLIER CONTACT - A List of Reports will be displayed that are available on the Web
for SUPPLIER OR SUPPLIER CONTACT
To obtain the Sales Order Reports within the desktop, select the Print button from the ManEx action buttons at the top of the screen.
The following reports screen
will display a list of reports that are available on the ManEx Desktop:
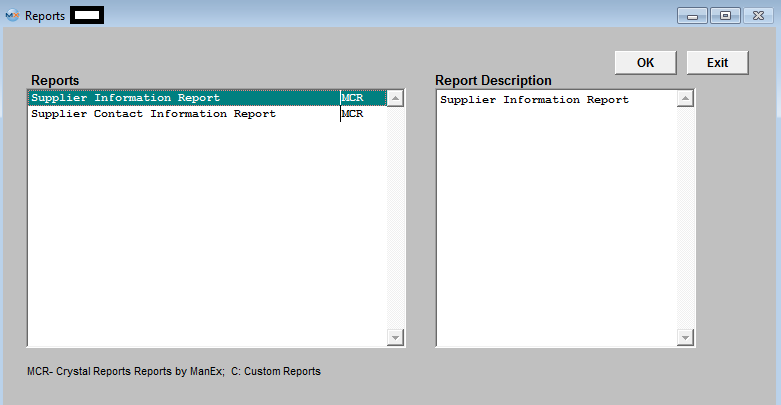 Highlight the report desired and Depress the OK button. Supplier Information report
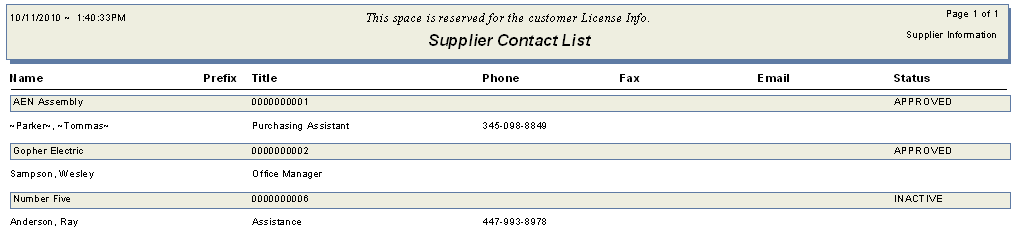
The following report will print: 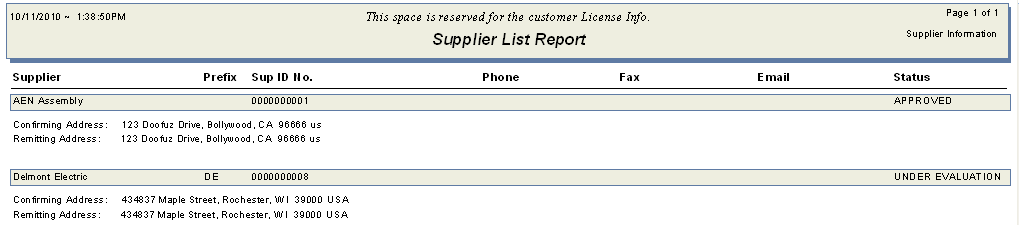 Supplier Contact Information report
The following report will print:
|

| 1.2. Supplier Contacts Information |
| 1.2.1. Prerequisites for Supplier Contact Information | ||||
Prerequisites for Entering a New Contact:
After activation, "Supplier Contact Information" access for each user must be setup in the ManEx System Security module. Users with “Supervisor Rights” will automatically have access.
The Contact must refer to a Supplier, which has been set up in the Supplier module. A picture of the contact may optionally be included as a memory jogger, but the picture must already be available to pickup in a picture format.
|
| 1.2.2. Introduction for Supplier Contact Information |
The Contact Module is used to record the details of supplier contacts. Contacts may be of any nature, but must be associated with a supplier. Manex provides the user with the ability to maintain both professional and personal details about a contact, including provision for personal tastes and affiliations. Contacts must be entered in this module if they are to be included in the supplier remit-to and confirm-to data fields at a later time. A contact who has moved to another supplier may have a new supplier assigned to him/her without having to re-enter their personal data. |
| 1.2.3. Fields & Definitions for Supplier Contact Information |
| 1.2.3.1. Business Tab | ||||||||||||||||||||||||||
Fields & Defintions
|
| 1.2.3.2. Personal Tab | ||||||||||||||||||||||
Fields & Definitions
|

| 1.2.3.3. Lookup Tab | ||||||||||
Fields & Defintions
|
| 1.2.4. How To .... for Supplier Contact Information |
| 1.2.4.1. Find a Supplier Contact | ||||
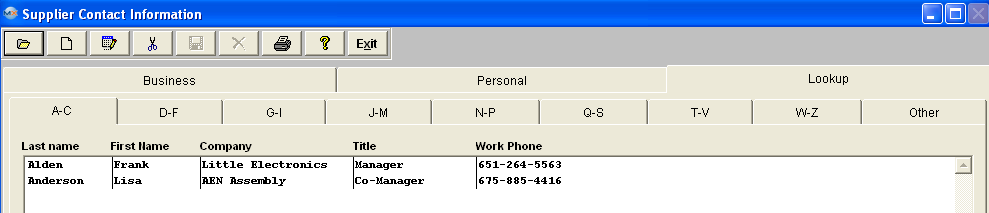
The following screen will be displayed:
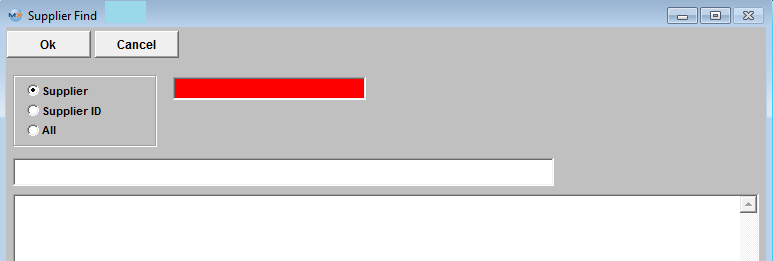
There are two ways to Find Existing Supplier Contacts: 1. By using the Find button located in the tool bar at the top of the screen. The following screen will appear: Select the desired Filter: by selecting the appropriate radio button - Active, InActive, or All. Select the desired Find: by selecting the appropriate radio button - Last Name, First Name, or Supplier Enter the information into the red box, depress the Enter key and the information will populate the screen.  2. Depress the Lookup tab. This screen allows the user to locate a supplier contact alphabetically. Double click on the supplier contact name will bring the associated data into all screens without having to use the FIND action button. This screen will list all of the supplier contacts entered beginning with the Last Name, First Name, Company, Title and Contact Phone number (not the company phone number).
|

| 1.2.4.2. Add a Supplier Contact | ||||||||
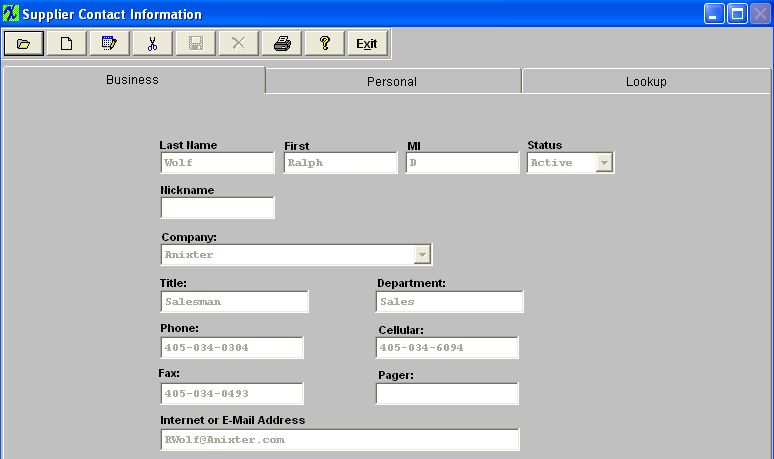
The following screen will be displayed:
Depress the Add action button. The user will be prompted for an authorized password. Type in the last name of the contact being added. Type in the first name of the contact being added. Type in the middle initial of the contact. Select the status of the Customer Contact, either Active or Inactive. Type in the nickname of the contact. Select the company to which the contact belongs by depressing on the down arrow located on the right hand side of this field and highlighting the selection. Type in the title of the contact at the supplier. Type in the phone number and/or extension of the contact at the supplier (may be different than the supplier main number). Type in the FAX number of the contact at the supplier (may be different than the supplier main number). Type in the E-Mail address of the contact. Type in the department at the supplier in which the contact works. Type in a Cellular phone number for the contact. Type in a Pager number for the contact. After completing the Business information, the user may click on the Personal tab. In this screen, the user may enter personal information relating to the contact.
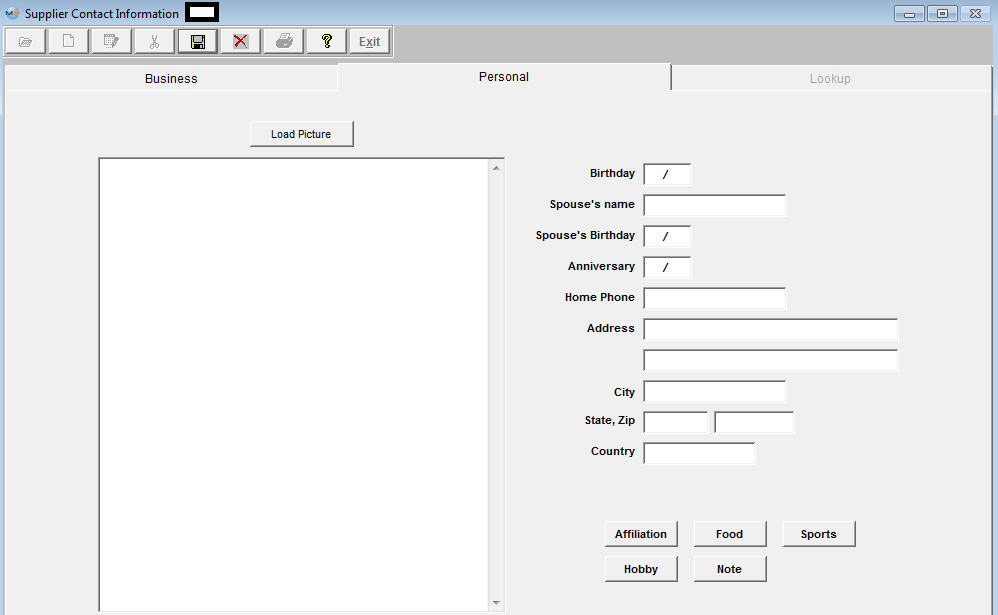
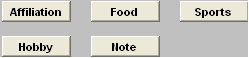
The Supplier Contact Directive buttons will now be active.
This set of buttons allow the user to record specific information that they may wish to retain about the customer contact. It is divided into several categories to narrow the search for information later. Pressing any of these buttons brings up a memo window that may be added to, edited or canceled at will. Type in the Supplier Contact Birth Date. Type in the Supplier Contact’s Spouse Name. Type in the Contact’s Spouse’s Birthday. Type in the Contact’s Anniversary. Type in the Contact’s Home Phone. Type in the Contact’s Home Address(two lines available). Type in the Contact’s Home City. Type in the Contact’s Home State and Zip code. Type in the Contact’s home country. Depress the Save action button to save changes, or depress the Abandon changes action button to abandon changes. |
| 1.2.4.3. Edit a Supplier Contact | ||||
The following screen will be displayed: Find a Contact following the procedure in Article 4452 .
Once you have made your choice, the information will be displayed as follows:
Depress the Edit action button. Enter password. All fields available for editing will be enabled for modification. At the conclusion of the modifications process, the user must Save changes, or Abandon changes using the action buttons. Depress the Exit action button to return to the previous screen. |
| 1.2.5. Reports - Supplier Contact Information |
|
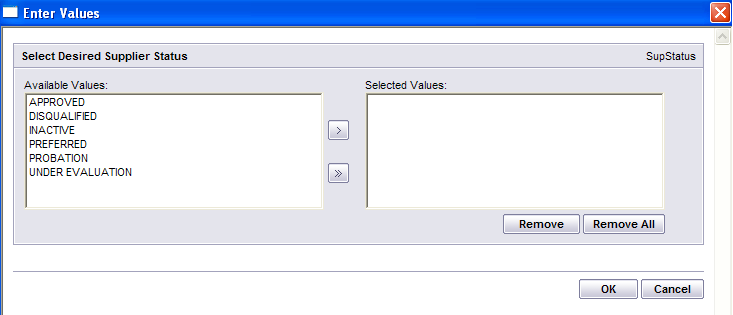
The report screen will be displayed: 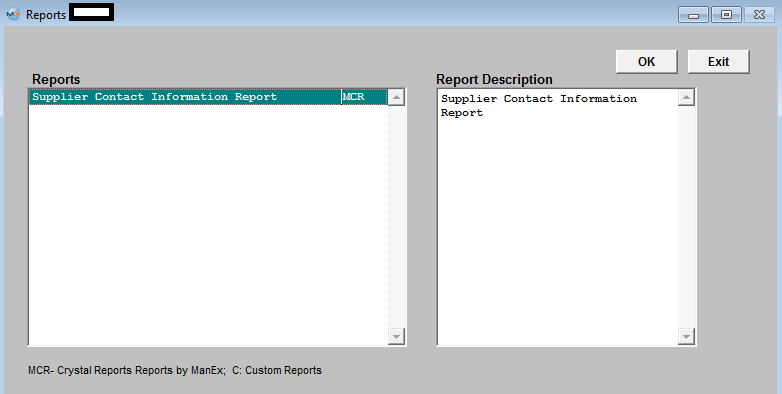 Highlight the report desired and Depress the OK button.
The following report will print:
|
| 1.3. Receiving And Billing Information |
| 1.3.1. Prerequisites for Receiving & Billing Information | ||||||||
Prerequisites for Entering Receiving & Billing Information:
After activation, "Receiving Information" access for each user must be setup in the ManEx System Security module. Users with “Supervisor Rights” will automatically have access.
The Sales Tax Authority must be setup in System Setup /Sales Tax Authority Table The Ship Via must be set up in System Setup /Ship Via The FOB must be setup in System Setup /FOB The Ship Charge must be setup in System Setup /Ship Charge
|
| 1.3.2. Introduction for Receiving & Billing Information |
| The Receiving & Billing Information Module is used to record the details of the user’s billing and receiving addresses. |
| 1.3.3. Fields & Definitions for Receiving & Billing Information |
| 1.3.3.1. Receiving Address Tab | ||||||||||||||||||||||||||
|


| 1.3.3.2. Tax & Shipping Mode Tab | ||||||||||||||||||
|

| 1.3.3.3. Billing Information Tab | ||||||||||||||||||||||
|
| 1.3.4. How To ..... for Receiving & Billing Information |
| 1.3.4.1. Add Receiving and Billing Information | ||||||||||||
|
The following screen will be displayed:
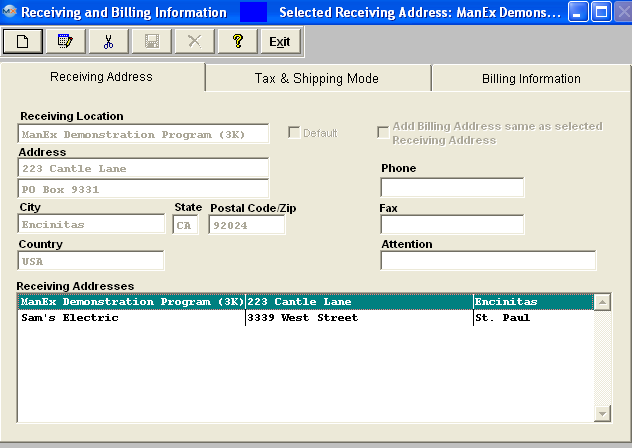
Depress the Add action Button. Note: When the Add button is selected user will be able to add "Receiving" and "BIlling" addresses. Enter in all of the receiving information as you would like it to appear on your Purchase Order.
Enter a street address - this would be where you would like the goods delivered. Two address lines are allowed. The second line is for a suite number, etc. Enter a phone number at the receiving location (if applicable). Enter a fax number at the receiving location (if applicable). Enter in the city, state and zip code. Enter in the country of the receiving location. Enter in the name of the contact at the receiving location.
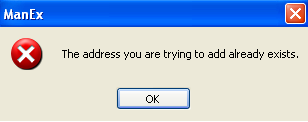
Check the "Add Billing Address same as selected Receiving Address" box if you would like this address added to the Billing Address list also. Note: If you check this box, it will stay checked until you select a different receiving address. Unchecking this box will not affect any data. If this box is check and the address user is trying to add already exists they will receive the following message:
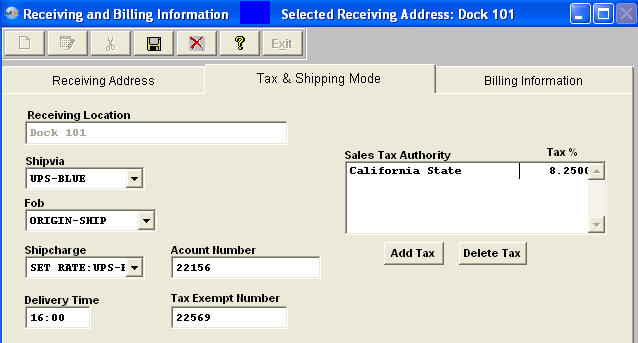
 A sample of the completed screen appears below: 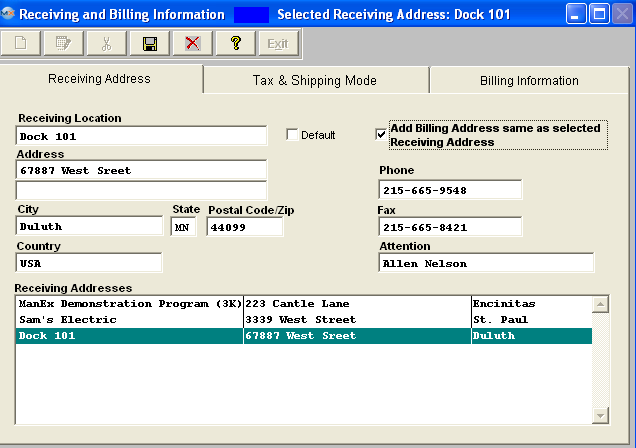 Depress the Tax and Shipping Mode information. 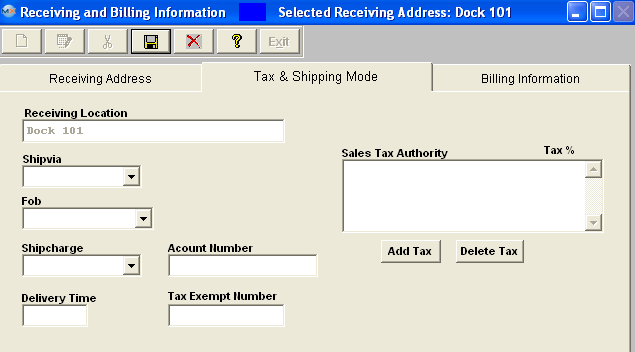 This screen has information for carrier name, FOB, tax status, etc. The name of the company at the receiving location carries over from the previous screen and can NOT be edited.
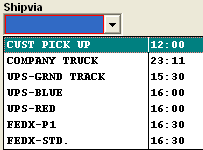
Select the carrier from the pull down. The selections default in from the Ship Via setup module within System Setup.
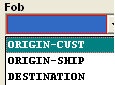
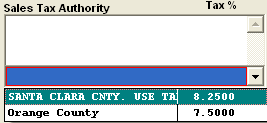
Select the FOB (Free-on-board) information from the pull down. This is the point when title passes. the selection default in from the FOB setup module within System Setup. Sales Tax
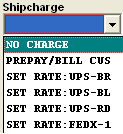
The sales tax authority and the Tax % is for those purchases which are subject to tax. Depress the "Add Tax" button and the selections will default in form the Sales Tax Authority Table setup module setup within the System Setup. Choose the one applicable to your company’s purchases. Select the Ship Chargefrom the pull down. The selections are defaulted in from the Ship Charge setup module within System Setup. This will indicate the shipcharge preference of the user Enter in the user’s account number in those instances where the user will be paying the freight charges directly to the carrier and not to the supplier. Enter in the time when the delivery is expected to be at the receiving location. Enter in the user’s sales tax identification number for those purchases which are not subject to sales tax. Please check with your state or local sales tax authorities for more information regarding Sales Tax exemptions since the laws vary from state to state. A sample of the completed screen appears below:
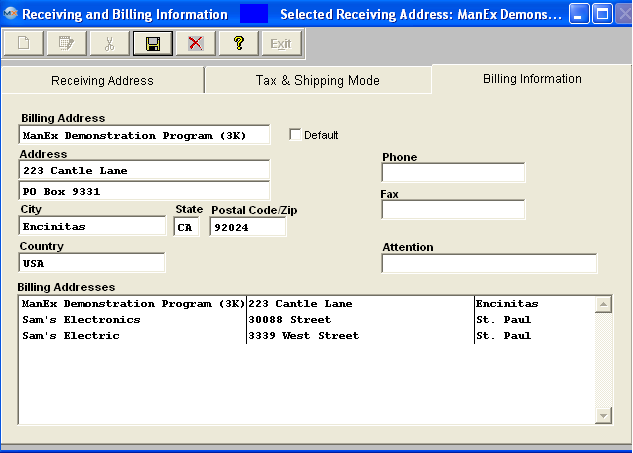
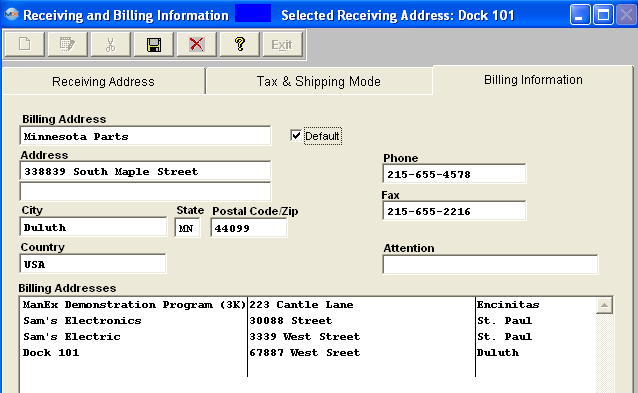
Depress the Billing information tab. This would be the address of the user’s Accounts Payable department. If you checked the "Add Billing Address same as selected Receiving Address" box on the Receiving address page the address was automatically added, however you can over write this address if you choose to do so. 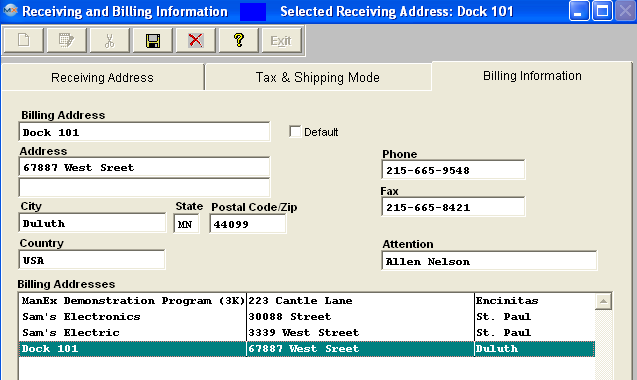 If you want to keep all the addresses listed and add a new address then you would need to depress the Save button at this point, then depress the Add button to add a new address to the Billing Address list.  Enter in a Billing name or location. Note: This is a required field. If you have more than one billing location, you must select at least one as the default. You can choose among the selection of billing addresses when you prepare the purchase order. Enter in the street address where you want your billing mailed. Two address lines are allowed. The second line is for a suite number, etc. Enter in the phone number at the billing location (if applicable) Enter in the fax number at the billing location (if applicable). Enter in the city, state and zip code. Enter in the country of the billing location. Enter in th name of the contact at the billing location, normally Accounts Payable, for example. The completed screen would appear as follows:
|

| 1.4. Supplier Contract Management (OPTIONAL Module) |
|
| 1.4.1. Prerequisites for Supplier Contract Mgmt | ||||
ManEx’s standard module configuration allows most users to accomplish their daily tasks. For those users wanting to get more from ManEx by leveraging the total solutions, this is one of the optional modules available for purchase. If user purchase's the Optional module -In-Plant Store (IPS) they will also receive the Supplier Contract Management module. These two modules go together. To place an order or to learn more about this specific module or any of the other optional modules please contact us at http://manex.com"contactus.aspx Prerequisites for Entering a Supplier Contract: After activation, "Contract Purchase Management" access for each user must be setup in the ManEx System Security module. Users with “Supervisor Rights” will automatically have access.
Supplier must be added in Supplier Information Part MUST exist in Inventory Control Management |
| 1.4.2. Introduction for Supplier Contract Mgmt |
Supplier Contract Management is for recording the contract with the supplier for In-Store items.
IPS inventory is received via Inventory Handling or IPS Upload. The IPS module is to keep inventory as Supplier owned but is recognized as being available for consumption by MRP and kitting. When it is consumed by kitting or transfer, a Purchase Order is automatically generated to reimburse the Supplier for the material.
There are three uses for the IPS module: supplier owned but stored on-site, customer owned and stored on-site, and internally owned but obsolete parts that the user does not want to affect the books. In any of these situations a supplier must be established (this means that the customer must also be a supplier and the user must be a supplier if they have obsolete inventory in the IPS location).
· Add the Supplier in the Supplier Information Module. · Set up an In-Store Warehouse and the applicable G/L number in System Setup/Warehouse Setup module. · Add the in-stores item into the Item Master in the Inventory Control Mgmt module and create an In-Store Warehouse. · Move the materials into the warehouse using the Inventory Handling module. · Add the In-Store Contract in the Supplier Contract Mgmt module. · Pull a kit (only a kit shortage gets a P.O.) within the Kitting & Shortage Mgmt module. · Add a Purchase Order and select In-Stores within the PO Mgmt module. |
| 1.4.3. Fields & Definitions for Supplier Contract Mgmt |
| 1.4.3.1. Supplier & Contract Part List Tab | ||||||||||||||||||||||||||||||
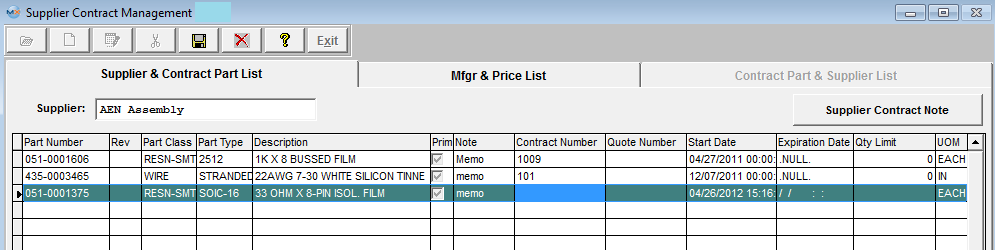 Supplier & Contract Part List Field Definitions
|

| 1.4.3.2. Manufacturer & Price List Tab | ||||||||||||||||||||||
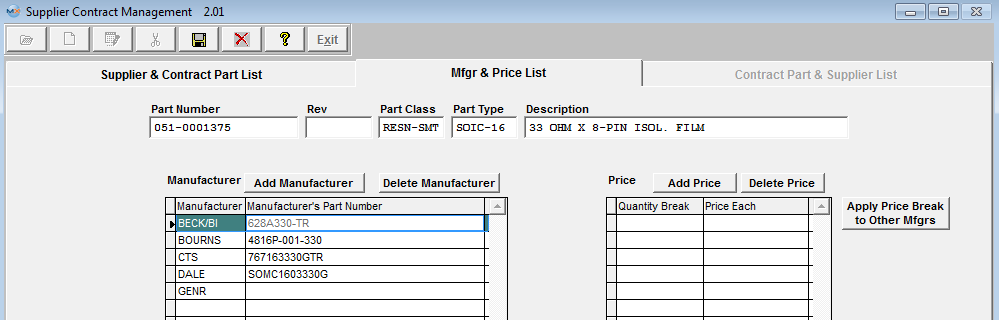 Manufacturer & Price List Tab Field Definitions For the Part Number highlighted in the Supplier & Contract Part List tab:
The number the user has assigned to the part. The revision number applicable to the part Number. The classification to which the part is assigned. The type within the classification to which the part is assigned. The description of the part. Manufacturer:
The name of the manufacturer. The number the manufacturer has assigned to the part. Price:
|
| 1.4.3.3. Contract Part & Supplier List Tab | ||||||||||||
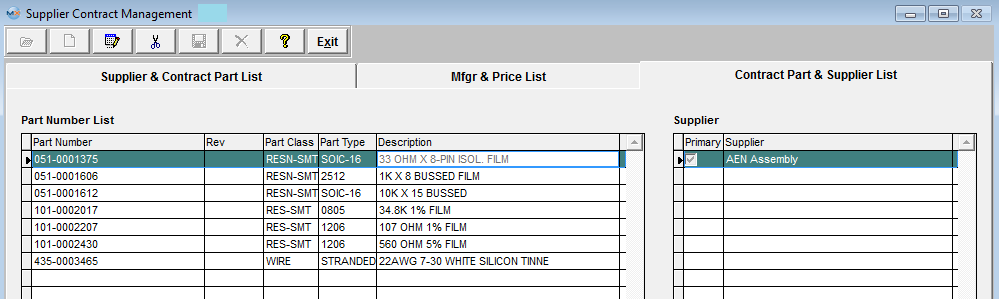 Contract Part & Supplier List Tab Field Definitions Part Number List:
The number the user has assigned to the part. The revision number applicable to the part Number. The classification to which the part is assigned. The type within the classification to which the part is assigned. If the user has the multi-plant version, the division number will display here. Supplier: For the part highlighted on the left, the Supplier(s) of that part will display. The primary or “First Choice” supplier will have a check mark in the Prim column, as illustrated above. |
| 1.4.4. How To .... for Supplier Contract Mgmt |
| 1.4.4.1. Find an In-Store Supplier Contract | ||||||||
|
The following screen will appear:
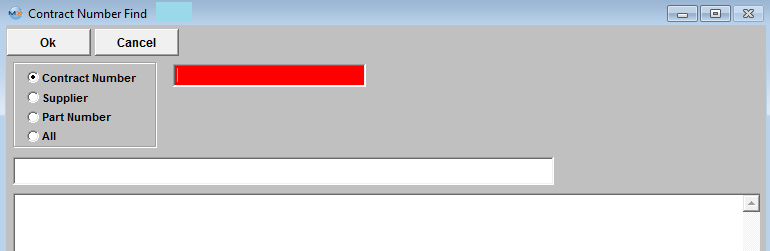
To find an existing contract, depress the Find action button.
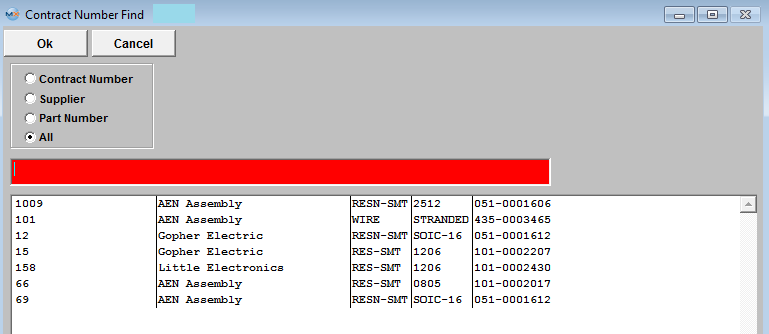
After the Find selection is completed, all the Contracts for the Selected Supplier are displayed on screen. 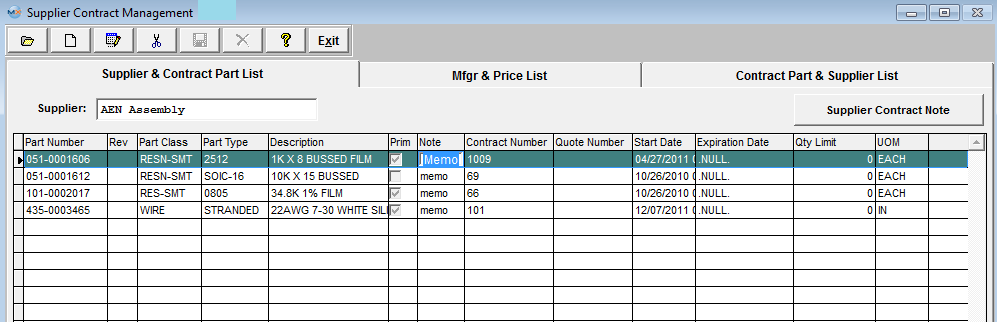
|

| 1.4.4.2. Add a New In-Store Supplier Contract | ||||||||||||||||||
|
The following screen will be displayed:
To add a new In-Store Supplier Contract, depress the Add action button while in the Supplier & Part List tab.
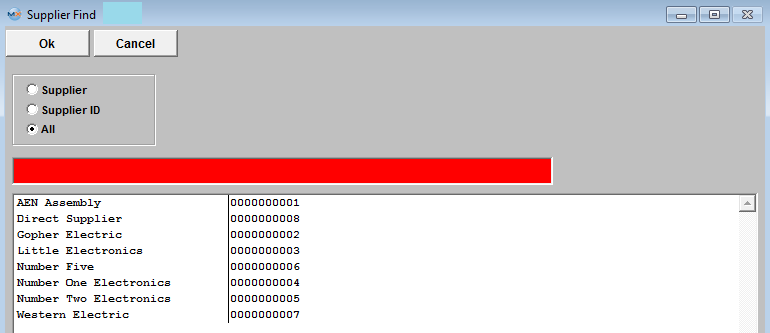
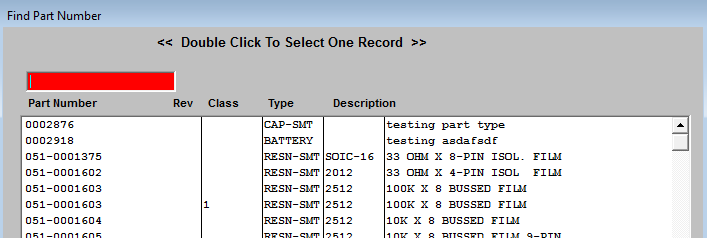
If you select All, the selection screen to the right will appear: Enter the Supplier or Supplier ID into the red box or highlight and double click. Once the Supplier is selected, a list of parts will appear:
If you want to add a note regarding the supplier contract, depress the Supplier Contract Note button. Depress the Edit button. Enter in the note. Depress the Save button. Depress the Exit button. If you want to add a note regarding the Part Number, click on the Note column. Depress the Edit button. Enter in the note. Depress the Save button. Depress the Exit button. Enter in a Contract number, a Supplier’s Quote number, and a start date for the contract. Today’s date will default, but you can override it. Enter in an expiration date. Enter in a quantity limit (the highest quantity which can be purchased). Depress the Manufacturer & Price list tab. The following screen will appear:
Note that the Manufacturer and Manufacturer’s Part Number per the Inventory Master have populated the left hand of the screen.
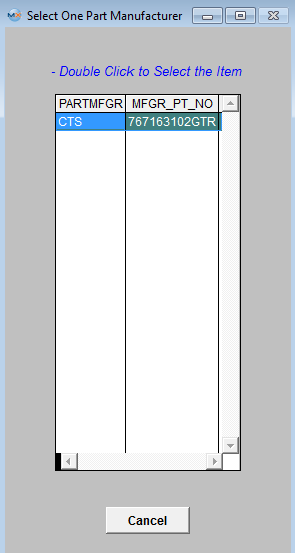
To apply Price Breaks to other Mfgr, user has the option to apply them individually or deperss this button If user elects to Depress the "Apply Price Break to Other Mfgrs" the following screen will appear:
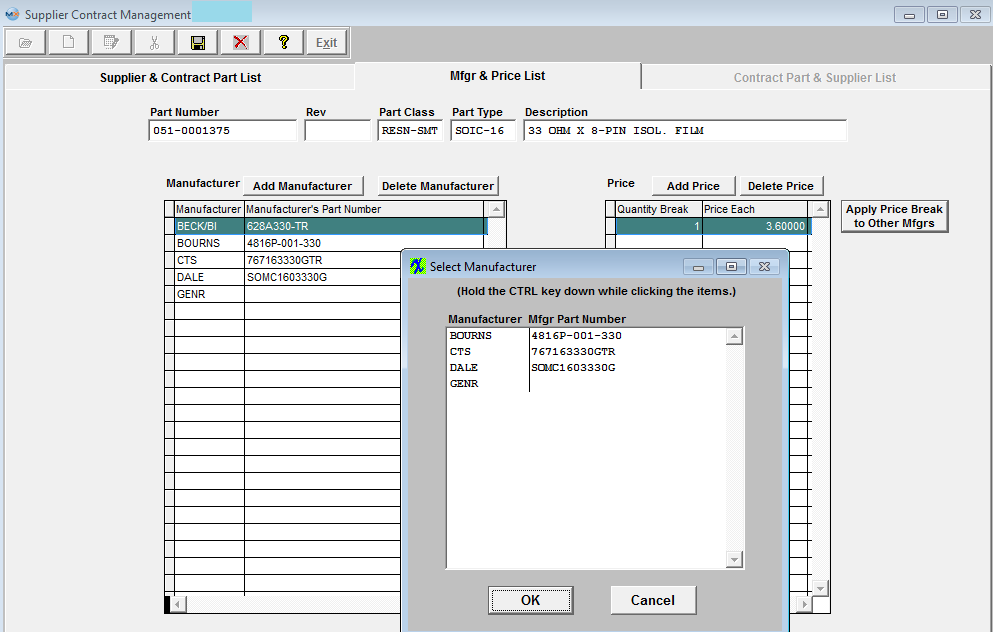 Select the Mfgr(s) and depress OK to continue or Cancel to abort screen.
Depress the Save record action button.
NOTE: Users MUST enter Qauntity Break and Price Each for every manufacturer listed or they will receive the following message and will unable to Save the record until ALL Quantities and Pricing breaks have been entered for the part highlighted. 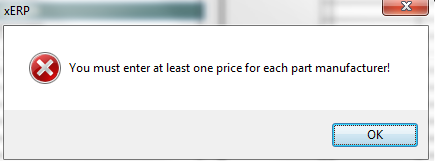 Depress the Contract Part & Supplier List tab: Note that the Part Number you selected in the Supplier & Contract Part List tab is listed in the Part Number list. Highlight that Part Number. The primary supplier for that part will display, as illustrated above. |

| 1.4.4.3. Edit an In-Store Supplier Contract |
Find the Supplier contract you wish to Edit. Depress the Edit action button. Type in the password. You’ll be able to add a Contract Note, change the Contract Number, Quote Number, Start Date, Expiration Date, Quantity Limit, Quantity Break and Price Each. Depress the Save action button to save your changes, or depress the Abandon changes button to abandon changes. |