| 1. Work Order Management |
| 1.1. Work Order Management |
| 1.1.1. Prerequisties for WO Mgmt | ||||||||
Prerequisites for Entering a New Work Order
After activation, "Work Order Management" access for each user must be setup in the ManEx System Security module. Users with “Supervisor Rights” will automatically have access.
A Customer database must be established in the Customer Information module. The Bill of Material must be entered (AVL optional)
|
| 1.1.2. Introduction for WO Mgmt |
The Work Order Module is used to record the details required for initiating assembly of products. The whole purpose of the WO Release is for various departments to fulfill their part of the task of releasing the WO on-line to avoid doing it manually. This is a very valuable feature and should not be by passed. This is why we do not allow the Work Order to be released within the Sales Order module.
The user initiates the internal flow of work actions by completing the Work Order. This order includes Kitting the material for the order, issuing the material to the production line, tracking the assembly of the order, and completing and evaluation of production performance.
A Sales Order number will be displayed if the Work Order was created within the Sales Order Mgmt module. If you are entering a Work Order through the Work Order module, you can manually link an existing Sales Order to the Work Order, only if the Sales Order and Work Order is for the same customer and same product number. Keep in mind though that even if you have the SO linked to a WO this does NOT mean that the quantities will always be the same. The link is for reference only between the two modules and they are still individual records so when any changes are made to either the SO or the WO the change will not update or be carried forward to the other. A message is displayed to the users that they will have to make the same changes to the WO.
Note: ManEx does not allow a Work Order to be created for a Make/Buy Product, (due to MRP calculating incorrect demand and showing incorrect message with safety stock).
|
| 1.1.3. Fields & Definitions for WO Mgmt |
| 1.1.3.1. Work Order Tab | ||||||||||||||||||||||||||||||||||||||||||||||||||||||||||
|
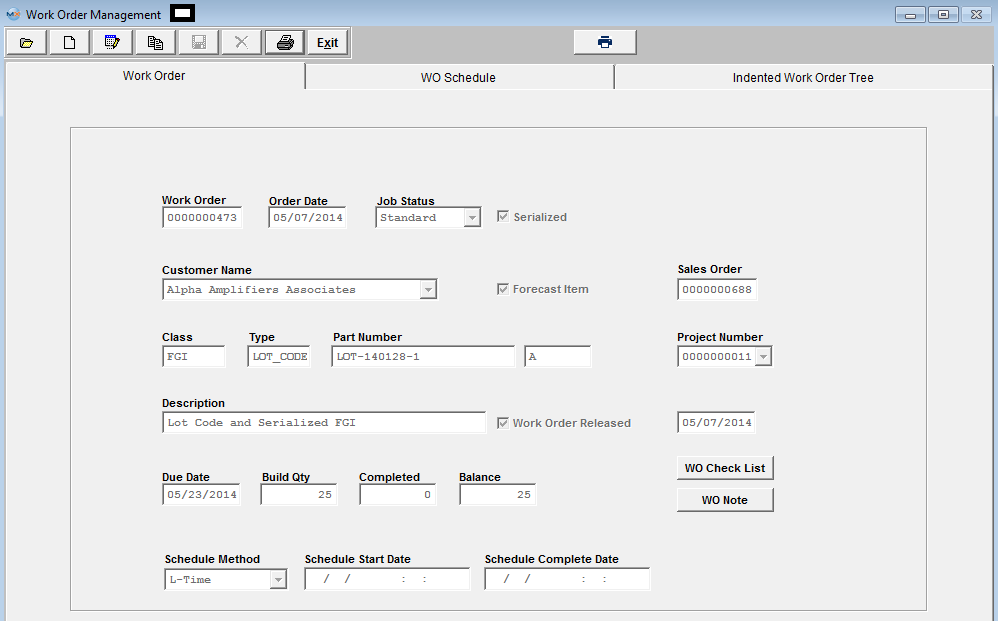
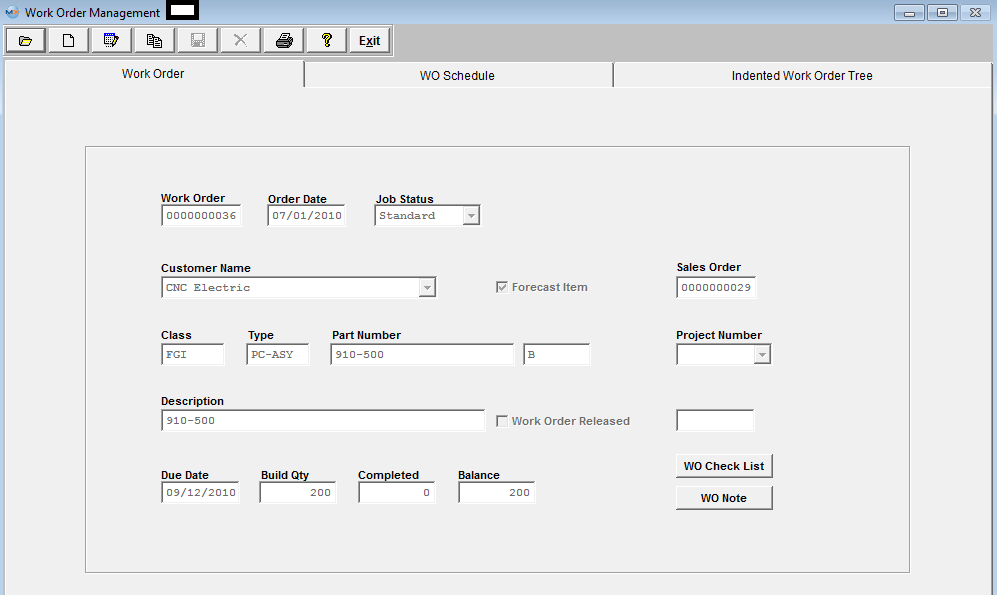
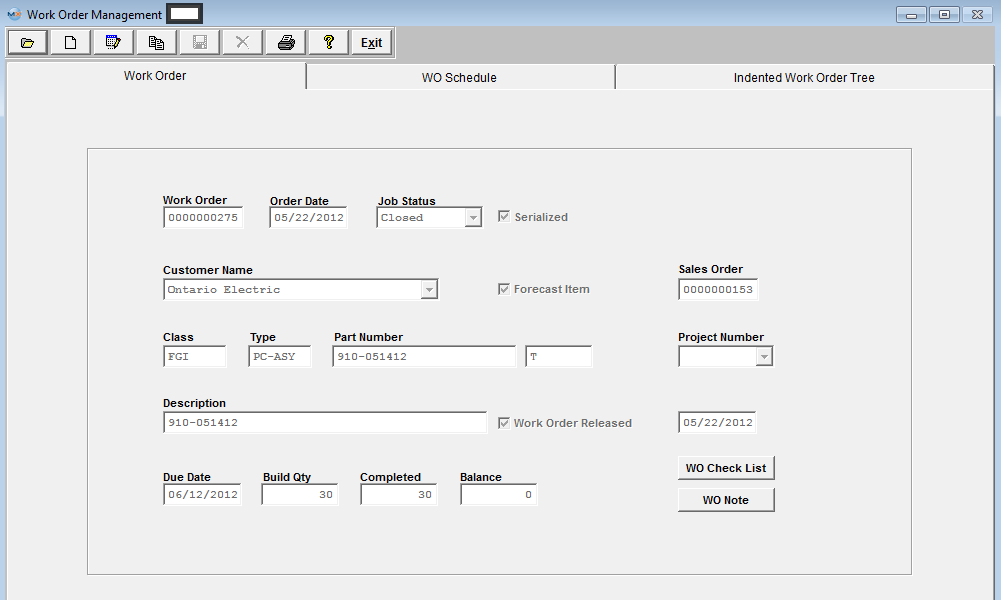
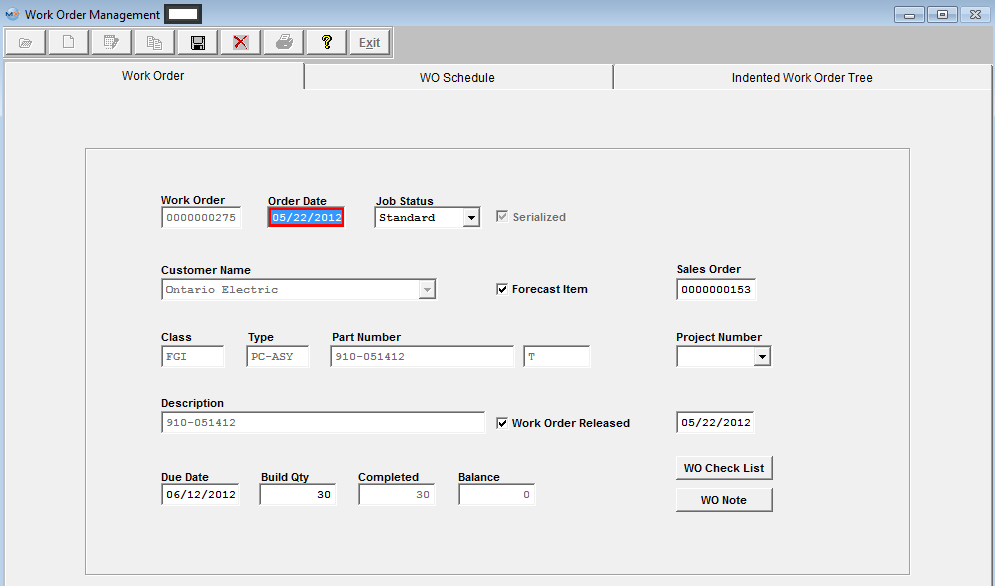
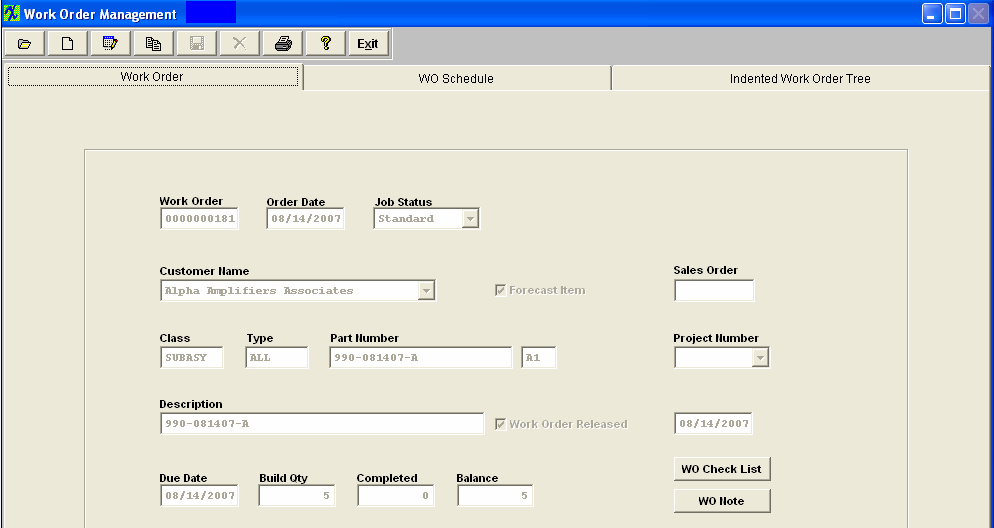
Work Order Tab field definitions
WO Check List Screen field definitions:
|

| 1.1.3.1.1. Changing Work Order Status, how it affects Kit Status and MRP? |
Once a Kit has been flagged as "In Process" the Work Order management module will not allow the users to change the WO status between Standard and Rework.
WO form Modifications: When a user is trying to change the status for the work order from the "REWORK" to any other status we check the KIT data and if the KIT has only line shortages present the KIT status will become empty (instead of "KIT PROCSS"). The reason is that MRP is checking for the KIT status in order to determine whether it needs to explode the BOM to get the demands for this work order or BOM is already exploded. When changing status from anything to "REWORK" check CURVAL () because if someone else pulled the kit for that work order while the user was editing the status the kit status might already be updated to the "KIT PROCSS".
KIT form Modifications:
In the save method when line shortages are added and rework work order is selected replace start date and initials only when they are empty. When re-opening the KIT, check if work order status is rework kit status has to be "REWORK" as well. When saving, after issuing items from the inventory, do not update Kit Status if WO status is not "REWORK". For the regular WO if BOM is already exploded and shortages are created the kit status would be already updated, but if BOM was not exploded and only line shortage are present we do not want to change the kit status because MRP will only use line shortages and miss all the demands from the BOM.
|
| 1.1.3.2. Work Order Schedule Tab | ||||||||||||||||||||
Work Order Schedule Field definitions
Note: This is for your reference only - this screen does not affect any other portion of the ManEx system.
Schedule
Automatic Scheduling
|


| 1.1.3.3. Indented Work Order Tree | ||||||||||||||
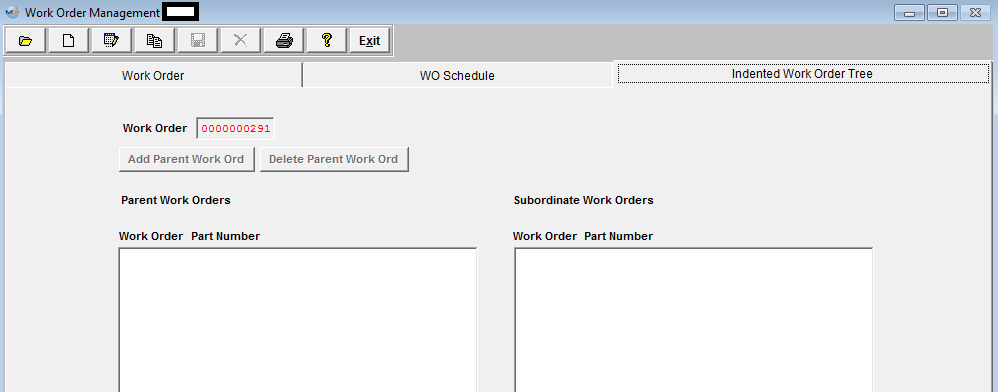
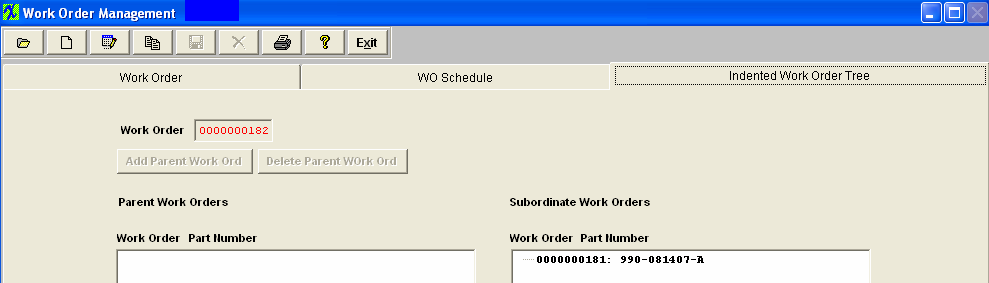
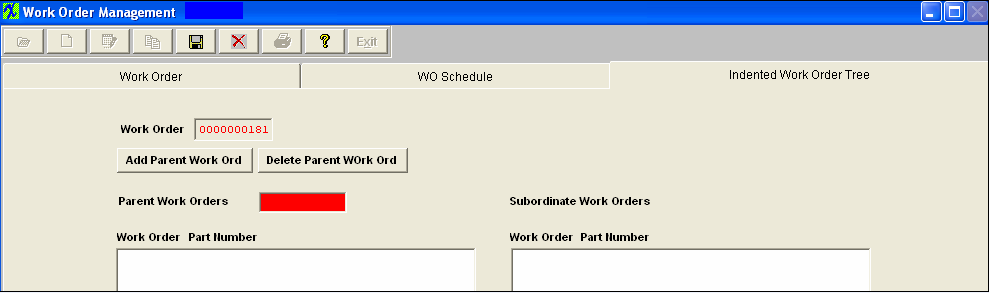
Indented Work Order Tree field definitions
Parent Work Orders
The Work Order number of the parent work order. The number of the part to which the parent work order pertains. (Subordinate) Work Orders
|


| 1.1.4. How To ..... for WO Mgmt |
| 1.1.4.1. Find a Work Order | ||||||||
|
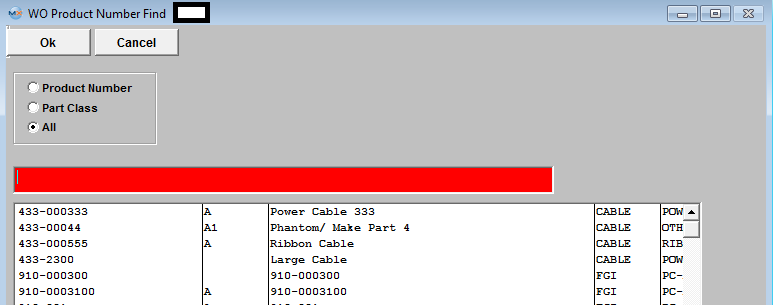
The following screen will be displayed:
And the information will populate the screen as displayed below:

|

| 1.1.4.2. Add a Work Order | ||||||||||||
|
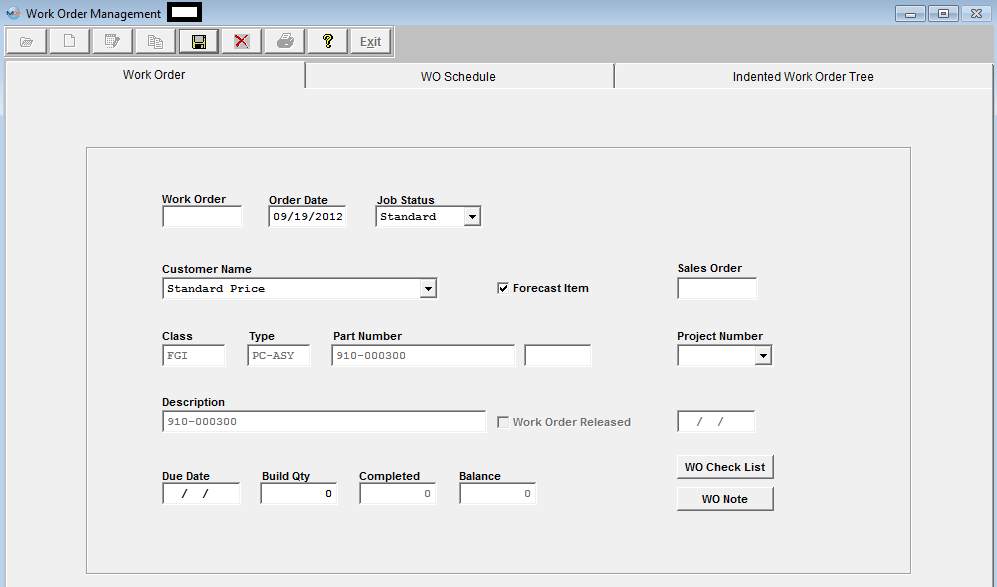
The following screen will be displayed:
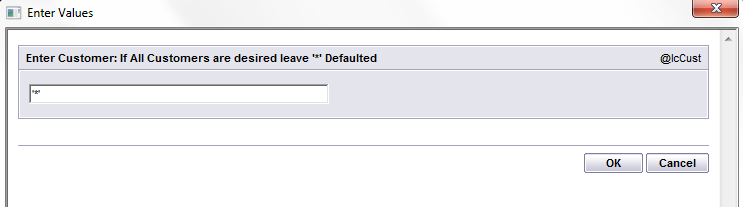
To ADD a new work order, depress the Add Action button. The user is first prompted for the appropriate password:
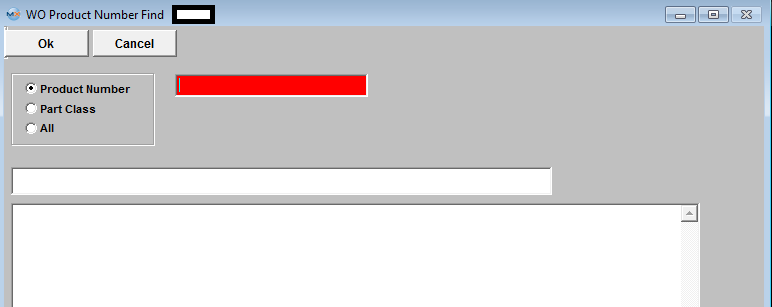
Note: If the Product Number you are looking for does not appear in the Find screens listed above you may want to check the Part Source of the Product number you are looking for. ManEx does NOT allow a Work Order to be created for a Make/Buy Product, due to MRP calculating incorrect demand and showing incorrect message with safety stock. Once a Product Number is selected the screen will be populated with the part information from the Inventory Control Module.
If the work order numbering is set to manual, the first prompt is for the Work Order Number. MANEX will enter the current system date as the Order Date, and the user may revise the date if desired.
Serial Number box. If this box is checked, the units must have a unique serial number assigned. (Note: Serial numbers are assigned in the Work Order Serial Number Control Module). Sales Order Number. A Sales Order number will be displayed if the Work Order was created within the Sales Order Mgmt module. If you are entering a Work Order through the Work Order module, you can manually link an existing Sales Order to the Work Order. Only if the Sales Order and Work Order is for the same customer and same product number. Keep in mind though that even if you have the SO linked to a WO does not mean that the quantities will always be the same. The link is for reference only between the two modules and they are still individual records so when any changes are made to either the SO or the WO the change will not update or be carried forward to the other. A message is displayed to the users that they will have to make the same changes to the WO.
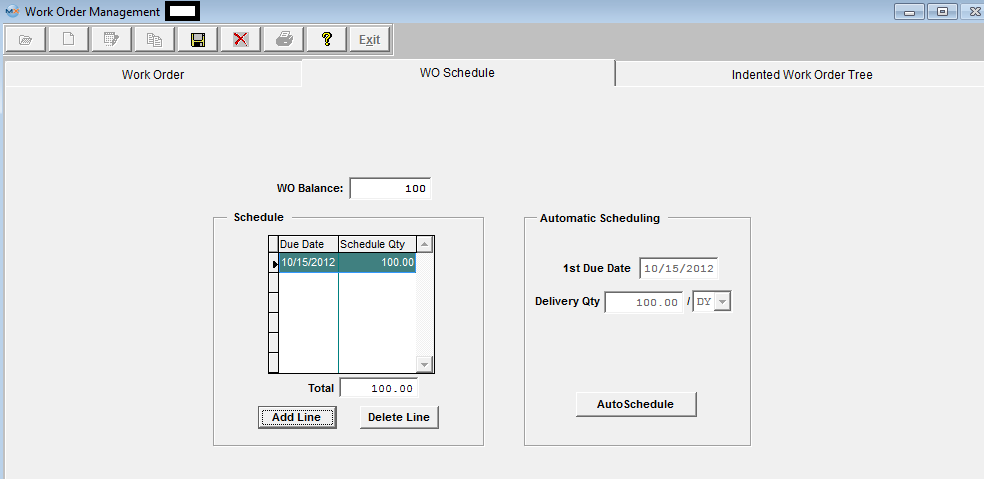
If the work order is ready to start being moved through SFT (material obtained and shortages at a minimum), then the user may check the Work Order Released box, which will allow the material to be moved through Shop Floor Tracking. If MRP is used, the demand for the material will be generated, but the work order cannot begin production. To see a list of unreleased work orders, request Back Log Report by Work Center as discussed in the Reports section. After that, the user enters a Due Date for the order (the date due of finished goods), and the Build Quantity. The shipped quantity will be set to zero, and the balance due to the same as the work order build quantity. Work Order Schedule Tab After all the information has been entered in the Work Order screen, depress the WO Schedule tab. The following screen will appear: Note: Keep in mind that this is for your reference only - this screen does not affect any other portion of the ManEx system.
There are two modes available for completing a scheduled delivery for a product: Automatic and Manual. In the Automatic mode, MANEX will take a beginning date and a quantity to be delivered each period (Days, Weeks or Months) and schedule out the delivery. The following activities are available: Automatic Scheduling. Pressing this button enables the scheduling box and places the default lead time date in the 1st Due Date box. (The user may establish a default number of days in the System Setup.) The user can then use that date, or enter the first (beginning delivery) date the customer expects to receive the order. The WO Schedule tab allows the user to divide the shipment into multiple deliveries of equal parts. For example, if the order is for a total of 100 pieces, and the customer wishes delivery to be at the rate of 10 units each day, then the delivery quantity should be entered as 10. The next box allows the user to select the delivery intervals. The options are by day (DY), week (WK) or month (MO). After selecting the delivery interval, pressing the SAVE button creates a line for each delivery date in the sequence requested. In this WO Schedule tab, the user may further edit, delete or add lines. Manual Scheduling. Pressing the Add Line button enables the delivery schedule box and places the cursor in the Due Date box. The user can then enter the first (beginning delivery) date the customer expects to receive the order. Next, the Ship Date (the date the order is to leave the user’s dock) will be entered by MANEX based on the transit days entered. This date can then be modified by the user if a different date is desired. Then the scheduled quantity is entered. The Shipped quantity will be completed by MANEX when the line has material shipped against it. Additional lines may be added or deleted by pressing the appropriate button. The total number of units scheduled will be displayed at the bottom of the box, so the user can verify all units have been scheduled.
Indented Work Order Tab If the user has multi-level products, and there are other work orders upon which the current work order depends having material, then the Indented Work Order tab will allow the user to establish relationships between those work orders and the current one.
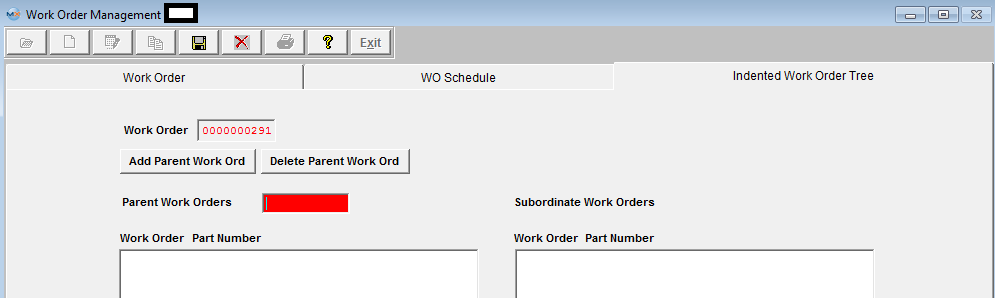
Depress the Add Parent Work Ord button. A red box will appear, as illustrated below:
Type the Parent Work Order number into the box. After entering a valid work order, the user is presented with a screen completed with the work order information, but with a blank work order number (if numbering is manual). After entering the work order, the schedule and quantity, the new work order may be saved. Once all information is entered, the user may either Save by depressing the Save Record action button, or Abandon Changes by depressing the Abandon Changes Action buttons. |
| 1.1.4.3. Edit a Work Order |
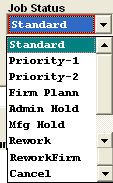
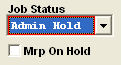
Find an existing Work Order After a Work Order has been found, it may be edited by selecting the Edit Action button.  All fields available for editing will be enabled for modification. The fields which may be edited are: Order Date, Job Status, Work Order Release, Due Date, Build Qty. The user may also add a note, or add or delete a parent work order. Note: Once a Kit has been flagged as "In Process" the Work Order Management module will NOT allow the users to change the Work Order status between Standard and Rework. For further detail see Article #2691 .
If the user wishes to change the Build Qty on a Work Order in process on the Floor the system will provide the users with what work center location they would like to reduce the qty from to match the new Work Order Qty. At this point the Kitting module will still show the original WO qty and what was picked. But if they depress the Update Kit button it will refresh the kit based off of the new WO Qty and now the qty that was adjusted will become WO-WIP. Which means it is available to fulfill any other demand that might be out there. Then upon Closing the kit the user has the option to cost that wo-wip to the kit or return it to stock. If they return it to stock it will have no affect on their Mfgr Variance for that work order.
If the user is going to reduce the Build Qty on a Work Order that will change the WO status to "CLOSED", upon Closing the kit the system will take the original quantity pulled to the kit and automatically cost the different to the kit without giving any option to the user. So, if the user does NOT wish to have the extra parts automatically costed to the kit upon closing they will need to change the WO status from "CLOSED" to "STANDARD", return to the Kitting module and "UPDATE" the kit, then return to the WO and edit/save the record without making any changes – the Status will automatically update to Closed. See attached word document <<PS_961_090427.docx>> for an example.
NOTE: Work Orders originated from an RMA Receiver will have "ReworkFirm" Job Status and users will NOT be allowed to change the Job Status, due to the fact that when the Work Order is created from RMA module all kitting, serial number, .... records are created and if user changes the WO status the system may loose track of these records. User will receive the following message if they try to change the job status on a Work Order that was originated from an RMA Receiver.  Since the material issued to the RMA is likely to be a defective assembly, or requires re-inspection, the work order must be completed by either transferring the material to FGI or to scrap to close the work order. Therefore, an RMA work order cannot be cancelled. Also, users will NOT be allowed to edit or change the Bld qty because when product is brought into the system with an RMA Receiver it is then automatically issued as itself to the kit at that time. At the conclusion of the modification process, the user may either Save the changes by depressing the Save changes action button or Abandon the changes by depressing the Abandon changes action buttons.The following message will be displayed to the user if a SO is linked to a WO:
 NOTE: The link is for reference only between the two modules and they are still individual records so when any changes are made to either the SO or the WO the change will not update or be carried forward to the other. |
| 1.1.4.4. Cancel A Work Order |
|
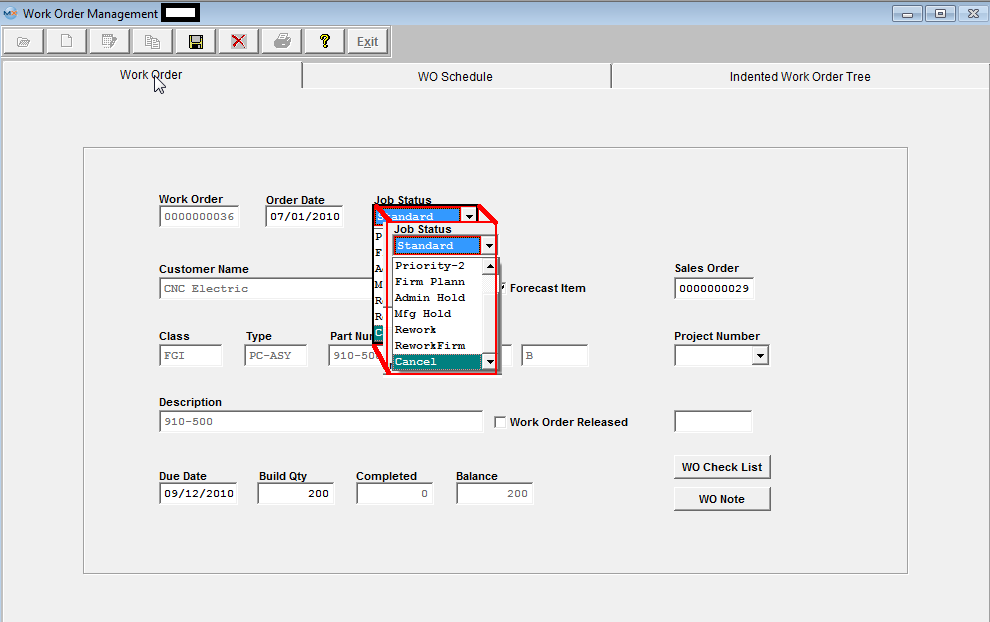
Depress the Edit button and enter your password. Depress the arrow next to the Job Status and change the Job Status to Cancel as displayed below.
 Depress the Save action button.
Note: You can’t Cancel a Work Order that has been kitted. If you must cancel a kitted Work Order, go into the Kitting & Shortage Mgmt module and de-kit the order. NOTE: Work Orders originated from an RMA Receiver will have "ReworkFirm" Job Status and users will NOT be allowed to change the Job Status, due to the fact that when the Work Order is created from RMA module all kitting, serial number, .... records are created and if user changes the WO status the system may loose track of these records. User will receive the following message if they try to change the job status on a Work Order that was originated from an RMA Receiver.
Since the material issued to the RMA is likely to be a defective assembly, or requires re-inspection, the work order must be completed by either transferring the material to FGI or to scrap to close the work order. Therefore, an RMA work order cannot be cancelled or re-opened. |
| 1.1.4.5. Manually Re-Open or Close a Work Order |
Find a Closed Work Order
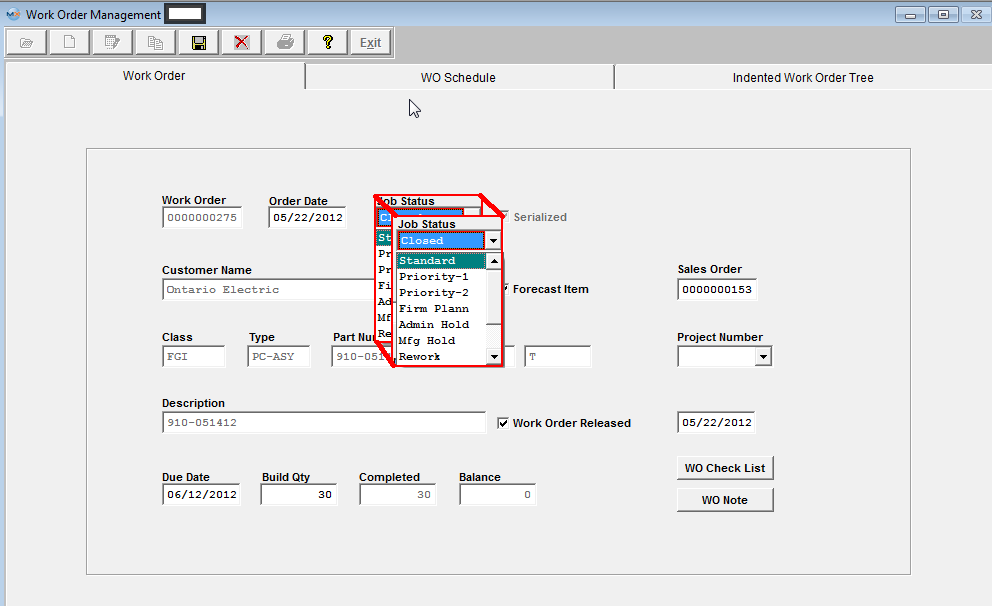
Depress the Edit action button and change the Job Status from Closed to Standard
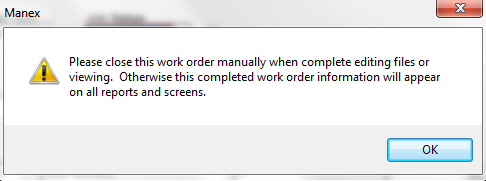
User will receive the following warning
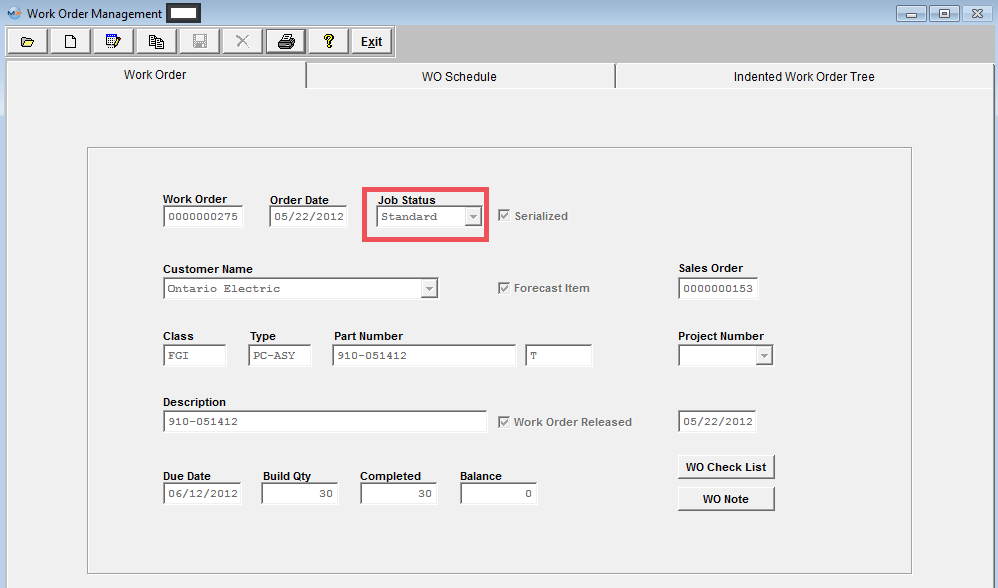
Depress OK then Depress the Save record action button, The following message will be displayed to the user if a SO is linked to a WO: 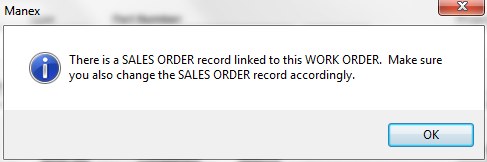 NOTE: The link is for reference only between the two modules and they are still individual records so when any changes are made to either the SO or the WO the change will not update or be carried forward to the other. Depress OK WO status is changed from closed to Open/Standard
To Manually Close Work Order Find Work Order with Job Status anything other than "Closed" Dperss the Edit action button (no need to make any changes)
Depress the Save record Action button. The following message will be displayed to the user if a SO is linked to a WO: NOTE: The link is for reference only between the two modules and they are still individual records so when any changes are made to either the SO or the WO the change will not update or be carried forward to the other.
Depress Ok and Job Status will automatically change to Closed  NOTE: Work Orders originated from an RMA Receiver will have "ReworkFirm" Job Status and users will NOT be allowed to change the Job Status, due to the fact that when the Work Order is created from RMA module all kitting, serial number, .... records are created and if user changes the WO status the system may loose track of these records. User will receive the following message if they try to change the job status on a Work Order that was originated from an RMA Receiver.
Since the material issued to the RMA is likely to be a defective assembly, or requires re-inspection, the work order must be completed by either transferring the material to FGI or to scrap to close the work order. Therefore, an RMA work order cannot be cancelled or Re-opened.
|
| 1.1.4.6. Add a Parent Work Order |
Indented Work Order Tab If the user has multi-level products, and there are other work orders upon which the current work order depends having material, then the Indented Work Order tab will allow the user to establish relationships between those work orders and the current one. Find an existing Child Work Order
 Go to the Indented Work Order Tree tab. Depress the Edit button. Depress the Add Parent Work Ord button. A red box will appear, as illustrated below:
Type the Parent Work Order number into the box. The Parent Work Order number will disappear and will not appear in the Work Order box until the Save record action button is depressed as displayed below. Depress the Abandon changes Action buttons to abandon changes.
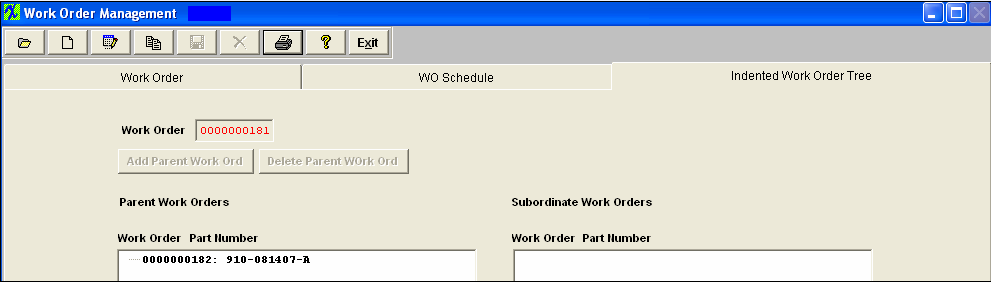 Find the Parent Work Order, go to the Indented Work Order Tree tab and the Child Work Order linked will be displayed:
 |
| 1.1.5. Reports for WO Mgmt | ||||||||||||||||
|
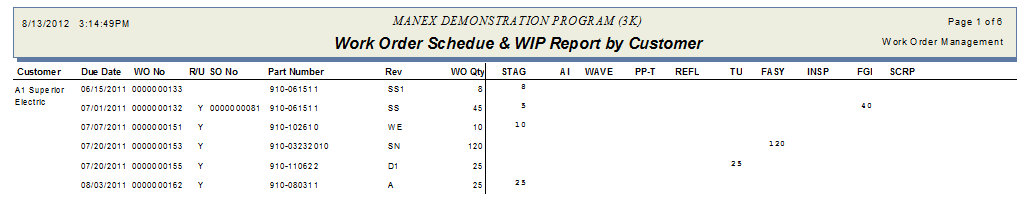
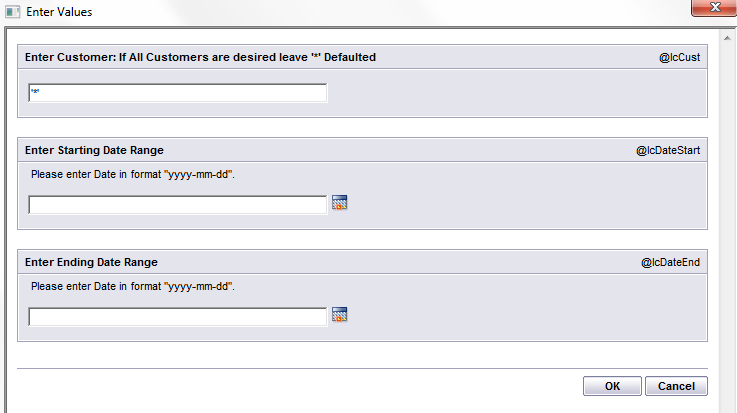
To obtain the Work Order reports, depress the Reports button. The following screen will be displayed: 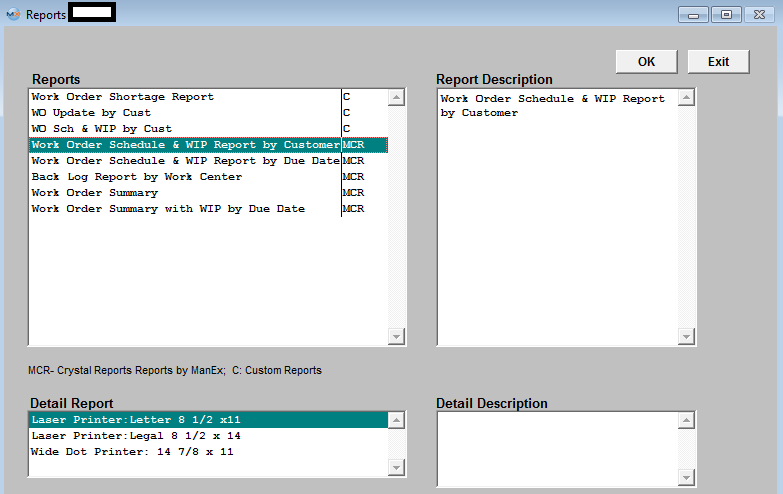 Note: The Work Center Information may not appear in some of the WIP reports within WO Management if the user prints it to an Excel Worksheet file. Some of the reports are quite complex, with multiple relationships and filters. In this instance, the Work Center Information is in a different data base and therefore will not be available. Work Order Schedule & WIP Report by Customer
The following report will print: This report provides a listing of the status of each job on the production floor. With this report, users can see where each board is in production.
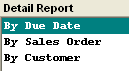
 Work Order Schedule & WIP Report by Due Date
The following Report will print: This report provides a listing of the status of each job on the production floor. With this report, users can see where each board is in production by Due Date.
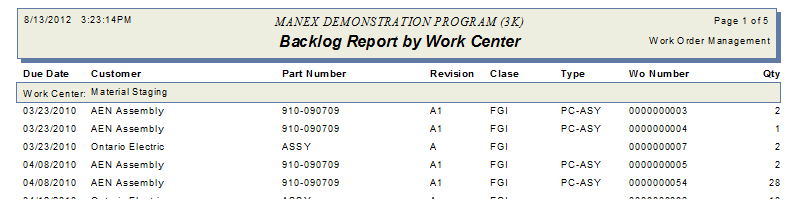
 Back Log Report by Work Center
The following report will print:
 Work Order Summary
The following report will print:
 Work Order Summary with WIP by Due Date
The following Report will print: The report can show up to 11 work center information at one time, if user has more than 11 work centers, the program will generate another set of report with same header information (due date, wono, build qty, part number...), with the rest of work center information (at right side). If you run by Screen, Printer...., it should appear twice too.

|
| 1.2. Unreleased Work Order List |
| 1.2.1. Prerequisites for Unreleased WO List | ||||||||||||||
Prerequisites for Viewing the Work Order Release Check list:
After activation, "Work Order Management" access for each user must be setup in the ManEx System Security module. Users with “Supervisor Rights” will automatically have access. Note: This screen is only to view the checklist.
|
| 1.2.2. Introduction for Unreleased WO List |
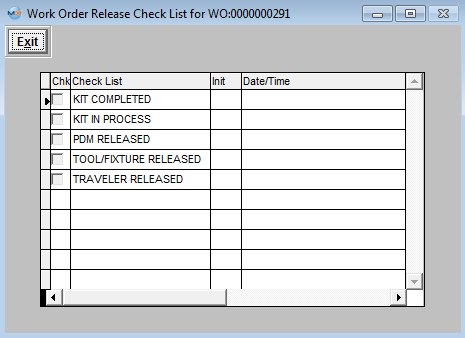
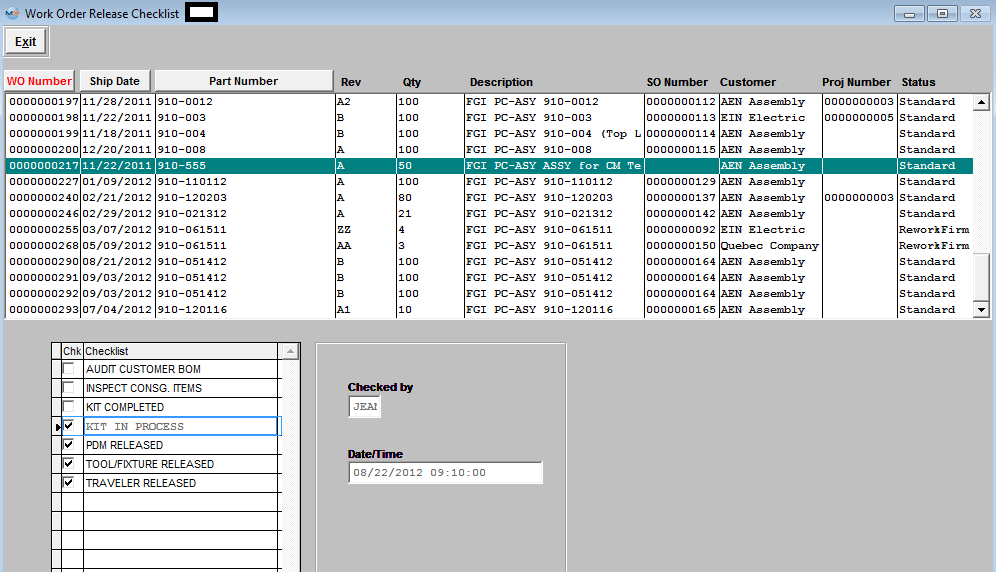
The Work Order Release Check List is originally developed in System Setup in the Shop Floor Tracking Defaults set up screen. The Work Order Release Check List displays the following: Work Order Number, Scheduled Ship Date, Part Number of the assembly, Revision Number pertaining to the assembly, Quantity in the Work Order and the Check List Items with information regarding items checked, by whom, the date and time.
The Work Center Check List Module is used to record that a process detailed in a check list established for the work center has been completed. The users must view and acknowledge that a procedure has been performed, and enter their concurrence and time of event. This information is created in the PDM (Product Data Management) module.
The overall purpose of the Work Order Release Check List is to provide better kitting status control and at the same time make the job a little easier for Production Control/Schedulers by automatically checking to see if various affected departments have checked off their part of the list. Then once everything has been checked, the work order can be released so scheduling can be started and material can start moving through SFT.
|
| 1.2.3. Fields and Definitions for Unreleased WO List | ||||||||||||||||||||||||||||||
Highlight the line you are interested in viewing. The information at the bottom of the screen will display the check list items associated with the assembly. If the item listed has been performed, there will be a check mark at the left of the item and the user may view the name of the person who performed the checking plus the date and time checked.
|
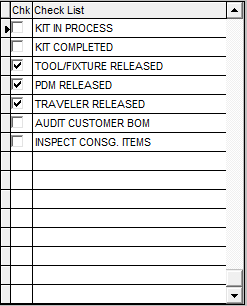
| 1.2.3.1. Check List Items | ||||||||||||||||
|
|
| 1.2.4. How To ...... for Unreleased WO List |
| 1.2.4.1. View and Approve Work Order Checklist Items | ||||||||||||||||||
The following screen will be displayed:
Highlight the line you are interested in viewing. The information at the bottom of the screen will display the check list items associated with the assembly.
If the item listed has been performed, there will be a check mark at the left of the item and the user may view the name of the person who performed the checking plus the date and time checked. User will NOT be allowed to process material through SFT until the Work Order Release box within the Work Order module has been checked off (Note: this box will NOT be checked until ALL checkpoints including the "Kit Complete" have been checked). This is to prevent moving material in SFT until everything has been approved. NOTE: If a user has the Work Order Checklist feature active and tries to use the PO Receiving shortage and issues feature within the PO Receiving, it will not recognize the shortages until the kit has been flagged as "Kit Complete". It is designed this way because the user will not know if the parts are short until the kit is completed.
You may have parts in the inventory and have not pulled them to the kit yet. If you allow seeing the shortage (which may not be a shortage because parts are not pulled yet) from the PO receiving, the receiver may be trained to automatically issue to the shortages first, but it may not be a shortage because parts have not been pulled from inventory, so how would they know if it is a real shortage or just not pulled from inventory yet.
|

| 1.3. Work Order Serial Number Control |
| 1.3.1. Prerequisites for WO SN Control | ||||||||||
There must be a Work Order. The part number must exist for a product or part. The Bill of Materials must be entered (AVL optional). The method must have been set up in Shop Floor Tracking Defaults. The option must have been selected in the Inventory Control Management Module |
| 1.3.2. Introduction for WO SN Control |
The Work Order Serial Number Control Module is used to set up serial numbering for a particular Work Order. |
| 1.3.3. Fields & Definitions for WO SN Control |
| 1.3.3.1. Serial Number Setup Tab | ||||||||||||||||
Serial Number Setup Fields & Definitions
|
| 1.3.3.2. Detail Tab | ||||||||

|
| 1.3.4. How To ..... for WO SN Control |
| 1.3.4.1. Find a Work Order for Serial Number Setup | ||||||||
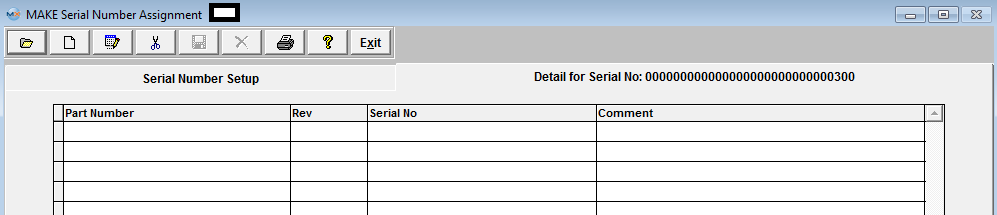
|
The following screen will be displayed:
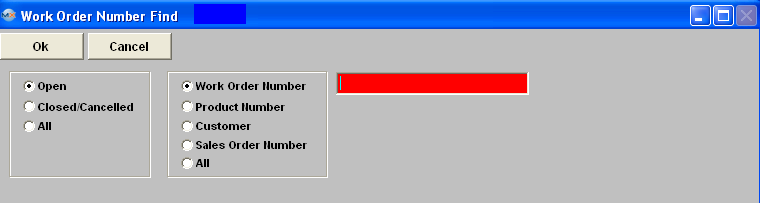
Selecting the Find Action Button displays the following screen: Select the desired Filter: by selecting the appropriate radio button - Open, Closed/Cancelled, or All.
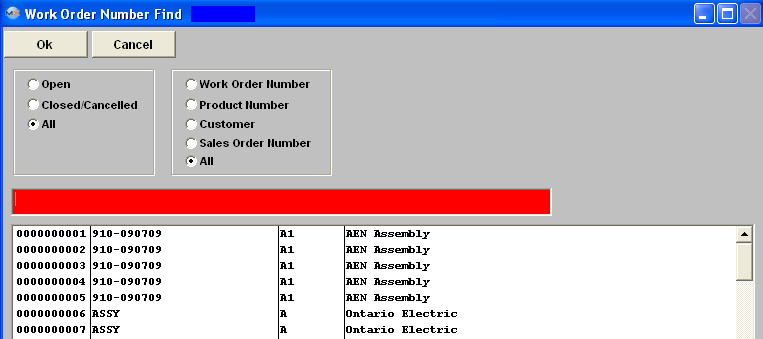
If user selects ANY of the Filters: and Find by All - a screen will appear listing all the Work Orders filtered by the selection, in numerical order, along with the part number, and Customer name.
|

| 1.3.4.2. Assigning Serial Numbers to Work Order | ||||||||
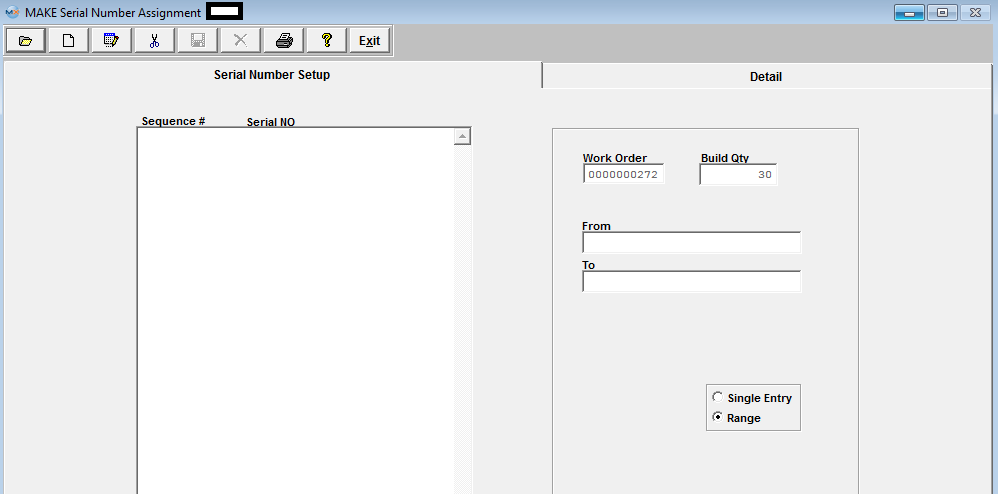
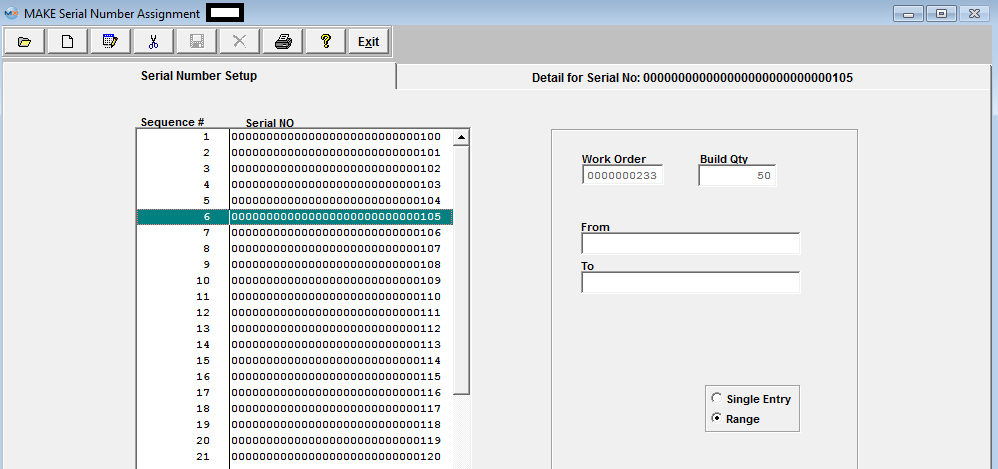
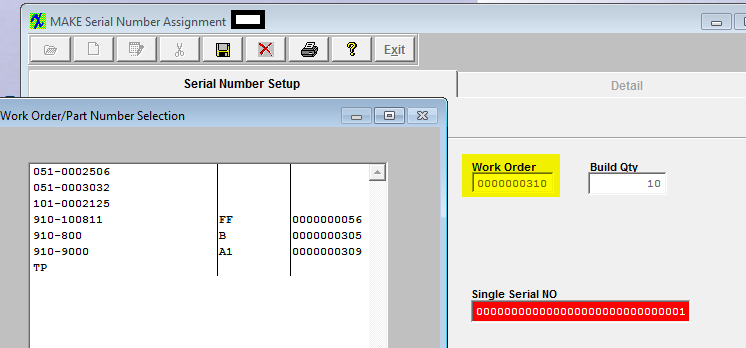
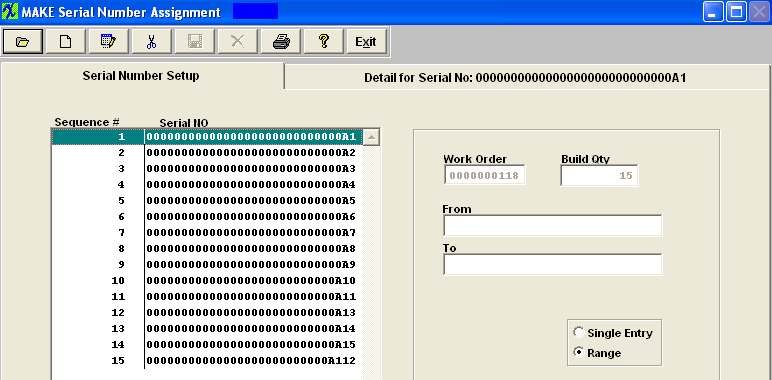
After Finding the Work Order. The following screen will appear, listing the Work Order and Build Qty. The Add record action button also becomes available.
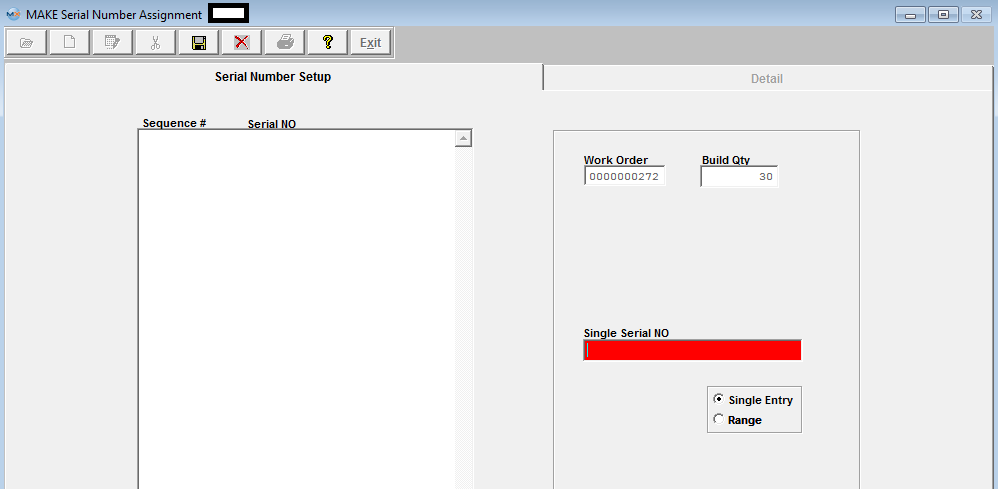
Depress the Add record action button. Enter in the password. Select Single Entry or Range method of assigning serial numbers by choosing the appropriate radio. If you select Single Entry, the following screen will display, only allowing you to type in one Serial number at a time.
If you select Range, the following screen will display, allowing you to type in From and To Serial numbers. 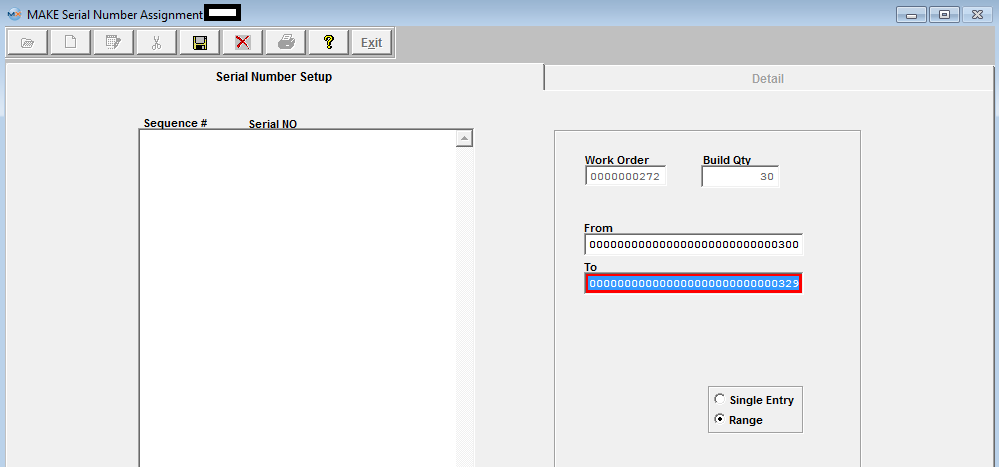
Note: The system will force individual entry for serial numbers with prefixes or characters. If user enters both character and number in one field, then it is hard to know which part (character or number) needs to be increased first. So the system cannot predict how the range is intended to increment: For Example if user enters a SN range of A101 to Z110. The system does not know how the user wants the range setup A101, B101, C101 or A101, B102, C103, etc. (We allow 30 characters for a SN)
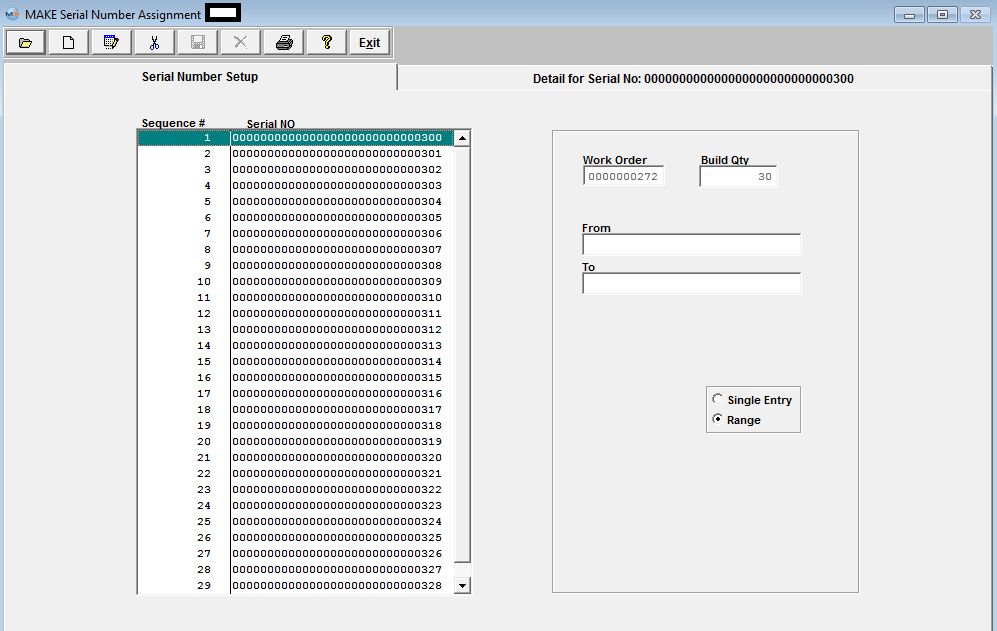
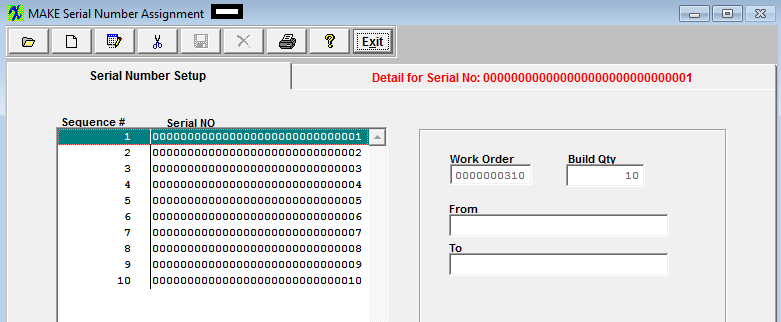
Depress the Save record action button and the range of numbers will populate on the left side of the screen. As displayed below: If you depress the Abandon changes action button the screen will abort and the serial numbers will not be saved.
Whether or not the system will allow you to enter duplicate serial numbers will depend on the method for tracking serial numbers chosen in System Setup. At the beginning of a ManEx implementation the company must decide a method for tracking serial numbers. Once this decision has been made and set up in Shop Floor Tracking Defaults it cannot be changed.
Detail for Serial Numbers To enter detail for serial numbers, highlight the pertinent serial number and then depress the Detail Tab. The following screen will appear:
Enter in Serial No and Comments if applicable.
Depress the Save record action button to save, or depress the Abandon changes action button to abandon changes.
|

| 1.3.4.3. Editing Serial Numbers |
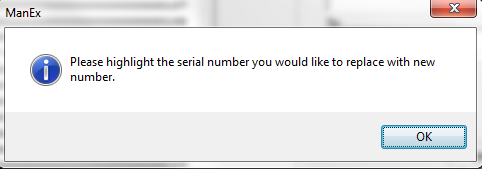
Find an Existing Work Order. Receive the following message:
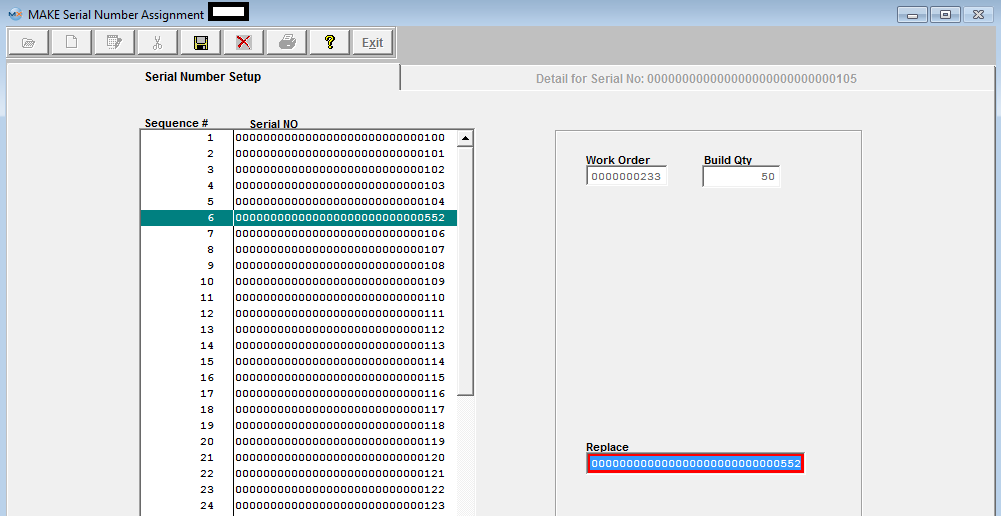
Depress OK and highlight the Serial number you would like to replace.
Type the correction into the Replace box. The Serial NO for that Sequence # will change. Depress the Save changes action button to save changes, or depress the Abandon changes action button to abandon changes. If you want to delete ALL of the Serial Numbers, depress the Delete action button. Then depress the Save changes action button. |
| 1.3.4.4. Invoking Serialization after the Work Order is Started |
Invoking Serialization after the Work Order is Started If you already have a Work Order started and then decide to invoke serialization, in order to assign serialization to a product with an open work order, in the Shop Floor Tracking Module, the parts must all be in a Work Center which is PRIOR to the Work Center in which serialization is to be applied.
Then the Work Center can be updated and the product moved BACK to the appropriate Work Centers after the product is serialized. If the Work Order has been completed and the product is in the Finished Goods Work Center, the user may move the product back to a “non-serial Work Center” and then serialize and update the Work Order. Then the user should move the parts back into the Finished Goods Work Center. If the parts in Finished Goods were already shipped, the user can use the Inventory Handling module to temporarily increase the finished goods to the needed quantity. Then they can be backed into the Work Order. After running these parts back down the chain, the user would use Inventory Handling to take the parts back out of inventory. |

| 1.3.4.5. Serial Number Turn-On Process |
There is no easy way to have some work orders without serialization and some with for the SAME product. Turning on Serial Numbers on a product with OPEN Work Orders must be done carefully. Here are some processes: 1. Using the same product and the SAME Revision – ship all of the non-serial numbered product PRIOR to turning on serialization OR don’t turn on serialization until you are ready to serialize everything not shipped. To serialize everything not shipped, you will have to move product back to the Work Center where serialization is started, then turn on serialization in Work Order Traveler Setup (for further information see Article #1134) and click on the “Update Open Work Orders”. Be sure to update all of the open work orders. If you don’t, you won’t be able to ship anything that was not updated. (The items will be in a black hole and will need a programmer to get them out.) 2. Using the SAME Revision, but using the special character trick: a. Copy the product number to the new product in the Inventory Control item Master but put "00" in front of the Rev. See Article #1058 for further instructions on copying a product number. b. Then copy the existing product BOM to the new 00 revision product. See Article #1104 for further instructions on copying a BOM. c. Turn on serialization for the new 00 rev product and copy the routing from the old product. Be sure to select which Work Center you want serialization to start. See Article #1106 for further instructions on how to turn on the serialization. d. Enter all new Sales orders using the 00 revision product number. e. When you have shipped all of the old non-serialized product, inactivate the product number in the Inventory Control module. See Article #1058 for further instructions on how to inactivate a product number. 3. Using a different revision number: a. Copy the product number to the new product revision in the Inventory Control Item Master. See Article #1058 for further instructions on copying a product number. b. Then copy the existing product BOM to the new revision product. See Article #1104 for further instructions on copying a BOM. c. Turn on serialization for the new revision product and copy the routing from the old product. Be sure to select which Work Center where you want serialization to start. See Article #1106 for further instructions on how to turn on the serialization. d. Enter all new Sales Orders using the revision product number. 4. You may prefer to create new revisions using the ECO module. It can change the revision of product in Work orders in WIP, but DO NOT turn on the serialization in the ECO module. See Article #1133 for further instructions on the ECO module. a. First change the revision of the product using the ECO module b. Then move the product back to the Work Center where you want serialization to begin in the Shop Floor Tracking module. See Article #1106 for further instructions on how to turn on the serialization. c. Then turn on serialization and select “Update Open Work Orders” in the Work Order Traveler Setup and click on the “Update Open Work Orders”. Be sure to update all of the open work orders. If you don’t, you won’t be able to ship anything that was not updated.(The items will be in a black hole and will need a programmer to get them out.) |
| 1.3.4.6. Re-work Work Order Serial Numbers |
If the rework Work Order is created from RMA, then the user doesn’t need to assign the serial number for the Work Order. The system will automatically transfer all serial numbers to the new re-work Work Order when the user creates the RMA Receiver. For a complete discussion of the RMA process, please refer to Article #1610. If the user MANUALLY creates a re-work Work Order, the following conditions for assigning existing serial number to a re-work Work Order will be:
When a Re-work Work Order is established for a serialized product, the user may select existing serial numbers that are in inventory (finished goods) that are to be reworked. Rework Work orders will not accept NEW serial numbers. When a serial number is placed in the rework Work Order, the serial number must exist in finished goods, and the number of serial numbers transferred to the Work order must equal the quantity of assemblies for the Work order. The part number for the serial number that is moved into the rework Work Order does not need to be the SAME part number and revision as the rework Work Order. Thus, if a user wants to upgrade part number 123 rev A to part number 123 rev B, they can transfer the parts to the Work Order and identify the serial numbers transferred. Parts may also be changed to a new part number: Part Number 123 rev A can be placed into a re-work Work Order for part number 234 rev C. The only condition is that the quantity and number of serial numbers must match. Once the record is saved a line shortage for the rework work order will be created and serialized parts will be issued to the "Rework" work order and the old part number will be removed from FGI at the time the new part number is moved into WIP. See example below:
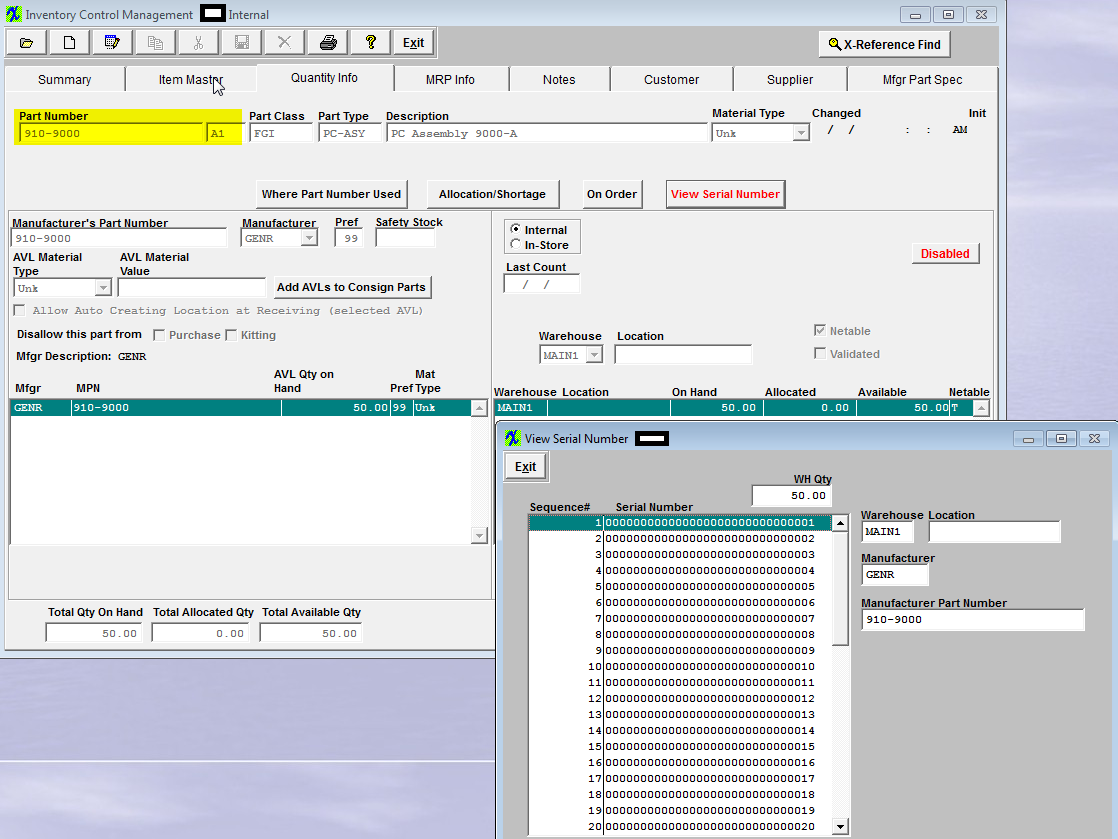
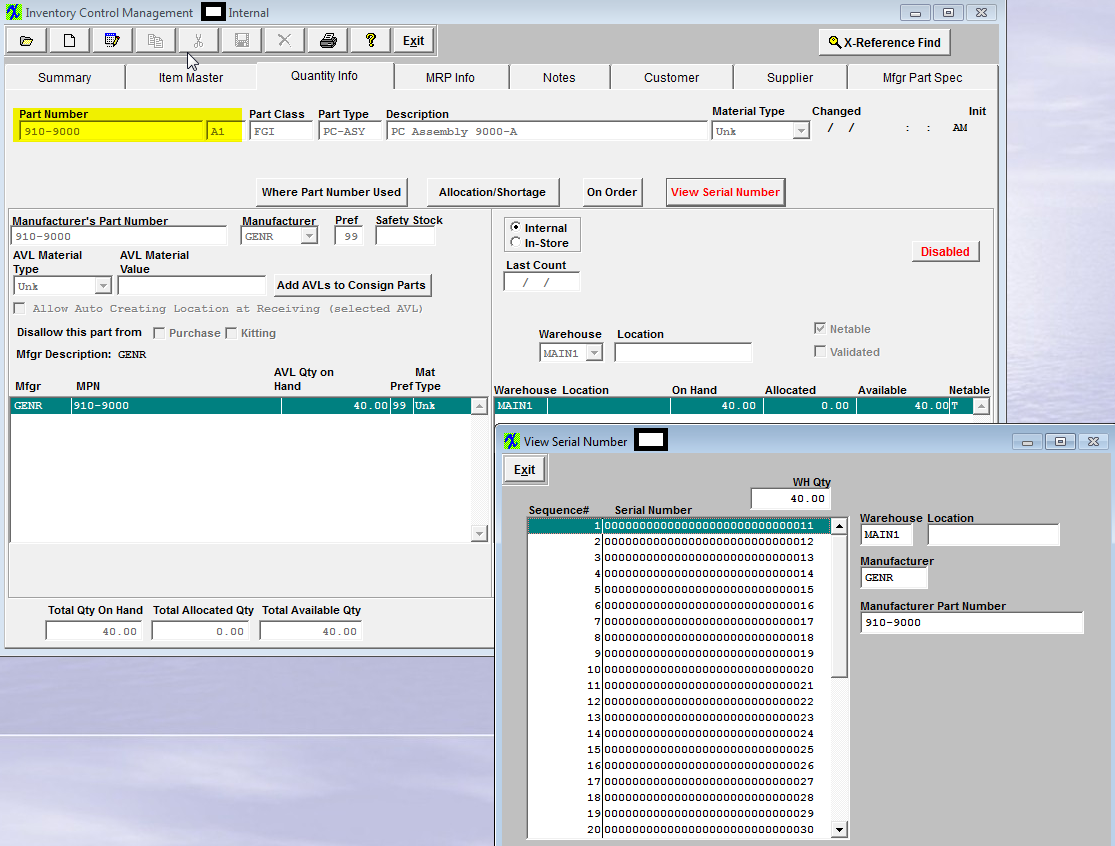
Serialized Inventory Parts (910-9000 Rev. A1) in FGI
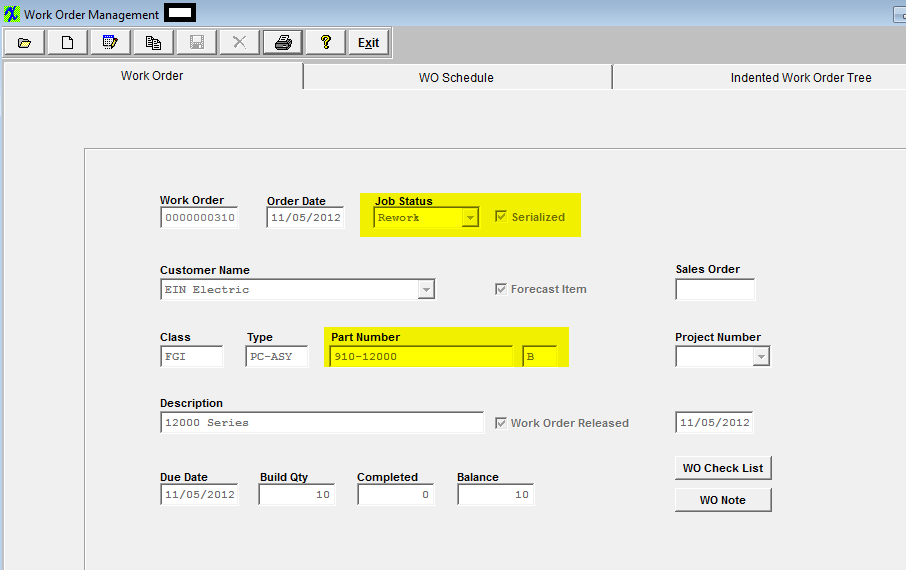
 Create a Rework Work Order using a different Part Number (910-12000 Rev. B)
 Enter the Work Order Serial Number Control Module and enter in the SN's you want to rework, if the SN you entered is found in other locations a screen will appear displaying all the PN's that have this SN in FGI and user can select which PN they want to pull this SN from
 Once user has assigned all the SN's to this WO, they should depress the Save button
 Now user can go to the Kitting Module and release the kit. The Make Parts #910-9000 Rev. A1) have already been issued to the Kit.
 And Removed from FGI for the Old PN (#910-9000 Rev. A1)
 |
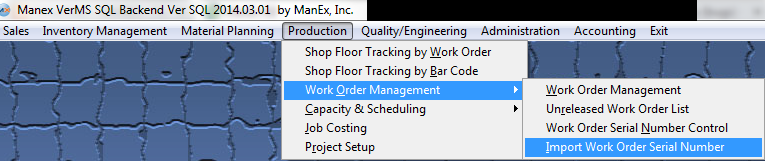
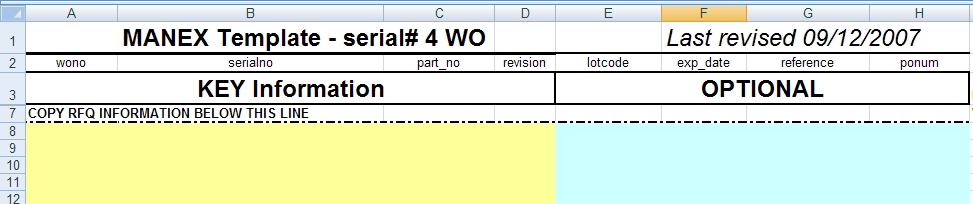
| 1.4. Serial Number Import-SQL | ||||
Serial Number Import
The following message will appear:
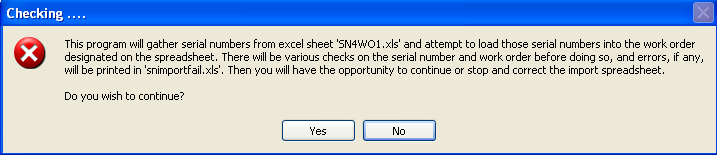 Depress "Yes" to continue user will receive the backup message then the following message:
 Then the Serial Number Import Complete message will appear:
 A 'importedsn.xls file will be created in the root directory, showing all the information that has been imported.
View the "WO Serial Number Control" and they have been uploaded correctly and complete:
 |