| 1. How To ..... for SFT by WO |
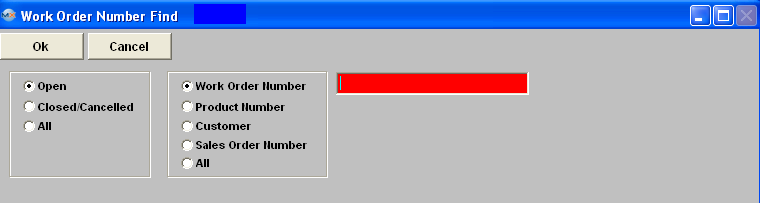
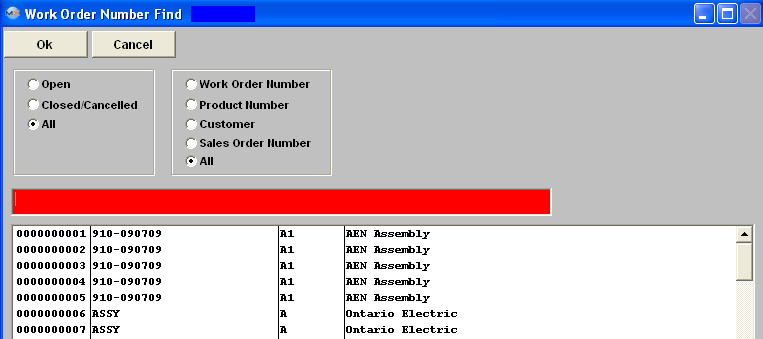
| 1.1. Finding A Work Order | ||||||||
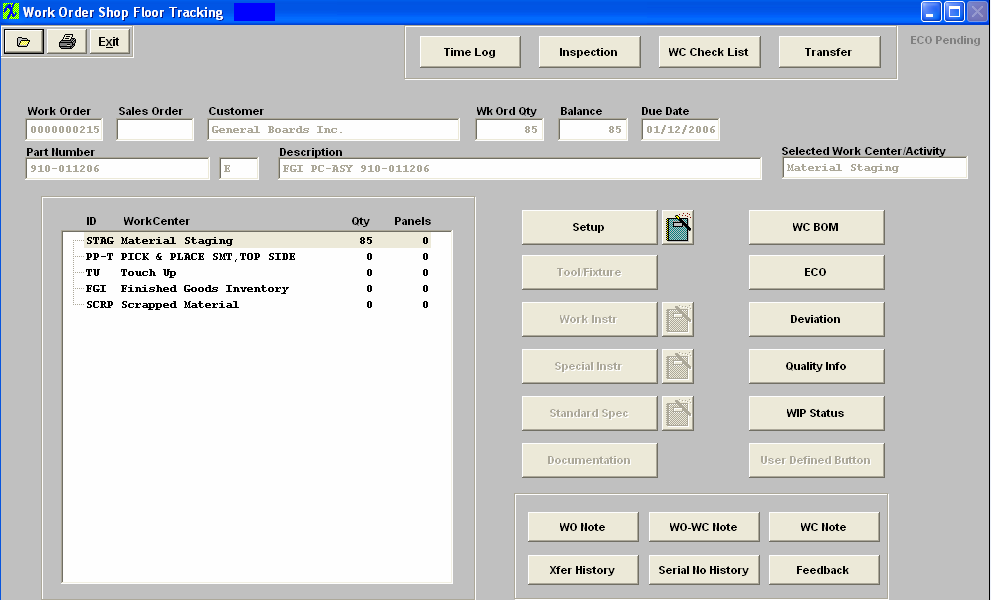
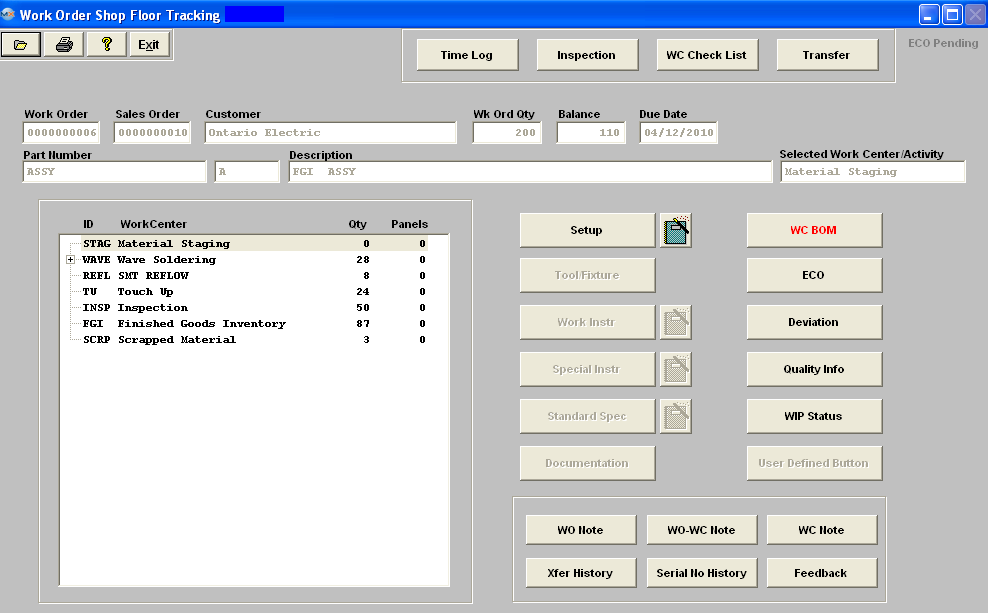
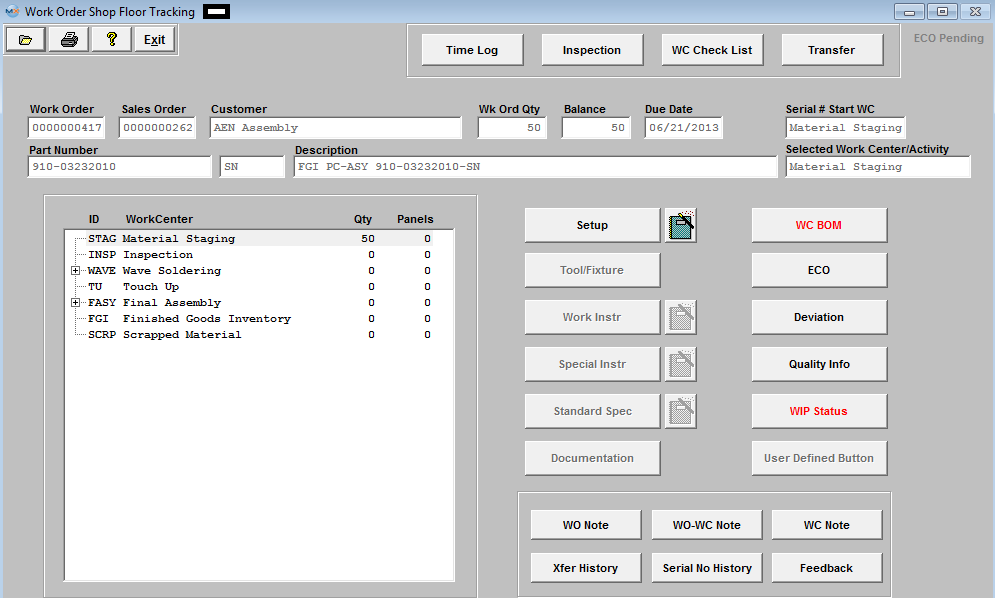
The Main Screen will be displayed:
The Shop Floor Tracking screen is then populated with the appropriate data.
|

| 1.2. Shop Floor Tracking - Transfer | ||||||||
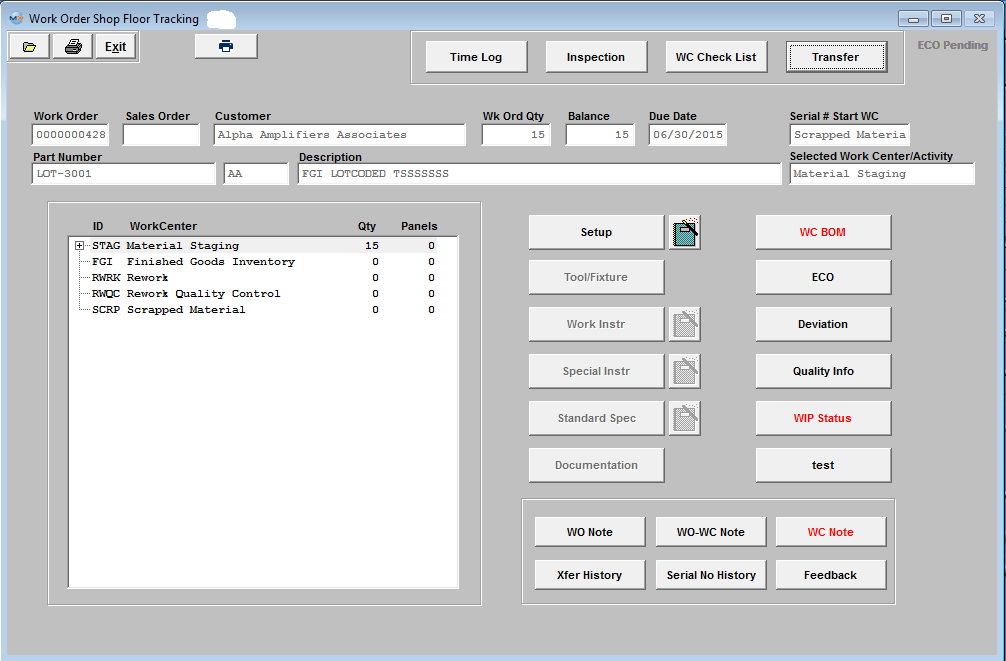
Find the desired Work Order record within the system. Highlight the current Work Center where quantity is displayed, as illustrated:
Depressing the Footnote button will bring up a note screen.
Depress the Edit button, Type in the footnote. Depress the Save button. Depress the Exit button.
Transferring Serialized product
If the work station being used to transfer serialized material is assigned to use a default work center in Production Work Center/Activity Setup module, when the user first opens the module, the module will use the default work center assigned for this workstation, if the transfer is "FROM" a different work center other than the default and user is NOT a supervisor or has the option "Allow Changing Default Work Center for Serial Number Transfer" box checked within the Security module, they will receive the following message:  When user depresses "OK" a supervisor approval is required to continue. After supervisor’s password is entered, the default work center will be changed to the one that the supervisor entered password for. For example: the workstation is assigned to use “TU” as default work center, now if user chooses to use “AI” to transfer, the system will ask for supervisor’s password, if user cancels the password, the default work center will still be “TU”, but if the supervisor enters his/her password on this machine, the default work center will be changed to “AI”. If now the user tried to transfer from “TU” again, the system will ask for supervisor’s password again. If user exits the module and come back, the default work center will be “TU” again.
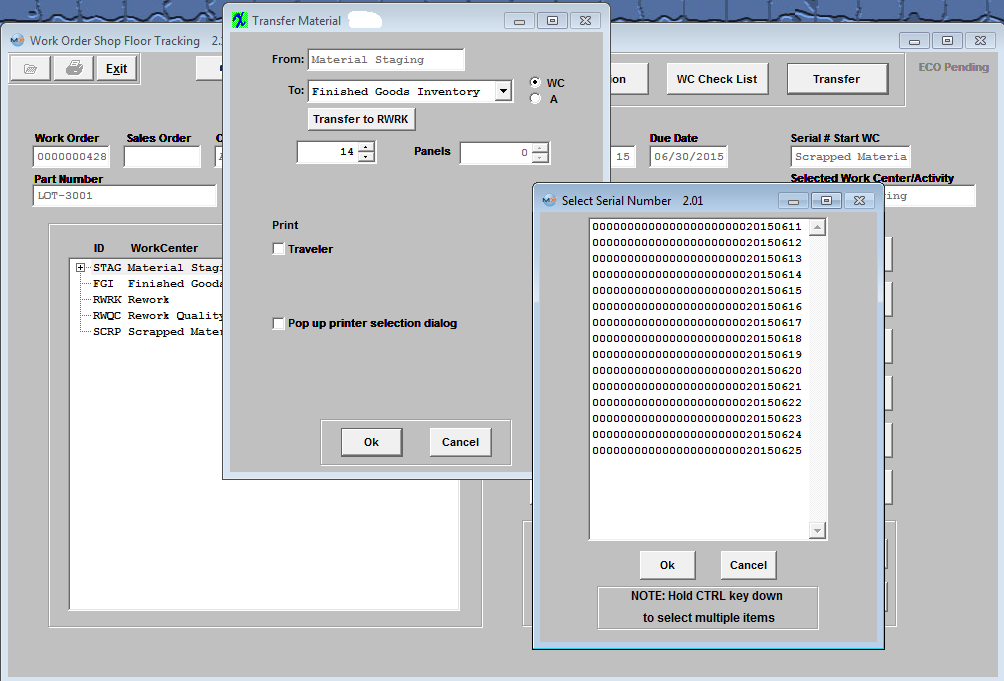
If the user is using tracking by serial numbers, and if the user is transferring a lesser quantity than displayed, ManEx will display a screen from which to select the serial number(s) to be moved in the transaction. The user may select one or more serial numbers to match the quantity being transferred, and then press the OK button. The user must select the proper number of serial numbers or the transaction will be cancelled.
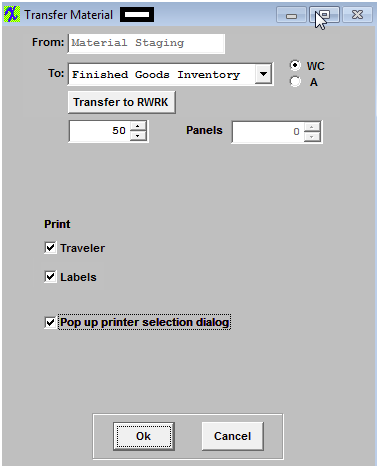
Depress the OK button. The material will transfer and the Traveler will go directly to the default printer. (This report requires that the user have the bar code font available).
If the product is included in an active Cycle count, or Physical Inventory count, the following message will appear after depressing the OK button on the transfer screen anud user will not be allowed to transfer product until the count has been completed and posted.  Discussion on the Accounting Entries If the user also has accounting installed, then the appropriate journal entries will forward to the Accounting “Release to General Ledger” screen. Briefly, assuming that the user has the material cost set up in the Inventory Control Item master, then when the product reaches the Work Center “Finished Goods Inventory”, the entry will be to debit Finished Goods Inventory (or the warehouse home general ledger number of the product) and to credit WIP .If the product ended up in the Work Station “Scrap”, then the debit would be to the default scrap general ledger account, as set up in the Accounting Set Up. Configuration Variance If the Material Cost per the product was not equal to the sum of the standard costs per the BOM components, then a configuration variance will be created. Please refer to the “Wip Value" Article #913 for further explanation. |

| 1.3. Use Work Center CheckList within SFT Module |
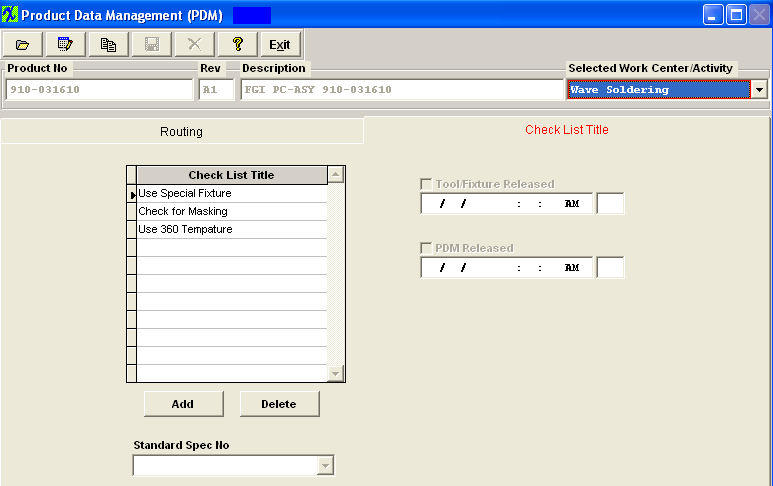
Create a Routing within the Work Order Traveler Setup module for Product. For further detail see Article #4246  Create a Checklist for a Specific WC within the PDM module. For further detail see Article #4584 .
 Create a Work Order for the product within the Work Order module. For further detail see Article #4236.
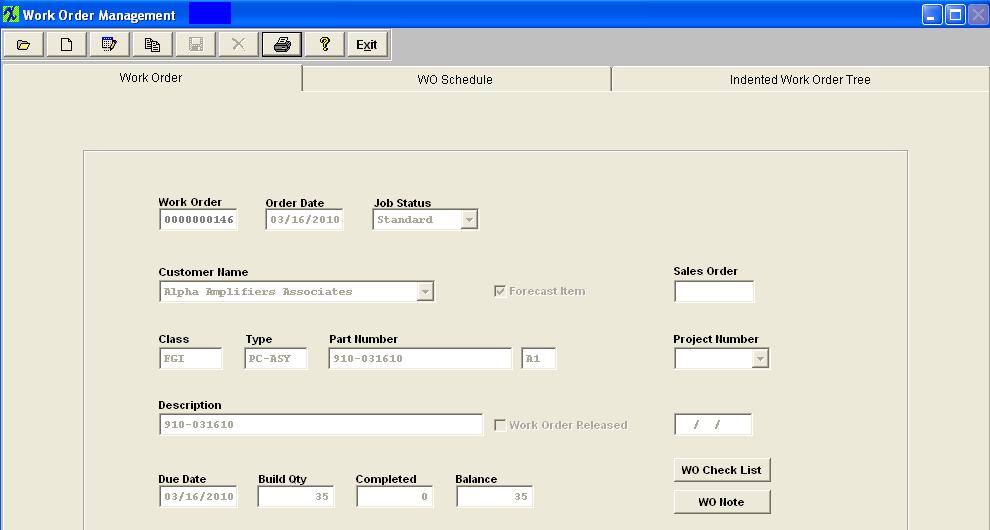 The Traveler Released box within the WO Traveler Setup MUST be checked.
The Tool/Fixture Released box and the PDM Released box within the PDM module MUST be checked.
The kit must be Released and the Kit Complete box within the Kitting module MUST be checked.
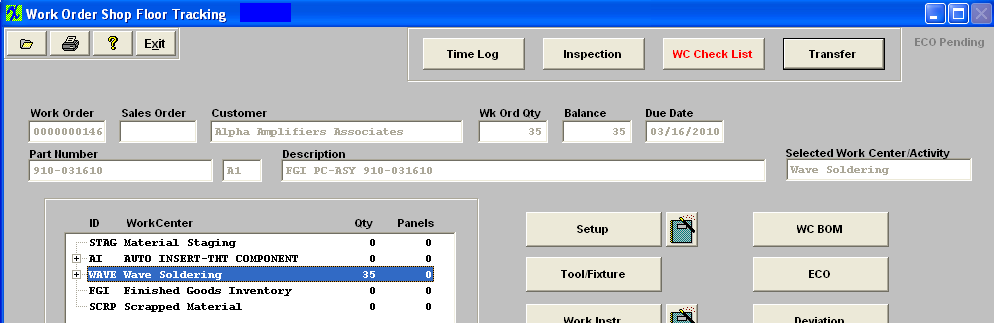
Transfer product through SFT when product reaches the Work Center with the checklist the "WC Check List" button will be displayed in Red (as displayed below).
 Click on the "WC Check List" button and the check list will appear (as displayed below):
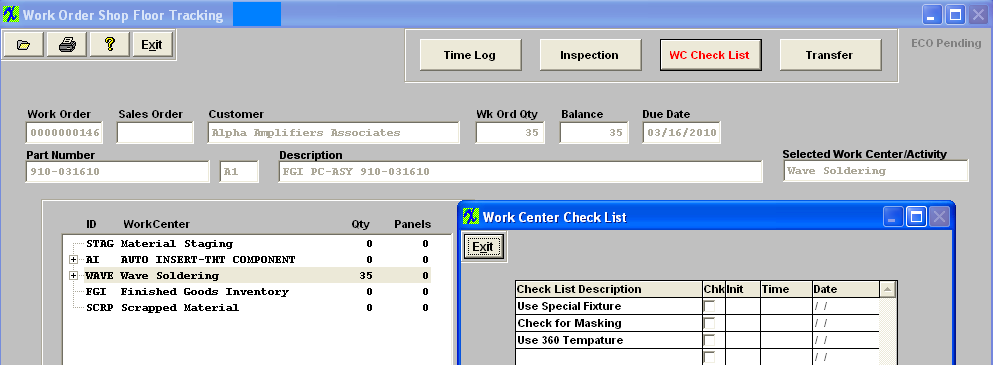 User must then review the list and check the box when task has been completed and their initials, time and date will default in (as displayed below): Note: This check List is for reference only and WILL allow the users to transfer product to the next Work Center if not all items have been checked off.
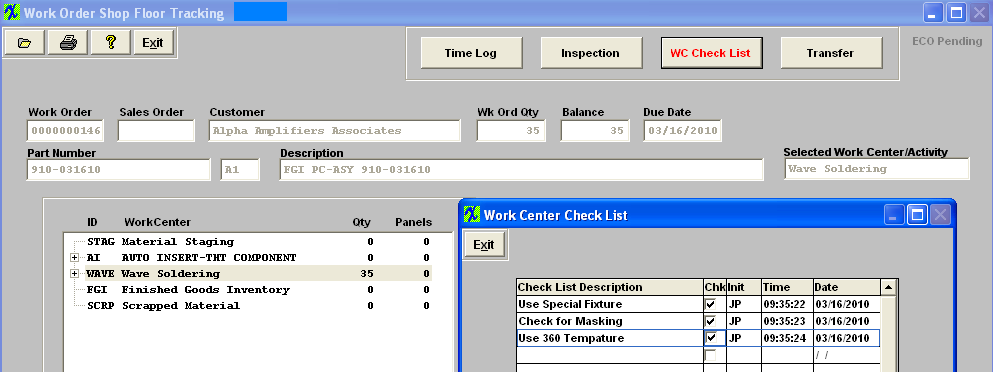 Once all the boxes have been checked within the Work Center CheckList user may complete the transfers. Note: This checklist is for users to check if they do all the necessary task, but it does NOT enforce the user to check all items before the user can transfter to next WC.
|
| 1.4. Enter the Defect Data Information | ||||
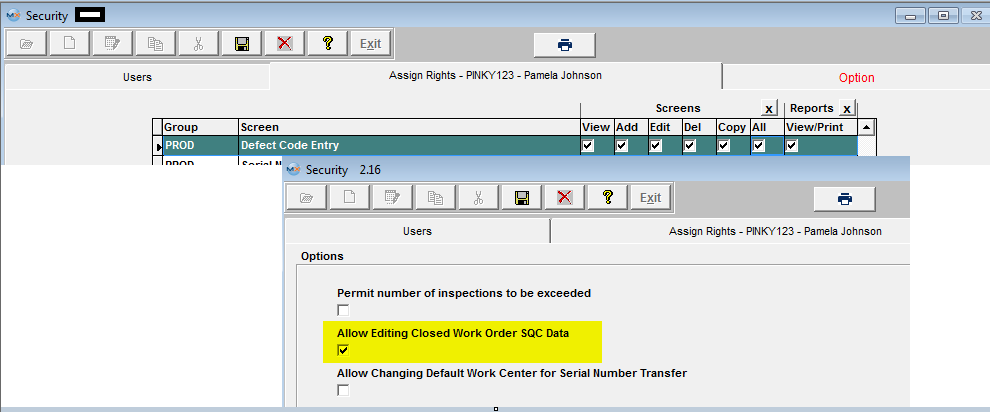
Entering a Defect Code Entry to a Work Order For closed Work Orders: In the Security module, there is an option which must be checked per user for the “Defect Code Entry”. Once the Security right has been entered, the user may edit a “closed” Work Order.
The following screen will be displayed:
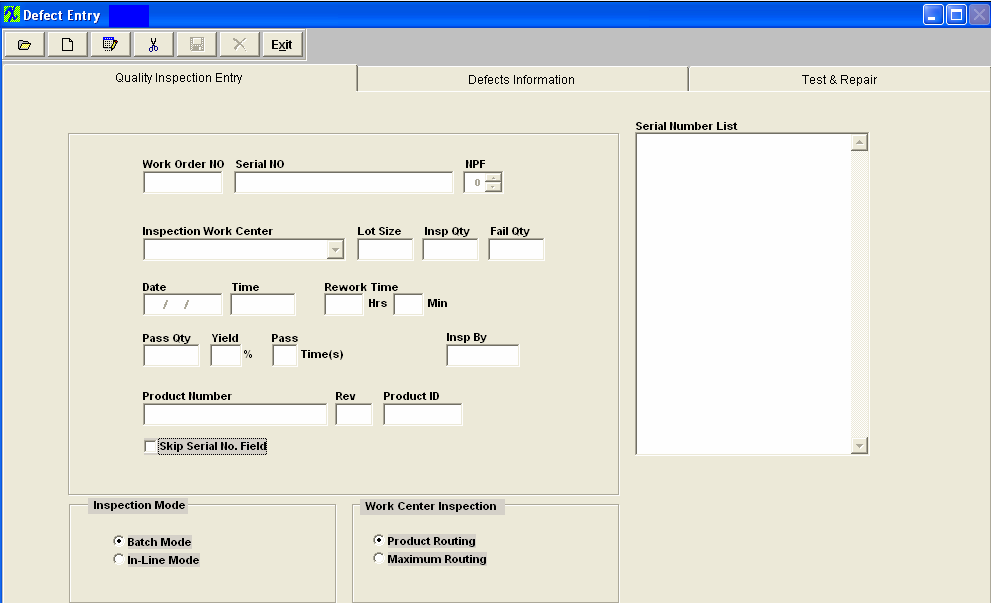
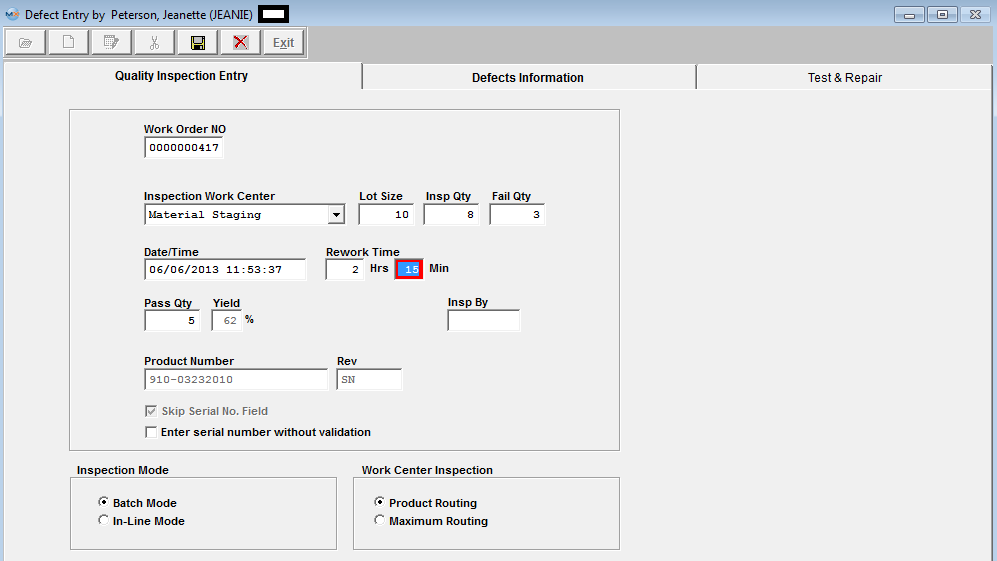
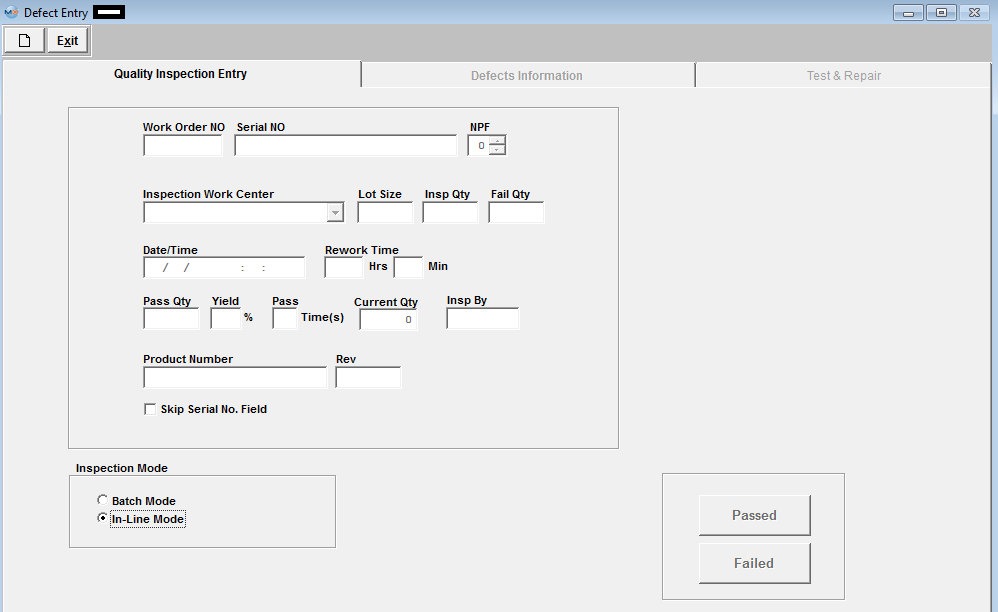
Depress the "Inspection" button located at the top of the screen. The screen below will be displayed: The first screen presented to the user will display all the defaults that are selected in the system setup/Quality Defect Codes, for Inspection Mode - the user has selected to enter defect information in BATCH or IN-LINE mode, for the Work Center Inspection the user has selected to display either Product or Maximum Routing . The user may change these selection if they choose to do so. Batch mode is used for entering data previously recorded during inspection of the product. When the user chooses to enter defect data in “In-Line” mode with the serial number, the user won’t be able to enter “lot quantity”, “inspection quantity” or “failed quantity”. These fields are all defaulted in when the user goes into the “Defects Information” tab. However, if the user enters defect data in “batch” mode without the serial number, then the user will be able to enter “lot quantity”, “inspection quantity” and “failed quantity”. If the user wishes to 100% inspect material, and directly move the passed material to the next routing work center, then the In-Line Inspection mode may be used. The user has the ability to limit some workstations (specific PCs) (which is defined in the Security Module) to be able to only transfer material “FROM” a certain Work Center. When the user transfers material from a Work Center (A Serialized part Number Only) in the Defect Code Entry In-Line Mode, the system will check to see if the serial number is currently in the Work Center. If not, a special supervisor’s password is required to transfer the serial number FROM a different Work Center. After the supervisor’s password is entered, the system will use the new Work Center to be the default FROM Work Center until the user closes the screen. The next time the user opens the screen, the default FROM Work Center will be changed back to the one defined in the Security Module.
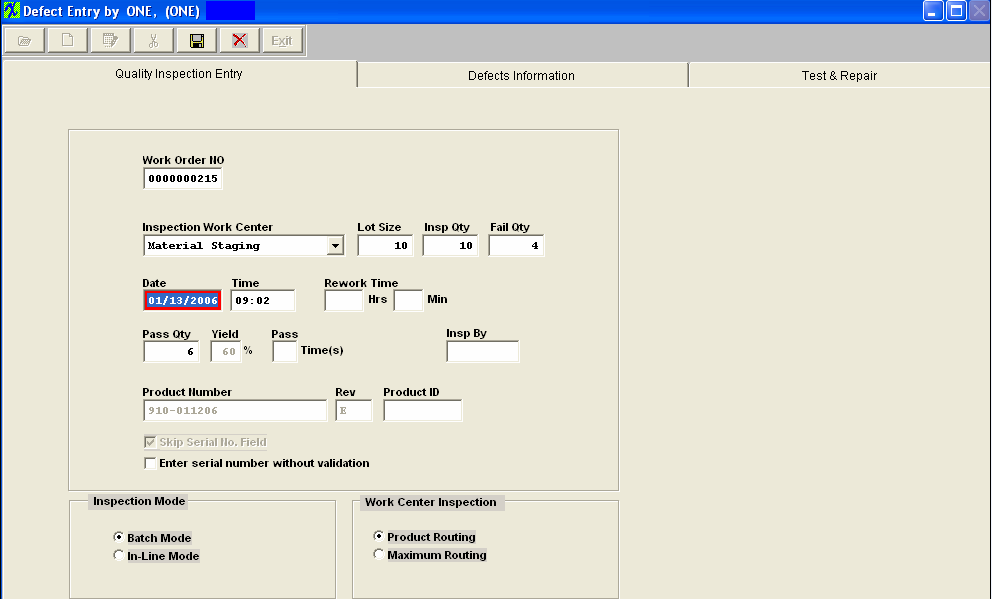
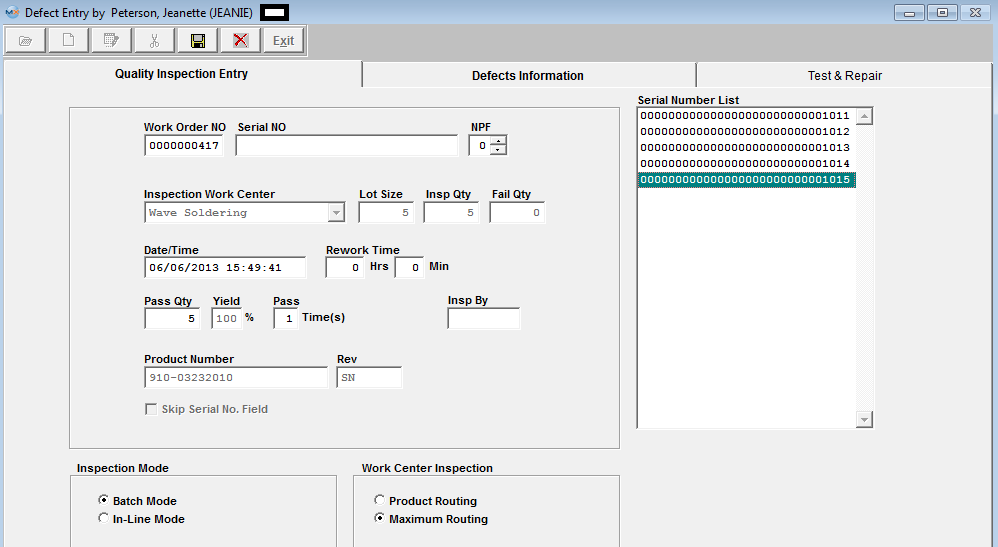
Entering Quality Inspection Data There are two different ways to enter the Inspection Data: Batch Mode or In-Line Mode Batch Mode The first information tab records information about the work order. This includes lot size, failures, inspection quality, date, etc. Depress the Add action button. Enter the password of the Employee that has inspected the product. When the user first brings up the Defect Entry program, and before entering or editing data, they have the option to check or uncheck the “Skip Serial No. Field”. Once the data entry process is begun, the option is cleared until the user exits the defect entry form and re-enters it. Adding Work Order Defect Information Without Serial Number Tracking Enter the Work Order number, select the Inspection Work Center from the pull down, enter Lot Size inspected, Inspected Qty, and Failed Qty. The Date, Time, Pass Qty, and Yeild % will default in. The date and time may be changed if needed. The user may enter estimated rework time, if desired.
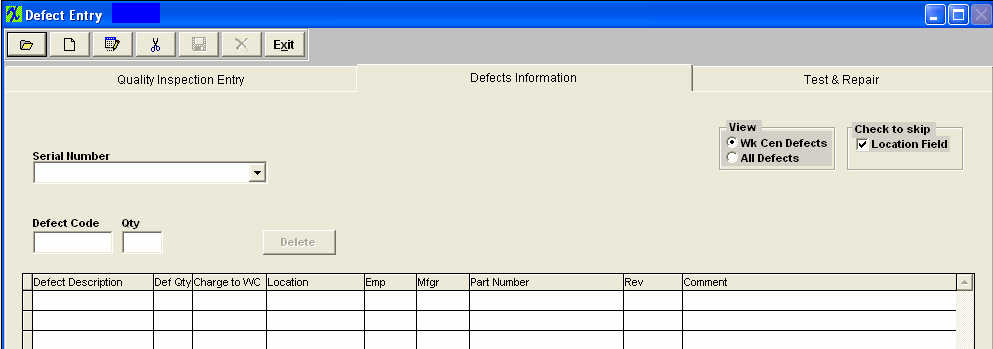
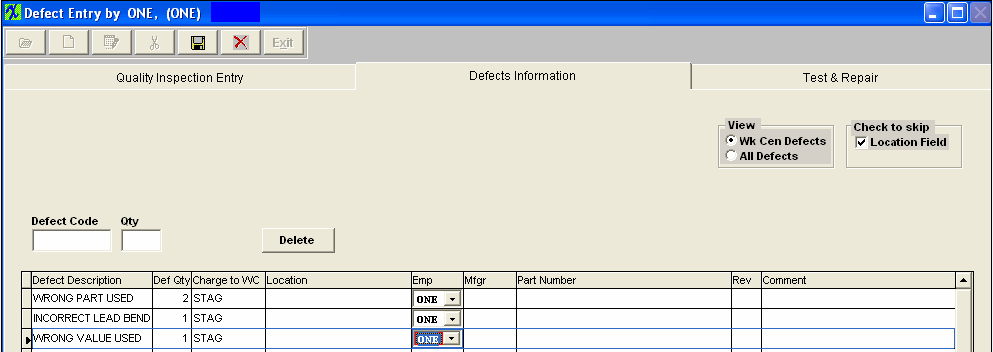
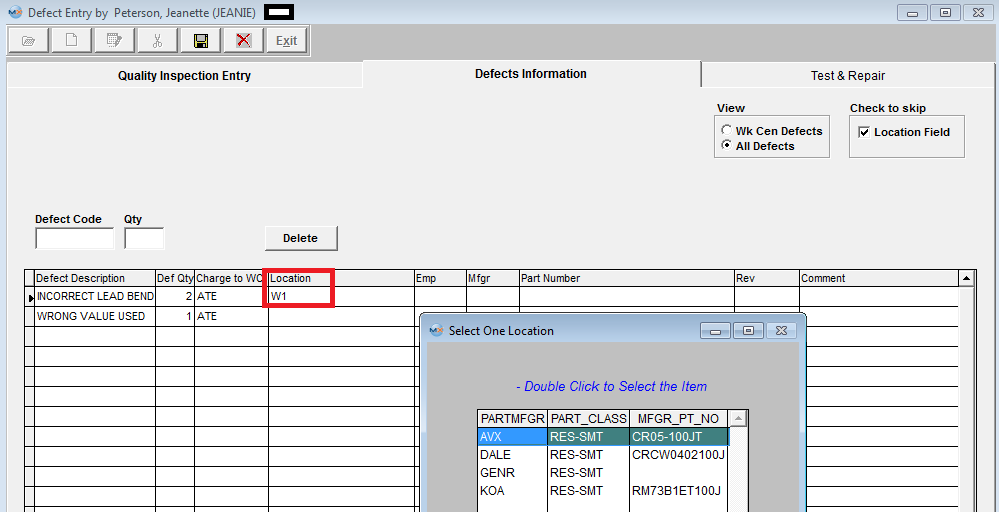
Depress the Defects Information tab and the following screen will appear:
The user may then enter a defect code by manually typing in the code, or by scanning a bar-code menu, or by double clicking on the field to review a list of defect codes. ManEx defaults the number of defects to one item, but the user may overwrite the quantity with an observed quantity greater than one. The list displayed will depend on which view is selected (in upper right hand corner of screen). If Work Center Defects is chosen, only those defects associated with the work center (as established in the system setup/Quality Defect Codes) will be displayed. If All Defects is chosen, then every defect entered in the system setup/Quality Defect Codes will be displayed. The user may select one or more defects from the list by holding down the Control Key while clicking on the defects to be selected. After completing the selection of the defects involved with the current inspection, clicking on the OK button loads the selected defects into the defect information screen. Although ManEx will enter a Charge To Work Center code based on the work center entered or the location of the part, the user may modify the originating work center by clicking on the field and selecting another work center from the list. The user may (optionally) then enter in the location (reference designator) where the defect was observed. The system will check the BOM to be sure that the location entered here matches locations entered on the Bill of Materials. When a valid location is entered, then system searches the Bill of Material to find manufacturers approved for the product, and displays a list of the approved manufacturers for the user to identify which manufacturer was associated with the defect observed. The user double-clicks on the manufacturer's name for the defective part, and the manufacturers name is placed in the defect information screen. (Note: the location field MUST be populated if using the Test and repair module)
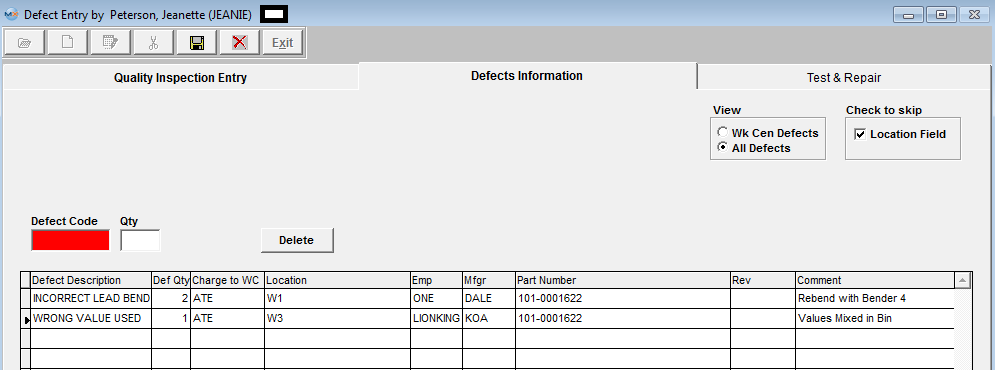
The user then must select an Employee from the pull down. The employee's being displayed in the pull down are only the employee's that are assigned to work centers (in the Security module) that are the same work centers listed in the Shop Floor Tracking by Work Order module and is sorted by the Employee User ID Number.
 The user may also enter a brief comment about the defect, for future reference.
The completed screen should appear as follows:
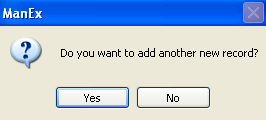
Depress the Save record action button to save changes or the Abandon changes action button to abandon changes. If you depress the Save record action button, the following message will be displayed:
If you want to add another defect record for the same user "ONE" then depress YES, if you want to add a defect record for a different user (Example user "TWO"), then you must depress NO. Depress the Add record action button and enter user "TWO"s password and continue to enter the defect information. When the user has completed the defect information, they may click on the Test & Repair tab, to enter more information about the part.
NOTE: The Test & Repair is actually a separate OPTIONAL module, but has been included into the Defect Entry screen for ease of use for the operators. For further detail about this module see Article #4211.. Adding Work Order Defect Information With Serial Number Tracking Enter the Defect Entry screen. Depress the Add Record action button. Un-check the "Skip Serial No Field" If the user is tracking serial numbers, then the first field to be entered (or bar-code scanned) is the serial number of the product being inspected. (Not the Work Order number).
Enter in a serial number. When the serial number has been entered, ManEx will complete the work order and product information. ManEx will also enter the current work center location of the serial number supplied. The user now has the option of continuing to scan (or type) serial numbers, and log the defect information for each one later, or enter a serial number then the defects for that serial number, enter the next serial number, then the defects for the second serial number, etc. When multiple serial numbers have been entered, the data will refer to the serial number that is highlighted in the Serial Number list. ManEx will enter in the lot size according to the quantity of serial numbers showing in the serial number list.
Go to the Defects Information Tab to enter in the Defect info for each SN entered:
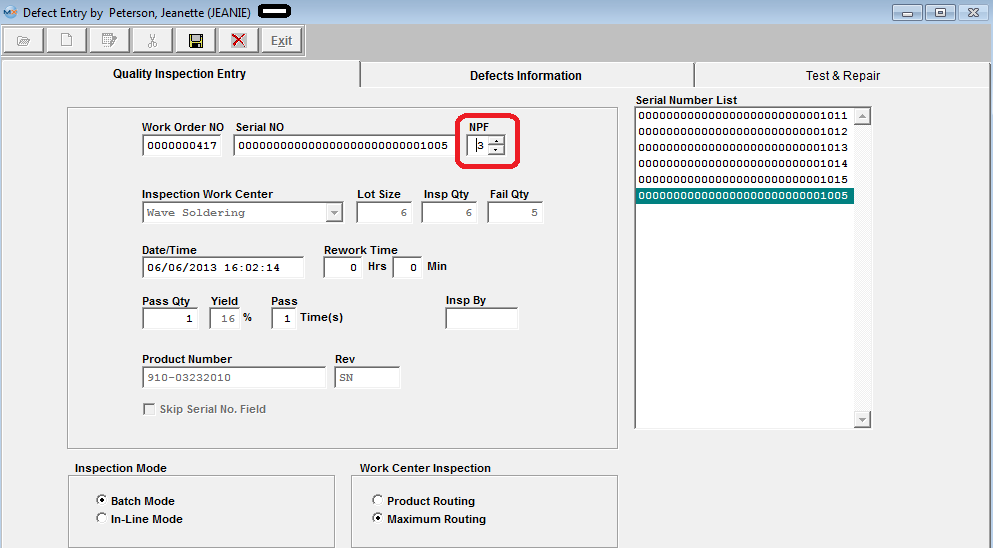
The next field, “NPF” is provided for the user to record when observing the product and finding that there is “No Problem Found”. If the serial number had previously been rejected, and analysis of the product yield no further problem, either with cosmetics or function, then the user may change this number to 1, meaning the first time it was inspected or tested, no problem was found. If the product serial number is subsequently rejected again, and a second inspection finds no problem, the number may be incremented to a “2”. This will alert users to repeated rejections of a product serial number, one or more times with no discernable defects.
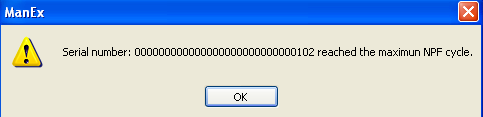
If the number of times that a part has experienced an NPF exceeds that established in the system setup/Quality Defect Codes the user will receive the displayed warning message and will allow you to proceed on with the Inspection. This is just a notification that the board has passed the maximum NPF cycle.
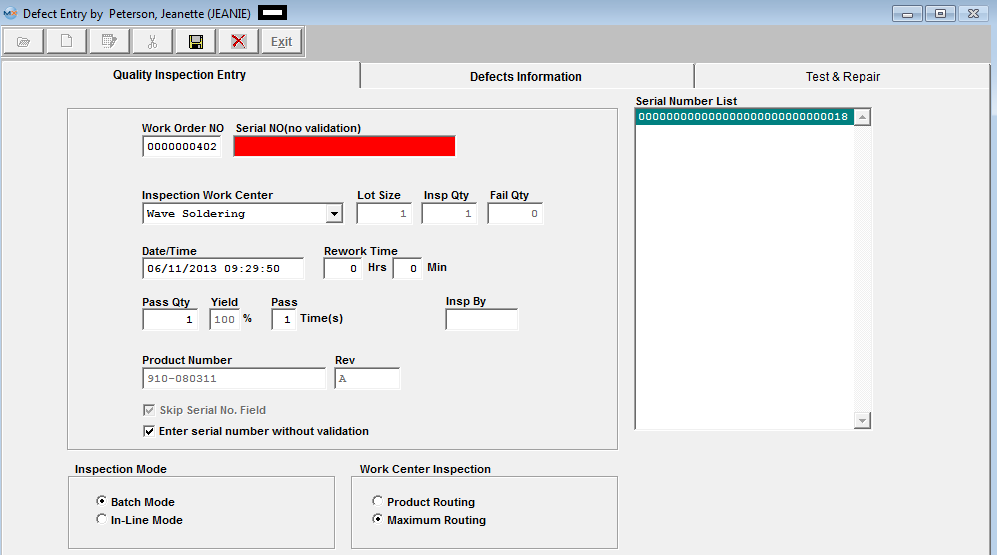
Entering Defect Information This screen operates as described under Entering Defect Information without serial numbers, except that the user must enter data for each serial number recorded. The serial number may be chosen by highlighting the serial number in the serial number box on the first screen, or in the defects information screen, by pressing the down arrow button next to the serial number field and selecting a serial number. Defect information is entered in the same fashion as described above, except that the user should remember that the data being entered is for one part at a time, by serial number of the part. The other difference in using serial number defect tracking is that on the Test & Repair screen, the user may view the Serial Number History tab. This view will display both the transfer history of the serial number through the work centers, and the history of defects associated with the serial number of the product. (Note: if you are entering Defect information and not using the Serial No, then this screen will remain blank) The user completes the defect entry for the first defect code (The location, quantity of defects observed, etc.). The process is repeated for each defect observed, storing the location and serial number to be analyzed at a later time. At the conclusion of defect entries for the lot, the Save action button is pressed to retain the data. If the user elects to ignore all data entered in this session, the Abandon changes action button may be clicked to void any entries. Notice that ManEx computes the total number of defects observed for the defect code and displays the number next to the defect code. Entering Defect Information Without Serial Number Validation The “Enter Serial Number without Vailidation” option will only be enabled if the user skips the regular Serial number entry, and if the Work Order Product has not been serialized within the ManEx system. This feature has been added to allow the users the ability to inspect Serial Numbers that do not actually exist within the ManEx system. (for example serial number created outside of ManEx, by customer or other software, etc. . .) If the user checks the “Enter serial number without validation” then ManEx does not validate when the users enters the Serial Number. The system just records the entry for later SQC analysis purpose. Enter the Defect Entry screen. Depress the Add Record action button. Select “Enter Serial Number without Validation. ” Enter the Work Order number, and the desired Custom Serial Number(s).
If the Work Order Product is serialized user will receive the following message:
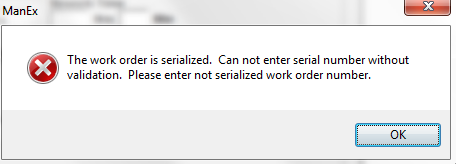  The remaining process will then be the same as listed above.
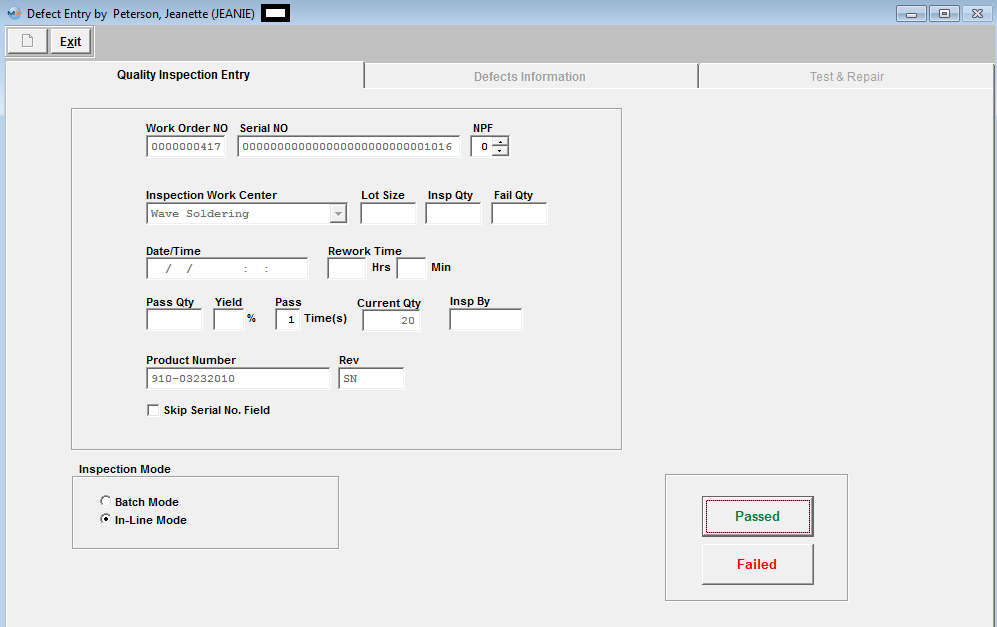
In-Line Mode When the user chooses In-Line inspection, either by setting it as the default in the Quality Defect Setup, or by selecting In-Line on the initial Quality Inspection Entry screen. The first information tab records information about the work order. This includes lot size, failures, inspection quantity, date, etc.
Depress the Add action button. Enter the password of the Employee that has inspected the product. Check the Skip Serial No. Field (if not applicable). Enter the Work Order number, select the Inspection Work Center from the pull down. The Product Number, Revision and Current Qty will default in. Then the Passed and Failed buttons are active. The user then clicks on either of these two buttons to proceed with the inspection.
Clicking on the Passed button transfers the serial number to the next work center (based on the product routing), and increments the lot inspection information by one and records the date time and inspector. Clicking on the Failed button activates the Defect Information Entry screen for the user to record his/her observations. Defect information is entered in the same fashion as described above, based on with or without serial numbers. When the user has completed the defect information, may click on the Test & Repair page, to enter more information about the part. The Test & Repair is actually a separate OPTIONAL module, but has been included into the Defect Entry screen for ease of use for the operators. Please see the Test & Repair article for further detail.
Edit Work Order Defect Information After a work order has been found or entered, it may be edited by selecting the Edit record action button. After selecting the transaction, the user may edit fields as described above in entering data.
|


| 1.5. Enter the Defect Data Information for the DPMO by Employee Report | ||||
In order to have the "DPMO by Employee" report create valid data, the user must be sure to enter the opportunities for defects (PPM) in the Work Order Traveler Setup and the employee must inspect the board and be assigned to the defects. The "DPMO by Employee" report only gathers data if BOTH "Inspected By" and "Emp" are the same user, and the PPM is setup. See Article #3156 for further detail on DPMO. The following steps need to be followed to collect and track defects per employee. All data must be Entered in the Quality Inspection Entry and Defect Information screens, with in the Shop Floor Tracking Module. Entering a Defect Code Entry to a Work Order for the "DPMO by Employee" report
Depress the "Inspection" button located at the top of the screen. The following screen will appear:
Entering Quality Inspection Data The first information tab records information about the work order. This includes lot size, failures, inspection quality, date, etc. Depress the Add action button. Enter the password of the Employee that has inspected the product and will be assigned to the defects. Example: If user "ONE" is going to be assigned to the defect(s) then you must enter user "ONE"'s password. Check the Skip Serial No. Field (if not applicable). Enter the Work Order number, choose the Inspection Work Center from the pulldown, enter Lot Size inspected, Inspected Qty, and Failed Qty. The Date, Time, Pass Qty, and Yeild % will default in.
Depress the Defects Information tab and the following screen will appear:
The user may then enter a defect code by manually typing in the code, or by scanning a bar-code menu, or by double clicking on the field to review a list of defect codes. The list displayed will depend on which view is selected. If Work Center Defects is chosen, only those defects associated with the work center (as established in the Quality Defect Codes setup) will be displayed. If All Defects is chosen, then every defect entered in the Quality Defect Codes setup will be displayed. The user may select one or more defects from the list by holding down the Control Key while clicking on the defects to be selected. After completing the selection of the defects involved with the current inspection, clicking on the OK button loads the selected defects into the defect information screen. Although Manex will enter a Charge To Work Center code based on the work center entered or the location of the part, the user may modify the originating work center by clicking on the field and selecting another work center from the list. The user may (optionally) then enter in the location (reference designator) where the defect was observed. The user then must choose the Emp from the pull down, which would be "ONE", because it needs to be the same user that has been entered in the "Inspected By". The user is allowed to enter other user's name on Defect detail page in the "Emp" column. But when the "DPMO by Employee" report is run, it will not display the records assigned to the different users. The system will check the BOM to be sure that the location entered here matches locations entered on the Bill of Materials. When a valid location is entered, then system searches the Bill of Material to find manufacturers approved for the product, and displays a list of the approved manufacturers for the user to identify which manufacturer was associated with the defect observed. The user double-clicks on the manufacturer's name for the defective part, and the manufacturers name is placed in the defect information screen. Manex defaults the number of defects to one item, but the user may overwrite the quantity with an observed quantity greater than one. The user may also enter a brief comment about the defect, for future reference. The completed screen should appear as follows:
Depress the Save record action button to save changes or the Abandon changes action button to abandon changes. If you depress the Save record action button, the following message will appear:
If you want to add another defect record for the same user "ONE" then depress YES, if you want to add a defect record for a different user (Example user "TWO"), then you must depress NO. Depress the Add record action button and enter user "TWO"s password and continue to enter the defect information. When the user has completed the defect information, he/she may review the "DPMO by Employee" report Article #815, or may click on the Test & Repair page, to enter more information about the part. The Test & Repair is actually a separate OPTIONAL module, but has been included into the Defect Entry screen for ease of use for the operators. Please see the Test & Repair Management (T&R) article for more information.
|