| 1. Accounting |
| 1.1. Accounts Receivable (AR) |
| 1.1.1. Accounts Receivable Aging |
| 1.1.1.1. Prerequisites for the AR Aging Module |
Users MUST have full rights to the "AR Aging, Reports" in Accounting Security . Users with “Accounting Security Supervisor” rights will automatically have access. The Ranges for the Aging screens must be setup within the Sales A/R Setup module.
|
| 1.1.1.2. Introduction for the AR Aging Module |
The process of printing an invoice produces an entry into the Accounts Receivable Aging module of the ManEx System. This dynamic nature of the process ensures that the aging reports always display the current receivables status regardless of whether an item has been posted into the General Ledger.
In order for the aging report to match the balances as shown in the balance sheet and account inquiry screens the user must first release the Sales (Invoice) and receipt information. This creates the underlying Journal Entry which then may be posted into the General Ledger system. The accounts receivable aging selection provides on screen and printed reports to assist the tracking and collection of outstanding invoices. Further, it provides a way to edit the credit status and payment terms of a customer. |
| 1.1.1.3. Fields and Definitions for the AR Aging Module |
| 1.1.1.3.1. A/R Summary Current - 60 | ||||||||||||||
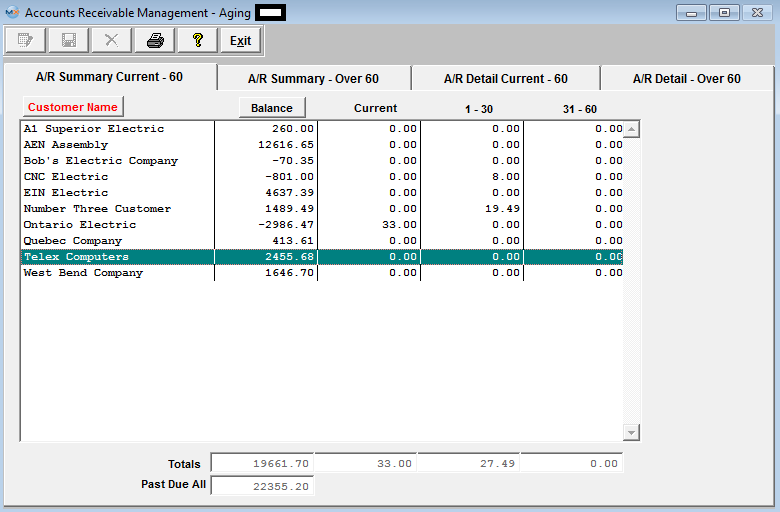 The summary screen will display each customer along with the outstanding balances for the customer. The screen may be sorted by customer or by balance by pressing on the appropriate button. This summary screen will show the total amounts due for each customer, the current open invoice amount, invoice one to thirty days past due, and thirty-one to sixty days (depending on what range is setup with the Sales A/R Setup) past due At the bottom of the screen, the total aged invoice amounts are displayed for each of these categories, as well as the total amount of aged invoice beyond sixty days (depending on what range is setup with the Sales A/R Setup) A/R Summary Current - 60 Tab Field Definitions
The name of the customer who owes the Account Receivable to the user.Note that the user may sort alphabetically by depressing the Customer Name button. The 1-30 column lists amounts to be received which are 1 to 30 days past the scheduled due date. (These ranges are setup within the Sales A/R Setup module). The 31-60 column lists amounts to be received which are 31 to 60 days past the scheduled due date. (These ranges are setup within the Sales A/R Setup module). The totals displayed are the totals of each column – Balance, Current, 1-30 and 31-60. Past Due is for all balances which are one day or more past the scheduled receipt date. |
| 1.1.1.3.2. A/R Summary Over 60 | ||||||||||||||
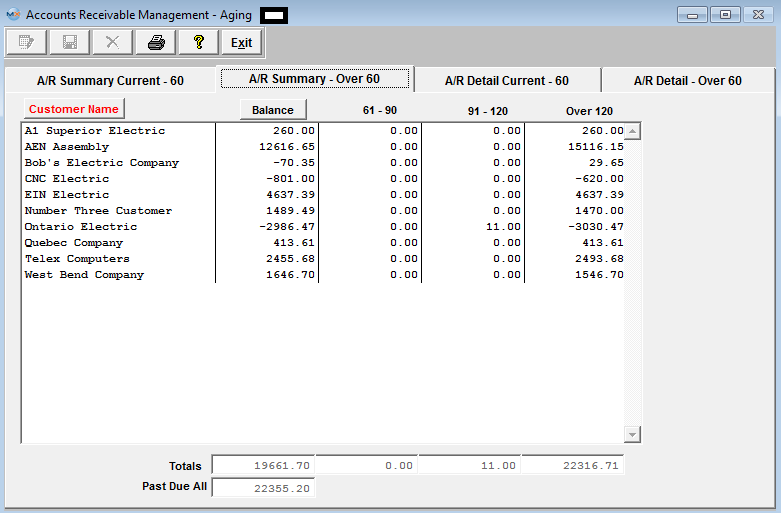
This summary screen will show the total amounts due for each customer, the current open invoice amount, invoice sixty-one to ninety days past due, ninety-one to 120 days past due, and over 120 days past due. (depending on what range is setup within the Sales A/R Setup module). At the bottom of the screen, the total aged invoice amounts are displayed for each of these categories, as well as the total amount of aged invoice less than sixty days. (depending on what range is setup within the Sales A/R Setup module). A/R Summary Over 60 Tab Field Definitions
|
Customer Name
|
The name of the customer who owes the Account Receivable to the user.Note that the user may sort alphabetically by depressing the Customer Name button.
|
Balance
|
The total balance of receivables for that customer.Note that the user may sort the balance in descending order by depressing the Balance button.
|
61 – 90
|
The 61-90 column lists amounts to be received which are 61 to 90 days past the scheduled due date. (These ranges are setup within the Sales A/R Setup module).
|
91 – 120
|
The 91-120 column lists amounts to be received which are 91 to 120 days past the scheduled due date. (These ranges are setup within the Sales A/R Setup module).
|
Over 120
|
The Over 120 column lists amounts to be received which are over 120 days past the scheduled due date. (These ranges are setup within the Sales A/R Setup module). Totals |
|
The totals displayed are the totals of each column – Balance, 61-90, 91-120 and Over 120. Past Due All |
|
Past Due is for all balances which are one day or more past the scheduled receipt date. |
| 1.1.1.3.3. A/R Detail Current - 60 | ||||||||||||||||||||||||||||||||||||||||||||||||
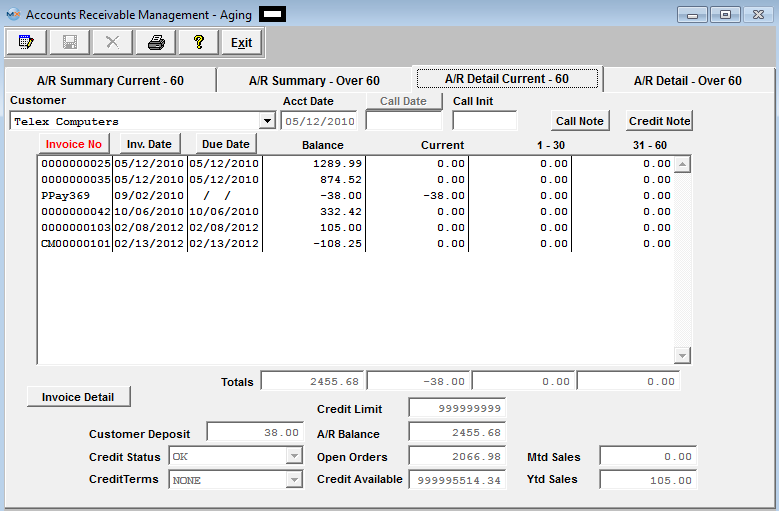 After selecting a customer by highlighting the customer in one of the summary screens, clicking on the detail tab will display the detailed aging for that customer. This screen displays the details of the invoice AGING. Displayed will be the Invoice Number, Invoice Date, Due Date, amount of the invoice, and the Aging of the amount. This screen displays current, one to thirty days past due, and thirty-one to sixty days past due. These data may be sorted by Invoice Number, Invoice Date or by Due Date by depressing on the desired button.At the bottom of the detail listing is a total of the balances in each category. Also in this screen, the user may edit limited fields: the Call Note may be viewed and edited, the Credit Note may be viewed and edited, The Credit Status, the Credit Terms and the Credit Limit may be changed. The Invoice Footnote for the highlighted invoice may be viewed, as well as the Customer Deposit, A/R Balance, Open Order Amount, Credit Available, Month To Date Sales Revenue and Year To Date Sales Revenues. A/R Detail Current 60 Tab Field Definitions
|
| 1.1.1.3.4. A/R Detail Over 60 | ||||||||||||||||||||||||||||
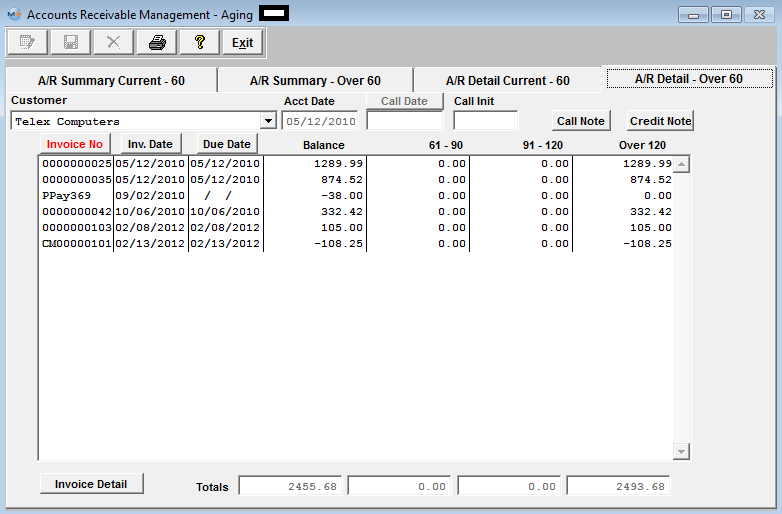
This detail screen will show the detailed Invoice Amounts due for each Customer, the current open Invoice Amount, invoice sixty-one to ninety days past due, ninety-one to 120 days past due, and over 120 days past due. (depending on what is setup within the Sales A/R Setup module). At the bottom of the screen, the total aged Invoice Amounts are displayed for each of these categories, as well as the total amount of aged invoice less than sixty days. (depending on what is setup within the Sales A/R Setup module). A/R Detail Over 60 Tab Field Defintions
Customer |
|
The name of the customer who owes the Account Receivable to the user. Acct Date |
|
This date represents the first date of activity for this customer. 
|
This date is the last time the user entered a call with the customer. (Initials) |
|
The initials of the user who made the call. 
|
If this button is lit up in red, there are notes recorded regarding the call. The call notes is per customer with open invoices. This note field is for active outstanding invoices. It allows you to quickly see notes on AR information that is being currently worked on. To add additional information, depress the Call Note button, depress the Edit button. Type in the note. Depress the Save button. 
|
If this button is lit up in red, there are notes recorded regarding the customer’s credit. To add additional information, depress the Credit Note button, depress the Edit button.Type in the note.Depress the Save button. Invoice Number |
|
The invoice number assigned by the system in the Packing List module.Note:The user may sort on this field in ascending order by depressing the Invoice No. button. Invoice Date |
|
The date of the invoice.Note:The user may sort on this field in ascending order by depressing the Invoice Date button. Due Date |
|
This column displays the scheduled date of payment to be received from the customer.Note:The user may sort this column in ascending order by depressing the Due Date button. Invoice Amount |
|
This is the total remaining balance on the invoice displayed on this line. 61 – 90 |
|
The 61-90 column lists amounts to be received which are 61 to 90 days past the scheduled due date. (These ranges are setup within the Sales A/R Setup module). 91 – 120 |
|
The 91-120 column lists amounts to be received which are 91 to 120 days past the scheduled due date. (These ranges are setup within the Sales A/R Setup module). Over 120 |
|
The over 120 column lists amounts to be received which are 121 days or more past the scheduled due date. (These ranges are setup within the Sales A/R Setup module). Totals |
|
The totals displayed are the totals of each column – Balance, Current, 1-30 and 31-60. |
| 1.1.1.4. Reports for the AR Aging Module | ||||||||||||||||||||
|
To obtain the AR Aging Reports within the Web, select the WEB Print button from the ManEx action buttons at the top of the screen. For further detail on How the Reports work within the Web refer to Article #5477. Note: In order to access the Reports within the Web the Company Root URL must be setup within the System Appearance module and user must be linked to web within the System Security Module.
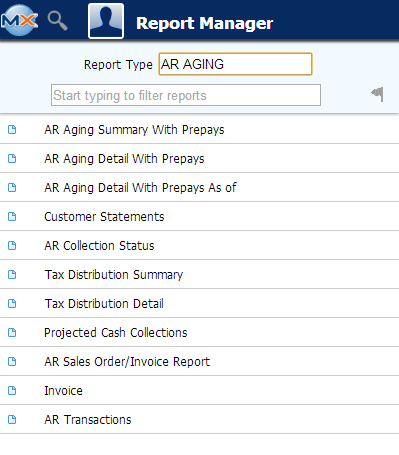
Select the Report Type: AR AGING - A List of Reports will be displayed that are available on the Web for AR AGING
To obtain the AR Aging Reports within the desktop, select the Print button from the ManEx action buttons at the top of the screen. The
following reports screen will display a list of reports that are available on
the ManEx Desktop:
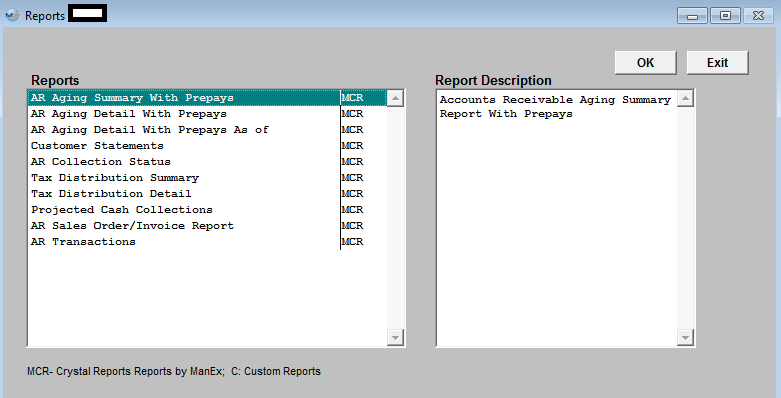 Highlight the report. Depress the OK button AR Aging Summary With Prepays
The following Report is printed: 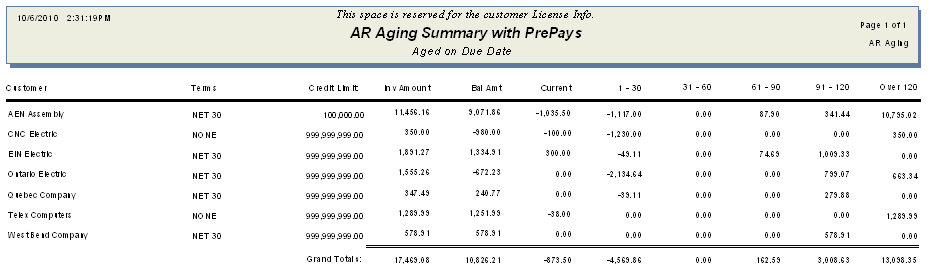 AR Aging Detail with Prepays
The following report will appear: 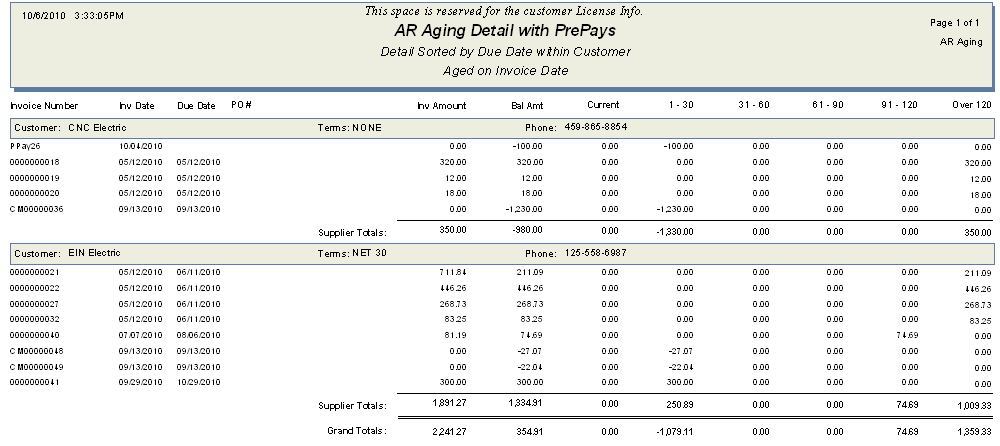 AR Aging Detail with Prepays as of
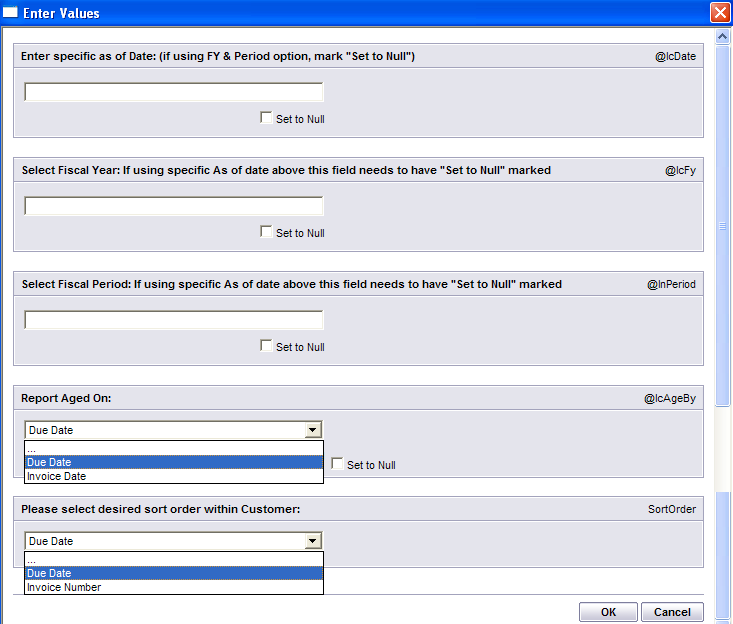
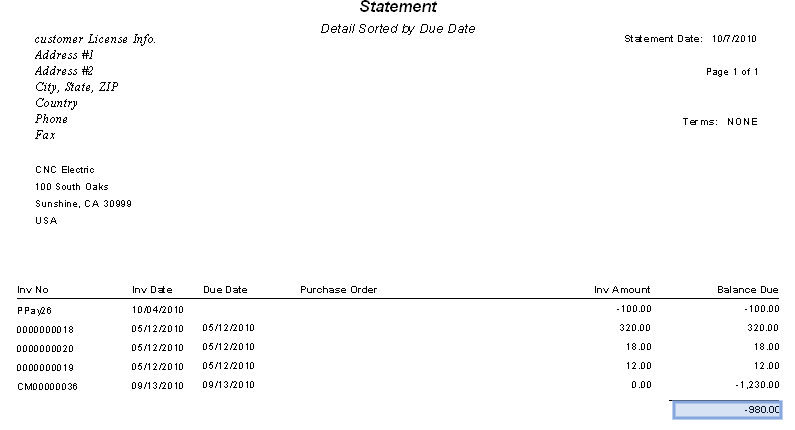
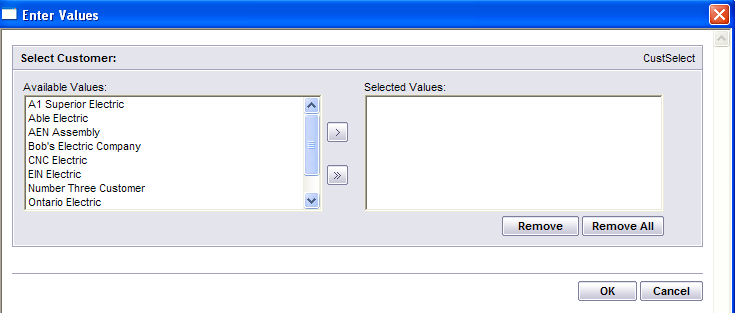
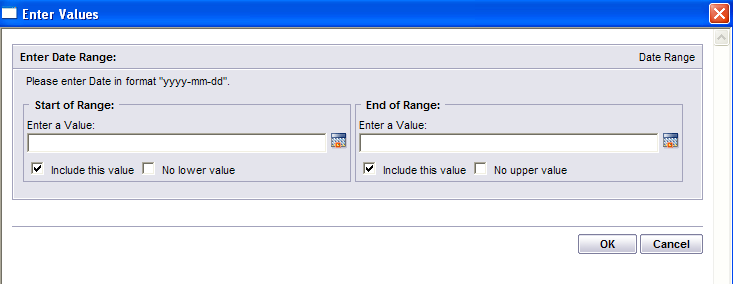
The following report will appear: 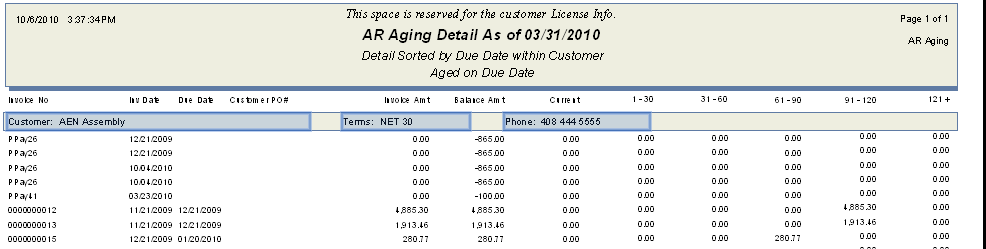 Customer Statements
The following report will appear: AR Collection Status
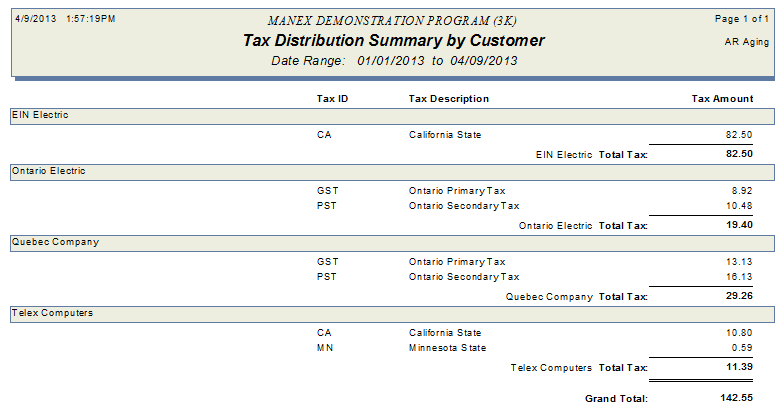
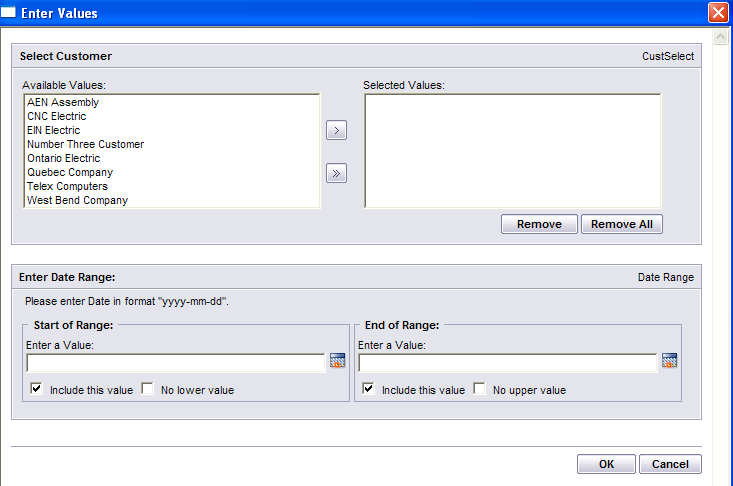
The following report will appear: 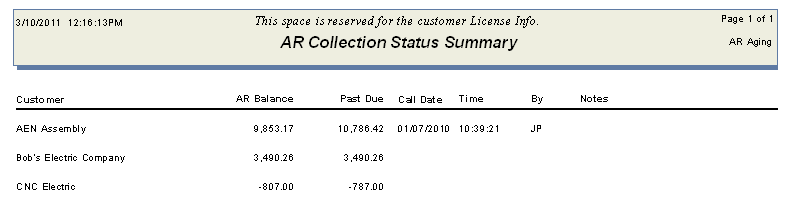 Tax Distribution Summary
The following report will appear:
Tax Distribution Detail
The following report will appear:
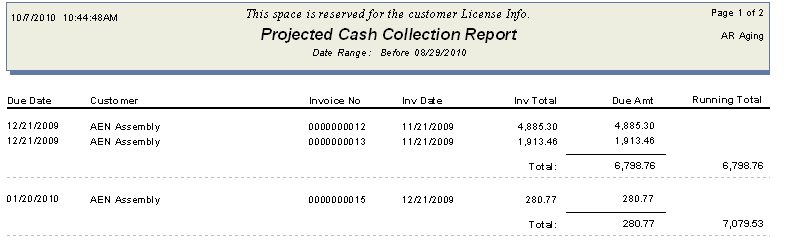
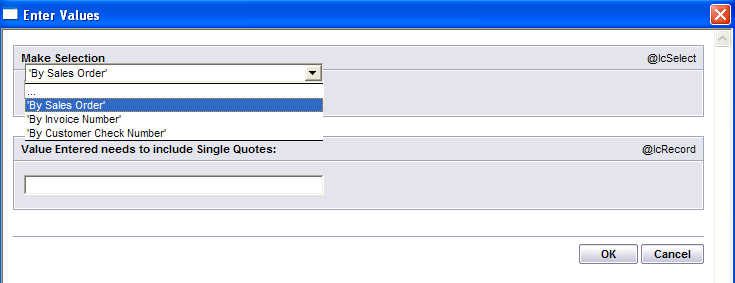
Projected Cash Collections
The following report will appear:
AR Sales Order/Invoice Report
The following report will appear: AR Transactions
The following report will appear:
|


| 1.1.2. Accounts Receivable Bank Deposit |
| 1.1.2.1. Prerequisites for the A/R Bank Deposit | ||||
Users MUST have full rights to the "Cash Receipts" in Accounting Security . Users with “Accounting Security Supervisor” rights will automatically have access.
|
| 1.1.2.2. Introduction for the A/R Bank Deposits |
The accounts receivable Bank Deposits section provides the ability to receive payments against outstanding invoice, Prepayments for orders and miscellaneous receipts that may be applied to a selected general ledger account.
To receive Cash Receipts that do not apply to a specific Customer account we suggest creating an "Other" Bank Deposit, within the system. This will allow user to select the desired GL account number and upon saving the "Other" Bank Deposit that amount is not populated to the AR Aging at all but will still increase your Bank Balance amount. For example: if it is a vendor refund, they can either credit AP, or Inventory (or Misc Receipts). If it is payment by an employee to reimburse for a purchase, they can credit the original account used for the purchase. To record a Bank Transfer see Article #3190 . The system does NOT allow the user to enter in a positive amount against an existing Prepayment or Credit Memo. |
| 1.1.2.3. Fields & Definitions for the A/R Bank Deposits |
| 1.1.2.3.1. A/R Receipt Summary Tab | ||||||||||||||||||||||||||
A/R Receipt Summary Tab Field Definitions
|
| 1.1.2.3.2. Check/Advice Detail Tab | ||||||||||||||||||||||||||||||||||
 Check/Advice Detail Field Definitions
|


| 1.1.2.4. How To ...... for the A/R Bank Deposits |
| 1.1.2.4.1. Add an AR Bank Deposit | ||||
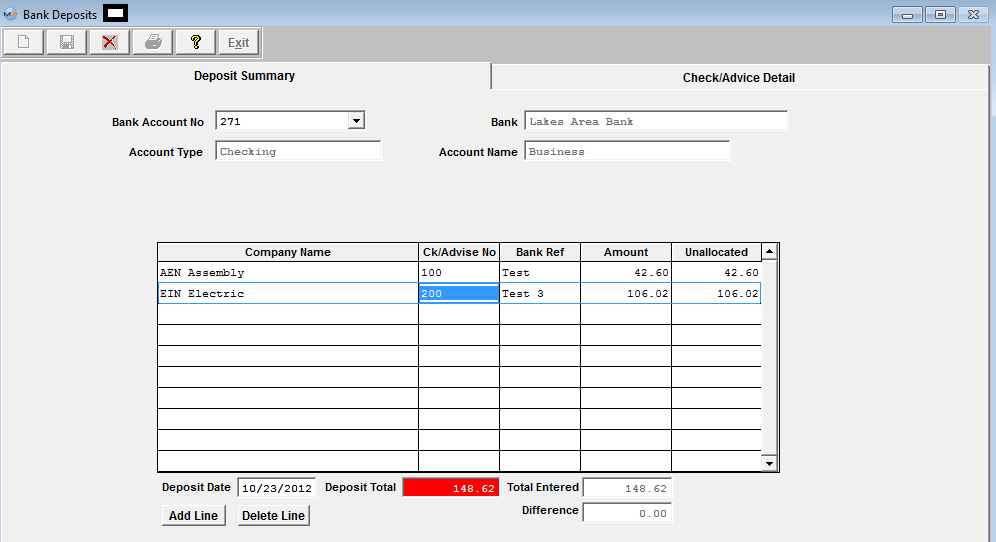
The following screen will be displayed: Depress the Add record icon. The prompt will activate the account number field, and the user enters the Bank Account to which the deposit is being made. Clicking on the down-arrow displays all Bank Accounts entered in the Bank Accounts Setup, and the user selects one by moving the cursor to the correct account and pressing the enter key.

Once the account is selected, the Account Type, the Bank, and the Account Name information will be displayed for the selected account.
The Deposit Date will default to the current date, but may be edited as required.
The user enters the total amount of the deposit at the bottom of the screen, and ManEx will track the total of the Deposits as they are entered and the difference from the total amount.
The Add Line button will then be displayed allowing the user to enter information about the Deposit.
After pressing the Add Line button, the prompt is placed on the Company Name and the Delete Line button is enabled. Clicking on the down-arrow next to the Company name field lists the names of all of the companies from which the deposit might be received.
After entering the Company Name, the user enters the Check/Advise Number, the Bank Reference Number and the amount of the Check. The unallocated amount will be automatically entered, and the Check/Advice Detail screen tab becomes enabled.
CHECK/ADVICE DETAIL Selecting a line by highlighting on the initial screen and pressing the Check/Advice Detail tab displays the screen on which the cash is to be applied for the Check selected. The system does NOT allow the user to enter in a positive amount against an existing Prepayment or Credit Memo.
To Add "AR Invoice" refer to Article #4437
To Add "PrePay/Acct Deposit" refer to Article #4438
To Add "Other" AR Cash Receipts refer to Article #4439 |


| 1.1.2.4.2. Add an AR Inv Payments |
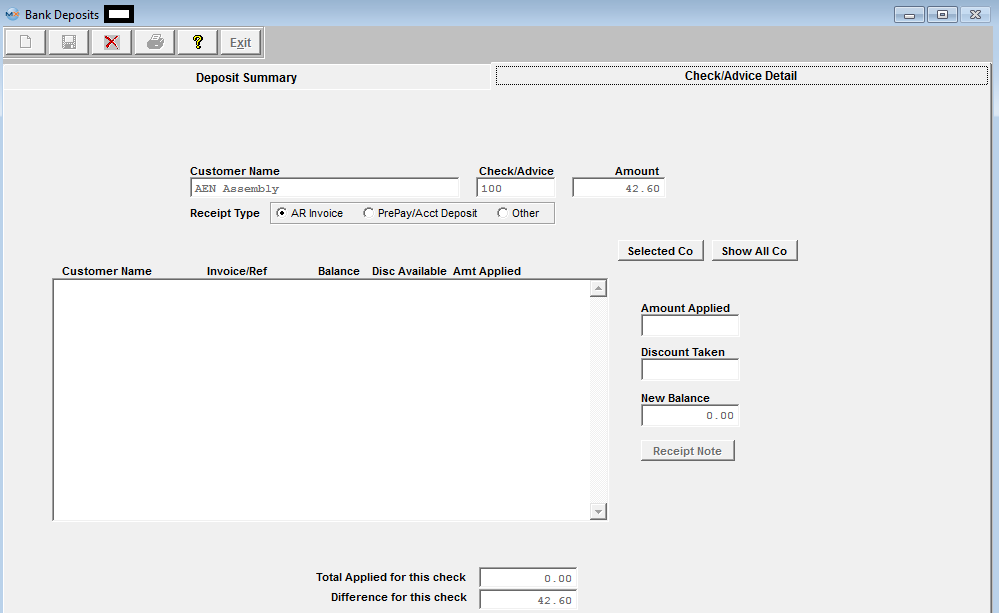
AR Invoice payments For AR Invoice Payments, follow the process for the AR Bank Deposits, then within the Check/Advice Detail screen, Select the AR Invoice radio button, the user may elect to show open invoices for the selected Customer by depressing the "Selected Co" button, or elect to show all open invoices by depressing the "Show All Co" button.  Once the open invoices are displayed, the Deposit may be applied to an open invoice by selecting an invoice and pressing the left arrow key (>) to move the invoice to the applied area. Pressing the double left arrow (>>) will move all invoices to the application area. After selecting invoice(s) to which the payment is to be applied, pressing the DONE button returns the user to a screen in which the amounts may be applied to each invoice. 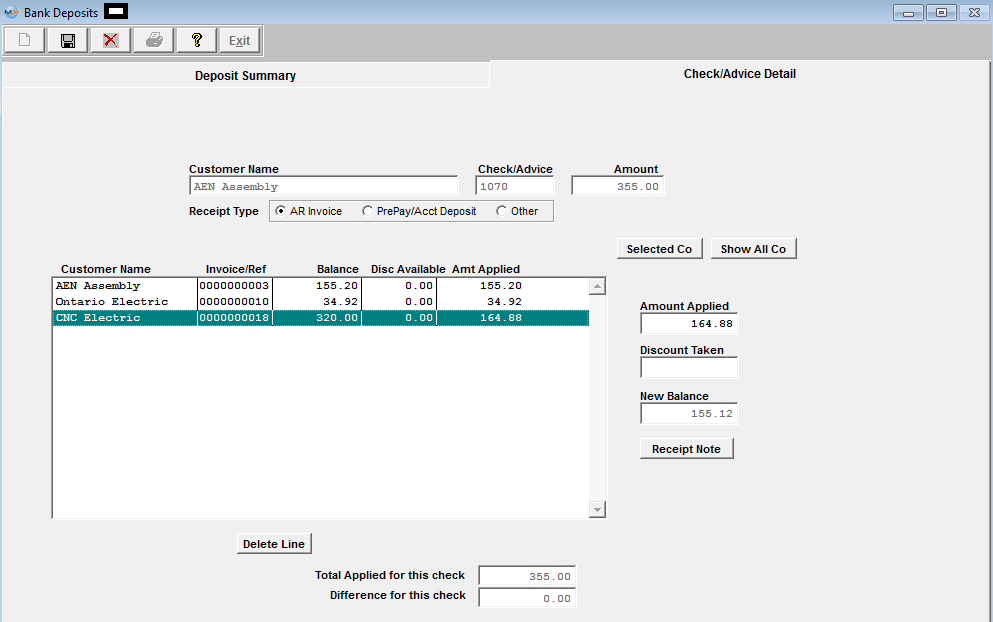 The user selects the invoice to be applied and enters the amount of the deposit to be applied to the invoice. Important Note: At this point, the user MUST depress the Enter key. When the invoice is selected to which the payment is applied, the user must continue to apply the Check to open invoice until the entire check is totally applied. If the Customer has taken an allowed discount, the amount of the discount may be entered by placing the cursor in the discount field and entering that amount. When exiting the Discount field, the amount applied will be reduced by the amount of the Discount automatically. The user may continue entering Deposits until the total of the entries matches the total deposit entered, and the Difference field displays 0.00. If the customer issued a check creating an overpayment see Article #4443 to account for the overpayment.
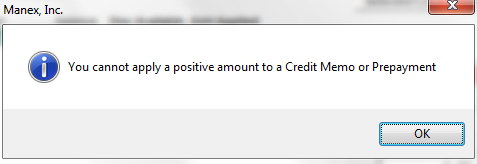
The system does NOT allow the user to enter in a positive amount against an existing Prepayment or Credit Memo.
If user attempts to add an AR Bank Deposit to a Credit Memo or Prepayment they will receive the following message:
 |
| 1.1.2.4.3. Add a PrePay/Account Deposit |
Prepay/Account Deposit If a Customer has prepaid an invoice, follow the process for the AR Bank Deposits, then within the Check/Advice Detail screen, Select the Prepay/Acct Deposit to make the allocation. After selecting the PrePay/Acct Deposit radio button, a Reference Number field is displayed, and a Reference Number must be entered. The name of the Customer selected appears in the application area, and the user enters the amount received as Prepayment in the Amount Received field.
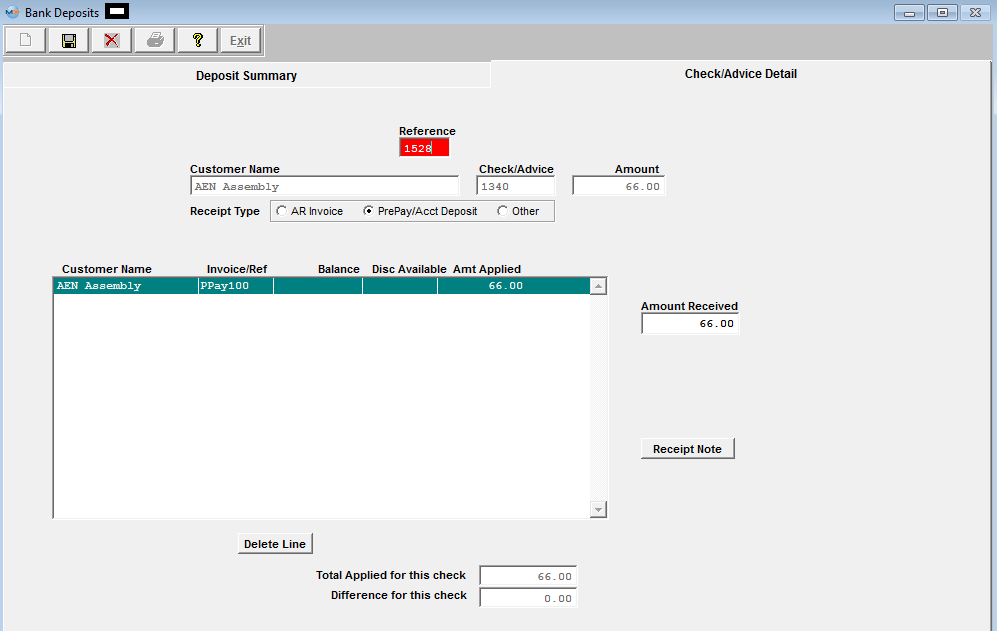 The Invoice/Ref field will be completed with the Reference Number, prefixed with “PPay” for future reference. The Pre-Pay amount will credit the G/L account default as set up in Accounting Setup. This is normally A/R Trade Receivables since the Prepayment will appear as a credit on the A/R Aging. To offset this payment against another open invoice, you will need to create an A/R Offset . NOTE: The system will NOT allow the user to enter in a positive amount against an existing Prepayment. |
| 1.1.2.4.4. Add Other A/R Bank Deposits |
Other
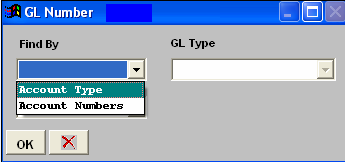
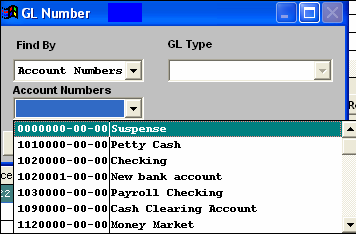
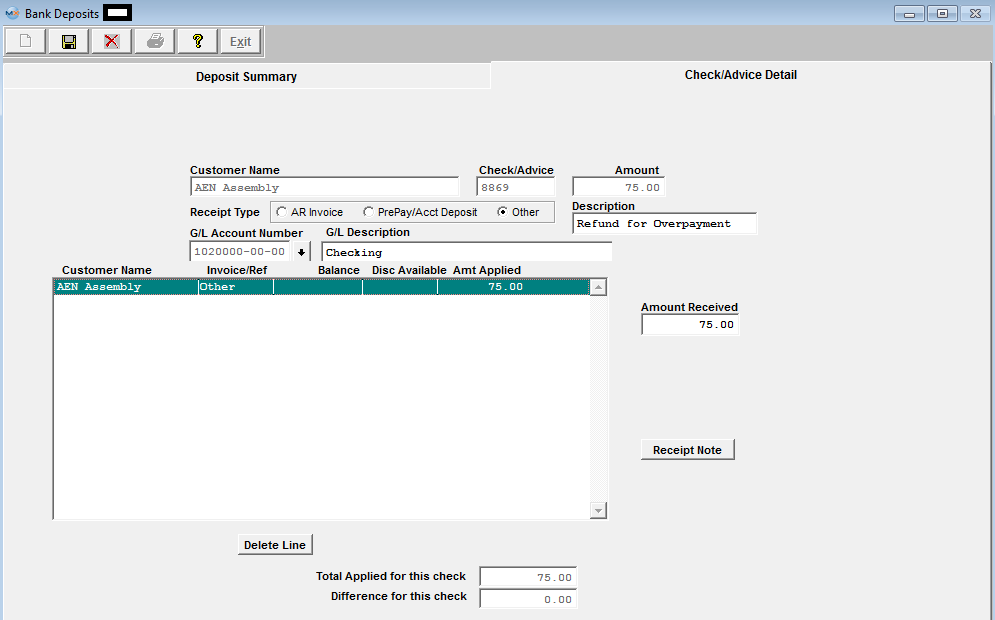 The user must then enter a General Ledger Number against which to apply the receipts, and finally, the amount of the receipt to be applied to the category. The GL number may be entered directly into the field or through the process of looking up by category. To look up by category, place the cursor in the G/L Account Number box and depress the enter key. The following selection will display: Depress the Find By down arrow and the following selection will appear: Select to find by Account Type or Account Numbers. If you select Account Type, the following will display:
Use the down arrow to find the General Ledger Type. Once the GL Type is selected, all of the General Ledger accounts within that type will display:
Select the General Ledger Account of interest. Type in the Amount Received. If desired, a Receipt Note may be attached to the receipt for later reference by pressing the Receipt Note button. Depress the Edit button. Type in the message. Depress the Save Button. Depress the Exit button. At the bottom of the screen, the total applied and remainder to be applied will be calculated as deposits are applied to one or more invoice. The user may continue entering Checks and then applying them until the total of the entries matches the total deposit entered, and the Difference field displays 0.00. When the total applied matches the total amount of the Deposit for each Customer, and the total Check Receipts match the total Deposit Amount, then the save button becomes activated, and the user may save or cancel the transaction.
|
| 1.1.2.4.5. Account for Overpayment from Customer |
Customer (Number Three Customer) has two invoices due: Inv #100 for the amount of $1470.00 and Inv #120 for the amount of $19.49 being displayed in AR Aging
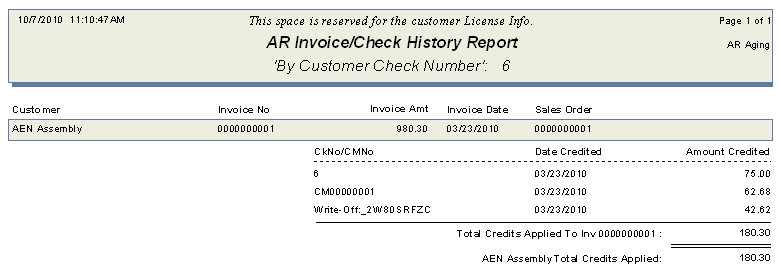
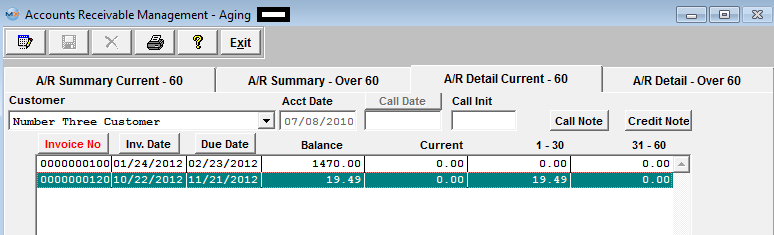 Customer issues a check for $50.00, apply $19.49 against Invoice #120, which leaves a difference of $30.51. 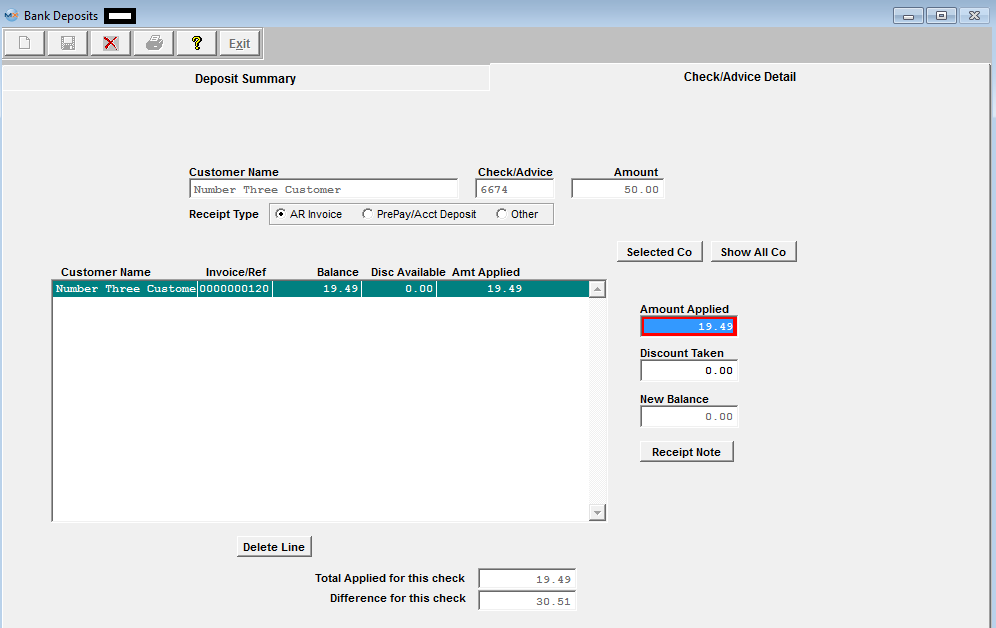 Depress the PrePay/Acct Deposit enter a Reference and apply the difference of $30.51 against the Prepay. 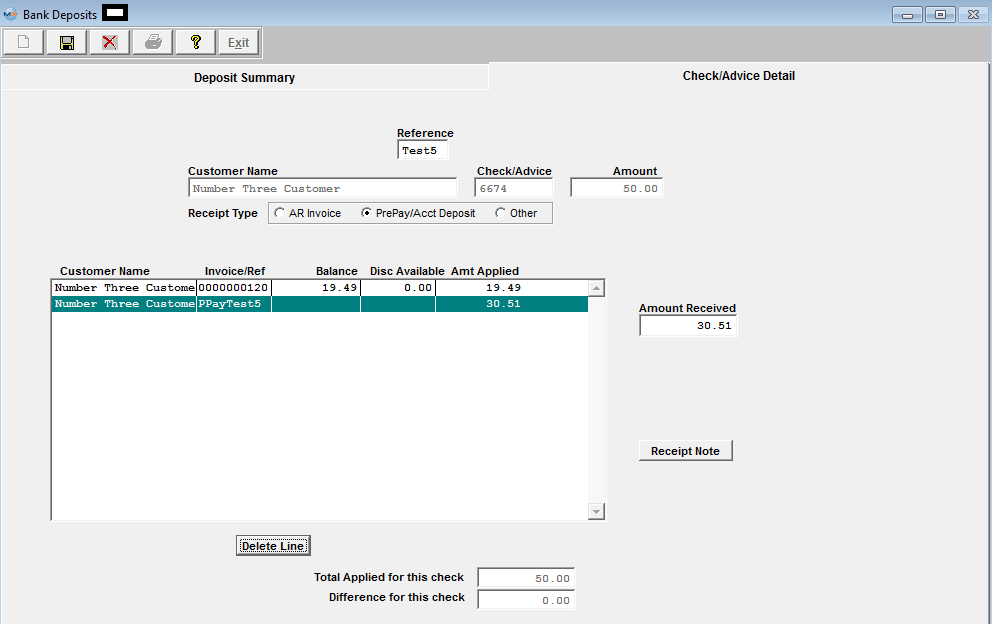 View the AR Receipt Detail Information and the overPayment is being properly displayed  AR Aging updated correctly 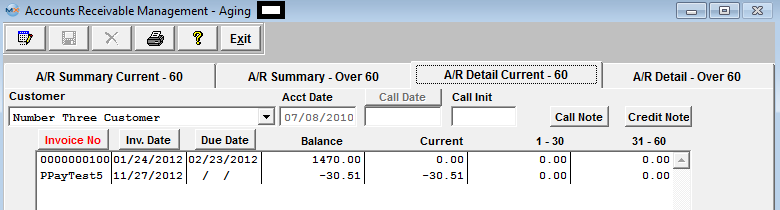 The customer later issues another check for the amt of $400.00 to be applied to Invoice #100 and they also want to apply the OverPayment of $30.51 to Invoice #100. Below shows that the system also allows me to apply the overPayment to Invoice #100 (you simply have to double-click on the PrepayTest5 record first and then double-click on the invoice to get the values to apply properly) 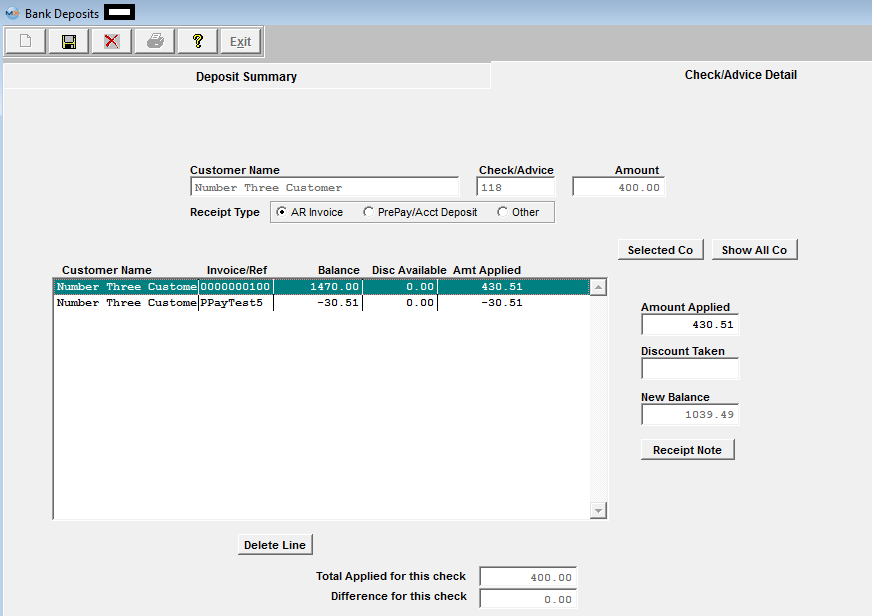 View the AR Receipt Detail Information and the PPayTest5 of $30.51 is applied to Inv #100 properly along with the Check for the amount of $400.00 for a total applied of $430.51. 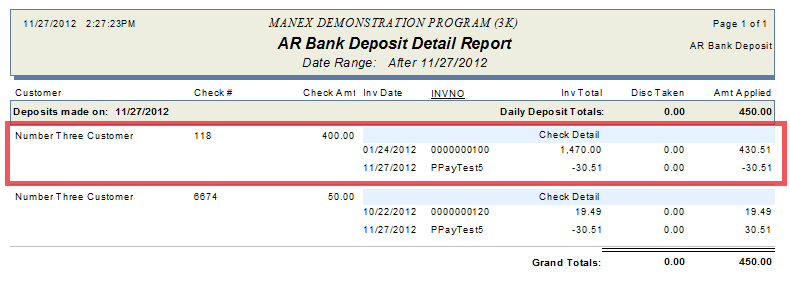 AR Aging updated correctly with Invoice #100 having a balance due of $1039.49. 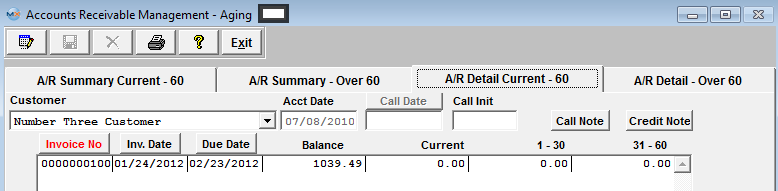 |
| 1.1.2.4.6. Apply a Prepayment or Credit Memo against an Invoice |
If the customer issues a check for the amt of $400.00 to be applied to Invoice #100 and they also want to apply the OverPayment of $30.51 to Invoice #100. Below shows that the system allows me to apply the overPayment to Invoice #100 (you simply have to double-click on the PrepayTest5 record first and then double-click on the invoice to get the values to apply properly) View the AR Receipt Detail Information and the PPayTest5 of $30.51 is applied to Inv #100 properly along with the Check for the amount of $400.00 for a total applied of $430.51. AR Aging updated correctly with Invoice #100 having a balance due of $1039.49. The system works the same when applying a Credit Memo to an Invoice. AR Aging displaying a Credit Memo # CM0000115 and Invoice #0000000103. 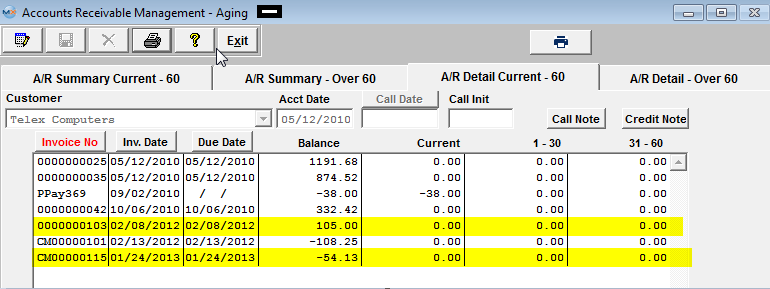 Customer wants to apply the Credit of $54.13 against Invoice #103, so they only send a check for the amount of $50.87. 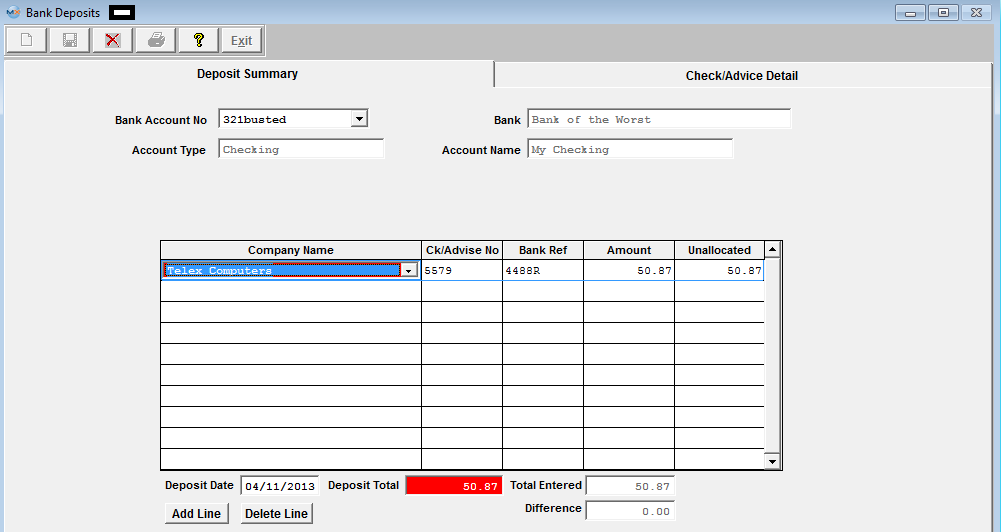 Select the Credit Memo and the Invoice from the Check/Advice Detail  Depress "Done" takes you to the next screen. Here user may double click on the CM0000115 to apply the amount to the Invoice 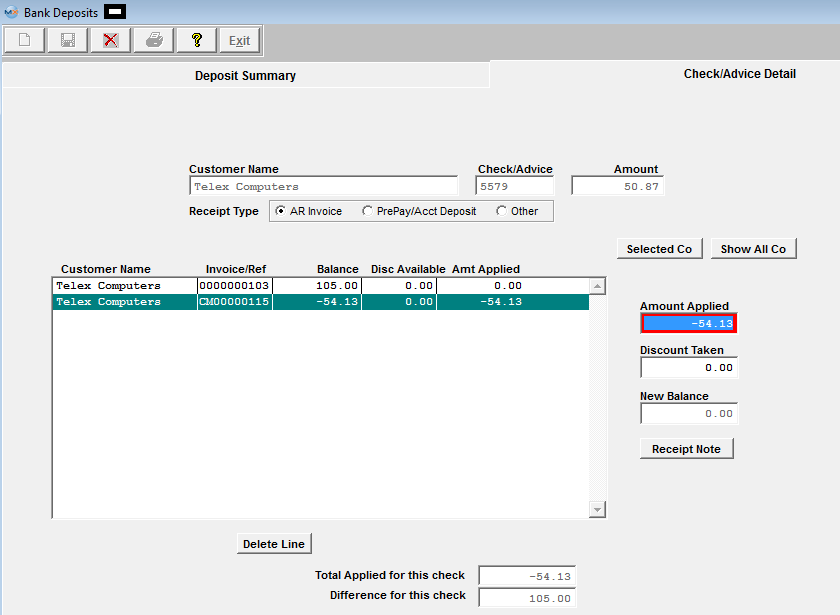 Then enter the amount Applied to Invoice  Save Record and both the Credit Memo #CM0000115 and Invoice #0000000103 have been cleared from the AR Aging 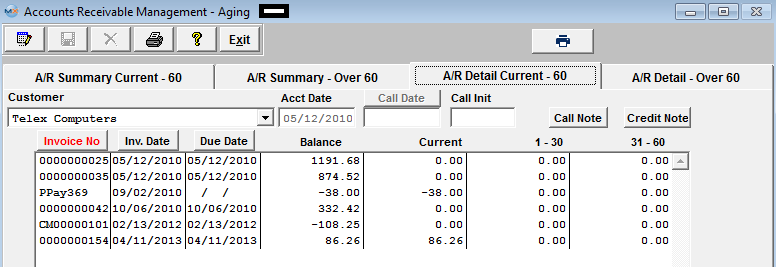 If user attempts to apply a deposit to a Credit Memo or Prepayment they will receive the following message: |
| 1.1.2.5. Reports for the A/R Bank Deposits | ||||||||
To obtain the AR Cash Receipt Reports within the Web, select the WEB Print button from the ManEx action buttons at the top
of the screen. For further detail on How the Reports work
within the Web refer to Article #5477. Note: In order to access the Reports within the Web the Company Root URL must be setup within the System Appearance module and user must be linked to web within the System Security Module.
Select
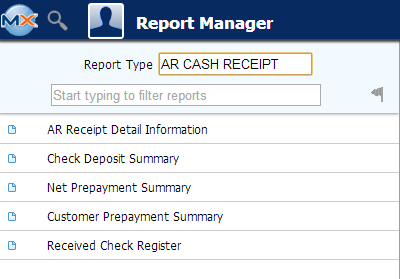
the Report Type: AR CASH RECEIPT - A List of Reports will be displayed that are
available on the Web for AR CASH RECEIPT
To obtain the AR Cash Receipts Reports, select the Print button from the ManEx action buttons at the top of the screen.
The following reports screen will display a list of reports that are available on the ManEx Desktop:  Highlight the report. Depress the OK button. A/R Receipt Detail Information
The following report will be displayed: 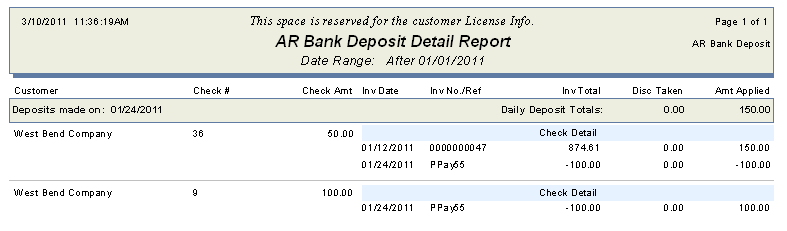 Check Deposit Summary
The following report will be displayed: 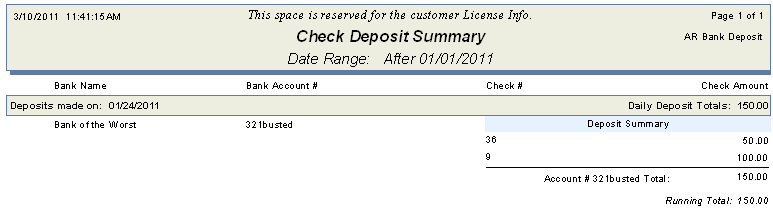 Net Prepayment Summary Highlight the Net Prepayment Summary Report. Depress the OK button. The following report will be displayed:
Customer Prepayment Summary
The following report will be displayed: 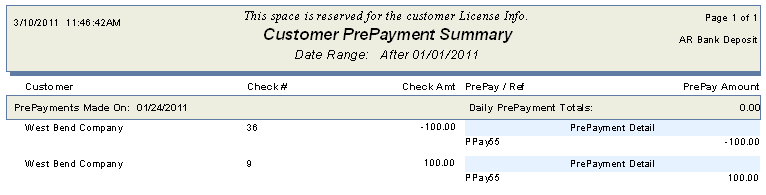 Received Check Register:
The following report will be displayed:
|


| 1.1.3. Accounts Receivable Check Returns |
| 1.1.3.1. Prerequisites for A/R Check Returns |
|
Users MUST have full rights to the "Returned Checks" in Accounting Security . Users with “Accounting Security Supervisor” rights will automatically have access. Existing A/R Cash Receipt |
| 1.1.3.2. Introduction for A/R Check Returns |
| If the bank returns a check, the user may record the Check Return in this module. Completing the transaction will credit the Bank Account in which the check was deposited, and reverse the application of the funds made in the Bank Deposits module. Additionally, the A/R Aging will update, if applicable |
| 1.1.3.3. Fields & Definitions for A/R Check Returns | ||||||||||||||||||
A/R Check Returned Recording - Field Defintions
|
| 1.1.3.4. How To ...... for Check Returns |
| 1.1.3.4.1. Add Check Returns | ||||
|
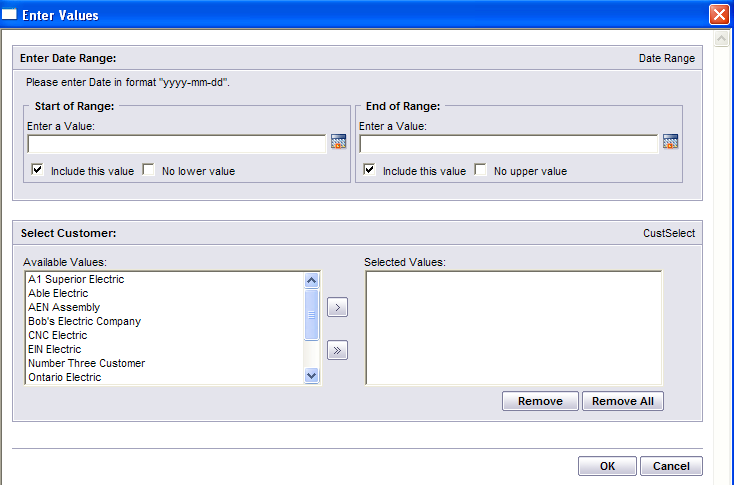
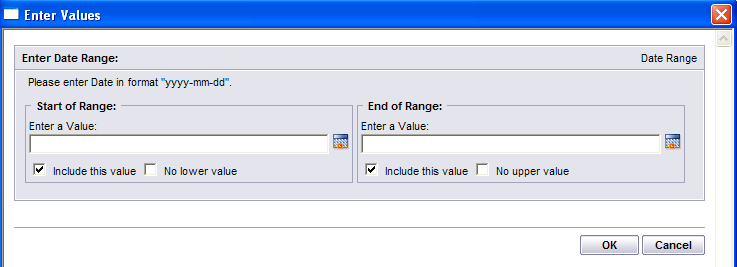
The following Screen will be displayed:
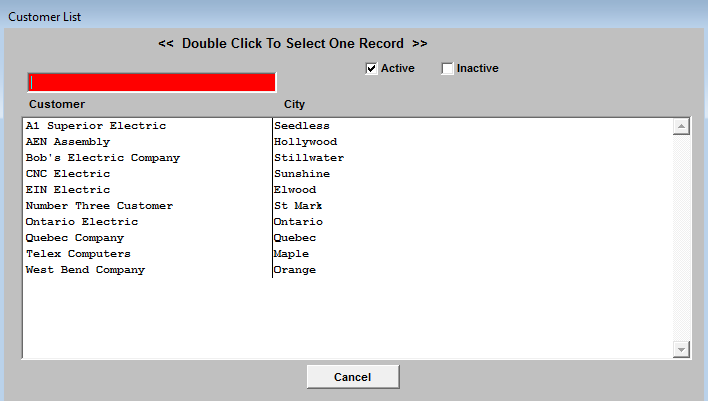
Depress the Add Record icon will then prompt the user to enter a Customer Name. The user may enter the Customer Name in the red search box, or move the cursor to the selected Customer and double click on the line. By default, only active Customers are shown, but if the user wishes to see inactive Customers, then clicking on the Inactive box will display both types of Customers.
Selecting a Customer will then cause a list of checks in the date range from that Customer to be displayed.
The user should then select the Check being returned by double clicking on the line. After the appropriate Check is selected, the original screen is populated with the data. The user may then enter a note about the Returned Check, if desired. Depress the Return Check Note. Depress the Edit button. Type in the note. Depress the Save button. Depress the Exit button.
Upon validating that the information is accurate, the user may Save the Returned Check record or the user may Abandon the operation. Saving the record credits the Bank Account and reverses any Cash Receipt transactions associated with the Returned Check.
|


| 1.1.3.5. Reports for Check Returns | ||
|
To obtain the AR Check Returned Reports within the Web, select the WEB Print button from the ManEx action buttons at the top
of the screen. For further detail on How the Reports work
within the Web refer to Article #5477. Note: In order to access the Reports within the Web the Company Root URL must be setup within the System Appearance module and user must be linked to web within the System Security Module.
Select
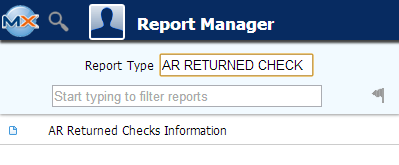
the Report Type: AR RETURNED CHECK - A List of Reports will be displayed that are
available on the Web for AR RETURNED CHECK
To obtain the AR Check Returned Reports, select the Print button from the ManEx action buttons at the top of the screen.
The following reports screen will display a list of reports that are available on the ManEx Desktop: 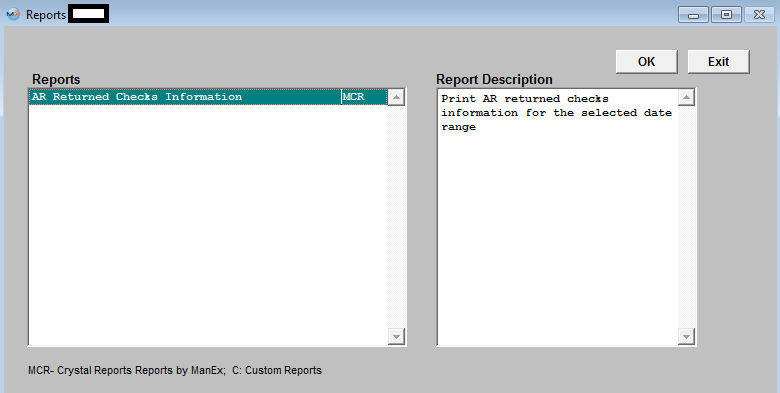
Highlight the report and depress the OK button.
A/R Returned Checks Information
The following report will print:
 |

| 1.1.4. Accounts Receivable Offsets |
| 1.1.4.1. Prerequisites for A/R Offsets |
Users MUST have full rights to the "AR Offsets, Write-offs & CM" in Accounting Security . Users with “Accounting Security Supervisor” rights will automatically have access. |
| 1.1.4.2. Introduction for A/R Offsets |
The accounts receivable offsets section provides for application of outstanding CREDITS and PREPAYMENTS against open invoices.
An A/R offset will NOT create a transaction in the GL. The offset itself has NO impact on the general ledger. It shifts the funds according to the way that the Credit memo and Receivable were established. See attached spreadsheet, each transaction involved from shipping and invoicing through credit memo and offset to check deposit are tracked.
|
| 1.1.4.3. Fields & Definitions for the A/R Offsets | ||||||||||||||||||||||
Accounts Receivable Offsets - Field Definitions
|

| 1.1.4.4. How To ...... for A/R Offsets |
| 1.1.4.4.1. Add A/R Offsets | ||||
|
The following screen will be displayed:
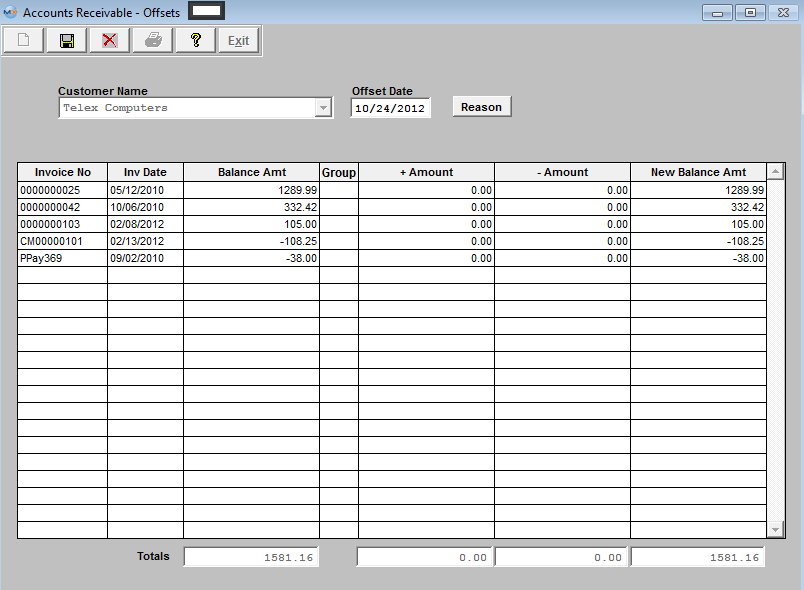
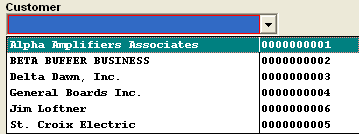
Depress the Add record action icon, user will be prompt for a password, after entering their password, the module will become editable. 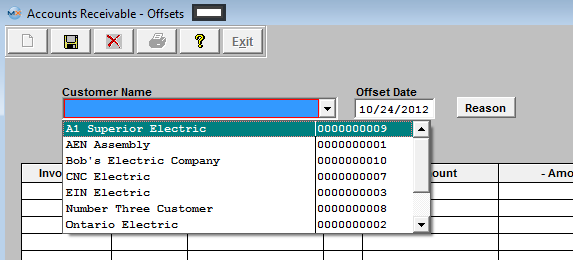 Select a Customer from the pull down list. Once the desired Customer to Offset is selected, the receivable records are displayed.
The user may then use the +Amount and -Amount columns to Offset payments against invoice, as illustrated. 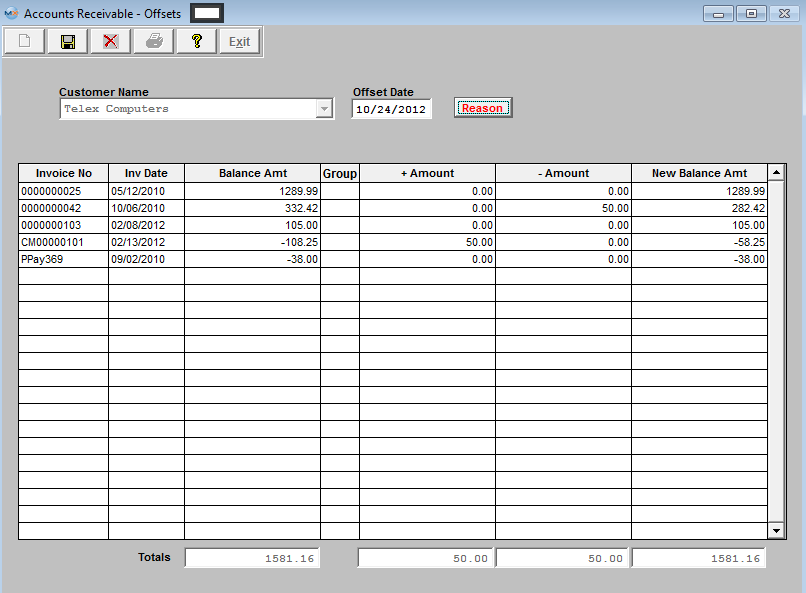 Only when the total amounts of the additions and subtractions are equal does the save button become enabled. After verifying the correct application of offsets, the user may save the information. On saving the information, the user will be prompted to enter a reason note for the Offset.
Depress the Reason button on screen. Then depress the Edit button, enter the reason, depress the Save button. Depress the Exit button. You’ll be returned to the prior Offset screen. Depress the Save record action button or the Abandon changes action button. |

| 1.1.5. Accounts Receivable Write-Offs |
| 1.1.5.1. Prerequisites for A/R Write-Offs |
Users MUST have full rights to the "AR Offsets, Write-offs, & CM" in Accounting Security . Users with “Accounting Security Supervisor” rights will automatically have access. |
| 1.1.5.2. Introduction for A/R Write-Offs |
The accounts receivable Write-Off section provides the ability to expense uncollectable invoice and to Write Off small amounts unworthy of collection efforts. |
| 1.1.5.3. Fields & Definitions for A/R Write-Offs | ||||||||||||||||
Accounts Receivable - Write-offs Field Definitions
|
| 1.1.5.4. How To ..... for A/R Write-Offs |
| 1.1.5.4.1. Find an A/R Write-Off | ||||
|
The following screen will be displayed:
Depress the Find record action icon will display a list of prior Write-Offs created through the Accounts Receivable Write-Offs module. 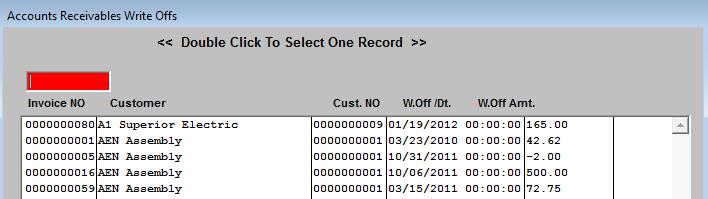 To select a previous Write-Off, enter the invoice No. into the red box or highlight your selection and double click. Once an existing Write-Off has been selected, the detail screen for that Write-Off will be displayed similar to that shown, below.
|


| 1.1.5.4.2. Add an A/R Write-Offset | ||||
|
The following screen will be displayed:
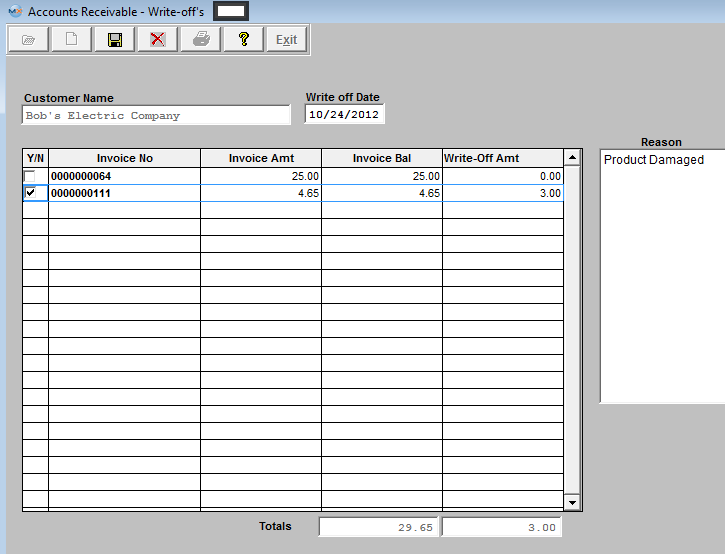
Depress the Add record action icon will begin the process of adding a Write-Off to the system. The user will be prompted for his/her password. The following screen will display showing those Customers with open invoice. 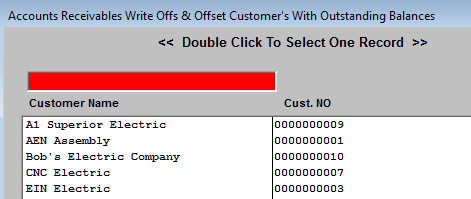 To select a Customer, enter the Customer Name into the red box or highlight your selection and double click. Once a Customer is selected, a list of open invoice for that Customer will be displayed for selection.
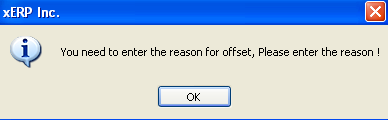
After checking the invoice to Write Off in the Y/N box and entering the Write Off amount, the user should enter a reason for each Write-Off selected:
When the batch process has been completed, the user may select the Save record action icon to Save the Write-Off batch or Abandon record action button to abort the entire process. Saving will cause the Accounts Receivable Aging to automatically update. The Write Off default account number is as selected in the Accounting Setup – normally Reserve for Bad debts.The A/R Trade Account will be credited.
|

| 1.1.6. Accounts Receivable Credit Memo |
| 1.1.6.1. Prerequisites for A/R Credit Memos |
Users MUST have full rights to the "AR Offsets, Write-offs & CM" in Accounting Security . Users with “Accounting Security Supervisor” rights will automatically have access. |
| 1.1.6.2. Introduction for A/R Credit Memos |
A Credit Memo can be created from two modules: the Accounts Receivable Credit Memo module or the RMA (Return Material Authorization) module.
The Accounts Receivable Credit Memo section provides the ability to issue Credit memos against specific Invoice (Invoice CM) or create a General CM. An Invoice Credit Memo will debit SCRAP and credit COGS. If a partial credit is required without returned goods, create a General Credit Memo. For returned goods, create an RMA . The RMA (Return Material Authorization) module notifies receiving to expect a return from a Customer. The authorization also allows for reworking/replacing the order so that the user doesn’t have to go to another screen to create a Sales Order. Once the RMA is received, a Credit Memo automatically forwards to the Accounting Accounts Receivable Credit Memo module where it can be viewed and printed. Rather than issuing an invoice Credit memo, the user may wish to use the RMA module instead. Please refer to the RMA (Return Material Authorization) Management manual. Note: DO NOT use this module to create a Credit Memo if it involves return of inventory from a Customer, use the RMA process. If the RMA is created from an Invoice the CM type will be "Invoice", if the RMA is a stand-alone the CM type will be "General".
See the attached word document <<How_CM_Affect_GL_Accts_090106.docx>> for further detail on how the different types of Credit Memo's affect the GL Accounts.
|
| 1.1.6.3. Fields & Definitions for A/R Credit Memo | ||||||||||||||||||||||||||||||||||||||||||||||||||||||||||||||||||||||||||||||||||||||||||
Credit Memo Field Definitions:
Credit Memo Summary/Credit Memo Line:
Credit Memo Summary/Invoice Detail Line:
The GST (Primary) tax and PST (Secondary) tax is divided into the Sales tax and Freight tax on the Credit Memo Summary/Invoice Detail Line: For Example: Primary Tax (GST): 144*10% (sales tax) + 0 (no freight tax is calculated) =$14.40 Secondary Tax (PST): 144*8% (sales tax) + 12*8% (Freight tax) = $12.48 Divided into sales tax and freight tax: Sales Tax: 144*10% (sales tax) + 144*8% (sales tax) = $25.92
|

| 1.1.6.4. How To ...... for A/R Credit Memos |
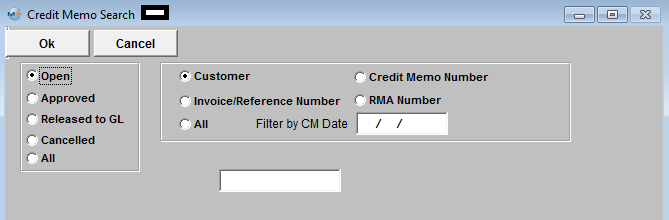
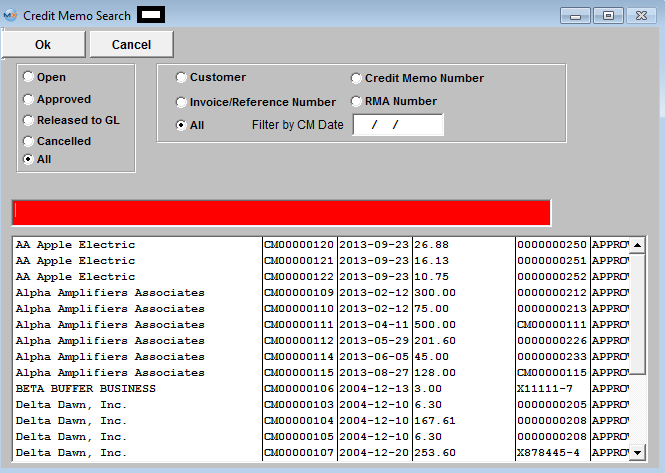
| 1.1.6.4.1. Find an A/R Credit Memo | ||||||||
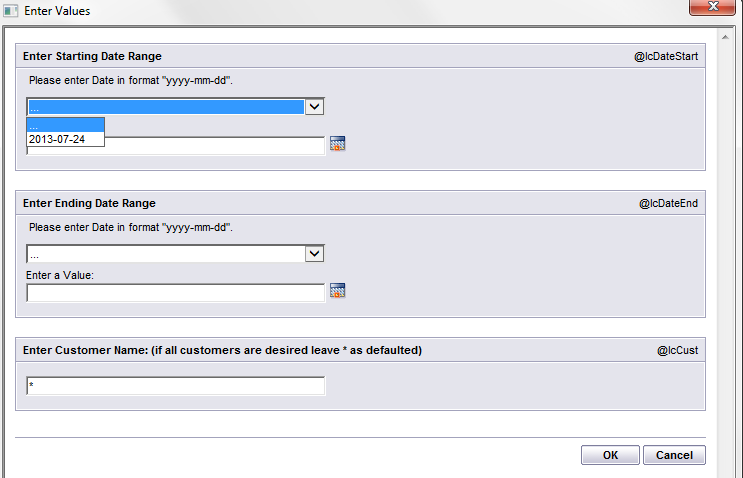
The following screen will be displayed:
Once an existing Credit Memo has been selected, the detail screen for that CM will be displayed:
|

| 1.1.6.4.2. Add an A/R Credit Memo |
| 1.1.6.4.2.1. Invoice Credit Memo | ||||||||
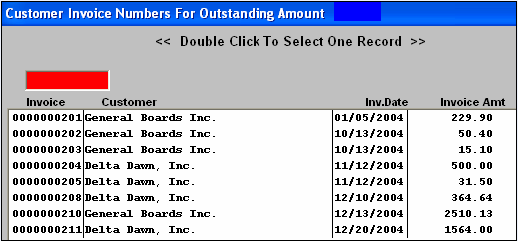
Enter the SQLMANEX.EXE (within the ManEx root directory) The following screen will be displayed, select Accounting/Accounts Receivable/A/R Credit Memo
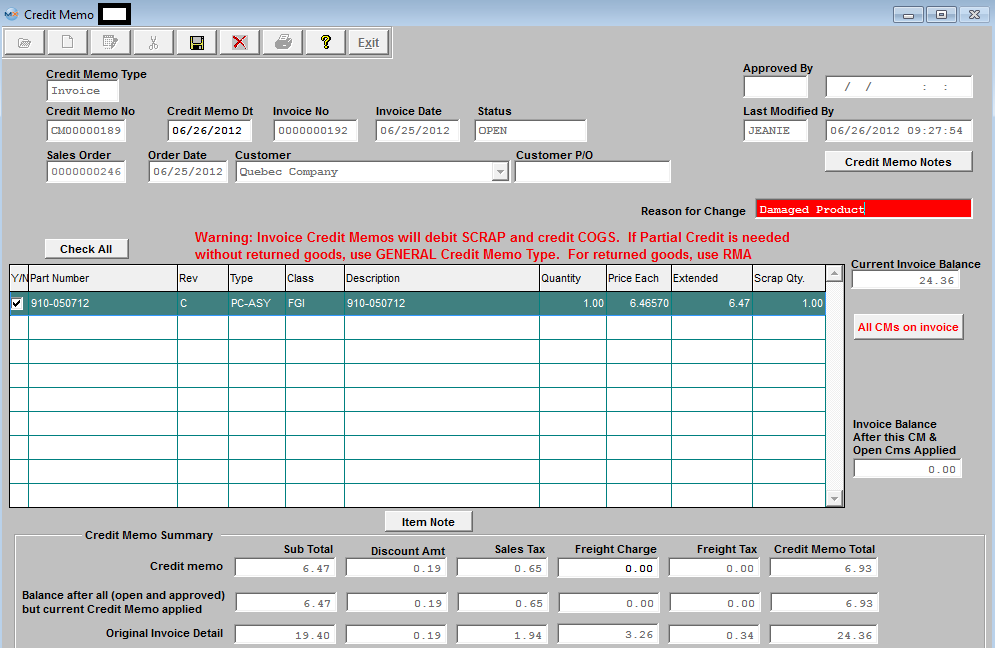
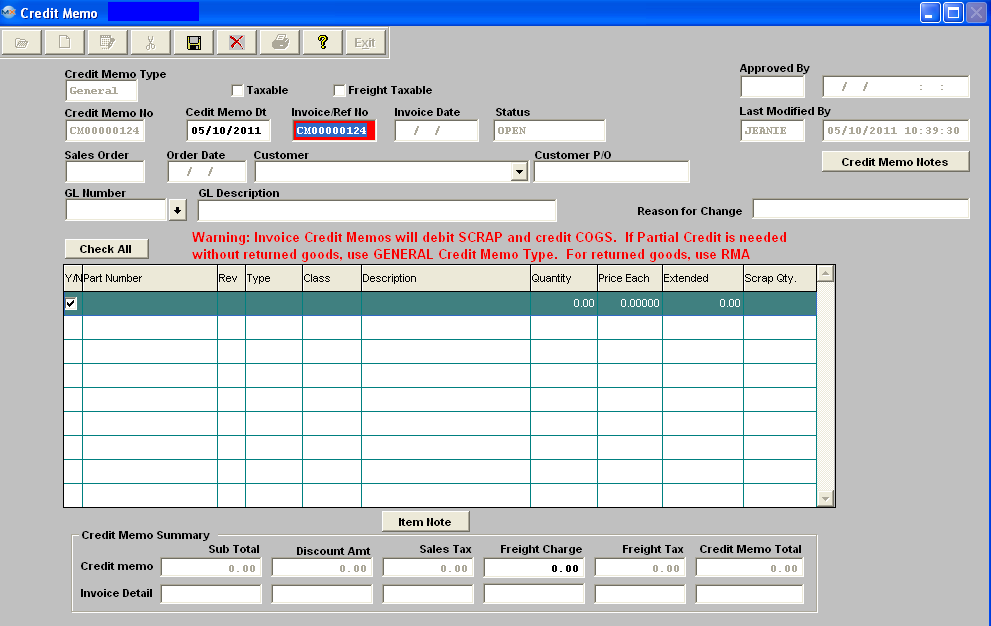
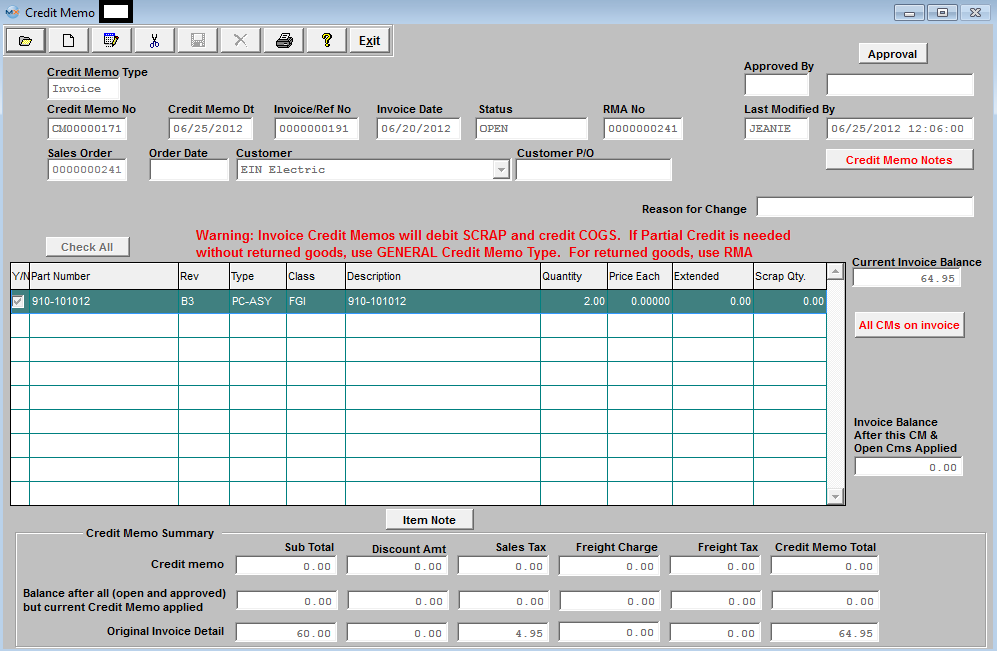
The following screen will be displayed:
The CM fields are populated with the data from the invoice selected. The qty will default into the Scrap Qty field (this field is read only). This is the qty that will hit the scrap account.
The following information will default into the fields to the right:
"Current Invoice Balance" is pulled from the AR record and reflects any Cash Payments, AR Offsets & "Approved" Credit Memos, but will NOT include "Open" Credit Memos.
"All CMs on invoice" - this button will display in Red, if there are any prior credit memos (open or approved) for the same invoice. "Invoice Balance after this CM & Open CMs Applied" is pulled from the AR record and reflects any Cash Payments, AR Offsets, "Approved" and "Open" Credit Memos, including the current one being added/edited. NOTE: If the amount in this field is within 1% of the Invoice, a button will appear "Adjust Invoice Balance to 0" (If user is creating a Credit Memo for a price adjustment to a Customer Invoice and is not returning the goods and does not want the amount to hit the scrap account then we suggest that user creates a General Credit Memo).
User can choose to issue a Credit Memo for the Sales Tax only or Freight only, by selecting the boxes at the top of the screen. The Sales Tax, Freight and Freight Tax to be credited will appear in the Credit Memo Summary section. NOTE: Users will only be allowed to use these three “only” check boxes at the time when the 1st CM for an invoice is created or if the prior credit memo did not use any amount of the tax/freight yet.
The user may select one or more lines from the invoice against which the credit is to be taken. The selection is accomplished by clicking on the left box on the desired line. As the boxes are checked, the amount of the Credit Memo at the bottom of the screen in the Credit Memo Summary is changed to reflect the lines selected. After selecting the lines to be credited, the user may edit both the quantity and the price of each line. Changing either of these changes the totals for the Credit Memo at the bottom of the screen in the Credit Memo Summary. In addition to selecting and\or modifying the line items, the sales tax, freight charges and freight taxes will also be modified pro-rata by the system. The values will be calculated pro-rata based on the credit being issued for each line. For the line items checked at the left, the qty entered in the Quantity field will default into the Scrap Qty column. The system will automatically debit SCRAP and credit COGS. (If you do not want the GL Transaction to hit the scrap account the user should create a General Credit Memo).
 Note: An invoice Credit Memo created in this module or one created in the RMA process against an OPEN invoice will offset the open A/R Trade invoice in the A/R Aging, and the amount displaying in A/R Trade Aging will be the NET. There will be a credit appearing in the A/R Aging only if the Customer invoice had already been paid down.
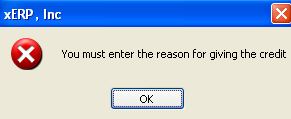
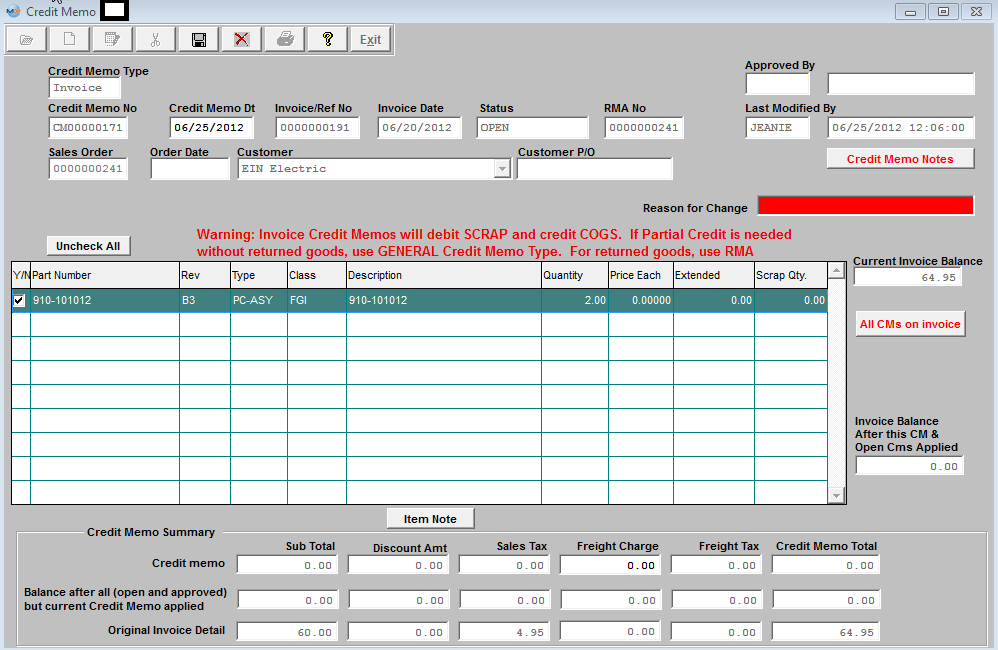
User MUST enter a reason for the Credit memo before saving. If the reason field is blank user will receive the folowing message:
 Once a reason has been entered user may Approve the Credit Memo. When user depresses the Approval button the following message will appear: 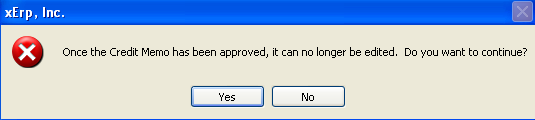 Once the Credit Memo has been approved the Status will change from Open to Approved and the CM will be forwarded to the AR Aging Module. If desired it may be Offset using the AR Offset module.
|
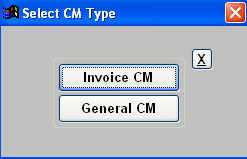

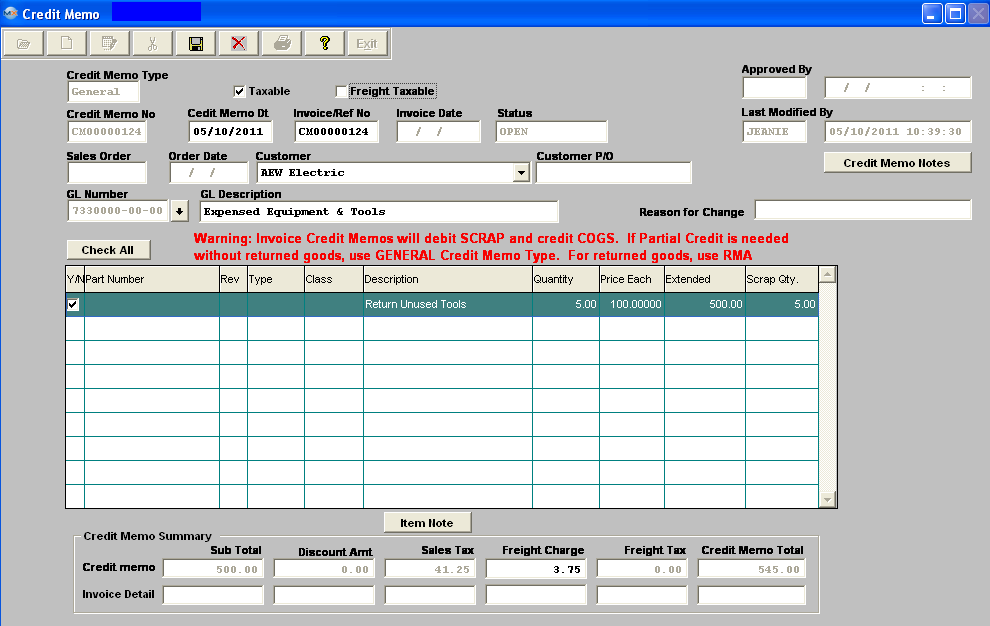
| 1.1.6.4.2.2. General Credit Memo | ||||||||||||
|
The following screen will be displayed:
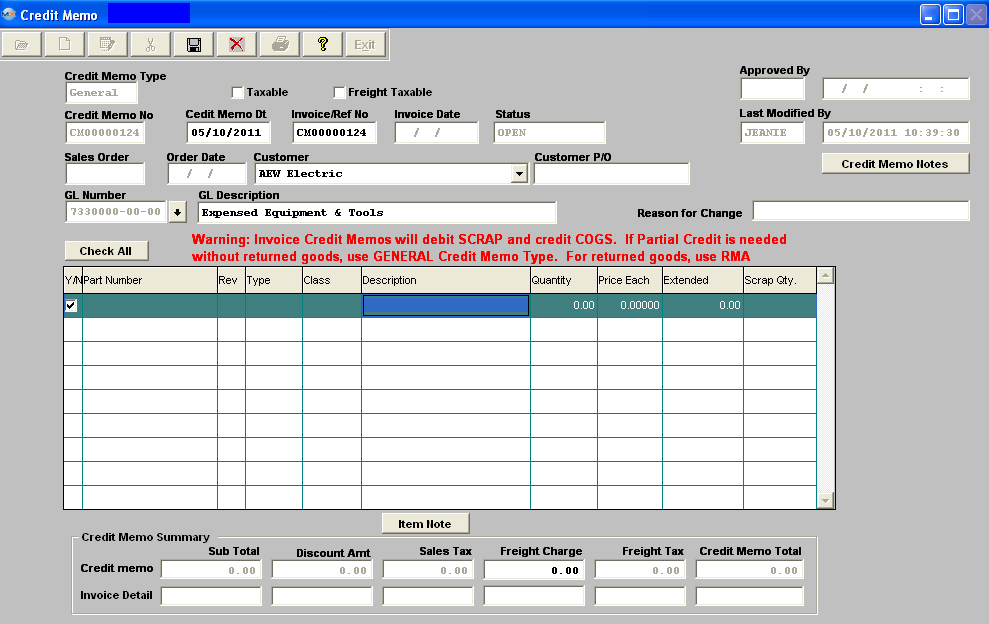
The following screen will appear:
The Invoice Number field changes to a reference number, and the user enters a Reference Number for the Credit Memo.
A General Ledger Account number must be supplied for a general Credit Memo. Note: When creating a General Credit Memo users should not select the same GL account number that is entered in the Actsetup for the Account Receivables. If you do, then the resulting transaction will debit and credit both the sane GL account number. The following GL screen will appear:
Select the method of finding the General Ledger Account number, by Account Type or Account Numbers. If you select Find By Account Type, depress the down arrow on the right hand side of the screen.
Select the desired Account Type, then select the Account Number.
Depress the OK button. If you select by account number, depress the down arrow next to the Account Numbers box and the accounts will appear. Highlight the Account Number you wish to use.
Then the user enters the description, quantity and price each to be credited. If the Taxable box is checked the Sales Tax will default in. If the Freight Taxable box is checked user must enter in the Freight Charge to be Credited as displayed below. The Credit Memo Total will calculate automatically.
User MUST enter a reason for the Credit Memo before saving. If Credit Memo Reason is blank user will receive the following message.
To enter the reason for the General Credit memo. Depress the Credit Memo Reason button. Depress the Edit button. Enter the Credit Memo Reason. Depress the Save button. Depress the Exit button. Then the Credit Memo may be saved and recorded by depressing the Save record action icon, or deleted by depressing the Abandon changes action icon. 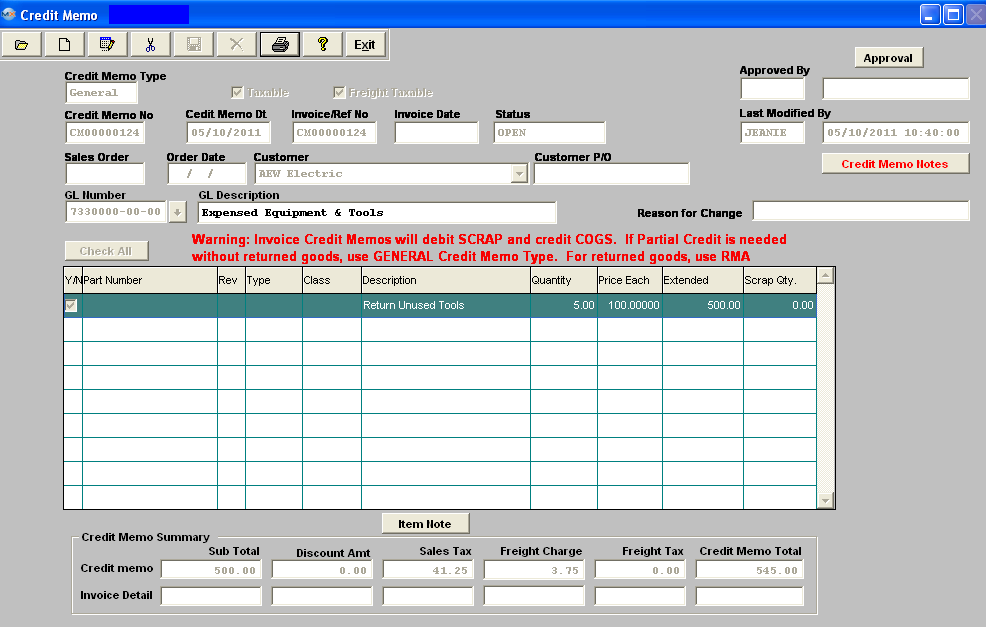 Depress the Approval button, and receive the following message.
Once Credit Memo has been approved the CM Status will change from Pending to Approved, and the CM will forward to the A/R Aging module. If desired, it may be Offset via the A/R Offset module.
 |


| 1.1.6.4.3. Edit an A/R Credit Memo |
Find an Exising Credit Memo with an "OPEN" status.
Depress the Edit record action icon. When in the edit mode the Credit Memo Date is editable, the quantity is editable, and the user may check or uncheck the line items to be credited.
NOTE: Any changes that affect the Credit Memo Total will also affect the totals on the right of the screen and they will be adjusted automatically with changes.
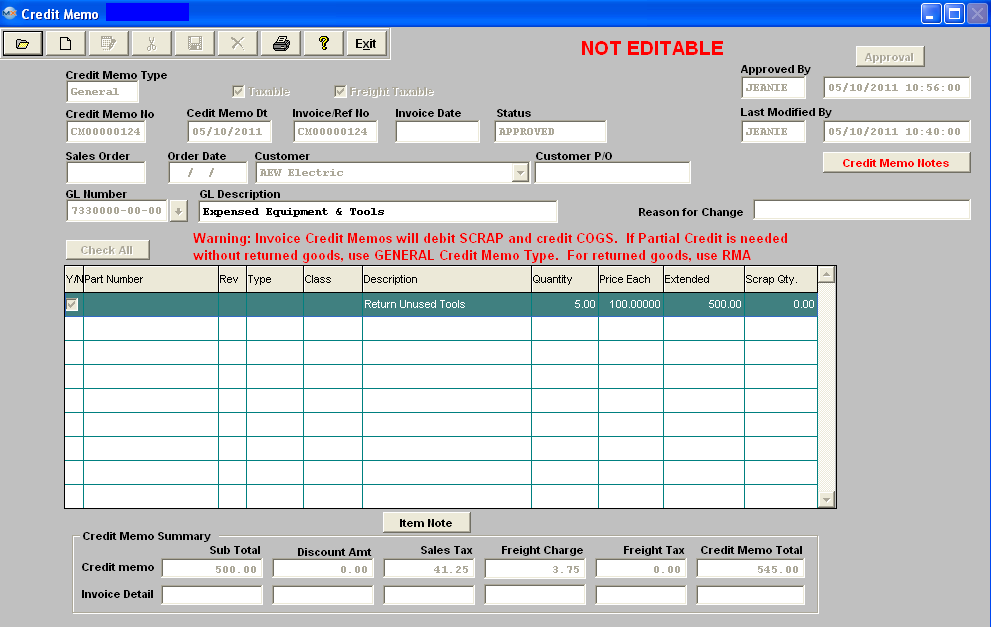
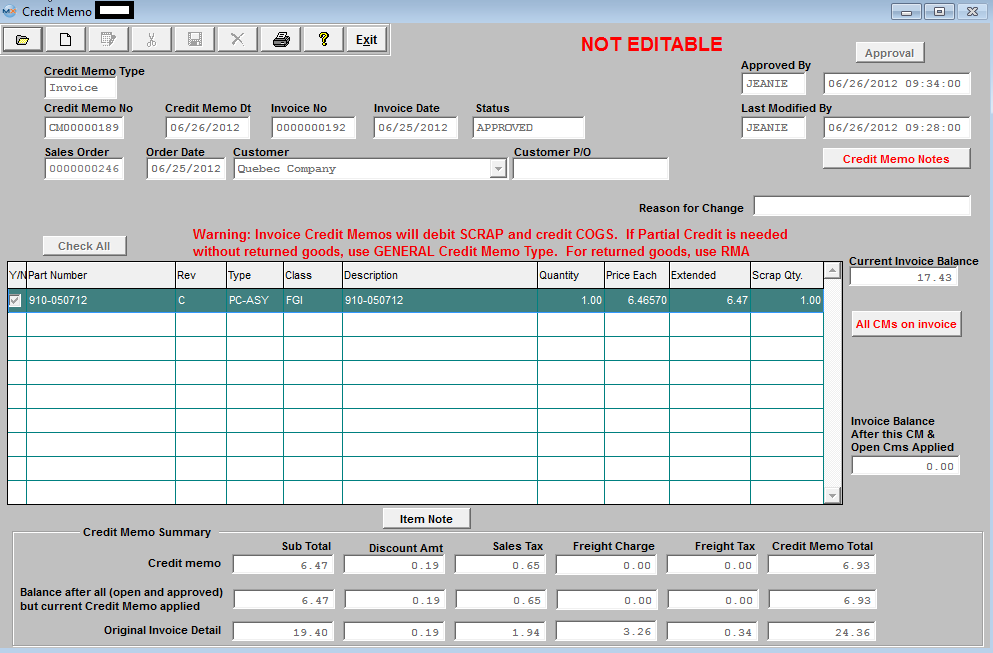
Once the Status changes from OPEN to APPROVED the Credit Memo is no longer editable. And "NOT EDITABLE" will be displayed at the top of the screen (as shown below).
|
| 1.1.6.5. Reports for A/R Credit Memos | ||||||||
The Return Material Authorization module notifies receiving to expect a return from a Customer. The authorization also allows for reworking/replacing the order so that the user doesn’t have to go to another screen to create a Sales Order. Once the RMA is received, a Credit Memo automatically forwards to the Accounting Accounts Receivable Credit Memo module where it can be viewed and printed. To obtain the Credit Memo Reports within the Web, select the WEB Print button from the ManEx action buttons at the top of the screen. For further detail on How the Reports work within the Web refer to Article #5477. Note: In order to access the Reports within the Web the Company Root URL must be setup within the System Appearance module and user must be linked to web within the System Security Module.
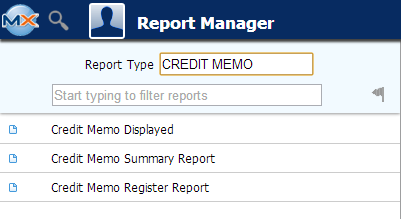
Select the Report Type: CREDIT MEMO - A List of Reports will be displayed that are available on the Web for Credit Memo
To view the Credit Memo created in the Return Material Authorization module, use the Find procedure.
To obtain the Credit Memo reports, select the Print button from the ManEx action buttons at the top of the screen
The following reports screen
will display a list of reports that are available on the ManEx Desktop:
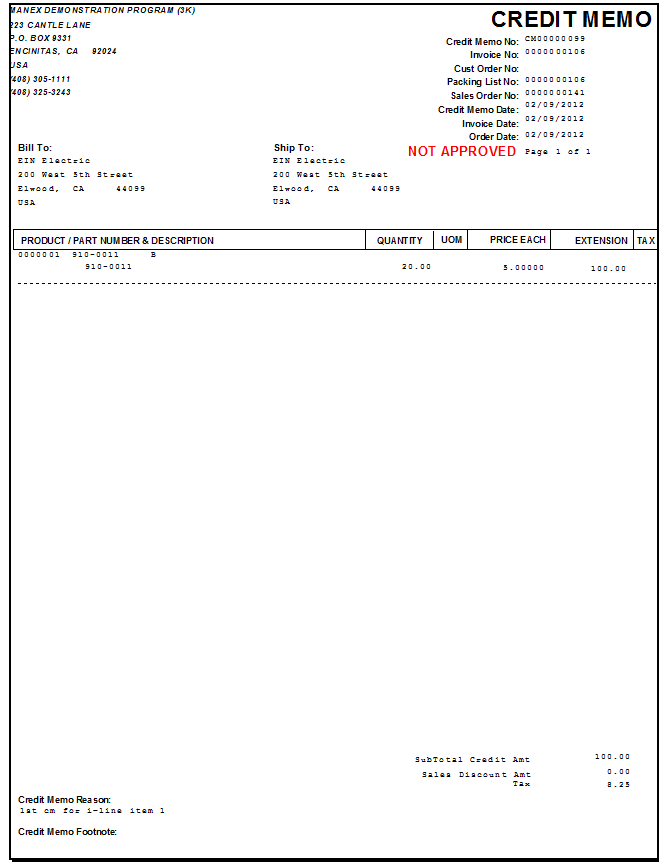
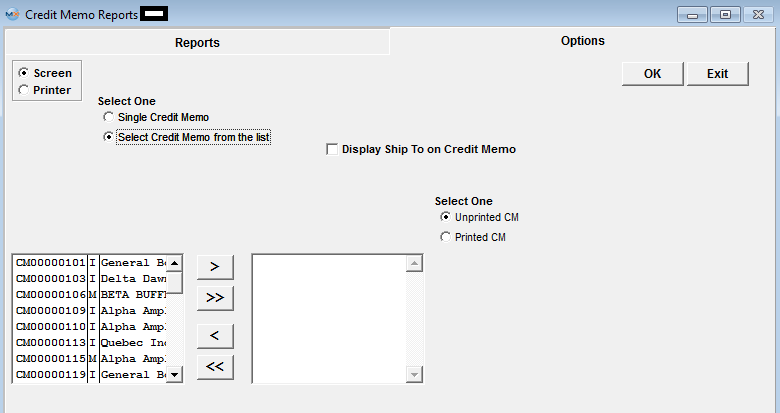
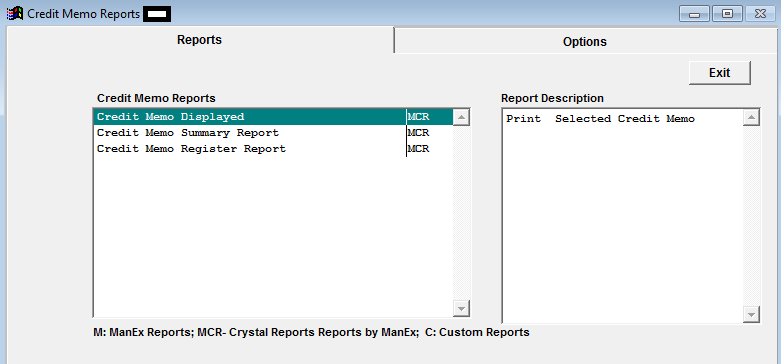 Highlight the report and depress the option tab. Credit Memo Displayed
The following report will be displayed:
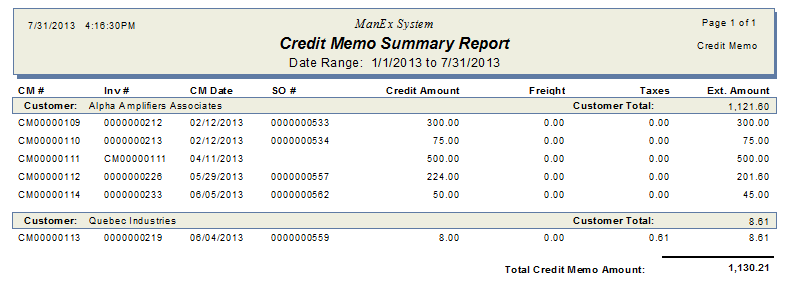
 Credit Memo Summary Report:
The following report will be displayed:
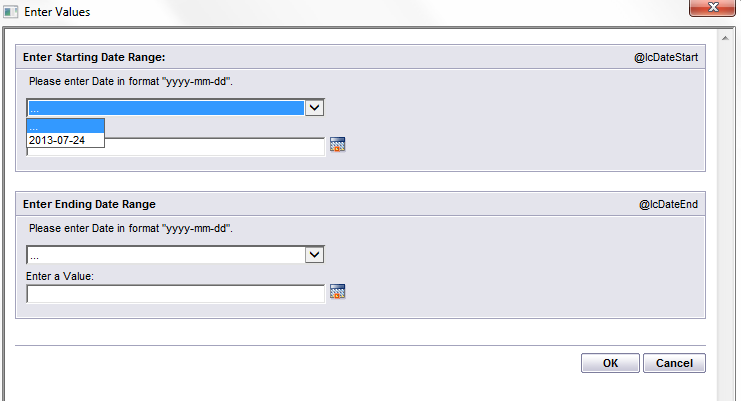
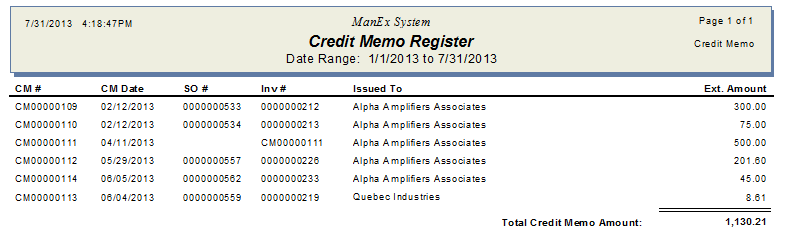
Credit Memo Register Report:
The following report will be displayed:
|

| 1.2. Accounts Payable (AP) |
| 1.2.1. PO Receipt Reconciliation |
| 1.2.1.1. Prerequisites for PO Receipt Reconciliation |
|
Users MUST have full rights to the "PO Reconcilliation" in Accounting Security . Users with “Accounting Security Supervisor” rights will automatically have access. The Purchase Order line item has been received and inspected. |
| 1.2.1.2. Introduction for PO Receipt Reconciliation |
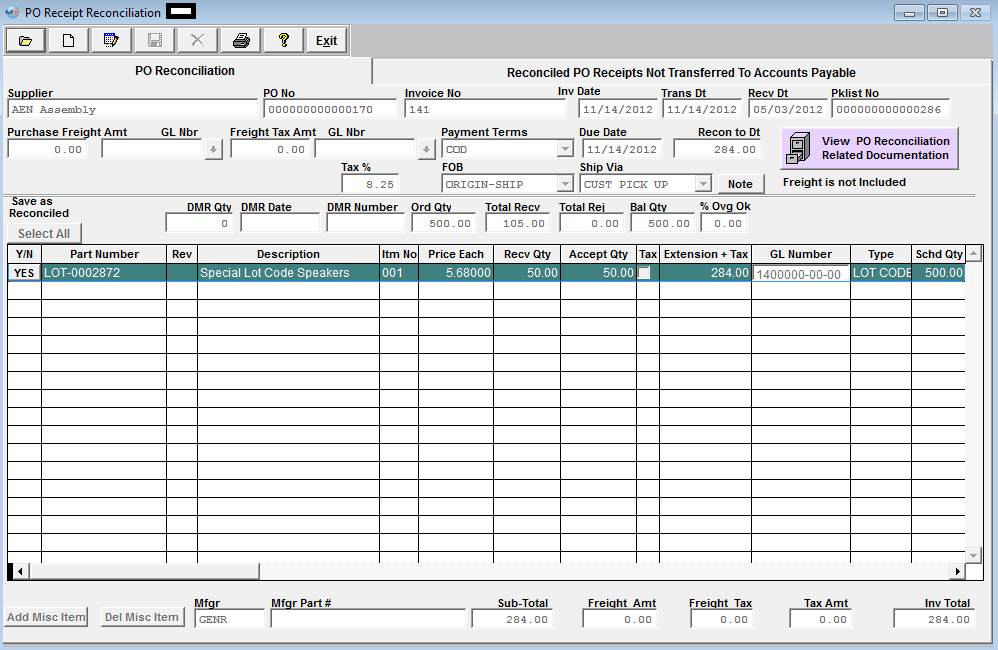
The PO Receivable Reconciliation provides on screen and printed reports to assist the tracking and payment of outstanding payables. Once the Purchase Order line item has been received and inspected, the received information will forward from the Receiving module to the Accounts Payable Purchase Order Reconciliation. |
| 1.2.1.3. Fields & Definitions for PO Receipt Reconciliation |
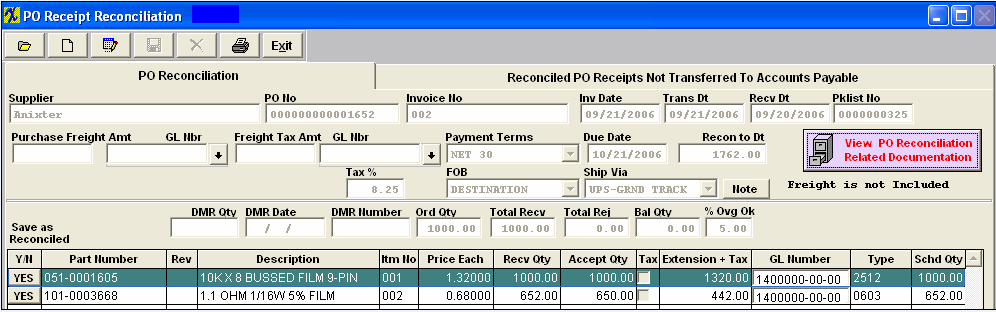
| 1.2.1.3.1. PO Reconciliation Tab | ||||||||||||||||||||||||||||||||||||||||||||||||||||||||||||||||||||||||||||||||||||||||||||||||||||||||||
PO Reconciliation Field Definitions
For the item number highlighted:
|


| 1.2.1.3.2. Reconciled PO Receipts not Transferred to A/P Tab | ||||||||||||||||||||||||||
|


| 1.2.1.4. How To ..... for PO Receipt Reconciliation |
| 1.2.1.4.1. Find a PO Reconciliation Record | ||||||||||
The following screen will be displayed:
Depress the Find Record action icon.
Once the Find Process is completed, the applicable data will be displayed. NOTE: The Edit button will only be available if the PO Receipt has NOT been transferred to AP.
|

| 1.2.1.4.2. Add a PO Reconciliation Record | ||||||||||||||||
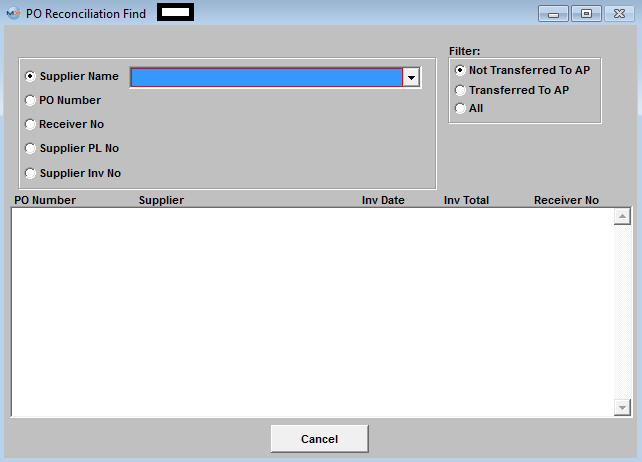
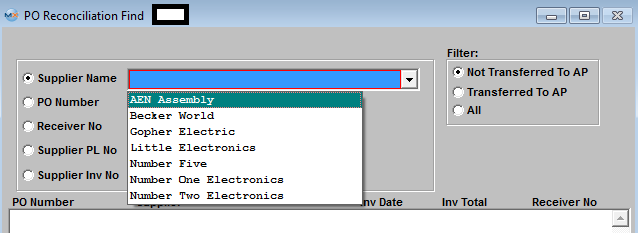
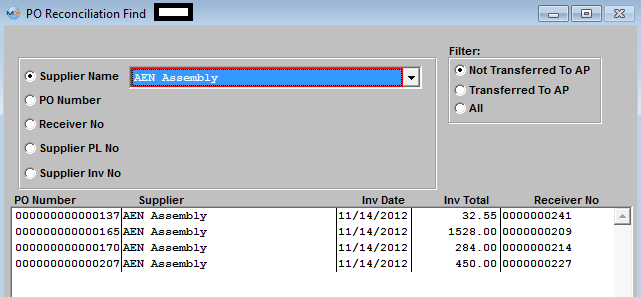
Enter the SQLMANEX.EXE (within the ManEx root directory) The following screen will be displayed:
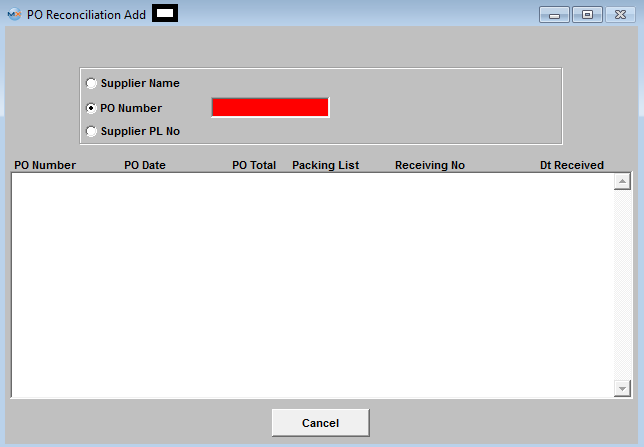
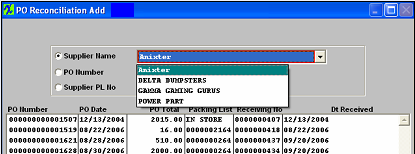
Depress the Add Record action icon. The following screen will be displayed: Select the Find by radio button; Supplier Name, PO Number or Supplier PL No. If you select by Supplier Name, a list of Suppliers will be displayed. Once the desired Supplier is selected, a further selection screen will be displayed. Highlight and double click on the desired Receiving No. If you decide to search by PO Number or Supplier PL No., type the PO Number or Supplier PL into the red box. The following screen will be displayed with the PO Receipt data:
Enter in the Invoice Number and Invoice Date. If desired, a different Transaction Date and/or Received Date may be entered.
If there is Freight or Freight Tax associated with the invoice, enter the amount into the field.
Enter in the GL NUMBER or search by depressing the down arrow next to the field. The following selection screen will be displayed: Depress the arrow next to the Find By field. Select either Find By Account Type or Account Numbers.
If you selected by Account Type, the following listing will be displayed, once you’ve depressed the down arrow next to the GL Type field: Scroll up or down until the appropriate range is found.
Then depress the down arrow next to the Account Numbers field. The following selection for the posting account will be displayed: You may change the payment terms or the due date, as desired. If you wish to add a note regarding this Supplier Invoice, depress the Note button. Depress the Edit button. Enter in the note. Depress the Save button. Depress the Exit button. If any portion of the Invoice is subject to tax, enter the tax percentage in the Tax % box. The user may change the FOB or Ship Via fields by depressing on the applicable down arrow and making a new selection.
Once a line item is highlighted in the lower section, information regarding DMR, Original Order Quantity, etc. will appear, as follows:
All of the line items on the PO which have been accepted will appear in the lower section. Note: The user will not be able to overpay an invoice. Only those quantities which have been ACCEPTED in PO Receiving will forward. The user may toggle on the Yes/No to reconcile. The user may change the Price Each. If the line item is subject to tax, check that box.
If there is a miscellaneous item associated with the invoice which was not included in the PO, the user may depress the Add Misc Item button at the bottom of the screen. Enter in the description of the item, the pricing, whether or not subject to tax, the accepted quantity and type in or select the GL Number. Entering Negative Amounts Note: The user may enter a NEGATIVE amount within this screen. Say to record a Coupon or something of that nature. The user should NOT record an early payment discount here as that is handled by the Payment Scheduling module.
Depress the Add Miscellaneous Item button. Enter in the description. Enter in the price, as a negative amount. Enter in the accepted quantity as 1. Enter in or select the General Ledger account number. Once all is completed, depress the Save record action button at the top of the screen.
|


| 1.2.1.4.3. Edit a PO Reconciliation Record | ||||
The following screen will be displayed: Select the record to edit using the Open/Find a record button. Once the Find Process is completed, the applicable data will appear. NOTE: The Edit button will only be available if the PO Receipt has NOT been transferred to AP. All editing for Purchase Order Invoices already transferred to the Accounts Payable MUST be edited in the Manual Invoicing module. |
| 1.2.1.4.4. Transfer an PO Reconciled PO Receipt to A/P |
Transfer Reconciled PO's to Accounts Payable
The following screen lists all of the Reconciled PO Receipts, which have NOT been transferred into Accounting Payable.
Toggle on the Yes/No column if desired, or depress the Select All button. Once all selections are made and you are ready to perform the transfer, depress the "Transfer Selected items to Accounts Payable" button, user will be prompted to enter a password. The items on the list will be transferred and saved one at a time, if one or more will fail you will receive a prompt asking if you want to continue with the rest. Note: The Reconciled Invoices can NOT be scheduled for payment unless they are TRANSFERRED. |
| 1.2.1.4.5. Attach a Related Document |
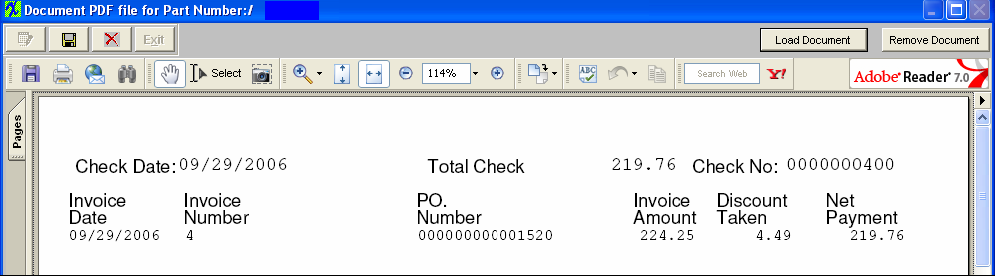
Find an existing PO Reconciliation Record, or Add a new PO Reconciliation record. Depress the The following screen will appear:
Depress the Add record icon, enter in a Document Number, REV, Doc Description, Doc Date, Doc Note; To load a document double click in the PDF File field and the following screen will appear:
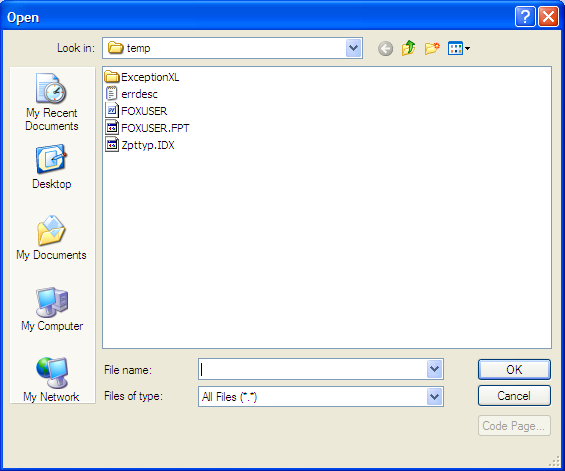
Depress the Load Document button and the following screen will appear: The PDF screen will allow you to load almost any type of document; (Word, Excel, pdf, Images, etc .... )
Locate the document and double click on it and the document will populate screen.
Depress the Save record icon to save or depress the Abandon changes icon to abandon changes. The following screen will appear:
Depress the Save record icon to save or depress the Abandon changes icon to abandon changes. Once documents are saved the "View PO Reconciliation Related Documentation" button will display in Red.
|


| 1.2.1.5. Reports for PO Receipt Reconcilitation |
|
To obtain the AP
Aging Reports within the Web, select the WEB Print button from the ManEx action buttons at the top
of the screen. For further detail on How the Reports work within the Web refer
to Article #5477.
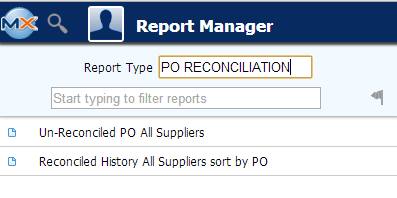
Select the Report Type: PO RECONCILIATION - A List of Reports will be displayed that are available on the Web for PO RECONCILIATION
These reports are not available within the desktop, the are only available through the Web.
|
| 1.2.2. Manual A/P Entries |
| 1.2.2.1. Prerequisites for Manual A/P Entries |
Users MUST have full rights to the "Manual AP Entry" in Accounting Security . Users with “Accounting Security Supervisor” rights will automatically have access. |
| 1.2.2.2. Introduction for Manual A/P Entries |
The Manual A/P Entries selection provides on screen and printed reports to assist the tracking and payment of manual invoice entries. The user may enter this module to input invoices which have no accompanying Purchase Order. |
| 1.2.2.3. Fields & Definitions for Manual A/P Entries |
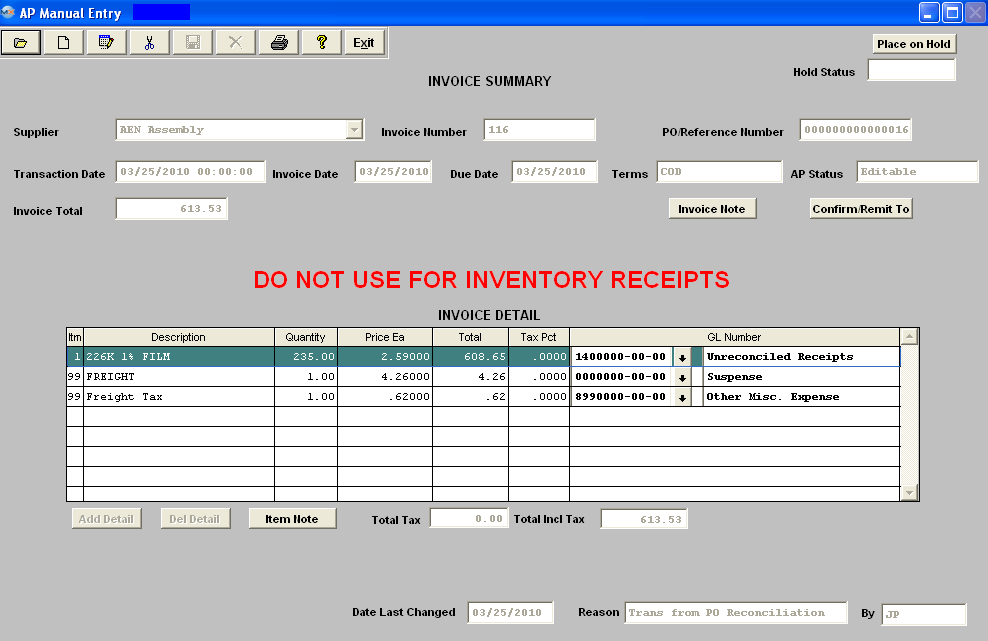
| 1.2.2.3.1. Manual AP Entry | ||||||||||||||||||||||||||||||||||||||||||||||||||||||||
Manual AP Entry tab field Definitions
INVOICE DETAIL
|
| 1.2.2.4. How To ..... for Manual A/P Entries |
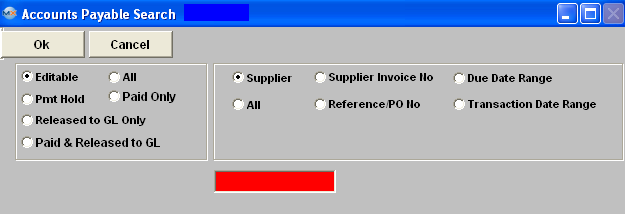
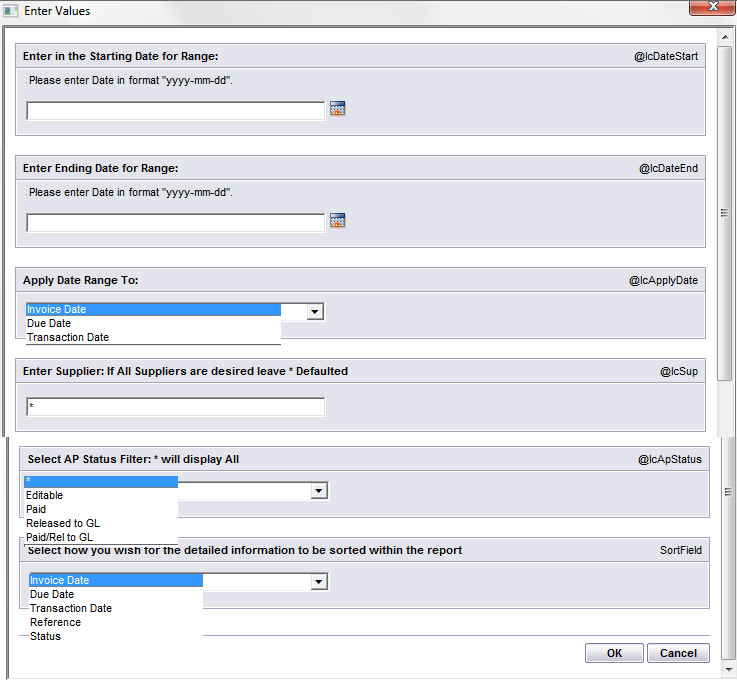
| 1.2.2.4.1. Find a Manual AP Entries | ||||||||||||||||||||||||||||||||
|
The following screen will be displayed:
Filter:
Sort By:
Once the selection is made, depress the "OK" button. The screen will update with data from the selection:
|


| 1.2.2.4.2. Add a Manual AP Entries | ||||||||||||||||
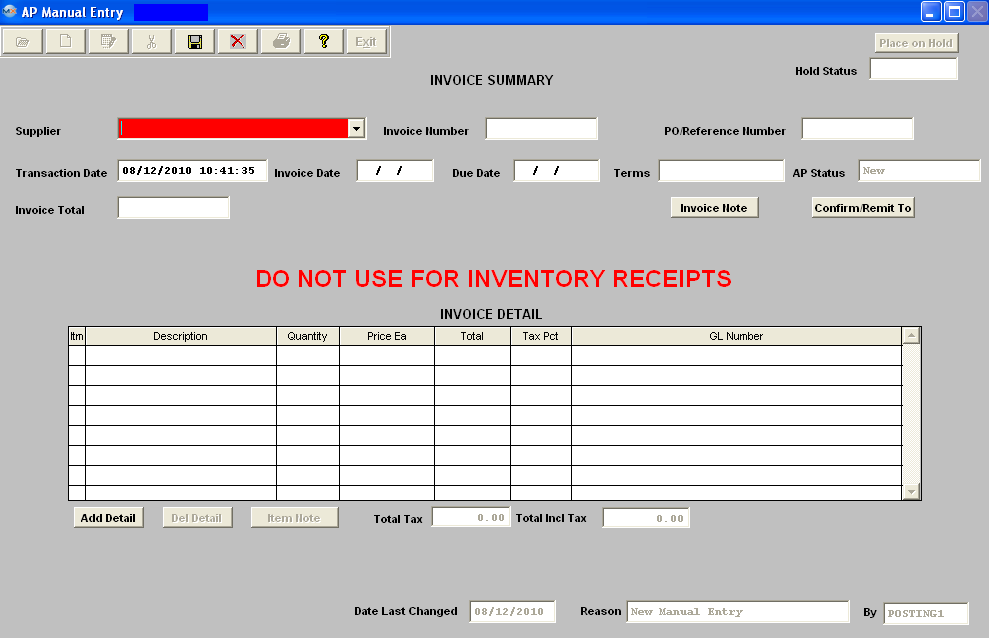
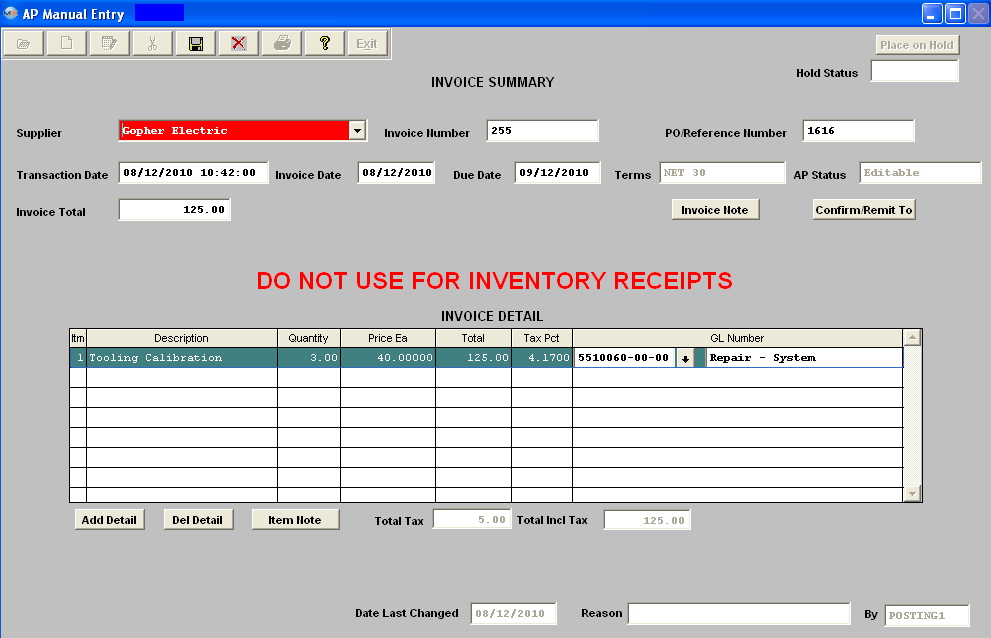
Adding Manual Invoices Manual AP Entry tab Note: Do NOT use for inventory receipts!
The following screen will be displayed:
Select the Add button and enter in your password. The following screen will appear: The transaction date will default in for the current day and time, but is editable.
Enter an Invoice Number ("DM" is disallowed as the two left characters of the invoice number) and Invoice Date.
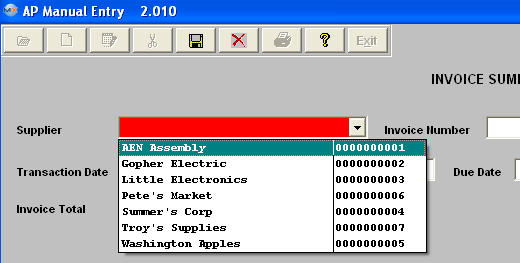
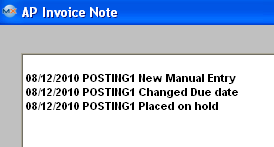
Enter a PO/Reference number if applicable. Enter in the Invoice date and the Due date. Enter in the total amount of the Invoice. If you want to add an Invoice Note, depress the Invoice Note button. Depress the Edit button. Type in the invoice note. Depress the Save button. Depress the Exit button. If you want to check on the Supplier’s CONFIRM/REMIT TO information, depress that button. Information regarding the Supplier addresses will appear on the screen. The user may change the TERMS by depressing the down arrow next to the Terms field and selecting a new term. The user may also change the CONFIRM TO address or the REMIT TO address by depressing the arrows next to those fields and selecting a new address.
Depress the Add Detail button at the bottom of the screen. 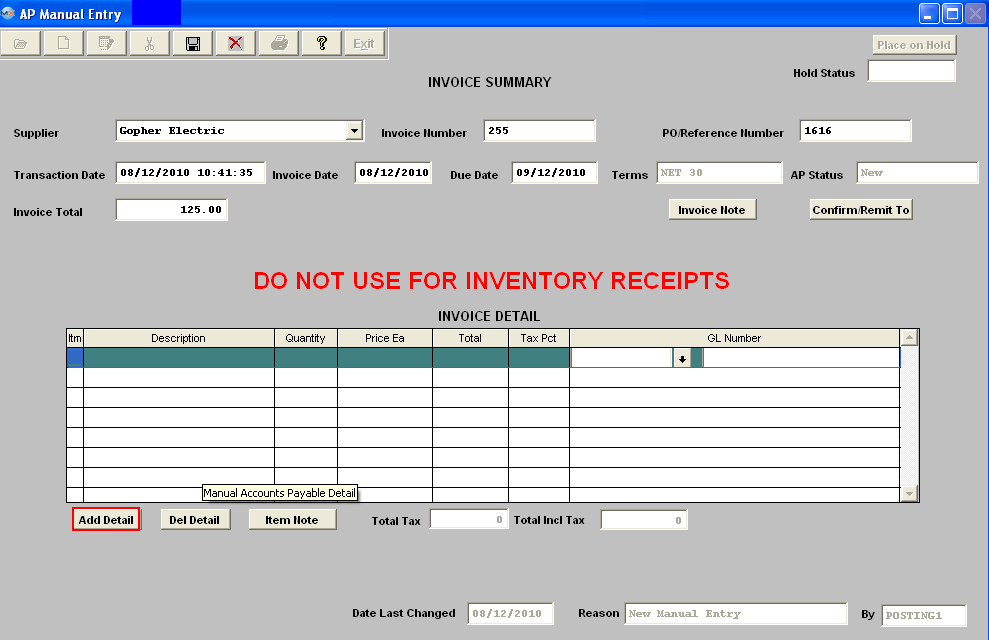 In the Invoice Detail Information section, enter in the Item Number, Description, Quantity, and Price Each. The Total column will update automatically. Enter in the Tax Percentage.(For example, a tax rate of 8 1/2 percent would be entered as 8.50), if applicable. Enter in the General Ledger Account Number.
To add an Item Note, depress the Item Note button. Depress the Edit button. Type in the note. Depress the Save button. Depress the Exit button. The note button will light up in red. Continue to add detail using the above procedures until the entire invoice amount has been covered and exactly matches the total amount column in the top section of the screen.
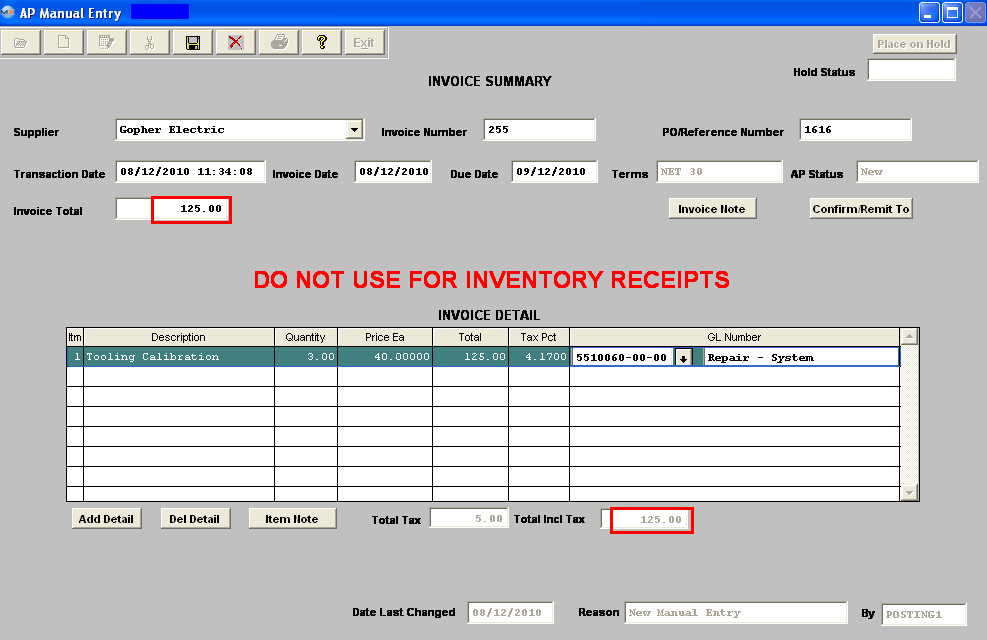 Depress the Save button at the top of the screen the Status will update from "New" to "Editable" and user will receive the following message:  . . Note: If the two total amounts do not exactly match user will receive the following message: 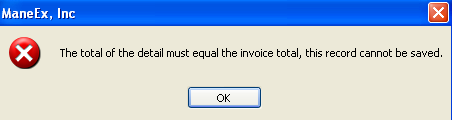 If the Transactions Date is left blank user will recieve the following message and will NOT be able to Save the record until this field is populated:
Invoice will then be transfered to the Release and Post screen . Once the record has been released and posted to the GL the status will updated from "Editable" to "Released to GL".
|
| 1.2.2.4.3. Edit a Manual AP Entries | ||||
Editing Manual AP Entries : If the Manual AP Entry Status is Editable and has NOT been released/posted to the GL, the user will have the ability to Edit the Invoice from the Manual AP Entry screen. All Editing for Purchase Order Invoices already transferred to the Accounts Payable Aging module MUST be edited in the Manual Invoicing module.
The following screen will be displayed:
Using the Find Procedures find a Manual AP Entry Record. Depress the Edit button and enter in your password.
 Make the desired changes. Enter in the Reason for the change. If you try to Save record without entering a the Reason you will receive the following message: 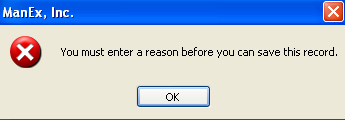 If you change any of the amounts, make sure that the "Invoice Total" field and the "Total Incl Tax" fields are equal. Note: If you change the Detail Total pricing, you MUST also change the Invoice Total at the top of the screen. If the two totals do NOT match user will receive the following message: The user may add notes to both the Invoice Notes and the Item Notes. Depress the Edit button. Depress the Note button. Depress the Edit button. Type in the note.Depress the Save button. Depress the Exit button. The note button will light up in red.
The user may also change information in the Confirm/Remit To screen. Depress the Edit button. Depress the Confirm/Remit To button. The following screen will appear:
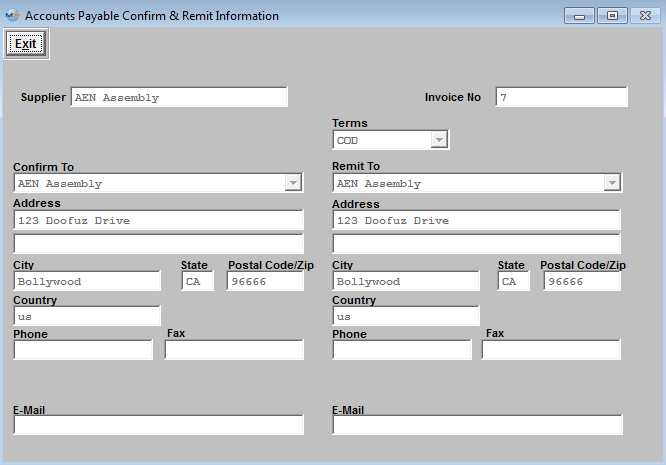 The user may change the TERMS by depressing the down arrow next to the Terms field and selecting a new term. The user may also change the CONFIRM TO address or the REMIT TO address by depressing the arrows next to those fields and selecting a new address. Once the edited changes are complete, depress the Save button. For future finds, the most recent edited change reason will display. If there was more than one edited change, depress the Invoice Note button to see all of the changes.
|
| 1.2.2.4.4. Delete a Manual AP Entries | ||||
Deleting an Manual AP Entry/Invoice
The following screen will be displayed:
Type in your password, you will receive the following warning:
 Depress the Yes button to complete the deletion.
Note: Upon Deletion the system will then completely remove the original transaction for the Manual AP Entry that was waiting to be Release/Posted to the GL. If the Invoice you want to delete is NOT editable, please follow the procedures below: If it’s a Manual Invoice or an MRO PO Invoice, use the Debit Memo procedures. If it’s an Inventory PO Invoice, use the DMR (Return to Vendor) procedures.
|
| 1.2.2.5. Reports for Manual A/P Entries | ||||
|
To obtain the Manual A/P Entry Reports within the Web, select the WEB Print button from the ManEx action buttons at the top
of the screen. For further detail on How the Reports work
within the Web refer to Article #5477. Note: In order to access the Reports
within the Web the Company Root URL must be setup within the System Appearance module and user must be linked to web within the System Security Module.
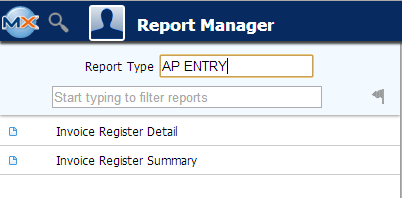
Select the Report Type: AP ENTRY - A List of Reports will be displayed that are available on the Web for AP ENTRY
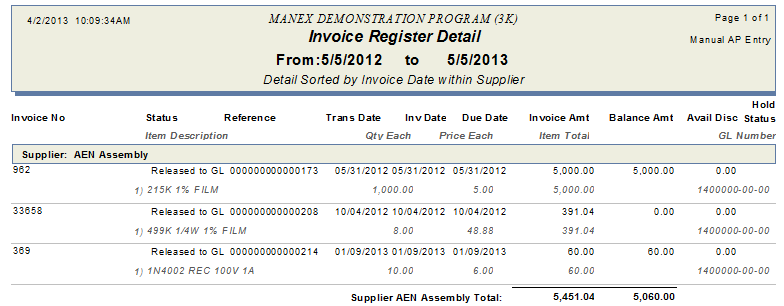
The following reports screen will display a list of reports that are available on the ManEx Desktop 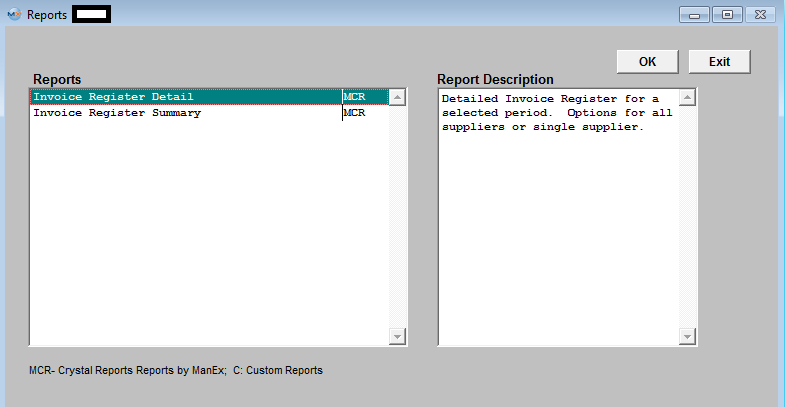 Invoice Register Detail
The following report will be displayed:
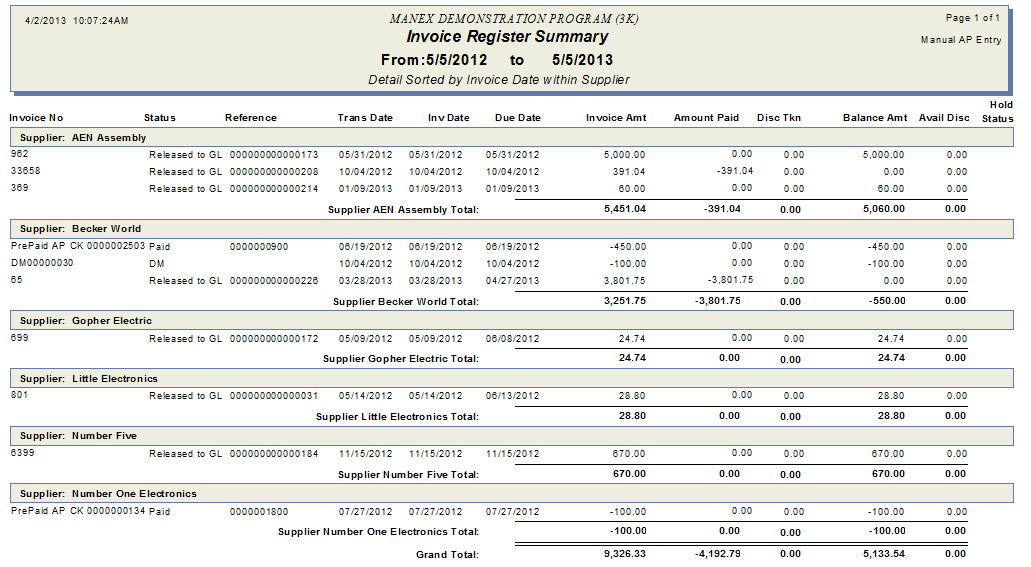
Invoice Register Summary
The following report will be displayed:
|
| 1.2.3. AP Recurring Entries |
| 1.2.3.1. Prerequisites for AP Recurring Entries |
Users MUST have full rights to the "Manual AP Entry" in Accounting Security . Users with “Accounting Security Supervisor” rights will automatically have access. |
| 1.2.3.2. Introduction for AP Recurring Entries |
The Recurring Payables selection provides the ability to set up a payment to a supplier on the frequency of your choosing and for the number of payments you determine. This module is also used to release recurring payables into the Accounts Payable Aging module. |
| 1.2.3.3. Fields & Definitions for AP Recurring Entries |
| 1.2.3.3.1. Maintain Recurring AP Entry | ||||||||||||||||||||||||||||||||||||||||||||||||||||||||||||||
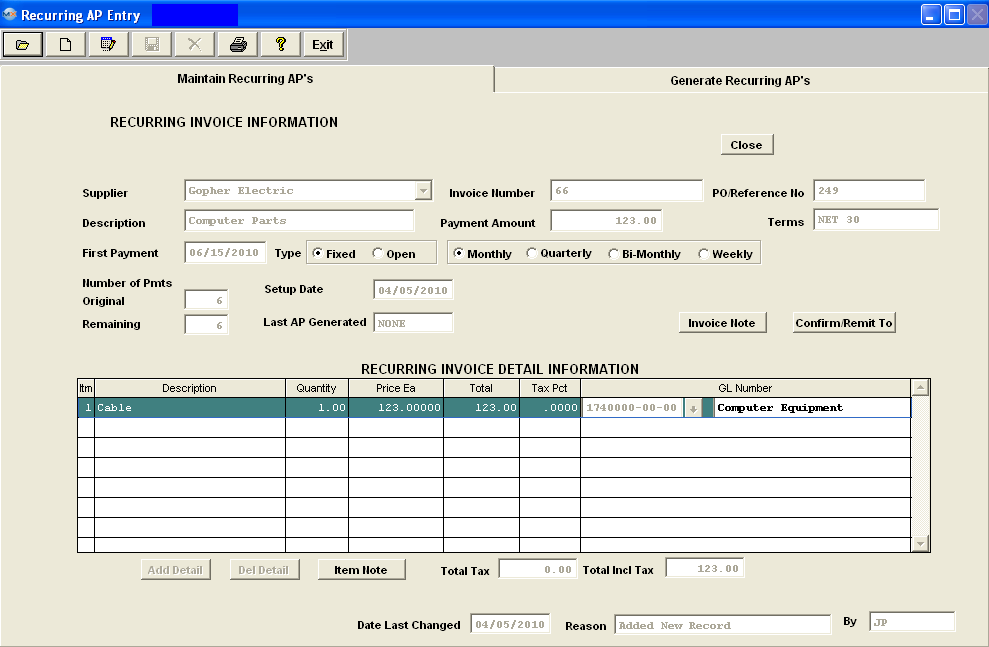
Maintain Recurring AP’s tab Field Definitions
RECURRING INVOICE INFORMATION
RECURRING INVOICE DETAIL INFORMATION
|
| 1.2.3.3.2. Generate Recurring AP Entry | ||||||||||||||||||||||||||
This screen is used to generate the Recurring Accounts Payable and set them up for payment by transferring them into the A/P Aging module. Generate Recurring AP’s tab Field Definitions
|
| 1.2.3.4. How To ..... for AP Recurring Entries |
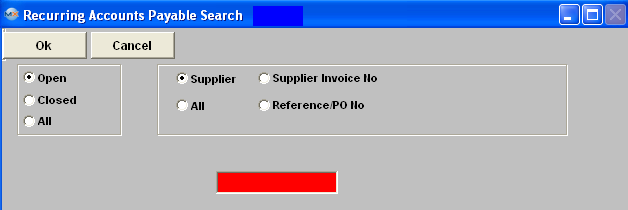
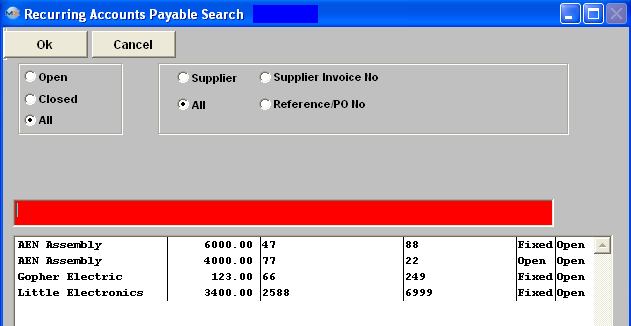
| 1.2.3.4.1. Find a Recurring AP Entries | ||||||||||||||||||||||
|
The following screen will be displayed:
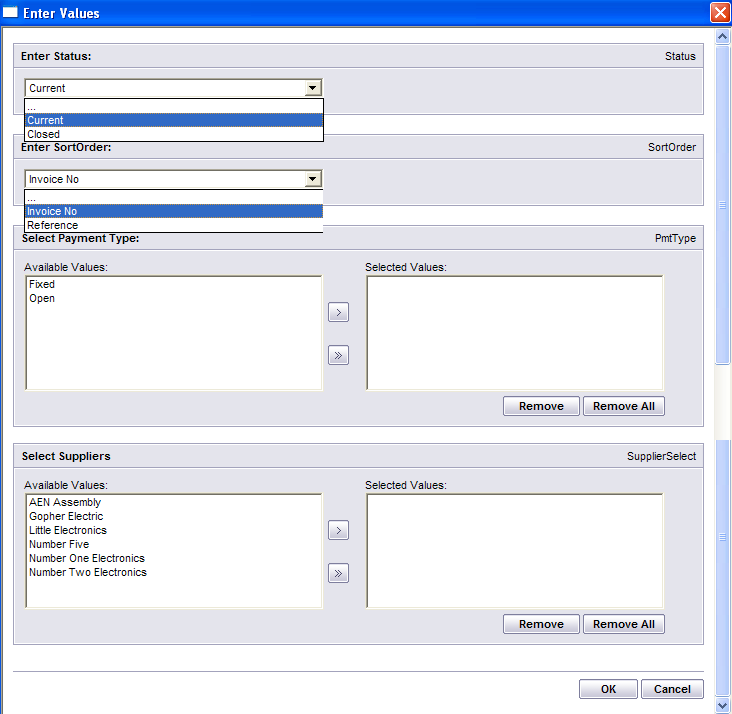
Filter:
Sort By:
Once the selection is made, the screen will update with data from the selection:
|

| 1.2.3.4.2. Add a Recurring Payment | ||||||||||||||
The following screen will be displayed:
Depress the Add button at the top of the screen. Enter in your password. Depress the down arrow in the Supplier Name column. Select the Supplier from the drop down screen.
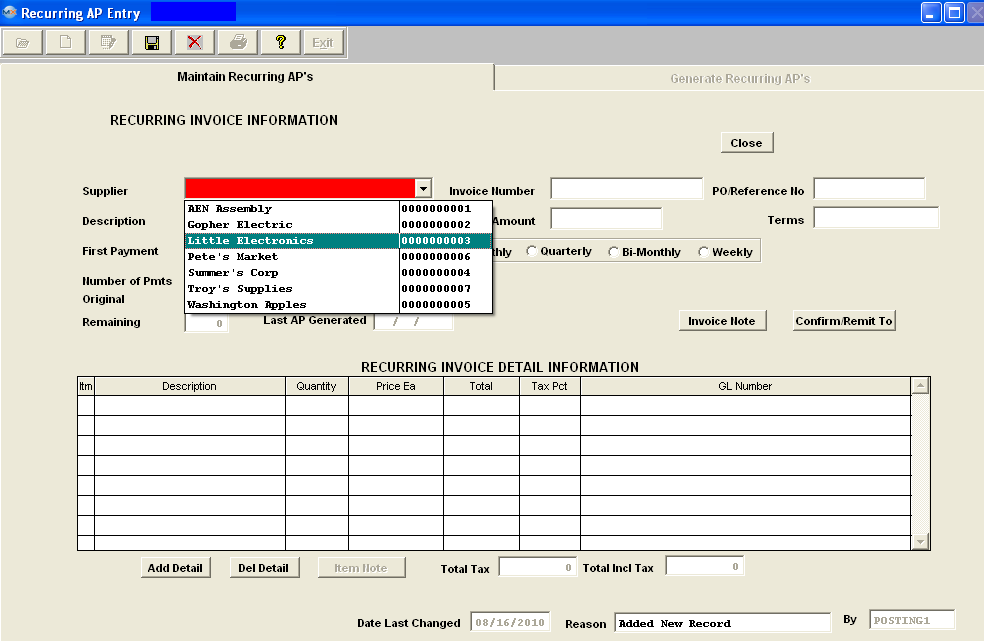 Complete the header information; Invoice Number, PO/Reference No, Description, Payment Amount, (Terms are defaulted in from Supplier info)
Select the Type (Fixed - is for a definite number of payments, Open - is for an indefinite number of payments)
Select the frequency; Monthly, Quarterly, BiMonthly, or Weekly. If the Recurring Payable is for a Fixed number of payments enter the Original Number of Pmts.
 Once all the Header Information is complete depress the "Add Detail" button located at the bottom of the screen.
Enter the Item Number, Description, Quantity, Price Each, Tax Pct.Type (if applicable) and the General Ledger Number. Note: The "Total Incl Tax" must equal the "Payment Amount" before the system will allow record to be saved.

If you want to add an Item Note, depress the "Invoice Note" button, enter the note, and depress the Save button.
If you want to view or edit the CONFIRM and REMIT TO addresses, depress the "Confirm/Remit To" button. The following screen will be available:
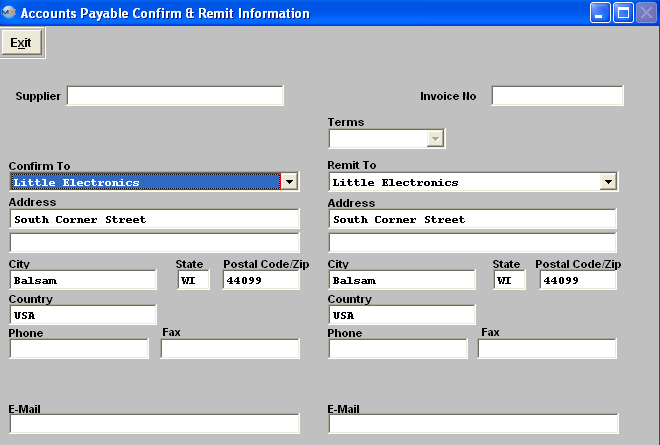 You may select or change the TERMS by depressing the down arrow next to the Terms field and selecting the desired terms for the recurring invoice. You may select or change the CONFIRM TO or REMIT TO address for the vendor by depressing the down arrow next to that field. Select the desired address for the recurring invoice.
Depress the Save button at the top of the screen and user will receive the following message:
. Note: If the two total amounts do not exactly match user will receive the following message: |

| 1.2.3.4.3. Edit a Recurring AP Entry | ||||
The following screen will be displayed:
Using the Find Procedures to find a Recurring AP Entry Record. Depress the Edit button and enter in your password.
Note: If there has been ANY transfer from Recurring to A/P Aging, the user will NOT be allowed to Edit or Delete. Instead, use the Close button to set the recurring to Inactive. 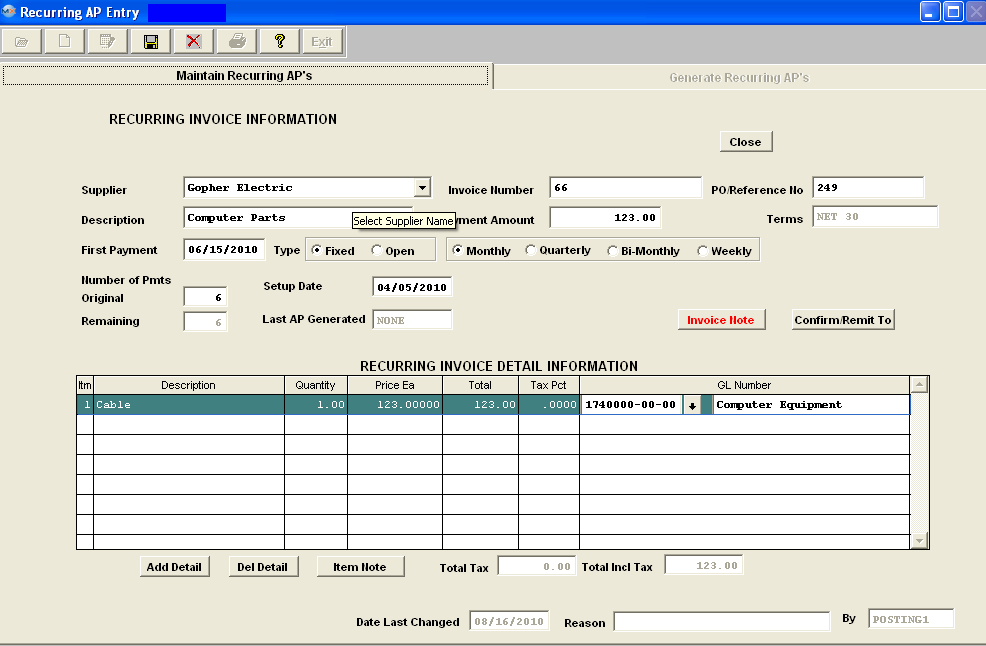 Make the desired changes. Enter in the Reason for the change. If you try to Save record without entering a the Reason you will receive the following message: If you change any of the amounts, make sure that the "Payment Amount" field and the "Total Incl Tax" fields are equal. Note: If you change the Detail Total pricing, you MUST also change the Payment Amount at the top of the screen. If the two totals do NOT match user will receive the following message: The user may add notes to both the Invoice Notes and the Item Notes. Depress the Edit button. Depress the Note button. Depress the Edit button. Type in the note.Depress the Save button. Depress the Exit button. The note button will light up in red.
The user may also change information in the Confirm/Remit To screen. Depress the Edit button. Depress the Confirm/Remit To button. The following screen will appear:
 The user may change the TERMS by depressing the down arrow next to the Terms field and selecting a new term. The user may also change the CONFIRM TO address or the REMIT TO address by depressing the arrows next to those fields and selecting a new address. Once the edited changes are complete, depress the Save button. For future finds, the most recent edited change reason will display. If there was more than one edited change, depress the Invoice Note button to see all of the changes.
|
| 1.2.3.4.4. Delete a Recurring AP Entry | ||||
The following screen will be dispalyed:
enter your password, you will receive the following warning:
 Depress the Yes button to complete the deletion.
Note: Upon Deletion the system will then completely remove the original transaction for the Recurring AP Entry. |
| 1.2.3.4.5. Generate a Recurring Payable | ||||
The following screen will be displayed: Enter the Generate Recurring AP's tab Enter in an Ending Date through which you wish the Recurring Payables to generate. Depress the "Generate Recurring AP's" button. Enter in your password. The ungenerated recurring payables through the Ending Date will populate the screen.  Go down the Select column and check any Recurring Payable, which you want to transfer to Account Payable Aging module. Once you have made your selection(s) depress the "Transfer to Accounts Payable" button.
NOTE: If the users skip selecting one or more payments and select a later payment for the same recurring AP for transfer to AP, the earlier payments will NOT be generated in later sessions and WILL BE LOST.
|
| 1.2.3.5. Reports for Recurring AP Entry | ||||
|
To obtain the AP Recurring Payable Reports within the Web, select the WEB Print button from the ManEx action buttons at the top
of the screen. For further detail on How the Reports work
within the Web refer to Article #5477. Note: In order to access the Reports
within the Web the Company Root URL must be setup within the System Appearance module and user must be linked to web within the System Security Module.
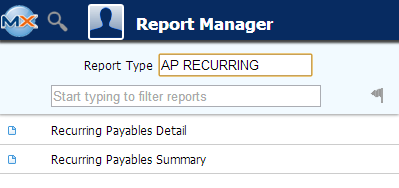
Select
the Report Type: AP RECURRING - A List of Reports will be displayed that are
available on the Web for AP RECURRING
The
following reports screen will display a list of reports that are available on
the ManEx Desktop:
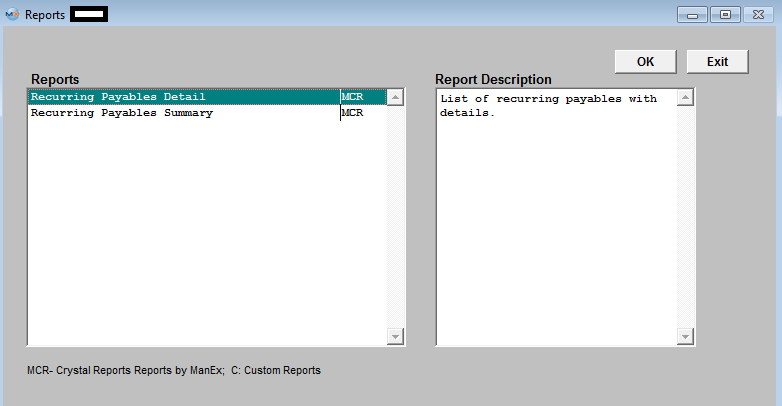 Highlight the report. Depress the OK button.
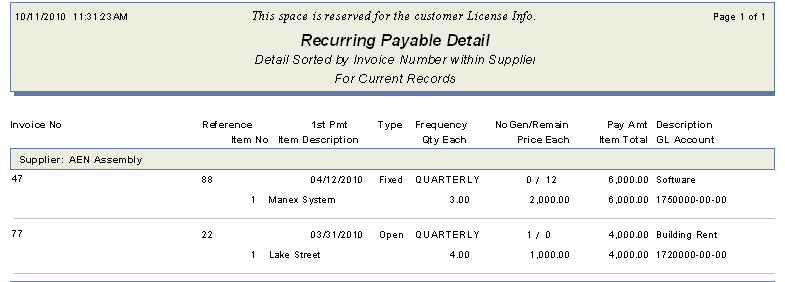
Recurring Payables Detail
The following report will be displayed:
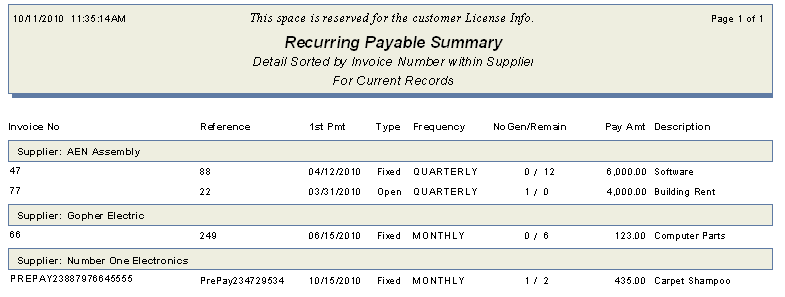
Recurring Payable Summary
The following report will be displayed:
|
| 1.2.4. A/P Aging |
| 1.2.4.1. Prerequisites for A/P Aging |
Users MUST have full rights to the "AP Aging, Reports" in Accounting Security . Users with “Accounting Security Supervisor” rights will automatically have access. The Ranges for the Aging screens must be setup within the Purchases A/P Setup module.
|
| 1.2.4.2. Introduction for A/P Aging |
The Accounts Payable Aging selection provides on screen and printed reports to assist the tracking and payment of outstanding payables. Note: the user cannot schedule for payment until such time as the Invoice to be paid appears in the A/P Aging. AP Prepayments are NOT considered outstanding payables so they will NOT be displayed on the AP Aging screen Note: There are three modules which forward into the A/P Aging module. The PO Reconciliation module, Manual A/P Entries & Recurring Payments module and the Debit Memo module.
|
| 1.2.4.3. Fields & Definitions for A/P Aging |
| 1.2.4.3.1. A/P Summary Current-60 | ||||||||||||||
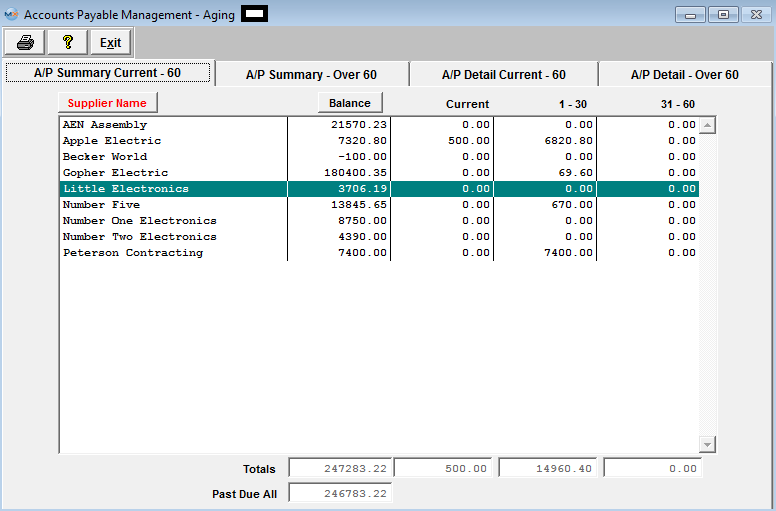
A/P Summary Current - 60 tab field Defintions
In the column below, the name of the supplier. The user may sort alpha by depressing the button. In the column below, the net due to the user for that supplier.T he user may sort on highest to lowest by depressing the button. The amount due to the user which is not past the due date. The amount due to the user which is 1 to 30 days past the due date. The Ranges for the Aging screens must be setup within the Purch A/P Setup module. The amount due to the user which is 31 to 60 days past the due date. The Ranges for the Aging screens must be setup within the Purch A/P Setup module The totals line will display the totals for each column, Balance, Current, 1-30 and 31-60. The grand net total for all of the suppliers for amounts past the scheduled due date. |
| 1.2.4.3.2. A/P Summary-Over 60 | ||||||||||||||
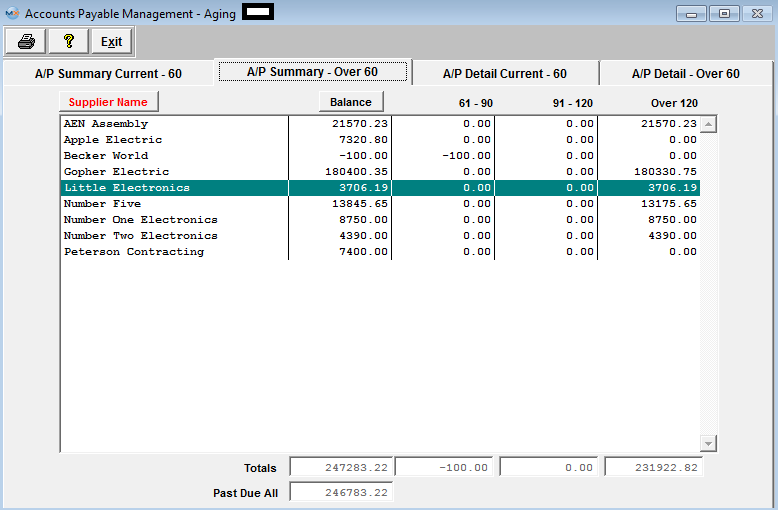 A/P Summary-Over 60 tab field Definitions
Highlight the Supplier of interest.To view the detail, select the appropriate tab – A/P Detail Current – 60 or A/P Detail – Over 60.The detail for that Supplier will display. |
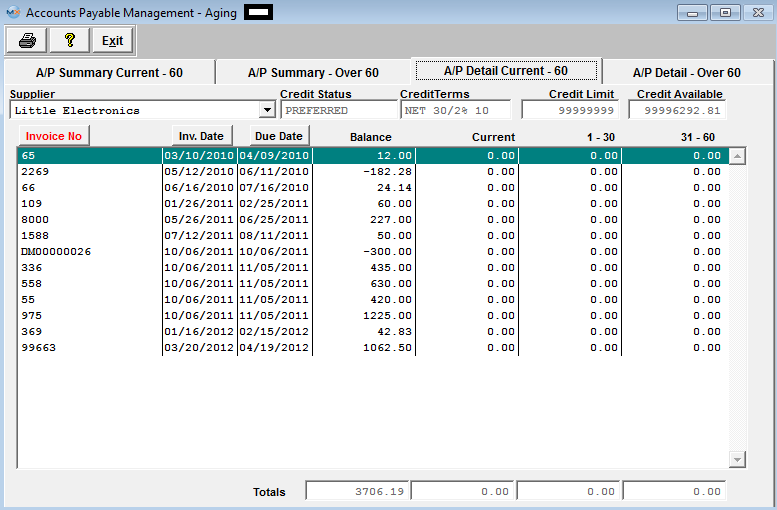
| 1.2.4.3.3. A/P Detail Current-60 | ||||||||||||||||||||||||||
A/P Detail Current-60 tab field Defintions
Supplier |
|
The name of the Supplier being displayed. Credit Status |
|
The status the supplier has with the user, Approved, On Probation, Disqualified, etc. Credit Terms |
|
These are the payment terms the supplier has for the user. Credit Limit |
|
This is the limit of credit that the supplier extends to the user. Credit Available |
|
This is the amount of credit still available to the user after consideration of all of the open invoices. The supplier’s number for their invoice. To sort by invoice number, depress that button. |
|
The date of the invoice.To sort by invoice date, depress that button.
|
The date the payment is due to the supplier. To sort by Due Date, depress that button. Invoice Amt |
|
The $ amount of the invoice. Current |
|
Invoices with scheduled due dates later than the current date. 1-30 |
|
Invoices with due dates between 1 and 30 days past the scheduled due date. The Ranges for the Aging screens must be setup within the Purch A/P Setup module 31-60 |
|
Invoices with due dates between 31 and 60 days past the scheduled due date. The Ranges for the Aging screens must be setup within the Purch A/P Setup module Totals |
|
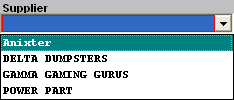
The total of the Invoice Amount, Current, 1-30 and 31-60 columns. To view another Supplier, depress on the down arrow next to the Supplier field. A list of Suppliers with open Invoices will display: Select the Supplier of choice. |
| 1.2.4.3.4. A/P Detail-Over 60 | ||||||||||||||||||||||||||
The name of the Supplier being displayed. The status the supplier has with the user, Approved, On Probation, Disqualified, etc. These are the payment terms the supplier has for the user. This is the limit of credit that the supplier extends to the user. This is the amount of credit still available to the user after consideration of all of the open invoices. The supplier’s number for their invoice. To sort by invoice number, depress that button. The date of the supplier’s invoice.To sort by invoice date, depress that button. The date the payment is due to the supplier. To sort by Due Date, depress that button. The $ amount of the invoice. Invoices with due dates between 61 and 90 days past the scheduled due date. The Ranges for the Aging screens must be setup within the Purch A/P Setup module Invoices with due dates between 91 and 120 days past the scheduled due date. The Ranges for the Aging screens must be setup within the Purch A/P Setup module Invoices with due dates between 31 and 60 days past the scheduled due date. The Ranges for the Aging screens must be setup within the Purch A/P Setup module The total of the Invoice Amount, 61-90, 91-120 and over 120 columns. To view another Supplier, depress on the down arrow next to the Supplier field.A list of Suppliers with open Invoices will display:
Select the Supplier of choice. Note: The Invoice must be displaying in A/P Aging before it can be selected for payment. |

| 1.2.4.4. Reports for the A/P Aging | |||||||||
|
To obtain the AP Aging Reports within the Web, select the WEB Print button from the ManEx action buttons at the top of the screen. For further detail on How the Reports work within the Web refer to Article #5477.
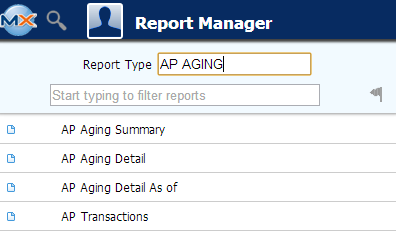
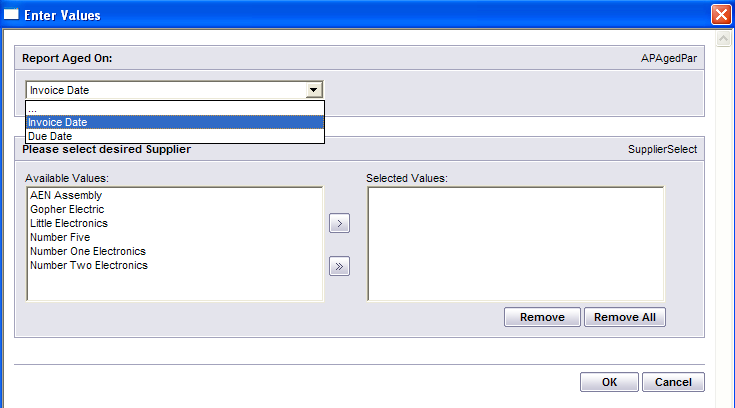
Note: In order to access the Reports within the Web the Company Root URL must be setup within the System Appearance module and user must be linked to web within the System Security Module. Select the Report Type: AP AGING - A List of Reports will be displayed that are available on the Web for AP AGING
To obtain the AP Aging Reports within the desktop, select the Print button from the ManEx action buttons at the top of the screen. The following reports screen will display a list of reports that are available on the ManEx Desktop: 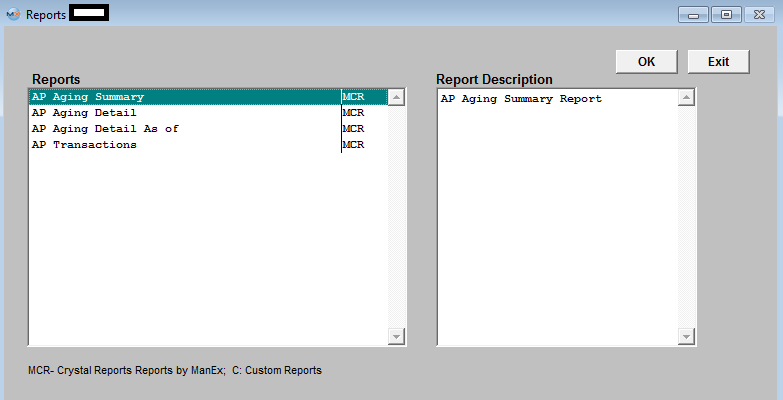 Note: All of the AP Aging Reports account for Prepayments which are not accounted for in the AP Aging screen.
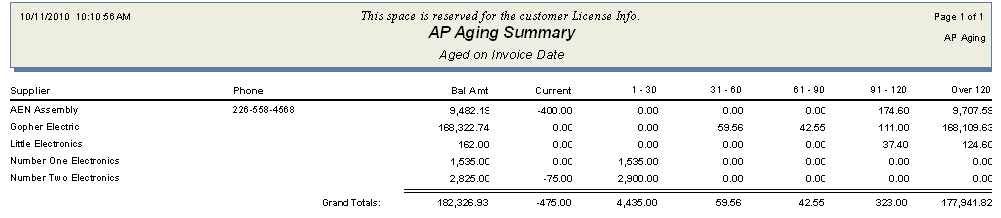
Highlight the report. Depress the OK button. AP Aging Summary
The following report will be Printed:
AP Aging Detail
The following report will be Printed: 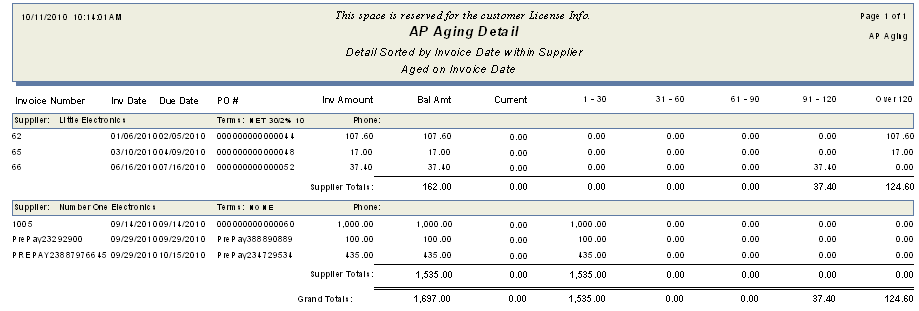 AP Aging Detail As of
The following report will be displayed: 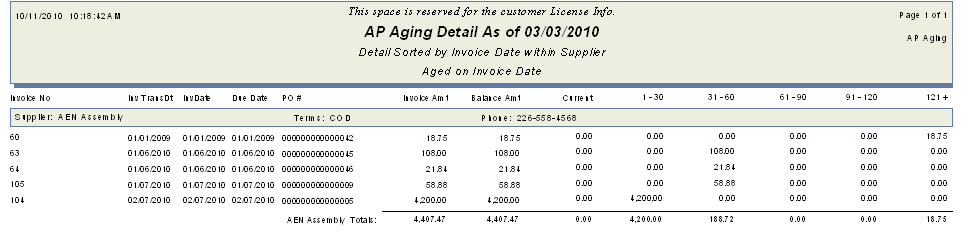 AP Transactions
The following report will be displayed: AP Reconciliation Report 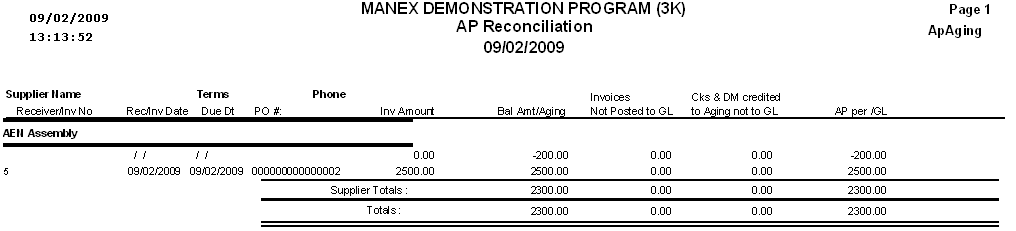 |
| 1.2.5. Payment Scheduling |
| 1.2.5.1. Prerequisites for Payment Scheduling |
|
Users MUST have full rights to the "Check Scheduling and Issue" in Accounting Security . Users with “Accounting Security Supervisor” rights will automatically have access. |
| 1.2.5.2. Introduction for Payment Scheduling |
The Payment Scheduling selection provides on screen ability to schedule payments to suppliers by due date, by supplier, or by batch. Note: In order to schedule a payment, the invoice must be displaying in the A/P Aging module.
The Issue Checks selection allows you to select a batch for check issuance or to record a manual check already written. The user may also void a previously written check in this module.
Note: This is a single user screen, so no more than one user can be in the edit or add mode at any given time. This is to prevent the users from selecting the same invoices and saving them into separate batches. However more than one user can enter the module to run and/or view the reports and view the check register screen.
|
| 1.2.5.3. Fields & Definitions for Payment Scheduling |
| 1.2.5.3.1. Batch Summary Tab | ||||||||||||||||||||||||||||||||||||||||||
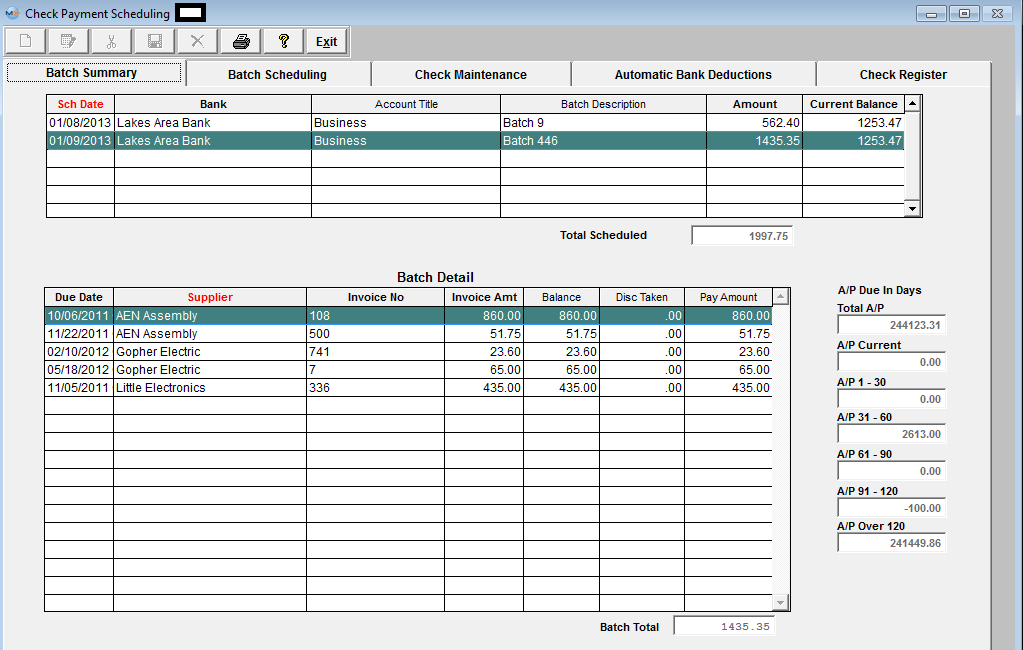
Batch Summary Field Definitions
This is the date that the user has selected for this batch to be paid. The name of the bank from which the checks will be written. The G/L title for this bank. The user assigned description pertaining to this batch. The current balance in bank account Batch Detail Section:
The name of the supplier which is being paid. The Suppliers number assigned to the invoice. The total amount of the individual invoice. The unpaid balance of the invoice. The applicable early payment discount amount. The amount of the check payment for this specified invoice. A/P Due in Days Section:
The grand total of all of the open Accounts Payable per the Accounts Payable Aging module. The total of all invoices due today and later per the Accounts Payable Aging module. The total of all invoices due yesterday and out 30 days per the Accounts Payable Aging module. The total of all invoices due 31 days to 60 days ago per the Accounts Payable Aging module. The total of all invoices due 61 days to 90 days ago per the Accounts Payable Aging module. The total of all invoices due 91 days to 120 days ago per the Accounts Payable Aging module. The total of all invoices due 120 days to infinity days ago per the Accounts Payable Aging module. |
| 1.2.5.3.2. Batch Scheduling Tab | ||||||||||||||||||||||||||||||||||||||||||||||||
Clicking on the Batch Scheduling tab will bring up the following screen:
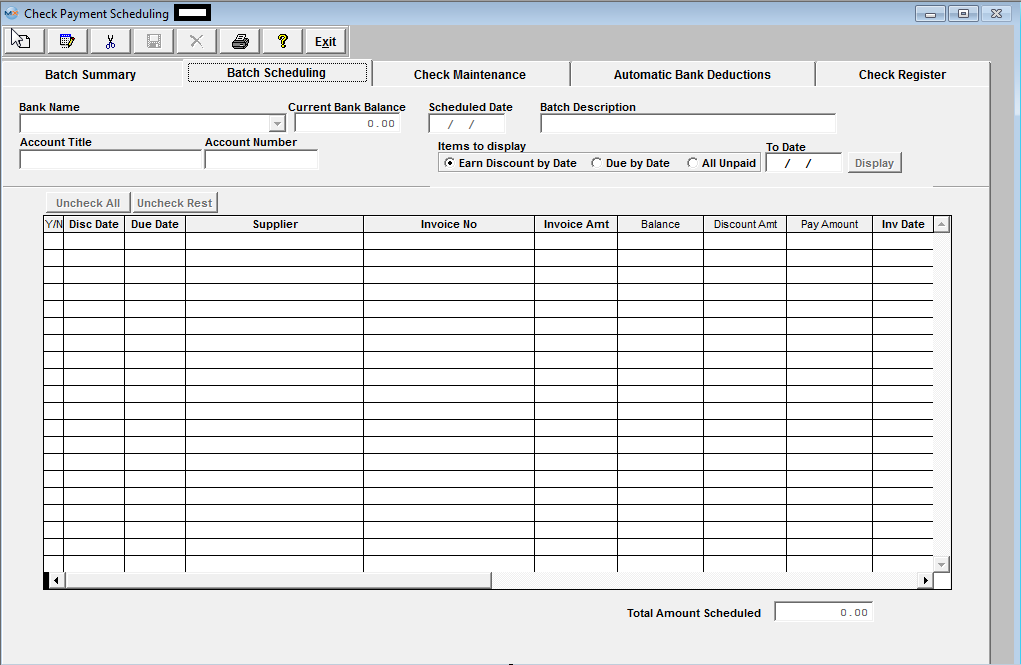 Field Definitions
The name of the bank from which the checks will be written. Only the Active Bank Accounts will be available in the pull down when processing new records. This is the date that the user has selected for this batch to be paid. The Batch description the user assigned to this batch. The G/L title for the bank being displayed in the Bank Name. The account number for the bank account selected. If this box is checked, the invoice is included in the batch for payment. The date on which the early payment discount expires for terms such as 2 % 10, net 30. Under the terms the supplier has for the user, the last possible payment date available before being considered delinquent.For example, if the terms are 2 % 10, net 30, the date appearing in this column would be 30 days from the invoice date without consideration for the early payment discount. The name of the supplier which is being paid. The Suppliers number assigned to the invoice. The total amount of the individual invoice. The unpaid balance of the invoice. The applicable early payment discount amount. The sum of all of the scheduled invoice payments for this batch. To view the Invoice Date, scroll to the right. If there are several invoices in the batch, the user may sort by invoice date by depressing the Invoice Date column header. |
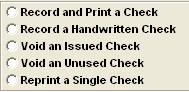
| 1.2.5.3.3. Check Maintenance Tab | ||||||||||||||||||||||||||||||||||||||||||||||
This tab is used to record and print a manual check, to void a check or to re-print a single check. Upon clicking on the tab, the followng screen appears:
Detail Information
|
| 1.2.5.3.4. Automatic Bank Deduction Tab | ||||||||||||||||||||||||||||||||||||||||
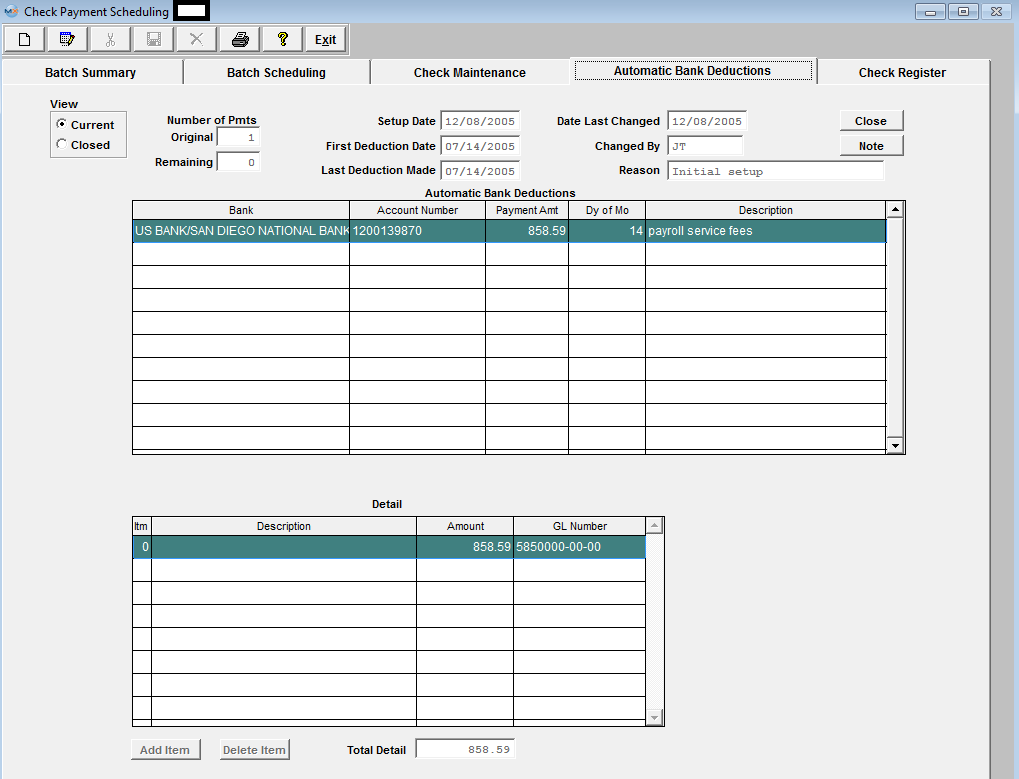
|
This is the companion screen to the Bank Reconciliation - Generate Automatic Deductions tab. In this screen, the automatic deductions are set up. Upon generation in the Bank Reconciliation module, the appropriate journal entry will generate and the outstanding check list will display the automatic deduction. To view the detail on a specific deduction, highlight it and the pertinent detail will display in the Detail section. Automatic Bank Deductions field definitions:
Automatic Bank Deductions Section:
Detail Section:
|
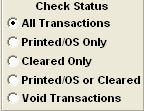
| 1.2.5.3.5. Check Register Tab | ||||||||||||||||||||||||||||||||||||
Depressing the Check Register tab will bring up the following screen:
|
| 1.2.5.4. How To ..... for Payment Scheduling |
| 1.2.5.4.1. Batch Scheduling |
| 1.2.5.4.1.1. Create a Scheduled Batch of Checks | ||||
Adding a New Scheduled Batch
The following screen will be displayed:
 Enter the Batch Scheduling screen:  Depress the Add record button. Select the Bank Name from the drop down display (Inactive Bank Accounts will not be listed). The Account Title and Number will appear automatically. Enter in the Scheduled Date. Enter in the Batch Description. Select your Payment type. Select the appropriate radio in the "Items to Display" section: "Earn Discount by Date", "Due By date" or "All Unpaid". If "Earn Discount by Date" or "Due by Date" are selected the date through which you want included in the scheduled batch must be enter into the "To Date" field. Then depress the Display button.
 All unpaid Invoices will be displayed:
 |

| 1.2.5.4.1.2. Edit a Scheduled Batch of Checks | ||||
The following screen will be displayed: To edit a scheduled batch, highlight the batch you want to edit. Go to the Batch Scheduling screen.
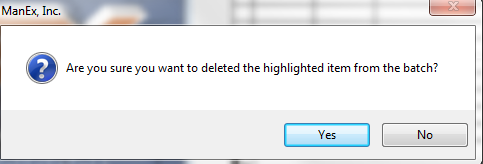
 Depress the Edit button. Enter your password. If you want to add to this batch, depress the Add items button at the botton of the screen. Enter the EXACT invoice number as is entered in the Accounts Payable Aging. Depress the Enter Key and the rest of the information regarding that invoice will fill in automatically. 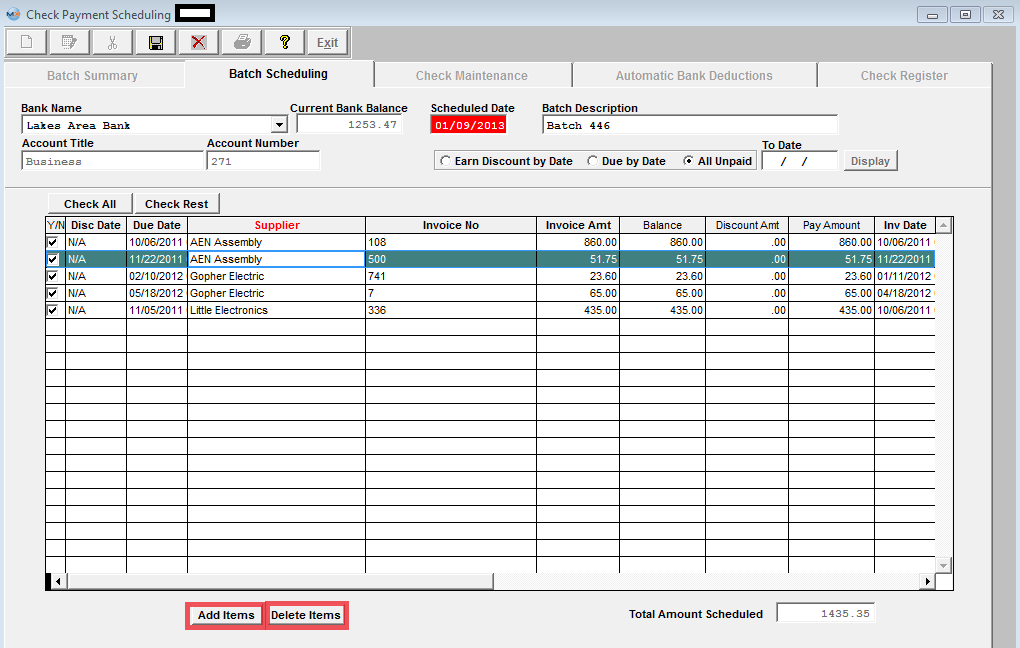 To delete an already scheduled line item, highlight the item. Depress the Delete Items button. You will receive the following message: Depress the Yes button to continue, depress the No button to abondon deletion.
Depress the Save button to save the changes, depress the Abandon changes button to abandon the changes.
|
| 1.2.5.4.1.3. Delete a Scheduled Batch of Checks | ||||
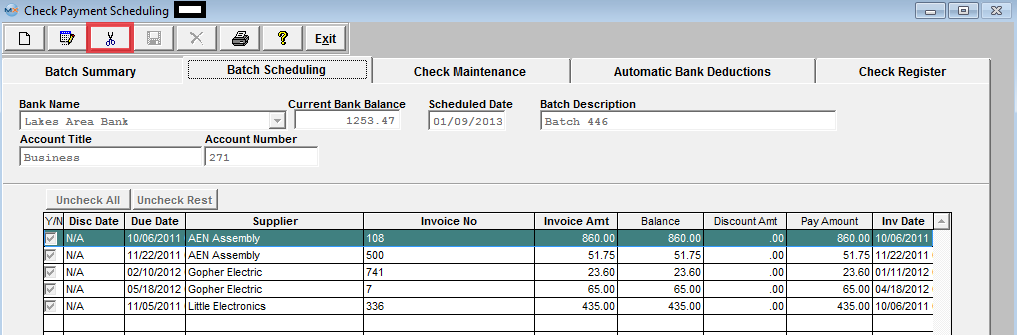
The following screen will be displayed: Highlight the batch you want to delete. Enter the Batch Scheduling screen. Depress the Delete Batch record button.
 Enter in your password. The following message will appear:
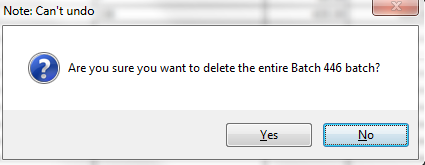 Depress the Yes button to continue. The batch will be deleted. Enter the No button to abandon the deletion. |
| 1.2.5.4.1.4. Printing Batch Checks | ||||||||||||||||||||||||||||||||||||||||||||||||||||||
The following screen will be displayed: Highlight the batch you want to print.
If the user selects the "Print Batch Checks", the following screen will appear: (Note: The Bank name field could be blank if the Bank is Inactive)
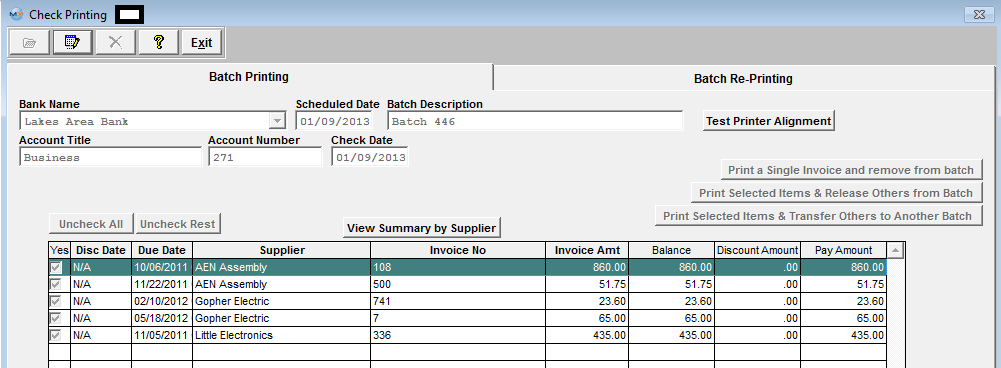 Check Printing Screen field definitions -- Batch Printing tab:
This is the date that the user has selected for this batch to be paid. The user assigned description pertaining to this batch. The G/L title for this bank. The number that the bank has for this account. The button will uncheck/check all of the checkmarks in the Yes column. Highlight the last item you want to include in this payment, then clicking on this button will uncheck/check the rest of the checkmarks in the Yes column. Depressing this button selection will bring up the following screen:
View Batch Detail field definitions: Summary of Selected Items By Supplier
The name of the supplier to which payment will be made. The name of the institution or business which will appear on the check. The first address line per the Supplier Information setup. The applicable early payment discount amount. The sum of all of the scheduled invoice payments for this batch. Selecting this will return you to the prior screen view. Print Checks
If user receives the following message after depressing the Print Check button:
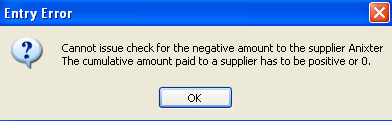 This message is displayed when the check that the system is attempting to print would end up being for a negative value. One possible reason would be that the Remit To information between the Invoice and Debit Memo's selected on the Check Batch are different, or blank. Due to this the system would want to create two separate checks, and that could place the Debit Memo on a check by itself. We can not allow checks for negative value. So we suggest that you make sure that all of your Remit To information is properly populated within the Supplier Information module. However, there is a work around if you need to create a check for an Invoice and Debit Memo that have different or Blank Remit To Information, you may process the records through the Check Maintenance module, Record & Print a Check . If the "Remit to Address" printing on the check is different then expected or balnk refer to Article #3342 for further detail.
.
Test Printer Alignment
Print a Single Invoice and remove from batch Choosing this option will allow the user to select just one invoice from a batch and print a check for it. Uncheck any boxes in the Yes column which you DO NOT want to pay. Depress the Print a Single Invoice and remove from batch button. The following will display:
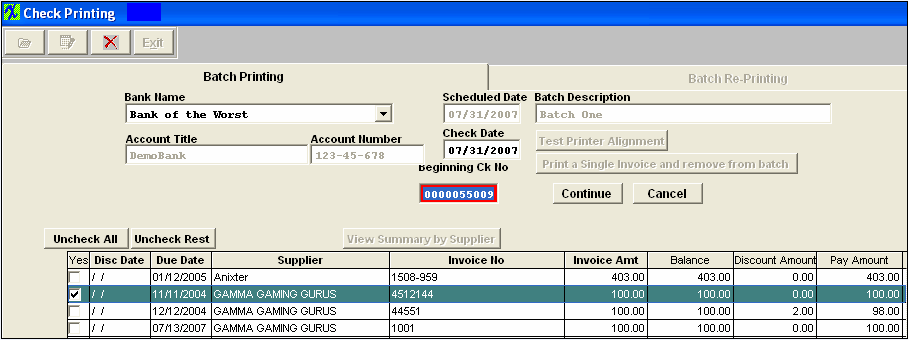 You may enter a different check number than the default if you choose. Depress the Continue button to print the check.
Print Selected items and release others from Batch
Choosing this option will allow the user to select some invoices from a batch and print checks for them. All invoices NOT checked in the Yes box will be released from all scheduling. Uncheck any boxes in the Yes column which you DO NOT want to pay. Depress the Print Selected items and release others from batch button.
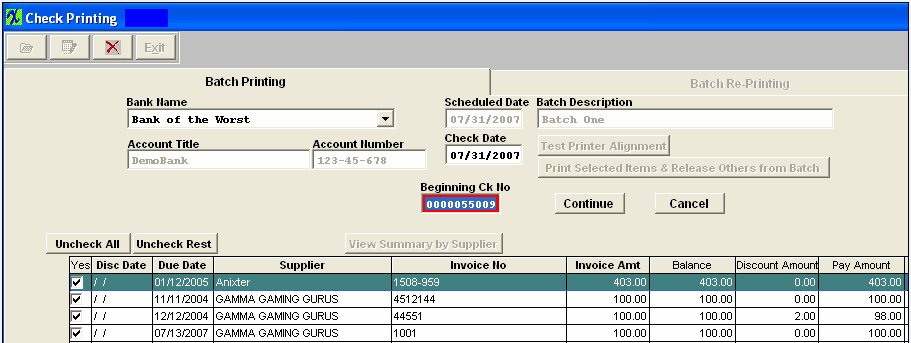 You may enter a different check number than the default if you choose. Depress the Continue button to print the check. Print Selected Items and Transfer Others to Another Batch Choosing this option will allow the user to select some of the invoices from a batch and print checks for them. Additionally, items not selected will be transferred to a newly created batch. After depressing the “Print selected Items and Transfer Others to Another Batch”, the screen below will appear. You will need to enter in the New Batch Description. You may enter a different check number than the one displayed if you choose. Depress the Continue button to print the checks.
Next, click on the OK button. Note: that an entirely new batch has been created for the invoices not checked.
Reprint ChecksThe Batch Re-Printing tab is used to re-print checks that got mangled in the printer.
The following screen will be displayed.
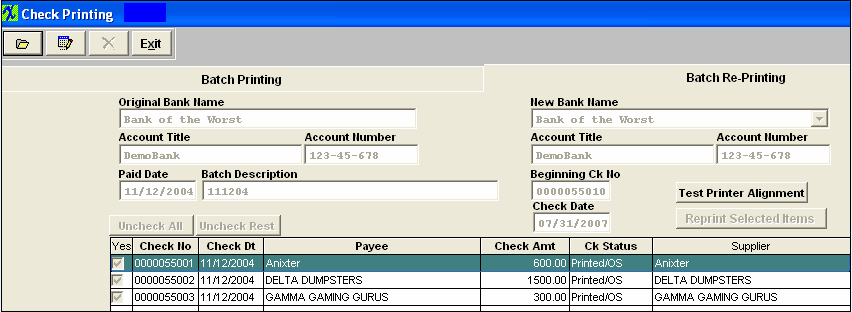 Depress the Edit button. Enter in your password. Check the Yes column at the far left for the checks you wish reprinted. You have the option to change the Check number at this point in time if needed. Depress the Reprint Selected Items button. The new check will go to the printer. The old check number will be voided and will be replaced by the new check number on the Check Register.
|
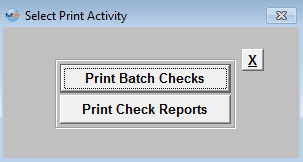
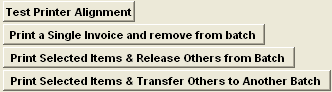
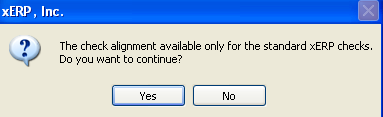

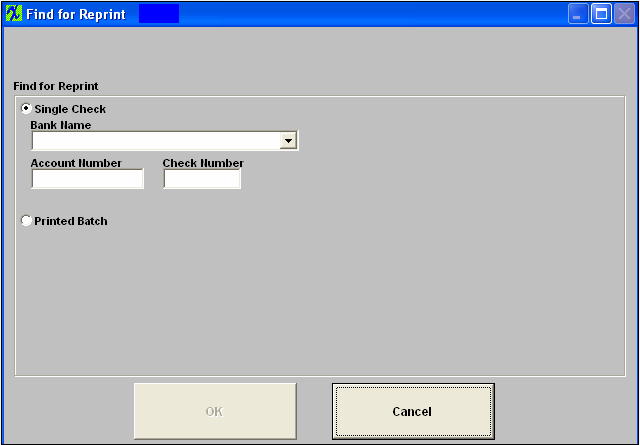
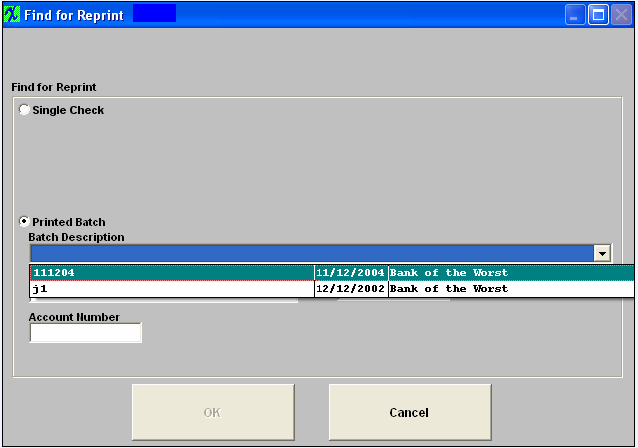
| 1.2.5.4.1.4.1. Check Forms |
STANDARD xERP CHECK LAYOUT - This layout would be used with blank checks.
 DELUXE FORM DLT104 - This form would be used with Checks purchased from Deluxe Business Checks & Forms. NOTE: When you switch over to using a new Deluxe Form, please contact ManEx for new layout.
 CANADIAN CHECK LAYOUT - This form would be used with Checks purchased from Litho-Quebec JGB Inc. See information below.
 Litho-Quebec JGB Inc. <st1:street w:st="on"><st1:address w:st="on">545 Delmar Ave.
Pointe-Claire, QC
H9R 4A7
514.694.9595
Item number to order from is: 402182 |
| 1.2.5.4.2. Check Maintenance |
| 1.2.5.4.2.1. Record & Print Check | ||||||||||
|
Select the "Check Maintenance" tab and the following screen will be displayed. This tab is used to record a manual check, to void a check or to re-print a single check. Note: To reprint batches of checks, see the Batch Re-Printing procedures.
If the "Record and Print a Check" radio is selected, the user will be able to issue a check via the printer and at the same time, record it. This is especially useful for COD non-inventory orders.
Note: For COD orders involving inventory, please refer to the Pre-Pay Supplier procedures.
Enter in the amount of the check. If you wish to add a Check Note, select the Check Note button, depress the Edit button, enter in your note, depress the Save button, then depress the Exit button. Depress the Add Item button located at the bottom of the screen. Enter in the Item Number, Description. Enter an Invoice number that may or maynot exists in the AP Aging. When the Invoice number is entered the Invoice Amount, Balance, and General Ledger Number will fill in automatically and user can make the needed changes to the Disc Taken and Amt Paid. If the Check is NOT against an Invoice user will need to assign a GL number to the record.
Once the Check amount and the detail total are the same, the Save button will enable. You may enter a different check number than the one displayed if you choose. 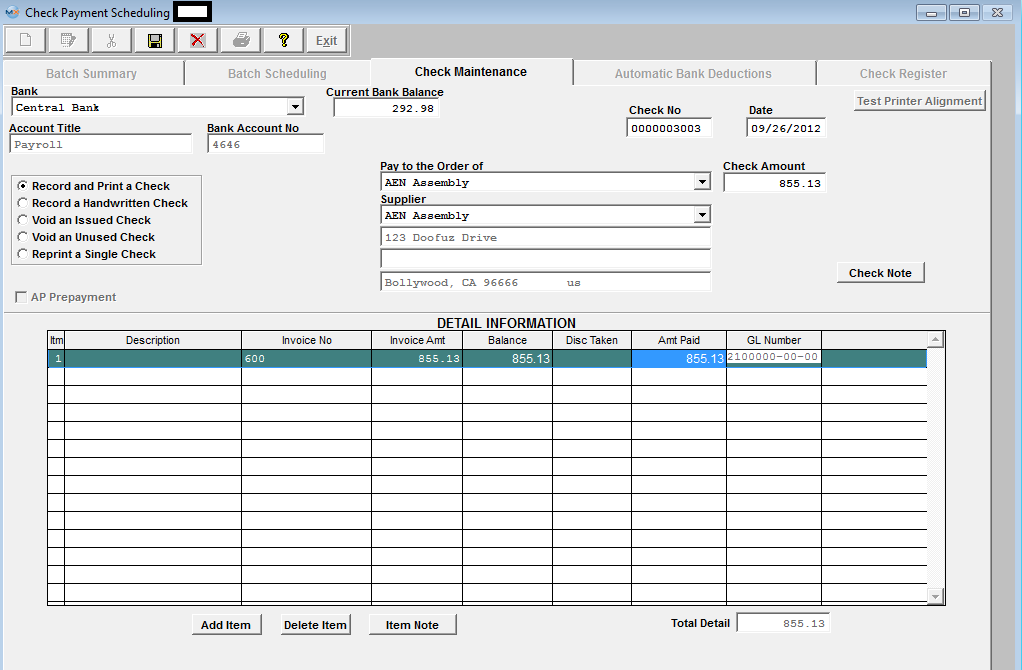 Depress the Save button and the following check format selection will appear:
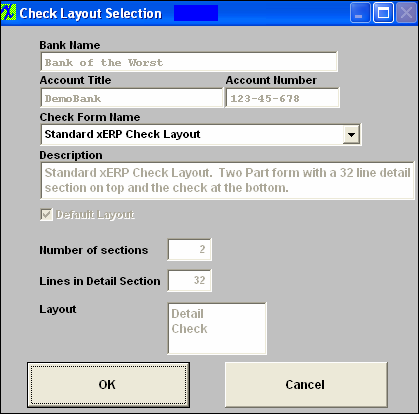 Click on the down arrow to select the desired layout; There are three types of Check Forms to select from: Standard xERP Check Layout; Deluxe Form DLT104; or Canadian Check Layout. See Article #4657 for further information on the check forms.
 Once the selection has been made, depress the "OK" button and the check will go to the printer and will also record.
|
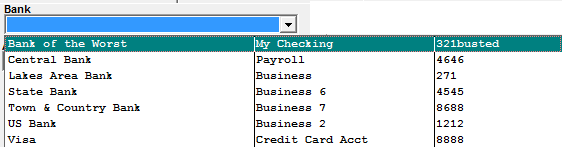
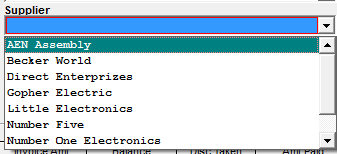

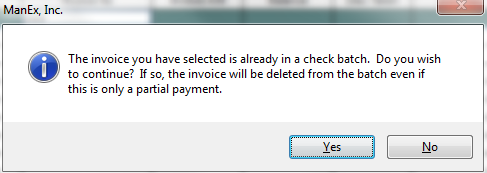
| 1.2.5.4.2.2. Record a Hand Written Check | ||||||||||
|
Select the "Check Maintenance" tab and the following screen will be displayed. This tab is used to record a manual check, to void a check or to re-print a single check.
If the "Record a Handwritten Check" radio is selected, the user will have already manually hand written a check. This function will only record the check, it will not print out a check.
Enter in the Amount. The system will default to the next check number, but the user may highlight the check number field and enter in a different number if desired. Depress the Add Item button. Enter in the Item number, if the invoice is applicable to an existing invoice already in the Accounts Payable Aging, enter in the Invoice number exactly as it exists in the AP Aging. Then the remaining fields will automatically update.
Enter in the Amt Paid and depress the Save Record button. The AP Aging will update and the check will be recorded. If the check you are attempting to record does not apply to an existing record in the AP Aging. After depressing the Add Item button, you will need to enter in an Item number, Description, Invoice Amt, Amt Paid, and a GL Number. Once the Total Detail equals the Amount field, the system will allow you to save the record.
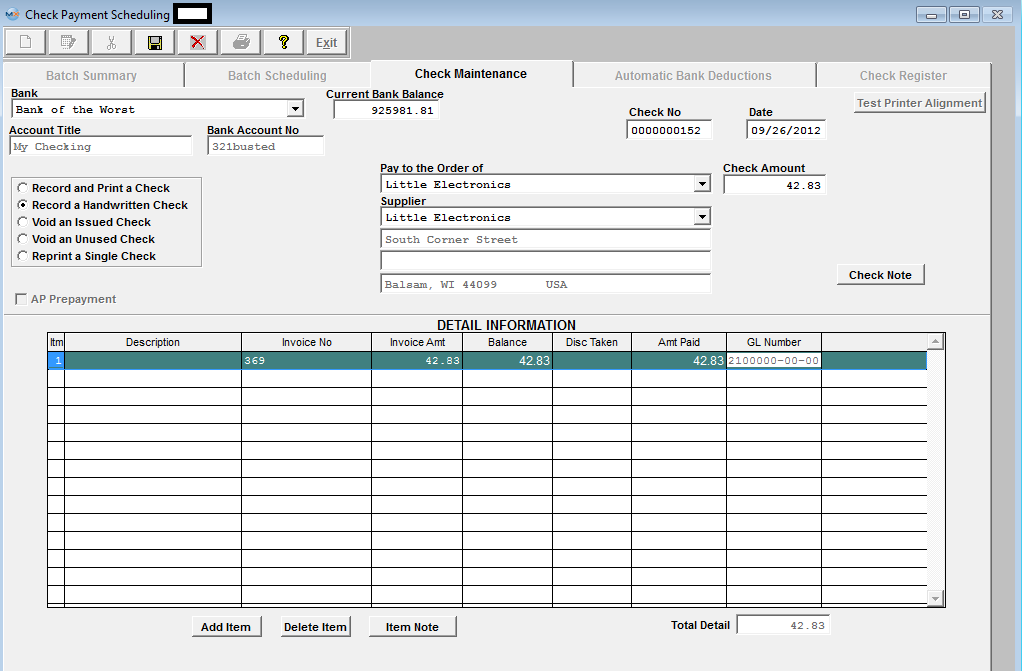 |
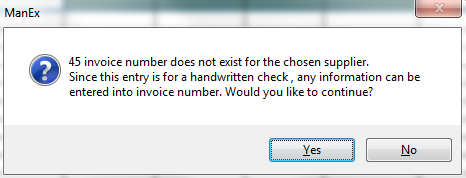
| 1.2.5.4.2.3. Void an Issued Check | ||||
|
Select the "Check Maintenance" tab and the following screen will be displayed. This tab is used to record a manual check, to void a check or to re-print a single check.
If the "Void an Issued Check" radio is selected, the user may void any un-cleared outstanding check. If the check has been recorded as cleared or reconciled the following message will be displayed and check cannot be voided:  Enter the check number you wish to void. All of the associated data will appear, as detailed below.
Depress the Save button. You will receive the following message to confirm that you want to void the check:
Select "Yes" and the check will be voided by displaying a negative Check Amount, shown in the red box below. NOTE: The date will be reverted back to the original check date upon Save.
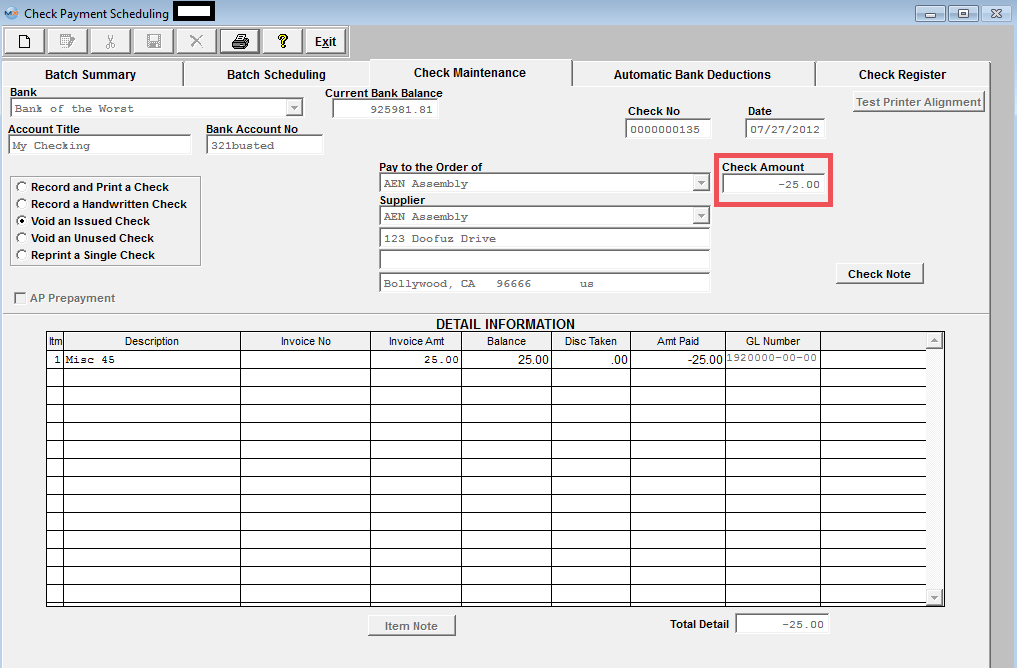 |

| 1.2.5.4.2.4. Void an Unused Check | ||||
|
Select the "Check Maintenance" tab and the following screen will be displayed. This tab is used to record a manual check, to void a check or to re-print a single check.
If the "Void an Unused Check" radio is selected, the user may void a check which had never been paid through or entered in the system as a manual check recording. Enter the check number you wish to void.
 Depress the Save button. You will receive the following message to confirm that you want to void the check:
Depress the Yes button. The check will be recorded as Void in the Check Register. |
| 1.2.5.4.2.5. Reprint a Single Check | ||
|
Select the "Check Maintenance" tab and the following screen will be displayed. This tab is used to record a manual check, to void a check or to re-print a single check.
Note: To reprint batches of checks, see the Batch Re-Printing procedures. To get started, depress the Add button. Type in your password. Depress the down arrow next to the Bank field. Select the appropriate bank.
If the "Reprint a Single Check" radial is selected, the user will be able to void out and reprint a single check. Enter the old check number into the field, the system will automatically fill in all of the rest of the information. The system will prompt for the next check number. The user may highlight the check number field and type in another number if needed. Once the Check amount and the detail total are the same, the Save button will enable.
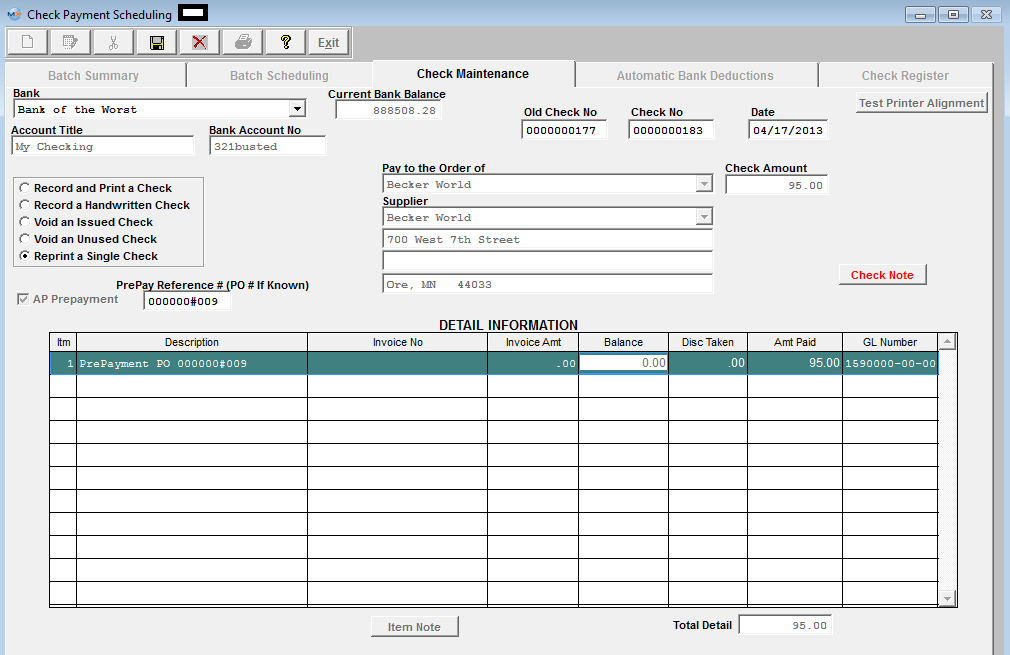 Depress the Save button. The check will go to the printer and will also record. |
| 1.2.5.4.3. Automatic Bank Deduction |
| 1.2.5.4.3.1. Add a New Automatic Bank Deduction |
|
Select the "Automatic Bank Deductions" tab and the following screen will be displayed. This tab is used to record a manual check, to void a check or to re-print a single check. Depress the Add button. Enter in your password. Enter the original number of payments, the date of the first deduction then select the bank. Enter the payment amount, the day of the month for the deduction and a description of the deduction.
 Depress the Add Item button. Type in the Item Number, a description of the line item, the line item amount and the General Ledger number. Note: if you don’t know the G/L number, place the cursor in the G/L field and hit the Enter key twice. This will bring up the following: 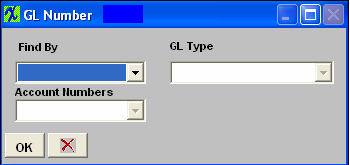 Depress the arrow next to the Find By field.
Scroll up or down until the appropriate G/L range is found. Then depress the down arrow next to the Account Numbers field. The following selection for the posting account will appear:
Select the account. Depress the OK button.
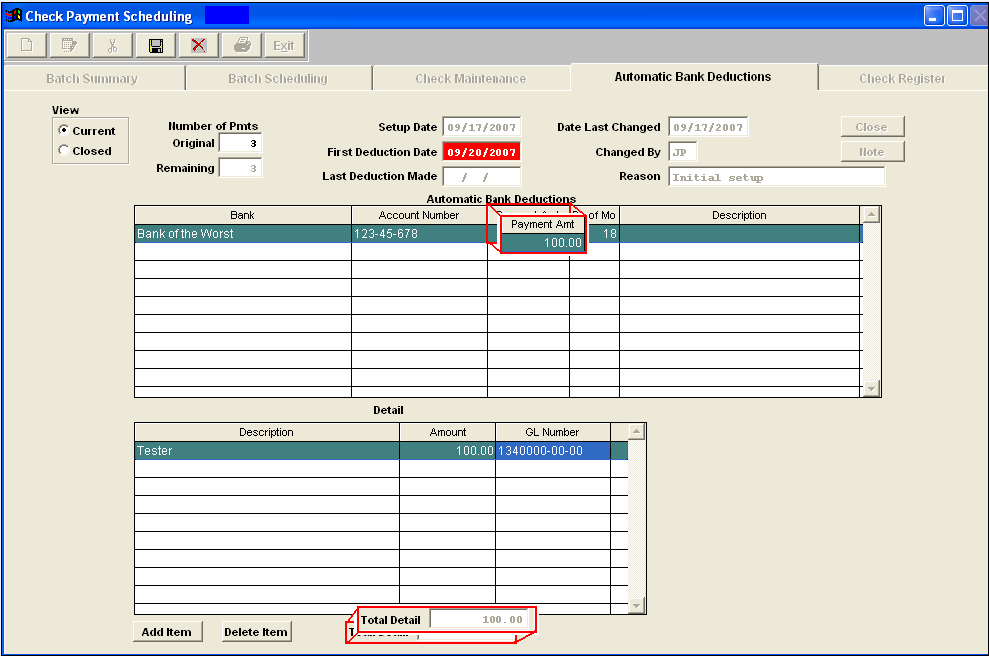 Note that the Payment Amt and the Total Detail must be equal before the save button will be available.
Depress the Save button to save changes, depress the Abandon Changes button to abandon changes. NOTE: Once this record is saved it will not be editable, if changes are needed to the record you will be required to close the existing record and create a new one accordingly. For further explanations see Article #2328.
|
| 1.2.5.4.3.2. Edit an Automatic Bank Deduction |
Editing a Automatic Bank Deduction
You may only make a change to an un-saved Automated Bank Deduction. If it’s been saved, you are able to edit the Note information only. The reason for this is that these records are the source for the automatic deductions frm the bank account and if we did allow any of the items to be changed user would have no audit trail. (For example if you have an automatic deduction from bank account for payment of an auto loan of $500 on the 2nd of each month and system allowed you to change the amount from $500 to $400 for an office equipment loan in July, you would have no audit trail back for the $500 auto loan). So instead of editing a record, the user may change the status to Closed and then add a new automatic bank deduction with the desired features. For further information see Article #2328.
|
| 1.2.5.4.3.3. Close an Automatic Bank Deduction |
To close out an automatic bank deduction. Highlight the pertinent deduction and depress the Close button.
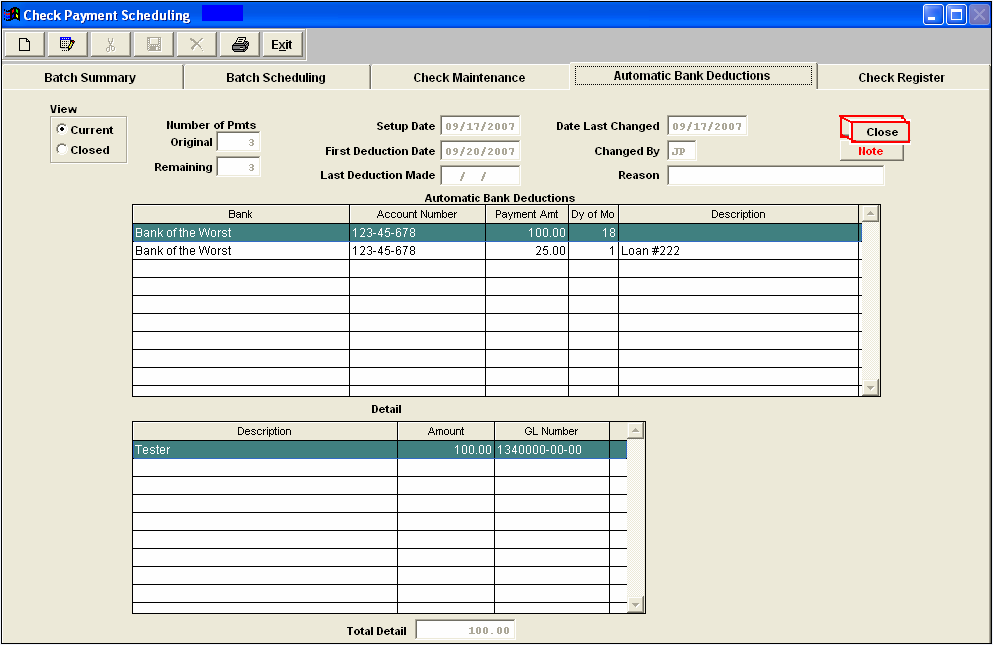 Type in your password. Depress the Save button to save the changes, depress the Abandon Changes button to abandon the changes. To view the deduction you’ve closed, click on the Closed radial and the screen view will update.
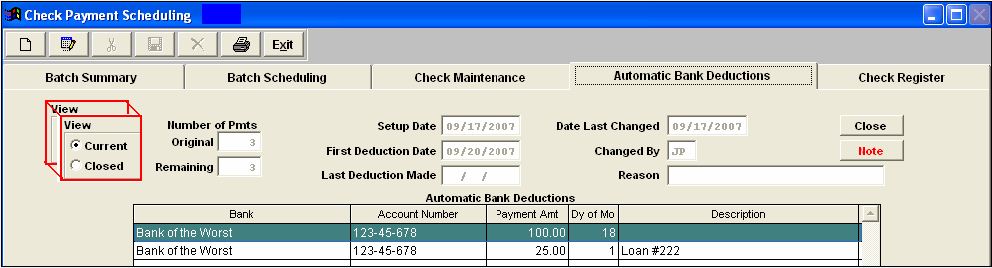 |
| 1.2.5.4.4. Check Register |
| 1.2.5.4.4.1. Create a Check Register | ||||||||||
Depressing the Check Register tab will bring up the following screen:
To design the check register display and the applicable print out, depress the down arrow next to the Bank field. Select the pertinent bank. The account number and account name will automatically fill in .If you are interested in only one specific payee, depress the down arrow next to the Payee filed and select the desired payee. If you want to view a specific date range, type in the Date Range From and To. If you are interested in a range of check numbers, type in the first and the last check number into the Check Number Range fields. Determine the Check status you desire by click on the appropriate radial:
All transaction status types will display in the detail. Only checks marked off as Cleared in the Bank Reconciliation module will display. Both un-cleared and cleared checks will display. Once you have all of the criteria selected, hit the Display button:
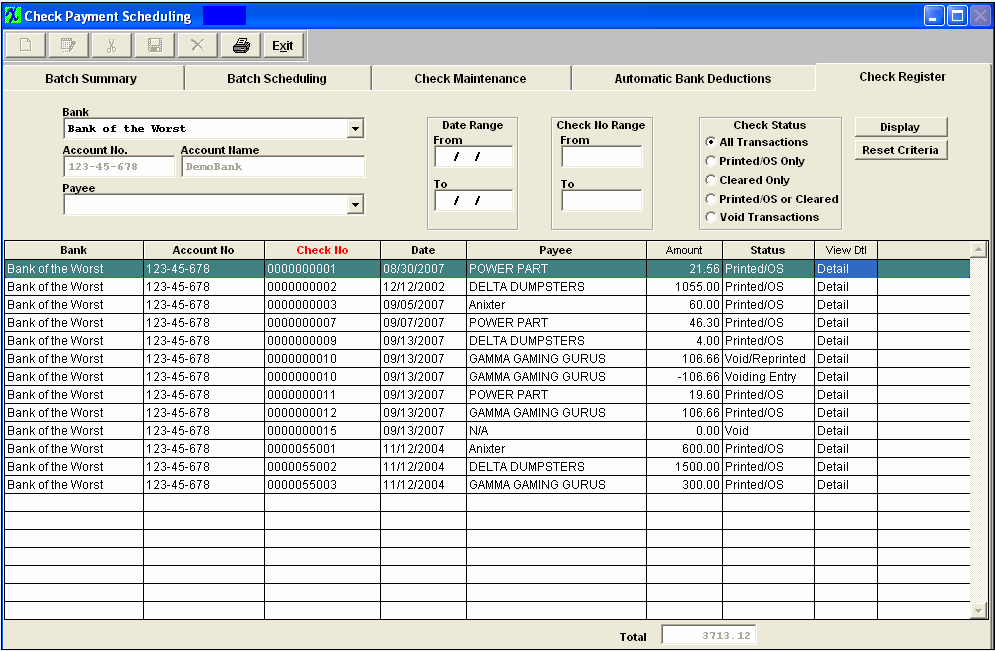 Once the display is showing on the screen, you may sort by Bank, Account Number, Check Number, Date, Payee or Status by clicking on the column header: To view the detail of any line item, click on the Detail column on the far right hand side.The following screen will display:
To further view any notes pertaining to the Check, depress the Check Note button. To view any note specific to the individual line item, depress the Item Note button. Hit Exit to return to the main screen. To reset the selection criteria, depress the Reset Criteria button. Then re-design the display. |
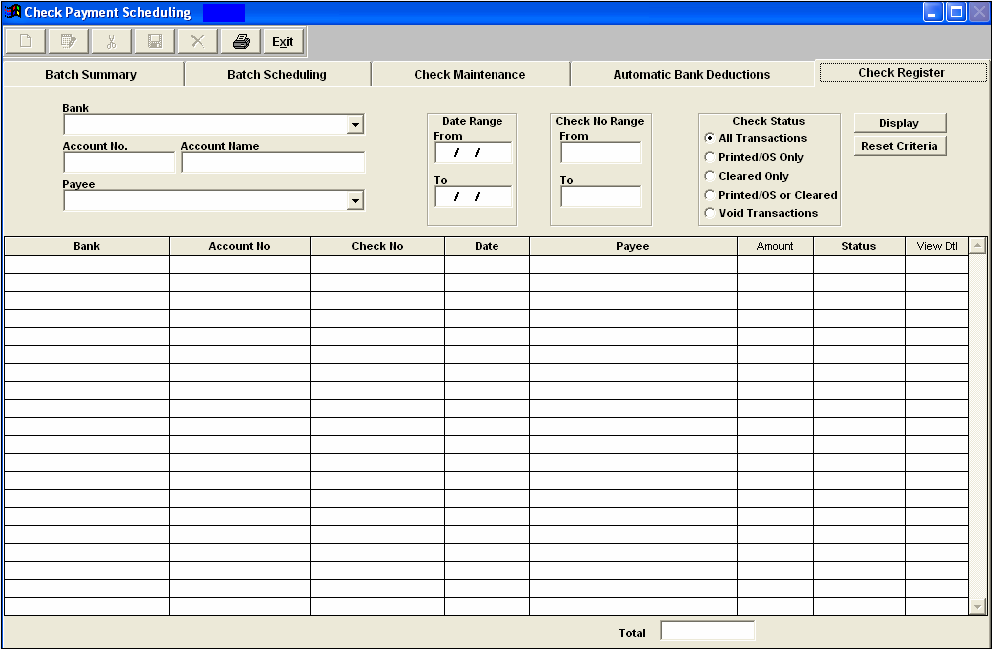

| 1.2.5.4.5. How To Pre-Pay A Supplier | ||
The following screen will appear:
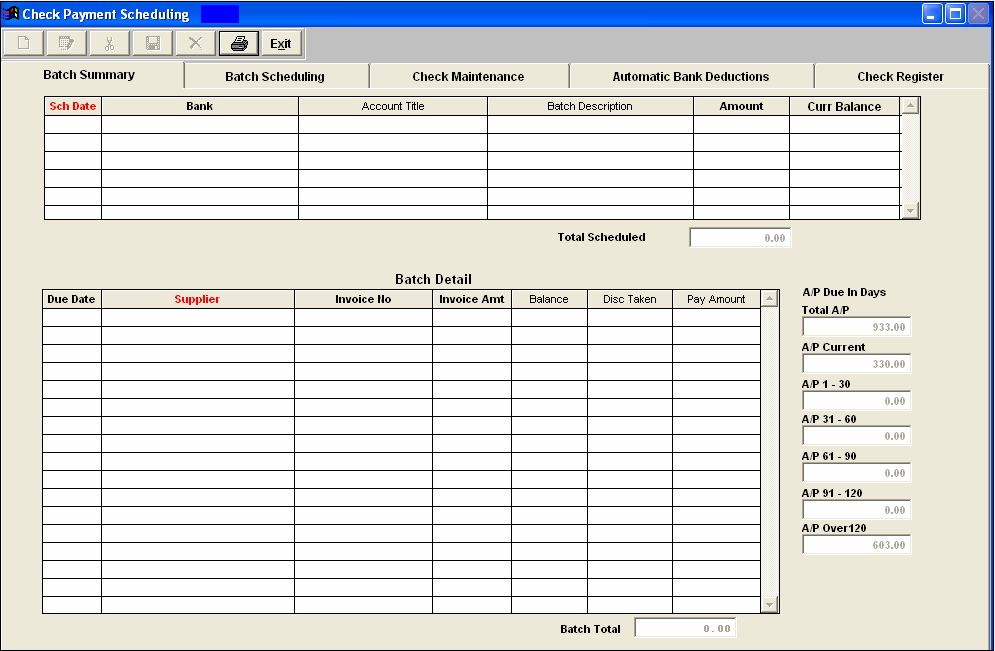 Depress the Check Maintenance tab. User can enter all of the information for a manual check on this screen.
  Once the AP Prepayment box is check, an additional box will appear for user to enter a Prepay Reference number (if applicable). We suggest that you populate it with Prepayment Reference # or Purchase order if known) NOTE: A Prepay GL number must be setup in the GL Acct Setup screen and the Purchase AP Setup in order to use this option.
Check number and date will default in, but may be edited: Select the Supplier (payee) from the pulldown and enter the Check amount. The "Add Item" button at the bottom of the detail info screen will become available: 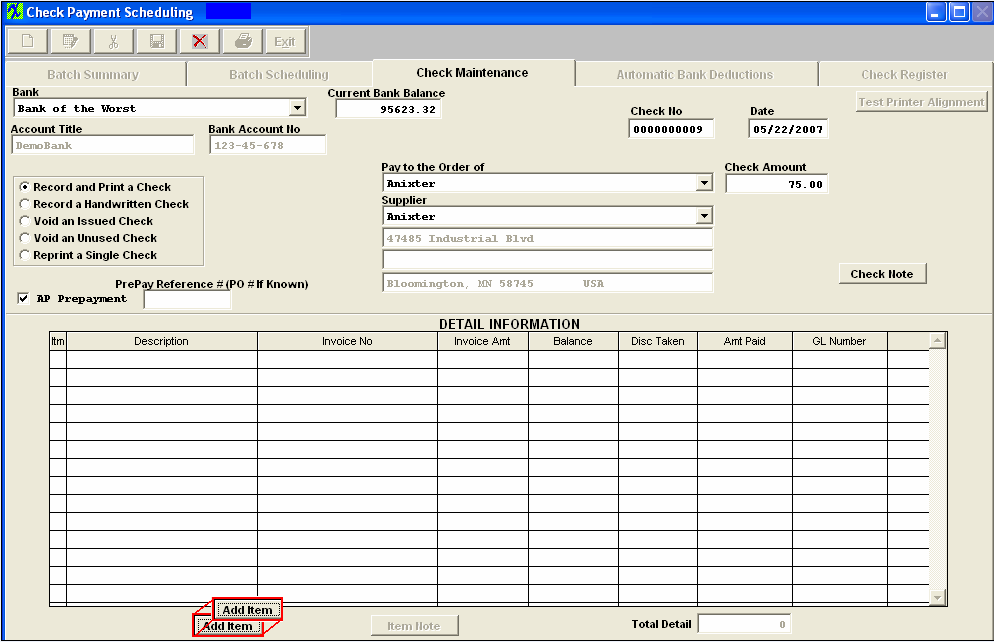 Depress this button and the detail information will default in, enter a GL number: 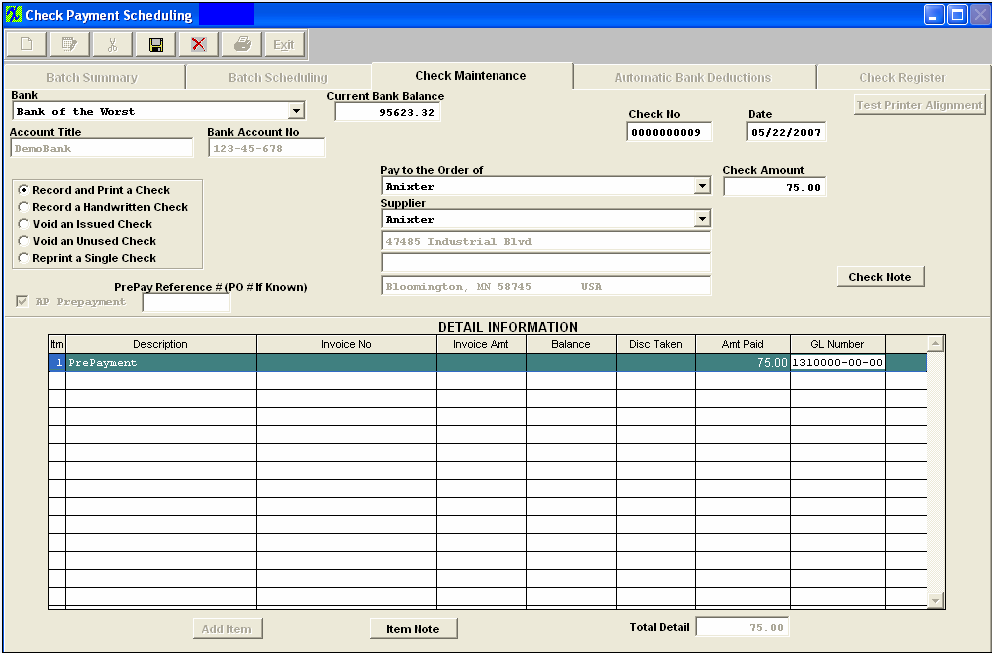 Save Record and print check. The entry will record as follows: |
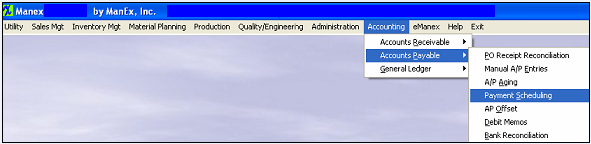
| 1.2.5.5. Reports for Payment Scheduling |
| 1.2.5.5.1. Check Register Reports |
To obtain the Check Register Reports within the Web, select the WEB Print button from the ManEx action buttons at the top of the screen. For further detail on How the Reports work within the Web refer to Article #5477. Note: In order to access the Reports within the Web the Company Root URL must be setup within the System Appearance module and user must be linked to web within the System Security Module.
Select the Report Type: CHECK REGISTER - A List of Reports will be displayed that are available on the Web for Check Register
The information will be based on the criteria selected in the Check Register screen.
Once the display is as desired, select the Print button from the ManEx action buttons at the top of the screen.
The following reports screen
will display a list of reports that are available on the ManEx Desktop:
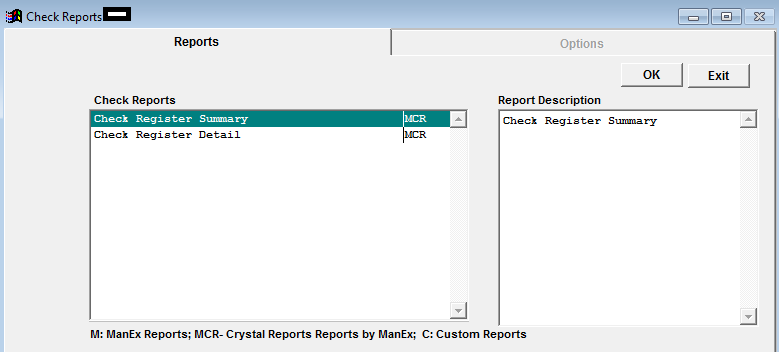 Highlight the desired report and depress the OK button.
 Check Register Summary Report
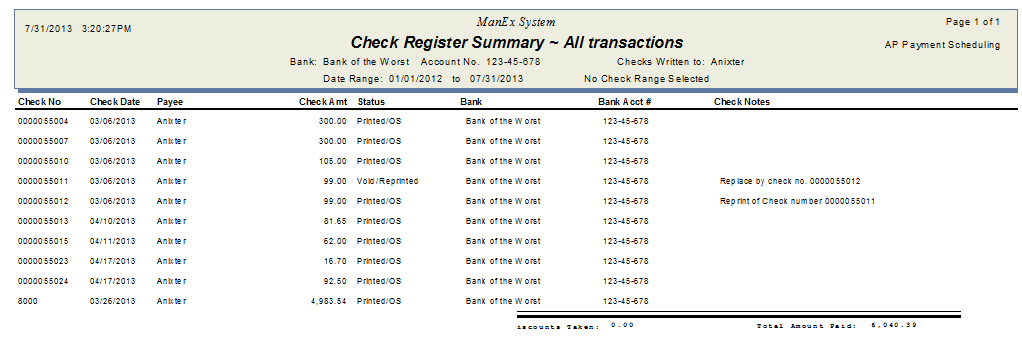 Check Register Detail Report
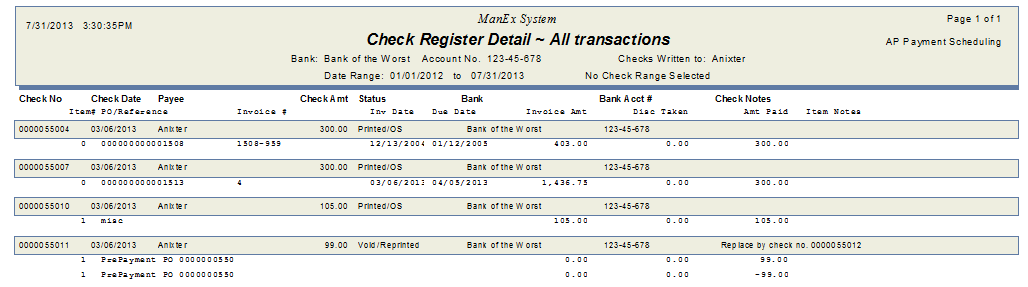 |
| 1.2.6. Accounts Payable Offset |
| 1.2.6.1. Prerequisites for A/P Offset |
Users MUST have full rights to the "AP Offsets and Debit Memos" in Accounting Security . Users with “Accounting Security Supervisor” rights will automatically have access. Invoices MUST be Released and Posted before they will be displayed in the AP Offset Module.
|
| 1.2.6.2. Introduction for A/P Offset |
|
The Accounts Payable Offset section allows the user to apply an open debit memo and/or prepayments against an invoice, or to debit and credit several invoices to change the amounts due per invoice. |
| 1.2.6.3. Fields & Definitions for A/P Offset | ||||||||||||||||||||||||||||||
|
| 1.2.6.4. How To .... for A/P Offset |
| 1.2.6.4.1. Add an AP Offset | ||||
|
The following screen will be displayed:
To add a new AP Offset, depress the Add button. Enter in your password, select the desired Supplier from the pull down. NOTE: Only the items currently existing in the A/P Aging with a status other than "Editable" and "Deleted" will be displayed. Invoices MUST be Released and Posted before they will be displayed in the AP Offset Module.
 To offset, select the applicable invoice. Enter in any amount you want subtracted to the invoice in the - Amount column. Enter an equal amount in the + Amount column that you want subtracted from a Debit Memo. Continue this until the totals appearing at the bottom of the screen equal the same amounts for both the + and – Amounts columns, as illustrated below: 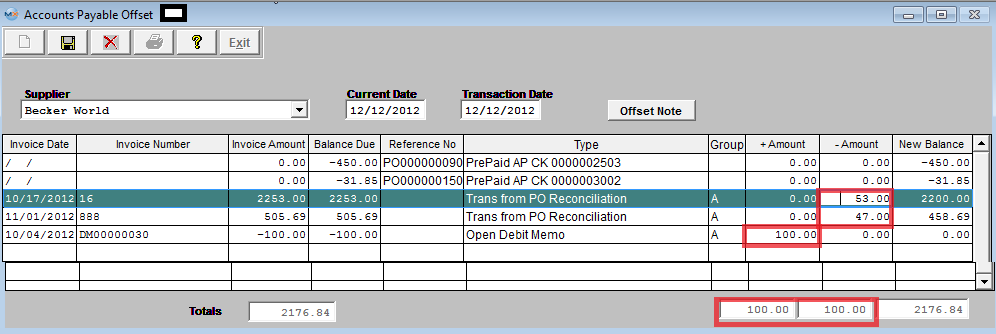
User can at this time add an Item Note to the AP Offset and this note will only appear on the AP Offset Report.
|

| 1.2.7. Debit Memo |
| 1.2.7.1. Prerequisites for Debit Memo | ||
Users MUST have full rights to the "AP Offsets and Debit Memos" in Accounting Security . Users with “Accounting Security Supervisor” rights will automatically have access.
|
| 1.2.7.2. Introduction for Debit Memo |
There are two types of Debit Memos: One created via the DMR process and the ones created directly via this entry screen.
Note: That if the Debit Memo concerns a return of inventory, the user should use the DMR process because any Debit Memo affecting the inventory general ledger numbers should be created via the DMR process. Note: A Debit Memo created against an open supplier invoice will automatically net against that invoice in the A/P Aging. In the case of a DMR Debit Memo, if the supplier invoice has already been paid, then a Debit Memo will forward to the A/P Aging. This open Debit Memo may be offset against other open invoices from that same supplier via the A/P offset module.
Additionally, please note that ONLY a "From Inventory DMR" will generate a Debit Memo (Only if the PO has been reconciled and transfered to AP). If a DMR was created "From a Purchase Order" then there will be no Debit Memo created – this is adjusted automatically within the ManEx system prior to the PO Reconciliation. Only what has been ACCEPTED will forward to the PO Reconciliation module. |
| 1.2.7.3. Fields & Definitions for Debit Memo | ||||||||||||||||||||||||||||||||||||||||||||||||||||||||||||||||||
Debit Memo field Definitions
|
Supplier Name
|
The name of the supplier for which the DM was created.
|
Date
|
The date of the DM.
|
Debit Memo Number
|
The unique number assigned to the DM.
|
Status
|
The Status of the Debit Memo - "ADD" "Pending" "Posted to AP" "Released to GL" or "Cancelled"
|
Supplier Number
|
The number assigned to the Supplier in the Supplier Information master.
|
Account Number
|
The number by which the supplier identifies the user.
|
Account Status
|
The status of the supplier, approved, pending, etc., per the Supplier Information master.
|
Type
|
The radio denotes the type of DM, either against an open A/P invoice or created as a general DM, just against the account without regard as to whether there was any open invoice.
|
|
If displayed in Red, depressing this button will bring up the History information. This field will display all the information entered into the reason for change field when debit memo was created and/or changed.
|
|
Depress this button to add any notes pertinent to this DM. If displayed in Red, depressing this button will display any pertinent notes re this DM. Depress this button to approve the Debit Memo and post to the AP. The DM status will then change from Pending to Posted to AP. |
|
PO Num/Ref
|
The Purchase Order number that the original Invoice was applied against.
|
PO Date
|
The Order Date pulled forward from when the Purchase Order was originally created.
|
RMA Number
|
This would be the RMA number information that was entered within the DMR module. RMA Date |
|
This is the RMA Date information that was entered within the DMR Module. Invoice No |
|
The Original Invoice that the Debit Memo is being applied against. DMR Number |
|
The DMR number that was assigned within the DMR module. DMR Date |
The date that the associated DMR was processed |
DMR Pack List |
|
The Packing List Number that was assigned to the DMR within the DMR module. Date Last Changed |
|
This is the date of any changes made to the original DM. By |
|
The initials of the user who made the last change. Reason for Change |
|
The description of the reason for the last change. DEBIT MEMO DETAIL INFORMATION section:
This is the item number of the detail. The description pertaining to this specific line item. The quantity for the line item. The price each for this line item. The sales tax percentage applicable to this line item. The sum of the (quantity X price each) + tax % (quantity X price each) = Total. The general ledger number for this line item. The total of the DM, after discount and including any applicable sales tax. Depressing this button will display any notes pertaining to the line item highlighted. |
| 1.2.7.4. How To ..... for Debit Memo |
| 1.2.7.4.1. Find a Debit Memo | ||||||||
The following screen will be displayed:
Depress the Find Record button.
Once the selection is made, depress the "OK" button. The screen will update with data from the selection: 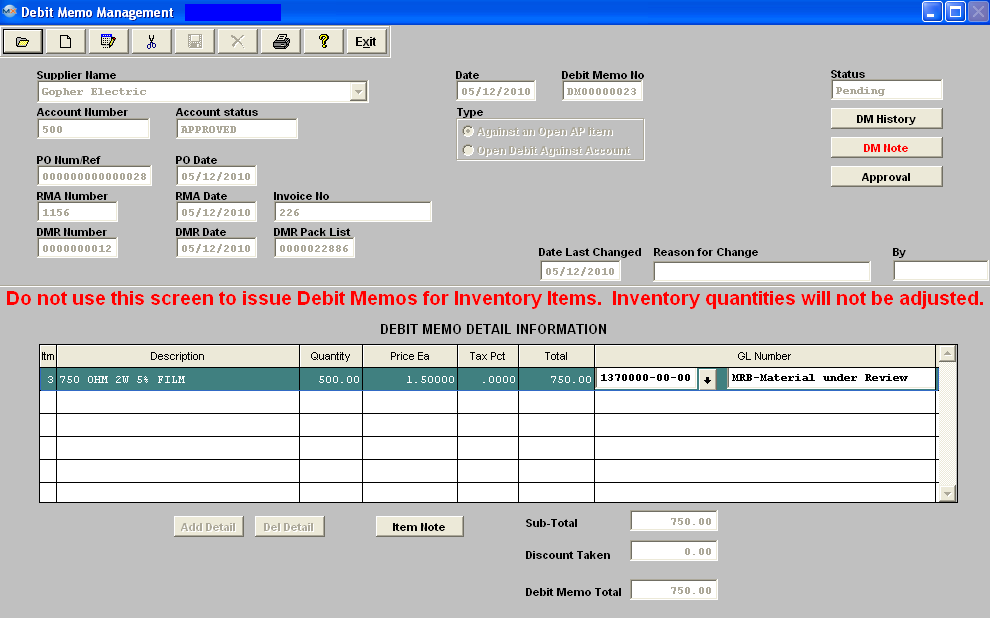
|
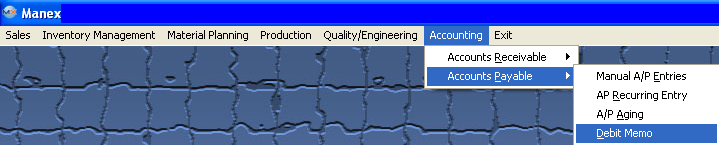
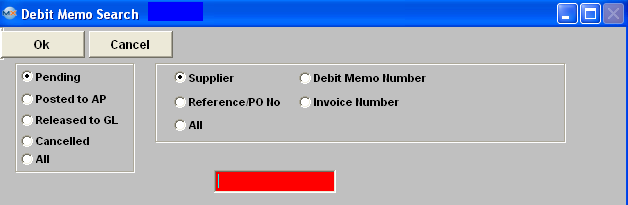
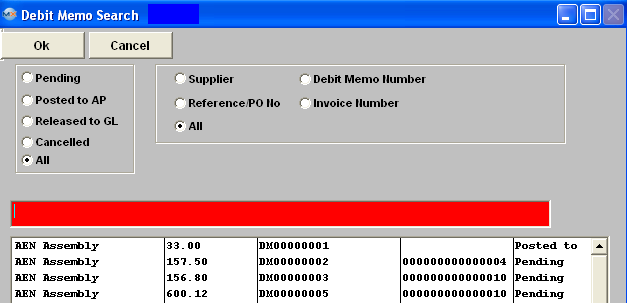
| 1.2.7.4.2. Add a Debit Memo | ||||||
The following screen will be displayed: Against an Open AP Item To add a Debit memo against an open A/P invoice, depress the Add button. Type in your accounting password.
Once the supplier is selected, pertinent information will appear in the screen:
Depress the Ok button.
If you want to add a DM Note, depress the DM Note button, depress the Edit button, type in your note, and depress the Save button. Depress the Exit button when complete. Enter the EXACT invoice number. The PO Number or Reference will update automatically. 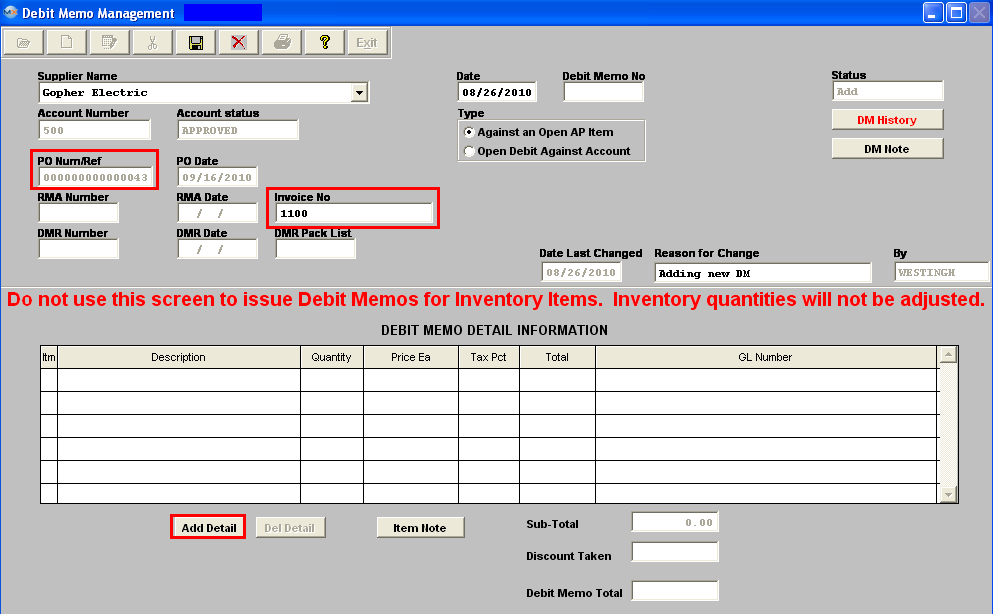 Depress the Add Detail Button. If there is more than one item on the Invoice and/or Freight and/or freight tax the following screen will appear listing all the Invoice Detail Lines:
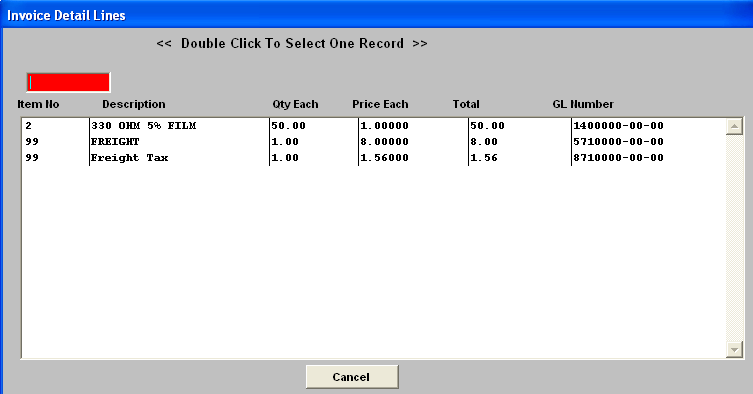 Highlight and double click on the item to be included on the Debit Memo. Note: System will only allow user to select one item at a time, so you will have to continue to depress the "Add Detail" button to add more items to the Debit Memo from the Invoice Detail Lines screen. If there is only one line item on the invoice selected the detail information will default in upon depressing the "Add Detail" button. The extension for the Total will update. (If you want to add an Item Note, depress the Item Note button, depress the Edit button, type in the note, and depress the Save button, depress the Exit button when finished). The Item Note button will then be displayed in Red. When the DM is completed, depress the Save button to save changes, depress the Abandon Changes button to abandon changes.
Upon Save the date, time, and User id information will default into the DM History. Then any changes to the DM before Approval will be documented within this screen also.  Once the DM is saved, the Approval button will appear. 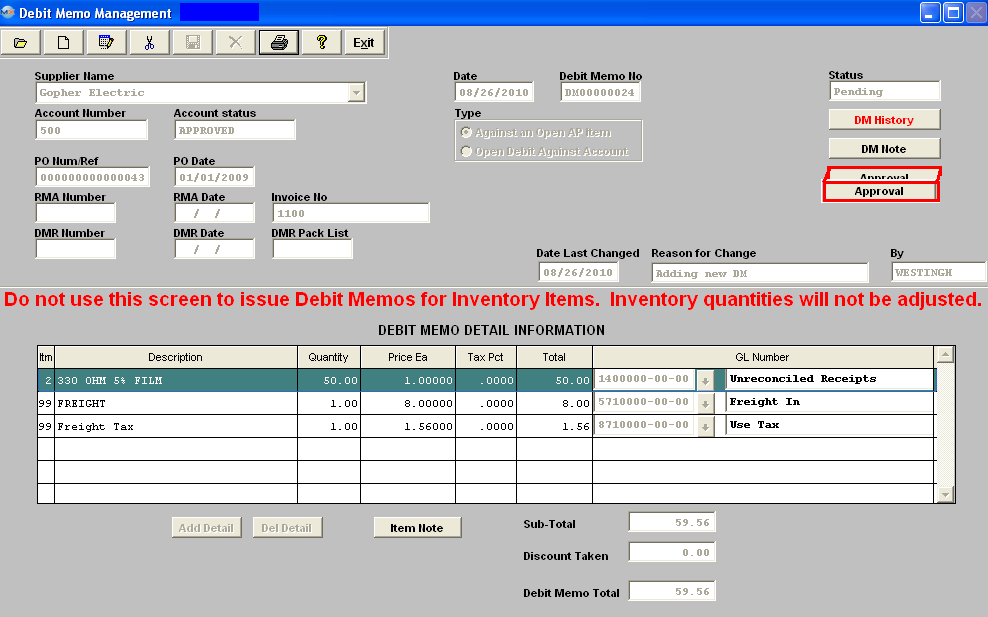 Depress the Approval button. The following Message will appear:  Depress the Yes button. Enter in your password. The invoice amount in the A/P Aging will be adjusted downward by the amount of the DM.
The Debit Memo will be marked as "Not Editable", the Status of the Debit Memo will be updated to “Posted to AP”, and the appropriate journal entry will be created for posting into the General Ledger. 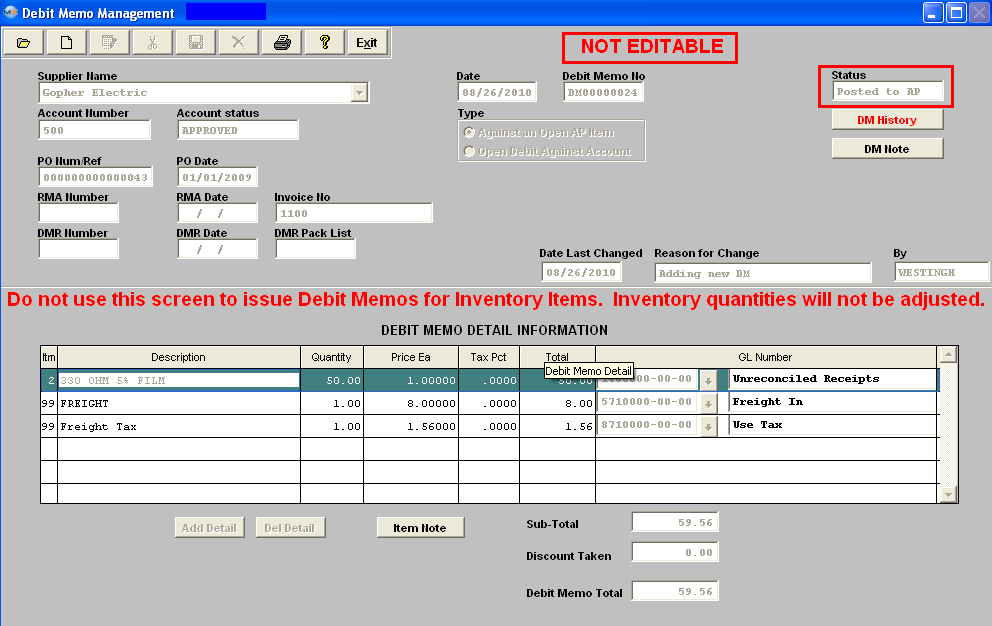 Add an Open Debit Against Account
Follow the steps above, with the following exceptions: For Type, click the radio for Open Debit Against Account.
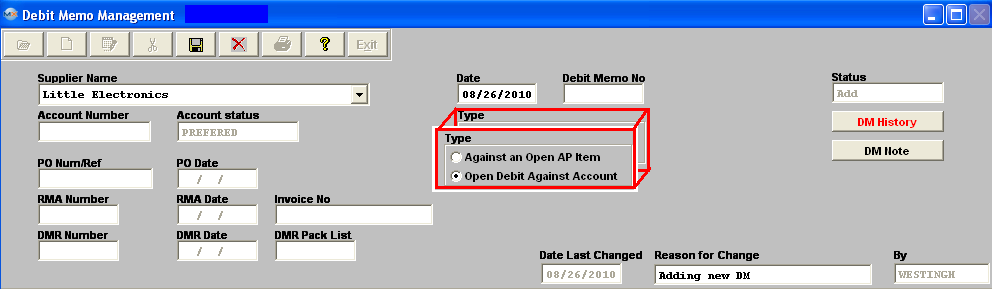 In the Debit Memo Detail Information section, depress the Add Item Button. Type in Item number, Description, Total and the General Ledger Number. Note: if you don’t know the G/L number, place the cursor in the G/L field and hit the Enter key twice. This will bring up the following:
Depress the arrow next to the Find By field. Select either Find By Account Type or Account Numbers. If you selected by Account Type, the following listing will appear, once you’ve depressed the down arrow next to the GL Type field: 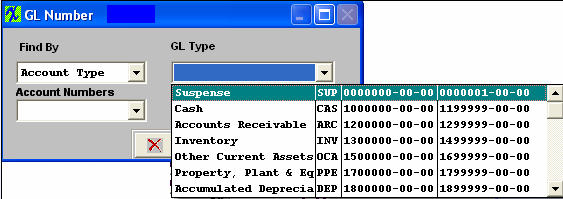 Scroll up or down until the appropriate G/L range is found.Then depress the down arrow next to the Account Numbers field. The following selection for the posting account will appear: 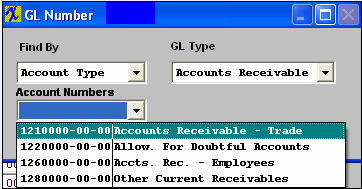 Select the account. Depress the OK button. The completed screen will look like this before Approval. 
|
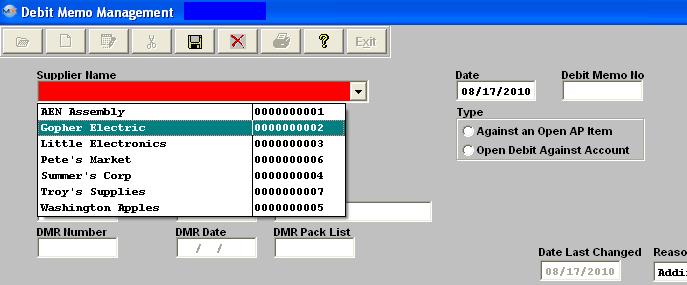
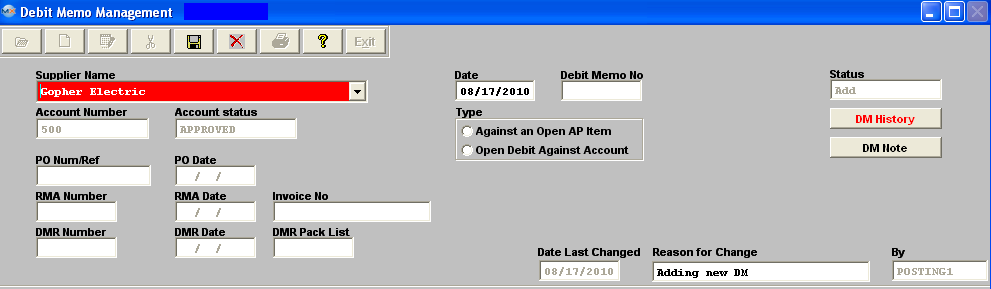

| 1.2.7.4.3. Edit a Debit Memo |
The user may edit a Debit Memo up to the time it’s approved and transferred to General Ledger. After Approval (status = “Posted to AP”) the DM can’t be changed. To Edit, find the DM using the procedures in Article #4315 Depress the Edit button and enter your password, the Date, and detail information is editable.
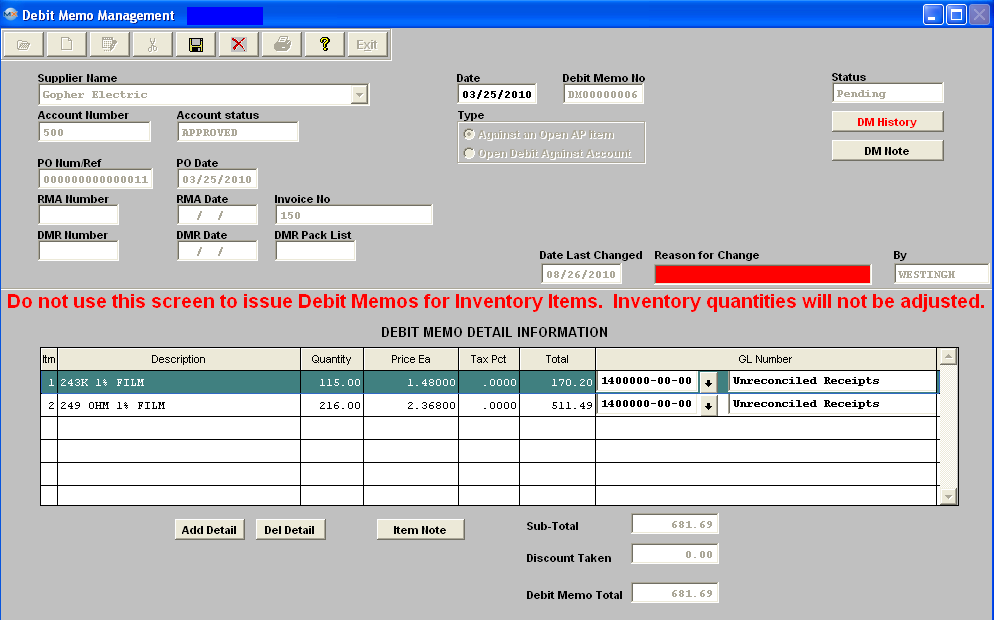 Make the desired changes, enter the Reason for the Change, depress the Save button to save the changes, depress the Abandon Changes button to abandon the changes. If ready to approve depress the Approval Button to Post the Debit memo to the AP. |
| 1.2.7.4.4. Cancel a Debit Memo |
Cancel a Debit Memo The user may cancel a Debit Memo up to the time it’s approved and transferred to General Ledger. After Approval and Transfer, the DM can NOT be cancelled. To delete, find the Pending DM using the procedures in Article #4315 . Depress the Cancel button. Enter your password. The following Message will be displayed: Depress the Yes button. Enter your password. The status will then be changed to “Cancelled.” 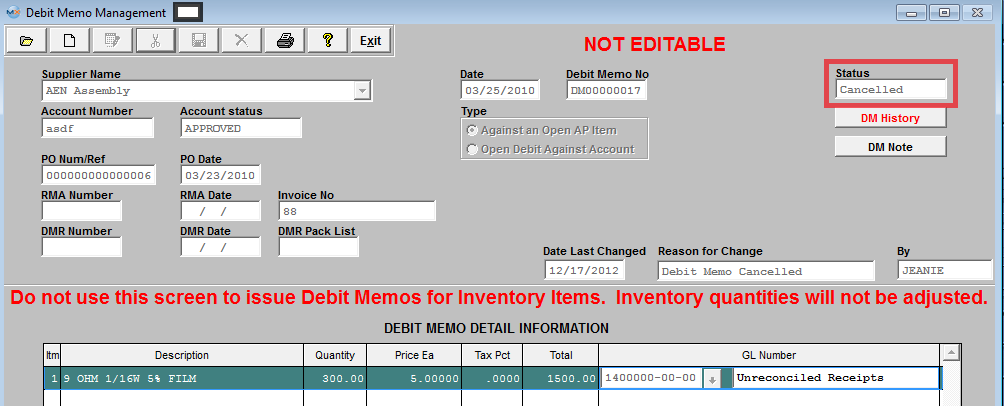
|
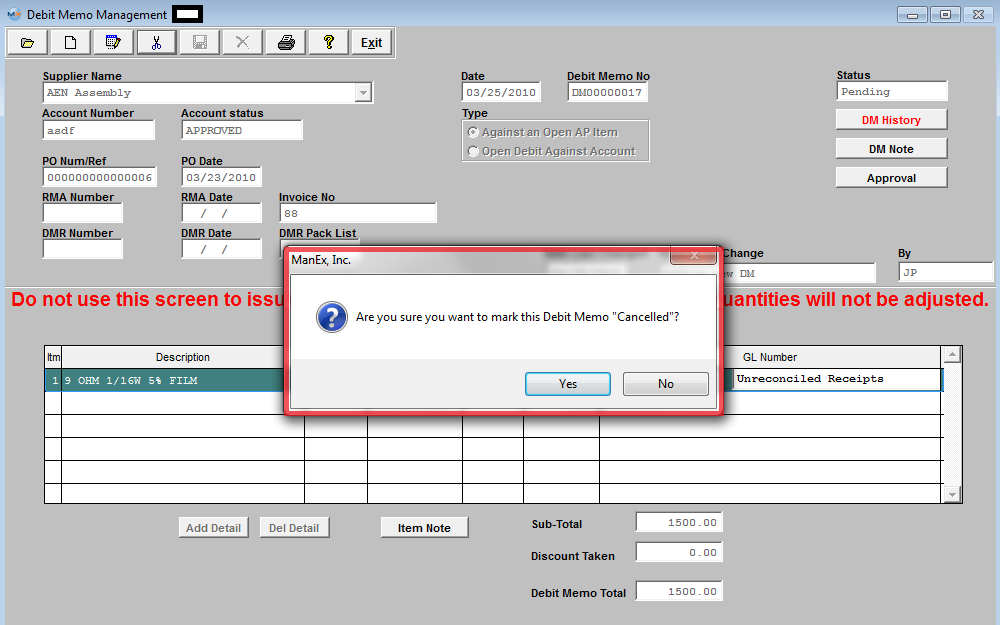
| 1.2.7.5. Reports for Debit Memo | ||||
To obtain the Debit MemoReports within the Web, select the WEB Print button from the ManEx action buttons at the top
of the screen. For further detail on How the Reports work within the Web refer
to Article #5477.
Note: In order to access the Reports within the Web the Company Root URL must be setup within the System Appearance module and user must be linked to web within the System Security Module. Select the Report Type: DEBIT MEMO - A List of Reports will be displayed that are available on the Web
for DEBIT MEMO.
To obtain the Debit Memo Reports within the desktop, select the Print button from the ManEx action buttons at the top of the screen.
The following reports screen
will display a list of reports that are available on the ManEx Desktop:
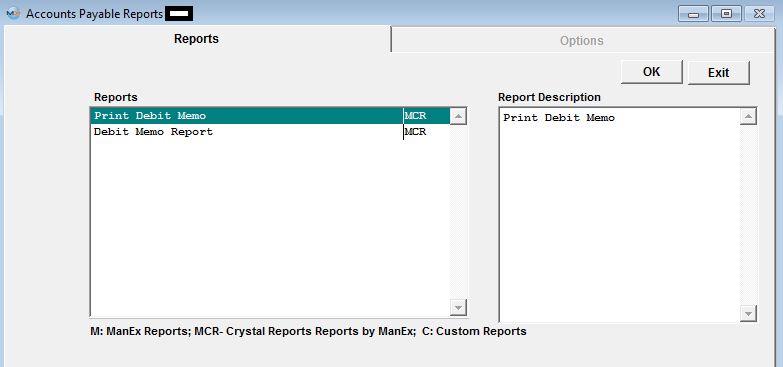 Highlight the Report of Interest and depress the OK button:
The following report will print:
Debit Memo Report
The following report will print: 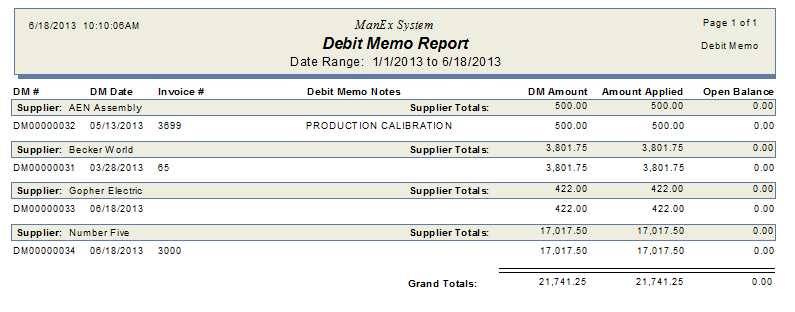
|
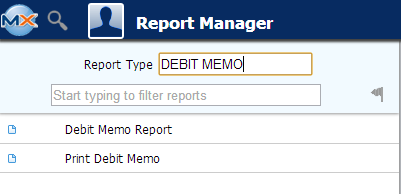
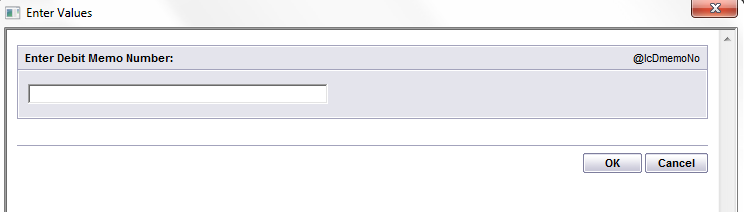
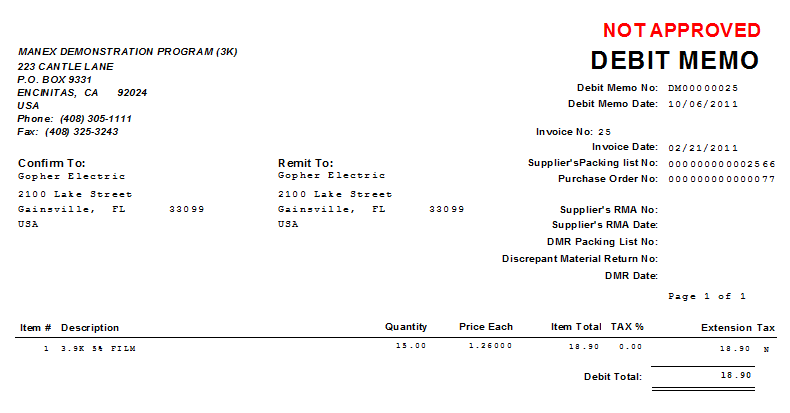
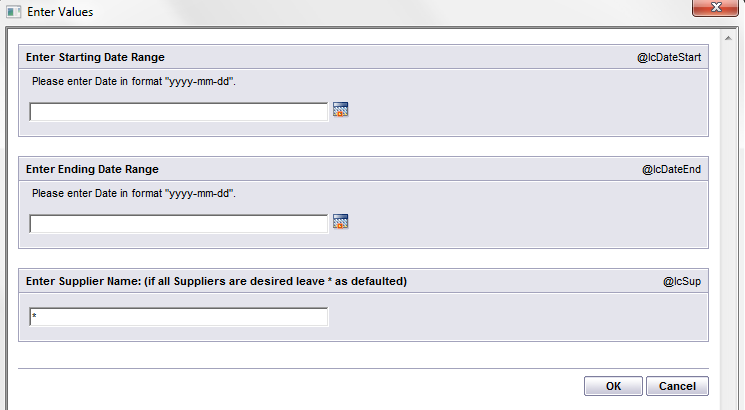
| 1.3. General Ledger (GL) |
| 1.3.1. Prerequisites for the General Ledger | ||||||
Prerequisites Required GENERAL LEDGER activity:
The account information for the General Ledger must be established in the G/L Account Setup. Users MUST have special rights within the Accounting Security module. Users with “Accounting Supervisor Rights” will automatically have access.
Optional Prerequisites for Entering a New GENERAL LEDGER:
Otherwise must be entered in Sales Order. |
| 1.3.2. View GL Accounts |
| 1.3.2.1. Prerequisites for View GL Accounts |
Users MUST have full rights to the "View GL Activity/Reports" in Accounting Security . Users with “Accounting Security Supervisor” rights will automatically have access. |
| 1.3.2.2. Introduction for View GL Accounts |
This screen shows all the GL # and the end balance of every period for the current fiscal year, and for two prior fiscal years for comparison. It is designed to allow a quick inquiry as to the balance of one or a series of accounts. |
| 1.3.2.3. Fields & Defintions for View GL Accounts |
| 1.3.2.3.1. G/L Balances | |||||||||||||||||||||||
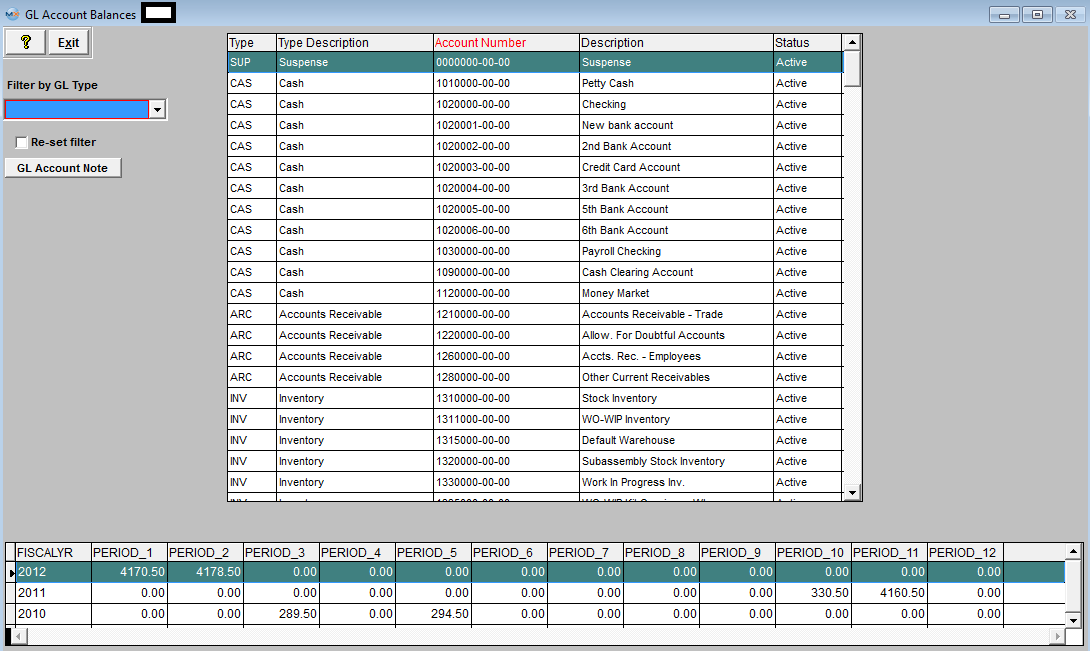 User has the ability to sort the grid on the top (with account numbers) by all the columns. The RED letters in the caption of the column indicate that the information is sorted by the data in that column.
|
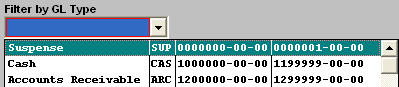
| 1.3.2.3.2. G/L Activity |
| 1.3.2.3.2.1. G/L Activity | ||||||||||||||||||||||||||
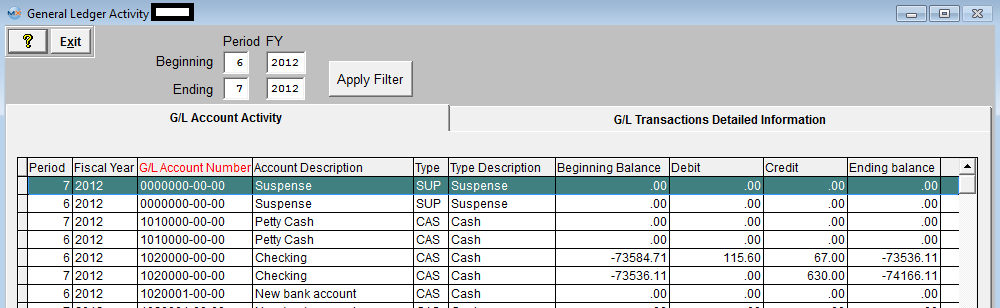 User has the ability to sort the grid on the top (with account numbers) by all the columns. The RED letters in the caption of the column indicate that the information is sorted by the data in that column.
|
| 1.3.2.3.2.2. G/L Detail | ||||||||||||||||||||||
User has the ability to sort the grid on the top (with account numbers) by all the columns. The RED letters in the caption of the column indicate that the information is sorted by the data in that column.
|
| 1.3.2.4. How To ..... for View GL Accounts |
| 1.3.2.4.1. Find G/L Balances | ||||
|
The following screen will be displayed: This screen shows all the GL # and the end balance of every period for the current fiscal year, and for two prior fiscal years for comparison. To find a specific record by GL Type, depress the pulldown arrow next to the "Filter by GL Type" box and the following list will appear:
 Highlight a GL Type and the screen will populate with the account information for that GL Type.
User has the ability to sort the grid on the top (with account numbers) by all the columns. The RED letters in the caption of the column indicate that the information is sorted by the data in that column. 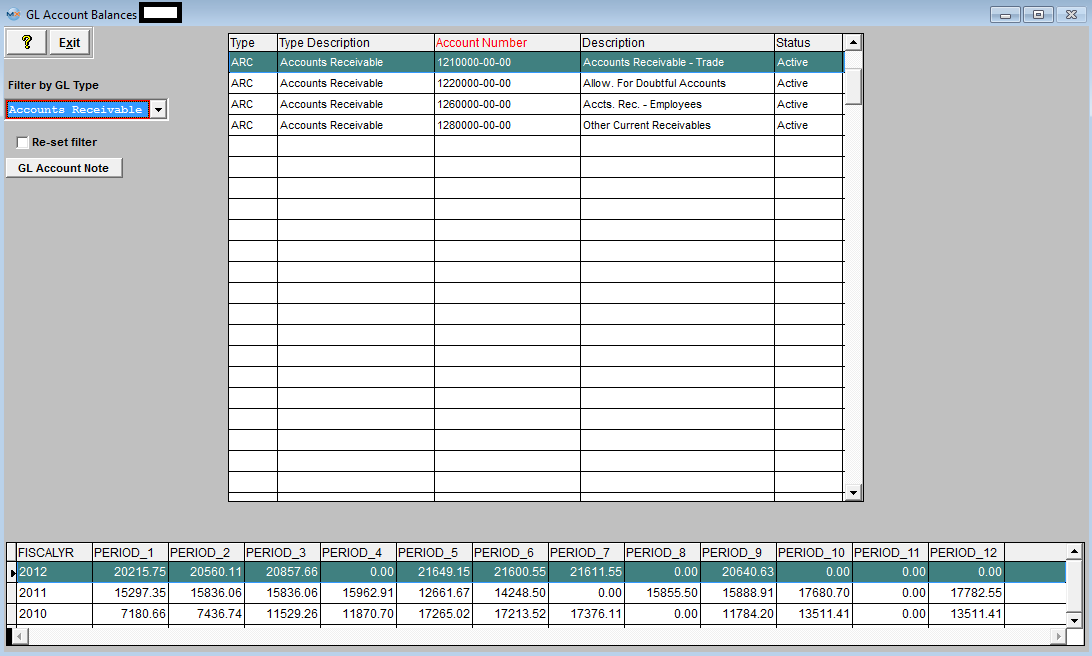 |

| 1.3.2.4.2. Find G/L Activity | ||||||
The following screen will be displayed:
You can sort by all of the Headers. To view other periods than the Current Period, change the Beginning and/or Ending Period at the top of the screen and depress the "Apply Filter" button.
Detail will be available when highlighting an account with amounts in the Debit or Credit columns. Select the GL Detail Tab. Note: that the detail will only show a summary line if the company chose to Post In Summary in the accounting setup. If the company chose to Post In Detail (General Ledger Defaults setup) each transaction that affects the balance of the selected account (selected on the summary screen) for the Period(s) selected will be shown.
You can sort by: Trans.Date.(default) Trans.No, Debit, or Credit by depressing the appropriate button. To view other periods than the Current Period, change the Beginning and/or Ending Period at the top of the screen.
Note: The Transaction Number showing the entire entry can be accessed via G/L Reports Transaction Inquiry.
|

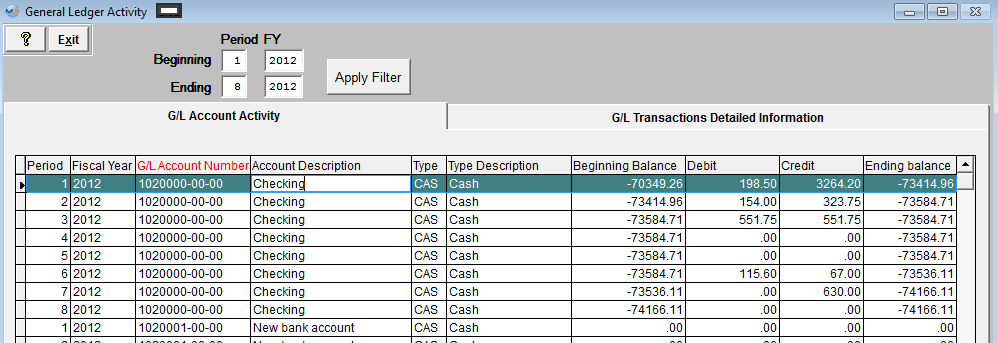
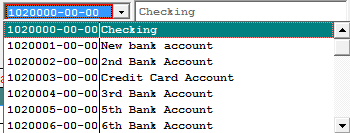
| 1.3.3. Journal Entries |
| 1.3.3.1. Journal Entries Introduction |
| Journal Entries are used to adjust Account Balances and to enter Transactions that do not flow from the standard accounts receivable, accounts payable or inventory activity portions of the program.
The ‘Journal Entries’ menu selection brings up a subsidiary menu displaying the 4 journal entry types and activities supported by the ManEx system: General Journal Entries , Standard Journal Entries , Recurring Entry Setup and Automatic Distribution Setup .
Journal Entries are entries made to Adjust Account Balances on a one time or recurring basis. Journal Entry is a straight forward process in which the affected Accounts are selected and debited or credited according to the nature of the transaction desired.
|
| 1.3.3.2. General Journal Entries |
| 1.3.3.2.1. Prerequisites for the General Journal Entry |
Users MUST have full rights to the "All Journal Activities" in Accounting Security . Users with “Accounting Security Supervisor” rights will automatically have access. |
| 1.3.3.2.2. Introduction for the General Journal Entry |
General Journal Entries are to be used to setup opening balances for General Ledger or to account for Payroll entry. Opening balances for New Bank Accounts MUST be setup in the Bank Setup module. |
| 1.3.3.2.3. Fields & Definitions for the General Journal Entry | ||||||||||||||||||||||||||||||
General Journal Entries field definitions
The Journal Number is generated by the system for reference purposes and is reflected in a number of reports including the "Posted Transaction Reports" and the "Detail General Ledger (cross-tabbed) Report". |
| 1.3.3.2.4. How To ..... for General Journal Entries |
| 1.3.3.2.4.1. Find a Journal Entry | ||||||
Enter the SQLMANEX.EXE (within the ManEx root directory) The following screen will be displayed:
When first entering the General Journal Entry area the ‘Find’, ‘Add’, ‘Generate RE/FY Closing’ and ‘Exit’ icons will be available for selection.
Selecting the desired entry will populate the screen as follows:
|

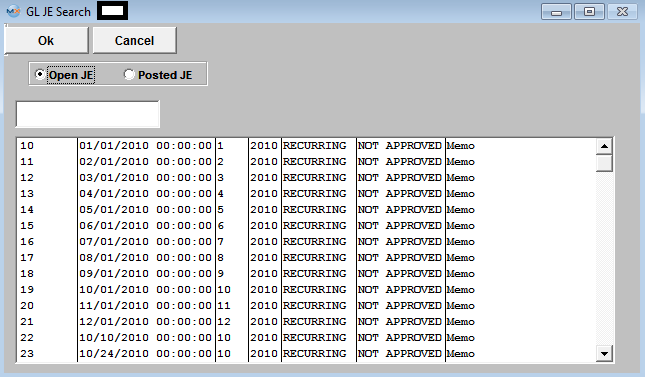
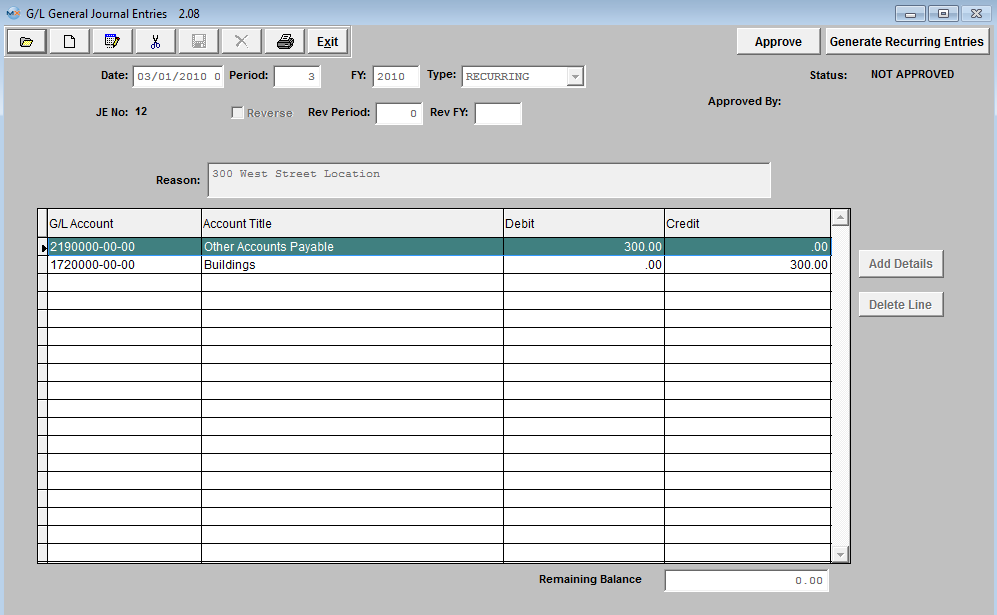
| 1.3.3.2.4.2. Add a Journal Entry | ||||||||
|
The following Screen will be displayed:
Depress the Add record action button. The first field (DATE) will default to the last day of the previous fiscal month, but can be changed to any date desired. The date as entered will be the Transaction Date of record so care must be taken to enter a date that lies within the Period you wish to affect with this Entry.
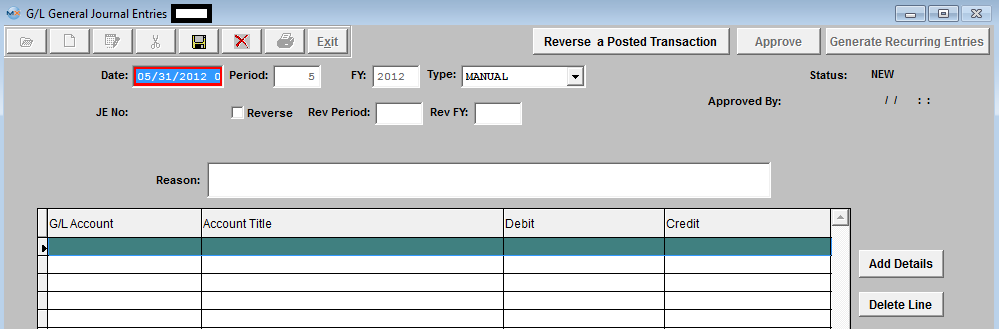
The ability to post a transaction outside of the current period is affected by the General Ledger Post Default setup, whether postings are allowed in previous periods and fiscal years and future periods.
The TYPE field is a pop up but will default properly to MANUAL when in Add mode. Other types such as STANDARD may be selected within display, if appropriate. STATUS will display ‘NEW’ when adding and will display the appropriate status when displaying a previously added but NOT APPROVED entry and well as an entry that has been POSTED. REVERSE refers to whether this is should be a Reversing Entry. A Reversing Entry is one that cancels itself out upon the Closing of the Period in which it is posted. The Reverse field will default as Unchecked and may be changed if the Transaction is of an appropriate type. REASON is a required field and some text must be entered to allow a successful save of a Journal Entry. Use the TAB key to exit the Reason Field.
The actual data entry occurs in the middle section. Once you tab out of the Reason Field the system will default to the first GL Account Number to be entered. The user must enter a G/L Account directly by typing in the account number. The system will default to the nearest G/L Account match as you type. Then once you hit the Enter/Tab key the system will default in the Account Title Information. Then enter the Debit or Credit Amount.
Depress the "Add Details" button to add another G/L Account.
Enter the Debits and Credits until the Remaining Balance at the bottom of the screen equals 0.00.
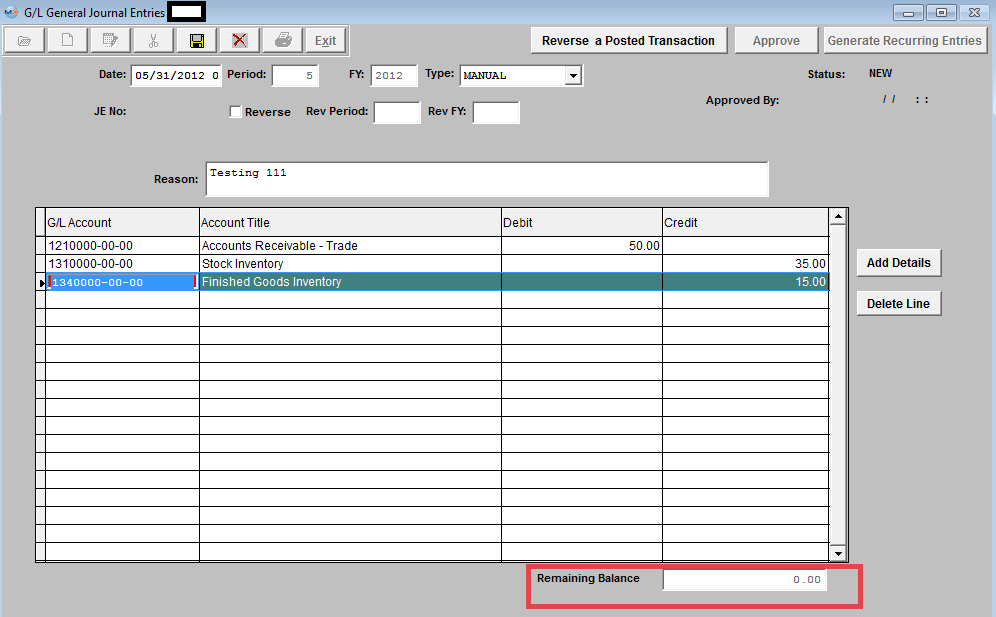 The Abandon changes action button is available at all times during an add operation. The Save record action button will also show as available but will not allow you to save the record until the entire General Journal Entry is in balance (debits = credits). Once the Entry is in Balance, the system will allow you to save the Journal Entry. A General Journal Number will then be assigned to the Transaction. 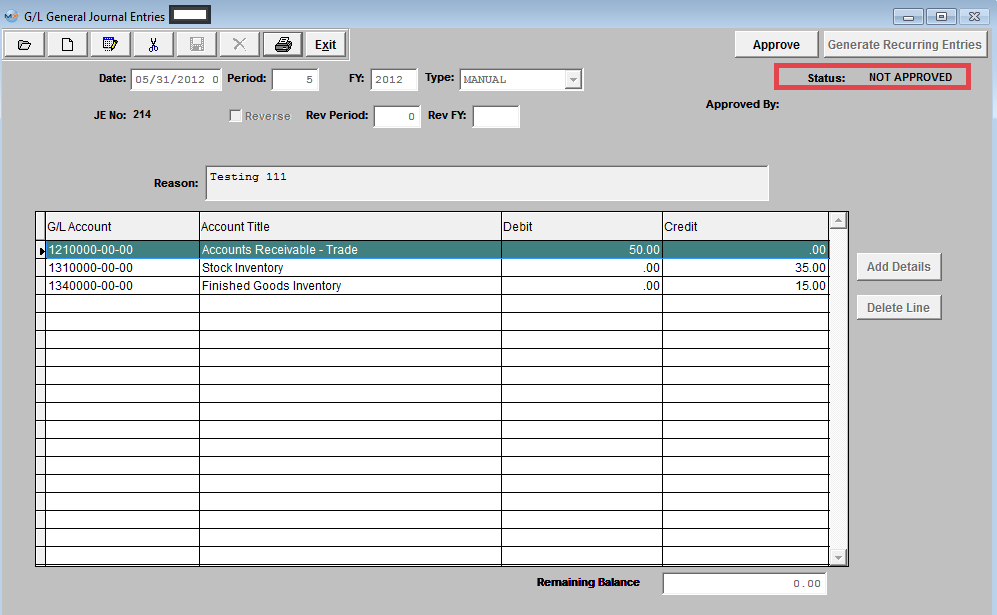 Journal Entry must be approved before it may be posted. After checking for accuracy, approve a Journal Entry by selecting the ‘Approve’ button and enter an authorized administrative password.
The JE Status will then be changed to Approved. 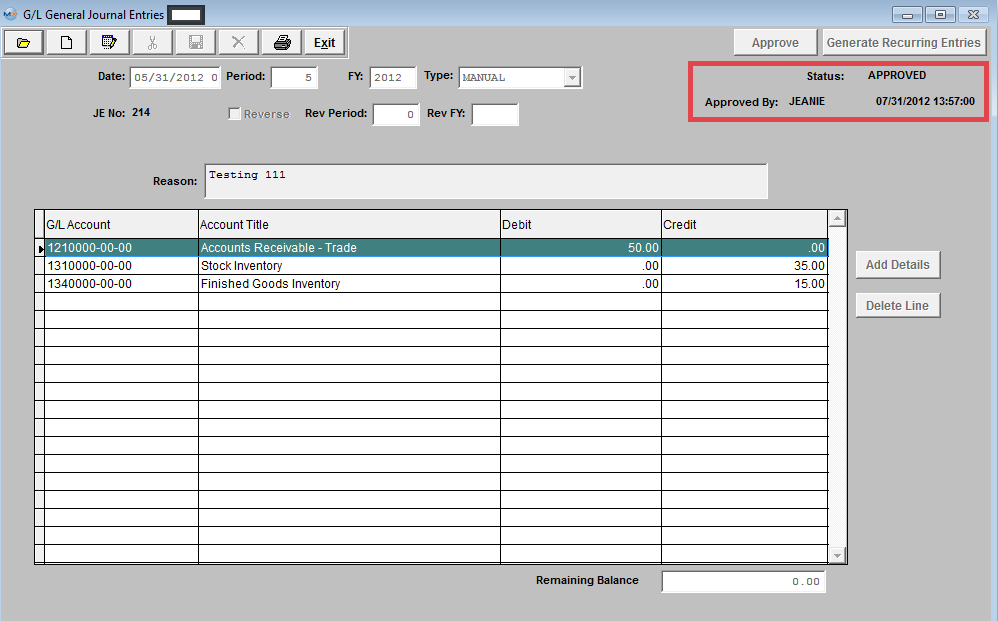 | ||||||||
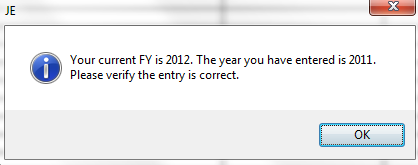
| 1.3.3.2.4.3. Edit a Journal Entry |
|
Find a Journal Entry you want to Edit. NOTE: The user may edit a ‘NOT APPROVED’ Journal Entry. Once an entry has been ‘APPROVED’ however, another Journal Entry must be entered to clear or reverse it.
The JE will populate the screen: All fields are editable. When changes have been completed, depress the Save record action button to save changes or depress the Abandon changes action button to abondaon changes. In order to save the transaction, both DEBITS and CREDITS must equal. The user may generate two types of entries with the ‘Generate RE/FY Closing’ (Generate Recurring entries/ Fiscal Year Closing) button selection.
The first type, Recurring Entries, must be defined under the Recurring Entry Setup module prior to being available as a recurring type. The second type of entry is a special kind of Fiscal Year End Closing Entry, which may be generated after all adjustments have been made for a period but before the actual Period Close Closing Entries zero out the income and expense items for the period and transfer the balance to the Balance Sheet's Retained Earnings. It is important that an entry be created to Close the Income and Expense to the Balance Sheet at the end of each Fiscal Year Period Close. Without such an entry the Balance Sheet will be out of balance by the amount of profit (or loss) incurred, because such an entry was last posted to the Equity Accounts. Such a transfer and closing should not affect reprint of Income Statements for Prior Periods but a Posting to a Prior Period will affect the Balance Sheet / Income Statement for the affected period. A General Journal Entry must be generated to close those Prior Period income and expense items to Retained Earnings if the company chose to allow posting to prior periods. Journal Entry must be approved before it may be posted. After checking for accuracy, approve a Journal Entry by selecting the ‘Approve’ button and enter an authorized administrative password.
|
| 1.3.3.2.4.4. Reverse a Journal Entry | ||||
|
The following Screen will be displayed:
Depress the Add button and Create a JE Transaction in Period (4), but user would like this JE reversed in a future period. So, they will need to check the "Reverse" box and have it set to reverse in period (7) of 2012. A Reversing Entry is one that cancels itself out upon the Closing of the Period in which it is posted.
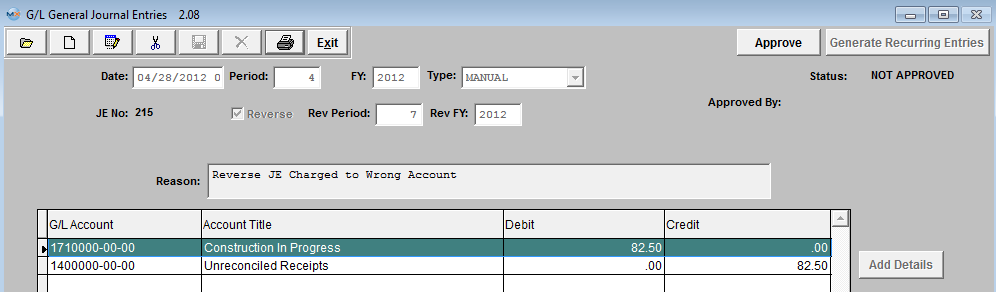 Approve the Entry and it will forward to the GL Release and Posting Screen.
 The JE #20 was properly released and posted in Period (4) of 2012.
 Current Accounting Period 7 of 2012
 Upon entering the JE Find screen you can see that the system automatically created the reversing JE waiting for approval.
 Approve the Entry and it will forward to the GL Release and Posting Screen.
Print out the Posted Journal Entry Report, as displayed:
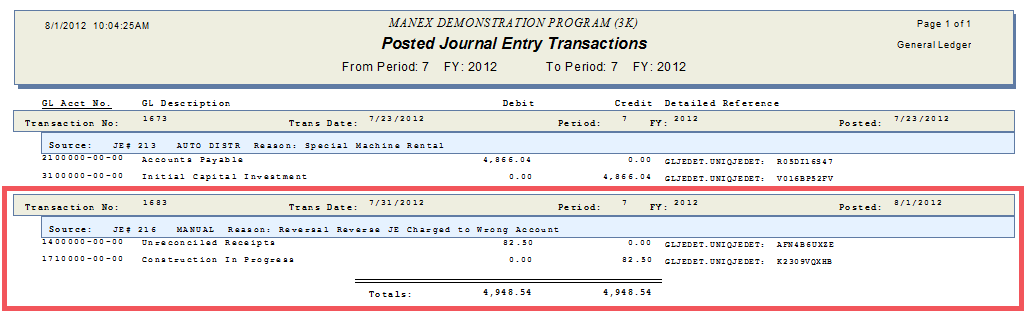 |
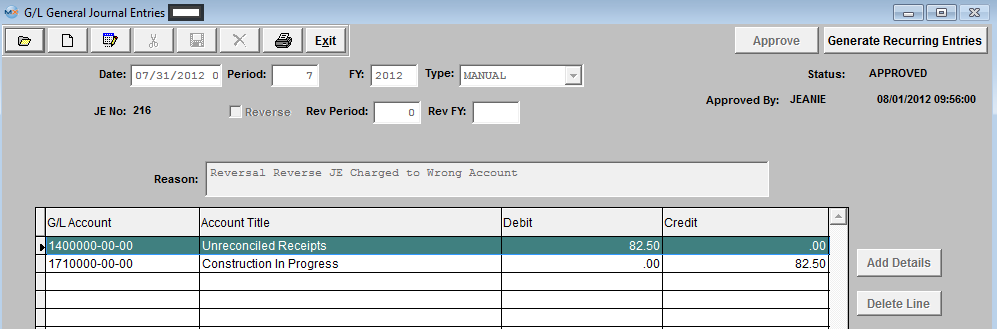
| 1.3.3.2.4.5. Reverse a Posted Transaction | ||||
|
The following Screen will be displayed: Depress the Add record action button, enter your password and the "Reverse a Posted Transaction" button becomes available: 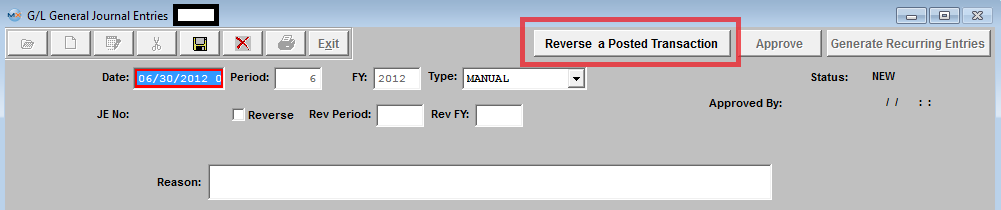 Depress the "Reverse a Posted Transaction" button and the following warning will appear:
Depress OK. Enter the number of the transaction you want to reverse into the field shown below and the info will poplulate the screen, the Reason will default in as a "Manual reversal of GL Transaction ___": Note: User can reverse any posted Transaction from any Prior Period or FY. The Same Transaction can be reversed more than once also.
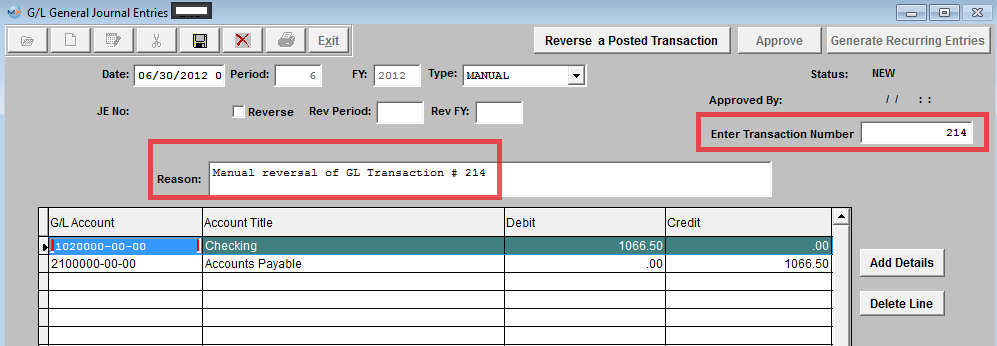 Once the Entry is Approved, it will forward to the GL Posting Screen. 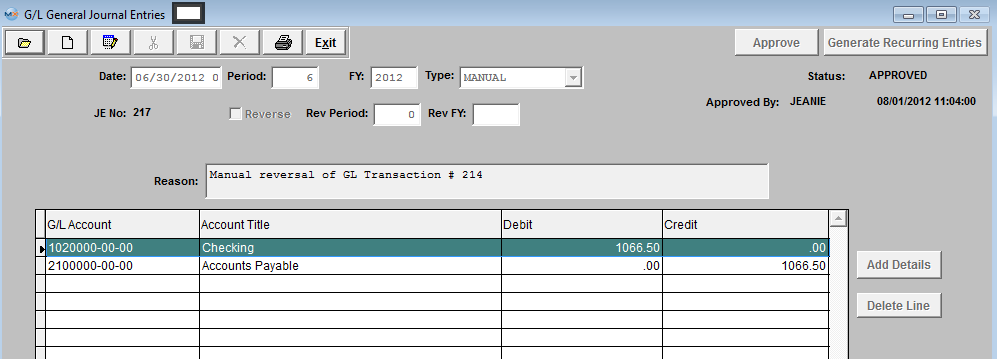 Release and Post within the GL Release and Post screen. Print out the Posted Journal Entry Report, as displayed: The reason displayed will display as a Manual reversal and reference the Transaction number reversed.  |
| 1.3.3.2.4.6. Generate RE/FY Closing |
| 1.3.3.2.4.6.1. Introduction for Generate RE/FY Closing |
The user may generate two types of entries with the ‘Generate RE/FY Closing’ (Generate Recurring entries/ Fiscal Year Closing) button selection. The first type, Recurring Entries, must be defined under the Recurring Entry Setup module prior to being available as a recurring type. The second type of entry is a special kind of FISCAL YEAR END CLOSING ENTRY, which may be generated after all adjustments have been made for a period but before the actual Period Close Closing Entries zero out the income and expense items for the period and transfer the balance to the Balance Sheet's Retained Earnings. It is important that an entry be created to Close the Income and Expense to the Balance Sheet at the end of each Fiscal Year Period Close. Without such an entry the Balance Sheet will be out of balance by the amount of profit (or loss) incurred, because such an entry was last posted to the Equity Accounts. Such a transfer and closing should not affect reprint of Income Statements for Prior Periods but a Posting to a Prior Period will affect the Balance Sheet / Income Statement for the affected period. A General Journal Entry must be generated to close those Prior Period income and expense items to Retained Earnings if the company chose to allow posting to prior periods. User may Generate the RE/FY Closing in the G/L General Journal Entry module, or in the End of FY Closing module. |
| 1.3.3.2.4.6.2. Generate Recurring Entries | ||||
The following screen will be displayed:
Depress the "Generate Recurring Entries" button and the following screen appears:
Enter in an Ending Date and all Recurring Entries due on or before this date will be listed:
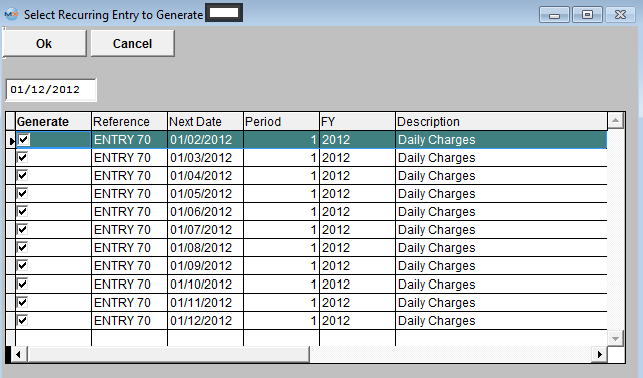 Depress OK and the following message will appear:
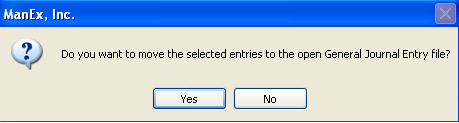 If user selects "Yes" to continue the following message will be displayed:
 The last generated entry will be displayed on the General Journal Entry screen fro approval
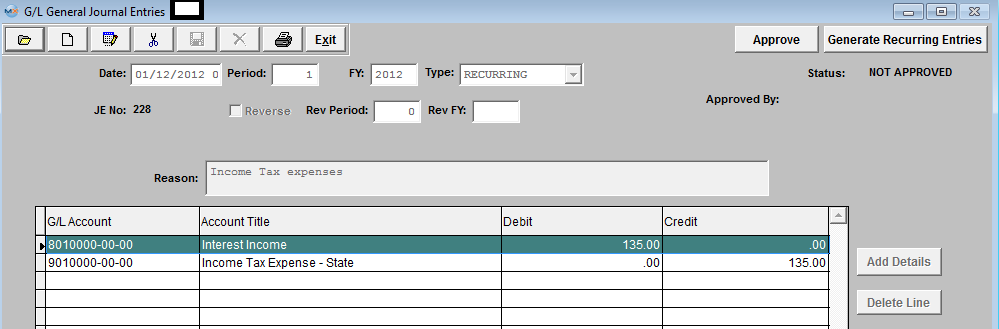 The rest of the Recurring Entries that were generated will be listed in the Open JE screen with a status of NOT APPROVED
 |
| 1.3.3.3. Standard Journal Entry Setup |
| 1.3.3.3.1. Prerequisites for the Standard Journal Entry |
Users MUST have full rights to the "All Journal Activities" in Accounting Security . Users with “Accounting Security Supervisor” rights will automatically have access. |
| 1.3.3.3.2. Introduction for a Standard Journal Entry |
Standard Journal Entries allow the user to set up a “canned” entry that may be used to avoid repetitive entry and save time. A Standard Journal Entry is generated once a month on either a fixed amount or a percentage from one expense account to another and will be generated until they are deleted. A good example would be rent. Say the rent was $10,000 per month and you want to distribute a fixed amount to various departments each month. You would make a Standard Journal entry crediting the general rent account for $10,000 and debit Manufacturing $5000, Admin $2500, and Sales $2500, or you could make it a percentage distributions with 50% going to Mfg, 25% to Admin, and 25% to Sales.
|
| 1.3.3.3.3. Fields & Definitions for the Standard Journal Entry | ||||||||||||||||||||
Standard Journal Entries field definitions
|
| 1.3.3.3.4. How To ...... |
| 1.3.3.3.4.1. Find a Standard Journal Entry | ||||
The following screen will be displayed: Depress the Find button, The following listing will be displayed:
 Select the Standard Journal Entry you are seeking, by either highlighting and double clicking on the Standard Journal Entry, or entering the JE Reference number in the Red Box. The following will be displayed on the screen:
 |

| 1.3.3.3.4.2. Add a Standard Journal Entry Setup | ||||
Enter a REFERENCE. This is a required field and represents a unique key to differentiate this entry from another that the user must enter. Some mnemonic is helpful to ease location of the record when reviewing entries with the ‘Find’ selection.
Enter the DESCRIPTION. This field allows the user more room to be descriptive about this Journal Entry then is available within the Reference field.
Choose the TYPE. This is a required field and may be either a dollar amount or a percentage. Fixed Dollar Entries may be modified when generated in the General Journal Entry screen, or distributed by Percentage (to distribute overhead to departments for instance).
Enter a REASON. This field must be entered and will be copied along with the specific detail of the Standard Journal Entry. The actual data entry occurs in the middle section. Once you tab out of the Reason Field the system will default to the first GL Account Number to be entered. The user must enter a G/L Account directly by typing in the account number. The system will default to the nearest G/L Account match as you type. Then once you hit the Enter/Tab key the system will default in the Account Title Information. Then enter the Debit or Credit Amount. Depress the "Add Details" button to add another G/L Account. 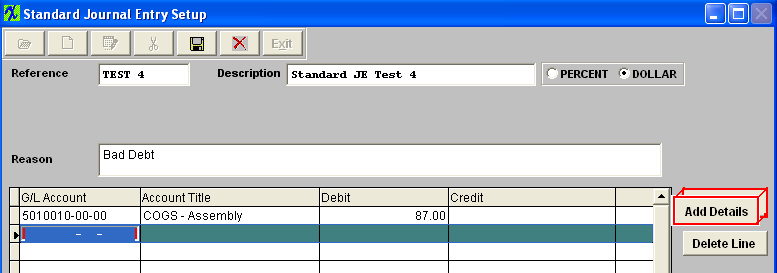 Enter the Debits and Credits until the Remaining Balance at the bottom of the screen equals 0.00. When entering a Percentage Distribution, the percentage must total 100 on each side of the transaction.
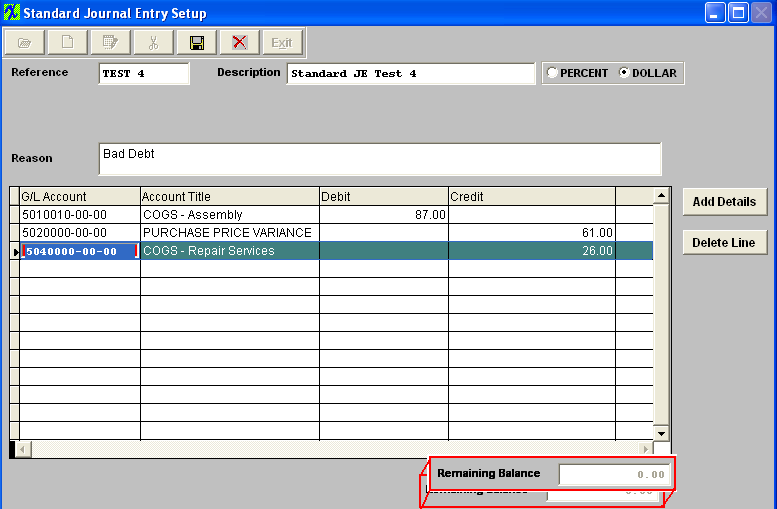 The Abandon changes action button is available at all times during an add operation. The Save record button will also show as available but will not allow you to save the record until the entier Standard Journal Entry is in balance (debits = credits). Once the Entry is in Balance, the system will allow you to save the Standard Entry.
 |
| 1.3.3.3.4.3. Post a Standard Journal Entry | ||||||||
The following screen will be displayed: Depress the ADD button. Depress the down arrow at the right side of the Type window. The following selection will appear: 
The entry will appear:
 Depress the Save button, the Status changes from "NEW" to "NOT APPROVED" and the Approve button becomes active. Here you may edit the Standard General Jornal Entry by selecting the Edit button or delete the Standard General Journal Entry by selecting the Delete button. Note: Once the Standard General Journal Entry has been ‘Approved’ you will no longer be able to edit or delete the record. 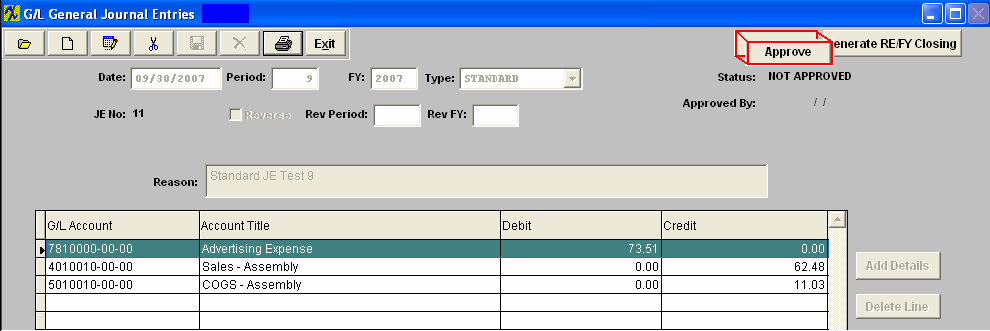 Depress the Approve button. You’ll be prompted for an authorized password. The Status will be changed to "APPROVED", and can now be posted to the General Ledger. 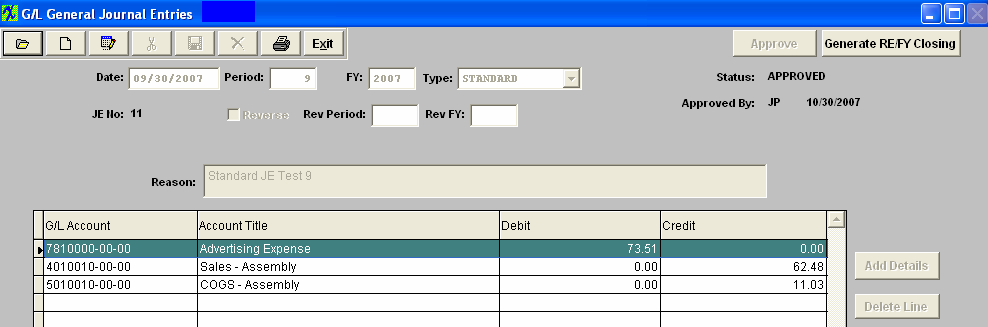 |
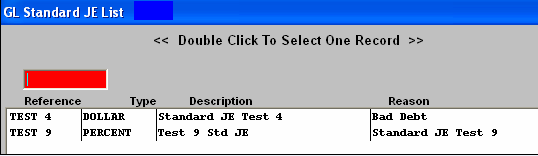
| 1.3.3.4. Recurring Entry Setup |
| 1.3.3.4.1. Prerequisites for Recurring Entry Setup |
Users MUST have full rights to the "All Journal Activities" in Accounting Security . Users with “Accounting Security Supervisor” rights will automatically have access. |
| 1.3.3.4.2. Introduction for Recurring Entry |
Recurring Entries are similar to Standard Journal Entries but are interval based. The user can set Recurring Journal Entries to generate every x number of days or periods and save time and effort by avoiding reentering the same posting over and over again. A good example would be an accured interest on a bond. If you have outstanding bonds of $1,000,000 at 6% that will be paid off in one year, so each month for 12 months you would have to accrue the interest liability. In this case you would set up a Recurring Entry to debit the interest expense for $5000, and credit the liability account "Accured Interest Expense" for the same amount. |
| 1.3.3.4.3. Fields & Definitions for Recurring Entry Setup | ||||||||||||||||||||||||||
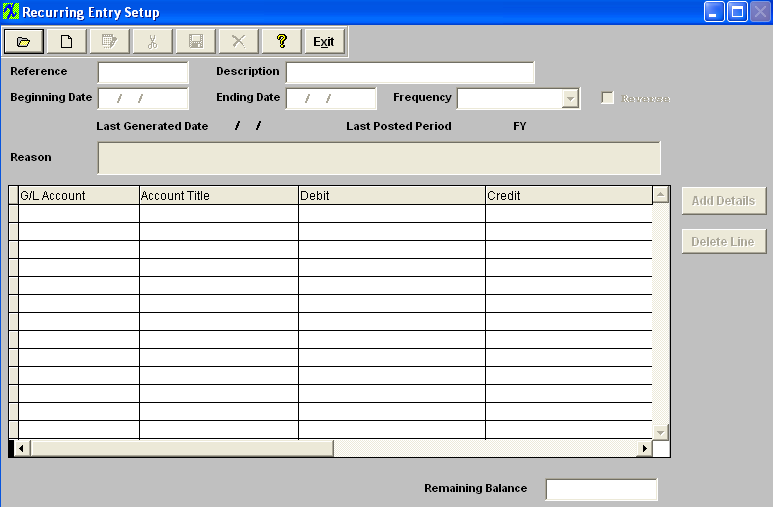
. |
| 1.3.3.4.4. How To ...... |
| 1.3.3.4.4.1. Find a Recurring Entry Setup | ||||||
The following screen will be displayed:
Once selected the record information will appear on screen:
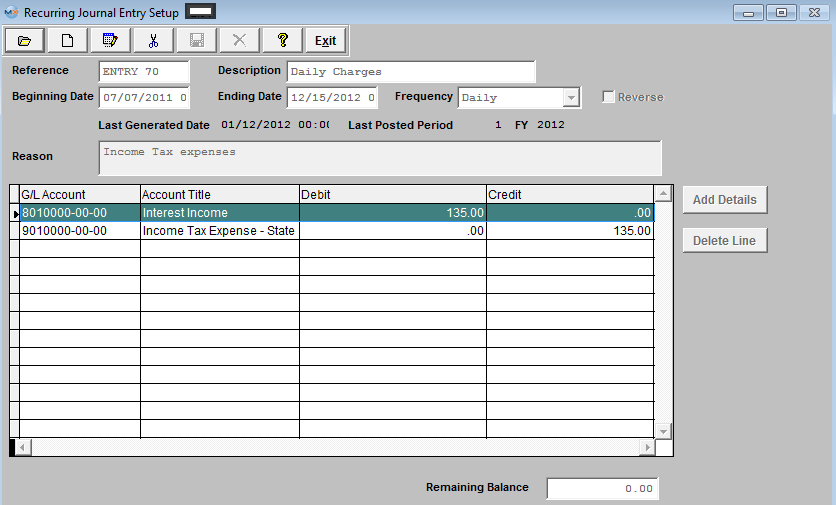 |

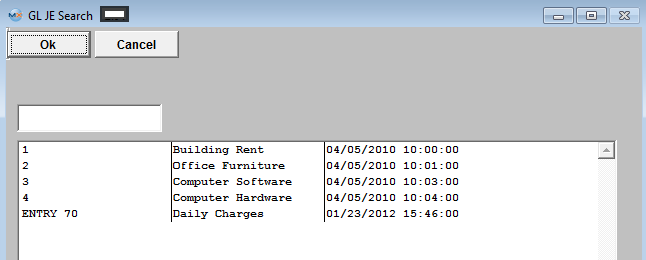
| 1.3.3.4.4.2. Add a Recurring Entry Setup | ||||
The following screen will be displayed: Selecting the ADD record button will allow the user to enter information about a New Recurring Entry. Enter a unique Reference to this entry, Description, Beginning Date, and Ending Date. Depress the down arrow on the right of the Frequency field and select the desired frequency.
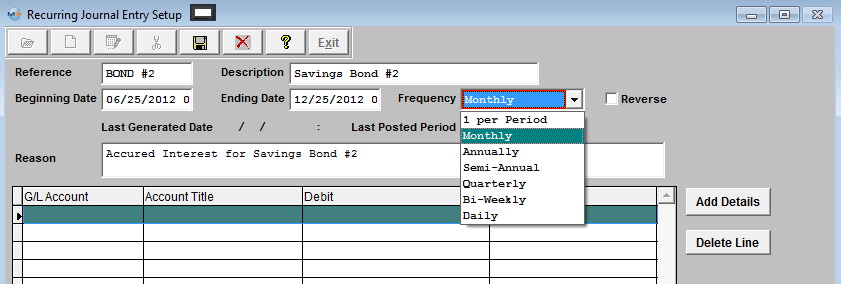 If a reversed entry check the Reverse entry box. Enter a default reason for the generated entry.
The actual data entry occurs in the middle section. Once you tab out of the Reason Field the system will default to the first GL Account Number to be entered. The user must enter a G/L Account directly by typing in the account number. The system will default to the nearest G/L Account match as you type. Then once you hit the Enter/Tab key the system will default in the Account Title Information. Then enter the Debit or Credit Amount. 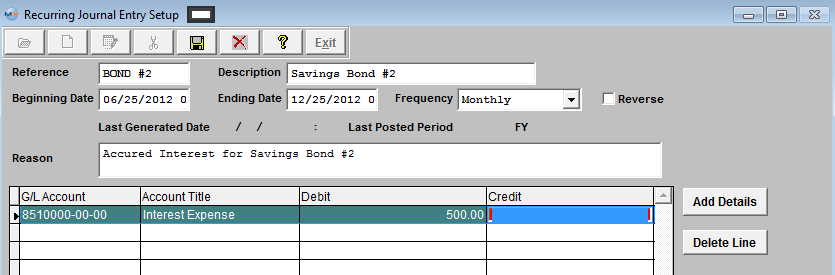 Depress the "Add Details" button to add another G/L Account. Enter the Debits and Credits until the Remaining Balance at the bottom of the screen equals 0.00.
 The user may choose to delete a line in the template by selecting the appropriate line and depressing the ‘Delete Line’ button. The Abandon changes action button is available at all times during an add operation. The Save record button will also show as available but will not allow you to save the record until the entier Recurring Entry Setup is in balance (debits = credits). Once the Entry is in Balance, the system will allow you to save the Recurring Entry.
|
| 1.3.3.4.4.3. Post a Recurring Entry Setup | ||||||||||||
The following screen will be displayed:
The Last generated entry will display on screen as follows: Here you may edit the Recurring General Journal Entry by selecting the Edit button or delete the Recurring General Journal Entry by selecting the Delete button. Note: Once the Recurring General Journal Entry has been ‘Approved’ you will no longer be able to edit or delete the record. 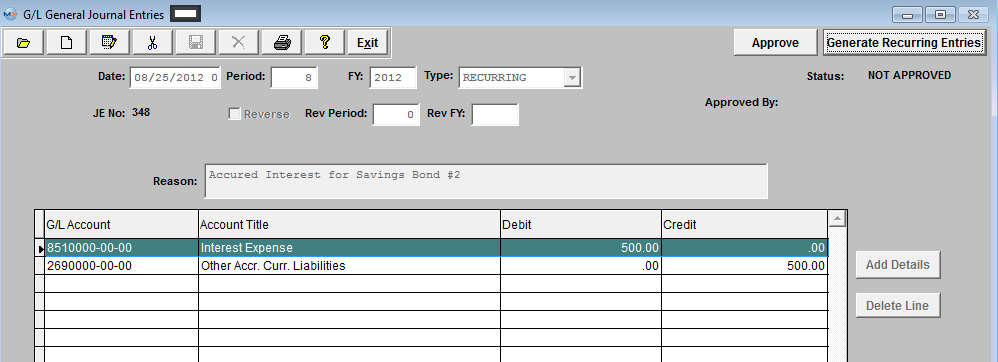 Or Depress the Find Record button, and select the appropriate Open Recurring Journal Entry from the list. 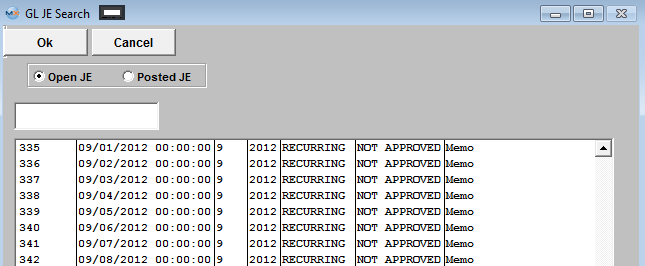 Depress the Approve button. You’ll be prompted for an authorized password. The Status will be changed to "APPROVED", and can now be posted to the General Ledger. 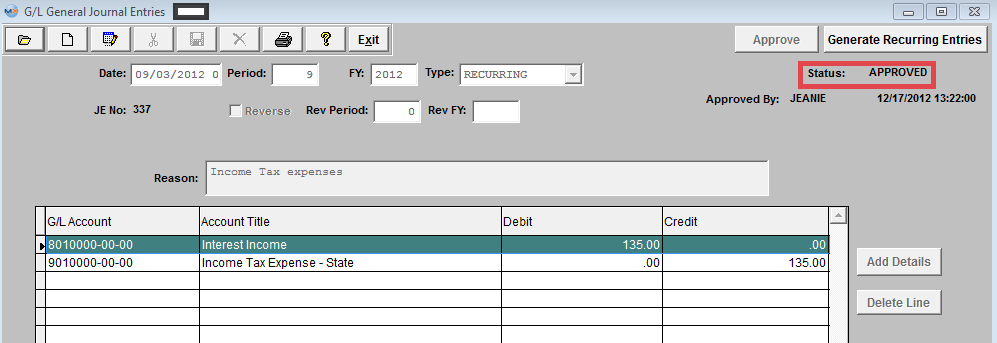 |
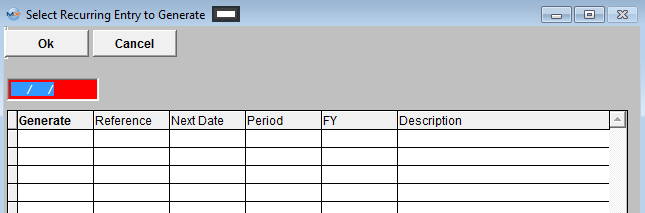
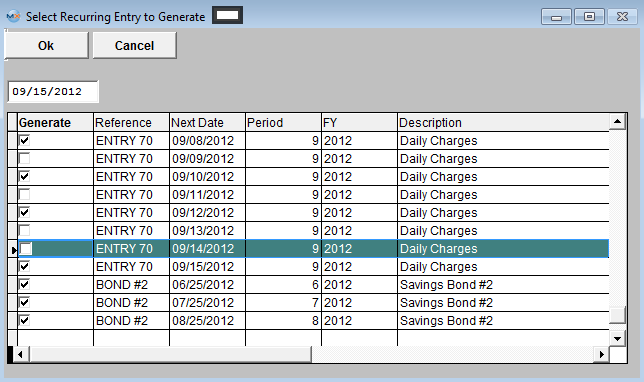
| 1.3.3.4.4.4. Edit a Recurring Entry Setup |
|
Remember that DEBITS must equal CREDITS in order to save.
|
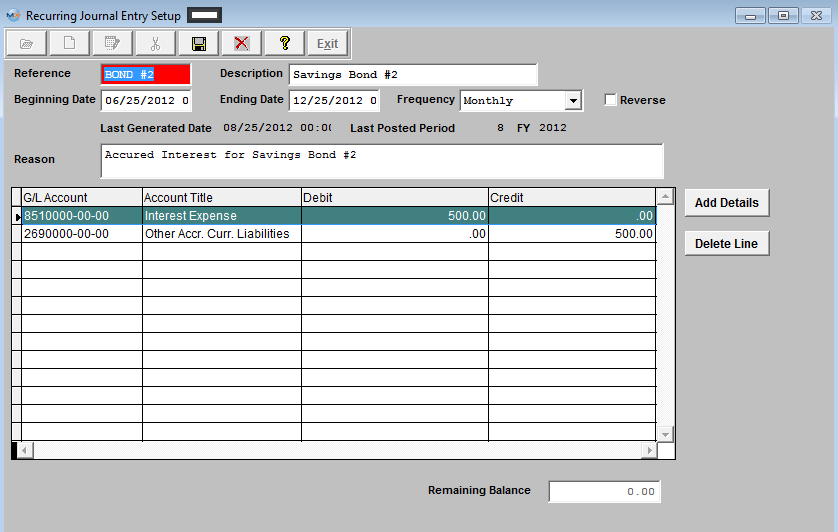
| 1.3.3.5. Automatic Distribution Setup |
| 1.3.3.5.1. Prerequisites for Automatic Distribution Setup |
Users MUST have full rights to the "All Journal Activities" in Accounting Security . Users with “Accounting Security Supervisor” rights will automatically have access. |
| 1.3.3.5.2. Introduction for Automatic Distribution Setup |
Automatic Distributions are used to distribute expenses from one expense account to others after all other transactions have been posted for the month. A good example would be promotional expense. When they write checks the amount of the check is distributed to one account, say "Promotional General", then at the end of the month the total activity in that account for the month is distrubuted to various departments, say Manufacturing 50%, Admin 30%, Sales 20%. So after the automatic distributions have been posted, the "Promotional General" account has a zero balance for the month's activity and the various accounts have their proportional amount of the expense.
Automatic Distributions may be reviewed at period close. |
| 1.3.3.5.3. Fields & Definitions for Automatic Distribution Setup | ||||||||||||||||
|
| 1.3.3.5.4. How To ...... for Automatic Distribution Setup |
| 1.3.3.5.4.1. Find an Automatic Distribution Setup | ||||
The following screen will appear:
Once selected the record information will appear on screen:
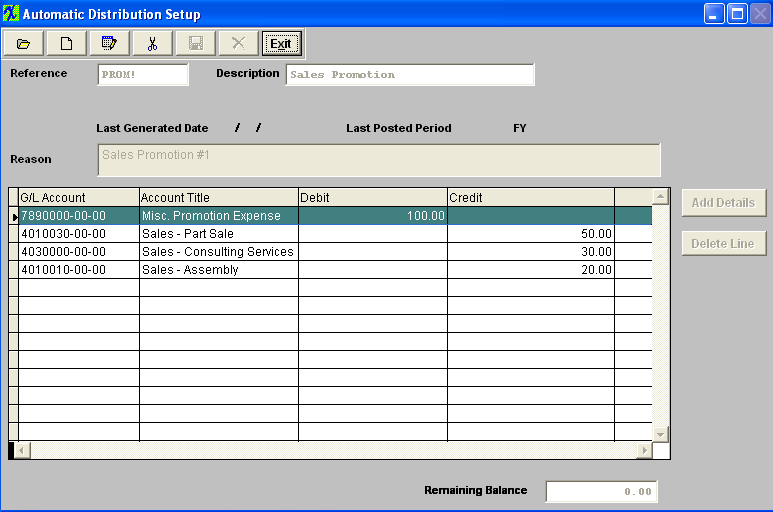 |


| 1.3.3.5.4.2. Add an Automatic Distribution Setup | ||
The following screen will appear: Selecting the ADD record button will allow the user to enter information about a New Automatic Distribution Entry. Enter a unique Reference to this entry, Description, and a default reason for the generated entry.
The actual data entry occurs in the middle section. Once you tab out of the Reason Field the system will default to the first GL Account Number to be entered. The user must enter a G/L Account directly by typing in the account number. The system will default to the nearest G/L Account match as you type. Then once you hit the Enter/Tab key the system will default in the Account Title Information. Then enter the Debit or Credit Amount. Depress the "Add Details" button to add another G/L Account. The user may choose to delete a line in the template by selecting the appropriate line and depressing the ‘Delete Line’ button.  Enter the Debits and Credits until the Remaining Balance at the bottom of the screen equals 0.00.
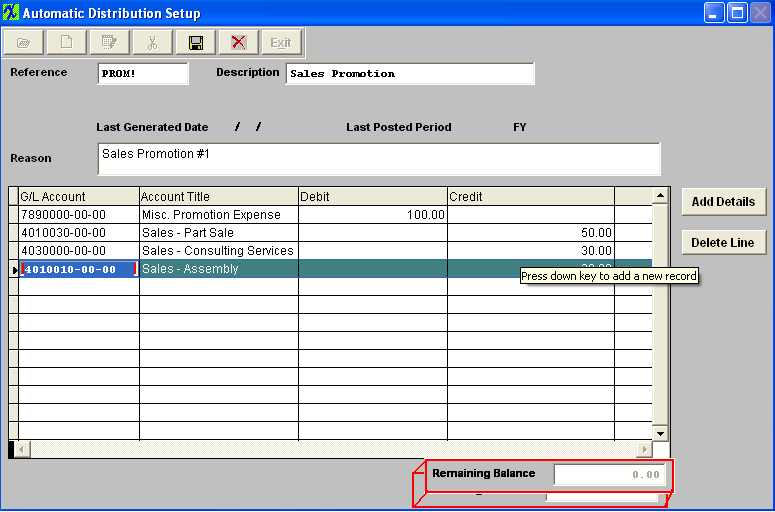 The Abandon changes action button is available at all times during an add operation. The Save record button will also show as available but will not allow you to save the record until the entier Automatic Distribution Setup is in balance (debits = credits). Once the Entry is in Balance, the system will allow you to save the Automatic Distribution Entry.
|
| 1.3.3.5.4.3. Edit an Automatic Distribution Setup |
Find an Existing Automatic Distribution Entry
Now you may edit the Automatic Distribution Entry by selecting the Edit button. Remember that DEBITS must equal CREDITS in order to save.
|
| 1.3.3.6. Multi-Currency Feature |
| We have "Create JE in" currency options when a user adds a new record. Here are the explanation of each type, (I use "TC" for Transaction Currency, "FC" for Functional Currency, and "PC for Presentation currency in below explanation) "Both Currencies" - User selects a transaction currency, and user can enter debit and credit in any currency and the system will convert the values to another two currencies. All three currency columns are enabled for user to enter. But if the JE record is from "Currency Transfer" module, the TC debit/credit columns are disabled, because there is "manual functional currency entry" checkbox in currency transfer, and we don't want the user to enter new values in transaction currency columns and mess up the functional currency fields. "Functional Currency" - User selects a transaction currency. Default transaction currency is functional currency, and user can change to different currency. User can enter either functional currency or transaction currency columns, the program will convert one currency fields to another currency fields. Presentation currency columns are disabled, and save 0 and won't be converted from TC or FC. This is for a situation that user only wants to enter JE for functional currency and doesn't want to enter for presentation currency. "Presentation Currency" - User selects a transaction currency. Default transaction currency is presentation currency, and user can change to different currency. User can enter either presentation currency or transaction currency columns, the program will convert one currency fields to another currency fields. Functional currency columns are disabled, and save 0 and won't be converted from TC or PC. This is for a situation that user only wants to enter JE for presentation currency and doesn't want to affect functional currency. |
| 1.3.4. G/L Release/Posting/Closing |
| 1.3.4.1. Release and Post to GL |
| 1.3.4.1.1. Prerequisites for the Release and Post Module | ||||||
Prerequisites Required for General Ledger activity:
In order for the ManEx General Ledger module to work correctly, all the modules in Accounting Setup must be setup properly, along with the following list of modules in System Setup : Inventory Items For Inventory Items, the Standard Cost must be entered: In Systems with ManEx Accounting installed, the amount entered in the Standard Cost field is used for Cost Accounting functions and is subject to strict change control. If ManEx Accounting is not being used, the field can show actual, target or user defined cost. Important Note - If accounting is installed: For ALL buy parts, the Standard Cost field MUST have data entered. If this data is missing (or wrong), the Raw Materials Inventory and the Work In Process (WIP) will be incorrect for the accounting records. Item Master tab – Buy part ·All make parts which are turnkey (not labor only), MUST have data entered in the Standard Cost field. Additionally, the data entered in the Standard Cost field for the make part should equal the sum of the Bill of Materials components. If the sum of the Bill of Materials components does not equal the Standard Cost per the MAKE PART Item Master, a CONFIGURATION VARIANCE will generate. A way to have the system upload these costs automatically is via the Standard Cost Adjustment module.
. |
| 1.3.4.1.2. Introduction for the GL Release and Post Module |
Release and Posting Information Overview
ManEx has revised and added new features to the Release and Posting to GL screen that will give the user much more detailed information on screen and flexibility. All transaction can be now released and posted from one screen. It also allows the users more control on how they wish to have the accounting records released/posted per transaction. Also, within the Release/Post Screen, where available user has the ability to drill back to the source in which the Transactions originated from. For Example: Within the Release/Post Sales screen the users will see a link back to the Sales Order and/or Invoice that the transaction originated from. If the user depresses this link the system will then bring them back to that module and record for further review.
Note: This screen is a single user screen, to prevent users from attempting to release/post the same record causing duplicated transactions to be posted to the GL.
There are three options for each of the 17 types of transactions to be released and posted.
1) The current method "Manual Release after Review & Manual Post after Review" This means that the transaction must first be released and then posted as two separate activities.
2) "Auto Release & Manual Post after Review" This means that when the transaction is saved or approved in the originating screen, the transaction is placed in the released tables and only has to go through the posting routine to be posted to the General Ledger.
3) "Immediate Auto Release & Post to G/L without Review" This means that when the transaction is saved or approved in the originating screen it is automatically posted to the General Ledger without having to go through any release or posting screen for review.
Postings To General Ledger are created automatically! For example, when a CUSTOMER INVOICE is printed, the system sets up the Underlying Journal Entry ready to post into the General Ledger.
Three Stage Posting Process: As designed, the General Ledger presents a 3 stage reporting/posting process to the user.
The first stage updates the aging reports and happens automatically when a Sales Invoice is printed or a Vendor’s Invoice is reconciled or entered directly into the accounts payable system through the use of a Manual Invoice. In this way the current aging status of both A/R and A/P can be known immediately. The second stage of the process occurs when the user activates the ‘RELEASE TO G/L’ selections. The process creates Underlying Journal Entries for the associated transactions. These Underlying Journals are in turn used in the actual General Ledger update procedure. The third and final stage of the General Ledger posting procedure is the actual posting to the General Ledger from the Underlying Journals. The posting process updates the tables used to present Balance Sheet and Income Statement information to the user.
Posting means that the transaction is recorded in the GLTRANS table. This information is then used in the GL Reports.
The last process is CLOSING A PERIOD and moving the final closing balance information into the appropriate history files. Real Time All of the G/L interfaces are created in a Real Time mode and forward into the various release modules. For example, the instant that the Invoice is printed in the ManEx Administration module, the entry is created and forwards into the Release Sales to General Ledger. The ManEx general ledger system is designed to give the user the widest range of possible entry options while maintaining compatibility with generally accepted accounting principals.
|
| 1.3.4.1.3. Fields and Defintions for the Release and Post Module |
| 1.3.4.1.3.1. General Ledger Release & Post Screen | ||||||||||||||||||||||||||||||||||||||||||||||||||||||||||||||||||||||||
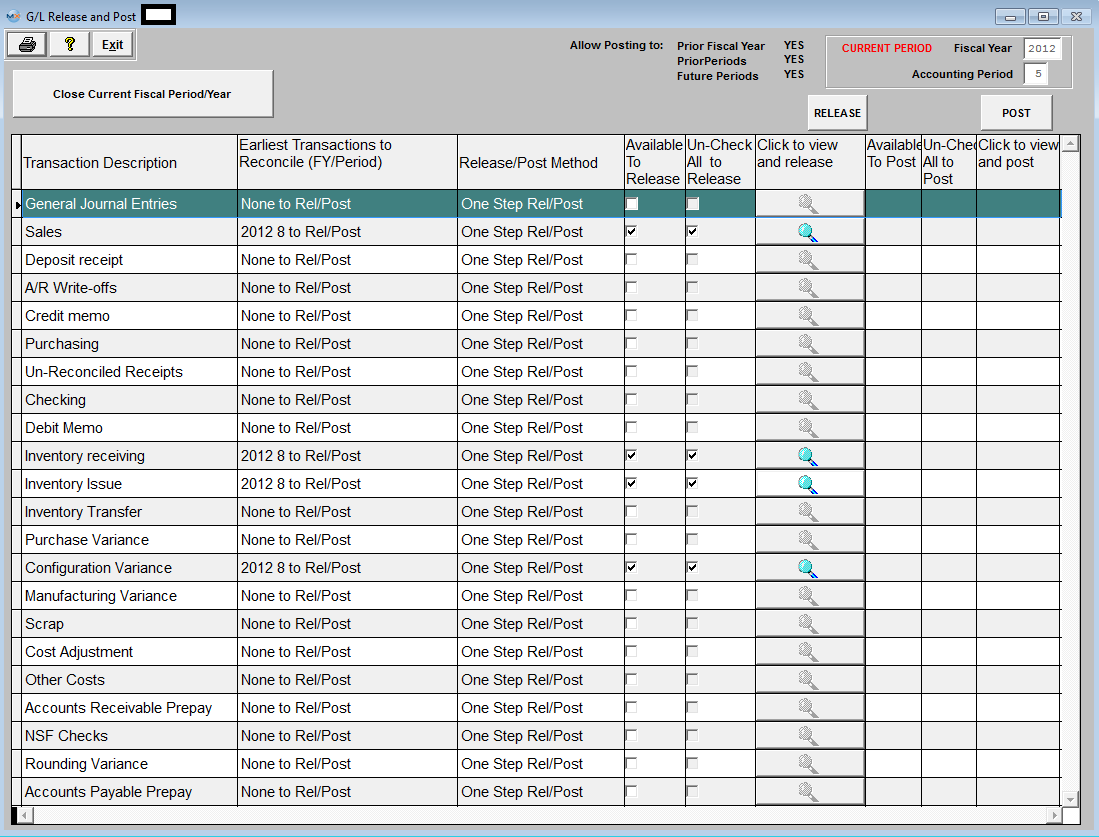
Transaction Types:
|
| 1.3.4.1.3.2. Release Screen | ||||||||||||||||||||||||||||||||||
(Note: The screens may vary in appearance by the type of transaction but basically contain the same information). There will be two grids, the grid on the left will display the Transaction information and the grid on the right will display the detail of the transaction. The data can be sorted in various ways by clicking on the column headers that are in bold font. Some types of transactions will allow users to drill back to the source in which the transactions originated from, such as Purchase Order, Sales Order, Work Order, etc. 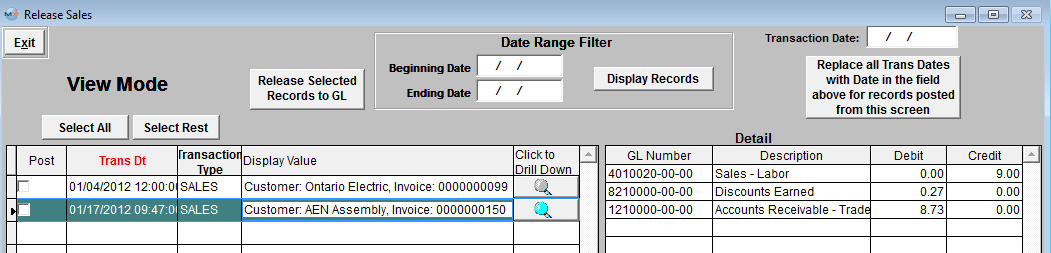
Date Range Filter
Transactions
Detail - This section breaks out the transaction that is going to be created.
|
| 1.3.4.1.3.3. Post Screen | ||||||||||||||||||||||||||||||||||
(Note: The screens may vary in appearance by the type of transaction but basically contain the same information). The transactions that have been released and waiting to be posted will appear in the first (left) grid. The data can be sorted in various ways by clicking on the column headers that are in bold font. Some types of transactions will allow users to drill back to the source in which the transactions originated from, such as Purchase Order, Sales Order, Work Order, etc. The detail of each transaction will be displayed in the second (right) grid with the GL number and the Debits and Credits. 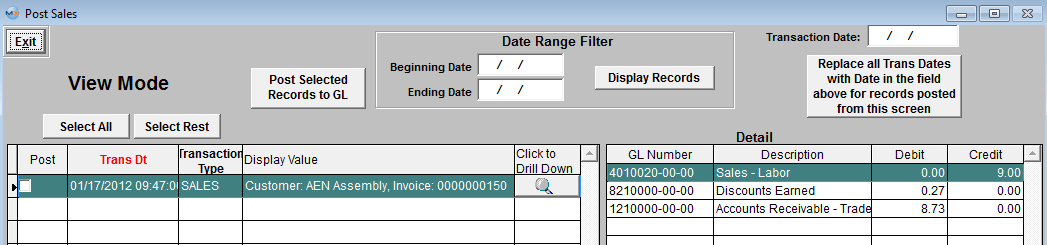
Date Range Filter
Transactions
Detail
|
| 1.3.4.1.4. How To ...... for the Release and Post to GL |
| 1.3.4.1.4.1. Release & Post Information to G/L | ||
The General Ledger Release & Post screen will appear: Transactions to be Released will be displayed with checkboxes in the "Available to Release" column.
To release transactions, select the transactions by checking the box to the left of the first grid or depress the "Select All" toggle buttons to "Select/Deselect the transactions to release.
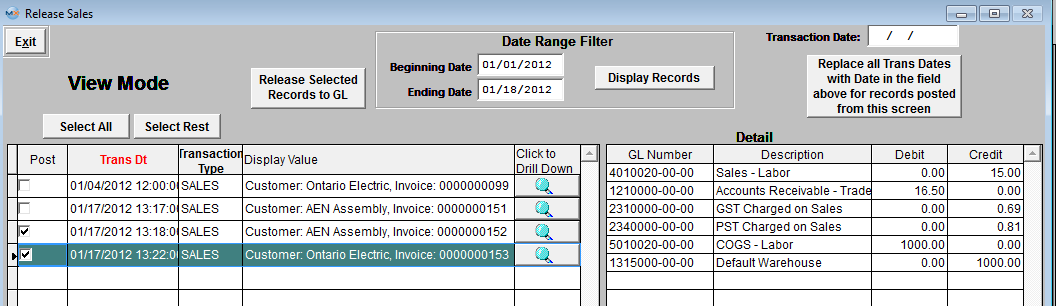 One you have selected the records to be released, Depress the "Release Selected Records to GL". The records selected to be released will be removed from the release screen and the records not selected to be released will stay on screen. Transactions to be Posted will be displayed with checkboxes under the "Available to Post" coulmn.
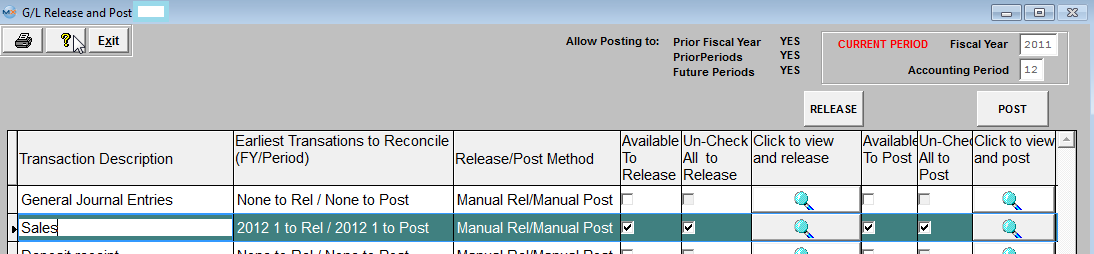 Click on one of the magnifying glasses under the "Click to view and post" and the following Posting screen will appear: (Note: The screens may vary in appearance by the type of transaction but basically contain the same information). The transactions that have been released and waiting to be posted to the general ledger will appear in the first (left) grid. The data can be sorted in various ways by clicking on the column headers that are in bold font. Some types of transactions allow drill down to the originial form such as Invoice No, Purchase Order, Sales Order, Work Order, etc. The detail of each transaction will be displayed in the second (right) grid with the GL number and the Debits and Credits. User can select a date range filter to display only those transactions within a given period of time, by entering different Beginning Date and/or Ending Date and depressing the "Display Records" button. Transactions that cannot be posted because of restrictions for past or future period posting will be shaded in RED.
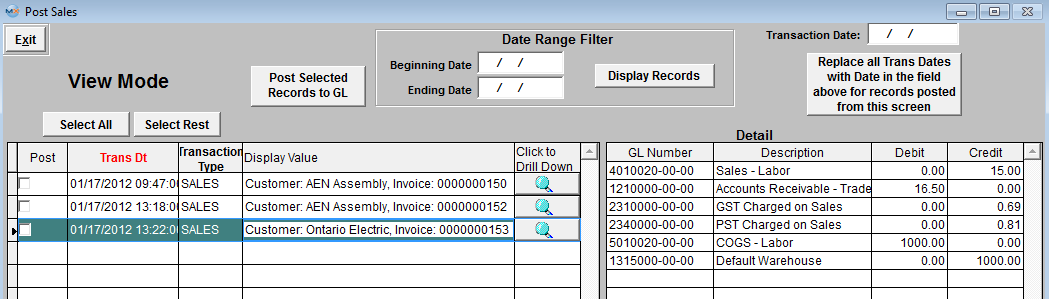 Select the files to be posted by checking the box under the "Post" column or depressing the "Select All" toggle buttons to Select/Deselect transactions to be posted.
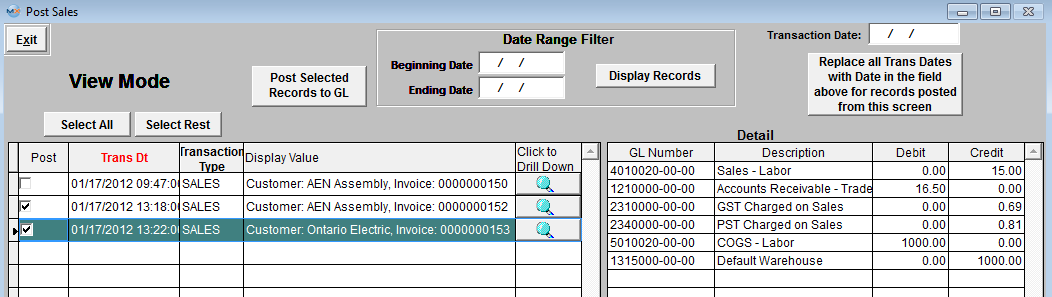 One you have selected the records to be posted, Depress the "Post Selected Records to GL". The records not selected to be posted will stay on screen, the records selected to be posted will be removed from the post screen and will create a Transaction record as the one displayed below:
|


| 1.3.4.1.5. Reports-Variance | ||||||||||||||||||
The following screen will appear:
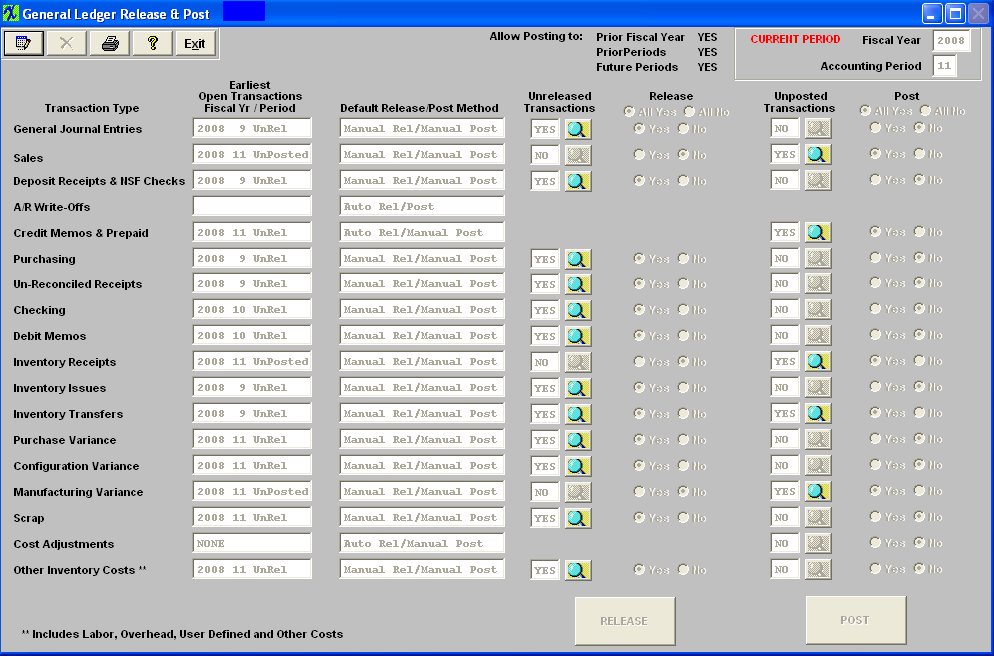
Configuration Variance Detail Report by Work Order No for all Transactions or Configuration Variance Detail Report by Part No for all Transactions
The following report will print: (Note: Report may view differently, depending on Report Selection):
 Posted Configuration Variance Detail Report by Work Order No or Posted Configuration Variance Detail Report by Part No
The following report will print: (Note: Report may view differently, depending on Report Selection):
 Manufacturing Variance Detail Report by Work Order No for all Transactions or Manufacturing Variance Detail Report by Part No for all Transactions
The following report will print: (Note: Report may view differently, depending on Report Selection):
 Posted Manufacturing Variance Report by Work Order No or Posted Manufacturing Variance Report by Part No
The following report will print: (Note: Report may view differently, depending on Report Selection):
 Purchase Variance Detail Report by PO or Purchase Variance Detail Report by Supplier for Variance Transactions Only or Purchase Variance Detail Report Posted
The following report will print: (Note: Report may view differently, depending on Report Selection):
 Standard Cost Adjustment Report Posted to GL by Part No or Standard Cost Adjustment Report Not Posted to GL by Part No
The following report will print: (Note: Report may view differently, depending on Report Selection):
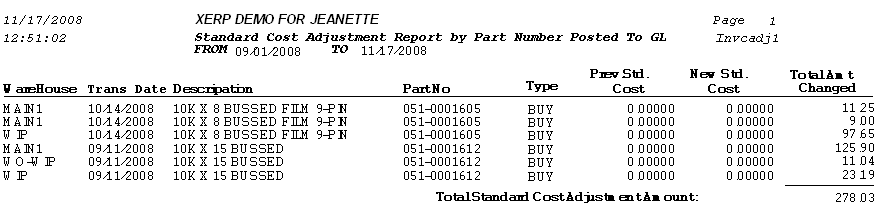
|
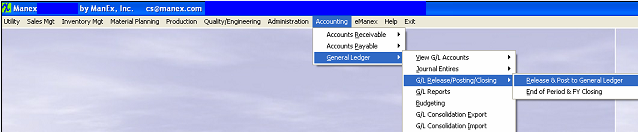

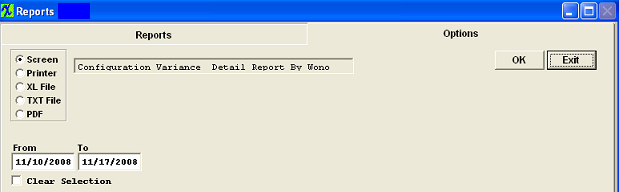
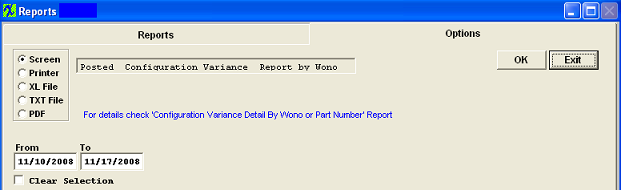

| 1.3.4.2. End of Period & F/Y Closing |
| 1.3.4.2.1. Prerequisites for the End of Period & FY Closing |
All transactions MUST be released and posted before the "Close Period/Fiscal Year" button will be enabled.
Users MUST have full rights to the "End of Period and FY" in Accounting Security . Users with “Accounting Security Supervisor” rights will automatically have access. Fiscal year end closing is a multi step process. First go through all of the normal Period End Closing routines. Print off all of the desired GL Reports , including a Year End Trial Balance Report. |
| 1.3.4.2.2. Introduction for the End of Period & F/Y Closing |
The closing of the final period of a fiscal year serves to close the fiscal year itself and to reset the current balance entries. All of the Income Statement Accounts will zero out and post into the Retained Earnings Account.
You do not have to close the fiscal period or fiscal year on the last day of that period. We do not recommend keeping the periods open for months, but it is okay to spend some time (couple weeks) to go review your accounts/numbers before closing. Production does not need to stop in order for you to close the prior period/fiscal year. In Manex system, even if the prior period is still open anything production does their transaction is time stamped for the fiscal period the transaction happened in. Example; I have not yet closed fiscal period 3 (March 1st- March 31st) but today's date is April 16th so any transactions done will be in Fiscal Period 4
Again you can see my current period open is Period 3 but I have transactions done in April so they will be posted to Fiscal Period 4 when released and posted. Production can continue to work even if accounting is reviewing prior periods.
|


| 1.3.4.2.3. How To ...... for the End of Period & F/Y Closing |
| 1.3.4.2.3.1. Close End of Period | ||
The following screen will appear displaying the unreleased or unposted transactions. NOTE: If there are any transactions for the current period that have NOT been released and/or posted the "Close Current Fiscal Period/Year" button will be disabled. Once all the transactions for the current period have been released and/or posted the "Close Current Fiscal Period/Year" button will be enabled. Depress this button and the following message will be displayed:
Select "Yes" to continue and system will check for any auto distribution transactions.
Select "No" system will proceed with the closing process without generating auto distribution transactions for the current period.
Select "Cancel" this will abort the closing process.
After selecting "Yes" if any auto distribution transactions are found they will be displayed and need to be Approved at this time.
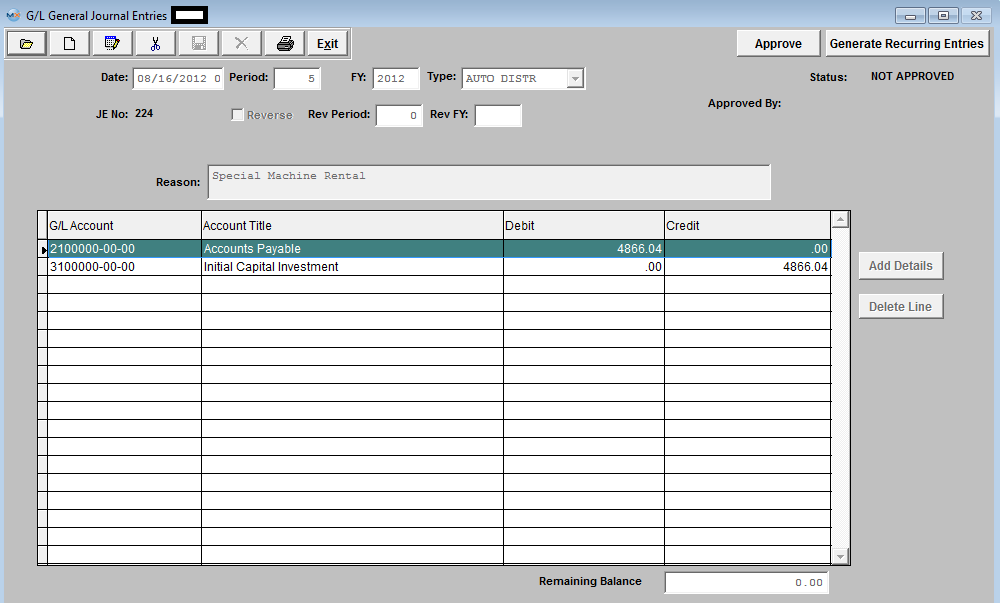 Once the Auto Distributions are Approved, the screen will update to next period.
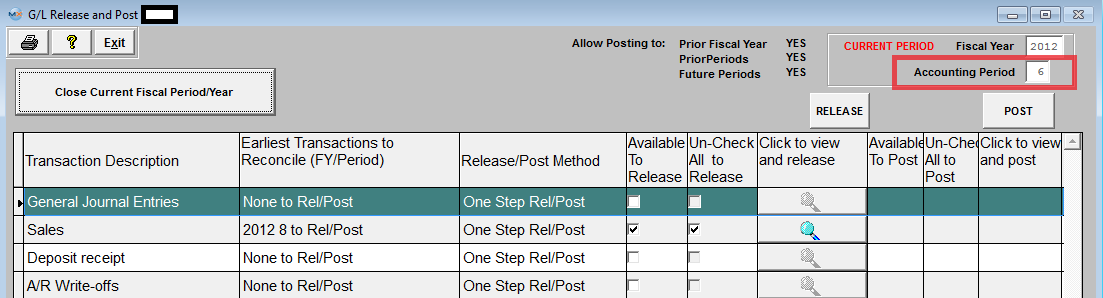 |
| 1.3.4.2.3.2. Fiscal Year Closing | ||
The following screen will appear displaying the unreleased or unposted transactions. NOTE: If there are any transactions for the current Fiscal Period/Year that have NOT been released and/or posted the "Close Current Fiscal Period/Year" button will be disabled. 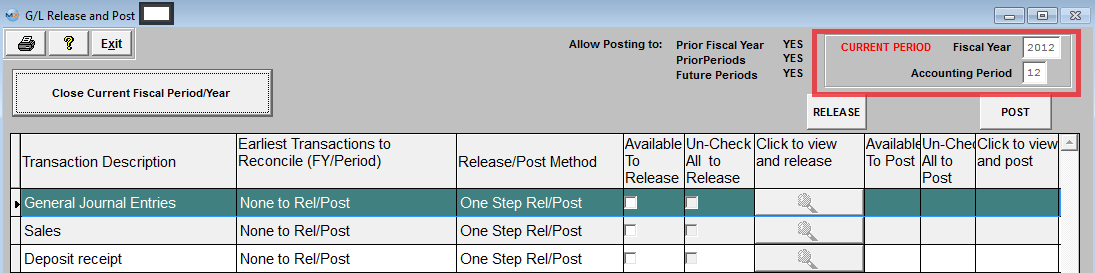 Once all the transactions for the current Fiscal Period/Year have been released and/or posted the "Close Current Fiscal Period/Year" button will be enabled. Depress this button and the following message will be displayed:
Select "Yes" to continue and system will check for any auto distribution transactions.
Select "No" system will proceed with the closing process without generating auto distribution transactions for the current period.
Select "Cancel" this will abort the closing process.
After selecting "Yes" another message will appear giving user the option to close the fiscal year with or without generating the closing journal entries....
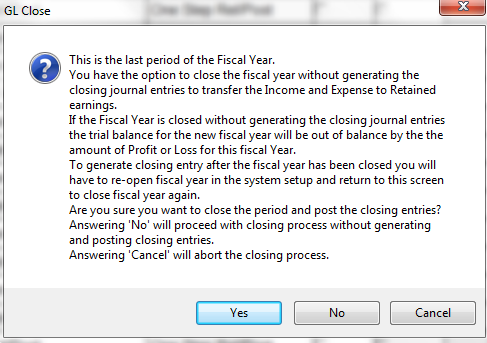 After selecting "Yes" all the closing journal entires are found they will be displayed and need to be Approved at this time.
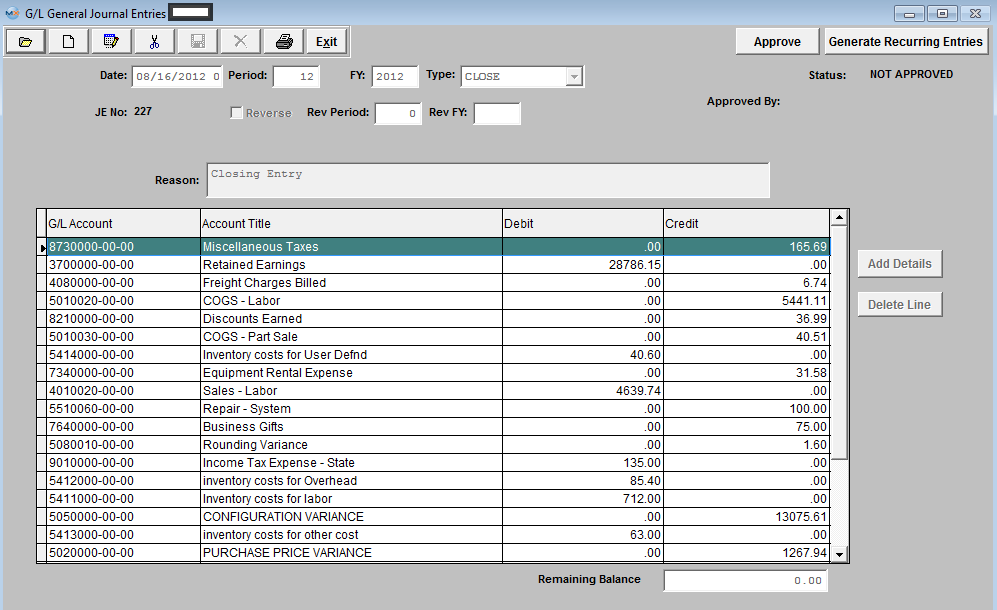 Once they are Approved, the screen will update to next period.
 |
| 1.3.5. General Ledger Reports |
| 1.3.5.1. Prerequisites for the GL Reports | ||||
Prerequisites Required GENERAL LEDGER activity:
The account information for the General Ledger must be established in the Accounting Setup . Users MUST have full rights to the "View GL Activity/Reports" in Accounting Security . Users with “Accounting Security Supervisor” rights will automatically have access. |
| 1.3.5.2. Introduction for GL Reports |
OVERVIEW
General Ledger reports are defined in 4 main categories: 1) Static Informational Reports 2) Account Inquiry Reports 3) Summary Reports 4) Posting Reports STATIC INFORMATIONAL REPORTS Static Informational Reports are reports allowing the user to review information entered during the setup phase of the general ledger. Currently the only static informational report is the Chart of Accounts.
|
| 1.3.5.3. How To .... for the GL Reports |
| 1.3.5.3.1. Chart of Accounts | ||||||
Enter the SQLMANEX.EXE (within the ManEx root directory) The following screen will be displayed, enter the Accounting/General Ledger/G/L Reports The following screen will appear:
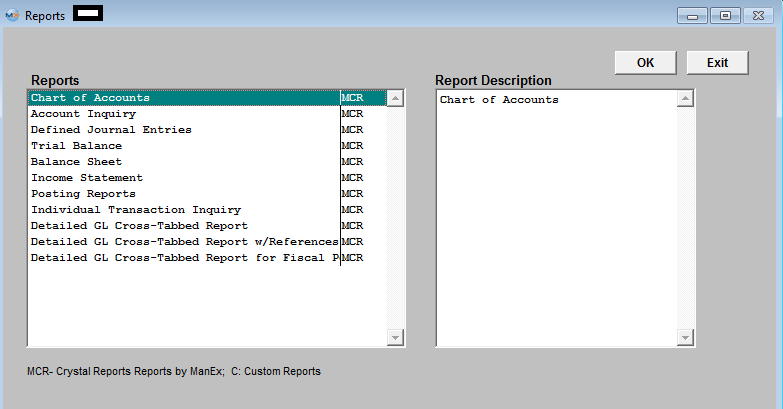 Select the Chart of Accounts report. Then depress the OK button, the following report will be displayed. 
ACCOUNT INQUIRY REPORTS - Account inquiry reports are on-screen reports allowing transaction viewing from summary for a particular account through detail as posted in the associated journal.
The following report will be displayed.
|

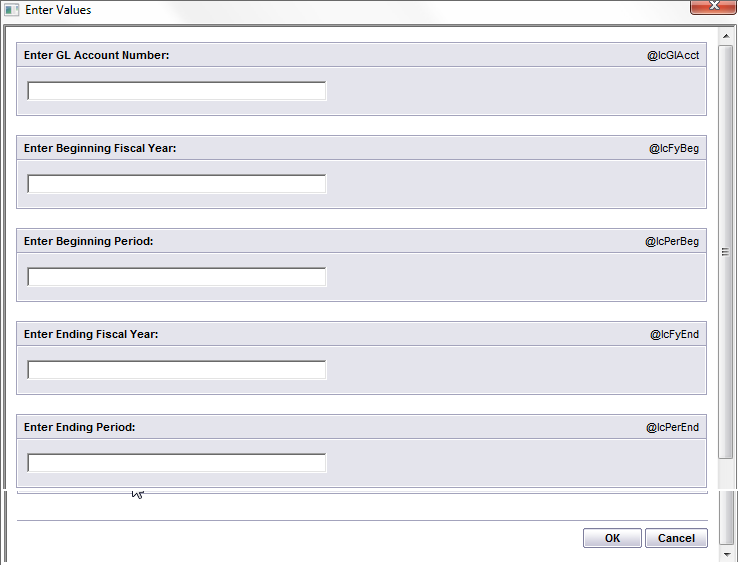
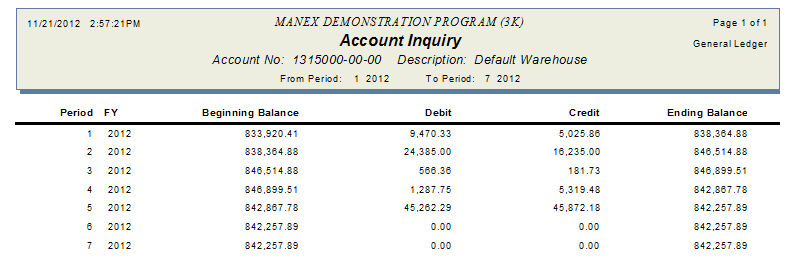
| 1.3.5.3.2. Journal Entries | ||||||
The following screen will appear:

The following report will print: 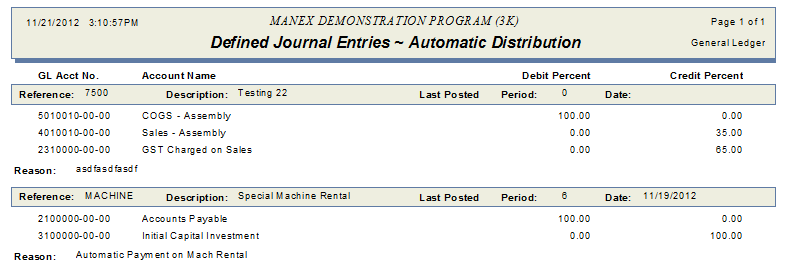
|
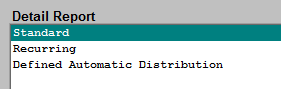
| 1.3.5.3.3. Trial Balance | ||||||||
The following screen will be displayed: 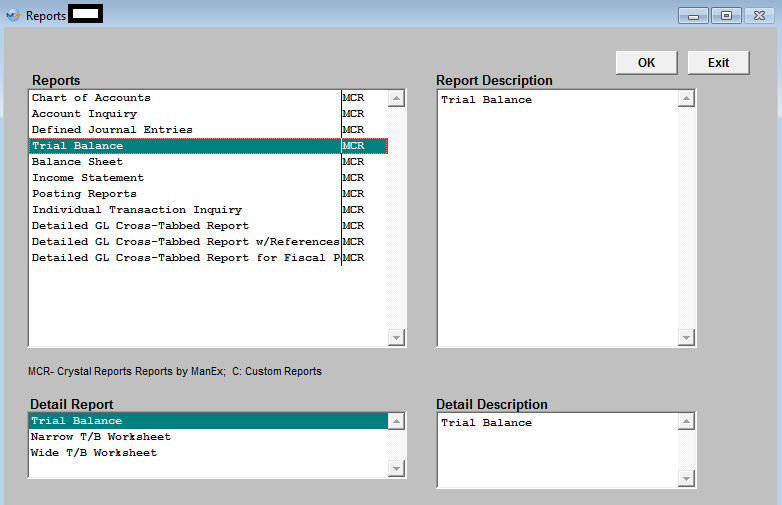
Depress the OK Button and the following report will be displayed (Basic Trial Balance Report) 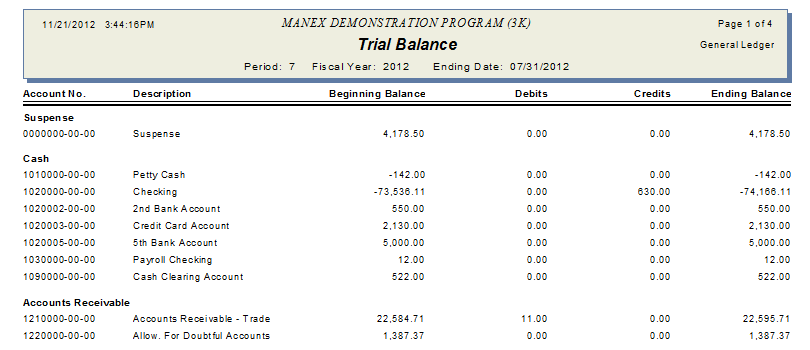
|
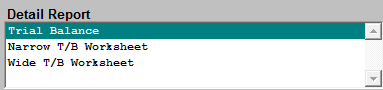
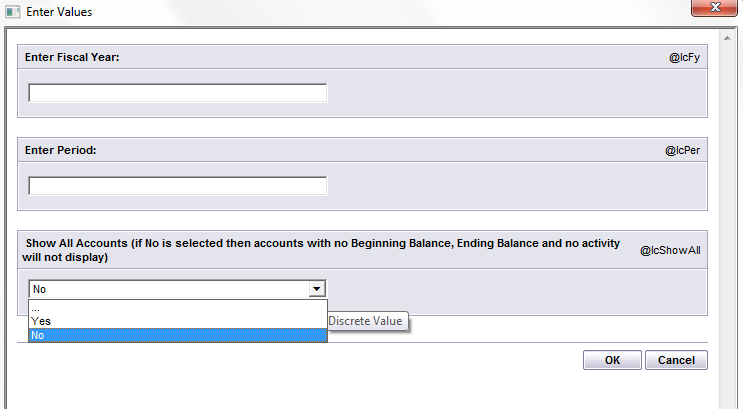
| 1.3.5.3.4. Balance Sheets | ||||||||
The following screen will be displayed: 
OVERVIEW
Balance Sheet reporting provides for the printout of ending balance values in a standard format as defined by the user. The Account Type, Account setup and report default definition is defined in the setup modules for the General Ledger . Current period report provides a single column of output while the comparative reports provide for two columns of data to compare one set of data with another. For example, one may compare the current period with the prior period, current period with same period in the previous year, current period and year to date, etc. The three Consolidated reports available are for the users that have multiple divisions setup within the ManEx system. They are the same as the individual balance sheets, but these reports consolidate multiple division into one report.
Note: If the user is having problems with the totaling within the Balance Sheet, the following is the way that the accounting normal balances are established within the ManEx General Ledger Account Ranges for the printing of the financial statements. All asset accounts must be set up with the normal balance value as DEBIT, including contra accounts.The system doesn’t distinguish between a liability and a contra asset on the balance sheet, therefore any contra asset must be identified with a normal balance of debit. This does not mean that the system will treat contra assets as normally having an accounting balance of debit. The debit in this field signifies only that it is part of the asset group and not a part of the liability group for the purpose of printing of the financial statements.
The following report will be displayed (Current BalanceSheet)
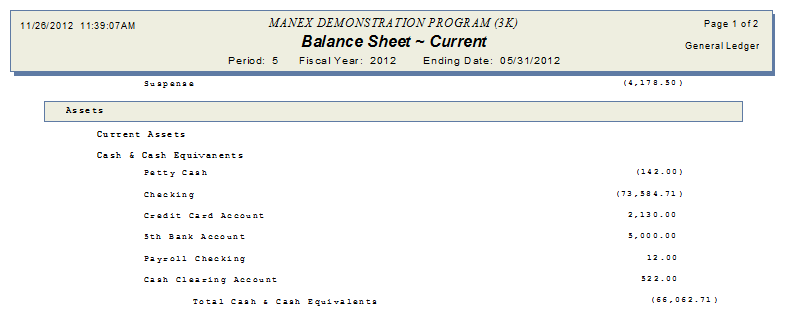 Note: Your Checking amount may not always match your Bank Balance. For more detail see Article #3262 .
|
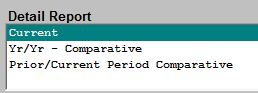
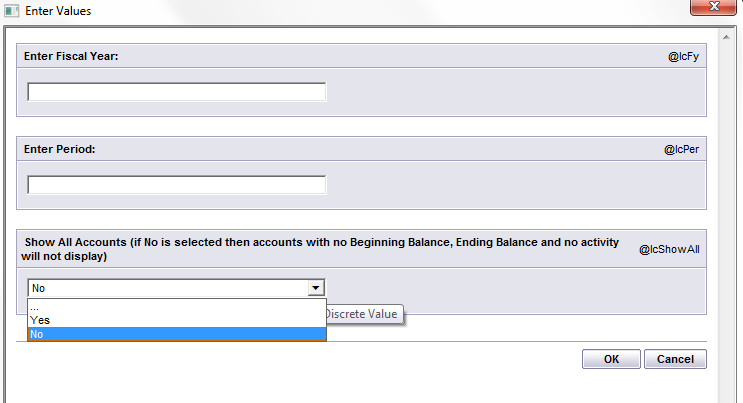
| 1.3.5.3.5. Income Statements | ||||||||
The following screen will appear: 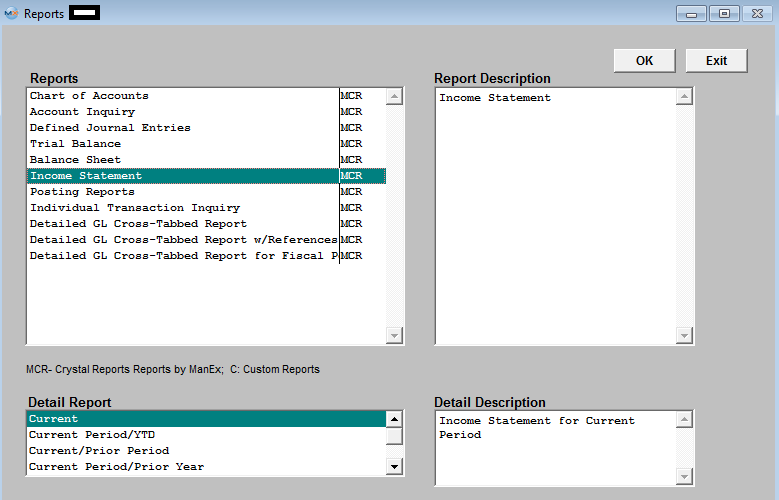
OVERVIEW Income Statement reporting provides for the printing of a single period income statements as well as the more traditional period based reports. The Comparative reports provide for two columns of information, for comparative purposes.
The following report will be displayed. (Current) (The numbers displayed in parenthesis are negative or Debits) 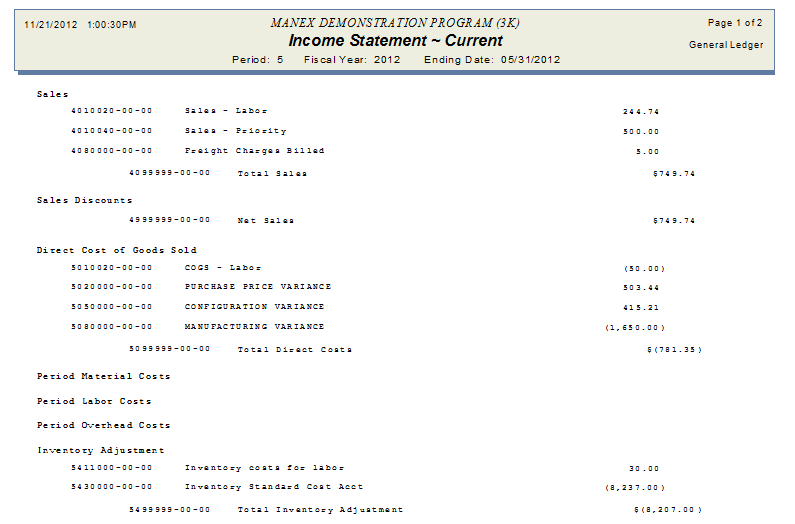
|
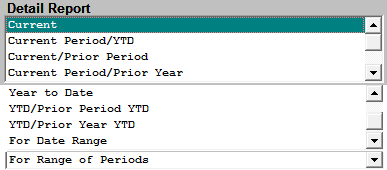
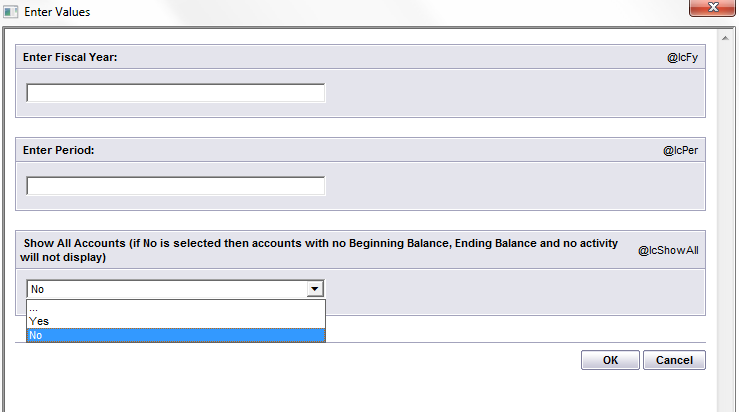
| 1.3.5.3.6. Posting Reports | ||||||||
The following screen will be displayed: 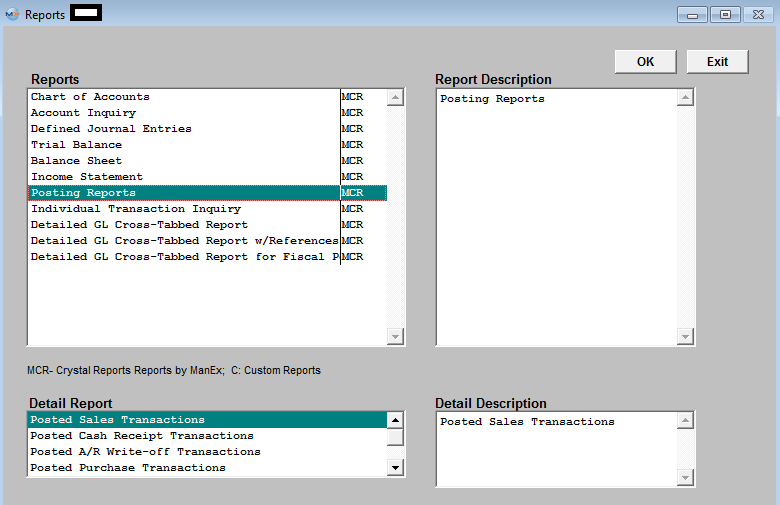
The following report will be displayed:
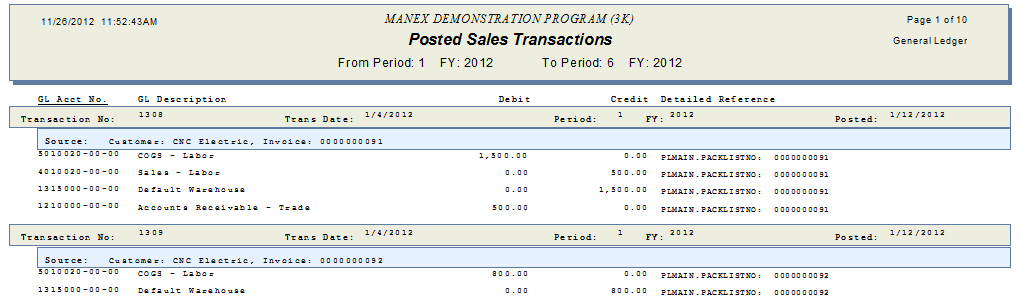 |
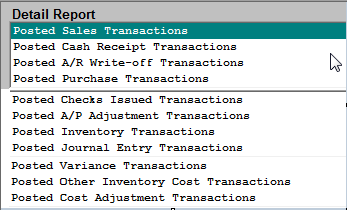
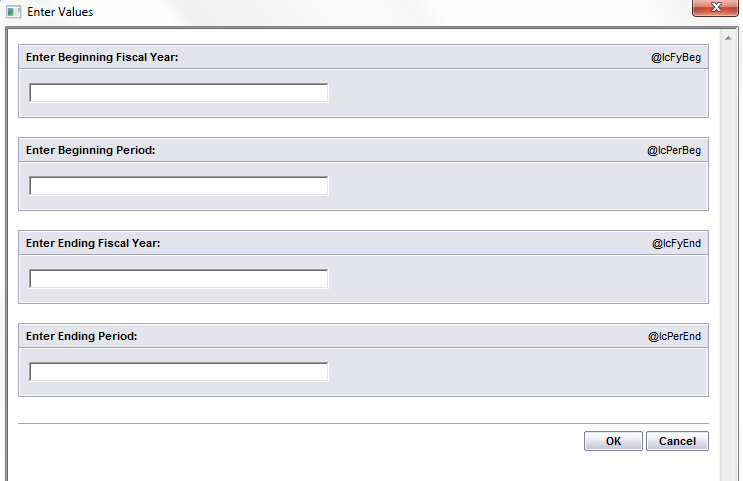
| 1.3.5.3.7. Individual Transaction Inquiry | ||||||
The following screen will be displayed: The Individual Transaction Inquiry is a sister report to the Detailed GL Cross-Tabbed reports, it provides the full entry as referenced by the transaction number, which the user has obtained in the View G/L Activity or the Detailed GL Cross-Tabbed Reports.
The following report will be displayed:
|
| 1.3.5.3.8. Detailed GL Cross-Tabbed Reports | ||||||
The following screen will be displayed:
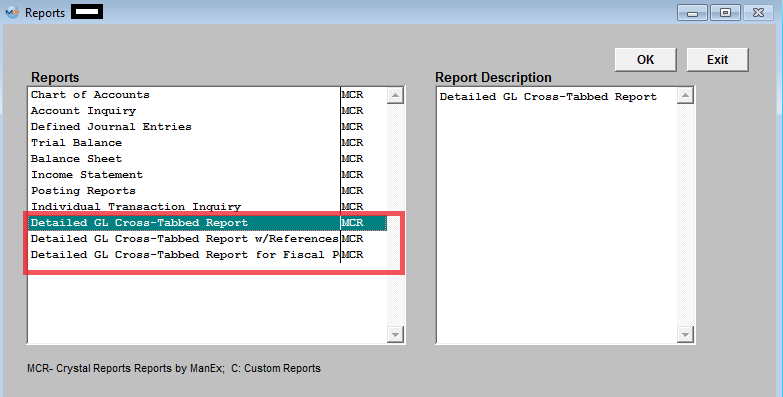 The "Detailed GL Cross-Tabbed Reports" and "Individual Transaction Inquiry" are available for the user to drill down into the source of the transaction, which was posted to the General Ledger.
The Detailed GL Cross-Tabbed Reports provides a way to trace activity posted to all accounts during a given date range based on the Transaction date NOT the Posted Date.. The report is sorted by account number so you may see what amounts were posted to the account. A reference number is provided to assist in finding the balancing entries.
NOTE: If user happens to Transfer product back and forth (for example: if user transfers 5 into FGI, then transfers the same 5 back into Stag, then transfers the same 5 back into FGI again) the Total Qty transferred on the "GL X-Tabbed w/Reference" report will reflect 15 which is how many total qty's were transferred. The transaction value itself will be for the quantity of 5, but the reference info will be reflecting the quantity of 15. If users see this on the "GL X-Tabbed Report w/Reference" report, they may want to check the transfer history by highlighting the FGI work center and depressing the "Xfer History" button located in the Shop Floor Tracking module. This will display all the transactions that happen even though it was the for the same quantity.
Highlight one of the Detailed GL Cross-Tabbed Reports from the menu.
The following report will be displayed.
Note: "Missing Information" could mean that the inventory part number that was assoicated to this transaction has been deleted from the system.
|
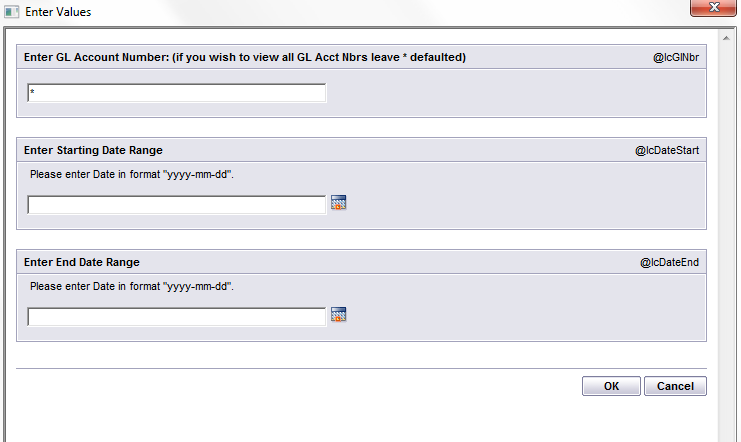
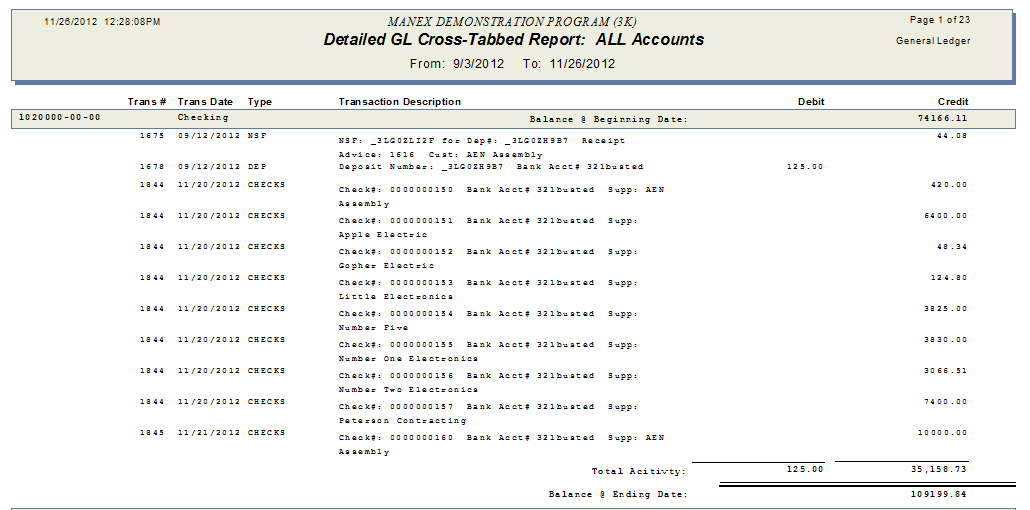
| 1.3.5.3.9. Process for comparing Valuation reports against GL Acct balances |
Before attempting to compare the GL Account Values to any of the Valuation reports (example Inventory Valuation, Unreconciled Receipt, etc. . ) throughout the system you need to make sure that the following has been done.
|
| 1.4. Bank Reconciliation |
| 1.4.1. Prerequisites for Bank Reconciliation |
|
Users MUST have full rights to the "Bank Reconcilliation" in Accounting Security . Users with “Accounting Security Supervisor” rights will automatically have access. |
| 1.4.2. Fields & Descriptions for Bank Reconciliation |
| 1.4.2.1. New Statement Information | ||||||||||||||||||||||||||
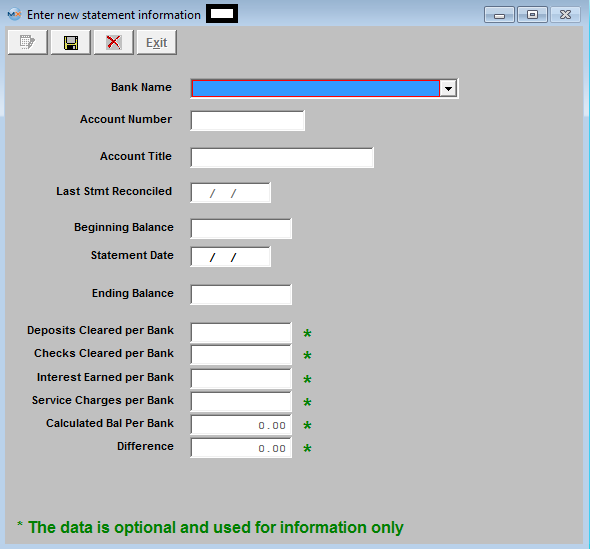 Bank Reconciliation Enter New Statement Information Field and Definitions:
|
| 1.4.2.2. Deposits Tab | ||||||||||||||||||||||||||||||||||||||||||||||||||||||||||||||||||||||||
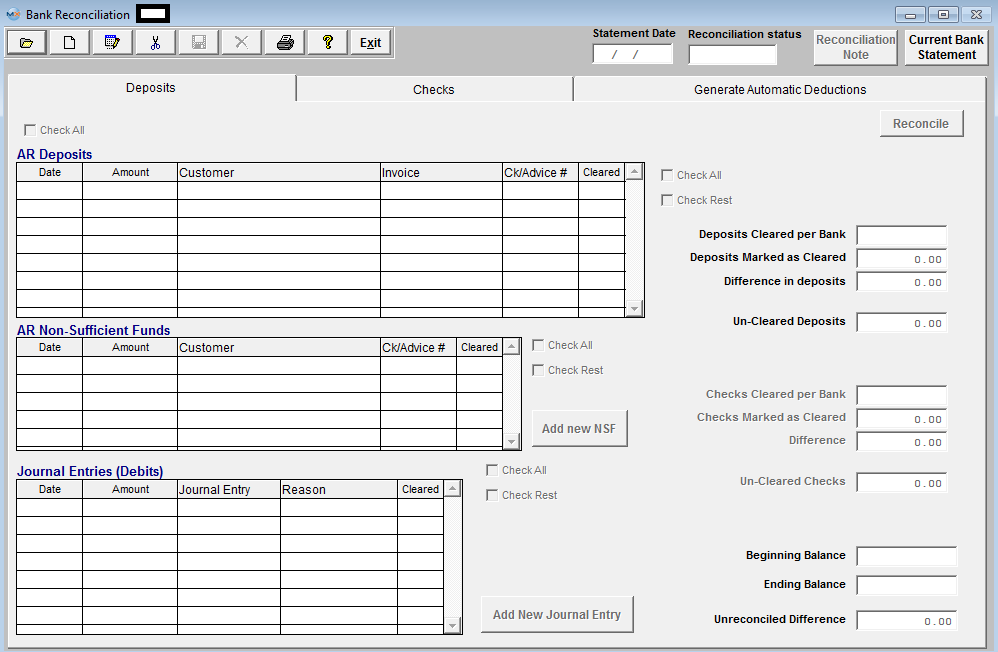 Field Defintions - Bank Reconciliation Deposits tab:
NOTE: Users
have the ability to sort by all the grids.
If you click on the same header twice the sort order will switch from
ascending to descending.
AR Deposits
AR Non Sufficient Funds
Journal Entries (Debits)
|
| 1.4.2.3. Checks Tab | ||||||||||||||||||||||||||||||||||||||||||||||||||||||||||
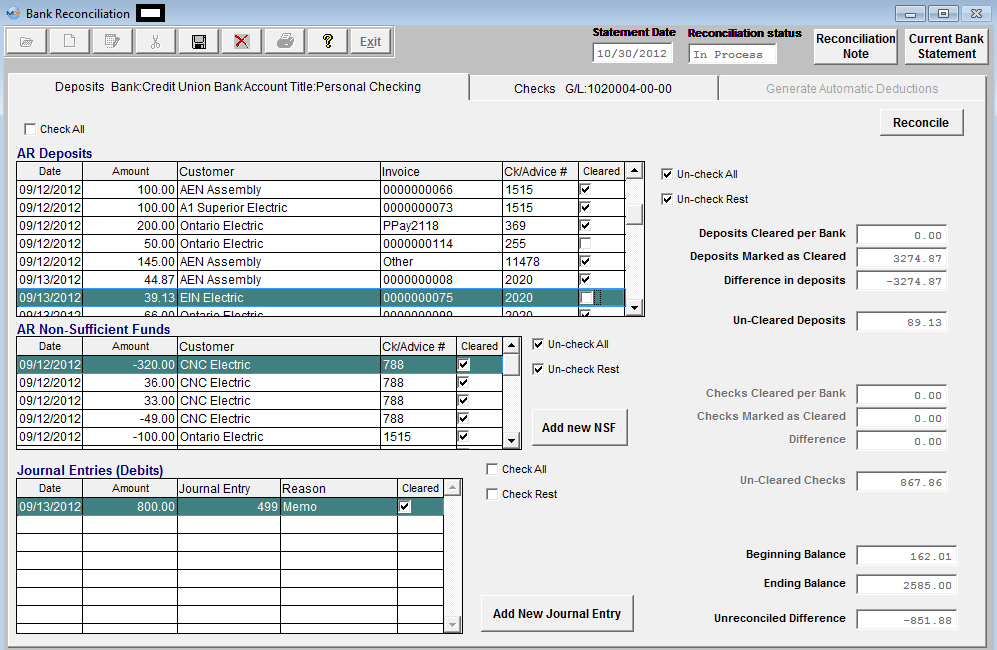 Field Defintions - Bank Reconciliation Checks tab:
NOTE: Users
have the ability to sort by all the grids.
If you click on the same header twice the sort order will switch from
ascending to descending.
AP Check
Journal Entries (Credits)
|
| 1.4.2.4. Generate Automatic Deductions Tab | ||||||||||||||||||||||||
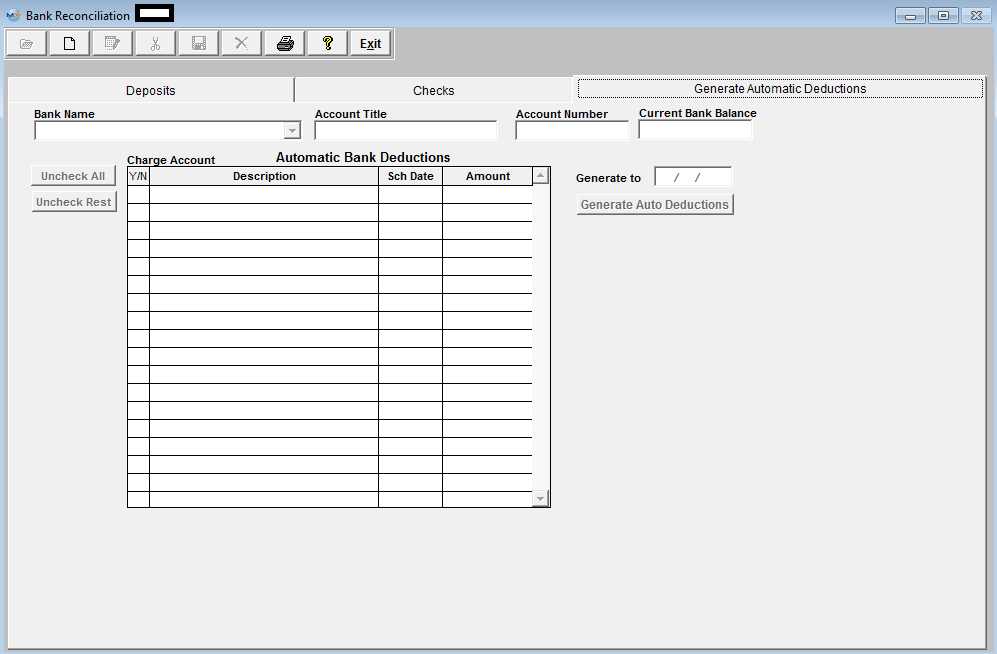
Automatic Bank Deductions
|
| 1.4.3. How To .... for Bank Reconciliation |
| 1.4.3.1. Add a New Bank Reconciliation | ||
Creating a New Bank Reconciliation
The following screen will appear: Depress the Add button to add a New Bank Reconciliation, enter password and the following screen will be displayed:
Select the Bank of your Choice from the Pull Down and the Bank Account Info will default in along with the Last Stmt Reconciled date and Beginning Balance:
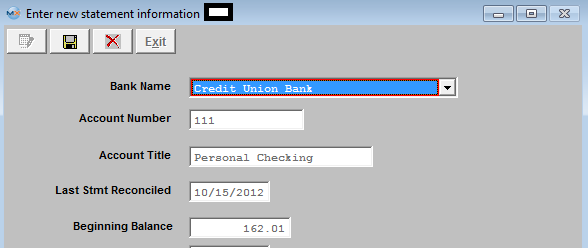 User will then need to enter in the Statement Date and Ending Balance from their Bank Statement. They may enter data into the other fields for their information only if applicable.
 Depress Save
 Generate any Automatic Deductions you want to include in this Bank Reconciliation and these will be displayed on the checks tab as shown below:
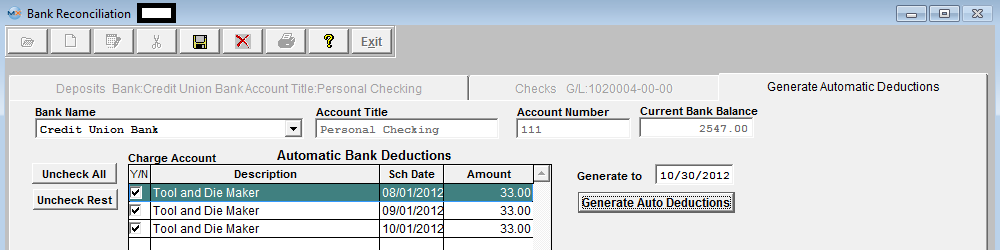 Check the Deposits, AR Non_Sufficient Funds and Journal Entries you want to clear
Check the AP Checks, Auto Ded, and Journal Entries you want to clear
Depress the Reconcile button and the following warning will be displayed (notice in the screen above that I have an Unreconciled Difference of -92.70):
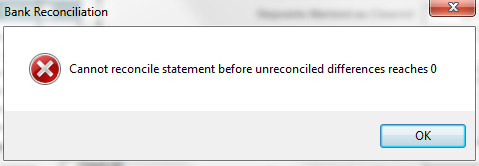 Depress the "Add New Journal Entry" button to Create a Journal Entry of $92.70 to Balance Checking
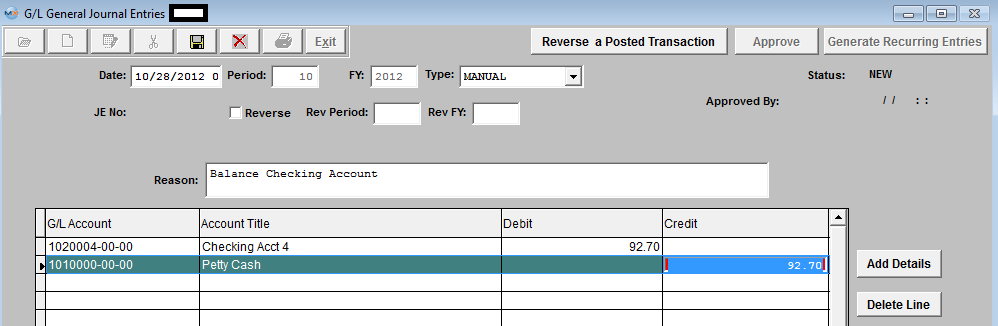 Save and Approve JE
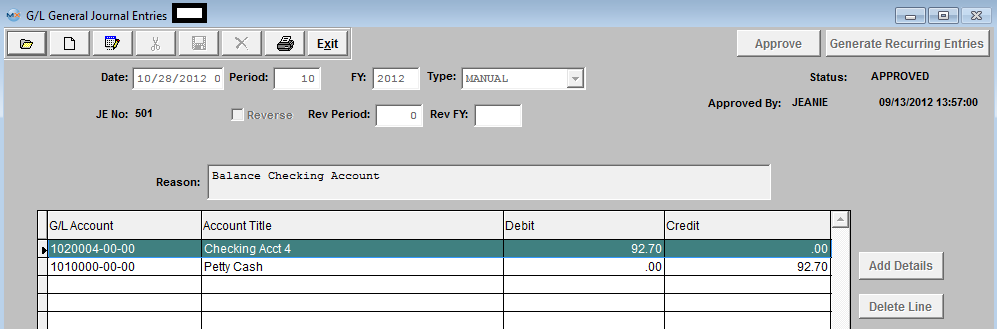 When exiting the JE screen the following message will be displayed:
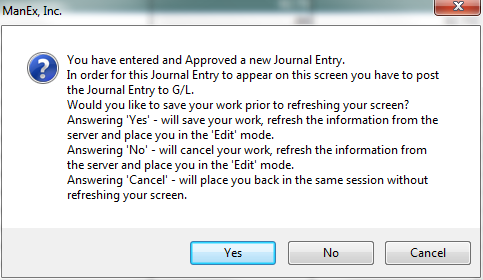 Select "Yes" to continue.
To refresh Bank Reconciliation screen so the Journal Entry created will be displayed, user must first Save then Edit
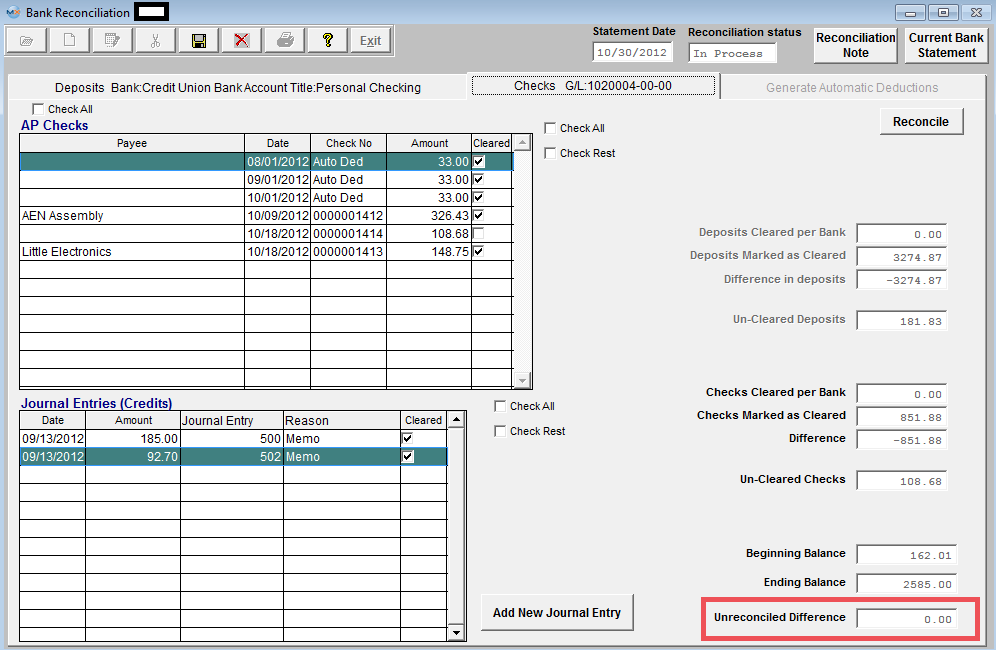 Once the Journal Entry has been cleared and the Unreconciled Difference = 0
Account can be Reconciled
If a Bank Reconcilitation record is In-Process for the Bank selected the following message will be displayed:
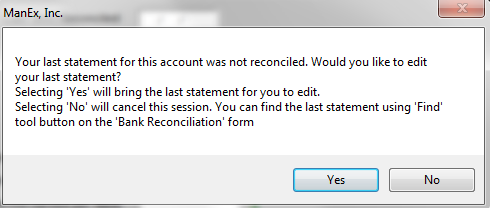 You will then have the choice of editing the last statement or statement that has a status of In-Process, or cancelling this session. If you select "Yes" the Statement information for the Bank Account that is In-Process will be displayed:
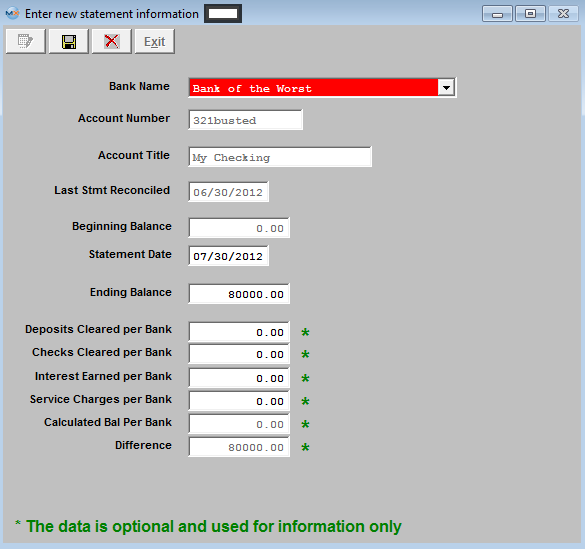 User may edit some of the information within this screen if applicable then depress the Save button or abandon changes button.
 |

| 1.4.3.2. Find and Edit a In-Process Bank Reconciliation | ||
Subsequent Bank Reconcilliations
The following screen will appear: Depress the Edit button, enter password and the following screen will be displayed:
Highlight the bank of your choice:
If no Records are found the following message will be displayed:
 If records are found the following Information will be displayed:
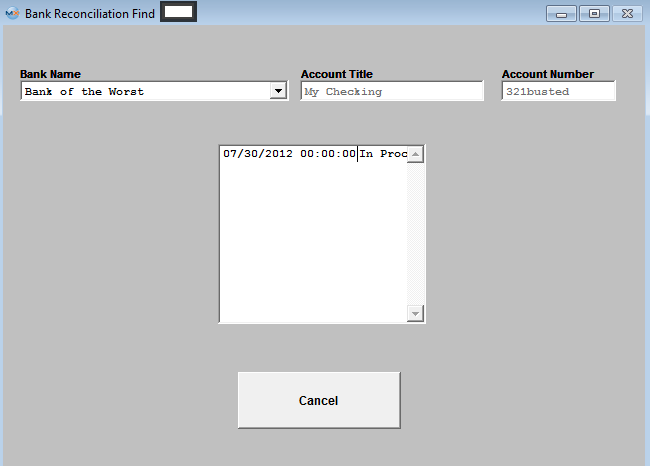 Click on the record In-Process and all All of the pertinent information will automatically load.
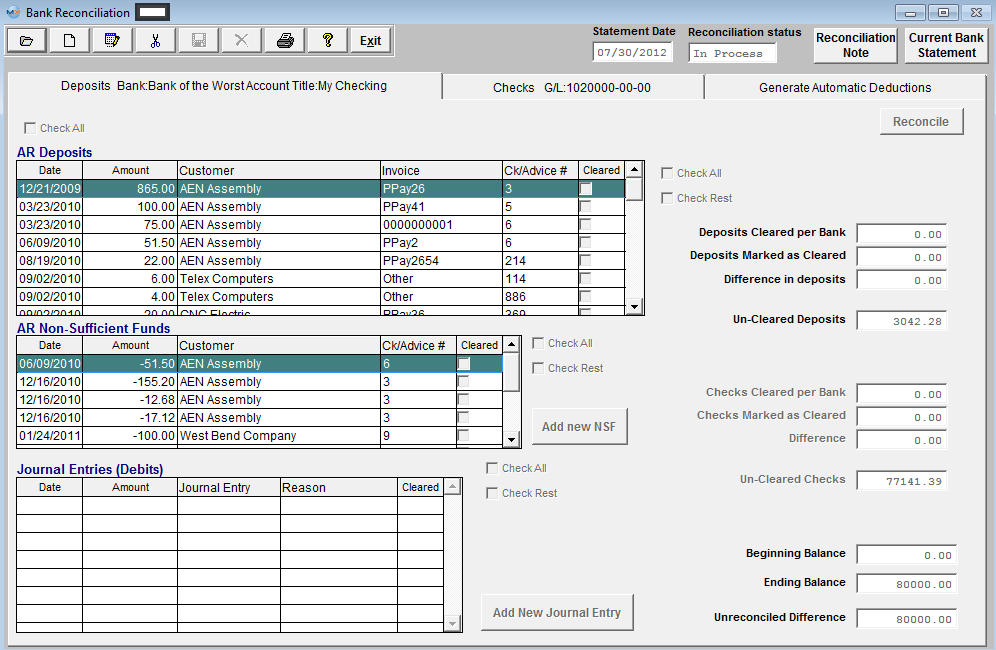 |
| 1.4.3.3. Generate Automatic Deductions | ||
Upon entering the Bank Reconciliation module, the following screen will display: Note that the Generate Automatic Deductions tab is enabled.
Click on the Generate Automatic Deductions tab and the following screen will appear:
To generate an automatic deduction, depress the Add button and enter your password. Depress the down arrow next to the Bank Name field. Select the appropriate bank. The Account Title, Account Number and Current Bank Balance will fill in automatically. Enter in the date you want to generate to and depress the Generate Automatic Deductions bar.
The list of all of the automatic bank deduction will appear. In the Y/N field, check the ones you want to be generated.
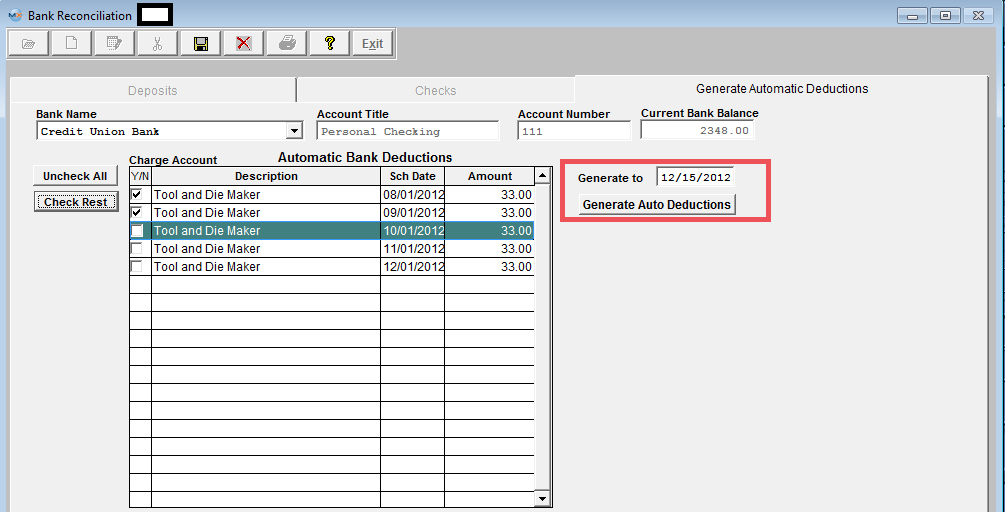 Depress the Save button. |