| 1. Material Planning |
| 1.1. Purchase Order Management |
| 1.1.1. Purchase Order Management |
| 1.1.1.1. Prerequisties - PO Mgmt | ||||||||||||||||||||||
After activation, "Purchase Order Management" access for each user must be setup in the ManEx System Security module. Users with “Supervisor Rights” will automatically have access.
Optional Prerequisites for Entering a New PURCHASING
|
| 1.1.1.2. Introduction for PO Mgmt |
The PURCHASING Module is the place where all procurement is done. This module allows the user to add purchase orders to the system, and to add items to each purchase order. Edit functions are available both at the purchase order level and at the item level. The process begins by selecting a Regular PO or an In-Store PO, then selecting a supplier for the order. The supplier is selected from a list of suppliers established in the Supplier Information module. After selecting a supplier, the user may enter orders for various types of material. Inventory material is ordered to be placed in on hand inventory and used in the making of product. The user may also select MRO parts, parts which are not kept in inventory, but are expensed as they are purchased and distributed to the requester when they are received. (MRO parts may be defined in the item master and kept in inventory, if desired.) There is also a selection for Services. The user may add a new part by selecting the part class and type, then choosing from a part matching that criteria, or go directly to the part number edit box and enter the part number without visiting the class and type box. The buyer may have entered a specific manufacturer of the item, providing that the manufacturer and the part number have been entered in the inventory item master. If there is only one manufacturer, that manufacturer will be the default manufacturer entered in the purchase order. If the user is adding an inventory item to the order, the system will add in the details from the item master once the part number is established. Purchased items may have the delivery schedule established for one or more deliveries. The delivery date entered in the purchase order is meant to be the date the material lands on the user’s dock. The user may enter either the stocking quantities based on the stocking unit of measure or the purchasing quantities, based on the purchase unit of measure. If the units of measure are different, the user must have defined the relationship between the different units in the Unit of Measure Conversion. Entering one quantity will automatically calculate and enter the other quantity. The user enters the unit price and whether or not the item is taxable. If it is taxable, the tax percentage will be supplied based on the data entered in the Tax &Shipping Mode tab. The system will display the extended amount of the item on the order based on the quantity and price. Note: If the Tax Information has not been filled in, the Purchase Order will NOT calculate any sales tax. Therefore, it is important that the user set this up properly. The user may define the quantity that may be received over the amount of the order by entering an overage percentage. This will allow incoming receiving to accept quantities up to the amount of overage specified for the order. The user may enter specific notes about the item on the purchase order, to be printed on the order. They may also view and edit any item master notes that may exist for the part, and may also view the procurement history for the part. Once entered, all orders require an approval. The approval authority established in the Purchase Order Authorization tab is used to determine whether or not an individual may approve an order. It is possible to allow two approvals to orders, and to set different approval limits for each of them. Orders will be identified as temporary orders until approved, after which they will have a permanent number assigned. Change orders to purchase orders must also be approved in the same manner. Once an order is changed, it cannot be printed or acted upon until it is approved again. Details about the remittance, delivery point, billing etc. will be completed with Supplier default information, and may be reviewed for the order if necessary. In-Store purchasing overview: In-Store is the situation where the Supplier has placed raw materials in the user’s warehouse. The Supplier still owns the raw materials. When the user is ready to use the Supplier’s raw materials, he/she issues an In-Store Purchase Order. For In-Store POs, the user may select by Supplier or by Part Number. Then the user may find records according to the selection. Once found, the user may create a PO for the In-Store Consumption. In-Store Purchasing also includes receiving. |
| 1.1.1.3. Fields & Definitions - PO Mgmt | |||||||||||||||||||||||||||||||||||||||||||||||||||||||||||||||||||||||||||||||||||||||||||||||||||||||||||||||||||||||||||||||||||||||||||||||||||||||||||||||||||||||||||||||||||||||||||||||||||||||||||||||||||||||||||||||||||||||||
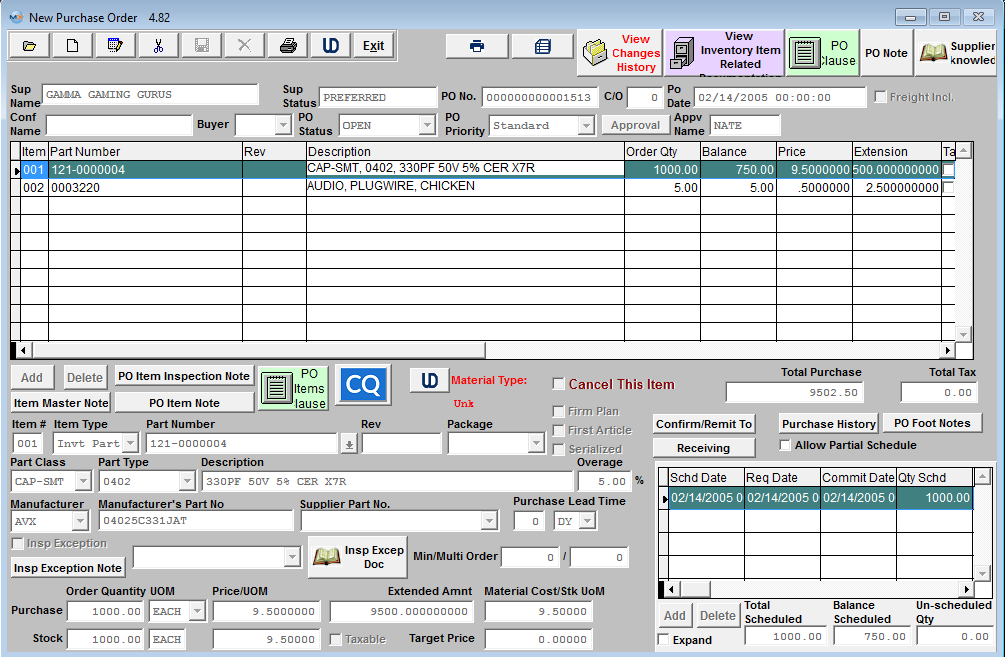
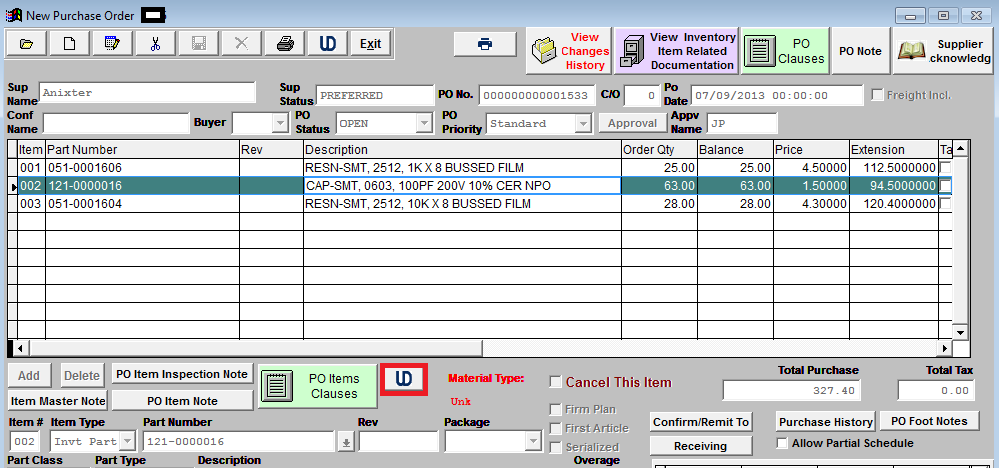
Purchase Order Items
Detail Definitions
Directive Buttons
The following buttons are displayed on the Purchase Order Screen.
After a purchase order is created or edited, it must be approved before it can be printed and issued to a supplier. Certain employees may be granted authority to approve purchases up to a certain total dollar value. Those authorized personnel may approve purchase orders under that amount. If only one signature is required, the order will be finalized and released. If it is a new order, and automatic PO numbering is enabled, Manex will assign the next available number to the order. The action is taken by clicking on the Approval button and responding with an authorized password.
If two signatures are required in order to release a purchase order, then a second person with approval authority for the amount of the order must approve the order, by clicking on the Final Approval button and responding with an authorized password.
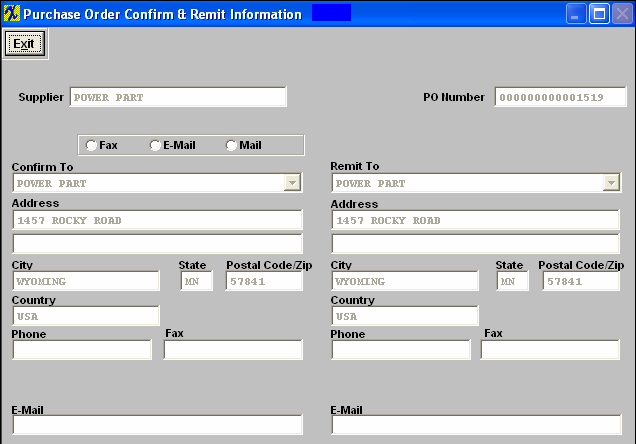
Confirm/Remit Screen Field Definitions
CONFIRM TO
REMIT TO
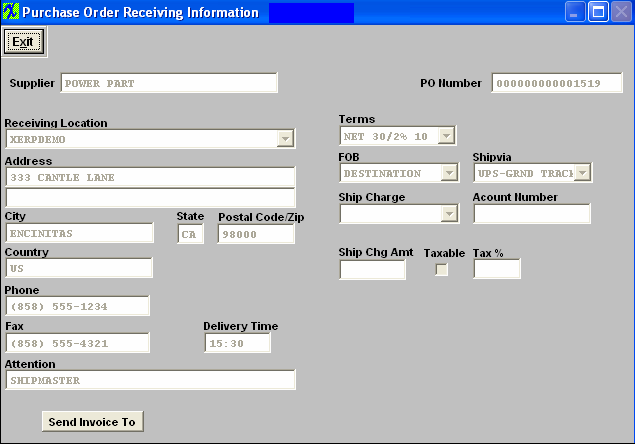 Receiving Screen Field Definitions
|
Supplier
The supplier or vendor with whom the order was placed. |
|
PO Number
The Purchase Order number of the order. New purchase orders that have not been approved will display a temporary number until approved. |
|
Receiving Location
The company and address to which the order is to be shipped. |
|
Terms
The terms of the purchase order. |
|
FOB
The FOB point for the order. |
|
Ship via
The preferred shipping carrier for the order. |
|
Ship Charge
How the freight costs are to be paid. |
|
Account Number
If needed, the freight company account number for the carrier to charge. |
|
Ship Chg Amt
The shipping charge cost for the order. This is referenced on Purchase Order Forms Only. These amounts wIll not be carried over to the PO Reconcilliation. |
|
Taxable
Indicates if the freight charges are taxable. This is referenced on Purchase Order Forms Only. These amounts wIll not be carried over to the PO Reconcilliation. |
|
Tax %
The tax rate for the shipping charges. This is referenced on Purchase Order Forms Only. These amounts wIll not be carried over to the PO Reconcilliation. |
|
Delivery Time
The preferred delivery time for receipts. |
|
Attention
The name of the person to whom the shipment is directed. |
DIRECTIVE BUTTONS
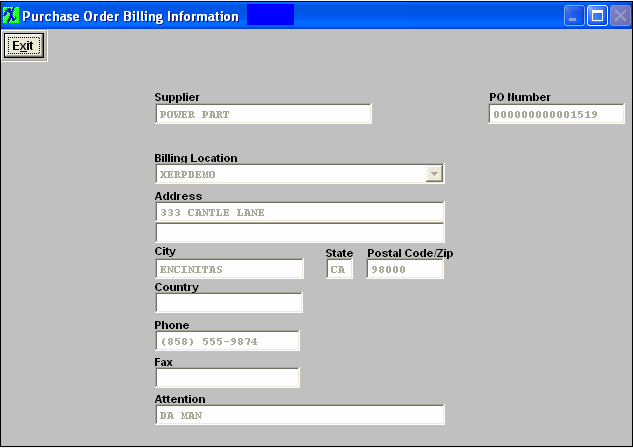 Send Invoice To Screen Field Definitions


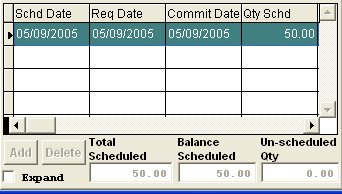
Schedule Field Definitions
|


 button will bring up a screen where the user can enter in specific notes that pertain to that one schedule, item, and date. Type in the note. Depress the Save button. Exit
| 1.1.1.4. How To ..... for PO Mgmt |
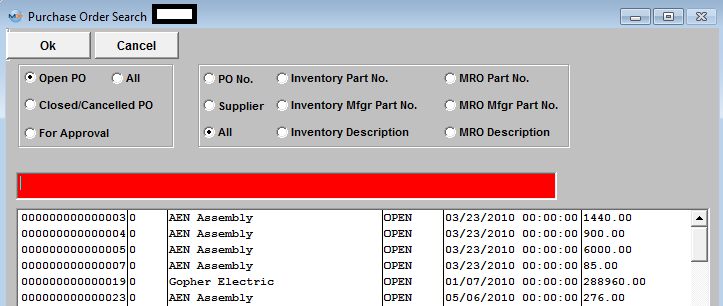
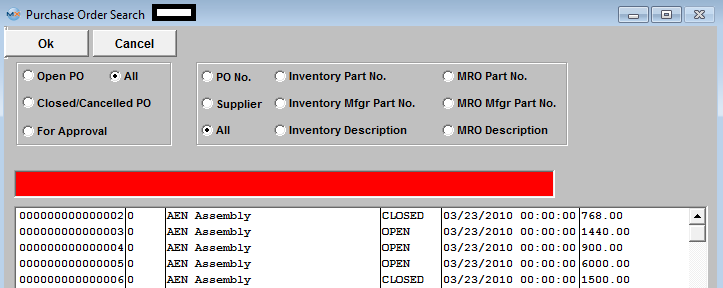
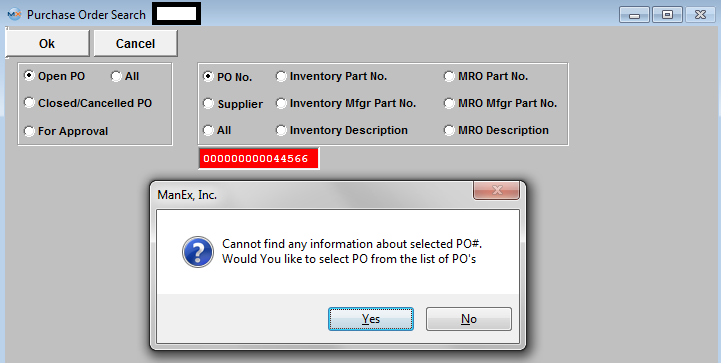
| 1.1.1.4.1. Find a Purchase Order | ||||||||||||
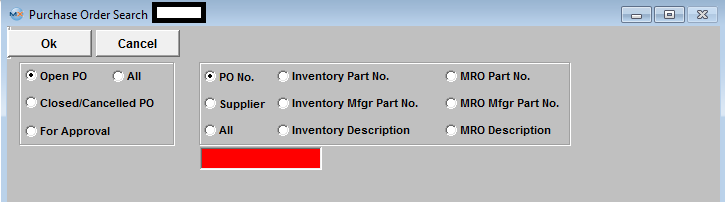
The following screen will be displayed:
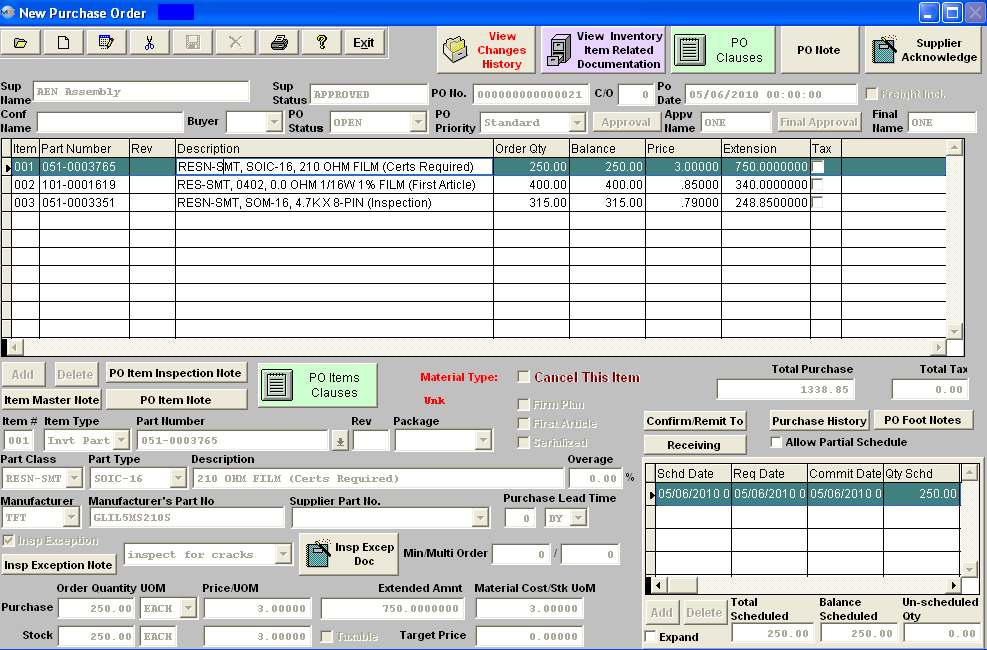
5. After finding the Purchase Order, the Purchase Order screen will be displayed, populated with any parts on order.
|

| 1.1.1.4.2. Add A Purchase Order | ||||||||
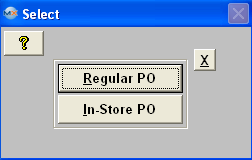
The following screen will be displayed:
After selecting "Regular PO" user will be prompted for their password and the following screen will be displayed:
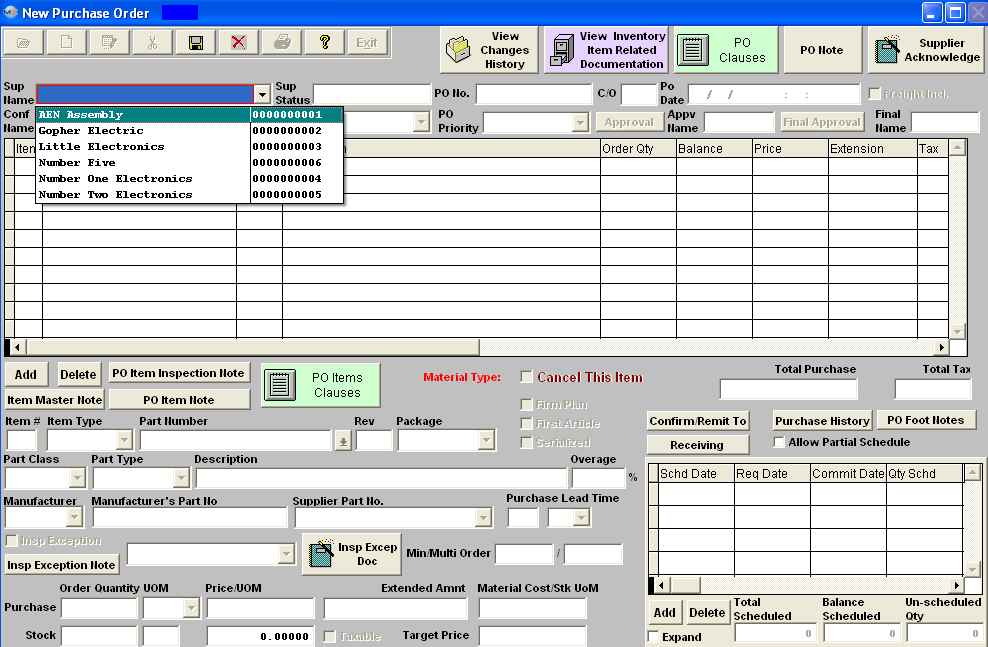 The user must first select the Supplier from the Pull down, and all the head information will default in: 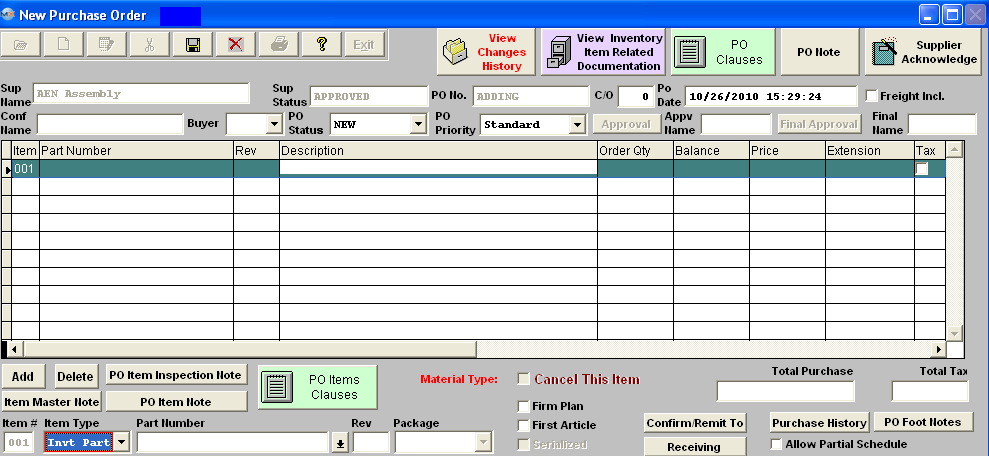 Entering Item Detail Information
|

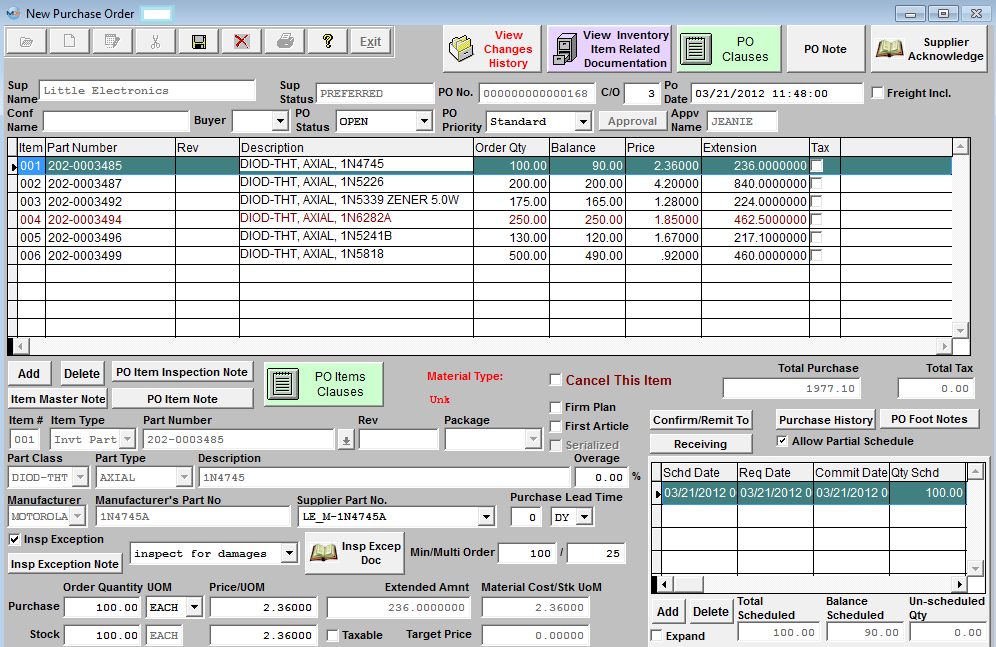
| 1.1.1.4.2.1. Inventory Part | ||||||||||||||||||||||||||||||
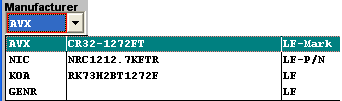
Selecting Inventory Parts as the item type, the user may jump directly to the part number box (click on it) and enter a part number. Or, the user may step through the Part Classes and Part Types to narrow the focus and then select a part from the desired part type. Once a part number from Inventory has been entered, ManEx completes the boxes associated with the item master.
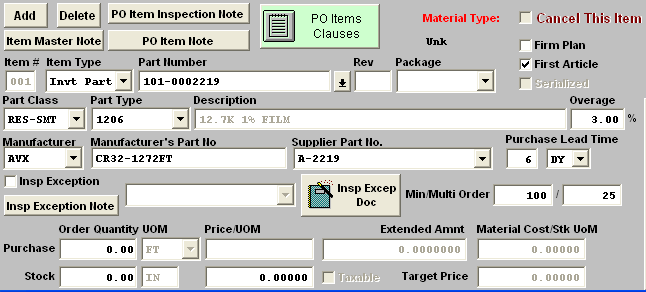
The user may edit or add a percentage amount of extra material that will be allowed to be shipped against the order. By entering a percentage in the OVERAGE field, receiving will be allowed to receive extra parts up to the limit imposed in this field. The user may also edit or add in purchasing lead time and min/mult order quantities through the Purchase Order Management module. Once the record has been saved this information will then be updated within the Inventory Control Management under the MRP Info screen. The user may check the box for Inspection Exception and select from the Inspection Exception Pulldown (which is established in the Inspection Exception Setup module). The user will then also be allowed to enter any Inspection Exception Notes and/or Load Insp Excep doc that pertain to that PO line item. This information will then be displayed within the PO Receiving as reference information to the users that are processing the Receipts through the system. The user is then prompted for the purchase order quantity of parts to be ordered. The user may enter either the Purchase Quantity or the Stocking Quantity, and ManEx will complete the other field based on the purchase/stocking unit of measure and conversion field.
NOTE: When creating a PO for an item with different purchasing and stocking UoMs, be sure to enter the MRP suggestion into the Stocking qty field rather than the purchasing qty field. The system will automatically convert the stocking unit into the purchasing unit for the purchase order qty.
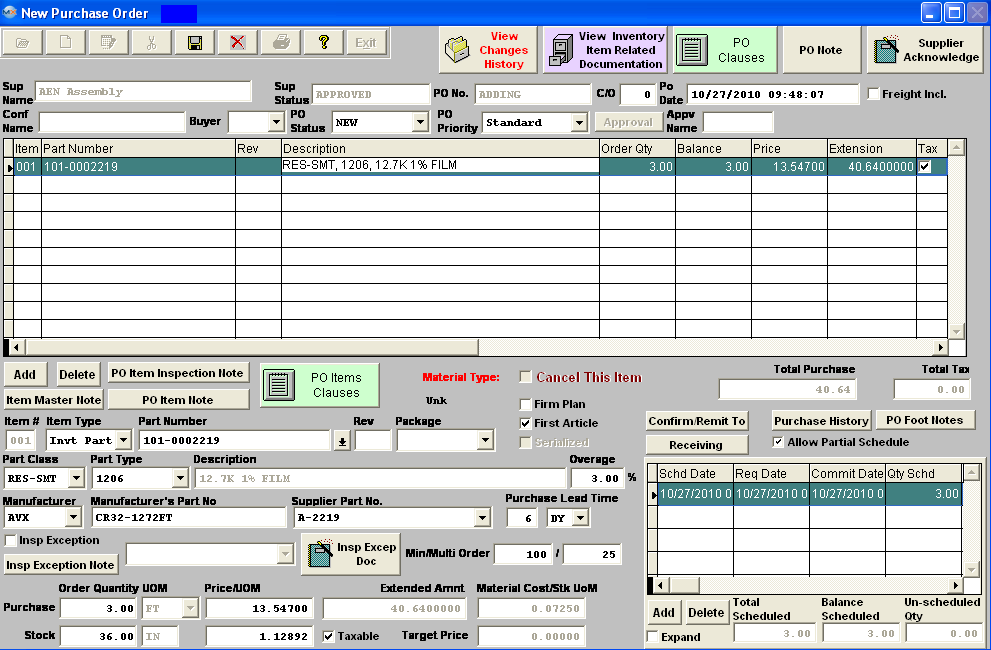
For example if the buyer is creating a PO for an item that is used by inches but sold by the foot, the user would enter qty of 36 into the stocking qty field and the PO would automatically convert it to 3 feet in the purchasing qty field (as shown in the example below). So the supplier deals in feet, but ManEx deals in inches. The conversion between the two are established in the Unit of Measure & Conversion module.
Then the unit price is entered (Price Each). The extended amount is shown, calculated by extending the quantity by price. If the inventory part that you are creating a line item for currently has a standard cost of 0.00 within inventory control the system will prompt the user with the following message, giving the user the option to assign the purchase price to be the standard cost for this item.
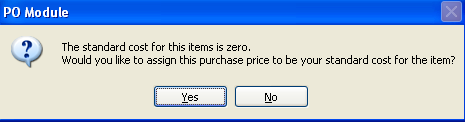 This can not be controlled by the Security level due to the fact that it is better practice to have a $$ assigned to the ICM record before the Purchase Order Receipt is accepted into the system. Otherwise you will have stock that is not valued properly, accounting records that will not be correct, etc. . . . So this is why ManEx allows any Purchase Order user to populate the STD cost field for that record with the purchase $ that you are loading. BUT . . Once a Std Cost is associated with the ICM record - the users within Purchase Order Management should no longer be able to change that value through the PO module. The user may then indicate that the items are taxable by clicking on the Taxable check box. The Stock/BOM field will update automatically based upon the conversion table defined in setup. The completed screen should appear as follows: Before saving the order you will need to check the expand box and enter the Schedule detail information.
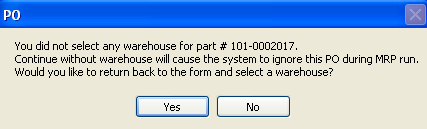
There are situations when the users will either not enter a schedule or enter a partial schedule at time of creating PO. If the scheduled qty does not match the order qty or the "Allow Partial Schedule" box is unchecked, upon depressing the Save button the following message will be displayed. This gives the user the option to stop the save process and return to the item and schedule or continue on and save without scheduling. Some users may not know an exact date for scheduling at the time of the PO creation and just create the PO to get the part on order. Then upon the supplier response add the scheduled dates to the PO at a later time. This is why we do not enforce the scheduling at the time of the PO creation.
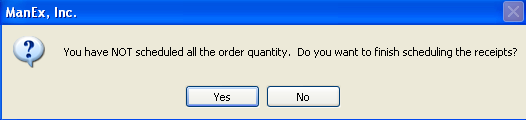 If the "Allow Partial Schedule" box is checked upon saving the PO without a schedule or a partial schedule this message will not be displayed.
Entering Schedule Detail Information
The item will schedule automatically by adding the lead time to todays date and schedule the entire order amount. (Note: MRP will NOT acknowledge qty's that are NOT scheduled).
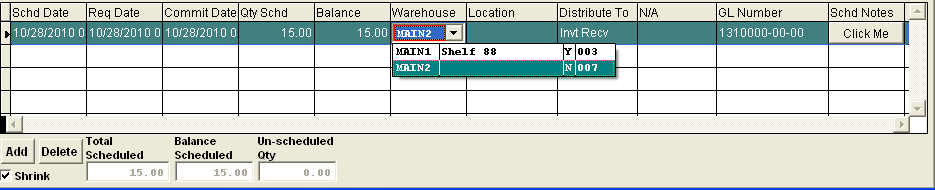 At this time the user has the option to change the Schd date/Req date/commit date information and also the Qty Schd.
Note: If user is NOT following MRP suggestions when creating POs they need to keep in mind inspection time when entering a schedule for a PO.
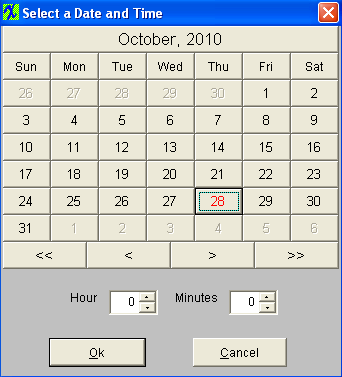
If the user wants to modify the automatic scheduled date, they can either manually adjust the Date information by highlighting the field and typing in the new date, or place the cursor in the Due Date field.Type in a ?. A calendar will appear. Depress the desired delivery date.To advance into the next month, depress the > button. Schedule Field Definitions
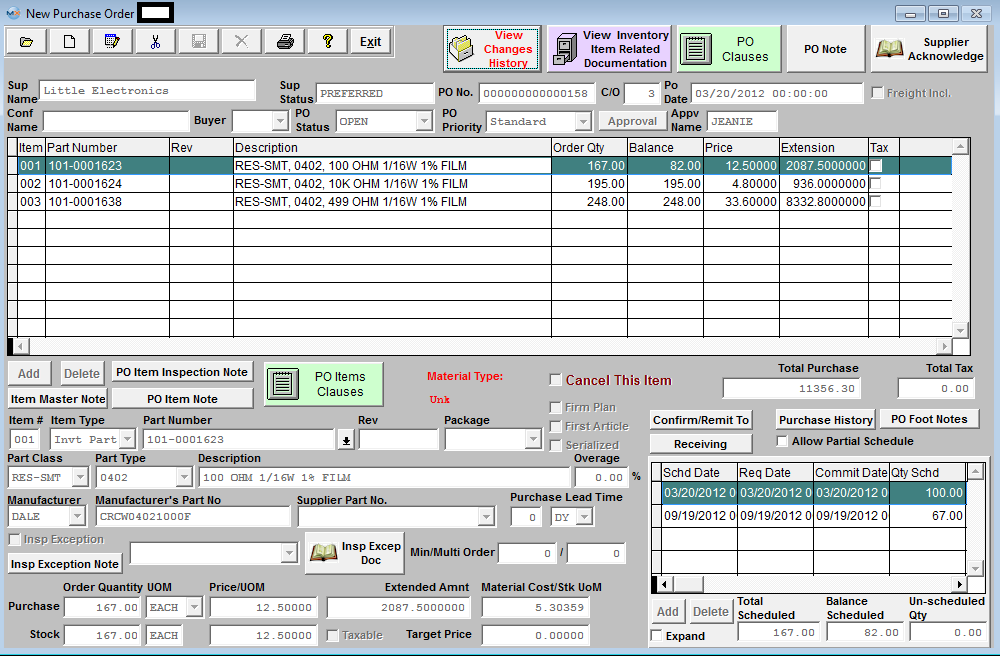
Pressing the Save button at the top of the screen saves the order and item(s) entered, and assigns a temporary number to the order. After adding items to the purchase order and saving them, the Purchase Order will display all items added to the order.  User must then Approve the Purchase Order.
The user may use the scroll bars at the right and bottom of the items listed to scroll over additional information. The user may modify the column widths in the current view by placing the cursor on the right border of the column in the column header, and pressing the left mouse button. Moving the border while holding the mouse button then releasing at the new location resizes the columns.
|
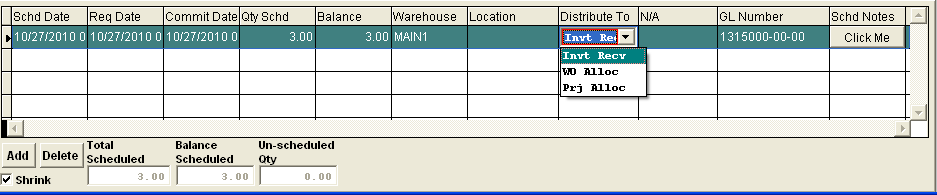
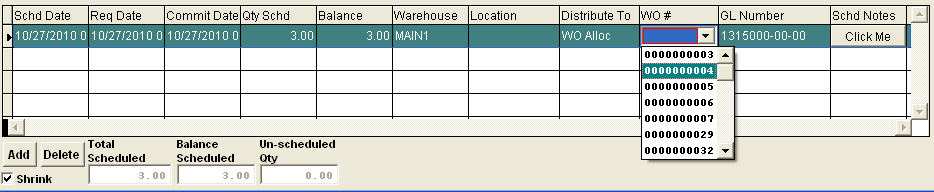
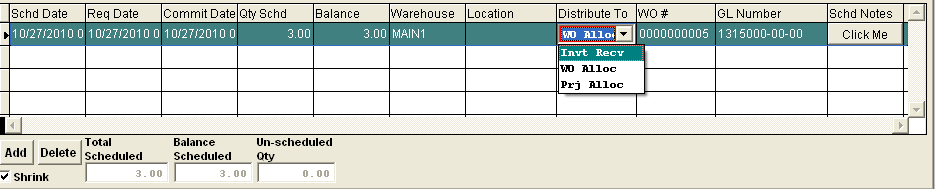
| 1.1.1.4.2.1.1. Allocate to Special Work Order or Project |
Introduction Inventory Allocation is used to allocate (reserve) quantities of existing items in stock or future Purchase Order deliveries to a Work Order or Project Number. This allocation prevents issuing the quantity reserved to any other use except the Work Order or Project Number specified. Purchase Order Line Item allocations may be removed prior to receipt of the parts by editing the Purchase Order. After receipt of parts allocated by Purchase Order, the allocation may only be removed after the parts are in stock, by using the Inventory Allocation module. ALLOCATION OF PURCHASE ORDER DELIVERIES Allocating a PO Line Item is used to make sure that the item will be reserved for a particular Work Order or Project Number when it is received. PO line item allocation is generally used when allocating to a Work Order or Project Number for which the items are not available in stock. Line Shortages of items NOT on the BOM, which are NOT in stock, are an example of typical PO Line Item Allocations. To allocate Purchase Order Line Item Deliveries to a Work Order or Project Number:
PROCEDURES To Allocate a PO Line Item to a Work Order or Project Number:
To Un-allocate a PO Line Item that has not yet been Dock Received:
To Un-allocate a PO Line Item that has already been Dock Received:
|
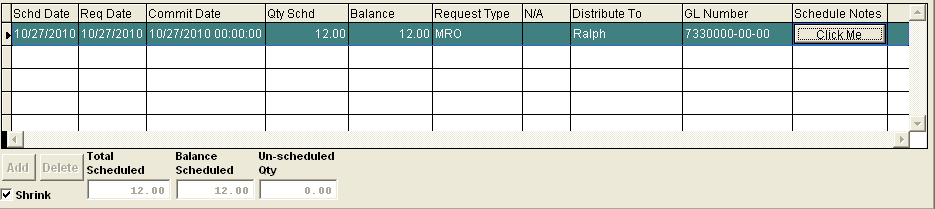
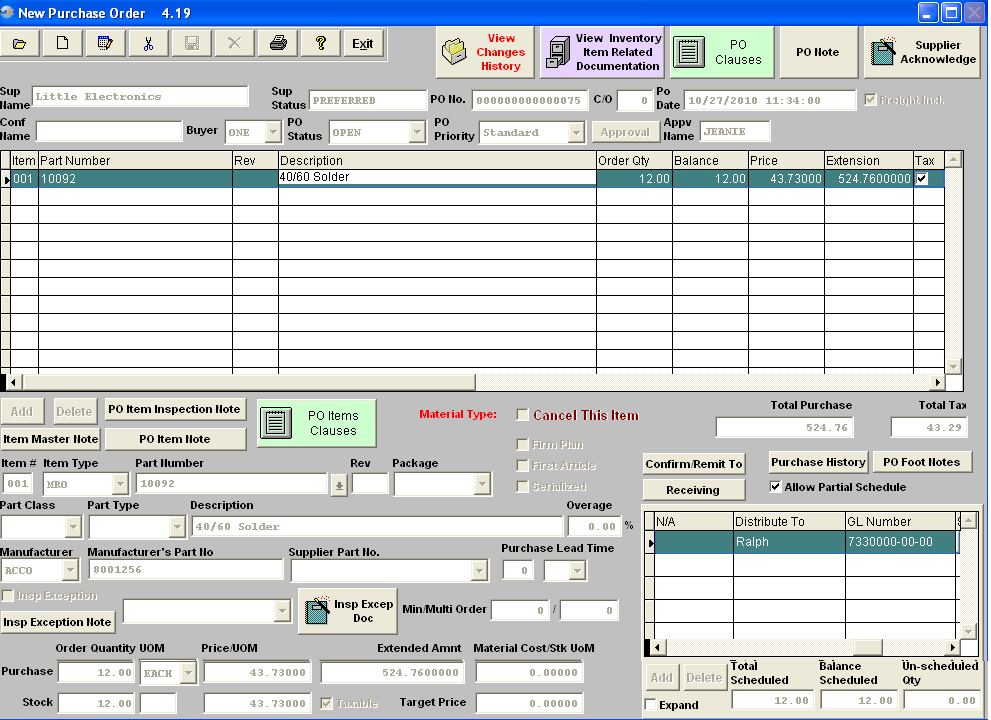
| 1.1.1.4.2.2. MRO Items |
MRO stands for Management Required Options. Generally this is used for supplies, etc. purchases. After selecting the Item Type to be "MRO" If the MRO item is included in inventory
a. The user may jump directly to the part number box (click on it) and enter a part number. Or, the user may step through the Part Classes and Part Types to narrow the focus and then select a part from the desired part type. b. Fill in the quantity and unit price. If the MRO item is NOT included in inventory a. The user may enter in a part number manually (or leave blank) and then jump to the description field and enter the description.
The finished screen should look like the screen displayed:
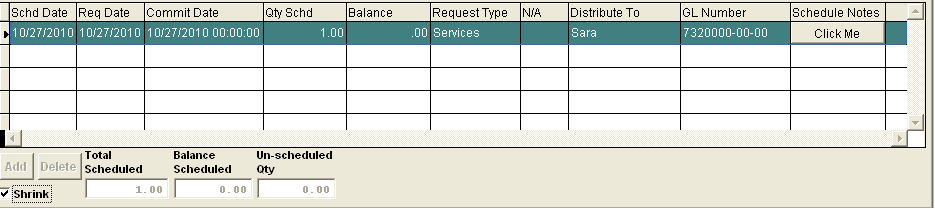
The completed Schedule screen will appear as follows:
|
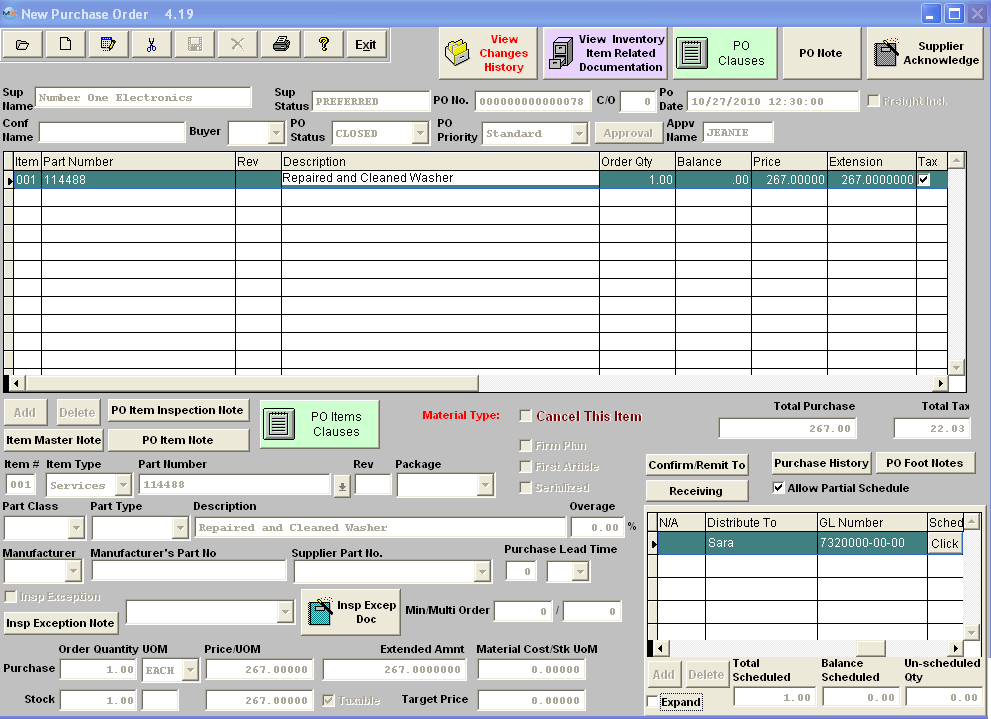
| 1.1.1.4.2.3. Service Items |
Service items are for those instances where the assembly is outsourced. After selecting the Item Type to be "Service"
The finished screen should look like the screen displayed:
The completed Schedule screen will appear as follows:
|
| 1.1.1.4.3. Edit, Cancel, or Close a Line Item or Purchase Order |
Find the Purchase Order that you would like to edit. Pressing the Edit record action button in the Purchase Order screen will allow the user to modify all the following information:
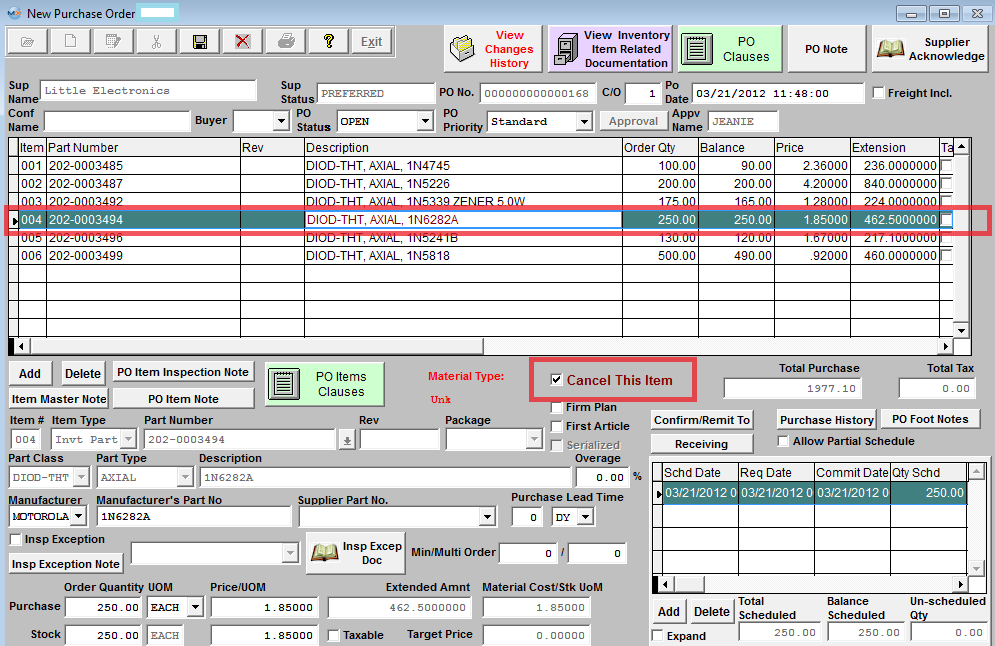
A user can Cancel a line item rather than deleting the line item from the PO by checking the "Cancel this Item" box.
Depress the Save record action button after you have finished with editing the record. The user will then need to approve the order. If user has the "Auto Assign new Change Order # Upon Approval" box checked within the System Setup/Material/Purchase Setup module, the reminder will NOT be issued and CO# field becomes NOT editable. When the user approves the change the Change Order number will be automatically increased. If user has the "Auto Assign New Change Order # Upon Approval" box unchecked within the System Setup/Material/Purchase Setup module when user makes changes the CO# will stay the same, the system will prompt the reminder, and user may manually assign a change order number if applicable. There are situations when an item may not have a schedule or may have a partial schedule. If the "Allow Partial Schedule" box is unchecked within the System Setup/Material/Purchase Setup module, user will receive the following popup warning when editing and saving that line item or any other line item on that same purchase order. If the box is checked the system will not ask any questions when saving a po with only partial schedule. (Note: MRP will NOT acknowledge qty's that are not scheduled).
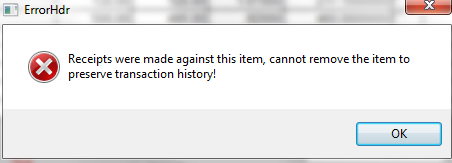
NOTE: If the "Auto Assign new Change Order # Upon Approval" box is checked, and PO is new and the user goes into the "Edit" mode prior to approval, no changes will be made to the CO# on screen or in the "View Changes History" screen. If PO has been approved and the user goes into the "Edit" mode the next CO# will be referenced in the "View Changes History" screen but will NOT increase on screen until PO has been approved. If the user goes to the "Edit" mode more than once before approving the change the CO# will only increase once in the "View Changes History" screen. NOTE: If users enter a PO number manually using a "T", then changes the numbering to Auto, and later edits and approves this PO the "T" will be changed to "0". The system has no way of knowing that the PO was manual numbered before the change. If multiple users are editing the same PO and the PO has not been approved yet, so it still has a temp # and the 1st users approves the PO, while the 2nd user is still making their changes, when the 2nd user goes to exit and save their changes they will receive the following message:  Manex tracks all revisions of a Purchase Order and each receipt against each revision of the order. The system will NOT allow any changes to a Purchase Order which has parts in Dock Receiving that have not yet been processed in the Purchase Order Receiving & Inspection module. Cancel a Purchase Order Find the Purchase Order you want to cancel. Press the Edit record action button in the Purchase Order screen this will allow the user to change the PO status from Open to Cancel. Note: User MUST have approval rights to Modify the PO Status.
Closing out a Purchase Order At times, the user may wish to close out a In the above set of circumstances, the user will be allowed to change the ORIGINAL order quantity by removing the rejected quantity via the DMR procedure. When the Received quantity PLUS the DMR quantity is LESS than the order quantity, the user will be allowed to decrease the order quantity by that many. Original Order 100; Received quantity 100; Rejected quantity 5. Returned to supplier via DMR 5. At this point, the user may reduce the quantity ordered, AND the accompanying amount scheduled to 95. This action will close out the Purchase Order. The user must depress the Edit button. Change the Purchase Order Quantity, then change the Quantity Scheduled so that the total of the schedule dates exactly equals the new quantity. Depress the Save button. Approve the PO and the
|

| 1.1.1.4.4. Approve a Purchase Order | ||||||
The following screen will be displayed: Approve PO Pressing the Approval button in the Purchase Order module will ask for the user’s password. The user must enter a password that has been authorized (within the Purchase Setup module) to approve the dollar amount of the order.
Entry of an authorized password and approval will inactivate the 1st approval button and place the initials of the person approving the order next to the approval button , (If in the Purchase Setup , the company has selected to allow one approval of purchase orders). Then upon approval the temporary Purchase Order number will be replaced with a permanent PO number (replacing the "T" with a "0").
If in the Purchase Setup , the company has selected requiring two approvals, then the process must be repeated for the second approval, and the temporary Purchase Order number will be replaced with a permanent PO number (replacing the "T" with a "0") once both approval are granted. Note: That if the Purchase Order is an Service or In-store order, once the
If the user has elected to use manual purchase order number,the screen will prompt the user for an order number to be applied to the purchase order. Note: If users enter a PO number manually using a "T", then changes the numbering to Auto, and later edits and approves this PO the "T" will be changed to "0". The system has no way of knowing that the PO was manual numbered before the change.
|
| 1.1.1.4.4.1. Load Supplier Acknowledgement |
To attached or Load a Supplier Acknowledge document to a PO
 Depress the "Supplier Acknowledge" button and the following screen will appear:
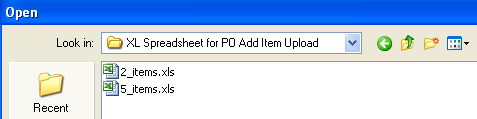
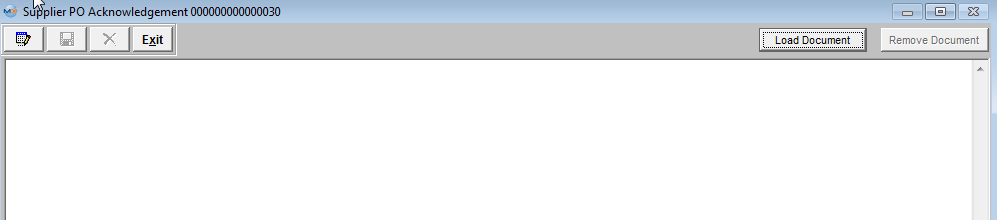 To load images or documents, depress the "Load Document" button, up in the right hand corner of the screen. A browser screen will appear similar to the one below: 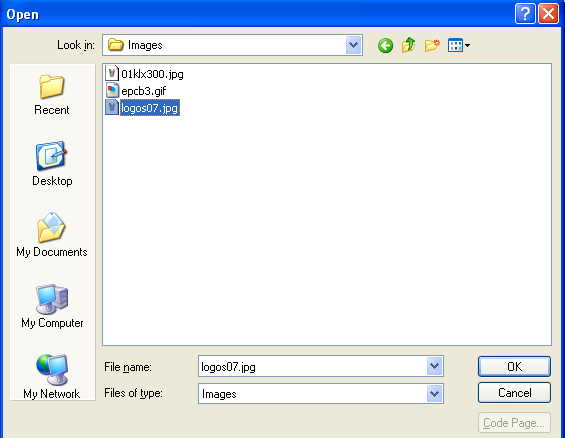 Find and highlight the desired Image file, as illustrated.
Once the file name appears, depress the Ok button. Note: that the user can also load other document types by changing the File of Type to ALL
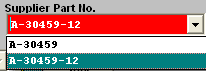
The file will appear in the screen as displayed: 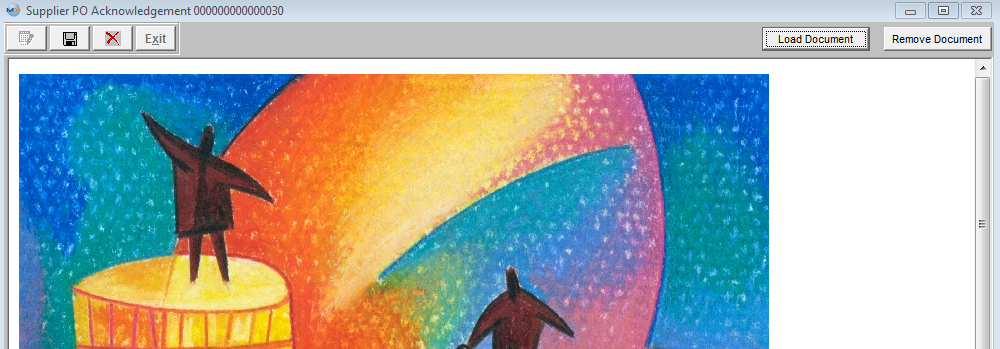 Depress the Save action button to save the changes or depress the Abandon changes action button to abandon changes. Exit will bring the user back to the Purchase Order Management module and the Supplier Acknowledge button will be displayed in Red as shown below.
 |
| 1.1.1.4.5. Copy "View Change History" Notes |
Find the Purchase Order you want to Copy the "View Changes History" notes on.
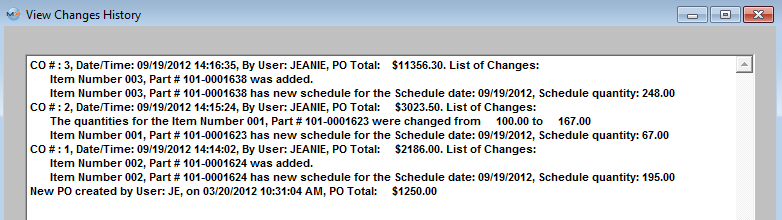
 Depress the "View Changes History" button, When in the “Change PO history” screen, click on the vertical scroll (on your keyboard), you will see the cursor appeared on the top inside the window with the text.
 Depress the "CTRL" button + the vertical scroll buttons to highlight the information you wish to copy;
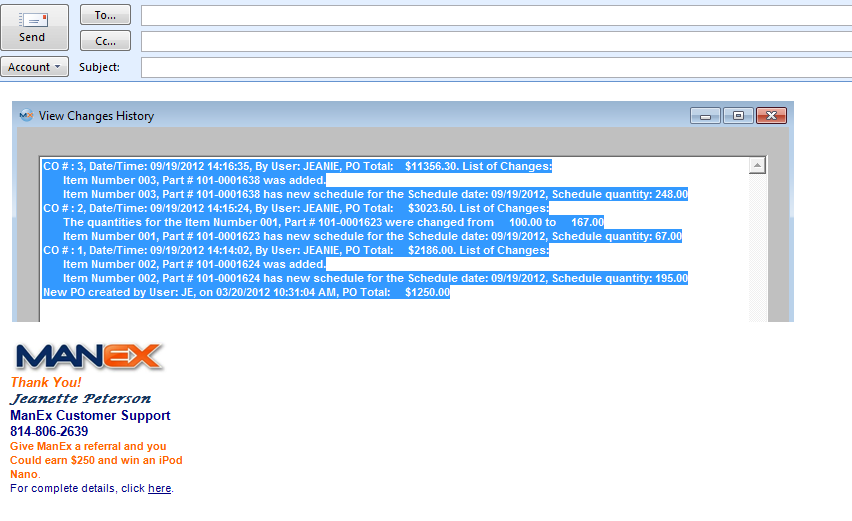
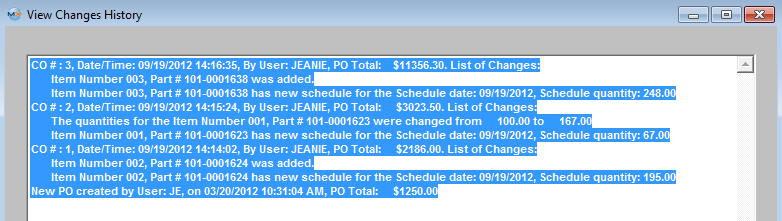 Depress the "CTRL + C" to copy, then paste to a document, e-mail, etc....
 |
| 1.1.1.4.6. Link User Defined Fields to a Purchase Order |
| The User Defined fields MUST be setup within Web ManEx. For further detail see Article #5454.
The User Defined Fields can then be linked to Purchase Order or a Purchase Order Item.
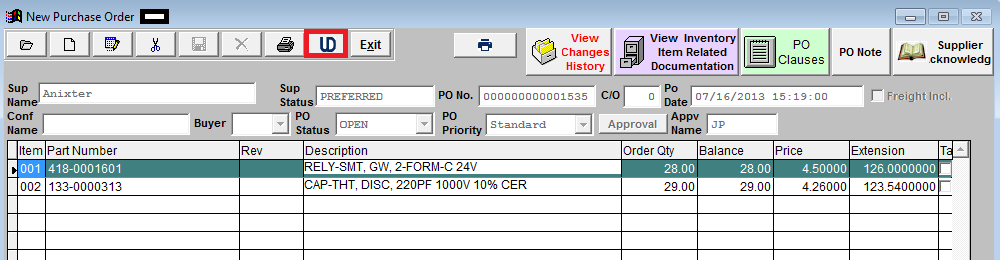
To link a UDF to a PO select a record in the ManEx
Desktop, and select the UD action button (as displayed below).
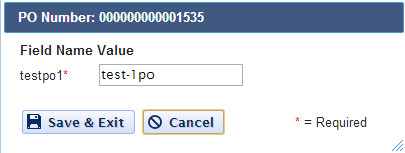
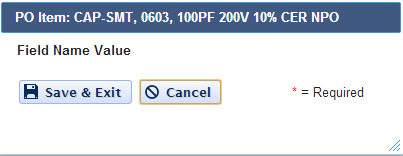
The UDF for that section will then be displayed, and user can make changes (if applicable), Save & Exit or Cancel.
To link a UDF to a Line Item on the PO select the line item, then select the UD action button that is located in the PO body (as displayed below)
The UDF for that section will then be displayed, and user can make changes (if applicable), Save & Exit or Cancel.
|
| 1.1.1.5. Reports - PO Mgmt | ||||||||||||||||||||
To obtain the Purchse Order Reports within the Web, select the WEB Print button from the ManEx action buttons at the top of the screen. For further detail on How the Reports work within the Web refer to Article #5477.
Note: In order to access the Reports within the Web the Company Root URL must be setup within the System Appearance module and user must be linked to web within the System Security Module
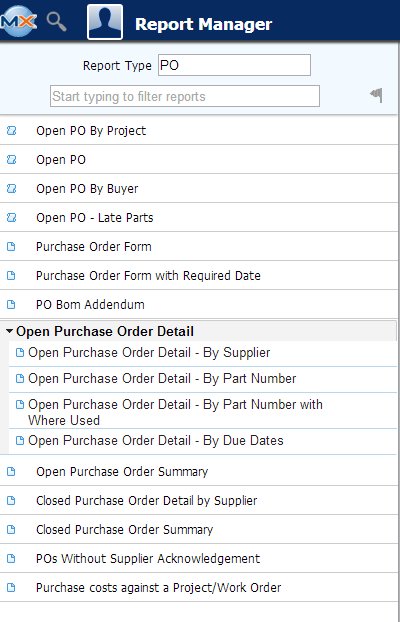
Select the Report Type: PO - A List of Reports will be displayed that are available on the Web
for PO
To obtain the Purchase Order Reports within the desktop, select the Print button from the ManEx action buttons at the top of the screen.
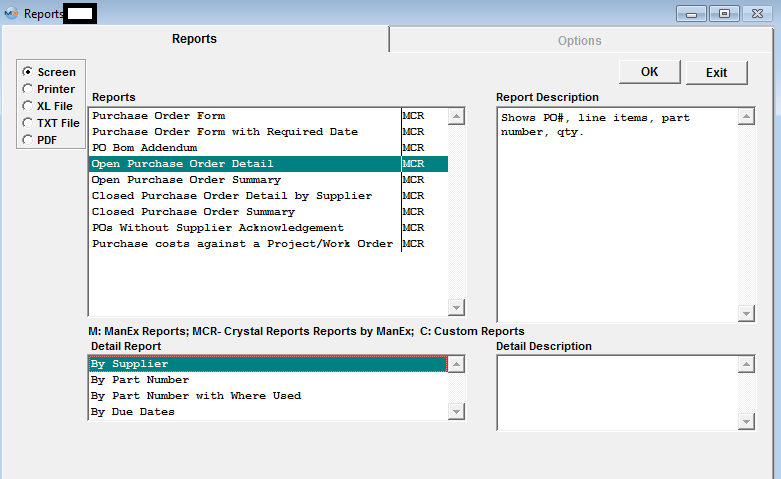
The following reports screen
will display a list of reports that are available on the ManEx Desktop:
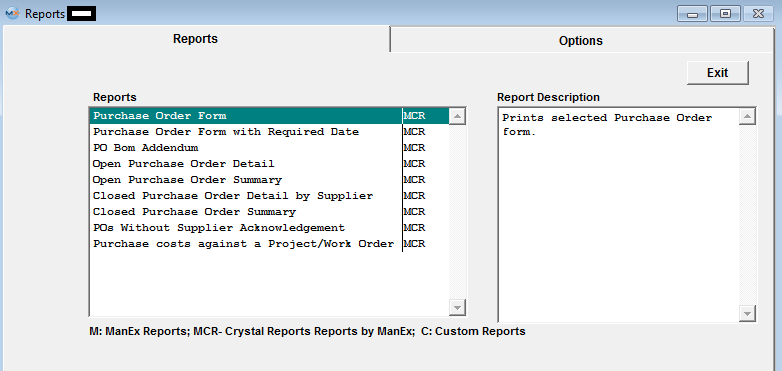
PURCHASE ORDER FORM report
The following report will be displayed: 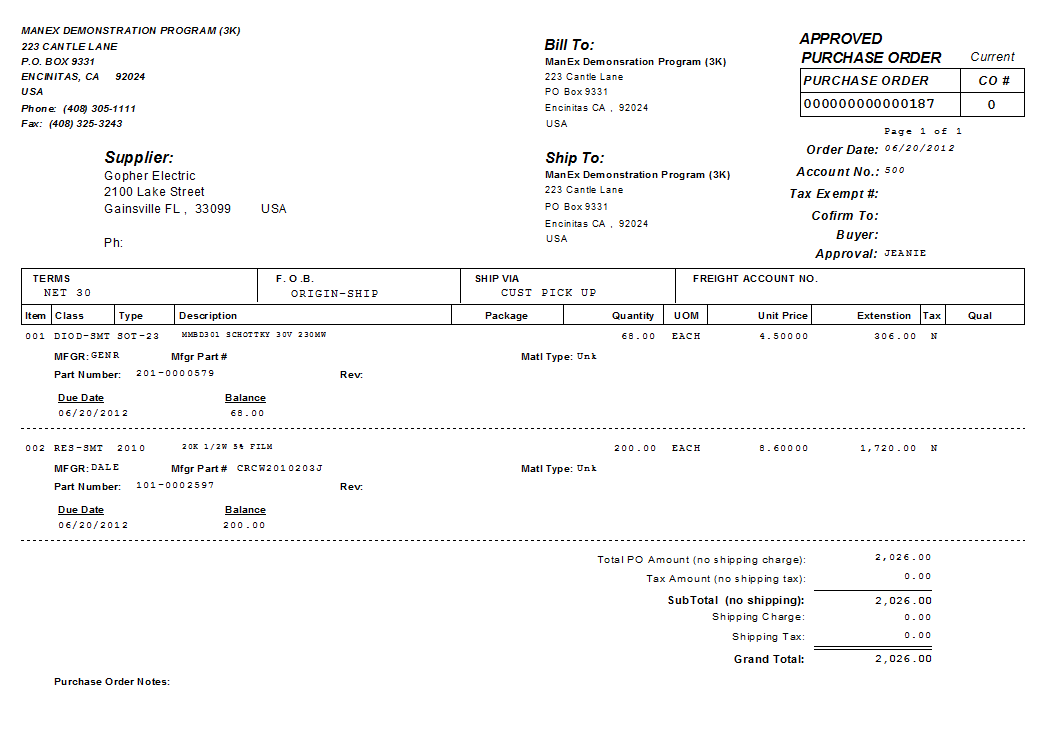 NOTE: If the user prints out the Purchase Order form AFTER some receiving has occurred against that PO, then ONLY the un-received still open amounts will print on this form. Any line items COMPLETELY RECEIVED or CANCELED will NOT display on the PO form. PURCHASE ORDER FORM with REQUIRED DATE report
The following report will be displayed: 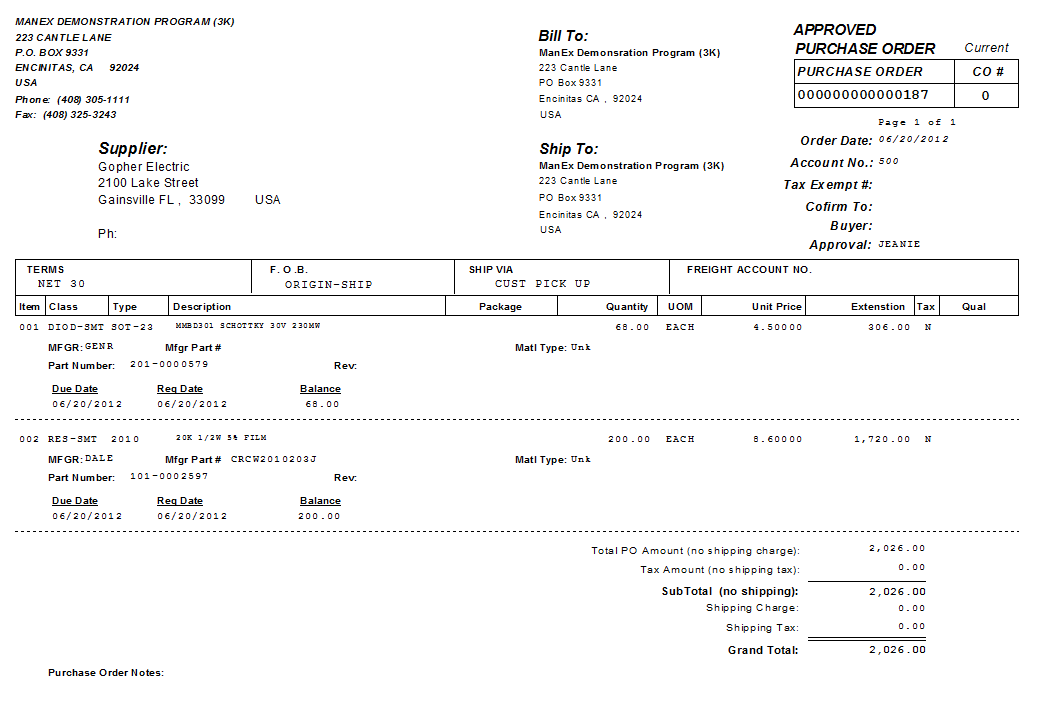 PO BOM ADDENDUM report
Check the "Print BOM Addendum for all "MAKE" parts on the Selected PO" When the users add a Make/Buy part to a Suppliers PO, and checks this option the system will then print a "BOM Indented with AVL" report as an addendum to the PO form. Each BOM will be printed as a separate report and will reference PO and item on the PO. If the AVL on the approve vendor list for any of the items on the BOM happens to be checked as "disallow to buy" this AVL will not be included within the addendum to the PO.
The following report will be printed.
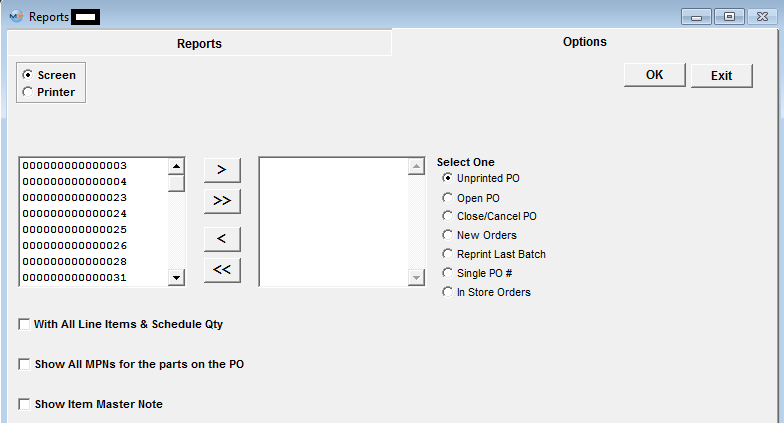
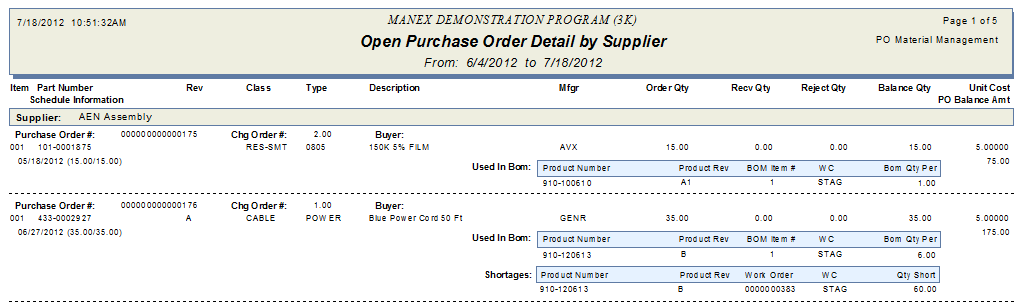
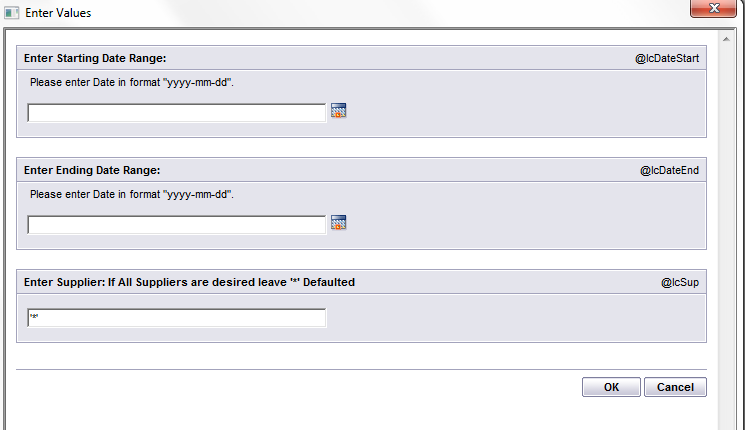
 OPEN PURCHASE ORDER DETAIL report
The following report will be displayed:
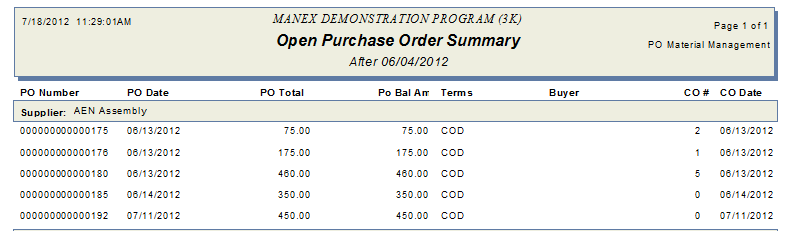
OPEN PURCHASE ORDER SUMMARY report
The following report will be displayed
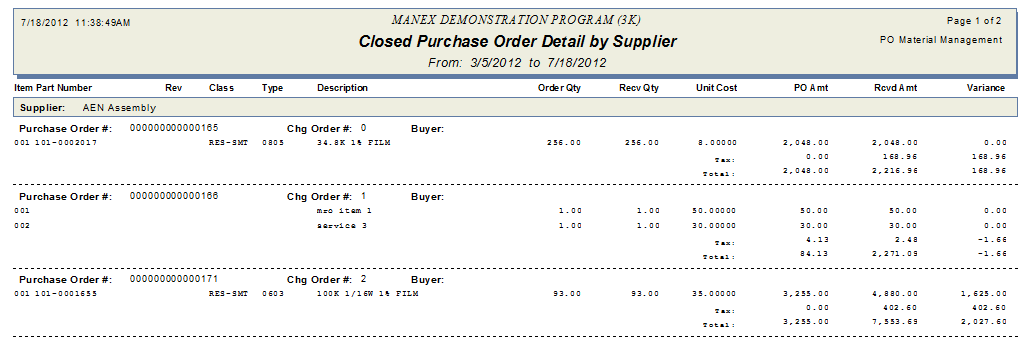
 CLOSED PURCHASE ORDER DETAIL BY SUPPLIER report
The following report will be displayed
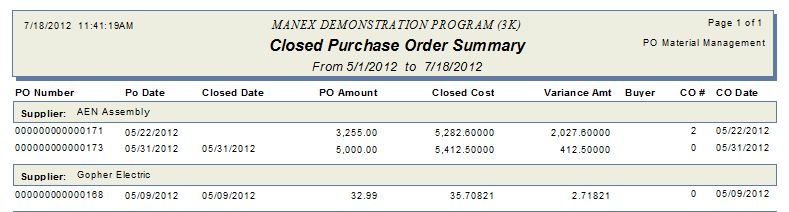
CLOSED PURCHASE ORDER SUMMARY report
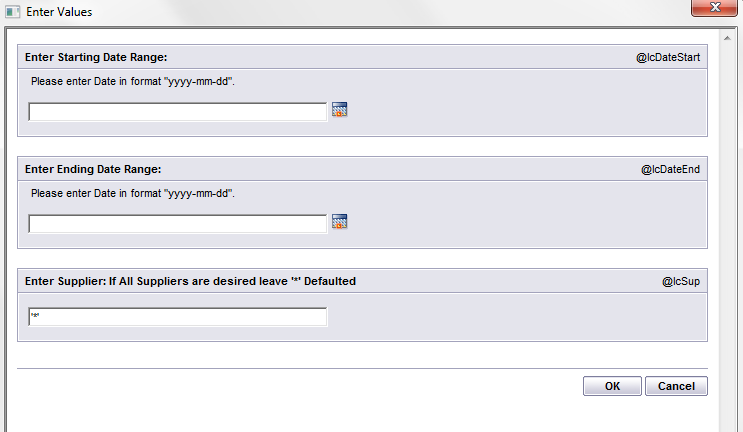
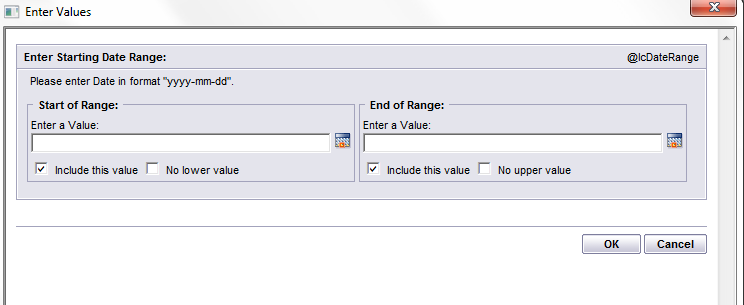
Enter in the desired Date Range. Depress the OK button. The following report will be displayed
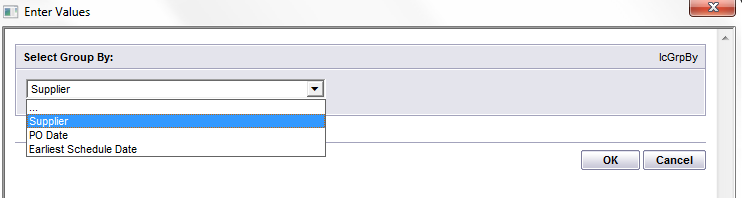
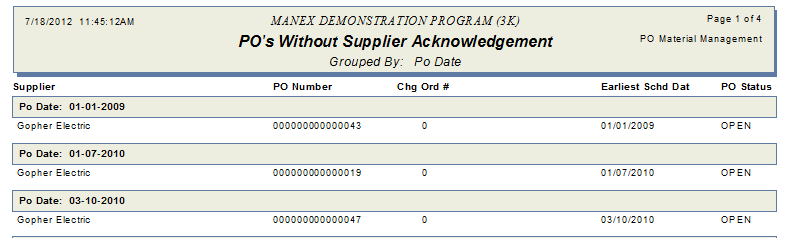
POs WITHOUT SUPPLIER ACKNOWLEDGEMENT report
Select one of the Group By options: Supplier, PO Date, Earliest Schedule Date Depress the OK button. The following report will be displayed
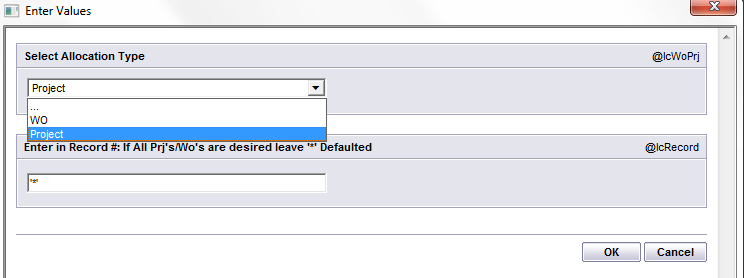
PURCHASE COSTS against a PROJECT/WORK ORDER report
Select Project # or Work Order Enter a Record # or If All Prj's/Wo's are desired leave '*' Defaulted Depress the OK button. The following report will be displayed
|

| 1.1.1.6. FAQs - PO Mgmt |
| Facts and Questions for the Purchase Order Module |
| 1.1.1.7. ManEx Minutes (PO) |
| 1.1.1.8. Video Walk-through |
| 1.1.2. Supplier Line Card Information | ||||
The following screen will be displayed. The Supplier Status, and Purchase Type are defaulted in from the Supplier Information module.
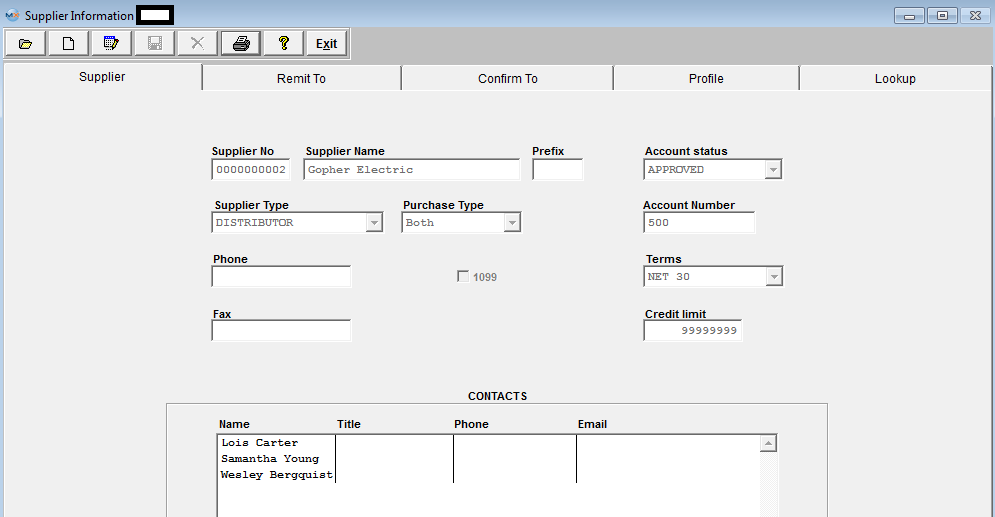
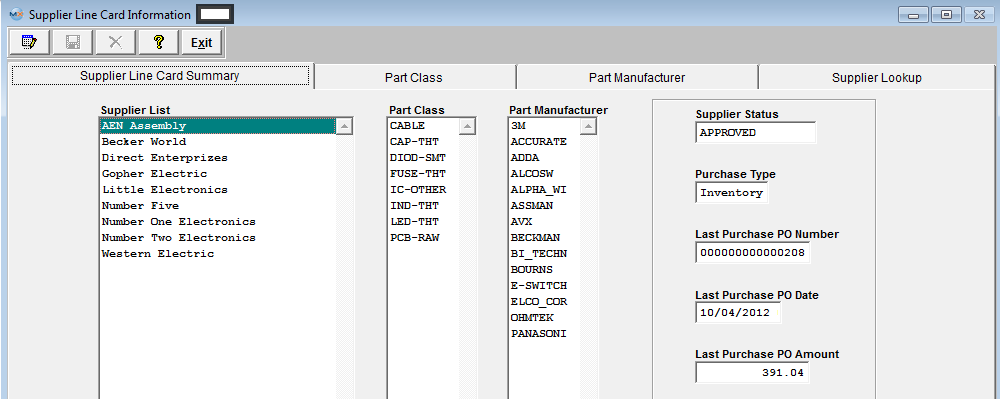 The user has the option to drill down to the Supplier level to View Supplier Information by double clicking on the Supplier name and the screen below will be displayed. The user also has the option to drill down to the PO level and view the last Purchase Order by double clicking in the "Last Purchase PO Number" field.
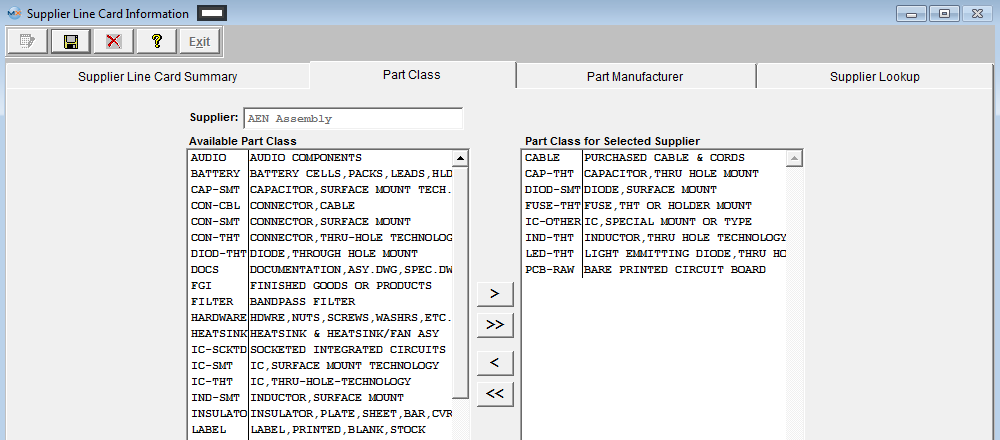
 To Add a Class to a Supplier, highlight the desired supplier. Depress the Edit action button.
Then enter the Part Class tab. The following screen will be displayed: Highlight the desired Part Class. Depress the > button. The selected Class will then populate the selection box to the right.
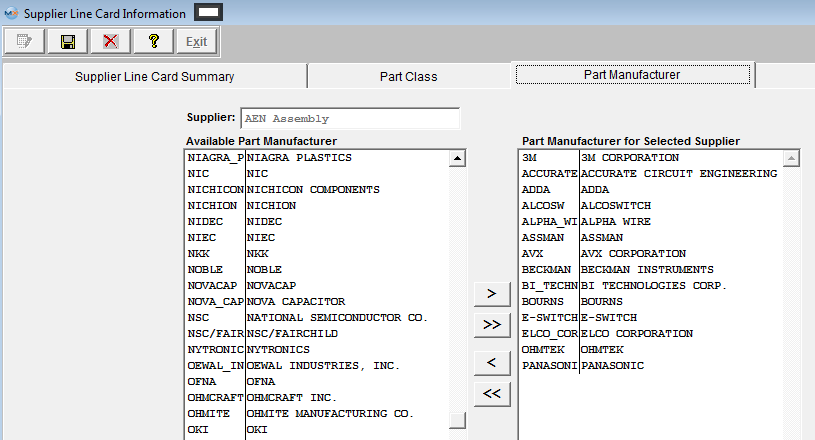
 Depress the Part Manufacturer tab.The following screen will be displayed: Highlight the desired Part Manufacturer.Depress the > button. The selected Manufacturer will then populate the selection box to the right. Depress the Save record action button.
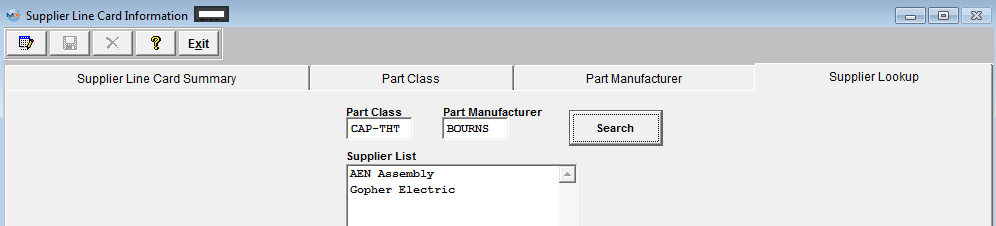
 Depress the Supplier Lookup tab. The following screen will be displayed: Enter the Part Class and the Part manufacturer. Depress the Search button. The name of the associated Supplier(s) will appear in the Supplier List section.
|

| 1.1.3. Upload New Purchase Orders |
| 1.1.3.1. Prerequisites for New PO Upload |
|
After activation, "PO Import" access for each user must be setup in the ManEx System Security module. Users with “Supervisor Rights” will automatically have access.
User has to complete the required fields in the PoUploadTemplate.xlt in the xlfiles directory to create <st1:place w:st="on">PO upload XL file.
If user wants the system to automatically approve all the POs uploaded the "Auto Approve PO when importing from XL" box must be checked in the Purchase Setup module. If this is NOT checked in the Purchase Setup module then all the POs will be uploaded as "NEW" and users will be required to approve within the Purchase Order Management module.
|
| 1.1.3.2. Introduction for New PO Upload |
This module gives our users the capability to take electronic files provided by the suppliers from quote and availability of items, copy and paste that information into the ManEx PO Upload template format. Users will have the flexibility to load a large PO into the system all at once, or upload multiple purchase orders for different suppliers at once, etc. During the upload process the system will find any problems with the template, the user will be prompted and exception XL files will be created within the POExceptionXL directory for the users to review and disposition. |
| 1.1.3.3. Fields and Definitions for New PO Upload |
| 1.1.3.3.1. PO Upload Template | ||||||||||||||||||||||||||||||||||||||||||||||||||||||||||||||
|

| 1.1.3.4. How To ....... for New PO Upload |
| 1.1.3.4.1. Add - Upload a New PO | ||||||||||||||
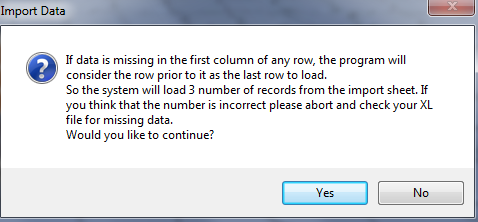
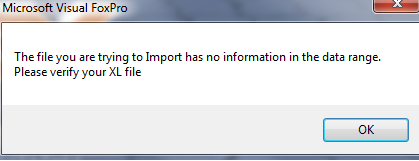
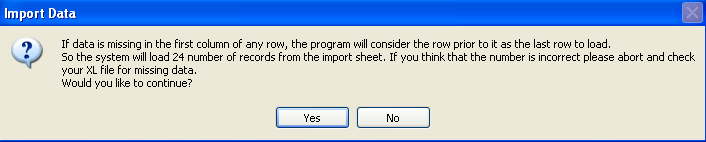
If system does NOT find any problems with the template the following message will appear: This message is for user to verify the number of records being loaded from the import sheet. User may depress "YES" to continue the upload or "NO" to abort the upload.
|


| 1.1.4. Upload PO Items Additions |
| 1.1.4.1. Prerequisites for PO Upload Addtions |
After activation, "PO Import" access for each user must be setup in the ManEx System Security module. Users with “Supervisor Rghts” will automatically have access.
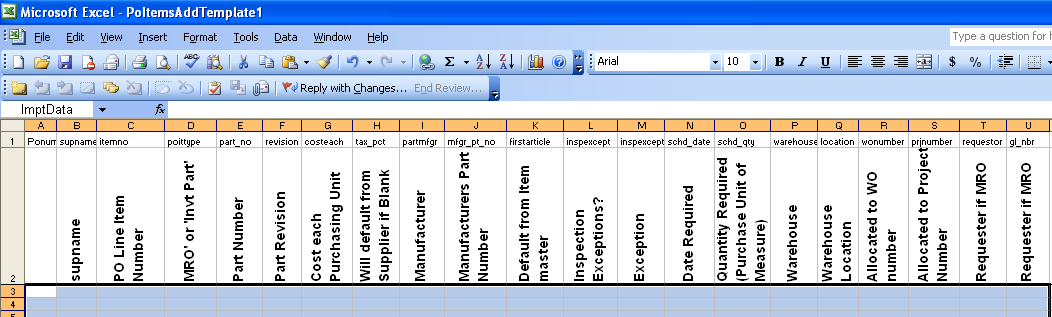
User has to complete the PoItemsAddTemplate.xlt in the xlfiles directory to create <st1:place w:st="on">PO Items Deletions upload XL file. If user wants the system to automatically approve all the POs after the "Upload PO Items Additions" the "Auto Approve PO when importing from XL" box must be checked in the Purchase Setup module. If this is not checked in the Purchase Setup module then all the POs will be updated with the PO Items Additions and the PO status will be changed to "EDITING" and users will be required to approve the PO within the Purchase Order Management module.
If user wants the system to automatically assign a new change order number upon upload after approval the "Auto Assign New Change Order # Upon Approval" box must be checked in the Purchase Setup module. If this is not checked in the Purchase Setup module then upon upload user will receive a popup window giving them the option of updating the change order # after the upload or not. |
| 1.1.4.2. Introduction for PO Upload Additions |
This module will allow users to upload additional items to an existing PO.
|
| 1.1.4.3. Fields and Definitions for PO Upload Addtions |
| 1.1.4.3.1. Upload PO Items Additons | ||||||||||||||||||||||||||||||||||||||||||
|
| 1.1.4.4. How To ............. for PO Upload Additions |
| 1.1.4.4.1. Add - Upload PO Items Additions | ||||||||||||||||
If system does not find any problems with the template and system is setup to Auto create PO Numbers the following message will appear: This message is for user to verify the number of recorrds being loaded from the import sheet. User may depress "YES" to continue the upload or "NO" to abort the upload.
|

| 1.2. Material Requirement Planning (MRP) |
| 1.2.1. Prerequisties for MRP | ||||||||
|
Prerequisites Required for Entering a New MATERIAL REQUIREMENTS PLANNING:
After activation, "Material Requirements Planning" (MRP) access for each user must be setup in the ManEx System Security module. Users with “Supervisor Rights” will automatically have access.
|
| 1.2.2. Introduction to MRP |
The Material Requirements Planning (MRP) Module is the heart of Inventory Control. In ManEx, the Material Requirements Planning actions drive the user towards zero inventory on hand through the scheduling and rescheduling of open orders for products and parts. When the Material Requirements Planning module runs, it accumulates all of the demands for products and parts, determines the available supply and recommends actions to be taken to meet the demand in the time required. (The attached Print Screens below <<BOM_Setup_MRP_Actions.docx>> displays an example of a BOM setup and how MRP gives the actions). The MRP module will also modify those recommendations by MRP policies established in the MRP Default Setup and in the Inventory Control Mgmt MRP Info for each part. MRP runs through a large number of tables and records to compile its calculations, and provides a snapshot of suggested actions at the same time it is ran. If users are changing things during this process it could definitely cause some strange outcome. To prevent this situation we strongly suggest that you use the Nightly MRP trigger. (Refer to Article #416 for more detail on trigger setup). Note: If you find the need to re-run MRP during the production work day then we suggest that you notify all departments that MRP is going to be ran and ask them to remain out of the system until the MRP run is complete. This will help assure that the most accurate MRP run is possible.
Run Scrap and Setup Scrap If the Top Level Assembly has a run scrap and user would like MRP to calculate this run scrap in the demands for all parts on the BOM, it must be set up in the MRP Defalut Setup Screen. If the user has scrap setup in the Inventory Control module and wants MRP to calculate it they must set it up in MRP Defalut Setup Screen. Note: If this field is changed it will update the setting in the Kit Default Setup and visa versa. If the user wishes for the setup scrap qty’s to be included in the Kitting and MRP calculations, the Setup Stcrp box MUST be checked on the BOM. Checking this box along with a Standard Bld qty will tell the system to use Setup Scrap when calculating the standard cost. Note: The "Exclude Scrap & Setup Scrap" options within the Kitting Setup module will overwrite this option. All lead times are calculated with the Production Calendar. Policies may be used to determine whether the part is ordered on a Lot for
NOTE: When creating a PO for an item with different purchasing and stocking UoMs, be sure to enter the MRP suggestion into the Stocking qty field rather than the purchasing qty field. The system will automatically convert the stocking unit into the purchasing unit for the purchase order qty.
For example if the buyer is creating a PO for an item that is used by inches but sold by the foot, the user would enter qty of 24 into the stocking qty field and the PO would automatically convert it to 2 feet in the purchasing qty field. So the supplier deals in feet, but ManEx deals in inches. The conversion between the two are established in the Unit of Measure & Conversion module.
Article #3597 explains the process MRP goes through to optimize the On-Hand Inventory to Demands.
Buffer times for placing purchase orders and for placing work orders may be defined and included.
The Dock to Stock value (setup in the ABC types ) is taken into consideration for MRP leadtime calculations in the projected requirement of the receipt of purchased parts. (For more detail refer to Article #1469). If a part has a Production Off-set time setup in the Bill of Materials , this is also taken into consideration for MRP leadtime calculations. (For more detail refer to Article #572).
The Material Requirements Planning module will run the Master Production Schedule generation automatically before running the Material Requirements Planning module.
ManEx Material Requirements Planning module may be run without logging users off the system. The work station used to run Material Requirements Planning should have at least 120MB available on the hard drive, and works best with 96MB memory or more. A Material Requirements Planning regeneration creates time-phased material requirements at the part (component) level by netting demand from the Master Production Schedule (MPS), open Sales Orders, Internal orders, Shortages and open Work Orders (released but not picked) against supply from inventory, open purchase orders and Finished Goods. The regeneration must also occur with demand synchronized: Master Production Schedule forecasted demand that has been consumed by Sales Orders should be relieved and Work Orders that are released but not picked should be picked or cancelled.
MRP Actions for Make/Phantom parts - If the actions originates from a higher level assembly for the Make/Phantom, then the MRP will display "Phantom" in the action section. This indicates to the user that there are no actions required and is listed so users can investigate where component actions are originating from. If the Make/Phantom is required directly for an Order itself, it will follow the same WO action rules as a regular Make product.
Planned Purchase Orders from previous demand that have been placed must be entered and/or firmed.
A Firm Planned Purchase Order tells MRP that the purchasing decision was intentional and MRP will NOT try to override. Discrepant material should either be moved into Material Review Board or Inspection Hold for disposition. If Material Review Board or Held material is not to be looked at as available material for Material Requirements Planning purposes, it should be in a Non-nettable warehouse or inventory location. For example: (If parts are rejected in PO receiving the parts are dispositioned into the MRB warehouse (which is Non-nettable) so MRP is not seeing the qty in MRB but is seeing the open PO). Transactions must be current with the location of materials. WIP (Work In Process) shrinkages must be expressed as Work Order shortages in the system.
MRP is designed to calculate from the Kit Shortage and not from the Lead times once the parts have been pulled to the kit and the kit status is changed to "Kit in Process". Once the parts have been pulled to the kit, the systems is assuming that the shortages are needed by the WO due date, rather than the Prooduction lead time, so MRP then calculates using the due date of the WO as the date the materials must be on hand, MRP no longer takes the production lead time into consideration.
NOTE: The Re-Order Point/Qty fields have NO AFFECT on MRP at all. MRP will NOT consider these fields for any calculations (these fields have no connection with MRP). These fields are intended to control stock on overhead items. Print the "Inventory Material Reorder List" report (located in the Inventory Control module) to show items which have dropped below re-order point minimums.
MATERIAL REQUIREMENTS PLANNING PROCESS Confirm status of system data for Material Requirements Planning validity Updated Forecast and Master Schedule Updated Item Master file data Lead Times entered and up to date Shrinkage factors current Order policies set Orders firmed as required Independent Demand items identified Inventories current Receivings current Safety Stocks appropriate Bills of Material current and complete Confirm system availability to run Material Requirements Planning Timing good for snapshot of data Transactions current Set the parameters for running the Material Requirements Planning Netable Inventory Locations flagged Discrepant material dispositioned Horizon set Time fences set for change control Bucket size and number set When executed, the Material Requirements Planning Module takes a snap-shot of the demand for parts and assemblies (created by Sales Orders, Work Order Shortages, Forecasts) and compares it with supply (on-hand inventory, open Purchase Orders with scheduled qty, open Work Orders) in order to generate an Action List of planned new orders and changes to existing ones to meet demand. The comparison is done one day at a time using the make and/or buy parameters from the Item Master/Material Requirements Planning Information screen in Inventory Control Management. The Parameters include: · Order Policy · Minimum Order Quantity · Order Multiples · Purchase Lead Time · Kitting Lead Time · Transit Days · Pull In Days · Push Out Days If the AVL suggested to the PO actions is flagged as "DO NOT PURCHASE" MRP will give Release PO actions if there is a need for the part and the part will be displayed on the Create PO screen with the Mfgr and MPN fields blank. This should flag the user to further investigate and see that it is flagged as "DO NOT PURCHASE" and that they will need to either remove the flag or add additional AVL's to ful-fill the demands. Notice at the top there is a note that explains what the empty "MFGR" field means.
Sales Orders on Hold When the Sales Order is on HOLD it does NOT drive MRP.
User does have the ability to turn off the function of the Sales order driving the demands for the MRP and just use the Work Order for buying components by checking the MRP on Hold box in the Sales Order module per line item or in the System Setup/Sales Order Default module.
If the MRP on Hold is checked in the SO module, MRP will instruct you to cancel all PO(s) you have open for the components needed for this SO.
If the MRP on Hold is checked in the SO module and you create a WO Manually, the MRP will tell you to cancel the WO since there is no SO demand. This can be solved one of two ways. Use the MPS module (Forecast) or Open/Create Firm planned WO’s so the MRP will NOT keep instructing you to cancel the order. This is a perfect solution for customer who wants to build products based on forecast or promised to maintain certain amount of FGI in inventory. The can use the MPS module to accomplish this and use the SO to ship products from FGI inventory. MRP will consider any SO items for the demands unless marked as MRP on Hold. See Article #1244 for further information. Check on Work Orders on either Admin or Production hold. Production Hold on a Work order will disallow movement of the parts. See Article #896 for more detail. MRP is checking work orders to be sure that they aren’t cancelled or closed. Everything else will be considered. MRP checks Sales Orders for OPEN status. Everything else is ignored. If the objective is to stop the shipment from the Sales Order, then in the Sales Order, the user may uncheck the “Sales Ack” box and then shipping won’t be able to initiate a Packing List.
Inventory Items Allocated
MRP does NOT distinguish between inventory items allocated to projects nor Purchase orders allocated to projects in the determination of the available supply (current and future). To do so would enormously complicate the MRP process. MRP WILL determine that the supply will meet the demand, whatever it is.
Should we have locked the requirements by project in MRP, then we could have the situation where we have unallocated inventory on hand, but since it's not for a specific product that requires it, MRP action could create an order action to buy more of the parts specifically for that project. This could result in an enormous amount of excess inventory. Since our objective in MRP is to drive to zero inventory, we do NOT want to ignore any available inventory that might satisfy demands. Conversely, when inventory is allocated to a specific project, and the demands created for another project are analyzed, the inventory on hand will be available to meet the other project demands, but also create the order actions to supply parts for the original project, if there are still demand requirements. In the case of having just enough inventory on hand for a given Project (A), but there are new requirements for Project (B) that precede those for the same parts as project (A), MRP will assume that the inventory on hand will be used for Project (B) first, but get more parts to meet the later date of Project (A). As long as there is inventory available to meet every demand, it will be up to the user to reallocate inventory for the most urgent need. If for some reason user has inventory that belongs to a specific customer and does not want MRP to consider it for any other customer they can change the inventory location to non-nettable.
|
| 1.2.3. Fields & Definitions for MRP |
| 1.2.3.1. MRP Action Tab | ||||||||||||||||||||||||||||||||||||||||||||||||||||||||||||||||||||||||||||||||
 Definition of Material Requirements Planning Action Fields:
Sorting, Searching and Selecting in the MRP Action Screen The user may sort by the Part Number, Class or Description by depressing the appropriate button. To sort the contents of the Summary screen by Part Number, Part Class or Description, click the button. It will turn red and the list will automatically sort in ascending alphanumeric sequence per the selection. To search for an item by Part Class, click Class and enter the first few characters of the Part Class in the Search by Part Class field. The list will scroll down to the first incidence of each character in the sequence entered.If a character is not found in the position typed, the list will scroll to the bottom. To Search for an item by Description starting with the 1st character on the left, click Description and begin entering the first characters in the field. The list will scroll down to the first incidence of each character in the sequence entered.If a character is not found in the position typed, the list will scroll to the bottom. To Search for an item by a word or character string anywhere in the Description, click on Description, click on the Left button next to the Search by Description window (changes to Random). Enter the search word or characters in the window. Hit return and the first match in the list will be highlighted. Click on the window and hit return to highlight the next match in the summary list. After the last match or if a match is not found, the last item in the summary list will be highlighted. To visually search the summary list, use the scroll bar or arrows to the right of the list.The Source (Buy, Make or Phantom) and total On Hand quantity is displayed in the last two columns. For further Details on any item in the Actions main body list, highlight the item by a search or mouse click and select the appropriate Tab to display the desired detail information. To display changes made in other windows or by other users while this window is open, repeat the Material Requirements Find and refresh the screen data. FILTERS:
Main Body
Material Requirements Planning Action List in Stock Units Of Measure: The information listed in this section pertains to the highlighted part number in the main body above. To see the list for another part number, highlight the part number in the main body.
Note: Dates are calculated with the Production Calendar
Defines the Material Requirements Planning action to be taken for the highlighted part. There are several different actions that will appear depending on the part. For example if the Part is a Make/Phantom part and the action originates from a higher level assembly for the Phantom, MRP will display "PHANTOM" in this section and that will indicate to the user that there are no actions required but is listed so users can investigate where component actions are originating from. If the Make/Phantom is required directly for an order itself, it will now follow the same WO action rules as a regular Make Product would. The projected balance of inventory for the part selected. MRP will display the stock qty UOM. Displays the new quantity that the action requires. MRP will instruct you to Purchase the Stock qty UOM, not the Purchase UOM. The PO Module will display the UOM conversion (if applicable). NOTE: When creating a PO for an item with different purchasing and stocking UoMs, be sure to enter the MRP suggestion into the Stocking qty field rather than the purchasing qty field. The system will automatically convert the stocking unit into the purchasing unit for the purchase order qty. For Example: if the item has inches for Stock UoM and Feet for Purchasing UoM, and the MRP demand is 24 , the buyer would enter the qty of 24 into the stocking qty field and the PO would automatically convert it to 2 feet in the purchasing qty field. So the supplier deals in feet, but ManEx deals in inches. The conversion between the two are established in the Unit of Measure & Conversion module. Displays the original (current) date of the existing action. If the action date is earlier than the current date, the number of days late for the action is shown. This is the date by which the action listed must take place. Changing the leadtime of a Buy part will NOT change the due date, only the date to take action. For a Buy part this date is arrived by subtracting the Purchase Lead time from the New Date. For a Make part this date is arrived by subtracting the Kitting and Production Lead times from the New Date which is the Sales Order ship date.
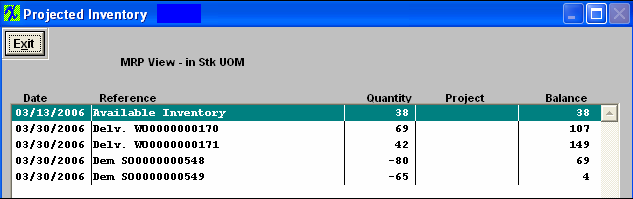
Clicking on the
Definition of fields in the Projected Inventory screen:
The projected date of a Materials Requirements Planning action. The Material Requirements Action. The projected balance of inventory for the part selected.
After depressing the Projected inventory button, highlight and double click on a WO, SO, PO, etc. This will bring up another drill down screen as follows which will display the Material Requirements Planning Detail. This screen allows user to Sort, Search, or Drill down to the WO, SO, PO. etc.

Material Requirements Planning Field Definitions:
This is the assembly part number where the component part number is highlighted. This is the balance for the Work Order Listed.
After highlighting and double clicking on a part number in the main body, the Material Requirements Planning Demands and Approved Vendors List will appeared, as displayed below. This screen will allow users to Sort, Search, or Drill Down to the WO, SO, etc. level.
Material Requirements Planning Demands and Approved Vendor List Field Definitions:
AVL
|
| 1.2.3.1.1. Create POs | ||||||||||||||||||||||||||||||||||||||||
|
| 1.2.3.1.2. Create WO's |
This portion of the MRP module is not fully completed yet in the current version. It is still a work in progress. While it displays the WO’s for quick reference you will still actually have to go into the WO module to create the WO’s as needed. You can also create WO’s directly in the SO module as well at the time you’re creating the Sales orders. |
| 1.2.3.2. Item Master Tab |
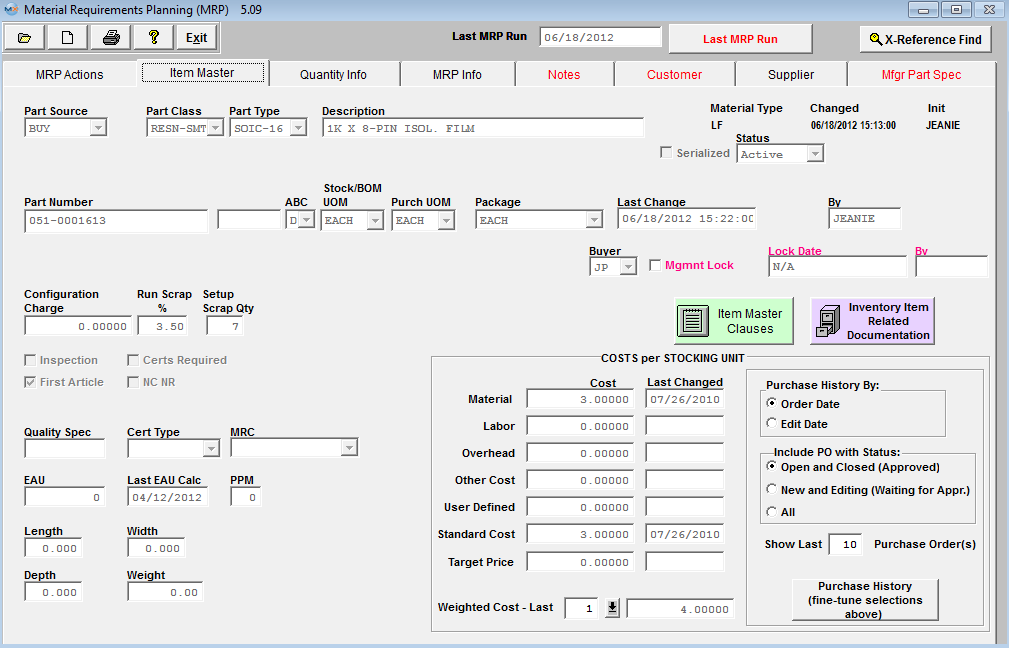
This screen will display details for the item highlighted in the MRP Action tab, which is being defaulted in from the Inventory Control Management module. See Article #4038 for field definitions. These fields may be edited in Inventory Control Management .
|
| 1.2.3.3. Quantity Info Tab |
|
This screen will display manufacturer, warehouse and inventory quantities for the item highlighted in the MRP Action tab, which is being defaulted in from the Inventory Control Management module. See Article #4039 for field definitions. These fields may be edited in Inventory Control Management .
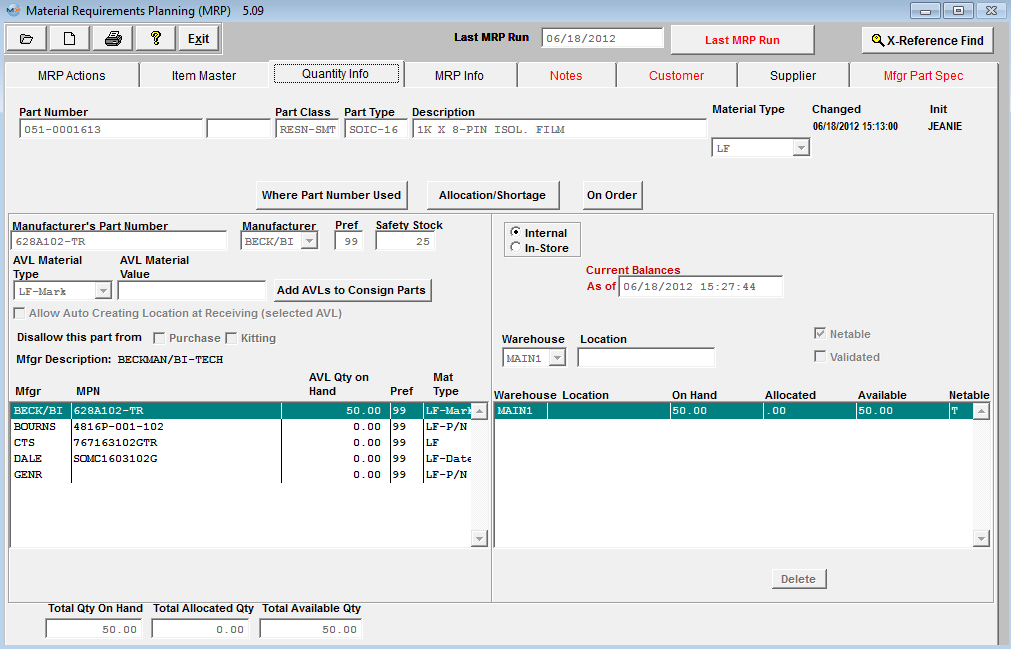
Complete inventory stock, allocation and usage information by Manufacturer is displayed or available at the click of a button. All current inventory information about any selected part can be displayed here. |
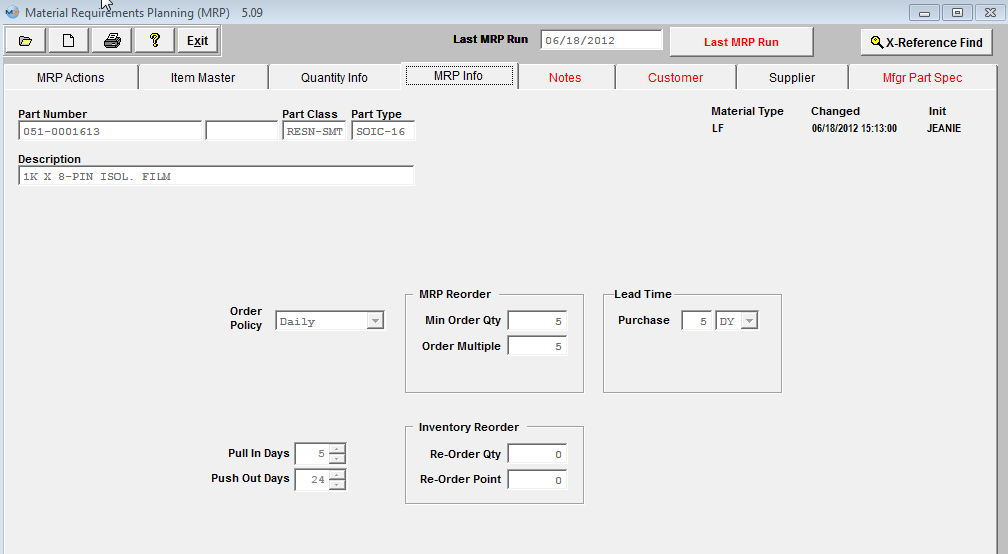
| 1.2.3.4. MRP Info Tab |
|
This screen will display MRP parameters for the item highlighted in the MRP Action tab, which is being defaulted in from the Inventory Control Management module. See Article #4040 for field definitions. These fields may be edited in Inventory Control Management .
|
| 1.2.3.5. Notes Tab |
|
This screen will display Inventory Notes for the item highlighted in the MRP Action tab, which is being defaulted in from the Inventory Control Management module. See Article #4041 for field definitions. These fields may be edited in Inventory Control Management . 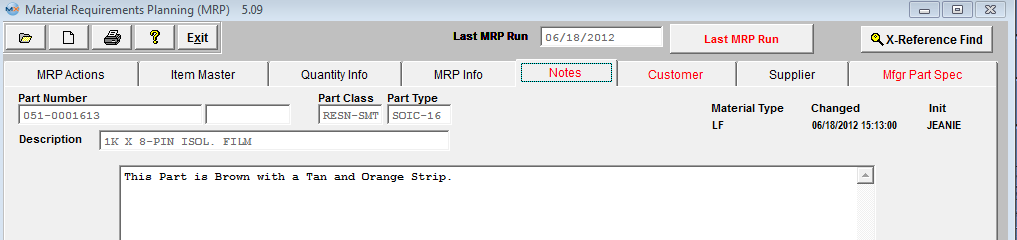 |
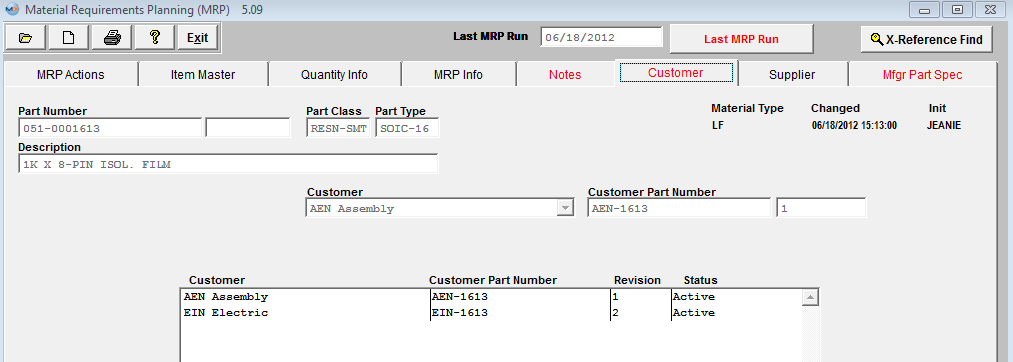
| 1.2.3.6. Customer Tab |
|
This screen will display customer part number(s) assigned to the internal part number for the item highlighted in the MRP Action tab, which is being defaulted in from the Inventory Control Management module. See Article #4042 for field definitions. These fields may be edited in Inventory Control Management .
|
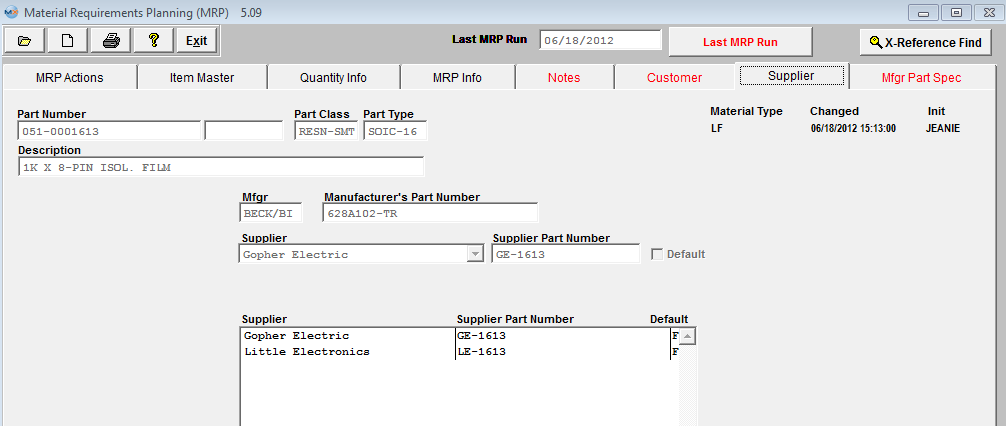
| 1.2.3.7. Supplier Tab |
|
This screen will display the name of the Supplier and Supplier's Part Number for the item highlighted in the MRP Action tab, which is being defaulted in from the Inventory Control Management module. See Article #4043 for field definitions. These fields may be edited in Inventory Control Management .
|
| 1.2.3.8. Manufacturer Part Spec Tab |
|
This screen will display any drawing, photograph, images, or .pdf files linked to the item highlighted in the MRP Action tab, which is being defaulted in from the Inventory Control Management module. See Article #4044 for field definitions. These fields may be edited in Inventory Control Management .
|
| 1.2.4. How To ..... for MRP |
| 1.2.4.1. Find a Material Requirements Planning (MRP) Record | ||||||||||||||||||||||||||
The following screen will be displayed:
Tips on Using the Material Requirements Planning Find Screen Selection of at least one parameter will reduce the time to retrieve the information. The Find by Parent BOM is specific down to the Revision level. If no information is selected in a Find operation, all part numbers with MRP actions will be displayed.
Pressing the Find action Button displays the following sequences: 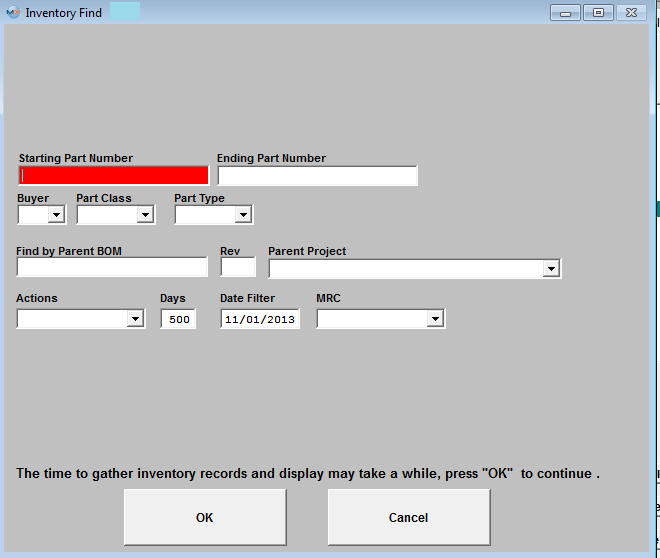 Definition of Material Requirements Planning Find Fields:
Starting Part Number and an Ending Part Number Select Buyer from the pull down menu. If you want ALL buyers, leave this area blank. Assigned Buyer will bring up all items assigned to that particular Inventory Buyer within the Inventory Control Management module. The Buyer assignment is setup in Part Class and Type System Setup Defaults or in the Inventory Control Management module/Item Master tab. If you selected a Class, depressing on the down arrow will bring up a list of Types within that Class. Select the Part Type within the Class selected. If you want all of the Types within the Class, leave this field blank. Revision of Parent BOM. If applicable this MUST be entered to located the exact Parent BOM. The "Find by Parent BOM" is specific down to the Revision level. If the exact part number and revison of the Parent BOM is not correct user will receive the following message: Select the action from the pull down. There are the various Material Requirements Planning actions, which the user may filter on such as: All Actions, All Purchase Order Actions, All Work Order Actions, Pull-Ins, Push-Outs, Release Purchase Orders, Release Work Orders, Cancel Purchase Orders, and Cancel Work Orders. Type in the number of days (from the current date), changes the Date Filter accordingly. This is a short-cut to the horizon date. The horizon date for the Material Requirements Planning actions. Parts with actions beyond this date are excluded from the report. The filtered information will populate the Material Requirements Planning Actions screen, as displayed below:
|

| 1.2.4.2. Add (Generate) A Material Requirements Planning (MRP) | ||||
Add (Run) a Material Requirements Planning
MRP runs through a large number of tables and records to compile its calculations, and provides a snapshot of suggested actions at the same time it is ran. If users are changing things during this process it could definitely cause some strange outcome. To prevent this situation we strongly suggest that you use the Nightly MRP trigger. (Refer to Article #416 for more detail on trigger setup).
If you find the need to re-run MRP during the production work day then we suggest that you notify all departments that MRP is going to be ran and ask them to remain out of the system until the MRP run is complete. This will help assure that the most accurate MRP run is possible. Then follow the procedure below:
The following Screen will be displayed:
To run a new Material Requirements Planning (MRP) manually, depress the Add action button (Generate MRP), and enter your password. The run percentage will be displayed on the header as displayed below:
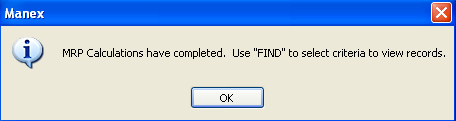
 The time it takes MRP to run is dependent on a number of factors. Here is a list of items that affect the processing time: Once the MRP run is completed and was successful, user will receive the following message:
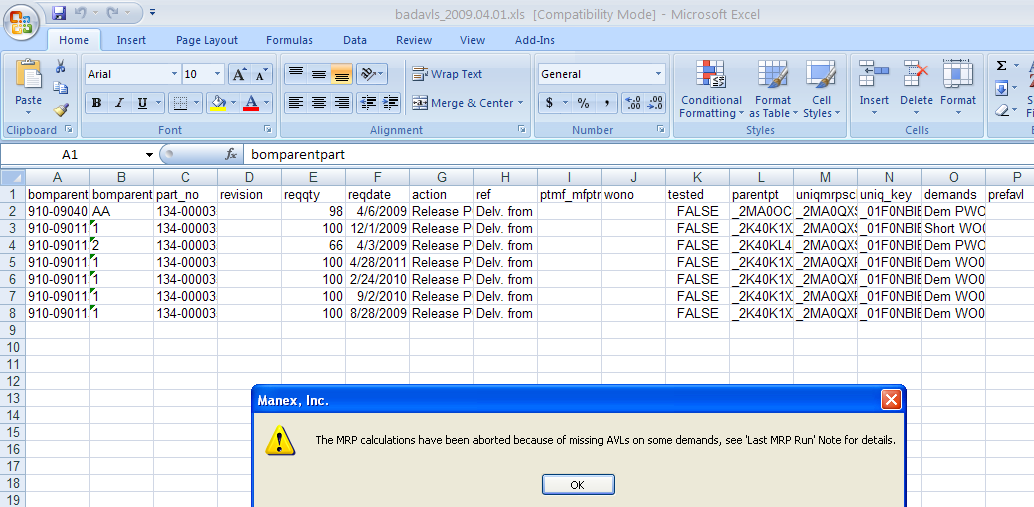
Depress the OK button. The Material Requirements Planning Date at the top right hand side of the screen will change.  If the MRP run was NOT successful due to AVL issues (missing, or exists but is marked as "Do Not Purchase and/or Kit, etc) the following message wil be displayed on screen indicating that MRP will NOT be able to continue until the BOM and/or part records have been correct. Then in addtion to the message an XLS file will be generated and placed in the ManEx Main Directory. This XLS file will contain the records that the user will need to review and address. If an XLS file is generated multiple times a day the system will add "_N" to the name of the XL file, where "N" is the dequence number. For example if MRP is run today three times without fixing a problem or a new problem is generated, the generated files will have names; badavls_2009.03.31_1.xls, badavls_2009.03.31_2.xls, badavls_2009.03.31_3.xls, unless one or all of the files were removed. The user will have the option of viewing the XL file now or later. NOTE: These XL files will need to be manually removed from the ManEx Main Directory.
 If the user selects "No" the user will receive the following message and they may review the XL file placed in the ManEx Main Directory.
 If user selects "Yes" an XL file (similar to the one shown below) will be displayed on screen and also placed in the ManEx Main Directory for later review:
 The date displayed in the "Last Successful MRP Run" will NOT change. The "Last MRP Run" button located in RED at the top of the screen will be displayed in a larger font if MRP run failed due to an AVL issue and there will be brief comment expaining what issues the MRP run encountered. This will allow any user that might not have seen the xls spreadsheet to be aware of what had taken place on the last attempt to run MRP.
 Double click on the "Last MRP Run" button and similar information will be displayed:
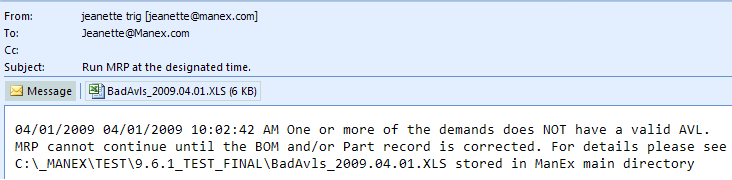
 NOTE: If MRP runs from Trigger, and MRP run was NOT successful due to AVL issues an XLS file will be generated and placed in the ManEx Main Directory for review and also be attached to the e-mail sent, informing user that the MRP run was NOT COMPLETED (similar to the one shown below). Upon opening the MRP screen the "Last MRP Run" button will be displayed in a larger font and will have information about the file as displayed above.
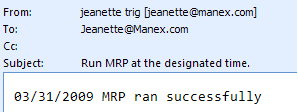
 If MRP runs Successfully from Trigger the e-mail sent will be similar to this:
 |
| 1.2.4.3. Drilling Down In MRP |
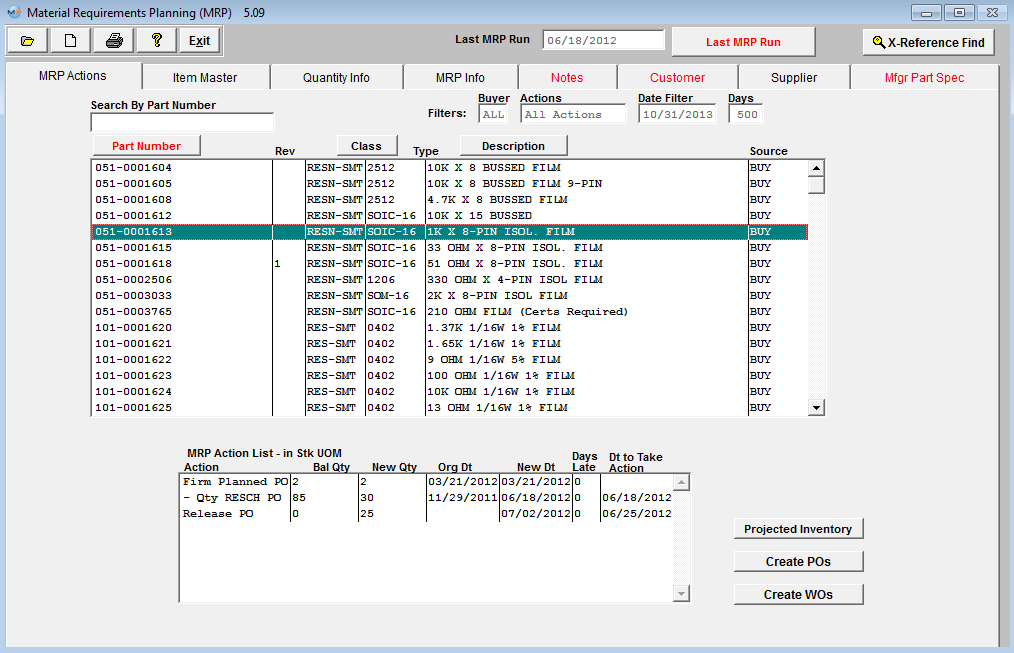
There are several drill downs within the MRP screen. Highlight a Buy or Make Part number of interest on the MRP main screen:
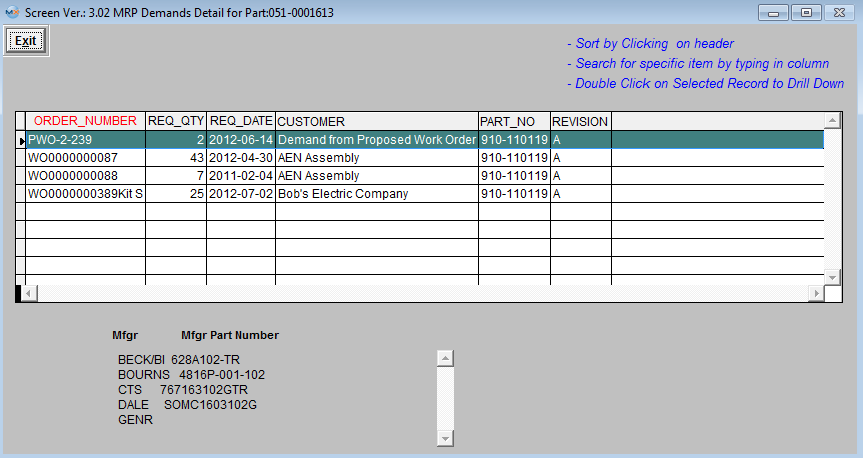
Double click on the highlighted buy part number 051-0001613 and the user can see the assembly of the proposed work order. Highlight the Proposed Work Order Number and the Approved AVL's will be listed per the BOM.
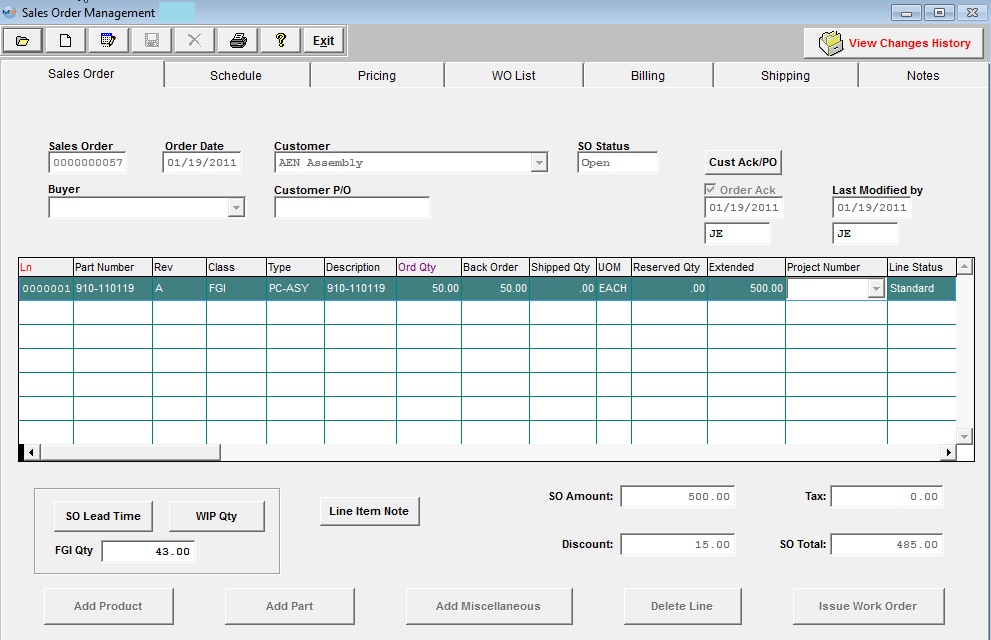
If the User double clicks on the PWO-2-239 (Proposed Work Order) the Sales Order, the assembly, required qty, and Customer will be displayed.: 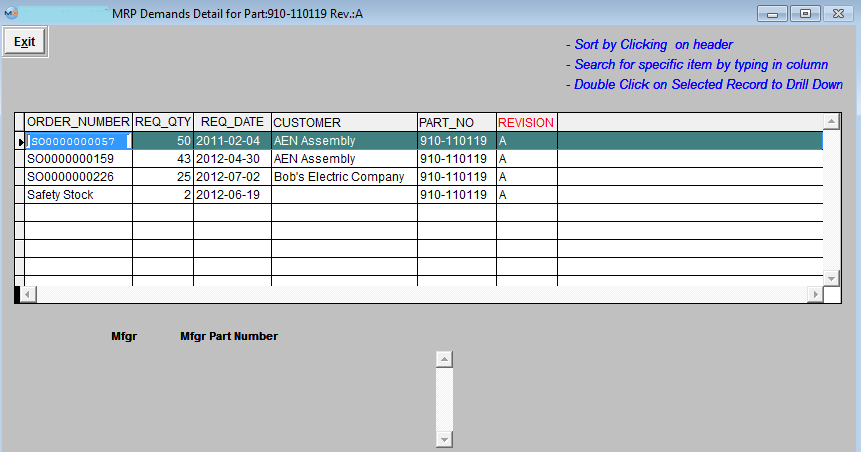 Highlight and double click on the SO0000000057 and the Original Sales Order will display.
Another Drill down located within the MRP Actions screen - is by highlighting one of the actions located in the MRP Action List-in Stk UOM box: 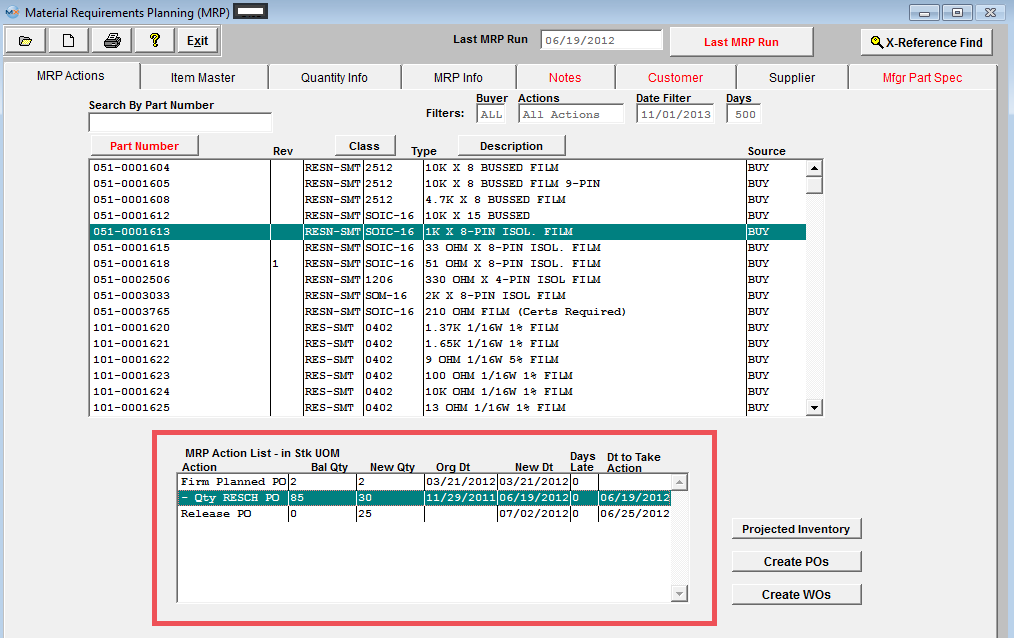 Double Click on the PO, WO, SO, etc of interest and the following screen will be displayed: All the Drill Down screens may be used to Sort, Search, or keep drilling down to actual PO, SO, WO, etc.
 Depress the 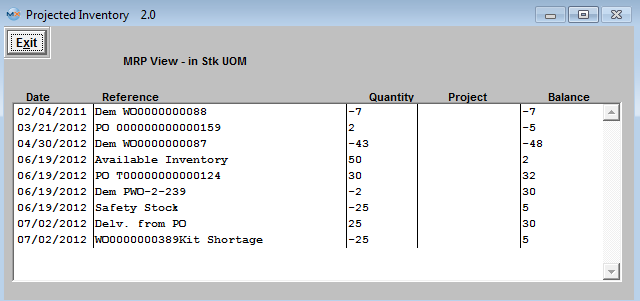 Within this screen you may highlight any of the Reference items and drill down to the original Sales Order, Inventory Level, Purchase Order, etc.
|
| 1.2.4.4. Create POs from MRP Action List | ||||
The following screen will be displayed:
Note: To start creating POs from the MRP action list, make sure you have run MRP creating a fresh MRP action list, and user must have "ADD" rights to the PO module in Security setup.
Find an MRP record.
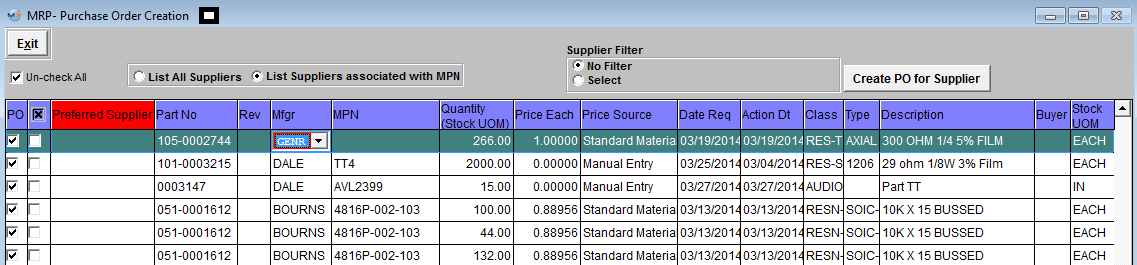
Highlight a part number of interest and depress the Create POs button in the bottom right hand corner, enter user password (user must have "ADD" rights to the PO module), and a list of Release PO suggestions based on the MRP filter that was applied and displayed within the MRP screen will appear. This will allow the buyers to auto created purchase order records based on what MRP is suggesting (mfgr, mfgr pn, etc...)
User may view records by selecting All Suppliers or only Suppliers assigned to the MPN in the ICM module. User may also use the Supplier filter to view records for one supplier at a time.
User may manually select the records to have POs created by placing a check in the box in the PO column. If no supplier is defaulted in the Preferred Supplier column from the ICM module, user may check item in the "x" column, select a supplier from the pull-down and receive the following message:
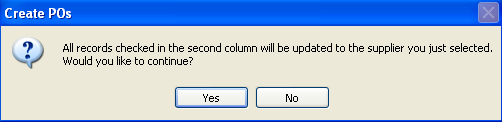 Depress "Yes" to continue and user will receive the following message:
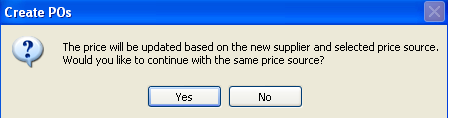 Depress "Yes" and all the records that have the check box to the left of the "Preferred Supplier" column checked will be updated with the selected supplier.
The Cost Each is defaulted in based on the "Price Source" column (which is setup in the Purchase Setup module). The standard Material Price and the Target Price defaults in from the Inventory Control Mgmt module. The Contract Price is defaulted in from the Supplier Contract Mgmt module. The Quote Price is defaulted in from the Quotation & Estimating module. The quote MUST be approved. If the part is on more than one quote the system will use the price from the most recent quote. The Mfgr and Supplier listed on the Auto PO screen must match the Mfgr and Supplier that was selected on the quote. The Last Purchase Price and Last Purchase Price for a Supplier will only be listed if they are within the last 6 months, if not then zero dollars will be displayed. Manual Entry allows user to manually enter in a cost each.
NOTE: The Auto PO screen will only find existing parts entered in the "Material 1" screen. There is no way to identify parts from "Material 2" screen. There is no connection between part entered in the quote module "Material 2" screen and the part before it becomes an Inventory part in ManEx until after the "Transfer".
All coulmns in the grid are sortable. To sort on the specific column click the header of the column. By default the items are sorted by "Preferred Supplier" column (red color of the header indicates that the data sored by the values in the column). Part No and Rev columns are both sorted by Part No and Rev vaules. If the cursor is in Part No, Mfgr,or MPN columns and the user begins to type the information, the interactive search will be performed and the record pointer will be moved to the appropriate record.
Once user has selected the records, they can depress the "Create PO for Supplier" button and PO's will be created (one for each supplier).
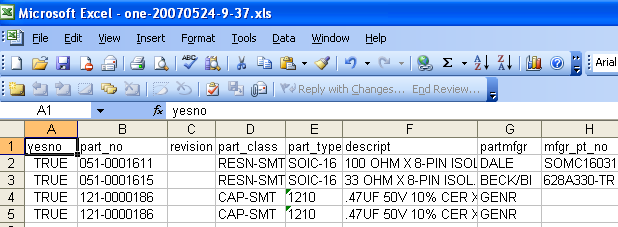
Once the POs have been created an xls report will be generated in the Manex local directory for review. The XL file name is based on the user initials plus the date and time the file is created. For Example if the file created has a name "ONE-20070524-9-37.xls" "ONE" - this is the user's initials; "20070524" - is the date when file was created (YYYYMMDD); "9-37" is the time (Hours-Min) when file was created, so this file was created at 09:37 am.
 User has the option of opening the created excel file by depressing Yes or No.
 |
| 1.2.5. Reports - MRP | ||||||||||||||
To obtain the MRP Reports within the Web, select the WEB Print button from the ManEx action buttons at the top of the screen. For further detail on How the Reports work within the Web refer to Article #5477.
Note: In order to access the Reports within the Web the Company Root URL must be setup within the System Appearance module and user must be linked to web within the System Security Module
Select the Report Type: MRP - A List of Reports will be displayed that are available on the Web
for MRP
To obtain the MRP Reports within the desktop, select the Print button from the ManEx action buttons at the top of the screen. The following reports screen will display a list of reports that are available on the ManEx Desktop: 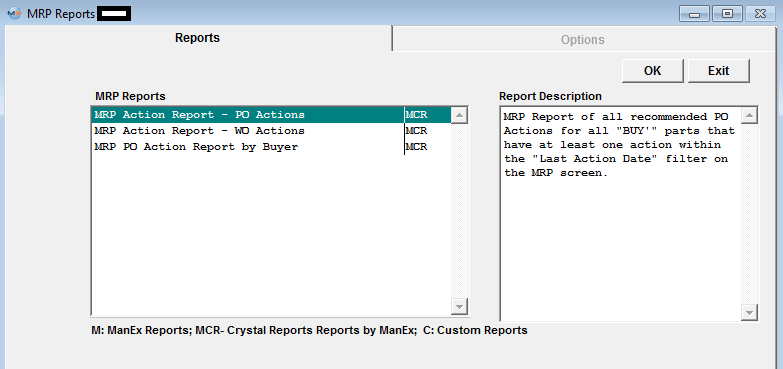 Highlight the report, depress the option tab (if applicable) and depress the OK button.
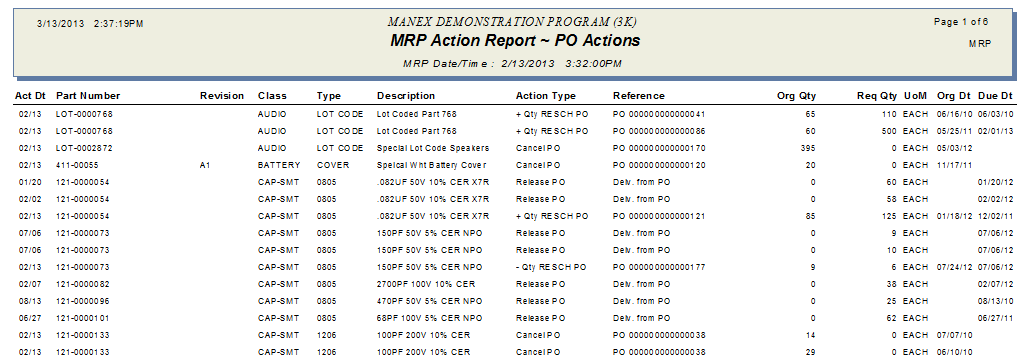
MRP Action Report - PO Actions - MRP Report of all recommended PO Actions for all "BUY'" parts that have at least one action within the "Last Action Date" filter on the MRP screen. The following report is printed:
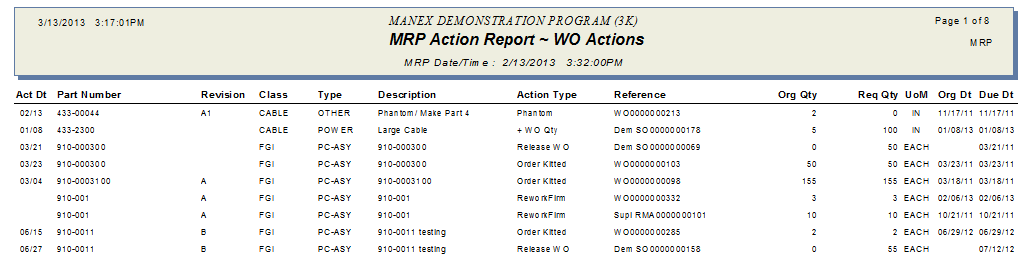
MRP Action Report - WO Actions - MRP Report of all recommended PO Actions for all "BUY'" parts that have at least one action within the "Last Action Date" filter on the MRP screen. The following report is printed:
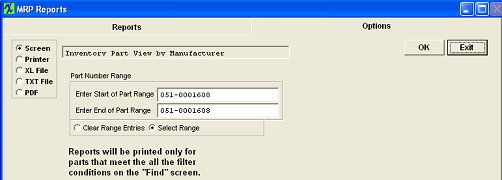
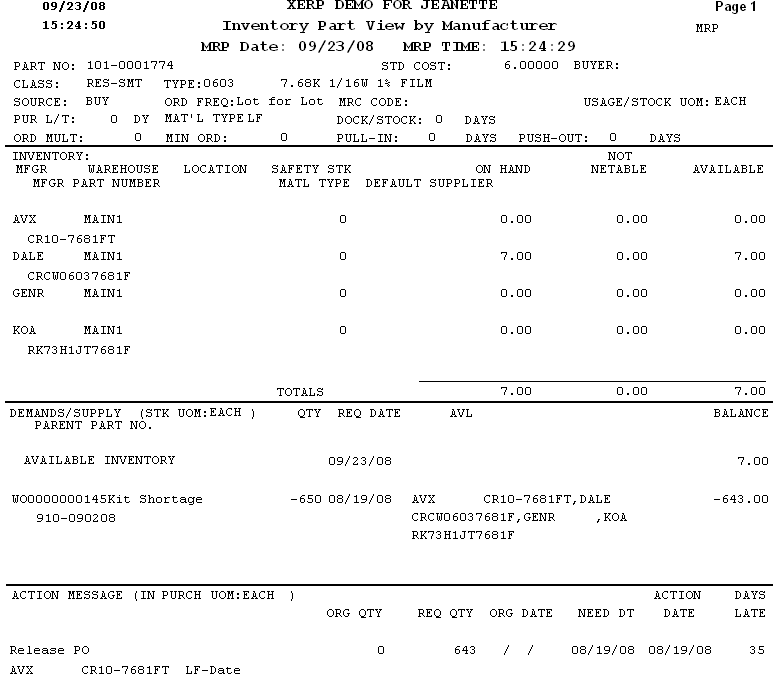
Inventory Part View by Manufacturer - This report displays the inventory information, supply, demands and action messages for a part that are the results of the latest MRP run.
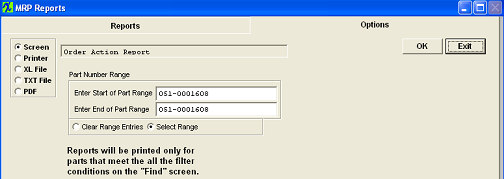
For Inventory Part View By Manufacturer, depress the Options tab: Select the Part Number Range desired. To clear the range entries, click on the "Clear Range Entries" radio. The following report is printed:
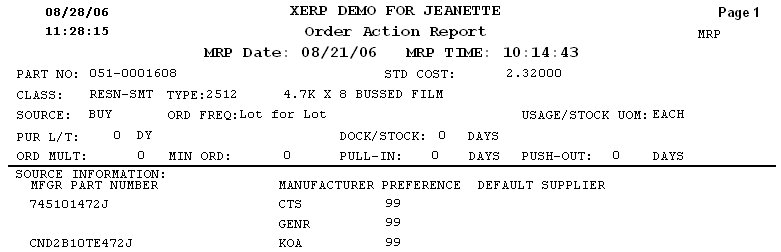
Order Action Report - This report displays the inventory information, purchase history, open PO's and MRP actions for 'BUY' parts that are the results of the latest MRP run.
The following report is printed:
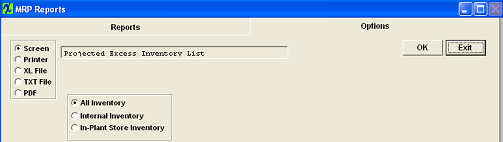
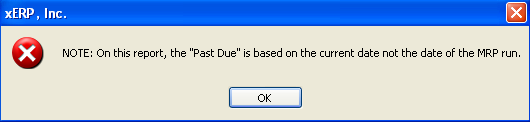
Projected Excess Inventory List - This report list the projected excess inventory that is on hand but not needed after MRP requirements.
The following report will print:
MRP Horizontal Planning Summary - This reports displays the supply and demand for each part on the MRP action list with the quantities in weekly buckets.
Note:This report requires Legal size paper.
The following message will appear:
Depress the OK button and the following report will be printed:
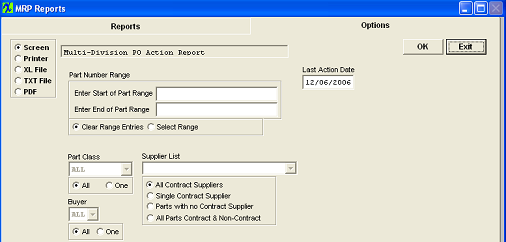
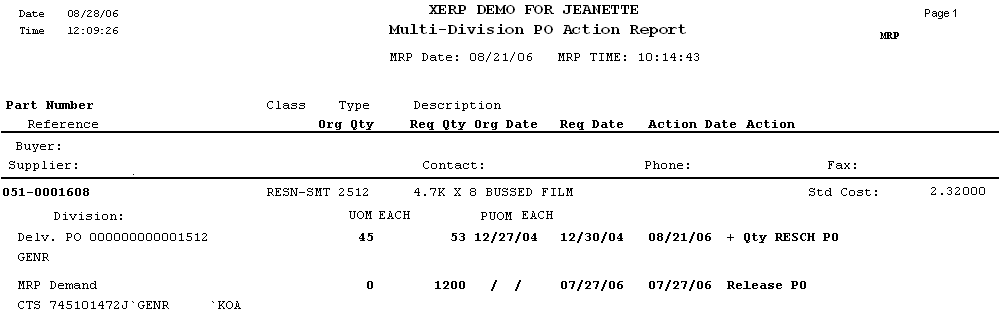
Multi Division Purchase Order Action Report - NOTE: The system does NOT require that you have Multi-Divisions setup to utilize this report.
The following report will be printed: The report is intended to break down the PO actions from the MRP run by Buyer, then part number.
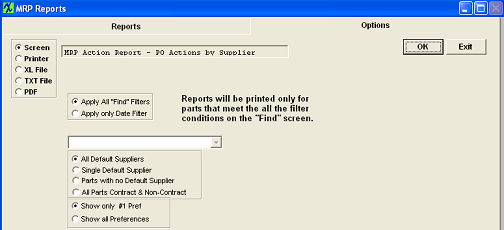
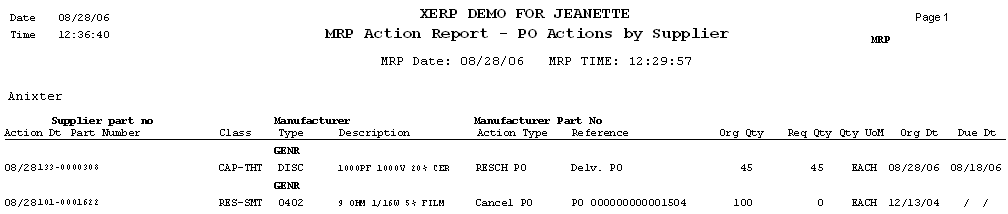
MRP Action Report - PO Actions by Supplier - MRP Report of all recommended PO Actions for all "BUY'" parts that have at least one action within the "Last Action Date" filter on the MRP screen by Supplier
The following report will print:
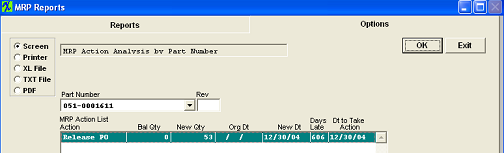
MRP Action Analysis by Part Number
The following report is available:
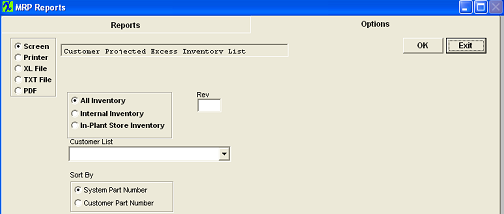
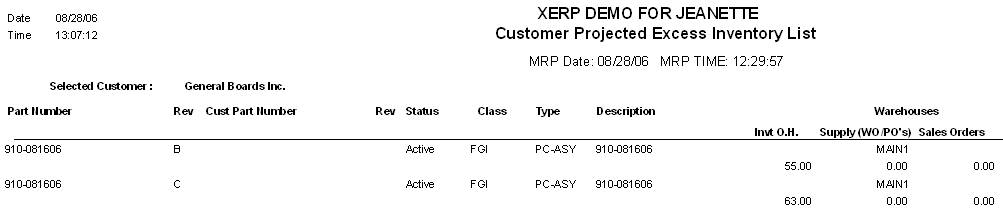
Customer Projected Excess - This report list the projected excess inventory that is on hand but not needed after MRP requirements for a selected customer.
Note: This report requires Legal size paper.
The following report will be printed:
MRP PO Action Report by Buyer - MRP Report of all recommended PO Actions for all "BUY'" parts that have at least one action within the "Last Action Date" filter on the MRP screen.
Note: A default Supplier MUST be linked to the inventory part before it will display on the report. The following report will print:
|


| 1.2.6. FAQs - MRP |
| Facts & Questions for the MRP Module |
| 1.2.7. MRP Hot List | ||||||||||||||||
|
After activation, "Material Requirements Planning" (MRP) access for each user must be setup in the ManEx System Security module. Users with “Supervisor Rights” will automatically have access.
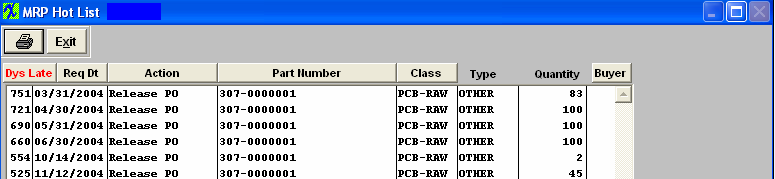 Material Requirements Planning Hot List Field Definition:
|
| 1.3. Purchase Setup |
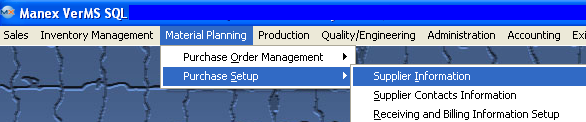
| 1.3.1. Supplier Information |
| 1.3.1.1. Prerequisites - Supplier Information | ||||||||||
After activation, "Supplier Information" access for each user must be setup in the ManEx System Security module. Users with “Supervisor Rights” will automatically have access.
|
| 1.3.1.2. Introduction for Supplier Infomration |
The Supplier Module is used to enter the details about Suppliers. This information is used to prepare purchase orders and receivers, as well as establish defaults to be used when new purchase orders are created for a supplier. A supplier may have more than one remit-to address, if there are different divisions for the supplier with different accounting departments. One supplier remit-to address will be identified as the default address to be used in the creation of new purchase orders. One supplier confirm-to address will be identified as the default address in new purchase orders. Also, terms and conditions identified in these screens will be used as defaults for purchasing, receiving and accounting. The user has the opportunity to modify the default information at the time a new purchase order is created. The Receiving and Billing Information is the user’s addresses which will print on the Purchase Order. |
| 1.3.1.3. Fields & Definitions for Supplier Information |
| 1.3.1.3.1. Supplier Tab | ||||||||||||||||||||||||||||||||
Supplier Information tab field definitions
CONTACTS
|
| 1.3.1.3.2. Remit To Tab | ||||||||||||||||
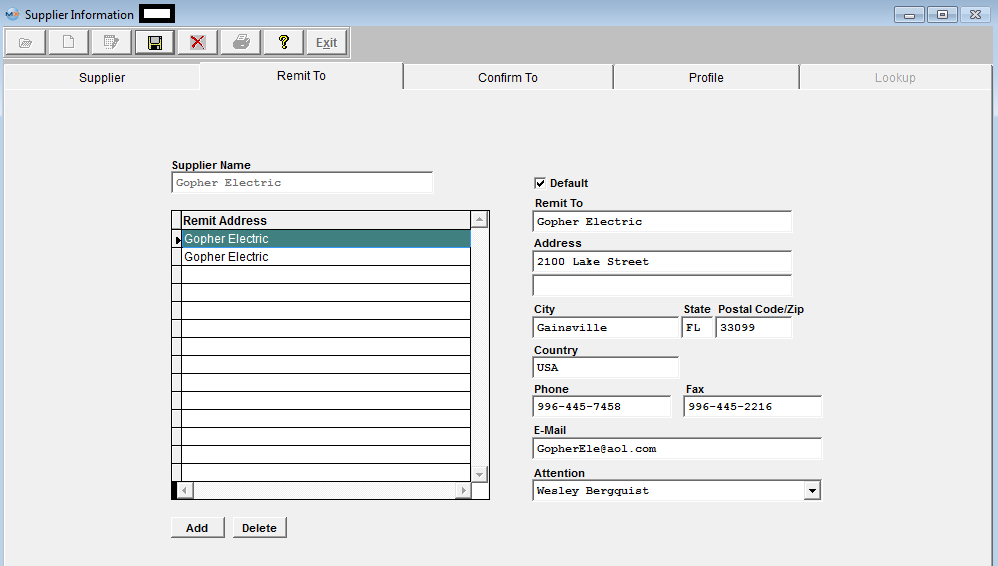 Remit To tab field definitions
The name of the check payee. The mailing address where the remittance will be sent. How to contact the remittance address personnel. The contact at the remittance address.
|
| 1.3.1.3.2.1. Supplier e-Bank Information | ||||||||||||||||||||||||||||||||||||||||||||||||
Information populated here would be the Supplier's banking information
|

| 1.3.1.3.3. Confirm To Tab | ||||||||||||||||
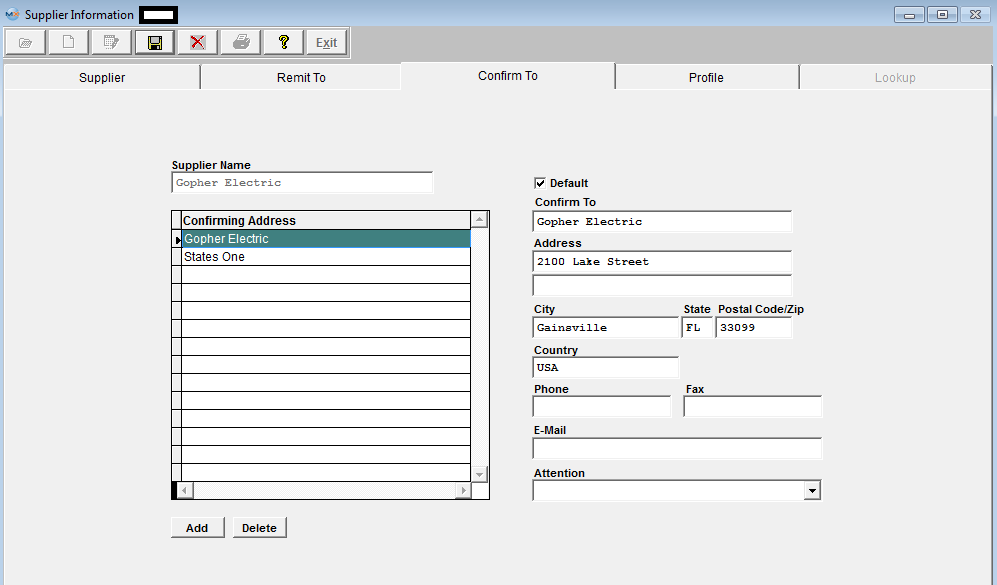 Confirm To tab field definitions
|
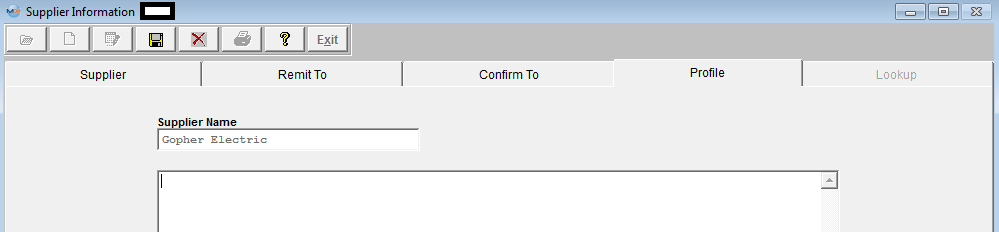
| 1.3.1.3.4. Profile Tab |
This tab is available for the user to make notes/comments about the Supplier.
|
| 1.3.1.4. How To .... for Supplier Information |
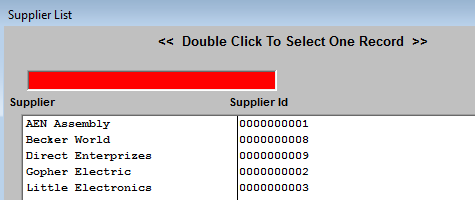
| 1.3.1.4.1. Find Supplier Information | ||||||
The following screen will be displayed:
|
| 1.3.1.4.2. Add Supplier Information | ||||||||||||||||||||||||
|
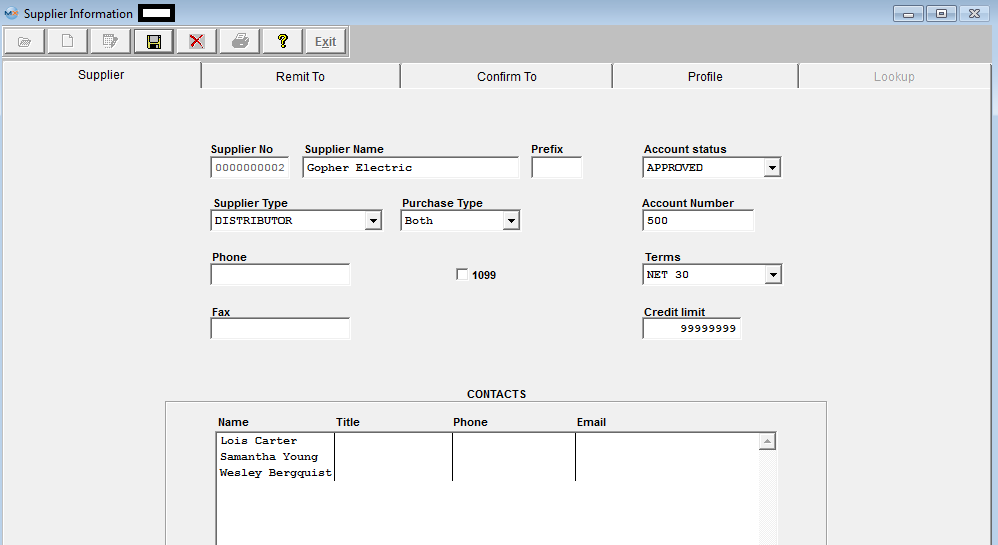
The following screen will be displayed:
To ADD a new Supplier, the user selects the Add action button, enter password, this enables the fields on the screen for data entry.
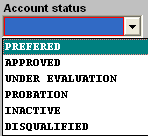
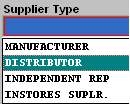
Enter the following fields: The Supplier Number assigned to the Supplier. If automatic numbering assignment was selected in Number System Setup, it will be completed when the data is saved. If manual, it must be entered. The Supplier Name. A Prefix if desired.
Enter the user’s Account Number with the Supplier. Enter the Phone Number of the Supplier. Check the box nex to (1099) if the Supplier is to receive a 1099.
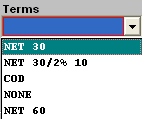
The Terms the Supplier has for the user, such as Net 30, 2% 10, COD, etc..... Select from the pull down: Enter the Fax Number of the Supplier.
Enter the Credit Limit established by the Supplier for the user.
When this screen is viewed for an existing Supplier, Contacts entered in the Contacts Module will show for this Supplier. This field is NOT editable from this module.
After completing the Supplier information screen, the user may tab (clicks on the next) to the Remit To screen.
In this screen, the user defines the Supplier information for payment purposes. The Supplier Remit-To Directive buttons will now be active:
Enter information as follows: The name of the Supplier, Defaulted from the first screen, but may be over-written. A list of Remit-To addresses created for the Supplier, from which to choose for editing data. The name of the organization to which payment is to be sent. (It may be a different division.) Enter the Supplier Remit-To Address (may use two lines). Enter the City, State and Zip Code for the Supplier Remit-to Address.
Enter the Supplier Country.
Enter the phone number at the Supplier’s Remit-to Address.
Enter the Fax Number of the Supplier’ Remit-to Address.
Enter the e-mail address of the Supplier Remit-to Address.
The Contact Name at the Remit-to address (if established in the Contacts Module). After completing the Remit To information screen, the user may tab (clicks on the next) to the Confirm-To screen.
In this screen, the user defines the Supplier information for ordering purposes. This screen and fields are identical to the Remit-to screen, except that the information will be used for the mailing address of the Supplier. Pressing the Add action button will automatically fill the information from the Remit-to screen, if it has been completed. All data may be edited and saved, or new data may be added to the database. Note: There must be a default Confirm To address. After completing the Confirm-To screen, the user may tab (clicks on the next) to the Profile screen.
In this screen, the user defines the Supplier Profile notes for internal purposes. This screen is a memo field that may be used to record Supplier company information. Once all of the data entry is complete. Depress the Save action button. You will be asked if you want to create another Supplier. |


| 1.3.1.4.3. Edit Supplier Information |
Depress the Edit action button. All fields on the Supplier tab will be enabled for modification.
 All fields on the Remit To tab will be enabled for modification.
Note: The system will keep the address information (on existing PO's) that was actually selected at the time the PO was created. If you add a new Supplier Remit To address and mark the new address as the Default. The previously created PO's will still carry the original Remit to (ManEx cannot assume that the user wants to change all Remit To's across the board for already created and approved PO's). The user will be required to edit each PO that the change affects and update the Remit to with the new default (any new PO's created will properly take the new default).
The Invoices created through the PO Reconciliation module also carry the original Remit to Address information. Any invoice that already was created and remains on your AP Aging will need to be edited through the Manual AP Entry screen. IF it was already released to the GL at that time, I don’t think that the Edit feature would be available. If you are unable to edit the Remit to information via the Manual AP Entry, then you can control the Remit to information that will print on the AP Check, by creating a Manual check through the Check Maintenance screen.
If you completely delete a Remit To address any previously created PO's will no longer have a Remit to address to refer to, therefore the remit to information on existing PO's will be blank. The AP check module prints the checks per the Remit To information that is associated with each PO, so the address printed on the check will also be blank. So, each PO that still has invoices residing within the AP Aging, will have to be edited and the Remit To information will have to be updated with the new address, if a Remit To address is deleted. We would suggest that the person making changes to the Remit To Address information is careful before deleting one from the system. You have to make sure that any record that has already been associated with that record has been processed through the system, and/or updated with the new address information.
All fields on the Confirm To tab will be enabled for modification.
All fields on the Profile tab will be enabled for modification.
 |
| 1.3.1.5. Reports - Supplier Information | ||||
|
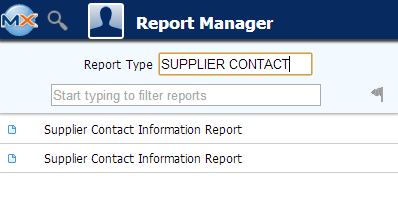
To obtain the Supplier Information Reports within the Web, select the WEB Print button from the ManEx action buttons at the top of the screen. For further detail on How the Reports work within the Web refer to Article #5477. Note: In order to access the Reports within the Web the Company Root URL must be setup within the System Appearance module and user must be linked to web within the System Security Module
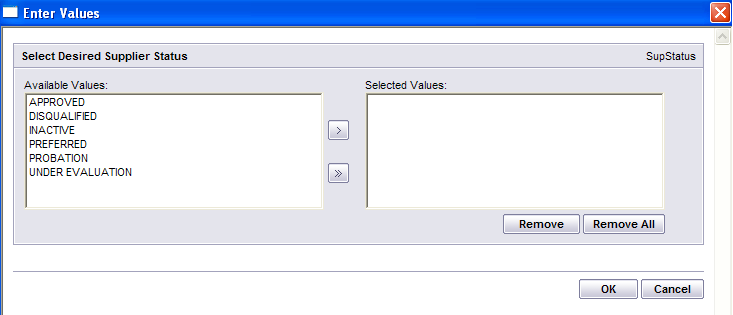
Select the Report Type: SUPPLIER OR SUPPLIER CONTACT - A List of Reports will be displayed that are available on the Web
for SUPPLIER OR SUPPLIER CONTACT
To obtain the Sales Order Reports within the desktop, select the Print button from the ManEx action buttons at the top of the screen.
The following reports screen
will display a list of reports that are available on the ManEx Desktop:
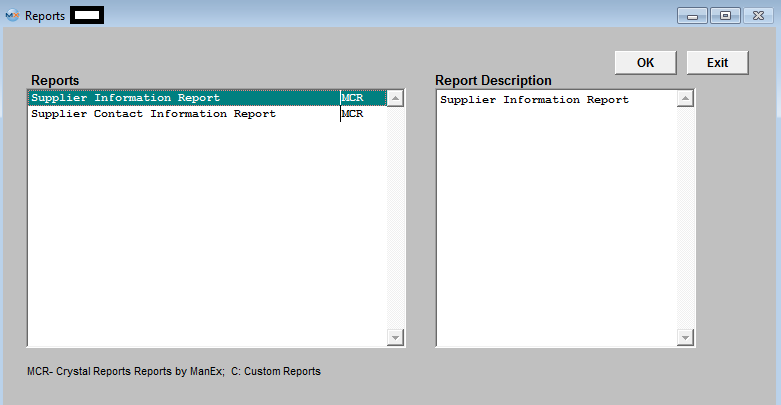 Highlight the report desired and Depress the OK button. Supplier Information report
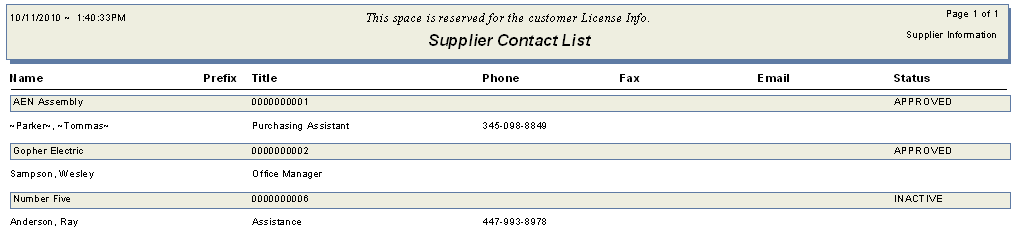
The following report will print: 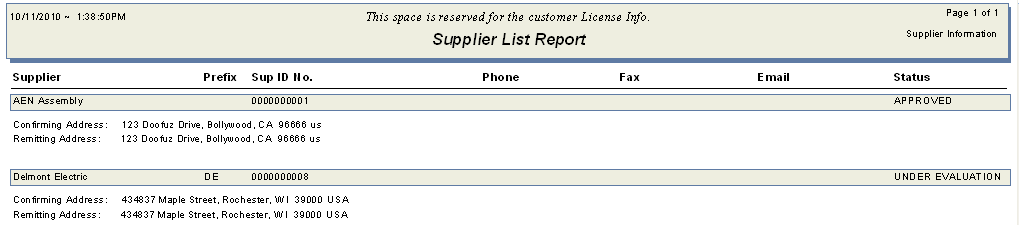 Supplier Contact Information report
The following report will print:
|

| 1.3.2. Supplier Contacts Information |
| 1.3.2.1. Prerequisites for Supplier Contact Information | ||||
Prerequisites for Entering a New Contact:
After activation, "Supplier Contact Information" access for each user must be setup in the ManEx System Security module. Users with “Supervisor Rights” will automatically have access.
The Contact must refer to a Supplier, which has been set up in the Supplier module. A picture of the contact may optionally be included as a memory jogger, but the picture must already be available to pickup in a picture format.
|
| 1.3.2.2. Introduction for Supplier Contact Information |
The Contact Module is used to record the details of supplier contacts. Contacts may be of any nature, but must be associated with a supplier. Manex provides the user with the ability to maintain both professional and personal details about a contact, including provision for personal tastes and affiliations. Contacts must be entered in this module if they are to be included in the supplier remit-to and confirm-to data fields at a later time. A contact who has moved to another supplier may have a new supplier assigned to him/her without having to re-enter their personal data. |
| 1.3.2.3. Fields & Definitions for Supplier Contact Information |
| 1.3.2.3.1. Business Tab | ||||||||||||||||||||||||||
Fields & Defintions
|
| 1.3.2.3.2. Personal Tab | ||||||||||||||||||||||
Fields & Definitions
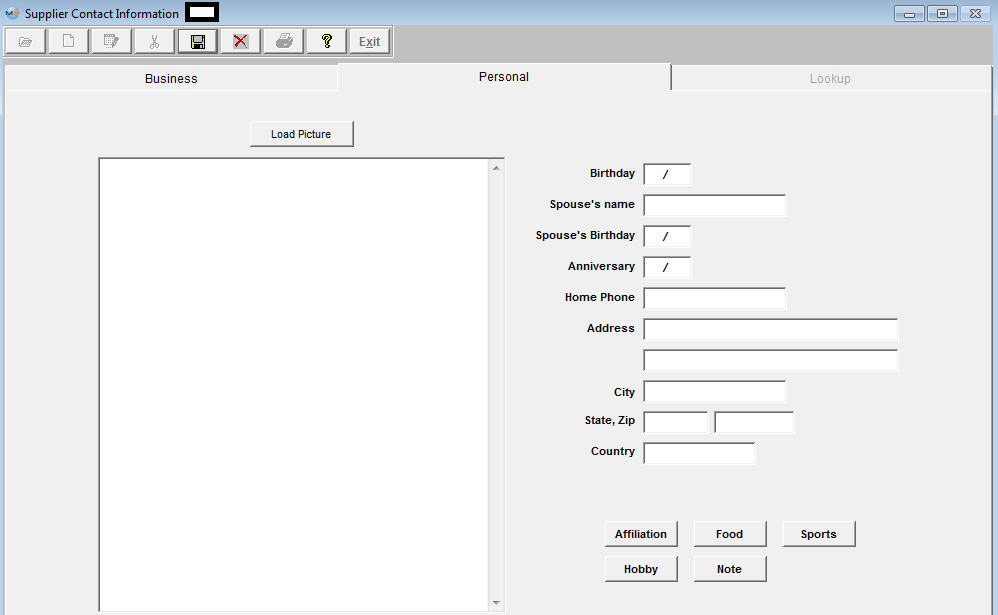
|

| 1.3.2.3.3. Lookup Tab | ||||||||||
Fields & Defintions
|
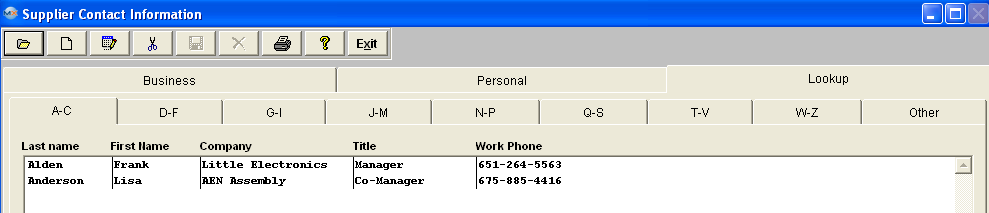
| 1.3.2.4. How To .... for Supplier Contact Information |
| 1.3.2.4.1. Find a Supplier Contact | ||||
The following screen will be displayed:
There are two ways to Find Existing Supplier Contacts: 1. By using the Find button located in the tool bar at the top of the screen. The following screen will appear: Select the desired Filter: by selecting the appropriate radio button - Active, InActive, or All. Select the desired Find: by selecting the appropriate radio button - Last Name, First Name, or Supplier Enter the information into the red box, depress the Enter key and the information will populate the screen.  2. Depress the Lookup tab. This screen allows the user to locate a supplier contact alphabetically. Double click on the supplier contact name will bring the associated data into all screens without having to use the FIND action button. This screen will list all of the supplier contacts entered beginning with the Last Name, First Name, Company, Title and Contact Phone number (not the company phone number).
|

| 1.3.2.4.2. Add a Supplier Contact | ||||||||
The following screen will be displayed:
Depress the Add action button. The user will be prompted for an authorized password. Type in the last name of the contact being added. Type in the first name of the contact being added. Type in the middle initial of the contact. Select the status of the Customer Contact, either Active or Inactive. Type in the nickname of the contact. Select the company to which the contact belongs by depressing on the down arrow located on the right hand side of this field and highlighting the selection. Type in the title of the contact at the supplier. Type in the phone number and/or extension of the contact at the supplier (may be different than the supplier main number). Type in the FAX number of the contact at the supplier (may be different than the supplier main number). Type in the E-Mail address of the contact. Type in the department at the supplier in which the contact works. Type in a Cellular phone number for the contact. Type in a Pager number for the contact. After completing the Business information, the user may click on the Personal tab. In this screen, the user may enter personal information relating to the contact.
The Supplier Contact Directive buttons will now be active.
This set of buttons allow the user to record specific information that they may wish to retain about the customer contact. It is divided into several categories to narrow the search for information later. Pressing any of these buttons brings up a memo window that may be added to, edited or canceled at will. Type in the Supplier Contact Birth Date. Type in the Supplier Contact’s Spouse Name. Type in the Contact’s Spouse’s Birthday. Type in the Contact’s Anniversary. Type in the Contact’s Home Phone. Type in the Contact’s Home Address(two lines available). Type in the Contact’s Home City. Type in the Contact’s Home State and Zip code. Type in the Contact’s home country. Depress the Save action button to save changes, or depress the Abandon changes action button to abandon changes. |
| 1.3.2.4.3. Edit a Supplier Contact | ||||
The following screen will be displayed: Find a Contact following the procedure in Article 4452 .
Once you have made your choice, the information will be displayed as follows:
Depress the Edit action button. Enter password. All fields available for editing will be enabled for modification. At the conclusion of the modifications process, the user must Save changes, or Abandon changes using the action buttons. Depress the Exit action button to return to the previous screen. |
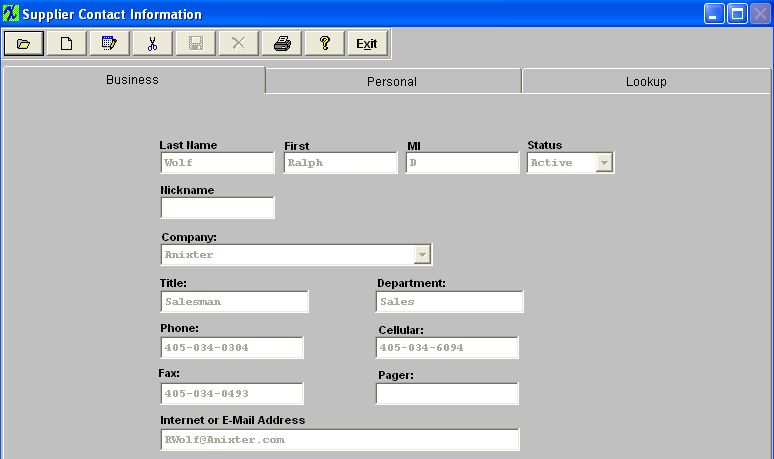
| 1.3.2.5. Reports - Supplier Contact Information |
|
The report screen will be displayed: 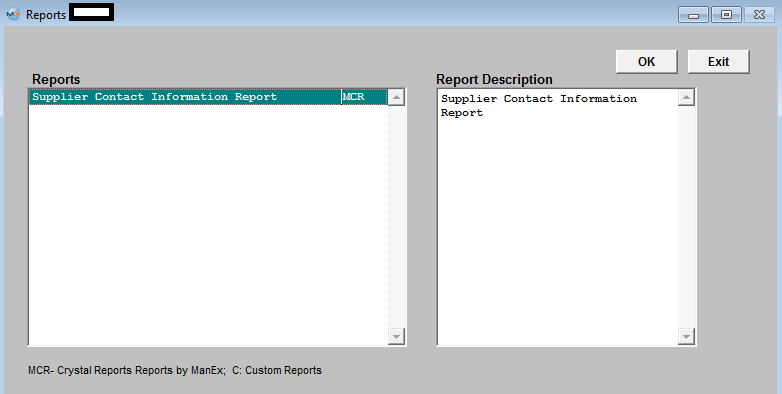 Highlight the report desired and Depress the OK button.
The following report will print:
|
| 1.3.3. Receiving And Billing Information |
| 1.3.3.1. Prerequisites for Receiving & Billing Information | ||||||||
Prerequisites for Entering Receiving & Billing Information:
After activation, "Receiving Information" access for each user must be setup in the ManEx System Security module. Users with “Supervisor Rights” will automatically have access.
The Sales Tax Authority must be setup in System Setup /Sales Tax Authority Table The Ship Via must be set up in System Setup /Ship Via The FOB must be setup in System Setup /FOB The Ship Charge must be setup in System Setup /Ship Charge
|
| 1.3.3.2. Introduction for Receiving & Billing Information |
| The Receiving & Billing Information Module is used to record the details of the user’s billing and receiving addresses. |
| 1.3.3.3. Fields & Definitions for Receiving & Billing Information |
| 1.3.3.3.1. Receiving Address Tab | ||||||||||||||||||||||||||
|


| 1.3.3.3.2. Tax & Shipping Mode Tab | ||||||||||||||||||
|

| 1.3.3.3.3. Billing Information Tab | ||||||||||||||||||||||
|
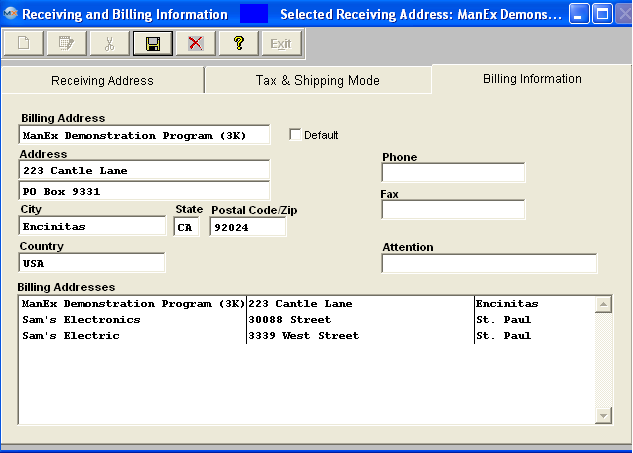
| 1.3.3.4. How To ..... for Receiving & Billing Information |
| 1.3.3.4.1. Add Receiving and Billing Information | ||||||||||||
|
The following screen will be displayed:
Depress the Add action Button. Note: When the Add button is selected user will be able to add "Receiving" and "BIlling" addresses. Enter in all of the receiving information as you would like it to appear on your Purchase Order.
Enter a street address - this would be where you would like the goods delivered. Two address lines are allowed. The second line is for a suite number, etc. Enter a phone number at the receiving location (if applicable). Enter a fax number at the receiving location (if applicable). Enter in the city, state and zip code. Enter in the country of the receiving location. Enter in the name of the contact at the receiving location.
Check the "Add Billing Address same as selected Receiving Address" box if you would like this address added to the Billing Address list also. Note: If you check this box, it will stay checked until you select a different receiving address. Unchecking this box will not affect any data. If this box is check and the address user is trying to add already exists they will receive the following message:
 A sample of the completed screen appears below: 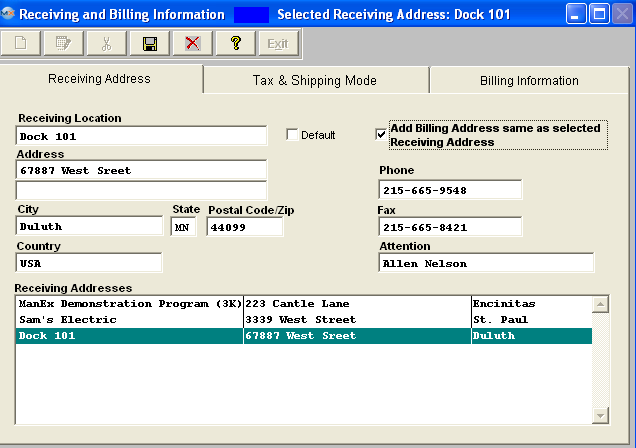 Depress the Tax and Shipping Mode information. 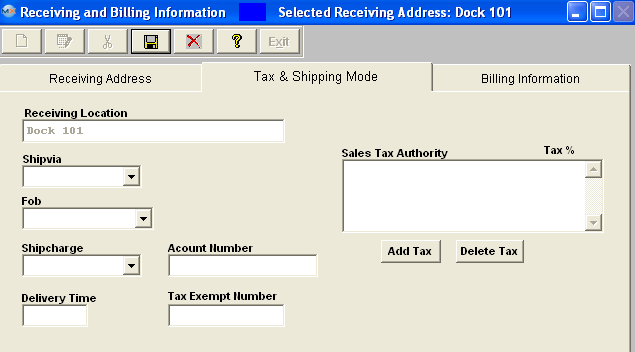 This screen has information for carrier name, FOB, tax status, etc. The name of the company at the receiving location carries over from the previous screen and can NOT be edited.
Select the carrier from the pull down. The selections default in from the Ship Via setup module within System Setup.
Select the FOB (Free-on-board) information from the pull down. This is the point when title passes. the selection default in from the FOB setup module within System Setup. Sales Tax
The sales tax authority and the Tax % is for those purchases which are subject to tax. Depress the "Add Tax" button and the selections will default in form the Sales Tax Authority Table setup module setup within the System Setup. Choose the one applicable to your company’s purchases. Select the Ship Chargefrom the pull down. The selections are defaulted in from the Ship Charge setup module within System Setup. This will indicate the shipcharge preference of the user Enter in the user’s account number in those instances where the user will be paying the freight charges directly to the carrier and not to the supplier. Enter in the time when the delivery is expected to be at the receiving location. Enter in the user’s sales tax identification number for those purchases which are not subject to sales tax. Please check with your state or local sales tax authorities for more information regarding Sales Tax exemptions since the laws vary from state to state. A sample of the completed screen appears below:
Depress the Billing information tab. This would be the address of the user’s Accounts Payable department. If you checked the "Add Billing Address same as selected Receiving Address" box on the Receiving address page the address was automatically added, however you can over write this address if you choose to do so. 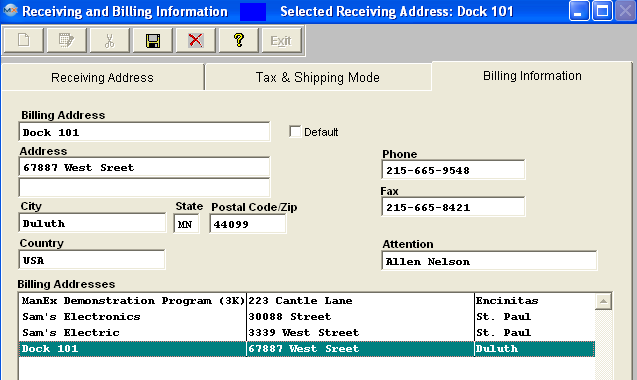 If you want to keep all the addresses listed and add a new address then you would need to depress the Save button at this point, then depress the Add button to add a new address to the Billing Address list.  Enter in a Billing name or location. Note: This is a required field. If you have more than one billing location, you must select at least one as the default. You can choose among the selection of billing addresses when you prepare the purchase order. Enter in the street address where you want your billing mailed. Two address lines are allowed. The second line is for a suite number, etc. Enter in the phone number at the billing location (if applicable) Enter in the fax number at the billing location (if applicable). Enter in the city, state and zip code. Enter in the country of the billing location. Enter in th name of the contact at the billing location, normally Accounts Payable, for example. The completed screen would appear as follows:
|

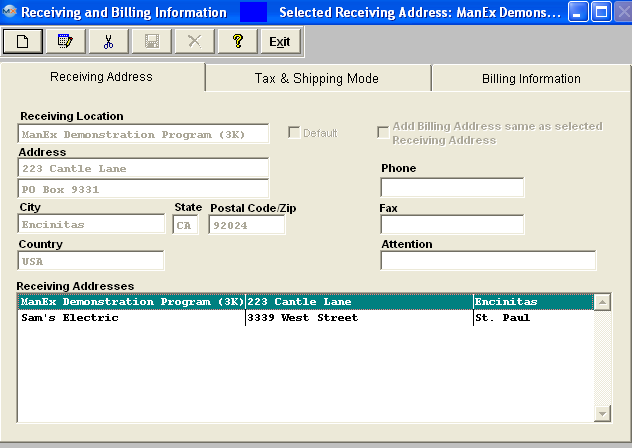
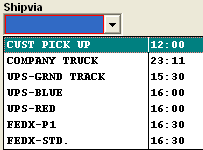
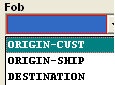
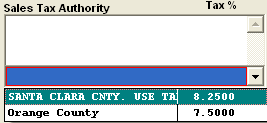
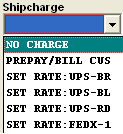
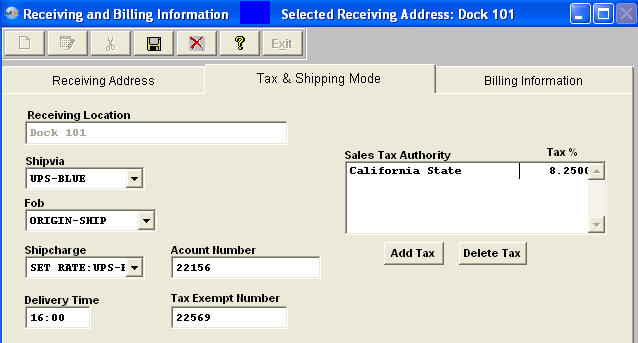
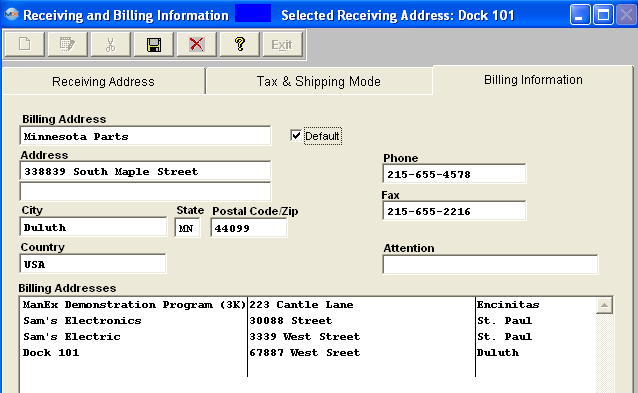
| 1.3.4. Supplier Contract Management (OPTIONAL Module) |
|
| 1.3.4.1. Prerequisites for Supplier Contract Mgmt | ||||
ManEx’s standard module configuration allows most users to accomplish their daily tasks. For those users wanting to get more from ManEx by leveraging the total solutions, this is one of the optional modules available for purchase. If user purchase's the Optional module -In-Plant Store (IPS) they will also receive the Supplier Contract Management module. These two modules go together. To place an order or to learn more about this specific module or any of the other optional modules please contact us at http://manex.com"contactus.aspx Prerequisites for Entering a Supplier Contract: After activation, "Contract Purchase Management" access for each user must be setup in the ManEx System Security module. Users with “Supervisor Rights” will automatically have access.
Supplier must be added in Supplier Information Part MUST exist in Inventory Control Management |
| 1.3.4.2. Introduction for Supplier Contract Mgmt |
Supplier Contract Management is for recording the contract with the supplier for In-Store items.
IPS inventory is received via Inventory Handling or IPS Upload. The IPS module is to keep inventory as Supplier owned but is recognized as being available for consumption by MRP and kitting. When it is consumed by kitting or transfer, a Purchase Order is automatically generated to reimburse the Supplier for the material.
There are three uses for the IPS module: supplier owned but stored on-site, customer owned and stored on-site, and internally owned but obsolete parts that the user does not want to affect the books. In any of these situations a supplier must be established (this means that the customer must also be a supplier and the user must be a supplier if they have obsolete inventory in the IPS location).
· Add the Supplier in the Supplier Information Module. · Set up an In-Store Warehouse and the applicable G/L number in System Setup/Warehouse Setup module. · Add the in-stores item into the Item Master in the Inventory Control Mgmt module and create an In-Store Warehouse. · Move the materials into the warehouse using the Inventory Handling module. · Add the In-Store Contract in the Supplier Contract Mgmt module. · Pull a kit (only a kit shortage gets a P.O.) within the Kitting & Shortage Mgmt module. · Add a Purchase Order and select In-Stores within the PO Mgmt module. |
| 1.3.4.3. Fields & Definitions for Supplier Contract Mgmt |
| 1.3.4.3.1. Supplier & Contract Part List Tab | ||||||||||||||||||||||||||||||
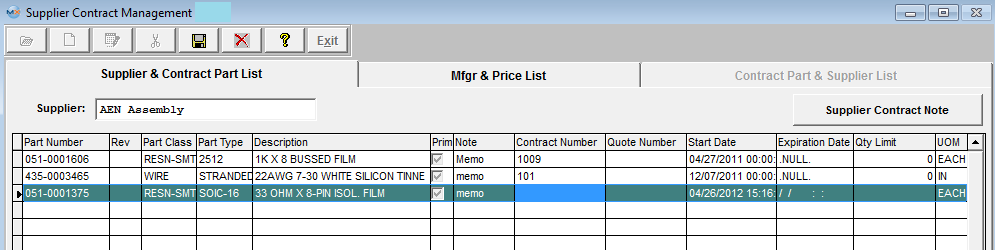 Supplier & Contract Part List Field Definitions
|

| 1.3.4.3.2. Manufacturer & Price List Tab | ||||||||||||||||||||||
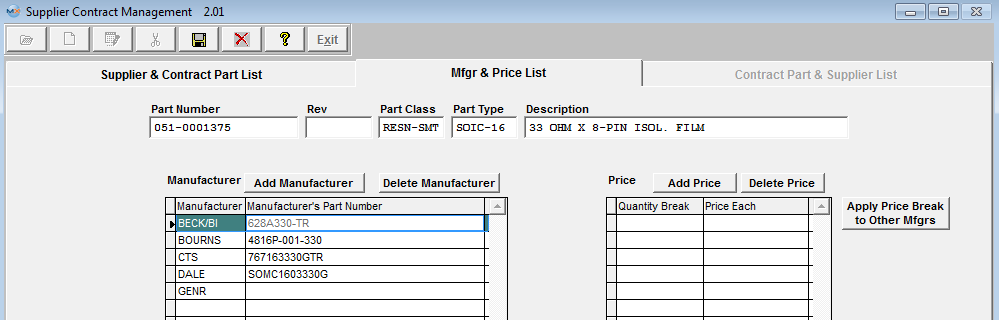 Manufacturer & Price List Tab Field Definitions For the Part Number highlighted in the Supplier & Contract Part List tab:
The number the user has assigned to the part. The revision number applicable to the part Number. The classification to which the part is assigned. The type within the classification to which the part is assigned. The description of the part. Manufacturer:
The name of the manufacturer. The number the manufacturer has assigned to the part. Price:
|
| 1.3.4.3.3. Contract Part & Supplier List Tab | ||||||||||||
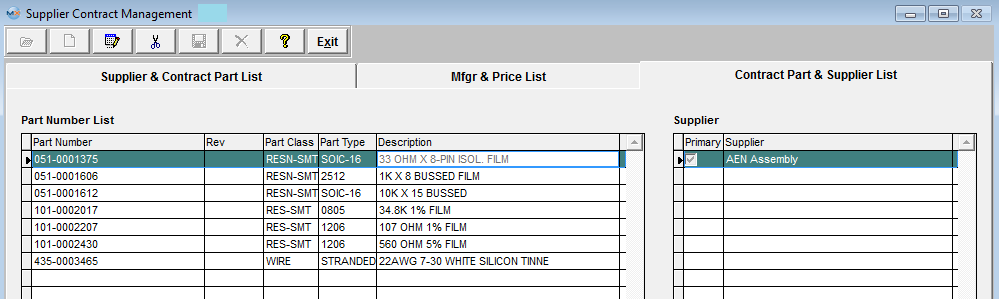 Contract Part & Supplier List Tab Field Definitions Part Number List:
The number the user has assigned to the part. The revision number applicable to the part Number. The classification to which the part is assigned. The type within the classification to which the part is assigned. If the user has the multi-plant version, the division number will display here. Supplier: For the part highlighted on the left, the Supplier(s) of that part will display. The primary or “First Choice” supplier will have a check mark in the Prim column, as illustrated above. |
| 1.3.4.4. How To .... for Supplier Contract Mgmt |
| 1.3.4.4.1. Find an In-Store Supplier Contract | ||||||||
|
The following screen will appear:
To find an existing contract, depress the Find action button.
After the Find selection is completed, all the Contracts for the Selected Supplier are displayed on screen. 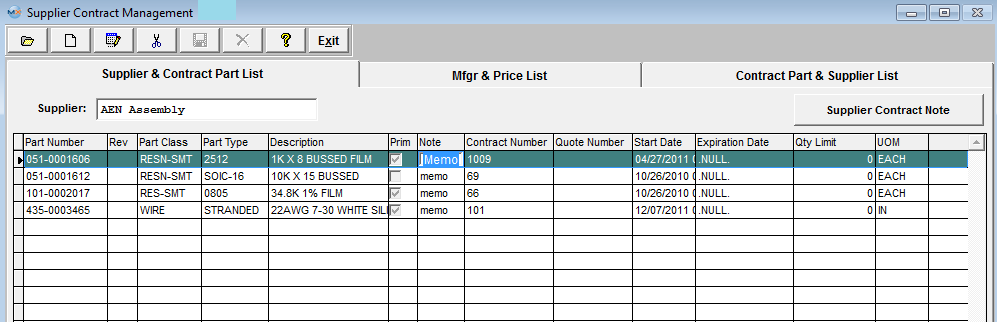
|

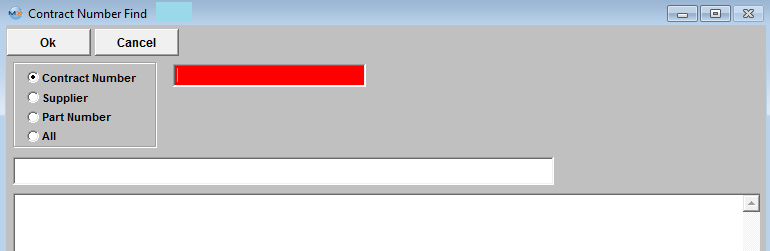
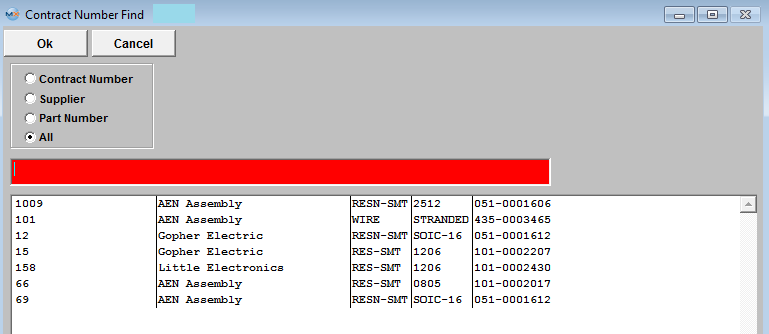
| 1.3.4.4.2. Add a New In-Store Supplier Contract | ||||||||||||||||||
|
The following screen will be displayed:
To add a new In-Store Supplier Contract, depress the Add action button while in the Supplier & Part List tab.
If you select All, the selection screen to the right will appear: Enter the Supplier or Supplier ID into the red box or highlight and double click. Once the Supplier is selected, a list of parts will appear:
If you want to add a note regarding the supplier contract, depress the Supplier Contract Note button. Depress the Edit button. Enter in the note. Depress the Save button. Depress the Exit button. If you want to add a note regarding the Part Number, click on the Note column. Depress the Edit button. Enter in the note. Depress the Save button. Depress the Exit button. Enter in a Contract number, a Supplier’s Quote number, and a start date for the contract. Today’s date will default, but you can override it. Enter in an expiration date. Enter in a quantity limit (the highest quantity which can be purchased). Depress the Manufacturer & Price list tab. The following screen will appear:
Note that the Manufacturer and Manufacturer’s Part Number per the Inventory Master have populated the left hand of the screen.
To apply Price Breaks to other Mfgr, user has the option to apply them individually or deperss this button If user elects to Depress the "Apply Price Break to Other Mfgrs" the following screen will appear:
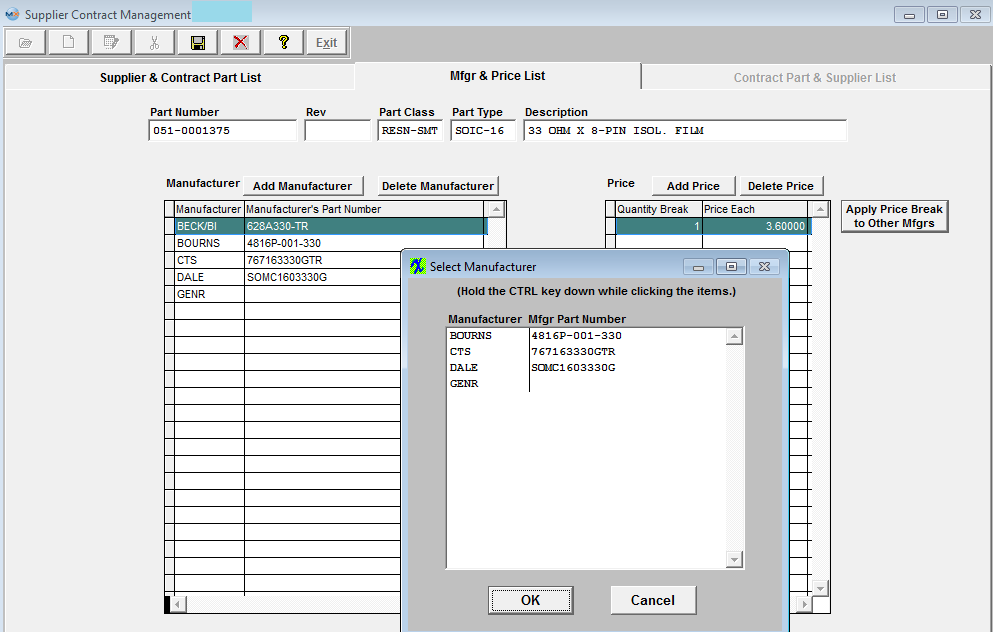 Select the Mfgr(s) and depress OK to continue or Cancel to abort screen.
Depress the Save record action button.
NOTE: Users MUST enter Qauntity Break and Price Each for every manufacturer listed or they will receive the following message and will unable to Save the record until ALL Quantities and Pricing breaks have been entered for the part highlighted. 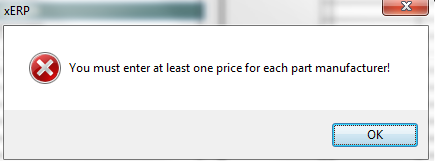 Depress the Contract Part & Supplier List tab: Note that the Part Number you selected in the Supplier & Contract Part List tab is listed in the Part Number list. Highlight that Part Number. The primary supplier for that part will display, as illustrated above. |
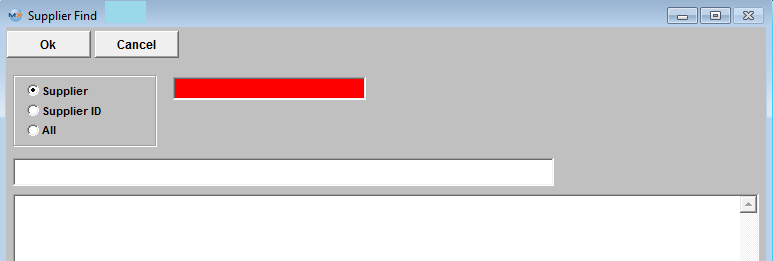
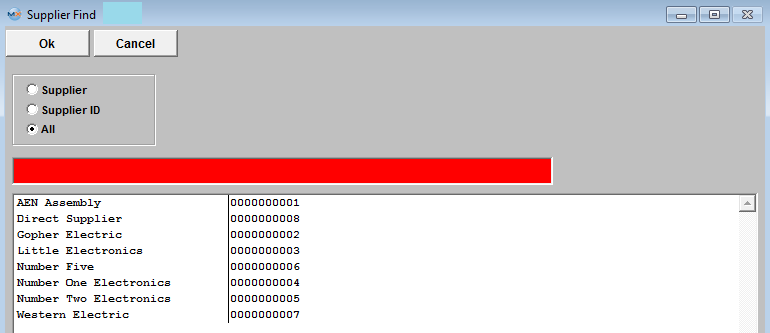
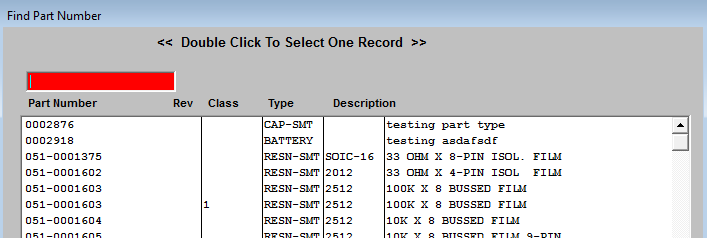
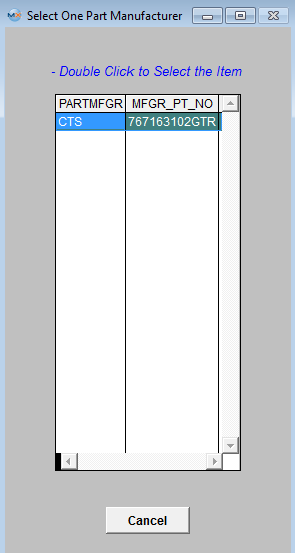
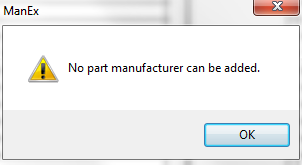
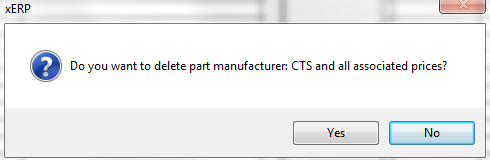

| 1.3.4.4.3. Edit an In-Store Supplier Contract |
Find the Supplier contract you wish to Edit. Depress the Edit action button. Type in the password. You’ll be able to add a Contract Note, change the Contract Number, Quote Number, Start Date, Expiration Date, Quantity Limit, Quantity Break and Price Each. Depress the Save action button to save your changes, or depress the Abandon changes button to abandon changes. |
| 1.4. In-Plant Store (IPS) (OPTIONAL Module) |
| 1.4.1. Prerequistes for In-Store PO | ||||||||||||||||||
|
ManEx’s standard module configuration allows most users to accomplish their daily tasks. For those users wanting to get more from ManEx by leveraging the total solutions, this is one of the optional modules available for purchase. If user purchase's the Optional module -In-Plant Store (IPS) they will also receive the Supplier Contract Management module. There are three uses for this module: supplier owned but stored on-site, customer owned and stored on-site, and internally owned but obsolete parts that the user does not want to affect the books. To place an order or to learn more about this specific module or any of the other optional modules please contact us at http://manex.com"contactus.aspx
After activation, "Purchase Order Management" access for each user must be setup in the ManEx System Security module. Users with “Supervisor Rights” will automatically have access. Prerequisites Required for Entering an In-Store PURCHASE ORDER
Optional Prerequisites for Entering an In-Store PURCHASE ORDER
|
| 1.4.2. Introduction for In-Plant Store |
Internal In-Plant Store Explanation
The IPS module is to keep inventory as Supplier owned but is recognized as being available for consumption by MRP and kitting. When it is consumed by kitting or transfer, a Purchase Order is automatically generated to reimburse the Supplier for the material.
This inventory type can be used to store all excess inventory caused by the minimum purchase requirement on parts for a particular turnkey job, but for which the customer does not want returned, and the User wishes not to count the inventory as assets as these parts may not be used in the future. The leftover parts can be stored in this inventory for possible future use and does not have to be treated as regular internal inventory for the accounting purpose. The system allows all in-store transactions to happen without any contract entered in the system until the user is ready to create an In-Store PO. There are three uses for this module: supplier owned but stored on-site, customer owned and stored on-site, and internally owned but obsolete parts that the user does not want to affect the books. In any of these situations a supplier must be established (this means that the customer must also be a supplier and the user must be a supplier if they have obsolete inventory in the IPS location). In-Store purchasing overview: In-Store is the situation where the Supplier has placed raw materials in the user’s warehouse. The Supplier still owns the raw materials. When the user is ready to use the Supplier’s raw materials, he/she issues the parts to a kit then creates an In-Store Purchase Order. For In-Store POs, the user may select by Supplier or by Part Number. Then the user may find records according to the selection. Once found, the user may create a P
This module also provides Instore designation for part numbers with a "MAKE" source. This will allow users to utilize inventory handling to add items sourced as MAKE parts to enter inventory into the IPS module. Then, as they are needed, be able to kit to work orders those subassemblies from IPS. There would be no GL records created when the material is moved into IPS via Inventory Handling. But on issue to kit, a PO will be generated, for the amount established in the IPS Contracts, and the Kit (along with WIP) will be charged for the standard cost of the assembly. Tracking In-Store processing through MANEX: · Add the Supplier in the Supplier Information module. · Set up a Stores Warehouse and the applicable G/L number in System Setup/Warehouse Setup module. · Add the in-stores item into the Item Master in the Inventory Control Mgmt module and create the In-Store warehouse. · Move the materials into the warehouse using the Inventory Handling module. · Add the In-Store Contract in the Supplier Contract Mgmt module. · Pull a kit (only a kit shortage gets a P.O.) within the Kitting & Shortage Mgmt module. · Add a Purchase Order and select In-Stores within the PO Mgmt module.
|
| 1.4.3. Fields & Definitions for In-Plant Store | ||||||||||||||||||||||||||||||||||||||||||||||
|
| 1.4.4. How To ........ for In-Plant Store |
| 1.4.4.1. Set-Up for an In-Store PO |
Find a part or product that exists within Inventory Control Mgmt. Setup an In-Store Warehouse for part. Setup up a contract with a supplier(s) within the Supplier Contract Management module. For all other Prerequisites see Article #5575.
Create an Inventory Receipt in the system for the In-Store location using the Inventory Handling module. Since the Receipt was made to a In-Store location there will be no Accounting transaction created at this time.
Or Upload parts to the In-Store warehouse using the IPS Upload module. At this time the following Accounting Inventory Issue Transactions will be created within the system.
 The next Step is to Create the In-Store PO .
|

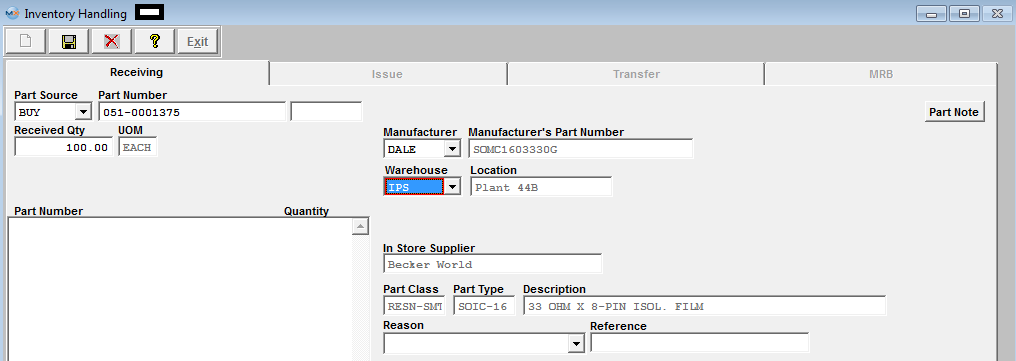
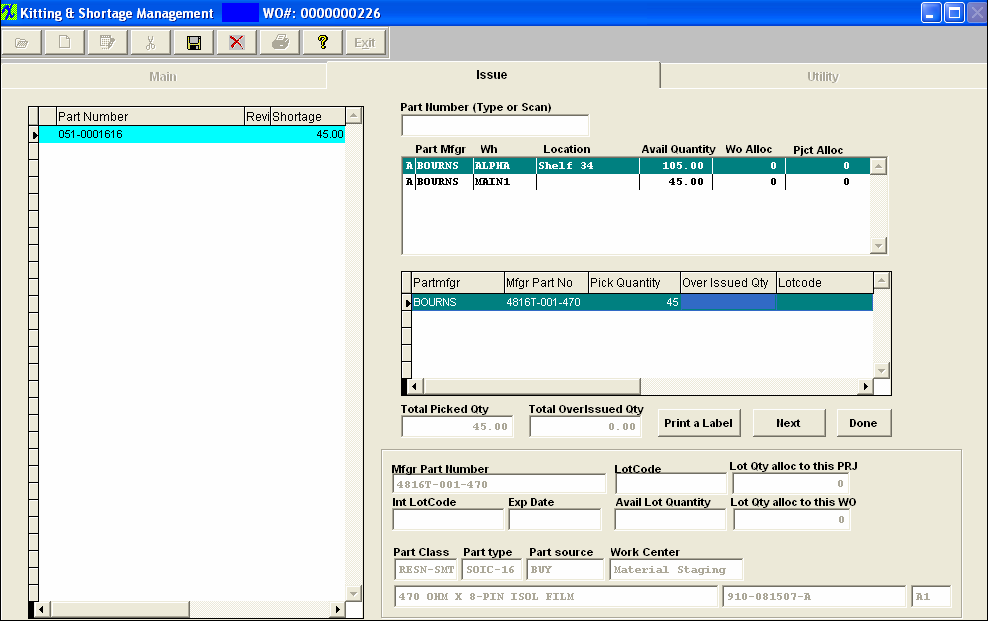
| 1.4.4.2. Creating an In-Store PO | ||||
The following screen will appear:
The following screen will appear. Sort By: Supplier or Part Number by clicking on the appropriate radial. If you Sort By Part Number, an entry box will appear, type in the Part Number and the Revision character, if applicable. 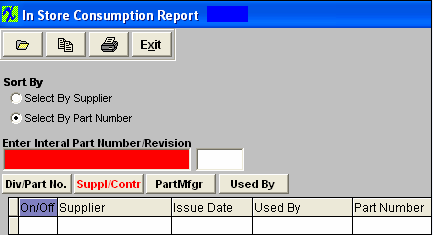 If you Sort By Supplier, the following screen will appear, highlight the supplier of choice.Depress the > button. If you want all of the Suppliers, depress the >> button. 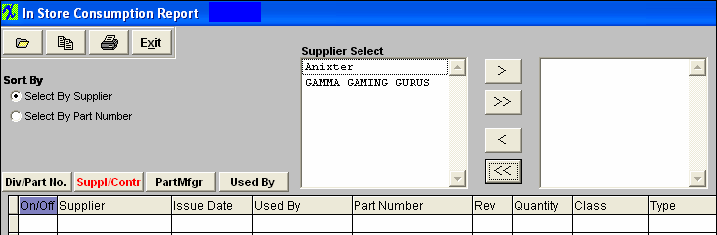 Depress the Find Record button to find records according to the selection. The bottom of the screen will populate. You may sort by Div/PartNo., Supply/Contr, Part Mfgr, or Used By; by depressing the appropriate button. 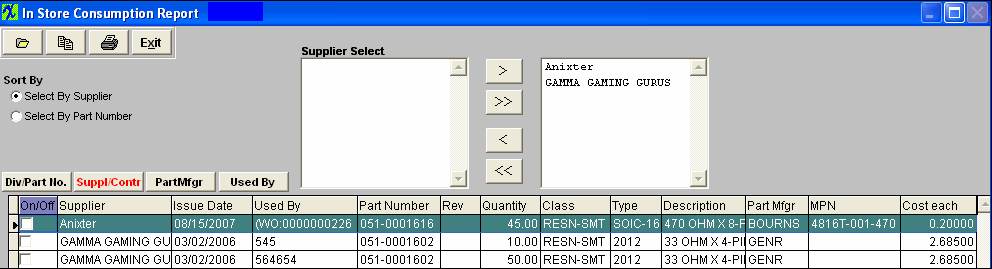 Depress the On/Off button to check all of the selections. Or, check them individually. Depress the Copy button. This will create a list of Purchase Orders for In Store Items, which will go directly to the default printer. The temporary purchase order number will appear on the report.
NOTE: If user has contract pricing already
setup for example: Up to qty of 5 = $1.00, Up to qty of
100 = $0.94, Up to qty of 101 = $0.95. When the in-store
 Depress the Exit button. This will create the IPS PO. Depress exit button again and it will pull up the IPS record created. The system will NOT allow the user to edit an IPS PO.
Note: In-Store PO's group the parts by Contract number per Supplier. For further detail see Article #3438 . 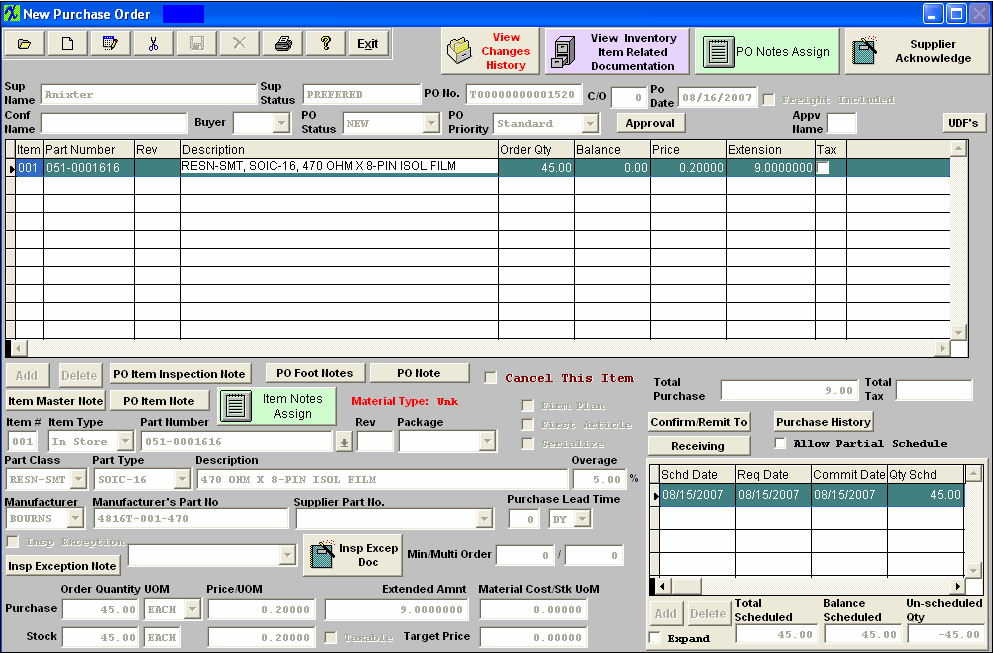 The user will then need to review the IPS PO created and approve the purchase order. Pressing the APPROVAL button in the Purchase Order module will ask for the user’s password. The user must enter a password that has been authorized to approve the dollar amount of the order. Entry of an authorized password and approval inactivates the 1st approval button and places the initials of the person approving the order next to the approval button. If the user is requiring two approvals, the process is repeated for the second approval. Once the PO has received it's final approval a Purchase Order number will be assinged and the PO Status marked as closed. At this point the normal Un-Reconciled Receipt account transaction will be created within the system. Then from this point on the Accounting transaction follow the normal flow through the system. Returning In-Plant Inventory to Supplier If the user has in-store items, which they want to return to Vendor without any impact on accounting or
Depress the Issue tab. Depress the Add record button. Enter Part Source, Part Number, Issued Qty, Issue Account Description, Issued To, Mfgr, then select the In-Store warehouse. Check the "In-Store Return 2 Vendor" box. (Note: This box will only be visible if the In-Store warehouse is selected). If this box is checked no purchase order will be created and there will be no impact on accounting.
Depress the Save button to Save the changes, depress the Abandon changes button to abandon changes.
|
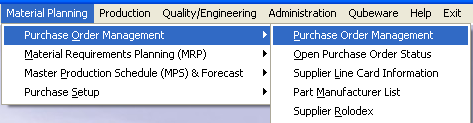
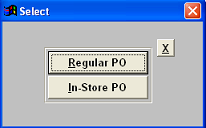
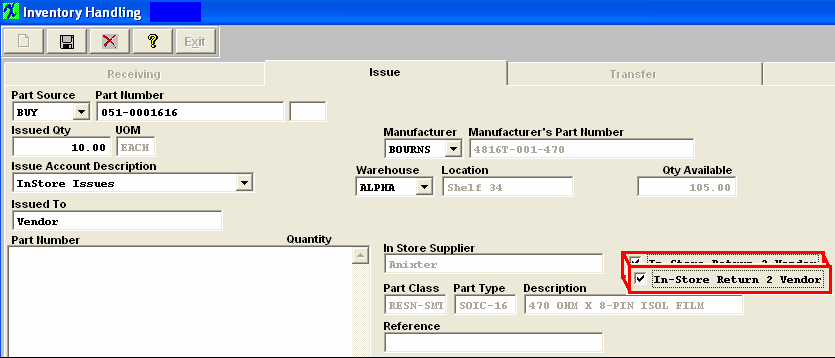
| 1.4.5. Reports - In-Plant Store |
The In-Store screen has 3 additional check boxes, one for each report and one for output to XL. If a report is selected and the user clicks on the "Print" icon the report will be generated to preview on the screen, if the output to excel is also selected, then the report data will be exported to Excel. If both reports are selected the reports will be generated in sequence.
.
|
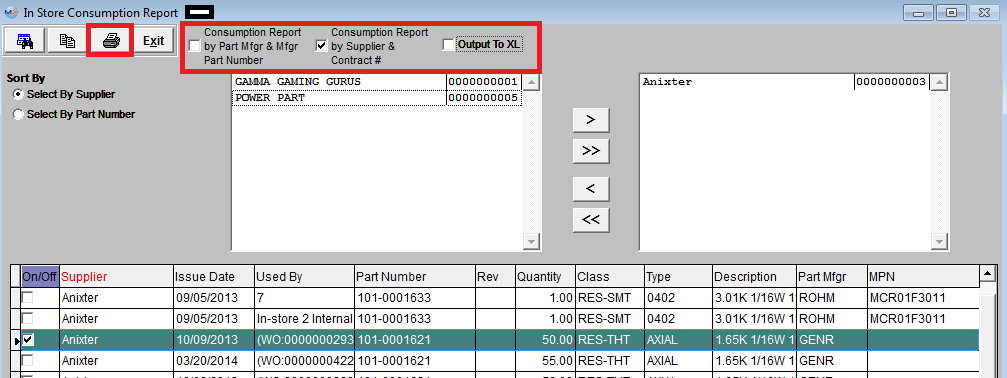
| 1.4.6. FAQs- In-Plant Store |
| Facts and Questions for the In-Plant Store |