| 1. Trigger Setup |
There are several system triggers established in different areas, as well as the opportunity for users to establish their own trigger definitions.
The following triggers are established in Manex: Sales Periodic Triggers Quote Past Due - Customer Quotation Past Due SO Shipping Late - Sales Order Shipping Past Due Action Triggers SO Approvals - Sales Order Approvals Needed RMA CM Created - RMA Receipt has generated a new Credit Memo SO Complete - Generate trigger when Sales Order is Complete User Defined Periodic Triggers Not Been Ack - Sales Order entered in the Last 30 Days Material Periodic Triggers PO Receipt Late - Purchase Order Receipt Past Due Kit Release Late - Kit Release for Work Order Late Automatic MRP - Run MRP at the Designated Time Action Triggers PO Approvals - Purchase Order Approvals Needed New Physical Inventory - New Physical Inventory Initiated DMR DM Created - DMR Shipment has generated a New Debit Memo Rejected Material - Material Rejected Production Periodic Triggers WO Late - Work Order Late Completion Automatic Re-index - Re-index Tables at the Designated Time Re-schedule - Re-schedule all Currently Scheduled Jobs to Maintain Work Center Due Out Dates (in Capacity Planning) Action Triggers ECO Initiated - ECO Initiated Deviation Initiated - Deviation Initiated ECO Release - ECO Released ManEx recommends that you do not have any other triggers scheduled within the system that will overlap into the Auto re-index run. This may cause issues due to the fact that the other triggers are accessing tables at the same time the Auto re-index is attempting to run. One of the triggers will set up the ability to automatically e-mail the error log information to ManEx, as required. This feature will give us the opportunity to respond to problems you may encounter at the time they occur, and monitor the success of your implementation (note, that only error log information is emailed, no other data files are sent).
 Note: The trigger engine runs on the workstation of the user who logs into ManEx first.
REMINDER: If triggers is NOT installed in the server, Triggers assumes that the user of the individual work station will leave his/her computer on all of the time.
|
| 1.1. Email Setup | ||
|
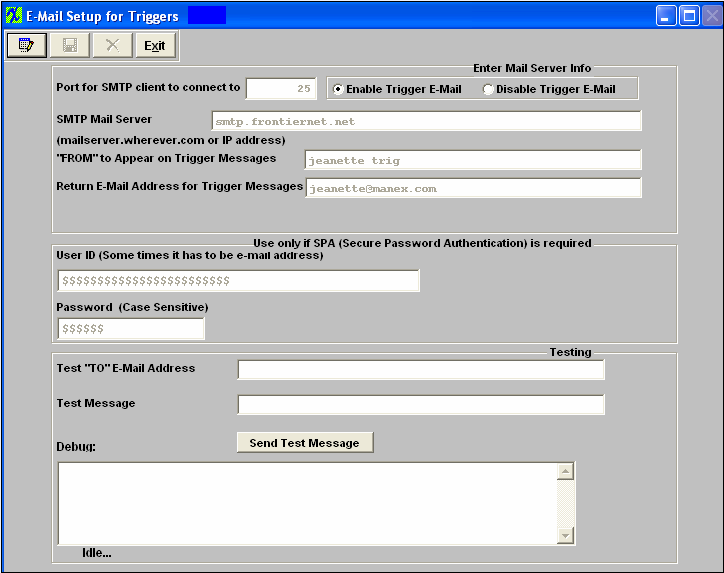
The following will appear. The Port will default to 25, but the user can change the port setting if needed.
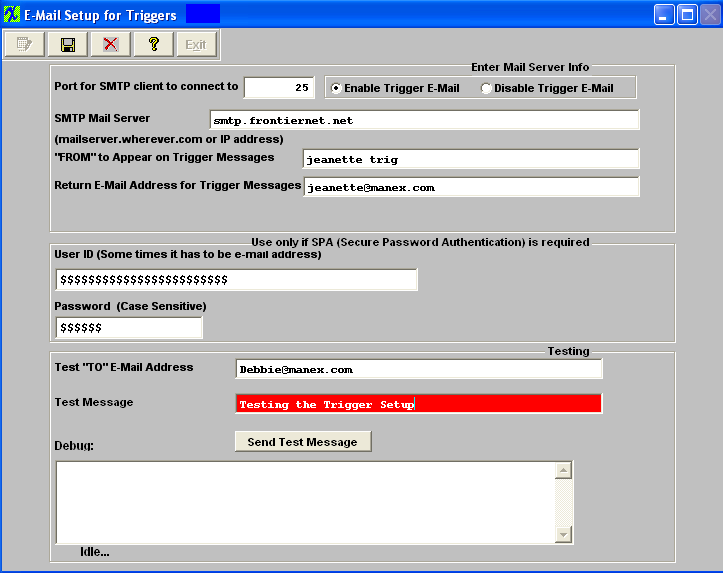
Depress the Edit action button. Select the Enable Trigger e-mail radial. Type in the SMTP Mail Server address. Type in the “From” to Appear on Trigger Messages. Type in YOUR e-mail address in the Return E-Mail Address for Trigger Messages.
If your Internet Provider requires PSA before e-mails are allowed to be sent out, then user must enter the User ID (which in most cases is their e-mail address) and a Password.
To test, type in the test “To” e-mail address and the test message.
Depress the Send Test Message button. Depress the Save button. Your test message should appear in your e-mail “In Box”, as illustrated below:
|
| 1.2. Mail List | ||
The following list will appear:
To add a new person, depress the Add Record action button. Type in your password. Type in the Name of the person, either I or O (I = Inside your company, O = Outside your company), the department or company and the e-mail address. Depress the Save record action button to save changes or depress the Abandon changes action button to abandon changes. |
| 1.3. Triggers | ||
|
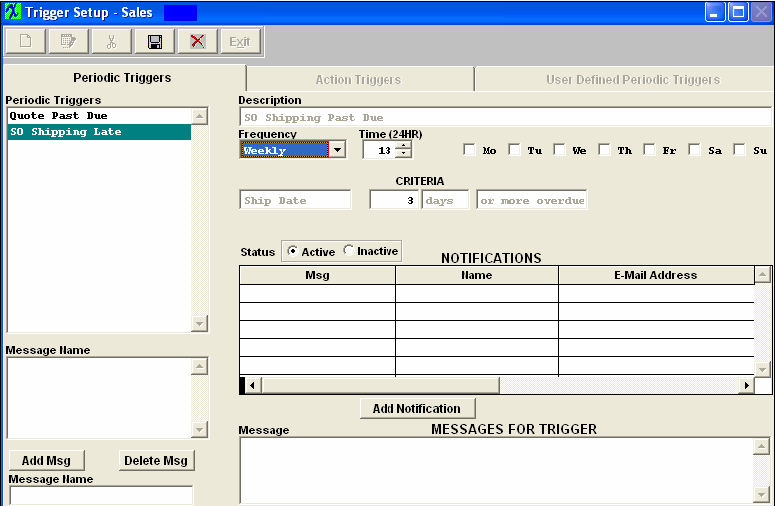
To Setup a Trigger or Reminder in Sales, Material, Production Quality, or Accounting. Select the proper Menu. (Sales for example) Highlight Trigger To Edit a Periodic Trigger, Depress the Edit action button. Highlight the Trigger you want to change. The following screen will appear:
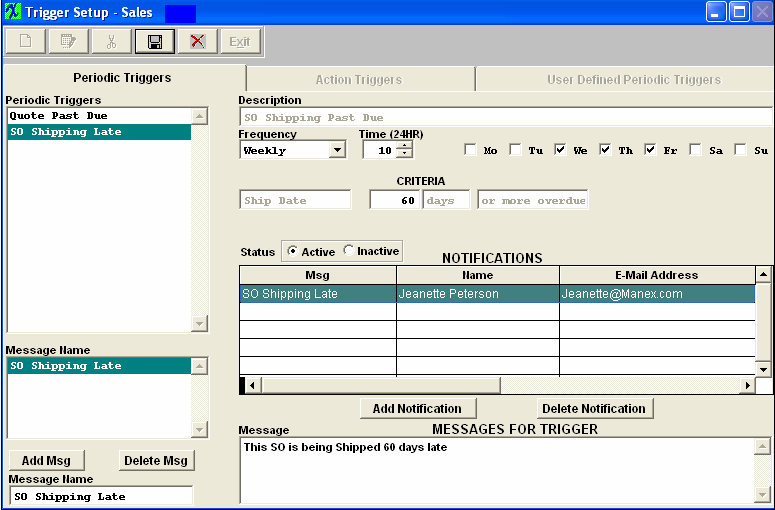
User can change the frequency and the time of day, if desired. Depress the Add Message button. Type in the name of the message. Depress the Add Notification button. Select the Message Name from the Down arrow selection. Place the cursor on the Name of the person to notify. A list of persons set up in the Mail List will appear. Select that person’s name. Their e-mail address will appear. At the bottom of the screen, type in the messages for the trigger. Depress the Save action button.
The next time the event occurs, the e-mail will be sent to the intended recipient, as illustrated:
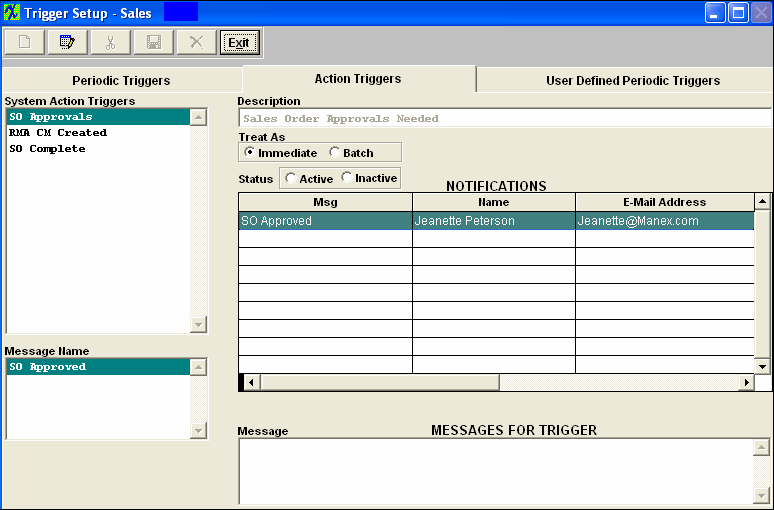
ACTION TRIGGERS Depress the Action Triggers tab. The following screen will appear:
Depress the Edit button. Type in your password. Highlight the System Trigger. You may change the "Treat As" to "Immediate" or "Batch".
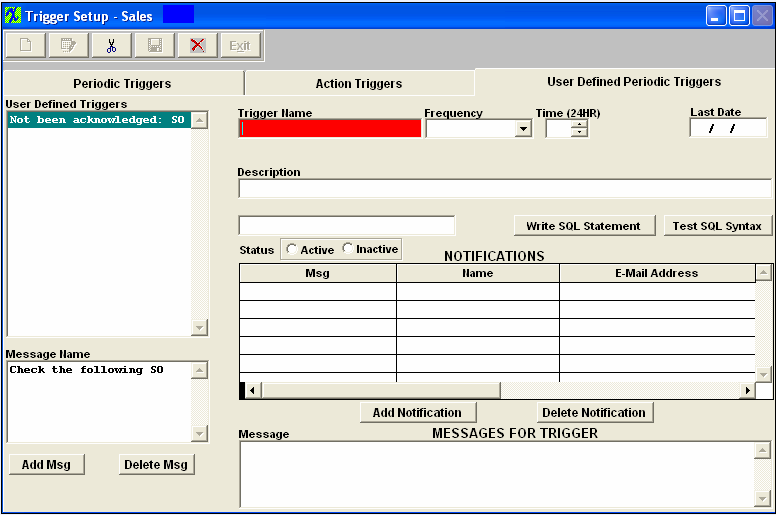
If you change the Treat As to Batch, then you can enter in the number of batches (Maximum of 4) you want ran daily. For every number of batches entered there will be a Time(s) box displayed. Here the user will enter in each time of the day they wish for this trigger to be ran, then a batch email will be sent to the intended recipients. Depress the Add Message button. Type in the name of the message. Depress the Add Notification button. Select the Message Name from the Down arrow selection. Place the cursor on the Name of the person to notify. A list of persons set up in the Mail List will appear. Select that person’s name. Their e-mail address will appear. At the bottom of the screen, type in the messages for the trigger. Depress the Save action button. The next time the event occurs, an e-mail will be sent to the intended recipient. USER DEFINED PERIODIC TRIGGERS The user defined tab is reserved for users who have expert knowledge of SQL syntax and an expert knowledge of the schema of the database. Note: Use first in your test database. Do not use in your live system until you are sure it’s working correctly. When the Add button is depressed, the following message will appear:
To continue, depress the Yes button. The following screen will appear:
Fill in the appropriate data fields. Depress the Write SQL statement button and write the statement in the box. When entering the SQL statement user needs to type the entire command in one line. Do not press enter at the end of the line to skip to the next one, if the screen is too small the command will wrap around to the next line by itself and do not place semicolons at the end. See example:
 To test, depress the Test SQL Syntax button. When you are satisfied all is working correctly, depress the Save button. The other Triggers setups for Material, Production, Quality and Accounting are virtually the same. |
| 1.4. User Defined Trigger/SQL Statements |
| 1.4.1. How to Setup a Trigger for a List of Sales Order's Not Acknowledged |
The below is the SQL statement that is already available to the users for the List of “Open SO” that we have available under the Sales User Defined triggers as an example SQL statement. select Orderdate, sono from somain where empty(poackdt) and ord_type = "Open" and orderdate > date() – 30
You can modify this trigger or you can create a new one. All you should have to do is setup a time and emails.
SELECT somain.sono,somain.orderdate,somain.ord_type FROM somain WHERE NOT poack AND ord_type='Open' ORDER BY OrderDate |
| 1.4.2. How to Setup a Trigger for when ALL Depts have Signed Off an ECO |
The below is the SQL statement to create a user defined trigger that will send an email to the appropriate individual(s) notifying them that an ECO has been approved by all the departments.
In Trigger setup, User defined trigger, there is a required field "Enter Single Field Name", please enter "Econo" in it. |
| 1.4.3. How to Setup a Trigger for a List of Assemblies not reordered within 60 Days |
The following is an SQL statement that could be setup to check all items that have NOT been ordered in the past 60 days, create a list of these items and trigger an e-mail to be sent to someone within the company so they can review the list and determine when to go back to a customer and charge for excess inventory.
SELECT distinct Customer.custname, Inventor.part_no, Inventor.revision FROM manex!somain INNER JOIN manex!sodetail ON Somain.sono = Sodetail.sono INNER JOIN manex!inventor ON Sodetail.uniq_key = Inventor.uniq_key INNER JOIN manex!customer ON Somain.custno = Customer.custno WHERE sodetail.balance=0 AND Sodetail.status='Closed' AND Somain.Custno+Sodetail.Uniq_key NOT IN (SELECT S2.CustNO+SD2.Uniq_key FROM Somain S2,Sodetail SD2 WHERE S2.Ord_type<>'Cancel' AND SD2.Status<>'Closed' AND Sd2.Status<>'Cancel' AND Sd2.Balance<>0 AND DATE()- S2.orderdate<=60)
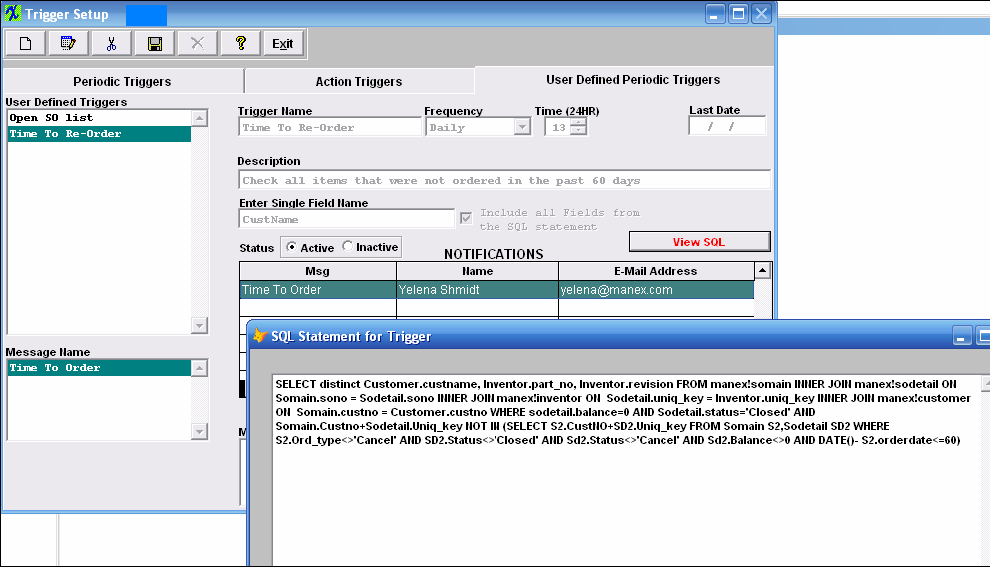 |
| 1.4.4. How to Setup a Trigger to pull part detail for parts to be purchased and assigned to a buyer. |
How to Setup a Trigger to pull part detail for parts to be purchased and assigned to a buyer.
The following SQL statement can be entered into a user defined trigger in trigger setup. In this example it pulls the following details for all parts to be purchased and assigned to buyer “ONE”: Part number, buyer, required qty, required date, and AVL info. SELECT mrplistview.part_no, mrpinvt.buyer_type, mrpact.reqqty, mrpact.reqdate, mrpact.prefavl FROM (mrplistview INNER JOIN mrpinvt ON mrplistview.uniq_key = mrpinvt.uniq_key) INNER JOIN mrpact ON mrplistview.uniq_key = mrpact.uniq_key WHERE (((mrpinvt.buyer_type)="ONE")) You can modify it as needed to suit your needs. Of course it sends an email with the selected info in the body of the email. |
| 1.5. Reminders | ||
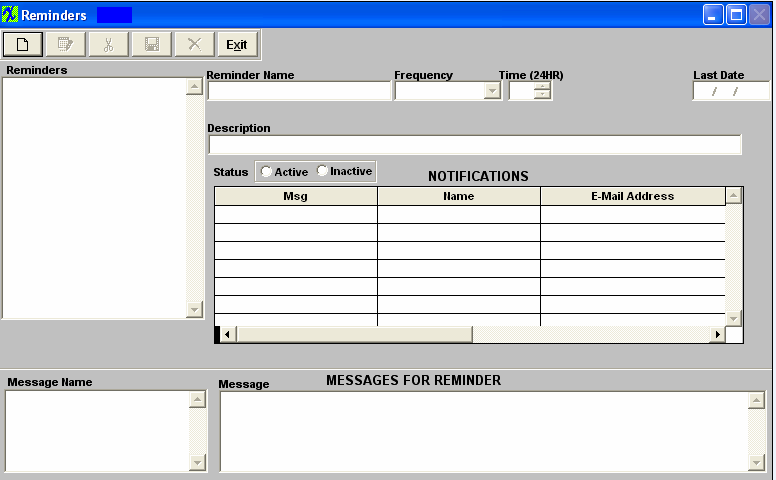
To Setup a Trigger or Reminder in Sales, Material, Production Quality, or Accounting. Select the proper Menu. (Sales for example) Highlight Trigger To set up a reminder, select the reminder option. The following screen will appear:
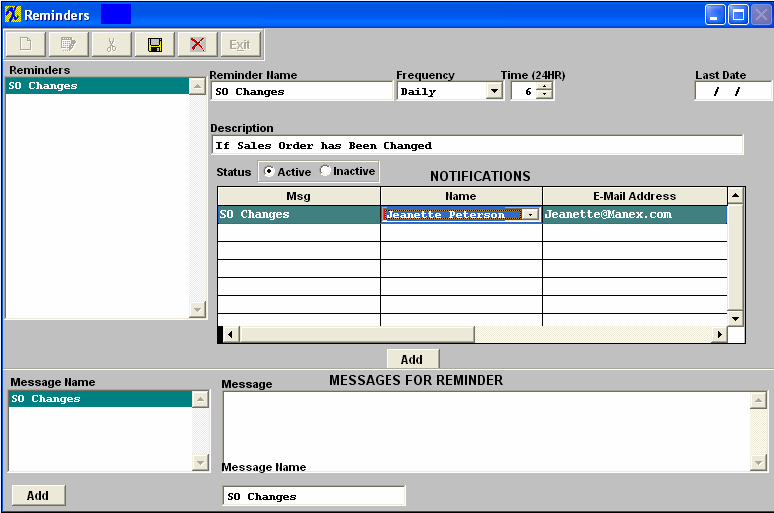
To add a new reminder, depress the Add action button. Type in your password. Type in the name of the reminder. Depress the down arrow next to the Frequency box. Select the frequency. Select the time. Depress the Add Message button. Type in the name of the message. Depress the Add Notification button. Select the Message Name from the Down arrow selection. Place the cursor on the Name of the person to notify. A list of persons set up in the Mail List (above) will appear. Select that person’s name. Their e-mail address will appear. At the bottom of the screen, type in the messages for the trigger.
Depress the Save action button. When the clock gets to the time, the e-mail will be sent to the intended recipient(s).
The other Triggers setups for Material, Production, Quality and Accounting are virtually the same. |
| 1.6. Automatic Re-Index | ||||
The following screen will appear:
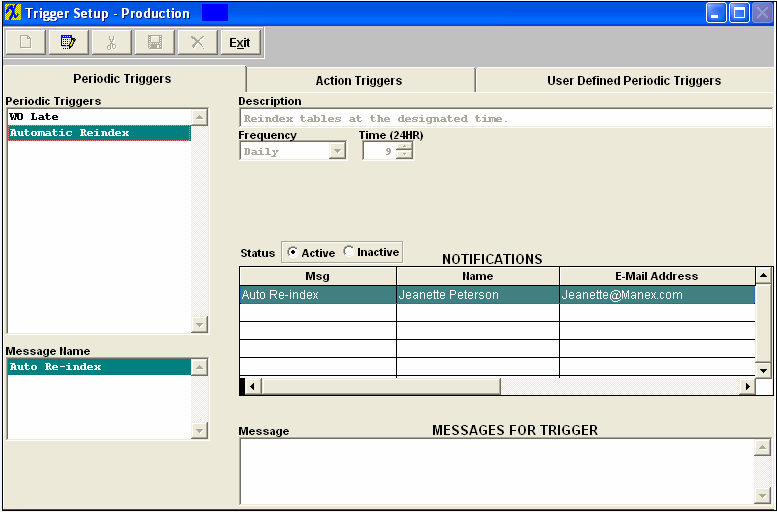
Depress the Edit button. Type in your password. Highlight the selection for Automatic Reindex. The frequency is hard coded in as daily. Select a time when all of the users would be off of the system by using the spinners – please note that it is a 24 hour clock. ManEx recommends that you do not have any other triggers scheduled within the system that will overlap into the Auto re-index run. This may cause issues due to the fact that the other triggers are accessing tables at the same time the Auto re-index is attempting to run. ManEx also recommends that you run the Auto Re-index during non-working hours (8PM to 7AM). NOTE: The system WILL automatically Log-Off ALL users if they are still logged in to Accounting and/or Main system when the Trigger is scheduled to run.
NOTE: If the users happen to attempt to re-access the ManEx system after the Trigtimer has begun, then the end users will receive a File Access denied message and they will NOT be allowed to enter the system and the indexing routine should run with out interference.
If you do enter in a time that falls during normal working hours, the following warning message will appear:
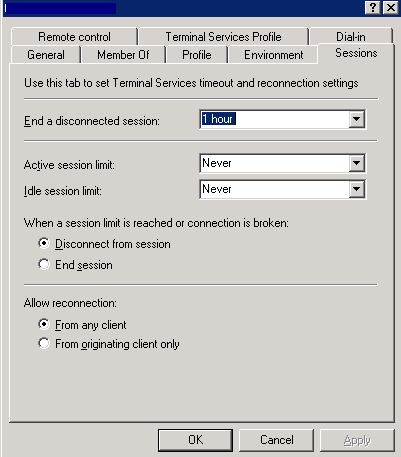
This is just a warning message and if you really need the schedule time to fall within working hours, then just depress OK and save the record. This is just a warning message, to make sure the user actually wants to save this Time selection. Depress the Add Message button. Type in the message and depress the Enter key. Depress the Add notification button. Depress the Add Notification button. Select the Message Name from the Down arrow selection. Place the cursor on the Name of the person to notify. A list of persons set up in the Mail List will appear. Select that person’s name. Their e-mail address will appear. At the bottom of the screen, type in the messages for the trigger. Depress the Save action button. The recipient should receive an e-mail whether or not the re-index ran properly or not. If the re-index was unable to run the e-mail notification will include the "File Access is Denied" information. Note: We are limited on the information we can add to this e-mail due to the fact that basically if the re-index cannot run it is due to the "File access is denied" problem. Which means that ManEx cannot get exclusive hold on the DBC due to other issues, like some times when users are using Terminal Servers the session stays open even if the users are out of the system. Once the Trigtimer.exe has been initiated, the trigger function for automatic reindexing will query the reindex files every hour to determine if the reindex has been completed, starting with the time entered in the trigger setup. If the reindex was not successfully completed, it will attempt to run it again. It will do this in the first 15 minutes of every hour, until it is successful. Then it will be quiet until the next scheduled run time occurs.
NOTE: If the users happen to attempt to re-access the ManEx system after the Trigtimer has begun, then the end users will receive a File Access denied message and they will NOT be allowed to enter the system and the indexing routine should run with out interference.
The automatic triggers run based on the time set on the workstation (or server) that the program is running. The user should activate the trigger function on the Server, as illustrated above, but if the user did not do this, then the TRIGTIMER.EXE will be activated on the first person to sign onto ManEx after re-starting the server. If that person closes out the trigger, then the next person to sign on will activate it again on their workstation. So all the trigger times established will be based on the machine that started it.
|
| 1.7. Manual Re-Indexing/Datamaintenance | ||
If you need to re-index at some other time, Stop the Trigger Timer by right-clicking on the “TRIGGER TIMER” located in the taskbar, and selecting Close. 
Be sure ALL users are logged-off the system. (Running DM manually will NOT log-off users automatically). To manually Log-out any users that are not logged out go the Logout.exe
NOTE: If the users happen to attempt to re-access the ManEx system after the Trigtimer has begun, then the end users will receive a File Access denied message and they will NOT be allowed to enter the system and the indexing routine should run with out interference.
To prevent users from logging on between the time the IT announce to all of the end users to please log off of the ManEx System until further notice and the IT is able to start the DM we suggest to temporarily rename the "manex.exe" file extention so that if the end users attempt to access it - it will be unable to launch. Then after the DM routine has finished they would have to make sure to rename the file extension back to exe.
Depress the “Yes” button to continue or depress the "No" button to abandon.
If the re-index cannot run it is due to the "File access is denied" problem. Which means that either NOT all the users were logged out of the system or ManEx cannot get exclusive hold on the DBC due to other issues, like some times when users are using Terminal Servers the session stays open even if the users are out of the system. 
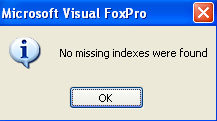
When Datamaintenance has completed the following message will appear.
If the system does find that you have missing indexes, the message will be displayed and an EXCEL file will be created and placed in your ManEx directory. This file will need to be emailed to support@manex.com as soon as possible so the missing index can be repaired.
The following screen will be displayed.
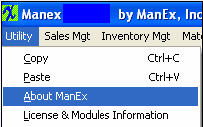
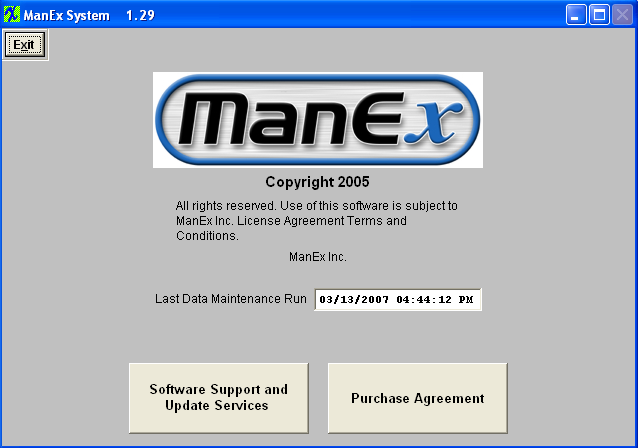
The last Data Maintenance Run will be listed. You can also view the Agreement information if needed. |

