| 1. Sales |
| 1.1. Sales Management |
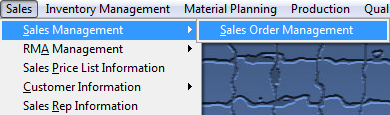
| 1.1.1. Sales Order Management |
| 1.1.1.1. Prerequisites for SO Mgmt |
|
Entering the Sales Order Module There are a number of functions regarding Sales Order Entry that should be established at the initial installation of ManEx.
The following Prerequisites are required for Entering a New Sales Order:
Optional Prerequisites for Entering a New Sales Order:
|
| 1.1.1.2. Introduction for SO Mgmt |
The Sales Order Module is used to record the details of the user’s Customer Purchase Order. It is a translation of the customer’s order (or contract) to deliver goods into the user’s format and language. This is done so that the user’s various departments can refer to a common format rather than have to adjust to a variety of customers’ formats. The Sales Order should reflect exactly what the customer ordered – the part numbers, the quantities, the delivery schedules, the price, the terms and conditions of the order, and any special charges. Other important information to be included (besides the customer’s name) is the name of the contact at the customer, the purchase order number (the contract), whether or not the purchase order or contract has been agreed upon by acknowledgment of the Sales Order. The user initiates the internal flow of operations by completing the Sales Order. This order then is used to track the progress of the customer order, account for costs and revenues, determine the manufacturing performance to commitment, define the company backlog of sales, schedule workloads, and in general direct the activities and operations once the customer’s order is accepted. The Sales Order module serves several functions relating to orders:
To review and edit an order, the user FINDs the order to display it on the screen. There are a number of ways that ManEx provides for the user to aid in locating a specific order, which are discussed later. Once an order is found and displayed, the order may be EDITED to make desired changes to the order. To create a new order, the user performs the ADD function. Once in the Sales Order, the user may add or edit the products being delivered to the customer, including the quantity. The deliveries may consist of products, (assemblies made by the user), and/or parts (from the user’s inventory), and/or miscellaneous items (non-inventory items or services). The sales order program will determine pricing from the pricing module, if the part has had pricing entered. Otherwise, the user must add the pricing as the products are entered. If the Pricing module doesn’t have the part entered, the user must also select the Sales Type. The user must then establish a schedule for shipping the product. The schedule may be for a single shipment, or scheduled out over a period of time with the same or different quantities for each delivery. In ManEx, there is also the provision for automatic scheduling, which simplifies the scheduling if the user wishes to ship a fixed portion of an order each day, week or month. The user may then verify that the Bill-to and Ship-to information is correct. It will be entered automatically in the Sales Order from the Customer Information module, using the default values. If more than one address exists for the customer, the user may change this information to match the individual order, if desired. The user may also create work orders for the product FROM the sales order module. If the product is scheduled for multiple deliveries, the user may elect to make one order for all parts, or spread out the deliveries over multiple work orders. We do not allow the Work Order to be released within the Sales Order module. The Work Order module is a very valuable feature and should not be by passed. The purpose of the WO Release is for various departments to fulfill their part of the task of releasing the WO on-line to avoid doing it manually.
|
| 1.1.1.3. Fields & Definitions for SO Mgmt |
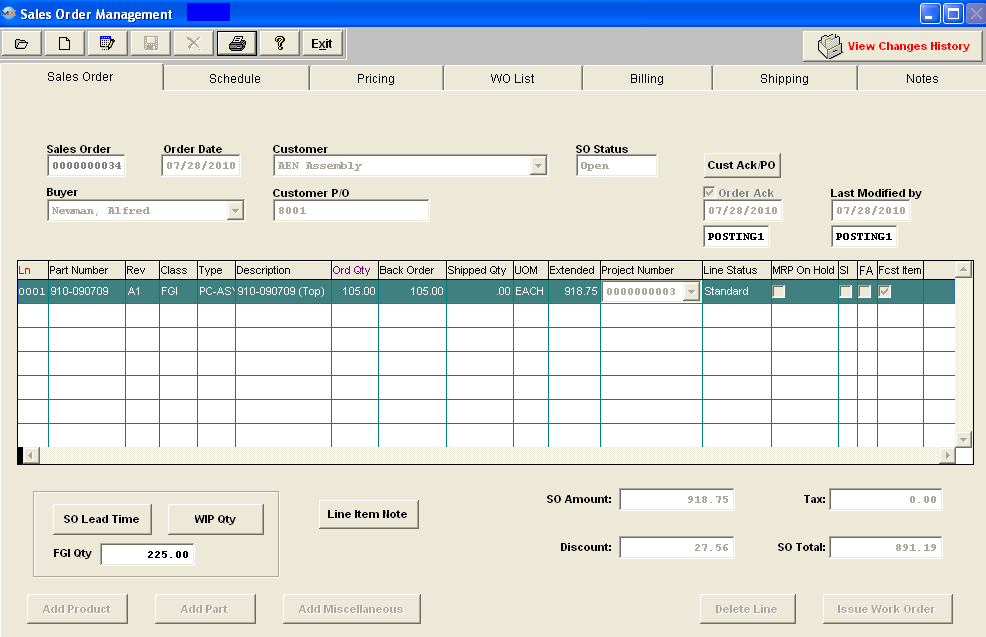
| 1.1.1.3.1. Sales Order Tab | ||||||||||||||||||||||||||||||||||||||||||||||||||||||||||||||||||||||||||||||||||||||||||||
Sales Order Tab field definitions
For the line item highlighted:
Directive Buttons:
|


| 1.1.1.3.2. Schedule Tab | ||||||||||||||||||||||||||||||||||||||||||||
 Schedule Tab field definitions
Delivery Schedule Section:
Buttons:
Auto Scheduling Section:
|

| 1.1.1.3.3. Pricing Tab | ||||||||||||||||||||||||||||||||||||||||||||||||||||
Pricing Tab field definitions
Commissions Note: For this information to be displayed on the SO user MUST also have "sales commission management" rights within the Security module. NOTE: The Sales Commission information was added to the system to allow our users to create their own customer commission reports based on the information that is stored within the tables. I would suggest that you consider using Crystal Reports to design the desired Commission report that would best fit your company, using the information stored within the ManEx tables.
|
| 1.1.1.3.4. WO List Tab | ||||||||||||||||||||||||||
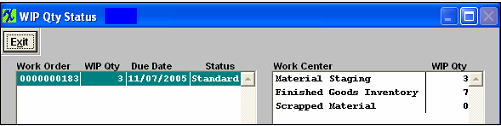
 WO List Tab field definitions
The name of the Customer. The Sales Order Line Item Number. The number the user has assigned to the part or product. The revision number pertaining to the part number. The classification to which the part number belongs. The type within the classification to which the part number belongs. The description of the part number. This is the number assigned to the Work Order for the assembly of the product. This is the date that the Work Order is due to be completed. This is the quantity to build by the date indicated. This is the un-shipped quantity. For the Work Order highlighted, this is the current work center location. This is the quantity of the Work Order currently in the Work Center. |
| 1.1.1.3.5. Billing Tab | ||||||||||||||||||||

The name of the Customer. The Billing address of the Customer. The Credit Status the Customer has with the user. This is the limit the user has for the Customer. The balance the Customer has in the user’s Accounts Receivable Aging. This is the sum of all other Open Sales Orders. This is the net credit available after subtracting A/R balance and the sum of the other open Sales Orders from the Credit Available. This is the total amount of this Sales Order. This is the credit available to the customer after considering this Sales Order. Note: If the user has selected to "Enforce Credit Limit at Shipment" (within the Sales - A/R Setup module) only a supervisor password can release the shipment. This section contains any notes regarding the Customer’s credit. This field is for internal use only and will NOT be displayed when printing Packing List or Invoice. |
| 1.1.1.3.6. Shipping Tab | ||||||||||||||||||
 Shipping Tab field definitions
This is the name of the customer. This is the Customer’s Ship To address. The name of the Customer’s Contact to whom the shipment will be directed. This is the point where title passes The is the name of the carrier. This is the Customer’s account number with the carrier.This would be used where the customer paid the carrier directly for the shipment. The is the time by which the shipment should be at the Customer’s address. |

| 1.1.1.3.7. Notes Tab | ||||||
 Note Tab field definitions
|
| 1.1.1.4. How To ..... for SO Mgmt |
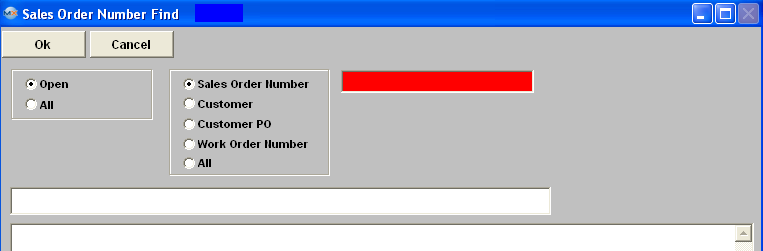
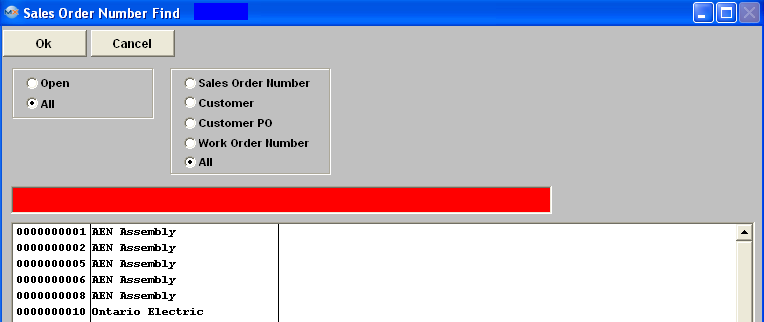
| 1.1.1.4.1. Find A Sales Order | ||||||||
The following screen will be displayed:
If user selects ANY of the Filters and Find by All - a screen will appear listing all the Sale Orders filtered by the selection, in numerical order, along with the Customer name. Once you have made your choice, the information will be displayed as follows:
Note: When an RMA is created, both the pending receipt of the items from the customer and the subsequent shipment of replacement product to the customer is entered. Reference is made to the original Sales Order and Invoice only to allow the credit memo (when created) to have a place to apply the credit. Otherwise, there is no interface between the Sales Order and the RMA modules. If you were unable to find the Sales Order, try to locate it under the RMA menu item. See RMA Management Module Article #1610 for further assistance. |
| 1.1.1.4.2. Edit A Sales Order |
Find a Sales Order, it may be edited by selecting the Edit Action button, then entry of the password. All fields available for editing will be enabled for modification. Sales Order tab - The user may add a new product, part or miscellaneous item. The user may delete an entire line item. The user may Issue a Work Order (if one hasn't already been issued). The user may change the quantity ordered, add or change the amount reserved or change the line status. To remove a project number from the project field, ,by right clicking on the field. (Note: If a SO for example has three line items and user deletes only line item 01 user will NOT be able to re-use this line item when adding a new line item to this SO. The system will use the next line item which would be line item number 04 in this example).
Schedule tab - For the Line Item selected, the user may add or delete a scheduled delivery, change the 1st Due Date, or the Transit Days.
Pricing tab - For the Line Item selected, the user may edit the Price, Sales Type, Tax, Lot Charge, Commissions info, Add or Delete a line. The Price Markup field is NOT editable within the Sales Order screen. This information defaults in from the Sales Price List Information module. The Customer Sales Discount field is NOT editable within the Sales Order screen. This information defaults in from the Customer Information module.  WO List - This screen is view only. 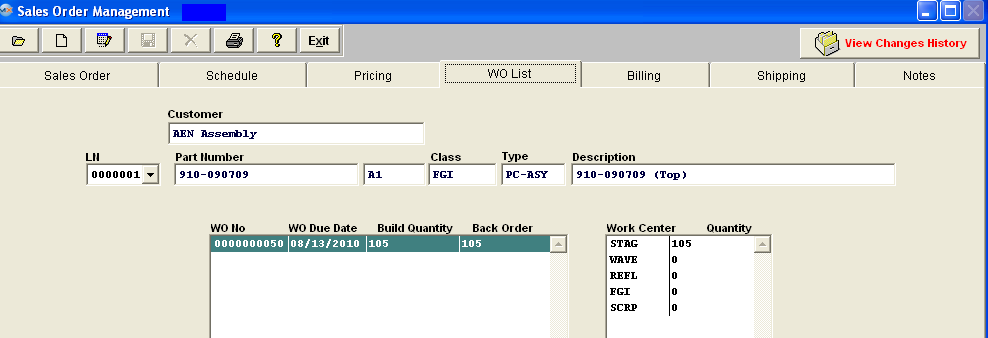 Billing tab - The user may change the Customer address and/or add a Credit Note. 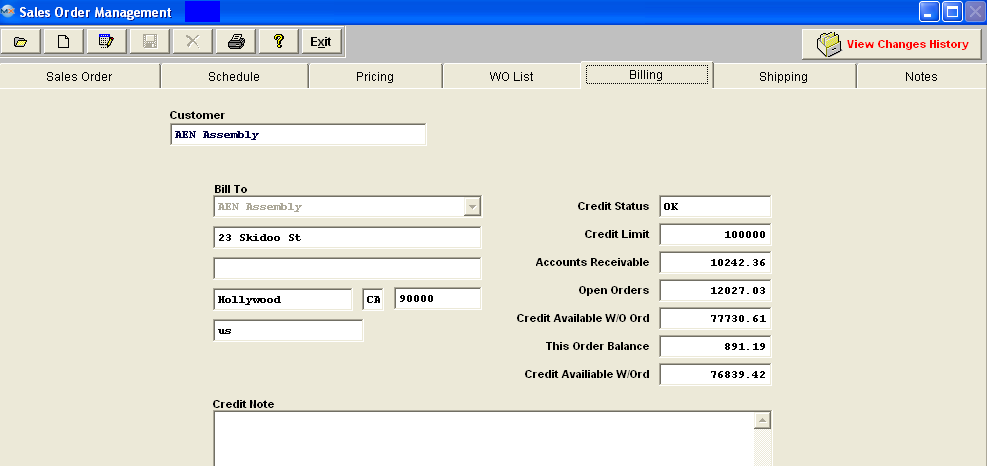 Shipping tab - The user may edit or Add a New Ship To address, select a different Attention, FOB, Ship Via, and/or select a different Delivery Time from the pull down. Note: The user is able to edit or change the Cust Account No to match any special Ship Via pertaining to the specific order within the SO Shipping screen without the changes affecting the Customer Information module or any other pre-existing orders. 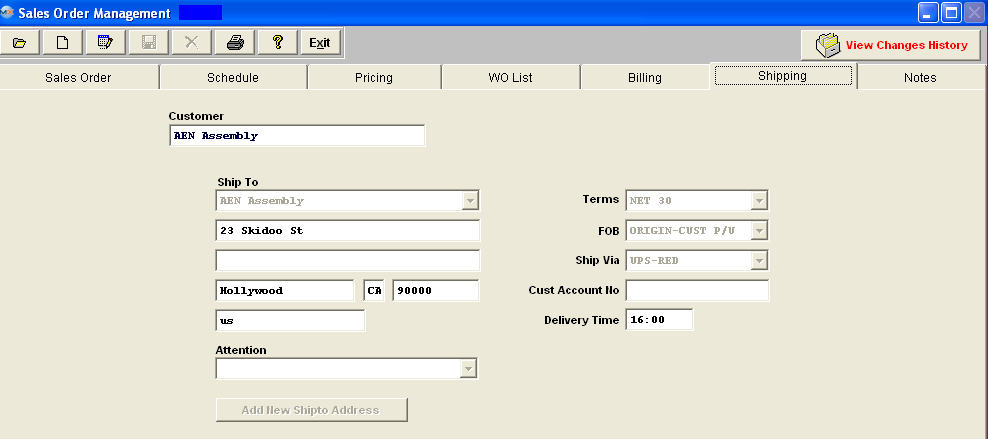 Notes tab - The user may add or change the Sales Order Note and/or the Sales Order Acknowledgement Footnote.  At the conclusion of the modification process, the user may either depress the Save action button to save the changes or depress the Abandon changes action button to cancel changes, located at the top of the screen. The following message will be displayed to the user if a WO is linked to the SO:
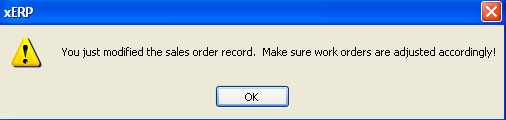 NOTE: The link is for reference only between the two modules and they are still individual records so when any changes are made to either the SO or the WO the change will NOT update or be carried forward to the other. |
| 1.1.1.4.3. Add A Sales Order | |||||||||||||||||||||||||||
Adding a sales order is accomplished by first selecting the customer, a product and quantity. Then the user visits additional tab/screens to add more information about the order. The first of these is the Schedule Screen, where the user defines the delivery requirements for the product, then the Pricing Screen. The user should visit the Billing Screen and the Shipping screen to ensure that the defaults established for the customer are appropriate to the order being entered. If the user is visiting this screen to view an existing sales order, they may tab to the WO List screen and view current work orders in process. Depress the Add action button. Enter your password. And the Sales Order Screen will be displayed. The current calendar date will default in the Order Date field. This may be changed if desired.
 If the user is using auto-numbering for sales orders, the Sales Order field will be completed by ManEx when the order is saved.
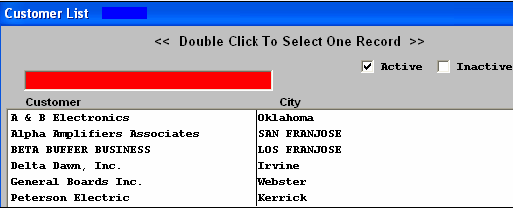
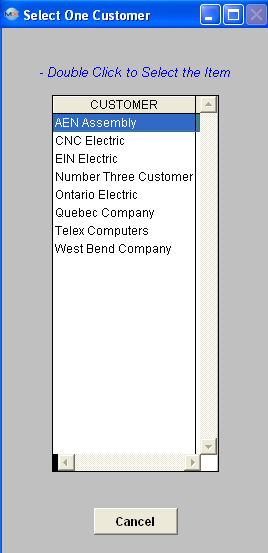
The next field to enter is the CUSTOMER. The user may begin entering the name, and ManEx will immediately begin tracking the key-entry to bring up the customer with as few keystrokes as necessary to identify the customer. Or, you may press on the down arrow adjacent to the field and ManEx will display all of the customers from which to choose for the order.
The SO Status is defaulted to the OPEN status during entry of a new sales order.
Next, a customer Purchase Order number is entered. This is a free-form field, and up to twenty of any normal characters(any combination of alphabet or numbers) may be entered. If the user has a purchase order from the customer, or a confirmation of the order from the customer, then the ORDER ACK box can be checked. If this box is NOT checked, the user will NOT be able to create a packing list for the order when it comes time to ship. If this box IS checked, then the date and initials of the user accepting responsibility for the order are recorded. The next step is to use the Directive Buttons to add information into the sales order. |
|
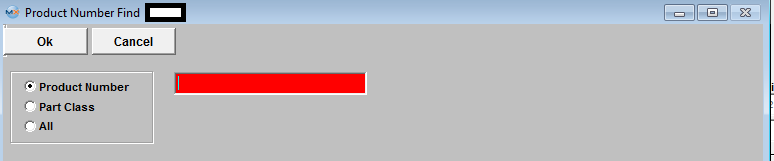
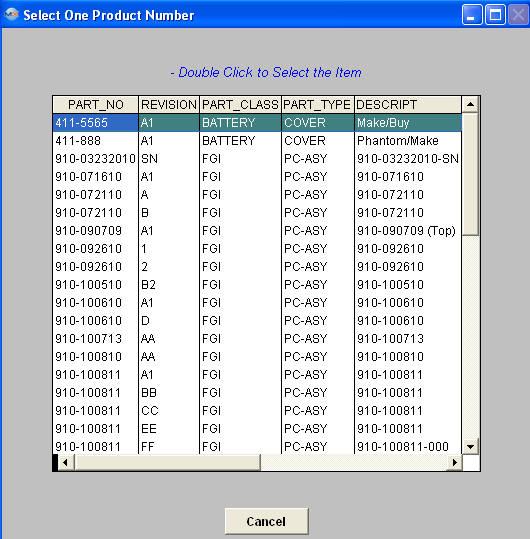
The "Add Product" button adds products or assemblies to the order. Pressing this button brings up the following selection screen. User may enter in a Product Number, Part Class, or select ALL, which will display a list of products that have been established for the customer selected for the sales order. The user selects the product number being ordered by entering it in the red box, or scrolling down the list and double-clicking on the assembly.
Note: If the user enters specific customers in the Customer List within the Sales Price List Information module, then that product will only be available for that customer when creating a Sales Order. |
 |
After selecting a part number, ManEx requests the quantity to be ordered.

You may view additional information about the part by sliding the scroll bar at the bottom of the grid to to the right.
![]()
|
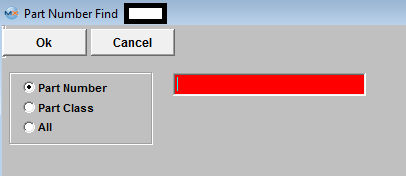
The "Add Part" button is to add a part from inventory to the sales order. This is material that is sold out of the stockroom, rather than material assembled to order. It may include any part carried in ManEx inventory, with a source as “Buy”. Pressing this button brings up the following dialogue box: User may enter in a Part Number, Part Class, or select ALL, which wiil display a list of Inventory parts. The user selects the part number being ordered by entering it in the red box, or scrolling down the list and double-clicking on the assembly. Note: If the user enters specific customers in the Customer List within the Sales Price List Information module, then that part will only be available for that customer when creating a Sales Order. |
 |
|
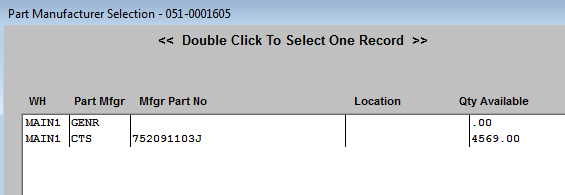
After selecting the part number the following dialog box will be displayed, displaying the Warehouse, Part Mfgr, Mfgr Part Number, Warehouse Location and the Quantity Available. Highlight and double click on the desired Part Manufacturer. |
 |

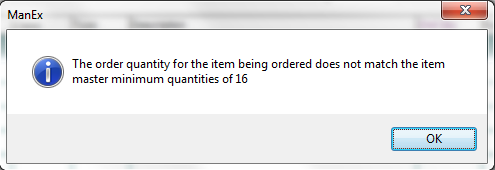
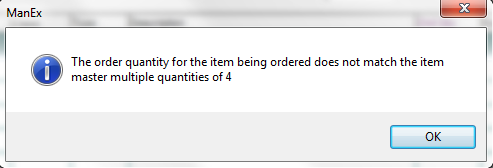
Note: When the user enters a quantity for a part, the system will check to see if there is a minimum and/or multiple setup in Inventory for this particular part/product.
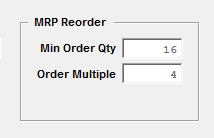
If the order quantity doesn't meet the requirements, the statements shown below will popup and display in the item master min and mult order quantity with an OK button. No other action is required. The user can choose to change the order quantity to match, or proceed as entered
![]()
The "Add Miscellaneous" button is to add any miscellaneous items to the sales order. This may be prototype items, engineering charges, or any item that is not manufactured nor is it in inventory. Pressing this button adds a line to the Sales Order and moves the cursor to the description field. The user enters the description, quantity and may then move to the pricing screen to complete the data.
The user is reminded that the scroll bars at the right side and bottom of the information box allow the information to be scrolled sideways and up or down to see additional information.
![]()
The "Delete Line" button is to delete a line already entered from the Sales Order. The user selects the line to be deleted from the Sales Order tab, and presses the button.
|
Pressing this button brings up the following dialogue box: The user confirms the deletion and the deletion is complete. |
 |
 Highlight the Assembly line item first before you depress the button.
Important Note: This action is taken AFTER the Scheduling tab is completely filled in for all add Products (assemblies). So, first go to the Schedule tab (instructions below). Schedule the product and then return to this tab.
| If user has the "SO Approval Required" box check in Sales Order Defaults & Sales Discount Type module checked, then user will be required to check the "SO Approved" box before being able to Issue a Work Order. If the "SO Approved" box is NOT checked user will receive the message located to the right. | 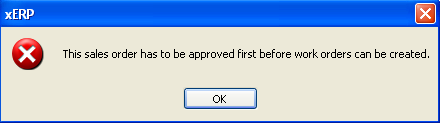 |
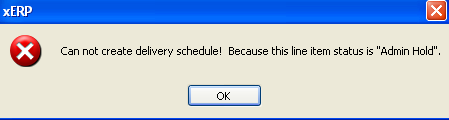
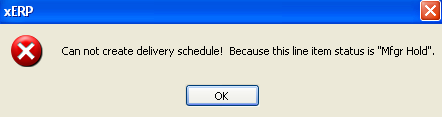
| If line item is on Admin Hold or Mfgr Hold user will receive one of the following messages and will be unable to Auto create a WO until the status has been changed for this specific line item. User will be able to manually add a Work Order for this product in the Work Order Management module. |
|
|
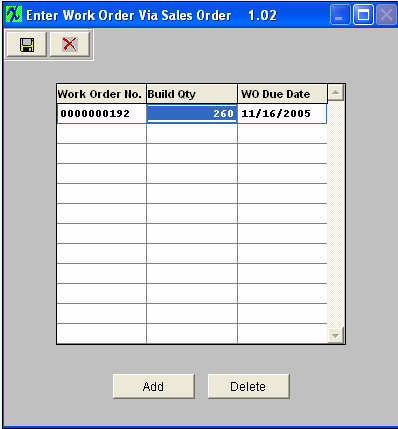
If there is only one delivery scheduled for the sales order, and the work order setup is established as automatic numbering, then the following screen appears:
Keep in mind though that even if you have the SO linked to a WO does not mean that the quantities will always be the same. The link is for reference only between the two modules and they are still individual records so when any changes are made to either the SO or the WO the change will not update or be carried forward to the other. A message is displayed to the users that they will have to make the same changes to the WO. |
 |
|
If the user has established more than one delivery date for the sales order, then pressing this button brings up the following: |
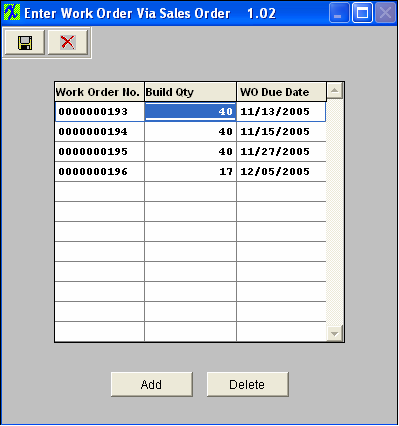 |
Depress the Save action button to finish creating the Work Order(s).
After completing all of the Sales Order data, the Sales Order must be saved. Then pressing the WO List tab will display all of the work orders created for the current sales order.
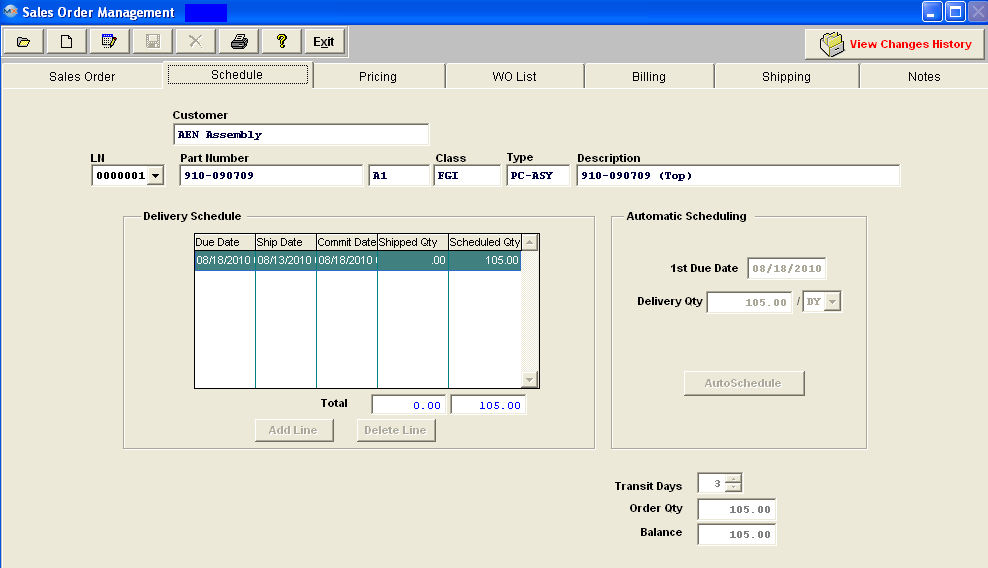
Schedule Tab
There are two modes available for completing a scheduled delivery for a product: Automatic and Manual. In the Automatic mode, ManEx will take a beginning date and a quantity to be delivered each period (Days, Weeks or Months) and schedule out the delivery using the Delivery Schedule Default Days which are setup in the Delivery Schedule Default Setup module.
Clicking on the Schedule screen tab brings up the following:
![]()
Sales Order Line number: Select the line number by depressing the LN down arrow. The following selection will be displayed:

| Automatic Scheduling |
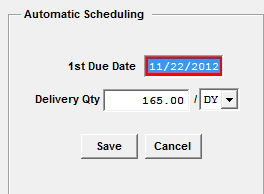
Pressing this button enables the scheduling box and places the default lead time date in the Due Date box. (The user may establish a default number of days setup in the Delivery Schedule Default Setup module). The user can then use that date, or enter the first (beginning delivery) date the customer expects to receive the order. The Delivery Qty screen allows the user to divide the shipment into multiple deliveries of equal parts. For example, if the order is for a total of 100 pieces, and the customer wishes delivery to be at the rate of 10 units each day, then the delivery quantity should be entered as 10. The next box allows the user to select the delivery intervals. The options are by day (DY), week (WK) (7 days) or month (MO) (30 days).
Note: In using the term Weekly and Monthly, it doesn't matter what the holidays or what the weekends are (i.e. that they are not excluded from the total time of a week or month), but are considered when the final date is calculated. |
 |
| Manual Scheduling |
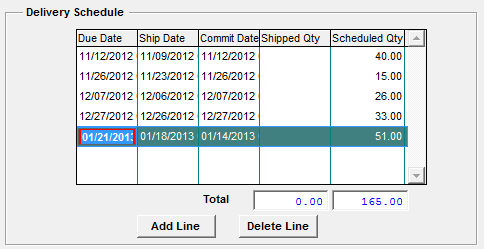
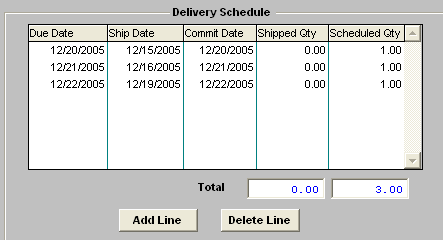
Pressing the Add Line button enables the delivery schedule box and places the cursor in the Due Date box. The user can then enter the first (beginning delivery) date the customer expects to receive the order. Next, the Ship Date (the date the order is to leave the user’s dock) will be entered by ManEx based on the transit days entered. This date can then be modified by the user if a different date is desired. Then the scheduled quantity is entered. The Shipped quantity will be completed by ManEx when the line has material shipped against it. Additional lines may be added or deleted by pressing the appropriate button. The total number of units scheduled will be displayed at the bottom of the box, so the user can verify all units have been scheduled. |
 |
After you’ve scheduled all assemblies, you may go back into the Sales Order tab and issue the Work Orders for those assemblies. Please refer to the instructions above regarding the Issue Work Order button.
Pricing Tab
Clicking on the Pricing screen brings up the following screen:
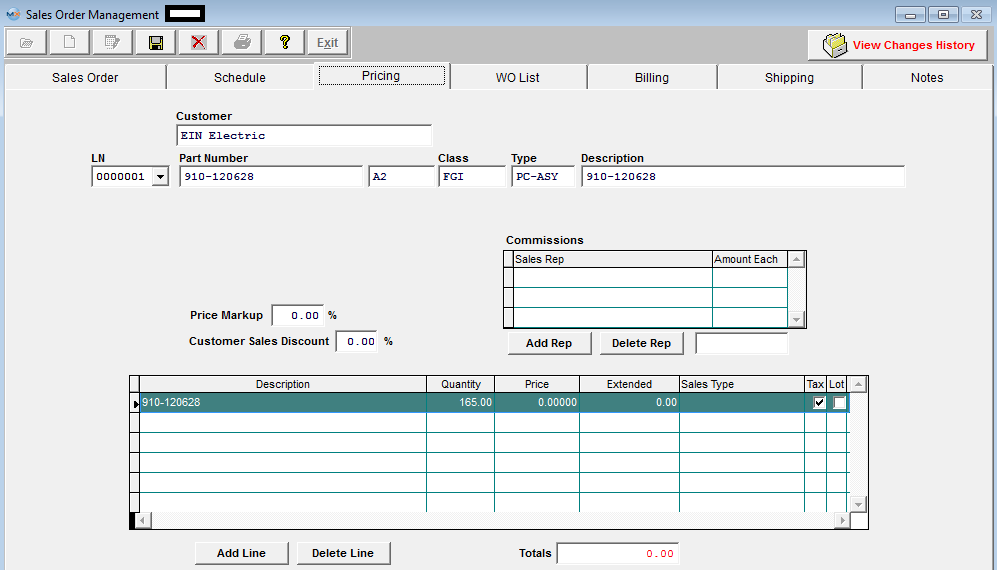
Depress the down arrow next to the LN field. The following list will appear:

Select the desired line number. If the user has completed the Pricing Screen for the product, then the pricing will be automatically entered. See Article #766 for more detail.
|
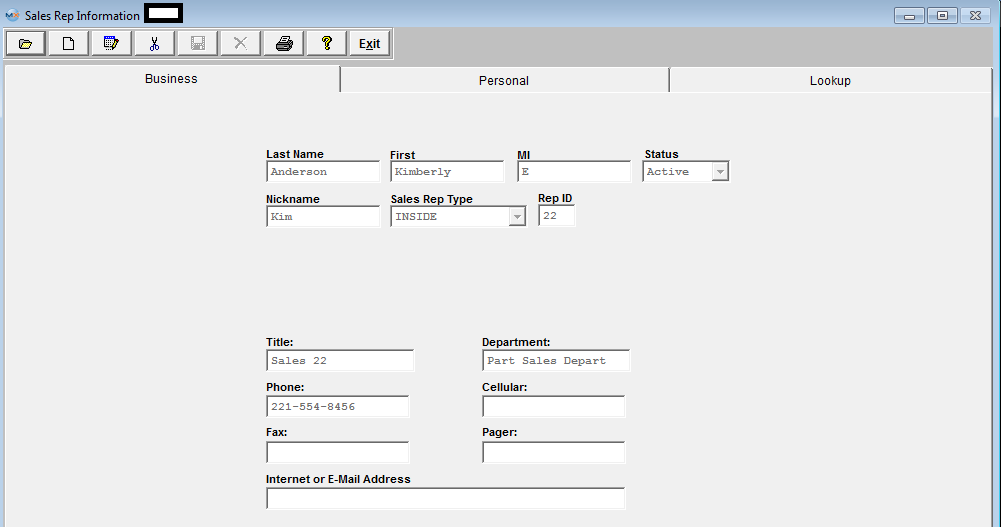
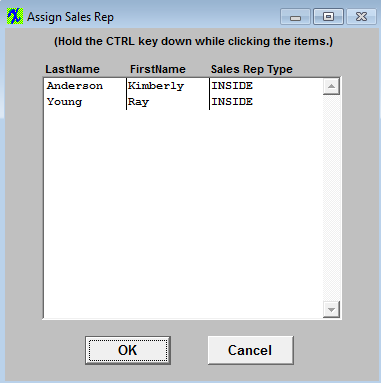
Depress the "Add Rep" button to add a Sales Rep. The following screen will appear listing all the Sales Rep's setup in the Sales Rep Information module.
Highlight the Sales Rep or Reps, then depress the OK button and they will appear in the commissions box as displayed below.
|
 |
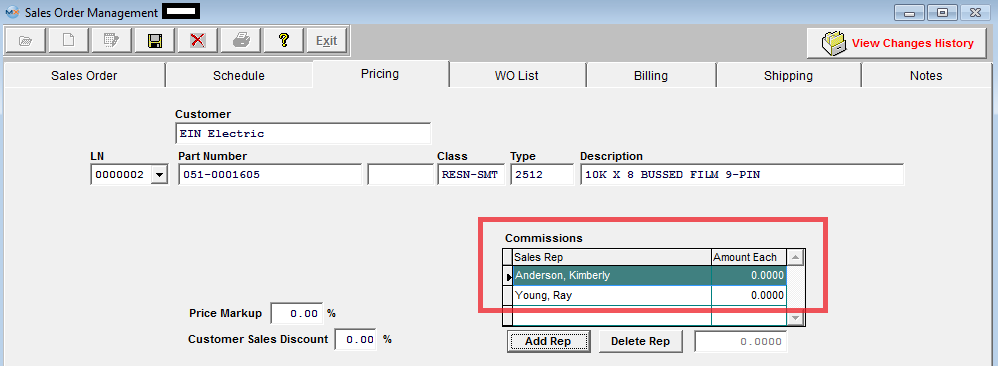
Enter in the commission amount for that specific Sales Rep.
If accounting is installed,the user selects the Sales Type. The user can select the Sales Type from the drop down list:

If the user has completed the Pricing Screen for the product, then the pricing will be automatically entered. See Article #766 for more detail.

For Sales Order Items with no Tax, leave the Tax box unchecked. No further action is required.
Adding a US Sales Tax or a US Shipping Charge Tax in Customer Information requires that those items added be entered in System Setup under Sales Tax Authority Table.
If a particular Customer Ship To Address has more than one US Tax (such as a Sales, Use, Excise, etc. tax), then the taxes may be entered in System Setup individually and added individually to the appropriate Customer Ship To addresses.
User CANNOT manually add Foreign tax to Sales Orders or Invoices. The Foreign tax box must be checked for the Shipping Address for the particular Customer selected in the Sales Order Header.
If the Foreign tax box is checked for the Shipping Address for the particular Customer selected in the Sales Order Header. Pricing will be listed as follows on the Sales Order Acknowledgement, Invoice, RMA, and Credit Memo: First the Product Sub-tot AMT, the Sales Discount (if applicable), the Freight AMT (if applicable), a SUB-TOTAL, the GST TAX (Primary tax) (Note: the Primary tax will always be displayed even if it is zero, if a Secondary Tax is present), then a second Sub-Total, PST TAX (secondary tax), and last the TOTAL. If no PST tax (secondary Tax), Sales Discount, or Freight is involved, then no lines would print for these items. See the Foreign Tax Examples.xls attachment to see how the Primary and Secondary taxes are calculated.
The Primary tax and Secondary tax is divided into the Sales tax and Shipping tax on the Sales Tax reports.
For Example:
Primary Tax (GST): 144*10% (sales tax) + 0 (no freight tax is calculated) =$14.40
Secondary Tax (PST): 144*8% (sales tax) + 12*8% (Freight tax) = $12.48
Divided into sales tax and freight tax:
Sales Tax: 144*10% (sales tax) + 144*8% (sales tax) = $25.92
Freight Tax 0 (from primary tax) + 12*8% (from secondary tax) = $0.96
If the user wants to use a Lot Charge instead of unit pricing, click on the Lot box. This will take the unit cost as a lot charge for the item without extending the units by the price. This may be used if a flat fee is charged for a number of parts.
Clicking on the Add Line button may enter additional charges for the product. These charges may carry a different unit price, and may be of any description. A Non-inventory line added on this screen will be invoiced on the first shipment made for this sales order.
Work Order List Tab
Clicking on the Work Order List tab brings up the following:
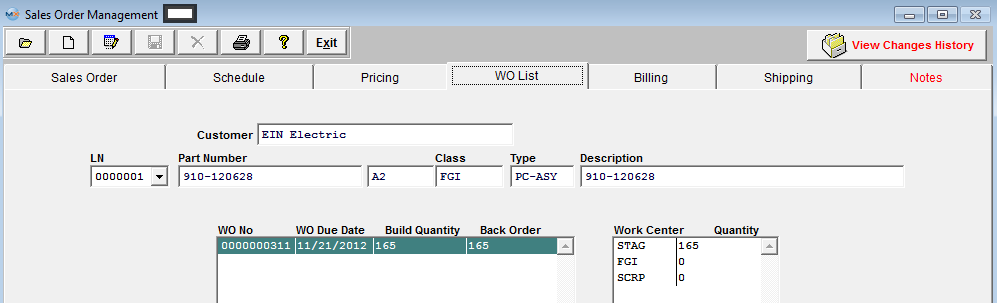
Depress the down arrow next to the LN field. The following will display:
Select the line item containing an assembly for which Work Orders have been created.
This screen is for information only, providing the user with status of work orders created for the current sales order. The user has the option of creating multiple work orders for a sales order line item. To see the Work Orders for the next line item, depress the LN down arrow and select the desired line item.
Billing Tab
Clicking on the Billing screen tab brings up the following:

In this screen, a Bill-to address will be completed with the default address established in the Customer Information Module. The Bill-to address also may be selected from any other addresses entered in the Customer Information Module. The first prompt is to enter the Bill-to address. The user may accept the default address, or select from any address established in the Customer Information Module. All address information in the set up will be displayed when the down-arrow is pressed at the right side of the field:
After selecting the appropriate bill-to address, the information fields on the screen are populated with the correct data.
Shipping Tab
Clicking on the Shipping screen tab brings up the following:

As in the Billing screen, the user may select from established ship-to addresses by pressing on the down-arrow key at the right of the first field:
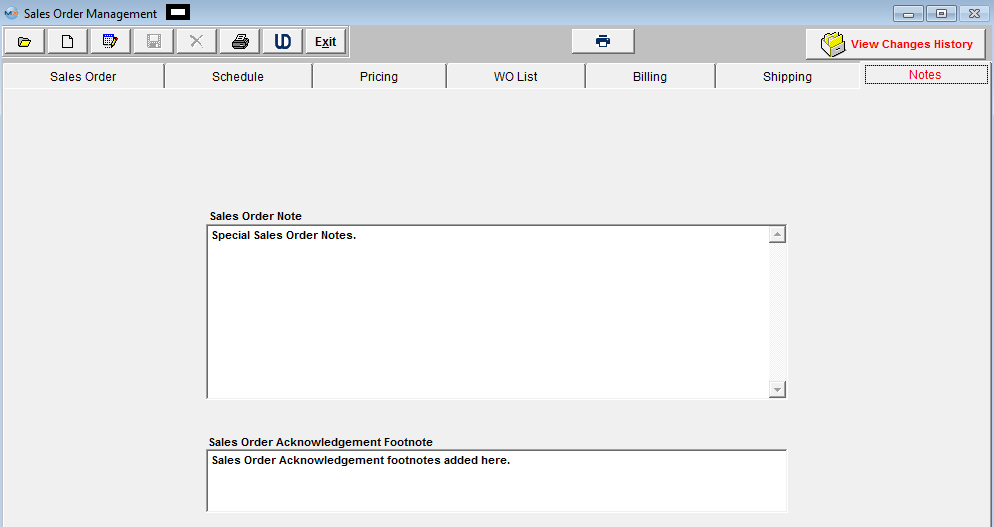
Notes Tab
The last screen, the NOTES screen, provisions are made to establish Sales Order Notes and/or Sales Order Acknowledgment Footnotes. These notes are available on their respective screens.

Note that when any note is entered on this screen, the screen tab NOTES turns red to indicate there is data in the notes.
Once all Tabs have been complete Depress the Save action button to save changes or the Abandon changes action button to abandon changes.
| 1.1.1.4.4. Cancel a Sales Order |
To cancel a Sales Order
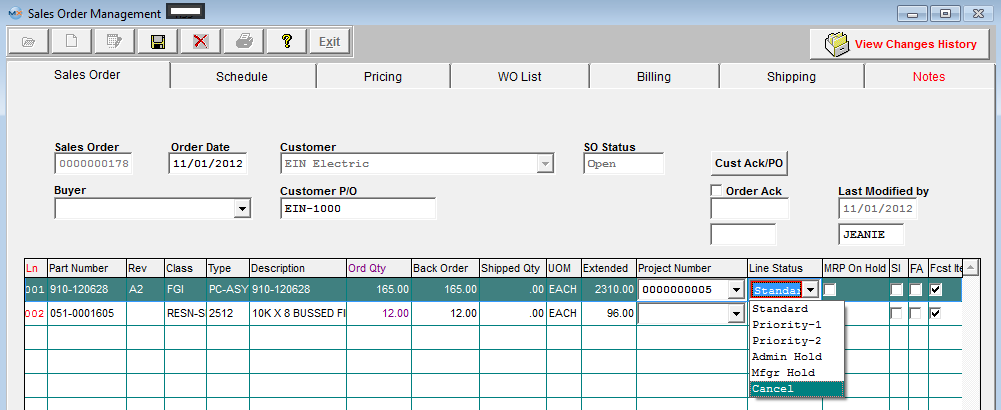 Once you have cancelled a line item on PO the following message will be displayed: 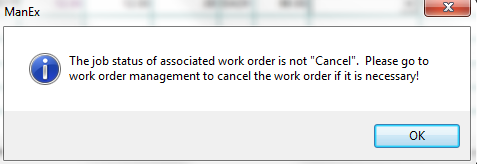 Depress Ok and the Sales Order status will be changed to "Cancel" Depress the Save action button, to save changes. Press the Red "X" to abandon changes. Depress the Exit action button to exit the current screen and returns the user to the previous screen. |
| 1.1.1.4.5. Delete a Sales order |
A sales order may be deleted using the Delete Unwanted Sales Order in the System Utility Module. This utility will allow users to delete any Sales Order record within the system as long as there are no shipments or reserved qty against it. In addition to deleting the Sales order, the utility will also check to see if there were any linked Work Orders to that Sales Order, if any were found it will display a warning and then also generate a XLS spreadsheet for the users to review and re-establish links to new Sales Orders if desired. |
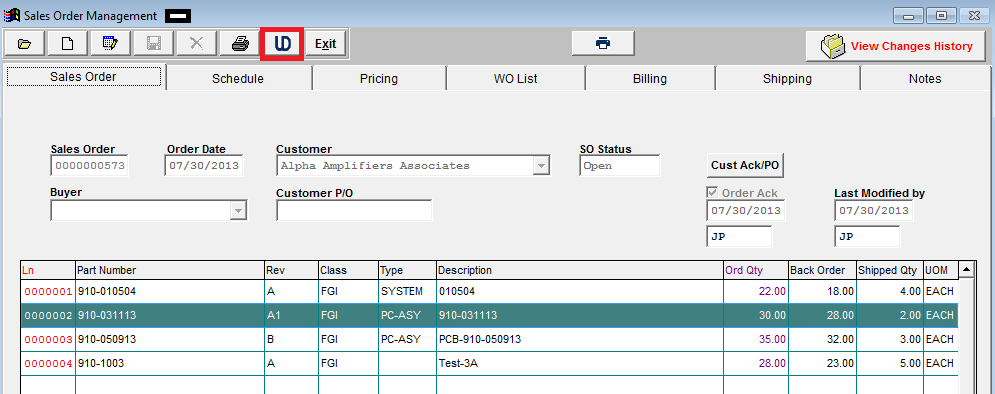
| 1.1.1.4.6. Link User Defined Fields to a Sales Order |
| The User Defined fields MUST be setup within Web ManEx. For further detail see Article #5454.
The User Defined Fields can then be linked to a Sales Order or a line Item on the SO.
To link a UDF to a Sales Order select a record in the ManEx
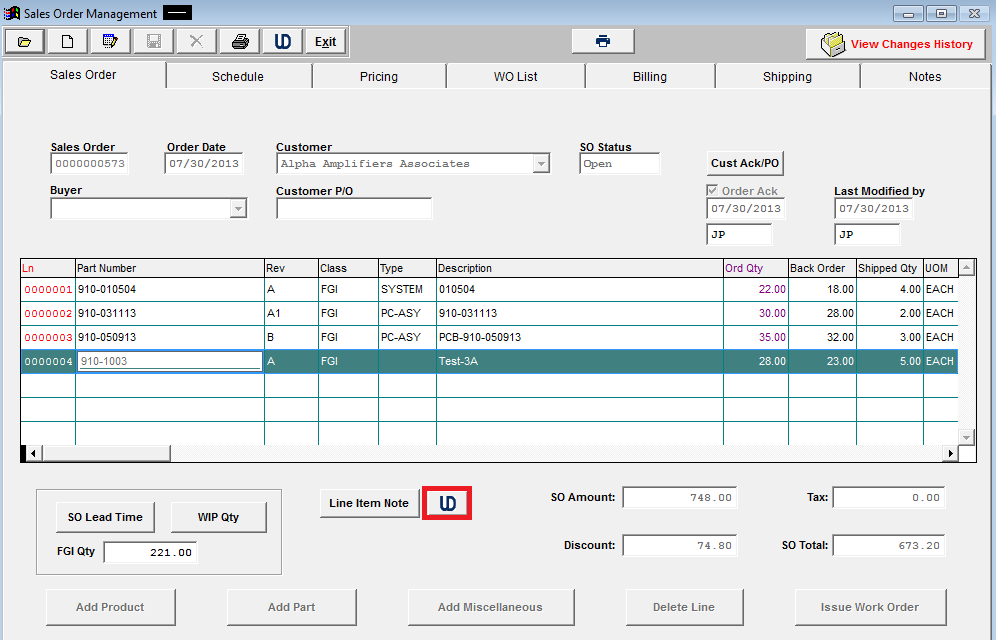
Desktop, and select the UD action button (as displayed below).
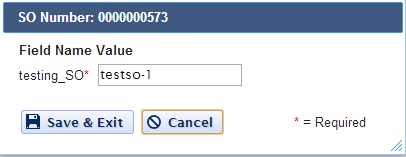
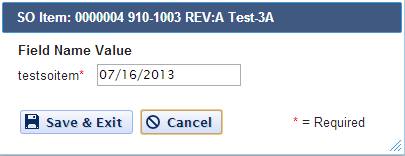
The UDF for that section will then be displayed, and user can make changes (if applicable), Save & Exit or Cancel.
To link a UDF to a Line Item on the SO select the line item, then select the UD action button that is located in the SO body (as displayed below)
The UDF for that section will then be displayed, and user can make changes (if applicable), Save & Exit or Cancel.
|
| 1.1.1.5. Reports for SO Mgmt |
| 1.1.1.5.1. Reports for SO Mgmt | ||||||||||||||||||||||||||
To obtain the Sales Order Reports within the Web, select the WEB Print button from the ManEx action buttons at the top of the screen. For further detail on How the Reports work within the Web refer to Article #5477. Note: In order to access the Reports within the Web the Company Root URL must be setup within the System Appearance module and user must be linked to web within the System Security Module.  Select the Report Type: SALES ORDER - A List of Reports will be displayed that are available on the Web
for SALES ORDER
To obtain the Sales Order Reports within the desktop, select the Print button from the ManEx action buttons at the top of the screen.
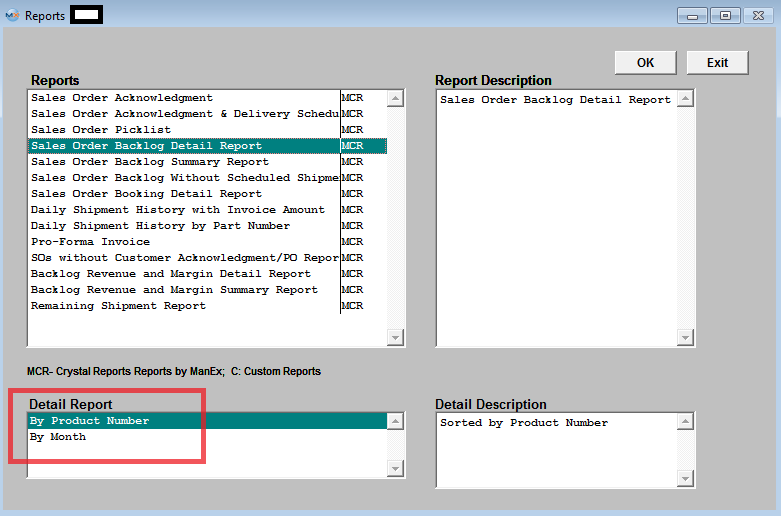
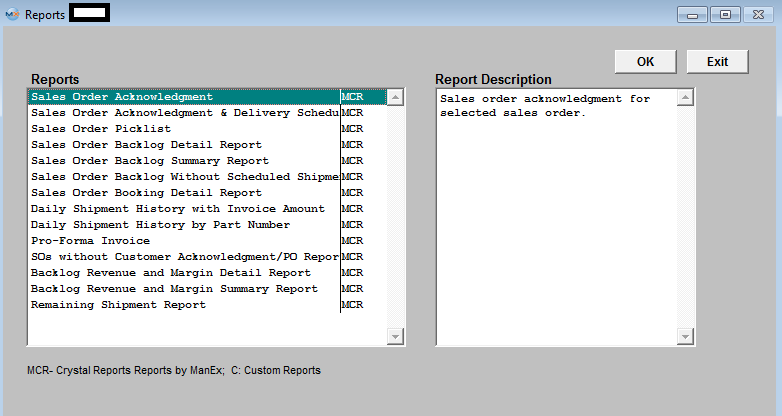
The following reports screen will display a list of reports that are available on the ManEx Desktop:
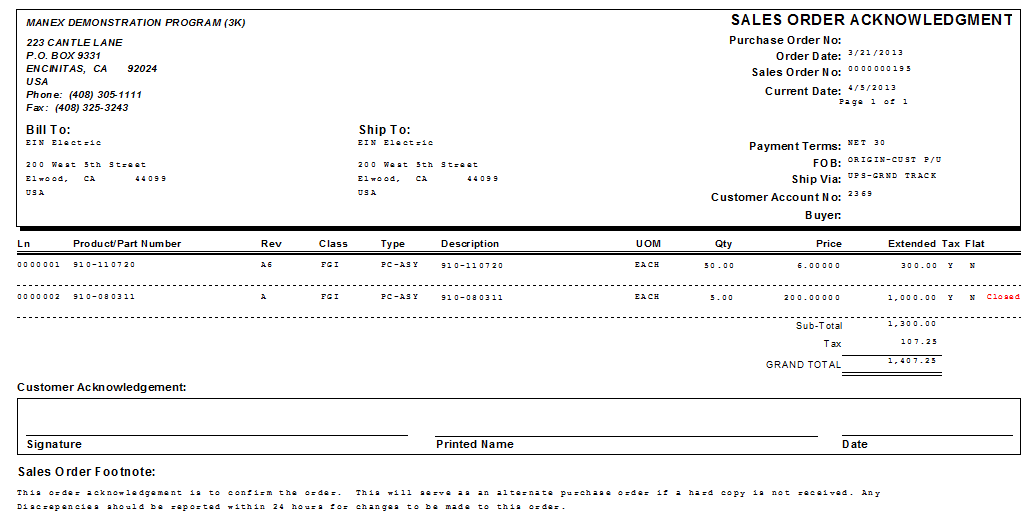
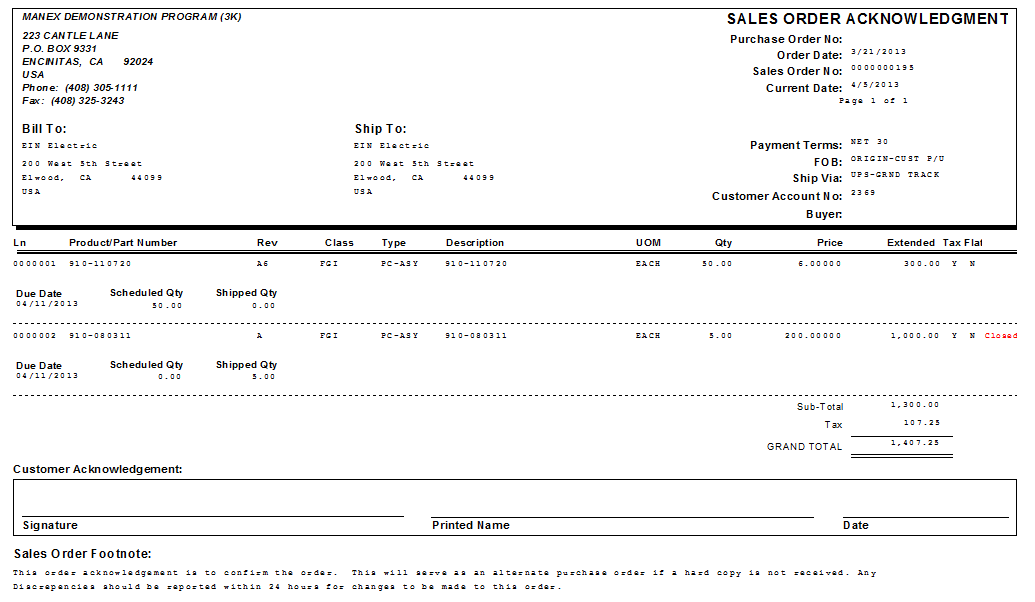
Highlight the desired report and then depress the OK button: Sales Order Acknowledgement Report
The following report will print:
Sales Order Acknowledgement & Delivery Schedule report
The following report will print:
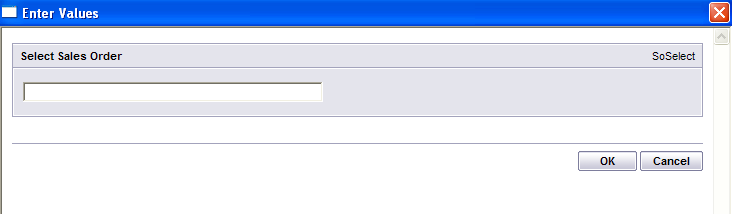
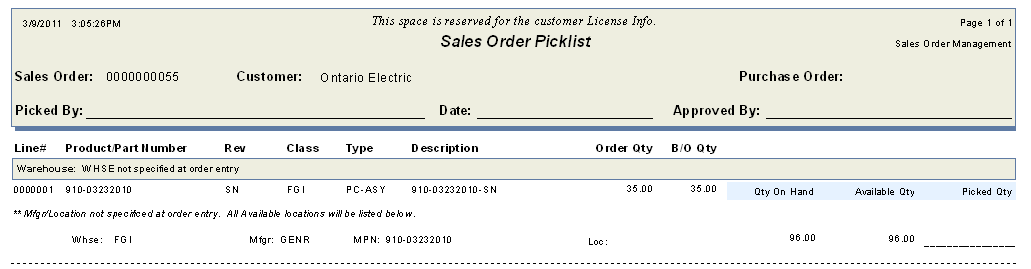
Sales Order Picklist report
The following report will print: This report will display the Sales order picklist for selected sales order.
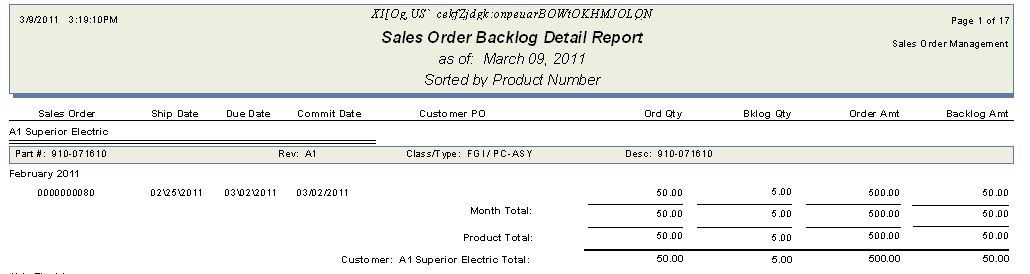
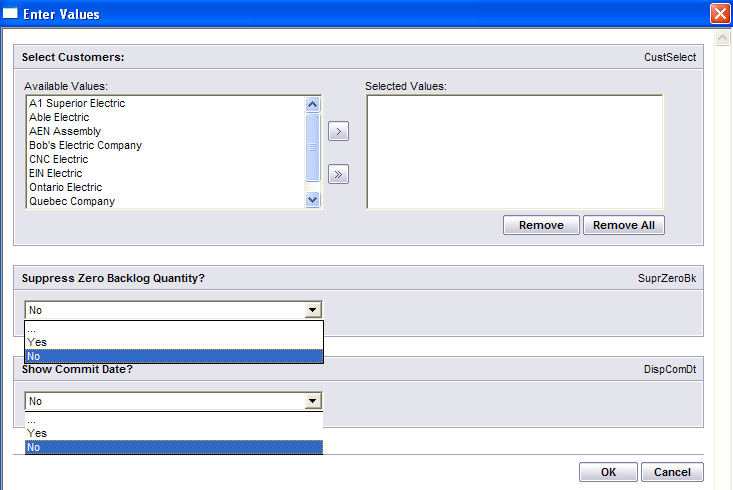
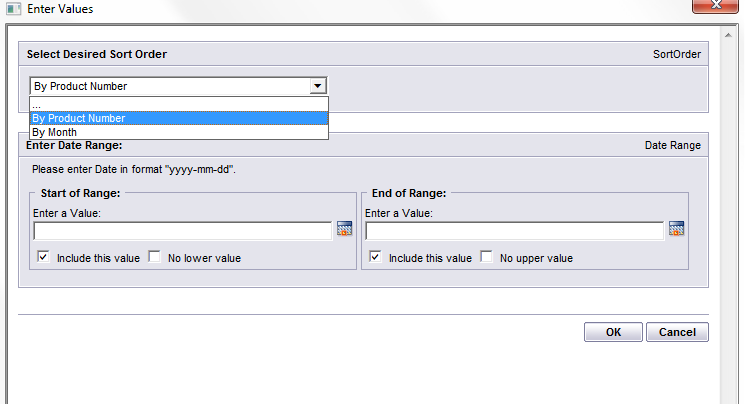
Sales Order Backlog Detail report For the Sales Order Backlog Detail report, you can select to sort By Product or By Month on the bottom of the screen.
The following report will print:
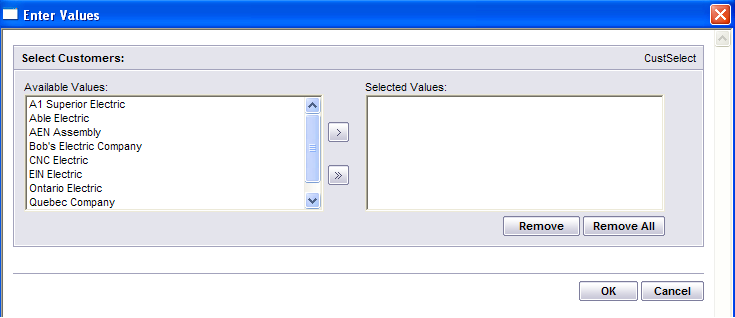
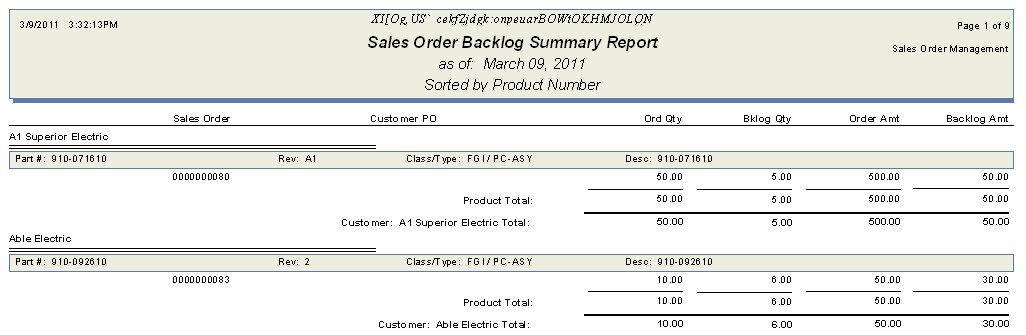
 Sales Order Backlog Summary report
The following report will print:
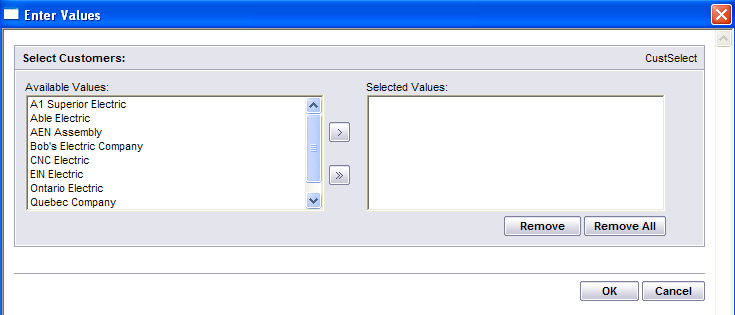
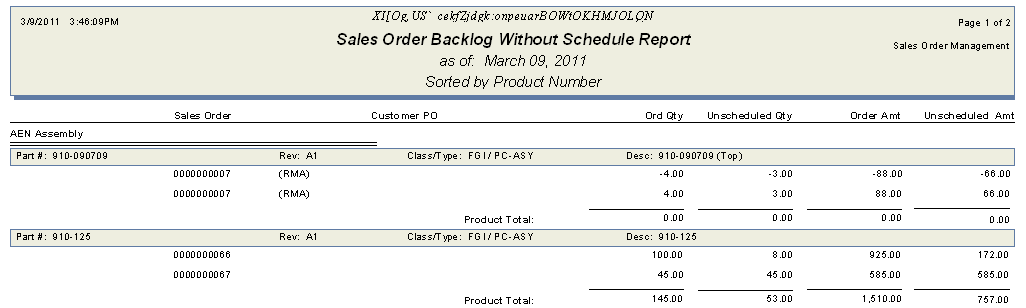
Sales Order Backlog Without Scheduled Shipment report
The following report will print:
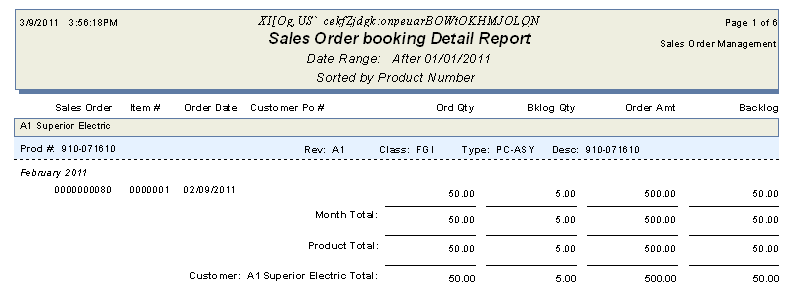
Sales Order Booking Detail report
The following report will print:
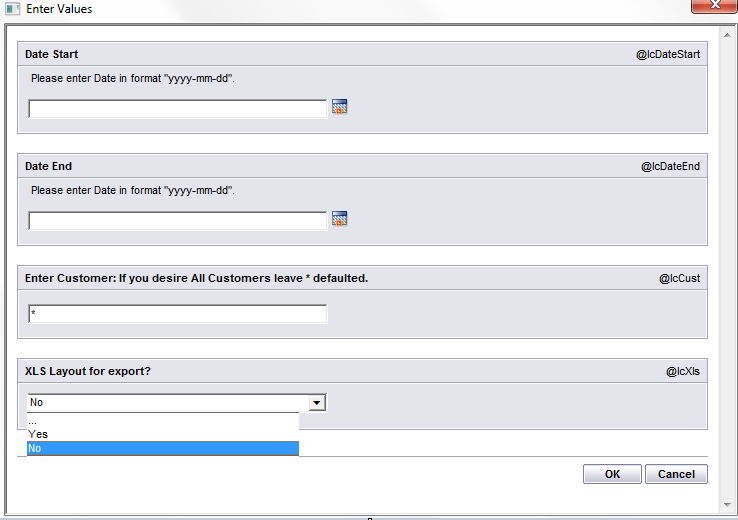
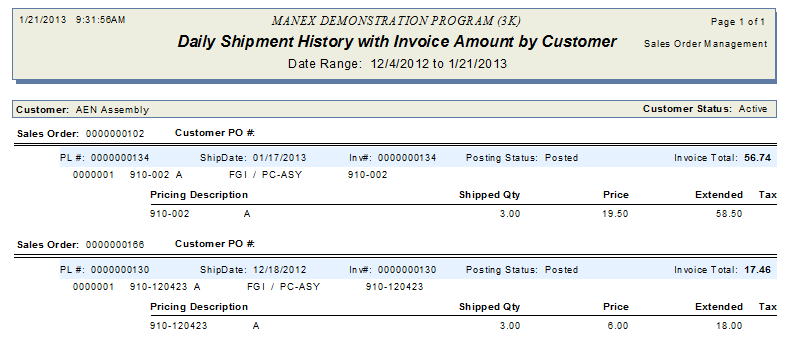
Daily Shipment Report With Invoice Amount For the Daily Shipment Report With Invoice Amount, you can select By Customer, By Packing List, or By Sales Order on the bottom of the screen. Depress the OK button. 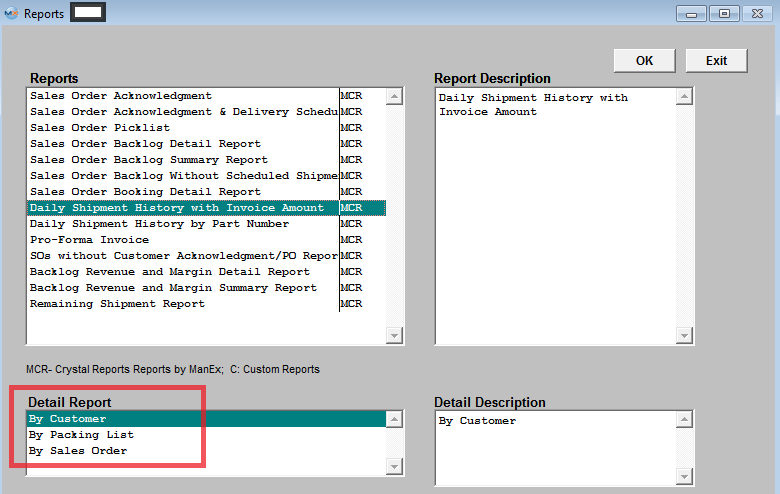
The following report will print:
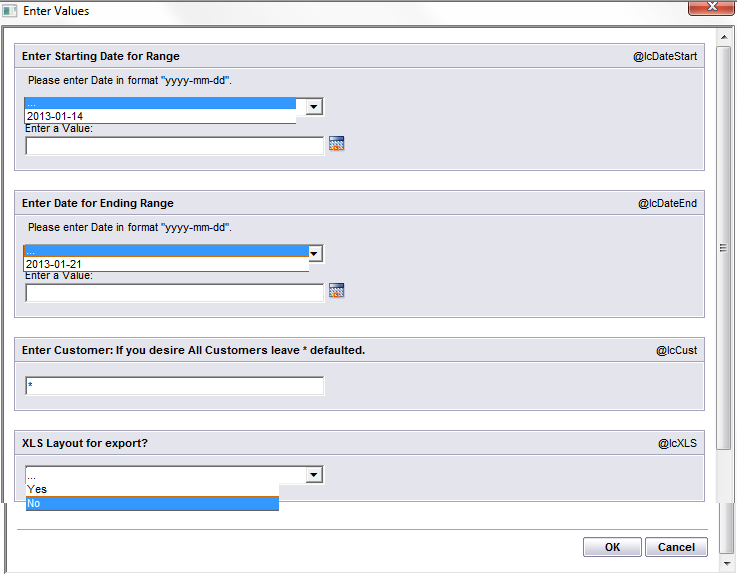
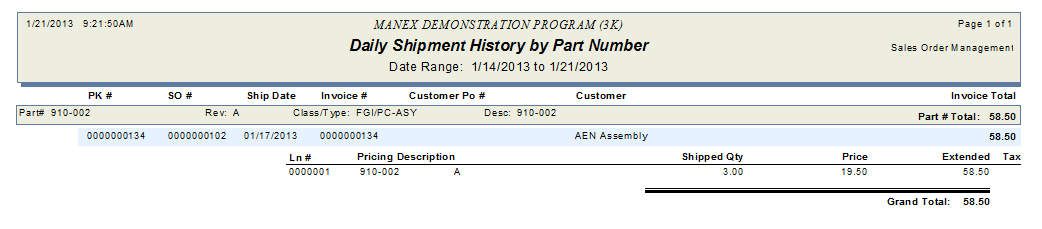
Daily Shipment History Report by Part Number
The following report will print:
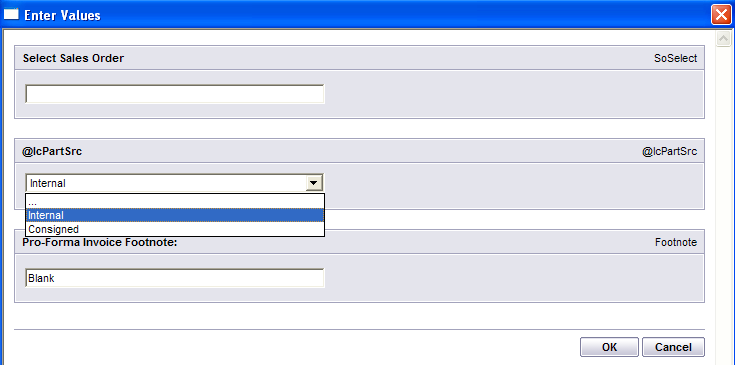
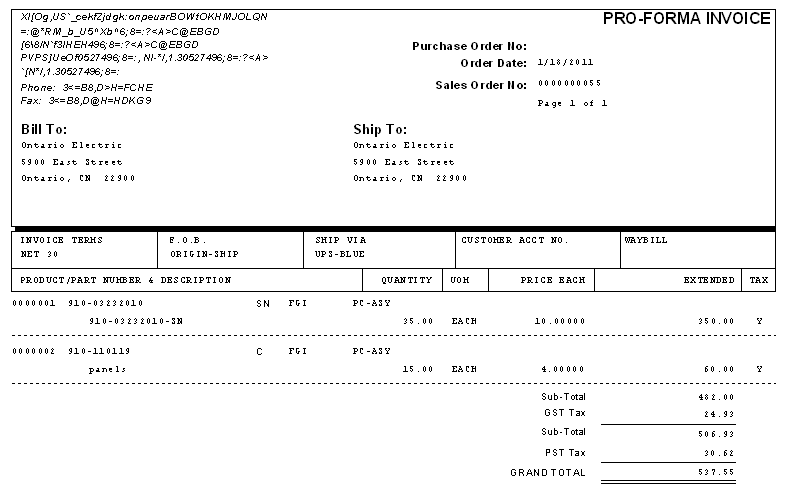
Pro-Forma Invoice report
SOs without Customer Acknowledgement/PO report
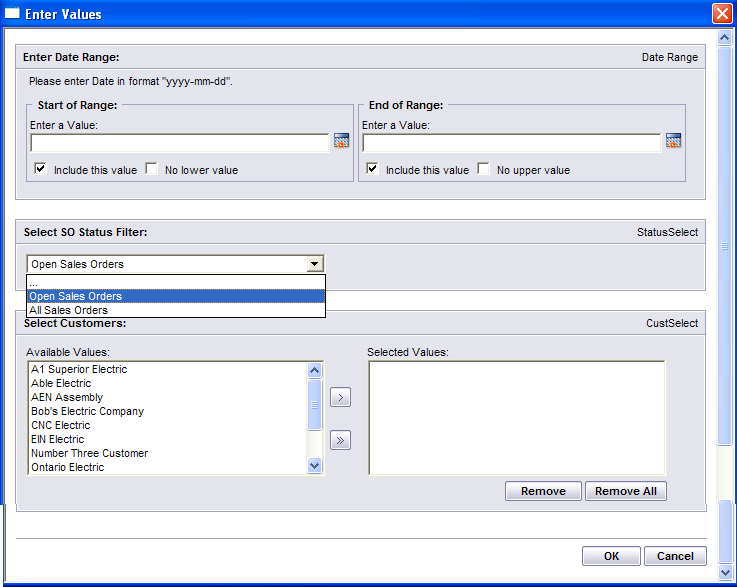
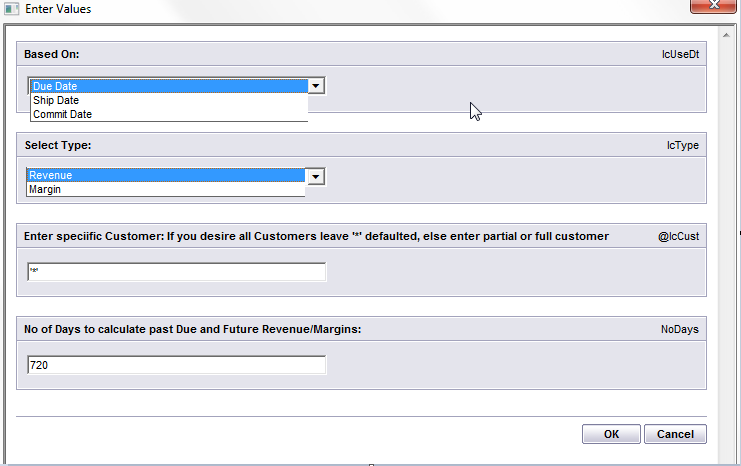
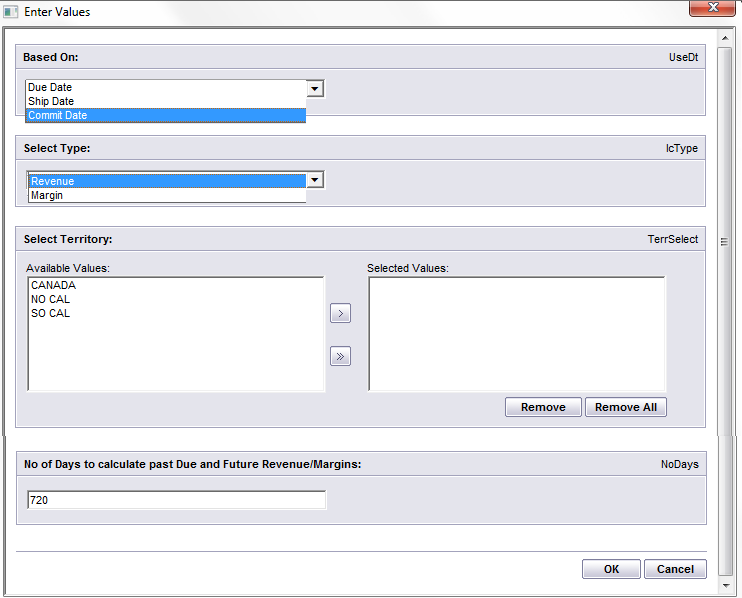
The following report will print: - This report will display a list of SOs that still need a Customer Acknowledgement/PO 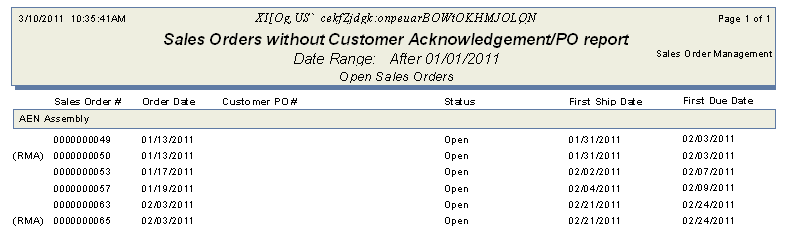 Backlog Revenue and Margin Detail Report
The following report will print:
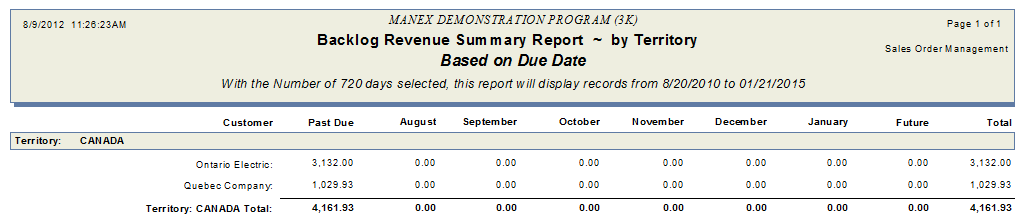
 Backlog Revenue and Margin Summary Report
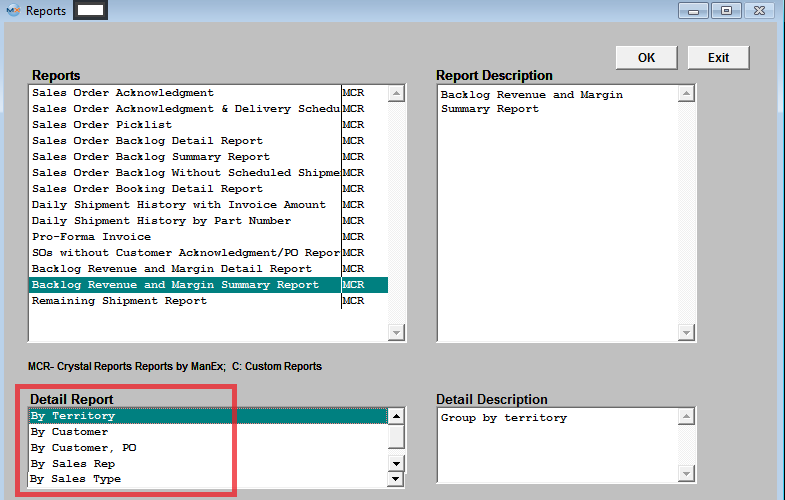 Select a Group: By Territory; By Customer; By Customer, PO; By Sales Rep; or By Sales Type
Depress OK
 Remaining Shipment Report - This report is NOT Available in SQL Yet Enter the Date to display Shipments Due Up To:
Basically, this report will get all MRP action records for SO demand that the date is up to whatever user set up on report "Option" page (default is 60 days from now). The program will get sales oder information (due date, price...) as well, then join this two set of data by sales order number and due date. That's how the proposed work orders linked to sales orders, even the user doesn't create the work orders for the sales orders. Because this report lists what order actions required in order to make the shipment, it will get those proposed WO records with negative balance, and get MRP action records for those components. If the part numbers have positive balance or regular WOs that will eventaully fill the demand, those records will be filtered out.
The following will print:
|

| 1.1.1.6. FAQs for SO Mgmt |
| Facts and Questions for the Sales Order Managment Module |
| 1.1.1.7. ManEx Minutes (SO) |
| 1.1.2. Upload New Sales Orders |
| 1.1.2.1. Prerequisites for New SO Upload |
|
| 1.1.2.2. Introduction for New SO Upload |
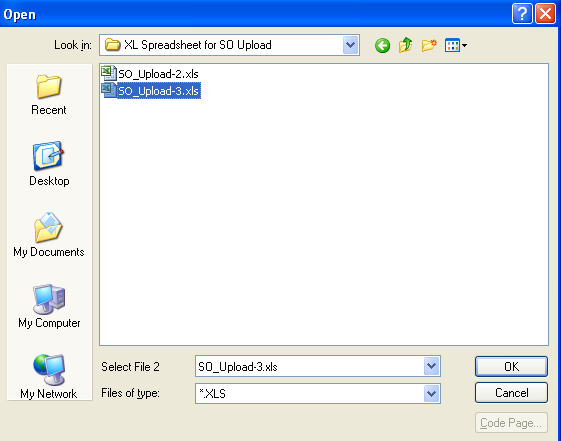
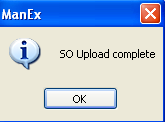
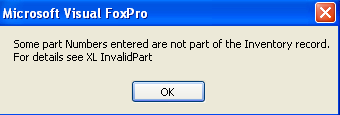
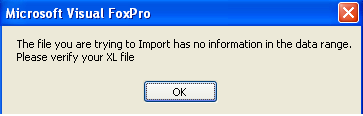
This module gives our users the capability to take electronic files, copy and paste that information into the ManEx SO Upload template format. Users will have the flexibility to load a large SO into the system all at once, or upload multiple sales orders for different customers at once, etc. This upload is also designed for the users to sell a big number of buy parts to their customers and to bring these parts in later as IPS parts using Inventory upload module. During the upload process the system will find any problems with the template, the user will be prompted and exception XL files will be created within the SOExceptionXL directory for the users to review and disposition.
|
| 1.1.2.3. Fields and Definitions for New SO Upload |
| 1.1.2.3.1. SO Upload Template | ||||||||||||||||||||||||||||||||||
|
| 1.1.2.4. How To ....... for New SO Upload |
| 1.1.2.4.1. Add - Upload a New SO | ||||||||||||||
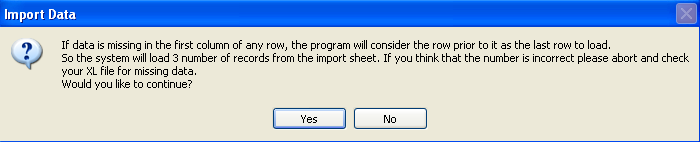
The following screen will be displayed:
This message will appear. This message is for user to verify the number of recorrds being loaded from the import sheet. User may depress "YES" to continue the upload or "NO" to abort the upload.
|

| 1.1.3. Customer Order Status |
| This module is available in the WebManEx. For further information see Article 5319 |
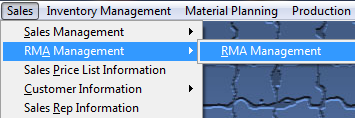
| 1.2. RMA Management |
| 1.2.1. RMA Management |
| 1.2.1.1. Prerequisites for RMA Mgmt | ||||||
Prerequisites for Entering a New Return Materials Authorization:
An Additional Prerequisite for Entering a Stand-Alone Return Materials Authorization: The product numbers displayed in the "Find Product Number" list are either only for "Standard Price", or the customers that are added into the customer list in the Sales Price List module. |
| 1.2.1.2. Introduction for RMA Mgmt |
The Return Material Authorization (RMA) Module allows the user to create two different types of RMA's a Standard RMA and a Stand-Alone RMA.
A Standard RMA is created when there is material being returned for rework/repair that was originally built and shipped by you. A Stand-Alone RMA is created when the material being returned for rework/repair was not originally built and shipped by you.
A Return Material Authorization (RMA) notifies receiving to expect a return. The authorization also allows for reworking/replacing the order so that the user doesn’t have to go to another screen to create a Sales Order. There are three options on pricing. 1. The user may enter zero for both the return and the re-work. For further detail on how this affects the GL accounts see Article #3397 . 2. The user may enter full price for both the return and re-work. For further detail on how this affects the GL accounts see Article #3396 .
3. The user may enter zero on the return and a dollar amount for the re-work.
Once the RMA has been acknowledged, user will then create the RMA Receiver . |
| 1.2.1.3. Fields & Definitions for RMA Mgmt |
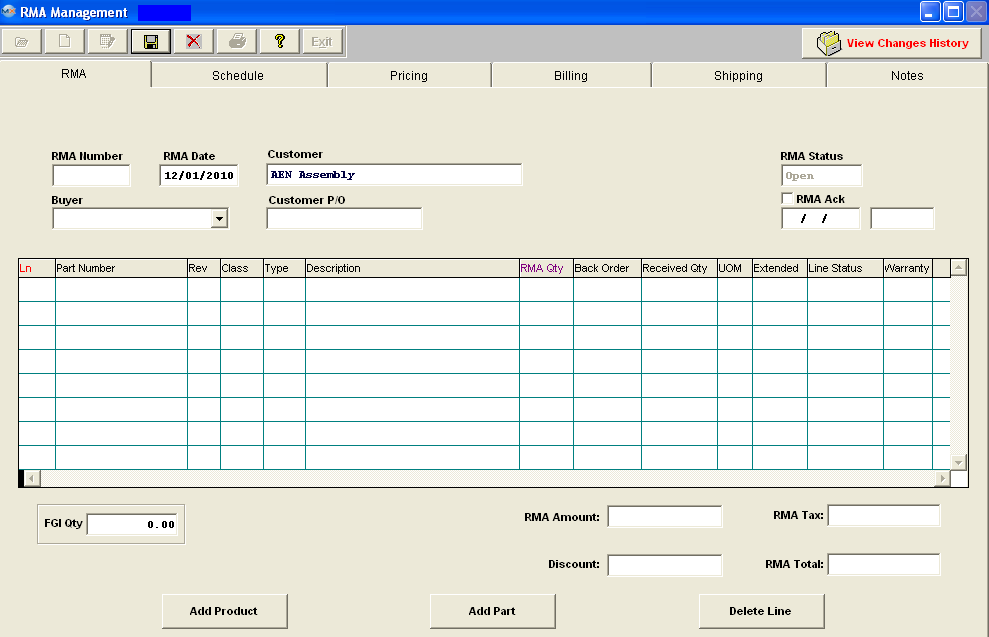
| 1.2.1.3.1. RMA Tab | ||||||||||||||||||||||||||||||||||||||||||||||||||||||||||||||||||||||
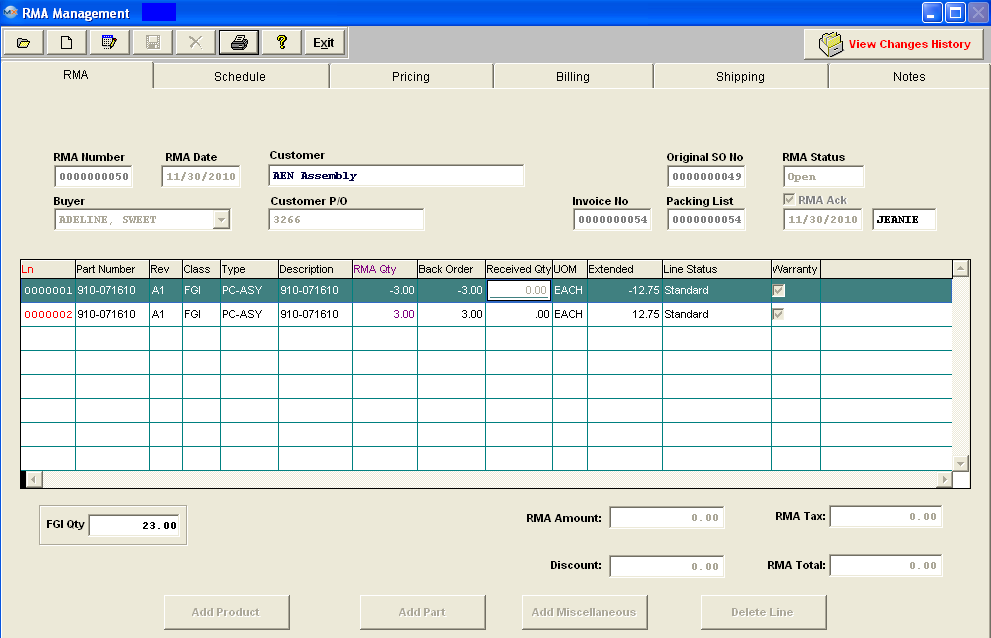
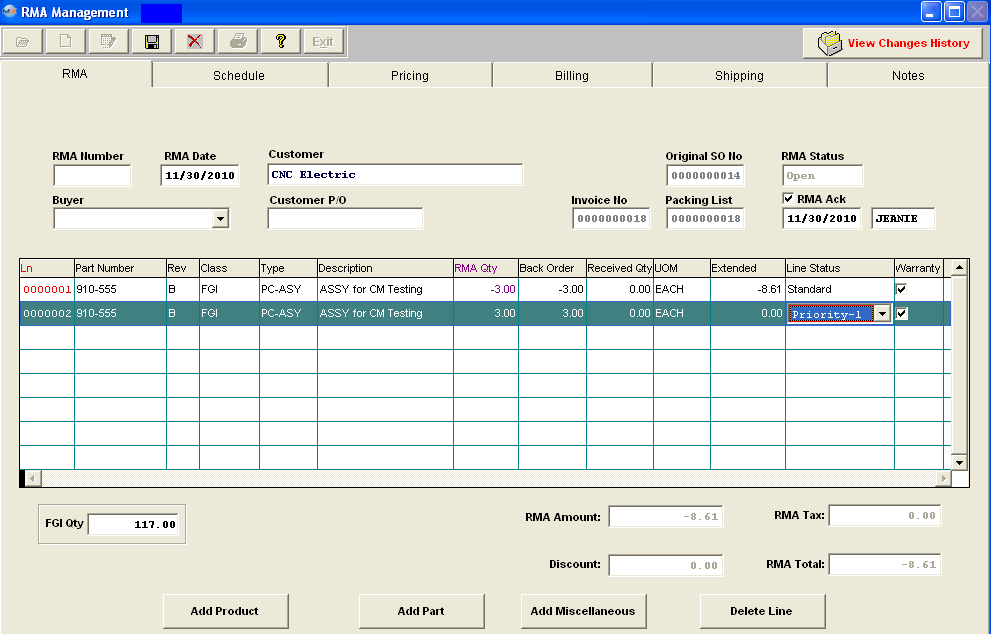
The first screen is Return Material Authorization. On this screen you can see the amount being returned against the Sales Order and Invoice. If there is to be a re-work, this information will also display.
RMA Tab Field Definitions
Directive Buttons
|
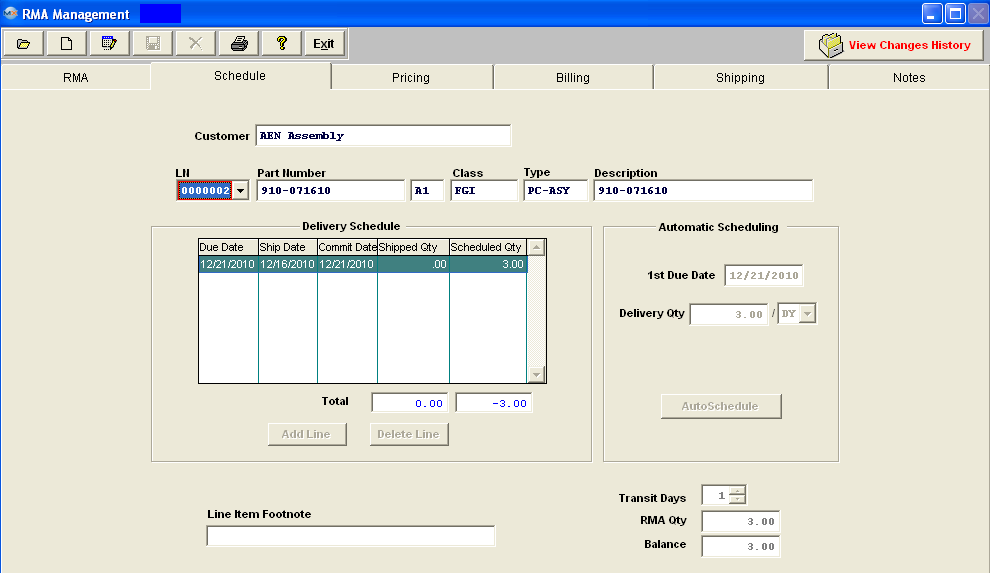
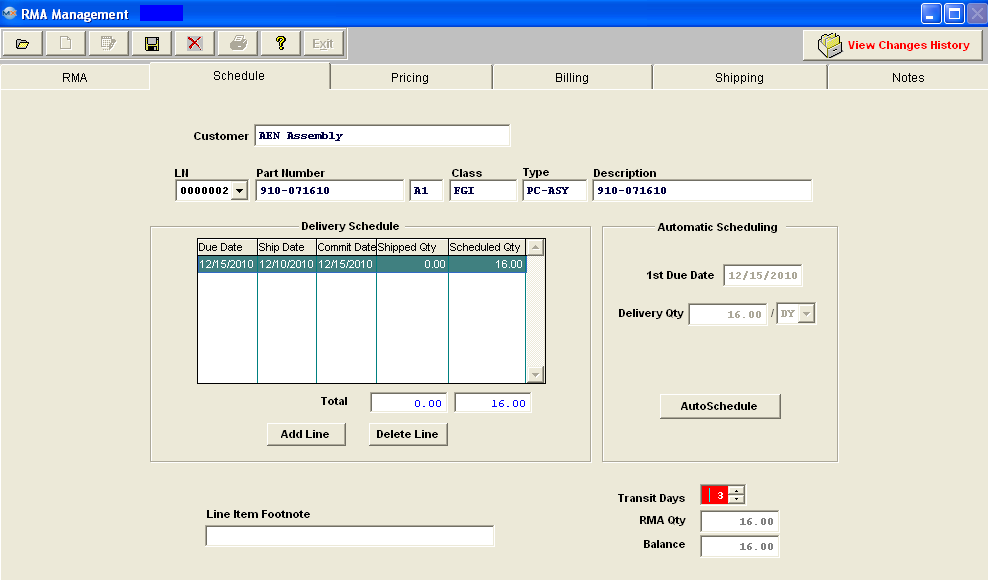
| 1.2.1.3.2. Schedule Tab | ||||||||||||||||||||||
|
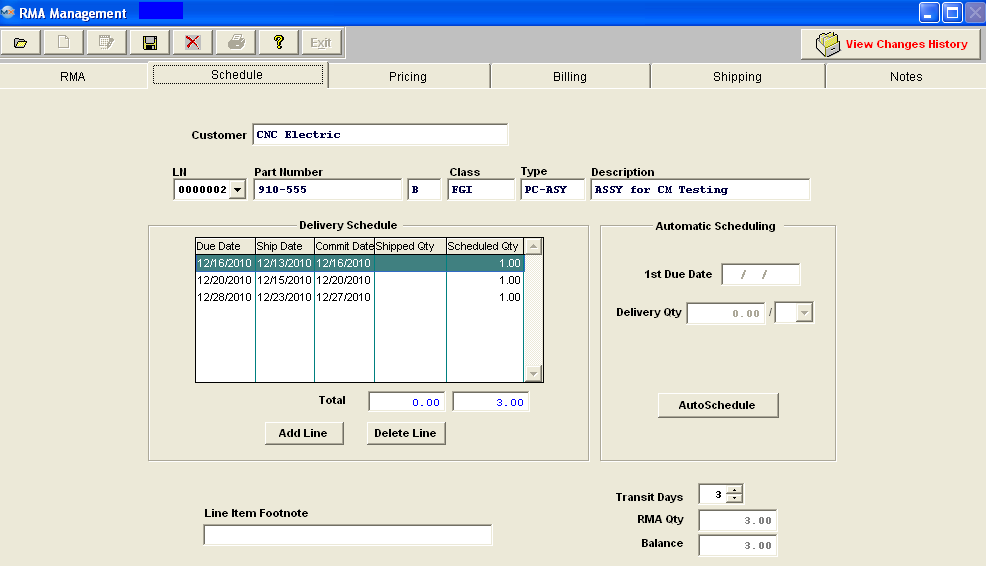
The schedule tab will display the due date and ship date for the re-work line item.
Schedule Tab Field Definitions: The first line is populated with the data from the part number entered on the previous screen.
|
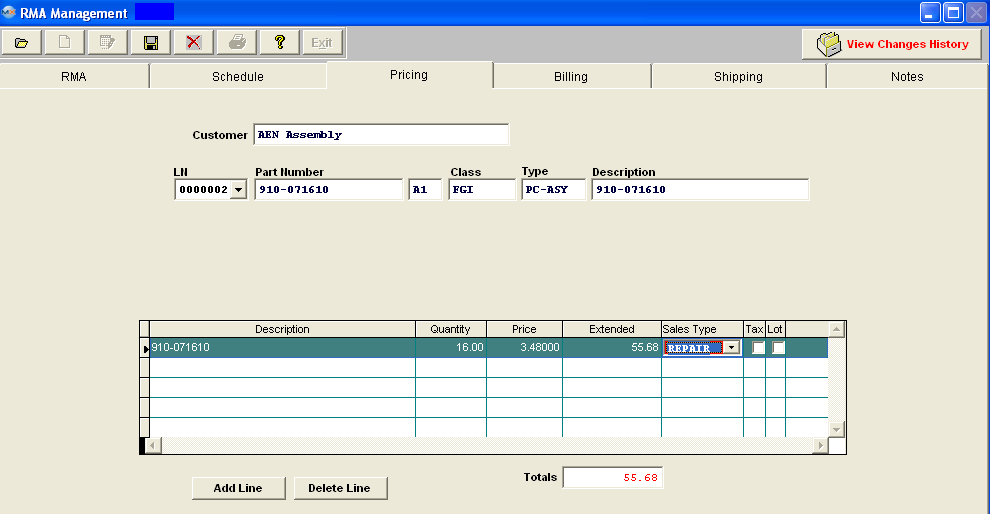
| 1.2.1.3.3. Pricing Tab | ||||||||||||||||||||||||||||||||||||||||
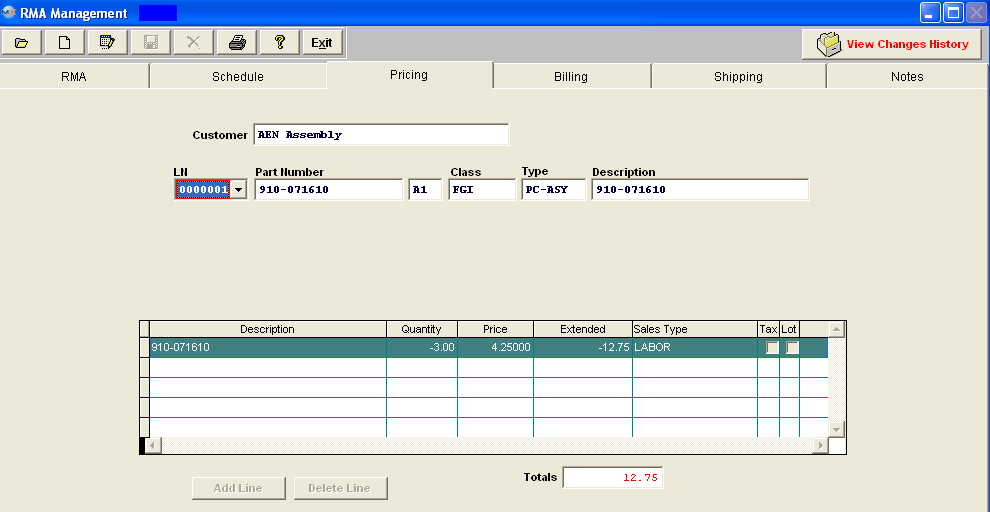
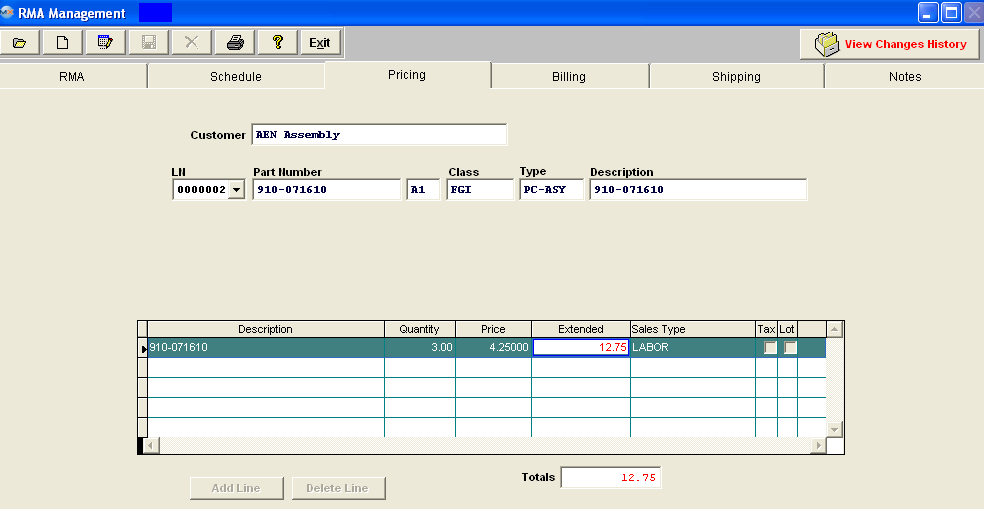
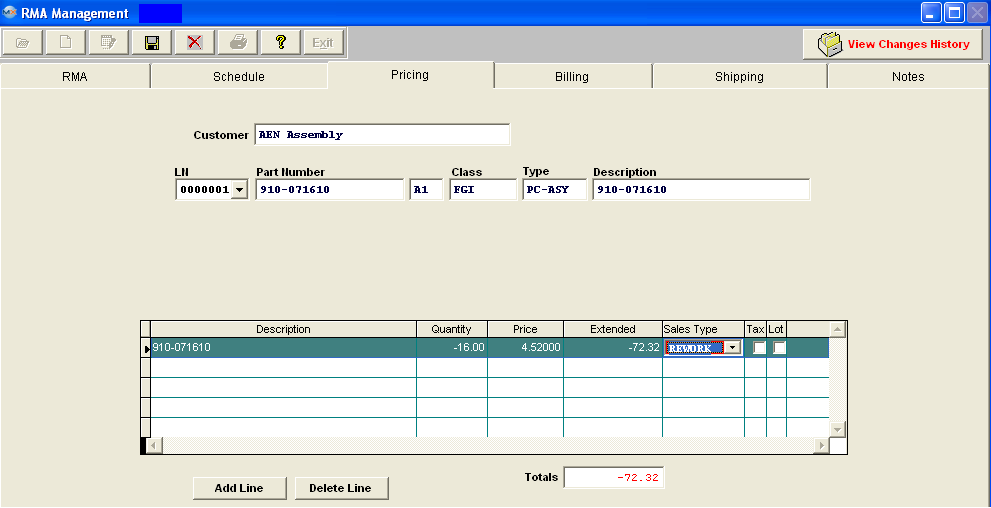
The pricing tab contains information as to the price to be credited, if any, and the price to be charged for the re-work, if any. Each line will display the Sales Type.
There are three options on pricing.
1. The user may enter zero for both the return and the re-work. For further detail on how this affects the GL accounts see Article #3397 .
2. The user may enter full price for both the return and re-work. For further detail on how this affects the GL accounts see Article #3396 .
3. The user may enter zero on the return and a dollar amount for the re-work.
Pricing Tab Field Definitions: Credit example:
The first line is populated with the data from the part number entered on the previous screen.
Pricing Tab Field Definitions: Re-work example:
The first line is populated with the data from the part number entered on the previous screen.
|
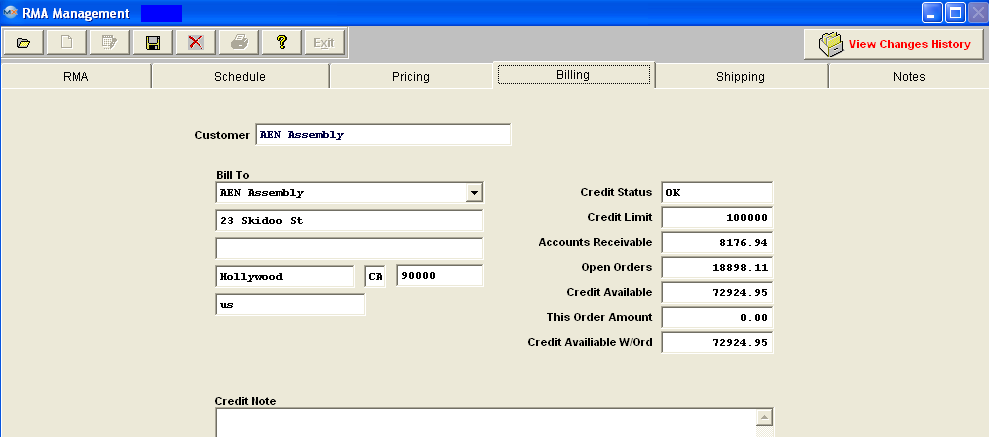
| 1.2.1.3.4. Billing Tab | ||||||||||||||||||||
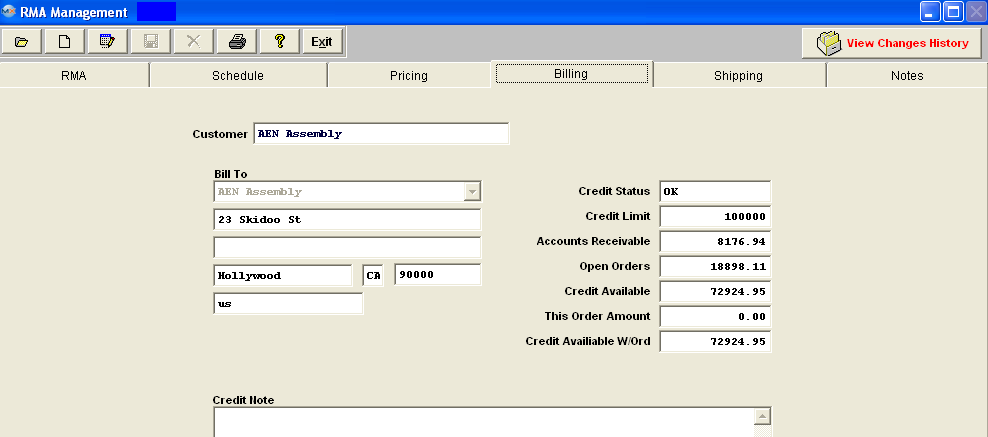 Billing Tab Field Definitions:
The name of the Customer. The bill to address of the Customer. Any note regarding the Customer’s credit. The status of the Customer’s credit with the user. The top $ amount of credit the user allows the customer. The current balance the customer owes the user. The sum of all open sales orders for this customer. The net of Credit Limit, less Accounts Receivable and less Open Orders. The amount of the current re-work/replacement order. Credit Available With Order The net of “Credit Available” above less “This Order Amount” above. |
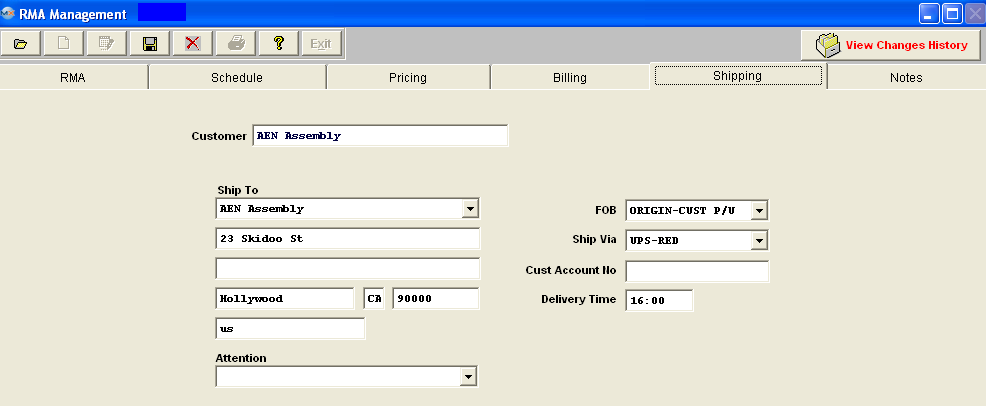
| 1.2.1.3.5. Shipping Tab | ||||||||||||
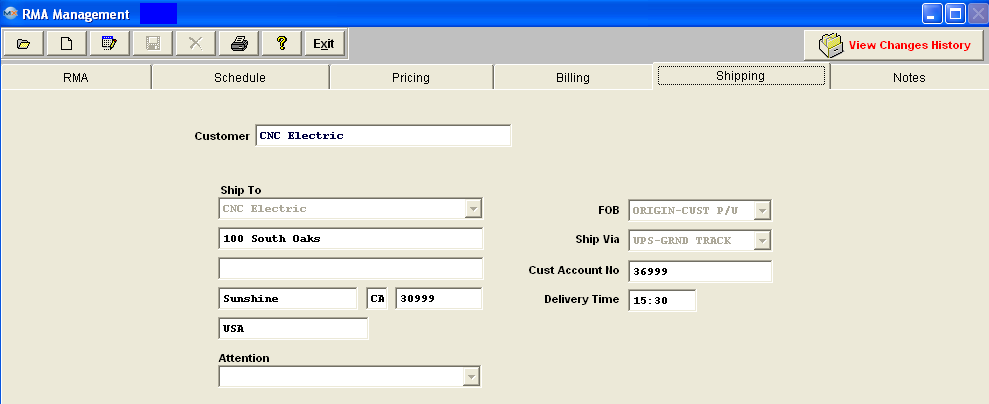
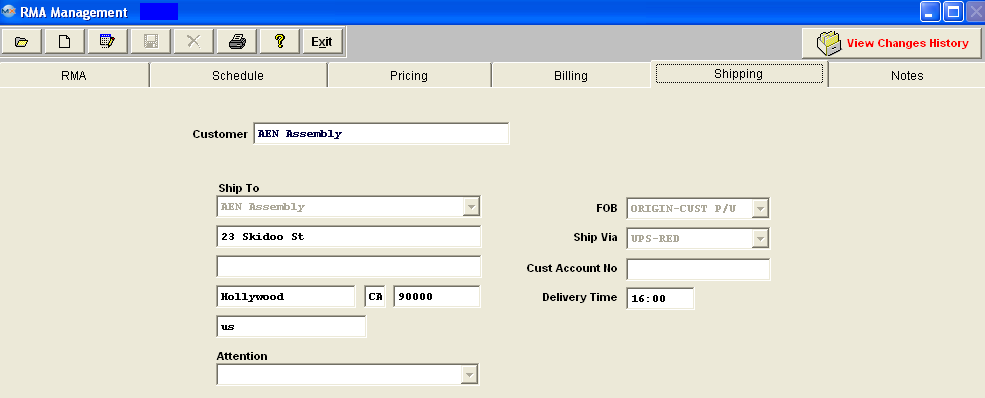 Shipping Tab Field Definitions
The name of the Customer. The Customer’s delivery address. The name of the shipper. Customer Account Number The Customer’s account number WITH the shipper. The time the delivery is to be picked up at the user’s dockby the shipper. |
| 1.2.1.3.6. Notes Tab | ||||
 Notes Tab Field Definitions:
|
| 1.2.1.4. How To ..... for RMA Mgmt |
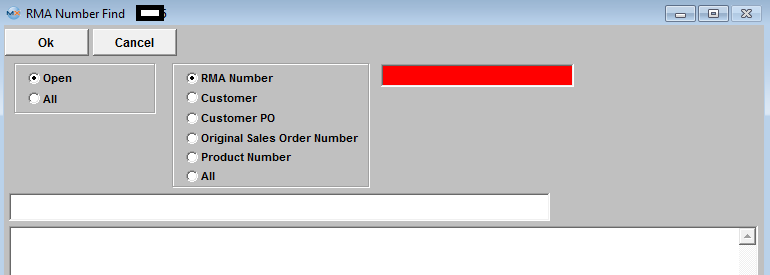
| 1.2.1.4.1. Find A RMA | ||||||||
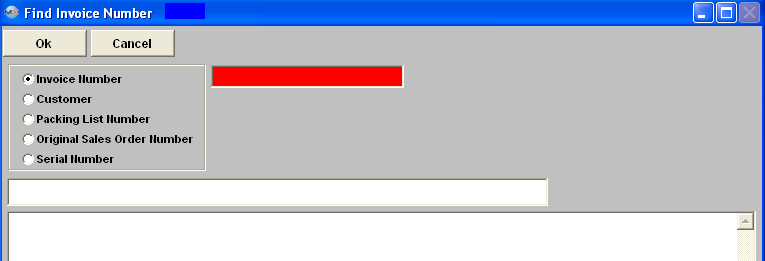
|
The following screen will be displayed:
The user may exit the selection screen without a selection by selecting the X button.
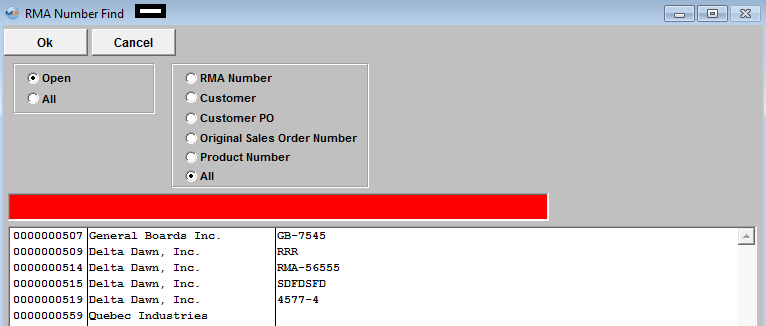
If user selects ANY of the Filters and Find by All - a screen will appear listing all the RMA's filtered by the selection, in numberical order, along with the Customer name.
Once your Find selection has been made, the RMA information will populate the screen as illustrated below:
|
| 1.2.1.4.2. Add a Standard RMA | ||||||||||||||||||||||||||||||
|
The following screen will be displayed:
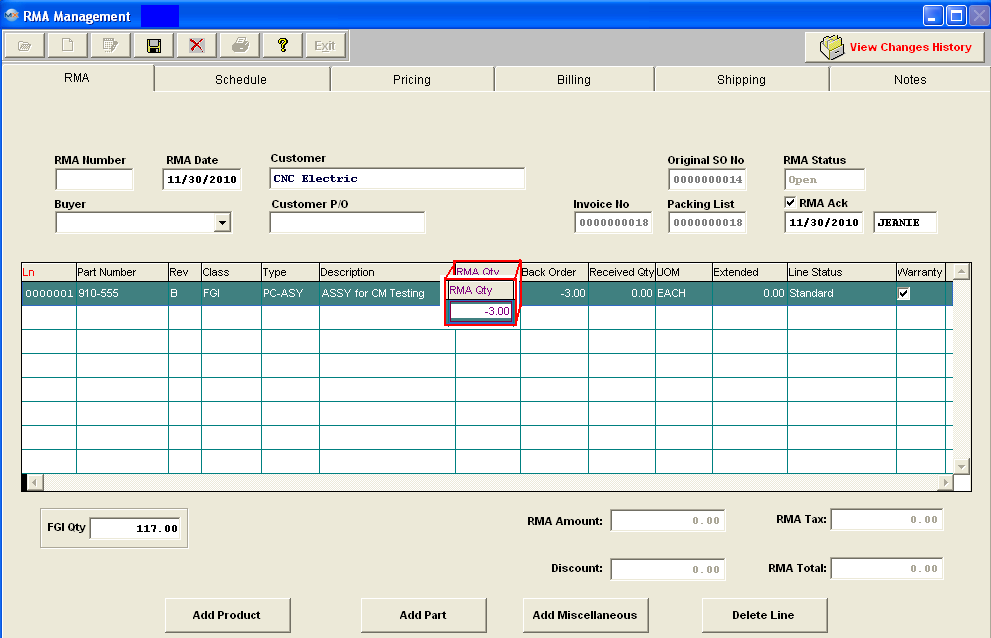
Once you’ve made your selection, the original information will populate the screen, as displayed below: Note: The customer PO and Buyer in RMA module is NOT pulled from the original sales order/invoice. It's a new field that user can enter in RMA module.
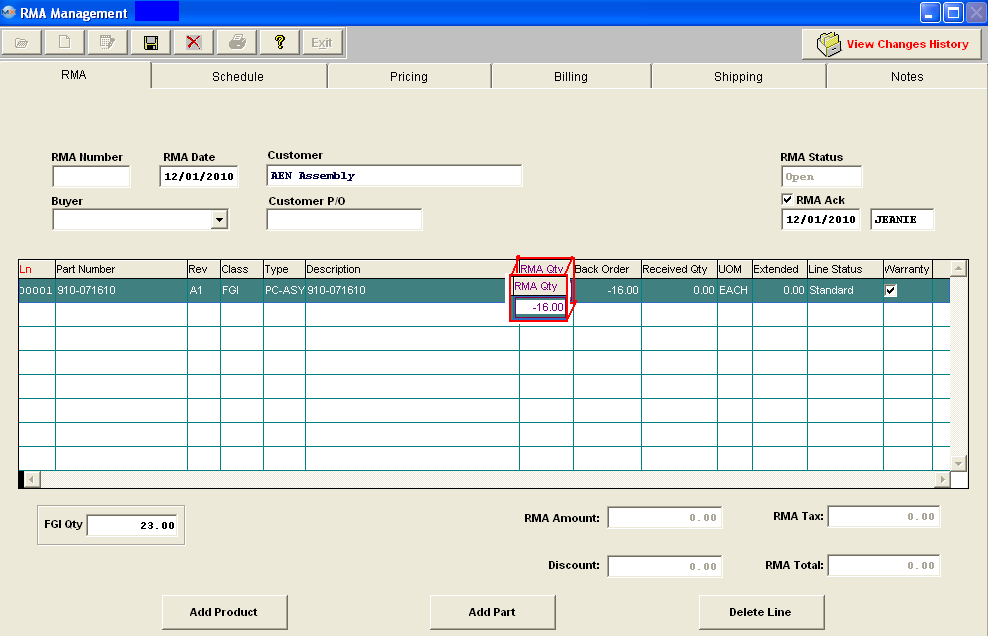
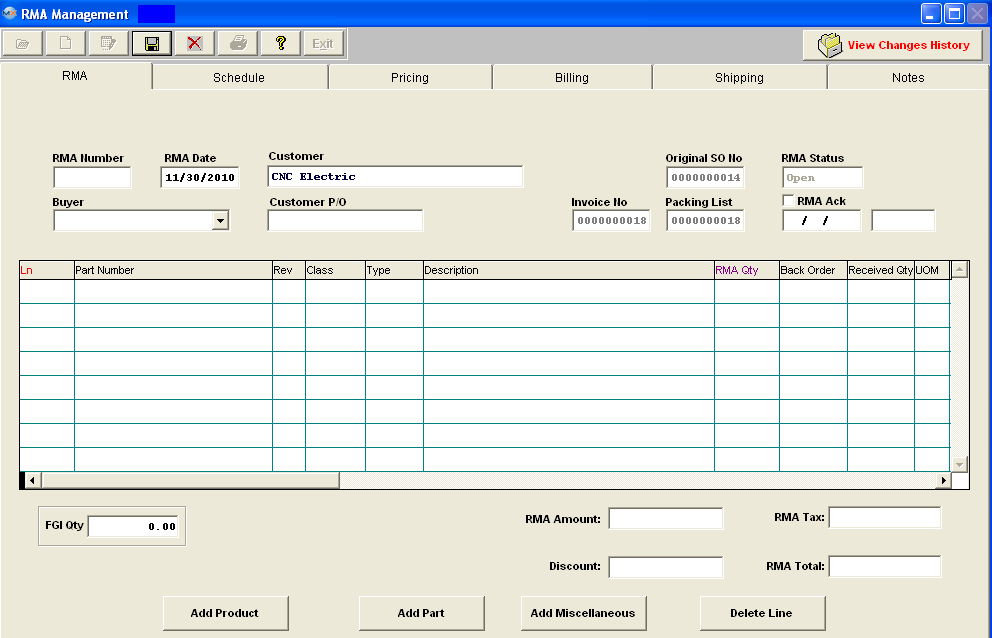 Click on the RMA Ack box, to acknowledge the RMA. The date and your initials will appear. Depress one of the three buttons at the bottom of the screen, Add Product, Add Part, or Add Miscellaneous. Add Product, Add Part, or Add Miscellaneous
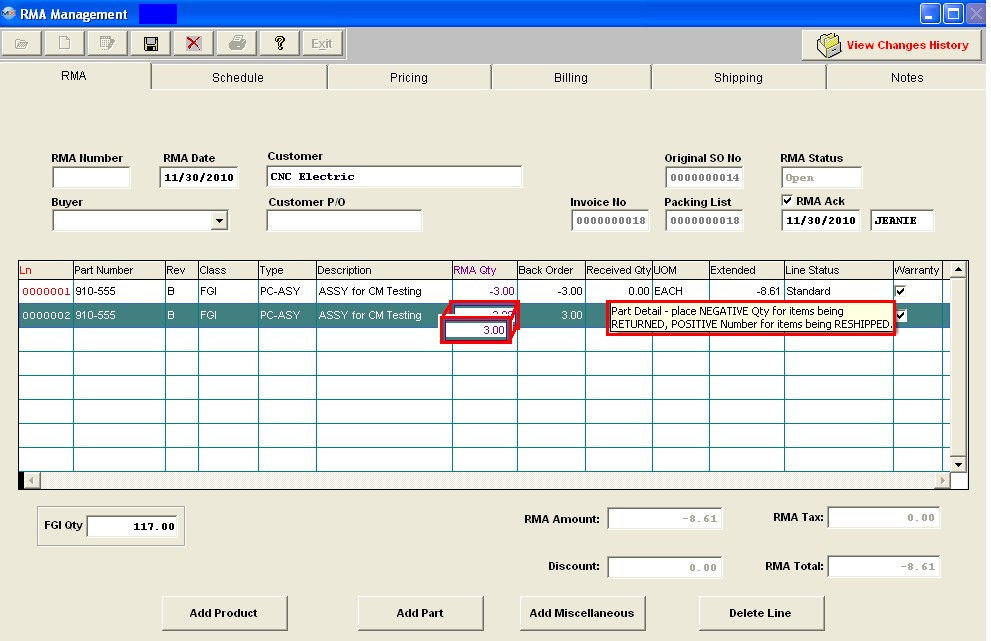
Type the RMA quantity in a negative amount into the column. The quantity entered must be equal to or less than the original Sales Order.
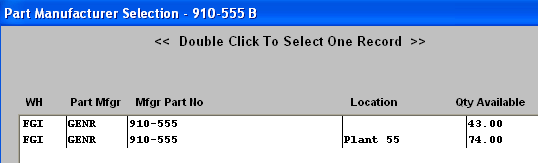
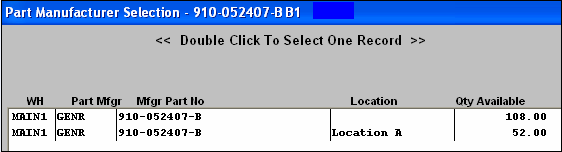
If there are multiple manufacturers or locations for the part in the Inventory Control Quantity Info tab, the following selection list will appear: Highlight the warehouse location and double click. Schedule Tab Depress the schedule tab.The following screen will appear: 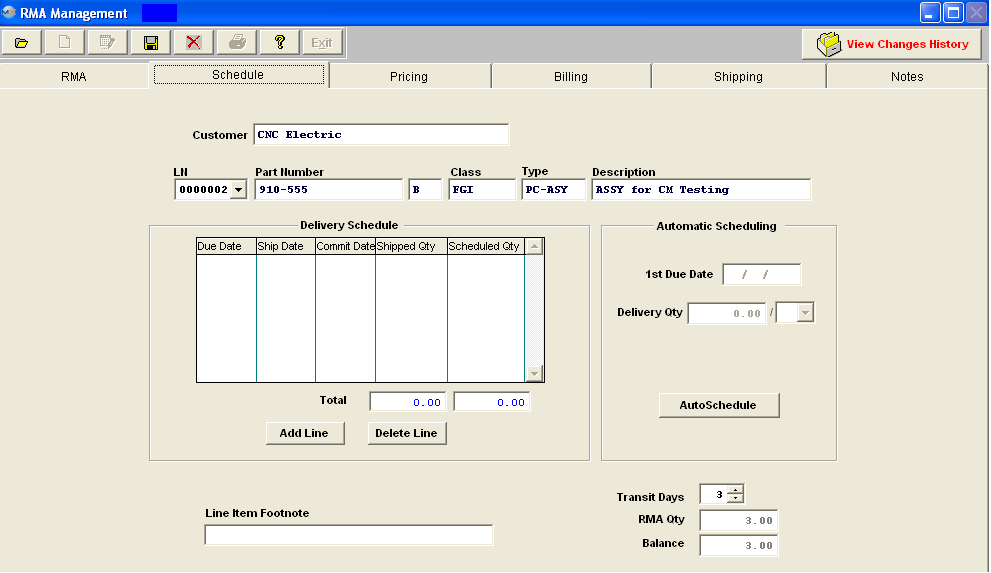 There are two modes available for completing a scheduled delivery for a product: Automatic and Manual. In the Automatic mode, ManEx will take a beginning date and a quantity to be delivered each period (Days, Weeks or Months) and schedule out the delivery using the Delivery Schedule Default Days which are setup in the Delivery Schedule Default Setup module.
The following activities are available: Sales Order Line number: Select the line number using the down arrow. Be sure that you’ve selected the line number which pertains to the re-work/replacement. 
A Line Item Footnote may be entered for comments on the delivery schedule for reference. 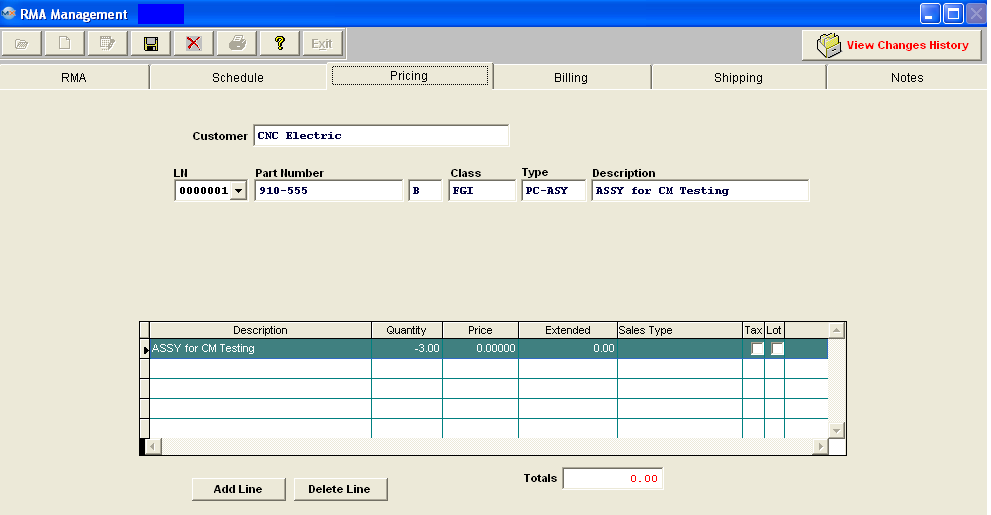 There are three options on pricing.
1. The user may enter zero for both the return and the re-work. For further detail on how this affects the GL accounts see Article #3397 .
2. The user may enter full price for both the return and re-work. For further detail on how this affects the GL accounts see Article #3396 .
3. The user may enter zero on the return and a dollar amount for the re-work.
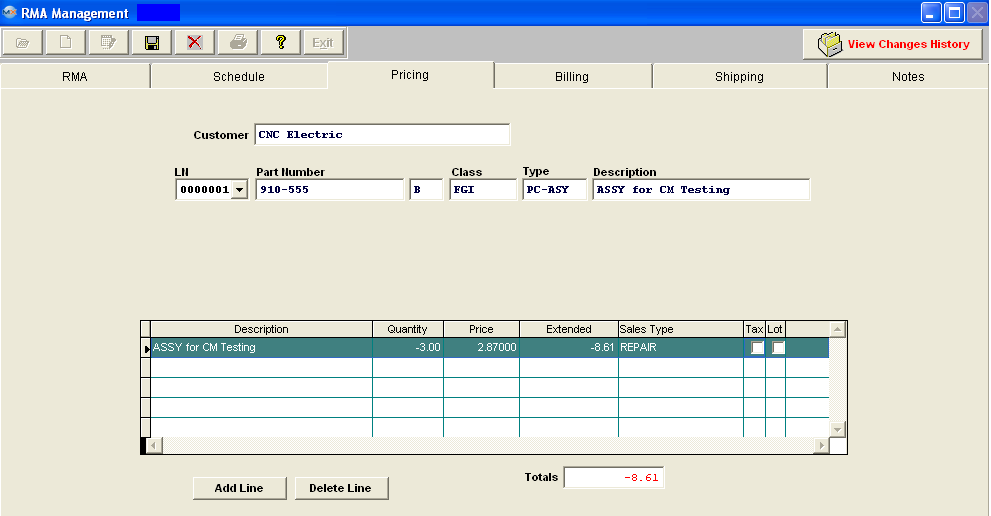
Enter the Price per unit in the Price column. Note that the price entered must be equal to or less than the original Sales Order price. The Extension column will update automatically, and will display as a negative. Any extra line item charges will default in from the original invoice. But, the system will not allow you to add more extra charges to the Retun line item that did not exist on the original invoice. Any additional charges that the users wants to add to the line item being shipped back out (positive line items) as needed for rework, etc... will be allowed.
The completed screen will appear as follows:
If you are NOT going to re-work or replace the order, depress the Save button and Exit the module. If you are going to re-work or replace the order, refer to Add a Re-Work/Replacement procedures below: Add a Rework/Replacement RMA Tab While the RMA order is still open, depress the RMA tab. Depress one of the following buttons: Add Product, Add Part or Add Miscellaneous.
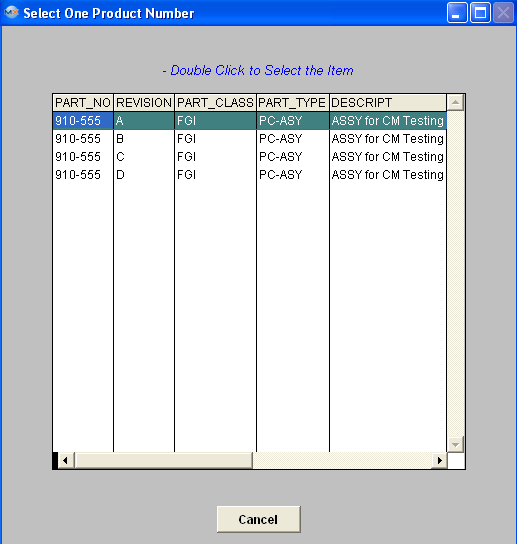
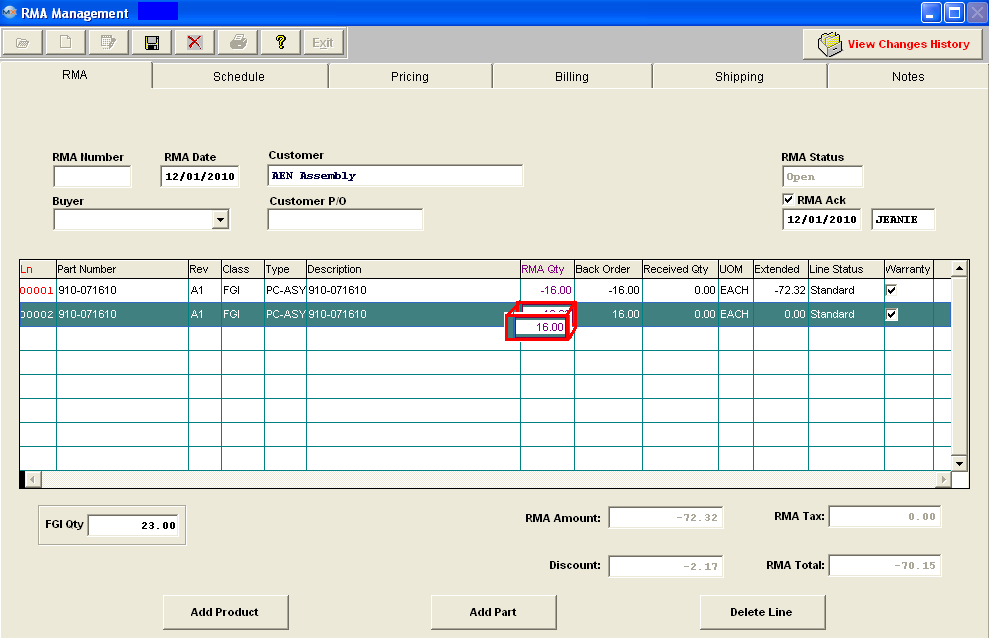
If you depress the Add Product button, the following screen will appear: Type in the Part Number or highlight your selection and double click. The Product will populate the screen. If you selected Add Part or Add Miscellaneous, the same type of selection procedure will take place. Note that you can’t add a part or add miscellaneous unless the original order contained such. Type the RMA quantitybeing re-worked or replaced in a positve amount into the column. The quantity entered must be equal to or less than the original Sales Order.
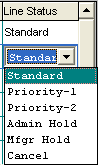
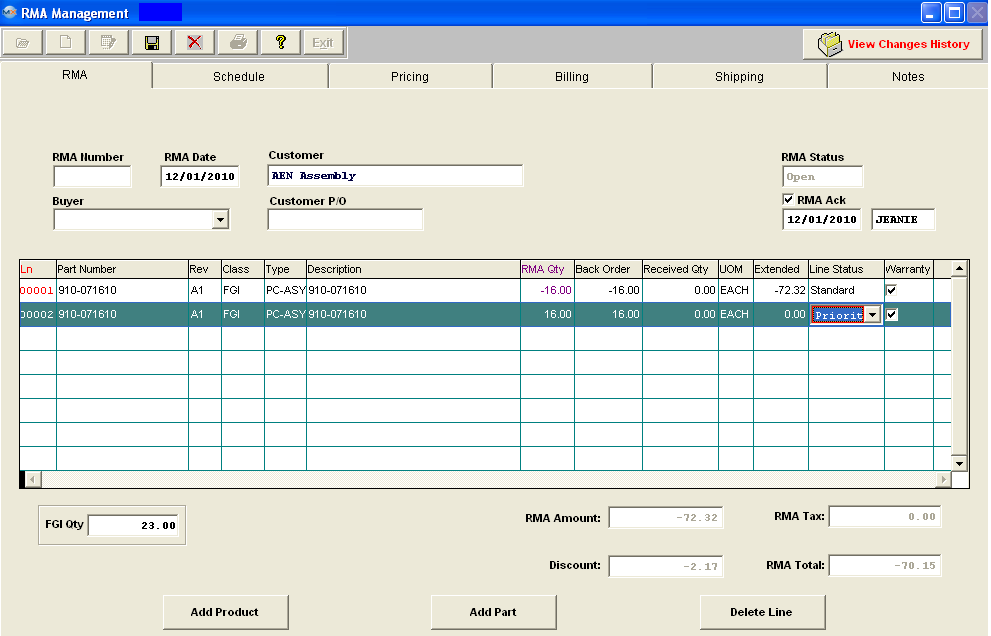
If you want to accelerate the re-work or replacement with a higher priority than standard, go to the Line Status column and depress the Enter key. The following selection will appear: Select the appropriate priority for the re-work/replacement. The completed screen will appear as follows:
Schedule Tab Depress the schedule tab.The following screen will appear:
There are two modes available for completing a scheduled delivery for a product: Automatic and Manual. In the Automatic mode, ManEx will take a beginning date and a quantity to be delivered each period (Days, Weeks or Months) and schedule out the delivery using the Delivery Schedule Default Days which are setup in the Delivery Schedule Default Setup module.
The following activities are available: Sales Order Line number: Select the line number using the down arrow. Be sure that you’ve selected the line number which pertains to the re-work/replacement.
A Line Item Footnote may be entered for comments on the delivery schedule for reference. The completed screen will appear as follows:
Pricing Tab Depress the Pricing tab. The following screen will display:
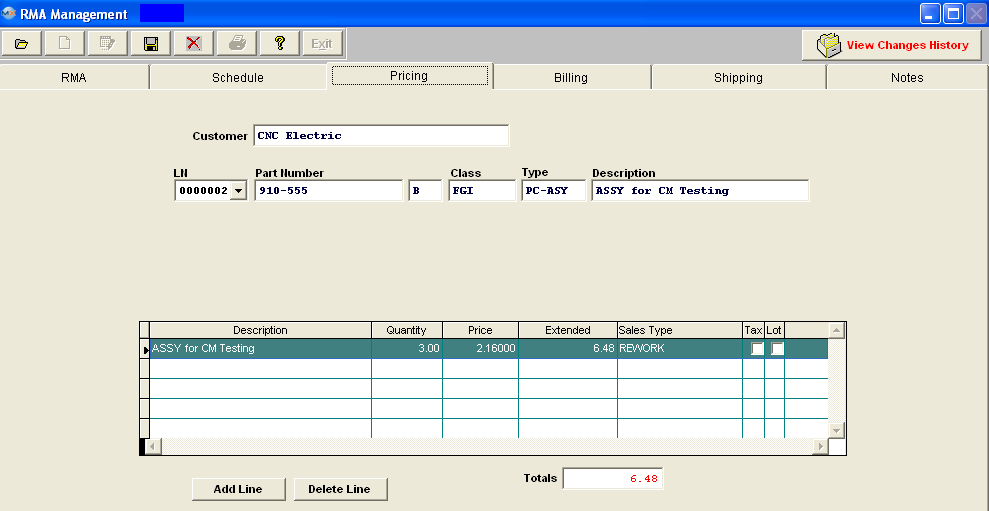 Then the unit price for the product can be entered. Note that the unit price for the re-work/replacement must be equal to or less than the original Sales Order price. Once entered, the extended price field is completed. Any additional charges that the users want to add to the line item being shipped back out (postive line items) for rework cost, etc. will be allowed.
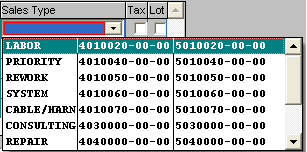
Place the cursor in the Sales Type column and depress the Enter key.The following selection will appear: Select the appropriate sales type. The user may select if the unit is taxable by clicking on the Tax box on the right side of the screen. For Sales Order Items with no Tax, leave the Tax box unchecked. No further action is required. To Manually add Tax (if not set up in Customer Information), enter line item and then in Pricing Screen click on Add Line and enter description of Sales Tax and Tax Amount manually. A Sales Type for the appropriate Tax G/L number should be setup in Accounting so that it can be selected when entering the Sales Tax manually. The full amount of the Tax will be Invoiced upon shipment of the first item so using manual sales tax entries may not be useful for shipments with multiple shipments against the same line item. Checking the Tax box in Sales Order Pricing will not calculate or add US Tax for a line item unless the Shipping Address for the particular Customer selected in the Sales Order Header has been set up. Shipping Address Tax Setup is done in the Tax and Shipping Mode screen in the Customer Information module. Adding a US Sales Tax or a US Shipping Charge Tax in Customer Information requires that those items added be entered in System Setup under Sales Tax Authority Table. If a particular Customer Ship To Address has more than one US Tax (such as a Sales, Use, Excise, etc. tax), then the taxes may be entered in System Setup individually and added individually to the appropriate Customer Ship To addresses. If there is more than one US Tax setup for a Customer Ship To Address, Manex will add up the tax rates and apply the combined percentage to the pre-tax line item total.
User CANNOT manually add Foreign tax to Sales Orders or Invoices. The Foreign tax box must be checked for the Shipping Address for the particular Customer selected in the Sales Order Header. If the Foreign tax box is checked for the Shipping Address for the particular Customer selected in the Sales Order Header. Pricing will be listed as follows on the Sales Order Acknowledgement, Invoice, RMA, and Credit Memo: First the Product Sub-tot AMT, the Sales Discount (if applicable), the Freight AMT (if applicable), a SUB-TOTAL, the GST TAX (Primary tax) (Note: the Primary tax will always be displayed even if it is zero, if a Secondary Tax is present), then a second Sub-Total, PST TAX (secondary tax), and last the TOTAL. If no PST tax (secondary Tax), Sales Discount, or Freight is involved, then no lines would print for these items. See the Foreign Tax Examples.xls attachment to see how the Primary and Secondary taxes are calculated. The Primary tax and Secondary tax is divided into the Sales tax and Shipping tax on the Sales Tax reports. For Example: Primary Tax (GST): 144*10% (sales tax) + 0 (no freight tax is calculated) =$14.40 Secondary Tax (PST): 144*8% (sales tax) + 12*8% (Freight tax) = $12.48 Divided into sales tax and freight tax: Sales Tax: 144*10% (sales tax) + 144*8% (sales tax) = $25.92 Freight Tax 0 (from primary tax) + 12*8% (from secondary tax) = $0.96 If the user has completed the Pricing Screen for the product, then the pricing will be automatically entered. Clicking on the "Add Line" button allows the user to enter additional charges for the product. These charges may carry a different unit price, and may be of any description. As the information is completed, the total cost for the line item is carried to the bottom of the box, to be validated with the customer’s purchase order. If a price is to be assessed as a lot charge rather than as a cost per unit charge, then the user may check (by clicking) the Lot box at the right of the screen. This will take the unit cost as a lot charge for the item without extending the units by the price. This may be used if a flat fee is charged for a number of parts. A Non-inventory line added on this screen will be invoiced on the first shipment made for this sales order. The completed screen will appear as follows:
Billing Tab Clicking on the Billing screen tab brings up the following:
In this screen, a Bill-to address will be completed with the default address established in the Customer setup. The Bill-to address also may be selected from any other addresses entered in the Customer setup.The first prompt is to enter the Bill-to address. The user may accept the default address, or select from any address established in the Customer Module. All address information in the set up will be displayed when the down-arrow is pressed at the right side of the field: After selecting the appropriate bill-to address, the information fields on the screen are populated with the correct data. Shipping Tab Clicking on the Shipping screen tab brings up the following:
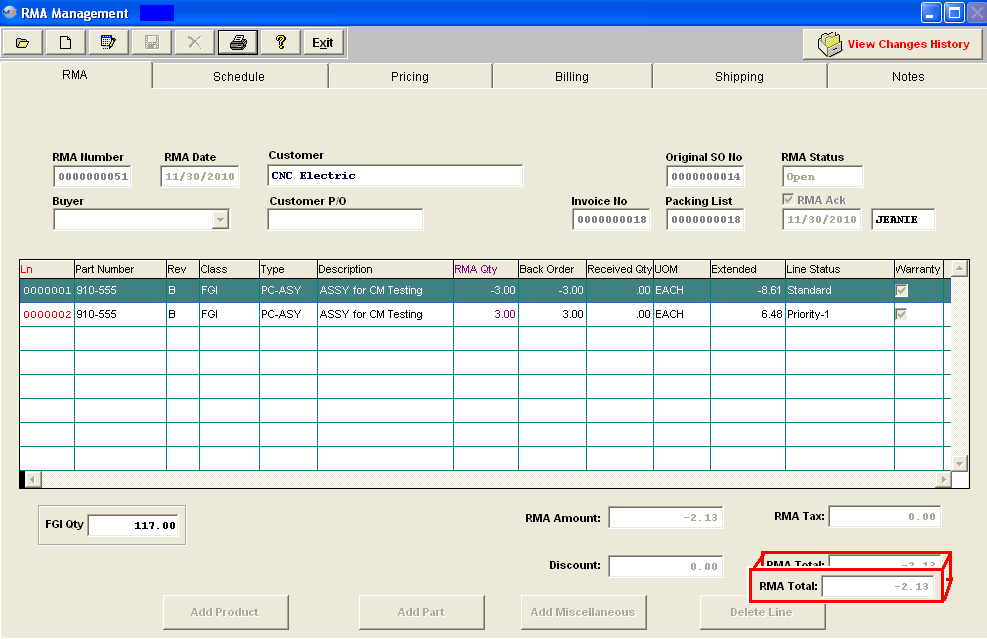
As in the Billing screen, the user may select from established ship-to addresses by pressing on the down-arrow at the right of the first field: Once the ship-to address is established, the address fields are populated from the Customer file. In addition to the address, the FOB, Ship Via, Customer Account and Delivery Time are also populated from the Customer File, if they were completed there. If not, or the user wishes to change them, the user may select the appropriate response by clicking on the down-arrow next to the field, and viewing choices set up in the System Setup module. NOTE: The Cust Account No is NOT editable within the RMA module. Notes Tab In the last screen, the NOTES screen, provisions are made to establish RMA Notes, and RMA Acknowledgement notes. These notes are available in their respective sections. The RMA Acknowledgement Footnote will appear on the Acknowledgement printout. Note that when any note is entered on this screen, the screen tab NOTES turns red to indicate there is data in the notes. Depress the Save button. Note that the RMA Total in the RMA tab will update for the net difference between the material to be returned and the material to be re-worked/replaced, as illustrated below:
|


| 1.2.1.4.3. Add a Stand-Alone RMA | ||||||||||||||||||||||||||
The following screen will be displayed:
Once you’ve made your selection, the original information will populate the screen, as displayed below:
Click on the RMA Ack box, to acknowledge the RMA. The date and your initials will appear. Depress one of the two buttons at the bottom of the screen, Add Product, or Add Part. Add Product, or Add Part.
If there are multiple manufacturers or locations for the part in the Inventory Control Quantity Info tab, the following selection list will appear: Highlight the warehouse location and double click. Depress the Pricing Tab. The following screen will appear:  There are three options on pricing.
1. The user may enter zero for both the return and the re-work. For further detail on how this affects the GL accounts see Article #3397 .
2. The user may enter full price for both the return and re-work. For further detail on how this affects the GL accounts see Article #3396 .
3. The user may enter zero on the return and a dollar amount for the re-work.
Enter the Price per unit in the Price column. The Extension column will update automatically, and will display as a negative.
The completed screen will appear as follows: If you are NOT going to re-work or replace the order, depress the Save button and Exit the module. If you are going to re-work or replace the order, refer to Add a Re-Work/Replacement procedures below: Add a Rework/Replacement RMA Tab While the RMA order is still open, depress the RMA tab. Depress one of the following buttons: Add Product, or Add Part.
If you depress the Add Product button, the following screen will appear: Highlight your selection and double click. The Product will populate the screen. If you selected Add Part, the same type of selection procedure will take place. Type the RMA quantity being re-worked or replaced in a positve amount into the column.
The completed screen will appear as follows:
Schedule Tab Depress the schedule tab.The following screen will appear:
There are two modes available for completing a scheduled delivery for a product: Automatic and Manual. In the Automatic mode, ManEx will take a beginning date and a quantity to be delivered each period (Days, Weeks or Months) and schedule out the delivery. The following activities are available: Sales Order Line number: Select the line number using the down arrow. Be sure that you’ve selected the line number which pertains to the re-work/replacement.

Automatic Scheduling. Pressing this button enables the scheduling box and places the scheduled date in the 1st Due Date box. The user may establish a default number of days from the current date in the System Setup. The user can then use that date, or enter the first (beginning delivery) date the customer expects to receive the order. The Delivery Qty screen allows the user to divide the shipment into multiple deliveries of equal parts. For example, if the order is for a total of 100 pieces, and the customer wishes delivery to be at the rate of 10 units each day, then the delivery quantity should be entered as 10. The next box allows the user to select the delivery intervals. The options are by day (DY), week (WK) or month (MO).
A Line Item Footnote may be entered for comments on the delivery schedule for reference. The completed screen will appear as follows:
Pricing Tab Depress the Pricing tab. The following screen will display:
 Then the unit price for the product can be entered. Once entered, the extended price field is completed.
Place the cursor in the Sales Type column and depress the Enter key. The following selection will appear: Select the appropriate sales type. The user may select if the unit is taxable by clicking on the Tax box on the right side of the screen. For Sales Order Items with no Tax, leave the Tax box unchecked. No further action is required. To Manually add Tax (if not set up in Customer Information), enter line item and then in Pricing Screen click on Add Line and enter description of Sales Tax and Tax Amount manually. A Sales Type for the appropriate Tax G/L number should be setup in Accounting so that it can be selected when entering the Sales Tax manually. The full amount of the Tax will be Invoiced upon shipment of the first item so using manual sales tax entries may not be useful for shipments with multiple shipments against the same line item. Checking the Tax box in Sales Order Pricing will not calculate or add Tax for a line item unless the Shipping Address for the particular Customer selected in the Sales Order Header has been set up. Shipping Address Tax Setup is done in the Tax and Shipping Mode screen under the Ship To tab in the Customer Information Module. Adding a Sales Tax or a Shipping Charge Tax in Customer Information requires that those items added be entered in System Setup under Sales Tax Authority Table. If a particular Customer Ship To Address has more than one Tax (such as a Sales, Use, Excise, etc. tax), then the taxes may be entered in System Setup individually and added individually to the appropriate Customer Ship To addresses. If there is more than one Tax setup for a Customer Ship To Address, Manex will add up the tax rates and apply the combined percentage to the pre-tax line item total. If the user has completed the Pricing Screen for the product, then the pricing will be automatically entered. Clicking on the Add Line button allows the user to enter additional charges for the product. These charges may carry a different unit price, and may be of any description. As the information is completed, the total cost for the line item is carried to the bottom of the box, to be validated with the customer’s purchase order. If a price is to be assessed as a lot charge rather than as a cost per unit charge, then the user may check (by clicking) the Lot box at the right of the screen. This will take the unit cost as a lot charge for the item without extending the units by the price. This may be used if a flat fee is charged for a number of parts. A Non-inventory line added on this screen will be invoiced on the first shipment made for this sales order. The completed screen will appear as follows:
Billing Tab Clicking on the Billing screen tab brings up the following:
In this screen, a Bill-to address will be completed with the default address established in the Customer setup. The Bill-to address also may be selected from any other addresses entered in the Customer setup.The first prompt is to enter the Bill-to address. The user may accept the default address, or select from any address established in the Customer Module. All address information in the set up will be displayed when the down-arrow is pressed at the right side of the field: After selecting the appropriate bill-to address, the information fields on the screen are populated with the correct data. Shipping Tab Clicking on the Shipping screen tab brings up the following:
As in the Billing screen, the user may select from established ship-to addresses by pressing on the down-arrow at the right of the first field: Once the ship-to address is established, the address fields are populated from the Customer file. In addition to the address, the FOB, Ship Via, Customer Account and Delivery Time are also populated from the Customer File, if they were completed there. If not, or the user wishes to change them, the user may select the appropriate response by clicking on the down-arrow next to the field, and viewing choices set up in the System Setup module. Notes Tab In the last screen, the NOTES screen, provisions are made to establish RMA Notes, and RMA Acknowledgement notes. These notes are available in their respective sections. The RMA Acknowledgement Footnote will appear on the Acknowledgement printout. Note that when any note is entered on this screen, the screen tab NOTES turns red to indicate there is data in the notes. Depress the Save button. Note that the RMA Total in the RMA tab will update for the net difference between the material to be returned and the material to be re-worked/replaced, as illustrated below:

|


| 1.2.1.4.4. Edit/Delete a RMA | ||||
|
The following screen will be displayed:
Depress the Open/Find Record, to find the record you want to Edit. For further assistance on finding an RMA see Article #822. Depress the Edit button.You will be prompted for your password. The fields which can be edited will appear in darkened black. RMA tab You may edit the following fields: RMA Date, Buyer Name, Customer PO #, uncheck or check the RMA Acknowledgement box or change the line status. To change the line status, scroll to the right, highlight the Status box and depress the Enter key. The following selection will appear:
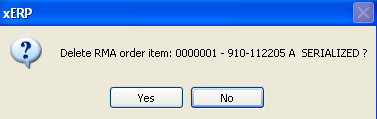
Select the desired status. By depressing on the Add Product, Add Part or Add Miscellaneous directive button, you may add such only if the original Sales Order contained it. To delete a line, highlight and depress the Delete Line button. The following message will appear:
To delete the line, depress the Yes button. Schedule Tab In the schedule tab, you may change the schedule, add a line or delete a line, change the 1st Due Date, change the Transit Days or add a Line Item footnote. Pricing Tab In the pricing tab, you may change the Unit Price, (it must be equal to the original Sales Order price or less), change the Sales Type by highlighting that field and selecting from the list displayed, check or uncheck the Tax box, check or uncheck the Lot box, or add a new price Item Line. To delete a Price Item line, highlight that line and depress the Delete Line button. Billing Tab In the Billing tab, you may change the selection of the Customer’s Billing address. Shipping Tab In the Shipping Tab, you may change the Customer’s Ship To address and Attention selection, change the FOB terms, the Ship Via selection and/or the Delivery time. Note: The Cust Account No is NOT editable in the RMA module. Notes Tab In the Notes tab, you may add a RMA note or a RMA Acknowledgement Note. Be sure to depress the Save button after any edit changes or deletions. If you don’t want to save your changes, depress the Abandon changes button. |
| 1.2.1.5. Reports - RMA |
| 1.2.1.5.1. Reports - RMA |
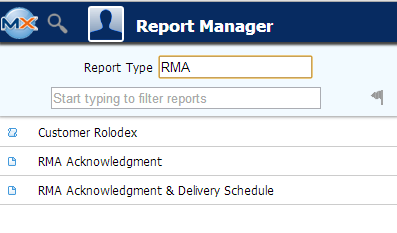
To obtain the RMA Reports within the Web, select the WEB Print button from the ManEx action buttons at the top of the screen. For further detail on How the Reports work within the Web refer to Article #5477. Note: In order to access the Reports within the Web the Company Root URL must be setup within the System Appearance module and user must be linked to web within the System Security Module. Select the Report Type: RMA - A List of Reports will be displayed that are available on the Web
for RMA
To obtain the RMA reports, select the Print button from the ManEx action buttons at the top of the screen. The following reports screen will display a list of reports that are available on the ManEx Desktop: 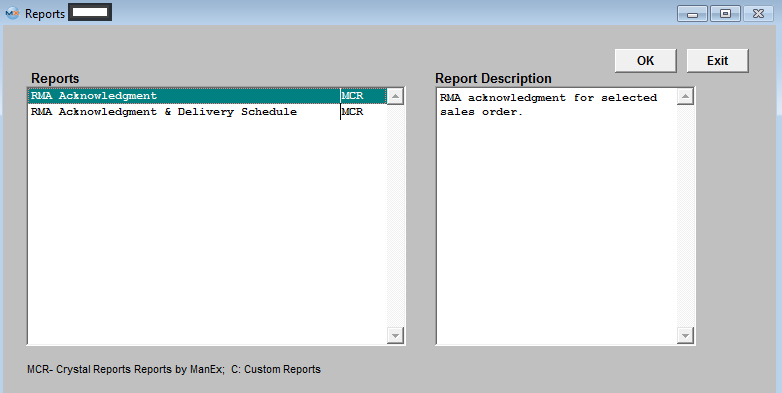
RMA Acknowledgment
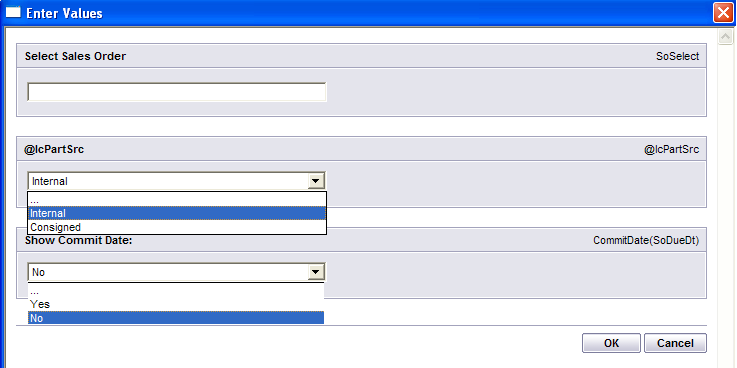
Enter the Values to print the RMA Acknowledgment Report
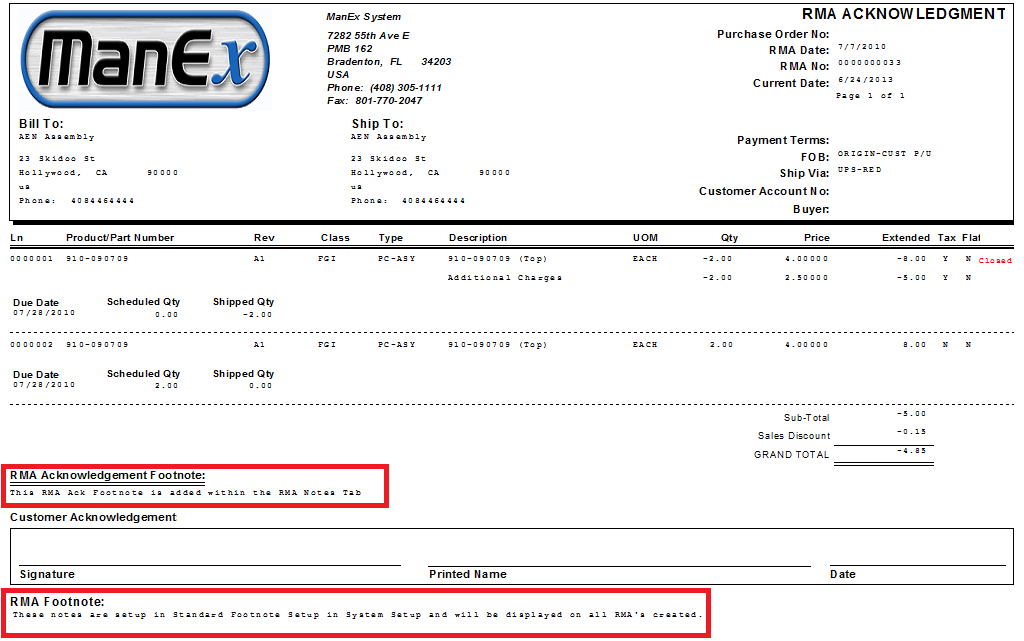
 The following report will be printed: The RMA Acknowledgement Footnoteis the note added under the RMA Acknowledgement Footnote, and the RMA Footnote is the note added in the Standard Footnote Setup. The RMA Note that is entered within the RMA Notes is for internal use only and will NOT be displayed on report.

RMA Acknowledgment & Delivery Schedule
Enter the Values to print the RMA Acknowledgment & Delivery Schedule Report. The RMA Note is the note added under the RMA Acknowledgement Footnote, and the RMA Footnote is the note added in the Standard Footnote Setup. The RMA Note that is entered within the RMA Notes is for internal use only and will NOT be displayed on report.
 The following report will be printed:
|
| 1.2.1.6. FAQ's for RMA Mgmt |
| Facts and Questions for the RMA Mgmt Module |
| 1.2.2. Return Material Authorization Accounting |
Overview regarding Return Material Authorization Accounting No Journal Entry is created in the RMA module, however the system is collecting the JE components from this module as follows: Assume that the original sale was for 10 units @ 100.00 each, with a standard cost of 80.00 each and freight charged the customer of 15.00. At the time the user selects the original Invoice number in the Return Material Authorization module, the system “remembers” the original accounting entry that was created at the time the original Invoice was printed, which was: Debit Accounts Receivable – Trade 1,015.00 Debit Cost of Goods Sold 800.00 Credit Sales 1,000.00 Credit Finished Goods Inventory 800.00 Credit Freight Income 15.00 When the user enters the “return quantity” (the one entered as a negative quantity), the system will remember that the original cost of sales was 80.00 per unit. The user then enters the pricing on the item to be returned on the Pricing page of the RMA module. The pricing entered can be any amount up to the amount of the original pricing of 100.00 per unit. And so the journal entry component for the debit to the sales account is 2X 100.00 = 200.00, in this example. The user selects the sales and cost of goods general ledger accounts to be used per the Sales Type column: And so, the sales account number selected will be debited for 200.00 once the journal entry is created, upon the actual receipt of the returned item. And the related Cost of Goods sold account will be credited for the 160.00. If the return is to be reworked and then returned back to the customer, the user creates a second line item on the RMA using a positive quantity which is in actuality creating the RMA Sales Order and an eventual invoice upon shipment. The journal entry and the applicable Credit Memo for the return is created in the Return Material Authorization Receiving module. (The value is calculated against the total value of the RMA minus any credit memos created against the invoice, whether manually or via RMA). On this screen, the user indicates the amount of freight to be credited, such as a pro rata 2/10 of 15.00, or 3.00, for example: After the user types in the quantity received on the Detail page and depresses the Save button, several things happen all at once: 1. The Journal Entry is created as follows and forwards to the Release & Post to GL module: Debit Sales 200.00 Debit WIP 160.00 Debit Freight 3.00 Credit Accounts Receivable 203.00 Credit COGS 160.00
Once the Rework Work order is released, the user may opt to go into the Kitting module and add line shortages which will be included in the Material Variance once the Kit is closed.
From this point forward, the accounting is the same as for a regular order.
|
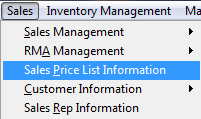
| 1.3. Sales Price List Information |
| 1.3.1. Prerequisites for Sales Price List Information | ||||||||
|
| 1.3.2. Introduction for Sales Price List Information |
The PRICING Module is used to establish the default pricing for a product. This pricing will be used as the default pricing for sales orders created for the product. Separate pricing may be established for multiple customers for the same product, and there may up to seven price breaks for each customer. |
| 1.3.3. Fields & Definitions for Sales Price List Information |
| 1.3.3.1. Part Number Tab | ||||||||||||||||||||||
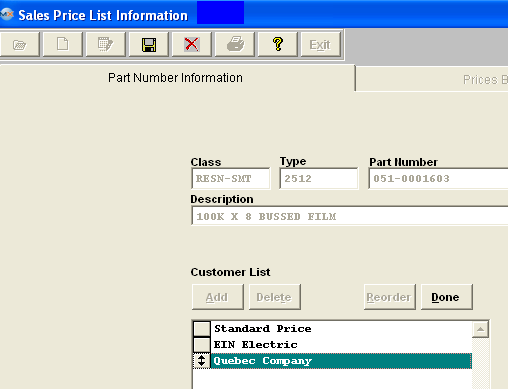
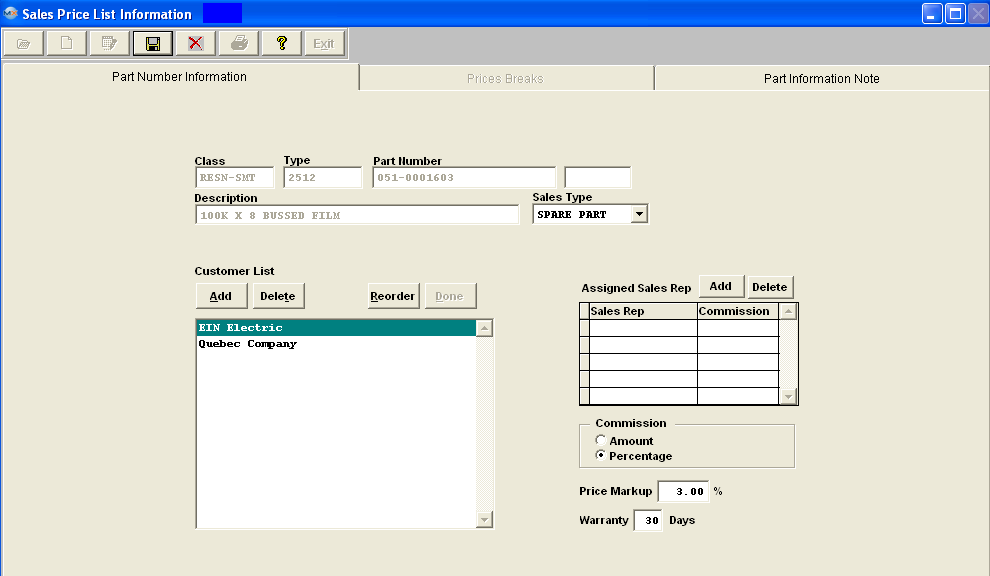
This tab identifies the part number, Sales Type and Customer for which the pricing applies.
This field identifies the Part Class of the Product, Taken from the item master based on the product chosen (not Editable). This field identifies the Part Type of the Product, Taken from the item master based on the product chosen (not Editable). This field identifies the Part Number of the Product(not Editable).
|
| 1.3.3.2. Price Breaks Tab | ||||||||||||||||||||
Prices Breaks tab field definitions
The quantity of products to be delivered over which charge is amortized. The dollar amount of the charge to be amortized. The amount of product shipped for date, used to calculate when the amortization charge is no longer applied to the price of the product. The dollar amount being charged for the sales item displayed. The unit price being added for amortization (until depleted). The combined dollar amount of the pricing charges. |
| 1.3.3.3. Part Information Note Tab |
|

| 1.3.4. How To ..... for Sales Price List Information |
| 1.3.4.1. Find a Sales Price List | ||||||||
|
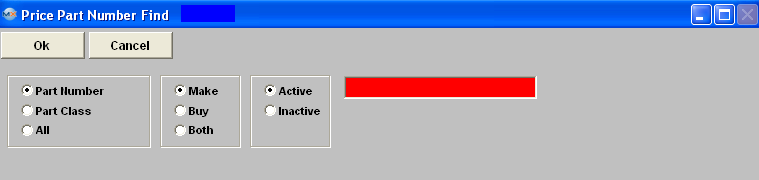
Depress the Find action button. The following selection screen will be displayed. Select the desired Filter: by selecting the appropriate radio button - Make, Buy, or Both and Active or Inactive The user may exit the selection screen without a selection by selecting the X button.
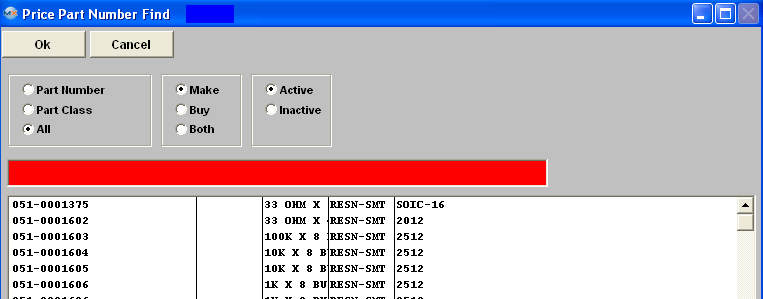
If user selects ANY of the Filters and Find by All - a screen will appear listing all the Part Numbers filtered by the selection, in numberical order, along with the Part Description, Part Class and Part Type. Once you have made your choice, the information will be displayed as follows:
 |
| 1.3.4.2. Edit/Add Sales Price List Information | ||||||||||
|
The following screen will be displayed:
Depress the Find Action button to find a Product. See Article #1652 for further information on how to find a record.
After a Product has been found or entered, it may be edited by selecting the Edit Action button. Once the password is entered, the "Add", "Delete". and "Reorder" buttons are activated.
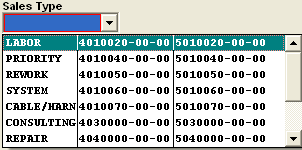
Add Sales Type By selecting a part number, you can then assign a Sales Type. Selecting a Sales Type will automatically enter the type when the part is added to a sales order. Otherwise, the user will have to select the Sales Type before saving a Sales Order. Depressing the down arrow next to the field will display a list of sales types:
Select the desired Sales Type.
Assigned Sales Rep and Select Commission
If applicable, assign a Sales Rep and Commission.
Add Price Markup Percentage If applicable, enter the markup percentage in the box. Add Warranty Information If applicable, enter the number of days for the warranty. The completed Part Number Information tab will look like this:
Depress the Save Action button to save changes or the Abandon changes Action button to abandon changes. ADD PRICING After completing the PART NUMBER INFORMATION tab, the user may (click on) to the PRICES BREAKS tab. In this screen, the user may elect to add additional customer pricing for a product by using the Edit function.
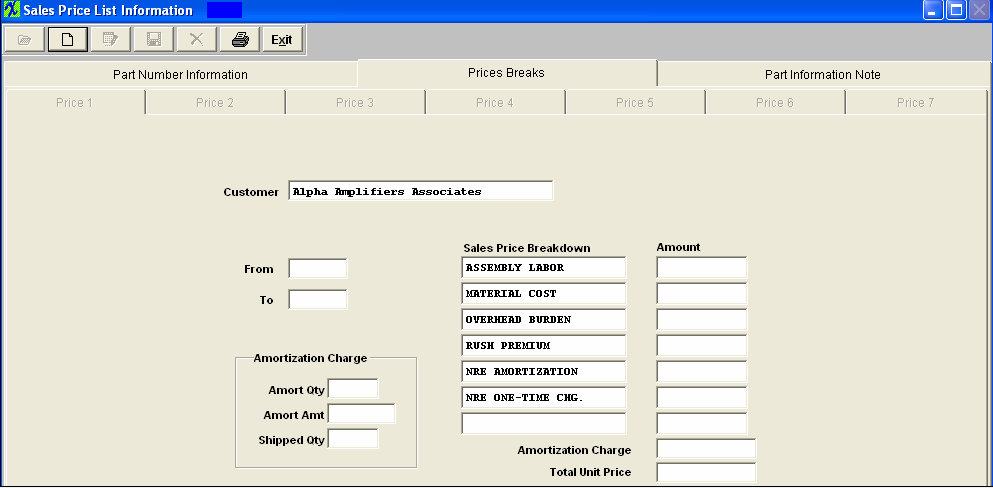
Then the Price Break screen for a specific customer is presented to the user, based on the customer selected in the first screen:
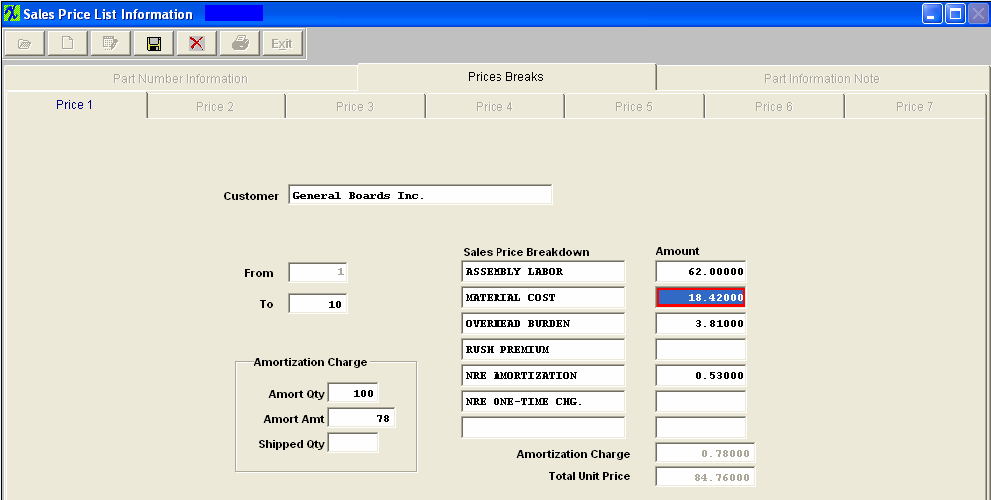
And the Add Action button becomes active. If the user is creating the first pricing screen, then the Edit Action button is not yet available. The user may create up to seven different pricing levels for each customer. To add the first pricing screen, the Add Action button must be pressed and the password entered. The “Price 1” screen is activated, allowing the user to enter pricing for the customer shown. 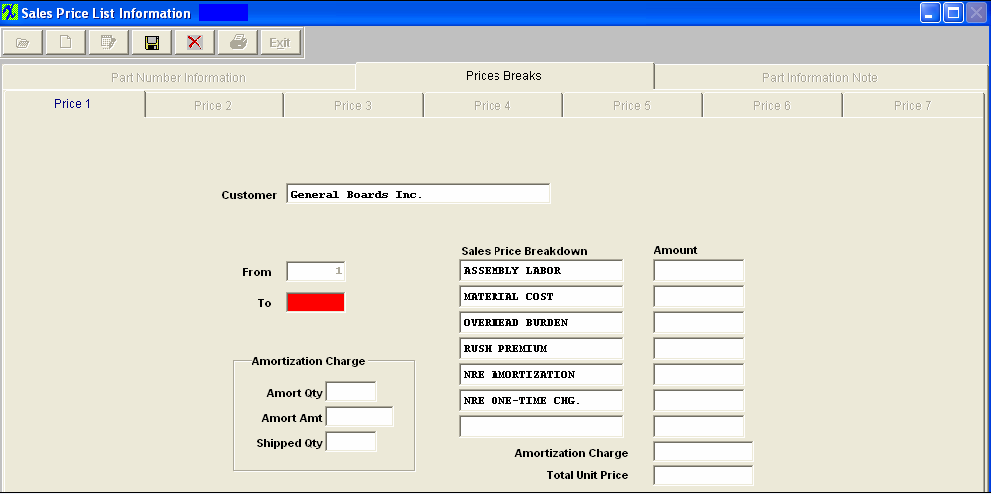 This screen has two main sections: the pricing at quantity levels; and the ability to amortize the expense of any object such as tooling over a fixed number of deliveries. In the Amortization Charge section, the user can enter an amount to be amortized, and the number of units shipped over which the amortization is to be applied. As product is shipped, the Shipped Qty will be updated, and when the entire quantity is shipped, the additional amortization cost will be dropped from the invoice. The first prompt is for the beginning number of items to be priced, defaulting to one (1). The next field is for the upper number to be included in the price structure, e.g., 100 (pricing is for 1 to 100 items).You can input pricing up to 999,999, but you are limited to seven price breaks.
In the Amortization Charge section, the user can enter an amount to be amortized, and the number of units shipped over which the amortization is to be applied. As product is shipped, the Shipped Qty will be updated, and when the entire quantity is shipped, the additional amortization cost will be dropped from the invoice.
The cursor then moves to the first Sales Price Breakdown section where the user may define the pricing used for individual units. The definition of the pricing is established in the System Setup, and may be selected with the “pulldown arrow” and clicking on a definition, or typing the definition. After selecting a definition, the pricing associated with the definition is entered. (e.g., the definition might be “Total Material Cost” and $350 per unit. Or, perhaps a definition simply called “Standard Price” is used.) On the next line, another pricing definition may be included, e.g. “Priority Charge”, with an additional charge of $50 per unit. Manex will continue to total up the unit pricing and show it on the screen. The completed screen looks like this:
When the user has completed the information for the 1st price break, the screen is either saved or canceled. The following message will appear asking if the user wants to add another record.
If there is another price category to be added, depress the Yes button. The user may then add an additional price break, which will default to a beginning quantity equal to the top of the first price break quantity plus one. The fields used in the first price break will be carried over to the second price. Changing the definition in any price break screen changes all the others for that product. Pricing for a different customer for the SAME product may be established by selecting the customer in the first screen, then adding a new price break for that customer. After completing this PRICING customer information screen, the user may tab (clicks on) to the Part Information Note screen. The Part Information screen for the product is presented to the user, and may be edited. Information placed in this screen is common to all customers, (it is based on information about the product), and the Tab Label turns RED. Press the Save Action button Save new or edited data. Press the Abandon changes Action button to Cancel any new or edited information without saving the information in the database. Press the Edit Action button to exit the current screen and returns the user to the previous screen. |
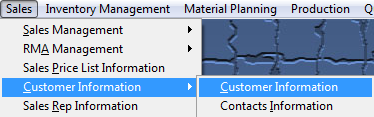
| 1.4. Customer Information (CI) |
| 1.4.1. Customer Information |
| 1.4.1.1. Prerequisites for Customer Information | ||||||||||||||||||||
|
After activation, "Customer Information" access for each user must be setup in the ManEx System Security module. Users with “Supervisor Rights” will automatically have access.
|
| 1.4.1.2. Introduction for Customer Information |
The Customer Management Module is used to enter the details about customers. This information is used to prepare invoices and packing lists, as well as establish defaults to be used when new orders are created for a customer. A customer may have more than one bill-to address, if there are different divisions for the customer with different accounting departments. Sometimes customers may wish to have material drop-shipped to a third party and bill them. One customer bill-to address will be identified as the default address to be used in the creation of new orders. One customer ship-to address will be identified as the default address in new orders. Also, terms and conditions identified in these screens will be used as defaults for shipping, invoicing and accounting. The user has the opportunity to modify the default information at the time a new order is created.
|
| 1.4.1.3. Fields & Definitions for Customer Information |
| 1.4.1.3.1. Customer Information Tab | ||||||||||||||||||||||||||||||||||||
Field & Definitons
|
| 1.4.1.3.2. Bill-To Tab | ||||||||||||||||||||||||||||||||||||||||
Field & Defintions
|


| 1.4.1.3.2.1. Customer e-Bank Information | ||||||||||||||||||||||||||||||||||||||||||||||||
Note: this information is here for future implementation at this time. It does not have any affect or functionality within Manex at this time. Information populated here would be the Customer's banking information
|

| 1.4.1.3.3. Ship To Tab | ||||||||||||||||||||||||||||||||||||||||||||||||||||||||||||||||||
US Tax - If user doesn't check "Use Foreign Tax", then the foreign tax set up will be invisible and the US Tax setup will be visible.
Foreign Tax - If user checks "Use Foreign Tax", then the foreign tax set up will be visible and the US Tax setup will be invisible.
|
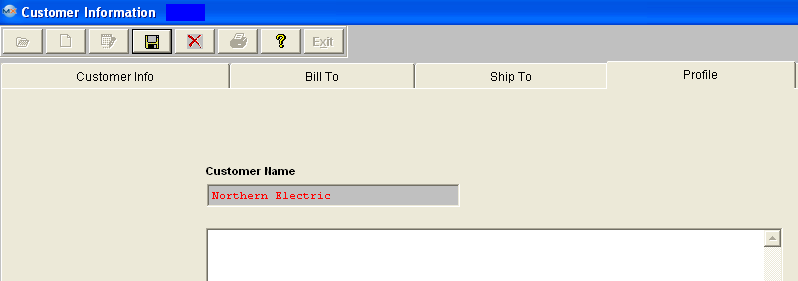
| 1.4.1.3.4. Profile Tab | ||||
Fields & Definitions
|
| 1.4.1.3.5. Lookup Tab | ||||||||
Fields & Definitions
|
| 1.4.1.4. How To .... for Customer Information |
| 1.4.1.4.1. Find Existing Customer Information | ||||
The following screen will be displayed: There are two ways to Find Existing Customer Information: 1. By using the Find button located in the tool bar at the top of the screen. The following screen will appear: Double click on the selected customer name to view the customer information. If you want to view customers with Inactive status or Quote status you must select the Inactive radio. 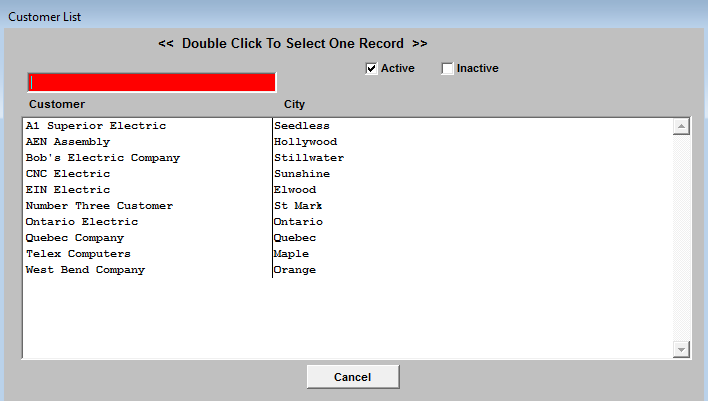 2. Depress the Lookup tab. This screen allows the user to locate a customer alphabetically. Double click on the customer name and view that customer information without having to use the FIND button. This screen will list all of the customers entered with their name beginning with the letters included in the tab selected. If you would like to view customers with Inactive status or Quote status you must select the Inactive radio. NOTE: If a customer's name begins with a number it will not be displayed in the Lookup. 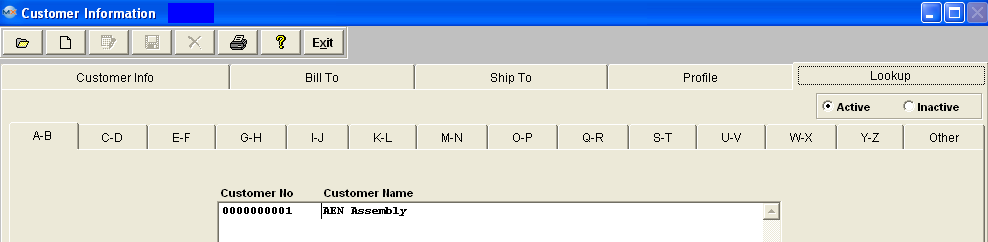 |
| 1.4.1.4.2. Add a Customer | ||||||||||||||||||||
|
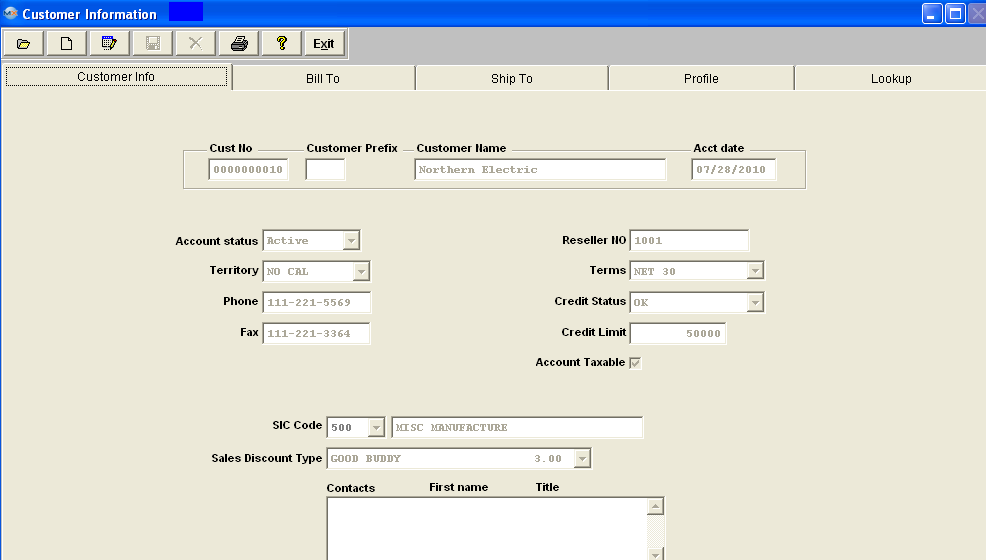
The following screen will be displayed:
The customer number assigned to the customer. If automatic, will be completed when the data is saved. If manual, must be entered. Enter the Customer Name. The date the account was established (defaults to current date). Enter the account status (Active, Inactive, or Quote). Active is the default. Choose the Territory for the account from the pull down (Territories are established in System setup/Sales Territory). Enter the phone number of the Customer. Enter the Fax Number of the Customer. The user may include the customer’s resale number for tax purposes. Enter the standard terms established for the customer from the pull down. Terms must first be established in the System setup/Payment Terms setup. Note that this field may be entered or edited only by a user with full Accounting rights. Choose the Credit status of the customer from the pull down. May be OK, On Hold or Reject. Note that this field may be entered or edited only by a user with full Accounting rights . Enter the credit limit established for the customer. The credit limit check takes place within the packing list. (Credit Limit Restrictions). Note that this field may be edited only by a user with full Accounting rights. Check the box if this account is taxable. Enter the SIC code for the Customer. If used, must first be established in the System setup/SIC Codes setup. Enter the Sales Discount available to this customer as established in System setup/Sales Discount Type setup. Contacts MUST be added for a customer within the Customer Contact module after the Customer has been created within the Customer Information. When this screen is viewed for an existing customer, contacts entered in the Customer Contact Module will show for this customer. This field is NOT editable from this module.
 After completing the Customer information screen, the user may click on the Bill To tab.
In this screen, the user defines the customer information for invoicing purposes. The Customer Bill-To Directive buttons will now be active:
This button allows the user to modify existing Bill-To information about a customer. If more than one Bill-To address exists for a customer, the address highlighted is the one that will be opened for editing. This button allows the user to delete an existing Bill-To record for a customer. This button allows the user to save the modified Bill-To information. This button will cancel any modifications made to the screen after the edit button has been pressed. Depress the Add directive button, located at the bottom of the screen and the following screen will appear:
 Enter the name of the organization to which invoicing is to be sent. (It may be a different division, or a drop-ship situation.) Enter the Customer Bill-To Address (may use two lines). Enter the City, State and Zip Code for the Customer Bill-To Address. Enter the Customer Country. Enter the phone number at the Customer’s Bill-To Address. Enter the fax number at the Customer’s Bill-To Address. The Contact Name at the Bill-To Address (if established in the Contact module). Enter the e-mail address for the Bill-To Customer.

Depressing this button will open a screen for a Invoice Footnote to be added that will appear on all of the Invoices for that customer. After completing the Bill-To information, depress the Save button at the bottom of the screen.
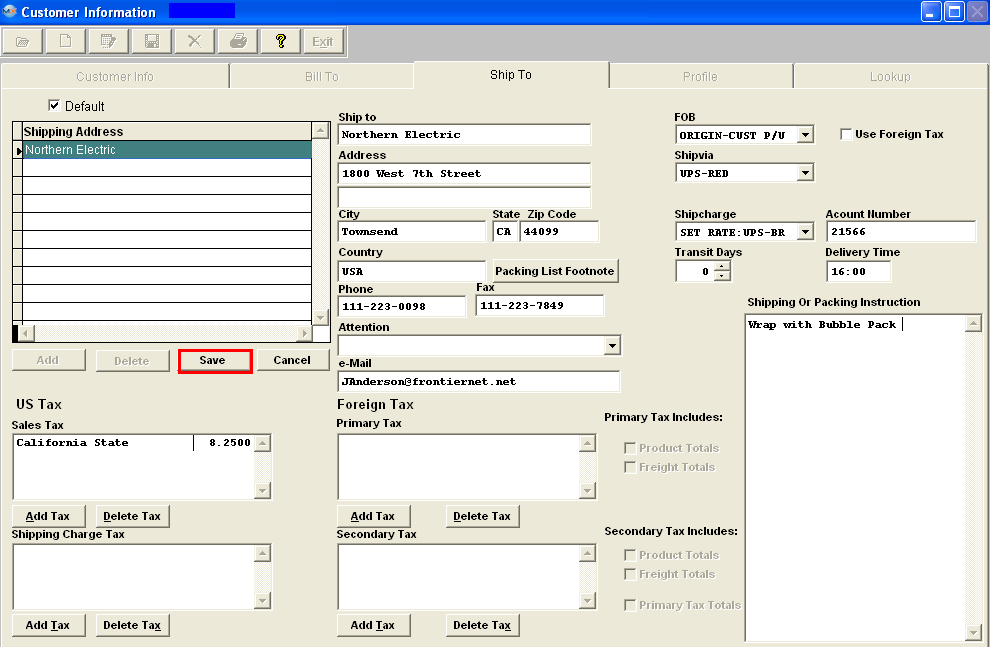
 The user then may click on the Ship To tab. In this screen, the user defines the customer information for shipping purposes. The Ship-To screen has additional tabs for more detailed information. The first screen is the Ship-To Address Information. The screen and fields are identical to the Bill-To screen, except that the information will be used for packing lists. Pressing the ADD button located at the bottom of the screen will automatically fill the information from the Bill-To screen, if it has been completed. All data may be edited and saved, or new data may be added to the database.
Select the FOB Terms from the pull down established for the customer. Must be established in the System setup/FOB setup prior to use. Select the Ship Via from the pull down definition established for the customer, as entered in System setup/Ship Via setup. Select the shipping charge from the pull down classification used for charging the customer, as entered in System setup/Ship Charge setup. Enter the number of Transit Days from user’s dock to customer’s dock, based on ship-via method. If the Customer transit days are blank or zero that then the system will take from the Delivery Schedule default. Enter the freight account number if the customer wishes the freight to be shipped against their own account. Enter the customer preferred delivery time to their dock.
When "Use Foreign Tax" box is checked, the foreign tax setup will be visible and US Tax setup will be invisible. When "Use Foreign Tax" box is unchecked the foreign tax set up will be invisible and the US Tax setup will be visible.
Check the "Use Foreign Tax" button to calculate foreign tax, if foreign tax applies to this Ship To address. This will allow users to use multiple taxes, based on the Province. See the Foreign Tax Overview below. Once this box has been checked for a specific address it should not be unchecked. If customer also uses US Tax user should setup another ship to address for US Tax. This box should not be checked and uncheck per shipment. Enter the Primary and/or Secondary tax information to be charged on taxable items shipped to this address, by depressing the "Add Tax" button and selecting a tax rate from the Pull Downs. Information being displayed in the pull downs is from the information entered in System Setup/Sales Tax Authority Table setup. The User can modify how the tax should be calculated by checking or unchecking the box on the right of the screen. If not using foreign tax, enter the sales tax to be charged on taxable items shipped to this address. See the US Sales Tax Overview below. Enter the shipping charge tax to be charged on freight costs for shipping to this address. Adding a Sales Tax or a Shipping Charge Tax in Customer Information requires that those items added be entered in System Setup/Sales Tax Authority Table setup. The Delete Tax button allows the user to select an existing tax authority for the customer for deletion.
Sales Tax Overview
Sales Orders/Customer Information US Sales Tax Overview
For Sales Order Items with no Tax, leave the Tax box unchecked. No further action is required. To Manually add US Tax (if not set up in Customer Information), enter line item and then in Pricing Screen click on Add Line and enter description of Sales Tax and Tax Amount manually. A Sales Type for the appropriate Tax G/L number should be setup in Accounting so that it can be selected when entering the Sales Tax manually. The full amount of the Tax will be Invoiced upon shipment of the first item so using manual sales tax entries may not be useful for shipments with multiple shipments against the same line item. Checking the Tax box in Sales Order Pricing will not calculate or add US Tax for a line item unless the Shipping Address for the particular Customer selected in the Sales Order Header has been set up. Shipping Address Tax Setup is done in the Tax and Shipping Mode screen under the Ship To tab under Customer Information Management. If a particular Customer Ship To Address has more than one US Tax (such as a Sales, Use, Excise, etc. tax), then the taxes may be entered in System Setup individually and added individually to the appropriate Customer Ship To addresses. If there are more than one US Tax setups for a Customer Ship To Address, Manex will add up all the tax rates and apply the combined percentage to the pre-tax line item total.
Foreign Tax Overview
User CANNOT manually add Foreign tax to Sales Orders or Invoices. The Foreign tax box must be checked for the Shipping Address for the particular Customer selected in the Sales Order Header.
If the Foreign tax box is checked for the Shipping Address for the particular Customer selected in the Sales Order Header. Pricing will be listed as follows on the Sales Order Acknowledgement, Invoice, RMA, and Credit Memo: First the Product Sub-tot AMT, the Sales Discount (if applicable), the Freight AMT (if applicable), a SUB-TOTAL, the GST TAX (Primary tax) (Note: the Primary tax will always be displayed even if it is zero, if a Secondary Tax is present), then a second Sub-Total, PST TAX (secondary tax), and last the TOTAL. If no PST tax (secondary Tax), Sales Discount, or Freight is involved, then no lines would print for these items. See the Foreign Tax Examples.xls attachment to see how the Primary and Secondary taxes are calculated.
The Primary tax and Secondary tax is divided into the Sales tax and Shipping tax on the Sales Tax reports.
For Example:
Primary Tax (GST): 144*10% (sales tax) + 0 (no freight tax is calculated) =$14.40
Secondary Tax (PST): 144*8% (sales tax) + 12*8% (Freight tax) = $12.48
Divided into sales tax and freight tax:
Sales Tax: 144*10% (sales tax) + 144*8% (sales tax) = $25.92
Freight Tax 0 (from primary tax) + 12*8% (from secondary tax) = $0.96
Enter the Shipping Instructions - This field is a memo field that may be used to record directions, notes, cautions, etc. for shipping to this Customer Address. After completing the Ship To information select either the Save or the Cancel button located below the Shipping Addresses. Then the user may click on the Profile Tab. In this screen, the user defines the Customer Profile notes for internal purposes. This screen is a memo field that may be used to record customer company information.
Once the record is complete user must depress the Save changes icon to save changes or the Abandon changes icon if you do not want to save change. |


| 1.4.1.4.3. Edit Customer Information | ||||||
|
The following screen will be displayed:
Depress the Find action button.
The Customers Information will appear on the screen: Depress the Edit action button. Enter password. All fields available for editing will be enabled for modification. Keep in mind that any changes within these screens will update all Open Sales Orders, Packing Lists, Invoices, RMA's, etc. upon save. Note: Terms, Credit Status and Credit Limit may only be edited by Accounting. All fields with the exception of the Customer No and Acct date become editable. If a user changes the Account status from Active to Inactive the program will check if there are any active BOM's and ask if the user wants to inactivate those BOM's at the same time or not. If the user will answer "YES" all BOM associated with the customer will be Inactive. When the user tries to Activate an Inactive BOM, which is associated with an inactive customer, the program will ask the user if they want to activate the customer at the same time, if not the system will abort BOM activation.
If a user changes the Terms, this will NOT affect existing Sales Orders, Packing Lists and/or Invoices. When creating a Packing List/Invoice from an existing Sales Order the old Terms will default in and user will need to manually change them. The new terms will ONLY affect any NEW Sales Orders that are created within the Sales Order Management module after the change has been made.
The Contacts field is not editable from this module. The Contacts must be edited in the Customer Contact section.
To Add a new Bill To address, user must select the "Add" button located below the List of Billing Addresses.
To edit an existing Bill To address, highlight the Bill To address located in the list on the right, and edit the information in the fields located on the left.
To Delete and existing Bill To address, highlight the Bill To address located in the list on the right, select the "Delete" box located below the List of Billing Addresses.
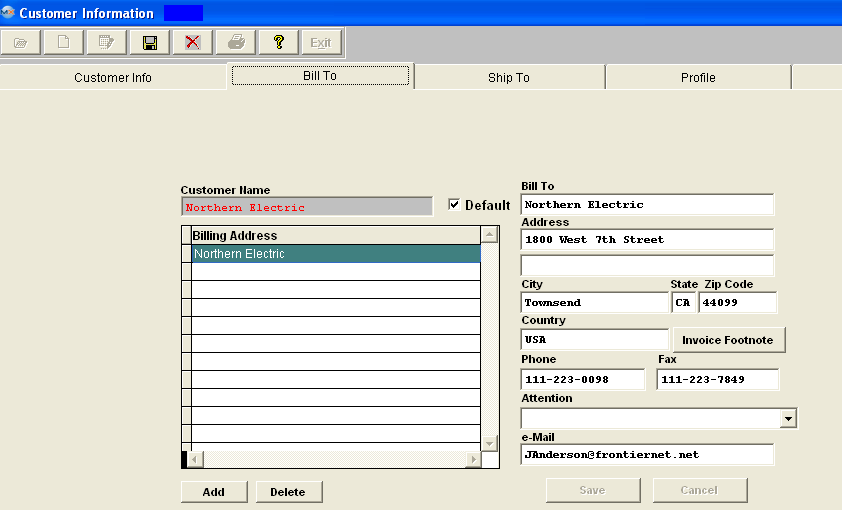 Once changes have been completed user must first depress the "Save" or "Cancel" button at the bottom of the screen.
To Add a new Ship To address, user must select the "Add" button located below the List of Shipping Addresses.
To edit an existing Ship To, highlight the Ship To address located in the list on the right, and edit the information in the fields located on the left.
To Delete and existing Ship To address, highlight the Ship To address located in the list on the right, select the "Delete" box located below the List of Shipping Addresses.
Tax Setup CANNOT be changed until all OPEN credit memo's have been approved for this customer. If users attempts to change the Tax Setup and Credit Memo's with "OPEN" status are found for this customer, they will receive the following message.
  Once changes have been completed user must first depress the "Save" or "Cancel" button located at the bottom of the Shipping Address List.
At the conclusion of the modifications process, the user must Save changes, or Abandon changes using the action buttons. If you depress the Save changes button all records will be updated with new information. Note: User will only be allowed to delete an existing Bill-To or Ship-To address for a customer if this address is NOT linked to a Sales Order. If this address is or has been linked to a Sales order you will receive the following message: 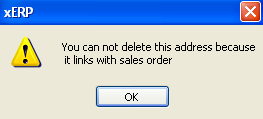 |
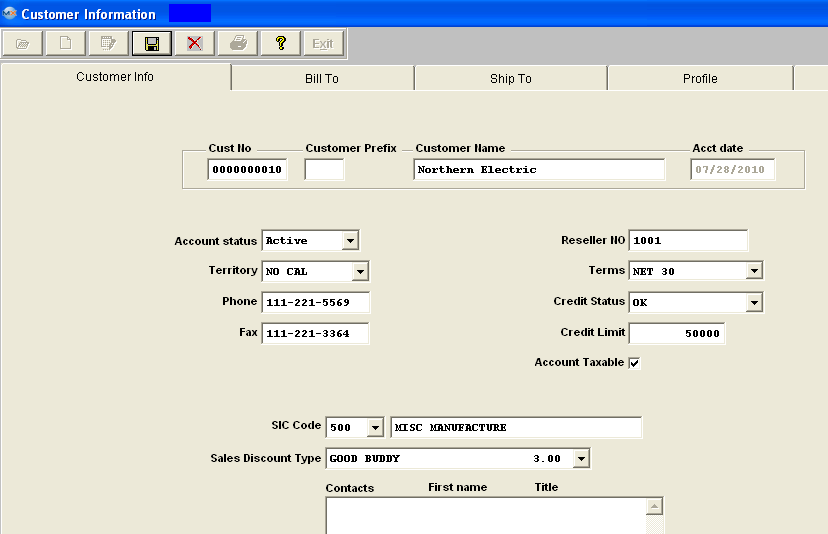
| 1.4.1.4.4. Link User Defined Fields to a Customer |
| The User Defined fields MUST be setup within Web ManEx. For further detail see Article #5454.
The User Defined Fields can
then be linked to a Customer by selecting a record in the ManEx
Desktop, and selecting the UD action button (as displayed below).
The UDF for that section will then be displayed, and user can make changes (if applicable), Save & Exit or Cancel.
|

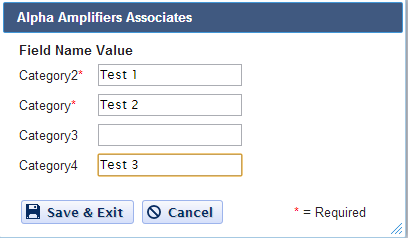
| 1.4.2. Contact Information |
| 1.4.2.1. Prerequisites for Contacts Information | ||||
|
After activation, "Customer Information & Customer Contact Information" access for each user must be setup in the ManEx System Security module. Users with “Supervisor Rights” will automatically have access.
|
| 1.4.2.2. Introduction for Contacts Information |
The Contact Module is used to record the details of customer contacts. Contacts may be of any nature, but must be associated with a customer. Manex provides the user with the ability to maintain both professional and personal details about a contact, including provision for personal tastes and affiliations. Contacts must be entered in this module if they are to be included in the customer Ship-To and Bill-To data fields at a later time. A contact who has moved to another customer may have a new customer assigned to them without having to re-enter their personal data. |
| 1.4.2.3. Fields & Definitions for Contacts Information |
| 1.4.2.3.1. Business Tab | ||||||||||||||||||||||||||
Fields & Defintions
|
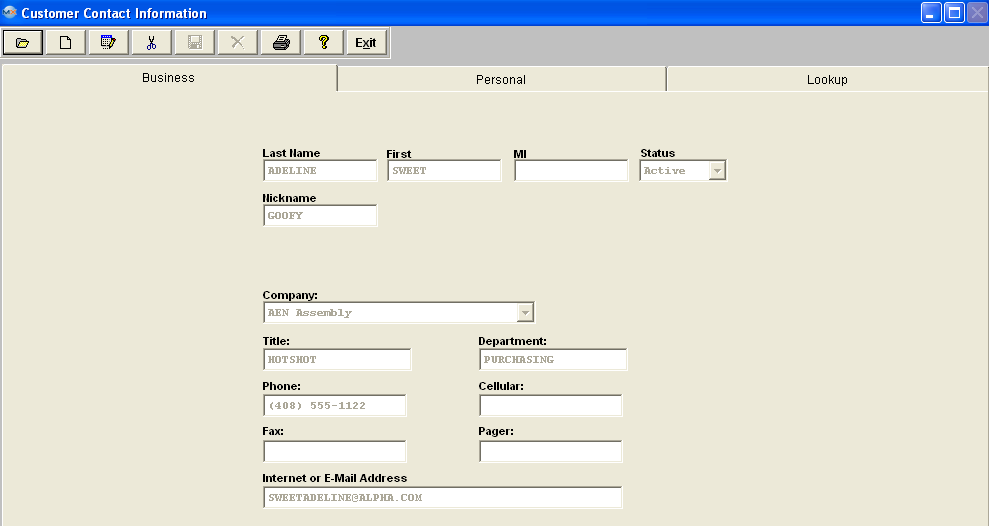
| 1.4.2.3.2. Personal Tab | ||||||||||||||||||||||
Fields & Definitions
|
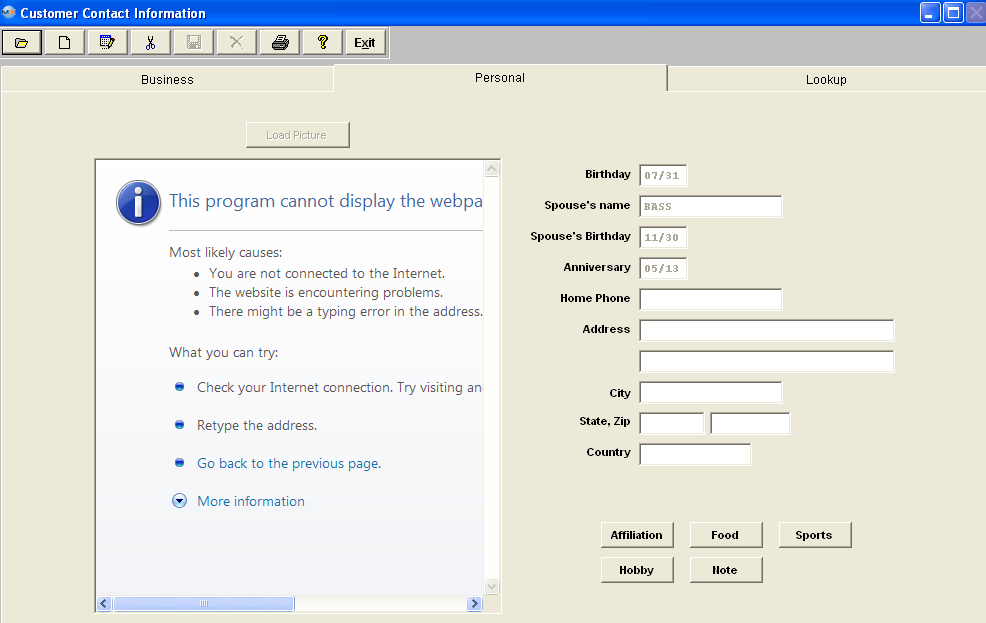

| 1.4.2.3.3. Lookup Tab | ||||||||||
Fields & Defintions
|
| 1.4.2.4. How To .... for Contact Information |
| 1.4.2.4.1. Find a Customer Contact | ||||
The Following screen will be displayed: There are two ways to Find Existing Customer Contacts: 1. By using the Find button located in the tool bar at the top of the screen. The following screen will appear: Select the desired Filter: by selecting the appropriate radio button - Active, InActive, or All. Select the desired Find: by selecting the appropriate radio button - Last Name, First Name, or Customer. Enter the information into the red box, depress the Enter key and the information will populate the screen. 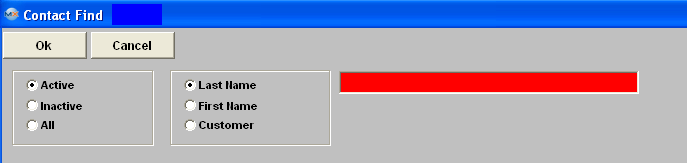 2. Depress the Lookup tab. This screen allows the user to locate a customer contact alphabetically. Double click on the customer contact name will bring the associated data into all screens without having to use the FIND action button. This screen will list all of the customer contacts entered beginning with the Last Name, First Name, Company, Title and Contact Phone number (not the company phone number).
|
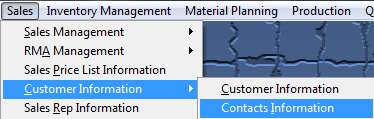
| 1.4.2.4.2. Add a Customer Contact | ||||||||
The following screen will be displayed: Enter in the last name of the contact being added. Enter in the first name of the contact being added. Enter in the middle initial of the contact. Select the status of the Customer Contact, either Active or Inactive. Enter in the nickname of the contact. Select the company to which the contact belongs by depressing on the down arrow located on the right hand side of this field and highlighting the selection. Enter in the title of the contact at the customer. Enter in the phone number and/or extension of the contact at the company (may be different than the company main number). Enter in the FAX number of the contact at the company (may be different than the company main number. Enter in the E-Mail address of the contact. Enter in the department at the customer in which the contact works. Enter in a Cellular phone number for the contact. Enter in a Pager number for the contact. After completing the Business information, the user may click on the Personal tab. In this screen, the user may enter personal information relating to the contact.
The Customer Contact Directive buttons will now be active.
This set of buttons allow the user to record specific information that they may wish to retain about the customer contact. It is divided into several categories to narrow the search for information later. Pressing any of these buttons brings up a memo window that may be added to, edited or canceled at will. Enter in the Customer Contact Birth Date. Enter in the Customer Contact’s Spouse Name. Enter in the Contact’s Spouse’s Birthday. Enter in the Contact’s Anniversary. Enter in the Contact’s Home Phone. Enter in the Contact’s Home Address(two lines available). Enter in the Contact’s Home City. Enter in the Contact’s Home State and Zip code. Enter in the Contact’s home country. Depress the Save action button to save changes, or depress the Abandon changes action button to abandon changes. |
| 1.4.2.4.3. Edit a Customer Contact | ||||||
The following screen will be displayed:
Or user can find an existing Customer Contact by using the Lookup screen:
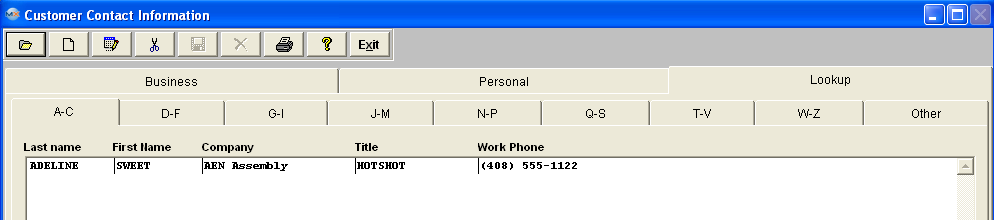 Once you have made your choice, the information will be displayed as follows:
Depress the Edit action button. Enter password. All fields available for editing will be enabled for modification. At the conclusion of the modifications process, the user must Save changes, or Abandon changes using the action buttons. Depress the Exit action button to return to the previous screen. |
| 1.4.3. Reports - Customer Information |
| 1.4.3.1. Reports - Customer & Customer Contact | ||
|
To obtain the Customer Information Reports within the Web, select the WEB Print button from the ManEx action buttons at the top of the screen. For further detail on How the Reports work within the Web refer to Article #5477. Note: In order to access the Reports within the Web the Company Root URL must be setup within the System Appearance module and user must be linked to web within the System Security Module. Select the Report Type: CUSTOMER OR CUSTOMER CONTACT - A List of Reports will be displayed that are available on the Web
for CUSTOMER OR CUSTOMER CONTACT
To obtain the Customer Information reports, select the Print button from the ManEx action buttons at the top of the screen.
The following reports screen
will display a list of reports that are available on the ManEx Desktop:
Highlight the desired report and then depress the OK button: Customer Information Report
The following report will print: 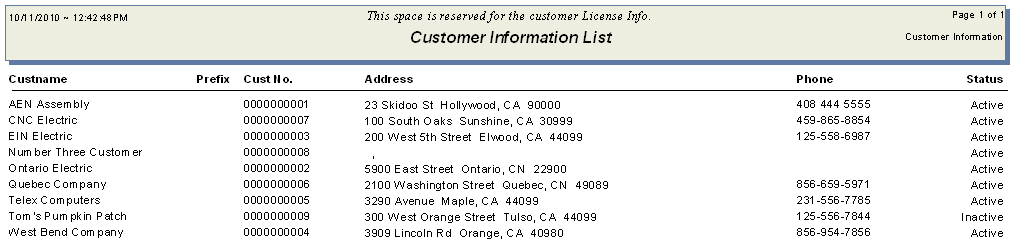 Customer Contact Information Report Highlight the report, depress the OK button:
The following report will print:
|
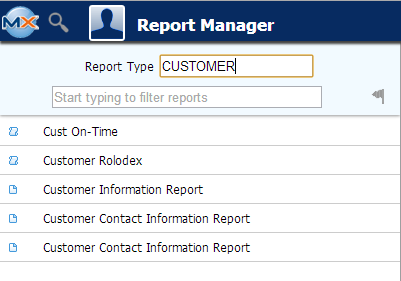
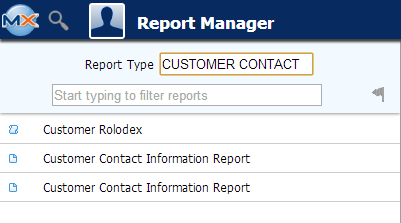

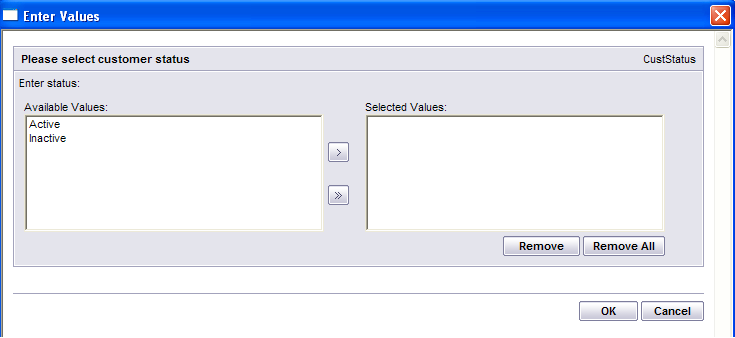
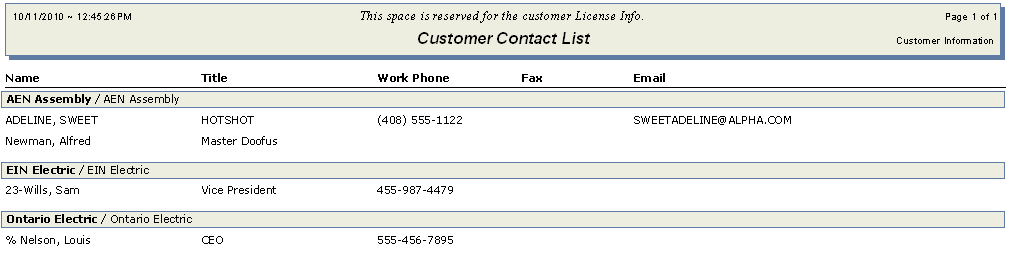
| 1.4.4. FAQs - Customer Information |
| FAQ's for the Customer Information Module |
| 1.5. Sales Representitive Information (SR) |
| 1.5.1. Prerequisites for Sales Rep Information | ||||
|
After activation, "Sales Rep Information" access for each user must be setup in the ManEx System Security module. Users with “Supervisor Rights” will automatically have access.
|
| 1.5.2. Introduction for Sales Rep Information |
The Sales Representatives Module is used to record the details of sales representatives. Manex provides the user with the ability to maintain both professional and personal details about a sales representative, including provision for personal tastes and affiliations.
When assigning Sales Commission to a sales order it does NOT affect the GL, at this time it is there as reference so you know how much Commission you owe your Sales Rep. Then at the time that you cut the check to your Sales Rep is the time that a GL # would be selected and processed through the system.
NOTE: The Sales Commission information was added to the system to allow our users to create their own customer commission reports based on the information that is stored within the tables. I would suggest that you consider using Crystal Reports to design the desired Commission report that would best fit your company, using the information stored within the ManEx tables. |
| 1.5.3. Fields & Definitions for Contacts Information |
| 1.5.3.1. Business Tab | ||||||||||||||||||||||||||||
Fields & Defintions
|
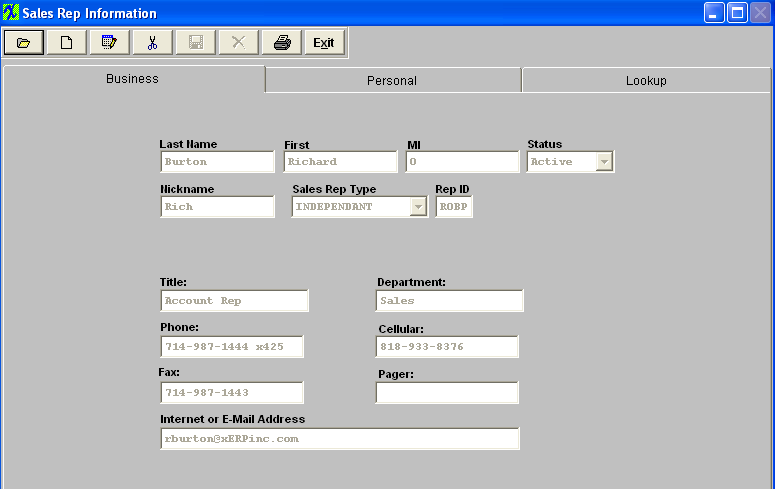
| 1.5.3.2. Personal Tab | ||||||||||||||||||||||
Fields & Definitions
|

| 1.5.3.3. Lookup Tab | ||||||||||
Fields & Defintions
|
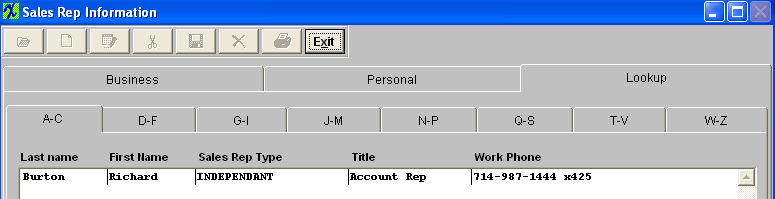
| 1.5.4. How To .... for Contacts Information |
| 1.5.4.1. Find a Sales Rep | ||||||
The following screen will be displayed:
There are two ways to Find Existing Sales Rep Information:
1. By using the Find button located in the tool bar at the top of the screen. The following screen will be displayed: Double click on the selected Representative's name to view the Sales Rep information.
Depress the Lookup tab. This screen allows the user to locate a Sales Rep alphabetically. Double click on the Sales Rep name will bring the associated data into all screens without having to use the FIND action button. This screen will list all of the Sales Rep's entered, beginning with the Last Name, First Name, Sales Rep Type, Title and Work Phone number (not the company phone number).
|
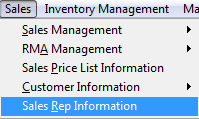
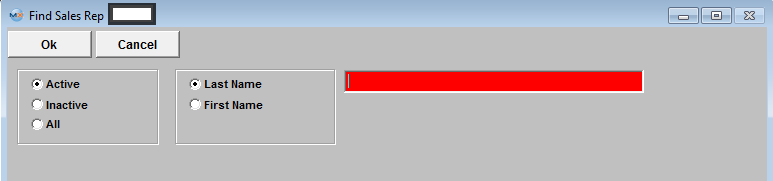
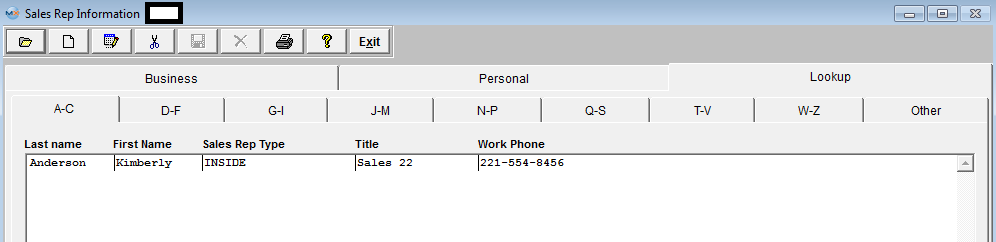
| 1.5.4.2. Add a Sales Rep | ||||||||
The following screen will be displayed: Enter the last name of the Sales Rep being added. Enter the first name of the Sales Rep being added. Enter the middle initial of the Sales Rep. Select the status of the Sales Rep, either Active or Inactive. Enter the nickname of the Sales Rep. Select the Sales Rep Type by depressing on the down arrow located on the right hand side of this field and highlighting the selection. Enter the title of the Sales Rep. Enter the phone number and/or extension of the Sales Rep. (may be different than the company main number). Enter the FAX number of the Sales Rep. (may be different than the company main number. Enter the E-Mail address of the Sales Rep. Enter the department of the Sales Rep. Enter the Cellular phone number for the Sales Rep. Enter the Pager number for the Sales Rep. After completing the Business information, the user may click on the Personal tab. In this screen, the user may enter personal information relating to the Sales Rep.
The Customer Contact Directive buttons will now be active.
This set of buttons allow the user to record specific information that they may wish to retain about the Sales Rep.. It is divided into several categories to narrow the search for information later. Pressing any of these buttons brings up a memo window that may be added to, edited or canceled at will. Enter the Sales Rep's Birth Date. Enter the Sales Rep's Spouse Name. Enter the Sales Rep's Spouse’s Birthday. Enter the Sales Rep’s Anniversary. Enter the Sales Rep’s Home Phone. Enter the Sales Rep’s Home Address(two lines available). Enter the Sales Rep’s Home City. Enter the Sales Rep’s Home State and Zip code. Enter the Sales Rep’s home country. Depress the Save action button to save changes, or depress the Abandon changes action button to abandon changes. |
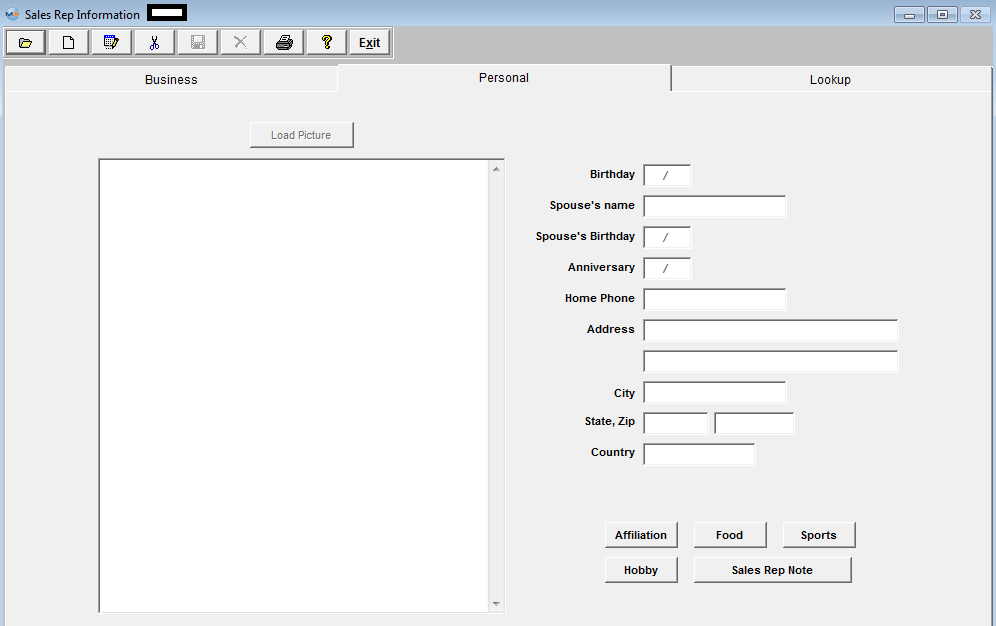
| 1.5.4.3. Edit a Sales Rep | ||||||
The following screen will be displayed:
Once you have made your choice, the information will be displayed as follows:
Depress the Edit action button. Enter password. All fields available for editing will be enabled for modification. At the conclusion of the modifications process, the user must Save changes, or Abandon changes using the action buttons. Depress the Exit action button to return to the previous screen. |