| 1. Inventory Control Management |
| 1.1. Inventory Control Management (ICM) |
| 1.1.1. Prerequisties for ICM Mgmt |
After activation, "Inventory Control" access for each user must be setup in the ManEx System Security module. Users with “Supervisor Rights” will automatically have access.
Before entering products and parts in the Item Master, the following product, part and system classifications and item parameters must be setup in ManEx using the System Setup Material Module. Note: that although data entry is possible with only the Prerequisites below, using the Data Entry Defaults explained in the next section is strongly advised to save time and maintain consistency.
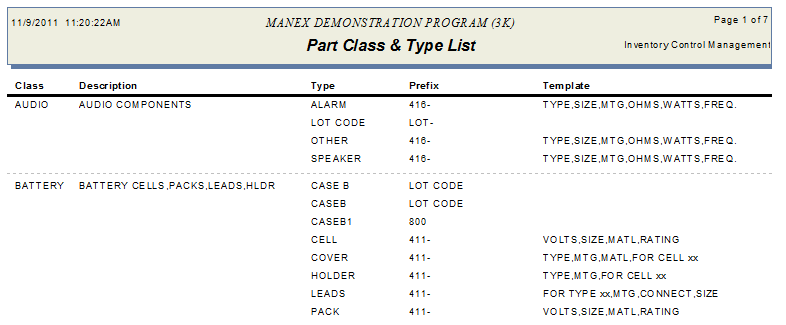
| Product and Part Class |
All items must be assigned a Class code (Finished Goods, Subassembly, Resistor, Capacitor, Raw PCB, etc.) in order for ManEx to number, connect, sort and organize the items. Class codes are User-defined but chosen carefully.
|
| Product and Part Type |
Each Class is further grouped into Types (Surface Mount, Thru-Hole, Precision, Programmed, etc.) to standardize description fields and allow use of default values. This speeds up data entry and eliminates redundant data and duplicate records.
|
| Units of Measure |
Several standard Units of Measure (U/M) are already setup in ManEx.Additional purchase or stocking U/M’s must be added in System Setup. Also, if the Purchase and Stocking U/M are different (eg. Wire purchased in FT, issued in IN.), a Conversion Formula must be entered in System Setup Unit of Measure & Conversion.
|
| Numbering System |
The User must select Automatic or Manually Numbering in System Setup Number System Module. For Auto-numbering, the Beginning Number must be entered. A customer-selected prefix can be entered in System Setup Number System to be added to each Manual or Auto-Numbered part no.
|
| Warehouse Assignments |
A System Setup (Warehouse Setup) to assign names and General Ledger Numbers (for ManEx Accounting) to the hard-coded MAIN1, WIP, WO-WIP and MRB Warehouses is required. Additional FGI and/or In-Store Warehouses can be added if assignment as stocking locations during Item Master data entry is desired.
|
Optional Data Entry Default fields are not required for Item Master entries, but are highly recommended to ensure consistency and save time during data entry.They are shown below.
Data Entry Defaults
|
Item Master Data Entry Defaults are selections that remain the same for most of the items for a particular Class and Type. These Defaults are entered in System Setup Inventory Part Class and will be automatically filled in by ManEx once the Item Class and Type have been selected during data entry of a new Item. Defaults can be over-ridden during data entry.
For instance, if the User wished to make the Default entry for Item Package to be REEL for all Items with the Class RES-SMT and the Type 0402, the User should select REEL in the Package field of the System Setup when entering Type “0402" as shown in the example.
|
|
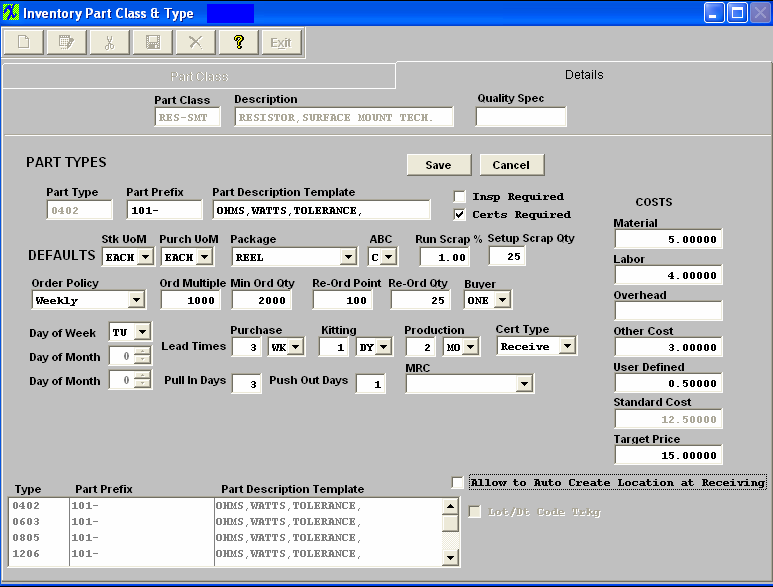
The same procedure would be used to set up Defaults for all of the fields for each Item Master Class and Type as shown. The information entered in each of the Default fields will be automatically entered in the corresponding field during data entry of a new Item after selecting the Class and Type. Defaults should be setup to apply in most cases. If the default in a particular field is not appropriate for a new Item being entered, the User may make another choice on a one-time basis or if the default has changed. Use System Setup Inventory Part Class to change the default. If too many over-rides are necessary for a particular Type, it may be too general. Consider splitting it into two Types, each with its own set of Defaults. Changed defaults only affect future data entry, not items already entered. Each existing item must be reassigned to a new Type before the old Type can be deleted from setup.
|
| 1.1.2. Introduction for ICM Mgmt | Information entered and maintained in the Inventory Control Management Module is used in nearly ALL of the ManEx Modules. Product, assembly and part information that is necessary to plan, purchase, receive, inspect, stock, issue, kit and cost all items can be found and should be maintained in this location. In particular this information includes:
- Item Master Part and Product Descriptions, Classifications and Revisions
- Purchasing Parameters, Buyer Assignments, Lead Times and Units of Measure
- Inspection, Certification and Specification Data and Notes
- Warehouse Assignments, Inventory and Stocking Locations and Quantities on Hand
- Material Requirements Planning Variables, Re-order Policy and Re-stocking Method
- Internal and Customer Approved Vendor List with Manufacturer Part Numbers
- Our system operates on a "Standard Cost Basis" (for further information see Article #3386 ) and Purchase Price Weighted Averages for Parts and Assemblies
- ABC Classification for Cycle Counts, Buyer Assignment and Inventory Stratification
- Supplier Name and Supplier Part Number
- Manufacturing Specifications with either a .bmp or a .pdf file
|
| 1.1.3. Fields & Definitions for ICM Mgmt |
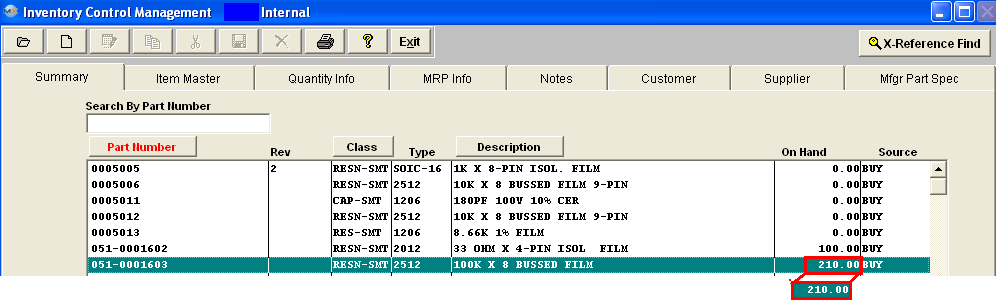
| 1.1.3.1. Summary Tab | The Summary Tab (screen) displays the results of an Inventory Find operation and is the starting point for further sorts, searches and selections based on Part Number, Part Class or a word or string of characters in the Description field. To view detailed information on a particular item, highlight the item and click on the appropriate Tab. An example Summary screen for all Internal Inventory is shown below.
Note: To display changes made in other windows or by other Users while this window is open, you must repeat the Inventory Find and refresh the screen data.
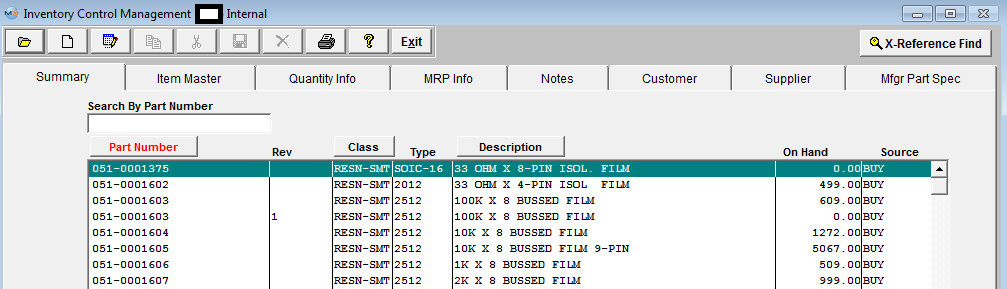
If a particular item does not appear on the Summary Screen, it may have been excluded by an Inventory Find that was too specific. Click on the Find a record and broaden the search criteria to display more records. Clicking OK with “Internal Inventory” and both “All Records” boxes checked will display ALL Internal items. Display all Consigned or In-Store records for a selected Customer or Supplier the same way.
Sorting, Searching and Selecting in the Inventory Summary Screen
- To sort the contents of the Summary screen by Part Number, Part Class or Description, click the button at the top of the column.
- It will turn red and the list will automatically sort in ascending alphanumeric sequence per the selection.
- To search for an item by Part Class, click Class and enter the first few characters of the Part Class in the Search by Part Class field.
- The list will scroll down to the first incidence of each character in the sequence entered. If a character is not found in the position typed, the list will scroll to the bottom.
- To Search for an item by Description starting with the 1st character on the left, click Description and begin entering the first characters in the field. The list will scroll down to the first incidence of each character in the sequence entered. If a character is not found in the position typed, the list will scroll to the bottom.
- To Search for an item by a word or character string anywhere in the Description, click on Description, click on the Left button next to the Search by Description window (changes to “Random”).
- Enter the search word or characters in the window. Hit return and the first match in the list will be highlighted. Click on the window and hit return to highlight the next match in the summary list. After the last match or if a match is not found, the last item in the summary list will be highlighted.
- To visually search the summary list, use the scroll bar or arrows to the right of the list. The Source (Buy, Make, Consigned or In-Store) and total On Hand quantity is displayed in the last two columns.
For further Details on any item in the summary list, highlight the item by a search or mouse click and select the appropriate Tab to display the desired detail information.
To display changes made in other windows or by other Users while this window is open, you must repeat the Inventory Find and refresh the screen data.
 |
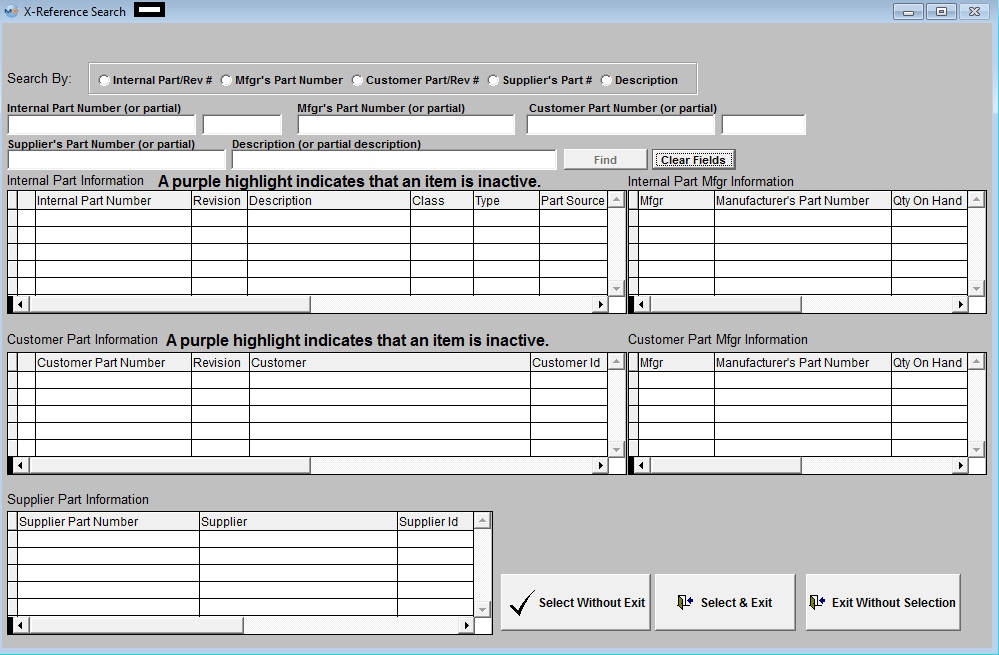
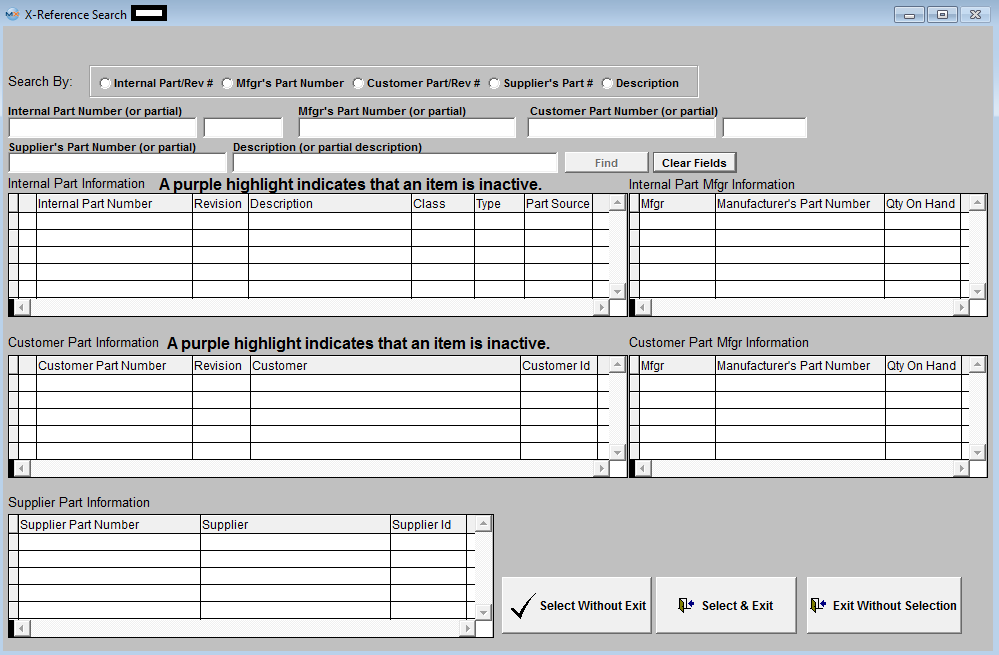
This button will take the user to a screen, where they can make a selection by what ever criteria needed by choosing (internal part number, mfgr part number, customer part number, supplier part number, or description) to search. |
The following screen will appear:
The user can enter partial string and search is not case sensitive. After system finds parts in response to the search (inactive parts will be highlighted in Purple), the user can make a selection by checking on one of the check boxes located at the left. If system was unable to find the exact match, a message will appear up in the right hand corner (in red) to let the user know that the part did not exist in the item master but the following are similar parts found.
The user can choose to "Select Without Exit"; "Select & Exit"; or "Exit Without Selection".
|
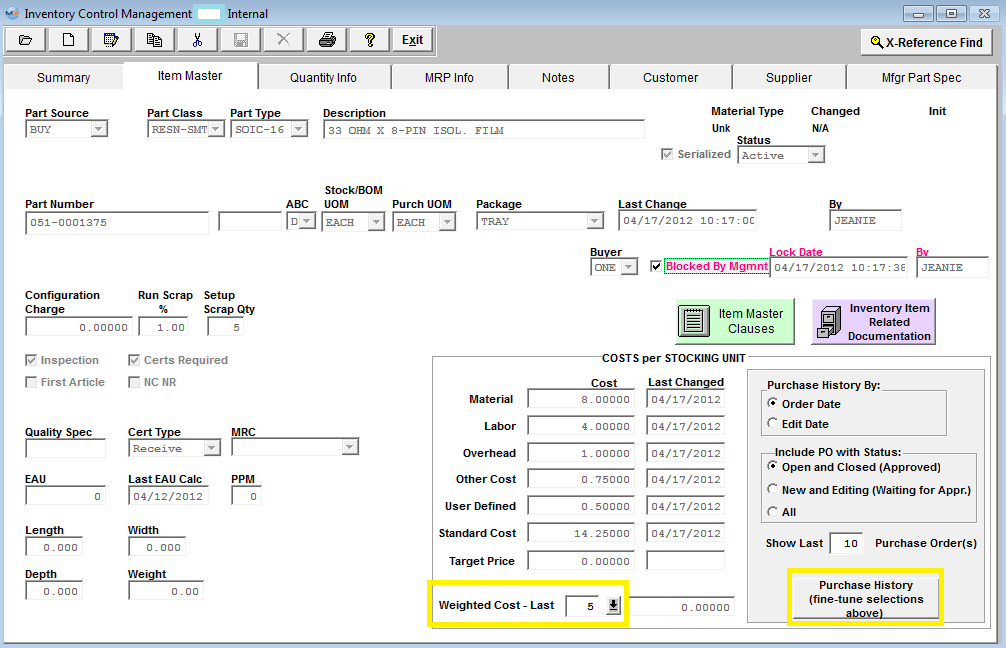
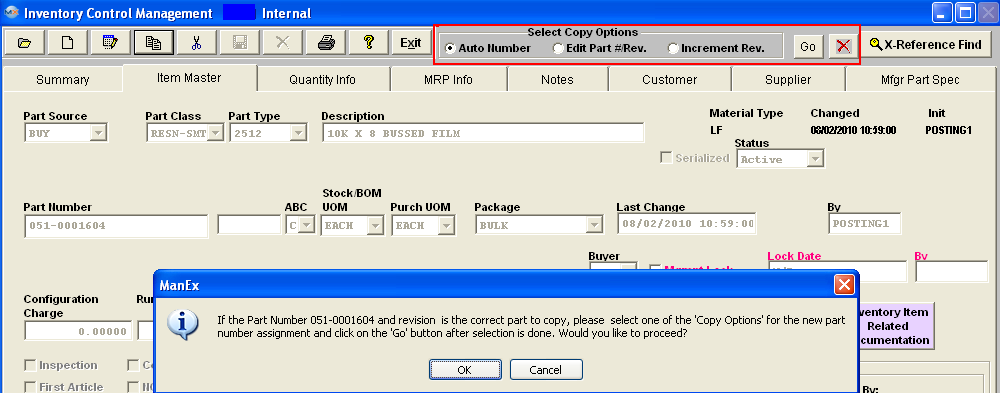
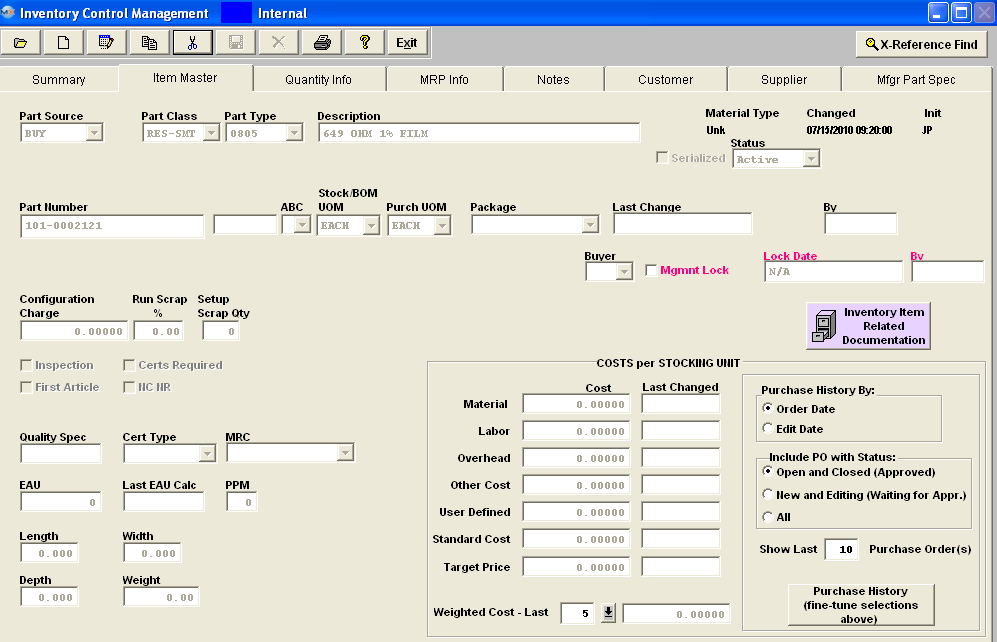
| 1.1.3.2. Item Master Tab | The following fields may be viewed in the Item Master screen. This screen is the starting point when the Add a New Inventory Record Action button is clicked or an existing record is highlighted within the summary screen. Clicking the Edit action button allows editing of existing Fields that are not grayed out. The ICM module will display "Internal" in the screen Header/Title bar, if internal inventory is open, and display the Customer name in the Screen Header/Title Bar if you have consigned inventory open. This will allow users that have multiple inventory screens open at the same time to seen at first glance which screen contains what type of inventory data.

|
See Article #4766 for further detail on how to Use the X-Reference Find |
Item Master Tab Field Definitions
| Part Source |
This field is hard coded in the system. Select BUY for purchased parts and assemblies, MAKE for an item made in-house (assemblies and sub-assemblies) and PHANTOM which is a list of parts that is common to several subassemblies.
A good example of where a Phantom can be used is a video card with different memory options. On all the variations of the memory card, there are a lot of parts which are common, including the circuit board. If we assume the only thing unique to each assembly is the amount or type of memory component and a couple of resistors, then the parts common to all the assemblies can be listed as a PHANTOM assembly. The PHANTOM part number is then listed as a component under each of the top-level assemblies. The BOM of the Phantom is exploded in the kitting module as if they were part of the BOM (hence the word Phantom) and pulled with the top level assembly. It becomes easy to maintain these BOMs since one change in the Phantom will ripple through all the video card variations.
|
| Phantom/Make |
If the Part Source is a MAKE and this box is checked, the system will treat the part as a Phantom when the sub-assembly components are called up during the Kitting process BUT as a Make part for a stand alone assembly when the part is NOT a sub-assembly.
You can assign the status of "Make/Phantom" to a sub assembly. In this condition, it will cause the components to be added to a kit for the top assembly as if it was a Phantom BOM. On the other hand, you can also create work orders and demands for the sub assembly itself. The difference between this Make/Phantom and a straight Phantom is that you cannot build the straight Phantom.
Phantoms - We suggest that the user utilizes this feature, especially if the subgroup of parts are going to be used in more than one top assembly. If the subgroup has a modification to its BOM, the user does not have to go to each top level and change all of them. By simply changing the BOM in the Phantom assembly (or Make/Phantom), the kitting for all top assemblies including this sub assembly will be changed to the new configuration. If you did not use the Phantom, and copied the parts into numerous top assemblies, you will have to make a change to every one of them if the subgroup of parts was modified. NOTE: When creating a phantom part user will NOT be required to enter any physical parameters for it, because it is just a pointer to a group of parts that are used together on the BOM. In kitting we explode the group as an individual item so this is also another reason why user is NOT required to enter any physical parameters when creating a phantom part. |
| Make/Buy |
Make/Buy is setup to allow users to have a part in the system that they wished to BUY but also keep documentation within the system (BOM). If the Part Source is a MAKE and this box is checked, the assembly MUST be purchased from an outside source. If a Part is marked as Make/Buy within Inventory the MRP will only give PO Actions and that product will not be available for selection within the Work Order Management module, (due to MRP calculating incorrect demand and showing incorrect message with safety stock). If the part souce on a product is originally setup as a MAKE the user WILL be allowed to edit the record and change the part souce to Make/Buy. For further details see Article #3289 .
|
| Part Class |
This is a general part, product or item classification that must be selected from the drop-down box. If an appropriate choice is not available when entering a new item, you may add a new part class in Inventory Part Class, (examples of Part Classes are BATTERY, DIODE, FUSE, FILTER, IC-SMT, CAP-SMT, RES-TH, etc.)
|
| Part Type |
Type is a sub-classification of Part Class. If an appropriate choice is not available when entering a new item, you may add a new part type in Inventory Part Class (examples of Part Types for the Class IC-SMT would be 0603-5%, 0805-10%, 0805-5%, 1206-5%, 1210-5%, Lot-Coded, etc.)
If the Part Type selected is Lot-Coded, the user will be required to enter a lot number, date code, expiration date (optional) and internal lot number information whenever performing a transaction for the part. If the user wishes to maintain inventory to this level, then they MUST enter information each time a part is moved. This will allow complete traceability by date and lot code for products assembled. The user will be able to determine all work orders or sales orders in which a certain date code was used. Users should use caution when changing the lot code tracking status. When lot code tracking status is change the entire history of the lot code is removed from system.
NOTE: A user does have the option of leaving the Part Type blank, however if this option is selected the prefix for the part number will be omitted. There is no reason to enforce part type if a user doesn’t want to have that kind of detailed classification. If the user decides to leave the Part Type blank they will receive a message and at this point they have the option to continue or go back and pick a Part Type
Manex uses the Part Class and Type as an extension to the description of the part. Therefore Class and type will be displayed throughout the system on screen and in reports as an extension of the description.
|
| Description |
There are 45 characters available to put descriptive data about the item being entered that is not already in Part Class and Part Type. For instance, in the previous figure the Part Class and Type already show that it is a RESN-SMT 2512 so this information need not be repeated in the Description. We suggest when entering the description, that you be consistent with your capitalization and punctuation. Some of the screens and reports can be sorted by description so the more consistent you are the easier it will be to use the system in the future.
|
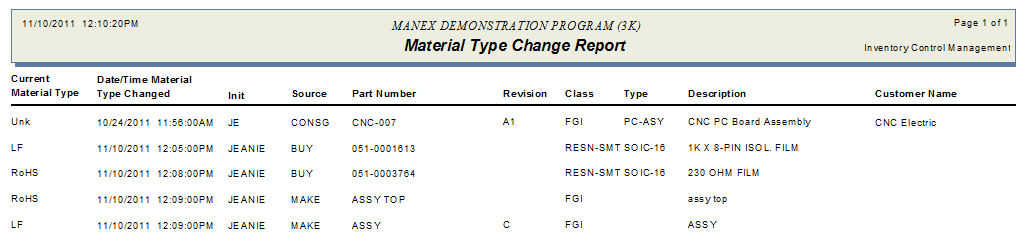
| Material Type |
This field is an Item fields which is repeat at the top of all Tabs to display the selected Item.
If the Inventory Material Type is set to "Auto" (within the Material Type Setup), everytime the user modifies the AVL material type, the program will update the Inventory Material Type automatically.
>> If any of the AVL material type for the item is 'Unk' - the item level type will be 'Unk'
>> If any the material type is the same for all of the AVL's of the same item, the material type for the item will be the same as material type of the AVL's without a suffix. For example: if AVL types is anyof the 'LF-P/N', 'LF-Date', 'LF-Mark', the material type for the item will be 'LF'. If AVL's material type is 'ROHS-P/N', 'ROHS-Date', 'ROHS-Mark', the item's material type will be 'ROHS'
>> If any of the material type of the AVL's for the same item are different and none of them is 'Unk' then the type of the item will be 'LF'
Any changes to the AVL material type that drives the item material type to a lower level will display a warning.
If the control is set to "Manual", then the user will be able to modify the Inventory Material Type from the Material Type pulldown. Keep in mind that the program will NOT validate if the material type in Inventory and AVL levels are in sync.
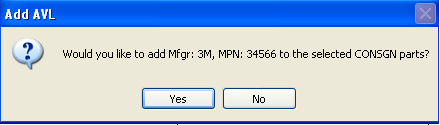
The AVL Material Type is carried forward for the consign part when the consign part is first added to the system or when new AVL was added to the internal part and the user elects to add this AVL to the existing consign parts. If the user later changes the Material Type on the internal part, the change is NOT carried over to the consigned part.
|
| Changed |
This field will display the date of the last change to the material type. |
| Initials |
This field will display the User ID of the user that made the last change to the material type. |
| Serialize |
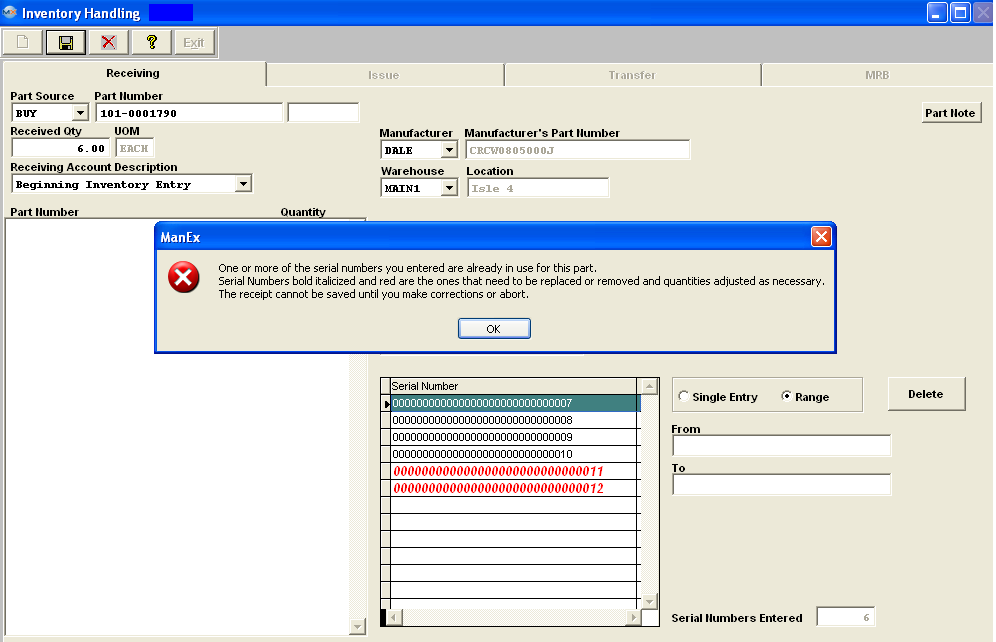
This box will be available only if the option to use Serial Number Tracking in Shop Floor Tracking Defaults is set up.
The system allows this box to be check for a MAKE or BUY part. If this box is checked for a BUY part, all components are being tracked by a serial number that was assigned to the part at time of receipt. If this box is checked for a MAKE part, the FG assemblies will be tracked by the serial number through complete process. Note: Once a serial number for a MAKE part is created, we don't allow user to turn off the serialized checkbox anymore, even if there is no qty on hand and all accounting records are cleared. This is so no history of Shop Floor tracking, shipping, RMA’s, etc. . . . for the Make Parts are lost.
If a user changes a non-serialized part to a Serialize part the system will check. * If the part has allocated qty, (user has to un-allocate parts before the system will allow user to check the "Serialize" box). *If the part has any OPEN kit (kit in process), (user has to de-kit or close kit before system will allow user to check the "Serialize" box) *If the parts is a BUY part and has un-reconciled PO (user has to reconcile all receipts before system will allow user to check the "Serialize" box).
After all these criterias are passed, if the part has quantity on hand, the user has to enter the serial numbers to match the quantity on hand.
Note: Users have to have special access in order to modify this checkbox, this access is assigned through Security/User Rights.
|
| Status |
All items must be Active in order to buy, receive, issue, invoice or ship. Use Inactive Status to remove items from use that have already had transactions against the Part Number. Use Delete button to delete Items with no transactions. Changing status from Active to Inactive (for a Make Inventory part) will NOT change BOM status. User will have to change BOM status seperately. Changing from Inactive to Active status can be used to release items from Engineering. Note: If WIP (Work-in-Process) exists for a part the system will not allow the part status to be changed. This will prevent any possiblity's of qty on hand being returned to an inactive part if the users would happen to dekit. |
| Part Number |
Item/Part number is a unique identifier for every Item Master record entered in the database. Part numbers can be setup to be manual numbered, or auto assigned to all items except MAKE assemblies, or all items including MAKE assemblies (within the Number System setup module). The standard part number is a 3-digit dash seven digit format where the three-digit prefix is used to define the part class, part type setup in the Inventory Part Class setup module to work with auto or manual numbered parts and assemblies. A manually assigned part number can be 25 characters. Alphanumeric part numbers are permitted. The revision field is 4 characters, also alphanumeric. ManEx uses separate assembly and revision fields making it easier to group all revisions of the same assembly and verify that the correct version is selected for production
|
| ABC |
|
| Stock/BOM UOM |
This is the Unit Of Measure (Foot, Inch, Each, Gallon, Quart, etc.) that is used to specify how much of the Item displayed or being entered is issued from Stock or is used in a Bill of Material for an assembly. ManEx tracks stocking units of measure within inventory, kitting, MRP, etc.
|
| Purchase UOM |
This is the Unit Of Measure (Foot, Inch, Each, Gallon, Quart, etc.) that is used to specify how the Item displayed or being entered is purchased from a supplier.
NOTE: When creating a PO for an item with different purchasing and stocking UoMs, be sure to enter the MRP suggestion into the Stocking qty field rather than the purchasing qty field. The system will automatically convert the stocking unit into the purchasing unit for the purchase order qty.
For example if the buyer is creating a PO for an item that is used by inches but sold by the foot, the user would enter the 24 inches into the stocking qty field and the PO would automatically convert it to 2 feet in the purchasing qty field. So the supplier deals in feet, but ManEx deals in inches. The conversion between the two are established in the Unit of Measure & Conversion module.
Once the items have been accepted into inventory it is then converted over to Stock UOM and from that point forward everything within the system is using the Stock UOM.
ManEx DOES NOT recommend changing either of the UOM's if the part has a qty on hand. See Article #3414 for further detail.
|
| Package |
This field defines how the components are to be packaged (ie. Reel, Tray, 6-Pak, Ream, Individually, etc.) when it is delivered. This defaults to what is setup in the Inventory Part Class setup. User can edit this field to fit the component package as it is purchased for your organization. This will default to the PO Screen. The buyer has the right to override the package definition in the item master or on the PO screen. (ie. Reel, Tray, 6-Pak, Ream, Individually, etc.)
|
| Last Changed |
This captures the date,and time from the password of the individual making the changes to this screen and/or changes to the fields displayed on this screen from outside modules. Anytime an edit/save occurs this field is updated. Note: This field will NOT be adjusted from outside modules that change the costs, such as the Purchase Order module or the Cost Adjustment module those Last Changed dates will be displayed in the Last Changed fileds displayed next to the costs. |
| By |
This captures the User ID from the password of the individual making the changes to this screen and/or changes to the fields displayed on this screen from outside modules. Anytime an edit/save occurs this field is updated. Note: This field will NOT be adjusted from outside modules that change the costs, such as the Purchase Order module or the Cost Adjustment module
|
| Buyer |
This field is automatically filled in from the information entered in the Inventory Part Class setup module. This field is used in the MRP lookup as a sort field to allow a buyer to find the parts they are exclusively responsible to purchase. If a buyer leaves or is replaced, there is a global replacement of one buyer to another located in the System Utilities.exe/Change Parameters for the Part/Class .
|
| Mgmnt Lock/Blocked by Mgmnt |
Users MUST have special access in order to modify this checkbox, this access is assigned through Security/User Rights.
If locked caption will change to "Blocked by Mgmnt" and ALL users will have access to the screen, but only those with complete access to inventory can make changes to the item master. Other users will NOT be able to edit the record until the Approved users remove the lock. Fields changed when adding a PO, such as purchase lead time and min/mult orders are back written to the item master. The item master notes are only back written to the item master if the user has edit rights to inventory. The internal and consigned parts have seperate controls.
Note: If locked the caption will be displayed as "Blocked to Mgmnt", if unlocked the caption will be displayed as "Mgmnt Lock".
|
| Lock Date |
This displays the date and time the Approved user implemented the Mgmt lock. |
| By |
This is the users ID that implemented the Mgmt lock.
|
| Configuration Charge |
This is NOT a part of the standard cost total.It is a specific cost used with the MANEX Order Configurator module and represents any additional cost over and above the standard cost total.
|
| Run Scrap % |
This amount is added to the exact quantity used on an assembly to provide an overage to cover losses during running due to predictable machine and human losses.
|
| Setup Scrap Qty |
Setup losses may be added to the BOM requirement and Run Scrap for an item.For instance, an auto-insertion machine may use extra parts for alignment checks.
|
 |
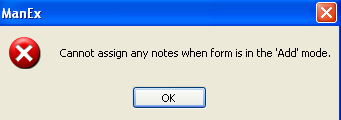
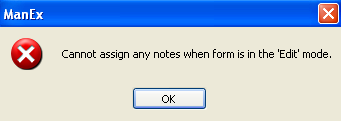
Depressing this button will bring up a screen listing Clause (s) from the Clause Setup module. User may select the desired clause (s) they would like added at the Inventory Part level. When this part is added to a PO any Clause(s) assigned will be defaulted into the PO Item Clauses. This button will be displayed in RED when clauses have been added. By design this button is ONLY editable in the view mode (See Article #3432 for further detail). If user trys to use this button in the add or edit mode the system will display one of the following warnings.
.
|
 |
Depressing this button will give the users the ability to scan any related documents directly into the ManEx system and attached the document directly to the item in the ICM Module.For further detail see Article #2396. If this button is displayed in Red there is Related documents attached. |
| Inspection / Quality Spec |
Checking the box will cause the item to require inspection to whatever Quality Spec. shows in the Quality Spec box. The Quality Spec appearing in the box is entered in System Setup Inventory Part Class Setup. Any Part Type in a particular Part Class can have Inspection Required turned on or off.
|
| Certs Required/ Cert Type |
Checking this box will allow selection of Cert Type. Cert Type choices are Receive, Ship or Both. A typical Cert would be UL or CSA Certification on wire. Check the box and then depress the down arrow for the types to display. Select the desired type: Receive - Requires user to check the "Certificate Required" box has been Done at Receiving. Ship - Requires user to check the "Certificate Required" box on Packing List/SHipping. Both - Requires user to check the "Certificate Required" box at both Receiving and Packing List/Shipping.
|
| First Article |
Checking this box will alert the users that the item requires a first article check at receiving inspection |
| NC NR |
Checking this box, means that this part cannot be cancelled or returned. NOTE: This field is for reference only.
|
| Taxable |
Checking this box, will then default the Make Part as taxable when added to new Sales Order and/or Buy parts will default as taxable when added to a purchase order. |
| MRC |
The Material Risk Codes listed in the pull down are entered in the System Setup Material Risk Code Setup. This is to inform the users which items are Low Risk or High Risk (can not be cancelled or returned).
|
| EAU |
The quantity displayed in this box is the estimated Annual quantity. This is calculated from information entered into the ABC Types screen. |
| Last EAU Calculated |
The date shown in this box is the date the EAU was last calculated in the ABC Types screen. |
| PPM (Parts per million) |
This is a data entry field and is not involved in any calculations or used anywhere within the system at this point.It is planned to be used in the future to calculate the component level of PPM and then update the assembly PPM within the routing module.
|
| Length |
Specific length allowed for part.
|
| Width |
Specific width allowed for part.
|
| Depth |
Specific depth allowed for part |
| Weight |
Specific weight allowed for part.
|
| Material Cost |
For BUY Parts: This is the purchase price of the BUY part. For MAKE Parts: The sum of the STANDARD COSTS of BUY parts in the assembly. Whether or not setup scrap is included is a system setup option. |
| Labor Cost |
For BUY Parts: If the user wishes to include any preparation labor costs associated with a BUY part, like crimping, tinning testing. etc., those costs may be included here. For MAKE Parts: The user may include the labor associated with building the assembly the Value of Labor will then be rolled into the Std Cost for the Make Part |
| Overhead Cost |
For BUY Parts: Any additional costs associated with the labor, such as heating, lighting, etc., that the user may wish to include in the cost of the inventory value. For MAKE Parts: Any additional costs associated with the labor, such as vacations, sick leave, meeting times, etc., that the user may wish to include in the inventory value.
|
| Other Cost |
For BUY or MAKE Parts: This is up to the user to decide if there are any other costs that should be absorbed in the inventory value. |
| User Defined |
For BUY or MAKE Parts: This is a field where a user may define the field name and include any optional costs.
Note: for Labor Cost, Overhead Cost, Other Cost and User Defined . . . BUY Parts: Transactions will hit the GL for this value upon reconciling the Receipt for AP MAKE Parts: The user may include these extra Costs with building the assembly the Value of extra cost fields will then be rolled into the Std Cost for the Make Part, but there will be no break outs of these as far as GL Transactions are concerned (all Transactions will be for the Std Cost Value). |
| Standard Cost |
The STANDARD COST of an item is a calculated value determined by the sum of individual costs. These individual costs may be in any combination of the Material, Labor, Overhead, Other and User Defined costs. Each of the individual costs should have their own account number in the Inventory Setup , and those accounts will accrue the costs when material is added to inventory. User MUST have optional rights within the Security module to "Allow Updating Inventory Std Cost and Standard Cost Rollups".
If ManEx Accounting is neither installed nor active, then there is no value other than reference in including values in these fields.
Important Notice: It is very important to have standard costs (as determined above) in place for any part entering inventory. ManEx allows users to enter a standard material cost at the time of purchase, if one is not already entered. Without accurate cost data, the inventory value could be next to useless, and major variances would show in Purchase Price, Configuration and Manufacturing Variances. If the material cost if the assembly does not equal the computed sum of the standard costs of the components based on the system setup, a configuration variance will be accrued. Please note Standard cost is based on Stock UOM.
|
| Target Price |
This field is currently only a data entry field and will be reflected in the Purchase Order module for "BUY" or "MAKE/BUY" parts. This field is not editable for "MAKE" or "PHANTOM" parts. NOTE: To assign prices to products ("MAKE" parts), ManEx suggests using the Sales Price List Information module. This module allows users to enter prices by product and by customer so different customers can have different prices. This price will default into the sales order, but is still editable within the Sales Order module. |
 |
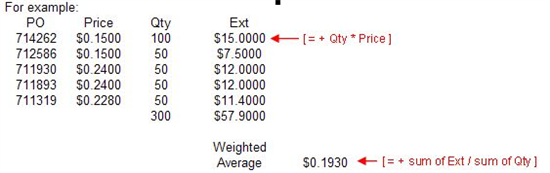
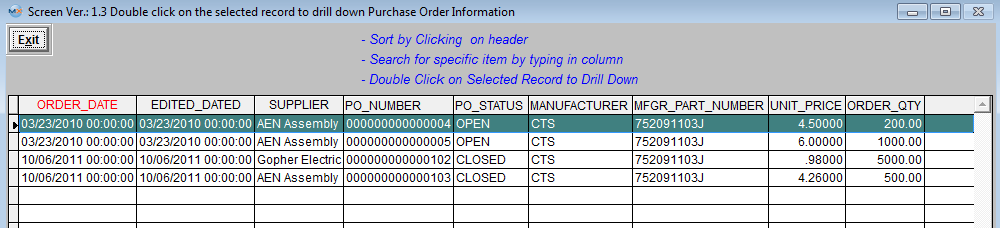
If the Part Source is a BUY, the weighted cost is calculated by dividing the extended total cost(s) by the total qty(s) from the total number of non-cancelled PO line items setup in the General Inventory Setup module or the total number of non-cancelled PO line items entered in theWeighted Cost - Last ( ) field). The Purchase Orders used are with a status of Open or Closed only, and goes by Order Date or Edit Date. You can choose what option it uses on the Inventory screen. You can also select the default use (Order Date or Edit Date) under General Inventory Setup .
Order Date: Order date on Purchase Order
Edit Date: Also known as latest version date (example if the original PO date is 1/3/06, but it was revised/edited on 12/5/06 it will use the 12/5/06 date), no matter what was edited on the PO. (if a user accidently selected the wrong PO to edit and had depressed the edit button, they could depress the abandon changes button to avoid the PO version date from being updated).
NOTE: The User has the option of changing the number of (Weighted Cost - Last ( )) purchase orders within the Inventory screen. Changing this number within the Inventory screen will change the Weighted Cost and also change the number of Purchase Orders displayed in the view screen. User cannot filter out non-received parts. Depress the (down arrow) to display the view screen. This screen allows user to Sort, Search and Drill Down to Selected Records.
|
| Last Changed |
This captures the date of the last change to the cost within this module and/or the outside modules such as the Purchase Order module and/or the Cost Adjustment module. |
| Purchase History By: |
This field allows the users to select which date "Order Date" or "Edit Date" on the PO to use when displaying the PO's in the Purchase History. The default is setup within the General Inventory Setup module.
NOTE: User has the option of changing the selection within this screen for a one time view and will reset back to the default once user exits the ICM module.
|
| Include PO with Status: |
This field allows the user to select the status of the Purchase Orders they would like to have displayed in the Purchase History. "Open and Closed (Approved)" or "New and Editing (Waiting for Appr.)" or "All". The default is setup within the General Inventory Setup module. PO;s with a status of Cancelled will only display when "All" is selected.
NOTE: User has the option of changing the selection within this screen for a one time view and will reset back to the default once user exits the ICM module.
|
| Show Last __ Purchase Order(s) |
This field allows the users to setup the number of Purchase Orders they would like displayed in the Purchase History. The default is setup within the General Inventory Setup module.
NOTE: User has the option of changing the selection within this screen for a one time view and will reset back to the default once user exits the ICM module.
|
 |
Once all the selections have been made, depress the "Purchase History" button and the following view screen will be displayed. This screen allows user to Sort, Search and Drill Down to Selected Records.
|
|
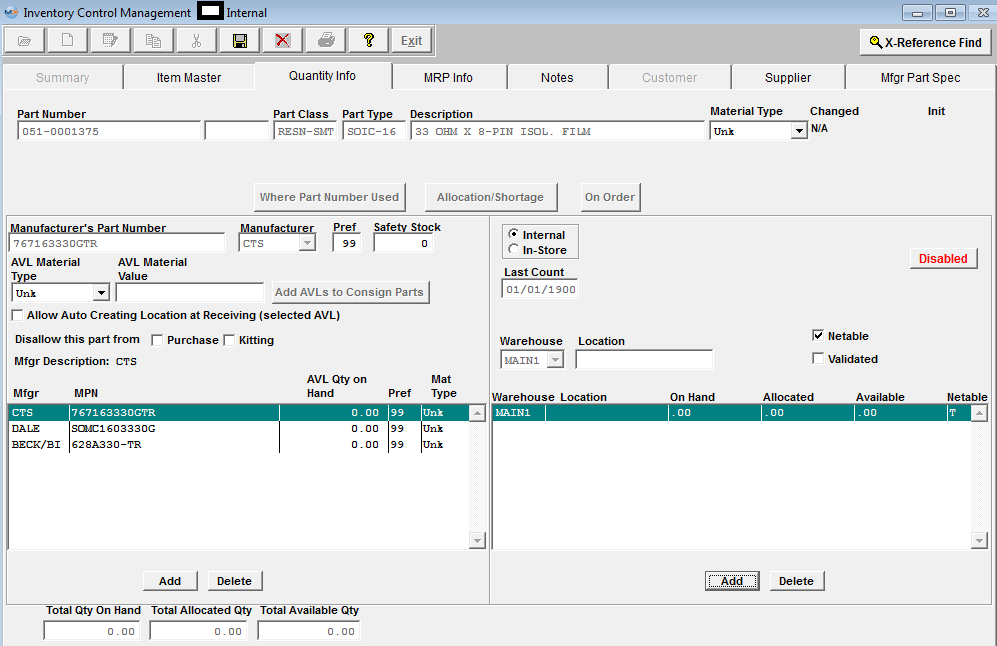
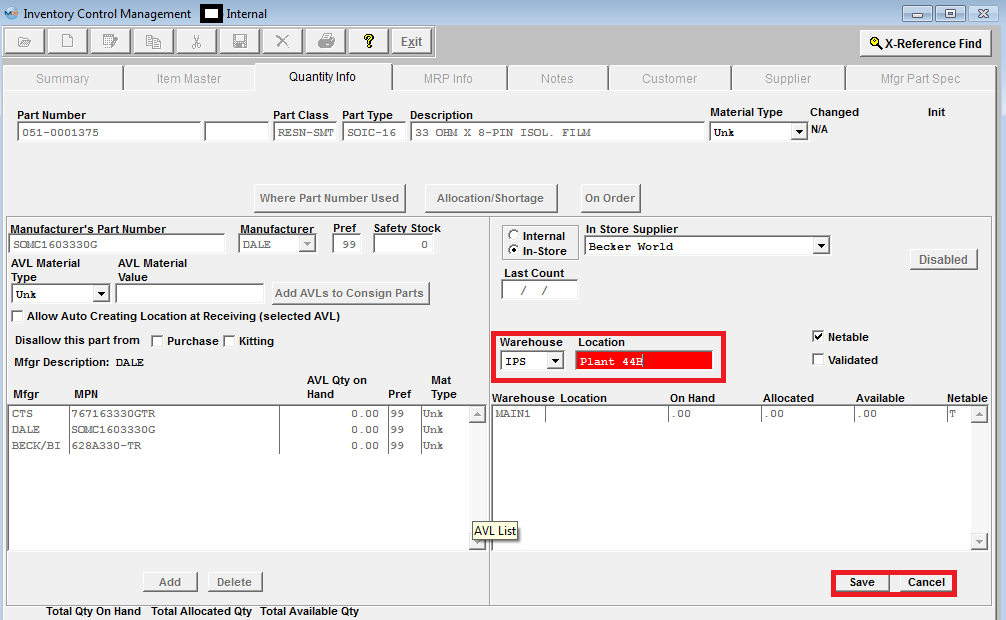
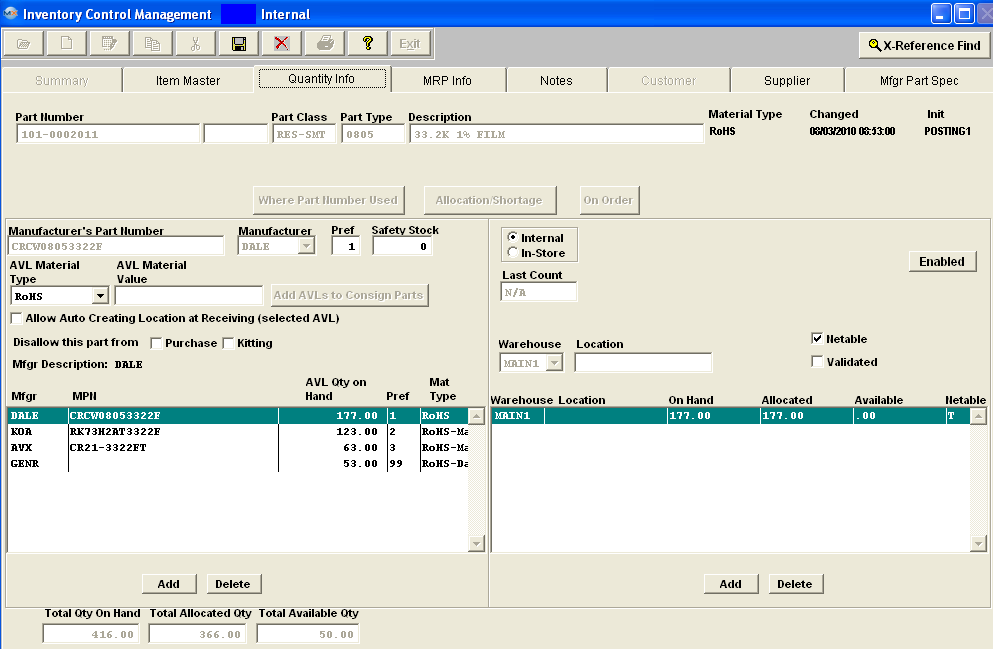
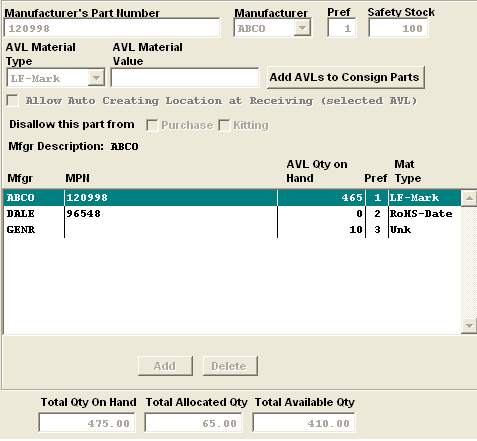
| 1.1.3.3. Quantity Info Tab | This screen is used to enter, edit and display Warehouse, Location, Manufacturer, and Safety Stock information for an inventory item. Also, after an item has been entered, complete inventory stock, allocation and usage information by Manufacturer is displayed or available at the click of a button. All current inventory information about any selected part can be displayed here.
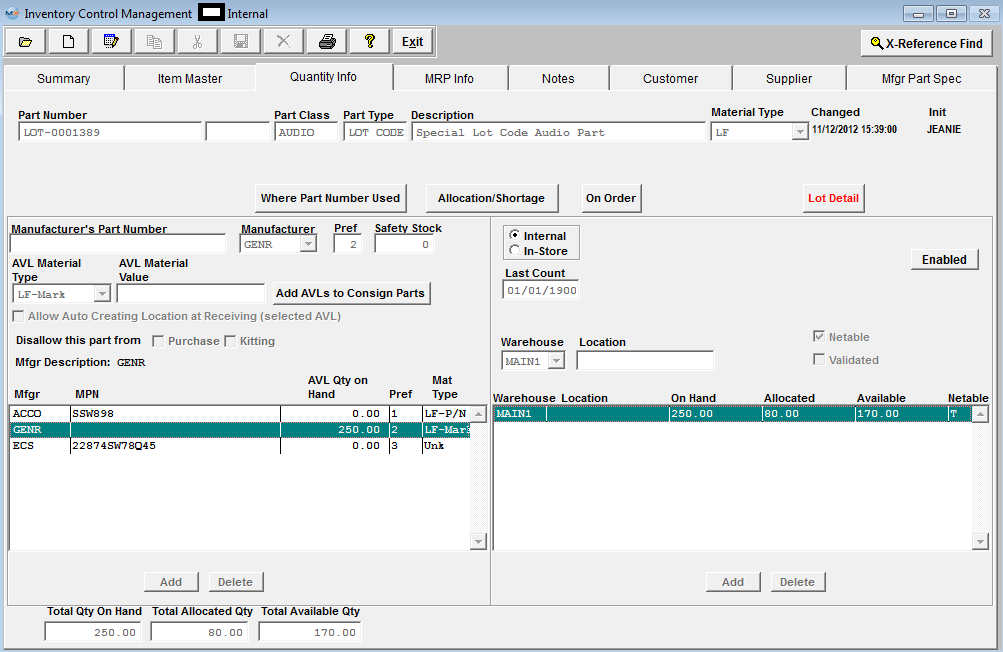
Header Information fields
Part Number, Part Class, Part Type, Description and Material Type are Item fields which repeat at the top of all Tabs to display the selected Item.
 |
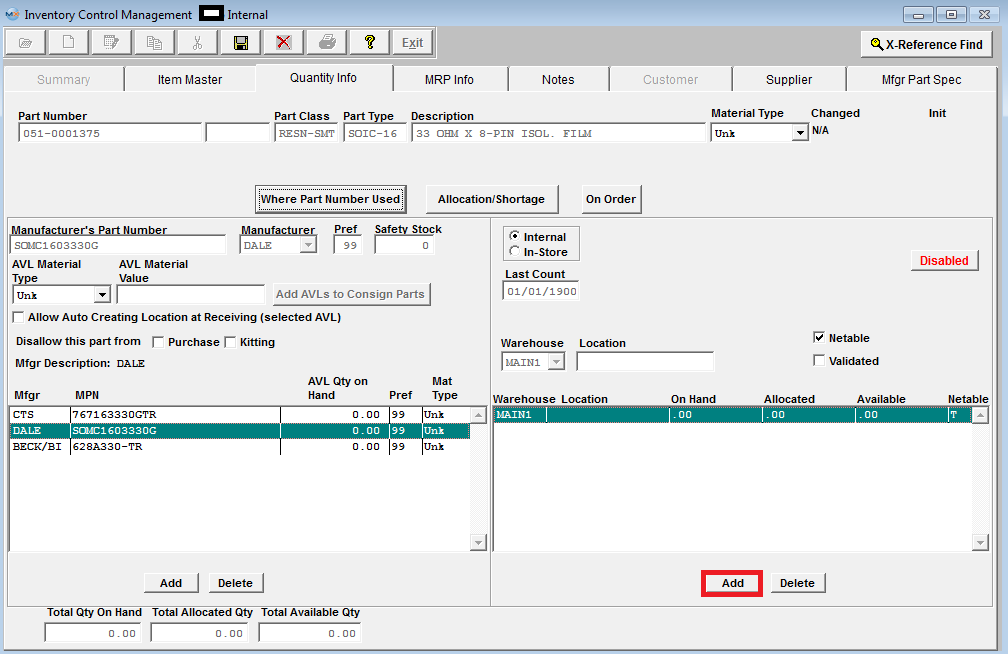
Clicking on this button will display all Active assemblies and sub-assemblies with this item appearing in their BOM. This screen allows user to Sort, Search and Drill Down to Selected Records. |
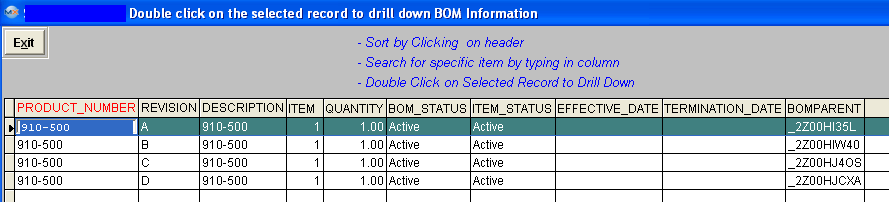
Where Part Used field Definitions
| Product Number |
Is the number assigned to the assembly for which the internal Part Number is a component |
| Revision |
Is the revision number of the assembly |
| Description |
Is the description of the assembly |
| Item |
Is the item number on the Bom |
| Quantity |
Pertains to the amount of the component used for 1 unit of the completed assembly |
| Bom Status |
Is status of the Bom (Active, Inactive,etc.) |
| Item Status |
Is status of the assembly (Active, Inactive, etc.) |
| Effective Date |
Pertain to any effective dates regarding the assembly |
| Termination Date |
Pertain to any obsolete dates regarding the assembly |
| BOM Parent |
|
 |
Clicking on this button will display Inventory Allocations and Shortages for this item by Work Order number, as displayed: This screen allows user to Sort, and Search for Selected Records.
|
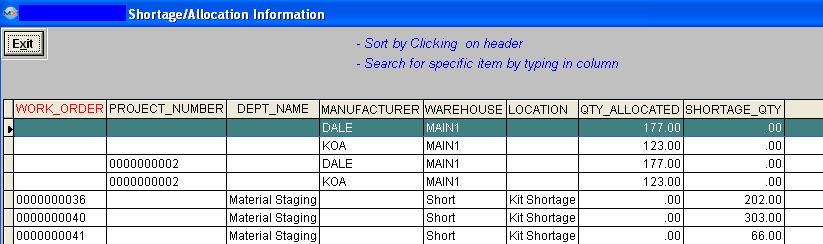
Part Shortage and Allocation Field definitions
| Work Order |
Is the number assigned to the Work Order for which the component part is short |
| Project Number |
Is the number assigned to a work order for a special project |
| Dept Name |
Is the name of the Work Center where the Part Number is short |
| Manufacturer |
Is the name of the manufacturer of this part. |
| Warehouse |
Is the name of the warehouse where this Part Number is stored |
| Location |
Displays if the shortage is a kit shortage, line item shortage, or an allocation. |
| Qty Allocated |
Displays the quantity allocated to a specific Work Order or Project |
| Shortage Qty |
Shows the number of units short for the Work Order |
The User may sort on Work Order Number, Project No, Work Center, Part Manufacturer or Warehouse by depressing the appropriate button.
 |
Clicking on this button will display all Open, Approved Purchase Orders for this item, as displayed: (The quantity being displayed is the qty scheduled not the qty on order) This screen allows user to Sort, Search and Drill Down to Selected Records. |
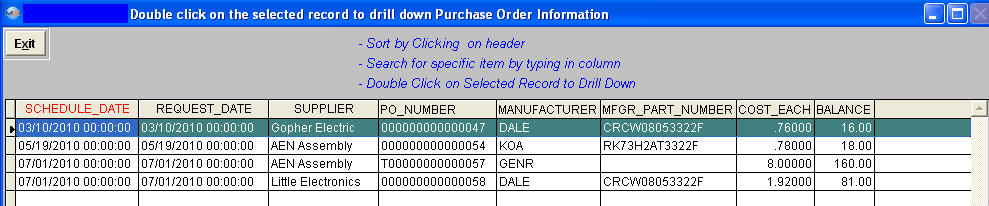
On Order Field definitions
| Schedule Date |
Represents the calendar date of the Purchase Order |
| Request Date |
|
| Supplier |
Is the name of the Supplier to which the Purchase Order was sent |
| PO Number |
Is the internal number assigned to that Purchase Order |
| Manufacturer |
Is the name of the Manufacturer specified in the Purchase Order |
| Mfgr Part Number |
Is the Manufacturer Part Number on order. |
| Cost Each |
Is the amount of money to be paid for one unit in the Purchase Order line item |
| Balance |
Is the amount of unit(s) scheduled on the PO, not the qty on order |
The User may sort on Date, Supplier, PO Number, Manufacturer or Price by depressing on the appropriate button.
 |
This field is read only. The button will be displayed in Red when there are serial numbers present. Clicking on this button will display all serial numbers assigned to this item, as display: (only if this item is serialized). This information comes from the PO Receiving module or Inventory Handling (Receiving) module and is not editable. This screen allows user to Sort, and Search for Selected Records. |
Serial Number Field definitions
| Serial Number |
Is the number assigned to that part |
| Manufacturer |
Is the name of the mfg. specified |
| Manufacturers Part Number |
Is the mfg. part number on order |
| Warehouse |
Is the name of the warehouse the parts are being stored in |
| Location |
Displays where the parts can be found |
| Lotcode |
Lot Code number if part is lot coded |
| Exp Date |
Displays the date the parts can no longer be used. This field is for reference only. Manex doesn't act on that date to expire the part. But it is part of the unique combination users can have LOT code A, exp date 01/10/2005 and LOT code A, exp date 01/01/2010 and the system will consider it as a completely different LOT. |
| Reference |
Is a name/number to identify the Lot. |
| PO Number |
Is the internal number assigned when order is placed. |
| Reserved |
|
 |
This field is read only and is not editable. The button will be displayed in Red and will be only displayed if the item is Lot Coded. Clicking on this button will display all the Lot Code Detail assigned to this item, as display below. All Lot Codes received by Purchase Order (in the PO Receiving module) will have a PO Number displayed against which they were received. If received using the Inventory Handling (Receiving) module the PO Number will be empty. This screen allows user to Sort, and Search for Selected Records |
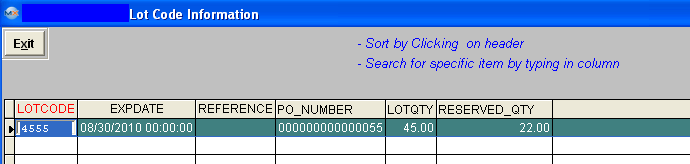
Lot Detail Field Definitions
| LotCode |
Is the number of the Lot/Date Code |
| ExpDate |
Displays the date the parts can no longer be used. This field is for reference only. Manex doesn't act on that date to expire the part. But it is part of the unique combination users can have LOT code A, exp date 01/10/2005 and LOT code A, exp date 01/01/2010 and the system will consider it as a completely different LOT.
|
| Reference |
Is a name/number identify the Lot |
| PO Number |
Is the internal number assigned when order is placed |
| Lot Qty |
Displays the qty available in Inventory |
| Reserved Qty |
Displays the quantity allocated to a specific Work Order or Project |
|
AVL Information
This section will define all the AVL, and Safety Stock information assigned to the inventory part. The user may Add, Delete, or Edit the AVL information here.
When adding new MPN's to the item master, if you do not want the BOM's automatically updated be sure that the "Disable Automatic BOM AVL update" is Enabled. See article #4010 for more information.
Note: When deleting an MPN - keep in mind that the MPN will be deleted from the screen but NOT from the tables. The MPN's that have been deleted are retained in the tables for history tracking purposes.
|
 |
AVL Field Definitions
| Manufacturers Part Number |
Displays the Mfg. Part Number for an existing highlighted Mfg. Also, Used to enter Mfg. Part Number during data entry. If no manufacturers Part Number is entered into the Inventory Master during data entry, GENR (Generic) will be automatically entered by the system as the Manufacturer and the Manufacturers Part Number will be left blank. If a Buy item is fabricated by a customer, then the Customers name must be added to the list of Manufacturers and the Customers Part Number entered in the Manufacturers Part Number field.
|
| Manufacturer |
Any Manufacturer entered in Part Manufacturer Setup can be selected in this field. If no specific Manufacturer is required, GENR. (Generic) may be used to show that any Manufacturer is usable. Also displays Manufacturer for an existing inventory record choosen.
|
| Pref |
This is a number indicating the preference for use in Work Order Kitting for each Manufacturer shown. The number 1 indicates 1st ranking, 2 is 2nd ranking, etc. User will only be allowed to enter postive numbers (1 through 99). If no preference code is entered the preference automatically is assigned 99. All items will be at the bottom of the preference list unless the user assigns another number to it. For further detail on how the preference code is used in MRP see Article #3032 . |
| Safety Stock |
Enter in a qty that you want kept on hand for this specific AVL. User may have safety stock for more than one AVL for a given part number. (Safety stock is calculated in MRP at the AVL level NOT the part number level). This qty is in addition to the MRP demands. ManEx will ensure that there is always the safety stock qty on hand regardless of the MRP demands. Please see Article #2331 for more detail. (This field is calculated off of the Stock UOM).
|
| AVL Material Type |
Select from the pull down, Unk, LF-P/N, LF-Date, LF-Mark, RoHS-P/N, RoHS-Date, RoHS-Mark. See Article 2267 for definitions. These choices have been defaulted in. Customers may establish the logic by which the material type for the parts are established by the material types at the AVL level in Material Type Setup.
The AVL Material Type is carried forward for the consign part when the consign part is first added to the system or when new AVL was added to the internal part and the user elects to add this AVL to the existing consign parts. If the user later changes the Material Type on the internal part, the change is NOT carried over to the consigned part.
If the Inventory Material Type is set to "Auto" (within the Material Type Setup), everytime the user modifies the AVL material type, the program will update the Inventory Material Type automatically, if the control is set to "Manual", then the user will be able to modify the Inventory Material Type from the Material Type pulldown. Keep in mind that the program will NOT validate if the material type in Inventory and AVL levels are in sync.
|
| AVL Material Value |
This field is a text modifier for a given material type. For example, if the material type was "LF-Date", the text in the field could be a date code. This value could be different for various AVL with the same Material Code. This field is optional and does not have to be populated. |
 |
This field is to add the AVL(s) to a consigned part. Note: This button is disabled when in Add or Edit mode.
|
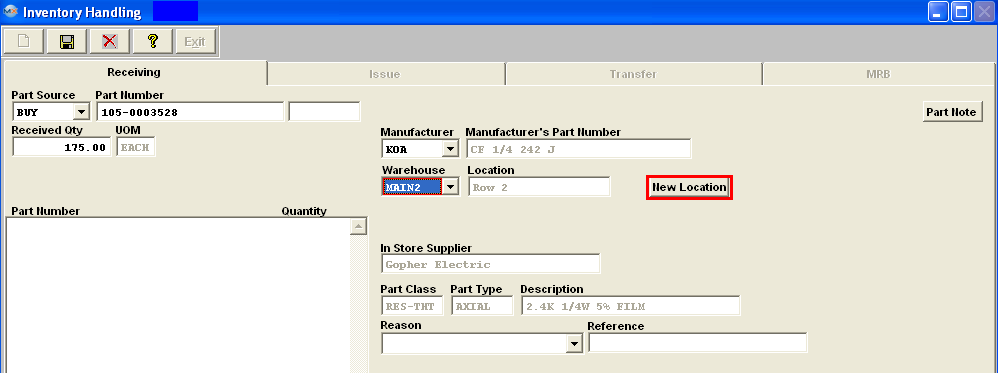
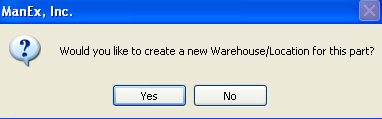
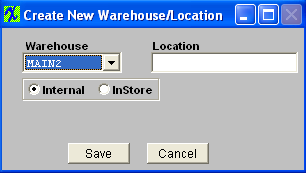
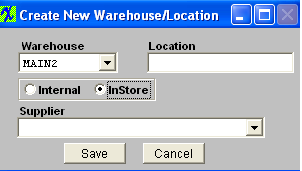
| Allow Auto Creating Location at Receiving (Selected AVL) |
Note: Users have to have special access in order to modify this checkbox, this access is assigned through Security/User Rights.
If the box is checked (for the highlighted AVL) it will allow the user to create a location when entering the Purchase Order or at PO Receiving. Note: The "Allow Auto Creating Location at Receiving" box must be checked also in Warehouse Setup.
If the user has the " Remove location with this warehouse from the Inventory when qty on hand gets to zero Box" box checked within the Warehouse Setup Setup module this box MUST be checked also. |
 |
There are situations where the Users customers will allow them to use up non-conforming inventory, but cannot replace the same AVLs. So, at the AVL level, we added two logic fields that would signify that the AVL is NOT to be purchased and/or kitted. In such a circumstance, it is NOT appropriate to delete the parts, but neither can they be purchased for future requirements. Likewise, they may want to avoid kitting so you would check these boxes to "Disallow this part from Purchase and/or Kitting". For special circumstances, the user can override the block from kitting if their customer permits it. For further information on how to use these fields effectively refer to Article #2329. For information on how these fields affect MRP refer to Article #3211 . (See the non-nettable function for the warehouse level described below).
|
| AVL Qty on Hand |
Total qty on hand for each individual mfg. |
| Total Qty on Hand |
Total qty on hand for all mfg.'s combined
|
| Total Allocated Qty |
Total qty allocated to a specific work order or project |
| Total Available Qty |
Total qty available minus the allocated qty
|
| Add |
Allows data entry to add Manufacturer record. Enter Manufacturer part number and a drop down list will appear to choose the Manufacturer. Click on the save button and the information entered will be displayed in the screen.
|
| Delete |
Deletes the highlighted manufacturer part number record. A ????? screen will appear. Click the NO button to restore the deleted record if this button is clicked in error. Deletion of manufacturer part number records is not allowed if a Warehouse quantity other than zero (0) is shown for that record. Before manufacturer records are deleted, please realize that SOME of the history regarding the manufacturer may also be deleted.
|
| Save |
Appears after clicking the Add button. Clicking on this button saves the record |
| Cancel |
Appears after clicking the Add button. Click to abort saving a new record or changes to existing records.
|
|
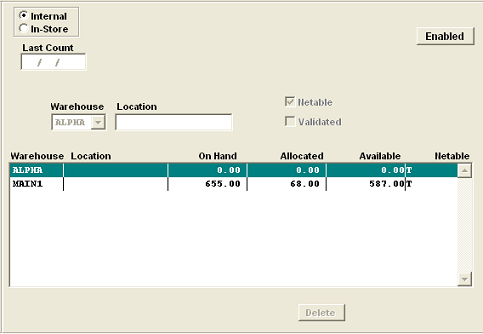
Warehouse Information
This section will define all the Warehouse information assigned to the inventory part. The user may add or edit the Warehouse information here also.
|
 |
Warehouse Field Definitions
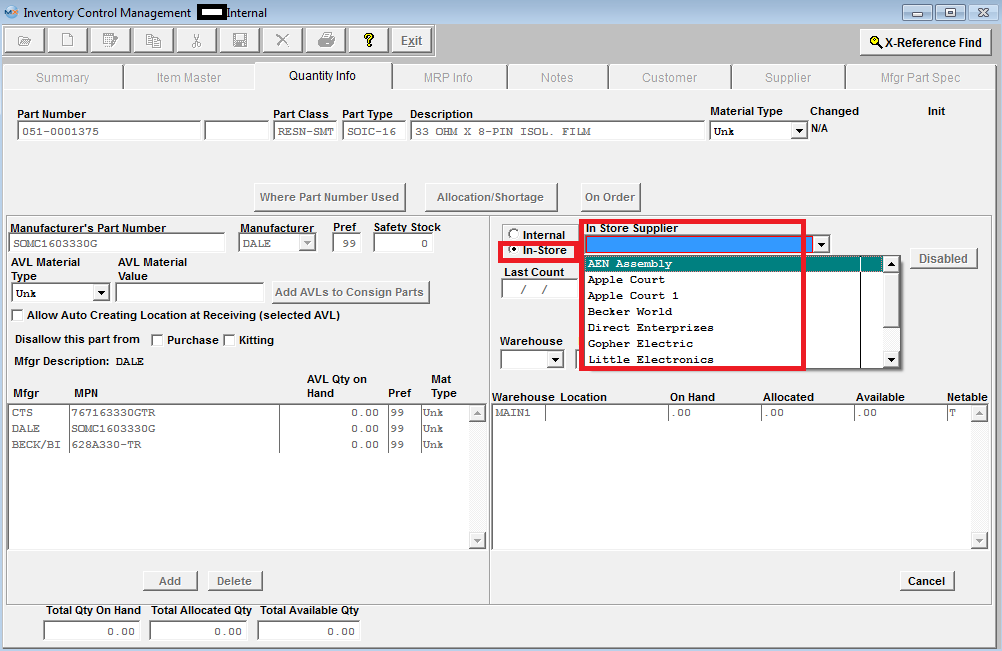
 |
One of these radials must be checked. Internal (User owned) or In-Store (supplier owned). This selection is available only for "BUY" parts. This selection will not be displayed for "MAKE" or "PHANTOM" parts.
|
| Last Count |
Displays the date of the last physical Inventory or Cycle Count for the highlighted item in the Warehouse/Location/Manufacturer display window.
|
| Warehouse |
Used to display the stocking Warehouse for an existing item or to select a Warehouse during entry of a new Location or Manufacturers Part Number. Only Warehouses entered in Warehouse Setup may be selected in this field.
|
| Location |
Allows entry of any Location code desired. It could be an area assigned for Finished Goods, High Value items, Programmed parts or a Row, Aisle and Shelf Code. Also displays Location for an existing highlighted Warehouse record. This field is flagged "Read Only" for MRB whse (meaning you can not create a location for an MRB whse).
|
| Netable (box) |
If this is checked, any On Hand inventory of the item in the Warehouse location being added or highlighted (if already added) will be used to fill Material Requirements Planning stipulations when processing the MRP. If you want to exclude this part from MRP, uncheck this box. You Cannot have a netable part that is excluded by MRP. The only warehouse that is non-netable is the MRB warehouse. Any parts in that warehouse are deemed questionable until the parts are validated and returned to a normal warehouse. So they will not be considered by MRP.
|
| Validated (box) |
This is for reference only and does not affect any other modules in Manex. This is simply to help users keep track of changes and for the users to check that the part being added has been verified as appropriate.
|
 or or  |
If Enabled ManEx will add the new AVL to all existing BOMs and check them as approved. If Disabled ManEx will add the new AVL to all existing BOMs but will NOT mark them as approved. Then they will not drive any demands or be available for pulling to that kit. Then you will have to manually go into each individual BOM and Check mark the ones that you do intend to use that new AVL on. See article #4010 for more information.
|
| On Hand |
Shows the total quantity of the Manufacturer Part Number indicated which is currently in the Warehouse and Location shown.
|
| Allocated |
Quantity of the item that has been allocated to a Work Order in the Inventory Mgt./ Kitting, Allocating and Shortage Management/ Work Order Allocation screen.
|
| Available |
(Calculated field) Equals the quantity On Hand minus the Allocated quantity.
|
| Add |
Allows data entry to add a Warehouse, and Location. A drop down list appears to select a warehouse. Enter in a location if you choose. Click on the save button and the information entered will appear in the screen.
|
| Delete |
Deletes the highlighted Warehouse record. A reminder screen will appear. Click the NO button to restore the Deleted record if this button is clicked in error. Deletion of Warehouse records is not allowed if a Warehouse quantity other than zero (0) is shown for that record.Before warehouse records are deleted, please realize that SOME of the history regarding the warehouse may also be deleted.
|
| Save |
Appears after depressing the Add button. Depressing this button saves the record.
|
| Cancel |
Appears after depressing the Add button. Depress to abort saving a new record or changes to existing records.
|
|
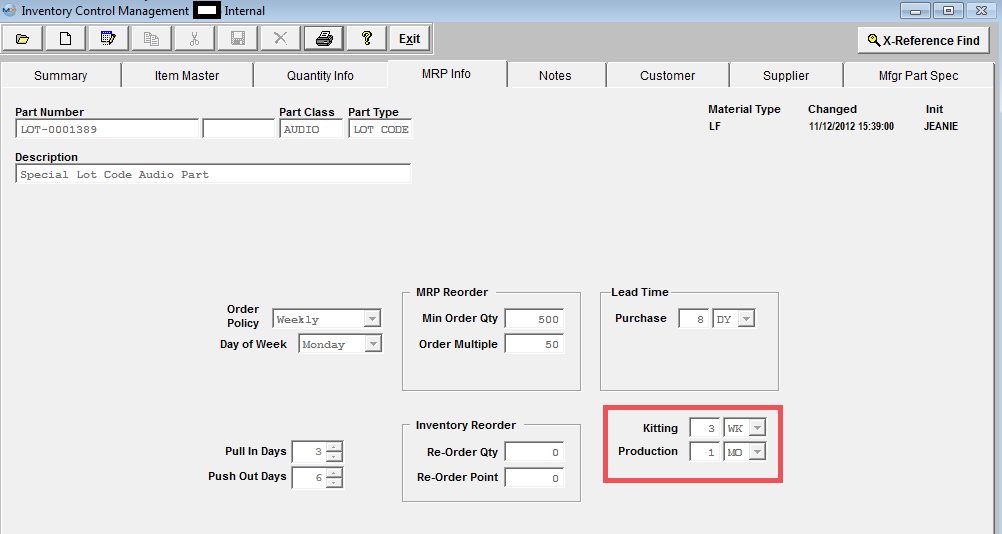
| 1.1.3.4. MRP Tab (Material Requirements Planning Info Tab) | This Tab displays the screen in which Material Requirements Planning parameters are entered, edited or viewed. Default choices for each of these fields may be selected in System Setup Inventory Part Class Setup.
Header Information fields
Part Number, Part Class, Part Type, Description, and Material type are Item fields which repeat at the top of all Tabs to display the selected Item.
Note: All lead times are calculated with the Production Calendar.
| Order Policy field |
This field is used to select the method used by the Material Requirements Planning module to combine requirements for this item in creating Planned Purchase Orders (PO’s). For instance if the choice is “Lot for Lot”, for a BUY part, the Material Requirements Planning module will plan one PO per requirement or if you select Daily then it will plan one PO for the total requirements on a daily basis. If the choice is "Lot for Lot" for a MAKE part MRP will calculate off of each Sales Order individually . If the choice were “Weekly”, for a BUY part, the Material Requirements Planning module would combine all the requirements each week and plan one PO on the first requirement day for the entire week’s needs, etc. Note: If order policy is left blank "Lot For Lot" will be used upon default for MRP calculations.
|
| Min Order Qty field |
This is smallest number of the item that can be ordered from the supplier in one PO. For instance, Surface Mount components on a reel usually have a minimum order of 1000 items or more. (This field is calculated off of the Stock UOM).
|
| Order Multiple field |
This field defines the even multiples of the Unit of Measure in which an item must be purchased. For example, 16AWG Wire might be only available in even hundreds of feet on a spool in which case the Material Requirements Planning module would plan a PO for the next higher even hundred above the requirement. (This field is calculated off of the Stock UOM). |
| Purchase Lead Time field |
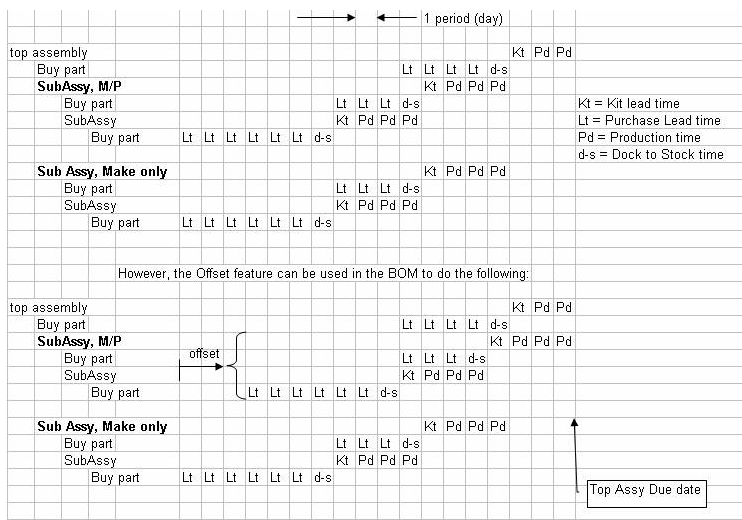
This field will be displayed for a Buy part or a Make with Make/Buy Flag part. Purchase of all items other than In-Store items requires that the PO be placed a minimum number of days before the actual requirement. This Lead Time requirement is what tells the Material Requirements Planning module how many days before a requirement to plan a PO. Changing the leadtime of a Buy part will NOT change the due date in MRP, only the date to take action. For more detail see diagram shown below. |
| Kitting Lead Time field |
This field will be displayed for a Regular Make part or a Make with Make/Phantom Flag part. This Lead Time requirement is what tells the Material Requirements Planning module how many days to allow for kitting. Changing the kitting leadtime of a Make or Make/Phantom part will change the due date in MRP. A TRUE phantom does NOT require any lead times and should be left blank. BUT . . . if for some reason you need to add a lead time for a TRUE phantom ManEx does have the capability. For more detail see diagram shown below.
|
| Production Lead Time field |
This field will be displayed for a Regular Make part, a Make with Make/Phantom Flag part or a Straight Phantom part. This Lead Time requirement is what tells the Material Requirements Planning module how many days to allow for production. Changing the production leadtime of a Make or Make/Phantom part will change the due date in MRP. A TRUE phantom does NOT require any lead times and should be left blank. BUT . . . if for some reason you need to add a lead time for a TRUE phantom ManEx does have the capability. For more detail see diagram shown below.
NOTE: Once the parts have been pulled to the kit and the kit status is changed to "Kit in Process" MRP is designed to calculate from the Kit Shortage and production lead time NOT from the production offset lead times. Once the parts have been pulled to the kit, the system is assuming that the shortages are needed by the WO due date, rather than the Production offset lead time, so MRP then calculates using the production lead time and due date of the WO as the date the materials must be on hand, MRP no longer takes the production offset lead time into consideration.
|
| Pull In Days field |
When PO due date is more than this number of days too late for a Material Requirements Planning module requirement, a PO Due Date change Action Notice will be generated. It allows the user to have the flexability for SO and WO due dates to be different without MRP actions being generated. For more information on how the Pull-in days work within MRP see Article #2557. Note: These parameters may be thought of as filters for MRP Order Actions when the requirement dates for the parts changes. In the case of the customer pulling forward their required date, it is a greater imperative that the work orders (thus the assembly) be pulled in to match the earlier due date. So the assemblies should probably have a minimum number of days to be sensitive to earlier demands. See attached Document <<pullin-pushout discussion.docx>>.
|
| Push Out Days field |
When PO due date is more than this number of days too early for a Material Requirements Planning module requirement, a PO Due Date change Action Notice will be generated. Example: if there is a PO that is due to be delivered Dec 15, but now it is not needed until Dec 26 and the Push out is 30 days, then there WOULD NOT be a message issued within MRP to reschedule the PO delivery, because it is within 30 days, but if the Push out was 5 days then an action message WOULD BE issue to reschedule the delivery because the new date was outside of the push-out days. It allows the user to have the flexability for SO and WO due dates to be different without MRP actions being generated. For more information on how the Push-out days work within MRP see Article #2557. Note: These parameters may be thought of as filters for MRP Order Actions when the requirement dates for the parts changes. The Push Out value (in days) is the number of days that the required date, base on MRP, may be pushed out (required later than the original date) but will not result in a change order to move the required delivery for the item involved. See attached Document <<pullin-pushout discussion.docx>>.
|
| Re-Order Point field |
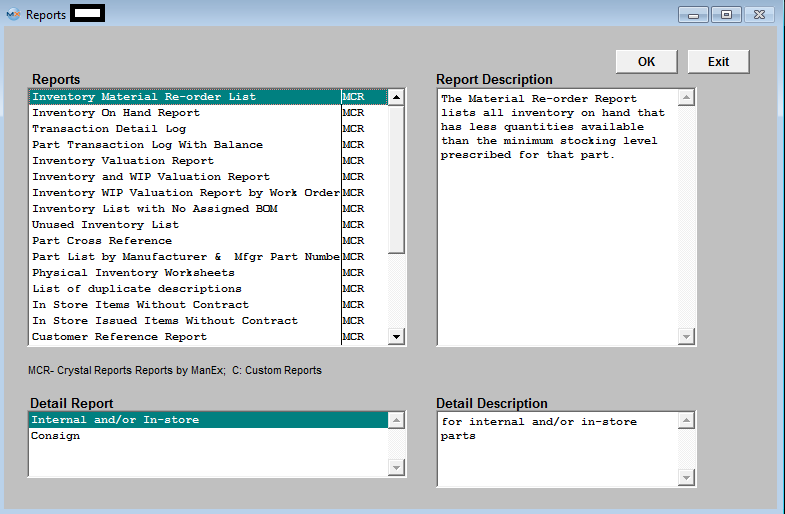
To use the Re-Order Point and Re-Order Qty rather than Material Requirements Planning for reordering this item, enter the quantity at or below which the item should be replenished. Print the "Inventory Material Reorder List" report to show items which have dropped below re-order point minimums. NOTE: The Re-Order Point/Qty fields have NO AFFECT on MRP at all. MRP will NOT consider these fields for any calculations (these fields have no connection with MRP). These fields are intended to control stock on overhead items.
|
| Re-Order Quantity field |
To use the Re-Order Point and Re-Order Qty rather than Material Requirements Planning for reordering this item, enter the quantity of the re-order here. Print the "Inventory Material Reorder List" report to show items which have dropped below re-order point minimums. NOTE: The Re-Order Point/Qty fields have NO AFFECT on MRP at all. MRP will NOT consider these fields for any calculations (these fields have no connection with MRP). These fields are intended to control stock on overhead items. |
|
| 1.1.3.5. Notes Tab | Notes are usable for text information relevant to this item that is of interest to Engineering, Purchasing, Stores or Planning. A typical note is shown below. These item notes are viewable from the Material Requirements Planning, Bill of Material and Purchasing screens.
|
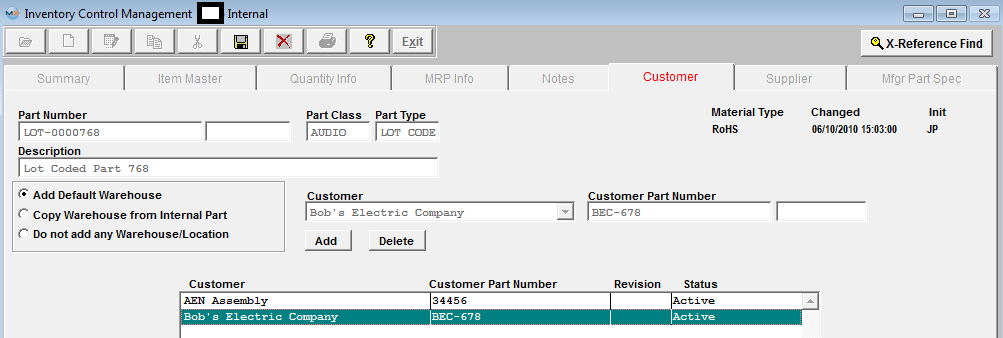
| 1.1.3.6. Customer Tab | This screen allows users to connect the customer part number and revision with the internal part number and revision. Entry of a Customer Part Number creates a Consigned Inventory Record that does several very important functions:
-
Serves as the place for selection of each Approved Manufacturers (Customer’s Approved Vendor List) from the list of all Manufacturer Part Numbers for that particular generic part
-
Provides a way to cross reference Customer Part Numbers to Internal Part Numbers
-
Allows generation of Bills of Material with Customer Part Numbers
-
Sets up a Consigned Inventory Warehouse(s) to allow receipt, issue and tracking of this Customer part
Header information fields: Displays the Part Number, Class, Type, Description and Material Type selected in the Summary Tab.
| Customer field |
In View Mode, this screen shows the Customer selected from the Customer window.In Edit Mode, use this field to enter Customer Name |
| Customer Part Number |
For viewing or entry of Customer Part Number for the internal Part Number displayed in the Header.
|
| Display/ select window |
Shows all Customers and Customer Part Numbers for this internal part and their status, (active, in-active, etc).
|
| Add |
Associate a customer and customer part number with the displayed internal part. |
| Delete |
Delete customer/customer part number/revision combination and the link with the displayed internal part.
|
| Save |
Save new Customer Part Number |
| Cancel |
Cancel a Customer Part Number |
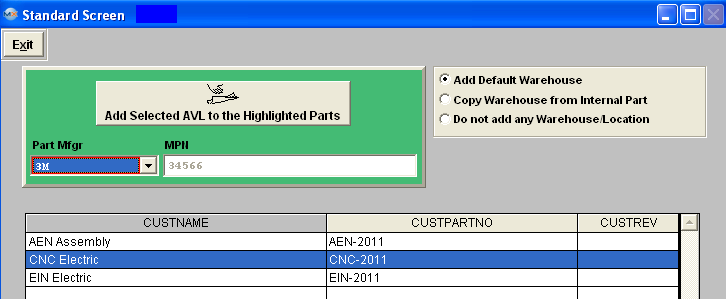
| Add Default Warehouse |
Select to add only the default warehouse to customer side when adding a Customer Part Number |
| Copy Warehouse Location from Internal Part |
Select to Copy Warehouse Location(s) from Internal Part to customer side when adding a Customer Part Number |
| Do not add any Warehouse/Location |
Select if user does not want to add any Warehouse/Location(s) from the interanl side to the customer side when adding a Customer Part Number |
ManEx does NOT allow user to link same customer with multiple customer part numbers to the same internal part number. Our structure is based tightly on the internal part number. We link to customer part numbers when needed for showing customer part numbers or for MRP AVL limitations. If we allowed more than one customer part number for the same customer to the same internal part number, we would NOT be able to process MRP AVL selection, nor reports that currently show customer part numbers. For further detail see Article #2489.
ManEx does allow users to link same customer same customer part numbers/revisions to different internal part numbers.
|
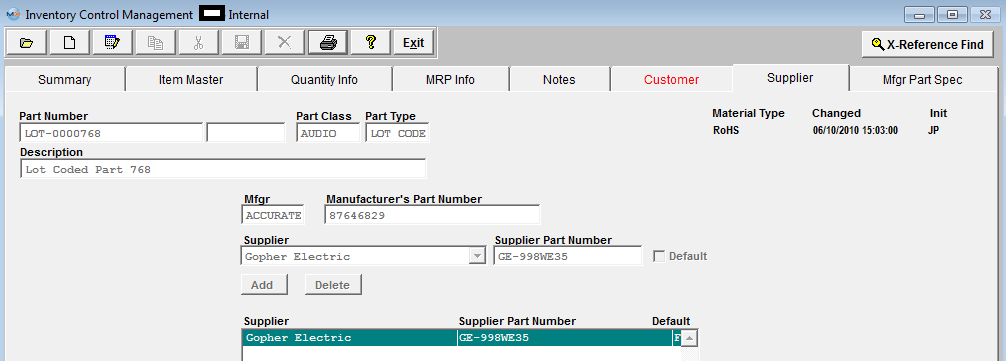
| 1.1.3.7. Supplier Tab | This screen is for referencing the supplier(s) of this part and the Supplier’s Part Number.
Header information fields: Displays the Part Number, Class, Type, Description, and Material Type selected in the Summary Tab.
| Mfg field |
Displays the mfg. selected in the quantity info. Tab |
| Manufacturer’s Part Number |
Displays the manufactuer’s part number selected in the quantity info. tab.
|
| Supplier field |
In View Mode, this screen shows the Supplier selected from the Supplier window. In Edit Mode, use this field to enter Supplier Name.
|
| Supplier Part Number |
For viewing or entry of Supplier Part Number for the internal Part Number displayed in the Header.
|
| Default |
Check this box if you want this Supplier to be the default when Auto Creating PO within MRP or for reports.
|
| Display Select Window |
Shows all Suppliers and Supplier Part Numbers for this internal part and whether it is chosen as a defalut.
|
| Add |
Add a new supplier and supplier part number |
| Delete |
Delete an existing supplier and supplier part number |
Note: The system allows you to have multiple suppliers per AVL and one default supplier per AVL. But each AVL can have a different default supplier and different suppliers.
|
| 1.1.3.8. Mfg. Part Spec Tab | This screen is used to view or enter a link to a drawing, photograph,image or .pdf file to be used as an on-line reference for engineering, purchasing, quoting or any other item master usage. It can be an assembly drawing, purchased part specification, spec. control drawing, photograph or any other image or .pdf file linkable to Manex. The image or .pdf file is not stored in Manex. The file in which the image or .pdf file is stored is linked to this screen in Manex and can be maintained without access to Manex.
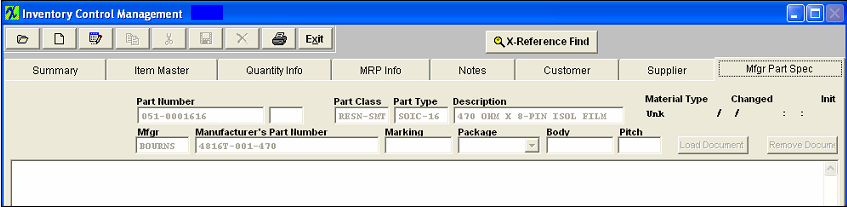
Header Information: Displays the Part Number, Rev, Class, Type and Description selected in the Summary screen. Displayed on the 2nd line is the manufacturer information selected in the Quantity Info screen. User may enter the Marking, Body and Pitch, and may select the Package configuration from the pull down. The Package Configuration selections are defaulted in from the Package Configuration module. Package configuration setup is provided so that the user may define a machine’s Units Per Hour. This definition can then be accessed in the Production Work Centers & Activities setup/Activities Setup & Run tab.
Load Picture or PDF document (Buttons): Used to link the Image Space below to a file on the local hard drive or any other location on the network connected to the Manex Server. To Load a Picture, while in the add or edit mode, the LOAD PICTURE button becomes active. Pressing this button prompts the User to enter the location of a picture file created for this particular inventory part.
Files (pdf.; word; jpeg;, etc.) should be stored in a permanent directory on the server (all users need network security access). The user will define the directory and file for each product in this module, but the information will be available elsewhere throughout the manufacturing module.
After defining the location for the document, the document is available for viewing, as displayed
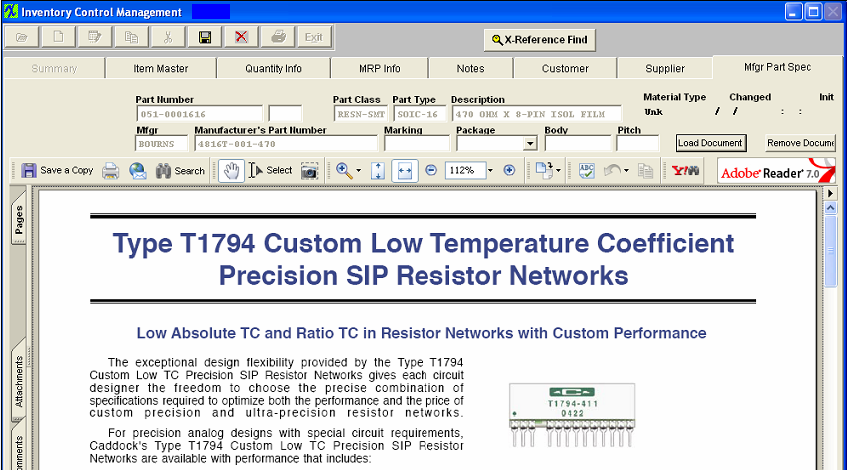
Scroll bars: The bars at the bottom and side of the picture allow viewing of the parts of the image that are outside the window’s display. This allows detail viewing of large drawings.As soon as you enter the module, Acrobat will load.The user may load a PDF file to the Mfgr Part Spec tab. This allows users access to whole textbooks from within MANEX.PDF files can be drawings, images, CAD files (as printed to a plotter), and multiple pages of mixed text and graphics.Users may also print these PDF files from MANEX.
PDF and Image files:
PDF and Image files used in the MANEX system should be placed in the server, where all users have access to them. These files are used in the Product Data Management, Inventory, Customer and Supplier Contact programs. We suggest that the users create an additional directory, called "Images" under the MANEX System directory on the server. So then under the Main MANEX system directory, there would be the \apps, \dbfs, \images and \reports subdirectory.
If the user is going to make extensive use of the image capability, they may wish to further provide subdirectories under the Image. These might be called "inventory", "PDM", "photos" etc. These files could, in turn, have further subdirectories. For example, under \manex\images\inventory there might be one for each class of part. Or one for make parts and one for buy parts. Under the PDM group could breakdowns by customer.
Such organization will make it much easier to find files when it is time to update them. MANEX can accommodate file path-names up to 100 characters long.
While viewing a PDF document, the user may scan and zoom throughout the document. Items may be copied from it, and the document can be printed from the MANEX program, as long as there is a default printer assigned to the workstation.
|
| 1.1.4. How To ..... for ICM Mgmt |
| 1.1.4.1. Find an Inventory Control Record |
|
Enter the SQLMANEX.EXE (within the ManEx root directory)
This action will then prompt the user for a password
|
 |
|
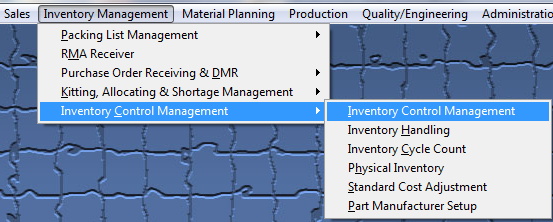
The following screen will be displayed, select Inventory Management/Inventory Control Managment/Inventory Control Management.
|
 |
The following screen will be displayed:
Inventory Find Prerequistes
In order to Find items with certain characteristics or parameters using the Inventory Find Screen, the items must have been entered in the Item Master with those characteristics. Listed below are the pre-requisites for doing 3 different kinds of Inventory Finds:
- Internal items must be in the system to be found.Searches for parts between a Starting number and Ending Part Number must include the prefix and any dashes or special characters.
- A part cannot be found in an “In-Store part find” unless it has been set up with an In-Store warehouse and supplier in the Item Master Quantity Info. screen.
- A Consigned record cannot be found for an item until the Customer has been entered and the item has been given a Customer Part No. in the Item Master Customer Reference screen.
When the user does an Inventory Find, in order to speed up the process the user may eliminate the quantity display.
Depress the Find button. The following screen will display:

Note that the default is for the Summary screen to NOT display the quantity.
If the user wants to have the quantity display on the Summary screen, highlight the desired part number and right click your mouse. The quantity will display for the one part number:
If the user wants the entire summary screen to display all of the quantities, then select the Display Summary Quantity radio button.
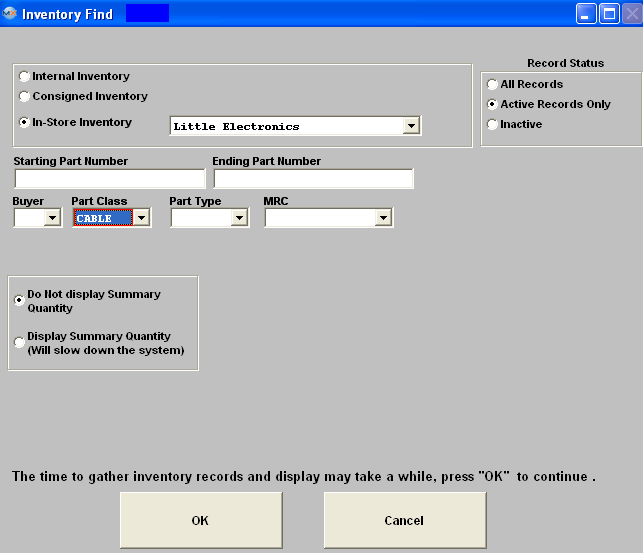
Inventory Find Search Field Definitions
- Internal Inventory – Products, Parts and Assemblies purchased, received, stocked, issued and shipped using standard in-house internal item numbers. These numbers are required and serve as the basis for creation of Consigned and In-Store parts. Just clicking on OK with the default selections shown in the preceding Find Screen will bring up all Active internal inventory parts in the Item Master Summary screen.
- Consigned Inventory – these records are created every time a Customer Part Number is entered in the Item Master Customer Reference screen. These records are used to enter Customer requirements (Approved Vendor List) and preferences (choices within the Approved Vendor List) for Manufacturers for a given Part Number.It is also where Customer-owned item inventory levels and locations can be seen.
- In-Store Inventory – any internal item can be setup with an In-Store Inventory for a Supplier under contract to supply that item. In-Store items are setup in the Internal Inventory Item Master Quantity Info screen and can be viewed individually in that screen or as a group by supplier in the Summary Screen as the result of an Inventory Find by In-Store Inventory.
- Starting Part Number and an Ending Part Number
- Enter all prefixes, dashes, spaces and alpha characters to show the entire number.
- Enter first and last Part Number of a series for those and all items numbered between.
- Enter a desired single item in the 1st box and hit return to select only that record.
- Assigned Buyer will bring up all items assigned to that particular Inventory Buyer.The Buyer assignment is made in Part Class and Type System Setup Defaults or in the Item Master.
- Part Class and/or Part Type will bring up only those items that match all entries made.Both Part Class and Part Type must be specified to bring up any items.
- Do not display Summary Quantity radio will by-pass the quantity calculation.
- Display Summary Quantity radio will open up another selection "Total On Hand Quantities"
- Total On Hand Quantities will bring up only items with matching inventory quantities.The user may choose from Total Quantity on Hand, Quantity on Hand > 0, or Quantity on Hand = 0.
- Record Status allows selection of All, Active Only or Inactive Only item records.
Tips on Using the Inventory Find Screen
- Selection of at least one parameter will reduce the time to retrieve the information.
- In-Store Inventory searches require that a Contract be entered in order to select a Supplier. (Please refer to Manex / Material Planning / Purchase Setup / Supplier Contract Management and the Supplier Management manual).
- Consigned Inventory searches show Customer-specific information (such as Approved Vendor List information) as well as Consigned Inventory On-Hand Quantities.
- If no information is selected in a Find operation, try using broader or fewer selection criteria.
Combination Searches
Combinations of search parameters may be made for further filtering of the Inventory Item Master files to see item(s) of interest. For instance, selecting the items on the example screen will find all ACTIVE, In-Store Inventory for "Little Electronics" with the Class “CABLE”.In-Store Inventory Searches are Supplier specific whereas Consigned Inventory searches require entry of a Customer in order to initiate the search.
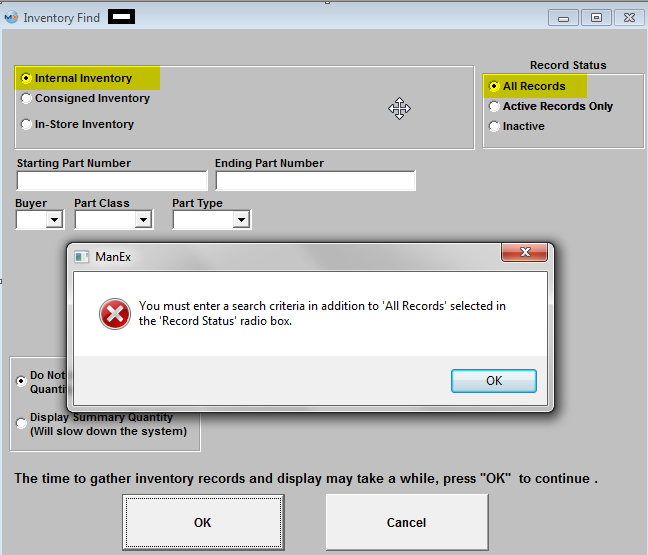
If user selects to find "Internal Inventory" "All Records" they will get the following message "You must enter a search criteria in addition to "All Records" selected in the "Record Status" radio button. This is because the inventory file may be very large so the user is encouraged to narrow down their selection. If they want all they will need
to narrow it down by another criteria, or the system will take way too long to to bring the screen up and put a burden on the network and the SQL server.
Inventory Find Example
The screen shown below is to illustrate Inventory Find results from selecting Internal Inventory, a Part Class of CAP-SMT, a type of 0805, Total On Hand Quantities of Qty on Hand = 0, and Record Status of Active Records Only
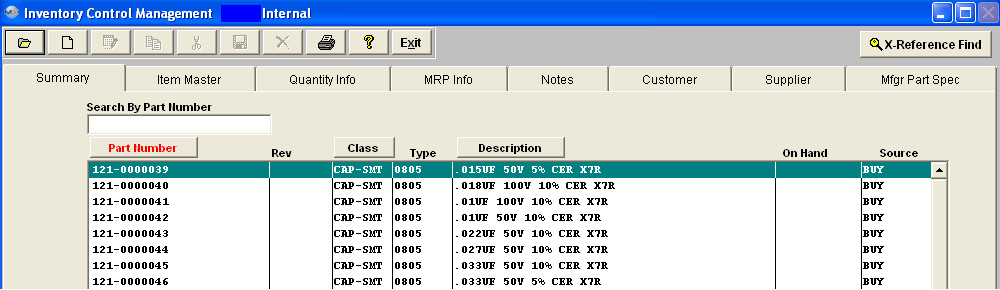
The first tab (Summary Tab) is used to display the results of an Inventory Find. The remaining Tabs will then display detail information for any item selected (highlighted) in the Summary screen. If no items have yet been entered in the system or copying an existing part is not needed, it is not necessary to populate the Summary screen by doing an Inventory Find.
If user has the internal inventory screen open as well as the customers inventory screen open, the customer name will be displayed at the top of the page. So when switching between the two screens user will easily be able to determine which screen they are in.

|
| 1.1.4.2. Find an Inventory Control Record Using the X-Reference Find |
|
Enter the SQLMANEX.EXE (within the ManEx root directory)
This action will then prompt the user for a password
|
|
|
The following screen will be displayed, enter Inventory Management
|
|
The following Screen will be displayed:
| |
This button will take the user to a screen, where they can make a selection by what ever criteria needed by choosing (internal part number, mfgr part number, customer part number, supplier part number, or description) to search. |
The following screen will be displayed:
The user can enter partial string and search is not case sensitive. After system finds parts in response to the search (inactive parts will be highlighted in Purple), the user can make a selection by checking on one of the check boxes located at the left. If system was unable to find the exact match, a message will appear up in the right hand corner (in red) to let the user know that the part did not exist in the item master but the following are similar parts found. 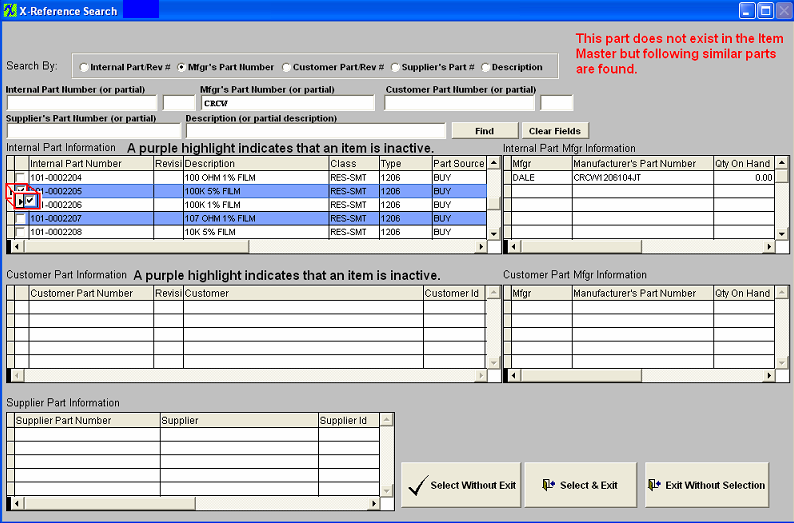
The user can choose to Select Without Exit; Select & Exit; or Exit Without Selection.
To Select user must check the box to the left of the Part Number. If user Selects a Part Number (Internal or Customer Part Number) then depresses the Select and Exit button, the part will be displayed in the Summary Tab as shown below.

|
| 1.1.4.3. Add an Inventory Control Record |
|
Enter the SQLMANEX.EXE (within the ManEx root directory)
This action will then prompt the user for a password
|
|
|
The following screen will be displayed, select Inventory Management/Inventory Control Management/Inventory Control Management
|
|
The following screen will be displayed:

Following a logical sequence when adding items into the Inventory Master not only eliminates lost time due to continual back-tracking, but ensures that decisions will be made in a sequence which will support the data entry process.The sequence shown below is for adding products, parts, assemblies, subassemblies or Phantoms to the Item Master after completion of System Setup.
-
Search whether item already exists. Use Find an Inventory Control Part to search the existing database along with the archived database, to verify that the items to be added do not already exist.
-
Verify Available Class and Type. Use Find an Inventory Control Part by Class and Type to verify that the item to be added will fit into the existing Class and Types . Refer to System Setup, Inventory Part Class if a new Part Class or Type and the corresponding Data Entry Defaults must be added.
-
Is Customer available? If the items to be entered will have a Customer-Specific Approved Vendor List (Approved Vendor List), then verify that the Customer is in the database using Customer Information. Add the Customer Information if it is not there.
-
Does Manufacturer exist? Use Part Manufacturer Setup to view existing Manufacturers. Enter new Manufacturers for Buy Items as required and enter the Source for Fabricated items being purchased as outside purchased assemblies. Please refer to procedures below.
-
Add a part/product, etc. Depress the Item Master screen tab. Use the Add button to enter the stand-alone product number or the top level assembly number for a Bill of Material (BOM) MAKE item that must be added. If the product is purchased complete and has no BOM, enter it as a BUY item. Enter your Password.
-
Enter information. Enter all basic item information in the Item Master Screen.
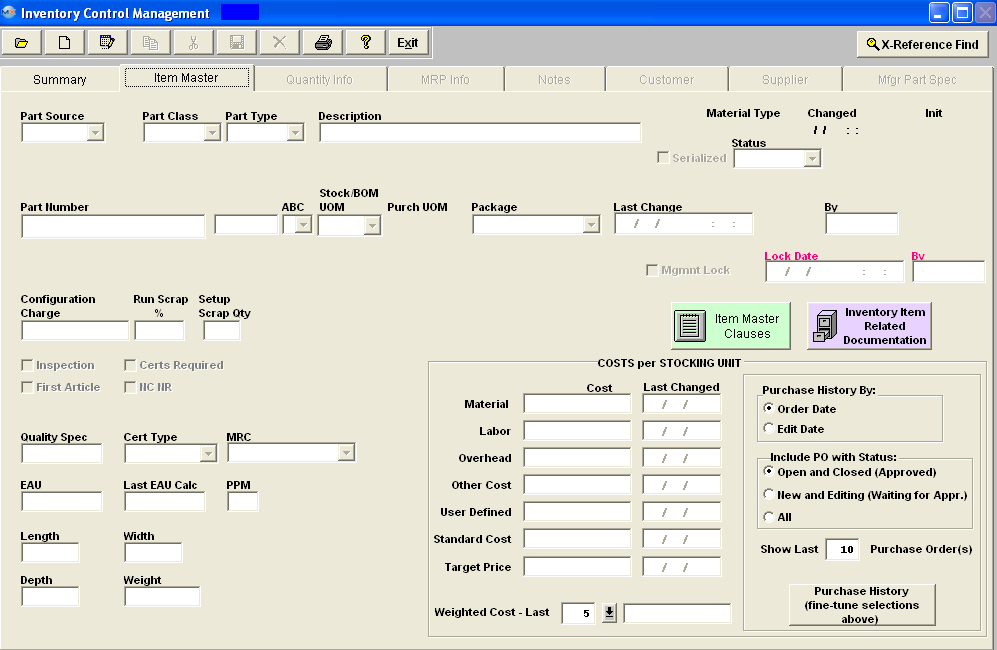
|
Part Source: This field is hard coded in the system. Select BUY for purchased parts and assemblies, MAKE for an item made in-house (assemblies and sub-assemblies) and PHANTOM for a number used to define a collection of items that does not exist as a separate assembly built on a Work Order (ship kits, upgrade packages, spares kits, etc.).
|
 |
-
Phantom/Make: If the Part Source above is a MAKE and this box is checked, the system will treat the part as a Phantom when the sub-assembly components are called up during the Kitting process BUT as a Make part for a stand alone assembly when the part is NOT a sub-assembly.
-
Make/Buy: Make/Buy is setup to allow users to have a part in the system that they wished to BUY but also keep documentation within the system (BOM). If the Part Source is a MAKE and this box is checked, the assembly could also be purchased from an outside source. If a Part is marked as Make/Buy within Inventory the MRP will only give PO Actions and that product will not be available for selection within the Work Order management module. If the part souce on a product is originally setup as a MAKE the user will be allowed to edit the record and change the part souce to Make/Buy. For further details see Article #3289 .
|
Part Class: This is a general part, product or item classification that must be selected from the drop-down box. If an appropriate choice is not available when entering a new item, see System Setup/Inventory Part Class to add a part class (examples of Part Classes are BATTERY, DIODE, FUSE, FILTER, IC-SMT, CAP-SMT, RES-TH, etc.)
|
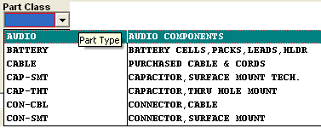 |
Part Type: Type is a sub-classification of Part Class. If an appropriate choice is not available when entering a new item, see System Setup/Inventory Part Class to add a Part Type (examples of Part Types for the Class CAP-SMT would be 0402, 0603, 0805,1206, 1210, Lot-Coded, etc.)
If the Part Type selected is Lot-Coded, the user will be required to enter a lot number, date code, expiration date (optional) and internal lot number information whenever performing a transaction for the part. If the user wishes to maintain inventory to this level, then they MUST enter information each time a part is moved. This will allow complete traceability by date and lot code for products assembled. The user will be able to determine all work orders or sales orders in which a certain date code was used. Users should use caution when changing the lot code tracking status. When lot code tracking status is change the entire history of the lot code is removed from system.
A user does have the option of leaving the Part Type blank, however if this option is selected the prefix for the part number will be omitted. There is no reason to enforce part type if a user doesn’t want to have that kind of detailed classification. If the user decides to leave the Part Type blank they will receive the following message:
At this point they have the option to continue or go back and pick a Part Type.
|
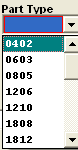 |
Description: There are 45 characters available to put descriptive data about the item being entered that is not already in Part Class and Part Type. For instance, in the previous figure the Part Class and Type already show that it is a CAP-SMT. 0603 so this information need not be repeated in the Description. We suggest when entering the description, that you be consistent with your capitalization and punctuation. Some of the screens and reports can be sorted by description so the more consistent you are the easier it will be to use the system in the future.
Material Type: If the Inventory Material Type is set to "Auto" (within the Material Type Setup), everytime the user modifies the AVL material type, the program will update the Inventory Material Type automatically.
Serialized: Check this box if the new part being entered is a serialized part.
|
Status: All items must be Active in order to buy, receive, issue, Invoice, or ship. Use Inactive Status to remove items from use that have already had transactions against the Part Number. Use the Delete button to delete Items with no transactions for further detail see Article #3143. Changing from Inactive to Active status can be used to release items from Engineering. The system will not allow you to change the status from Active to Inactive if there is WIP for that item. This will prevent the possibility of qty on hand being returned to an inactive part upon dekitting.
|
 |
Part Number: The item/Part Number is a unique identifier for every Item Master record entered into the database. Part Numbers can be auto-assigned to all items or all items except Make assemblies or all items including Make Assemblies. Use of a 3-digit prefix for each different Part Type may be setup in System Setup Number System to work with auto or manual numbered parts and assemblies. The user has the option to have the Make and Phantom Parts auto number within the System Setup/Material/General Inventory Setup .
|
ABC: This field allows further grouping of items (parts, products or assemblies) into classes according to: 1) the percent of the total inventory their current stock value represents.2) the percent of total inventory their forecasted value will represent.3) a manual classification based upon chosen factors. If an appropriate choice is not available when entering a new item, see System Setup ABC Types to add a new Type.
|
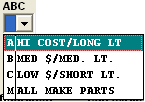 |
Stock/BOM UOM: This is the Unit Of Measure (Foot, Inch, Each, Gallon, Quart, etc.) that is used to specify how much of Item displayed or being entered is issued from Stock or is used in a Bill of Material for an assembly. Note that in ManEx, the Unit of Measure Each is treated as being an integer unit. That is, you can only have one or multiples of an Each, but not a fraction of an each. You can have fractions of inches, feet, pounds, ounces and any other Unit of Measure. Although you can use fractions in the Bill of Material, the User can't kit fractions of each parts. ManEx will round up to the nearest whole number. The proper way to approach the situation where the kit amount is expressed in fractions, is to use any Unit of Measure other than Each. If an appropriate choice is not available when entering a new item, see System Setup/Unit of Measure & Conversion to set up a new Unit of Measure.
|
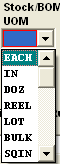 |
Purchase UOM: This is the Unit Of Measure (Foot, Inch, Each, Gallon, Quart, etc.) that is used to specify how the Item displayed or being entered is purchased from a vendor. If an appropriate choice is not available when entering a new item, see System Setup/Unit of Measure & Conversion to set up a new Unit of Measure.
|
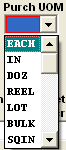 |
| Package: Specifies the way in which the Item is packaged when it comes from a vendor (ie. Reel, Tray, 6-Pak, Ream, Individually, etc.) If an appropriate choice is not available when entering a new item, see System Setup/Part Package to set up additional part packaging. |
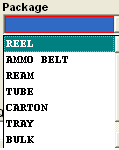 |
| Buyer: All items with the same Buyer's initials in this field will be grouped together for display or printout of the Material Requirements Planning Action List when filtered or displayed by Buyer. If an appropriate choice is not available when entering a new item, see System Setup/Inventory Buyer Setup to set up additional buyers. |
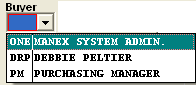 |
| Last Change |
This automatically defaults in the date and time of the last change made to this part number in the item master. Once the change has been saved.
|
| By |
This automatically defaults in the initials of the user that made the last change to this part in the item master. Once the change has been saved.
|
| Configuration Charge |
This is NOT a part of the standard cost total, as discussed below.It is a specific cost used with the ManEx Order Configurator module and represents any additional cost over and above the standard cost total.
|
| Run Scrap % |
This amount is added to the exact quantity used on an assembly to provide an overage to cover losses during running due to predictable machine and human losses.
|
| Setup Scrap Qty |
Setup losses may be added to the BOM requirement and Run Scrap for an item.For instance, an auto-insertion machine may use extra parts for alignment checks. |
|
Mgmt Lock: If locked, all users can access the screen, but will not be able to edit the record until Approved users remove the lock.
Lock Date: This automatically defaults in the date and time the lock was implemented to this part number in the item master.
By: This automatically defaults in the initials of the user that implemented the lock to this part number in the item master.
|
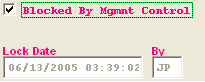 |
| |
Depressing this button will give the users the ability to scan any related documents directly into the ManEx system and attached the document directly to the item in the ICM Module. For further detail see Article #2396. If this button is displayed in Red there is Related documents attached. |
| Inspection Required/ Quality Spec |
Checking the box will cause the item to require inspection to whatever Quality Spec. shows in the Quality Spec box. The Quality Spec appearing in the box is entered in System Setup in the Inventory Part Class & Type Setup. Any Part Type in a particular Part Class can have Inspection Required turned on or off.
|
| First Article |
Checking this box will alert the users that the item requires a first article check at receiving inspection.
|
| NC NR |
Checking this box, means that this part cannot be cancelled or returned. NOTE: This field is for reference only.
|
| Certs Required/ Cert Type: Checking this box will allow selection of Cert Type. Cert Type choices are Receive, Ship or Both. A typical Cert would be UL or CSA Certification on wire. Check the box and then depress the down arrow for the types to display. Select the desired type: Receive - Requires user to check the "Certificate Required" box has been Done at Receiving. Ship - Requires user to check the "Certificate Required" box on Packing List/Shipping. Both - Requires user to check the "Certificate Required" box at both Receiving and Packing List/Shipping. |
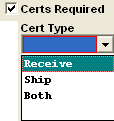 |
| MRC |
This is to inform the users which items are Low Risk, High Risk, etc.This will need to be defined in System Setup Material Risk Code Setup.
|
| EAU/Last EAU Calc |
These fields display the Estimated Annual Usage, if applicable and the last date that the EAU was calculated.
|
| PPM |
This field is a data entry field and is not currently involved in any calculations or used anywhere else within the system at this point. It is planned to be used in the future to calculate the component level of PPM and then update the assembly PPM within the routing module.
|
| The dimensions such as Length, Width, Depth and Weight are entered in this section |
 |
Within Security there is the option to allow users to have access (all or partial) to the Inventory Control Management module. Then within those Inventory Security settings there is a provision for optional additional privileges, including the ability to make changes to the Standard Costs. Only a user with these rights will be allowed to change any of the costs listed below. Also, none of the cost listed below will be editable if there is inventory or WIP on hand.
|
Material Cost
|
This is the purchase price of the BUY part.
For MAKE Parts: The sum of the STANDARD COSTS of BUY parts in the assembly. Whether or not setup scrap is included is a system setup option.
|
| Labor Cost |
If the user wishes to include any preparation labor costs associated with a BUY part, like crimping, tinning testing. etc., those costs may be included here.
For MAKE Parts: The user may include the labor associated with building the assembly.
|
| Overhead Cost |
For BUY Parts: Any additional costs associated with the labor, such as heating, lighting, etc., that the user may wish to include in the cost of the inventory value.
For MAKE Parts: Any additional costs associated with the labor, such as vacations, sick leave, meeting times, etc., that the user may wish to include in the inventory value.
|
| Other Cost |
For BUY or MAKE Parts: This is up to the user to decide if there are any other costs that should be absorbed in the inventory value. |
| User Defined Cost |
For BUY or MAKE Parts: This is a field where a user may define the field name and include any optional costs. |
| Standard Cost |
The STANDARD COST of an item is a calculated value determined by the sum of individual costs. These individual costs may be in any combination of the Material, Labor, Overhead, Other and User Defined costs. Each of the individual costs should have their own account number in the Inventory setup, and those accounts will accrue the costs when material is added to inventory.
If ManEx Accounting is neither installed nor active, then there is no value other than reference in including values in these fields.
|
| Target Price |
NOTE: To assign prices to products ("MAKE" parts), ManEx suggests using the Sales Price List Information module. This module allows users to enter prices by product and by customer so different customers can have different prices. This price will default into the sales order, but is still editable within the Sales Order module. |
| Weighted Cost |
If the Part Source is a BUY, the weighted cost is calculated by dividing the extended total cost from number of purchase orders (setup in the General Inventory Setup module) by the total qty.
NOTE: The User has the option of changing the number of (Weighted Cost - Last ( )) purchase orders within the Inventory screen, but, changing this number within the Inventory screen will NOT change the Weighted Cost it will only change the number of Purchase Orders displayed in the view screen.
|
| Last Changed |
This captures the date of the last change to the cost within this module and/or the outside modules such as the Purchase Order module and/or the Cost Adjustment module |
| Purchase History By: |
This field allows the users to select which date "Order Date" or "Edit Date" on the PO to use when displaying the PO's in the Purchase History. The default is setup within the General Inventory Setup module. |
| Include PO with Status: |
This field allows the user to select the status of the Purchase Orders they would like to have displayed in the Purchase History. "Open and Closed (Approved)" or "New and Editing (Waiting for Appr.)" or "All". The default is setup within the General Inventory Setup module. PO;s with a status of Cancelled will NOT be displayed |
| Show Last __ Purchase Order(s) |
This field allows the users to setup the number of Purchase Orders they would like displayed in the Purchase History. The default is setup within the General Inventory Setup module.
|
The completed Item Master screen will appear:
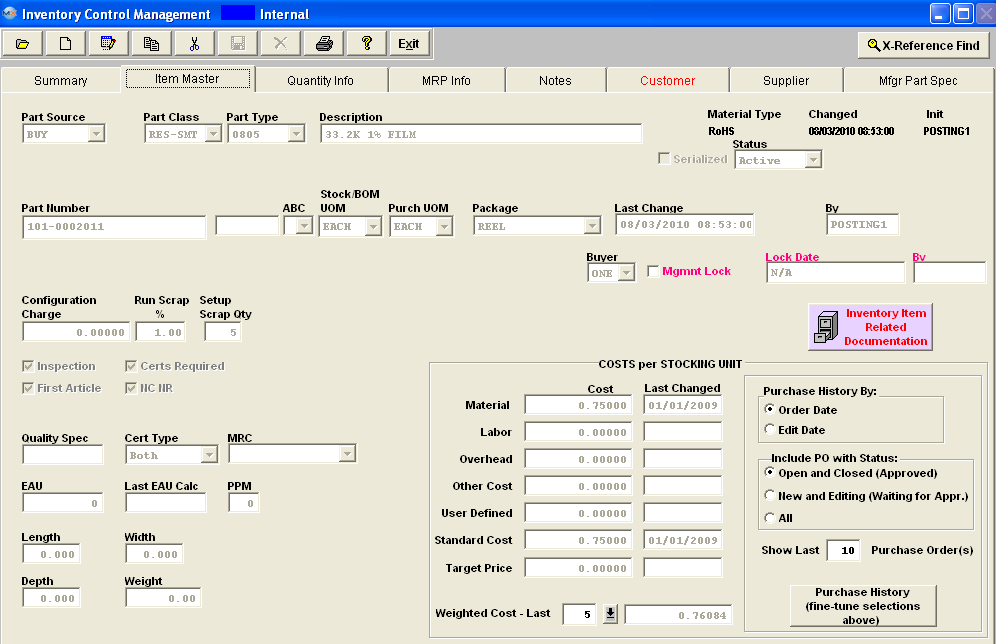
Click on the Quantity Info tab and the following screen will appear. This screen is split. You must enter in the manufacturer information and click save. Then the system will allow you to add the warehouse and location information.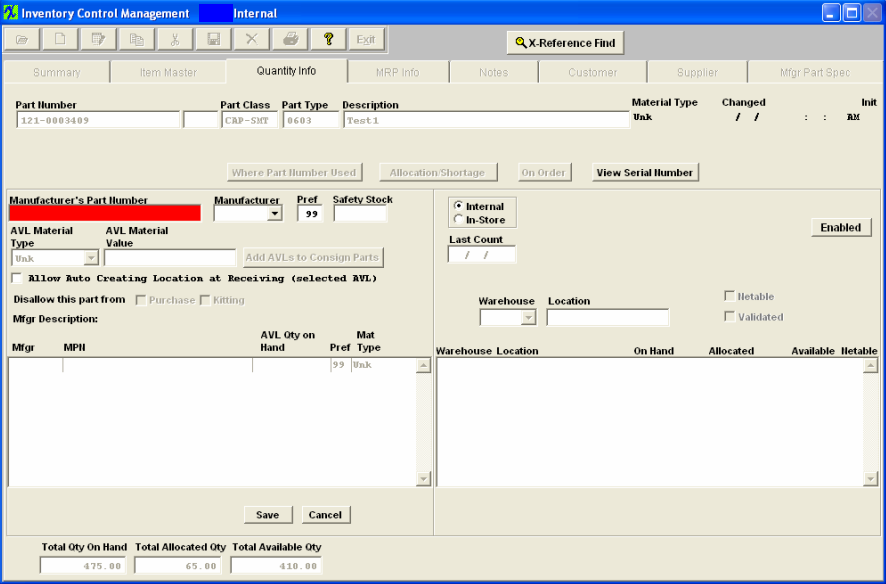
|
If the Inventory Material Type is set to "Auto" (within the Material Type Setup), everytime the user modifies the AVL material type, the program will update the Inventory Material Type automatically, if the control is set to "Manual", then the user will be able to modify the Inventory Material Type from the Material Type pulldown. Keep in mind that the program will NOT validate if the material type in Inventory and AVL levels are in sync.
The AVL Material Type is carried forward for the consign part when the consign part is first added to the system or when new AVL was added to the internal part and the user elects to add this AVL to the existing consign parts. If the user later changes the Material Type on the internal part, the change is NOT carried over to the consigned.
|
 |
Enter Manufacturers Part Number: Type in the manufacturers part number.
|
Enter Manufacturer: Choose a mfgr from the pull down. If no Manufacturer is specified use GENR (Generic). If no information is entered in the Quantity Info screen, GENR will be added by the system automatically when saving the item.
System will not allow users to have duplicate AVL/MPN combinations. If user has same mfgr and mfgr PN but different material types, we suggest that the user create a new AVL with a dash (or any other symbol) and use that designation to transfer to the UNK material type parts or create a different location for the same part, but have it be non-nettable, making it ineligible as a source for MRP.
|
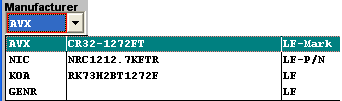 |
Enter Pref: Type in the Preference. (Whether this is a preferred manufacturer and if so the ranking or preference). If no preference code is added, 99 will be assigned automatically. All items will be at the bottom of the preference list unless the user assigns another number to it. See Article 943 for more information. The Pref Code is carried forward for the consign part when the consign part is first added to the system or when new AVL was added to the internal part and the user elects to add this AVL to the existing consign parts. If the user later changes the preference code on the internal part, the change is not carried over to the consigned part.
Enter Safety Stock: Enter in a qty that you want kept on hand for this specific AVL. (User may have safety stock for more than one AVL in a given part number). This qty is in addition to the MRP demands. (Note: Safety stock is calculated at the AVL level not part # level). ManEx will ensure that there is always the safety stock qty on hand regardless of the MRP demands. Please see Article #2331 for more detail.
| If this option is check marked then the users will be able to automatically create any new Location for this part within the PO Receiving module. Note: Users MUST have special access within the Inventory Control Security setup module to modify this checkbox. There is also a similar check box within System Setup, Warehouse Setup, this will also have to be marked for the warehouse in order for this option to be applied. |
 |
Depress the save button located at the bottom of the screen. You now have the option of entering an AVL Material Type (as described below) for the existing mfg., enter in another manufacturer part number or creating a warehouse for the existing manufacturer.
|
AVL Material Type: Choose from the pull down, Unk, LF-P/N, LF-Date, LF-Mark, RoHS-P/N, RoHS-Date, RoHS-Mark. See Article 4002 for definitions. These choices have been defaulted in. Customers may establish the logic by which the material type for the parts are established by the material types at the AVL level in System setup/Material Type Setup.
The AVL Material Type is carried forward for the consign part when the consign part is first added to the system or when new AVL was added to the internal part and the user elects to add this AVL to the existing consign parts. If the user later changes the Material Type on the internal part, the change is NOT carried over to the consigned part.
If the Inventory Material Type is set to "Auto" (within the Material Type Setup), everytime the user modifies the AVL material type, the program will update the Inventory Material Type automatically, if the control is set to "Manual", then the user will be able to modify the Inventory Material Type from the Material Type pulldown. Keep in mind that the program will NOT validate if the material type in Inventory and AVL levels are in sync.
|
 |
| AVL Material Value |
This is a text field for a given material type. For example: if the material type was "LF-Date" user could enter the date code in this field. The Value could be different of various AVL's with the same material code. This fields is a reference only field and is optional. |
| |
If the users add new AVL's to the Internal part number, they can add it to a Consigned part number by depressing this button. A screen will appear and within that screen they can select which AVL they want to add to a Customer consigned part number. |
| |
User would check these boxes if there is a situation where the Users customers will allow them to use up non-conforming inventory (might be leaded), but cannot replace the same AVLs. In such a circumstance, it is not appropriate to delete the parts, but neither can they be purchased for future requirements. Likewise, they may want to avoid kitting except by special circumstances where the user can override the block from kitting if their customer permits it. So at the AVL level, we have added these two logic fields that would signify that the AVL is NOT to be purchased and/or kitted. If the disallow kitting checkbox is checked, the disallow purchasing checkbox will be checked as well. For more information on how this affects MRP see Article #2329. |
When the "Disallow Purchase" is checked ON - ManEx will check if any Safety Stock (SS) is entered, if so the following prompt will be displayed and will un-check the checkbox upon depressing the OK button.

When the "Disallow Purchase" is checked OFF - ManEx will check and if "Disallow Kit" is ON the following prompt will be displayed and will revert the change to leave "Disallow Purchase" ON and leave "Disallow Kit" ON.

When the "Disallow Kit" is checked ON - ManEx will check if any SS is entered, if so the following prompt will be displayed and will un-check the checkbox upon dpressing the OK button. If SS is zero, no message will be displayed and ManEx will auto check "Disallow Purchase"
When the "Disallow Kit" is checked OFF - ManEx will check and if "Disallow Purchase" is still checked ON the following message will be displayed giving the user the option to uncheck the "Disallow Purchase" but is not required.

To create a warehouse, depress the Add button (located under the right hand section of the screen)
| Choose Internal (To Create an In-Store Warehouse refer to Article #5583) |
|
|
Enter Warehouse: Select the Warehouse from the pulldown. In ManEx, the default warehouse is Main 1. If the User has accounting, this would equate to the Raw Materials Inventory. Many Users want to separate their Raw Materials and Finished Goods Inventories. So, if this is a Make part, the User may want to select the finished goods inventory warehouse. Some Users also set up separate warehouses and general ledger account numbers for In-Stores and Consigned. If no warehouse is selected upon saving the record the system will deafult in the default warehouse setup in System Setup Warehouse Setup.
|
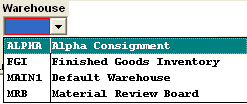 |
| Enter Location |
The location entered is where the parts will be stocked and/or located within the warehouse. System will NOT allow users to add same locations with leading spaces This field is flagged as “Read Only” for an MRB whse item. (Meaning you can not create new locations for MRB whse). Due to the fact that the MRB location is usually generated from a PO rejection – and if so, it needs to retain that link back to the original PO information and that is populated into the location field and is not editable. If you move into MRB via Inventory Handling then no location information is populated, but you are still unable to edit it. |
| Netable box |
Remove the check mark from Netable only if the item entered is NOT to be considered as Supply when running Material Requirements Planning. If the MRB whse is being added the Netable field is disabled and unchecked.
|
| Validated box |
This is for reference only and does not affect any other modules in Manex. This is simply for the users to check that the part being added has been verified as appropriate.
|
Depress the Save button at the bottom of the screen.
The completed Quantity Info screen looks like this:
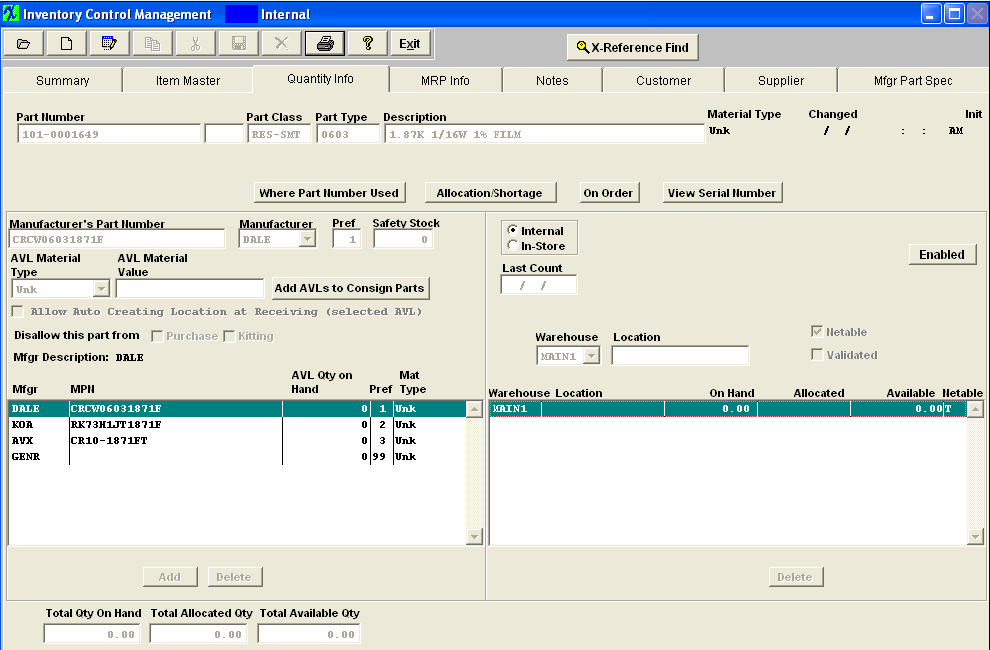
Material Requirements Planning Information: Depress the MRP tab and the following screen will appear. Enter the Material Requirements Planning information for the item.

|
Order Policy: This field is used to select the method used by the Material Requirements Planning module to combine requirements for this item in creating Planned Purchase Orders (POs). For instance if the choice is (Lot for Lot), the Material Requirements Planning module will plan one PO for the total requirements on a daily basis. If the choice were (Weekly), the Material Requirements Planning module would combine all the requirements each week and plan one PO on the first requirement day for the entire weeks needs.
|
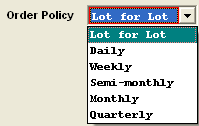 |
| Min Order Qty |
This is the smallest number of the item that can be ordered from the vendor in one PO. For instance, Surface Mount components on a reel usually have a minimum order of 1000 items or more.
|
| Order Multiple |
This field defines the even multiples of the Unit of Measure in which an item must be purchased. For example, 16AWG Wire might be only available in even hundreds of feet on a spool in which case the Material Requirements Planning module would plan a PO for the next higher even hundred above the requirement.
|
|
Purchase Lead Time: Purchase of all items other than In-Store items requires that the PO be placed a minimum number of days before the actual requirement. This Lead Time requirement is what tells the Material Requirements Planning module how many days before a requirement to plan a PO. Changing the leadtime of a Buy part will NOT change the due date in MRP, only the date to take action.
|
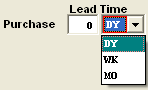 |
|
Kitting Lead Time: This field will be displayed only if it is a Make or Phantom part. This Lead Time requirement is what tells the Material Requirements Planning module how many days to allow for kitting. Changing the kitting leadtime of a Make or Phantom part will change the due date in MRP. A TRUE phantom does NOT require any lead times and should be left blank. BUT . . . if for some reason you need to add a lead time for a TRUE phantom ManEx does have the capability.
Production Lead Time: This field will be displayed only if it is a Make or Phantom part. This Lead Time requirement is what tells the Material Requirements Planning module how many days to allow for production. Changing the production leadtime of a Make or Phantom part will change the due date in MRP. A TRUE phantom does NOT require any lead times and should be left blank. BUT . . . if for some reason you need to add a lead time for a TRUE phantom ManEx does have the capability.
|
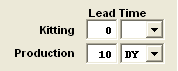 |
| Pull In Days |
When PO due date is more than this number of days too late for an Material Requirements Planning module requirement, a PO Due Date change Action Notice will be generated. . Note: These parameters may be thought of as filters for MRP Order Actions when the requirement dates for the parts changes. See attached Document <<pullin-pushout discussion.docx>>.
|
| Push Out Days |
When PO due date is more than this number of days too early for an Material Requirements Planning module requirement, a PO Due Date change Action Notice will be generated. . Note: These parameters may be thought of as filters for MRP Order Actions when the requirement dates for the parts changes. See attached Document <<pullin-pushout discussion.docx>>. |
| Re-Order Qty |
This is the number of the item to order at time of order.
|
| Re-Order Point |
To use a Min/Max system rather than Material Requirements Planning for reordering this item, enter the quantity at or below which the item should be replenished. Print the Inventory Material Reorder List report to show items which have dropped below re-order point minimums.
|
The completed MRP screen would appear as follows:
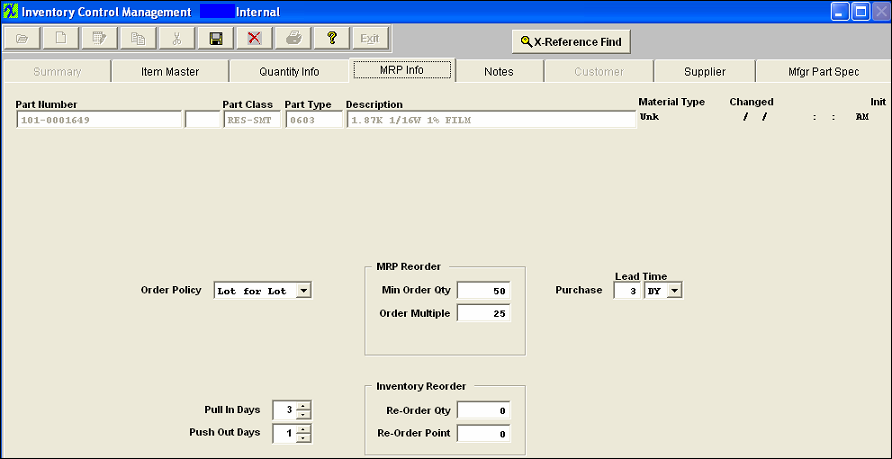
| Notes Tab |
Depress the Notes tab. Add Notes by clicking the Edit Action Button and typing in manually. Use Utility/ Copy or Ctrl+C and Utility/ Paste Ctrl+V to copy and paste from the existing Item Notes to new Item Notes.
|
Depress the Customer tab. Depress the Edit button and the following screen will appear:
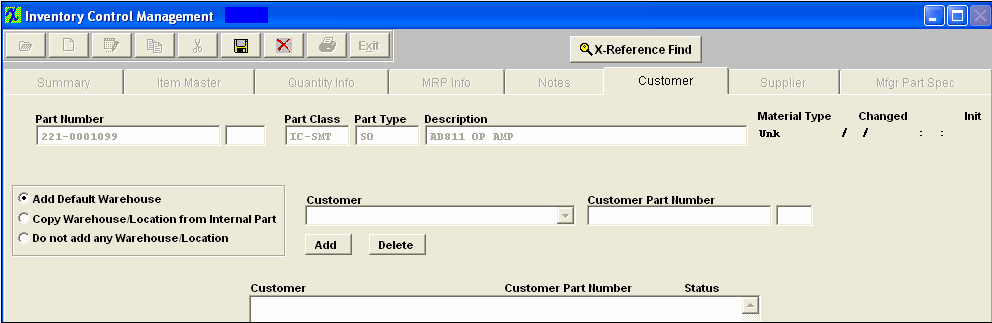
|
Depress the Add button (under to the Customer Field) to select a Customer. A customer list will appear. Select the customer desired. For every Customer that requires an Approved Vendor List, selection of these items Manufacturer Part Numbers list (in the Quantity Info Screen), a Customer Part Number must be entered in the Customer Screen. Enter a Customer Part Number and Save. When you create a Customer Part number (Consigned) within the system, user has the option to Add Default Warehouse, Copy Warehouse Location from Internal Part, or Do not add any Warehouse Location upon creation. Note: System does not allow you to enter more than one part number per customer to the same internal part, (for more detail see Article #2389).
|
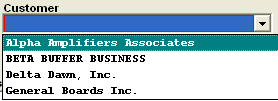 |
|
Depress the Supplier tab, depress the Edit button and then the Add button (under the Supplier Field) to select a Supplier, enter a Supplier Part Number and Save.
|
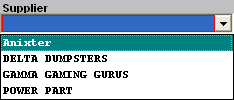 |
The completed Supplier screen would appear as follows:
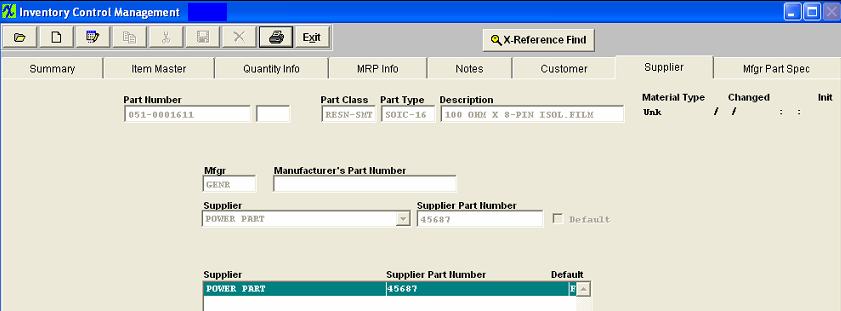
| Manufacturer Part Specifications |
Depress the Mfgr Part Spec tab. Enter the Marking, Body, and/or Pitch, or select the Packaging Configuration (from the pull down), if desired. Add Manufacturer Part Spec drawings, images or .pdf file by clicking on Load Document and linking to the desired image or pdf file. The completed screen will appear: NOTE: Package configuration setup is provided so that the user may define a machine's Units per Hour. This definition can then be accessed in the Production Work Centers & Activities setup/Activities Setup & Run tab.
|
Once all information for new record has been entered, depress the Save button to save the record, or the Abandon record button to abandon record.
|
| 1.1.4.4. Create an In-Store Warehouse | | Find or Add an Inventory Record.
Go to the Quantity Info Tab, select the Edit button, then enter your password
Highlight a Mfgr then depress the Add button (under the warehouse section as displayed below)
Select In-Store and Select a Supplier from the Pull Down
Select an In-Store Warehouse and Enter a location (if applicable)
Select the Save button to Save or Select the Cancel button to abandon changes.
|
| 1.1.4.5. Copy or Edit an Inventory Record | Copy a Part Number
To copy an existing part, Find the part you want to copy, using Find an Inventory Control Record. Highlight that part number and then depress the Item Master tab. Depress the Copy icon at the top of the screen. The following message will appear along with the "Select Copy Options" at the top of the screen.
Selecting Auto Number will create a copy, and open the Item Master Screen. The fields which may be edited are highlighted.
|
Selecting Edit Part # Rev. will bring up a reminder message:
Depress the Ok button.
The Item Master Screen will open. All of the fields which can be edited, including the part number and the revision number, will be available for editing.
|
 |
Selecting Increment Rev, will cause the system to assign the same part number and the revision number will automatically increment by 1. In the Item Master all the fields which may be edited are highlighted, as illustrated below:
Edit an Inventory Item
Depress the appropriate tab which needs to be modified. Depress the Edit button. Enter your Password. The items displayed in Black may be edited:
ITEM MASTER TAB
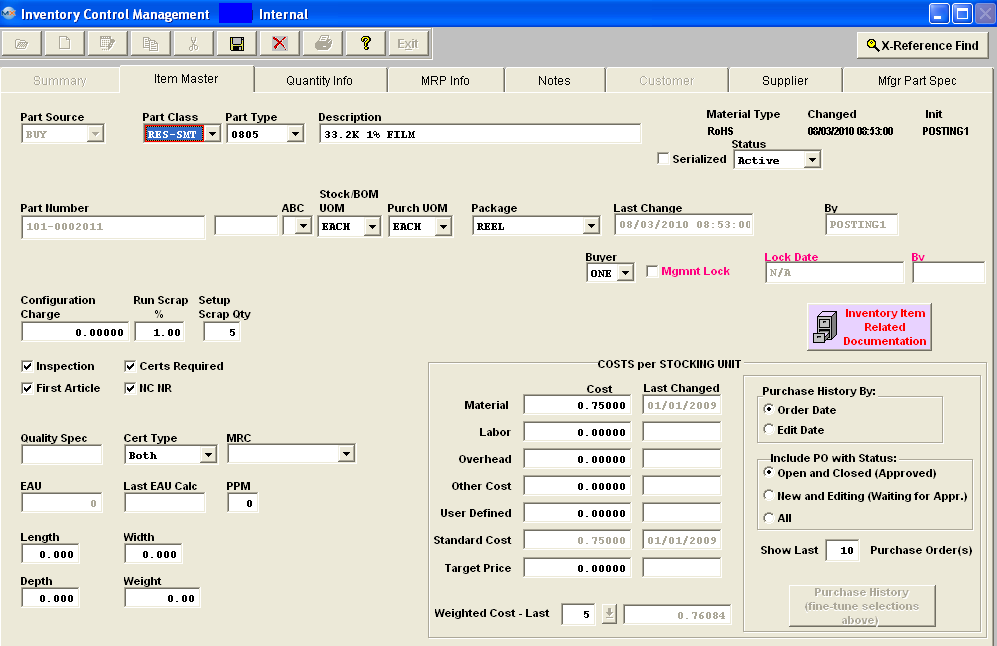
| Item Master tab |
The following fields are all editable: Part Class, Part Type, Description, Material Type, Serialize box, Status (for status defintions see Article #924), ABC code, Stock / BOM UOM, Purchase UOM, Package, Buyer, Mgmt Lock, Configuration Charge, Run Scrap %, Setup Scrap Qty, Costs (see NOTE below), Inspection box, Certs Required box, First Article box, NC NR, box, MRC, PPM, Length, Depth, Width, & Weight.
Users should use caution when changing the lot code tracking status. When lot code tracking status is change the entire history of the lot code for this specific part is removed from system.
We do NOT recommend users to change the Unit of Measure while there is qty on hand within the system. For further detail see Article #3414.
If the part souce on a product is originally setup as a MAKE the user WILL be allowed to edit the record and change the part souce to Make/Buy and/or Phantom/Make. For further details see Article #3289 . After all these criterias are passed, if the part has quantity on hand, the user has to enter the serial numbers to match the quantity on hand.
Note re Editing Standard Cost: You will need a Supervisors Password to change the Standard Cost. The best procedure is to use the Standard Cost Adjustment module. The Standard Cost Adjustment module will update the Inventory records AND will create the appropriate accounting entry. If you edit the cost in this screen, a manual accounting entry will be required.
User can select how they would like to view the Purchase History either by Order Date or Edit Date, also which PO's to include by status and the number of Purchase Orders viewed on screen. NOTE: These changes will NOT change the Standard Cost. These changes will only affect how the PO's will be viewed on screen when the Purchase History button is selected.
|
Changing a non-serialize part to a serialized part
BUY - If a user changes a non-serialized BUY part to a Serialize part the system will check. *If the part has allocated qty, (user has to un-allocate parts before the system will allow user to check the "Serialize" box). *If the part has any OPEN kit (kit in process), (user has to de-kit or close kit before system will allow user to check the "Serialize" box). *If the part has un-reconciled PO (user has to reconcile all receipts before system will allow user to check the "Serialize" box).
MAKE or a Make/Phantom Part - If a user changes a non-serialized MAKE part to a Serialize part and the part has quantity in FGI the following message will appear:
Changing a Lot Coded Part to a Non-Lot Coded Part or Vis-Versa - ManEx does NOT recommend users changing parts from Lot Coded to Non Lot Coded or vis-versa unless it is absolutely necessary.
If a user is changing a Non Lot Coded part to a Lot Coded part they will receive the following message informing the user that "Dummy" lot codes will be setup for existing oh hand quantities and asking the user if they would like to continue.
If a user is changing a Lot Coded part to a Non Lot Coded part they will receive the following message informing them that any existing Lot Code information for this part will be deleted from the system if these changes are saved and asking the user if they would like to continue.
If a user is changing a Lot Coded part to a Non Lot Coded part or vis-versa and the part is also serialized and if there is qty on hand, user will receive the following message and will be unable to save the change.
|
Material Type
|
Select from the pull down, Unk, LF-P/N, LF-Date, LF-Mark, RoHS-P/N, RoHS-Date, RoHS-Mark. See Article 4002 for definitions. These choices have been defaulted in. Customers may establish the logic by which the material type for the parts are established by the material types at the AVL level in System setup/Material Type Setup.
The AVL Material Type is carried forward for the consign part when the consign part is first added to the system or when new AVL was added to the internal part and the user elects to add this AVL to the existing consign parts. If the user later changes the Material Type on the internal part, the change is NOT carried over to the consigned.
If the inventory material type update is set to "Auto" (within the Material Type Setup), everytime the user modifies a part or AVL, the program will update the inventory material type automatically, if the control is set to "Manual" then user will be able to modify inventory material type on "Quantity Info" page via a Material Type pulldown, the program will not validate if the material type in inventory and AVL levels are in sync.
|
| AVL Info |
User can edit the Pref Code, Safety Stock, AVL Material Type, Enter AVL Material Value info, check the Allow Auto Creating Location at Receiving (selected AVL) and/or Disallow this part from Purchasing and/or Kitting (if applicable). Depress the ADD button to enter a new mfgr and mfgr PN. Highlight an existing mfgr and mfgr PN in the box and depress the DELETE button to delete an existing mfgr and mfgr PN (if there is no qty on hand). Note: When deleting an MPN - keep in mind that the MPN will be deleted from the screen but NOT from the tables. The MPN's that have been deleted are retained in the tables for history tracking purposes.
If the user changes the preference code or material type these changes are not carried forward to the existing consigned parts.
System will not allow users to have duplicate AVL/MPN combinations. If user has same mfgr and mfgr PN but different material types, we suggest that the user create a new AVL with a dash (or any other symbol) and use that designation to transfer to the UNK material type parts or create a different location for the same part, but have it be non-nettable, making it ineligible as a source for MRP.
|
| Warehouse Info |
User can edit a location to an existing Warehouse, check or uncheck the Netable and Validated boxes. Depress the ADD button to add a new Warehouse. Highlight an existing warehouse in the box depress the DELETE button to delete an existing warehouse (if there are no qty on hand). Caution on deleting warehouses: Please remember if you delete a warehouse for a given part number, that you are ALSO deleting some of the history for that part at that location. If you think that such history will be required in the future, then DO NOT delete the warehouse. NOTE: When removing/changing WH/Location system will prompt the user if any POs are open, which are using the modified location. This prompt will allow the user to abort or continue with the change. |
| If the user adds new AVL's to the Internal part number, they may click on this button and it will bring up the following screen. |
|
Highlight the Consigned part number (s) you want to add AVL to. Select the radio button for the Warehouse you want to add to the AVL. Select the Part Mfgr from the pull down you want added to the consigned part number (s) highlighted. As shown in the screen above.
Depress on "Add Selected AVL to the Highlighted Parts" The following warning will appear.
|
If "yes" is depressed you will receive the following screen:
If "No" is depressed the action will be deleted.
Depress "OK" and the transaction is completed
|
 |
MRP INFO TAB
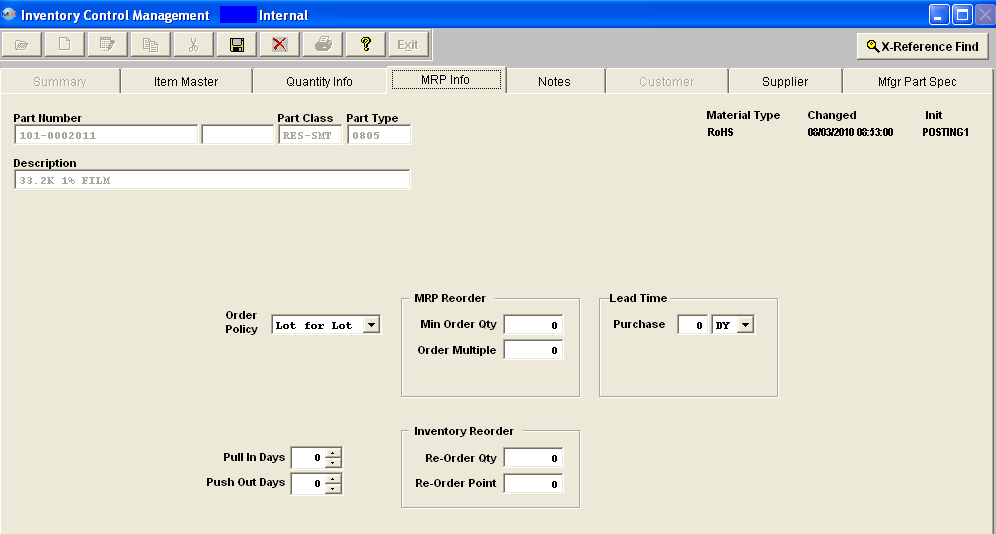
| MRP Info Tab |
Order Policy, Min Order Qty, Order Multiple, Purchase Lead Time, Pull In Days,Push Out Days, Re-Order Qty, Re-Order Point |
CUSTOMER TAB
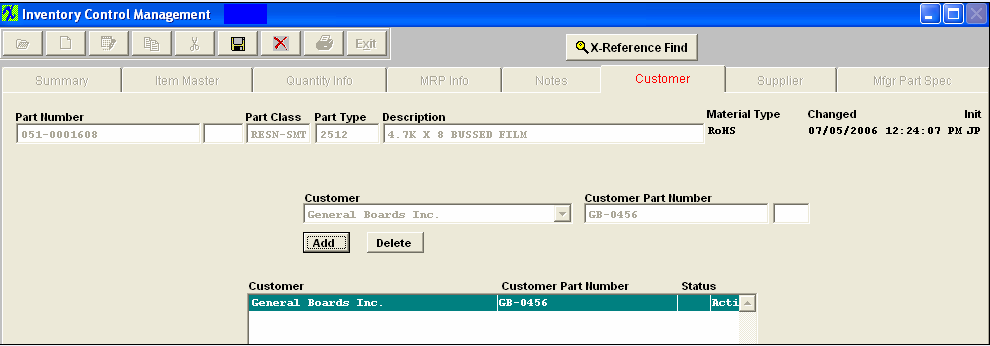
| Customer Tab |
Add or Delete a Customer and Customer PN. |
SUPPLIER TAB
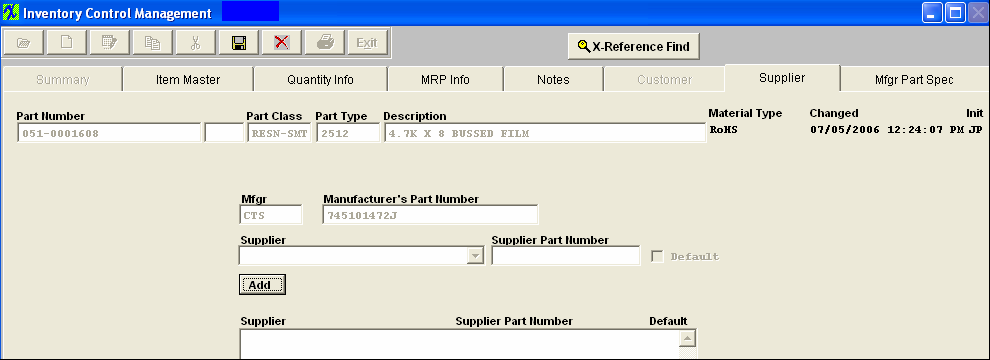
| Supplier Tab |
Add or Delete a Supplier and Supplier PN. |
MFGR PART SPEC
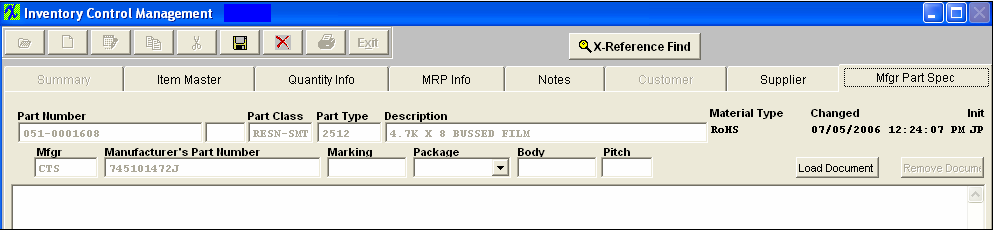
| Mfgr Part Spec |
Load/change picture or .pdf file. |
Depress the Save Action button at the completion of each edit.
|
| 1.1.4.6. Delete an Inventory Control Record | |
Depress the Delete button and the following message will appear:
The System will allow the users to delete an Inventory Part from the system if:
there is no Quantity on Hand
it is not used on a BOM
there is no shortages or allocations
there is no open Purchase Orders and if the receipt has been reconciled and posted to the General Ledger
Note: When deleting an MPN - keep in mind that the MPN will be deleted from the screen but NOT from the tables. The MPN's that have been deleted are retained in the tables for history tracking purposes.
If part has qty on hand the following message will appear and user will NOT be allowed to delete the inventory part:
|
 |
| If Part is associated with consigned part(s) the following message will appear and user will NOT be allowed to delete inventory part: |
 |
| If part is used on a BOM the following message will appear and user will NOT be allowed to delete the inventory part: |
 |
| If part has shortages or allocations the following message will appear an XL spreadsheet will be created with detailed information and user will NOT be allowed to delete the inventory part: |
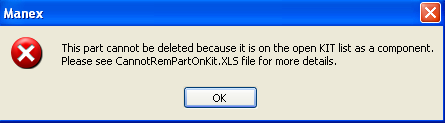 |
| If part has open PO(s) the following message will appear and user will NOT be allowed to delete the inventory part: |
 |
| If part has NOT been reconciled the following message will appear and user will NOT be allowed to delete the inventory part: |
 |
| If part has NOT been Posted to GL the following message will appear and user will NOT be allowed to delete the inventory part: |
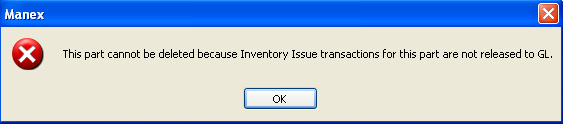 |
| After receiving any of the above warnings the user then will receive this warning |
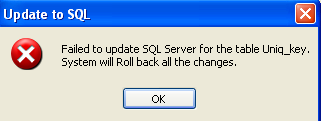 |
If you do not want to loose the History, the other option you have is to change the Status of the Part from Active to Inactive rather than deleting the ICM part. To see further detail on change the status of a part see Article #931 .
|
| 1.1.4.7. Attach a Related Document | Find an existing Inventory item Record, or Add a new Inventory item record.
Depress the  button, and enter password. button, and enter password.
The following screen will appear:
Depress the Add record icon, enter in a Document Number, REV, Doc Description, Doc Date, Doc Note;
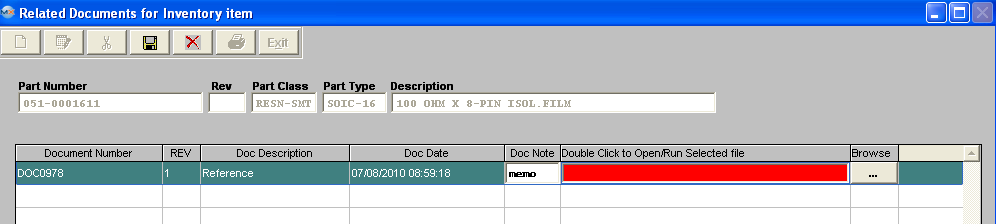
To load a document double click in the "Double Click to Open/Run Selected file" and the following screen will appear: (User may load almost any type of document "PDF File" and/or an "Exec File", (Word, Excel, pdf, Images, etc .... ) It will NOT let you load a document with symbols in the file name. Example "Int ' l". (Symbol in Red). If you are receiving a system error when attempting to load a document check the file name to make sure there are no symbols within that file name.
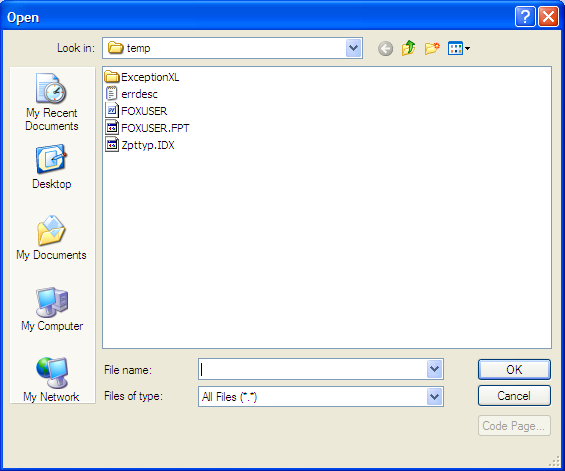
Locate the document and double click on it and the document will populate screen.
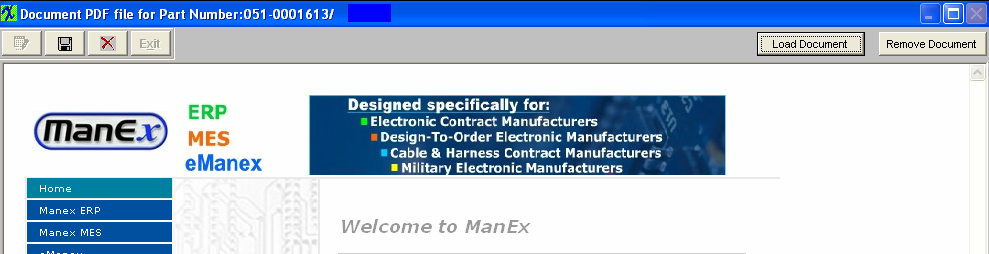
Depress the Save record icon to save or depress the Abandon changes icon to abandon changes. The following screen will appear:
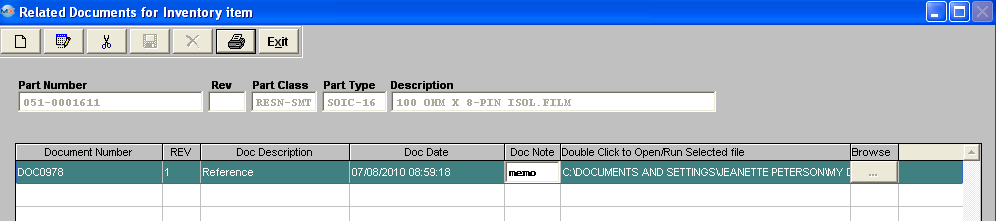
Depress the Save record icon to save or depress the Abandon changes icon to abandon changes. Once documents are saved the "Inventory Item Related Documentation" button will display in Red. This Document will be available to view in the PO Module and PO Receiving Module also.
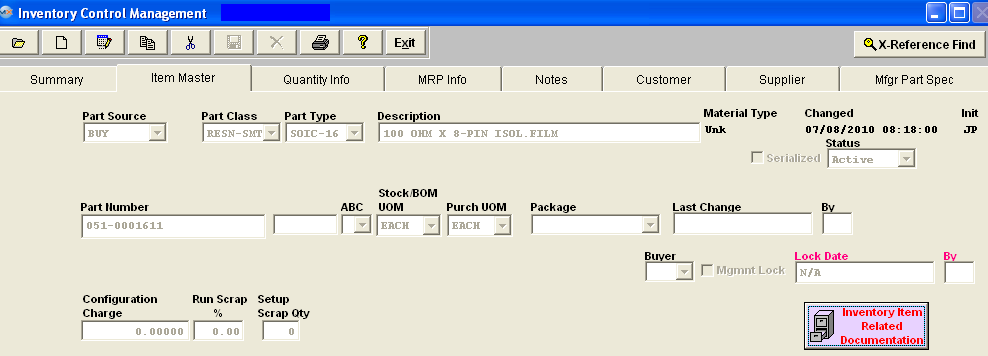
|
| 1.1.4.8. Link User Defined Fields to an Inventory Record | | The User Defined fields MUST be setup within Web ManEx. For further detail see Article #5454.
The User Defined Fields can
then be linked to Inventory records by selecting a record in the ManEx
Desktop, and selecting the UD action button (as displayed below).
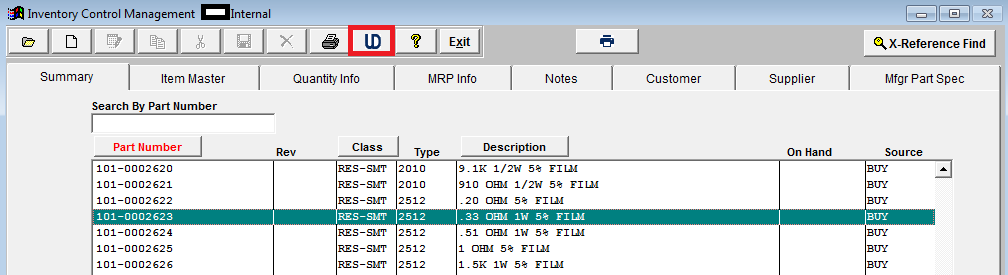
The UDF for that section will
then be displayed, and user can make changes (if applicable), Save & Exit or
Cancel.
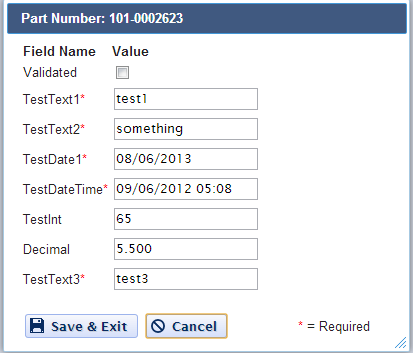
|
| 1.1.5. Reports - ICM Mgmt |
| 1.1.5.1. Inventory Control Reports |
To obtain the Inventory Reports within the Web, select the WEB Print button from the ManEx action buttons at the top of the screen. For further detail on How the Reports work within the Web refer to Article #5477.
Note: In order to access the Reports within the Web the Company Root URL must be setup within the System Appearance module and user must be linked to web within the System Security Module.
Select the Report Type: INVENTORY - A List of Reports will be displayed that are available on the Web
for INVENTORY
To obtain the Inventory Reports, select the Print button from the ManEx action buttons at the top of the screen.
The following reports screen
will display a list of reports that are available on the ManEx Desktop:
| Highlight the desired report and the Detail of the Report "Internal and/or In-store" or "Consign" and depress the OK button: |
 |
Inventory Material Re-order List Report - This report uses the "Re-order Point" to decide if the part needs to be re-ordered, NOT the "Re-order Qty"
|
If user selects "Internal and/or In-Store" this Value screen will appear:
|
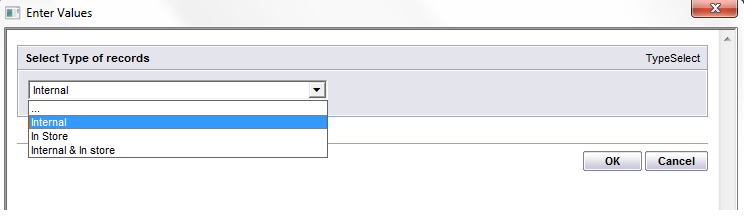 |
| If user selects "Consign" this Value screen will appear: |
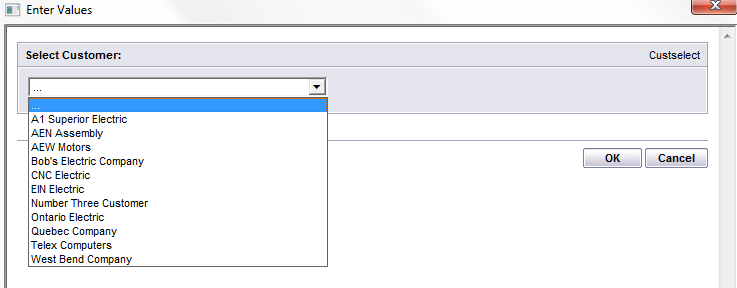 |
The Following is printed: This report displays all inventory on hand that has less quantities available than the minimum Reorder Point prescribed for that part.
Inventory On Hand Report
|
User must first select Type: 'Internal', 'Internal & In-Store', 'In-Store', or 'Consigned'
User then may enter Customer (only if consigned type is selected), Class, Warehouse, Part Range Start, Part Range End. Entry must be within Single Quotes. Leave '*' defaulted and all will be displayed.
Select to suppress 0.00 records, then select to sort by, either Part Number or Warehouse.
Once all Values have been entered depress the OK button.
|
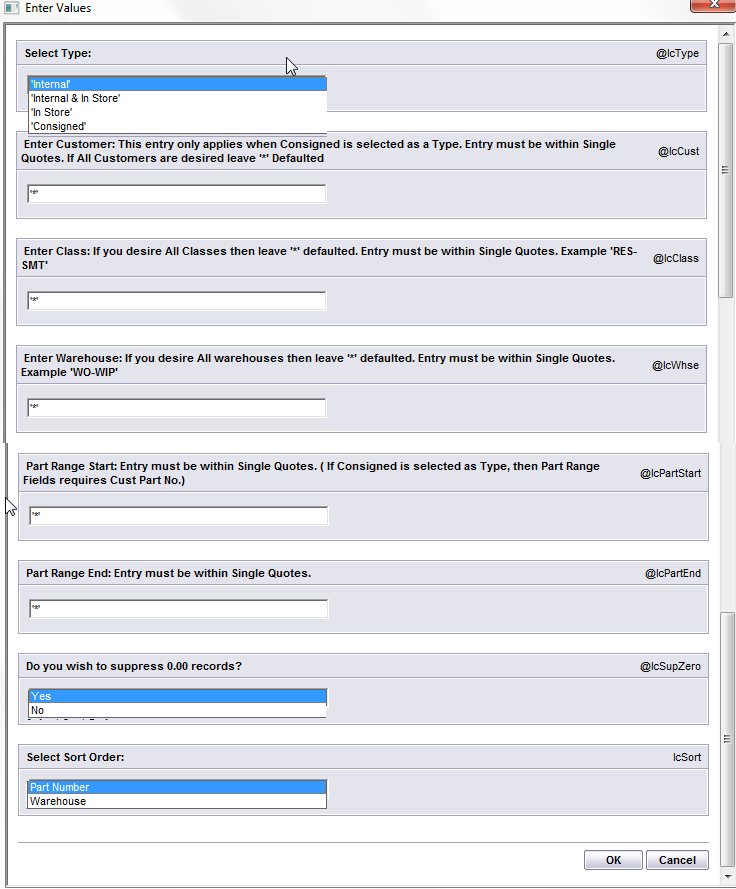 |
The following is printed: This report displays the amount of inventory on hand in each location, including WIP, and identification of the manufacturer, Lot Code information, and allocated inventory. There are several ways to select the information so that the report is specific to chosen areas.
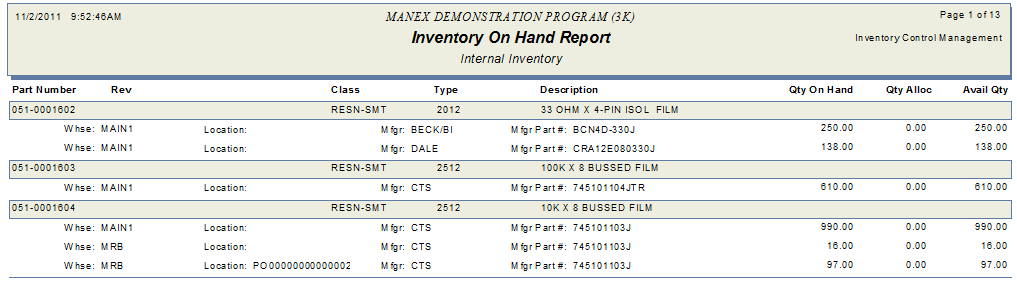
Transaction Detail Log Report
|
Highlighting the Transaction Detail Log report brings up a further selection:
Highlight the desired selection, 'All', 'Receipt', 'Issue' or 'Trans/Exp'
Depress the OK button will bring up the Values screen:
|
 |
|
Enter Starting Date Range, and Ending Date Range.
If desired enter Starting PN and Ending PN. If left blank all PN will be displayed on report.
Select Type: 'Internal', 'Internal & In-Store', 'In-Store', or 'Consigned'
Enter Customer only if type 'Consigned' was selected
If desired select Part Class. If left blank all Part Classes will be displayed on report.
Select 'Yes' or 'No' to show Serial numbers on report, (Note: Leading Zero's will NOT be displayed on report), and if you want the reason to be displayed or not.
Once all the Values have beeen selected, depress the OK button.
Note: The reference field as entered in the Inventory Handling module will display on the Transaction Detail report.
|
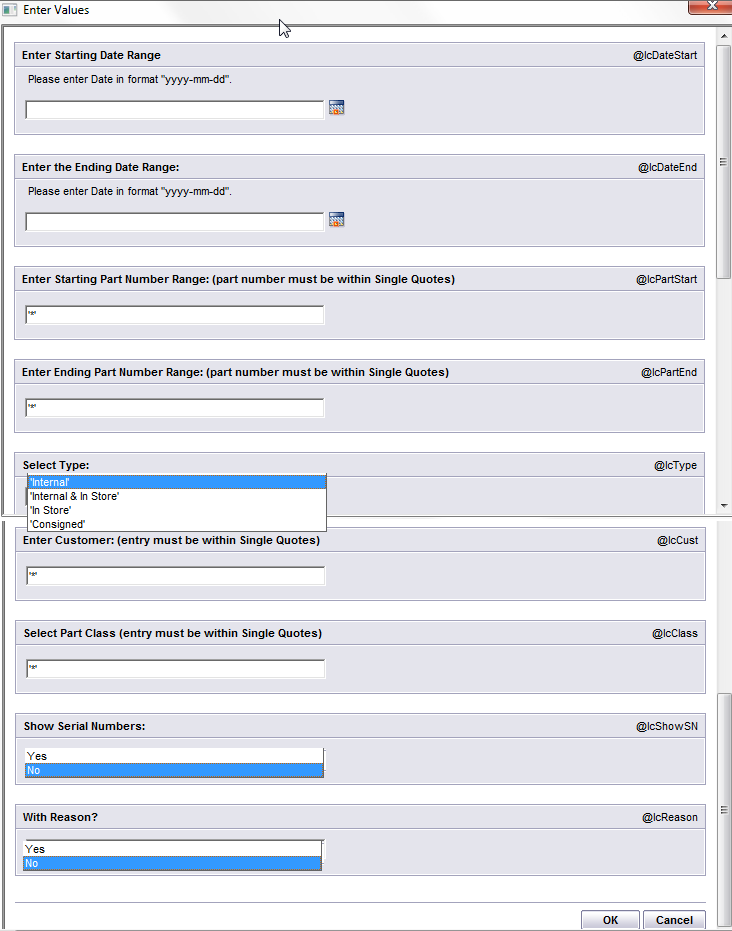 |
The following is printed: This report displays all inventory movement transactions for the selected criteria for the report. Issued qty's are displayed as negative, and Received qty's are displayed as postive.
Part Transaction Log With Balance Report
Select Type: 'Internal', 'Internal & In-Store', 'In-Store', or 'Consigned'
If desired enter Part Number and Revision if applicable. If these fields are left blank all part numbers and revisions will be displayed on report.
Enter a Start Date (this field is required)
Enter Customer only if type 'Consigned' was selected
Once all the Values have beeen selected, depress the OK button.
Note: The beginning balance is a calculation based on transactions. It is not associated with the GL, nor has any effect on it. If the beginning balance is being displayed as anthing other than "0" it may be caused by the UOM being changed with qty on hand. See Article #3414 for further detail.
|
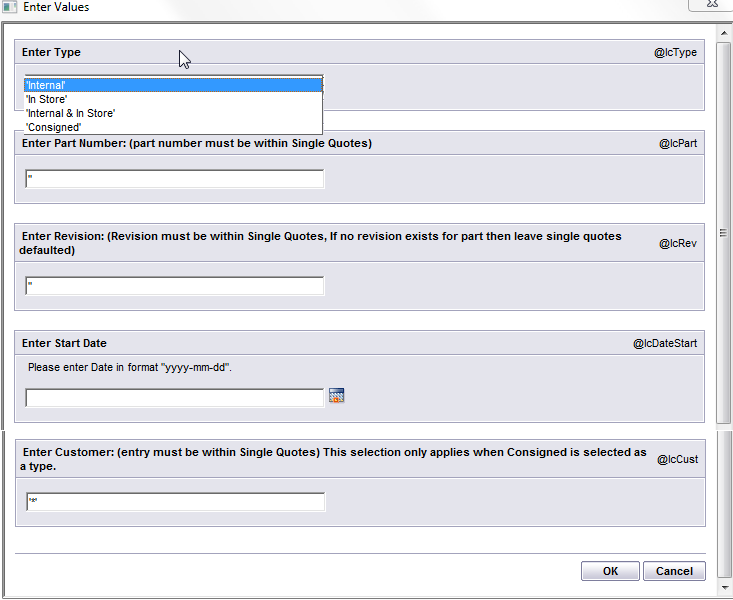 |
The following is printed: This report displays all transactions for a specific part from date selected. Issued qty's are displayed as negative, and Received qty's are displayed as postive.
To read this report you need to start from the bottom and work your way up.
We use the current qty OH, then get all the receiving, issue, transfer... records, and go backwards to create the transaction with balance report. For example, I have a new part like this:
Starts with a 0.00 balance:
09/01/2011 receiving 230
10/12/2011 issue 15
10/28/2011 receiving 75
The Qty OH now is 290, the report gets all the receiving, issue, transfer records and sorts the data by date from latest to oldest to get the beginning balance.
Qty OH: 290
+75 balance: 215 (by -75 from the 290)
-15 balance 230 (by adding 15)
+230 beginning balance: 0 (by -230 to get the balance)
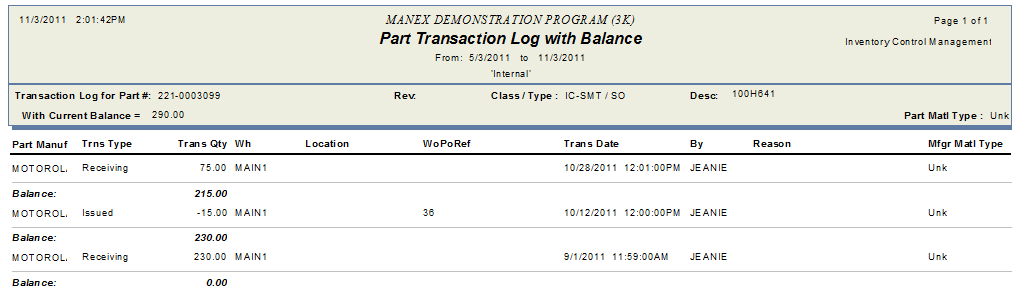
Inventory Valuation Report
|
Enter Part Class (if applicable)
Enter Warehouse (if applicable)
Enter Starting Part Number (if applicable)
Entering Ending Part Number (if applicable)
Select how you wish to have the report costed by: Standard Cost, Weighted Cost, or User Defined Cost.
Note: The reason the report was not calculating value when using weighted cost is because in General Inventory Setup (within system setup) I had zero in the "Number of Purchase Orders used in the calculation of the weighted costs" field. For this report to work user must have a number greater than zero within this field.
Depress the OK button.
NOTE: The Last Paid information is calculated from the Last Change date not necessarily the PO Date that is displayed in the Purchase History box. If a user happens to edit an older <st1:place w:st="on">PO (that does not match the Purchase Order History screen) and saves the changes the Last Paid will be updated based on the last change order recorded and the PO History screen will still remain as is. (Example: If a <st1:place w:st="on">PO was originally created in 2002 , but edited and saved today, it would then be included into the Last Paid record from the date it was modified).
For further details on Possible Reasons why the Inventory Valuation Report is not matching the GL Balance for the Inventory GL Acct # see Article 5712.
|
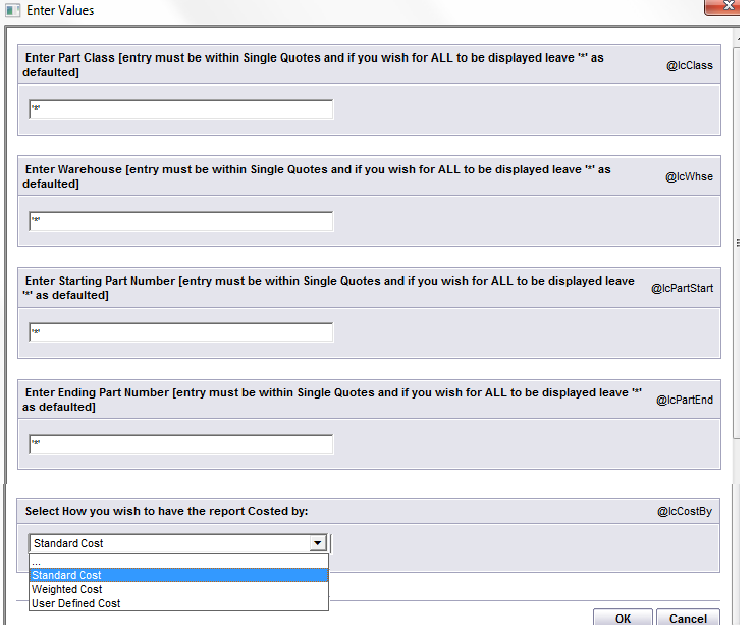 |
The following is printed: This report displays all inventory by part class and summerizes the inventory value of the parts selected.
Inventory and WIP Valuation Report
|
Enter Part Class within Single Quotes (if applicable)
Enter Starting Part Number within Single Quotes (if applicable)
Enter Ending Part Number within Single Quotes (if applicable)
Select How you wish to have the report Costed by: Standard Cost, Weighted Cost, or User Defined Cost.
Select to Round WIP Qty to Interger or Not
Depress the OK button.
|
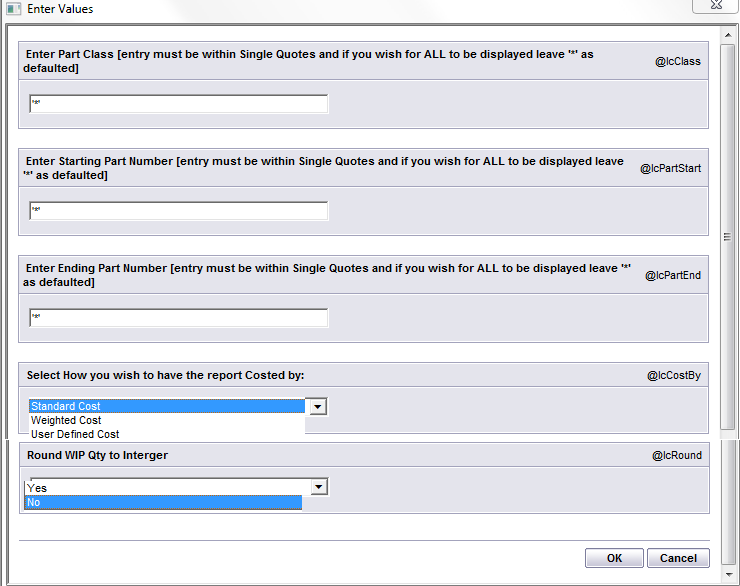 |
The following is printed:
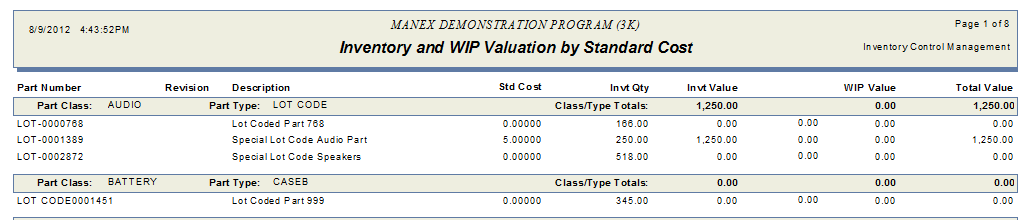
**Inventory and WIP Valuation report is not intended to be used as a validation to the GL WIP Balance
See Article #1777 "How WIP Qty and WIP Value is Calculated".
See Article #913 "How Manex tracks and values the dollars in WIP".
See Article #5712 "Why doesn't the Inventory Valuation Report Match the GL Balance for the Inventory GL Account Number?".
Inventory WIP Valuation Report by Work Order
|
Enter Work Order Number within the Single Quotes (if applicable)
Enter Part Class within the Single Quotes (if applicable)
Enter a Starting Part Number within the Single Quotes (if applicable)
Enter a Ending Part Number within the Singel Quotes (if applicable)
Select How you wish to have the report Costed by: Standard Cost, Weighted Cost, or User Defined Cost
Select if you wnat to Round WIP qty to Interger or not
Depress the OK button.
|
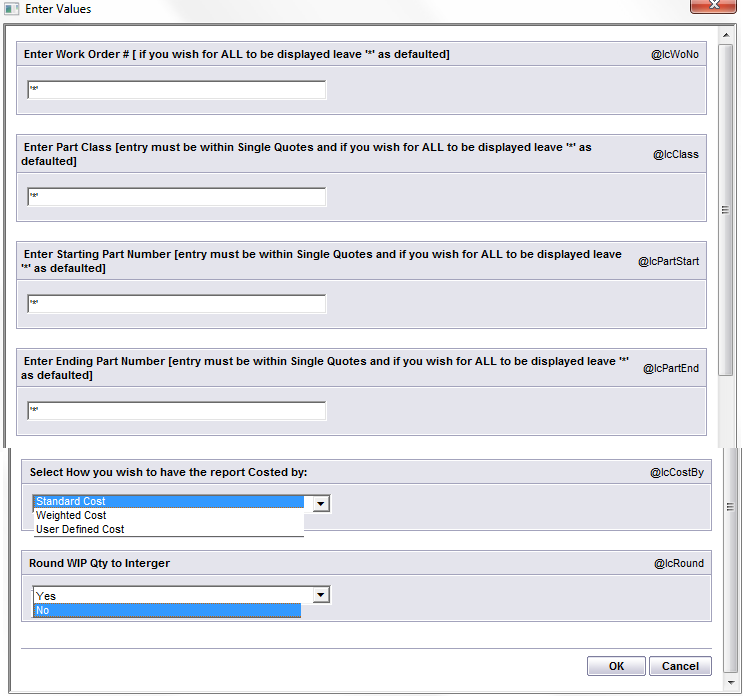 |
The following is printed: Every new WO will start on the new page.
Inventory List With No Assigned BOM Report
|
This report displays all material on hand with no parent assembly associated with it.
Select the Part Type to Display: All, Internal, or Consigned Only
|
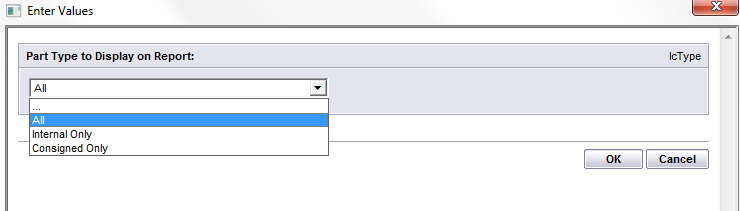 |
The following is Printed: Note: The first letter of the Status is displayed to the left of the "Part Number" column (A for Active and I for In-active).
Unused Inventory List Report
|
User must first select Type: 'Internal', 'Internal & In-Store', 'In-Store', or 'Consigned'
User then may enter Customer (only if consigned type is selected), Part Class, Starting Part Number, and/or Ending Part Number. Entry must be within Single Quotes. Leave '*' defaulted and all will be displayed.
User MUST enter a Date
Select to suppress 0.00 records, then select to sort by, either Part Number or Warehouse.
Once all Values have been entered depress the OK button. Note: The search for the un-used parts will be based on the MFGR/ MPN level.
|
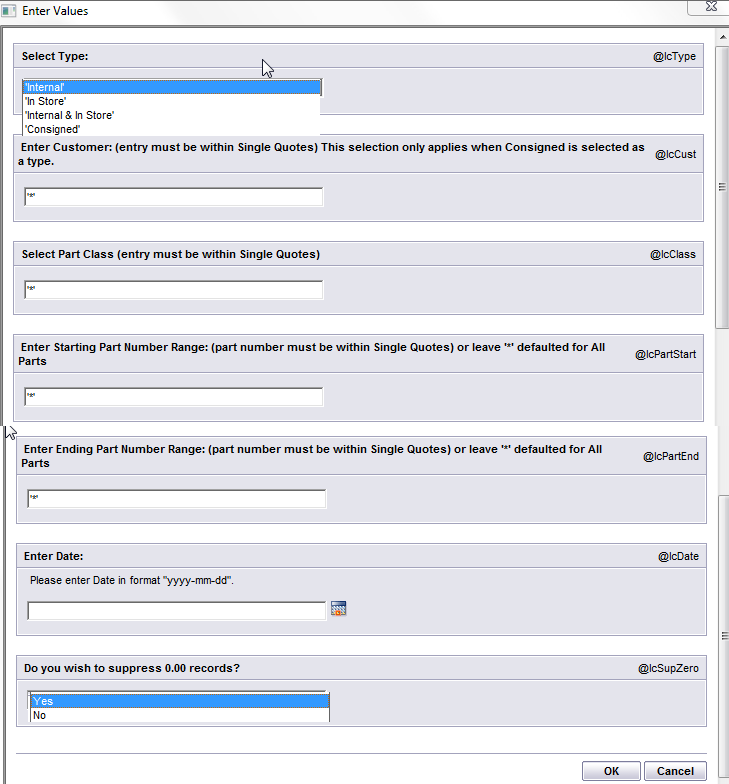 |
The following is printed: This report displays all inventory for which no transactions have occured since the selected date based on the MFGR/MPN level.
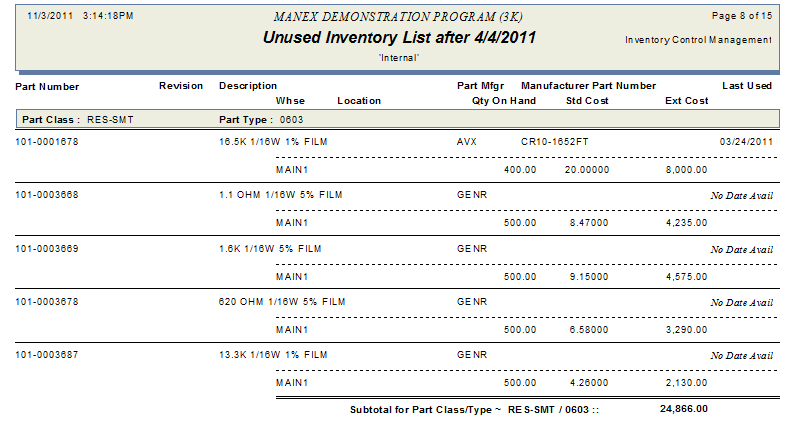
Part Cross Reference Report
|
Highlighting the Part Cross Reference report brings up a further selection:
Select the type of Cross Reference desired.
This will display the relation between Mfgr part number and Internal part number.
|
|
|
User MUST first select Part Source: 'BUY', 'CONSG', 'MAKE', or 'PHANTOM'
Then select sort Order: Manufacturer Part Number or Manufacturer
Once the values have been selected depress the OK button.
|
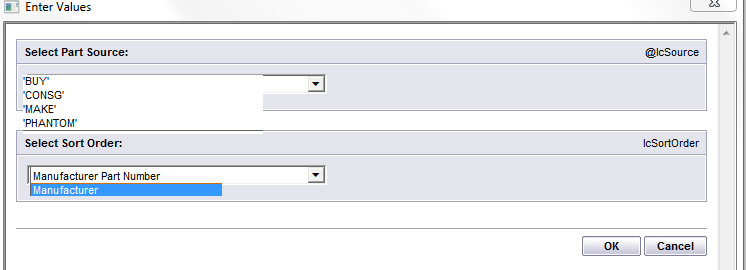 |
The following is printed: This will display the relation between Mfgr part number and Internal part number.
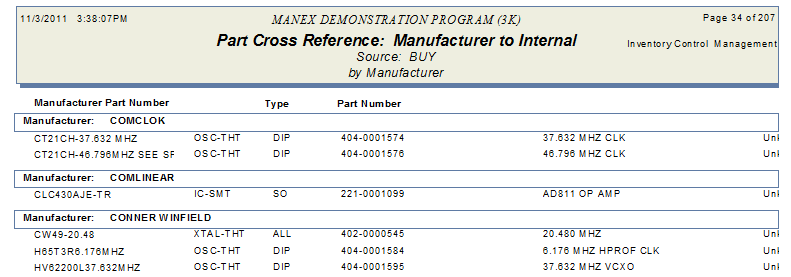
Part List by Manufacturer and Manufacturer Part Number Report
|
Enter the Manufacturer desired within the single quotes, if all Mfgr's are desired leave '*' defaulted. Partial entry is allowed.
Once the values have been selected, depress the OK button to print report.
|
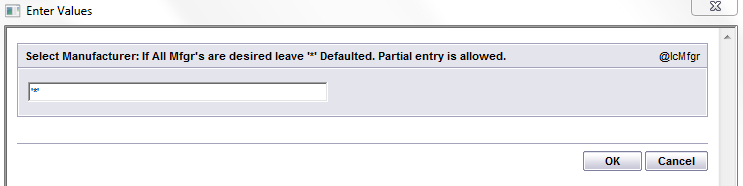 |
The following is printed: This report displays all part numbers by Manufacturer, Manufacturer Part Number, Class, Type, Description, Internal Part Number, Matl Type and Qty on Hand.
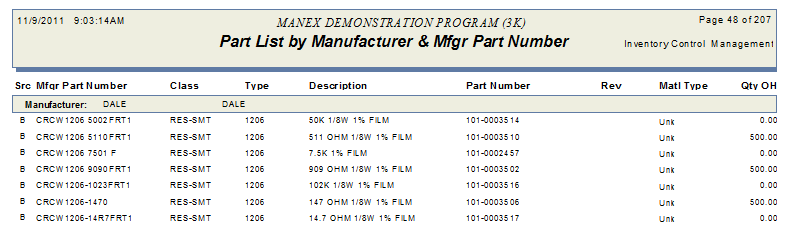
Physical Inventory Work Sheets Report
|
Select Inventory Type: 'Internal', 'Internal & In-Store', 'In-Store' or 'Consigned'
Select the Desired Part Source: 'All', 'Buy', or 'Make'
Enter Customer: (this field only applies if Consigned is selected)
Enter Part number Start Range within the single quotes. If left blank it will check all records
Enter Part number End Range within the single quotes. If left blank it will check all records
Enter specific Warehouse within the single quotes (if desired)
Select to sort by: Warehouse/Location or Part Number/Rev
Select to display With Book Quantity or Without Book Quantity
Once all the values have been selected, depress the OK button to print report.
|
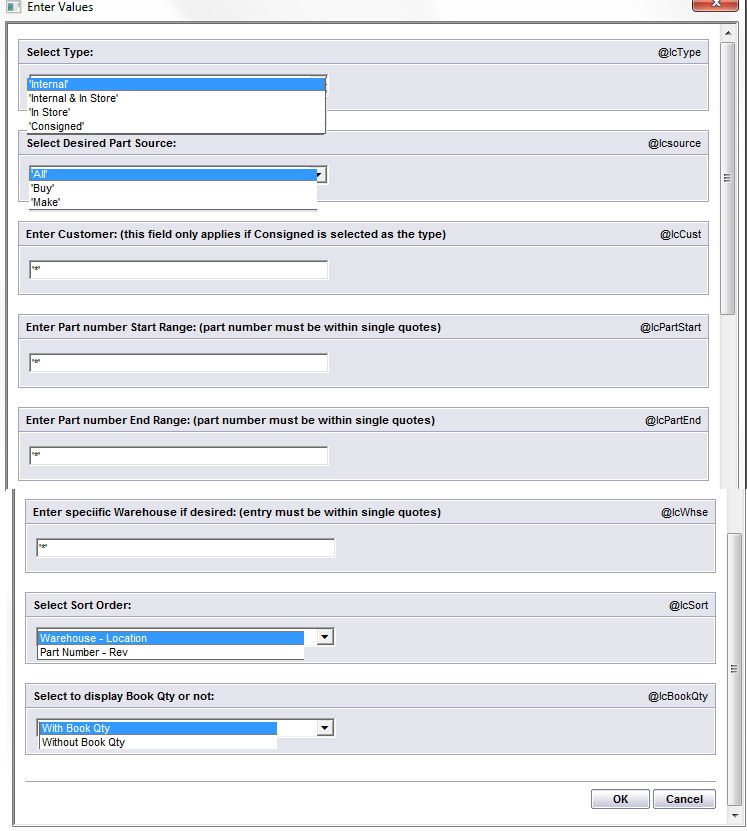
|
The following is printed: This is the Worksheets to be used to take physical inventory.
List of Duplicate Descriptions - This report displays all part numbers with duplicate descriptions
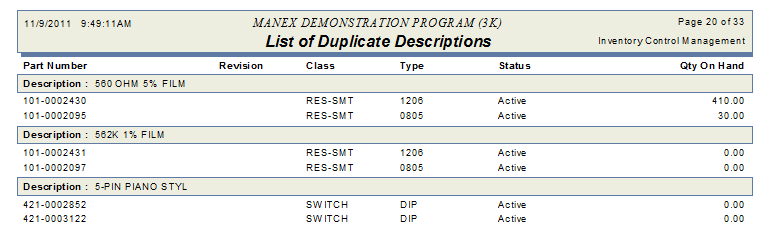
In Store Items Without Contract Report - This report displays all part numbers from Invt mfgr Instore without contract
In Store Issued Items Without Contract Report - This report displays a list of items issued from in-stores without contract
Customer Reference Report - This report lists by customers, all customers part number along with quantity in stores
Part Class and Type List - This report is a listing of Part Classes & Types
Print Inventory Labels
|
The Print Inventory labels report requires that the Barcode Font be installed.
Highlighting the Print Inventory Labels brings up a selection of printers to be used:
Laser Printer (sheet): Avery Label # 5163, 4" x 2", 2 accross, 5 down, printed portrait
Portable Printer (roll): Redline Solutions, Zebra QL DT Labels 4x3 PN 81475
Portable Printer (roll): Zebra Printer (roll): Label size 2" x 3" (for Zebra printers Part #10000286 (or equivalent)
|
 |
Select Inventory Type: 'Internal', 'In Store', 'Internal & In-Store', or 'Consigned'
Enter Part number Start Range within the single quotes
Enter Starting Rev Range within the single quotes
Enter Part number End Range within the single quotes
Emter Ending Rev Range within the single quotes
Enter Customer within the single quotes: (this field only applies if Consigned is selected)
Enter specific Warehouse within the single quotes (if desired)
Enter Specific Location within the Single Quotes. If you do not wish to filter on Location leave '*' as default
Enter Specific Whse within the Single Quotes. If you do not wish to filter on warehouse leave '*' as default
Once all the values have been selected, depress the OK button to print labels
.
|
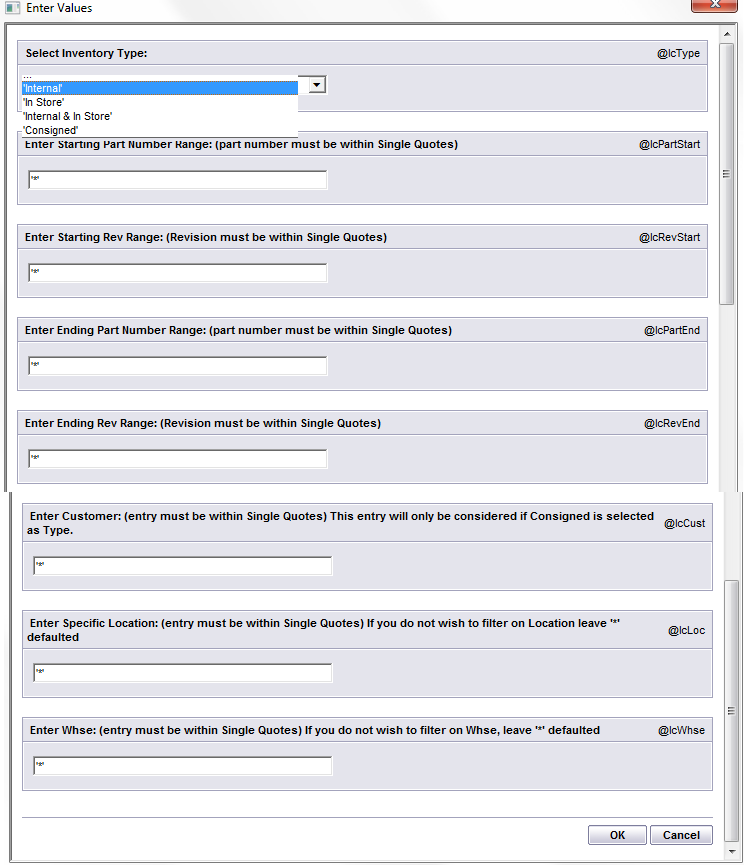 |
|
The following is printed.
|
 |
Allocated Report for Closed and Cancelled WO - This report displays a listing of Part Classes & Types
Material Type Change Report
|
Enter the From Date in format "yyy-mm-dd" (the To Date is todays)
Depress the OK button.
|
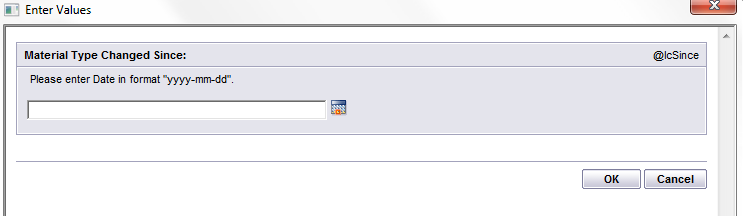 |
The following is printed: - Listing of the parts that have their material type changed since given date.
Material Type Change Log Detail Report
|
Enter the From Date in format "yyyy-mm-dd" (the To Date is todays).
Depress the OK button.
<st1:place w:st="on"><st1:placetype w:st="on"> |
|
The following is printed: This report displays the history of the Inventory Material Type Changes.
Inventory and AVL Material Type Validation - This report goes through the inventory part numbers to check and lists if the Inventory and AVL material types are not in sycn. It does not update the inventory material types.
Depress the OK button. User will receive the following popup to warn them that the report could take a while to run. So at this point you have the option of continuing or aborting the procedure.

Depress Yes and the following report will appear: This report compares inventory material type with AVL calculated material type and lists those part numbers which have different material types in inventory and AVL levels.

|
| 1.2.1. Prerequisites for Inventory Handling |
After activation, "Inventory Handling" access for each user must be setup in the ManEx System Security module. Users with “Supervisor Rights” will automatically have access.
|
| 1.2.2. Introduction for Inventory Handling | The Inventory Handling module is for receiving without a purchase order, issuing without a packing list, transferring inventory items from one warehouse location to another and to transfer discrepant materials into the MRB (Material Review Board) Warehouse.
Receiving is particularly useful in setting up the initial inventory when first launching ManEx.
Issuing is useful to expense Inventory Items.
This module can also be used to adjust the Inventory Master to the actual count after taking a physical inventory, if the user does NOT have the ManEx Physical Inventory module.
If the user has in-store items, which they want to return to Vendor without any impact on accounting or PO (like obsolete parts), within the Issue page users will see a check box "Return In-store 2 Vendor". This field will only be visible if the In-Store warehouse is selected, and if check-marked no purchase order will be created and there will also be no impact on the GL values.
Buy Part Serialization Feature: The users will be able to properly assign Serial numbers to Buy parts through the Receiving screen. Within the other remaining Inventory Handling screens (Issue, Transfer, & MRB) Serial number selection boxes will appear.
When receiving a part with no Warehouse or location setup within the Inventory Control AVL, and that specific part/warehouse has been marked as "Allow Auto Creation", users will be able to set warehouse and location directly from the Inventory Handling Receipt.
These transactions are recorded and tracked in the "Transaction Detail Log Report" and "Part Transaction Log with Balance Report" located in the Inventory Control Mgmt module.
|
| 1.2.3. Fields & Definitions for Inventory Handling |
| 1.2.3.1. Receiving Tab |
The main screen
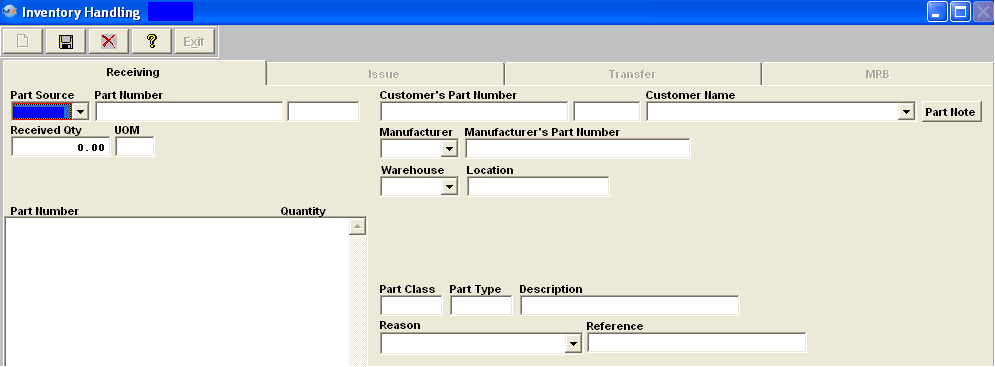
Receiving tab field definitions
| Part Source |
The source of the part, Buy, Make, or Consigned |
| Part Number |
The internally assigned number of the part. |
| (Rev) |
The revision assigned to the part. |
| Customer's Part Number |
The customers number of the part. This field will only be displayed if the Part Source selected is (Consigned) |
| (Rev) |
The customers revision assigned to the part. This field will only be displayed if the Part Source selected is (Consigned) |
| Customer Name |
The Name of the Customer. This field will only be displayed if the Part Source selected is (Consigned) |
 |
Depressing this button will reveal any notes about the part that have been entered in the item master.
|
| Received Qty |
The quantity received. See Article #1240 for more detail on why the system will not allow user to enter in a fraction of a number, and an alternative. |
| UOM |
The Unit of Measure for the part.
|
| Receiving Account Description |
The description (and its related General Ledger account) pertaining to the receipt.
|
| Manufacturer |
The name of the manufacturer of the part. |
| Manufacturer’s Part Number |
The number the Manufacturer has assigned to the part.
|
| Warehouse |
The name of the Warehouse. |
| Location |
The location within the warehouse where the part received will be placed.
|
 |
This button will ONLY be displayed if the "Allow Auto Creating Location at Receiving" box is checked in the Mfgr/AVL Quantity Info tab within the ICM module. |
| Part Class |
The classification to which the part number belongs.
|
| Part Type |
The type within the classification to which the part number belongs. |
| Description |
The description of the part number.
|
| Reason |
The reason for the receipt.
|
| Reference |
The reference for the receipt.
|
|
| 1.2.3.2. Issue Tab | |
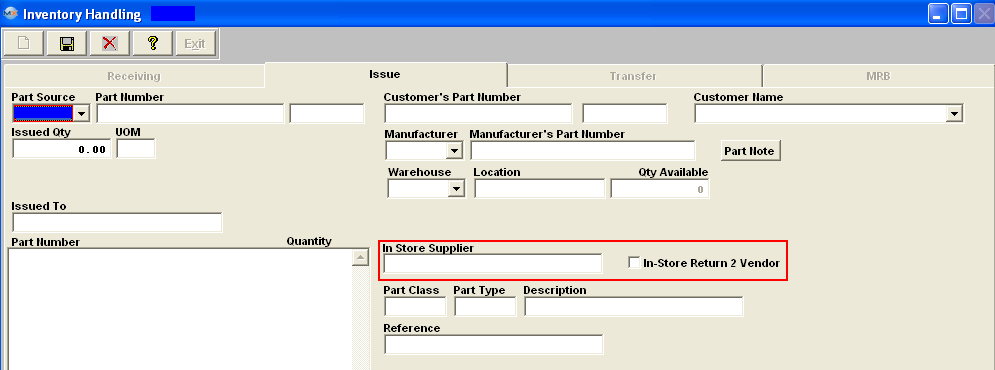
Issue tab field definitions
| Part Source |
The source of the part, Buy, Make, or Consigned
|
| Part Number |
The internally assigned number of the part.
|
| (Rev) |
The revision number assigned to the part. |
| Customer's Part Number |
The customer's number of the part. This field will only be displayed if the Part Source selected is (Consigned) |
| (Rev) |
The customer's revision assigned to the part. This field will only be displayed if the Part Source selected is (Consigned) |
| Customer Name |
The Name of the Customer. This field will only be displayed if the Part Source selected is (Consigned) |
 |
If this button is shown in RED, depressing this button will reveal any notes about the part that have been entered in the item master.
|
| Issued Qty |
The quantity issued. See Article #1240 for more detail on why the system will not allow user to enter in a fraction of a number, and an alternative.
|
| UOM |
The Unit of Measure for the part. |
| Issue Account Description |
The description (and its related General Ledger account) pertaining to the issue.
|
| Issued To |
The name of the project, etc. |
| Manufacturer |
The name of the manufacturer of the part.
|
| Manufacturer’s Part Number |
The number the Manufacturer has assigned to the part. |
| Warehouse |
The name of the Warehouse.
|
| Location |
The location within the warehouse where the part issued will be pulled from. |
| Qty Available |
The on hand quantity.
|
| Part Number |
The internal number assigned to the part.
|
| Quantity |
The quantity issued.
|
| In-Store Supplier |
If an In-Store warehouse is selected the In-Store Supplier will be displayed within this field. |
| In-Store Return 2 Vendor |
Check this box If the user has in-store items, which they want to return to the Vendor without any impact on accounting or PO (like obsolete parts). (This field will only be visible if the In-store warehouse is selected). If check-marked no purchase order will be created and there will also be no impact on the Gl values. |
| Part Class |
The classification to which the part number belongs.
|
| Part Type |
The type within the classification to which the part number belongs.
|
| Description |
The description of the part number.
|
| Reference |
The user defined reference for this issue.
|
|
| 1.2.3.3. Transfer Tab | 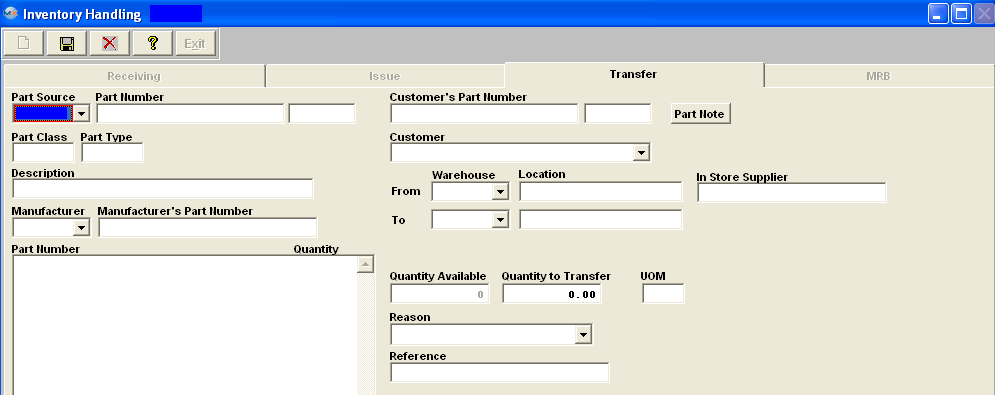
Transfer tab field definitions
| Part Source |
The source of the part, Buy, Make, or Consigned
|
| Part Number |
The internally assigned number of the part.
|
| (Rev) |
The revision number assigned to the part. |
| Customer's Part Number |
The customer's number of the part. This field will only be displayed if the Part Source selected is (Consigned) |
| (Rev) |
The customer's revision assigned to the part. This field will only be displayed if the Part Source selected is (Consigned) |
| Customer |
The Name of the Customer. This field will only be displayed if the Part Source selected is (Consigned) |
|
If this button is displayed in RED depressing this button will reveal any notes about the part that have been entered in the item master.
|
| Part Class |
The classification to which the part number belongs. |
| Part Type |
The type within the classification to which the part number belongs. |
| Description |
The description of the part number. |
| Manufacturer |
The name of the manufacturer of the part. |
| Manufacturer’s Part Number |
The number the Manufacturer has assigned to the part.
|
| From Warehouse |
The name of the Warehouse.
|
| From Location |
The location within the warehouse where the part transferred will be pulled from. |
| In-Store Supplier |
The name of the In-Store supplier. (this field will only be displayed if the warehouse selected is an In-Store warehouse)
|
| To Warehouse |
The name of the Warehouse.
|
| To Location |
The location within the warehouse where the part transferred will be placed. |
| Qty Available |
The on hand quantity.
|
| Quantity to Transfer |
The quantity transferred. See Article #1240 for more detail on why the system will not allow user to enter in a fraction of a number, and an alternative.
|
| UOM |
The Unit of Measure for the part.
|
| Reason |
The reason for the Transfer.
|
| Reference |
The reference for the Transfer.
|
|
| 1.2.3.4. MRB Tab | 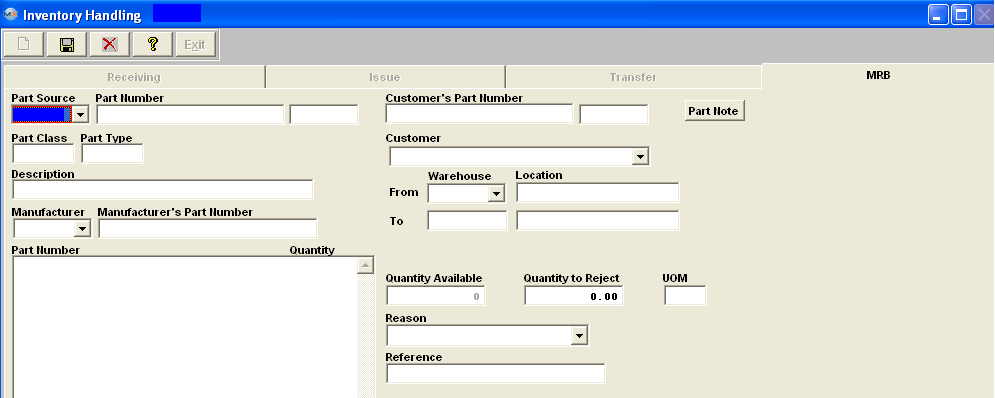
MRB (Material Review Board) tab field definitions
| Part Source |
The source of the part, Buy, Make, or Consigned
|
| Part Number |
The internally assigned number of the part.
|
| (Rev) |
The revision number assigned to the part.
|
| Customer's Part Number |
The customer's number of the part. This field will only be displayed if the Part Source selected is (Consigned) |
| (Rev) |
The customer's revision assigned to the part. This field will only be displayed if the Part Source selected is (Consigned) |
|
Depressing this button will reveal any notes about the part that have been entered in the item master.
|
| Part Class |
The classification to which the part number belongs.
|
| Part Type |
The type within the classification to which the part number belongs.
|
| Customer |
The Name of the Customer. This field will only be displayed if the Part Source selected is (Consigned) |
| Description |
The description of the part number.
|
| Manufacturer |
The name of the manufacturer of the part.
|
| Manufacturer’s Part Number |
The number the Manufacturer has assigned to the part.
|
| Part Number |
The internal number assigned to the part. |
| Quantity |
The quantity transferred. |
| From Warehouse |
The name of the Warehouse.
|
| From Location |
The location within the warehouse where the part transferred will be pulled from.
|
| To Warehouse |
The name of the Warehouse.
|
| To Location |
The location within the warehouse where the part transferred will be placed.
|
| Qty Available |
The on hand quantity. |
| Quantity to Transfer |
The quantity transferred. See Article #1240 for more detail on why the system will not allow user to enter in a fraction of a number, and an alternative.
|
| UOM |
The Unit of Measure for the part.
|
| Reason |
The reason for the Transfer. |
| Reference |
The reference pertaining to the Transfer.
|
|
| 1.2.4. How To ..... for Inventory Handling |
| 1.2.4.1. Receiving Tab |
|
Enter the SQLMANEX.EXE (within the ManEx root directory)
This action will then prompt the user for a password
|
|
|
The following screen will be displayed, select Inventory Management/Inventory Control Management/Inventory Handling
|
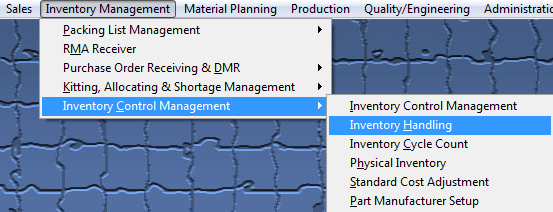 |
The main screen will be displayed:
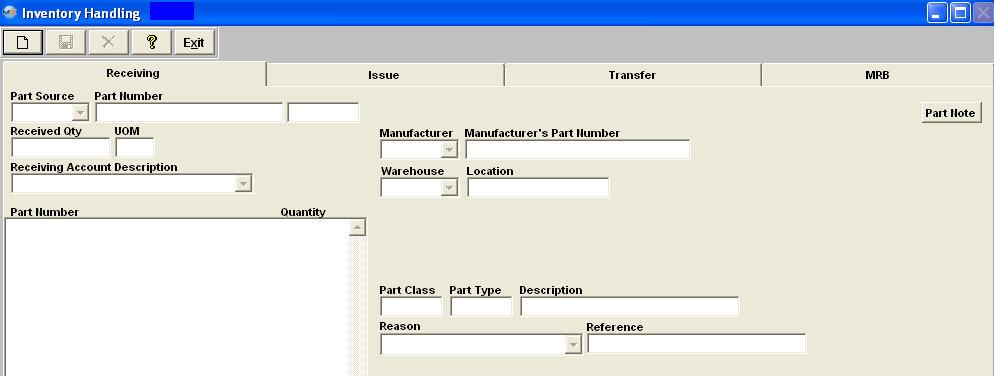
Inventory Handling is used for receipt of non-purchase order receipts.
To add inventory, depress the Receiving tab.
- Depress the Add button.
- Enter your password.
- Select the Part Source from the pull down menu (BUY, MAKE, or CONSG).
- Enter a Part Number, if Part Source is "CONSG" you will need to enter Customer Name from pull down, then you will have a choice to enter in customer PN or Internal PN.
- Part type, class, and description will default in.
- Enter the Received quantity.
- Select the Receiving Account Description from the pull down menu.
- Select the Manufacturer & manufacturer part number from the pull down list.
- The warehouse will default in. If the default is not the warehouse you want you may select a dffferent warehouse from the pull down list.
- Select the reason for the receipt from the pull down list.
- Enter in a Reference (Optional).
- Depress the Save button.
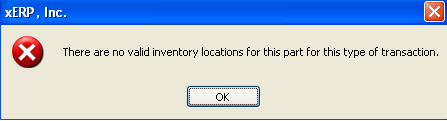 |
This message is a general message that is displayed in Inventory Handling if all locations/AVL's for a part are flagged in a Cycle Count or Physical Inventory and the part has ONLY one WHSE and AVL setup.
User must reconcile and post the cycle count or physical inventory for this part and then you will be able to process the records within Inventory Handling.
|
If the part has more than one WHSE and/or AVL setup and the part number is flagged in a Cycle Count or Physical Inventory the warning is NOT displayed, but the warehouse drop down is not available for selection within the issuing, receiving, transferring, and MRB screens after you select the AVL. As shown in the screen below.
If there are multiple revisions for the same part number a screen will appear for user to select the correct part number from:
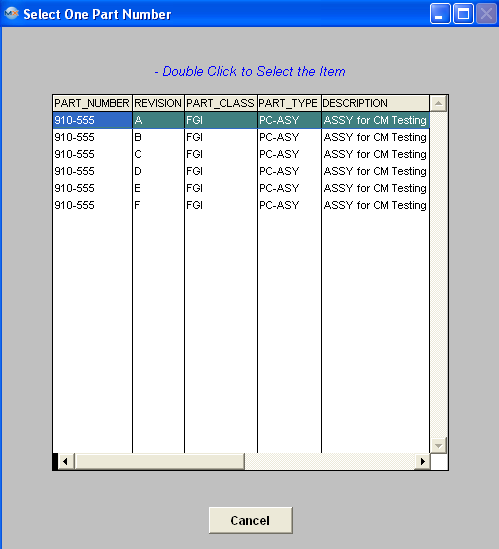
The completed screen will look like this for a Buy, or Make part.
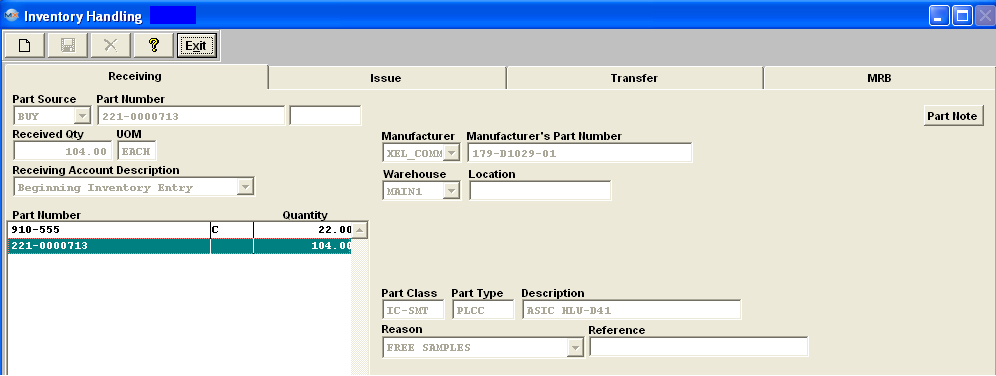
The completed screen will look like this for a Consigned part. 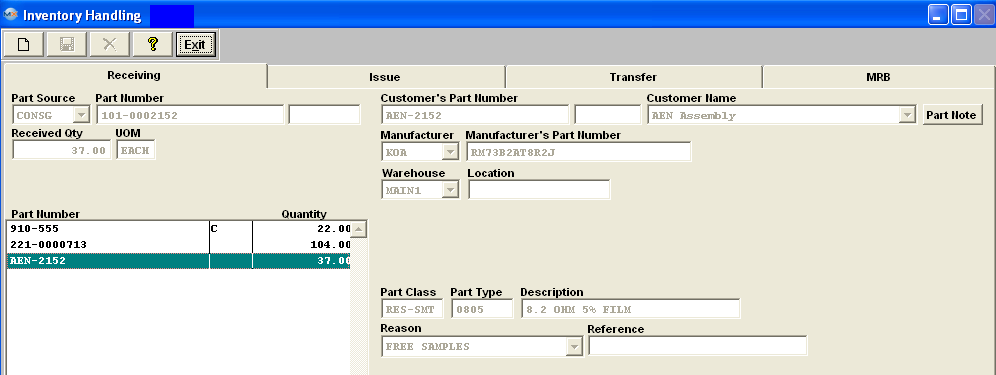
The completed screen will look like this for a Serialized part. Note: Users are allowed to receive in once issued out SN(s) back into stock, if the SN is for the same part number, and was issued out through inventory handling, then the system will re-link it to its old history. If the SN has been shipped out of the system via a packing list, then the user will be required to receive it back in through the RMA Process.
If user enters a SN that already exists for this PN they will recevie the following message:
Depress OK, then delete or remove the SN(s) being displayed in Red by depressing the Delete button and the following confirmation message will be displayed
Depress Yes to continue, then user must re-enter new serial numbers and save changes.
The completed screen will look like this for a Lot Coded part.
If the "Allow Auto Creating Location at Receiving" box has been selected for a specific AVL in the ICM module the "New Location" button will appear on the Receiving screen as shown below.
Depress the New Location button and the following screen will appear, giving the user the option to create a new Warehouse/Location for this part:
Depress "Yes" and the following screen will appear, listing the Warehouse(s) that have the "Allow to Auto Create Location at Receiving" box selected in the Warehouse Setup module.
If user selects InStore a Supplier selection will appear in the screen:
When all the information has been entered the New Warehouse/Location will appear in the Quantity Info screen within the ICM module.
|
| 1.2.4.2. Issue Tab | Issuing or Expensing Inventory Items with no Work Order
The following types of items would be covered in the Issue screen:
1. Issuing to Cost of Goods Sold (Usually Non-taxable)
Such as: Tems with no Bills of Material; Prototypes and Pilot Products for Resale; Items not classified as “Used in Kit”
2. Expensing for In-House Consumption (Usually Taxable)
Such as: Items consumed in the production process but not shipped as a part of product for resale; Items used for calibration or testing of the production process; Items used for samples or prototypes which are not resold.
3. Return In-store 2 Vendor
If the user has in-store items, which they want to return to the Vendor without any impact on accounting or PO (like obsolete parts) there is a check box available within the issue page "Return In-store 2 Vendor". (This field will only be visible if the In-store warehouse is selected). If check-marked no purchase order will be created and there will also be no impact on the GL values.
|
Enter the SQLMANEX.EXE (within the ManEx root directory)
This action will then prompt the user for a password
|
|
|
The following screen will be displayed, select Inventory Management/Inventory Control Management/Inventory Control Management
|
|
The following screen will be displayed:
Depress the Issue tab and the following screen will be displayed:
To issue inventory items follow these steps.
- Depress the Add button.
- Enter your password.
- Select the Part Source from the pull down menu. (BUY, MAKE, or CONSG).
- Enter a Part Number, if Part Source is "CONSG" you will need to enter Customer Name from pull down, then you will have a choice to enter in customer PN or Internal PN.
- Part type, class, and description will default in.
- Enter the Issued quantity.
- Select the Issue Account Description from the pull down menu.
- Enter the Issued To.
- Select the Manufacturer & manufacturer part number from the pull down list.
- The warehouse will default in. If the default is not the warehouse you want you may select a different warehouse from the pull down list.
- Enter the Reference if applicable.
- Depress the Save button.
|
This message is a general message that is displayed in Inventory Handling if all locations/AVL's for a part are flagged in a Cycle Count or Physical Inventory and the part has one WHSE and AVL setup.
User must reconcile and post the cycle count or physical inventory for this part and then you will be able to process the records within Inventory Handling.
|
If the part has more than one WHSE and/or AVL setup and the part number is flagged in a Cycle Count or Physical Inventory the warning is NOT displayed, but the warehouse drop down is not avaiable for selection within the issuing, receiving, transferring, and MRB screens after you select the AVL. As shown in the screen below.
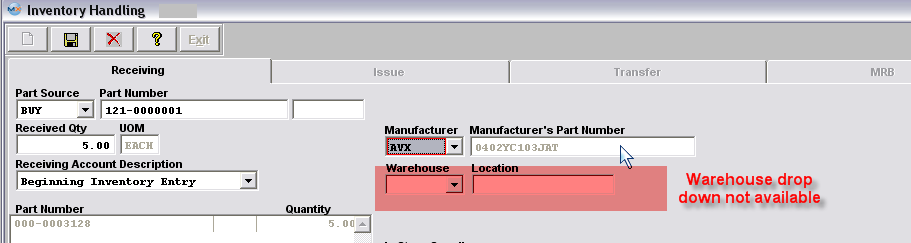
The completed screen will look like this.
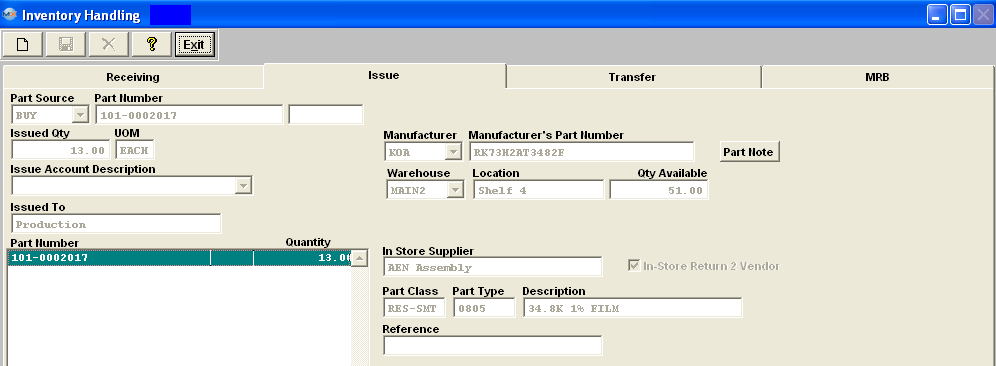
If issuing parts with Serial Numbers once user has entered the Part number info, etc. Users have the option of selecting the Serial Numbers to be issued two different ways:
By highlighting and using the arrows. Select the proper radial "Single Entry" or "Range" and enter in the From and To SN's:
Depress the Save button and the SN's will transfer over into the Inventory Handling issue screen.
Below is how the screen will appear If issuing Lot Coded parts:
Depress the Save button to save changes, or the Abandon changes button the abandon changes.
|
| 1.2.4.3. Transfer Tab | |
|
Enter the SQLMANEX.EXE (within the ManEx root directory)
This action will then prompt the user for a password
|
|
|
The following screen will be displayed, select Inventory Management/Inventory Control Management/Inventory Handling
|
|
The following screen will be displayed:
Depress the Transfer tab and the following screen will be displayed:
To transfer inventory from one warehouse to another follow these steps.
- Depress the Add button.
- Enter your password.
- Select the Part Source from the pull down menu. (BUY, MAKE, or CONSG)
- Enter the Part Number, if Part Source is "CONSG" you will need to enter Customer Name from pull down, then you will have a choice to enter in customer PN or Internal PN.
- Part type, class, and description will default in.
- Select the Manufacturer & Manufacturer part number from the pull down list.
- Select the "From" warehouse from the pull down list.
- Then select the "To" warehouse from the pull down list.
- Enter quantity to transfer.
- Select the reason from the pull down list.
- Enter the reference if applicable
- Depress the Save button.
For this feature to work properly, the Inventory Part Number MUST have two warehouse locations assigned to it within the ICM module. The "From" Location MUST have quantity on hand.. If user attempts to transfer parts that do NOT have two warehouse locations, or from regular inventory location to MRB, the following message will be displayed. This screen is used to move parts from a regular warehouse to another regular warehouse, or to move parts that are already located in MRB back into regular stock. (Note: System will NOT allow users to transfer parts out of MRB location to regular inventory if parts were transfered into the MRB warehouse through PO Receiving). To move parts from stock to MRB you will need to use the Inventory Handling MRB screen .

|
This message is a general message that is displayed in Inventory Handling if all locations/AVL's for a part are flagged in a Cycle Count or Physical Inventory and the part has ONLY one WHSE and AVL setup.
User must reconcile and post the cycle count or physical inventory for this part and then you will be able to process the records within Inventory Handling.
|
NOT displayed, but the warehouse drop down is not avaiable for selection within the issuing, receiving, transferring, and MRB screens after you select the AVL. As shown in the screen below.
The completed screen will look like this.
If transfering qty from an In-Store warehouse to an Internal warehouse an accounting transaction will be created in Inventory Transfer upon saving the transfer. Then user will then need to create the In-Store PO within the PO module.
|
| 1.2.4.4. MRB Tab | MRB (Material Review Board) Warehouse Overview
The MRB (Material Review Board) Warehouse is where rejected material found at time of PO receiving or in production is transferred through inventory handling into the WHSE so management has time to determine whether to return discrepant material to the Supplier. It is a non-netable account meaning qty's residing in this WHSE are not consider as available inventory for MRP demands or production needs.
|
Enter the SQLMANEX.EXE (within the ManEx root directory)
This action will then prompt the user for a password
|
|
|
The following screen will be displayed, select Inventory Management/Inventory Control Management/Inventory Handling
|
|
The following screen will be displayed:
Depress the MRB tab. The following screen will be displayed.
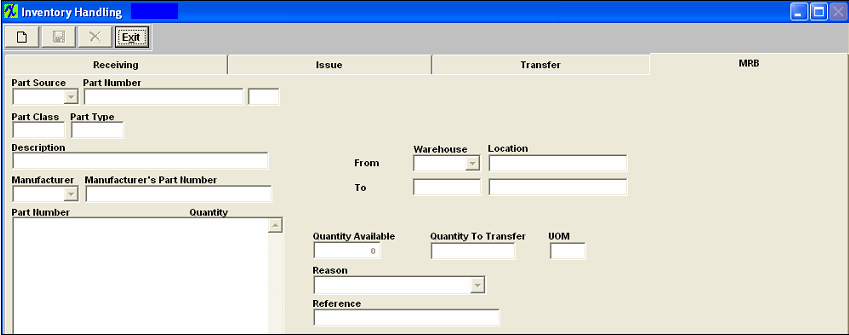
To Transfer Inventory Items from Inventory to MRB follow these steps.
- Depress the Add button.
- Enter in your password.
- Select the Part Source from the pull down menu. (BUY, MAKE, or CONSG)
- Enter the Part Number, if Part Source is "CONSG" you will need to enter Customer Name from pull down, then you will have a choice to enter in customer PN or Internal PN.
- Part type, class, and description will default in.
- Select the manufacturer & manufacturer part number from the pull down list.
- Select the From Warehouse from the pull down list:
- The To Warehouse automatically defaults to MRB (Material Review Board).
- Enter the Quantity to Transfer.
- Select the Reason for transfer from the pull down list:
- Enter in the Reference if applicable.
- Depress the Save button.
|
This message is a general message that is displayed in Inventory Handling if all locations/AVL's for a part are flagged in a Cycle Count or Physical Inventory and the part has ONLY one WHSE and AVL setup.
User must reconcile and post the cycle count or physical inventory for this part and then you will be able to process the records within Inventory Handling.
|
If the part has more than one WHSE and/or AVL setup and the part number is flagged in a Cycle Count or Physical Inventory the warning is NOT displayed, but the warehouse drop down is not avaiable for selection within the issuing, receiving, transferring, and MRB screens after you select the AVL. As shown in the screen below.
The completed screen will appear as follows:
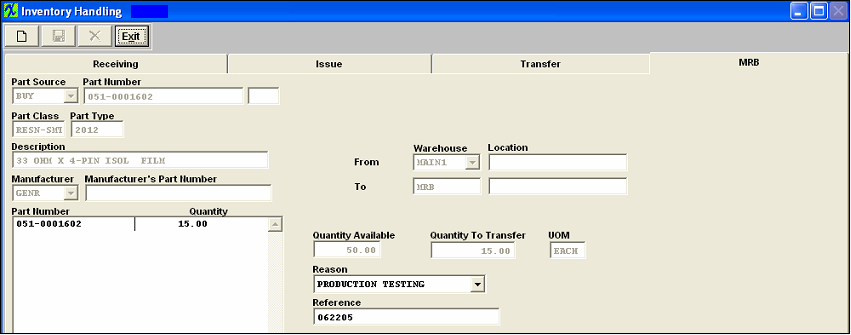
Once the preceding steps have been completed, the user may Add to PO DMR (Discrepant Material Return) module, or you may transfer it back into Inventory using the Transfer tab .Once the DMR (discrepant material return) has been added and saved, a Debit Memo will be created in the Accounting System. Additionally, the corresponding entry will be created and the balance in the Accounts Payable Aging will adjust.
|
| 1.3.1. Prerequisites for the IPS Upload |
-
User must have the In-Store optional module.
-
After activation, "IPS Upload" access for each user must be setup in the ManEx System Security module. Users with “Supervisor Rights” will automatically have access.
- User has to complete the required fields in the IPSimport.xlt located in the xlfiles directory to import to a In-Store PO.
-
|
| 1.3.2. Introduction for the IPS Upload | This upload is designed to add quantities to the existing part number and MPN into the in-Store location. If the MPN has "auto location" checked the upload will allow the user to auto add a location that does not exist. The quantity will update if the contract does not exist and will be created for the price entered in the "price" column. If the price is omitted the system will use the material price for the part as entered in the inventory module and Inventory receiving transactions will be populated, but there will be no affect on accounting upon receipt/import.
|
| 1.3.3. Fields & Defintions for the IPS Upload |
| 1.3.3.1. In-Store XL Spreadsheet | 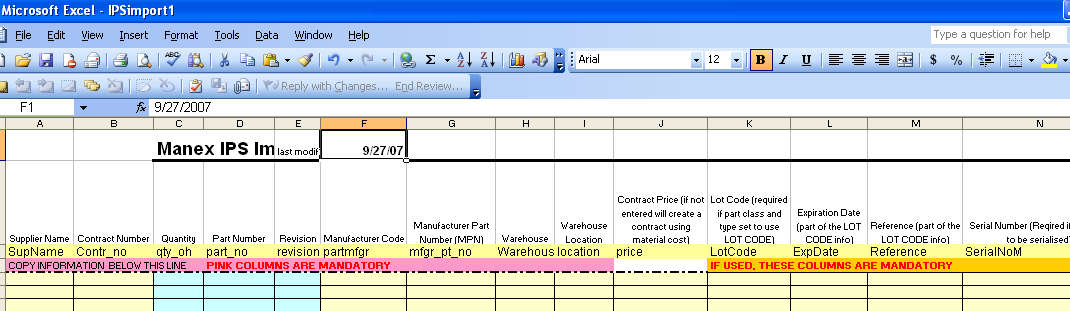
|
SupName
|
(Required) Existing In-Store Supplier Name for In-Store Warehouse
|
|
Contr_no
|
(Required) Contract Number (If contract already exists the contract number entered must match existing)
|
|
qty_oh
|
(Required) Quantity On-Hand
|
|
part_no
|
(Required) Existing Internal Part Number with exsiting In-Store Warehouse Setup
|
|
revision
|
(Required) Existing Revision (if applicable)
|
|
partmfgr
|
(Required) Existing Part Manufacturer with existing In-Store Warehouse Setup
|
|
mfgr_pt_no
|
(Required) Existing Manufacturer Part Number with existing In-Store Warehouse Setup
|
|
Warehouse
|
(Required) Existing In-Store Warehouse
|
|
location
|
(Required) Existing In-Store Warehouse Location
|
|
price
|
(Option) Contract Price (If price is omitted it will use material price for the part as entered in the inventory module).
|
|
LotCode
|
(Required if Lot Coded Part) Lot Code
|
|
ExpDate
|
(Required if Lot Code Part) Expiration Date
|
|
Reference
|
(Required if Lot Coded Part) Reference
|
|
SerialNoM
|
(Required if Part is Serialized) If the part is serialized the users can enter all serial numbers into the “SerialNoM” column of the spreadsheet separated by one of the following; coma, semicolon, space, tab. If the user wants to enter range of the serial numbers they have to separate starting and beginning of the range with the dash surrounded by spaces like “ – “. The reason for that is that serial number itself might have “-“ as a part of the serial numbers. For example serial numbers entered as
“C123 - C125” will translate as C123, C124, C125
but serial number entered as “C123-C125” will translate as “C123-C125” (notice no space surrounded the “-“). The following example will show other combinations that could be treated as ranges in the upload;
Z1000002 - Z100005 (Z1000002, Z1000003. Z1000004, Z1000005)
FU12 – 15 (FU12, FU13, FU14, FU15)
98 – 103 (98, 99, 100, 101, 102, 103)
z150-0009 - z150-0013 (z150-0009, z150-0010, z15-0011, z15-0012, z15-0013)
Here is an example of the entered serial numbers that will not translate into the range;
H890129292 K87827327 (H890129292, K87827327)
V5678888X - V32787382S (V5678888X, V32787382S)
540 - c670 (540, c670)
|
|
| 1.3.4. How To ..... for the IPS Upload |
| 1.3.4.1. Add - Upload to IPS |
|
Enter the SQLMANEX.EXE (within
the ManEx root directory)
This
action will then prompt the user for a password
|
|
|
The following screen will be
displayed, select Inventory Management/Inventory Control Management/IPS Upload
User will get a prompt to find the file which they want to upload and then the system will import the data and proceed with validation and saving
|
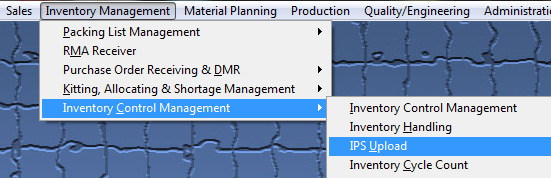 |
|
Locate XL File to Upload
|
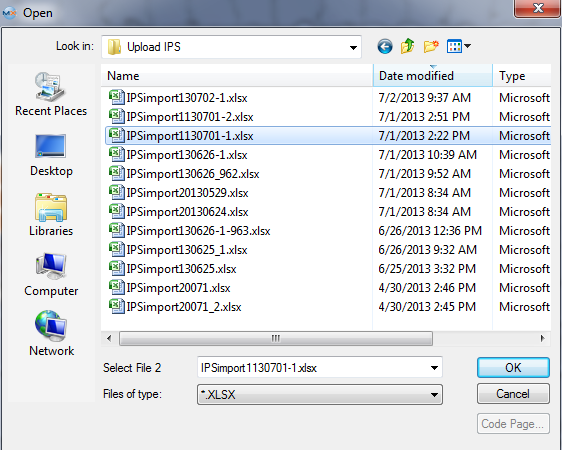
|
|
The following Warning will appear: This message is for user to verify the number of records being loaded from the import sheet. User may depress "YES" to continue the upload or "NO" to abort the upload.
|
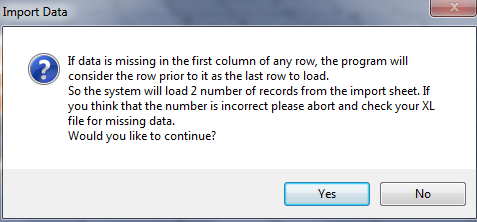 |
If you depress No to Abort Upload the user will be prompted the following message that the Inventory Upload was not complete
|
 |
| If you depress Yes to Continue the user will be prompted the following message that the Inventory Upload complete. |
 |
|
If the system finds any problems with template the user will be prompted the following message and exception XL file will be created in the Inv Exception XL Sub Directory on the server.
Depress OK and user will receive the message (shown above) that the "Inventory Upload was not complete" and system will abort. |
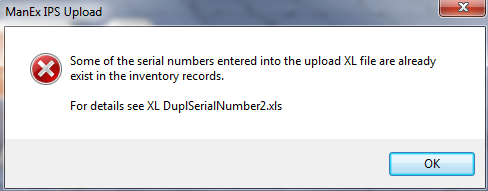 |
|
During the upload if user has a contract already setup the following message will appear. If user selects "Yes" Upload will continue, if user selects "No" Upload will abort.
This is a message to remind users that the contract number already exists for suppliers and creates an XL file, so user can check to be sure they didn't accidentally enter in the incorrect contract number. Because the system does allow the same contract number to be used multiple times for same supplier for different parts, but does NOT allow the same contract to be used multiple times for the same supplier and same part.
|
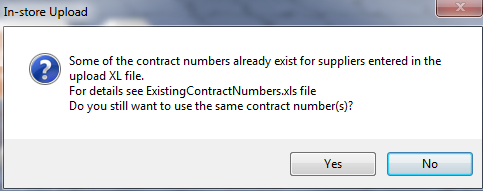 |
During the upload if the Contract Number/Part Number/Mfgr already exists in system, and user has it again in the template:
1. Find same qty and same price, only qty OH will be changed.
2. Find same qty but different price, the following message will be displayed, giving you the option to overwrite the existing price.
3. If only less qty with same price is found, system will use the contract price break qty instead of creating a new qty break.
4. If only larger qty with same price is found, system will use the contract price break qty instead of creating a new qty break.
5. Otherwise the system will create a new price break with new price/qty.
If price is omitted from xl spreadsheet system will use the material price from the Inventory Control screen.
|
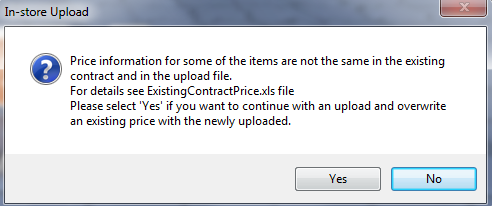 |
| During the upload if the contract number listed on the xl spreadsheet is different than the existing contract number, user will receive the following message and system will abort. |
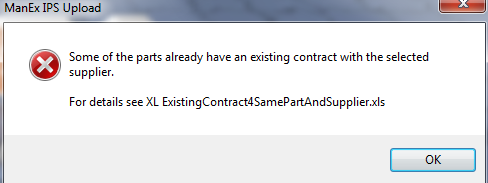 |
Once the upload is complete the "Transaction Detail Log" report is updated for In-Store location, as displayed below:
Since these items are being received into a In-Store location there will be no affect on accounting upon receipt/import.
|
| 1.4. Inventory Cycle Count |
| 1.4.1. Prerequisites for Inventory Cycle Count | Prerequisites Required for Using CYCLE COUNT:
After activation, "Inventory Cycle Count" access for each user must be setup in the ManEx System Security module. Users with “Supervisor Rights” will automatically have access.
| Part Number |
Part numbers must exist in the Item Master . |
| ABC Codes |
The ABC codes must be assigned to each part (within the Item Master) to be counted.
|
Optional Prerequisites for Modifying ABC Codes:
| ABC Setup |
The ABC codes must be established for percentages of value in the ABC Types setup module.
|
| Inventory Issues |
There must be a history of inventory issues to establish Estimated Annual Usages.
|
|
| 1.4.2. Introduction for Inventory Cycle Count | The CYCLE COUNT Module is provided for the user to establish a daily routine for counting INTERNAL inventory. Note: Only user owned inventory will be considered – NOT “consigned” (Customer owned), and/or WO-WIP or WIP locations. If the user needs to count “consigned”, or a smaller range of internal parts outside the ABC Code setup, ManEx suggests to use the Physical Inventory module. Records that have been allocated will display in red within the Inventory Cycle count module. If the users attempt to edit the record that is allocated lower than the allocated qty it will display a message. In-Store inventory will be considered unless the "Ignore In'Store" box is checked within the ABC Types Setup module, if this box is checked then In-Store warehouses will NOT be considered in the Cycle Count.
The ABC codes need to be specifically setup for Make parts, if Make parts are to be included in the cycle count. If an ABC code is setup for a buy part and that ABC code is assigned to a Make part the make part will NOT be included in the cycle count and vica vera.
The three steps to completing Cycle counting activities in ManEx are:
1) Create a New List - User generate a list of inventory items to count by clicking the "Run Cycle Count Setup" button (Add button).
2) Count and Record Results - Then the stores keepers physically count the items listed and enter the quantity counted for each item into the cycle count screen.
3) Reconcile Differences - At the conclusion of the data entry, the data is reconciled with the inventory records. If the count is different than the record, then the user is prompted whether to accept the difference or to recount and re-enter. Count adjustments are logged to the GL adjustment account, if accounting is used.
A report is available summarizing and itemizing the results of the cycle count activities. If the user has established cycle count tolerances in the ABC Types setup, then a report will delineate the number of times that the cycle count exceeded the permissible tolerance.
The frequency of counting for each part is defined in the ABC Type setup, and based on the ABC Type assigned to each part.
There is provision to automatically assign ABC Types after the user has been operating the ManEx system for some time. The user has the option to base the assigned ABC Type on either the current dollar value of the inventory, or the Estimated Annual Usage dollar amount of inventory. If the user chooses to reassign ABC Types automatically, the ABC Type setup must have established the amount (by percentage) of inventory value to be attributed to each ABC Type.
There is also a provision for establishing the EAU (estimated annual usage) for each inventory item. The EAU is based on inventory issues in the last 30 days, weighted by another factor to account for historical issues. In order to create the EAU, there must have a minimum of 30 days activity in issues from stores.
Cycle Counting is the practice of counting a small subset of inventory on a given day. It can be an effective and efficient method for maintaining current on-hand inventory counts. It allows for greater flexibility, greater accuracy, and less interruption to production than an annual physical inventory.
The first step in establishing a cycle counting program, is to determine component groups and group count frequency. Groups are typically designated by their ABC code with A parts counted more often than B parts and B parts counted more often than C parts, and so forth. Some common parameters, in this industry, for determining the correct ABC code are: Value, Lead Time, Usage, EAU Value, and Hybrid.
Value - This method groups components according to their on-hand value. The components with the highest on-hand value are counted more frequently than those with a smaller on-hand value. This method is ideal from an accounting perspective as it typically results in a much smaller variance in inventory value, but may not be ideal from a supply chain management perspective since even inexpensive components can cause expensive production delays and missed shipments. This is relatively easy to calculate and can be assigned manually if needed.
Lead Time - This method groups components according to their lead time. Components with long lead times will receive more frequent counts and thus have higher inventory accuracy. While this makes sense from a supply chain management perspective, it can lead to high inventory value variances since expensive components don't always have long lead times. This is relatively easy to calculate and can be assigned manually if needed.
Usage - This method groups components by their annual usage (EAU) regardless of their value or lead time. The argument for this method is that the more frequently accessed components have a greater likelihood for inventory variances and should therefore be counted more often. This method tries to reduce the impact of human error in inventory transactions. However, it may not minimize variance in inventory value, or prevent long lead parts from stopping production if those parts are not used as often. This may be a little more difficult to calculate manually, but can be done if needed.
EAU Value - This method groups components by the value of the annual usage (EAU). This method attempts to rectify the inventory value variance issue with the Usage method, by including component costs. It is likely to have a lower inventory value variance, but may not fully adjust for inexpensive or low usage parts with long lead times. This may be a little more difficult to calculate manually, but can be done if needed.
Hybrid - This method combines any or all of the methods listed above. This method assigns components with high on-hand value, high usage, and/or long lead times to group A. This ensures that parts with the greatest potential for causing production delays or inventory value variances are counted most often. While this can be done manually, it is better to allow the ERP system to assign and adjust the ABC code according to current conditions.
The second step is to determine how often each ABC code should be counted. Higher count frequencies lead to more accurate inventory records, but also increased handling costs. Management needs to find a balance between cost and benefit. One common frequency is to count A parts every 30 days, B parts every 120 days, and C parts every 180 days.
The third step is to determine the best time of day for cycle counting activities. Ideally this will occur either before production begins, or at a time when production and inventory movement will be at the lowest level of the day. This can be early in the morning before production starts or during the standard lunch break.
The fourth step is to determine who should be responsible for performing cycle counting activities. Because cycle counting reduces the daily time required, the focus can shift from speed to accuracy and process improvement. A shift that requires knowledgeable and experienced employees to conduct the cycle counting activities. This is typically limited to employees in inventory.
The final step is to start counting and discovering the sources of each significant discrepancy. As part of the counting process, it is imperative to identify why discrepancies exist and work to eliminate the sources. Initially, it is far more important to identify and eliminate sources of discrepancy than to get through the full cycle each period. Not only will eliminating sources of count discrepancies reduce costs and production delays, but it will speed the cycle counting process as well.
A well designed and executed cycle counting program should achieve an accuracy of 97% or more.
|
| 1.4.3. Fields & Definitions for Inventory Cycle Count |
| 1.4.3.1. Main Screen |
Main Screen field definitions
 |
Depress this button to record the adjustments in the count into the Inventory Master and to create the applicable accounting entry. The "Allow Updating Inventory" option button (for Physical Inventory) within the Security module MUST be checked in order to Post Inventory Adjustments |
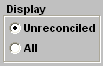 |
This will allow user to select only the un-reconciled parts or all parts. Selecting "All" will display parts that are un-reconciled and reconciled but not yet posted. |
| Location |
The warehouse location for the part to be counted.
|
| Part Mfgr |
The Manufacturer for the part to be counted.
|
| MPN (Manufacturer’s Part Number) |
If the source is a buy, the number that the manufacturer has assigned to the part.
|
| Part Number |
The Internal Part Number for the item to be counted. Depressing the Part Number button will sort the grid by part number.
|
| Rev |
The Part Number Revision for the item. An item may exist under multiple revisions.
|
| Count |
The physical count quantity of the item observed during cycle counting |
| Init |
The initials of the individual who performed the cycle count.
|
| Date |
The date that the inventory was counted. The date will default to the current date, but may be over-written.
|
| Allocated |
If an inventory part number has allocated inventory, the line will show in red and the Allocated box will have a check mark.This field is a reference field which indicates to the user that there is allocated inventory against this item and the system will not allow you to adjust the qty below the allocated amount.
|
| Lot Code |
If the part type has been designated as requiring lot tracking, then the lot tracking reference number appears.
|
| Reference |
Lot Code tracking reference number. |
| Exp Date |
Expiration date of Lot Code |
| PO # |
Customer PO number |
| Warehouse |
The name of the warehouse for the part. Depressing the Warehouse button will sort the grid by warehouse |
| Source |
The source of the part number, Make or Buy. Depressing the Source button will sort the grid by source.
|
| Part Class |
The classification of the part. Depressing the Part Class button will sort the grid by part class. |
| Part Type |
The part type within the classification of the part number.
|
| Description |
The description of the part number.
|
| UoM |
The unit of measure of the part number.
|
| Serial Number |
If the part has been designated as requiring serial numbers, then the serial numbers must be entered in this screen. |
|
| 1.4.3.2. ABC Types | ABC codes are used as an aid to manage inventory tracking. Traditionally, ABC codes are established to divide the inventory by value, and to guide in the cycle counting of inventory.
First the value of all inventory in stores is added up and listed by part in order of the highest extended value first. Then, the top percentage value (e.g. 80 % of the parts value) would be classified as “A” items, and will probably consist of about 10-15% of the inventory part numbers. The next 15% of the value items would be classified as “B” items, and will be in the neighborhood of 20-40% of the part numbers. The last 5% of the value will be classified as “C” items, and represent at least 50% of the part numbers.
The user then sets up an inventory counting program called “Cycle Counting”, which assists in counting all inventory over a period of time. The “A” items might be counted completely within each month. Therefore, a list of all of the “A” items (the highest dollar value) is generated, and randomly divided into 20 days, and each day 1/20th of the list counted and checked. The “B” items might be checked every quarter, and the “C” items checked once a year. This is one way to verify the accuracy of stockroom transactions, and to take measures necessary to keep the counts accurate.
In ManEx, the ABC codes have a slightly different meaning. In addition to identifying the most or least expensive part numbers, a Dock to Stock period may be included in each ABC code. Dock to Stock is the number of days a part is expected to take to be delivered to the stock room after the part is received on the user’s dock. This duration may include the amount of time it takes to organize the shipment, count the parts, log the receipt into the inventory system, perform incoming inspection, and physically move the parts to stores. Intuitively, the higher dollar parts may have longer dock to stock times because of increased inspection. And the lesser valued parts may not require inspection.
Also, for each ABC code, ManEx provides a cycle count tolerance, which, if exceeded, will result in reporting unfavorable inventory control results during cycle counting. These tolerances may be expressed in an absolute dollar value, or a percentage of the inventory being counted. For further information on the cycle count tolerances and what the purpose of setting them up in ManEx is see the attachment <<Cycle Count Tolerance.docx>>
And, the ABC code identifies a part source for inventory parts. Because ManEx allows up to 36 ABC codes, it also provides for identifying if a part is a make or buy part.
The ABC codes need to be specifically setup for Make parts. If Make parts are to be included in the cycle count. If an ABC code is setup for a buy part and that ABC code is assigned to a Make part the make part will NOT be included in the cycle count and vica vera.
Note: If an internal part number does NOT have an ABC code assigned, that part will NEVER be selected for cycle counting. Therefore, all internal parts which the user wished to be cycle counted, MUST have a code in the ABC field in the Inventory Control Item Master.

|
| 1.4.4. How To ..... for Inventory Cycle Count |
| 1.4.4.1. Generate Cycle Count List |
|
Enter the SQLMANEX.EXE (within the ManEx root directory)
This action will then prompt the user for a password
|
|
|
The following screen will be displayed, select Inventory Management/Inventory Control Management/Inventory Cycle Count
|
 |
The following screen will appear: When the screen first opens, the user is limited to only six of the eight action buttons shown: Add button (Run a cycle count setup), Edit button (Enter cycle count results), Copy button (Reconcile cycle count data), Print reports, Help and Exit. This is the first screen to be used in the module. In this screen, a CYCLE COUNT is created (ADD) for viewing, printing and editing.
A cycle count may NOT be added on a non-working calendar day, however, open cycle count records may be counted, entered and reconciled. If trying to add a cycle count on a non-working calendar day this message will popup.
Depress okay and no cycle count will be ran.
Depress the "Run Cycle Count" button (Add button)
Records for cycle count will be pulled forward. Records that have allocations made within the system will be pulled forward for count, these records will be highlighted in RED (as displayed below). Parts in WO-WIP and/or WIP locations will NOT be pulled forward for count.
User may select to Display only the "Unreconciled" parts or "All" parts. Selecting "All" will display parts that are un-reconciled and reconciled but not yet posted.
Note: The cycle count module will allow multi-user access to enter and/or reconcile. The users must exit and re-enter to screen to refresh if an action was done on another work station. Only one user may Post.
|
| 1.4.4.2. Entering Cycle Count Data |
|
Enter the SQLMANEX.EXE (within the ManEx root directory)
This action will then prompt the user for a password
|
|
|
The following screen will be displayed, select Inventory Management/Inventory Control Management/Inventory Cycle Count
|
|
The following screen will appear displaying the records pulled forward for cycle count.
Note: The user may not ADD a cycle count on a non-working calendar day. However, open cycle count records may be counted, entered and reconciled. Records that have allocations made within the system will be pulled forward for count, these records will be highlighted in RED. Parts in WO-WIP and/or WIP locations will NOT be pulled forward for count.
Depress the Edit Record action button (Enter Cycle Count Results). User will be prompt for password.
The user then enters the recorded counts in the COUNT column. The counter’s initials and the date counted will update automatically.
Depress the Save changes action button to save changes, or depress the Abandon changes button to abandon changes.
If the number of serial numbers entered does not match the count number entered for a part that is marked as Serialized, user will receive the following message.
Depress OK and these descrepancies must be fixed before the records can be saved.
Note: The cycle count module will allow multi-user access to enter and/or reconcile. The users must exit and re-enter to screen to refresh if an action was done on another work station. Only one user may Post.
|
| 1.4.4.3. Reconciling Cycle Counts and Post Inventory Adjustments | |
|
Enter the SQLMANEX.EXE (within the ManEx root directory)
This action will then prompt the user for a password
|
|
|
The following screen will be displayed, select Inventory Management/Inventory Control Management/Inventory Cycle Count
|
|
The following screen will be displayed:
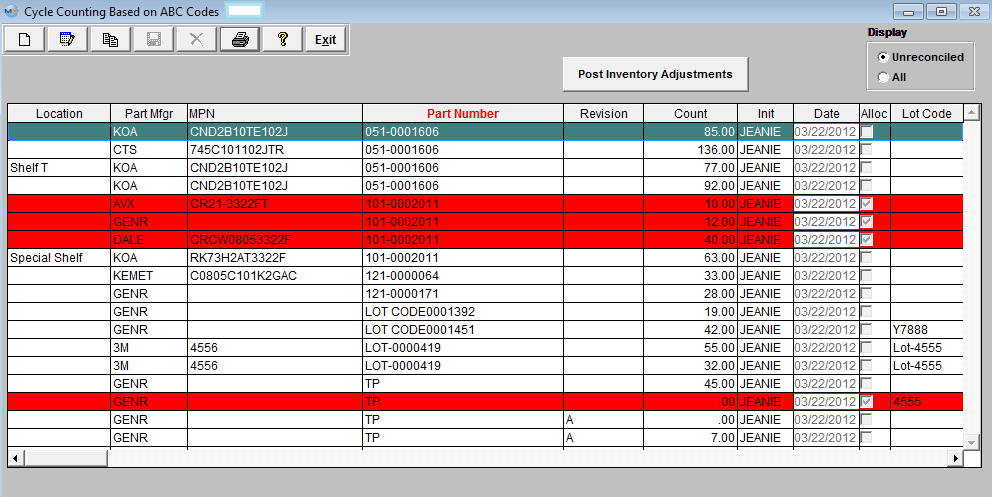
Depressing the Copy action button (Reconcile Count Records)
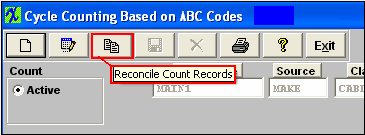
Enter password.
The system checks the counted quantities entered into the Cycle Count screen and verifies that the count matches the inventory records.
If the users attempt to edit the record that is allocated lower than the allocated qty it will display the following message and those records will be eliminated for reconciliation. If you need to apply the count into the system you must first unallocate some of the inventory via the Inventory Allocation module to free up the amount you are attempting to adjust then return to the count and it will then allow you to post to inventory.
If the count matches the inventory record the item drops from the list.
If it does not match the inventory record, the following screen appears and the user is asked whether to accept the entered count as the new count, by depressing the "YES" button and entering a reason for the change (cycle count, missing parts, etc) or to wait until the user has had the opportunity to recheck the number and reconcile it at a later time by depress the "Next Item" button.
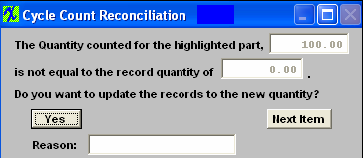
Items not reconciled will remain on the list until reconciled.
Note: The user should not post the Inventory Adjustments until all of the reconciliation is completed.
To record the adjustments in the count into the Inventory Master and to create the applicable accounting entry, depress the "Post Inventory Adjustments" button. You will be prompted for your password. The "Allow Updating Inventory" option button (for Physical Inventory) within the Security module MUST be checked in order to Post Inventory Adjustments. If user does NOT have these special rights they will receive the following message.
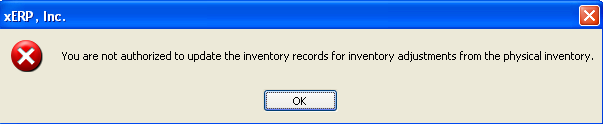
Note: If the inventory item has changed in quantity (due to kitting or an issue via Inventory Handling between the beginning of the cycle count and the reconciliation), the system will alert the user and will print out a report detailing the part number and the discrepancy. The user must change the data entry for the count, and then re-reconcile.
Once the system has made the transfer, the following message will appear:
Depress the OK button and all Inventory Adjustments are completed.
|
| 1.4.5. Reports - Inventory Cycle Count |
To obtain the Packing
List Reports within the Web, select the WEB Print button from the ManEx action buttons at the top
of the screen. For further detail on How the Reports work within the Web refer
to Article #5477.
Note: In order to access the Reports within the
Web the Company Root URL must be setup within the System Appearance module and user must be
linked to web within the System Security Module.

Select the Report Type: CYCLE COUNT - A List of Reports will be displayed that are available on the Web
for CYCLE COUNT
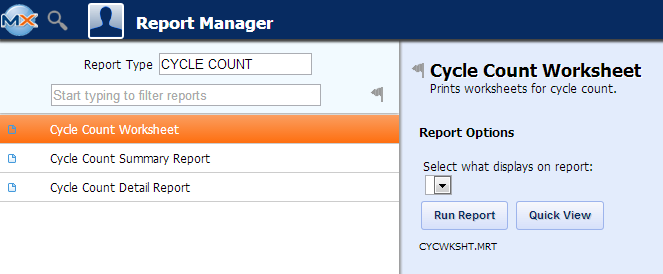
To obtain the Inventory Cycle Count reports, select the Print button from the ManEx action buttons at the top of the screen.

The following reports screen will display a list
of reports that are available on the ManEx Desktop:
Cycle Count Worksheet Report
|
Select between printing the Manufacturer and Manufacturer’s Part Number or Description.
Depress the OK button.
|
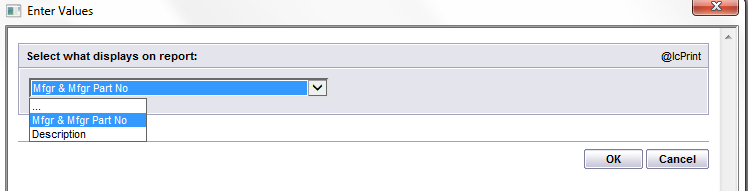 |
The following report is available:
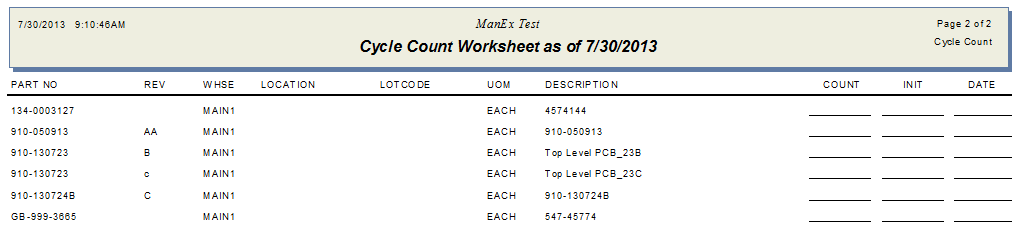
The items are counted and recorded on the sheet, and then data is entered into the ManEx System.
Cycle Count Summary Report (NOT Complete in SQL)
|
Select the date range of interest and the warehouse and part classes to be included.
Highlight the Warehouse of interest and depress the > button.If you want all warehouses, depress the >> button.
Highlight the Part Class of interest and depress the > button.If you want all of the classes, depress the >> button.
Depress the OK button
|
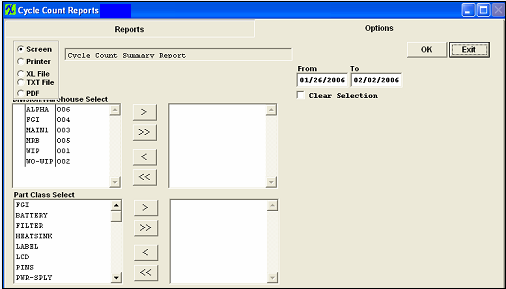 |
The following report will be displayed.
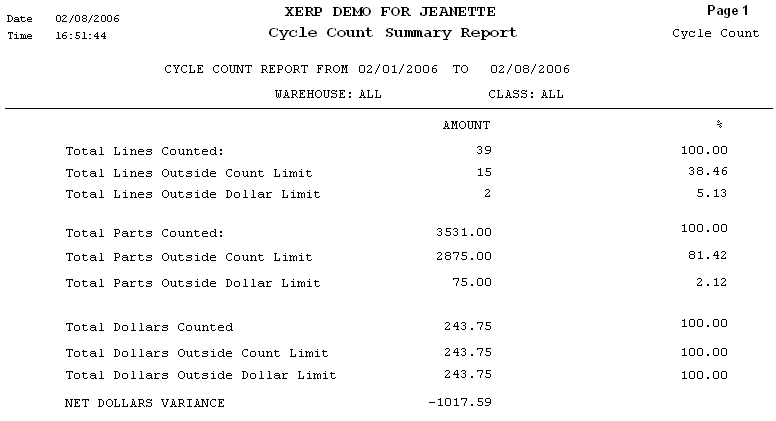
Cycle Count Detail Report - Sorted by Division (NOT Complete in SQL)
|
Select the date range of interest and the warehouse and part classes to be included.
Highlight the Warehouse of interest and depress the > button.If you want all warehouses, depress the >> button.
Highlight the Part Class of interest and depress the > button.If you want all of the classes, depress the >> button.
Depress the OK button
|
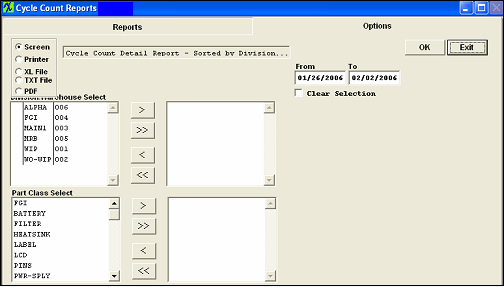 |
The following report will be displayed.
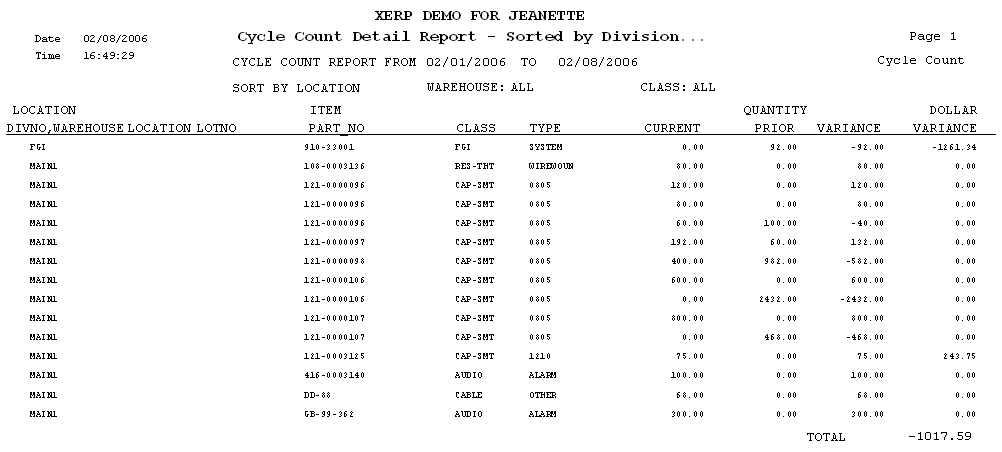
Cycle Count Detail Report - Sorted by Class (NOT Complete in SQL)
|
Select the date range of interest and the warehouse and part classes to be included.
Highlight the Warehouse of interest and depress the > button.If you want all warehouses, depress the >> button.
Highlight the Part Class of interest and depress the > button.If you want all of the classes, depress the >> button.
Depress the OK button.
|
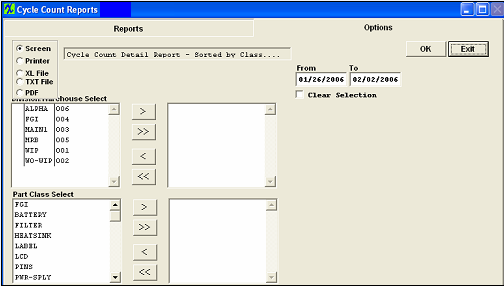 |
The following report will be displayed.
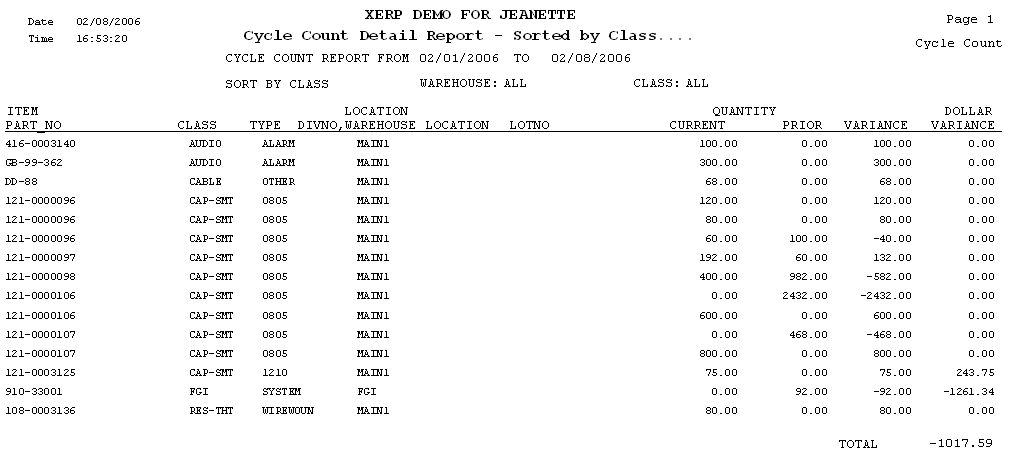
|
| 1.4.6. FAQ - Inventory Cycle Count |
| 1.4.6.1. How can I clear out a Cycle Count that was started in error? | For Example, a user has begun the Cycle Count process by pulling items fwd into the module for counting by accident, but for what ever reason, you do not wish to continue on with the reconciliation process of the count. But now those parts are locked in a count and will not be editable throughout the system (Kitting, PO Receiving, Inventory Handling, etc. . . ) If the part is locked in a count you will see messages similar to the below throughout the system.
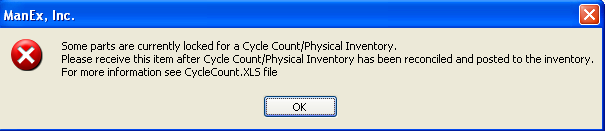
If you wish to Purge the Cycle Count out of the system you can run the below procedure and any record that has not had a count entered into the Cycle Count module will be cleared.
Please be sure to follow the procedure below to install this program. It is highly recommended that you follow this procedure on your TEST system first before applying it against your Live ManEx System.
1.) Create a Backup of your Live ManEx System
2.) Extract << purgecc9.exe>> into the ManEx Root Directory
3.) Run the Executable
4.) Verify the Results
5.) Remove << purgecc9.exe>> from the ManEx Root Directory
Once satisfied with the results in your test system, you may proceed with your Live ManEx System. Please let me know if you have any questions.
|
| 1.4.6.2. Why are some ABC type parts no longer being included in the Cycle Count? | Q. Why are some ABC type parts no longer being included in the Cycle Count?
A. Check your calendar date to be sure it is extended out far enough for the program to find the date in the calendar.
For Example: If the System Admin Calendar setup ends 12/31/2008, and the Cycle count day for "B" type is 180 days, and the cycle count is ran on 10/25/2008 the date would be 1/25/2009, the program will not find 1/25/2009 in calendar, so the "B" type parts are not included in the cycle count. Once the System Admin Calendar is reset to end 12/31/2009 and the Cycle Count is re-ran then the "B" items are included in the Cycle Count.
|
| 1.5.1. Prerequisties for Physical Inventory | Before entering transactions, the following must be setup in Manex.
After activation, "Physical Inventory" access for each user must be setup in the ManEx System Security module. Users with “Supervisor Rights” will automatically have access.
|
| 1.5.2. Introduction for Physical Inventory |
The Physical Inventory module is to manage the physical inventory count. The user has the choice of using count tags or a count worksheet. The inventory is physically counted and then input into the system. More than one user may input into the system at a time. Note: The users must exit and re-enter the screen to refresh if an action was done on another work station. Only one user may post. IMPORTANT NOTE: DO NOT MOVE ANY MATERIAL WHILE THE COUNT IS TAKING PLACE. Once the count is input into the system, the system provides for a reconciliation between the Inventory Master and the physical count. If the count is different than the record, the user is prompted whether to accept the difference or to recount and re-enter. If the count equals the Inventory Master, there is no adjustment required and the number counted will drop off of the reconciliation list. Once the reconciliation is completed, the user may print out a reconciliation report. Then, after reviewing, the user may update the quantity on hand in the Inventory Master. Note: This takes a high level password or special rights as assigned in Security. Once this is done, the accounting journal entries will update automatically, if the MANEX accounting module is used. |
| 1.5.3. Fields & Definitions for Physical Inventory |
| 1.5.3.1. The Setup Tab | 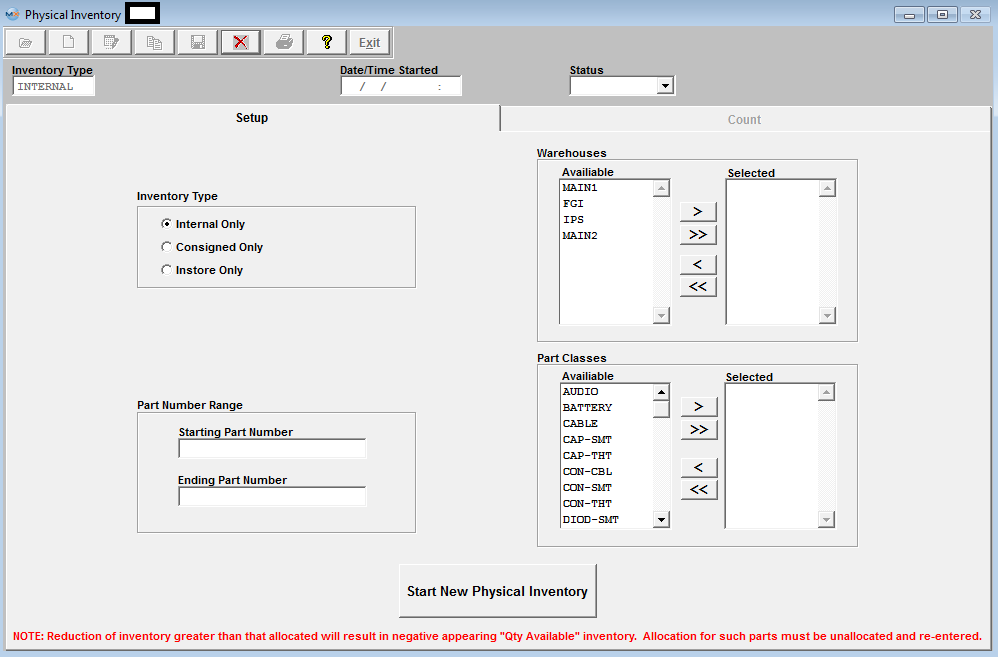
Setup tab field definitions
| Inventory Type |
The type of Inventory, either Internal, Consigned or Instores.
|
| Customer |
If the Inventory Type is Consigned, the Customer name will display in this field.
|
 |
| Supplier |
If the Inventory Type is Instore, the Supplier name will display in this field
|
 |
| Date/Time Started |
The date and time (24 hour clock) when the Inventory was originally started.
|
| Status |
The status of the physical inventory, either In Process, Completed or Cancelled.
|
| Inventory Type |
The radial selected will display either Internal, Consigned or Instores only.
|
| Part Number Range |
The range or internal part numbers selected for counting. |
Warehouses
| Available |
The name of any available warehouses selected for counting.
|
| Selected |
The name of the warehouses that were actually selected for counting.
|
Part Classes
| Available |
The part classifications which were available for counting.
|
| Selected |
The part classifications that were actually selected for counting.
|
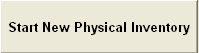 |
Depressing this button will start a new Physical Inventory.
|
|
| 1.5.3.2. The Count Tab | Depressing on the Count Tab brings up the following screen:
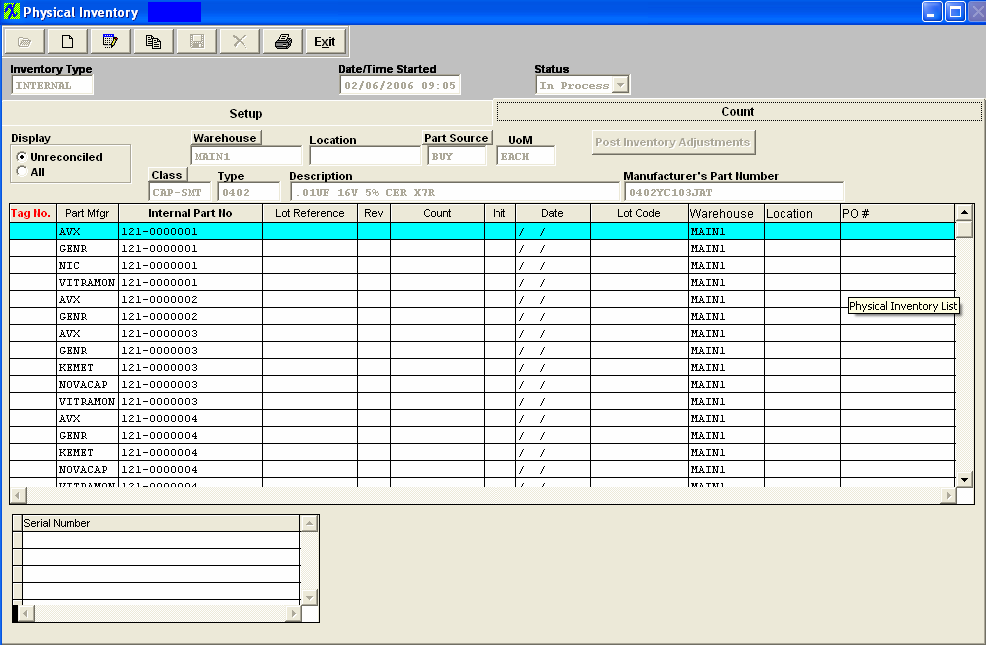
Count Screen Fields
| Inventory Type |
The type of Inventory, either Internal, Consigned or Instores.
|
| Supplier/Customer |
If the Inventory Type is Instore, the Supplier name will display in this field.If the Inventory Type is Consigned, the Customer name will display in this field.
|
| Date/Time Started |
The date and time (24 hour clock) when the Inventory was originally started.
|
| Status |
The status of the physical inventory, either In Process, Completed or Cancelled.
|
For the part number highlighted:
| Warehouse |
The warehouse location for the part to be counted.
|
| Location |
The warehouse location for the part to be counted.
|
| Part Source |
The Make/Buy/Consigned/In Store type for the part to be counted.
|
| UOM |
The Unit of Measure to be counted. Same as stocking unit. |
| Class |
The classification of the part.
|
| Type |
The type within the classification to which the part belongs.
|
| Description |
The description of the part.
|
| Manufacturer’s Part No |
The number used by the manufacturer to identify the part.
|
| Tag No. |
If you have already printed Physical Inventory Tags, the Tag Number will appear in the Tag Number column. (Unless you numbered them manually, as described above.)I f you have not printed tags, the Tag Number column will be blank. |
| Part Mfgr |
The Manufacturer for the part to be counted. |
| Part Number |
The Internal Part Number that has been assigned to the item to be counted.
|
| Lot Reference |
If the part type has been designated as requiring lot tracking, then the lot tracking reference number appears.
|
| Rev |
The part number revision for the item. An item may exist under multiple revisions.
|
| Count |
The physical count quantity of the item observed during Physical Inventorying. |
| Init |
The initials of the individual who performed the Physical Inventory.
|
| Date |
The date that the inventory was counted.The date will default to the current date, but may be over-written.
|
| |
This button is used to post the Inventory Adjustments.This is used after the inventory has been reconciled and the Physical Inventory Detail Report has been printed and reviewed. This button will update the Inventory Master for the quantity on hand. Note: this action requires a supervisor’s password or specific "Post Inventory Adjustments" authorization in the Security module. |
|
| 1.5.4. How To ..... for Physical Inventory |
| 1.5.4.1. Setup a Physical Inventory | |
|
Enter the SQLMANEX.EXE (within the ManEx root directory)
This action will then prompt the user for a password
|
|
|
The following screen will be displayed, select Inventory Management/Inventory Control Management/Physical Inventory Module
|
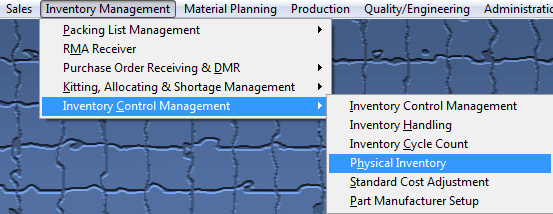 |
The following screen will be displayed:
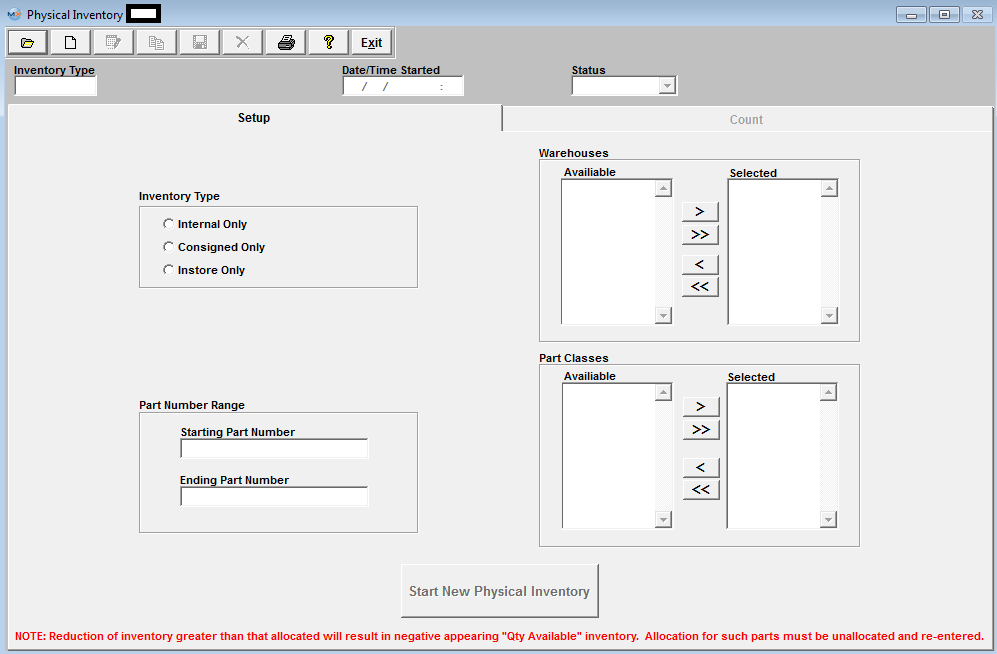
Depress the Add record action button. Type in your password. The following warning will appear:
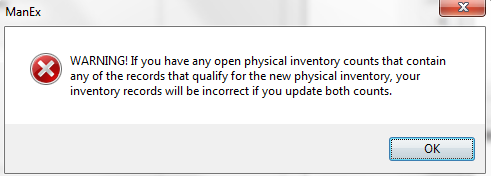
Depress Ok and the following options screen will appear:
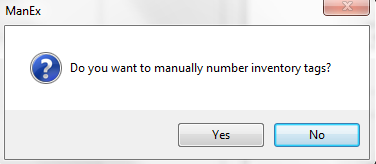
Selecting “Yes” will allow the user to manually number the inventory tags, item by item.
Selecting “No” causes the system to automatically number the tags.
Please refer to the Tags and Work Sheets instructions.
The following screen will appear:
Select the Inventory type by clicking on the appropriate radial. Select from Internal, Consigned or In Store Inventory. Internal inventory represents user-owned inventory. Consigned inventory is owned by the user’s Customer. In Stores inventory is owned by the Supplier.
In-Store purchasing overview: In-Store is the situation where the Supplier has placed raw materials in the user’s warehouse. The raw materials still are owned by the Supplier. When the user is ready to use the Supplier’s raw materials, he/she issues an In-Store Purchase Order. For In-Store POs, the user may select by Supplier or by Part Number. Then the user may find records according to the selection. Once found, the user may create a PO for the In-Store Consumption. In-Store Purchasing also includes receiving.
If you select the Inventory Type to be Consigned, a list of customers will appear:
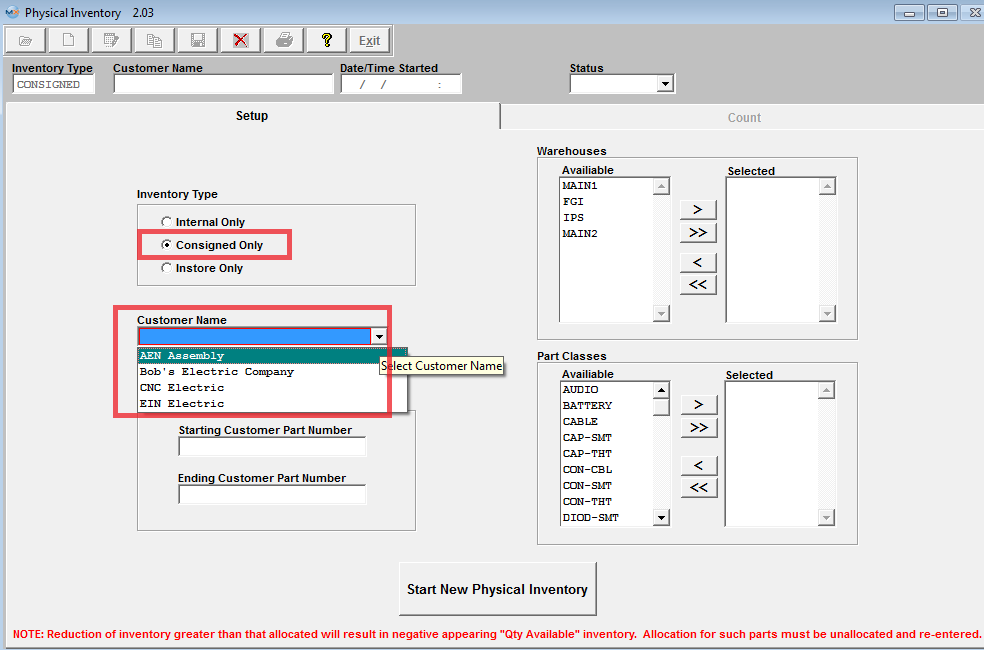
Select the Customer.
If you select In store Inventory, a list of Suppliers will appear:

Select the supplier.
Select the warehouses to be counted by highlighting a warehouse and depressing the > button. If you want to count all warehouses, depress the >> button.
To select part number range, enter the starting part number and the ending part number.
To select the part classes, highlight the class desired and depress the > button. For all of the part classes, depress the >> button.
A view of the screen would be as follows:
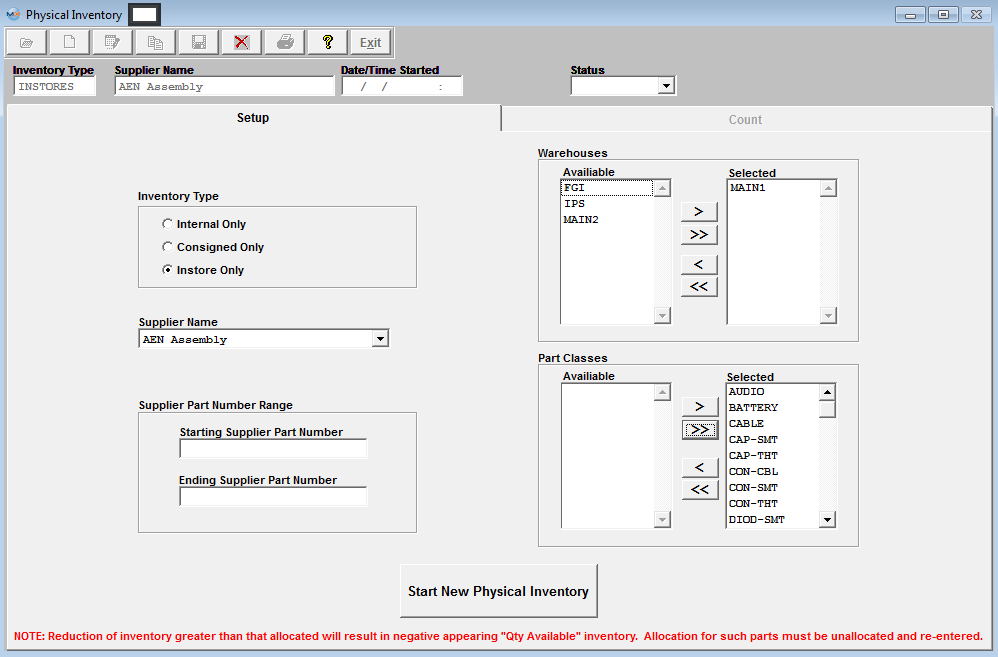
Depress the button to Start New Physical Inventory. A message will appear on the screen:
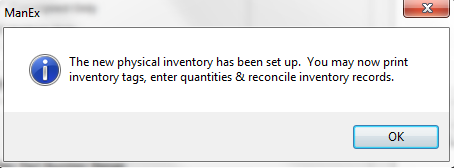
Depress the OK button. Information is transfered to the Count Tab.
Important Caution: The user must finish the Physical Inventory completely before the system is enhanced.
|
| 1.5.4.2. Finding a Physical Inventory | |
|
Enter the SQLMANEX.EXE (within the ManEx root directory)
This action will then prompt the user for a password
|
|
|
The following screen will be displayed, select Inventory Management/Inventory Control Management/Physical Inventory Module
|
|
The following screen will be displayed:
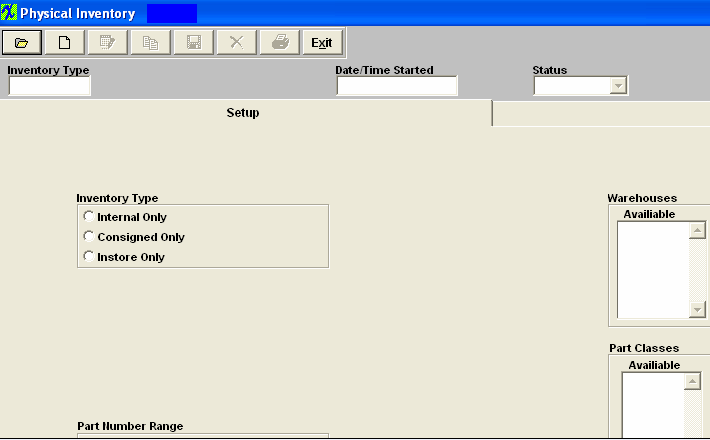
Depress the Find action button. The following screen will be displayed:
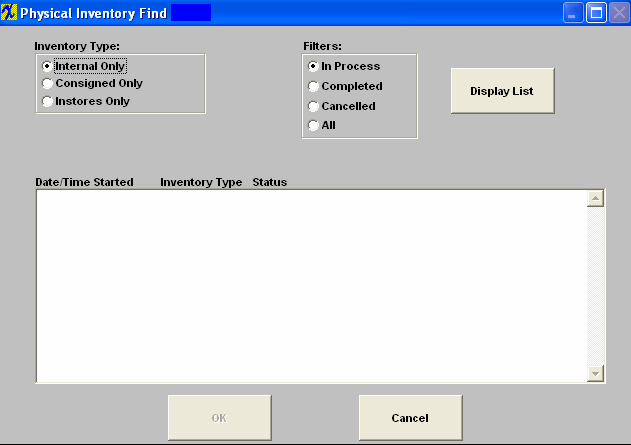
Decide upon the Inventory Type that you want to find. Select from Internal Only, Consigned Only or Instores Only by clicking on the appropriate radio.
Then choose the appropriate filter, either In Process, Completed, Cancelled or All by clicking on the appropriate radio. Depress the Display List button once the selections are made. The information at the bottom of the screen will display Date/Time Started, Inventory Type and Status.
If you select Consigned, you’ll be prompted for the Customer name. If you select Instores, you will be prompted for the Supplier name.
Once you’ve found the Inventory you’re seeking, the information will populate the Count tab screen, as follows:
|
| 1.5.4.3. Record a Physical Count | Find an In-Process Physical Inventory. The following information will appear in the Count tab screen.
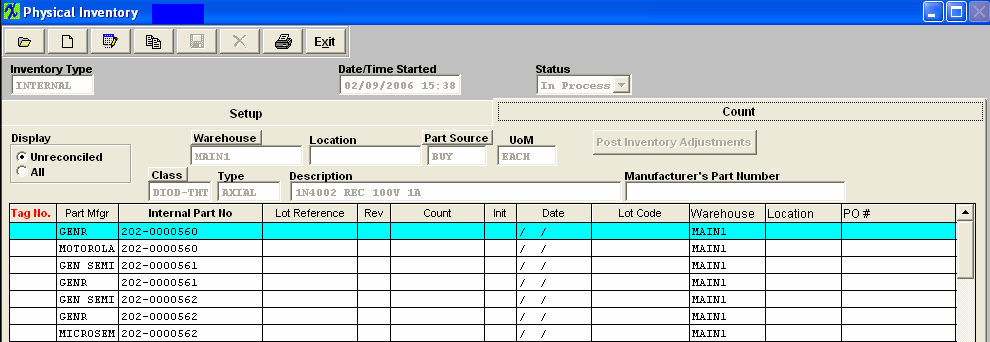
Depress the Edit action button. Type in your password.
To sort by warehouse, depress the Warehouse button. To sort by Class, depress the Class button. To sort by part source, depress the Part Source button. You will also be able to sort by tag number or part number by depressing on the heading.
Enter the final count from the tag or the worksheet. The system will capture the initials from your password. The system will enter the date.
All warehouses and location will be listed for the internal part pulled forward for a count, with the exception of quantities that are in WO-WIP, these quantities are not included in the Physical Inventory. At this time user may move parts from one warehouse/location to another if needed by entering the count that resides in that location/warehouse. User are not allowed to add new items to the PI inventory listing, due to the fact that the count could phycially already be in process. If we allow you to keep adding and deleteing records from the count it might cause issues for what is already in process.
Also, ManEx does not allow user to edit a lot code for inventory items once they have been accepted into the system. ManEx does not allow you to change the Lot Code information anywhere within the system once received. Once in the system we have to maintain that lot code with those records through out the system, to have good Lot Control.
Depress the Save action button.The screen would appear as follows:
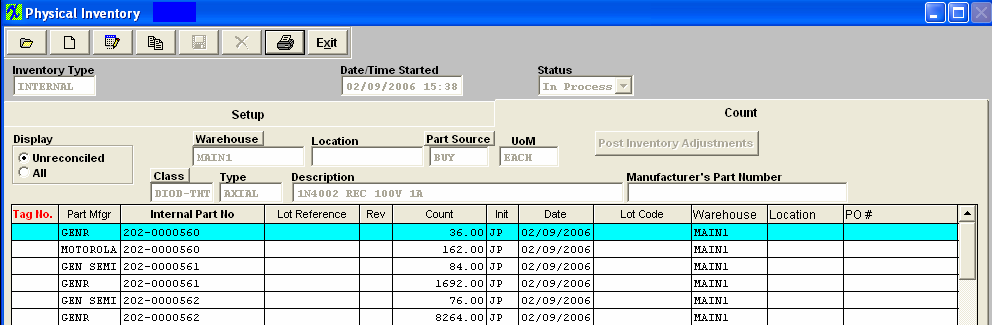
|
| 1.5.4.4. Reconcile the Physical Count | When the recording is complete, depress the Reconcile button (as highlighted below). Enter your password. This will reconcile the inventory.

If the inventory count does not match the system on hand quantity, the following screen will appear:
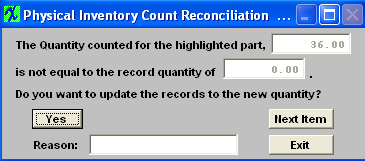
If you want to update the records for the counted quantity, depress the Yes button. Type in the reason in the Reason box.
If you want to skip over the record, depress the Next Item button. Note, however, that you can’t update the quantity on hand until all of the inventory items are reconciled.
Once all of the counts are reconciled, the detail will disappear from the screen.
|
| 1.5.4.5. Update the Inventory Master for Inventory on Hand | Once you’ve reconciled the inventory and printed and reviewed the Physical Inventory Detail Report, you may update the Inventory Master for the Inventory on hand.
Depress the Count tab. Depress the Post Inventory Adjustments button. Note: this action requires a supervisor’s password or specific "Post Inventory Adjustments" authorization in the Security module.
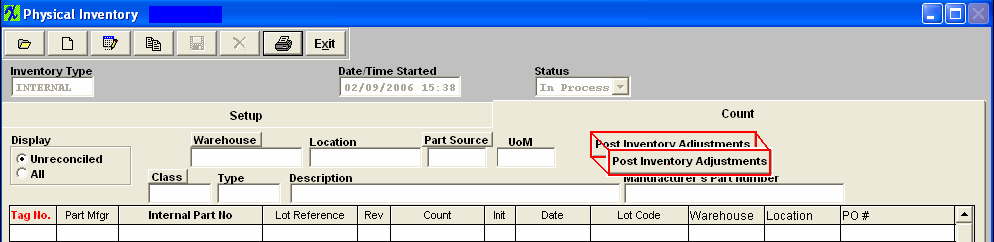
All of the reconciled count numbers will update the quantity on hand in the Inventory Master. The status will change to Posted. The following message will appear:
Additionally, the requisite journal entries for any variances will forward into the accounting module.
Note that journal entries will not be created in the following circumstances: Consigned stock or In Store additions.
|
| 1.5.5. Physical Inventory - FAQ |
| 1.5.5.1. When Processing Physical Inventory is there one large GL Transaction or many individual ones? | Q5: Physical inventory: What GL #’s will be used and will it hit as one huge Transaction or individual Transactions?
A5: Below you can see the Inventory Default Account Setup Screen. And I have highlighted the GL account for Inventory Adjustments.

Then I had the following parts in the system as follows:
Before the Physical Inventory Adjusted To via Physical Inventory
101-0001688 100 On Hand @ 0.67 120
101-0001689 200 @1.321 150
101-0001690 0 @ 0.47 100
101-0001691 0 @ 0.874 100
101-0001692 0 @ 2.11 100
Since the 1st, 3rd, 4th and 5th records were actually increasing the qty on hand they all were included into the Transaction # 2124 shown below. So yes they are grouped into one larger transaction #, but they are displayed in sub categories within the Individual Transaction Inquiry reports as shown below for easier reference.
Since the 2nd records was reducing qty out of stock it generated an inventory issue transaction # 2125 shown below.

|
| 1.6. Standard Cost Adjustment |
| 1.6.1. Prerequisites |
After activation, "Standard Cost Rollups" access for each user must be setup in the ManEx System Security module. Users with “Supervisor Rights” will automatically have access.
Note: Users MUST have special access for the "Roll Costs" button to be activated. This access is assigned through Security/User Rights.
|
Part Number
|
The Part numbers for at least one of the following must have been entered in the Inventory Control module: Customer, Manufacturer or Supplier.
|
|
| 1.6.2. Introduction | This module allows the user to change the Standard Cost, labor cost, overhead cost, other costs, and user defined costs. This screen also allows a roll up of standard costs into the appropriate Bill of Materials. The user has the ability to start a new cost roll up. The roll ups go to another screen where the user can select or modify the rollup.
(This module will consider Make/Buy inventory part numbers as BUY parts and will be rolled into the Buy portion of the Std Cost Adjustment module.
Phantom parts are not rolled up and calculated costs assigned. The components will remain rolled up to the next higher assembly. The system will reset all the Phantom parts to 0.00 before saving it to the inventory. The standard cost adjustment module will just use their cost to calculate Top assembly costs. When the last rollup is reached, the system will reset all phantom standard costs to zero (since they should not have a cost), and also make sure that any phantoms at the lower level has the "Use calculated cost" checked so that it gets updated in order to roll into the next level up. Because users may have numerous phantom (not make/phantom) assemblies in the system, the module will automatically check the "Use calculated cost" for every phantom assembly at each cost roll level.
Once satisfied, the user can roll the costs into the inventory tables and the General Ledger journal entries will be created. The user also has the ability to level make parts. All Make parts will be leveled. After the leveling has been completed, the user has the ability to roll up Make parts. All Make parts will be rolled up. If the same part appears more than once (used at different levels of BOM's throughout the system), the BOM will be leveled and considered at the lowest level that exists within the system.
The user then go to the Modifications tab where he/she can evaluate the changes, accepting or modifying them. Once the user is satisfied, the Roll Costs button can be used. All inventory tables will be updated and records will be created for the General Ledger Journal entry. Note: A high level Accounting password is required to generate the Roll up.
When standard cost adjustments are created against an inventory part number that contain both regular stock and In-store stock the module will only show the delta for the regular stock on hand. The Std Cost Adjustment module will filter out the in-store warehouse qty's when updating the costs within the Cost Adjustment Release to GL screen.
|
| 1.6.3. Fields & Definitions |
| 1.6.3.1. Selection Tab | 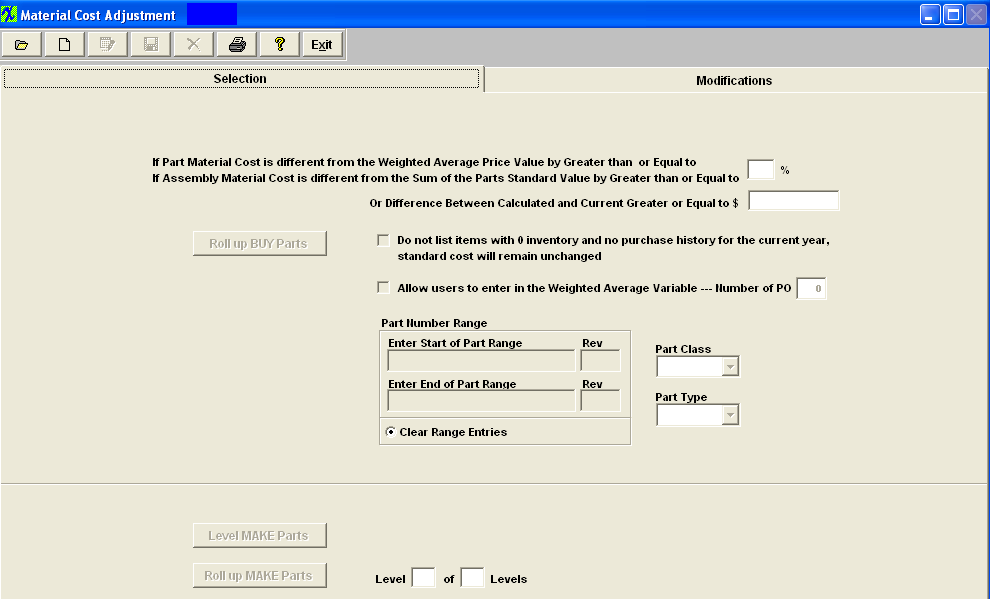
Enter the percentage to use if the part material cost is different from the Weighted Average Price Value by Greater than or Equal to or if the assembly material cost is different from the Sum of the parts standard value by Greater than or Equal to Or Difference between Calculated and Current Greater or Equal to $
Example: if there is a $2000.00 assembly in stock, and users apply the 1% criteria, a $19.00 difference won't be brought into the matrix to be checked. On the other users enter 0%, then every single part will be included. A Minimum dollar value has been added to the Standard Cost Adjustment screen that will be used to determine whether or not an item is included in the matrix. If left blank then the percentage rules. If value entered then it becomes the criteria for inclusion in the matrix.
Check box if you "Do not want items listed with 0 inventory and no purchase history for the current year", then the standard cost will remain unchanged
Check this box if you want to "Allow user to enter in the Weighted Average Variable". Once this has been checked the users can then enter in the number of the most recent Purchase Orders they wish to have included in the Weighted Average Calculation. This give the user the option to eliminate the Quick Turn buys that may throw the calculations off.
User also has the option to select the part number range , class, or type, on which part(s) to process. This will complete the adjustment process faster and user will be able to maintain more accurate records and also allow the users the ability to narrow the resulting filter of the Buy parts. NOTE: The Part Number range selection is available for only BUY parts. ManEx does not offer it for MAKE parts, because the system needs to roll ALL sub assemblies up to determine the top level costs. However, in the modifications tab, it is possible to sort by part number or class, to make it easier for the user to find specific items of interest.
To roll up the Buy Parts, depress the Roll up BUY Parts button. To roll up Make Parts, depress the Roll up MAKE Parts button. To Level Make Parts depress the Level MAKE Parts button.
|
| 1.6.3.2. Modification Tab |
Modifications tab field definitions
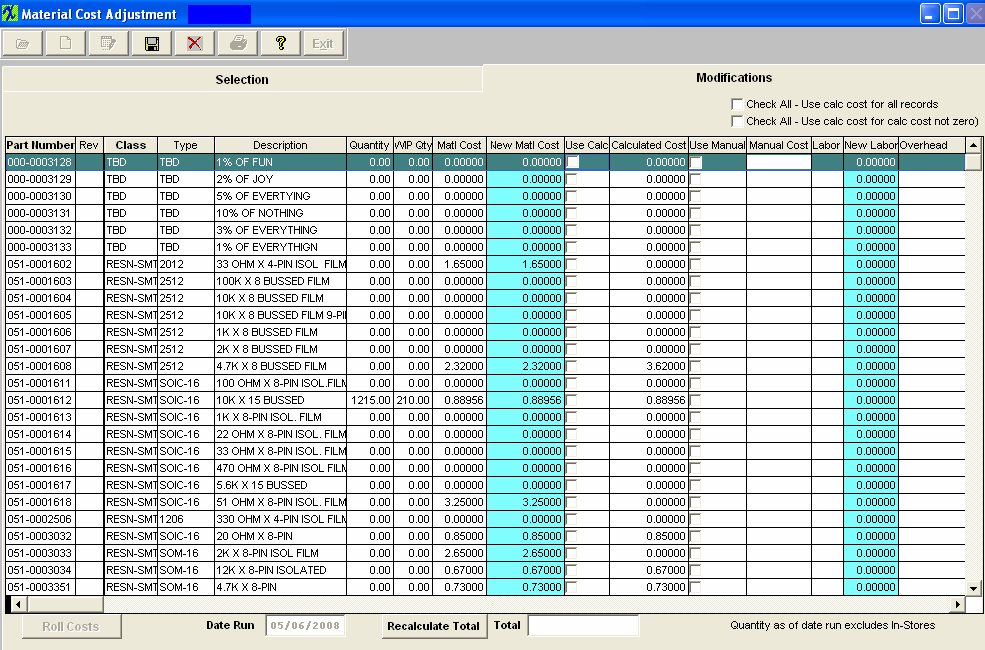
| Check All - Use calc cost for all records |
If this box is checked - the system only checks the record if the calcualted cost > 0. If this box is checked at one level, this option will carry forward as checked when users move to the next levels. |
| Check All - Use calc cost for calc cost not zero |
if this box is checked - the system will check all records to use calculated cost no matter it's zero or not. If this box is checked at one level, this option will carry forward as checked when users move to the next levels. |
|
| Part Number |
The number the user has assigned to the part within the ICM module.
|
| Rev |
The revision number assigned to the Part Number within the ICM module.
|
| Class |
The classification to which the part belongs.
|
| Type |
The type within the classification to which the part number belongs.
|
| Description |
The description assigned to the Part Number within the ICM module.
|
| Quantity |
The quantity is the number of units currently owned. This excludes all un-purchased In-Stores Inventory. ( for explanation on In-Store Inventory See Purchasing Manual) See Article #1240 for more detail on why the system will not allow user to enter in a fraction of a number, and an alternative.
|
| Material Cost |
This cost is defaulted in from the cost currently assigned to the part number through ICM or PO .
|
·Important Note - If accounting is installed: For all buy parts, the standard cost field must have data entered. If this data is missing (or wrong), the Raw Materials Inventory and the Work In Process (WIP) will be incorrect for the accounting records. All make parts which are not labor only (the customer brings you the kit and all you do is apply the labor), must have data entered in the standard cost field. Additionally, the data entered in the standard cost field for the make part must equal the sum of the Bill of Materials components.(Please refer to Bill of Materials Reports – Bill of Material With Standard Cost.) If the data is missing or wrong on a Make Part, the Work In Process, Cost of Goods Sold and Finished Goods Inventory will be wrong for the accounting records. If the sum of the Bill of Materials components does not equal the standard cost per the Item Master, a configuration variance will generate.
| New Material Cost |
This represents the revised or up-dated Standard Cost. This column is colored so users can easily differentiate between the old cost and new cost.
|
| Use Calc |
If this box is checked, the calculations determined in the Selection tab were applied to the cost. This box will be automatically checked for phantom (not Make/Phantom) assemblies in the system at each cost roll up.
|
| Calculated Cost |
This column is the result of the calculations determined in the Selection tab as applied to the original Standard Cost.
|
| Use Manual |
If this box is checked, the new Standard Cost was manually typed in and was not determined by any thing in the Selection tab.
|
| Manual Cost |
This column is the result of the new standard cost being entered manually and the Use Manual box being checked.
|
By moving the arrows (at the bottom of the screen) to the right the following fields are also available
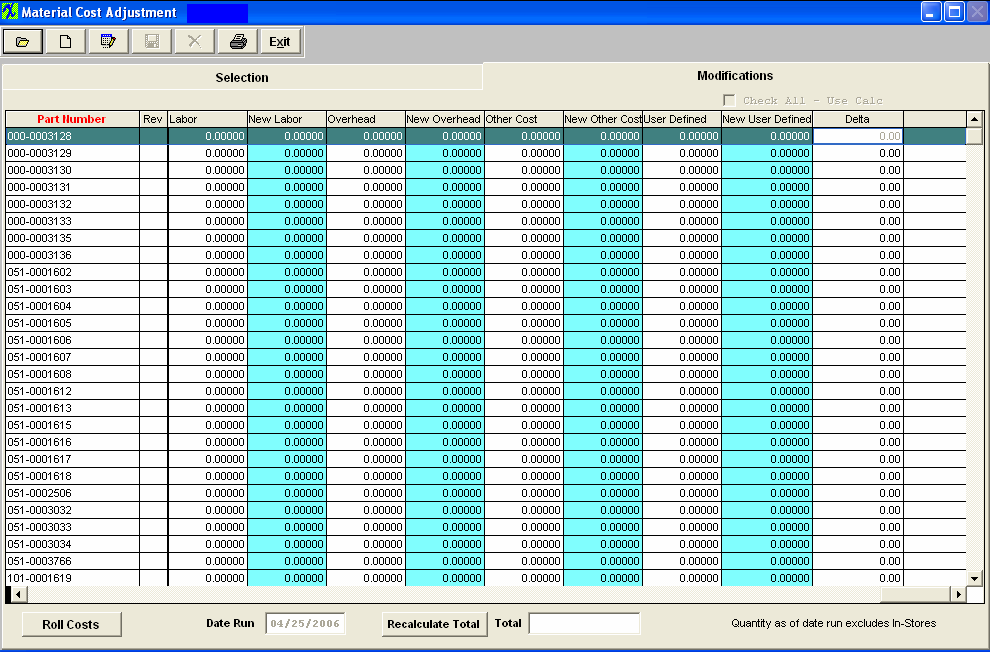
| Labor |
The labor cost currently assigned to the part number.
|
| New Labor |
This represents the revised or up-dated Labor cost. This column is colored so users can easily differentiate between the old cost and new cost.
|
| Overhead |
The overhead cost currently assigned to the part number. |
| New Overhead |
This represents the revised or up-dated Overhead cost. This column is colored so users can easily differentiate between the old cost and new cost. |
| Other Costs |
The other costs currently assigned to the part number. |
| New Other Costs |
This represents the revised or up-dated other costs. This column is colored so users can easily differentiate between the old cost and new cost. |
| User Defined |
The user definded costs currently assigned to the part number. |
| New User Defined |
This represents the revised or up-dated user defined costs. This column is colored so users can easily differentiate between the old cost and new cost. |
| Delta |
The column is the net change between the original Standard Cost and the New Standard Cost multiplied by the Quantity.
|
 |
If this button is depressed the costs will roll up to all of the Inventory Tables plus the records required for accounting will be created for posting to the General Ledger.
Note: Users have to have special access in order for this button to be enabled. This access is assigned through Security/User Rights. |
| Date Run |
This is the date of the run.
|
 |
This button is used to recalculate the total change (Delta) column.
|
| Total |
This is the total of the column “Delta” (change).
|
|
| 1.6.4.1. Find a Standard Cost Adjustment | |
|
Enter the SQLMANEX.EXE (within the ManEx root directory)
This action will then prompt the user for a password
|
|
|
The following screen will be displayed, select Inventory Management/Inventory Control Management/Standard Cost Adjustment Module
|
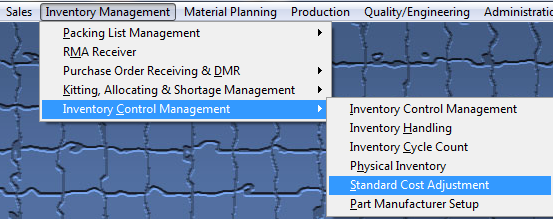 |
The following screen will be displayed:
To find a Previously created Standard Cost Adjustment where the roll costs has not yet been performed, depress the Find action button. The following selection screen will be displayed:
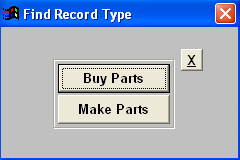
If you select to find by Buy Parts, the following screen will be displayed:
|
| 1.6.4.2. Start New Roll Cost |
|
Enter the SQLMANEX.EXE (within the ManEx root directory)
This action will then prompt the user for a password
|
|
|
The following screen will be displayed, select Inventory Management/Inventory Control Management/Standard Cost Adjustment Module
|
|
The following screen will be displayed:
Depress the Add action button (Start New Cost Roll) and the folloiwng items will become enabled:
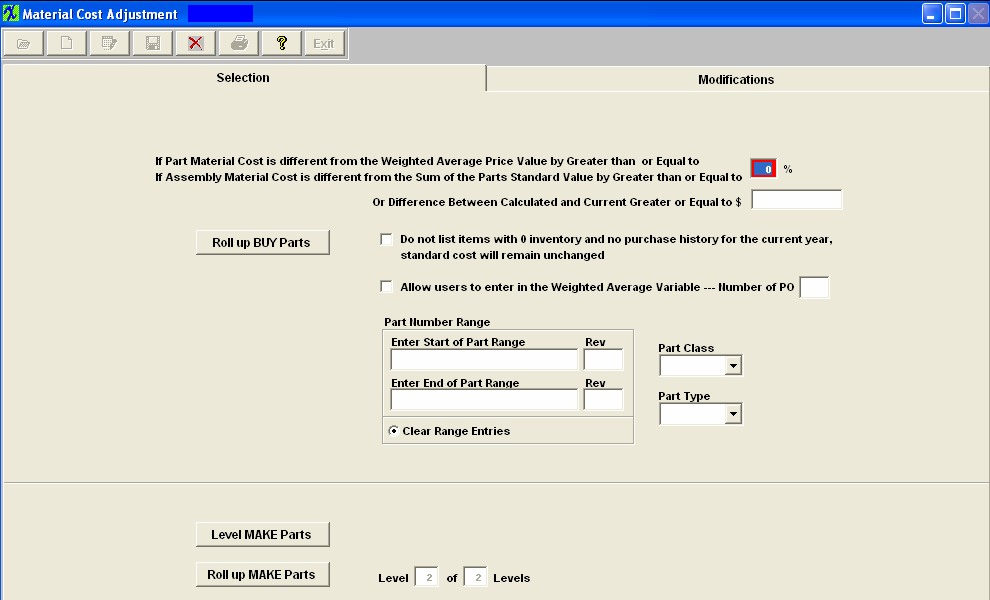
Enter the percentage to use if the part material cost is different from the Weighted Average Price Value by Greater than or Equal to or if the assembly material cost is different from the Sum of the parts standard value by Greater than or Equal to Or Difference between Calculated and Current Greater or Equal to $
Example: if there is a $2000.00 assembly in stock, and users apply the 1% criteria, a $19.00 difference won't be brought into the matrix to be checked. On the other users enter 0%, then every single part will be included. A Minimum dollar value has been added to the Standard Cost Adjustment screen that will be used to determine whether or not an item is included in the matrix. If left blank then the percentage rules. If value entered then it becomes the criteria for inclusion in the matrix.
Check box if you "Do not want items listed with 0 inventory and no purchase history for the current year", then the standard cost will remain unchanged
Check this box if you want to "Allow user to enter in the Weighted Average Variable" or you can type in the number of PO(s) to include in the calculated weighted cost.
User also has the option to select the part number range , class, or type, on which part(s) to process. This will complete the adjustment process faster and user will be able to maintain more accurate records and also allow the users the ability to narrow the resulting filter of the Buy parts. NOTE: The Part Number range selection is offered only for BUY parts. ManEx does not offer it for MAKE parts, because the system needs to roll ALL sub assemblies up to determine the top level costs. However, in the modifications tab, it is possible to sort by part number or class, to make it easier for the user to find specific items of interest.
NOTE: Due to the fact that inventory records flagged as MAKE/BUY can not have Work Orders generated for them. The Standard Cost Adjustment module will consider MAKE/BUY inventory part numbers as BUY parts and will be rolled into the Buy portion of the Std Cost Adjustment module.
To roll up the Buy Parts, depress the Roll up BUY Parts button. Upon rolling the records the system will now consider all of the Costs, and not just the material cost.
After the calculation is complete, the following message will be displayed:

Depress the OK button. Depressing on the Modifications tab reveals the following:
Depress the Edit button. To effect a change, click on either the Use Calc column or the Use Manual column.
If you choose Use Manual column, you must also enter a new manual, labor, overhead, other, or user defined cost:
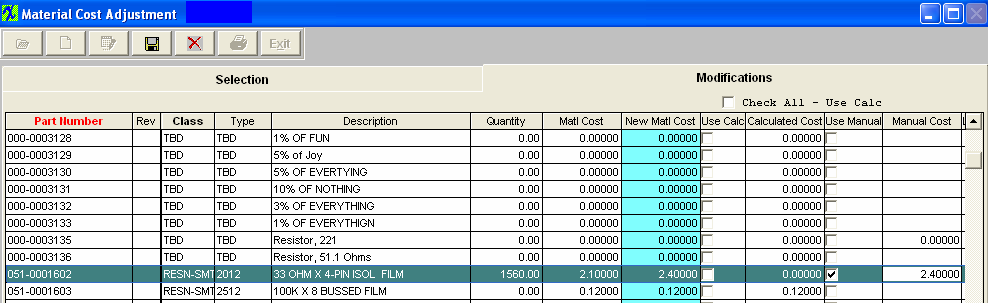
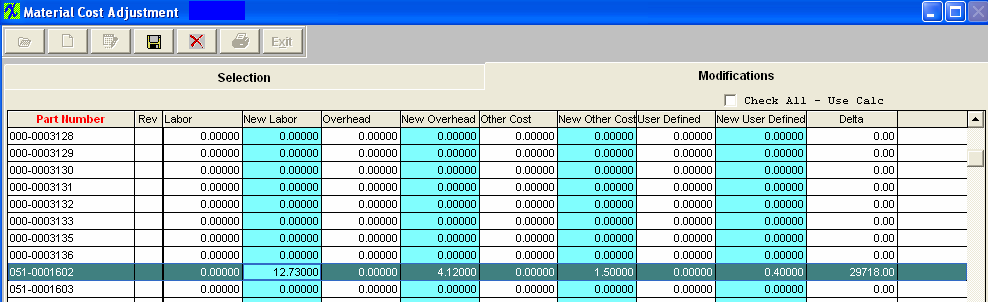
Note that the Delta column updates automatically. This is the difference between the old Standard Cost and the New Standard Cost multiplied by the Quantity. (Note: The quantity may include setup scrap and/or run scrap if the box to exclude scrap from Cost Rollup is not checked in the Kit Default Setup screen).
To Re-calculate the total change (Delta), depress Recalculate Total button.The Total will update, as illustrated:
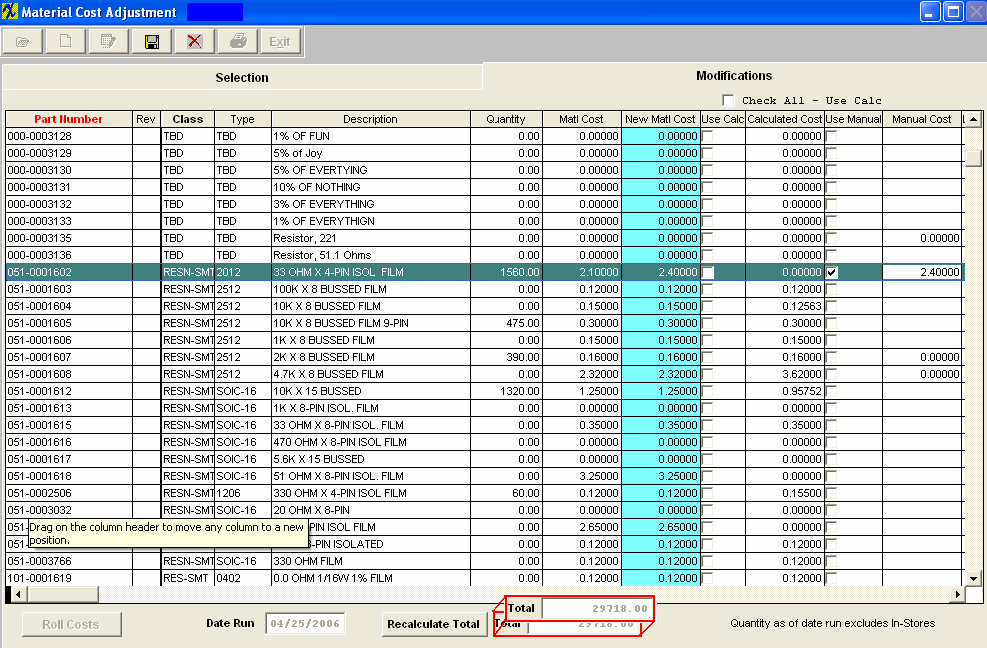
Depress the Save record action button.
To Post the changes to the Standard Cost and generate the General Ledger entries, depress the Roll Costs button. The system will update the "Last Change" field (within the ICM screen) for part numbers that actually had pricing information changed within the Std Cost Adjustment.
Enter your password. Note: This requires a high level accounting password.
The following message will appear once the update has been completed.

Depress the OK Button.
|
| 1.6.4.3. Level and Roll Up Make Parts |
The Level Make Parts button causes the system to find all Indented Bills of Materials. Then the system “tags” the lowest indenture. Users will NOT be able to add or edit any BOM during this process. If a user is already in the process of modifying a BOM and this process is started the user will NOT be allowed to save the changes until the leveling process is complete.
|
Enter the SQLMANEX.EXE (within the ManEx root directory)
This action will then prompt the user for a password
|
|
|
The following screen will be displayed, select Inventory Management/Inventory Control Management/Standard Cost Adjustment
|
|
The following screen will be displayed:
Depress the Add Record (Start New Cost Roll) action button, enter password, then depress the Level MAKE Parts button. The following message will appear once the update has been completed.
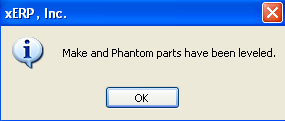
Depress the OK Button. The following screen will be displayed:
The Level of Levels information automatically updated to the next level that needs to be Rolled up.
Then depress the Roll up Make Part button. The following message will be displayed:

Depress "Yes" to continue. If a rollup already exists the following option screen will be displayed:
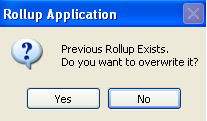
Depress "Yes" to continue. The following message will be displayed:

Enter into the Modification screen, only the Level 1 of 2 Levels assemblies will be displayed (sub-assemblies, etc). Depress the Edit Record action button and select the Use Calculated or Use manual to make any changes. If Use Manual is selected then you have to enter in the Manual Cost.

Save the changes and depress the “Roll Costs” button. The following message will be displayed:

Depress the OK Button, then return to the Selection screen.
The Level of Levels information automatically updated to the next level that needs to be Rolled up.
Depress the Add Record (Start New Cost Roll) action button, enter password, then depress the Roll up MAKE Parts button to roll up Level 2 of 2 Levels. Continue this process to level all indents starting with the lowest to the highest.
Once the highest level has been reached the Modufications screen will be poplulated with all the Finished Goods Inevntory parts.
a) For the PHANTOM parts the standard cost calculated is based on their components (SUM of component's qty * component standard cost). Once the standard cost is calculated for the PHANTOM part, the cost roll up will treat the PHANTOM part as a single entity on the top assembly BOM and proceed as it was a BUY part with the std cost already entered.
b) If one of the component parts on the top level is a MAKE (not MAKE_BUY) and HAVE components assigned to it, the cost roll up will NOT include the std cost of the parts itself, it will only include the std cost of its subcomponents.
c) If one of the component parts on the top level is a MAKE (not MAKE_BUY) and does NOT HAVE parts assigned to it the cost roll up will include the std cost of the part itself.
d) If one of the component parts on the top level is a MAKE and MAKE_BUY the cost roll up will included the std price for the part itself and will NOT include the std costs for the subcomponents. For an example see the Word attachment <<The Std Cost of the MAKE_BUY_081211.docx>>).
e) If one of the component parts on the top level is a MAKE and a Phantom/Make the cost roll up will NOT include the std price for this part because the cost roll up will include the cost of this parts components.
Note: The calculated cost will only include the costs for ACTIVE parts and subassemblies as of the date of the roll up and will NOT include any parts that may have been identified as inactive either in the item master or in the obsolete date of the part on the BOM.
The values displayed should be in sync with the BOM with Std Cost Report values. The following may be why the Standard Cost Roll is different from the Cost BOM Reports.
a) On the costed BOM Report for a Make/Buy assembly we display the value of the BOM in the costed report, but that total is NOT used in subsequent rollups to higher levels only the standard cost is.
b) In Kit Default Setup , user can exclude scrap and setup scrap in Kitting, MRP, and Cost Rollup, this will overwrite what user check in the BOM. Therefore, if user checks "Setup Scrap" checkbox in BOM, but checks to exclude in cost roll, the costroll will not calculate setup scrap cost, but BOM will always calculate setup scrap cost if the Setup Scrap checkbox in check in BOM. |
| 1.6.5. Std Cost Adjustment Reports |
To obtain the Standard Cost Adjustment Report within the Web, select the WEB Print button from the ManEx action buttons at the top of the screen. For further detail on How the Reports work within the Web refer to Article #5477.
Note: In order to access the Reports within the Web the Company Root URL must be setup within the System Appearance module and user must be linked to web within the System Security Module.
Select the Report Type: STANDARD COST ADJUSTMENTS - A List of Reports will be displayed that are available on the Web
for STANDARD COST ADJUSTMENTS
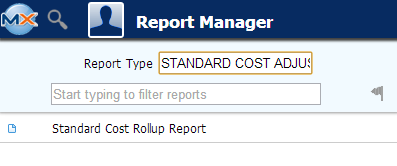
To obtain the Standard Cost Adjustment report, select the Print button from the ManEx action buttons at the top of the screen.
The following reports screen
will display a list of reports that are available on the ManEx Desktop:
|
Highlight the desired report and then depress the OK button.
|
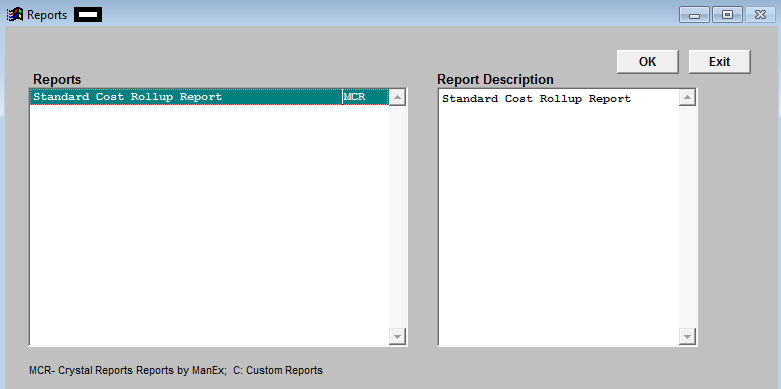 |
Select the Cost Roll Type: BUY or MAKE
Depress the OK button |
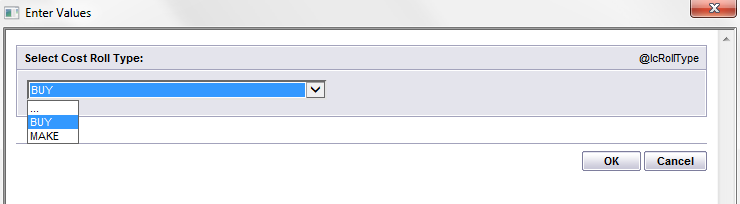
|
Standard Cost Rollup Report will print:
Note: The calculated cost will only include the costs for ACTIVE parts and subassemblies as of the date of the roll up and will NOT include any parts that may have been identified as inactive either in the item master or in the obsolete date of the part on the BOM.
a) On the costed BOM Report for a Make/Buy assembly we display the value of the BOM in the costed report, but that total is NOT used in subsequent rollups to higher levels only the standard cost is.
b) In Kit Default Setup , user can exclude scrap and setup scrap in Kitting, MRP, and Cost Rollup, this will overwrite what user check in the BOM. Therefore, if user checks "Setup Scrap" checkbox in BOM, but checks to exclude in cost roll, the costroll will not calculate setup scrap cost, but BOM will always calculate setup scrap cost if the Setup Scrap checkbox in check in BOM.
|
| 1.7. Part Manufacturer Setup | |
|
Enter the SQLMANEX.EXE (within the ManEx root directory)
This action will then prompt the user for a password
|
|
The following screen will be displayed, select Inventory Management/Inventory Control Management/Part Manufacturer Setup Module
Note: After activation, "Part Manufacturer Setup" access for each user must be setup in the ManEx System Security module. Users with “Supervisor Rights” will automatically have access.
Each Item Master Quantity Info Screen with a Buy Source refers to a Manufacturer to be selected from a pull-down list of Approved Manufacturers and a Manufacturer’s part number to be entered. Note: If no manufacturer is selected, it will default to GENR, for generic.
|
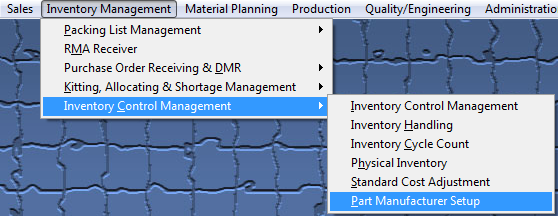 |
The following screen will be displayed:
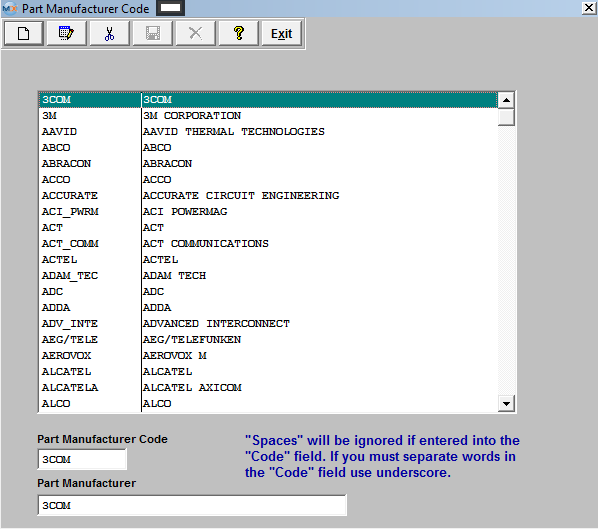
Depress the Add Record action button, to add a New record. Depress the Edit action button to edit an existing record. Enter the password.
Enter the Manufacturer’s Code in the box shown. (A code of up to 8 characters must be entered) The system will not allow the Mfgr Code to contain any spaces.
Enter in the full Part Manufacturer Name.
Depress the Save record action button to save changes, depress the Abandon changes action button to abandon changes.
|
| 1.7.1. Why are the Part Mfgr Codes not numeric? | Q: Why the Customer Codes and Supplier Codes are numeric but the Manufacturer Codes are not?
A: the reason that we have the code user assigned, and not numbers, because through out the system we are using the code to display the manufacturer, rarely we show the actual name (or description as we call it). If the user decided to upload the code as numbers, that is all they will see on all our screens and reports. For the changing the names of the manufacturer including the code, I believe, we have a utility. All the user has to do is to add new manufacturer and replace the old with the new , then they can remove the old. This would be found under the <<SQLSYSUTILITY.EXE>>
|
|