| 1. Sales |
| 1.1. Prerequisites |
The Sales module setup section allows the user to prepare tables for most of the modules your company has purchased.Once the items are setup in the system, the user will be able to use these tables and/or perform certain functions automatically.
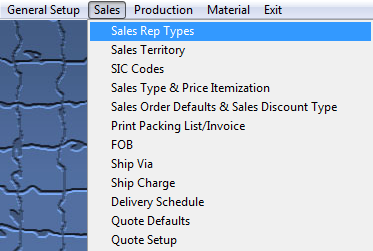
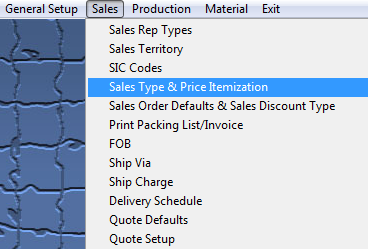
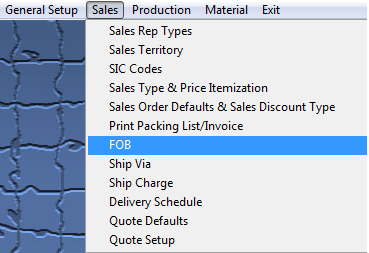
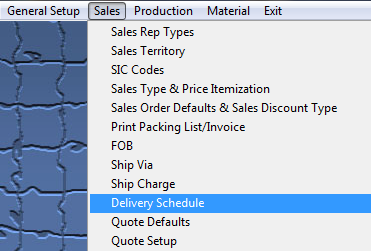
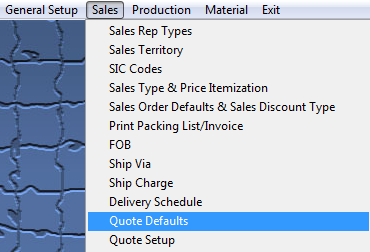
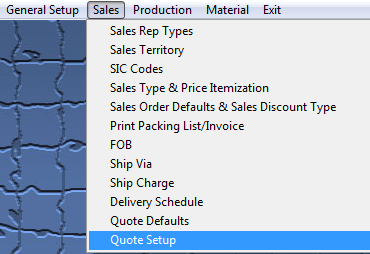
The Sales Setup section worksheets cover the following modules: Sales Rep Types, Sales Territory, SIC Codes, Sales Type & Price Itemization, Sales Order Defaults & Sales Discount Type, Print Packing List/Invoice, FOB, Ship Via, Ship Charge, Delivery Schedule, Quote Defaults, and Quote Setup. This section will first define the nature of each of the Sales Setup screens, then describe how to fill out the work sheets.
User MUST have full rights to the "System Setup" in System Security to setup these modules. Users with “Supervisor Rights” will automatically have access.
|
| 1.2. Sales Rep Types |
| 1.2.1. Prerequisites for Sales Rep Types |
Complete the attached worksheet and "Mark as Completed RoadMap Section B Item 2-a" before continuing the setup.
A Sales Rep Type that is used to describe an active sales rep may NOT be deleted.
User MUST have full rights to the "System Setup" in System Security . Users with “Supervisor Rights” will automatically have access.
|
| 1.2.2. Introduction for Sales Rep Types |
This section is to establish different types of sales reps, and it is required in order to use the Sales Rep Information setup. Some examples are: Inside Sales, Outside Sales, Independent Rep, etc. This feature will allow the user to analyze data based on the type of representatives entered here. The user also may select the Commission Type, either a stated dollar amount or a Percentage of the |
| 1.2.3. Fields & Definitions for Sales Rep Types |
This feature will allow the user to analyze data based on the type of representatives entered here. The user also may select the Commission Type, either a stated dollar amount or a Percentage of the |
| 1.2.4. How To ..... for Sales Rep Types |
| 1.2.4.1. Setup a Sales Rep Type | ||||
|
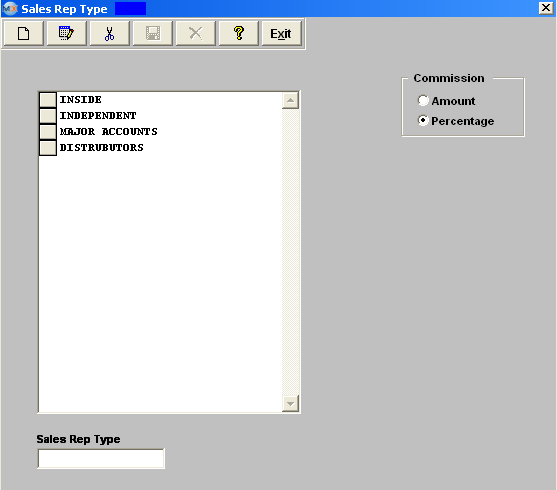
The following screen will be displayed:
To modify this screen, the user must click on the Add, Edit or Delete button and supply the password. That action will enable the screen. Pressing the Add button will enable the data entry box at the bottom of the screen for the user to enter new data. Selecting an existing Sales Rep Type and pressing the Edit button will bring the selected information to the data entry box to be modified. Selecting an existing Sales Rep Type and pressing the Delete button will remove the selected information. The user must Save or Abandon changes after adding or editing the record.
These items may be sorted in any order by clicking on and dragging the box on the left side, to the (vertical) position desired. This order will be the order displayed in the pull downs when using this list in other modules within the system. Suggestion: Have the one most used at the top of the list. Where Used: In the Sales Rep setup screen.
«Mark as Completed in RoadMap Section B Item 2-a» |
| 1.3. Sales Territory |
| 1.3.1. Prerequisites for Sales Territory |
Complete the attached worksheet and "Mark as Completed RoadMap Section B Item 2-b" before continuing the setup.
User MUST have full rights to the "System Setup" in System Security . Users with “Supervisor Rights” will automatically have access.
|
| 1.3.2. Introduction for Sales Territory |
This screen is used to assign geographical sales territories and is used in the Customer Information Module. Some examples are: The user may optionally assign a territory to a customer for purposes of grouping sales and other business considerations. |
| 1.3.3. Fields & Definitions for Sales Territory |
This screen is used to assign geographical sales territories and is used in the Customer Information Module. Some examples are: The user may optionally assign a territory to a customer for purposes of grouping sales and other business considerations. |
| 1.3.4. How To ..... for Sales Territory |
| 1.3.4.1. Setup Sales Territory | ||||
|
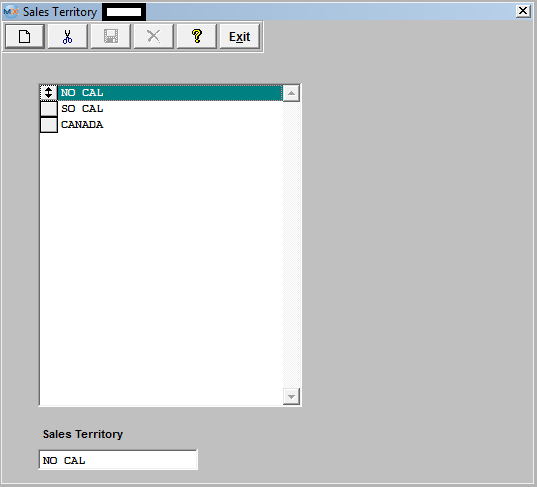
The following screen will be displayed:
To modify this screen, the user must click on the Add or Delete button and supply the password. That action will enable the screen. Pressing the Add button will enable the data entry box at the bottom of the screen for the user to enter new data. Selecting an existing Sales Territory and pressing the Delete button will remove the selected information. The user must Save or Abandon changes after adding a Sales Territory.
These items may be sorted in any order by clicking on and dragging the box on the left side, to the (vertical) position desired. This order will be the order displayed in the pull downs when using this list in other modules within the system. Suggestion: Have the one most used at the top of the list. Where Used:I n the Sales Rep setup screen and the Customer Information screen.
«Mark as Completed in RoadMap Section B Item 2-b» |
| 1.4. SIC (Standard Industrial Codes) |
| 1.4.1. Prerequisites for SIC Codes |
Complete the attached worksheet and "Mark as Completed RoadMap Section B Item 2-c" before continuing the setup.
User MUST have full rights to the System Setup in Security . Users with “supervisor’s rights” will automatically have access. |
| 1.4.2. Introduction for SIC Codes |
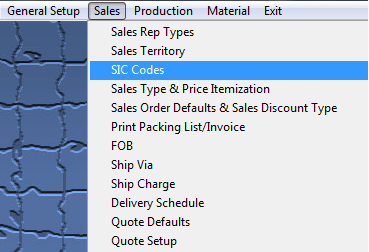
Use this screen to setup the different Industrial codes that pertain to the user’s customers. The SIC codes are nation-wide standard industrial classifications given to each industry type. In some cases, the user may wish to deal with multiple industries. This is also useful for the user who wants to track business conditions by the type of businesses served. |
| 1.4.3. Fields & Definitions for SIC Codes |
Use this screen to setup the different Industrial codes that pertain to the user’s customers. The SIC codes are nation-wide standard industrial codes given to each industry type. In some cases, the user may wish to deal with multiple industries. This is also useful for the user who wants to track business conditions by the type of businesses served. |
| 1.4.4. How To ..... for SIC Codes |
| 1.4.4.1. Setup the SIC Codes | ||||
|
The following screen will be displayed: 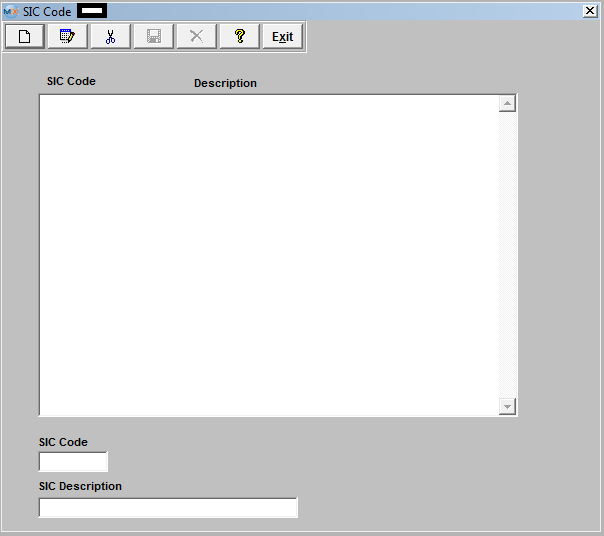 To modify this screen, the user must click on the Add, Edit or Delete button and supply the password. That action will enable the screen. Pressing the Add button will enable the data entry box at the bottom of the screen for the user to enter new data. Selecting an existing SIC code and pressing the Edit button will bring the selected information to the data entry box to be modified. Selecting an existing SIC code and pressing the Delete button will remove the selected information. The user must Save or Abandon changes after adding or editing the record.
These items may be sorted in any order by clicking on and dragging the box on the left side, to the (vertical) position desired. This order will be the order displayed in the pull downs when using this list in other modules within the system. Suggestion: Have the one most used at the top of the list. Where Used: In the Customer Setup. «Mark as Completed in RoadMap Section B Item 2-c» |
| 1.5. Sales Type & Price Itemization |
| 1.5.1. Prerequisites for Sales Type & Price Itemization |
|
Complete the attached worksheet and "Mark as Completed RoadMap Section B Item 2-d" before continuing the setup.
User MUST have full rights to the "System Setup" in System Security . Users with “Supervisor Rights” will automatically have access. |
| 1.5.2. Introduction for Sales Type & Price Itemization |
This section is to prepare information to be used in the Sales Price List module in the Sales main menu. The Sales Type portion is used when adding Sales Orders. The Sales Price Itemization List is used in the Sales Price List Information module. |
| 1.5.3. Fields and Definitions for Sales Type & Price Itemization |
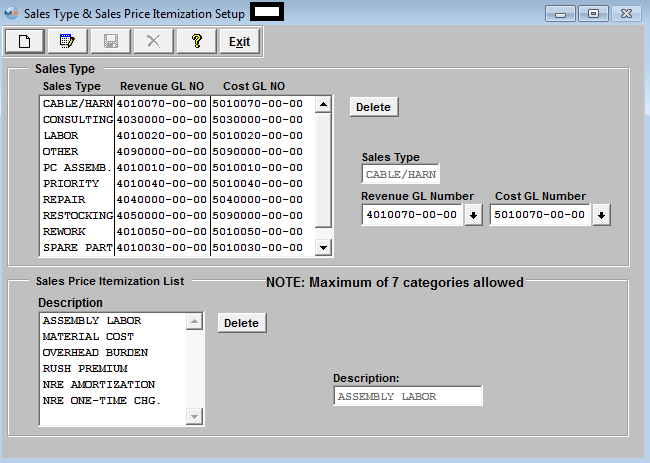 The user may define a sales type, to be used to associate the revenues, and related costs with a specific market sector and general ledger account (assuming the accounting module is installed).
The user may also customize the itemization used in the pricing module by establishing different categories for collecting pricing information details. For example, the user may wish to break out the pricing for materials, for labor, for engineering costs, for out-sourcing, and anything else imaginable.
In the pricing module, each unit can itemize it up to seven categories for breaking down the unit price. In the setup, as many different pricing categories may be set up as desired. These price categories will NOT show on any printed information that is available to the user’s customer.
Please review the attached <<How GL #'s from Sales Type setup will be used in GL Trans>> for example of how the GL #'s used within this Setup screen will be generated within the Resulting GL Transactions. |
| 1.5.4. How To ..... for Sales Type & Price Itemization |
| 1.5.4.1. Setup the Sales Type & Price Itemization | ||||||||
|
The following screen will be displayed:
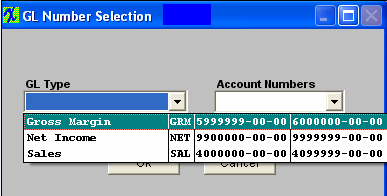
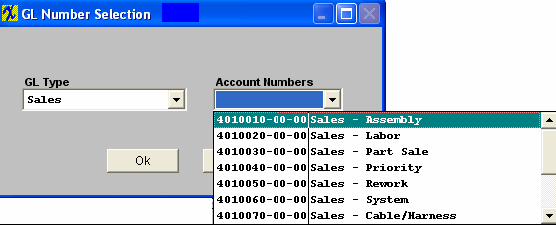
To modify this screen, the user must click on the Edit button and supply the password. That action will enable the screen. Then the user may address either the Sales Type or Price Itemization List. The user may Add, Edit or Delete a Sales Type by pressing the appropriate buttons. This will activate the data entry boxes for addition or modification of data. However, the user is cautioned to not remove sales types that have already been assigned to orders. To select the Revenue GL Number and the accompanying Cost GL Number, depress on the down arrows next to the appropriate field, as illustrated below:
Then, select the Account Number. The user may Add, Edit or Delete a Price Itemization by pressing the appropriate buttons. This will activate the data entry boxes for addition or modification of data. The user must Save or Abandon the changes after adding or editing the record.
Where Used: In the Pricing Module, revenue analysis for Accounting.
«Mark as Completed in RoadMap Section B Item 2-d» |
| 1.6. Sales Order Defaults & Sales Discount Type |
| 1.6.1. Prerequisites for Sales Order Defaults & Sales Discount Type |
|
Complete the attached worksheet and "Mark as Completed RoadMap Section B Item 2-e" before continuing the setup.
User MUST have full rights to the "System Setup" in System Security . Users with “Supervisor Rights” will automatically have access. |
| 1.6.2. Introduction for Sales Order Defaults & Sales Discount Type |
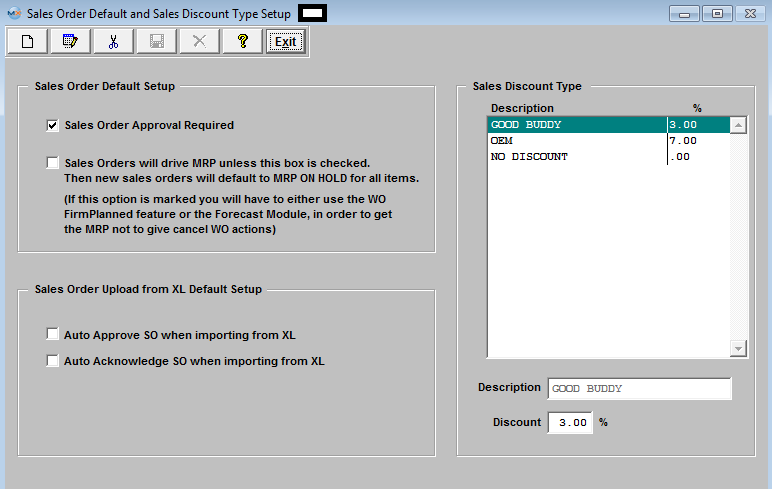
In this set up screen, the user enters customer’s discount terms and applicable percentages which will be used at the time of Sales Order data entry. This data could be used for discount coupons, promotional discount, quantity discounts and wholesale discounts, etc.
|
| 1.6.3. Fields and Definitions for Sales Type & Price Itemization | ||||||||||||
 Sales Order Default Setup
Sales Order Upload from XL Default Setup
Sales Discount Types In this set up screen, the user enters discount terms and applicable percentages which will be used at the time of Sales Order data entry.
|
| 1.6.4. How To ..... for Sales Order Defaults & Sales Discount Type |
| 1.6.4.1. Setup the Sales Order Defaults & Sales Discount Type | ||||
|
The following screen will be displayed:
To modify this screen, the user must click on the Add, Edit, or Delete button and supply the password. That action will enable the screen.
The user must Save or Abandon changes after modifying the screen. Where Used: In the Customer Set Up, Sales Orders, Invoices and Accounting.
|
| 1.7. Print Packing List and Invoice |
| 1.7.1. Prerequisites for Print Packing List/Invoice |
Complete the attached worksheet and "Mark as Completed RoadMap Section B Item 2-f" before continuing the setup.
User MUST have full rights to the "System Setup" in System Security . Users with “Supervisor Rights” will automatically have access. |
| 1.7.2. Introduction for Print Packing List/Invoice |
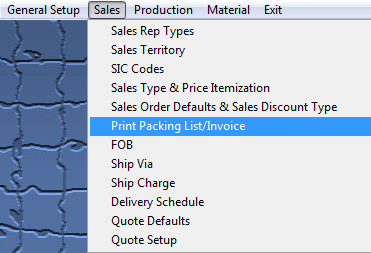
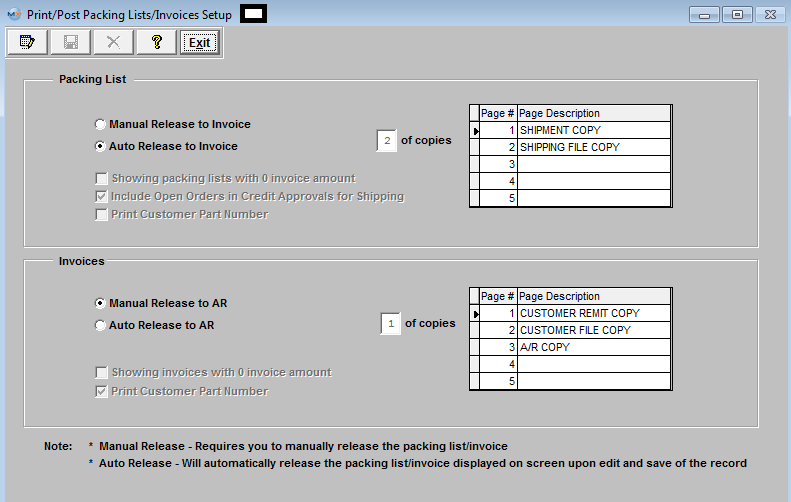
This is where the user determines whether they want to set the Packing List and Invoice to Auto Release or Manual Release, what type of form to use for printing, how many forms to print, option to show Packing Lists and Invoices with 0 invoices amounts, and/or Print Customer part numbers when printing Packing Lists and/or Invoices. Manual Release to Invoice - will require user to Print the Packing List before it will be released to Invoice. Auto Release to Invoice - will automatically release the Packing List being displayed on screen to Invoice upon edit and save of the record. The ManEx system will update the records even if the user does not print the record. The system will maintain the records for history information and management reports Manual Release to AR - will require user to depress the "Release to AR" button available on screen to release Invoice to AR. Auto Release to AR - will automatically release the Invoice being displayed on screen to AR upon edit and save of the record. The ManEx system will update the records even if the user does not print the record. The system will maintain the records for history information and management reports. |
| 1.7.3. Fields & Definitions for Print Packing List & Invoice | ||||||||||||||||||||||||||
Packing List
Invoices
Hold for Credit Limit Overview If the user has elected “Enforce Credit Limit at Shipment” feature in AR-AP Acct Default Setup, the following message will appear if a non-supervisor attempts to ship:
Depress the OK button and try to add the Packing List with a Supervisor’s password. The Supervisor will receive the following warning:
|
| 1.7.4. How To ..... for Print Packing List/Invoice |
| 1.7.4.1. Setup Print Packing List/Invoice Module | ||||
|
The following screen will be displayed:
 To modify this screen, the user must click on the Edit button and supply the password. That action will enable the screen. The user clicks on the button desired to either Manual or Auto Release Packing Lists and Invoices.
Enter the number of copies and the Description to be printed on each copy.
The user may also check the following: A check box for showing of invoices with a zero dollar amount is available. A check box to elect to include open orders in credit approvals for shipping is available. To exclude, leave the box unchecked.
The user must Save or Abandon changes after modifying the screen.
«Mark as Completed in RoadMap Section B Item 2-f» |
| 1.8. Freight On Board (FOB) |
| 1.8.1. Prerequisites for FOB |
Complete the attached worksheet and "Mark as Completed RoadMap Section B Item 2-g" before continuing the setup.
User MUST have full rights to the "System Setup" in System Security . Users with “Supervisor Rights” will automatically have access.
|
| 1.8.2. Introduction for FOB |
FOB (Freight On Board) defines the point of ownership of the product as it is transferred from one business to another. If the FOB is Origin, it usually means that the customer pays for freight and insurance from the seller’s dock, and assumes ownership at the time the product leaves the seller’s dock. FOB Destination would usually mean the seller is responsible for the product until it is accepted at the buyer’s dock. FOB types are used in the Customer Shipping Information, Order Management, Packing List, Purchase Order Receiving, and Purchase Order. |
| 1.8.3. Fields & Definitions for FOB |
FOB (Freight On Board) defines the point of ownership of the product as it is transferred from one business to another. If the FOB is Origin, it usually means that the customer pays for freight and insurance from the seller’s dock, and assumes ownership at the time the product leaves the seller’s dock. FOB Destination would usually mean the seller is responsible for the product until it is accepted at the buyer’s dock. FOB types are used in the Customer Shipping Information, Order Management, Packing List, Purchase Order Receiving, and Purchase Order. |
| 1.8.4. How To ..... for FOB |
| 1.8.4.1. Setup the FOB Module | ||||
|
The following screen will be displayed: 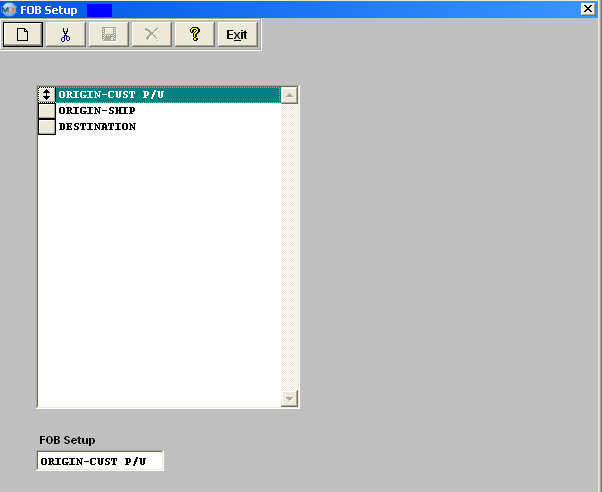 To modify this screen, the user must click on the Add or Delete button and supply the password. That action will enable the screen. Pressing the Add button will enable the data entry box at the bottom of the screen for the user to enter new data. Selecting an existing FOB and pressing the Delete button will remove the selected information. The user must Save or Abandon changes after modifying the screen.
These items may be sorted in any order by clicking on and dragging the box on the left side, to the (vertical) position desired. This order will be the order displayed in the pull downs when using this list in other modules within the system. Suggestion: Have the one most used at the top of the list.
Where Used: In the Customer Setup, Sales Orders, Packing Lists, Invoicing, Receiving and Billing Information.
«Mark as Completed in RoadMap Section B Item 2g» |
| 1.9. Ship Via |
| 1.9.1. Prerequisites for Ship Via |
Complete the attached worksheet and "Mark as Completed RoadMap Section B Item 2-h" before continuing the setup.
User MUST have full rights to the "System Setup" in System Security . Users with “Supervisor Rights” will automatically have access. |
| 1.9.2. Introduction for Ship Via |
Ship Via is a term used to describe the freight carrier or method of shipping product to a customer. Some customers, because of FOB origin considerations, may prescribe their preferred delivery system. The Ship Via is entered as a preference for each ship-to destination, and guides the shipping department in which carrier to use for a shipment. The delivery system may also be US Mail, a company truck, will-call, etc. |
| 1.9.3. Fields & Definitions for Ship Via |
Ship Via is a term used to describe the freight carrier or method of shipping product to a customer. Some customers, because of FOB origin considerations, may prescribe their preferred delivery system. The Ship Via is entered as a preference for each ship-to destination, and guides the shipping department in which carrier to use for a shipment. The delivery system may also be US Mail, a company truck, will-call, etc. |
| 1.9.4. How To ..... for Ship Via |
| 1.9.4.1. Setup the Ship Via Module | ||||
|
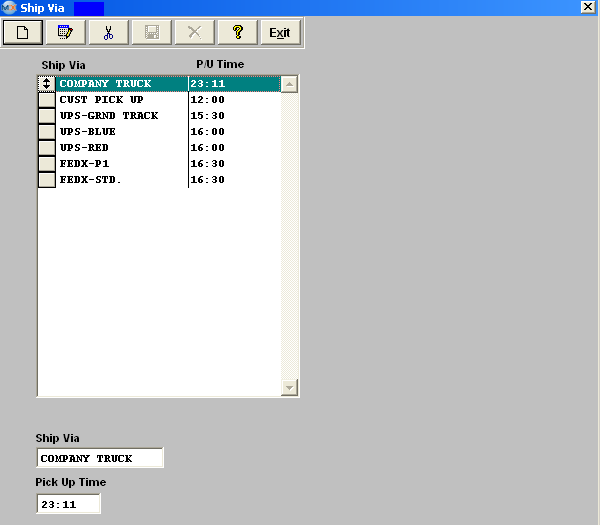
The following screen will be displayed:
To modify this screen, the user must click on the Add, Edit or Delete button and supply the password. That action will enable the screen. Pressing the Add button will enable the data entry boxes at the bottom of the screen for the user to enter new data. Selecting an existing Ship Via and pressing the Edit will populate the data entry boxes at the bottom of the screen and allow a change. Selecting an existing Ship Via and pressing the Delete button will remove the selected information. These items may be sorted in any order by clicking on and dragging the box on the left side, to the (vertical) position desired. This order will be the order displayed in the pull downs when using this list in other modules within the system. Suggestion: Have the one most used at the top of the list.
Where Used: Customer Setup, Sales Orders, Packing Lists, Invoicing, Purchase Setup Receiving and Billing Information. "Mark as Completed RoadMap Section B Item 2-h"
|
| 1.10. Ship Charge |
| 1.10.1. Prerequisites for Ship Charge |
|
Complete the attached worksheet and "Mark as Completed RoadMap Section B Item 2-i" before continuing the setup.
User MUST have full rights to the "System Setup" in System Security . Users with “Supervisor Rights” will automatically have access. |
| 1.10.2. Introduction for Ship Charge |
This information is also used for the User’s own Receiving Tax and Shipping mode as entered in Purchasing setup. |
| 1.10.3. Fields & Definitions for Ship Charge |
This section is to set up the types of shipping charges assessed the customer. This data is used in the Customer and Packing List Modules. Types of shipping charges could be Standard, No Charge, Overnight, Premium, etc. This information is also used for the User’s own Receiving Tax and Shipping mode as entered in Purchasing setup. |
| 1.10.4. How To ..... for Ship Charge |
| 1.10.4.1. Setup the Ship Charge Module | ||||
|
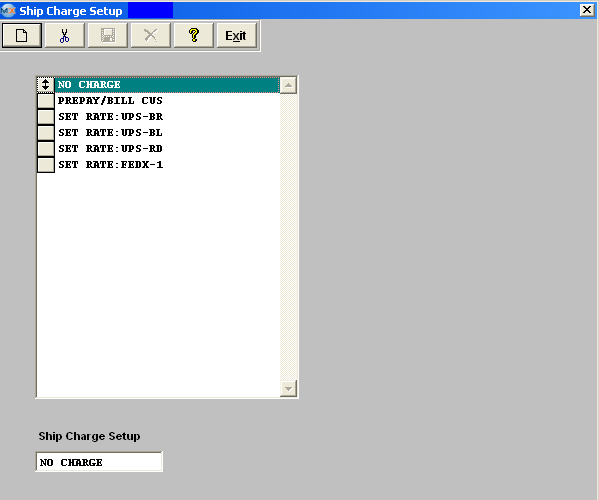
The following screen will be displayed:
To modify this screen, the user must click on the Add or Delete button and supply the password. That action will enable the screen. Pressing the Add button will enable the data entry boxes at the bottom of the screen for the user to enter new data. Selecting an existing Ship Charge and pressing the Delete button will remove the selected information. The user must Save or Abandon changes after modifying the screen.
These items may be sorted in any order by clicking on and dragging the box on the left side, to the (vertical) position desired. This order will be the order displayed in the pull downs when using this list in other modules within the system. Suggestion: Have the one most used at the top of the list. Where Used: In the Customer Setup, Sales Orders, Packing lists, Invoicing, Purchase Setup Receiving and Billing Information.
«Mark as Completed in RoadMap Section B Item 2-i» |
| 1.11. Delivery Schedule |
| 1.11.1. Prerequisites for Delivery Schedule |
Complete the attached worksheet and "Mark as Completed RoadMap Section B Item 2-j" before continuing the setup.
User MUST have full rights to the "System Setup" in System Security . Users with “Supervisor Rights” will automatically have access.
|
| 1.11.2. Introduction for Delivery Schedule |
|
| 1.11.3. Fields & Definitions for Delivery Schedule |
 Over/Under Shipment Management
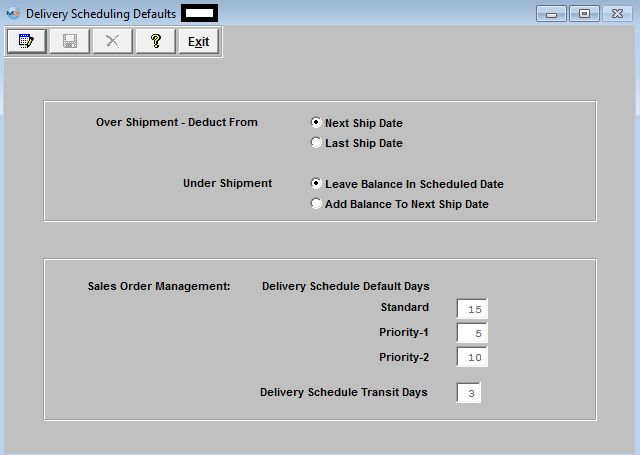
OVER SHIPMENT-DEDUCT FROM: Next Shipment Date: If the user wants over shipment quantities to be deducted from the next scheduled delivery for the same sale order and product. OVER SHIPMENT DEDUCT FROM: Last Shipment Date: If the user wants the over shipment amount to be deducted from the last scheduled delivery for the same sales order and product. UNDER SHIPMENT: Leave Balance in Scheduled Date: If the user wants to leave the back order quantity at the originally scheduled delivery date for the product on the same sales order. UNDER SHIPMENT: Add Balance To Next Ship Date: If the user wants to add the remaining back order to the next scheduled delivery date for the product on the same sales order. Sales Order Schedule Delivery Management When the user enters a new order, the system will default delivery due dates to a certain number of days from the date of the entry. The number of days is defined by the job type and the numbers in this setup screen. STANDARD: the number of days beyond the current date that MANEX will default a new sales order due date. PRIORITY1: the number of days beyond the current date that MANEX will default a new sales order due date. PRIORITY2: the number of days beyond the current date that MANEX will default a new sales order due date DELIVERY SCHEDULE TRANSIT DAYS: enter the number of days the user wants deducted from sales order delivery date, to account for freight delivery and to establish the dock shipment date. |
| 1.11.4. How To ..... for Delivery Schedule |
| 1.11.4.1. Setup the Delivery Schedule Module | ||||
|
The following screen will be displayed:
To modify this screen, the user must click on the Edit button and supply the password. That action will enable the screen. This will allow the user to click on the radio button desired for over and under shipments. The days may be entered into the data entry boxes for the default due dates and ship dates for sales order. The user must Save or Abandon changes after modifying screen.
Where Used: In Sales Orders, Packing Lists and Invoicing.
«Mark as Completed in RoadMap Section B Item 2-j» |
| 1.12. Quote Defaults |
| 1.12.1. Prerequisites for Quote Defaults |
|
Complete the attached worksheet and "Mark as Completed RoadMap Section B Item 2-k" before continuing the setup. User MUST have full rights to the "System Setup" in System Security . Users with “Supervisor Rights” will automatically have access. |
| 1.12.2. Introduction for Quote Defaults |
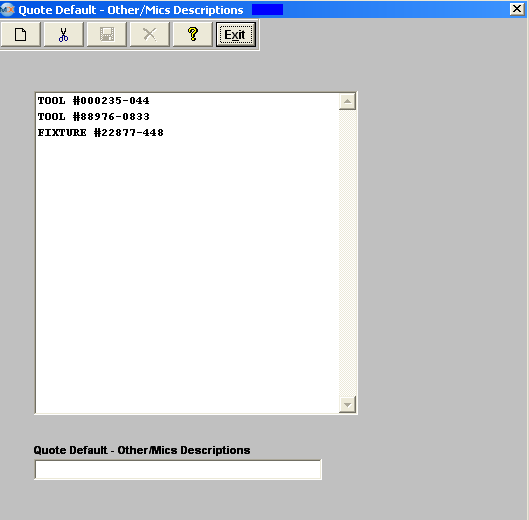
The Quote Defaults setup screen is used to quote the other/miscellaneous description prices on assemblies. These descriptions are used in the Customer Quotation module in the Sales section. Types of descriptions could be Tooling, Non Recurring Expense, Burden, etc. |
| 1.12.3. Fields & Definitions for Quote Defaults |
|
The Quote Defaults setup screen is used to quote the other/miscellaneous description prices on assemblies. These descriptions are used in the Customer Quotation module in the Sales section. Types of descriptions could be Tooling, Non Recurring Expense, Burden, etc. |
| 1.12.4. How To ..... for Quote Defaults |
| 1.12.4.1. Setup the Quote Defaults Module | ||||
|
The following screen will be displayed:
To Add a Customer Quote Default, depress the Add button. Enter your password. Type in the desired description for Other or Miscellaneous descriptions to be used in the Customer Quote module. To Edit a Customer Quote Default, depress the Edit button. Highlight the description to be changed. Type in the desired changes. To Delete a Customer Quote Default, depress the Delete button .Highlight the description to be deleted. The user must Save or Abandon changes after modifying the screen. "Mark as Completed RoadMap Section B Item 2-k"
|
| 1.13. Quote Setup |
| 1.13.1. Prerequisites for Quote Setup |
|
Complete the attached worksheet and "Mark as Completed RoadMap Section B Item 2-l" before continuing the setup. The Departments must have been set up in Administrative Departments in the General Setup.
User MUST have full rights to the "System Setup" in System Security . Users with “Supervisor Rights” will automatically have access.
|
| 1.13.2. Introduction for Quote Setup |
This setup screen is used in the Customer Quote modules in ManEx Sales section. Check off the department(s) which must approve a Customer Quote before the Inventory, BOM and Pricing tables can be updated by the use of “Transfer” on the Customer Quote module. |
| 1.13.3. Fields & Definitions for Quote Setup |
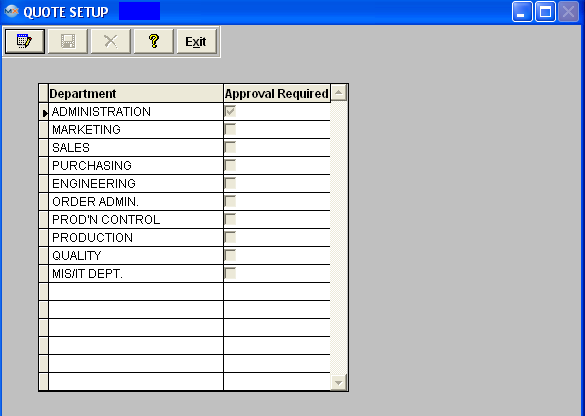 This setup screen is used in the Customer Quote modules in ManEx Sales section. Check off the department(s) which must approve a Customer Quote before the Inventory, BOM and Pricing tables can be updated by the use of “Transfer” on the Customer Quote module. |
| 1.13.4. How To ..... for Quote Setup |
| 1.13.4.1. Setup the Quote Setup Module | ||||
|
The following screen will be displayed:
To modify the quote setup screen, depress the Edit button. Check off the department(s) which must approve a Customer Quote by clicking in the Approval Required box. The user must Save or Abandon changes after modifying the screen. Where Used: This setup screen is used in the Customer Quote modules in MANEX Sales section.
"Mark as Completed RoadMap Section B Item 2-l"
|
