| 1. System Setup |
| 1.1. General Setup |
| 1.1.1. General Setup Introduction |
| This section covers the setups to be used in various modules. Please take time to consider how to use these tables to take the maximum advantage of the ManEx features. Each section entered will affect the way that operations are performed.
The ManEx program is designed to minimize the user’s keystrokes when entering data. By careful consideration of strategies for system control, the user may arrive at the point where ManEx can automatically assign numbers to a variety of functions.
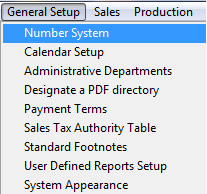
The General Setup section covers the following modules: Number Systems, Admin/Production Calendar, Administrative Departments, Designate a PDF Directory, Payment Terms, Sales Tax Authority Table, Standard Footnotes, User Defined Reports Setup, and System appearance.
User MUST have full rights to the "System Setup" in System Security to setup these modules. Users with “Supervisor Rights” will automatically have access. |
| 1.1.2. Number System |
| 1.1.2.1. Prerequisties for Number System |
Complete the attached worksheet and "Mark as Completed RoadMap Section B Item 1-a" before continuing the setup.
User MUST have full rights to the "System Setup" in System Security. Users with “Supervisor Rights” will automatically have access. |
| 1.1.2.2. Introduction for Number System |
The Number System setup determines whether your company will use automatic or manual numbering method for the items listed.
If "Auto" numbering is selected, the user will need to enter the starting number in the space provided on the right side of the form (starting number.) If no starting number is entered, the system will automatically start assigning numbers with number one. ManEx will automatically assign the next available sequential number (with no revision) when adding a new record in a selected module, user may at this time enter a revision if applicable. Once the "Next" number is selected, the counter moves to the succeeding number, if the abandon changes button is depress that number will be considered as used and will be skipped even though the record was never saved.
If "Manual" mode is selected, the user will need to maintain a manual numbering sequence log and manually enter the number when adding a new record in a selected module. It is not necessary to fill in the starting number field when using manual mode. In the manual mode, the user may combine alpha and numeric characters up to the length of the field.
If the user wishes to begin with manual assignment of tracking numbers, it is recommended that they begin with an alpha character imbedded in the numbers. When the user decides to change to automatic number assignment, there will be no possibility of duplicate numbers, because all of the auto-numbering systems use numbers only. It may be appropriate for the user to enter the last number used in a manual system as the starting number for auto-numbering in the ManEx setup. |
| 1.1.2.3. Fields & Definitions for Number System |
The following numbering systems are established in this setup:
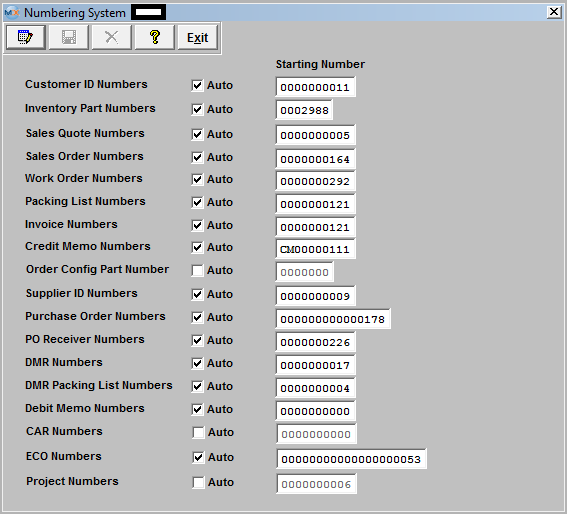 If the user wishes to start the number sequence for a number type at a number other than the one shown, the user types in the new starting number. The user must NOT enter a number below a number already existing. If "Auto" numbering is selected, the user will need to enter the starting number in the space provided on the right side of the form (starting number.) If no starting number is entered, the system will automatically start assigning numbers with number one. ManEx will automatically assign the next available sequential number (with no revision) when adding a new record in a selected module, user may at this time enter a revision if applicable. Once the "Next" number is selected, the counter moves to the succeeding number, if the abandon changes button is depress that number will be considered as used and will be skipped even though the record was never saved. If the Auto mode is unchecked the system will require user to manually assign the numbers. "Manual" mode is where the user will need to maintain a manual numbering sequence log and manually enter the number when adding a new record in a selected module. It is not necessary to fill in the starting number field when using manual mode. In the manual mode, the user may combine alpha and numeric characters up to the length of the field.
If the user wishes to begin with manual assignment of tracking numbers, it is recommended that they begin with an alpha character imbedded in the numbers. When the user decides to change to automatic number assignment, there will be no possibility of duplicate numbers, because all of the auto-numbering systems use numbers only. It may be appropriate for the user to enter the last number used in a manual system as the starting number for auto-numbering in the ManEx setup. Customer ID NumbersAs the user adds customers to the database, it is useful to have a customer code assigned to each customer. In many systems, the user is required to remember the customer code in order to process information concerning the customer. In such a system, mnemonic code is usually assigned so the user can remember the customer code. In ManEx, the customer code may be used to find a customer, but every screen requiring a customer identification code will display at least the customer’s full name to choose from, and often the code also. The ManEx user does not need to customize the customer codes, but can let ManEx automatically apply a new number for each new customer. Inventory Part Number As discussed in the Materials Setup section, ManEx provides users with the ability to automatically assign part numbers to new items being added to the inventory item master. Utilization of this numbering system relieves the user of the chore of having to maintain a separate logbook of assigned numbers. The user has the option of assigning a prefix to the number based on part type information established in the materials setup section. In most instances, the user may easily find an inventory item without having to remember the number, because ManEx provides several ways to locate a part – by customer, by class and type, by description, by where used, etc. Sales Quote Numbers If the user is in the quotation module, the creation of a new quotation will require a control number before saving the quotation. The user may have ManEx assign these numbers, releasing the user from having to maintain a separate log, or the user may assign numbers at the time of the quote generation. Sales Order Numbers When a sales order is created, there must be a control number assigned before the order is saved. The user may have ManEx assign these numbers, releasing the user from having to maintain a separate log, or the user may assign numbers each time a new sales order is entered. Work Order Number When a work order is created, there must be a control number assigned before the order is saved. The user may have ManEx assign these numbers, releasing the user from having to maintain a separate log, or the user may assign numbers each time a new work order is entered. Also, if the user elects to have ManEx automatically create work orders from sales orders, the numbering system for work orders MUST be automatic. Packing List Numbers When the shipping department is ready to make a shipment, they must create a packing list to go with the shipment, and to record in ManEx the details of the shipment. These too, must have a control number assigned at the time the packing list is created. The user may do this manually, or the user may have ManEx assign these numbers, releasing the user from having to maintain a separate log. Invoice Numbers Invoices are created after the shipment has been completed and delivered to a carrier or customer. When the user assigned to printing invoices is ready to do so, the invoices must have a control number assigned to them. The user may do this manually, or the user may have ManEx assign these numbers, releasing the user from having to maintain a separate log. Credit Memo Numbers Credit memos are created in accounting or via an RMA Receiver, and also require control numbers. The user may do this manually, or the user may have ManEx assign these numbers, releasing the user from having to maintain a separate log. Order Configuration Part Number Order configuration is set up in the ManEx Sales section’s Order Configuration module. The numbering selection for Order Configuration can be either automatic or manual.If automatic, the user is spared from maintaining a manual log. Supplier ID Numbers As the user adds suppliers to the database, it is useful to have a supplier code assigned to each supplier. In many systems, the user is required to remember the supplier or vendor code in order to process information concerning the vendor. In such a system, mnemonic code is usually assigned so the user can remember the vendor code. In ManEx, the supplier code may be used to find a vendor, but every screen requiring a supplier identification code will display at least the supplier’s full name to choose from, and often the code also. So the ManEx user does not need to customize the supplier codes, but can let ManEx automatically apply a new number for each new supplier. Purchase Order Numbers Tracking numbers are vital to purchase orders, as they are the legal binding of the user to the supplier for the delivery and payment of goods. These numbers may be assigned manually, as many users do. However, the reasons for assigning them manually is usually associated with the ability to group purchasing actions by buyer or commodity. In ManEx, the user may use a wide variety of selections to view procurement information. The user may view the orders by buyer code, by class code, by part types, by require actions, and more. Because of the ease of extracting data about the purchase orders, it is recommended that the user utilize the auto-numbering system to track order numbers. The auto-numbering obviates the need for separate log books for each buyer, and trying to find the book when the buyer is not available. PO Receiver Number Each time a shipment is received against a purchase order, it is assigned a tracking number to identify the specific receipt against the order, and to reconcile the accounts payable. The user may do this manually, or the user may have ManEx assign these numbers, releasing the user from having to maintain a separate log. Discrepant Material Return Numbers Discrepant Material Return Numbers track shipments when items previously purchased are returned to the supplier. The user may do this manually, or the user may have ManEx assign these numbers, releasing the user from having to maintain a separate log. Discrepant Material Return Packing List Numbers When the shipping department is ready to make a shipment, they must create a packing list to go with the shipment, and to record in ManEx the details of the shipment. These too, must have a control number assigned at the time the packing list is created. The user may do this manually, or the user may have ManEx assign these numbers, releasing the user from having to maintain a separate log.
Debit Memo Numbers Debit memos against a Supplier’s invoice are created in accounting or via a DMR return shipment, and also require control numbers. The user may do this manually, or the user may have ManEx assign these numbers, releasing the user from having to maintain a separate log. Corrective Action Request Numbers If the user is using the CAR module, whenever the user issues a corrective action request, the ManEx program requires the assignment of a tracking number in order to report on the progress and resolution of the findings. The user may do this manually, or the user may have ManEx assign these numbers, releasing the user from having to maintain a separate log. Calibration Numbers Calibration numbers are used to assign control numbers to specific equipment and tooling. If the user is using the Calibration and Maintenance module, these control numbers are provided to identify equipment and tooling that need regular maintenance or calibration. In a manual mode, the user may choose to use asset numbers (if available). Otherwise, ManEx can automatically assign numbers to each piece of equipment or tooling as it is entered into the ManEx database. (The user may wish to use these numbers as asset numbers for their equipment). ECO Numbers If the user has the Engineering Change Order module, whenever the user ADDs and Saves a new ECO, the ManEx program requires the assignment of a tracking and control number. The user may do this manually, or the user may have ManEx assign these numbers, releasing the user from having to maintain a separate log. Project Numbers If the user has a system which tracks project numbers, when the user sets up a NEW Project, there is a requirement of a new unique number. The user may do this manually, or the user may have ManEx assign these numbers, releasing the user from having to maintain a separate log. |
| 1.1.2.4. How To ..... for Number System |
| 1.1.2.4.1. Setup the Number System | ||||
The following screen will be displayed;
To modify this screen, the user must click on the Edit action button and supply the password. That action will enable the screen, and the user then can select which option to apply. For Auto numbering user MUST check the box by clicking on the radio/box. Unchecking the radio/box will indicate Manual numbering. If the user wishes to start the number sequence for a number type at a number other than the one shown, the user types in the new starting number. The user must NOT enter a number below a number already existing.
If "Auto" numbering is selected, the user will need to enter the starting number in the space provided on the right side of the form (starting number.) If no starting number is entered, the system will automatically start assigning numbers with number one. ManEx will automatically assign the next available sequential number (with no revision) when adding a new record in a selected module, user may at this time enter a revision if applicable. Once the "Next" number is selected, the counter moves to the succeeding number, if the abandon changes button is depress that number will be considered as used and will be skipped even though the record was never saved. If the Auto mode is unchecked the system will require user to manually assign the numbers. "Manual" mode is where the user will need to maintain a manual numbering sequence log and manually enter the number when adding a new record in a selected module. It is NOT necessary to fill in the starting number field when using manual mode. In the manual mode, the user may combine alpha and numeric characters up to the length of the field. If the user wishes to begin with Manual mode of tracking numbers, it is recommended that they begin with an alpha character imbedded in the numbers. When the user decides to change to Auto number mode, there will be NO possibility of duplicate numbers, because all of the auto-numbering systems use numbers only. It may be appropriate for the user to enter the last number used in a Manual system as the starting number for Auto-numbering in the ManEx setup. "Mark as Completed RoadMap Section B Item 1-a"
Where Used: All activities that issue control numbers. |
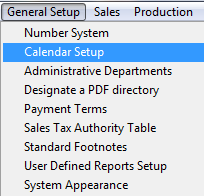
| 1.1.3. Calendar Setup |
| 1.1.3.1. Prerequisites for Calendar Setup |
|
Complete the attached worksheet and "Mark as Completed RoadMap Section B Item 1-b" before continuing the setup. User MUST have full rights to the "System Setup" in System Security . Users with “Supervisor Rights” will automatically have access. |
| 1.1.3.2. Introduction for Calendar Setup |
Administrative and Production calendar sections consist of three parts. They are: Company Holiday setup, Work Days setup, and
ManEx recommends that the user maintain a minimum of at least two years of calendar data ahead of the current date. If the user places a purchase order a year in advance and the generated calendar range is not enough to cover the range, then the system will generate an incorrect schedule. Likewise, the user should have at least six months in the past, otherwise any MRP actions that show up as being required beyond that date will provide erroneous information. However ManEx recommends that the user does NOT setup an extensive amount of calendar years. Having extensive calendars (both accounting and production) will slow down operations in each. More specifically, MRP has to determine from the production calendar all of the possible dates necessary for production schedules. With larger files, it takes a little longer to find the target information. In accounting, each time they post and close, accounting makes a record for every account, for every period in the accounting calendar. So the fewer periods set up, the faster the process of updating the accounting records. |
| 1.1.3.3. Fields and Definitions for Calendar Setup | ||||||||||||||||||||||||||||||
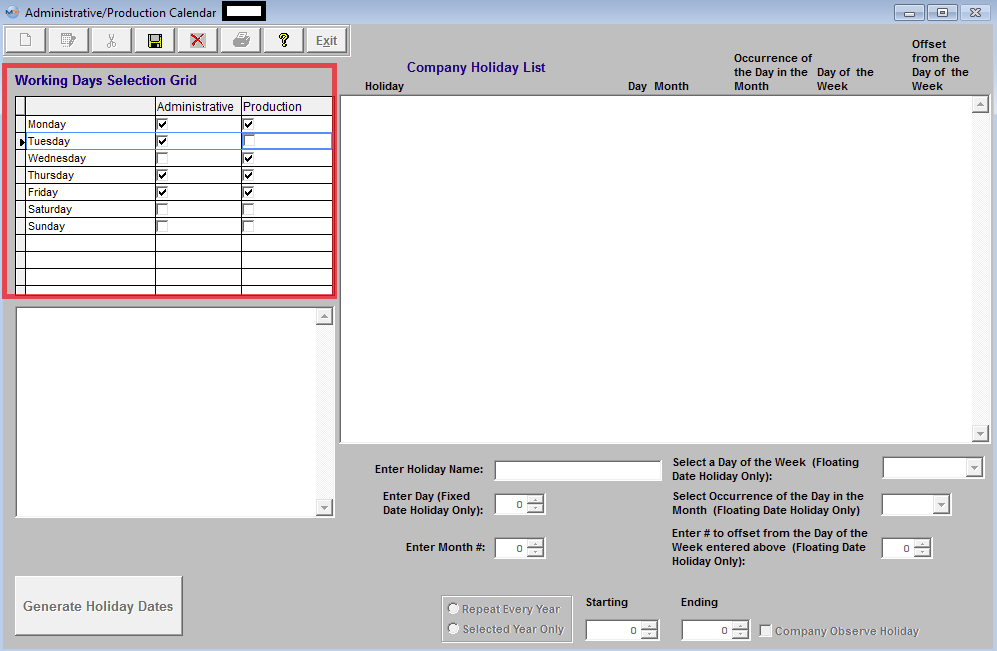
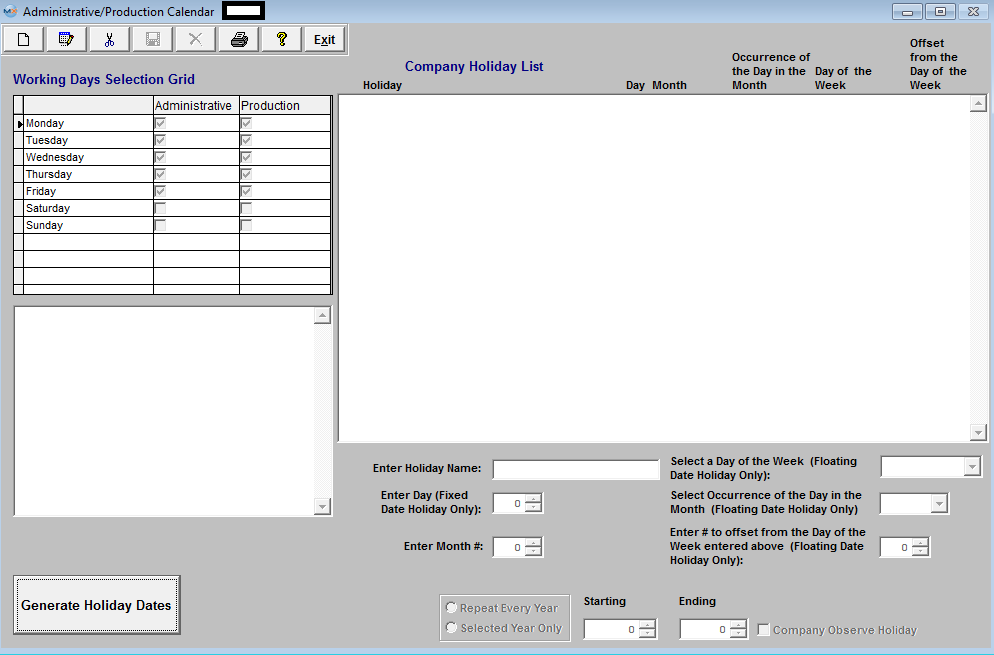 Working Days Selection Grid - This section is to tell the system how many standard work days are available each week (exclusive of holidays) for all functioning operations. All computations for deliveries, action dates and resource availability are based on this information.
Company Holiday List
|
| 1.1.3.4. How To ..... for Calendar Setup |
| 1.1.3.4.1. Setup the Admin/Production Calendar | ||||
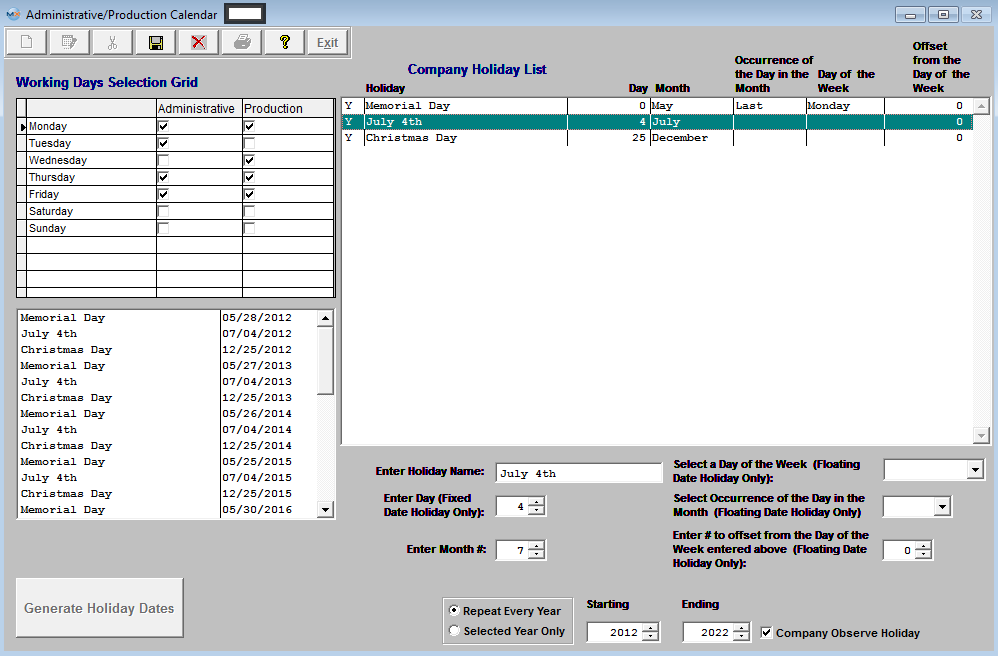
The following screen wiil be displayed:
Working Days Selection Grid
To modify this screen, the user must click on the Edit button and supply the password. That action will enable the screen. This screen determines which weekdays will be considered as available for resources for the Administrative and/or Production. User may check the box if the day should be considered or is available or leave it unchecked of the day should NOT be considered or will NOT be available.
COMPANY HOLIDAYS
The user may Add, Edit or Delete holidays by using the action buttons. To ADD a holiday user must click on the ADD action button and supply the password. That action will enable the Holiday Information fields. 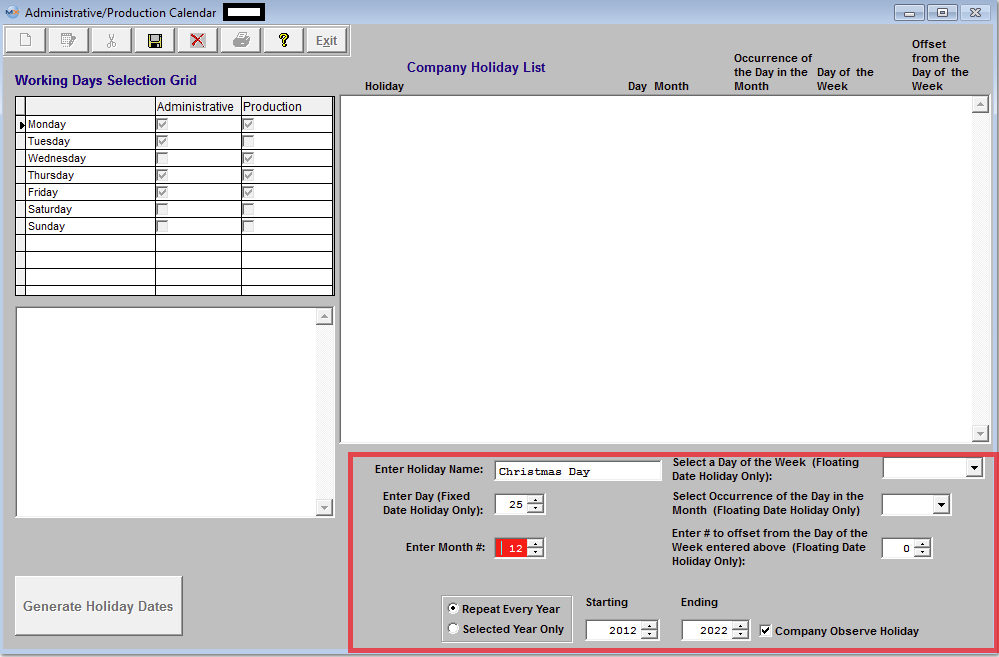 Enter the Holiday Name, if the Hoilday is the same date every year (Fixed Date Holiday) and NOT based on the same day of the year, user would enter in the date of the holiday and the Month of the holiday. Select to "Repeat Every Year" or "Selected Year Only". Select the Starting Year and Ending Year. Check if the Company is to Observe the Holiday being entered. Once all this has been completed depress the "Save" changes or "Abandon Changes" action button. If changes have been saved the "Generate Holiday Dates" button will become available. Depress the "Generate Holiday Dates" button and the Holiday dates will be created as displayed below: 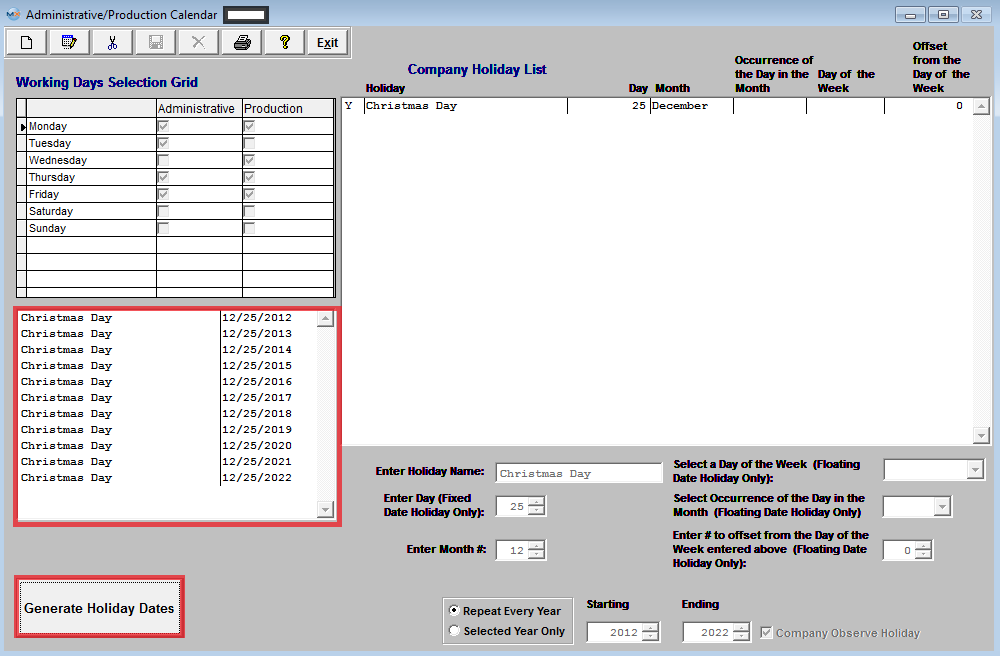 If the Holiday is the same day of the year so the date fluctuates then the user would select a day of the week fron the pull down, select the Occurrence of the Day in the month (such as First, Second, Third, Fourth, or Last) and enter the Month the Holiday is in. Select to "Repeat Every Year" or "Selected Year Only". Select the Starting Year and Ending Year. Check if the Company is to Observe the Holiday being entered. Once all this has been completed depress the "Save" changes or "Abandon Changes" action button. If changes have been saved the "Generate Holiday Dates" button will become available. Depress the "Generate Holiday Dates" and holiday dates will be created as displayed below: 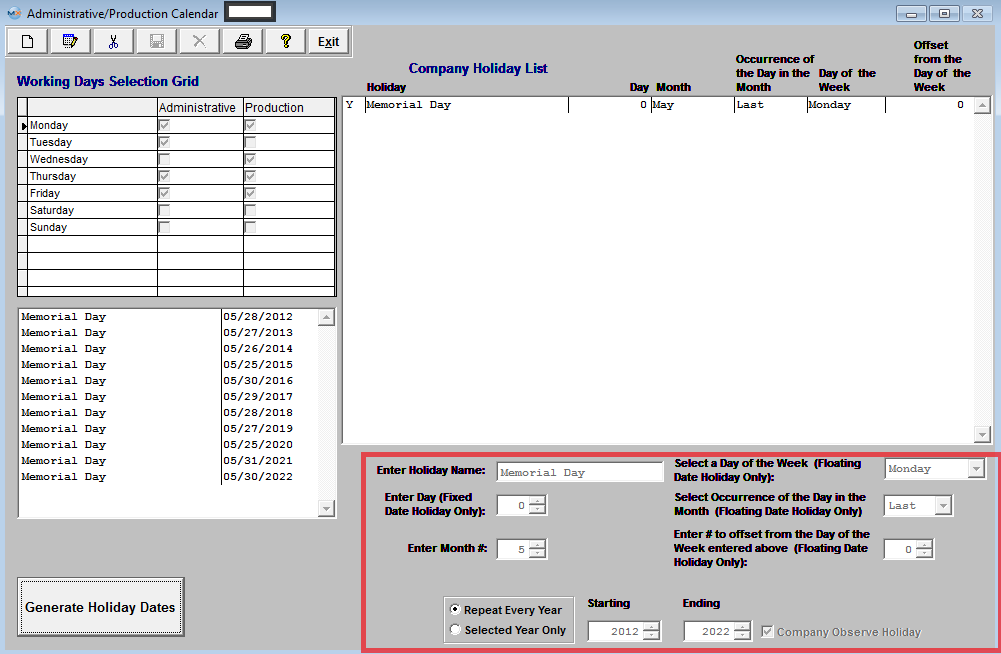 To EDIT Holiday Information Highlight the holiday you want to edit, depress the Edit button and the Holiday information will become editable
 Once user has made the changes, depress the Save action button and depress the "Generate Holiday Dates" button to refresh the screen with the changes.
To DELETE a Holiday Highlight the holiday you want to remove or delete (Example July 4th) 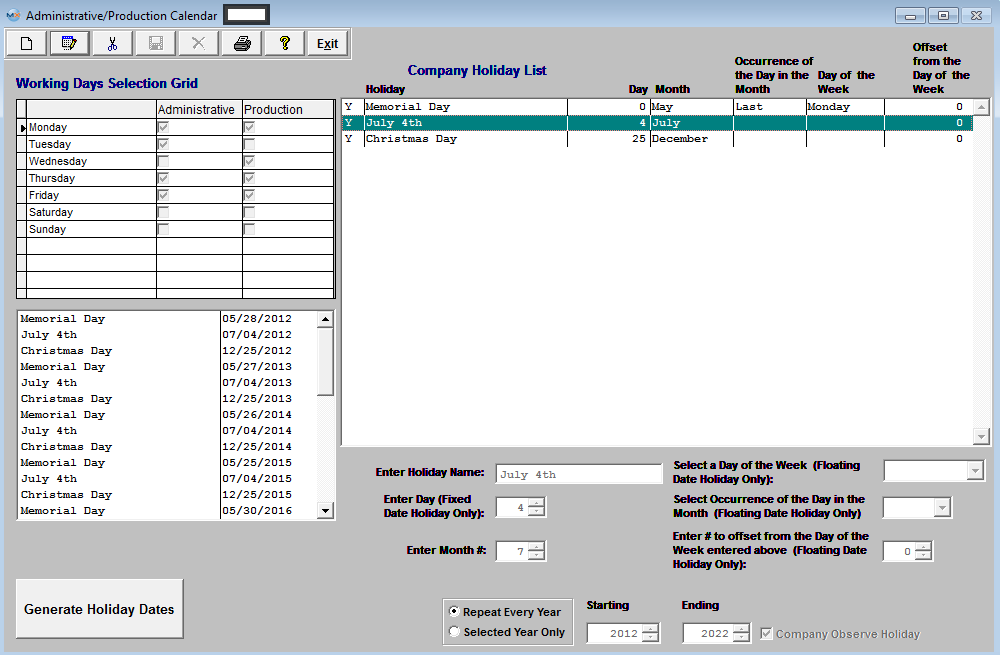 Depress the Delete action button the following message will be displayed: 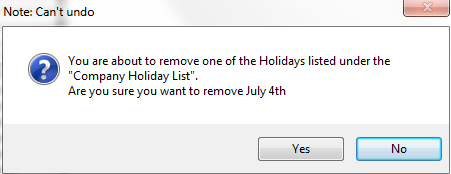 Depress Yes to Continue (notice that the Holiday (July 4th) has been removed from the Company Holiday List screen to the right but has NOT been removed from the Holiday Dates screen to the left) 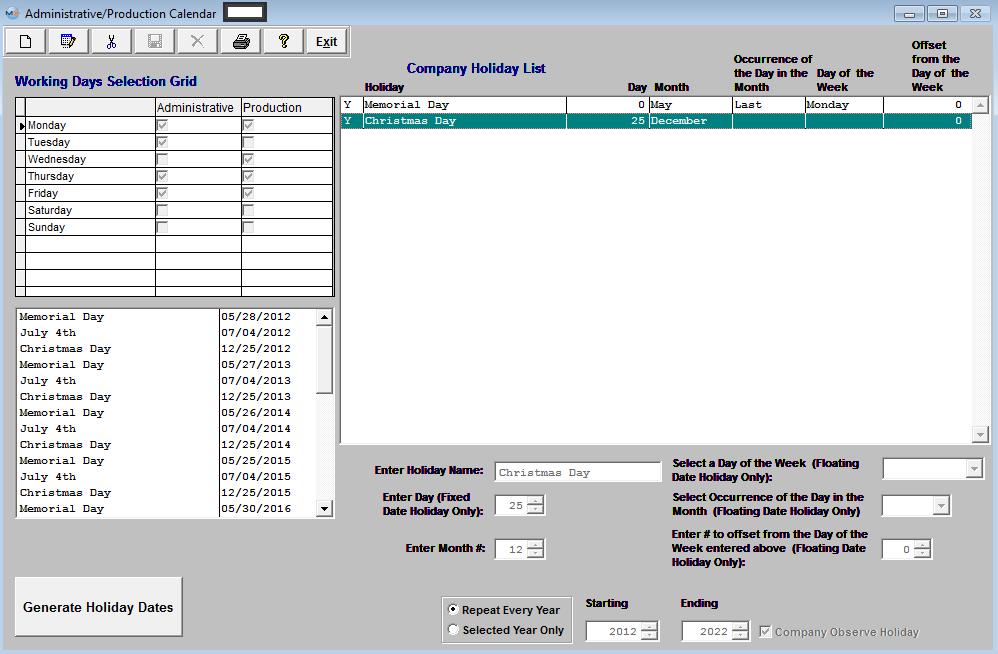 User MUST depress the "Generate Holiday Dates" to refresh the Holiday Dates screen. Once this button has been depressed the (July 4th) dates will be removed from this screen also, as displayed below. 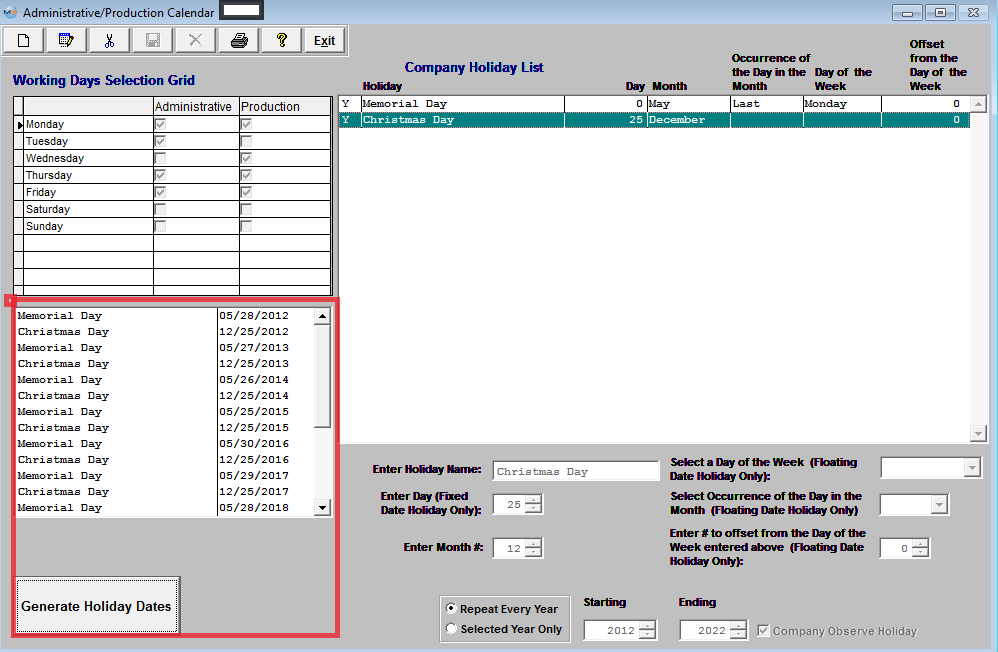 Where Used: All activities that consider available work days.
|
| 1.1.3.5. Reports for the Calendar Setup |
To obtain the AP
Aging Reports within the Web, select the WEB Print button from the ManEx action buttons at the top
of the screen. For further detail on How the Reports work within the Web refer
to Article #5477.
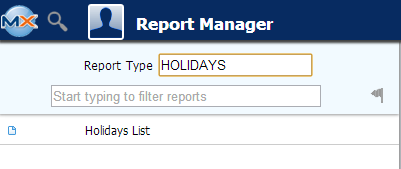
Select the Report Type: HOLIDAYS - A List of Reports will be displayed that are available on the Web
for HOLIDAYS
To obtain the Holiday Reports within the desktop, select the Print button from the ManEx action buttons at the top of the screen.
The following reports screen
will display a list of reports that are available on the ManEx Desktop:  Highlight the Holiday List Report and depress the OK button, the following screen will appear: 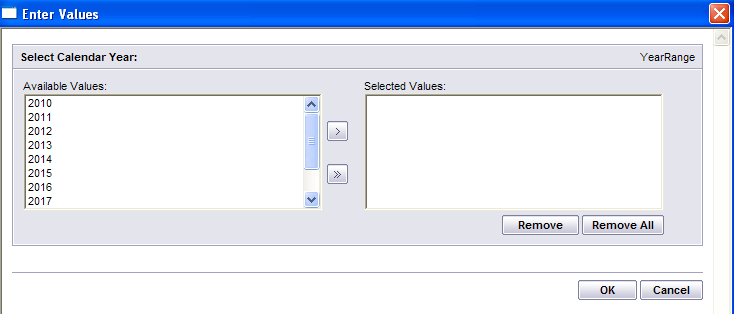 Highlight the Calendar Year and depress the > button. To select All of the Calendar Years listed, depress the >> button.
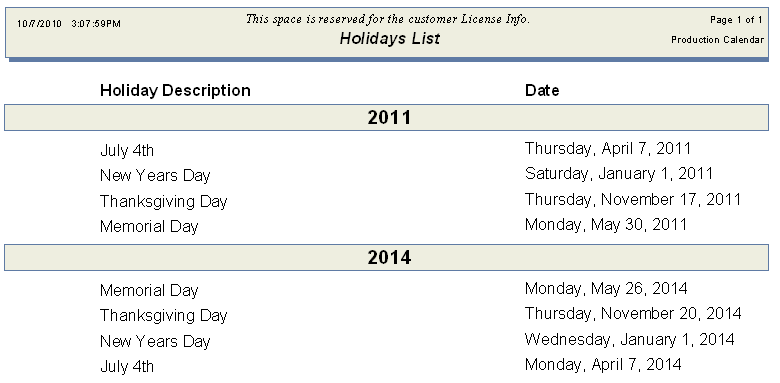
Depress the OK button. The following report is available:
 |
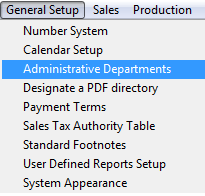
| 1.1.4. Administrative Departments |
| 1.1.4.1. Prerequisites for Administrative Departments |
Complete the attached worksheet and "Mark as Completed RoadMap Section B Item 1-c" before continuing the setup. User MUST have full rights to the "System Setup" in System Security . Users with “Supervisor Rights” will automatically have access. |
| 1.1.4.2. Introduction for Administrative Departments |
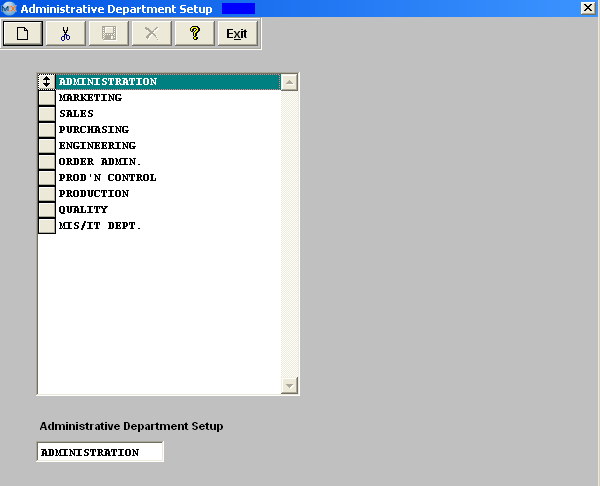
This screen is used to establish the different administrative departments within the company. |
| 1.1.4.3. Fields & Definitions for Admin Departments Module |
 The ManEx System will use this information as a means for traceability. Do not use this screen for entering Production Department or Work Centers. Production departments are set up in the Production Work Centers & Activities setup. The Administrative Department is only used in System Security to assign user to either "work center" or "department"
The user may enter as many departments as desired. |
| 1.1.4.4. How To ..... for Administrative Department |
| 1.1.4.4.1. Setup the Adminstrative Departments | ||||
|
The following screen will be displayed:
To modify this screen, the user must click on the Add or Delete button and supply the password. That action will enable the screen. The user may either add or delete department names to the list. After adding or deleting a department name, the user must Save or Abandon changes.
These items may be rearranged in any order by clicking on and dragging the box to the left side to the (vertical) position desired. This order will be the order the user sees when using this list in other modules within the system. Suggestion: Have the one most used at the top of the list. Where Used: When assigning non-production users to an administrative department, and in establishing accounts for the departments. «Mark as Completed in RoadMap Section B Item 1-c» |
| 1.1.5. Designate a PDF directory |
| 1.1.5.1. Prerequisites for Designate a PDF Directory |
User MUST have full rights to the "System Setup" in System Security . Users with “Supervisor Rights” will automatically have access. |
| 1.1.5.2. Introduction to Designate a PDF Directory |
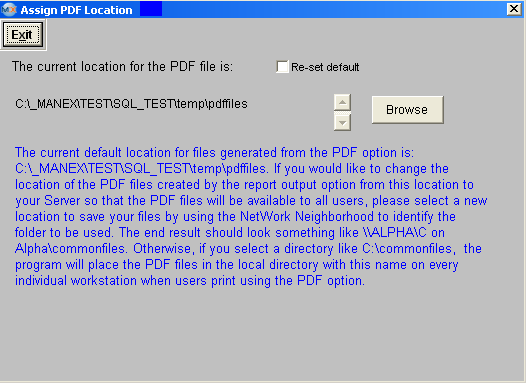
| This is the current default location for files generated from the pdf option. |
| 1.1.5.3. Fields & Definitions for Designate a PDF Directory |
|
| 1.1.6. Payment Terms |
| 1.1.6.1. Prerequisites for Payment Terms |
Complete the attached worksheet and "Mark as Completed RoadMap Section B Item 1-e" before continuing the setup.
User MUST have full rights to the "System Setup" in System Security . Users with “Supervisor Rights” will automatically have access.
|
| 1.1.6.2. Introduction for Payment Terms |
This is where the user sets up Payment Terms (used in Customer Information, Sales Order, Quotation, Invoicing, Supplier Information, Purchase Order and Accounts Payable). The description is a free text field to describe the payment terms as the user wishes to see it, i.e.: 2% 10 Days, N30 etc. This is provided for the user to select payment terms based on the description. |
| 1.1.6.3. Fields and Definitions | ||||||||
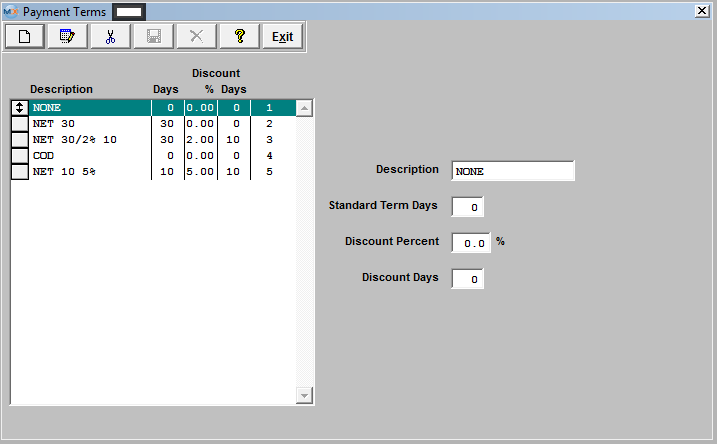
In the example Net 30/2% 10, if the buyer pays the invoice within ten days of the invoice date, they are entitled to take a two percent (2%) discount on the amount of the invoice. After the ten days have passed, the buyer has up to thirty days from the date of the invoice to pay. Payments made after that time may be charged other fees. |
| 1.1.6.4. How To ..... Payment Terms |
| 1.1.6.4.1. Setup Payment Terms | ||||
|
The following screen will be displayed:
Pressing the Add button will enable the data entry boxes at the left of the screen for the user to enter new data. Selecting an existing Payment Term and pressing the Edit button will bring the selected information to the data entry box to be modified. Selecting an existing Payment Term and pressing the Delete button will remove the selected information. The user enters in the Description, standard days, discount (as a percent) and discount days. These items may be rearranged in any order by clicking on and dragging the box to the left side to the (vertical) position desired. This order will be the order the user sees when using this list in other modules within the system. Suggestion: Have the one most used at the top of the list. Where Used: In the Customer Setup, Sales Orders, Packing Lists, Invoicing, Supplier Setup, and Accounting.
«Mark as Completed in RoadMap Section B Item 1-e» |

| 1.1.7. Sales Tax Authority Table |
| 1.1.7.1. Prerequisites for Sales Tax Authority Table |
|
Complete the attached worksheet and "Mark as Completed RoadMap Section B Item 1-f" before continuing the setup. If Accounting is used, the appropriate General Ledger numbers must have been set up in the Accounting Set Up section.
User MUST have full rights to the "System Setup" in System Security . Users with “Supervisor Rights” will automatically have access. |
| 1.1.7.2. Introduction for Sales Tax Authority Table |
This is where the user must enter all sales tax information. The tax ID, Tax Authority description, and rates for various city, county, state, province, etc. are entered. This information is used in Customer Shipping Information and Material Receiving Location default tables. This default setting assigned to each shipping address for each customer will be entered in orders automatically when a new order is added, if the Tax Box is checked. The tax ID is also associated with the user’s Bill-to / Ship to address for purchases, and added to taxable items on a purchase order. The default information in the invoice and purchase order can be modified during the entry process for a new order. This section may not apply to states that do not have local or state sales tax or states with manufacturing local & state sales exemption.
The user may also define the GL accounts to be used for taxes in this section, if the accounting module is active. |
| 1.1.7.3. Fields & Definitions for Sales Tax Authority Table |
| 1.1.7.3.1. US Sales Tax | ||||||||||
|
| 1.1.7.3.2. Foreign Tax | ||||||||||||||||
|
| 1.1.7.4. How To ..... for Sales Tax Authority Table |
| 1.1.7.4.1. Setup the US Sales Tax | ||||
|
The following screen will be displayed:
To modify this screen, the user must click on the Add, Edit, or Delete button and supply the password. That action will enable the screen. Pressing the Add button will enable the data entry boxes at the bottom of the screen for the user to enter new data. Selecting an existing Tax ID and pressing the Edit button will bring the selected information to the data entry box to be modified. Selecting an existing Tax ID and pressing the Delete button will remove the selected information. The user enters in the Tax ID, Description, Rate, the GL Liability Account and the GL Asset Account. Pressing on the down-arrow keys will display the GL account numbers, if the user is using the accounting module. The user must Save or Abandon changes when finished adding or editing screen. Where Used: In the Customer Setup, Sales Orders, Packing Lists, Invoicing, Purchase Setup Receiving and Billing Information, and Accounting.
«Mark as Completed in RoadMap Section B Item 1-f» |

| 1.1.7.4.2. Setup the Foreign Sales Tax | ||||
|
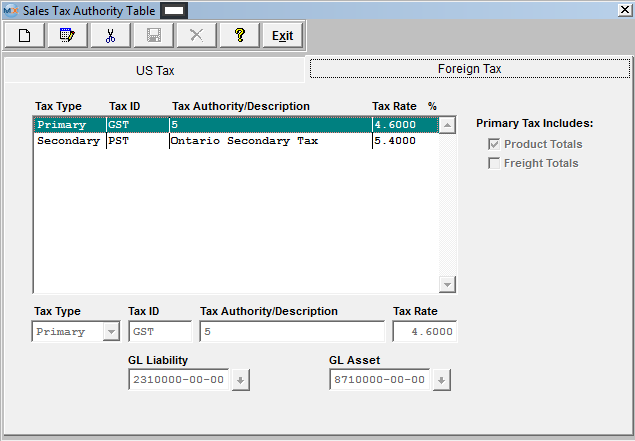
The following screen will be displayed: 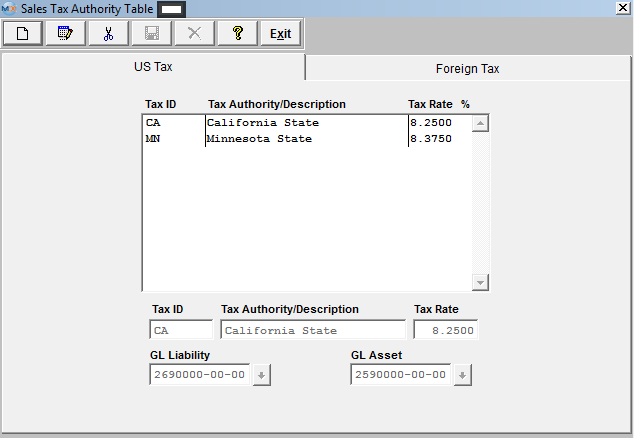 Depress the Foreign Tax tab
To modify this screen, the user must click on the Add, Edit, or Delete button and supply the password. That action will enable the screen. Pressing the Add button will enable the data entry boxes at the bottom of the screen for the user to enter new data. Selecting an existing Tax ID and pressing the Edit button will bring the selected information to the data entry box to be modified. Selecting an existing Tax ID and pressing the Delete button will remove the selected information. The user selects the Tax Type from the pull down, enters in the Tax ID, Description, Rate, the GL Liability Account and the GL Asset Account. Pressing on the down-arrow keys will display the GL account numbers, if the user is using the accounting module.
If user selects "Primary" tax type, this tax will be calculated first, the calculation will be based on what user checks for Primary Tax to include Product Totals, and/or Freight Totals. If user selects "Secondary" tax type, this tax will be calculated after primary tax, and the calculation will be based on what boxes are checked, Product Totals, and/or Freight Totals, and/or Primary Tax Totals. If user checks "Primary Tax Totals", the tax calculated will be based on only the "Primary Tax Total". The user must Save or Abandon changes when finished adding or editing screen. For examples see the "Foreign Tax Examples.xlsx" or the "canadian provice vats.xls" attached.
Where Used: In the Customer Setup, Sales Orders, Packing Lists, Invoicing, Purchase Setup Receiving and Billing Information, and Accounting.
«Mark as Completed in RoadMap Section B Item 1-f» |
| 1.1.8. Standard Foot Notes |
| 1.1.8.1. Prerequisites for Standard Footnotes |
Complete the attached worksheet and "Mark as Completed RoadMap Section B Item 1-g" before continuing the setup.
User MUST have full rights to the "System Setup" in System Security . Users with “Supervisor Rights” will automatically have access. |
| 1.1.8.2. Introduction for Standard Footnotes |
The foot note section is used to set up standard system level messages that will print on the foot note section of the various type of forms. Whenever any of the forms listed are printed, the setup message will automatically appear on the foot note section of the form. Enter messages in the space provided. Sample verbiage provided is for reference only, and is not intended to be a suggestion for the user to adopt for their own use. |
| 1.1.8.3. Fields & Definitions for Standard Footnotes |
The foot note section is used to set up standard system level messages that will print on the foot note section of the various type of forms listed below. Whenever any of the forms listed below are printed, the setup message will automatically appear on the foot note section of the form. Enter messages in the space provided. Sample verbiage provided is for reference only, and is not intended to be a suggestion for the user to adopt for their own use.
|
| 1.1.8.4. How To ..... for Standard Footnotes |
| 1.1.8.4.1. Setup Standard Footnotes | ||||
|
The following screen will be displayed:
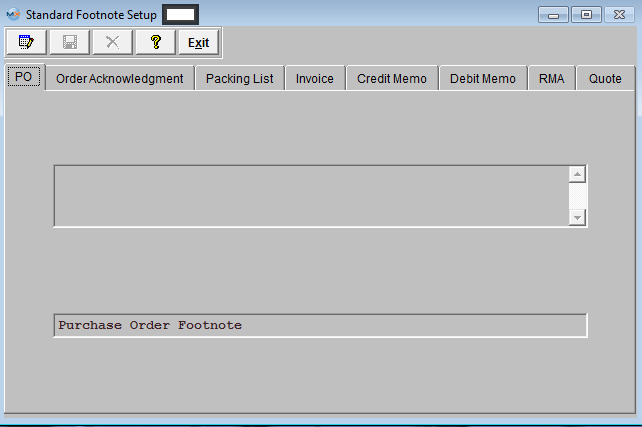 To modify this screen, the user must click on the Edit button and supply the password. That action will enable the screen. This will allow the user to click on the tabs for the documents displayed. The user may enter text in each of these screens, but the text will be limited to the amount of space reserved on each of the documents for such notes. The user must Save or Abandon changes after entering the Edit mode.
Where Used: In ALL documents named on the screen.
«Mark as Completed in RoadMap Section B Item 1-g» |
| 1.1.9. User Defined Reports Setup |
| 1.1.9.1. Prerequisites for User Defined Reports Setup |
A Crystal Report Interface is available. This function allows the user to view any custom Crystal Report that has been compiled into an Executable and loaded into the "User Defined Report Setup" screen. WITHOUT having to have any Crystal Report software loaded on this machine.
To view the Custom Crystal Reports once they have been linked in ManEx user must have the VFPODBC Drivers installed. For further detail on how to install these drivers see Article #3072 .
We are currently using CR XI Developer, but our new Library files should work with previous versions. You no longer need to compile your reports using Crystal Reports Designer software. You can now attach your Crystal Report in the User Defined Reports Setup and run them in ManEx. PRECAUTIONS WHEN USING CRYSTAL REPORTS AND CRYSTAL REPORT DESIGNER WITH THE MANEX DATABASE ManEx does not provide training on the use of Crystal Reports software. It is not our product. To arrange for training, call Seagate Software at 1-800-877-2340. If you do not have anyone on your staff who can do the reports and you want an outside designer, there are independent software consultants who do this type of work. In the Silicon Valley area, one of these consultants is Wisdom Technology. The number is 408-997-7165. The contact’s name is Bob Shatzer. ManEx can provide you or your designer with the database information for the reports you are trying to create. We will charge you phone support hours your company purchased for the time we spend. Complete the attached worksheet and "Mark as Completed RoadMap Section B Item 1-h" before continuing the setup.
Rights to "System Setup" in the System Security module. Users with "Supervisor Rights" will automatically have access.
|
| 1.1.9.2. Introduction for User Defined Reports Setup |
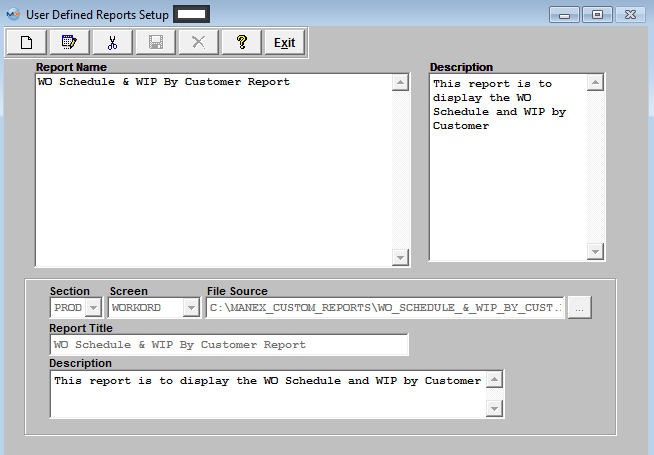
This module will allow each end workstation the ability to view(desktop only) any custom Crystal Report that has been compiled in .rpt format and loaded into the "User Defined Report Setup" screen. ManEx includes the Crystal Reports viewer so custom reports created in Crystal Reports can be controlled and distributed through the software, WITHOUT having to have any Crystal Report software loaded on that machine.
For Manexcloud custom reports users can create custom Quick View reports. See article here. Article 5816 For full report options on Manexcloud you can use Stimulsoft software Once setup you can configure to work with SQLManex Configure Stimulsoft To Work With SQL Data |
| 1.1.9.3. Fields & Definitions for User Defined Reports Setup |
|
1. Crystal Reports must NOT be designed using "live" MANEX DBFS tables. Data will be corrupted in MANEX if any of the tables used for the design are accessed and changed while the design is in progress. To use Crystal Report Designer, create a copy of the DBFS and use the copy to design the report. 2. MANEX has no reason to believe that running a previously designed Crystal Report using live MANEX files will cause any problems. It does not matter if the report was designed using Crystal Report Designer or written as a custom executable.
3. However, when using Crystal Report Designer or running a pre-existing Crystal Report, the user's workstation should be using "absolute" NOT "relative" paths to the DBFS files in use (ie. X:\Manex\DBFS\xyz.dbf NOT \\Manex\DBFS\xyz.dbf), where “X” is the absolute drive letter. Therefore, workstations setup with shortcuts to MANEX using relative addressing (for security reasons*) shouldn't be used to run Crystal Reports.
* Normally MANEX suggests that users use the MANEX shortcuts with relative addressing (not mapped to the server) to keep users from accessing the MANEX Server files in Windows Explorer. 4. If you accidentally corrupt the MANEX DBFS files using Crystal Report Designer or relative addressing, get all users off of MANEX and reindex TWICE. The first time clears the incorrect End of File table and the second time writes a corrected index. So in conclusion, as long as you don't design on the live database and you use "absolute" mapping to the server, using Crystal Reports to look at the live data after the report is designed should not be a problem.
|
| 1.1.9.4. How To ..... for User Defined Reports Setup |
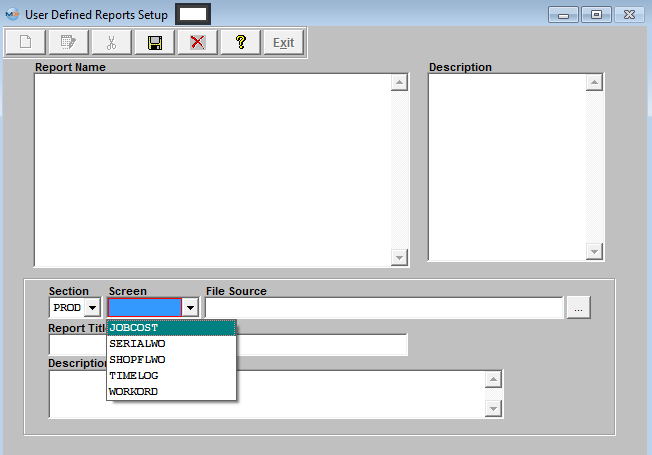
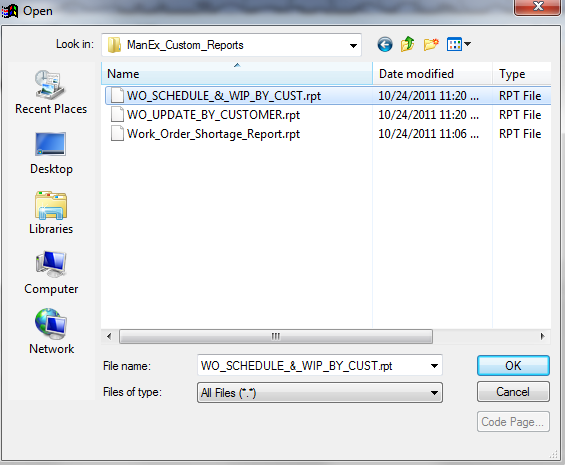
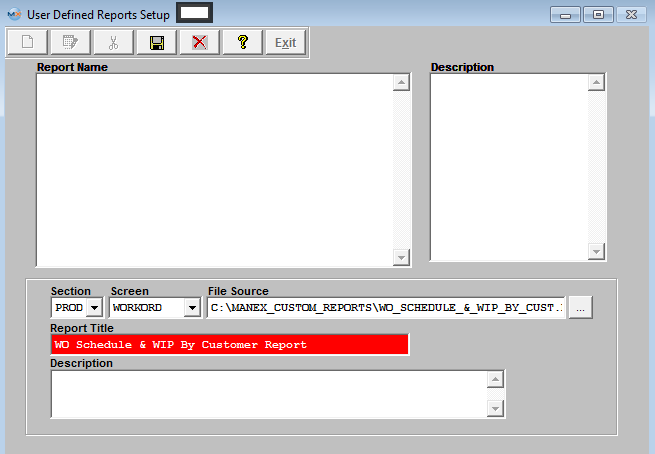
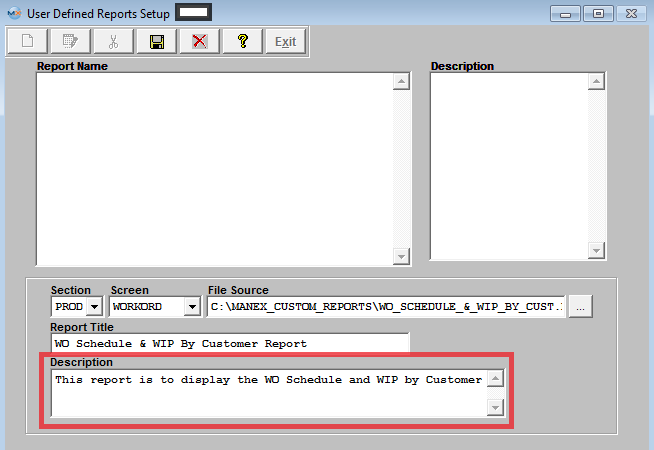
| 1.1.9.4.1. Setup the User Defined Reports | ||||||||||||||||||||
|
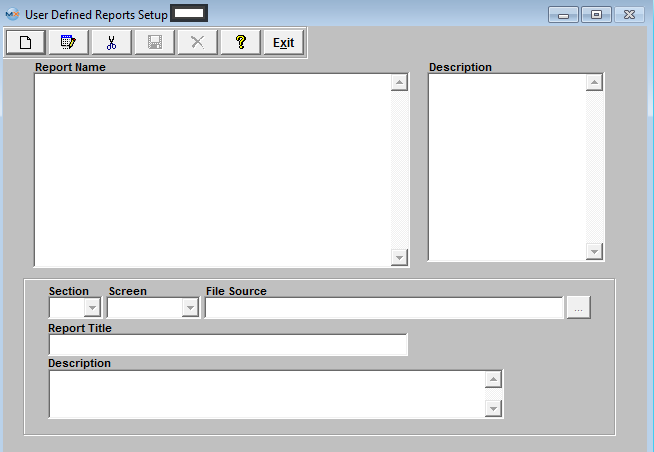
The following screen will be displayed:
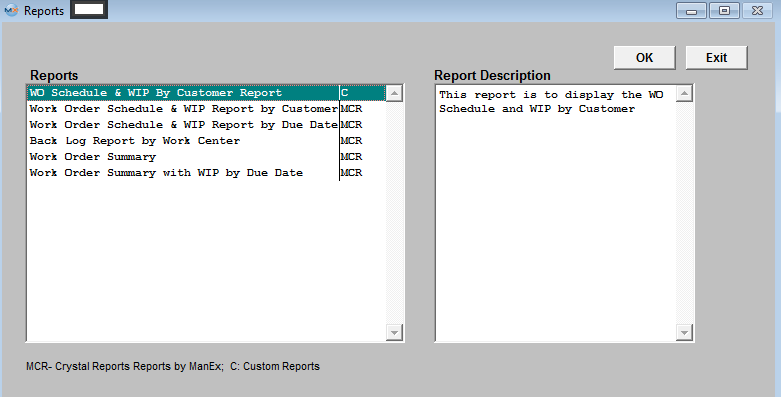
When you visit the applicable module, the report you created will appear in the Reports Selection window, as illustrated:
1. Crystal Reports must not be designed using "live" ManEx DBFS tables. Data will be corrupted in ManEx if the any of the tables used for the design are accessed and changed while the design is in progress. To use Crystal Report Designer, create a copy of the DBFS and use the copy to design the report.
3. However, when using Crystal Report Designer or running a pre-existing Crystal Report, the user's workstation should be using "absolute" not "relative" paths to the DBFS files in use (ie. X:\Manex\DBFS\xyz.dbf NOT \\Manex\DBFS\xyz.dbf). Therefore, workstations setup with shortcuts to ManEx using relative addressing (for security reasons*) shouldn't be used to run Crystal Reports.
* Normally ManEx suggests that users use the ManEx shortcuts with relative addressing (not mapped to the server) to keep users from accessing the ManEx Server files in Windows Explorer. 4. If you accidentally corrupt the ManEx DBFS files using Crystal Report Designer or relative addressing, get all users off of ManEx and reindex TWICE. The first time clears the incorrect End of File table and the second time writes a corrected index.
So in conclusion, as long as you don't design on the live database and you use absolute mapping to the server, using Crystal Reports to look at the live data after the report is designed should not be a problem.
|


| 1.1.10. System Appearance |
| 1.1.10.1. Prerequisites for System Appearance |
User MUST have full rights to the "System Setup" in System Security . Users with “Supervisor Rights” will automatically have access. |
| 1.1.10.2. Introduction for System Appearance |
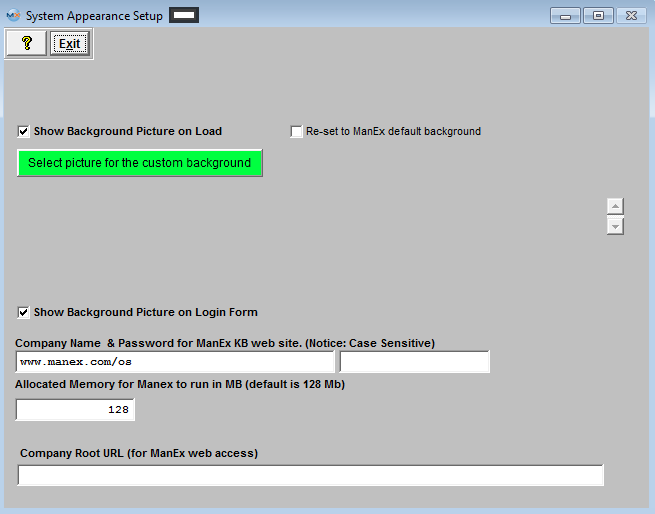
| This is to setup the System Appearance on screens and Setup the Connection to WebManEx. |
| 1.1.10.3. Fields & Definitions for System Appearance | ||||||||||||||
|
| 1.2. Sales |
| 1.2.1. Prerequisites |
The Sales module setup section allows the user to prepare tables for most of the modules your company has purchased.Once the items are setup in the system, the user will be able to use these tables and/or perform certain functions automatically.
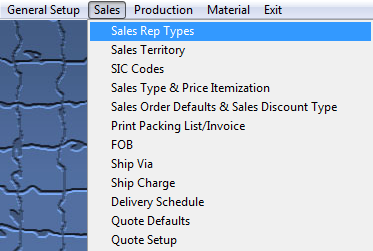
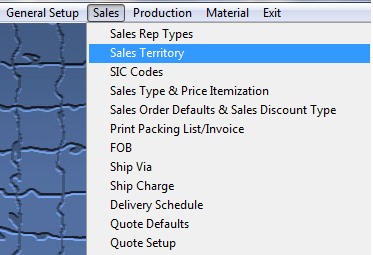
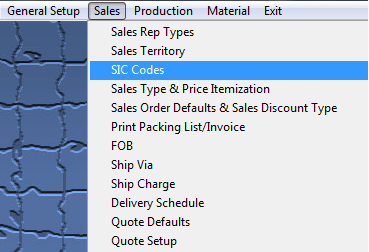
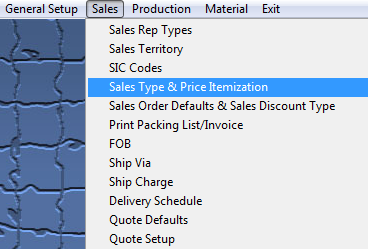
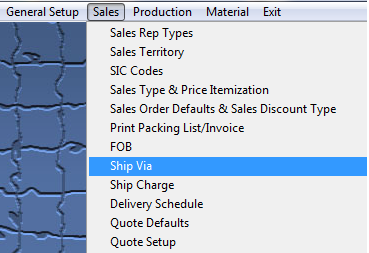
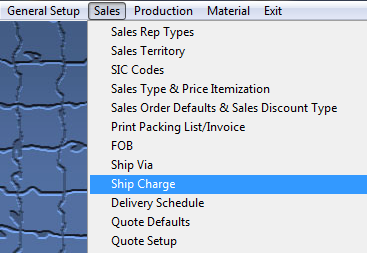
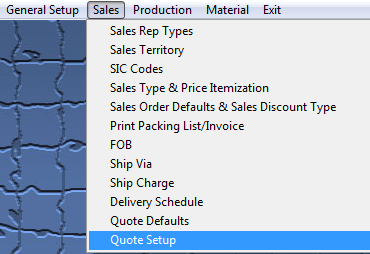
The Sales Setup section worksheets cover the following modules: Sales Rep Types, Sales Territory, SIC Codes, Sales Type & Price Itemization, Sales Order Defaults & Sales Discount Type, Print Packing List/Invoice, FOB, Ship Via, Ship Charge, Delivery Schedule, Quote Defaults, and Quote Setup. This section will first define the nature of each of the Sales Setup screens, then describe how to fill out the work sheets.
User MUST have full rights to the "System Setup" in System Security to setup these modules. Users with “Supervisor Rights” will automatically have access.
|
| 1.2.2. Sales Rep Types |
| 1.2.2.1. Prerequisites for Sales Rep Types |
Complete the attached worksheet and "Mark as Completed RoadMap Section B Item 2-a" before continuing the setup.
A Sales Rep Type that is used to describe an active sales rep may NOT be deleted.
User MUST have full rights to the "System Setup" in System Security . Users with “Supervisor Rights” will automatically have access.
|
| 1.2.2.2. Introduction for Sales Rep Types |
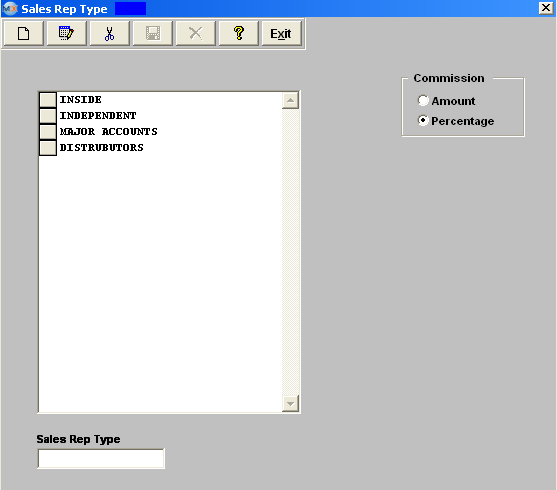
This section is to establish different types of sales reps, and it is required in order to use the Sales Rep Information setup. Some examples are: Inside Sales, Outside Sales, Independent Rep, etc. This feature will allow the user to analyze data based on the type of representatives entered here. The user also may select the Commission Type, either a stated dollar amount or a Percentage of the |
| 1.2.2.3. Fields & Definitions for Sales Rep Types |
This feature will allow the user to analyze data based on the type of representatives entered here. The user also may select the Commission Type, either a stated dollar amount or a Percentage of the |
| 1.2.2.4. How To ..... for Sales Rep Types |
| 1.2.2.4.1. Setup a Sales Rep Type | ||||
|
The following screen will be displayed:
To modify this screen, the user must click on the Add, Edit or Delete button and supply the password. That action will enable the screen. Pressing the Add button will enable the data entry box at the bottom of the screen for the user to enter new data. Selecting an existing Sales Rep Type and pressing the Edit button will bring the selected information to the data entry box to be modified. Selecting an existing Sales Rep Type and pressing the Delete button will remove the selected information. The user must Save or Abandon changes after adding or editing the record.
These items may be sorted in any order by clicking on and dragging the box on the left side, to the (vertical) position desired. This order will be the order displayed in the pull downs when using this list in other modules within the system. Suggestion: Have the one most used at the top of the list. Where Used: In the Sales Rep setup screen.
«Mark as Completed in RoadMap Section B Item 2-a» |
| 1.2.3. Sales Territory |
| 1.2.3.1. Prerequisites for Sales Territory |
Complete the attached worksheet and "Mark as Completed RoadMap Section B Item 2-b" before continuing the setup.
User MUST have full rights to the "System Setup" in System Security . Users with “Supervisor Rights” will automatically have access.
|
| 1.2.3.2. Introduction for Sales Territory |
This screen is used to assign geographical sales territories and is used in the Customer Information Module. Some examples are: The user may optionally assign a territory to a customer for purposes of grouping sales and other business considerations. |
| 1.2.3.3. Fields & Definitions for Sales Territory |
This screen is used to assign geographical sales territories and is used in the Customer Information Module. Some examples are: The user may optionally assign a territory to a customer for purposes of grouping sales and other business considerations. |
| 1.2.3.4. How To ..... for Sales Territory |
| 1.2.3.4.1. Setup Sales Territory | ||||
|
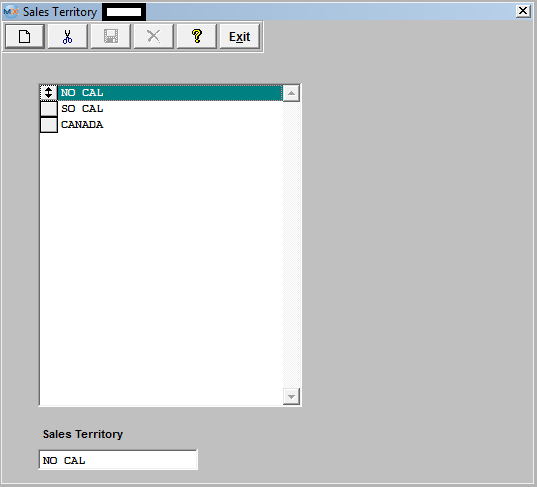
The following screen will be displayed:
To modify this screen, the user must click on the Add or Delete button and supply the password. That action will enable the screen. Pressing the Add button will enable the data entry box at the bottom of the screen for the user to enter new data. Selecting an existing Sales Territory and pressing the Delete button will remove the selected information. The user must Save or Abandon changes after adding a Sales Territory.
These items may be sorted in any order by clicking on and dragging the box on the left side, to the (vertical) position desired. This order will be the order displayed in the pull downs when using this list in other modules within the system. Suggestion: Have the one most used at the top of the list. Where Used:I n the Sales Rep setup screen and the Customer Information screen.
«Mark as Completed in RoadMap Section B Item 2-b» |
| 1.2.4. SIC (Standard Industrial Codes) |
| 1.2.4.1. Prerequisites for SIC Codes |
Complete the attached worksheet and "Mark as Completed RoadMap Section B Item 2-c" before continuing the setup.
User MUST have full rights to the System Setup in Security . Users with “supervisor’s rights” will automatically have access. |
| 1.2.4.2. Introduction for SIC Codes |
Use this screen to setup the different Industrial codes that pertain to the user’s customers. The SIC codes are nation-wide standard industrial classifications given to each industry type. In some cases, the user may wish to deal with multiple industries. This is also useful for the user who wants to track business conditions by the type of businesses served. |
| 1.2.4.3. Fields & Definitions for SIC Codes |
Use this screen to setup the different Industrial codes that pertain to the user’s customers. The SIC codes are nation-wide standard industrial codes given to each industry type. In some cases, the user may wish to deal with multiple industries. This is also useful for the user who wants to track business conditions by the type of businesses served. |
| 1.2.4.4. How To ..... for SIC Codes |
| 1.2.4.4.1. Setup the SIC Codes | ||||
|
The following screen will be displayed: 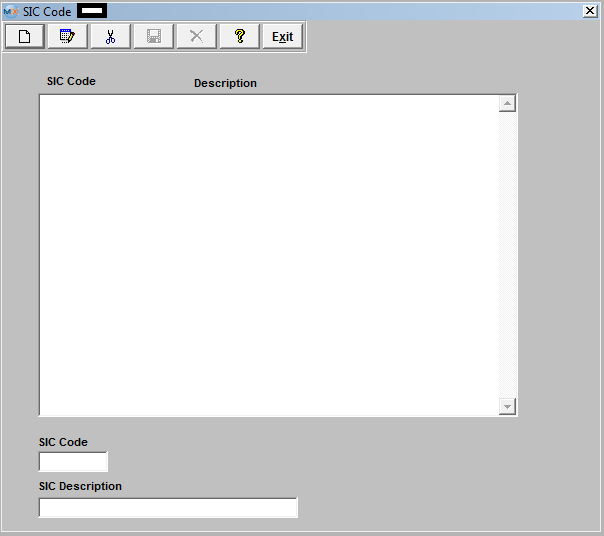 To modify this screen, the user must click on the Add, Edit or Delete button and supply the password. That action will enable the screen. Pressing the Add button will enable the data entry box at the bottom of the screen for the user to enter new data. Selecting an existing SIC code and pressing the Edit button will bring the selected information to the data entry box to be modified. Selecting an existing SIC code and pressing the Delete button will remove the selected information. The user must Save or Abandon changes after adding or editing the record.
These items may be sorted in any order by clicking on and dragging the box on the left side, to the (vertical) position desired. This order will be the order displayed in the pull downs when using this list in other modules within the system. Suggestion: Have the one most used at the top of the list. Where Used: In the Customer Setup. «Mark as Completed in RoadMap Section B Item 2-c» |
| 1.2.5. Sales Type & Price Itemization |
| 1.2.5.1. Prerequisites for Sales Type & Price Itemization |
|
Complete the attached worksheet and "Mark as Completed RoadMap Section B Item 2-d" before continuing the setup.
User MUST have full rights to the "System Setup" in System Security . Users with “Supervisor Rights” will automatically have access. |
| 1.2.5.2. Introduction for Sales Type & Price Itemization |
This section is to prepare information to be used in the Sales Price List module in the Sales main menu. The Sales Type portion is used when adding Sales Orders. The Sales Price Itemization List is used in the Sales Price List Information module. |
| 1.2.5.3. Fields and Definitions for Sales Type & Price Itemization |
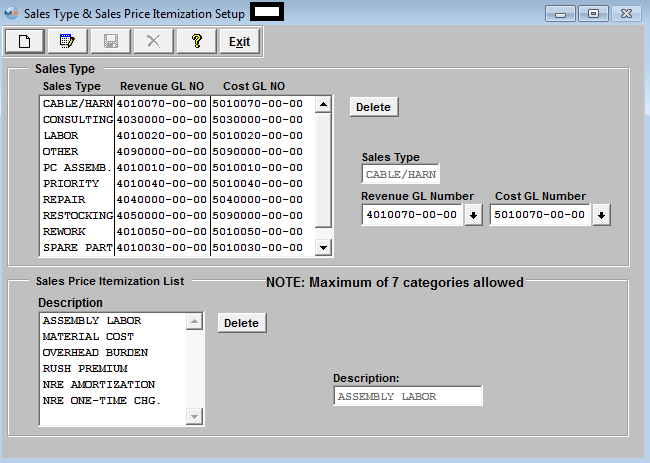 The user may define a sales type, to be used to associate the revenues, and related costs with a specific market sector and general ledger account (assuming the accounting module is installed).
The user may also customize the itemization used in the pricing module by establishing different categories for collecting pricing information details. For example, the user may wish to break out the pricing for materials, for labor, for engineering costs, for out-sourcing, and anything else imaginable.
In the pricing module, each unit can itemize it up to seven categories for breaking down the unit price. In the setup, as many different pricing categories may be set up as desired. These price categories will NOT show on any printed information that is available to the user’s customer.
Please review the attached <<How GL #'s from Sales Type setup will be used in GL Trans>> for example of how the GL #'s used within this Setup screen will be generated within the Resulting GL Transactions. |
| 1.2.5.4. How To ..... for Sales Type & Price Itemization |
| 1.2.5.4.1. Setup the Sales Type & Price Itemization | ||||||||
|
The following screen will be displayed:
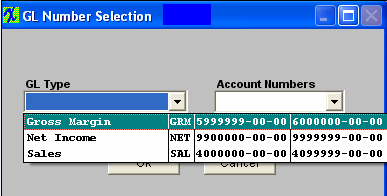
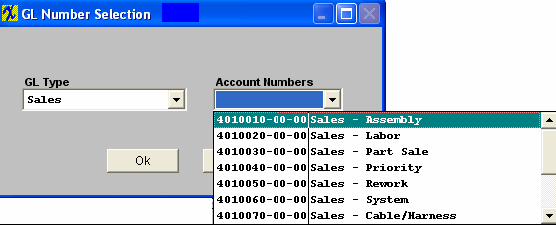
To modify this screen, the user must click on the Edit button and supply the password. That action will enable the screen. Then the user may address either the Sales Type or Price Itemization List. The user may Add, Edit or Delete a Sales Type by pressing the appropriate buttons. This will activate the data entry boxes for addition or modification of data. However, the user is cautioned to not remove sales types that have already been assigned to orders. To select the Revenue GL Number and the accompanying Cost GL Number, depress on the down arrows next to the appropriate field, as illustrated below:
Then, select the Account Number. The user may Add, Edit or Delete a Price Itemization by pressing the appropriate buttons. This will activate the data entry boxes for addition or modification of data. The user must Save or Abandon the changes after adding or editing the record.
Where Used: In the Pricing Module, revenue analysis for Accounting.
«Mark as Completed in RoadMap Section B Item 2-d» |
| 1.2.6. Sales Order Defaults & Sales Discount Type |
| 1.2.6.1. Prerequisites for Sales Order Defaults & Sales Discount Type |
|
Complete the attached worksheet and "Mark as Completed RoadMap Section B Item 2-e" before continuing the setup.
User MUST have full rights to the "System Setup" in System Security . Users with “Supervisor Rights” will automatically have access. |
| 1.2.6.2. Introduction for Sales Order Defaults & Sales Discount Type |
In this set up screen, the user enters customer’s discount terms and applicable percentages which will be used at the time of Sales Order data entry. This data could be used for discount coupons, promotional discount, quantity discounts and wholesale discounts, etc.
|
| 1.2.6.3. Fields and Definitions for Sales Type & Price Itemization | ||||||||||||
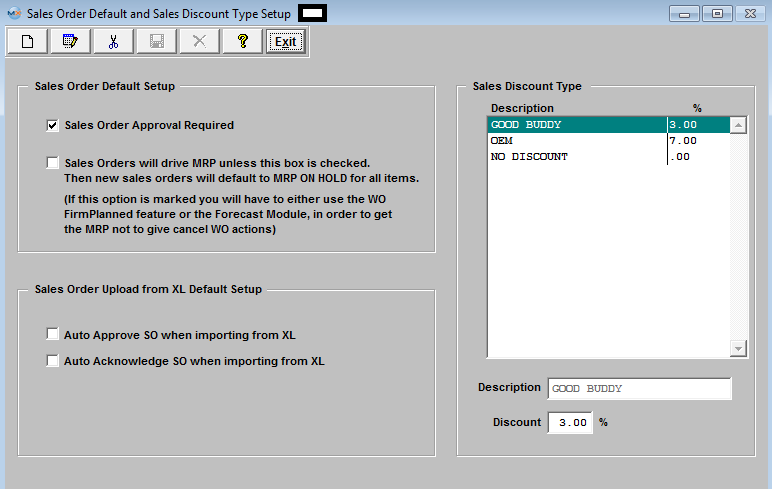 Sales Order Default Setup
Sales Order Upload from XL Default Setup
Sales Discount Types In this set up screen, the user enters discount terms and applicable percentages which will be used at the time of Sales Order data entry.
|
| 1.2.6.4. How To ..... for Sales Order Defaults & Sales Discount Type |
| 1.2.6.4.1. Setup the Sales Order Defaults & Sales Discount Type | ||||
|
The following screen will be displayed:
To modify this screen, the user must click on the Add, Edit, or Delete button and supply the password. That action will enable the screen.
The user must Save or Abandon changes after modifying the screen. Where Used: In the Customer Set Up, Sales Orders, Invoices and Accounting.
|

| 1.2.7. Print Packing List and Invoice |
| 1.2.7.1. Prerequisites for Print Packing List/Invoice |
Complete the attached worksheet and "Mark as Completed RoadMap Section B Item 2-f" before continuing the setup.
User MUST have full rights to the "System Setup" in System Security . Users with “Supervisor Rights” will automatically have access. |
| 1.2.7.2. Introduction for Print Packing List/Invoice |
This is where the user determines whether they want to set the Packing List and Invoice to Auto Release or Manual Release, what type of form to use for printing, how many forms to print, option to show Packing Lists and Invoices with 0 invoices amounts, and/or Print Customer part numbers when printing Packing Lists and/or Invoices. Manual Release to Invoice - will require user to Print the Packing List before it will be released to Invoice. Auto Release to Invoice - will automatically release the Packing List being displayed on screen to Invoice upon edit and save of the record. The ManEx system will update the records even if the user does not print the record. The system will maintain the records for history information and management reports Manual Release to AR - will require user to depress the "Release to AR" button available on screen to release Invoice to AR. Auto Release to AR - will automatically release the Invoice being displayed on screen to AR upon edit and save of the record. The ManEx system will update the records even if the user does not print the record. The system will maintain the records for history information and management reports. |
| 1.2.7.3. Fields & Definitions for Print Packing List & Invoice | ||||||||||||||||||||||||||
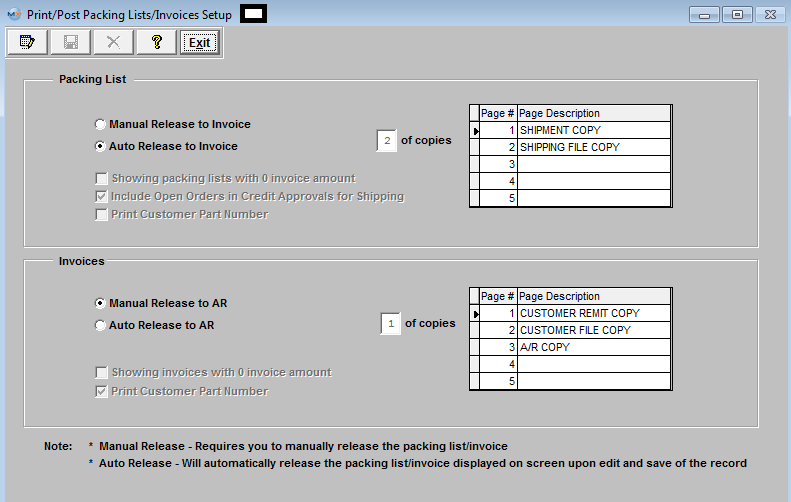
Packing List
Invoices
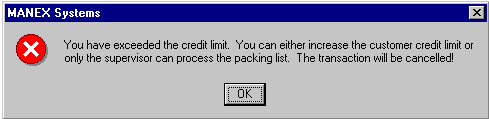
Hold for Credit Limit Overview If the user has elected “Enforce Credit Limit at Shipment” feature in AR-AP Acct Default Setup, the following message will appear if a non-supervisor attempts to ship:
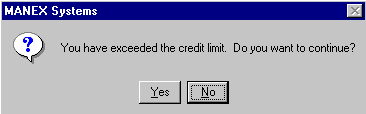
Depress the OK button and try to add the Packing List with a Supervisor’s password. The Supervisor will receive the following warning:
|
| 1.2.7.4. How To ..... for Print Packing List/Invoice |
| 1.2.7.4.1. Setup Print Packing List/Invoice Module | ||||
|
The following screen will be displayed:
To modify this screen, the user must click on the Edit button and supply the password. That action will enable the screen. The user clicks on the button desired to either Manual or Auto Release Packing Lists and Invoices.
Enter the number of copies and the Description to be printed on each copy.
The user may also check the following: A check box for showing of invoices with a zero dollar amount is available. A check box to elect to include open orders in credit approvals for shipping is available. To exclude, leave the box unchecked.
The user must Save or Abandon changes after modifying the screen.
«Mark as Completed in RoadMap Section B Item 2-f» |
| 1.2.8. Freight On Board (FOB) |
| 1.2.8.1. Prerequisites for FOB |
Complete the attached worksheet and "Mark as Completed RoadMap Section B Item 2-g" before continuing the setup.
User MUST have full rights to the "System Setup" in System Security . Users with “Supervisor Rights” will automatically have access.
|
| 1.2.8.2. Introduction for FOB |
FOB (Freight On Board) defines the point of ownership of the product as it is transferred from one business to another. If the FOB is Origin, it usually means that the customer pays for freight and insurance from the seller’s dock, and assumes ownership at the time the product leaves the seller’s dock. FOB Destination would usually mean the seller is responsible for the product until it is accepted at the buyer’s dock. FOB types are used in the Customer Shipping Information, Order Management, Packing List, Purchase Order Receiving, and Purchase Order. |
| 1.2.8.3. Fields & Definitions for FOB |
FOB (Freight On Board) defines the point of ownership of the product as it is transferred from one business to another. If the FOB is Origin, it usually means that the customer pays for freight and insurance from the seller’s dock, and assumes ownership at the time the product leaves the seller’s dock. FOB Destination would usually mean the seller is responsible for the product until it is accepted at the buyer’s dock. FOB types are used in the Customer Shipping Information, Order Management, Packing List, Purchase Order Receiving, and Purchase Order. |
| 1.2.8.4. How To ..... for FOB |
| 1.2.8.4.1. Setup the FOB Module | ||||
|
The following screen will be displayed: 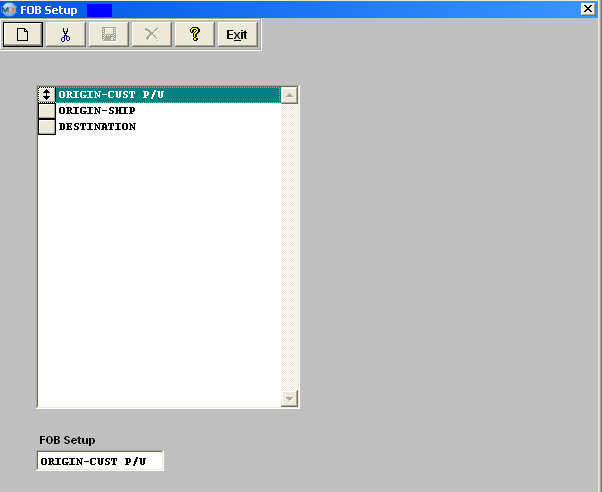 To modify this screen, the user must click on the Add or Delete button and supply the password. That action will enable the screen. Pressing the Add button will enable the data entry box at the bottom of the screen for the user to enter new data. Selecting an existing FOB and pressing the Delete button will remove the selected information. The user must Save or Abandon changes after modifying the screen.
These items may be sorted in any order by clicking on and dragging the box on the left side, to the (vertical) position desired. This order will be the order displayed in the pull downs when using this list in other modules within the system. Suggestion: Have the one most used at the top of the list.
Where Used: In the Customer Setup, Sales Orders, Packing Lists, Invoicing, Receiving and Billing Information.
«Mark as Completed in RoadMap Section B Item 2g» |
| 1.2.9. Ship Via |
| 1.2.9.1. Prerequisites for Ship Via |
Complete the attached worksheet and "Mark as Completed RoadMap Section B Item 2-h" before continuing the setup.
User MUST have full rights to the "System Setup" in System Security . Users with “Supervisor Rights” will automatically have access. |
| 1.2.9.2. Introduction for Ship Via |
Ship Via is a term used to describe the freight carrier or method of shipping product to a customer. Some customers, because of FOB origin considerations, may prescribe their preferred delivery system. The Ship Via is entered as a preference for each ship-to destination, and guides the shipping department in which carrier to use for a shipment. The delivery system may also be US Mail, a company truck, will-call, etc. |
| 1.2.9.3. Fields & Definitions for Ship Via |
Ship Via is a term used to describe the freight carrier or method of shipping product to a customer. Some customers, because of FOB origin considerations, may prescribe their preferred delivery system. The Ship Via is entered as a preference for each ship-to destination, and guides the shipping department in which carrier to use for a shipment. The delivery system may also be US Mail, a company truck, will-call, etc. |
| 1.2.9.4. How To ..... for Ship Via |
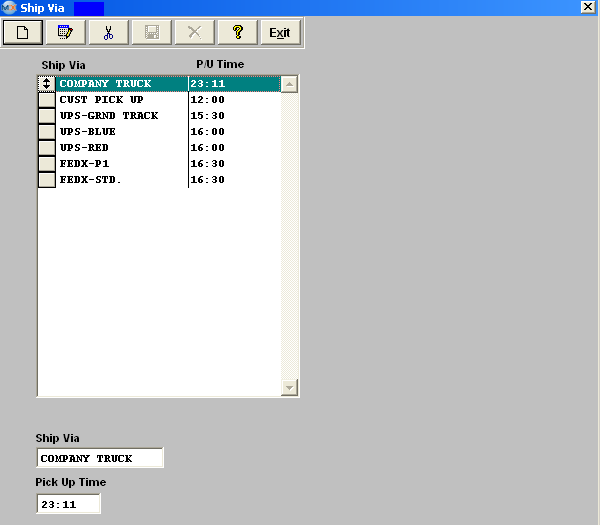
| 1.2.9.4.1. Setup the Ship Via Module | ||||
|
The following screen will be displayed:
To modify this screen, the user must click on the Add, Edit or Delete button and supply the password. That action will enable the screen. Pressing the Add button will enable the data entry boxes at the bottom of the screen for the user to enter new data. Selecting an existing Ship Via and pressing the Edit will populate the data entry boxes at the bottom of the screen and allow a change. Selecting an existing Ship Via and pressing the Delete button will remove the selected information. These items may be sorted in any order by clicking on and dragging the box on the left side, to the (vertical) position desired. This order will be the order displayed in the pull downs when using this list in other modules within the system. Suggestion: Have the one most used at the top of the list.
Where Used: Customer Setup, Sales Orders, Packing Lists, Invoicing, Purchase Setup Receiving and Billing Information. "Mark as Completed RoadMap Section B Item 2-h"
|
| 1.2.10. Ship Charge |
| 1.2.10.1. Prerequisites for Ship Charge |
|
Complete the attached worksheet and "Mark as Completed RoadMap Section B Item 2-i" before continuing the setup.
User MUST have full rights to the "System Setup" in System Security . Users with “Supervisor Rights” will automatically have access. |
| 1.2.10.2. Introduction for Ship Charge |
This information is also used for the User’s own Receiving Tax and Shipping mode as entered in Purchasing setup. |
| 1.2.10.3. Fields & Definitions for Ship Charge |
This section is to set up the types of shipping charges assessed the customer. This data is used in the Customer and Packing List Modules. Types of shipping charges could be Standard, No Charge, Overnight, Premium, etc. This information is also used for the User’s own Receiving Tax and Shipping mode as entered in Purchasing setup. |
| 1.2.10.4. How To ..... for Ship Charge |
| 1.2.10.4.1. Setup the Ship Charge Module | ||||
|
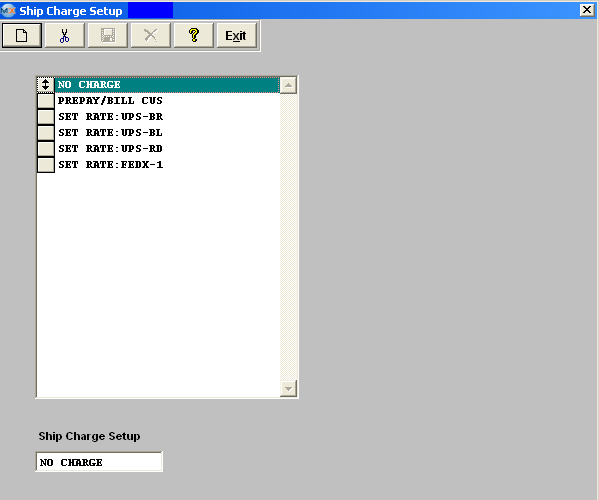
The following screen will be displayed:
To modify this screen, the user must click on the Add or Delete button and supply the password. That action will enable the screen. Pressing the Add button will enable the data entry boxes at the bottom of the screen for the user to enter new data. Selecting an existing Ship Charge and pressing the Delete button will remove the selected information. The user must Save or Abandon changes after modifying the screen.
These items may be sorted in any order by clicking on and dragging the box on the left side, to the (vertical) position desired. This order will be the order displayed in the pull downs when using this list in other modules within the system. Suggestion: Have the one most used at the top of the list. Where Used: In the Customer Setup, Sales Orders, Packing lists, Invoicing, Purchase Setup Receiving and Billing Information.
«Mark as Completed in RoadMap Section B Item 2-i» |
| 1.2.11. Delivery Schedule |
| 1.2.11.1. Prerequisites for Delivery Schedule |
Complete the attached worksheet and "Mark as Completed RoadMap Section B Item 2-j" before continuing the setup.
User MUST have full rights to the "System Setup" in System Security . Users with “Supervisor Rights” will automatically have access.
|
| 1.2.11.2. Introduction for Delivery Schedule |
|
| 1.2.11.3. Fields & Definitions for Delivery Schedule |
 Over/Under Shipment Management
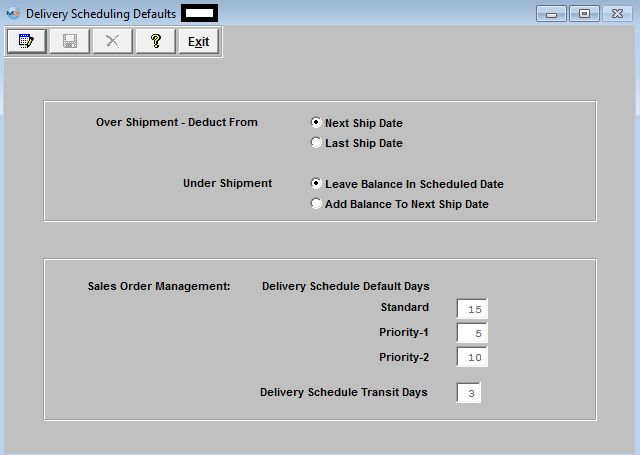
OVER SHIPMENT-DEDUCT FROM: Next Shipment Date: If the user wants over shipment quantities to be deducted from the next scheduled delivery for the same sale order and product. OVER SHIPMENT DEDUCT FROM: Last Shipment Date: If the user wants the over shipment amount to be deducted from the last scheduled delivery for the same sales order and product. UNDER SHIPMENT: Leave Balance in Scheduled Date: If the user wants to leave the back order quantity at the originally scheduled delivery date for the product on the same sales order. UNDER SHIPMENT: Add Balance To Next Ship Date: If the user wants to add the remaining back order to the next scheduled delivery date for the product on the same sales order. Sales Order Schedule Delivery Management When the user enters a new order, the system will default delivery due dates to a certain number of days from the date of the entry. The number of days is defined by the job type and the numbers in this setup screen. STANDARD: the number of days beyond the current date that MANEX will default a new sales order due date. PRIORITY1: the number of days beyond the current date that MANEX will default a new sales order due date. PRIORITY2: the number of days beyond the current date that MANEX will default a new sales order due date DELIVERY SCHEDULE TRANSIT DAYS: enter the number of days the user wants deducted from sales order delivery date, to account for freight delivery and to establish the dock shipment date. |
| 1.2.11.4. How To ..... for Delivery Schedule |
| 1.2.11.4.1. Setup the Delivery Schedule Module | ||||
|
The following screen will be displayed:
To modify this screen, the user must click on the Edit button and supply the password. That action will enable the screen. This will allow the user to click on the radio button desired for over and under shipments. The days may be entered into the data entry boxes for the default due dates and ship dates for sales order. The user must Save or Abandon changes after modifying screen.
Where Used: In Sales Orders, Packing Lists and Invoicing.
«Mark as Completed in RoadMap Section B Item 2-j» |
| 1.2.12. Quote Defaults |
| 1.2.12.1. Prerequisites for Quote Defaults |
|
Complete the attached worksheet and "Mark as Completed RoadMap Section B Item 2-k" before continuing the setup. User MUST have full rights to the "System Setup" in System Security . Users with “Supervisor Rights” will automatically have access. |
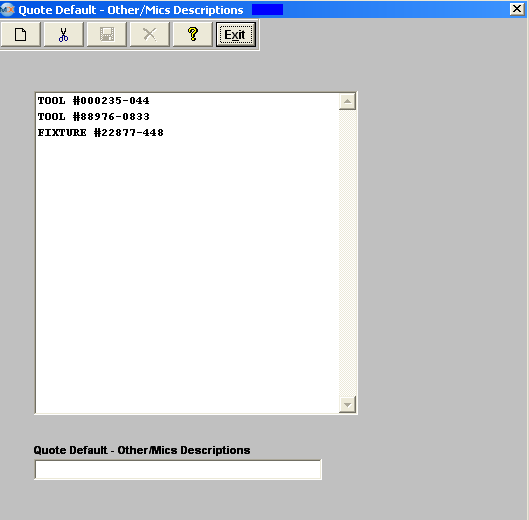
| 1.2.12.2. Introduction for Quote Defaults |
The Quote Defaults setup screen is used to quote the other/miscellaneous description prices on assemblies. These descriptions are used in the Customer Quotation module in the Sales section. Types of descriptions could be Tooling, Non Recurring Expense, Burden, etc. |
| 1.2.12.3. Fields & Definitions for Quote Defaults |
|
The Quote Defaults setup screen is used to quote the other/miscellaneous description prices on assemblies. These descriptions are used in the Customer Quotation module in the Sales section. Types of descriptions could be Tooling, Non Recurring Expense, Burden, etc. |
| 1.2.12.4. How To ..... for Quote Defaults |
| 1.2.12.4.1. Setup the Quote Defaults Module | ||||
|
The following screen will be displayed:
To Add a Customer Quote Default, depress the Add button. Enter your password. Type in the desired description for Other or Miscellaneous descriptions to be used in the Customer Quote module. To Edit a Customer Quote Default, depress the Edit button. Highlight the description to be changed. Type in the desired changes. To Delete a Customer Quote Default, depress the Delete button .Highlight the description to be deleted. The user must Save or Abandon changes after modifying the screen. "Mark as Completed RoadMap Section B Item 2-k"
|
| 1.2.13. Quote Setup |
| 1.2.13.1. Prerequisites for Quote Setup |
|
Complete the attached worksheet and "Mark as Completed RoadMap Section B Item 2-l" before continuing the setup. The Departments must have been set up in Administrative Departments in the General Setup.
User MUST have full rights to the "System Setup" in System Security . Users with “Supervisor Rights” will automatically have access.
|
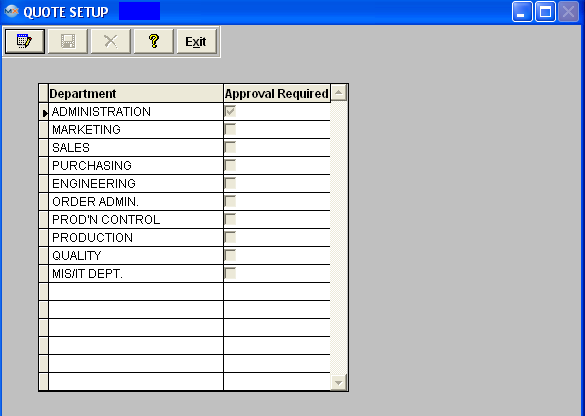
| 1.2.13.2. Introduction for Quote Setup |
This setup screen is used in the Customer Quote modules in ManEx Sales section. Check off the department(s) which must approve a Customer Quote before the Inventory, BOM and Pricing tables can be updated by the use of “Transfer” on the Customer Quote module. |
| 1.2.13.3. Fields & Definitions for Quote Setup |
 This setup screen is used in the Customer Quote modules in ManEx Sales section. Check off the department(s) which must approve a Customer Quote before the Inventory, BOM and Pricing tables can be updated by the use of “Transfer” on the Customer Quote module. |
| 1.2.13.4. How To ..... for Quote Setup |
| 1.2.13.4.1. Setup the Quote Setup Module | ||||
|
The following screen will be displayed:
To modify the quote setup screen, depress the Edit button. Check off the department(s) which must approve a Customer Quote by clicking in the Approval Required box. The user must Save or Abandon changes after modifying the screen. Where Used: This setup screen is used in the Customer Quote modules in MANEX Sales section.
"Mark as Completed RoadMap Section B Item 2-l"
|
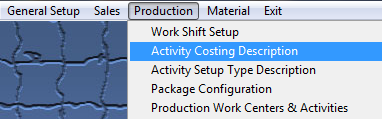
| 1.3. Production |
| 1.3.1. Prerequisties for Production Setup |
In general, the production work is divided up among several departments. Some products may require that some work that is done in each of these departments. Other products may require that work be done in only a few of all the departments in operation. In order to identify the work processes for each product, ManEx allows the user to define Work Centers. These Work Centers describe a physical aspect (usually) of production operations that applies a specific type of labor to the product. Examples of work centers may be: SMT - where the product is assembled on a surface mount line; AI - where parts are Auto-Inserted into the product; Wave - where the parts are wave soldered; Cleaning; Inspection; Test; etc. Each of these work centers contains within it, a common aspect of production. For example, in SMT, the surface mount operator’s pay scale is probably higher than other parts of production, the parts are all contained within one area, the setup time is appropriate to one lot of a given product, and the parts are contained within the work area. If inventory counting is necessary, the user can identify that the parts are in the work center.
The user may create as many work centers as necessary to define the production activities that occur within the operation. Within a work center, the user may establish additional definitions, called Activities. These activities may be set up separately from the work centers, and then used as needed within individual work centers. The activities may be assigned their own hourly charge rate. And within an Activity, there is yet another classification called sub-activities, which have activity costs associated with them. These activity costs are established in the Activity Cost & Volume Type setup. Also, in this section the setups for Quality items are accomplished, and will be discussed in each setup. Outside Program Calls Setup is also available.
User MUST have full rights to the "System Setup" in System Security to setup these modules. User with "Supervisor Rights" will automatically have access.
|
| 1.3.1.1. Manex Notes Matrix |
See the word attachement <Notes Matrix.doc>> for a table which shows the cross-reference for all ManEx Notes.
|
| 1.3.2. Introduction for Production Setup |
This section covers the production setup to be used in all production related modules. Please take time to think about how you want to use these tables for best production management. Some sample data is provided with this setup as a guideline. These tables are used in various modules throughout the system. The production application module setup section allows you to prepare tables for specific production related modules your company has purchased. Once setup in the system, you will be able to use these tables and/or perform certain functions automatically. These tables are completed by preparing worksheet tables and/or setting certain switches.
Production System worksheet covers the following modules: Work Shift Set Up, Activity Costing & Volume Type Set Up, Package Configuration, Production Work Centers & Activities, Time & Attendance Types, Shop Floor Tracking Defaults, Production Scheduling Method, Quality Defect Codes, CAR Problem Types, CAR Number Types, Tools Setup and Outside Program Calls Setup.
|
| 1.3.3. Work Shift Setup |
| 1.3.3.1. Prerequisites for Work Shift Setup |
Complete the attached worksheet and "Mark as Completed RoadMap Section B Item 3-a" before continuing the setup.
User MUST have full rights to the "System Setup" in System Security to setup these modules. User with "Supervisor Rights" will automatically have access.
|
| 1.3.3.2. Introduction for Work Shift Setup |
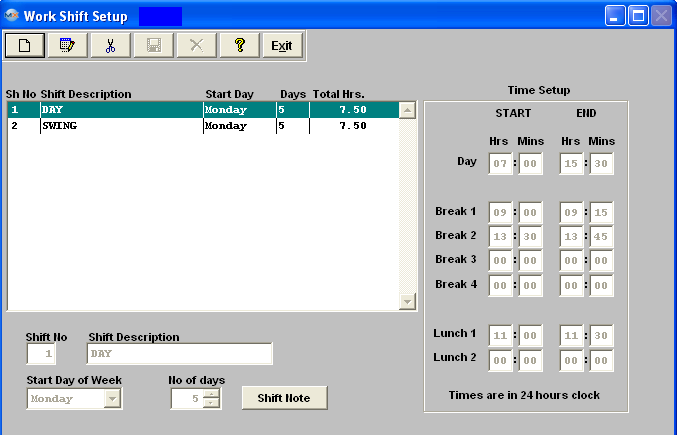
| 1.3.3.3. Fields & Definitions for Work Shift Setup | ||||||||||||||||
|
| 1.3.3.4. How To ..... for Work Shift Setup |
| 1.3.3.4.1. Setup the Work Shift Module | ||||
|
The following screen will be displayed:
The user may Add new or Edit and Delete existing shifts. The user must either Save or Abaondon to close the screen. Where Used: In the job routing functions for a product. «Mark as Completed in RoadMap in Section B Item 3-a» |
| 1.3.4. Activity Costing and Setup Type Setup |
| 1.3.4.1. Prerequisites for Activity Costing & Setup Type Setup |
Complete the attached worksheet and "Mark as Completed RoadMap Section B Item 3-b" before continuing the setup.
User MUST have full rights to the "System Setup" in System Security to setup these modules. User with "Supervisor Rights" will automatically have access.
|
| 1.3.4.2. Introduction for Activity Costing & Setup Type Setup |
This module is essential if you are using Activity Based Cost (ABC) methodology for managing the production floor. The information entered here forwards to Production Work Center/Activity Setup. Then both setups are used in the MANEX Capacity Planning module.
Activity Costing and Activity Volume Type Description setup is a requirement only if your company is employing Activity Based Cost (ABC) methodology for managing the production floor. The Activity Costing and Activity Volume Type Descriptions are used in Production Work Center/Activity setup to assign Activity Costs and Activity Volume Types to a production Work Center/Activity. The Activity Volume Type Description is a pre-requisite for Production Work Centers & Activities / Activity Setup & Run tab. Your company should become knowledgeable about the principles of ABC prior to using Activity Costing and Activity Volume Type Descriptions.Activity Cost and Volume types allow the users to define the costs and capacity for individual activities within a work center. It is used in the capacity planning module to determine available and required capacities. It is also used to assign costs of operation. For example, there may be several machines that can do the same job in a work center. However, one may have a higher operating cost, but also greater capacity. Both machines can be displayed as a resource. The selection of the machine is performed in the routing and capacity modules. |
| 1.3.4.3. How To ..... for Activity Costing & Setup Type |
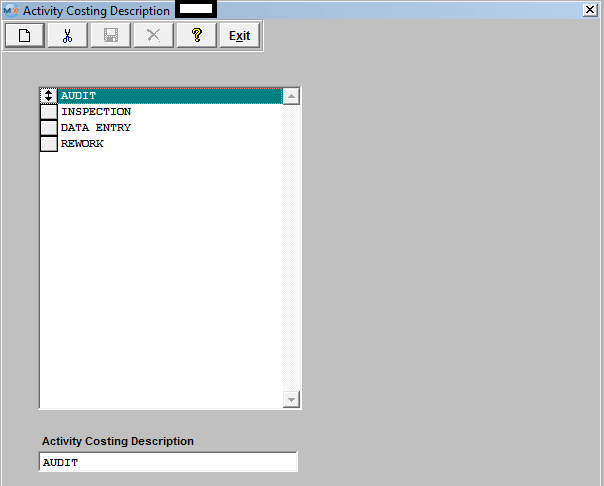
| 1.3.4.3.1. Setup the Activity Costing | ||||
The following screen will be displayed:
To ADD new Costing descriptions, depress on the ADD button, enter the description. When complete depress the Save or Abandon changes button. To DELETE existing descriptions, highlight the description you want to delete, depress the Delete button. The following popup screen will appear:
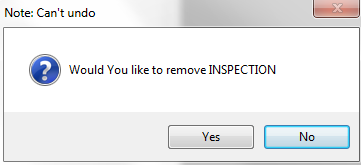 Depress "Yes" to Continue or "No" to abandon changes.
To REORDER descriptions, click and drag the activities to the desired order. When exiting the re-order changes will be saved.
Where Used: In the Production Work Center/Activity Setup.
«Mark as Completed in RoadMap in Section B Item 3-b» |
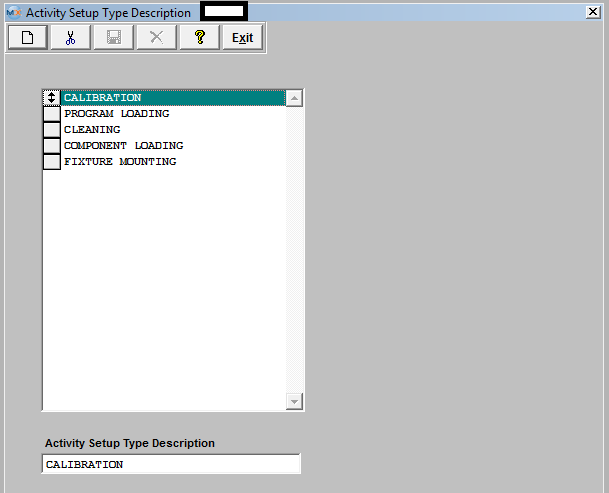
| 1.3.4.3.2. Setup the Activity Setup Type Description | ||||
The following screen will be displayed:
To ADD new Activity Setup Type descriptions, depress on the ADD button, enter the description. When complete depress the Save or Abandon changes button. To DELETE existing Activity Setup Type descriptions, highlight the description you want to delete, depress the Delete button. The following popup screen will appear:
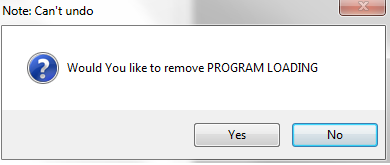 Depress "Yes" to Continue or "No" to abandon changes.
To REORDER descriptions, click and drag the activities to the desired order. When exiting the re-order changes will be saved.
Where Used: In the Production Work Center/Activity Setup.
«Mark as Completed in RoadMap in Section B Item 3-b» |

| 1.3.5. Package Configuration |
| 1.3.5.1. Prerequisites for Package Configuration |
Complete the attached worksheet and "Mark as Completed RoadMap Section B Item 3-c" before continuing the setup.
User MUST have full rights to the "System Setup" in System Security to setup these modules. User with "Supervisor Rights" will automatically have access.
|
| 1.3.5.2. Introduction for Package Configuration |
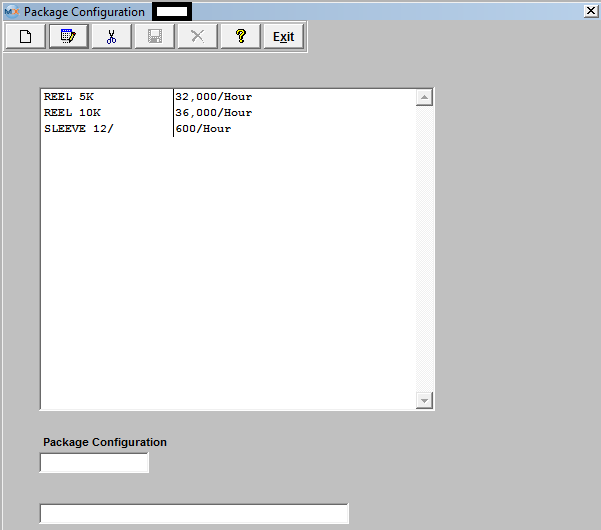
Package configuration setup is provided so that the user may define a machine’s Units Per Hour. This definition can then be accessed in the Production Work Centers & Activities setup/Activities Setup & Run tab. |
| 1.3.5.3. Fields and Definitions for the Package Configuration | ||||
|
| 1.3.5.4. How To ..... for Package Configuration |
| 1.3.5.4.1. Setup the Package Configuration Module | ||||
The following screen will be displayed:
To ADD a record, depress the Add button, type in the Package Configuration and description. To EDIT a record, depress the Edit button, edit the Package Configuration and/or description. To DELETE a record, highlight the Package Configuration and description you wish to delete, depress the Delete button. "Mark as Completed RoadMap Section B Item 3-c"
Where Used: In the Production Work Center/Activity Setup. |
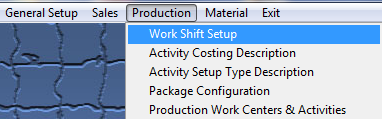
| 1.3.6. Production Work Center & Activity Setup |
| 1.3.6.1. Prerequisites for Production Work Centers & Activities |
Complete the attached worksheet and "Mark as Completed RoadMap Section B Item 3-d" before continuing the setup.
User MUST have full rights to the "System Setup" in System Security to setup these modules. User with "Supervisor Rights" will automatically have access.
|
| 1.3.6.2. Introduction for Production Work Centers & Activities |
| Production Work center activities are optional sub-sets of work center departments. Activities may be defined prior to establishing work centers, and then used as more detailed actions within a work center. Each of these activities may be assigned a separate hourly charge rate.
Please note: As of 03/03/2016: We are actually in the process of implementing optional routing steps in place of activities. We are working to simplify and flatten the process to make it easier for everyone. Presently, you can still choose to setup activities if desired and then decide if you want to track production through activities or not. With the current activity setup this decision is universally applied for all work centers and work orders. With the optional routing steps that we are implementing, you would still have to decide if you want to add activities or not (optional steps), but now you would be able to decide on the fly if you want to track production through those steps. It also means that you would have fewer places to maintain in setup. |
| 1.3.6.3. Fields & Definitions for Production Work Centers & Activities |
| 1.3.6.3.1. Work Center Tab | ||||||||||||||||||
Assign work center to workstations (button)
If a customer wants to install workstations along the production line, with scanners to read serial numbers as they passed down the line, this button provides the ability to limit a work station (specific computer) to be able to only transfer material “FROM” a certain Work Center. So, when a user first opens the "SFT by WO" or "Shop Floor Tracking by Bar Code" module, the module will use the default work center assigned for this workstation, but if user chooses to use a different work center, supervisor approval or a user that has the option "Allow Changing Default Work Center for Serial Number Transfer" box checked within the Security module is required to continue. After a supervisor's or user with this option’s password is entered, the default work center will be changed to the one that the supervisor entered password for. For Example: the workstation is assigned to use “TU” as default work center, now if user chooses to use “AI” to transfer, the system will ask for supervisor’s password, if user cancels the password, the default work center will still be “TU”, but if the supervisor enters his/her password on this machine, the default work center will be changed to “AI”. If now the user tried to transfer from “TU” again, the system will ask for supervisor’s password again. If user exits the module and come back, the default work center will be “TU” again.
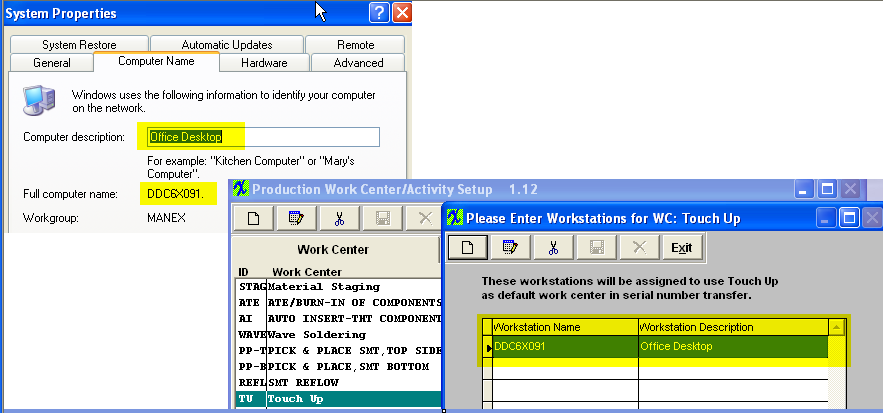 Defect Code Entry In-Line Mode, the system will check to see if the serial number is currently in the Work Center which was set up here. If not, a special supervisor’s password is required to transfer the serial number FROM a different Work Center. After the supervisor password is entered, the system will use the new Work Center to be the default FROM Work Center until the user closes the screen. The next time the user opens the screen, the default FROM Work Center will be changed back to the one defined in Systems Setup. |
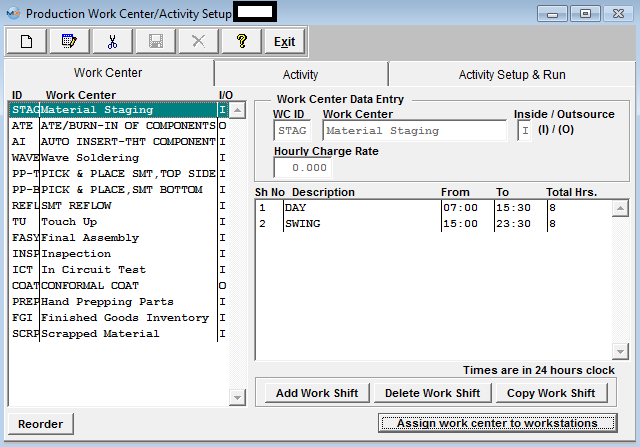
| 1.3.6.3.2. Activity Tab | ||||||||||||||
This is the description of the work center highlighted in the Work Center tab. Activity ID This is the abbreviated (4 character) code for the name of the activity. Activity Description This is the description of the activity being performed.It may take 25 characters in length. Standard Rate This is the standard hourly rate for the activity performed within the Work Center. Cap Click here for capacity totaling election.Capacity totaling means that if multiple activities are used in a work center, and if there are multiple resources in the activities, the capacity will be the sum of the resources rather than limited by just one resource. Activity Costing Description This field is selected from the available activity costing descriptions created in the Activity Costing & Setup module within system setup. This is the field used to enter hourly charge rates, for each activity. The formatting is three digits to the left of the decimal, and two to the right (999.99). If this optional field is entered, it will be used to determine the hourly charge rate of the activity to which it is assigned.
|
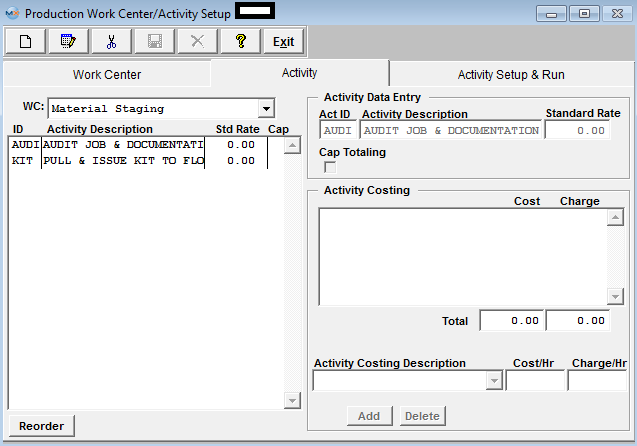
| 1.3.6.3.3. Activity Setup & Run Tab | ||||||||||||
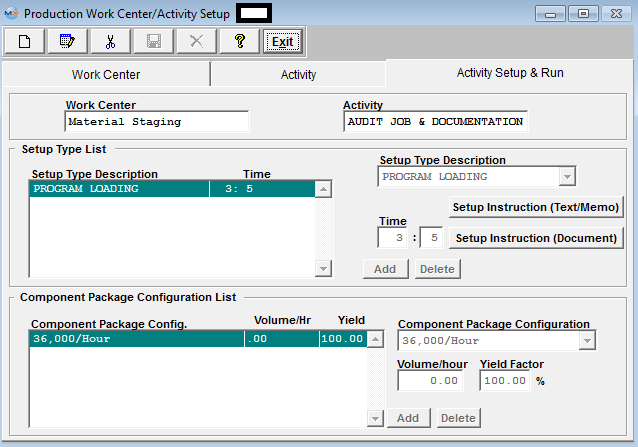 The information set up in this screen will be used in Capacity Planning & Dynamic Scheduling modules. Setup Type List The Setup Type description is input into a previous screen “Activity Costing & Setup Type Setup/Activity Setup Type Description”.
Component Package Configuration List The Component Package Configuration is set up in a prior screen. See Setup Package Configuration.
Note: In order to add Times in Routing, the Run and Setup Time MUST be selected in the Production Schedule Setup module.
Using Run and Setup Times in the Production Schedule Setup module is preferred when there is great variability in the products produced and the setup and run rates in each Work Center.
Using the Run and Setup Times in System Setup under this module, Work Center Setup, is preferred when the product flow is uniform, the machine rates are well established and the setup times very uniform regardless of product. Use of Run and Setup Times in the Production Schedule Setup module is optional unless either Job Costing or Capacity Planning Modules are in use. |


| 1.3.6.4. How To ..... for Production Work Centers & Activities |
| 1.3.6.4.1. Setup the Production Work Centers & Activities | ||||||||||||||||||||||||||||||||
|
To Assign Work Center to Workstations In this screen, highlight the name of the Work Center. Depress the button at the bottom of the screen "Assign work center to workstations", the following assignment screen appears: 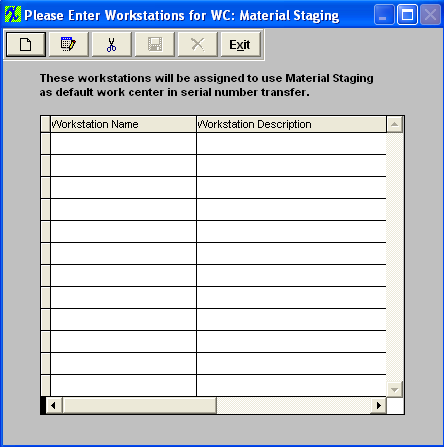 To enter a new assignment, depress the Add button. When setting up a workstation user must enter the Full computer name in the Workstation Name field and the Computer description in the Workstation Description field. See Example below.
Where Used: In all Shop Floor related Activities. «Mark as Completed in RoadMap in Section B Item 3-d» |
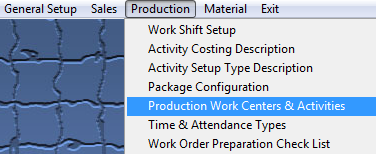
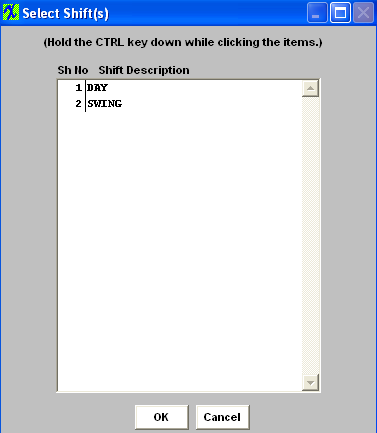
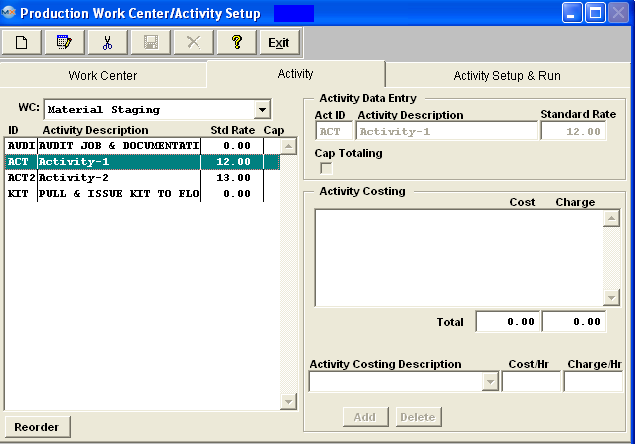
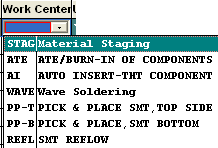
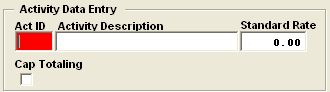
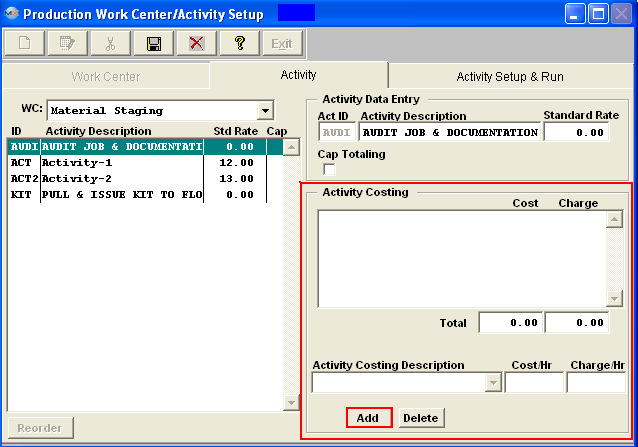
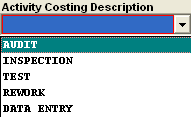
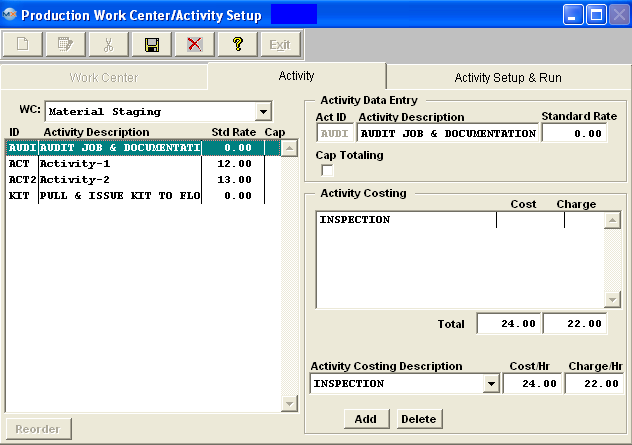
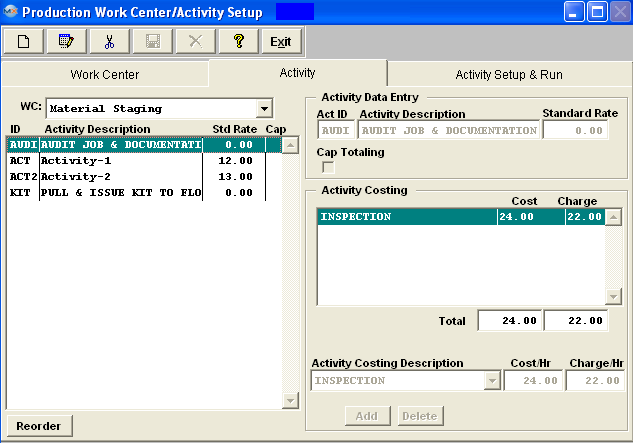
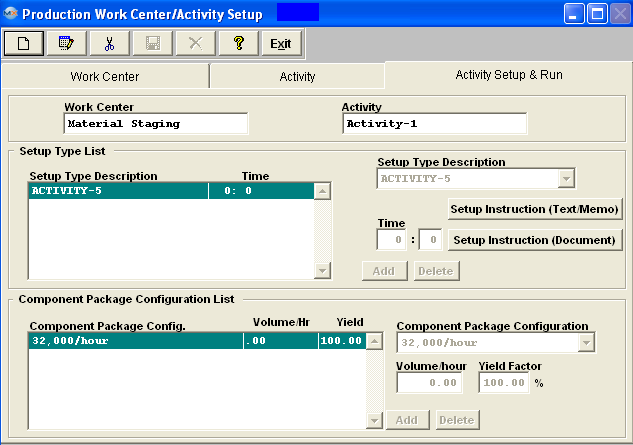
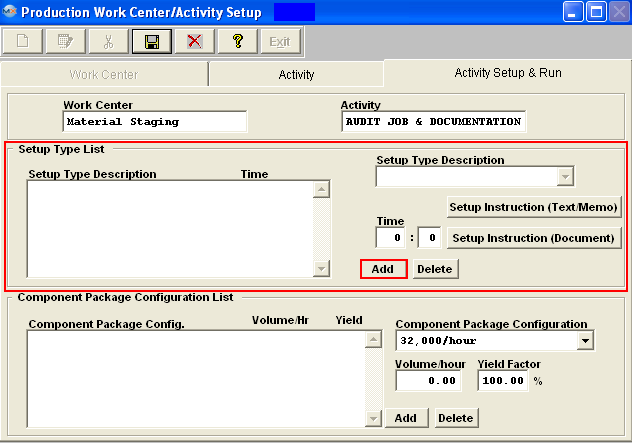
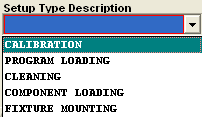
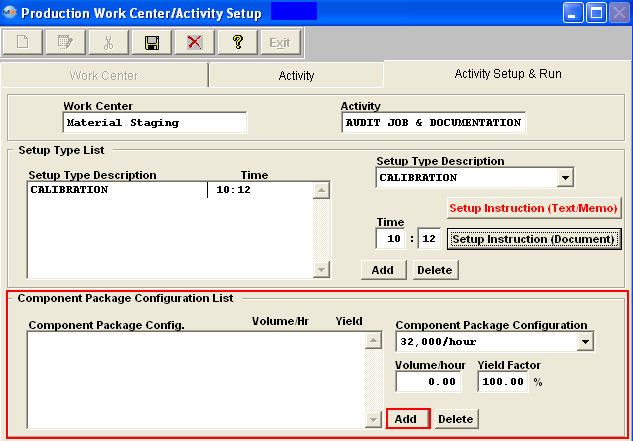
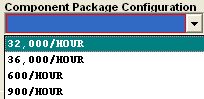
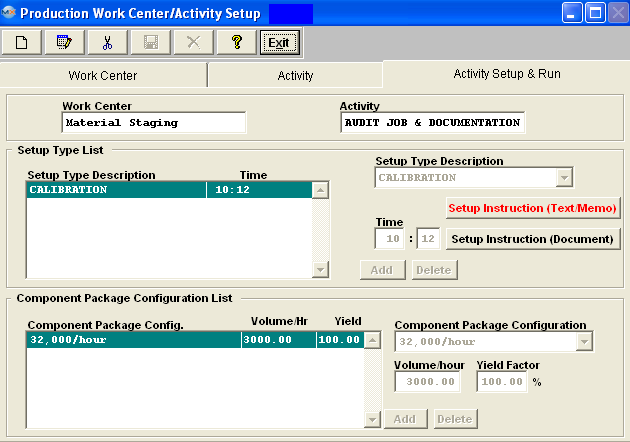
| 1.3.7. Time and Attendance Types |
| 1.3.7.1. Prerequisites for Time & Attendance Types |
|
Complete the attached worksheet and "Mark as Completed RoadMap Section B Item 3-e" before continuing the setup.
User MUST have full rights to the "System Setup" in System Security to setup these modules. User with "Supervisor Rights" will automatically have access.
|
| 1.3.7.2. Introduction for Time & Attendance Types |
These types are established to be available during time and attendance tracking in production. Please refer to the Time & Attendance Management module. If the user chooses to track an employee’s time, the time may be associated with attendance or a specific job (Work Order). Attendance is in for the day and out at the end of the day, like a time clock. Job (Work Order) logging is when an employee begins work on a work order (product) or finishes working on a work order. When the employee visits the screen for job (Work Order) logging, they are prompted to define whether they are logging in for attendance, defined as “Time Clock” or job defined as “Job (Work Order) In Or Out”. |
| 1.3.7.3. Fields & Definitions for Time & Attendance Types | ||||||||||||||||||||||
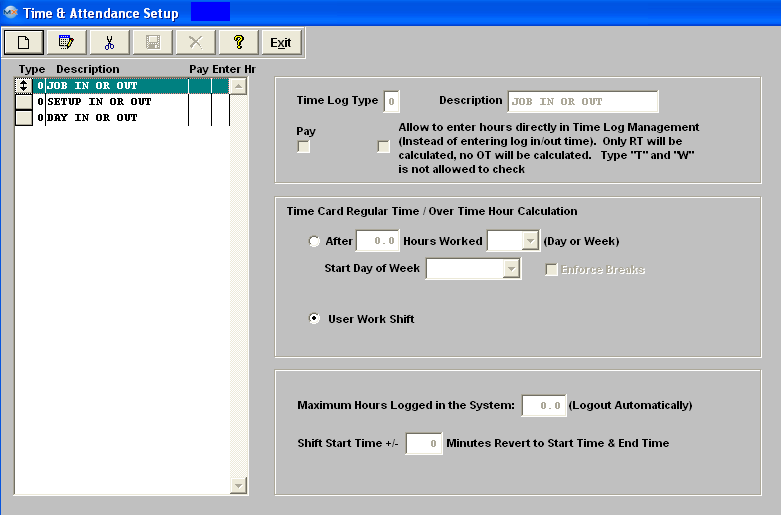
|
| 1.3.7.4. How To ..... Time & Attendance Types |
| 1.3.7.4.1. Setup the Time and Attendance Module | ||||
|
The following screen will be displayed:
The ADD, EDIT, and DELETE buttons are available. The user adds a type by selecting the ADD button from the main tool bar and entering the type in the entry field box. Time and Attendance Types indicate how the hours are to be collected. (In the future, General Ledger Numbers will be associated with each type listed.) Therefore, each type of job (Work Order) logging will collect charges accordingly. If you check the Pay box, that means the company will pay for that type. For example, an unexcused absence would NOT be checked, but Jury Duty might be checked if it is the company policy to pay for jury duty. "Allow to enter hours directly in Time Log Management" checkbox in T&A setup, if it's checked, the user will be able to enter hours directly in Time used field for that type in the Time Log Management module. Once user adds a new record for a time log type which is allowed to enter hours directly, the time in and time out fields will be blank out and disabled, and user can enter how many hours for that record directly. Otherwise, the user has to enter time in/out.
The system only allows user to enter "RT" no "OT" can be entered. Therefore, user can not check type "W" or "T" to enter hours directly. The system will have to calculate the total log in time and determine what's the RT and OT for type "W" and "T".
The time in and out will also be blank if the type is "H" -- holiday, and the system will use shift to calculate the RT, no OT will be calculated.
Overtime hours are established for determining overtime pay if the timeclock function is used without shift data per person. Hours entered in excess of X hours per day or week would be counted as overtime.
User Work Shift - user will check this radial if they want this as a work shift. Maximum hours logged on in the system is the number of hours which, if a user has remained logged on, the system would automatically log them off, assuming that they left without logging off. Note: ManEx suggests that you populate this field with a number of 1-24. If left empty or with a -0-, the automatic loggout process will NOT run and will NOT logout the user automatically.
This field is restricted to only allow a minimum entry of "0" and a maximum entry of "24". Shift Tolerance allows users to consider a line at the timeclock .If an employee logs in a few minutes early, or late, the system will log them in at the beginning of their shift. Once you have completed all modifications to screen select the Save or Abandon changes button from the main tool bar.
These items may be sorted in any order by clicking on and dragging the box on the left side, to the (vertical) position desired. This order will be the order displayed in the pull downs when using this list in other modules within the system. Suggestion: Have the one most used at the top of the list. Where Used: In all job logging functions for a product’s work orders. «Mark as Completed in RoadMap in Section B Item 3-e» |
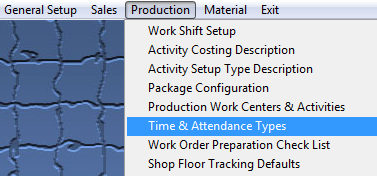
| 1.3.8. Work Order Preparation Check List |
| 1.3.8.1. Preprequisites for the Work Order Preparation Check List |
User MUST have full rights to the "System Setup" in System Security to setup these modules. User with "Supervisor Rights" will automatically have access.
|
| 1.3.8.2. Introduction for the Work Order Preparation Check List |
| Within this module user will enter items to be used in a checklist for a product and it will be used to record that, that action was taken for the work order, by whom and when it occurred. Examples of check lists might be: Verify product revision, perform tooling setup, complete first article, deburring, or any other critical function for which the user wishes to have a verifiable record of being accomplished. The description of the checklist item may be up to 20 characters in length. Note: In order to complete the Unreleased Work Order List user MUST also have the Product Data Management (PDM) optional module. |
| 1.3.8.3. Fields and Definitions for the Work Order Preparation Check List |
Within this module user will enter items to be used in a checklist for a product and it will be used to record that, that action was taken for the work order, by whom and when it occurred. Examples of check lists might be: Verify product revision, perform tooling setup, complete first article, deburring, or any other critical function for which the user wishes to have a verifiable record of being accomplished. The description of the checklist item may be up to 20 characters in length.
Note: In order to complete the Unreleased Work Order List user MUST also have the Product Data Management (PDM) optional module. 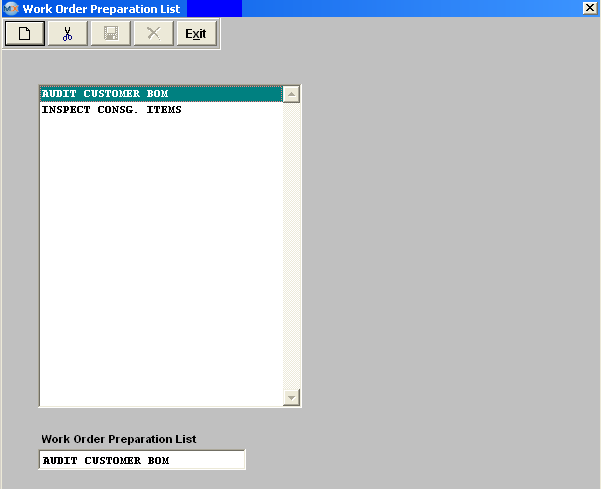 |
| 1.3.8.4. How To ....... for the Work Order Preparation Check List |
| 1.3.8.4.1. Setup the Work Order Preparation Check List | ||||
The following screen will be displayed:
Within this module user will enter items to be used in a checklist for a product and it will be used to record that, that action was taken for the work order, by whom and when it occurred. To modify this screen, the user must click on the Add or Delete button and supply the password. That action will enable the screen. Pressing the Add button will enable the data entry boxes at the bottom of the screen for the user to enter new data. Selecting an existing Work Order Preparation List and pressing the Delete button will remove the selected information. The user must Save or Abandon changes after modifying the screen. |
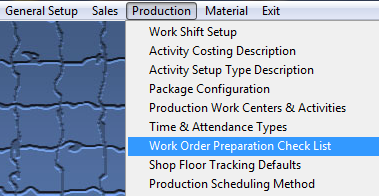
| 1.3.9. Shop Floor Tracking Defaults |
| 1.3.9.1. Prerequisites for SFT Defaults |
Complete the attached worksheet and "Mark as Completed RoadMap Section B Item 3-f" before continuing the setup.
User MUST have full rights to the "System Setup" in System Security to setup these modules. User with "Supervisor Rights" will automatically have access.
|
| 1.3.9.2. Introduction for SFT Defaults |
There are a number of functions within MANEX that the user may establish as default conditions during operations. Each function relating to this setup screen is described in the Fields & Definitions article. |
| 1.3.9.3. Fields and Definitions for the SFT Defaults |
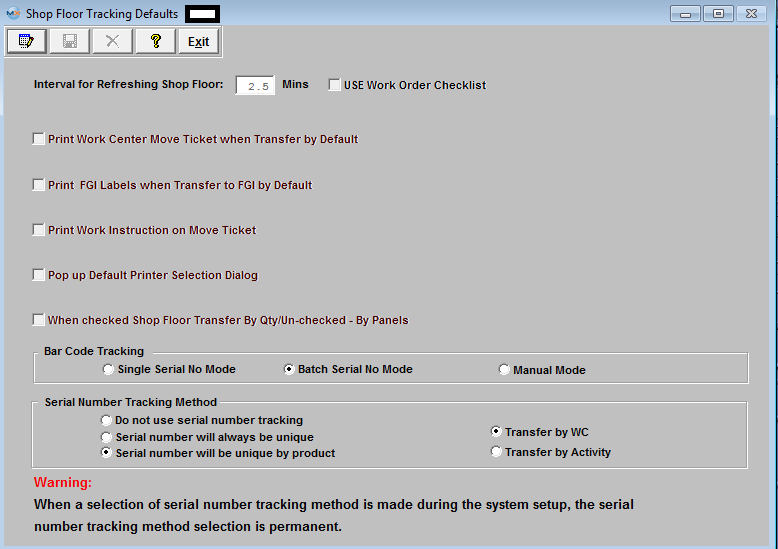 Interval for Refreshing Shop Floor When the user is in the Shop Floor module, and has information displayed on the screen (for example, the wip status of a work order). The user then leaves the screen up and alone to do another task (say breaks for lunch). Then the data represented by the screen may actually undergo changes by other employees. If the user does not use the screen in the meantime, when they return from their alternate task, the information on the screen would be incorrect (because someone else moved material). ManEx performs a periodic update (refresh) to Shop Floor screens when the user has information displayed on the screen, but has not performed any functions in the meantime. The period of the refresh rate is initially set to every two and a half minutes by ManEx. So, if the user has a work order tracking screen displayed with a work order showing wip, and does not perform any transaction for 2-1/2 minutes, ManEx will automatically update the information on the screen. This timing is initially set at 2-1/2 minutes, but the user may change this period in this setup. However, the trade-off for shorter periods is increased network traffic, and setting too many workstations to be refreshed every few seconds will seriously impact the server’s ability to deliver data.
USE Work Order Check List This list is a list from which to choose items to be included as a checklist for a product. The checklist is created in the Work Order Preparation List module. Examples of check lists might be: Verify product revision, perform tooling setup, complete first article, deburring, or any other critical function for which the user wishes to have a verifiable record of being accomplished. The description of the checklist item may be up to 20 characters in length. Note: In order to complete the Unreleased Work Order List user MUST also have the Product Data Management (PDM) optional module. Print Work Center Move Ticket When Transfer by Default Whenever a product is moved from one work center to another, the user has the option to print a move ticket (like a traveler) for each transaction. This move ticket may be printed and accompany the material to the next work center, identifying the work order, product date, work center, etc. The user may choose to turn this feature off by selecting the “Printer OFF” button in the setup. If the printer is turned on (“Printer ON”), then a sheet with the details will be printed for every product movement.
Print FGI Labels When Transfers to FGI by Default Whenever a product is moved from one work center to the Work Center called FGI (Finished Goods Inventory), the user has the option to print a move ticket (like a traveler) for each transaction. This move ticket may be printed and accompany the material to finished goods, identifying the work order, product date, work center, etc. The user may choose to turn this feature off by selecting the “Printer OFF” button in the setup. If the printer is turned on (“Printer ON”), then a sheet with the details will be printed for every product movement.
Print Work Instructions on Move Ticket If the user chooses to print move tickets, then they may also choose whether or not work instructions and work order notes are included in the printing.
Pop up Default Printer Selection Dialog
When Checked Shop Floor Transfer by Qty/Un-checked - By Panels If the user chooses to identify material movement by quantity of product, then this option MUST be checked. If the user wishes to move material by the panel, sheet or roll, they may uncheck this option. This requires the user to define in the product definition the number of products contained in a panel/sheet/roll. Then, if this method is chosen, the user moves panels and ManEx keeps track of the number of units.
Bar Code Tracking If the user is tracking serial numbers through the production process, and is using the ManEx bar code tracking module, then they have the option of defining a default method for picking up the bar-coded serial numbers. One option is to scan one serial number at a time, and collect those serial numbers for processing a transaction. Another option is to enter the beginning and ending serial number of a series of serial numbers and allow ManEx to fill in all of the serial numbers in between for processing a transaction. The third option is for the user to manually enter the quantity of boards to be moved. If the boards are serialized, then a list of serial numbers is presented to the user from which to select the serial numbers being moved with the quantity of parts. The user has the option to change any of these defaults at the time of entry. Please refer to the Shop Floor Tracking Management manual. The ManEx Manufacturing System Software has bar code scan and print capability which is designed primarily for transfer of products in Shop Floor Tracking and input of inspection data by serial number and defect code.
Installation: Bar Code Shop Floor Tracking is an OPTIONAL module; it is NOT a part of the Core ManEx MES modules. · Upon purchase of this module, ManEx will send a soft-key to activate the module · After activation, Bar Coding access for each user must be setup in the ManEx Security module. Users with “Supervisor’s Rights” will automatically have access.
· Each client workstation (individual PC) which will be printing Reports, Travelers, Labels, Serial Tags, Physical Inventory Tags and Defect Lists with Bar Coding must have the font installed as an active Windows font.
· If Bar Coding of Serial Numbers is desired, the Serial Number tracking must be setup in Shop Floor Tracking Defaults . Specification: · ManEx uses the Microsoft Truetype BC C39 Narrow Font. See Article #1225 for the installation procedure. · Use of a Y-Type keyboard-emulation scanner is supported by ManEx. The scanner output goes into ManEx via the keyboard-input cable. Bar code fields may be scanned or manually entered with the scanner installed. · Most scanners require ¼” of white space surrounding the bar code. Laser and inkjet printed labels must have adequate resolution, contrast and clarity to print barcodes that are readable. · ManEx recognizes a bar code by an asterisk (*) at the beginning and end of the bar coded field.
Serial Number Tracking Method At the beginning of a ManEx implementation, the user must decide a method for tracking Serial Numbers. THIS DECISION, ONCE STARTED, IS IRREVOCABLE. The decision to be made is:
1, Do NOT use Serial Number tracking. 2, Serial Number will always be unique. This will insure that a serial number is unique throughout the company; (meaning once used, can NEVER be used again, no matter what product). 3, Serial Number will be unique by Product. This will allow duplicate serial numbers to be used throughout the company, but they must be unique for a given product, (can be used for other products, but never again for the same product). If Serial Numbers are NOT to be used, then the option will NOT appear when creating new part numbers within the ICM module. If Serial Numbers ARE used, then the user will have the option when creating parts within the ICM module to either serialize the part or leave it unserialized. If Serial Numbers are used on a part, then the user MUST enter Serial Numbers in order to move product through the SFT for shipment. The user will also need to define whether Serial Numbers are to be transferred by Work Center or by Activity within a Work Center. For further detail on why the system enforces the uniqueness per Product rule and will not base the uniqueness on SN that exist in the Qty at that time see Article #2495.
|
| 1.3.9.4. How To ..... SFT Defaults |
| 1.3.9.4.1. Setup the Shop Floor Tracking Defaults | ||||
The following screen will be displayed:
The user may edit any of the defaults by selecting the Edit button from the main tool bar and selecting the default to be changed. Check List items may be added by selecting the Add button from the main tool bar and entering the description of the item to be listed.
Serial Number Tracking Method can NOT be changed once a selection has been made at the beginning of a ManEx implementation. THIS DECISION, ONCE STARTED, IS IRREVOCABLE. The decision to be made is:
1, Do NOT use Serial Number tracking. 2, Serial Number will always be unique. This will insure that a serial number is unique throughout the company; (meaning once used, can NEVER be used again, no matter what product). 3, Serial Number will be unique by Product. This will allow duplicate serial numbers to be used throughout the company, but they must be unique for a given product, (can be used for other products, but never again for the same product). If Serial Numbers are NOT to be used, then the option will NOT appear when creating new part numbers within the ICM module. If Serial Numbers ARE used, then the user will have the option when creating parts within the ICM module to either serialize the part or leave it unserialized. If Serial Numbers are used on a part, then the user MUST enter Serial Numbers in order to move product through the SFT for shipment. The user will also need to define whether Serial Numbers are to be transferred by Work Center or by Activity within a Work Center. For further detail on why the system enforces the uniqueness per Product rule and will not base the uniqueness on SN that exist in the Qty at that time see Article #2495.
When the user has completed the changes they must select the Save or Abandon button from the main tool bar, before exiting. Where Used: In all shop floor functions for a product’s work orders.
Mark as Completed in RoadMap Section B Item 3 |
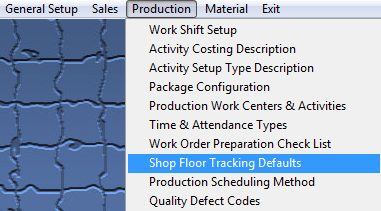
| 1.3.10. Production Scheduling Method |
| 1.3.10.1. Prerequisites for Production Scheduling Method |
|
User MUST have full rights to the "System Setup" in System Security to setup these modules. User with "Supervisor Rights" will automatically have access.
|
| 1.3.10.2. Introduction for Production Scheduling Method |
In this setup, the user defines the method to be used by ManEx to determine the capacities and scheduling in the Capacity Planning module. |
| 1.3.10.3. Fields and Definitions for the Production Scheduling Method | ||||||
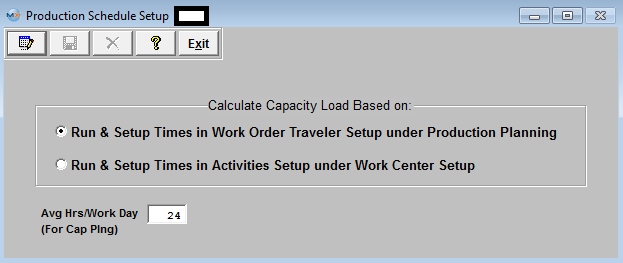 Calculate Capacity Load Based on:
No change is required in this setup unless the user is going to make extensive use of the job planning module. Note: In order to add Times in Routing, the Run and Setup Time MUST be selected in this module.
|
| 1.3.10.4. How To ..... for Production Scheduling Method |
| 1.3.10.4.1. Setup Production Scheduling Method | ||||
|
The following screen will be displayed:
The user may select the Edit button from the main tool bar to change the defaults. The user must select the Save or Abandon changes button from the main tool bar after entering the Edit Mode. Where Used: In all shop floor functions defining labor costs, and for Capacity Planning Modules. «Mark as Completed in RoadMap in Section B Item 3-g» |
| 1.3.11. Quality Defect Codes |
| 1.3.11.1. Prerequisites for Quality Defect Codes |
Complete the attached worksheet and "Mark as Completed RoadMap Section B Item 3-h" before continuing the setup.
User MUST have full rights to the "System Setup" in System Security to setup these modules. User with "Supervisor Rights" will automatically have access.
|
| 1.3.11.2. Introduction for Quality Defect Codes |
In Shop Floor Tracking, the ability to record the results of quality inspections is available to the user. These records usually contain information about the lot or work order being inspected, the quantity of parts viewed, the quantity of parts rejected and the number and types of defects observed in the process. In the ManEx Quality Defect Setup, the user has the opportunity to define these defects, and to shape the manner in which they are used. |
| 1.3.11.3. Fields & Definitions for Quality Defect Codes |
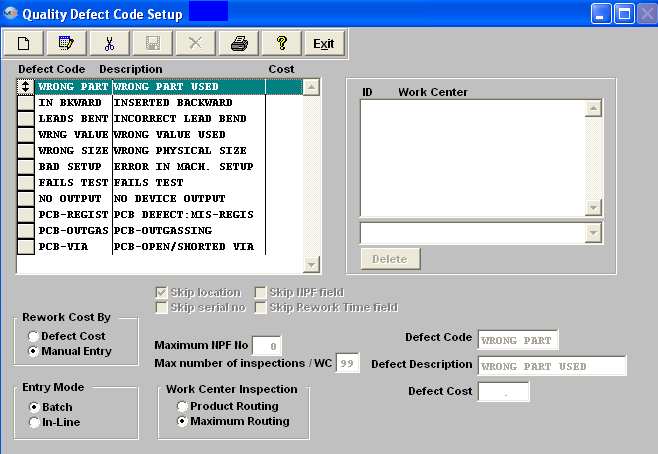 Entry Mode: The results of inspection may be entered in ManEx in two basic ways: 1, in Batch Mode; and 2, using In-Line processing. Batch mode allows the user to perform the inspection on a batch or lot of materials, and enter the observations at a later time. In this mode, the user does not automatically forward the product to the next workstation, but merely inspects it and allows production personnel to move the material. Using the In-Line mode is like inserting an inspection step at the end of a work center, viewing the parts one at a time, and passing or failing the part. If the part passes, it is moved by ManEx to the next work center, and the user has only to physically move the parts to the next workstation. The ManEx WIP tracking automatically moves the part to the next work center. Parts which fail the inspection may stay in their current work center, be moved to another (rework) work center, or passed on to the following work center, at the option and discretion of the operator. Most users prefer to use the batch processing, which accommodates sampling procedures, instead of In-Line processing, which always requires 100% inspection. In this setup area, the user selects the default condition for defining the method of data entry. Rework Cost By: The Cost of Quality may be determined in one of two possible ways: 1, by defining a specific cost to each defect code; and 2, by manual entry of the actual rework time as determined by the inspector during inspection. In this setup area, the user selects whether to track the costs by Defect Cost (assigned to each defect code), or Manually (by entering the rework time as defects are determined). Defect Code: During the defect logging and entry process, the user will be presented with a list of defects from which to choose the defect observed. These defects codes and descriptions are entered and defined in this setup. The code is a ten-digit character field that will be used to identify the defects on charts, graphs and data collected and printed. The user may enter as many defect codes as needed. While the user may enter the defect codes in any order they wish, the defect codes may be rearranged so that the most used codes are at the top of the list. This becomes a time-saver when actually entering defects on a lot, as the defect codes are presented in the same order as ordered in the setup. This is done after defect code entry by clicking on the REORDER button just below the defect codes. After pressing this button, the screen will place a small button in front of each defect code. The user may then use the windows drag & drop method to click on a button, hold the mouse button down and drag the code to the order desired. When satisfied that the most used defect codes are at the top of the list, click on the DONE button to secure the order. Alternatively, the user may wish to enter in alphabetical order to ease searches if there are no predominant defects. Also, to aid the inspector in selecting a defect code, the user may associate a given defect code with one or more work centers. The user selects from the established work centers to include as many work centers for a specific defect as desired. Work centers may also be deleted from a defect code, if the user wishes. Work Center Inspection: The user has the option of viewing defects based on the product routing (Product Routing), or to view all defects (Maximum Routing). The Maximum Routing will show ALL defect codes in inspection, the Product Routing will only display those that have been related to a work center in which the inspection is taking place. However, the user can still opt to see the max (ALL) defects within the Defect Entry screen.
Skip Location: Associated with the Defect Entry screens are subsets of information relating to the defects observed. Some of these subsets may be very useful to analyze defects causes and origination. If the user completes the Reference Designators in the Bills of Materials, then entering the reference designation for each defect may provide directions for investigation of repeated failures on an assembly. ManEx provides the capability to track the defects to locations, but if the user opts not to enter location information, then they may set the default condition of the screen to exclude location information. Checking the “Skip Location” box on the setup screen does this. Skip serial no: If the user is not using serial number tracking for defect data collection, this too may be omitted by checking the “Skip Serial No” box on the setup screen. Skip NPF field: The Skip NPF field “no problems found” will cause the Defect Entry screen to by-pass this information. The Maximum NPF No box, no problems found, is provided for the user to record when observing the product. If, in the Defect Entry screen, the serial number had previously been rejected, and analysis of the product yield no further problem, either with cosmetics or function, then the user may change this number to 1, meaning the first time it was inspected or tested, no problem was found. If the product serial number is subsequently rejected again, and a second inspection finds a problem, the number may be incremented to a “2”. This will alert users to repeated rejections of a product serial number, one or more times with no discernable defects. If the number of times that a part has experienced an NPF (no problems found) exceeds that established here in the system setup, the user will not be allowed to go further. “Maximum number of inspections/WC” Box:This field is for serial number use only. The user may define how many times a given serial number can pass through a given Work Center. If the user selects the “Skip Serial Number” field, this max number will be come invisible. In the Defect Entry screen, once the pass number of a serial number exceeds the max number as set up here, a supervisor or special rights password is needed to continue. Please refer to the Implementation – Security |
| 1.3.11.4. How To ..... for Quality Defect Codes |
| 1.3.11.4.1. Setup Quality Defect Codes Module | ||||||
The following screen will be displayed: Items may be re-sorted by dragging the box of the left side of the defect desired to the (vertical) position desired, upon exit the re-order will be saved. This order will be the order displayed in the pull downs when using this list in other modules within the system. Suggestion: Have the one most used at the top of the list.
The user initiates a new defect code by selecting the Add button from the main tool bar. Note: When creating a new Defect Code you will want the Defect Code descriptive as possible because this is what appears in the Pareto Chart in the SQC module information. NOTE: The "Defect Code" field is NOT editable once it has been saved.
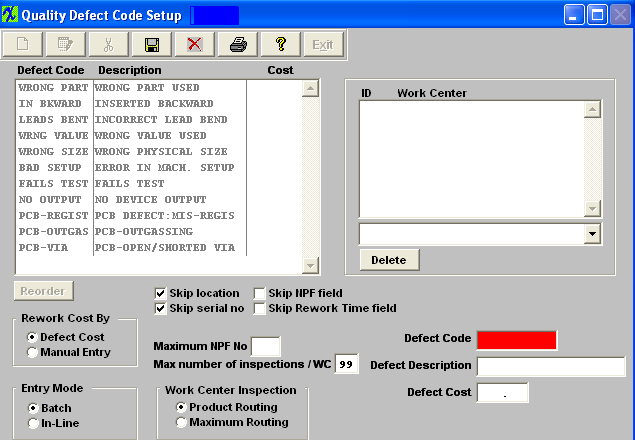
Enter in the maximum NPF number. Type in the desired number of times for Maximum number of inspections /WC.T his field is for serial number use only. If the user selects the “Skip Serial Number” field, this max number will be come invisible. In the Shop Floor Tracking module, Inspections section, once the pass number of a serial number exceeds the max number as set up here, a supervisor or special rights password is needed to continue.
When all changes have been completed, the user must select the Save or Abandon changes button from the main tool bar. Select the Edit button from the main tool bar and work centers assigned to or deleted from the defect code. All fields are editable except for the "Defect Code" field.
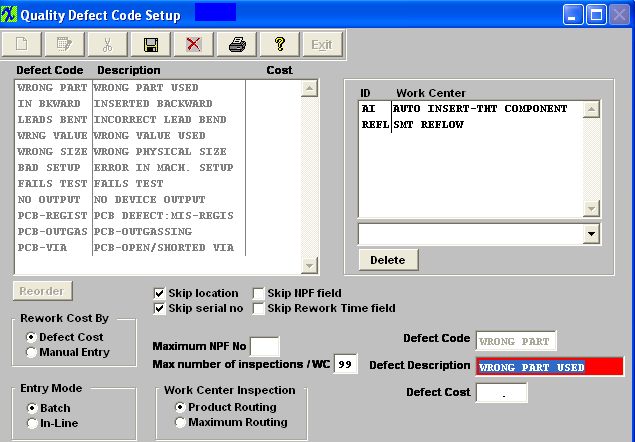 When all changes have been completed, the user must select the Save or Abandon changes button from the main tool bar.
User may ONLY delete a Defect Code if it has not been used in the SQC module. This info needs to be retained for history/reporting purposes. If the defect code has been used in the SQC module user will receive the following warning when trying to delete the defect code. 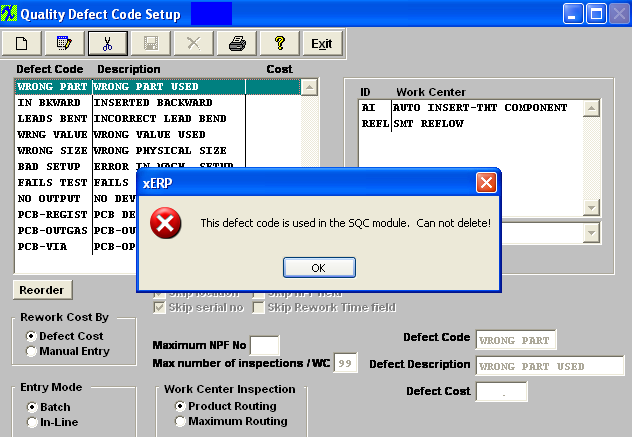 If defect code has NOT been used in the SQC module the defect code may be deleted. User will receive the following confirmation to be sure they want to delete the Defect Code.
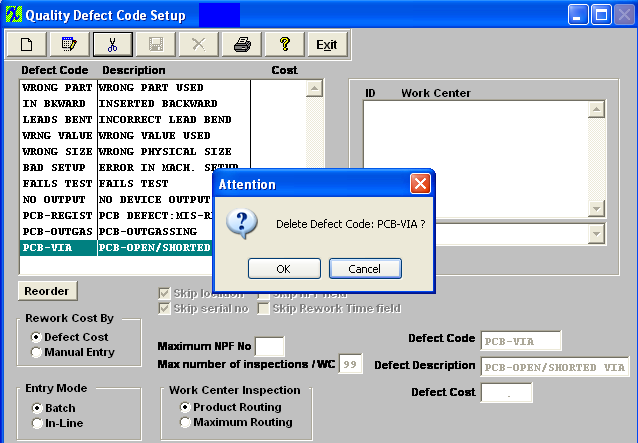 Depress OK to continue or Cancel to abandon the deletion.
Where Used: In all Statistical Quality Control tracking operations and reporting. «Mark as Completed in RoadMap in Section B Item 3-h» |
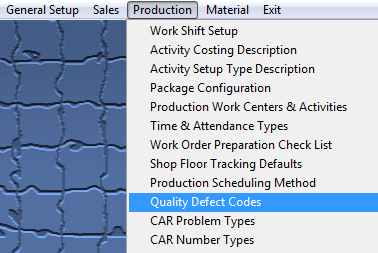
| 1.3.11.5. Reports for the Quality Defect Codes |
To obtain the Defect Code Setup Reports within the Web, select the WEB Print button from the ManEx action buttons at the top
of the screen. For further detail on How the Reports work within the Web refer
to Article #5477. Note: In order to access the Reports within the Web the Company Root URL must be setup within the System Appearance module and user must be linked to web within the System Security Module.
Select the Report Type: DEFECT CODE SETUP - A List of Reports will be displayed that are available on the Web for DEFECT CODE SETUP
To obtain THE DEFECT CODE SETUP Reports within the desktop, select the Print button from the ManEx action buttons at the top of the screen.
The following reports screen will display a list of reports that are available on the ManEx Desktop:
Highlight the Master Defect List Report and depress the OK button, the following report will be displayed:
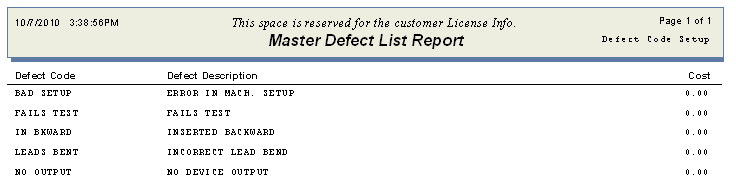 Highlight the Defect List by Work Center Report and depress the OK button, the following report will be displayed:
 |
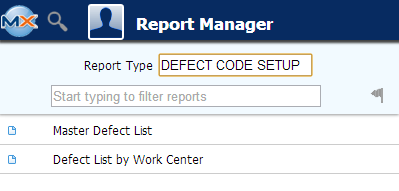
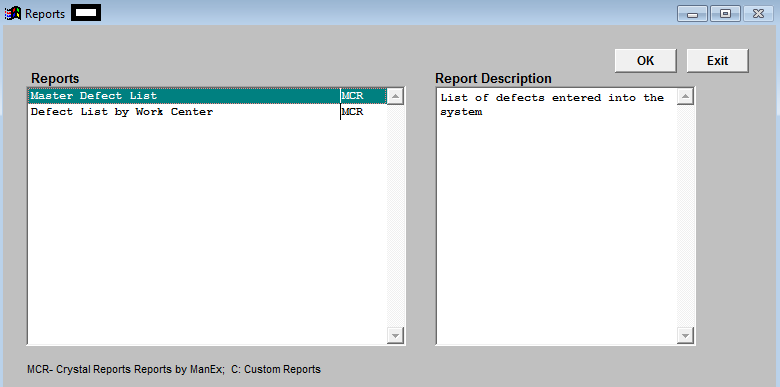
| 1.3.12. Corrective Action Reporting Problem Types |
| 1.3.12.1. Prerequisites for CAR Problem Types |
|
Complete the attached worksheet and "Mark as Completed RoadMap Section B Item 3-i" before continuing the setup.
User MUST have full rights to the "System Setup" in System Security to setup these modules. User with "Supervisor Rights" will automatically have access.
|
| 1.3.12.2. Introduction for CAR Problem Types |
If the user is utilizing the CAR (Corrective Action Reporting) module, then the types of corrective actions may be grouped into specific categories in relation to the nature of the problems. For example, one problem type might be Customer Originated corrective actions. Another might be actions required of a Supplier. Another might be directed toward Engineering or Quality departments, or any company function. Another consideration may be to organize the problem types by the target of the action, like a work order or process.
|
| 1.3.12.3. Fields & Definitions for CAR Problem Types |
|
If the user is utilizing the CAR (Corrective Action Reporting) module, then the types of corrective actions may be grouped into specific categories in relation to the nature of the problems. For example, one problem type might be Customer Originated corrective actions. Another might be actions required of a Supplier. Another might be directed toward Engineering or Quality departments, or any company function. Another consideration may be to organize the problem types by the target of the action, like a work order or process.
Once these problem types are defined, they may be placed in order by clicking on and dragging the box to the left of the type to the (vertical) position desired.
|
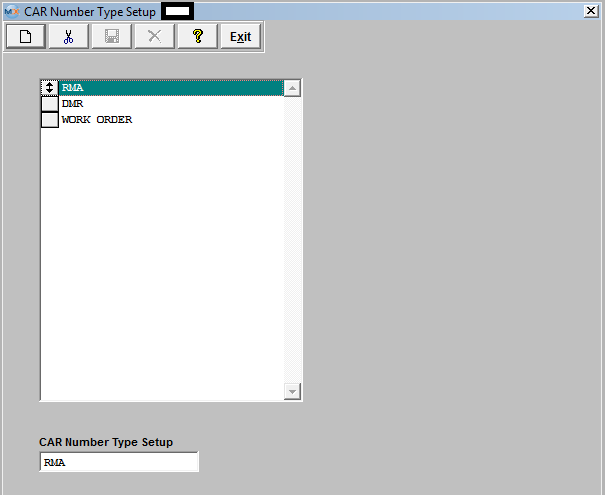
| 1.3.12.4. How To ..... for CAR Problem Types |
| 1.3.12.4.1. Setup the CAR Problem Types Module | ||||
The following screen will be displayed:
To Add CAR Problem types, select the Add button from the main tool bar, and enter the type in the text box at the bottom of the list. These items may be sorted in any order by clicking on and dragging the box on the left side, to the (vertical) position desired. This order will be the order displayed in the pull downs when using this list in other modules within the system. Suggestion: Have the one most used at the top of the list. Where Used: In all Corrective Action activities. «Mark as Completed in RoadMap in Section B Item 3-i» |
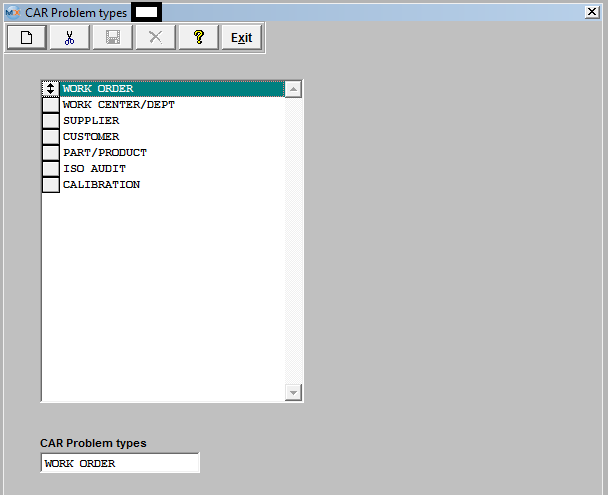
| 1.3.13. Corrective Action Reporting Number Types |
| 1.3.13.1. Prerequisites for CAR Number Types |
Complete the attached worksheet and "Mark as Completed RoadMap Section B Item 3-j" before continuing the setup.
User MUST have full rights to the "System Setup" in System Security to setup these modules. User with "Supervisor Rights" will automatically have access.
|
| 1.3.13.2. Introduction for CAR Number Types |
| This Corrective Action Reporting number type refers to the number of the document that resulted in the corrective action. While the Corrective Action Reporting itself has a number assigned to it, there is usually another document that originates the corrective action. This document may be an RMA (Returned Material Authorization) report from the customer (e.g. RMA # 0112), and the Corrective Action Reporting Number type would be “RMA Number”. The source document may be a DMR (Discrepant Material Return) originated by production inspection or incoming inspection. The Corrective Action Reporting number type would be “DMR Number” to describe the number identified in the Corrective Action Reporting report. The number type is used solely to identify the source of the numbered document referred to in the Corrective Action Reporting. |
| 1.3.13.3. Fields & Definitions for CAR Number Types |
|
This Corrective Action Reporting number type refers to the number of the document that resulted in the corrective action. While the Corrective Action Reporting itself has a number assigned to it, there is usually another document that originates the corrective action. This document may be an RMA (Returned Material Authorization) report from the customer (e.g. RMA # 0112), and the Corrective Action Reporting Number type would be “RMA Number”. The source document may be a DMR (Discrepant Material Return) originated by production inspection or incoming inspection. The Corrective Action Reporting number type would be “DMR Number” to describe the number identified in the Corrective Action Reporting report. The number type is used solely to identify the source of the numbered document referred to in the Corrective Action Reporting. |
| 1.3.13.4. How To ..... for CAR Number Types |
| 1.3.13.4.1. Setup CAR Number Types Module | ||||
The following screen will be displayed:
To add CAR Number types, select the Add button from the main tool bar, and enter the type in the text box at the bottom of the list. The user must select the Save or Abandon changes button from the main tool bar.
These items may be sorted in any order by clicking on and dragging the box on the left side, to the (vertical) position desired. This order will be the order displayed in the pull downs when using this list in other modules within the system. Suggestion: Have the one most used at the top of the list. Where Used: In all Corrective Action activities. «Mark as Completed in RoadMap in Section B Item 3-j» |
| 1.3.14. Tools Setup |
| 1.3.14.1. Prerequisites for Tools Setup |
Complete the attached worksheet and "Mark as Completed RoadMap Section B Item 3-k" before continuing the setup.
User MUST have full rights to the "System Setup" in System Security to setup these modules. User with "Supervisor Rights" will automatically have access.
|
| 1.3.14.2. Introduction for Tools Setup |
These are the descriptions to be used in the Tools/Fixtures section of the Customer Quote Module.
It’s for non recurring charges relating to tools or fixtures, etc. purchased for a particular make assembly. |
| 1.3.14.3. Fields & Definitions for Tools Setup |
|
These are the descriptions to be selected from in the NRE (Non-Recurring Charges relating to Tools and/or Fixtures) section of the Customer Quote module.
|
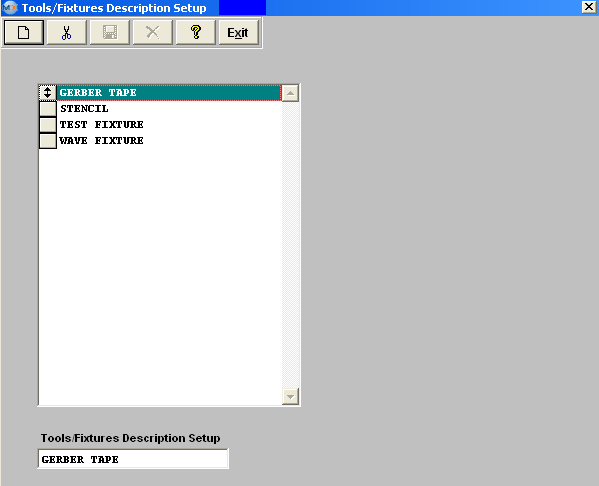
| 1.3.14.4. How To ..... for Tools Setup |
| 1.3.14.4.1. Setup Tools Setup Module | ||||
The following screen will be displayed:
These items may be sorted in any order by clicking on and dragging the box on the left side, to the (vertical) position desired. This order will be the order displayed in the pull downs when using this list in other modules within the system. Suggestion: Have the one most used at the top of the list. To Add, select the Add button from the main tool bar. Enter in the description. To Edit, select the Edit button from the main tool bar. Highlight the description to be edited, and make any changes.
To Delete, highlight the item you want to delete, select the Delete button from the main tool bar.
Where Used: Customer Quote module.
«Mark as Completed in RoadMap in Section B Item 3-k»
|
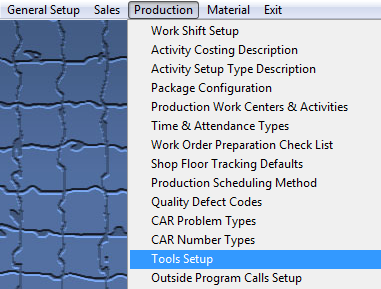
| 1.3.15. Outside Program Calls Setup |
| 1.3.15.1. Prerequisites for Outside Program Calls Setup |
|
Complete the attached worksheet and "Mark as Completed RoadMap Section B Item 3-l" before continuing the setup.
User MUST have full rights to the "System Setup" in System Security to setup these modules. User with "Supervisor Rights" will automatically have access.
|
| 1.3.15.2. Introduction for Outside Program Calls Setup |
User can enter a program within this screen which is used to create a button that will appear in the Shop Floor Tracking module. In Shop Floor Tracking, when user depresses this button, they will need to enter a serial number, the program will then gather all the part number, work order information into a text file, and the user defined program will use the text file to print the label.
|
| 1.3.15.3. Fields & Definitions for Outside Program Calls Setup |
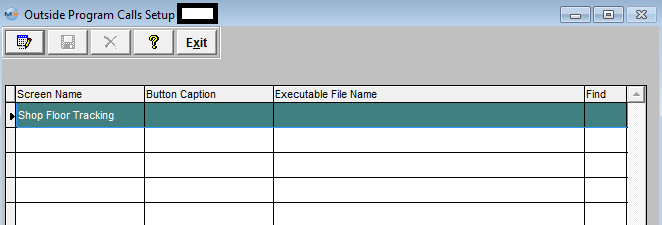 This screen is used to create a button which will appear in the Shop Floor Tracking module. The button will direct the program to a user written program which is used to print labels for serialization.
The system automatically enters the screen name as Shop Floor Tracking. Then the user types in the Button Caption and the name and path of the executable file. |
| 1.3.15.4. How To ..... for Outside Program Calls Setup |
| 1.3.15.4.1. Setup the Outside Program Calls Setup Module | ||||
The following screen will be displayed:
The system automatically enters the screen name as Shop Floor Tracking. Select the Edit button from the main tool bar to enter in the caption you want to appear in the Shop Floor Tracking module, then enter in the executable file name.
If you don’t know the executable file name, double click on the Find column. The browse window will appear:
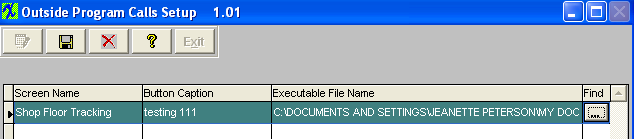 If the user Saves the changes. A button will be created in Shop Floor Tracking with the Button Caption name entered in the Setup screen:
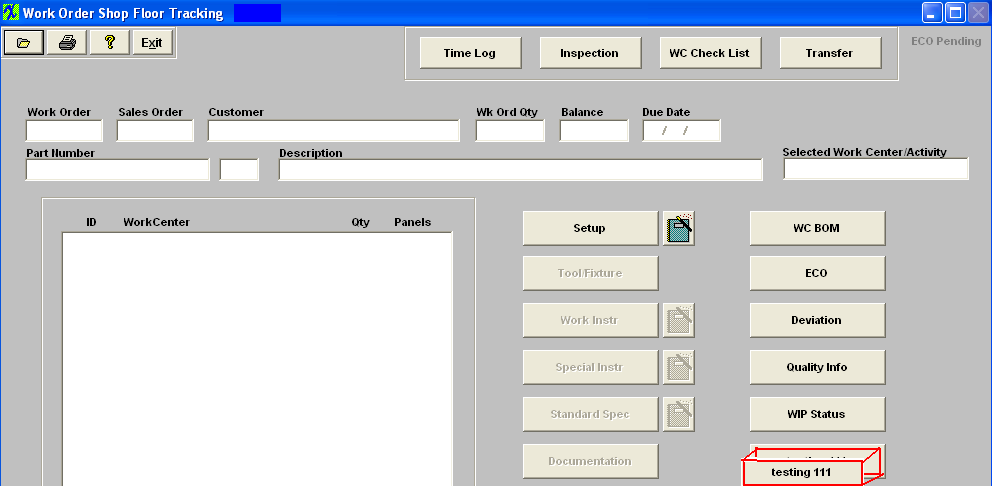 When user depresses this button, the following screen will appear and they will need to enter a serial number, the program will then gather all the part number, work order information into a text file, and the user defined program will use the text file to print the label. 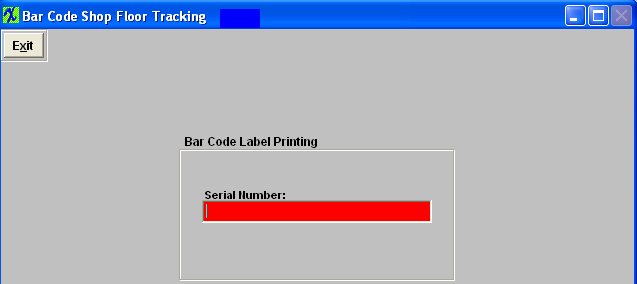 Where Used: Shop Floor Tracking module.
«Mark as Completed in RoadMap in Section B Item 3-l»
|
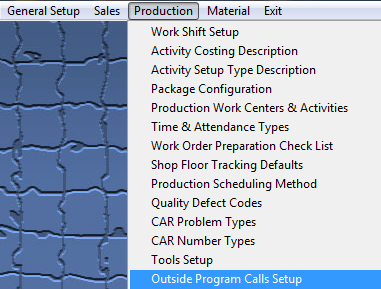
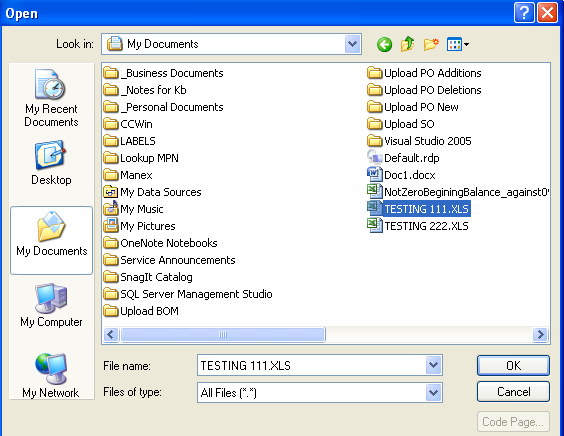
| 1.4. Material |
| 1.4.1. Prerequisites |
User MUST have full rights to the "System Setup" in System Security . Users with “Supervisor Rights” will automatically have access. |
| 1.4.2. Introduction |
This section covers the system setups required to use Materials and Inventory related modules. These setups are fundamental to Inventory Control Management, Inventory Handling and Materials Requirements Planning. They affect everything from data entry and conversion of existing (legacy) part numbering systems to the layout of the Stockroom. It is absolutely essential to review all aspects of these Materials setups prior to beginning data entry, because once entered, many setup fields cannot be backed out without Manex's assistance. Data Entry MANEX System Setups and Defaults are designed to minimize the user’s keystrokes when entering actual data. Careful choice of a scheme for item master numbering of products and parts will allow MANEX to automatically create item master part numbers and enter default data when the user selects Class and Type and enters a Description.
Conversion of Legacy Product and Part Number System The first decision to be made prior to System Setup is whether to try to use your existing product and part numbers in Manex. Because Manex item numbering is significantly different than most legacy numbering systems, this decision is best made after you understand Manex's numbering system structure, options and functionality. · Manex uses Classes (similar to Commodity Codes) to "classify" all Items entered in the Item Master. Each Class is further broken down into Types. All screens and printouts of Items (Products and Parts) show the Class and Type for each Item; therefore it is not necessary to include Class and Type information in the Description field for an item. · An "intelligent" prefix (3 digit numeric suggested) is usually assigned as an identifier of a particular Type of part under a particular Class which allows grouping of like items for: 1. Automatic entry of Default (common) information during data entry of items in the Item Master. 2. Prevention of double-assignment of part numbers to items already having numbers. 3. Rapid searches for existing part numbers in the database. 4. Organized viewing of items in screen displays and reports 5. Ease of assignment for planning, purchasing and inventory management. 6. Simplifying receiving, stocking, locating and kitting. 7. Maintenance of standard costing by commodity. 8. Assignment of Buyers by commodity. · Using Autonumbering of the "root" or main part of a part or product number creates a unique identifier for each number which: 1. Is never reused, once it has been assigned to prevent two different items from having the same part number. 2. Becomes a unique identifier to provide an audit trail of any and all transactions and changes. 3. Has no significance other than unique identification to allow assignment without encoding. 4. Should be all-numeric for ease in finding, sorting and arranging items. 5. Should be at least 5 digits to allow for a minimum of 99,999 part numbers to be assigned. · Manex suggests that you use your customers' product numbers as Manex product numbers in order to: 1. Allow transferring open Sales Orders and Work Orders into Manex with the least amount of confusion. 2. Retain established numbers for customer recognition on Sales Orders, Packing Lists and Invoices. 3. Minimize the need for reprinting of labels, travelers, serial plates and pcb artwork. 4. Provide a link between the old Bills of Material and the new ones. · Legacy Part numbering systems that have been maintained manually usually cannot be imported directly into Manex because they: 1. Contain duplicate part number assignments, use the same part number root more than once and are not uniform in structure. 2. Use item descriptions with non-standard nomenclature, sequence, separators, abbreviations and data. 3. Have Manufacturer's data such as part number, name and/or specifications imbedded in the part number, prefix or description. 4. Use Customer part numbers instead of internally created numbers. These numbers can create confusion when created by one customer but used for another customer. 5. Were not under Engineering Change Control to insure correct assignment or change of Revision Level. 6. Have different versions or revisions all with the same part number. A new Manex part number should be assigned for each item that differs in form, fit or function. Stockroom LayoutThe simplest layout for a stockroom is in part number sequence. To make this work, Prefixes must be systematically assigned to each Item Class and Type. This type of layout: · Eliminates the need for assignment, data entry and maintenance of aisle, row and shelf location codes for every item. · Allows expansion for added items without re-entry of location codes. Expansion may be achieved by just shifting everything down, using empty or expansion spaces. · Simplifies Cycle Counting and Physical Inventories by having only one location for each part number. · Concentrates all of the same parts and all like items together for uniformity of storage of similar packaging. The materials application module setup section allows you to prepare tables for specific material related modules your company has purchased. Once setup in the system, you will be able to use these tables and or perform certain functions automatically. Sample data is provided as a guideline in preparing the Pre-Installation Work Sheets. These Sample setups are not necessarily the only ways to setup Manex Materials, but they have been compiled as the result of many successful Manex installations and may save you many hours of "re-inventing the wheel". This section will first explain each of the Material Setup screens, then describe how to fill out the work sheets, and finally, how to enter the data into the MANEX system. |
| 1.4.3. Part Source |
| 1.4.3.1. Prerequisites for Part Source |
User MUST have full rights to the "System Setup" in System Security . Users with “Supervisor Rights” will automatically have access. |
| 1.4.3.2. Introduction for Part Source |
A Part Source describes the source of the part in inventory. |
| 1.4.3.3. Fields & Definitions for Part Source | ||||||||
|
Part source table contains the following items:
A phantom assembly is a bill of materials assembled for the convenience of the user, and is not actually built or maintained in inventory. This may be useful when a certain sequence of parts is always used in many different assemblies, but the parts are actually assembled at the same time as the top assembly. Any components reporting to a phantom will be picked and assembled with the assembly to which the phantom reports.
|
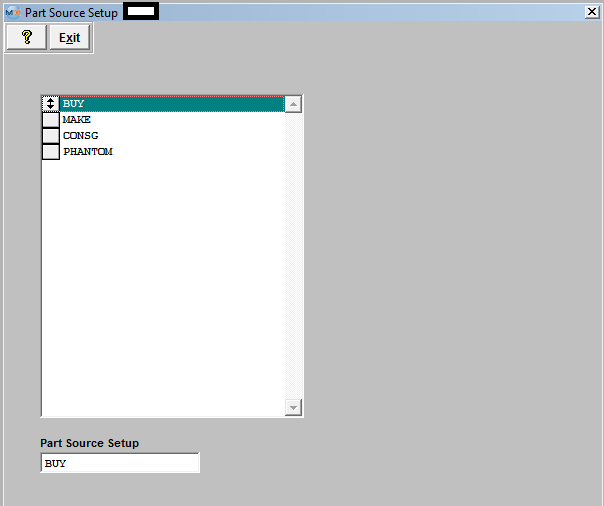
| 1.4.3.4. How To ..... for Part Source |
| 1.4.3.4.1. Setup the Part Source | ||||
|
The following screen will be displayed:
The Part Source screen is presented so that the user may rearrange the order of the presentation of the sources. If the user most frequently uses consigned parts, then the CONSG tab should be at the top of the list, probably followed by MAKE parts, etc. This table is hard coded in the system. Therefore it is not necessary for the user to enter any information here. This is a requirement to setup the item master in the Inventory Control Management module.
These items may be sorted in any order by clicking on and dragging the box on the left side, to the (vertical) position desired. This order will be the order displayed in the pull downs when using this list in other modules within the system. Suggestion: Have the one most used at the top of the list. «Mark as Completed in RoadMap Section B Item 4-a» |
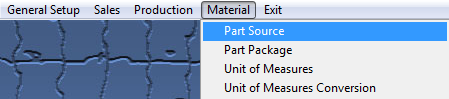
| 1.4.4. Part Package |
| 1.4.4.1. Prerequisites for Part Package |
|
Complete the attached worksheet and "Mark as Completed RoadMap Section B Item 4-b" before continuing the setup. User MUST have full rights to the "System Setup" in System Security . Users with “Supervisor Rights” will automatically have access.
|
| 1.4.4.2. Introduction for Part Package |
When parts are purchased, they may have several different kinds of packaging. Some examples of the way parts may come are:
in boxes at the convenience of the vendor
in reels for automatic machine operations in tubes for automatic and semi-automatic operations
in crates for protection and handling
on pallets for handling
in barrels for storage
in six-packs for convenience
in bulk
The user may identify these packaging properties in the item master descriptions for parts so that the rest of the company will know what to expect in the way of storage and handling when the parts arrive and must be stored or issued to production. The package descriptions entered may be up to 15 characters long. |
| 1.4.4.3. Fields & Definitions for Part Package Setup |
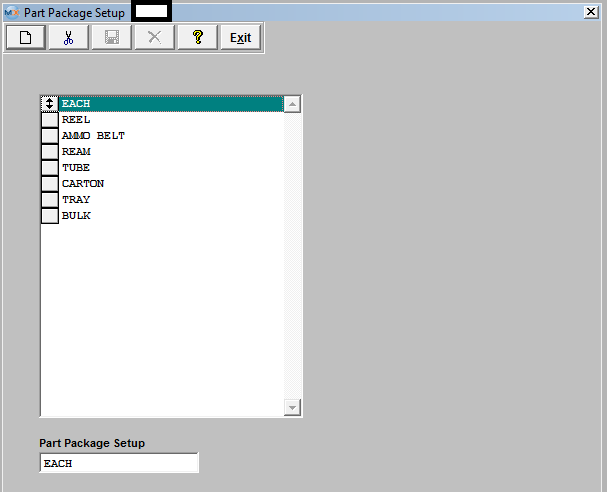 When parts are purchased, they may have several different kinds of packaging. Some examples of the way parts may come are: in boxes at the convenience of the vendor
in reels for automatic machine operations in tubes for automatic and semi-automatic operations
in crates for protection and handling
on pallets for handling
in barrels for storage
in six-packs for convenience
in bulk
The user may identify these packaging properties in the item master descriptions for parts so that the rest of the company will know what to expect in the way of storage and handling when the parts arrive and must be stored or issued to production. The package descriptions entered may be up to 15 characters long. |
| 1.4.4.4. How To ..... for Part Package |
| 1.4.4.4.1. Setup the Part Package Module | ||||
The following screen will be displayed:
This field is to specify the kind of package the part must be in so the parts can be used in certain specific kind of machine, processing, handling, etc. This is particularly helpful if a part can be packaged so the automatic machine can accept them directly. This information is used in all materials modules including Material Requirements Planning and Purchasing. Part package examples are: Reel, Tube, Tray, Bulk, etc. The user begins entry of a new package by selecting the Add button from the main tool bar, then enters the data in the window at the bottom of the page. When satisfied that the data was entered correctly, select the Save button from the main tool bar, and the item will be added to the list. Items may be deleted by highlighting the item and selecting the Delete button from the main tool bar.
These items may be sorted in any order by dragging the box on the left side, to the (vertical) position desired. This order will be the order displayed in the pull downs when using this list in other modules within the system. Suggestion: Have the one most used at the top of the list. Where Used: Inventory Item Master.
«Mark as Completed in RoadMap Section B Item 4-b» |
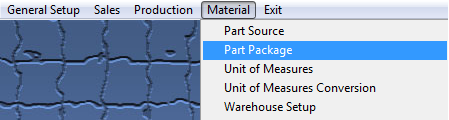
| 1.4.5. Unit of Measures |
| 1.4.5.1. Prerequisites for Unit of Measures |
Complete the attached worksheet and "Mark as Completed RoadMap Section B Item 4-c before continuing the setup.
User MUST have full rights to the "System Setup" in System Security . Users with “Supervisor Rights” will automatically have access.
Note: Purchasing units of measure, if different than the stocking units of measure, must have a conversion factor entered in order for ManEx Material Requirements Planning and Purchasing modules to correctly interpret the amount of material required. Identifying the purchasing unit and the stocking unit and a factor between the two does this. For example, 1 foot = 12 inches, and 12 is the conversion factor.
|
| 1.4.5.2. Introduction for Unit of Measures |
When parts or assemblies are stored in the storeroom, or used in Bills of Materials, the unit of measure must be defined. It is important to know if a particular wire is stored in inventory, if it is 100 inches, 100 feet, 100 yards, etc. This definition is required so that when items are counted and removed from stock inventory, it is clear what the quantity numbers represent. Other examples might be ounces, pounds, quarts, gallons, pints, milliliters, liters, etc. It is also possible to purchase material in different units of measure than the material is accounted for in stock inventory and bills of materials. For example, wire might be purchased in feet, yards or miles, but because of the way that it is used in manufacturing, is probably stored and issued in inches. All units of measure, for both stock inventory and purchasing, are to be entered in this screen, if not already available. Once a unit of measure is entered in this screen, it can never be removed as the value of any purchases and inventory depends on having a unit of measure associated with it. Manex is provided with a number of units of measures. The length of the unit of measure field is 4 characters.
« Purchasing units of measure, if different than the stocking units of measure, must have a conversion factor entered in order for MANEX Material Requirements Planning and Purchasing modules to correctly interpret the amount of material required. Identifying the purchasing unit and the stocking unit and a factor between the two does this. For example, 1 foot = 12 inches, and 12 is the conversion factor. |
| 1.4.5.3. Fields & Definitions for Unit of Measures |
| 1.4.5.3.1. Unit of Measures Setup |
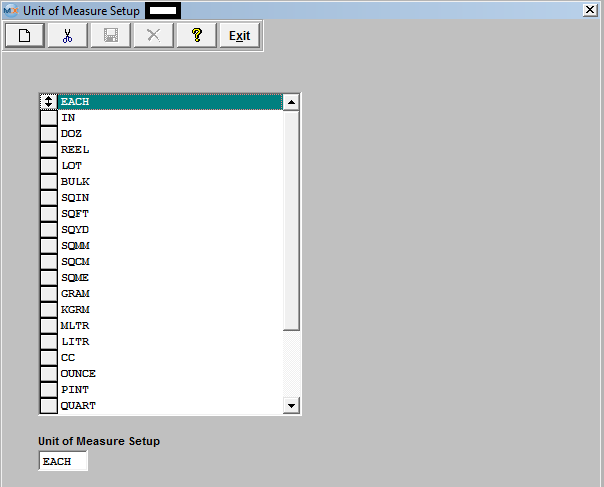 Manex is provided with a number of units of measures. The length of the unit of measure field is 4 characters. When parts or assemblies are stored in the storeroom, or used in Bills of Materials, the unit of measure must be defined. It is important to know if a particular wire is stored in inventory, if it is 100 inches, 100 feet, 100 yards, etc. This definition is required so that when items are counted and removed from stock inventory, it is clear what the quantity numbers represent. Other examples might be ounces, pounds, quarts, gallons, pints, milliliters, liters, etc.
It is also possible to purchase material in different units of measure than the material is accounted for in stock inventory and bills of materials. For example, wire might be purchased in feet, yards or miles, but because of the way that it is used in manufacturing, is probably stored and issued in inches. All units of measure, for both stock inventory and purchasing, are to be entered in this screen, if not already available. Once a unit of measure is entered in this screen, it can never be removed as the value of any purchases and inventory depends on having a unit of measure associated with it. |
| 1.4.5.4. How To ..... for Unit of Measures |
| 1.4.5.4.1. Setup the Unit of Measures | ||||
|
The followng screen will be displayed:
Data in this table is already entered in the basic system. Therefore, it is not necessary for the user to enter any information here, but the user may have some specific requirements that they may wnat to add to the table. Unit Of Measure table is used in all materials related modules.
To add, select the Add button from the main tool bar. Enter a new Unit of Measure. Select the Save button from the main tool bar. These items may be sorted in any order by clicking on and dragging the box on the left side, to the (vertical) position desired. This order will be the order displayed in the pull downs when using this list in other modules within the system. Suggestion: Have the one most used at the top of the list. Where Used: In all Purchasing and Receiving Modules
«Mark as Completed in RoadMap Section B Item 4-c»
|
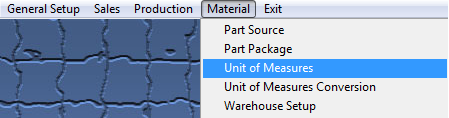
| 1.4.6. Unit of Measures Conversion |
| 1.4.6.1. Prerequisites for Unit of Measures Conversion |
Complete the attached worksheet and "Mark as Completed RoadMap Section B Item 4-c before continuing the setup.
User MUST have full rights to the "System Setup" in System Security . Users with “Supervisor Rights” will automatically have access.
Note: Purchasing units of measure, if different than the stocking units of measure, must have a conversion factor entered in order for ManEx Material Requirements Planning and Purchasing modules to correctly interpret the amount of material required. Identifying the purchasing unit and the stocking unit and a factor between the two does this. For example, 1 foot = 12 inches, and 12 is the conversion factor.
|
| 1.4.6.2. Introduction for Unit of Measure Conversion |
When parts or assemblies are stored in the storeroom, or used in Bills of Materials, the unit of measure must be defined. It is important to know if a particular wire is stored in inventory, if it is 100 inches, 100 feet, 100 yards, etc. This definition is required so that when items are counted and removed from stock inventory, it is clear what the quantity numbers represent. Other examples might be ounces, pounds, quarts, gallons, pints, milliliters, liters, etc. It is also possible to purchase material in different units of measure than the material is accounted for in stock inventory and bills of materials. For example, wire might be purchased in feet, yards or miles, but because of the way that it is used in manufacturing, is probably stored and issued in inches. All units of measure, for both stock inventory and purchasing, are to be entered in this screen, if not already available. Once a unit of measure is entered in this screen, it can never be removed as the value of any purchases and inventory depends on having a unit of measure associated with it. Manex is provided with a number of units of measures. The length of the unit of measure field is 4 characters.
« Purchasing units of measure, if different than the stocking units of measure, must have a conversion factor entered in order for MANEX Material Requirements Planning and Purchasing modules to correctly interpret the amount of material required. Identifying the purchasing unit and the stocking unit and a factor between the two does this. For example, 1 foot = 12 inches, and 12 is the conversion factor. |
| 1.4.6.3. Fields & Definitions for Unit of Measures Conversion |
| 1.4.6.3.1. Unit of Measure Conversion |
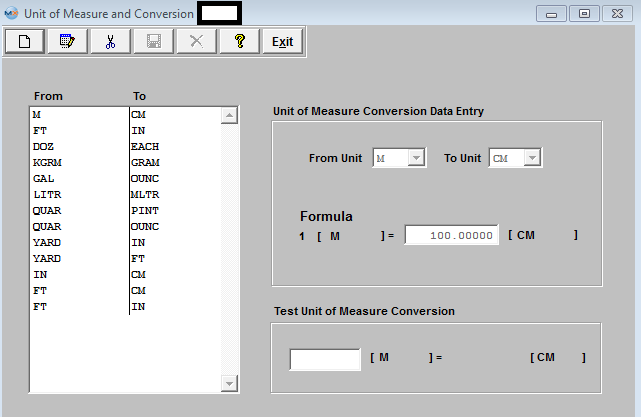 If Purchasing units of measure, is different than the stocking units of measure, there must be a conversion factor entered in order for ManEx Material Requirements Planning and Purchasing modules to correctly interpret the amount of material required. Identifying the purchasing unit and the stocking unit and a factor between the two does this. For example, 1 foot = 12 inches, and 12 is the conversion factor. |
| 1.4.6.4. How To ..... for Unit of Measure Conversion |
| 1.4.6.4.1. Setup the Unit of Measures Conversion | ||||
|
The followng screen will be displayed:
Data in this table is already entered in the basic system. Therefore, it is not necessary for the user to enter any information here, but the user may have some specific requirements that they may want to add to the table. Unit Of Measure table is used in all materials related modules.
Prerequisites
Each Unit of Measure must be in the Unit of Measures table before establishing a conversion factor. When the user expects to purchase material in different units than which it is stored and used in BOMs, the conversion factors are required.
To ADD a new conversion, select the Add button from the main tool bar, select the "From Unit" (for purchasing) from the pull down, then select the "To Unit" (for stocking) from the pull down, then enter the conversion formula. The user may test the equation by entering in the same number in the "Test Unit of Measure Conversion" field you entered above into the formula field, depress enter and the exact same formula should appear in the test section. When the user is satisfied with the equation, select the Save button from the main tool bar. Conversion factors already entered may be Edited or Deleted but the user must be aware of any currently open orders using the factor.
Where Used: In all Purchasing and Receiving Modules
«Mark as Completed in RoadMap Section B Item 4-c»
|

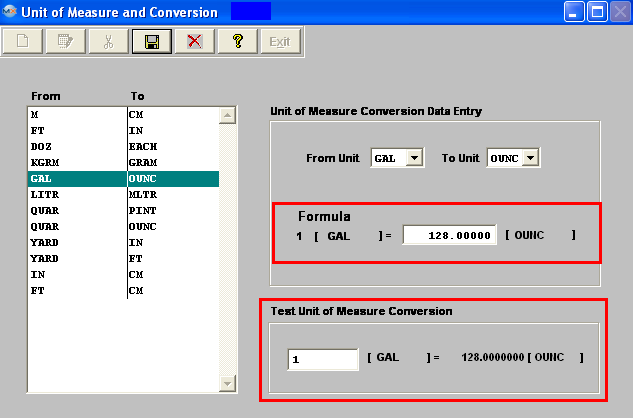
| 1.4.7. Warehouse Setup |
| 1.4.7.1. Prerequisites for Warehouse Setup |
|
Complete the attached worksheet and "Mark as Completed RoadMap Section B Item 4-d before continuing the setup.
To Add, Edit, or Save a Warehouse the user MUST have "System Setup" rights within the System Security module and also MUST have "Warehouse Setup" rights within the Accounting Security module.
Note: If you have "Supervisor Rights" in the System Security module the Warehouse Setup module will still require you to have "Warehouse Setup" rights in the Accounting Security and vis-versa if you are an Accounting Supervisor you will still be required to have "System Setup" rights in the System Security module to Add, Edit, or Save a Warehouse in Warehouse Setup.
If the user is using the Accounting Module, the General Ledger Accounts must be completed.
Note: The GL numbers are required if the ACCOUNTING Module is active. ManEx recommends choosing the accounting GL numbers with care because we do NOT recommend changing them once the selection is saved. WIP and MRB GL numbers must be unique. |
| 1.4.7.2. Introduction for Warehouse Setup |
ManEx users may identify an unlimited number of warehouses in which to store materials. If the user wishes, it is possible to establish a wide variety of warehouses for special needs. If the user is involved with much consigned activity, it is possible to set up a warehouse for each customer and their material. A warehouse might be set up as a secure location for very high value material, with additional physical security precautions to access this area.
|
| 1.4.7.3. Fields and Definitions for Warehouse Setup | |||
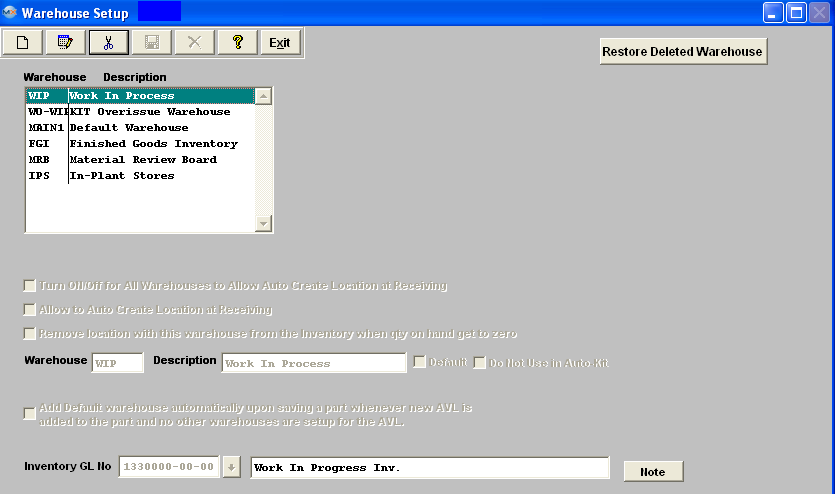 ManEx users may identify an unlimited number of warehouses in which to store materials. If the user wishes, it is possible to establish a wide variety of warehouses for special needs. If the user is involved with much consigned activity, it is possible to set up a warehouse for each customer and their material. A warehouse might be set up as a secure location for very high value material, with additional physical security precautions to access this area. For those users who want to separate the Finished Goods from the Raw Materials Inventory, be sure to include a Finished Goods Warehouse. The MRB (Materials Review Board) Warehouse is required for the DMR (Discrepant Material Return) module. There are at least two warehouses that cannot be removed from the system: WIP and WO-WIP. These warehouse locations are used by ManEx to track materials within the manufacturing process. For more detail on WO-WIP see Article #3061. Also, any warehouse that has material purchased to be placed in it, or has inventory in it, may NOT be deleted. All other warehouses may be deleted.
One warehouse must be selected as the default warehouse. This is normally Main1 Warehouse. 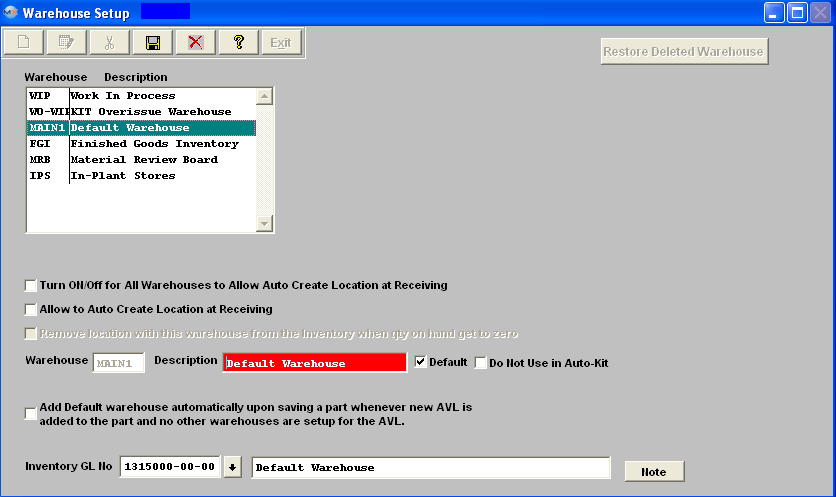
|
| 1.4.7.4. How To ..... for Warehouse Setup |
| 1.4.7.4.1. Setup the Warehouse Setup Module | ||||||||
|
The following screen will appear:
To add a new warehouse, depress the Add button. Enter your password. Type the Warehouse abbreviation into the Warehouse window. Type the Description pertaining to the warehouse into the Description window. If this is the default warehouse, check the Default box. (You may have only one default Warehouse, but MUST have at least one.) If there is not default warehouse setup using will receive the following warning upon save:
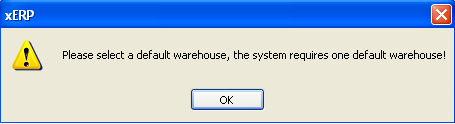 Turn ON/Off for All Warehouses to Allow Auto Create Location at Receiving Box -If this box is UNCHECKED it will not “Allow Auto Create Location at Receiving” for all Warehouses listed in Warehouse setup.If this box is CHECKED it will “Allow Auto Create Location at Receiving” for all Warehouses listed in Warehouse setup. Allow to Auto Create Location at Receiving Box - checking this box will allow user to create a location a the PO level or PO receiving level for this warehouse. Unchecking the Auto Create disables that warehouse from being used on the fly. Remove location with this warehouse from the Inventory when qty on hand gets to zero Box -This will only be available if user checks the “Allow to Auto Create Location at Receiving” box.You would check this box if you want the Warehouse and location created at the Inventory level, PO level or PO Receiving level to be rendered inactive (made invisible in most screens) from that Inventory part once the inventory reaches “0”. If the user de-kitted the work order, that same warehouse would be reactivated and product inserted. Default Box – If none of the WHSE or Inventory AVL's are marked for Auto-location creation then the system will automatically assign the default whse upon creation of a brand new part number/avl. If you have the auto-location creation option enabled for the WHSE and AVL then the system will leave the WHSE section blank for new parts, and allow users to create new locations from PO Receiving. Do Not Use in Auto-Kit – If this box is checked this warehouse will not be used in Auto-Kitting. Add Default warehouse automatically upon saving a part whenever a new AVL is added to the part and no other warehouses are setup for the AVL -If this box is checked the system will add a warehouse within the Inventory module upon saving the record even if the Allow to Auto Create Location at Receiving box is checked.
If accounting is installed, depress the Inventory GL No field down arrow. The following GL Number account selection will appear: Depress the down arrow next to the Find By field. Choose between Account Type or Account Numbers. Depending upon your selection, either GL Types or Account Numbers will appear. Highlight the number of choice. Depress the Ok button. he account number will appear in the Inventory GL Number field. Repeat this process for the selection of the Shrinkage GL number. (Note: The GL numbers are required if the ACCOUNTING Module is active. ManEx recommends choosing the accounting GL numbers with care because we do NOT recommend changing them once the selection is saved. WIP and MRB GL numbers must be unique.
Depress the Save button. The following message will appear: If you are totally satisfied with your selection, depress the OK button. If there has been no activity in the Warehouse, the user may delete it. Highlight the warehouse. Depress the Delete button. (Note: You cannot delete a default warehouse. So, if you want to delete a default warehouse, you must create or assign the default status to another warehouse first.) You will receive a message to confirm the deletion. Depress the Yes button to confirm the deletion. Where Used: In all Materials, Production and WIP functions «Mark as Completed in RoadMap in Sect. B Item 4-d» |
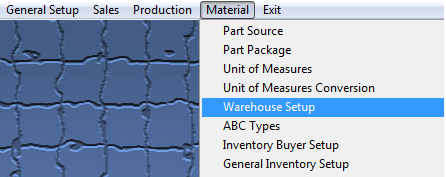
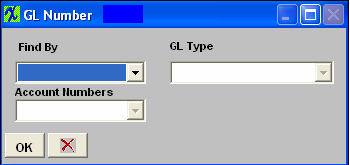
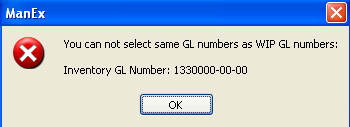
| 1.4.7.4.2. Edit an Existing Warehouse | ||||
The following screen will be displayed:
Highlight the warehouse you would like to edit and depress the Edit button, all fields are editable with the exception of the Warehouse field.
 If user decides to change the GL number the following reminder message will be displayed: Note: ManEx does NOT recommend changing the GL numbers once they have been setup.
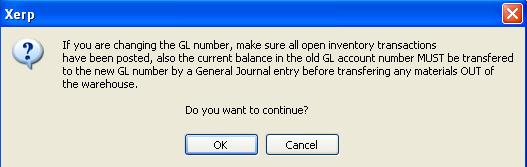 |
| 1.4.7.4.3. Restore Deleted Warehouse | ||||
The following screen will be displayed:
Depress the "Restore Deleted Warehouse" Button and a selection screen will appear:
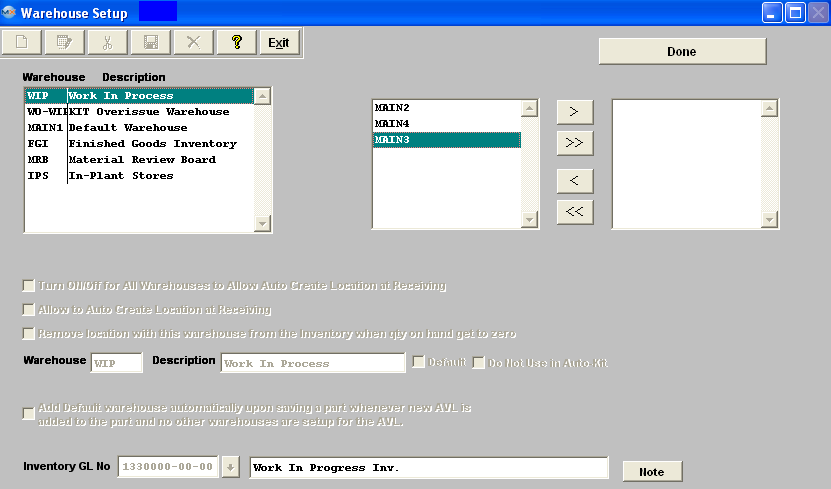 Highlight the selection and depress the (<) arrow to move your selection to the right screen.
 Once selection has be made depress the "Done" button and the warehouse(s) selected will be restored.
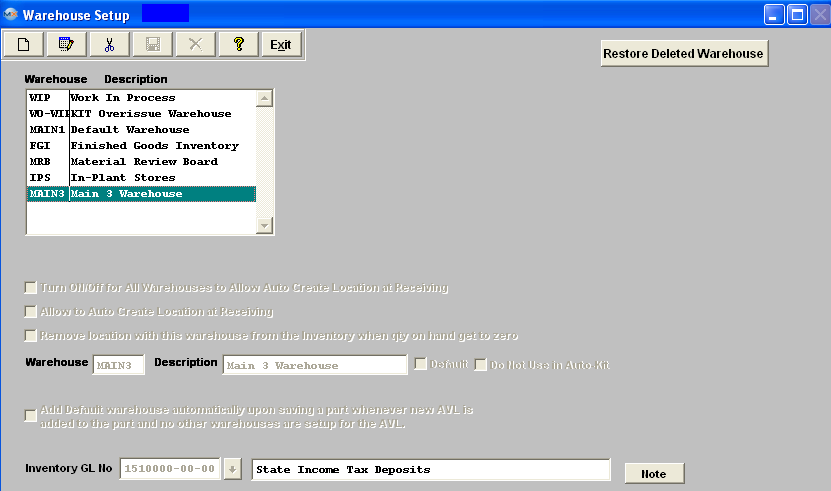 |
| 1.4.8. ABC Types |
| 1.4.8.1. Prerequisites for ABC Types |
|
Complete the attached worksheet and "Mark as Completed RoadMap Section B Item 4-e before continuing the setup. User MUST have full rights to the "System Setup" in System Security . Users with “Supervisor Rights” will automatically have access.
|
| 1.4.8.2. Introduction for ABC Types |
This section is provided to setup ABC Code template table. This information is used in the item master during add or edit mode. ABC types are used when setting up part class and types, which in turn are used when adding an inventory part to the item master. ABC codes are used as an aid to manage inventory tracking. Traditionally, ABC codes are established to divide the inventory by value, and to guide in the cycle counting of inventory. First the value of all inventory in stock is added up and listed by part in order of the highest extended value first. Then, the top 80 % of the parts value would be classified as “A” items, and will probably consist of about 10-15% of the inventory part numbers. The next 15% of the value items would be classified as “B” items, and will be in the neighborhood of 20-40% of the part numbers. The last 5% of the value will be classified as “C” items, and represent at least 50% of the part numbers.
ManEx allows the user to differentiate between assemblies and components. Users may create a setup of ABC (and DEFG...if they choose) for components (buy/consigned parts) and a different set (e.g. MNO) for assemblies. The reason for this is that it is likely that the assemblies may need tighter control than the ranges available for the whole inventory, and the user has the option of differentiating between components, and assemblies. If a user is carrying components in finished goods inventory to ship to a customer, they will still be counted as components in the ABC group. The type of warehouse is not considered when calculating cycle counts (except for in-house items, regardless of where they are stored). |
| 1.4.8.3. Fields and Definitions for the ABC Types | ||||||||||||||||||||||||||||||||||||||
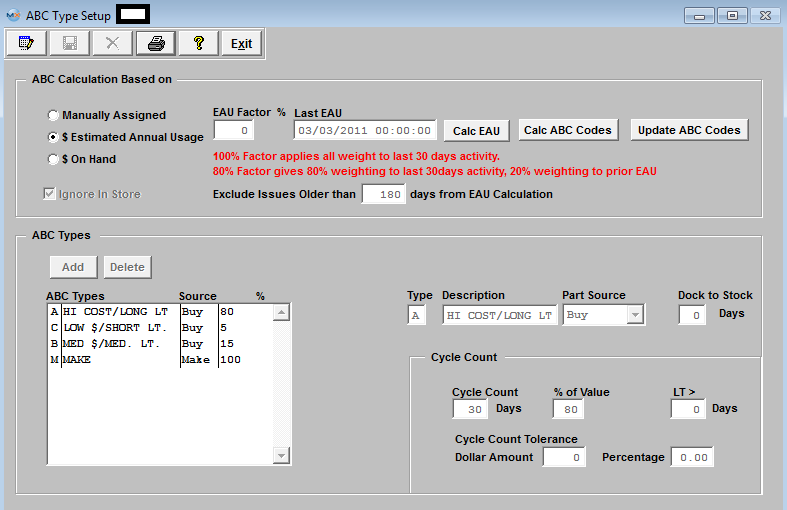 ABC Calculation Based on:
ABC Types:
|
| 1.4.8.4. How To ..... for ABC Types |
| 1.4.8.4.1. Setup the ABC Types | ||||
|
The following screen will be displayed:
The "ABC calculation based on:" affects the meaning of the % of Value field. If Manual has been selected then it does not apply. If $ Estimated Annual Usage (EAU) has been selected, then it is EAU x STD cost and % of that value (top 80%, 15-80%, etc) If $ On-Hand has been selected, then it is On-Hand x STD cost and % of that value (top 80%, 15-80%, etc).
ABC Codes will be calculated using the information in the % value and LT> fields. These fields are used to determine which parts should have their ABC codes automatically adjusted. After the ABC codes are updated, those parts will be included with the appropriate group for cycle counting.
Check the "Ignore In-Store" box only if you do NOT want the In-Store warehouses to be included in the Cycle Counts, regardless of which Calculation Based on is selected. Depress the Edit button. Select the "ABC Calculation based on" by clicking on the appropriate radio. If the user selects $ Estimated Annual Usage, the following screen will appear. Type in the EAU factor. then depress the "Calc EAU" button will update the EAU field within the ICM screen. This button will only be available if the screen is in "EDIT" . Depressing this button will update the EAU field within the ICM screen. The term EAU, (ESTIMATED Annual USAGE) may be considered as consumption, depletion, loss, used up, etc. So the EAU calculations MUST include the In-store issues to be accurate. If a user is issuing a part out of in-store to a Sales Order to be shipped the parts still count as an issue, or usage and was consumed, so it is necessary to include them when considering plans for future usage. If a user were to deliver ALL material directly to work orders from in-house, and these transactions were not included, there would be no calculated EAU. This is why we do NOT allow in-store issues to be ignored. The only time in-store issues will NOT be calculated in the EAU is if they are being returned to the vendor through Inventory Handling. 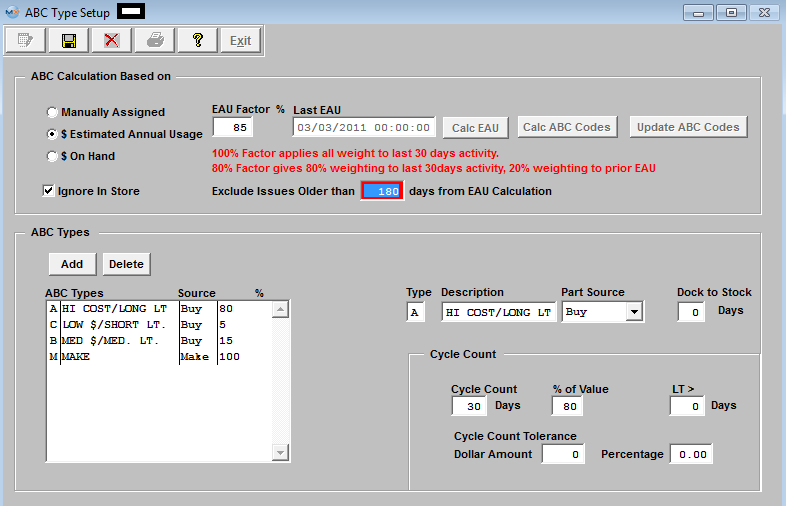 Depress the Save button. 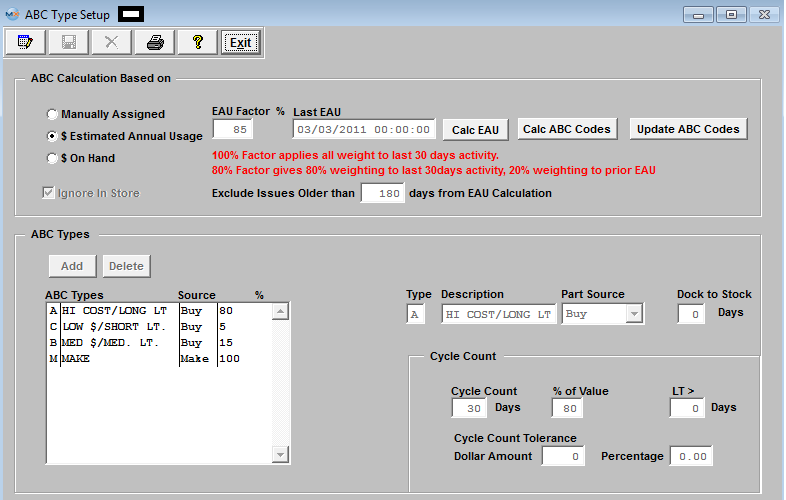 User can then depress any of the Calculation buttons.
If the "Calc EAU" button will update the EAU field within the ICM screen. The Last EAU date will fill in. If the "Calc ABC Codes" button is depressed, this button will use the information in the % value and LT> fields to determine which parts should have their ABC codes automatically adjusted. After the ABC codes are updated, those parts will be included with the appropriate group for cycle counting. If the "Update ABC Codes" button is depressed this button will use the information in the % value and LT> fields to determine which parts should have their ABC codes automatically adjusted. After the ABC codes are updated, those parts will be included with the appropriate group for cycle counting.
The user then sets up an inventory counting program called “Inventory Cycle Count”, which assists in counting all inventory over a period of time. The “A” items might be counted completely within each month. Therefore, a list of all of the “A” items (the highest dollar value) is generated, and randomly divided into 20 days, and each day 1/20th of the list counted and checked. The “B” items might be checked every quarter, and the “C” items checked once a year. This is a way to verify the accuracy of stockroom transactions, and to take measures necessary to keep the counts accurate. Type the ABC Types into the appropriate boxes.
The ABC code identifies a part source for inventory parts. Because MANEX allows up to 26 ABC codes, it also provides for identifying if a part is a make or buy part. Click on the desired Part Source radial, either Buy or Make. Enter the Dock to Stock days. In MANEX, the ABC codes have a slightly different meaning. In addition to identifying the most or least expensive part numbers, a Dock to Stock period may be included in each ABC code. Dock to Stock is the number of days a part is expected to take to be delivered to the stock room after the part is received on the user’s dock. Also, for each ABC code, MANEX provides a cycle count tolerance, which, if exceeded, will result in reporting unfavorable results during cycle counting. These tolerances may be an absolute dollar value, or a percentage of the inventory being counted. In the Cycle Count section, enter Cycle Count Days (NOTE: This field MUST be populated with a number other than "0". If "0" is entered these parts will NOT be included in the Cycle Count), % of Value, Lead Time Greater than, and Cycle Count Tolerances: Dollar Amount and Percentage. The user must either depress the Save or Abandon changes button. Where Used: In all Part Type Setup, Inventory Item Master, Material Requirements Planning and Cycle Count functions.
«Mark as Completed in RoadMap in Sect. B Item 4-e» |
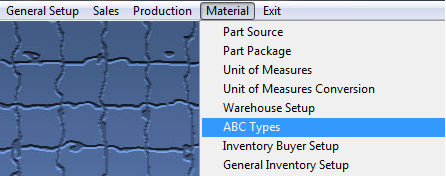
| 1.4.8.5. Reports for the ABC Types |
To obtain the ABC Setup Reports within the Web, select the WEB Print button from the ManEx action buttons at the top of the screen. For further detail on How the Reports work within the Web refer to Article #5477.
Note: In order to access the Reports within the Web the Company Root URL must be setup within the System Appearance module and user must be linked to web within the System Security Module.
Select
the Report Type: ABC Setup - A List of Reports will be displayed that are
available on the Web for ABC SETUP 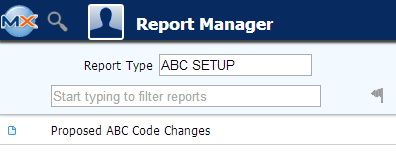 To obtain the ABC Setup Reports, select the Print button from the ManEx action buttons at the top of the screen. The following reports screen will display a list of reports that are available on the ManEx Desktop:
Highlight the Proposed ABC Changes Report and depress the OK button, the following screen will be displayed: (Note: This Report is available on the WEB also)
Highlight the type of parts and depress the > button. If you want both types of parts, depress the >> button.
Select "Proposed Changes Only" or "All Parts" Depress the OK button. The following report is available:
|
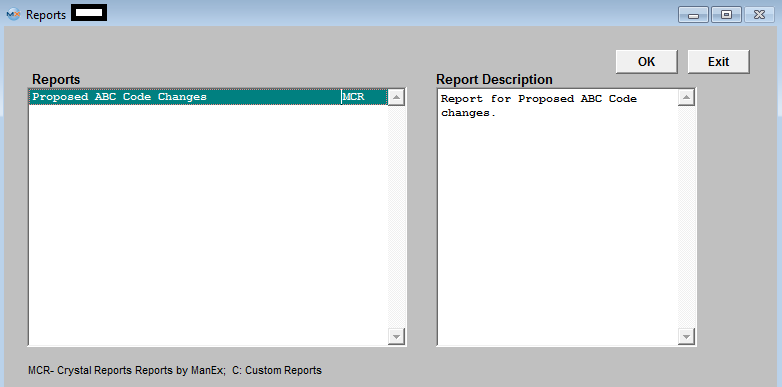
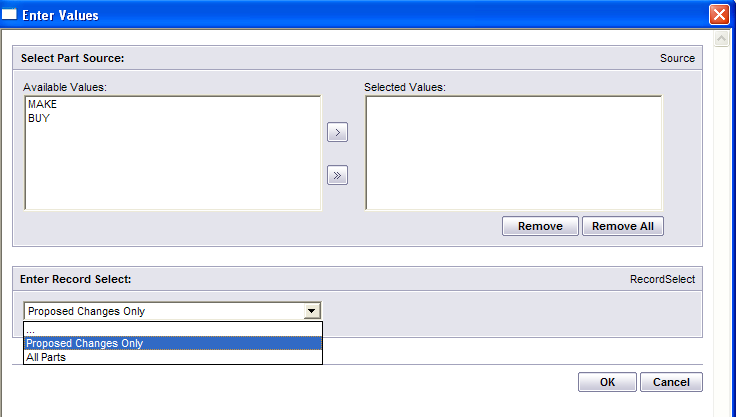
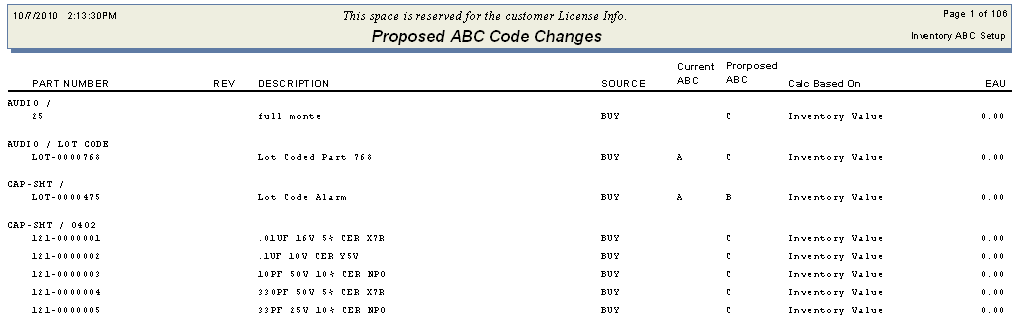
| 1.4.9. Inventory Buyer Setup |
| 1.4.9.1. Prerequisites for Inventory Buyer Setup |
Complete the attached worksheet and "Mark as Completed RoadMap Section B Item 4-f before continuing the setup.
User MUST have full rights to the "System Setup" in System Security . Users with “Supervisor Rights” will automatically have access. |
| 1.4.9.2. Introduction for Inventory Buyer Setup |
| This is the section to enter all the inventory buyers responsible for procuring materials. This is a requirement when adding to or editing the item master record. This information is used when setting up Part Class and Type in system setup. |
| 1.4.9.3. Fields and Definitions for the Inventory Buyer Setup |
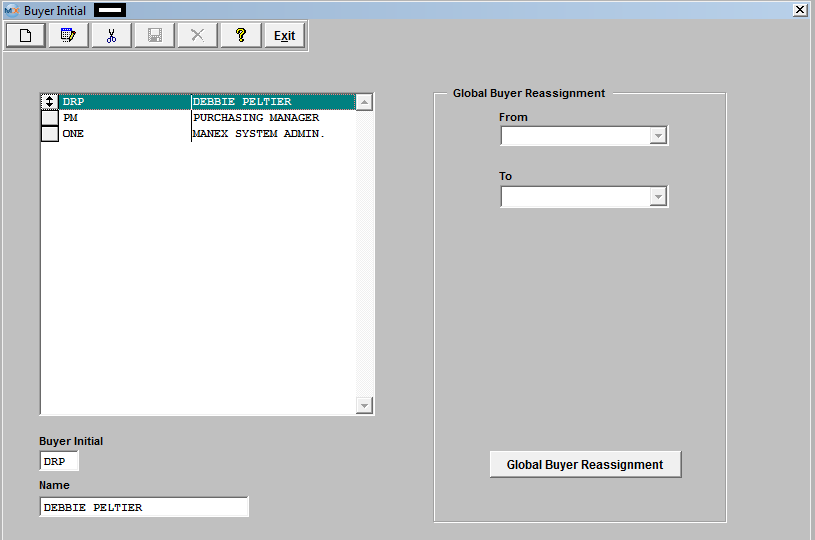 For inventory parts, it is often useful to assign code to parts of the person responsible for buying the parts. This makes it easy for receiving to resolve any issues with incoming material, and it makes it easy to divide up the workloads in purchasing. Also, several reports are available which can be sorted by the buyer code. One valuable report is the order actions necessary to be taken as a result of running MRP. The buyers may have a list of only those parts affecting their own workload, and not be burdened with looking at all of the rest of the actions. Also, shortages may be better resolved with the inclusion of a buyer code for the part number. ManEx provides the ability to assign a three-character buyer code to each part. ManEx also provides for the eventuality that the buyer codes will change from time to time, and provides a buyer reassignment utility to change all parts for a specific buyer to another buyer. |
| 1.4.9.4. How To ..... for Inventory Buyer Setup |
| 1.4.9.4.1. Setup the Inventory Buyer Setup Module | ||||
|
The following screen will be displayed:
To add and Inventory Buyer, depress the Add button. Type in the Initial, type in the Buyer Name. Depress the Save or Abandon changes button. These items may be sorted in any order by clicking on and dragging the box on the left side, to the (vertical) position desired. This order will be the order displayed in the pull downs when using this list in other modules within the system. Suggestion: Have the one most used at the top of the list. Where Used: In all Part Type Setup, Inventory Item Master and Material Requirements Planning functions.
«Mark as Completed in RoadMap in Sect B Item 4-f» |
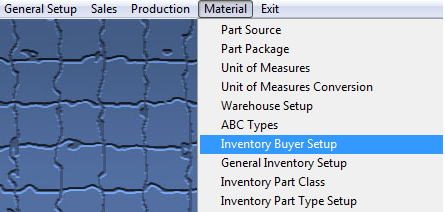

| 1.4.9.4.2. Global Buyer Re-assignment |
Global Buyer Reassignment is a utility program that allows users to replace current inventory buyers of all items linked to a buyer to another buyer. This is helpful when a buyer goes on vacation or leaves the company. To reassign, depress the Global Buyer Reassignment button.
 Depress the OK button to continue.
Depress the down arrow next to the From field. A list of existing buyers will appear. Select the buyer to be changed. Depress the down arrow next to the To field. Select the To buyer. Depress the Done button. All of the records (inventory part class/type setup, inventory, and purchase order) associated with the From buyer will update to the To buyer. If the the "Done" button is depress with the From and To fields blank, user will receive the following message:
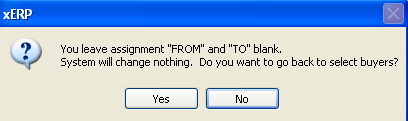
User MUST depress the "DONE" button for the changes to be made to the records.
|
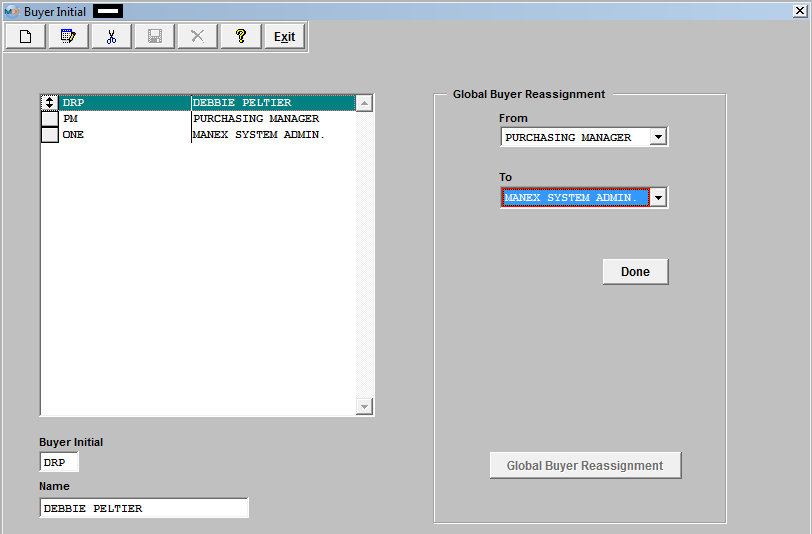
| 1.4.10. General Inventory Setup |
| 1.4.10.1. Fields and Definitions - General Inventory Setup | ||||||||||||||
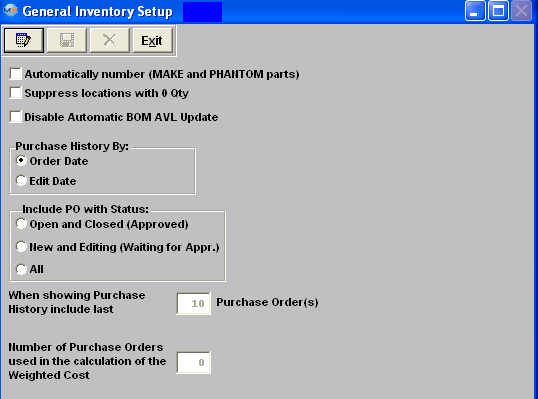
|
| 1.4.10.2. How To ..... General Inventory Setup | ||||||||||||||||||
The following screen will be displayed:
|
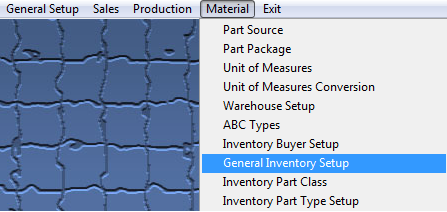
| 1.4.11. Inventory Part Class |
| 1.4.11.1. Prerequisites for Inventory Part Class |
|
Complete the attached worksheet and "Mark as Completed RoadMap Section B Item 4-g before continuing the setup. User MUST have full rights to the "System Setup" in System Security . Users with “Supervisor Rights” will automatically have access. |
| 1.4.11.2. Introduction for Inventory Part Class |
The inventory class and types are one of the most powerful parts of the ManEx system. These classifications allow the users to break up large inventories into groups and sub-groups. The smaller groups make it easier to locate an item, to view reports by classes, and easier to identify a part. In ManEx, it also guides users in the addition of new parts, insuring that there are common approaches to descriptions for common parts. ManEx even will allow for automatic part number generation, where the user has to only enter a description, after selecting a part class and type. Utilization of the class and types greatly simplifies the amount of information that must be contained in the description and part number for each part. The user must enter part classes for each part, but is not required to enter part types. However, without the part types established, the user is required to enter much more data when adding specific items to the item master.
Manex uses the Part Class and Type as an extension to the description of the part. Therefore it will be displayed throughout the system on screen and in reports as an extension of the description. |
| 1.4.11.3. Fields and Definitions for Inventory Part Class | ||||
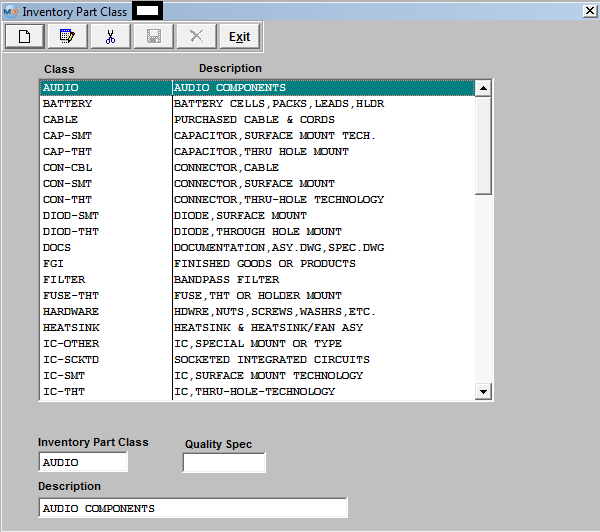
Once a part classification has been established, then sub-groups may be assigned to each class. The sub-groups are called Part Types, and each part type may have a number of different characteristics associated with it.
|
| 1.4.11.4. How To ..... for Inventory Part Class |
| 1.4.11.4.1. Add, Edit, or Delete a Part Class | ||||
|
The following screen will be displayed:
To ADD a part class depress the Add button from the main tool bar. 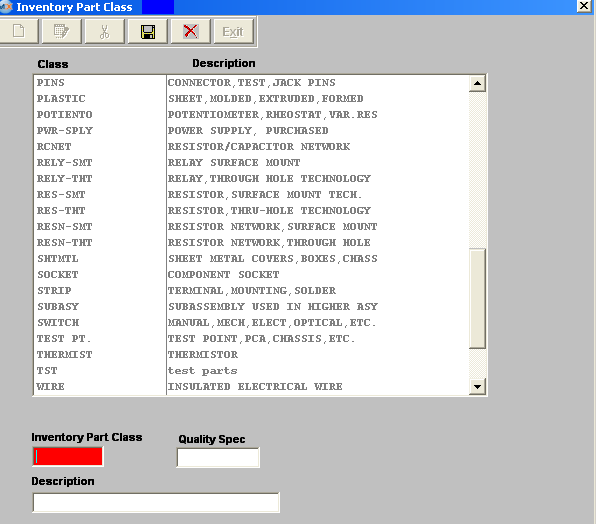 Enter in the Inventory Part Class, Description and Quality Spec information. Depress the Save button from the main tool bar to Save, depress the Abandon Changes button from the main tool bar to abandon changes. To EDIT a part class highlight the part class that you want to make changes to, depress the Edit button from the main tool bar.
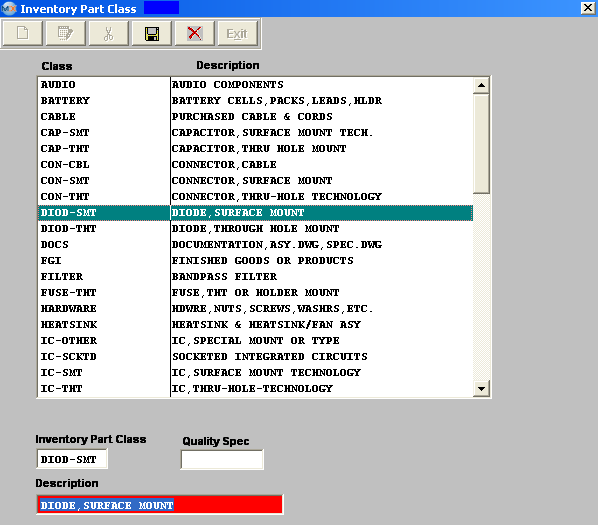 User may edit the Description or Quality Spec. Depress the Save button from the main tool bar to save changes or depress the Abandon Changes button from the main tool bar to abandon changes.
To DELETE a part class highlight the part class that you want to delete, depress the Delete button from the main tool bar. User will receive the followin popup.
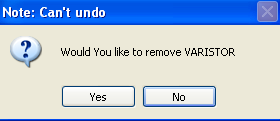 Select "YES" to continue deleting the part class, select "NO" to stop the deletion.
Where Used: In all Material functions.
«Mark as Completed in RoadMap in Sect. B Item 4-g» |
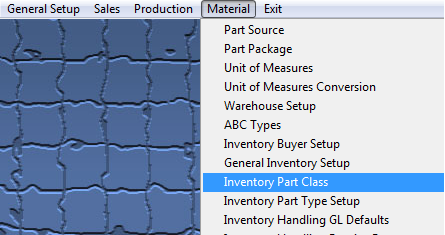
| 1.4.12. Inventory Part Type Setup |
| 1.4.12.1. Prerequisites for Inventory Part Type Setup |
|
Complete the attached worksheet and "Mark as Completed RoadMap Section B Item 4-g before continuing the setup. User MUST have full rights to the "System Setup" in System Security . Users with “Supervisor Rights” will automatically have access. Part Types require Unit of Measure , Part Package , ABC Codes , and Inventory Buyer setups to be available.
|
| 1.4.12.2. Introduction for Inventory Part Type Setup |
The inventory class and types are one of the most powerful parts of the ManEx system. These classifications allow the users to break up large inventories into groups and sub-groups. The smaller groups make it easier to locate an item, to view reports by classes, and easier to identify a part. In ManEx, it also guides users in the addition of new parts, insuring that there are common approaches to descriptions for common parts. ManEx even will allow for automatic part number generation, where the user has to only enter a description, after selecting a part class and type. Utilization of the class and types greatly simplifies the amount of information that must be contained in the description and part number for each part. The user must enter part classes for each part, but is not required to enter part types. However, without the part types established, the user is required to enter much more data when adding specific items to the item master. |
| 1.4.12.3. Fields and Defintions for Inventory Part Type | ||||||||||||||||||||||||||||||||||||||||||||||||||||||||||||||||||||||
 Once a part classification has been established, then sub-groups may be assigned to each class. The sub-groups are called Part Types, and each part type may have a Prefix (number of different characteristics) associated with it.
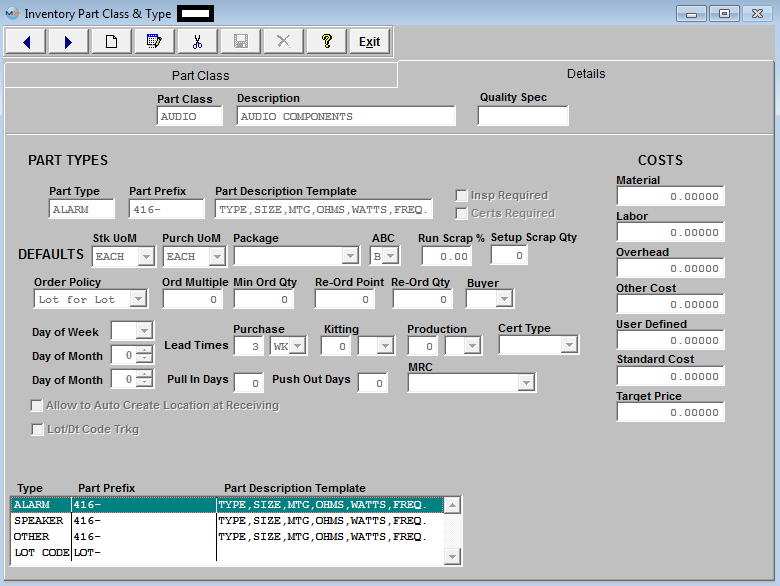 Once a part type is defined, the user’s workload in entering new part numbers is greatly reduced. For each part type, the user may set up parameters for that part type that will automatically be entered as the default condition when adding a new part for the same type.
If the user wishes, there can be a specific prefix (15 characters) added to each part number within a part type to distinguish the component from other types. The use of the prefix is entirely optional, and can be anything the user would like it to be numerical, alphabetical or both. A given prefix is tied to a part type, it is not exclusive, and can be the same prefix for many part types. When using a prefix it must have the "-", this is how the system identitifes it as the prefix. An example of a prefix might be “CS05-”, which would be the prefix for all Ceramic Capacitors in the part type SMT-0805. Then, anyone looking at the part number would know much more than otherwise possible. Also, because the part class and type is assigned to each part number, it may not be necessary to repeat the information in the description, leaving more room for specifics. If a part was in the CS05- type just described, the description would not have to include “SMT 1205” or “CER”, because they are already contained in the part type and prefix. Setting up a prefix is NOT required. Each part type may also have a specific description template (30 characters) assigned to it to be used as a guide when entering new parts. In the example just defined, the template might appear like this: ”value xxFxx%,xxxV”. The words “CAP” and “CER” are not necessary, as all reports print out the class next to the part number. However, the user may wish to include “CAP” to aid in understanding BOMs, and searches based on part descriptions. The template entered in this setup will show under the description when defining a new item number description. In addition to the prefix and description template, additional parameters may be set up and be defaulted into the item master when setting up a new part. These parameters are: Units of Measure, both stocking and purchasing; Packaging, ABC codes, Buyer Code, Run (production) Scrap percentage; Setup Scrap Quantity; Costs – Material, Overhead and/or User Defined, Material Requirements Planning Order Frequency, Order Multiples; Order Minimums; Re-order points (safety stock); Re-order qty; and lead-times for purchasing, kitting and production. There is also provision for MRP adjustment sensitivity in the Push-out, Pull-in days. Each of these will be discussed below. Also, for each part type, the user may define whether or not the parts in the type are to be tracked by lot number and/or date code, inspected at incoming or require certification. There is an option in ManEx for "Automatic Numbering of MAKE and Phantom parts" when they are added to the database. See Article #3510 for further detail.
NOTE: The most expensive parts will probably be with the shortest order policy. This will help control the customer’s inventory turns, and maintain tight control over the parts. On the other hand, the least expensive parts may be better positioned towards monthly purchases, since the cost to process purchase orders may exceed the cost of the parts and of maintaining the inventory. It is up to the user to determine the best balance between order policies, inventory turns and the cost of procurement.
Note: The value of each of these terms may be in days, weeks or months.
Costs – These are the standard (budgeted) costs associated with the item.
The Part Class and Type MUST exist in the setup, if the user wishes to add a part to the item master within the Inventory Control Management module. Once the part class and type are entered, complete the description according to the description template established for the part type in this section. ManEx will then assign a prefix to a new part number according to the prefix in the part type setup, pick the next available sequential number (if automatic part numbering has been selected within the Numbering Setup module), and complete all of the Inventory and Material Requirements Planning module data based on the part type. The user may, if needed later, adjust any of these values within the Inventory Control Management module. |
| 1.4.12.4. How To ..... for Inventory Part Type Setup |
| 1.4.12.4.1. Add, Edit, or Delete a Part Type | ||||
|
The following screen will be displayed: The main screen, Part Class, lists the existing records. Highlighting a part class will show the corresponding types linked to it on the right. The second screen, Details, is where records are created. Re-Order - This gives the user the option to re-sort the order the part types are displayed in the pulldown when setting up parts in the Inventory Control Mgmt module.
 First select the Part Class, the Part Types for this Class will be displayed on the right. The Part Types may be re-sorted by clicking on the REORDER button, click on and drag the box on the left side of the part type desired to the (vertical) position desired. When completed with the re-order, click on the DONE button. This order will be the order displayed in the pull downs when using this list in other modules within the system. Suggestion: Have the one most used at the top of the list.
To add a new part type to a class you must first highlight the Part Class that you want to add the part type to, then enter the Details tab:
Depress the Add button from the main tool bar:
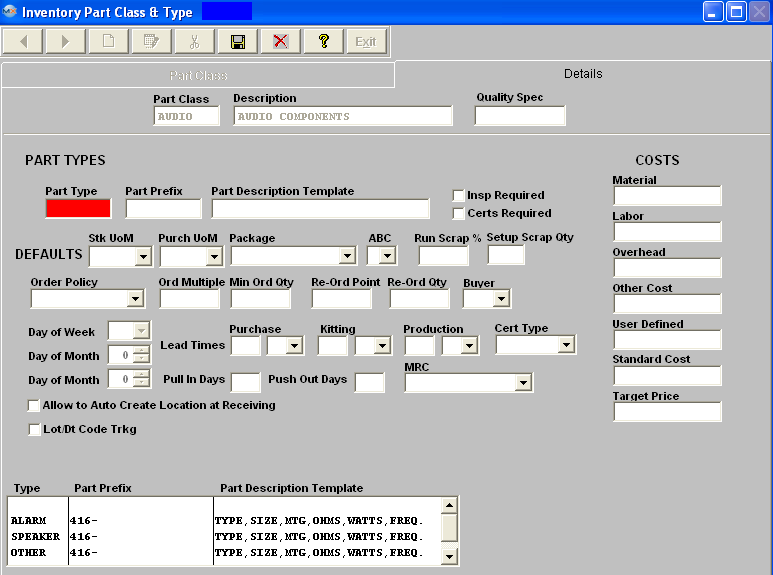 Enter the Part Type, Part Prefix, and Part Description Template. Check whether Inspection and/or Certificates are required. Select the Stock Unit of Measure, Purchasing Unit of Measure, Package, ABC code and Buyer code by depressing on the down arrow next to the field. Type in the Run Scrap %, Setup Scrap Quantity and Cost Information – Material, Labor, Overhead and/or User Defined. The total of the Costs entered will appear in the Standard Cost field. Important Note - If accounting is installed: For all buy parts, the material cost field must have data entered. If this data is missing (or wrong), the Raw Materials Inventory and the Work In Process (WIP) will be incorrect for the accounting records. All make parts which are not labor only (the customer brings you the kit and all you do is apply the labor), must have data entered in the material cost field. Additionally, the data entered in the material cost field for the make part must equal the sum of the Bill of Materials components. (Please refer to Bill of Materials Reports – Bill of Material With Standard Cost.) If the data is missing or wrong on a Make Part, the Work In Process, Cost of Goods Sold and Finished Goods Inventory will be wrong for the accounting records. If the sum of the Bill of Materials components does not equal the standard cost per the Item Master, a configuration variance will generate. Select the Order Policy by depressing on the down arrow next to the field. Enter in the Order Multiple, the Minimum Order Quantity, Re-Order point and Re-Order Quantity. Select the Certificate type by depressing the down arrow next to the field. Select the Day of the Week or Day of the Month by depressing on the down arrow next to the field. Select the Purchase, Kitting and Production Lead Times by entering the number in the appropriate box and depressing on the down arrow to select the Days, Weeks or Months. Type in the Pull In or Push Out days. Check the Lot Code box, if desired. If you select Lot/Date Code tracking, you’ll also be prompted for Auto Date for all Lots and for the product expiration days, as displayed below.
If the user wishes to edit or delete part type information, pressing the Edit or Delete button from the main tool bar enables the user to choose a part type used in the class (assuming there is more than one) and edit or delete it. (NOTE: Users will not be allowed to delete a part type which has active inventory or orders.) After Adding, Editing or Deleting a part type, the user must save the data, by depressing the Save button from the main tool bar.
When saving a new part type the user will receive the following message to remind the user that once this record is saved the Lot/Date code tracking field can not be edited:
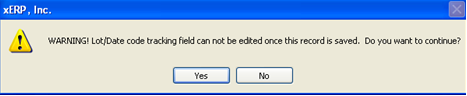 At this time the user can select "YES" to continue the save or "NO" to abort the save.
Where Used: In all Material functions. «Mark as Completed in RoadMap in Sect. B Item 4-g» |
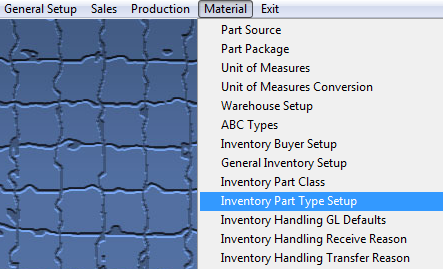

| 1.4.13. Inventory Handling G/L Defaults |
| 1.4.13.1. Prerequisites for Inventory Handling GL Defaults |
|
Complete the attached worksheet and "Mark as Completed RoadMap Section B Item 4-h before continuing the setup. All applicable General Ledger Account Numbers must be set up in the G/L Account Setup module.
User MUST have full rights to the "System Setup" in System Security . Users with “Supervisor Rights” will automatically have access. |
| 1.4.13.2. Introduction for Inventory Handling GL Defaults |
This section sets up the General Ledger account number defaults for items received or issued via the Manex Inventory Handling screen. This is for adding to or subtracting the quantities in the Inventory Master without using a Purchase Order or a Sales Order. Make sure that you do not use GL account #s that are associated to Warehouses within Warehouse Setup. |
| 1.4.13.3. Fields & Definitions for Inventory Handling GL Defaults |
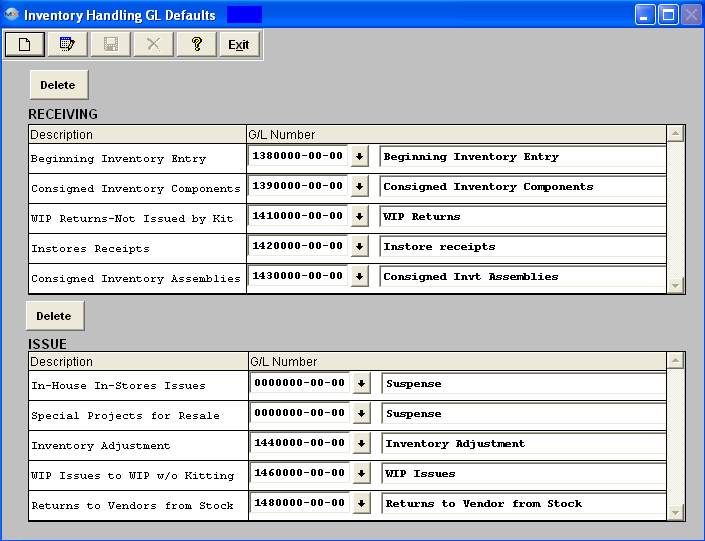 This section sets up the General Ledger account number defaults for items received or issued via the Manex Inventory Handling screen. This is for adding to or subtracting the quantities in the Inventory Master without using a Purchase Order or a Sales Order. Determine the description of the inventory receiving or inventory issuing. At data entry, the system will display the General Ledger account number and description for your selection. Plan your selections using the worksheet. Examples of Receiving could be Opening Inventory, receipt of free sample, etc. Examples of Issue could be Special Project Samples sent to customers, etc.
NOTE: The Inventory Handling GL Codes entered within this screen should NOT be the same as the GL Codes selected for the Warehouse setup .
|
| 1.4.13.4. How To ..... for Inventory Handling GL Defaults |
| 1.4.13.4.1. Setup the Inventory Handling GL Defaults | ||||
|
The following screen will be displayed:
To Add a record, depress the Add button from the main tool bar, Enter in the description in the section and then select the general ledger number, from the list shown below:
Depress on the Down arrow next to the field until you reach the account. Depress the Save button in the section. The General Ledger Description will automatically fill in. When finished depress the Save or Abandon changes button. Where Used: This section sets up the General Ledger account number defaults for items received or issued via the Manex Inventory Handling module.
«Mark as Completed in RoadMap in Sect. B Item 4-h»
|
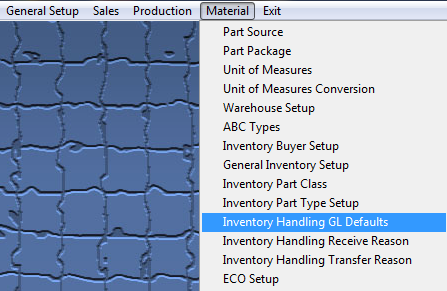
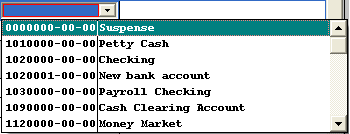
| 1.4.14. Inventory Handling Receive Reasons |
| 1.4.14.1. Prerequisites for Inventory Handling Receive Reasons |
|
Complete the attached worksheet and "Mark as Completed RoadMap Section B Item 4-i before continuing the setup. User MUST have full rights to the "System Setup" in System Security . Users with “Supervisor Rights” will automatically have access. |
| 1.4.14.2. Introduction for Inventory Handling Receive Reasons |
This screen is to enter Inventory Receiving reason codes in order to save the user from a lot of repetitive data entry. The information entered here will be used in the Inventory Handling module. |
| 1.4.14.3. Fields & Definitions for Inventory Handling Receive Reasons |
|
This screen is to enter Inventory Receive Reasons in order to save the user from a lot of repetitive data entry. The information entered here will be used in the Inventory Handling module. Examples of Receiving reasons would be Opening Inventory, Material Received on Trial, etc. Enter the reasons in the table. |
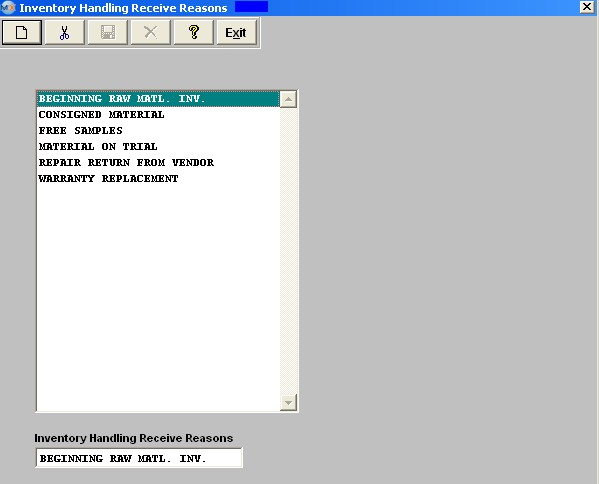
| 1.4.14.4. How To ..... for Inventory Handling Receive Reasons |
| 1.4.14.4.1. Setup the Inventory Handling Receive Reasons | ||||
The following screen will be displayed:
To delete a reason code, highlight the reason, and depress and Delete button.
When finished making changes depress the Save or Abandon changes button. Where Used: The Reason Codes are used in the Inventory Handling module.
«Mark as Completed in RoadMap in Sect. B Item 4-i»
|
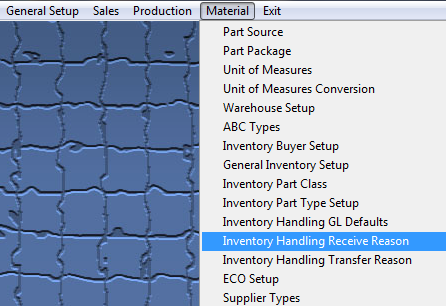
| 1.4.15. Inventory Handling Transfer Reasons |
| 1.4.15.1. Prerequisites for Inventory Handling Transfer Reasons |
|
Complete the attached worksheet and "Mark as Completed RoadMap Section B Item 4-i before continuing the setup. User MUST have full rights to the "System Setup" in System Security . Users with “Supervisor Rights” will automatically have access. |
| 1.4.15.2. Introduction for Inventory Handling Transfer Reasons |
This screen is to enter Inventory Transferring codes in order to save the user from a lot of repetitive data entry. The information entered here will be used in the Inventory Handling module. |
| 1.4.15.3. Fields & Definitions for Inventory Handling Transfer Reasons |
|
This screen is to enter Inventory Transferring codes in order to save the user from a lot of repetitive data entry. The information entered here will be used in the Inventory Handling module. Examples of Transferring codes would be Special Projects, Prototype, etc. Enter the reasons in the table. |
| 1.4.15.4. How To ..... for Inventory Handling Transfer Reasons |
| 1.4.15.4.1. Setup the Inventory Handling Transfer Reasons | ||||
The following screen will be displayed:
To Add a new reason code, depress the Add button. Enter in the reason. To delete a reason code, highlight the reason, and depress and Delete button.
When finished making changes depress the Save or Abandon changes button. Where Used: The Reason Codes are used in the Inventory Handling module.
«Mark as Completed in RoadMap in Sect. B Item 4-i»
|
| 1.4.16. Engineering Change Order Setup |
| 1.4.16.1. Prerequisites for ECO Setup |
|
Complete the attached worksheet and "Mark as Completed RoadMap Section B Item 4-j before continuing the setup.
Administrative Departments must be set up.
User MUST have full rights to the "System Setup" in System Security . Users with “Supervisor Rights” will automatically have access. |
| 1.4.16.2. Introduction for ECO Setup |
This setup screen is used in the Engineering Change Order module. Check off the department(s) which must approve an Engineering Change. Note: The departments are set up in the Administration Department Setup . The users within those departments are set up in the Security module. |
| 1.4.16.3. Fields & Definitions for ECO Setup | ||||||
|
|
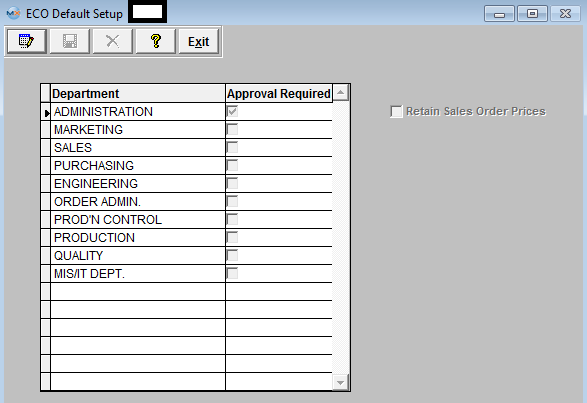
| 1.4.16.4. How To ..... for ECO Setup |
| 1.4.16.4.1. Setup the ECO Setup Module | ||||
|
The following screen will be displayed:
The departments displayed on the screen are setup in the Administration Department Setup module.
Depress the Edit action button, click on the appropriate boxes for those departments which must authorize an Engineering Change Order. Uncheck the appropriate boxes to remove a department which no longer must authorize an ECO. Where Used: In the Engineering Change Order Module.
«Mark as Completed in RoadMap in Sect. B Item 4-j»
|
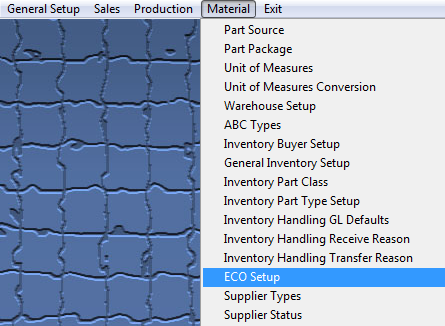
| 1.4.17. Supplier Types |
| 1.4.17.1. Prerequisites for Supplier Types |
Complete the attached worksheet and "Mark as Completed RoadMap Section B Item 4-k before continuing the setup. User MUST have full rights to the "System Setup" in System Security . Users with “Supervisor Rights” will automatically have access. |
| 1.4.17.2. Introduction for Supplier Types |
When adding suppliers, it is convenient to identify the supplier by a type. Examples of supplier types might be: Manufacturer, Distributor, Rep. Etc. |
| 1.4.17.3. Fields & Definitions for Supplier Types |
|
When adding suppliers, it is convenient to identify the supplier by a type. Examples of supplier types might be: Manufacturer, Distributor, Rep. Etc. A supplier type must be entered prior to entering suppliers. The field length is 20 characters. |
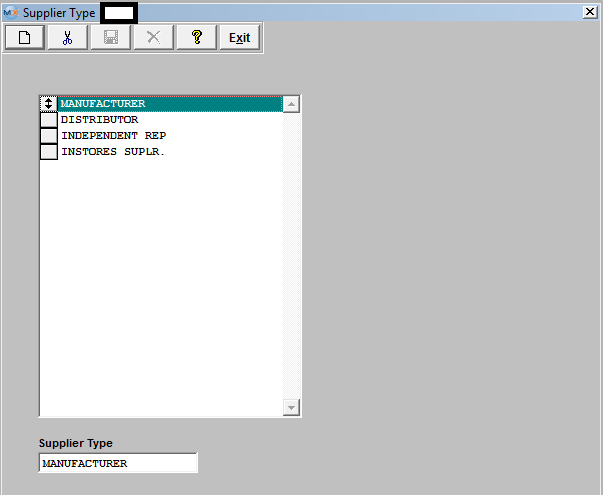
| 1.4.17.4. How To ..... for Supplier Types |
| 1.4.17.4.1. Setup the Supplier Types | ||||
The following screen will be displayed:
To add additional Supplier Types depress the Add button. Tye in the Supplier Type. To delete an existing Supplier Type, highlight the Supplier Type you want to delete, and depress the Delete button. These items may be sorted in any order by clicking on and dragging the box on the left side, to the (vertical) position desired. This order will be the order displayed in the pull downs when using this list in other modules within the system. Suggestion: Have the one most used at the top of the list. Where Used: Supplier types are used in the addition of suppliers, and in some reporting functions.
«Mark as Completed in RoadMap in Sect. B Item 4-k» |
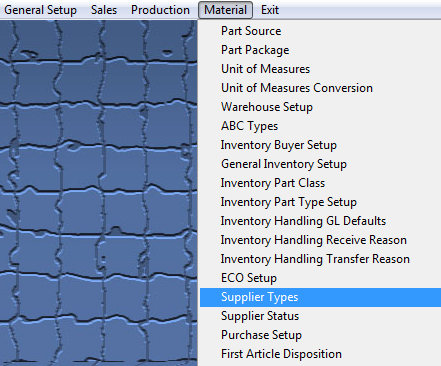
| 1.4.18. Supplier Status |
| 1.4.18.1. Prerequisites for Supplier Status |
Complete the attached worksheet and "Mark as Completed RoadMap Section B Item 4-l before continuing the setup.
User MUST have full rights to the "System Setup" in System Security . Users with “Supervisor Rights” will automatically have access. |
| 1.4.18.2. Introduction for Supplier Status |
MANEX provides six classifications of vendor status: Preferred, Approved, Under Evaluation, Probation, Inactive and Disqualified. These Status types are permanently installed in the software, and MANEX has already provided a description for these classifications the same as the status. However, if the user wishes, the description of this status may be changed to suit the user. No action is necessary in the setup if the user is satisfied with the current defaults. |
| 1.4.18.3. Fields & Definitions for Supplier Status |
|
MANEX provides six classifications of vendor status: Preferred, Approved, Under Evaluation, Probation, Inactive and Disqualified. These Status types are permanently installed in the software, and MANEX has already provided a description for these classifications the same as the status. However, if the user wishes, the description of this status may be changed to suit the user. No action is necessary in the setup if the user is satisfied with the current defaults. |
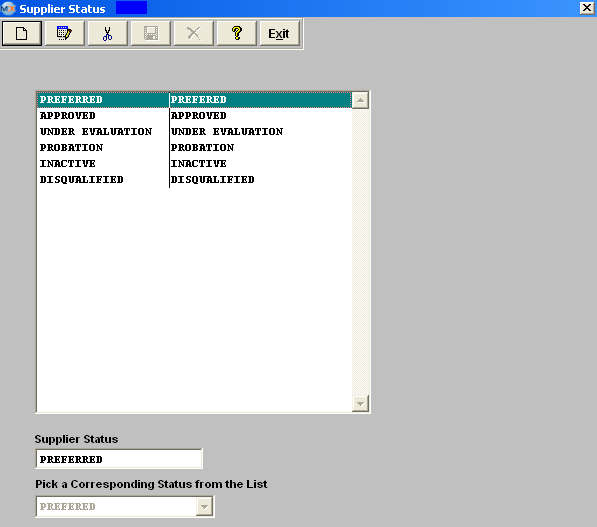
| 1.4.18.4. How To ..... for Supplier Status |
| 1.4.18.4.1. Setup the Supplier Status Module | ||||
|
The following screen will be displayed:
To modify the description of a supplier status, click on the Edit button, and enter the new description.
When changes have been complete, depress the Save or Abandon changes button.
Where Used: Supplier status is used during the selection of suppliers for purchasing «Mark as Completed in RoadMap in Section B Item 3-l» |
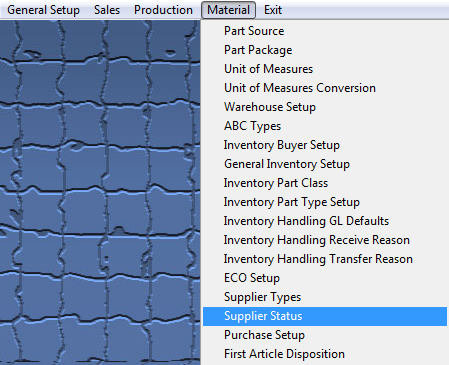
| 1.4.19. Purchase Setup |
| 1.4.19.1. Prerequisites for Purchase Setup |
Complete the attached worksheet and "Mark as Completed RoadMap Section B Item 4-m" before continuing the setup.
The prerequisites for entering Purchasing Setups are:
General Ledger Account Numbers set up in the G/L Account Setup module.
User MUST have full rights to the "System Setup" in System Security . Users with “Supervisor Rights” will automatically have access. |
| 1.4.19.2. Introduction for Purchase Setup |
In this section, the approval authority is established for purchase order approval for each user. The company has the option to declare whether one or two approvals are required in order for a purchase order to be approved. If the user chooses to have two approvals, then one of the approval-users must have final approval authority. The company also has the option to declare whether they want approvals Based on the PO Value and approvals when there is date changes or note changes. This section also establishes a default percentage that is allowed over and above the purchase order line item quantity. If material is received that exceeds in quantity the ordered amount by this percentage, then the receiving department cannot receive the material until the order is modified by purchasing. This is a default percentage applied to each order as it is placed, but may be over-ridden at the time the order is created.
|
| 1.4.19.3. Fields & Definitions for Purchase Setup |
| 1.4.19.3.1. Purchase Order Default Tab | ||||||||||||||||||||||||||
|
When a buyer generates a purchase order, it is created as a temporary order until it is approved. These orders will be created with a prefix to distinguish them as temporary until approved. As a temporary order, the document cannot be printed, nor will the order be considered as supply for Material Requirements Planning considerations. When a purchase order undergoes a revision, changing schedules, quantities and/or pricing, the order returns to a temporary status until approved. Note: These changed orders are not changed back to a prefix.
The company has the option to declare whether one or two approvals are required in order for a purchase order to be approved. If the user chooses to have two approvals, then one of the approval-users must have final approval authority.
When a non-inventory item is being purchased, the user must indicate the General Ledger MRO receiving numbers, if Accounting is used.
|
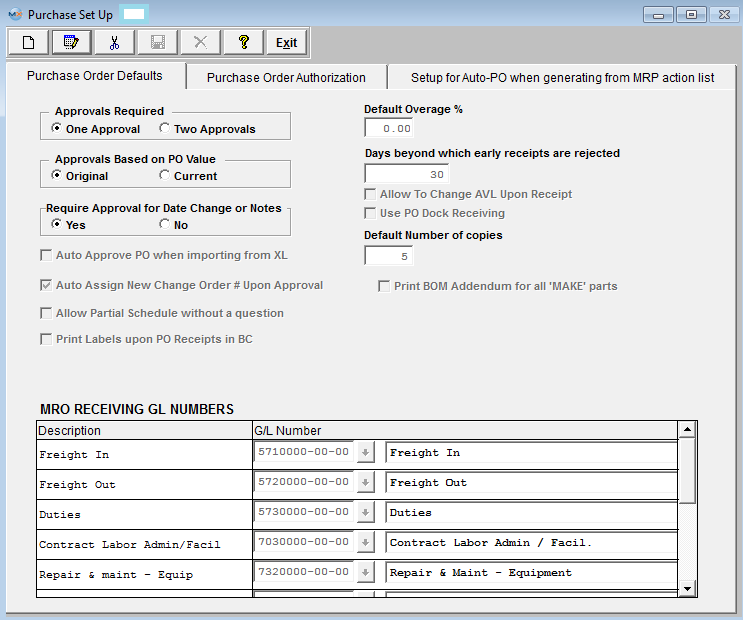
| 1.4.19.3.2. Purchase Order Authorization | ||||||||
For each user approval, the user may be authorized to approve one or both: Inventory and/or MRO. And each of these may have different levels of dollar amounts. If the administrator chooses to have one approval for orders, then there must be at least one person with approval for the expected dollar value of purchase orders. If two approvals are chosen, then there must be at least two people with approvals for the expected dollar vaule of purchase orders. The names of the users must have been entered in the Security Setup before entering in the Purchasing Setup, as they become available in the pull down listing for names.
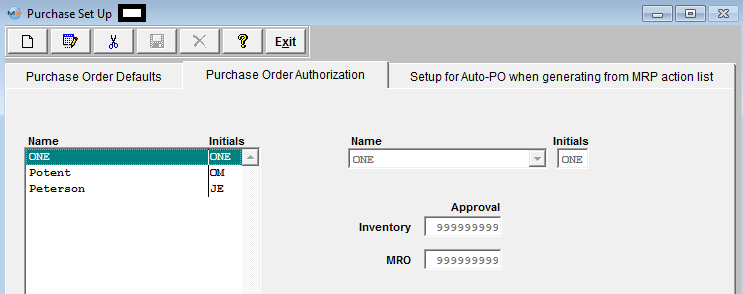
Approval
|
| 1.4.19.3.3. Setup for Auto-PO when generating from MRP action List | ||||||||||||||
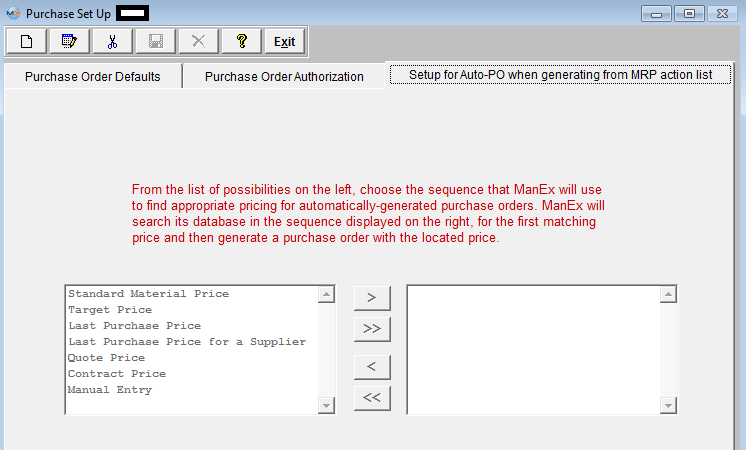
|
| 1.4.19.4. How To ..... for Purchase Setup |
| 1.4.19.4.1. Setup the Purchase Setup Module | ||||
|
The following screen will be displayed:
Depress the Edit button. For Approvals Required, click on the desired radial for either One Approval or Two Approvals. Enter Default Overage % if applicable. Click on desired radial for Approvals based on P.O. Value. Click on desired radial if Approvals are required for Date or Note Changes. Enter a Qty of Days beyond which early receipts are rejected if applicable. If you want to Change AVL Upon receipt this box must be checked. If you want to Use PO Dock Receiving this box must be checked. If you want to Auto Apporve PO's when importing from XL this box must be checked. If you want the system to Auto Assign New Change Order #'s upon Approval this box muxt be checked. If user wants to Allow partial schedule without receiving the reminder popup this box must be checked. If you want to Print labels upon PO receipts in the BC (Bar Code Receiving module) this box must be checked. Depress the Add button to add additional MRO (Materials, Repairs and Other) Receiving GL Numbers, enter in the description, then select the appropriate General Ledger account number and description, by clicking on the down arrow next to the field, as follows:
When finished, the user must depress the Save or Abandon changes button. Purchase Order Authorization On this screen, the user establishes the procurement authority levels for individuals.
To add a new user, click on the Add button and select a user from the Name pulldown field. Then enter the dollar amount authorized for either or both (Inventory and/or MRO) Approval and Final OK. If the company chooses only one approval, it must be in the Final column. Each user may have different authority levels for different kinds of purchases. Additionally, the user may have different amounts authorized, depending on whether they are the first approval or the final approval. For example, a buyer may have authority to do a final approval for $1000, but must also approve P.O.s up to $10,000 before the person with final authority will authorize the P.O.
Setup for Auto-PO when generating from MRP action list
In order to create an automatic PO within the MRP action list, the system has to figure out unit cost. Within this screen the user can select multiple methods ordered by their preference, from selecting items on the left and entering them on the right. The system will try to find the price based on the first method in the selected list (on the right) and if the system cannot find any price information it will proceed with the next method (on the right) until price is found. If not found system will assign "Manual Entry" and leave it at zero as a default. The price source can be changed and the price can be overwritten in the screen which creates POs from the MRP action list.
Where Used: Approvals are required on all purchase orders in order to place and receive material. General Ledger Account selection for all MRO purchases.
«Mark as Completed in RoadMap in Section B Item 3-m» |
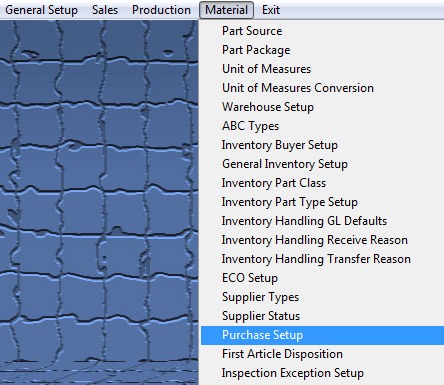
| 1.4.19.5. ManEx Minute for Purchase Set-up |
| 1.4.20. First Article Disposition |
| 1.4.20.1. Prerequisites for First Article Disposition |
|
User MUST have full rights to the "System Setup" in System Security . Users with “Supervisor Rights” will automatically have access. |
| 1.4.20.2. Introduction for First Article Disposition |
|
The First Article Disposition section is used to set up standard system instructions. The information entered here will be used in the PO Receiving module for Inventory items that require First Article Inspections.
|
| 1.4.20.3. Fields & Definitions for First Article Disposition |
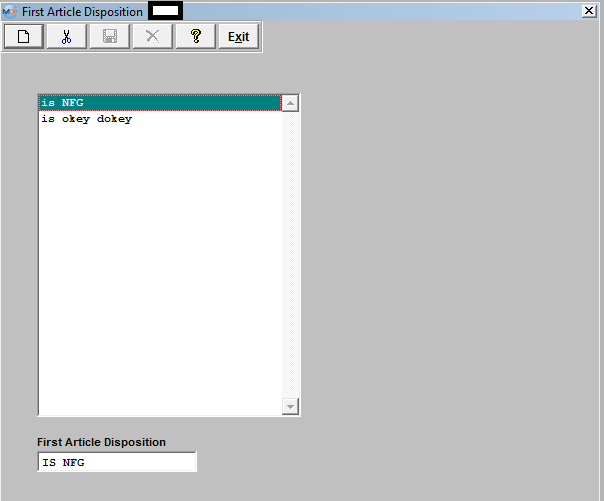
|
| 1.4.20.4. How To ..... for First Article Disposition |
| 1.4.20.4.1. Setup the First Article Disposition Module | ||||
The following screen will be displayed:
To add a new record, depress the Add button and type in description. |
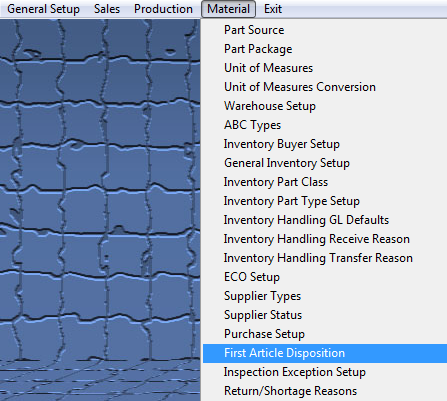
| 1.4.21. Inspection Exception Setup |
| 1.4.21.1. Prerequisites for Inspection Exception Setup |
|
User MUST have full rights to the "System Setup" in System Security . Users with “Supervisor Rights” will automatically have access. |
| 1.4.21.2. Introduction for Inspection Exception Setup |
|
This screen is to enter Inspection Exception codes in order to save the user from a lot of repetitive data entry. The information entered here will be used in the Purchase Order module for inventory items that require Inspection.
|
| 1.4.21.3. Fields & Definitions for Inspection Exception Setup |
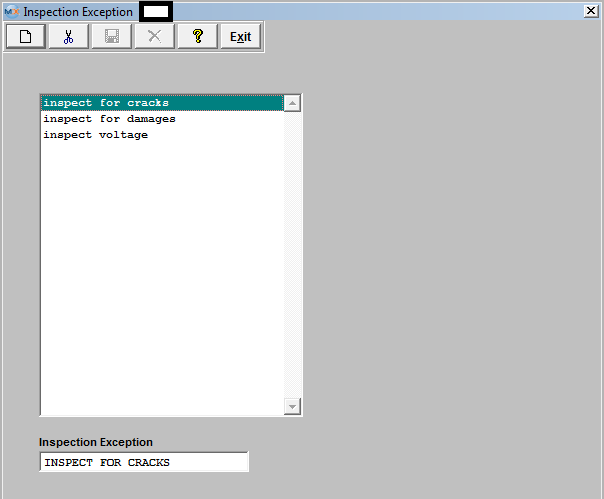
|
| 1.4.21.4. How To ..... for Inspection Exception Setup |
| 1.4.21.4.1. Setup the Inspection Exception Setup Module | ||||
The following screen will be displayed:
To add a new record, depress the Add button and type in description. Depress the Save or Abandon changes button. You may Edit or Delete existing records, also.
|
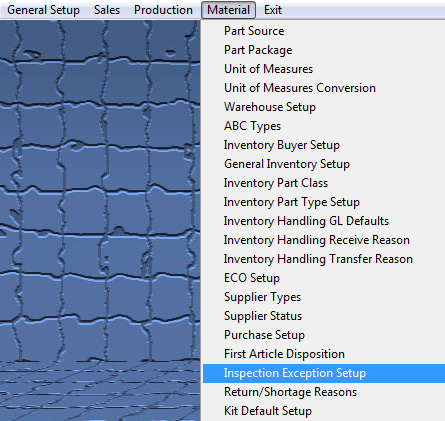
| 1.4.22. Return/Shortage Reasons |
| 1.4.22.1. Prerequisites for Return/Shortage Reasons |
Complete the attached worksheet and "Mark as Completed RoadMap Section B Item 4-p" before continuing the setup. User MUST have full rights to the "System Setup" in System Security . Users with “Supervisor Rights” will automatically have access. |
| 1.4.22.2. Introduction for Return/Shortage Reasons |
Throughout the operation, there will be instances where material has been rejected in the course of business. Examples of these places are Purchasing Receiving, Kit Preparation, Material Shortages, Shipping, etc. It is useful to have a common terminology to choose from, and avoid development of similar nomenclature that mean the same thing. To aid in focusing terms for reason codes, this setup area is established to be used whenever material is rejected. The available number of reasons for rejection is unlimited, but the user must have at least one entered in order to reject material in operations. |
| 1.4.22.3. Fields & Definitions for Return/Shortage Reasons |
|
Throughout the operation, there will be instances where material has been rejected in the course of business. Examples of these places are Purchasing Receiving, Kit Preparation, Material Shortages, Shipping, etc. It is useful to have a common terminology to choose from, and avoid development of similar nomenclature that mean the same thing. To aid in focusing terms for reason codes, this setup area is established to be used whenever material is rejected. The available number of reasons for rejection is unlimited, but the user must have at least one entered in order to reject material in operations. |
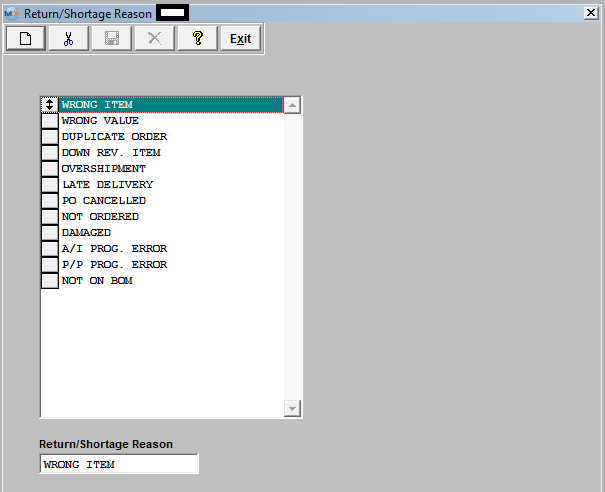
| 1.4.22.4. How To ..... for Return/Shortage Reasons |
| 1.4.22.4.1. Setup the Return/Shortage Reasons | ||||
|
The following screen will be displayed:
To Add a reason, depress on the Add button and enter the reason in the highlighted field. To Delete a reason, highlight the reason you would like to delete, and depress the Delete button. These items may be sorted in any order by clicking on and dragging the box on the left side, to the (vertical) position desired. This order will be the order displayed in the pull downs when using this list in other modules within the system. Suggestion: Have the one most used at the top of the list. Where Used: Used by Purchase Receiving, Kit Preparation & Audit and Material Shortage Management. «Mark as Completed in RoadMap in Section B Item 3-p» |

| 1.4.23. Kit Default Setup |
| 1.4.23.1. Prerequisites for Kit Default Setup |
Complete the attached worksheet and "Mark as Completed RoadMap Section B Item 4-q" before continuing the setup User MUST have full rights to the "System Setup" in System Security . Users with “Supervisor Rights” will automatically have access. |
| 1.4.23.2. Introduction for Kit Default Setup |
|
This screen is designed for the user to select Kitting and Shortage defaults regarding the display of manufacturers, excluding Scrap from kitting, MRP or Cost Rollup, and to Allow use of non-nettable warehouse locations. The user can choose between showing all manufacturers or show only approved manufacturers, and allow use of non-nettable warehouse locations when working with the Kitting & Shortage Management module. Within this screen the user can also select the default to exclude scrap and scrap setup from any of the following three modules; kitting, MRP, and/or Cost Rollup.
|
| 1.4.23.3. Fields and Definitions for Kit Default Setup |
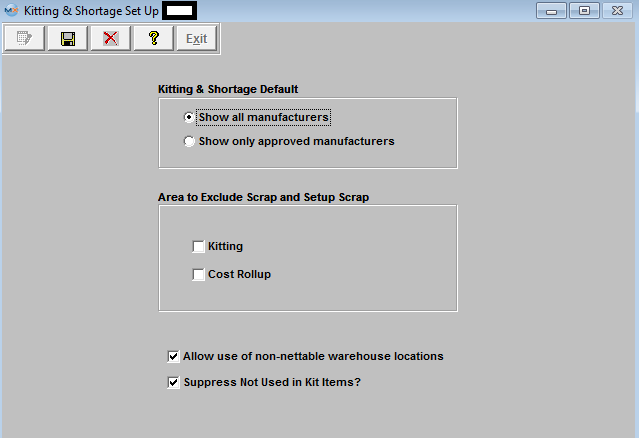 This screen is designed for the user to select Kitting and Shortage defaults regarding the display of manufacturers. The user can choose between showing all manufacturers or show only approved manufacturers when working with the Kitting & Shortage Management module.
If the "Show all Manufacturers" is selected the kitting module will display ALL AVL's and then indicate the approved ones with an "A" on the screen and will allow user to pick from the non-approved AVL's as well as the approved AVL's.
If the "Show only Approved Manufacturers" is selected the kitting module will ONLY display the approved AVL's and so users will only be able to pull parts from the Approved AVL's.
User can select the default to exclude scrap and scrap setup from any of the following three modules; Kitting, and/or Cost Rollup.
User can select the default to Allow use of non-nettable warehouse location when working with the Kitting & Shortage Management module.
User can select the default to Suppress Not Used in Kit items - The following reports will take this default when printing: ICM Module Reports: Inv on hand report; Inv and WIP Valuation report; Unused INV list report. Kitting and Shortage Report: Kit pick work sheet.
|
| 1.4.23.4. How To ..... for Kit Default Setup |
| 1.4.23.4.1. Setup Kit Default Setup | ||||
|
The following screen will be displayed:
This screen is designed for the user to select Kitting and Shortage defaults regarding the display of manufacturers. The user can choose between showing all manufacturers or show only approved manufacturers when working with the Inventory Management Kitting & Shortage Management option.
If the "Show all Manufacturers" is selected the kitting module will display ALL AVL's and then indicate the approved ones with an "A" on the screen and will allow user to pick from the non-approved AVL's as well as the approved AVL's.
If the "Show only Approved Manufacturers" is selected the kitting module will ONLY display the approved AVL's and so users will only be able to pull parts from the Approved AVL's.
User can also select the default to exclude scrap and scrap setup from any of the following three modules; kitting, and/or Cost Rollup.
User can also select the default to Allow use of non-nettable warehouse location when working with the Kitting & Shortage Management module.
Depress the Edit key and then select your choice. When finished making selections, depress the Save or Abandon changes button. Where Used: The Kit Default Setup selection is used in the Kitting module.
«Mark as Completed in RoadMap in Section B Item 3-q» |
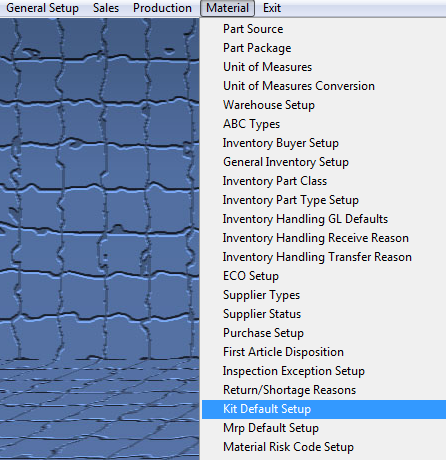
| 1.4.24. MRP Default Setup |
| 1.4.24.1. Prerequisites for MRP Default Setup |
|
Complete the attached worksheet and "Mark as Completed RoadMap Section B Item 4-r" before continuing the setup. User MUST have full rights to the "System Setup" in System Security . Users with “Supervisor Rights” will automatically have access. Suggestion: We suggest that if the MRP takes a larger amount of time to run you may want to schedule it to run during non-working hours. If you run it during working hours and it takes a large amount of time, you might experience results that you are not expecting. Because, transactions could have been made in the system after the MRP was started and some data captured in the first part of the run may affect the transaction during the MRP run. The MRP time stamp does not get updated until the very end of the MRP run.
|
| 1.4.24.2. Introduction for MRP Default Setup |
This screen is used to setup what the user wants to see when using MRP. |
| 1.4.24.3. Fields & Definitions for MRP Default Setup | ||||||||
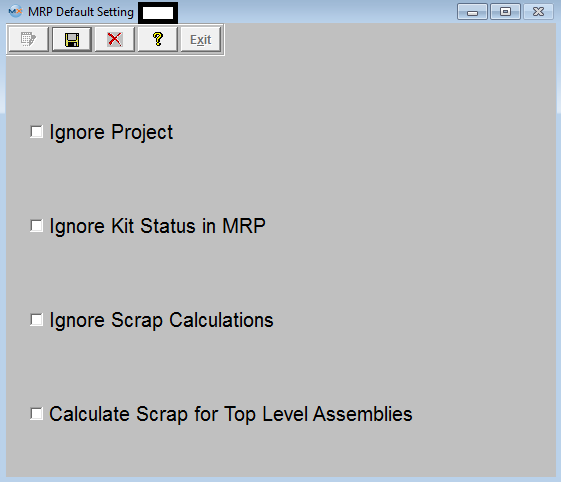
|
| 1.4.24.4. How To ..... for MRP Default Setup |
| 1.4.24.4.1. Setup the MRP Default Setup Module | ||||
The following screen will be displayed:
When editing the MRP Scrap Setting the following warning will appear:
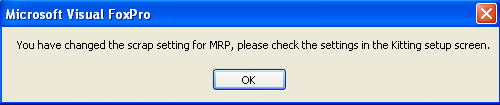
|
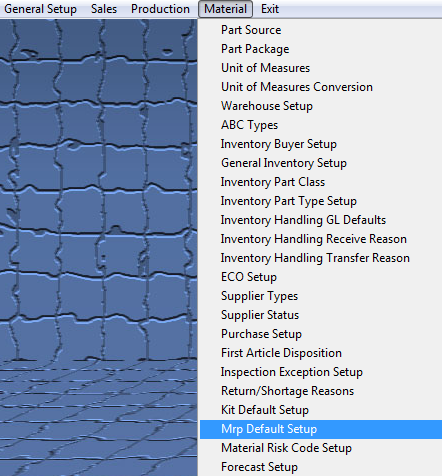
| 1.4.25. Material Risk Code Setup |
| 1.4.25.1. Prerequisites for Material Risk Code Setup |
User MUST have full rights to the "System Setup" in System Security . Users with “Supervisor Rights” will automatically have access. |
| 1.4.25.2. Introduction for Material Risk Code Setup |
| This is to inform the users which items are Low Risk or High Risk (can not be cancelled or returned). |
| 1.4.25.3. Fields & Definitions for Material Risk Code Setup |
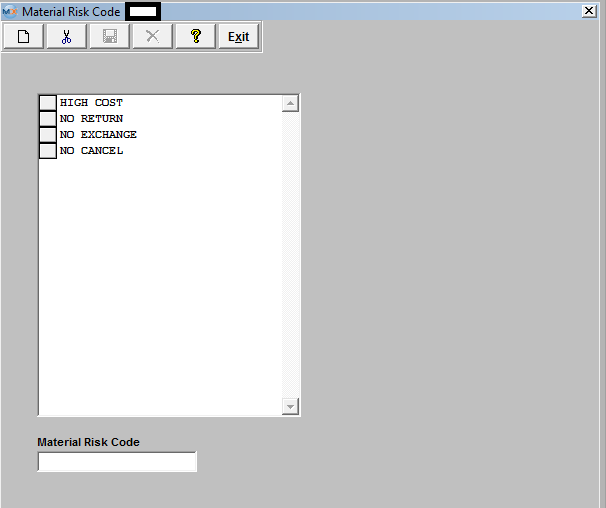 This is to inform the users which items are Low Risk or High Risk (can not be cancelled or returned).
|
| 1.4.25.4. How To ..... for Material Risk Code Setup |
| 1.4.25.4.1. Setup the Material Risk Code Setup Module | ||||
The following screen will be displayed:
To add a new record, depress the Add button and type in a code. This is to inform the users which items are Low Risk or High Risk (can not be cancelled or returned). Depress the Save or Abandon changes button. You may Delete existing records, also. |
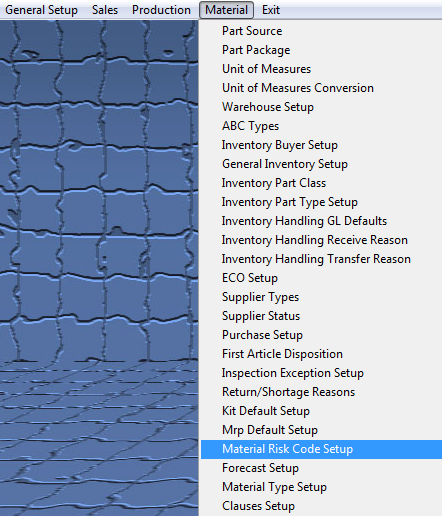
| 1.4.26. Material Type Setup |
| 1.4.26.1. Prerequisites for Material Type Setup |
Complete the attached worksheet and "Mark as Completed RoadMap Section B Item 4-u" before continuing the setup. User MUST have full rights to the "System Setup" in System Security . Users with “Supervisor Rights” will automatically have access. |
| 1.4.26.2. Introduction for Material Type Setup |
The User may establish the logic by which the material type for the parts are established by the material types at the AVL level. User may also reorder the Material Type per proirity. |
| 1.4.26.3. Fields & Definitions for Material Type Setup |
| 1.4.26.3.1. Material Type Mgmt | ||||||||
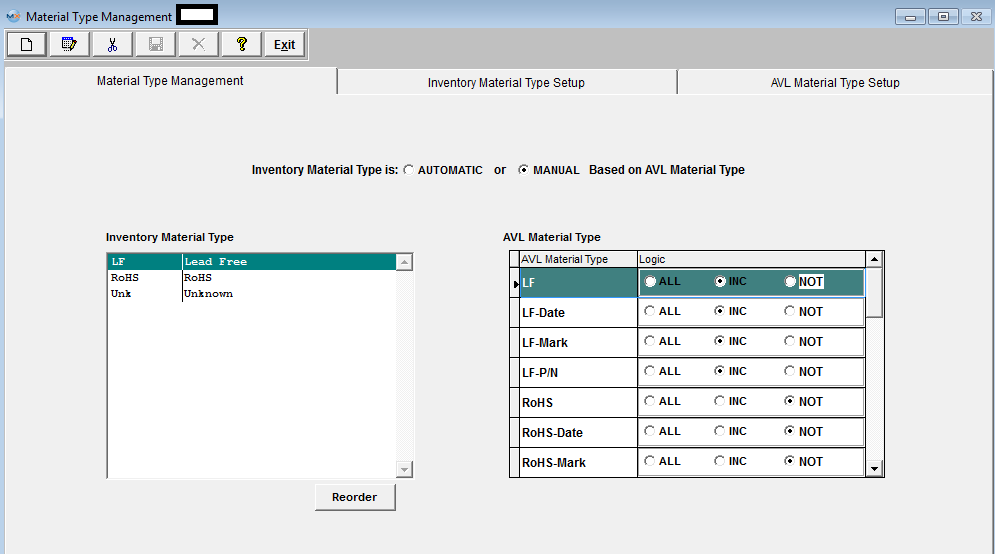 This allows the users to decide if they would like the inventory part material type controlled automatically or manually. If the user chooses MANUAL, each time an AVL is added, edited or deleted, the user would receive a popup reminder that "The Inventory level Material Type is set to Manual. Be sure to verify how changes affect the Inventory Material Type". If the user chooses AUTOMATIC then each time an AVL is added, edited or deleted, a popup will be displayed (if the the AVL material type is DIFFERENT than the inventory type) that says "AVL Material Type is different than Inventory Material Type and may affect the Inventory Material Type", with an option to proceed or cancel. If proceeding, then the system recalculates the material type on saving the edit.
|
| 1.4.26.3.2. Inventory Material Type Setup Fields and Definitions | ||||
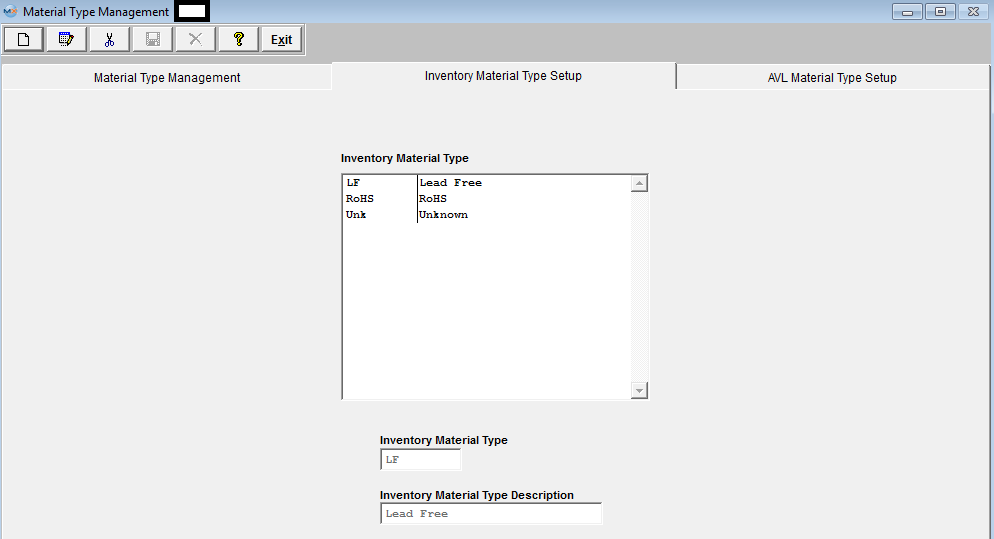
|
| 1.4.26.3.3. AVL Material Type Setup Fields and Definitions | ||||

|
| 1.4.26.4. How To ..... for Material Type Setup |
| 1.4.26.4.1. Edit the Material Type Logic | ||||
The following screen will be displayed:
Depress the Edit action button. This will allow you to change the Inventory Material Type to "Automatic" or "Manual" Based on AVL Material Type. If the user chooses the MANUAL option, there will be a pull down next to the Material Type field at the top of the Quantity Info screen within the Inventory Control Mgmt module, listing all the Inventory Material Types available:
User may highlight the Material Type they wish to be assigned to this Inventory part regardless of the material types of the AVLs. Each time an AVL is added, edited or deleted, the user will receive the following popup reminder:
If the user chooses the AUTOMATIC option user must also setup the Logic by clicking on the Radial next to "ALL" "INC" or "NOT". Reminder: Make sure you do not setup duplicate logics for different material types. There are two grids in the Material Type Management screen. The left side displays the different INVENTORY Material Types that the user has established in the Inventory Material Type setup screen. When one of these Material Types (MT) is selected, the grid on the right side of the page displays all available AVL Material Types that the user has established in the AVL Material Type Setup screen. For each INVENTORY MT, the user can select each of the AVL MT, and how they affect the INVENTORY MT. The choices to affect the INVENTORY MT selected are ALL, INC, and NOT: If ALL is selected, then every one of the AVL's available for that Inventory part must have the same MT. (There can only be one ALL selected). If INC is selected, then if any of the AVLs with that designations are included, then the INVENTORY MT will be assigned accordingly. IF ANY of the AVL's for an Inventory part contain a designation in the NOT category, then the inventory designation will become "UNK". For more MT Logic Setup Examples see attached document. If the AVL material type is automatic, and you edit the Logic setup the following message will be displayed:
EXAMPLE: Setup Logic for a new Inventory MT (Mixed). Go to the AVL Material Types; Check - LF-Date and RoHS-Date as INC, Check - all other AVL MT as NOT (For more MT Logic Setup Examples see attached document)
Find an existing Inventory Part # 101-0001621 with different AVL MT and Inventory MT as UNK
Edit record and change all AVL MT to either LF-Date or RoHS-Date and the Inventory MT will update to Mixed per the Mixed Logic in System Setup (Shown above)
OR User can leave all AVL MT as is, go to System Setup and Edit the Inventory MT - MIXED Logic to include UNK and LF-P/N, update records.
and Inventory MT will update automatically, with existing AVL MT's 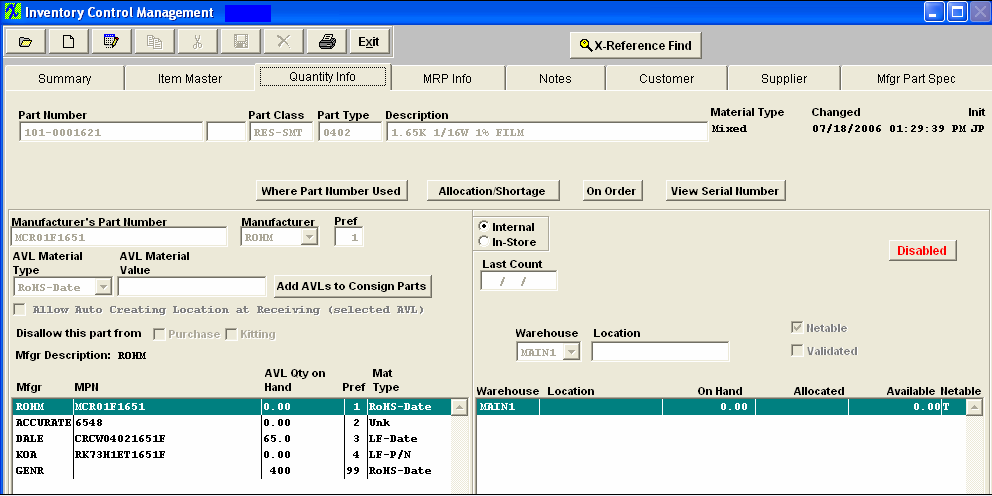 User may also sort the Inventory Material Type in order of priority in which the logic is checked. By depressing the Reorder button as shown in the screen below;
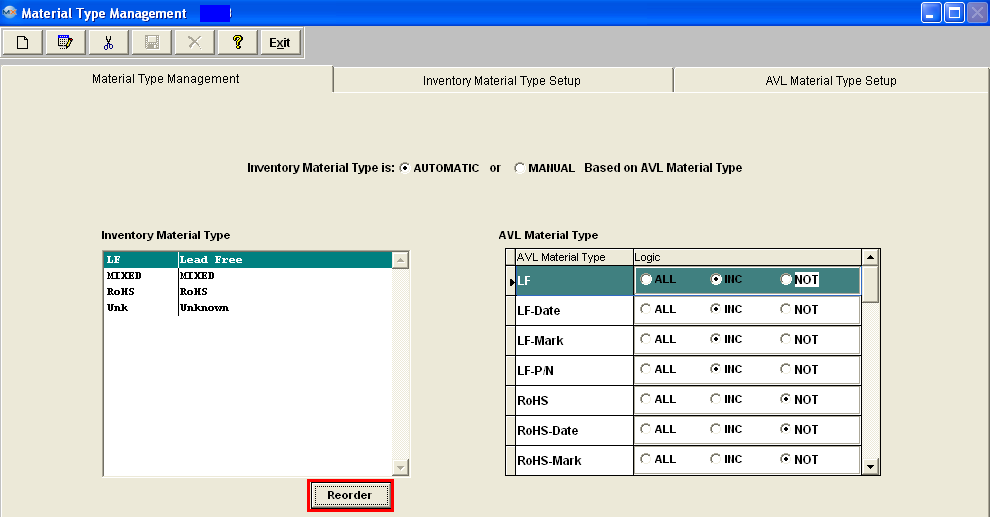 Re-order by using the arrows on the left side of the Inventory Material Types
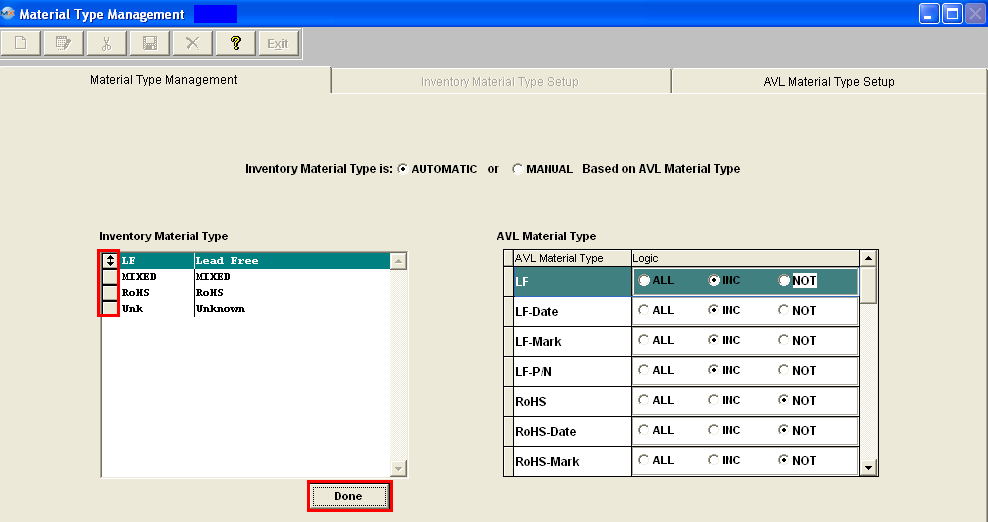 Depress the Done button when re-order is complete.
If Inventory Material Type is set to Automatic user will receive the following message:
 If Inventory Material Type is set to Manual user will receive the following message:

|
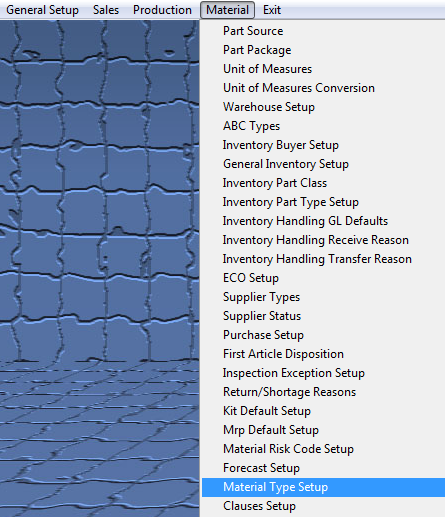
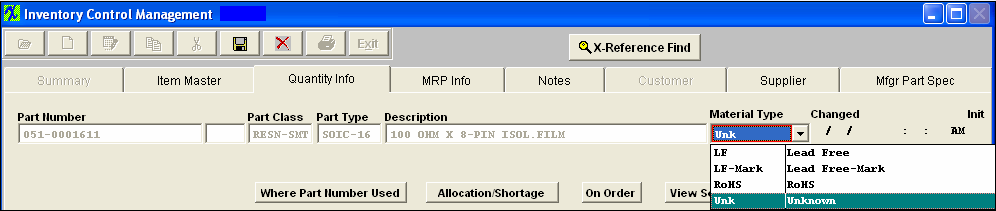
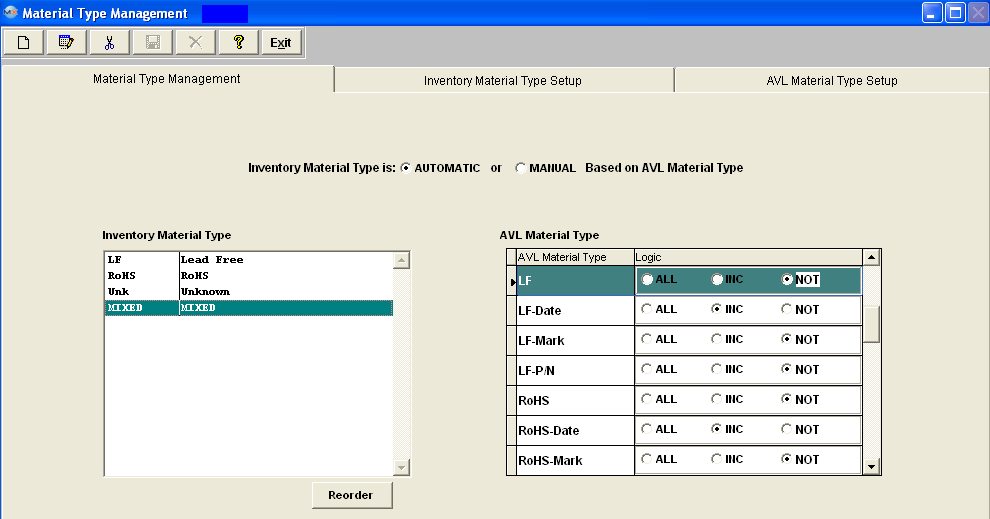
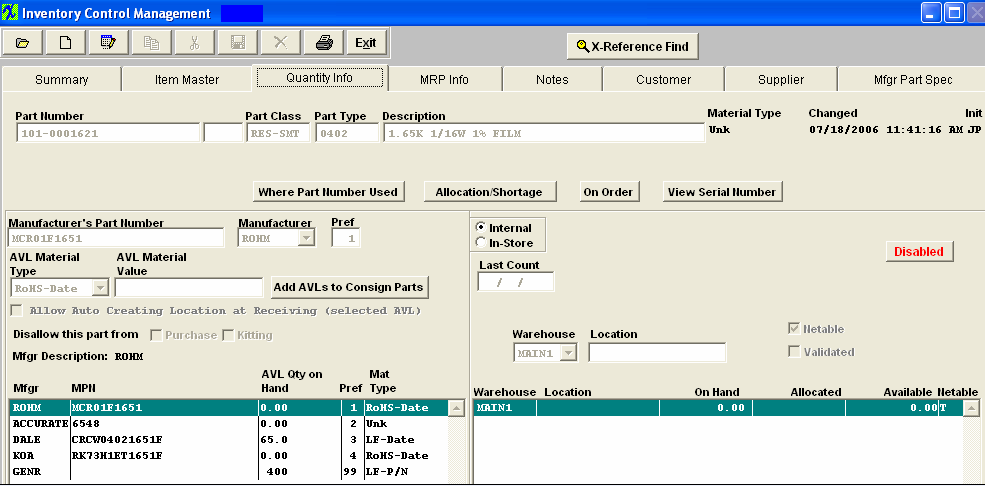

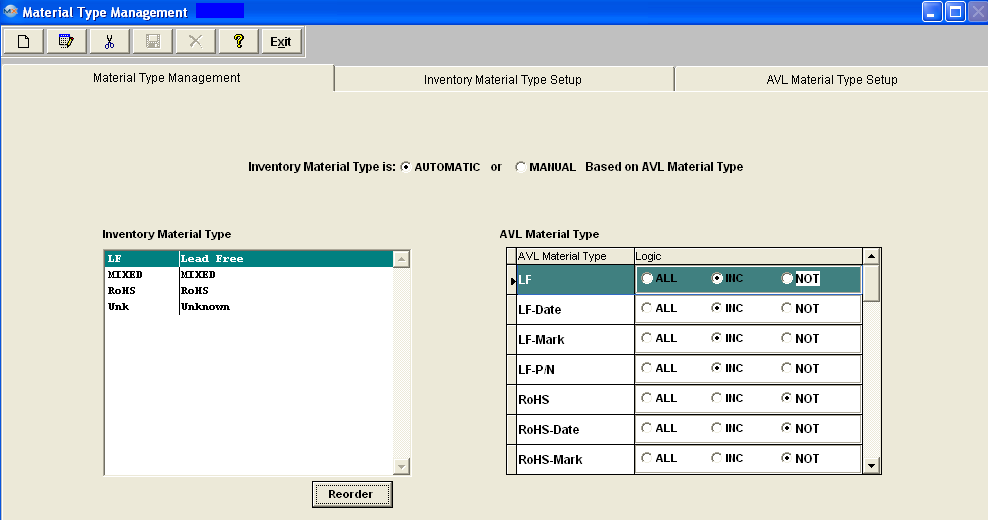
| 1.4.26.4.2. Add or Edit an Inventory and/or AVL Material Type | ||||
The following screen will be displayed: Go to the "Inventory Material Type Setup" tab. The Inventory Material Types displayed on screen are hard-coded into the system and cannot be removed. Select the Add button from the main tool bar to add a new Inventory Material type or select the Edit button for the main tool bar to edit an Inventory Material Type, then depress the Save record action button to save changes or depress the Abandon changes action button to abandon changes. If Inventory Material Type is set to Automatic user will receive the following message:
If Inventory Material Type is set to Manual user will receive the following message:
Go to the "AVL Material Type Setup" tab. The AVL Material Types displayed on screen are hard-coded into the system and cannot be removed.
 Select the "Add" button from the main tool bar to add a new AVL Material type or select the "Edit" button for the main tool bar to edit an AVL Material Type, then depress the Save record action button to save changes or depress the Abandon changes action button to abandon changes.
If Inventory Material Type is set to Automatic user will receive the following message:
If Inventory Material Type is set to Manual user will receive the following message:
|
| 1.4.26.4.3. Delete a Inventory and/or AVL Material Type | ||||
The following screen will be displayed:
Go to either the "Inventory Material Type Setup" tab or the "AVL Material Type Setup" tab
Highlight the Material Type you want to Delete, and select the Delete button from the main tool bar. A popup will appear verifying the Material Type you are deleting and giving you the option to continue with the Deletion or not:
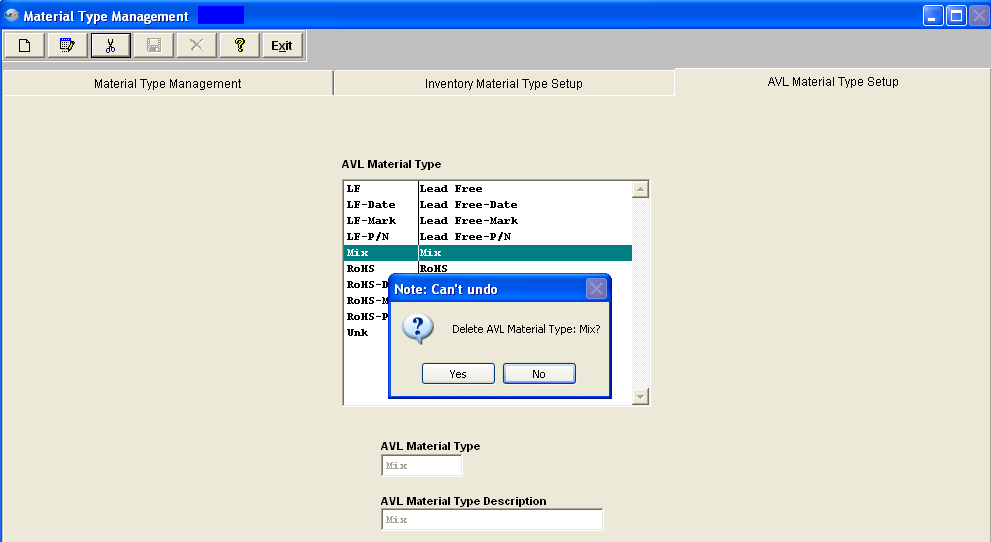 Depress Yes to continue or No to abandon changes.
|
| 1.4.27. Clauses Setup |
| 1.4.27.1. Prerequisites for Clauses Setup |
User MUST have full rights to the "System Setup" in System Security . Users with “Supervisor Rights” will automatically have access. |
| 1.4.27.2. Introduction for Clauses Setup |
| This setup screen will allow you to enter Template Clauses that can be applied to Inventory parts, Purchase Orders and/or Items on the PO. |
| 1.4.27.3. Fields & Definitions for Clauses Setup |
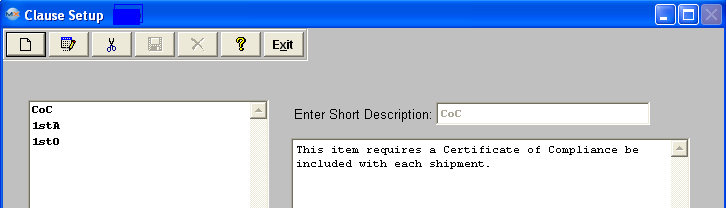
|
| 1.4.27.4. How To ..... for Clauses Setup |
| 1.4.27.4.1. Setup the Clauses Setup Module | ||||
The following screen will be displayed:
To edit a record, highlight the record and select the EDIT button from the main tool bar and edit the record.
Depress the SAVE or ABANDON changes button from the main tool bar. |
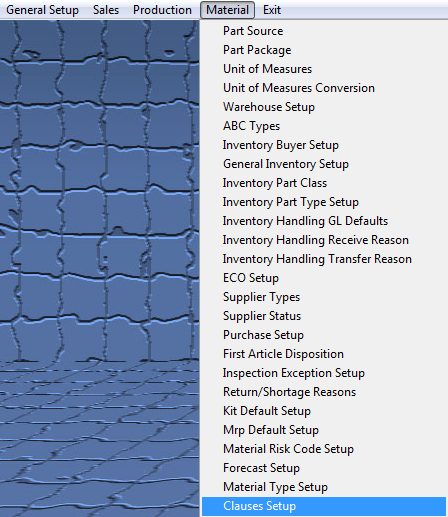
| 1.5. FAQs |
| Facts and Questions for the System Setup Modules |