1. IPS Upload
1.1. Prerequisites for the IPS Upload
  1. User must have the In-Store optional module.
  2. After activation, "IPS Upload" access for each user must be setup in the ManEx System Security module.  Users with “Supervisor Rights” will automatically have access. 
  3. User has to complete the required fields in the IPSimport.xlt located in the xlfiles directory to import to a In-Store PO.   
  4. The part must exist in the Inventory Control Mgmt module and must have the Supplier and In-Store warehouse setup within the Inventory Control Mgmt module.  
1.2. Introduction for the IPS Upload
This upload is designed to add quantities to the existing part number and MPN into the in-Store location.  If the MPN has "auto location" checked the upload will allow the user to auto add a location that does not exist.  The quantity will update if the contract does not exist and will be created for the price entered in the "price" column.  If the price is omitted the system will use the material price for the part as entered in the inventory module and Inventory receiving transactions will be populated, but there will be no affect on accounting upon receipt/import.


1.3. Fields & Defintions for the IPS Upload
1.3.1. In-Store XL Spreadsheet
 
 
SupName
(Required) Existing In-Store Supplier Name for In-Store Warehouse
Contr_no
(Required) Contract Number (If contract already exists the contract number entered must match existing)  
qty_oh
(Required) Quantity On-Hand
part_no
(Required) Existing Internal Part Number with exsiting In-Store Warehouse Setup
revision
(Required) Existing Revision (if applicable)
partmfgr
(Required) Existing Part Manufacturer with existing In-Store Warehouse Setup
mfgr_pt_no
(Required) Existing Manufacturer Part Number with existing In-Store Warehouse Setup
Warehouse
(Required) Existing In-Store Warehouse
location
(Required) Existing In-Store Warehouse Location
price
(Option) Contract Price (If price is omitted it will use material price for the part as entered in the inventory module).
LotCode
(Required if Lot Coded Part)  Lot Code
ExpDate
(Required if Lot Code Part) Expiration Date
Reference
(Required if Lot Coded Part) Reference
SerialNoM
(Required if Part is Serialized)  If the part is serialized the users can enter all serial numbers into the “SerialNoM” column of the spreadsheet separated by one of the following; coma, semicolon, space, tab.  If the user wants to enter range of the serial numbers they have to separate starting and beginning of the range with the dash surrounded by spaces like “ – “. The reason for that is that serial number itself might have “-“ as a part of the serial numbers. For example serial numbers entered as
“C123 - C125” will translate as C123, C124, C125    

but serial number entered as “C123-C125” will translate as “C123-C125” (notice no space surrounded the “-“). The following example will show other combinations that could be treated as ranges in the upload;

Z1000002 - Z100005 (Z1000002, Z1000003. Z1000004, Z1000005)
FU12 – 15  (FU12, FU13, FU14, FU15)
98 – 103 (98, 99, 100, 101, 102, 103)
z150-0009 - z150-0013 (z150-0009, z150-0010, z15-0011, z15-0012, z15-0013)

Here is an example of the entered serial numbers that will not translate into the range;

H890129292 K87827327 (H890129292, K87827327)
V5678888X - V32787382S (V5678888X, V32787382S)
540 - c670 (540, c670)


1.4. How To ..... for the IPS Upload
1.4.1. Add - Upload to IPS
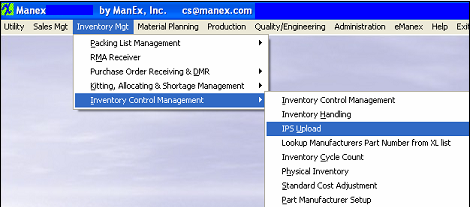
Enter Inventory Mgt/Inventory Control Management/IPS Upload
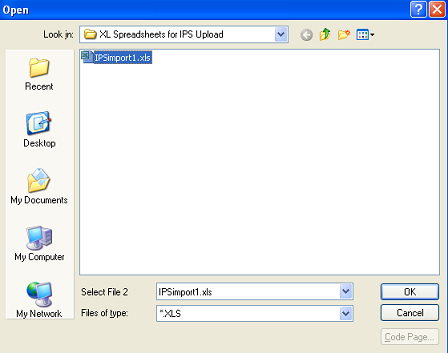
User will get a prompt to find the file which they want to upload and then the system will import the data and proceed with validation and saving.
 

Locate XL File to Upload

 
The following Warning will appear This message is for user to verify the number of records being loaded from the import sheet.  User may depress "YES" to continue the upload or "NO" to abort the upload.


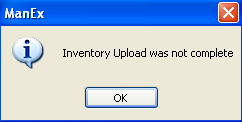
If you depress No to Abort Upload the user will be prompted the following message that the Inventory Upload was not complete
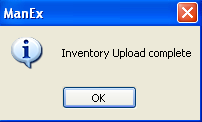
If you depress Yes to Continue the user will be prompted the following message that the Inventory Upload complete.


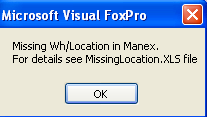
If the system finds any problems with template the user will be prompted the following message and exception XL file will be created in the Inv Exception XL Sub Directory on the server.

Depress OK and user will receive the message (shown above) that the "Inventory Upload was not complete" and system will abort.
 

During the upload if user has a contract already setup the following message will appear.  If user selects "Yes"  Upload will continue, if user selects "No" Upload will abort.  

During the upload if the pricing on the xl spreadsheet is different than the existing contract prices the following message will appear, giving you the option to overwrite the existing price.  If price is omitted from xl spreadsheet system will use the material price from the Inventory Control screen.  If user has contract pricing already setup for example: Up to qty of  5 = $1.00, Up to qty of  100 = $0.94, Up to qty of 101 = $0.95. When the in-store PO is created it will find the correct price break.   Also if there are multiple records for the same part, which will end up on the same PO, (like multiple serial numbers or lot codes), the qty will be combined in determining the correct price break.
During the upload if the contract number listed on the xl spreadsheet is different than the existing contract number, user will receive the following message and system will abort. 
 
Once the upload is complete the "Transaction Detail Log" report is updated for In-Store location, as displayed below:
 
 
Since these items are being received into a In-Store location there will be no affect on accounting upon receipt/import.