| 1. Quality Defect Codes |
| 1.1. Prerequisites for Quality Defect Codes |
Complete the attached worksheet and "Mark as Completed RoadMap Section B Item 3-h" before continuing the setup.
User MUST have full rights to the "System Setup" in System Security to setup these modules. User with "Supervisor Rights" will automatically have access.
|
| 1.2. Introduction for Quality Defect Codes |
In Shop Floor Tracking, the ability to record the results of quality inspections is available to the user. These records usually contain information about the lot or work order being inspected, the quantity of parts viewed, the quantity of parts rejected and the number and types of defects observed in the process. In the ManEx Quality Defect Setup, the user has the opportunity to define these defects, and to shape the manner in which they are used. |
| 1.3. Fields & Definitions for Quality Defect Codes |
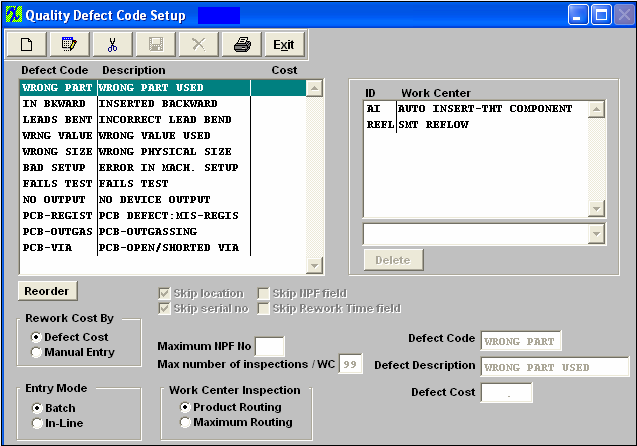
Entry Mode: The results of inspection may be entered in ManEx in two basic ways: 1, in Batch Mode; and 2, using In-Line processing. Batch mode allows the user to perform the inspection on a batch or lot of materials, and enter the observations at a later time. In this mode, the user does not automatically forward the product to the next workstation, but merely inspects it and allows production personnel to move the material. Using the In-Line mode is like inserting an inspection step at the end of a work center, viewing the parts one at a time, and passing or failing the part. If the part passes, it is moved by ManEx to the next work center, and the user has only to physically move the parts to the next workstation. The ManEx WIP tracking automatically moves the part to the next work center. Parts which fail the inspection may stay in their current work center, be moved to another (rework) work center, or passed on to the following work center, at the option and discretion of the operator. Most users prefer to use the batch processing, which accommodates sampling procedures, instead of In-Line processing, which always requires 100% inspection. In this setup area, the user selects the default condition for defining the method of data entry.
Rework Cost By: The Cost of Quality may be determined in one of two possible ways: 1, by defining a specific cost to each defect code; and 2, by manual entry of the actual rework time as determined by the inspector during inspection. In this setup area, the user selects whether to track the costs by Defect Cost (assigned to each defect code), or Manually (by entering the rework time as defects are determined). Defect Code: During the defect logging and entry process, the user will be presented with a list of defects from which to choose the defect observed. These defects codes and descriptions are entered and defined in this setup. The code is a ten-digit character field that will be used to identify the defects on charts, graphs and data collected and printed. The user may enter as many defect codes as needed.
While the user may enter the defect codes in any order they wish, the defect codes may be rearranged so that the most used codes are at the top of the list. This becomes a time-saver when actually entering defects on a lot, as the defect codes are presented in the same order as ordered in the setup. This is done after defect code entry by clicking on the REORDER button just below the defect codes. After pressing this button, the screen will place a small button in front of each defect code. The user may then use the windows drag & drop method to click on a button, hold the mouse button down and drag the code to the order desired. When satisfied that the most used defect codes are at the top of the list, click on the DONE button to secure the order. Alternatively, the user may wish to enter in alphabetical order to ease searches if there are no predominant defects.
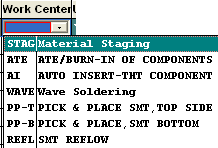
Also, to aid the inspector in selecting a defect code, the user may associate a given defect code with one or more work centers. The user selects from the established work centers to include as many work centers for a specific defect as desired. Work centers may also be deleted from a defect code, if the user wishes.
In this manner, the inspector will have a smaller list of defects to select from, but which would include all of the defects for the work center in which the inspection is being performed. The ability to see just defects associated with a specific work order is determined in this setup. Defect Description: The description is a 20-character field that helps the user further define the code. Defect Cost: The cost is defined by numeric field formatted as 999.99, and represents the cost of each occurrence of a defect. Work Center Inspection: The user has the option of viewing defects based on the product routing (Product Routing), or to view all defects (Maximum Routing). The Maximum Routing will show ALL defect codes in inspection, the Product Routing will only display those that have been related to a work center in which the inspection is taking place. However, the user can still opt to see the max (ALL) defects within the Defect Entry screen. Skip Location: Associated with the Defect Entry screens are subsets of information relating to the defects observed. Some of these subsets may be very useful to analyze defects causes and origination. If the user completes the Reference Designators in the Bills of Materials, then entering the reference designation for each defect may provide directions for investigation of repeated failures on an assembly. ManEx provides the capability to track the defects to locations, but if the user opts not to enter location information, then they may set the default condition of the screen to exclude location information. Checking the “Skip Location” box on the setup screen does this.
Skip serial no: If the user is not using serial number tracking for defect data collection, this too may be omitted by checking the “Skip Serial No” box on the setup screen. Skip NPF field: The Skip NPF field “no problems found” will cause the Defect Entry screen to by-pass this information. The Maximum NPF No box, no problems found, is provided for the user to record when observing the product. If, in the Defect Entry screen, the serial number had previously been rejected, and analysis of the product yield no further problem, either with cosmetics or function, then the user may change this number to 1, meaning the first time it was inspected or tested, no problem was found. If the product serial number is subsequently rejected again, and a second inspection finds a problem, the number may be incremented to a “2”. This will alert users to repeated rejections of a product serial number, one or more times with no discernable defects. If the number of times that a part has experienced an NPF (no problems found) exceeds that established here in the system setup, the user will not be allowed to go further. “Maximum number of inspections/WC” Box: This field is for serial number use only. The user may define how many times a given serial number can pass through a given |
| 1.4. How To ..... for Quality Defect Codes |
| 1.4.1. Setup Quality Defect Codes Module | ||||
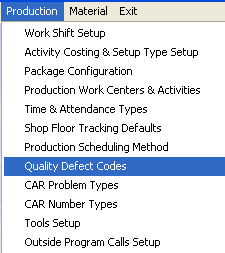
The following screen will appear:
The user initiates a new defect code by clicking on the Add button. Note: When creating a new Defect Code you will want the Defect Code descriptive as possible because this is what appears in the Pareto Chart in the SQC module information. NOTE: The "Defect Code" field is NOT editable once it has been saved.
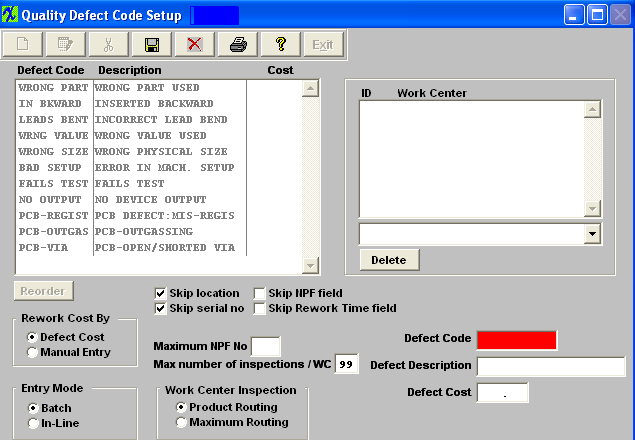
Enter in the maximum NPF number. Type in the desired number of times for Maximum number of inspections /WC.T his field is for serial number use only. If the user selects the “Skip Serial Number” field, this max number will be come invisible. In the Shop Floor Tracking module, Inspections section, once the pass number of a serial number exceeds the max number as set up here, a supervisor or special rights password is needed to continue.
Items may be re-sorted by clicking on the REORDER button, click on and drag the box of the left side of the defect desired to the (vertical) position desired. When completed with the order, click on the DONE button to return to the edit screen, and Save to record the changes. This order will be the order displayed in the pull downs when using this list in other modules within the system. Suggestion: Have the one most used at the top of the list. Depress the Edit button and work centers assigned to or deleted from the defect code. All fields are editable except for the "Defect Code" field.
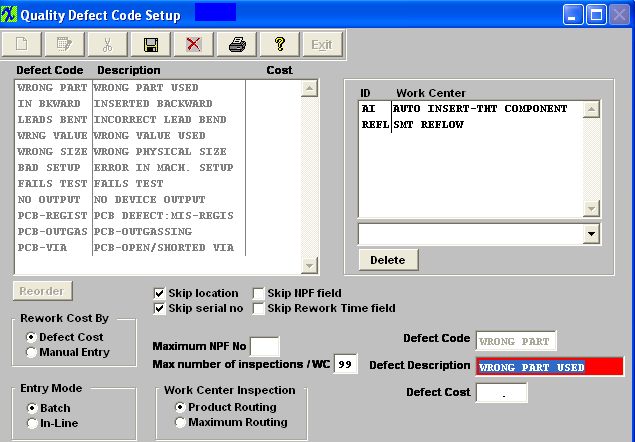 When all changes have been completed, the user must Save or Abandon changes.
User may ONLY delete a Defect Code if it has not been used in the SQC module. This info needs to be retained for history/reporting purposes. If the defect code has been used in the SQC module user will receive the following warning when trying to delete the defect code. 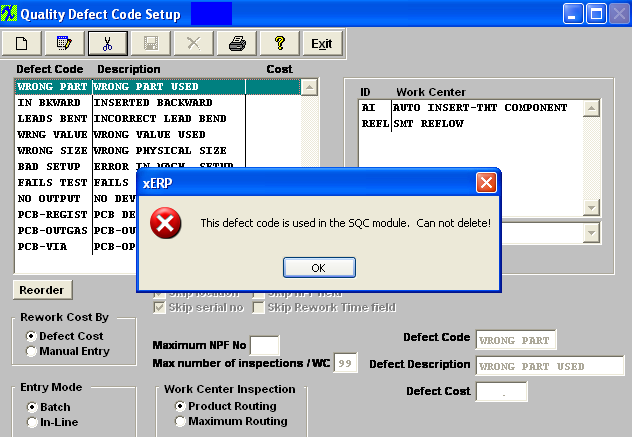 If defect code has NOT been used in the SQC module the defect code may be deleted. User will receive the following confirmation to be sure they want to delete the Defect Code.
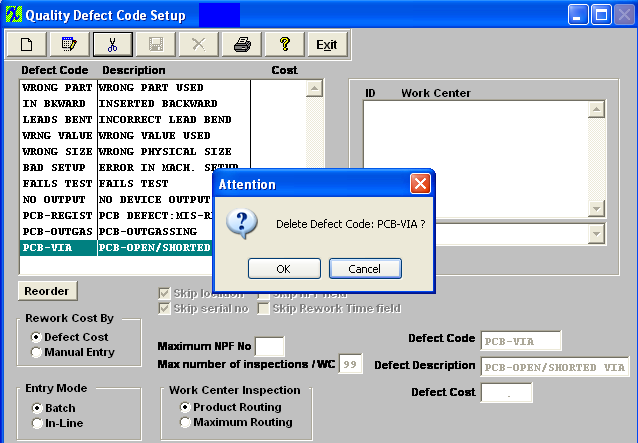 Depress OK to continue or Cancel to abandon the deletion.
Where Used: In all Statistical Quality Control tracking operations and reporting. «Mark as Completed in RoadMap in Section B Item 3-h» |
