1. Purchase Bar Code Receiving
1.1. Prerequisites for Bar Code Receiving

After activation, "PO Bar Code Receiving" access for each user must be setup in the ManEx
System Security module.  Users with “Supervisor Rights” will automatically have access.
 
Dock Received Purchase Order There must be a dock receiver for the purchase order. (If required in Purchase Setup).
Return/Shortage Reasons  Return/Shortage reasons must have been entered in System Setup - Return/Shortage Reasons Setup.
BarCode Printer Zebra Model #LP2844 and ZEBRA labels part number 10000281 (or equivalent) for the 4 x 6 label.  For further detail see Article #142
1.2. Introduction for Bar Code Receiving
This module is designed to streamline the receiving process by giving the user the capability to scan the bar code in PO Receiving and print out the labels upon receipt.  This module can be used with a Bar Code Scanner or manually.  This will enhance the process of receiving product by saving time with the simple procedure of scanning by bar code and the option to print out labels upon receipts. 
 
The objective of the bar code receiving is to minimize the time spent on receiving a PO.  Having a number of additional items on the screen is NOT practical from a space standpoint nor from a user standpoint.  If the receiving clerk is required to modify the Warehouse location, AVL, etc. they will need to use the manual PO Receiver module.


1.3. Fields and Definitions for Bar Code Receiving

Bar Code Command

When you first open the Bar code screen your cursor will be located in the “Bar Command” text box. You can use a scanner or just type the same value as you see on the print-out to navigate this screen.   For example when you first started you can just type “add” into the “Bar Code Command” space to activate the “Add” button. 

Supplier PL No  The Supplier PL No scanned or entered
Receiver No  The Receiver No scanned or entered
Date Received  The Current Date and Time will default in when Bar Code is scanned or info is entered manually
  Depress this button to clear Values (if scanned incorrect Bar Code or entered incorrect information) 
Depress this button to Print the Label after Transaction has been saved.
Print Labels Upon PO Receipts in BC If this box is checked the Label will be printed upon PO Receipt
PO Number  The PO Number (scanned or entered manually)
CO #  The Chance Order Number listed on the PO 
Buyer  The Buyer listed on the PO  
Item #  The item number on the PO for the part number scanned or entered manually 
Part Number  The Part Number scanned or entered manually
Revision  The Revision of the Part Number scanned or entered manually
Material Type  The Material Type assigned to the Part Number scanned or entered manually
Manufacturer Part Number  The Mfgr PN  listed on the PO
Part Manufacturer   The Mfgr listed on the PO
Accept Quantity  Enter the Accept Quantity 
Reject Quantity  Enter the Reject Quantity
Reject Reason  The reject reason field is linked to the appropriate setup tables if you print just partial information and press enter the information should get completed, but if the information is completely wrong then the system will prompt for the correct info. 
Inspection/Certifcate/1st Article  The 1st article disposition field is linked to the appropriate setup tables if you print just partial information and press enter the information should get completed, but if the information is completely wrong then the system will prompt for the correct info.  
Lot Code Entry Area 

Enter Lot Code number assigned to parts, expiration date, qty, etc. 

Serial Numbers Entry Area  Enter Serial numbers assigned to parts.
  If this button is displayed in Red related documents have been attached to this item in the ICM module and may be viewed by depressing the "View Inventory Item Related Documentation" button.  For further detail see Article #2396  

1.4. How To ..... for Bar Code Receiving
1.4.1. Accept/Reject Quantity
Enter Inventory Mgt/Purchase Order Receiving & DMR/Purchase Bar Code Receiving Module    

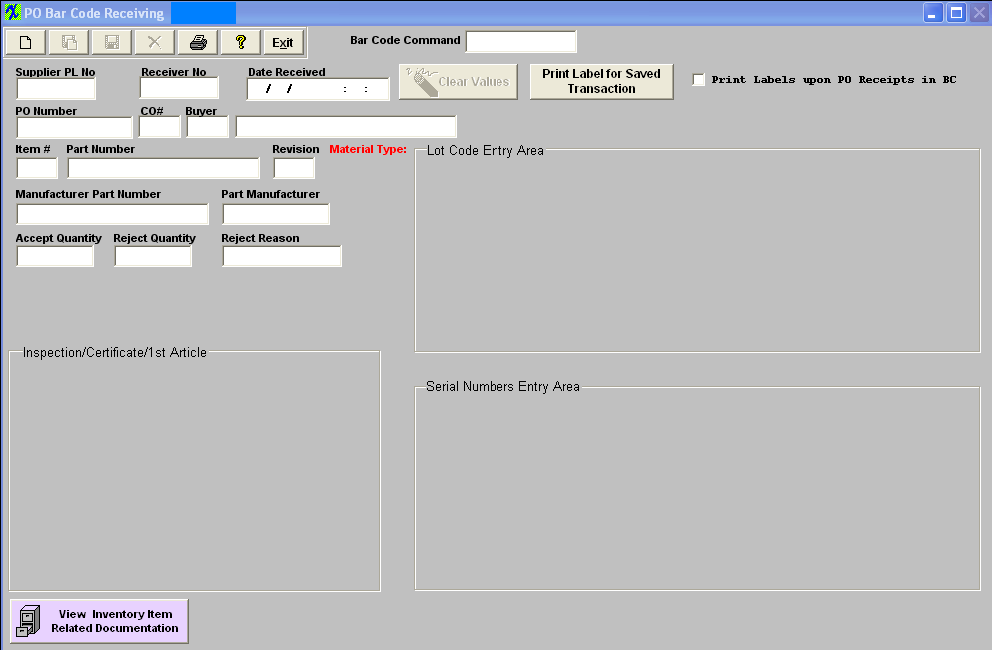
The following screen will appear:

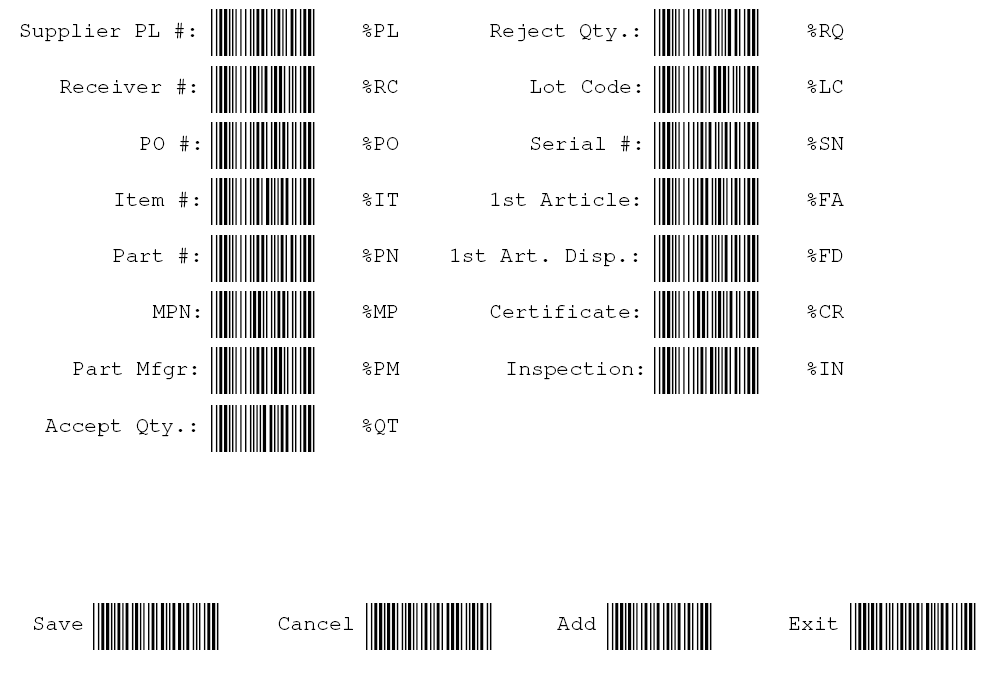
When you first open the Bar code screen your cursor will be located in the “Bar Command” text box.  Use print button to print a bar code for all the commands you can use in this screen.


You can use a scanner or just type the same value as you see on the print-out to navigate this screen.  For example when you first started you can just type “add” into the “Bar Code Command” space to activate the “Add” button.  When in the “Add” mode cursor will be positioned in the “Supplier PL No” field you can enter or scan a supplier packing list number or if you would like to advance to the let say “PO Number” field you can type\scan “PO” and the cursor will advance to the PO # field.   If you have a barcode which has “PO1530” where “1530” is an actual PO#  the cursor will advance to the “PO Number” field and place value of “1530” into it.   You can do the same with any of the other fields, which have a command listed in the print out.
 
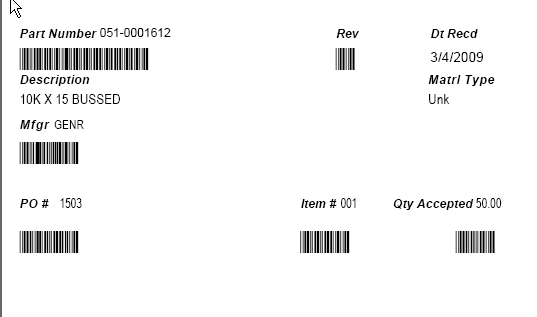
Depress the "Print Label for Saved Transaction" or check the box "Print Labels upon PO Receipts" .  ManEx has designed the labels to be printed on a Zebra Label #10000281 (or equivalent) for a 4 X 6 label.