1. How To ..... Forecast
1.1. Find a Forecast
Enter Material Planning/Master Production Schedule (MPS) & Forecast/Forecast   

The following screen will appear:

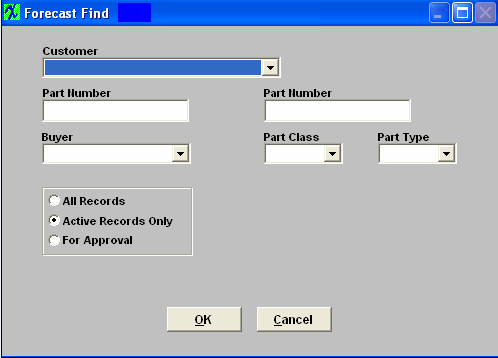
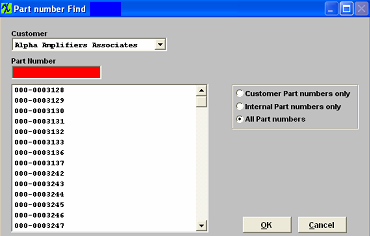
Depress the Find action button.  A dialogue box will appear that will filter the amount of forecasts displayed.  For example, clicking on OK without any entry will display all active forecasts. Selecting a customer will then display only forecasts for the selected customer. Clicking on a part number (or range of part numbers) will display all forecasts for them, if they are available.  

After depressing the OK button the following screen will appear:


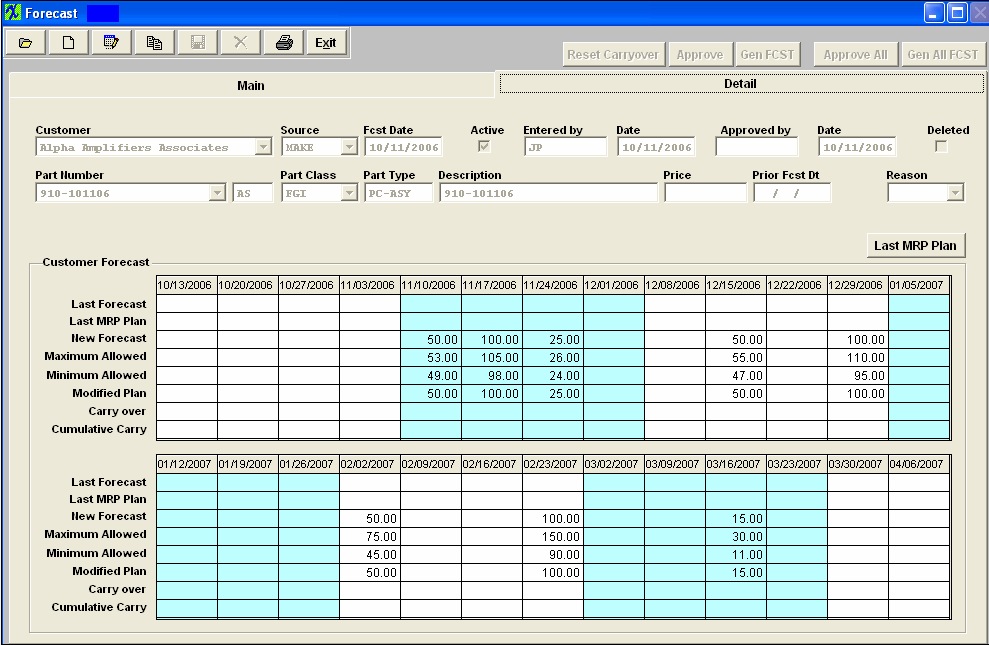
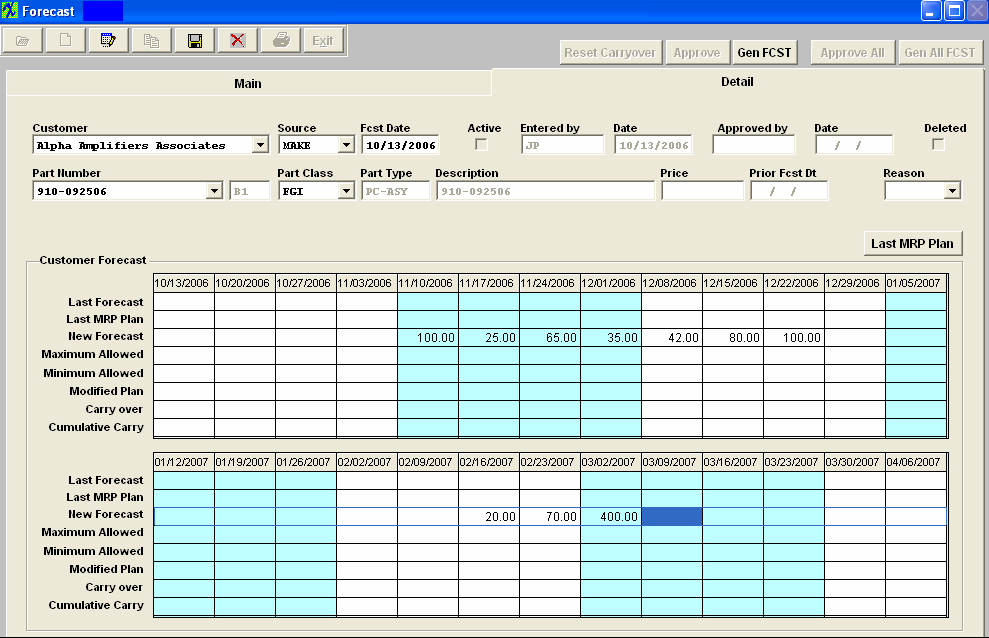
Highlight the PN of interest, then click on the Detail tab and the forecast detail for that PN will be displayed  


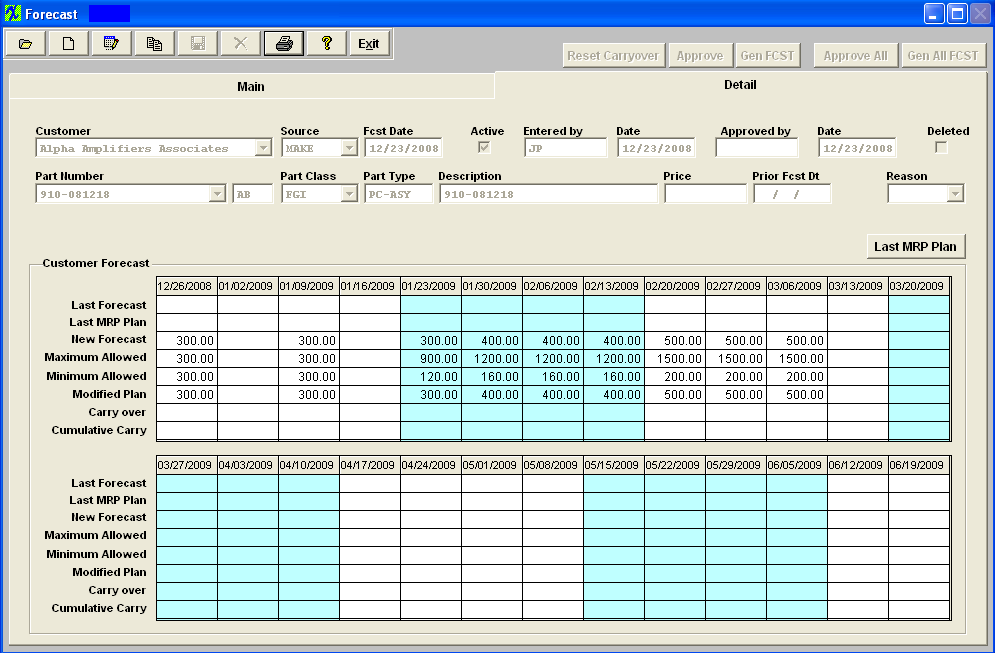
The weekly buckets are established as of the end date of the current week.  Any data loaded from an excel sheet will aggregate the data by these week end dates.

The Maximum Allowed and Minimum Allowed rows of data are calculated based on the tolerances provided for the customer in the Forecast Setup module.   


1.2. Add a Forecast
Enter Material Planning/Master Production Schedule (MPS) & Forecast/Forecast   

The following screen will appear:

Depress the Add a record action button.  The following screen will appear.  Select a Customer from the dropdown list. 


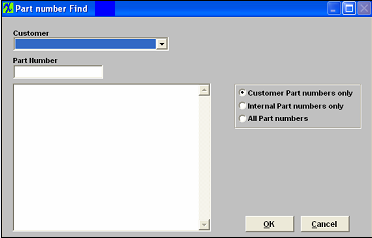
Once a Customer is selected, the user may view a list of part CUSTOMER numbers for the chosen customer, or…

Choose from a list of INTERNAL part numbers associated with the chosen customer, or…

Choose from a list of ALL part numbers in the database.


Using the Highlighted RED box, the user may type in a part number, and the dropdown list will move to show the information typed.


When the Customer and Part number are identified, depress the OK button. 


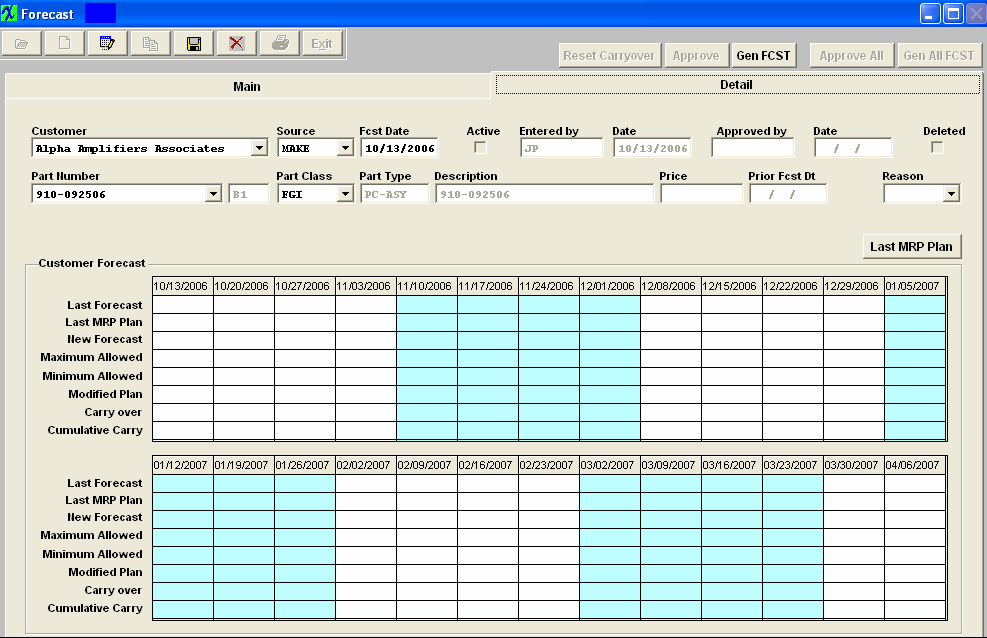
Go to the Detail Tab Screen.  The header information will deafult in;

Enter in the new forecast;

Once the forecast is entered, the User should save the information by depressing the Save record action button, and/or depress the GenFCST button to extend the Original forecast to the Planned Forecast, based on the system setup for the customer.

The user may also approve the forecast, if they have the authority. If the Forecast Setup indicates that approval is NOT required, the Approval button will be inactive, and saving the forecast will automatically make it active.
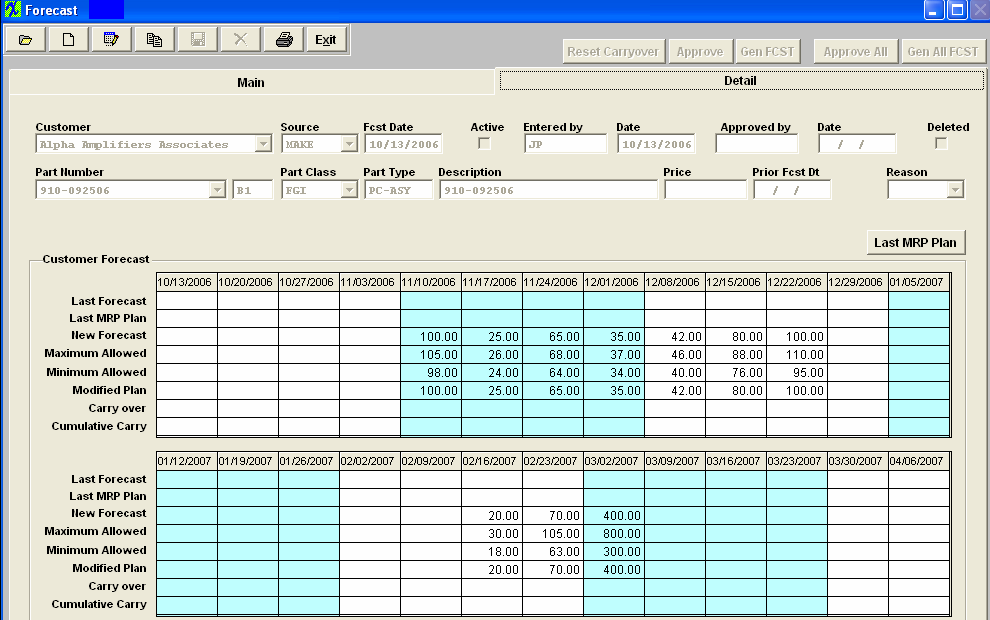


1.3. Edit a Forecast


Depress the Edit button. Then the NEW FORECAST line can be edited. If there was a previous forecast, it will be shown on the top line.

In order to move forward with the forecast, the ACTIVE checkbox needs to be unchecked (in edit). After saving the changes and checkbox, then re-entering the same forecast in edit mode will activate the Approval and Gen FCST buttons. (If approvals are not required in the system setup, the Approval buttons will not be displayed.)

The Reset Carryover button can be used but as mentioned earlier, needs to have an approval entered in the system setup. The purpose of this button is to allow the user to eliminate any items carried over from previous or unfulfilled forecasts. When activated and password entered, the prompt is for a date on which the carryover will be eliminated.
 
 
The Last Forecast will be the values entered in the most recent previous forecast plan upon which MRP acted.

The Last MRP Plan will be what MRP will be providing as a basis for component and work orders.

The New Forecast is the forecast being entered in the edit mode.

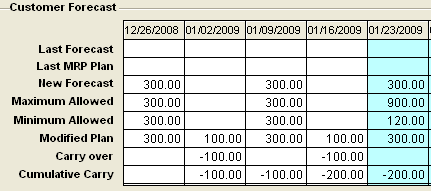
The Maximum Allowed is the last forecast plan modified by the system setup tolerances. If the last FORECAST was for 100 units on the first week, and the tolerance was for 50%, then this line would have the number 150.

The next is calculated similarly, showing the Minimum Allowed. So if the tolerance was 10%, then this line would be 90 units.

The Modified Plan is the New Forecast modified by the constraints of the Maximum and Minimum allowed. In this example, no change is allowed, because of the system setup and the fact that we are in the current period. Notice in the 5th week, these numbers become active as it falls in the next period.

The Carry Over is anything that is not covered by the forecast modified by the tolerances. Thus, if the previous forecast were 200, and the current forecast is for 300, and the tolerance is zero, the forecast could not be changed from 200 to 300, but held constant at 200. But the 100 left over that couldn’t be added to that week of the forecast becomes the carryover to the next week. As long as the tolerance allows it, the next week will be inclusive of the carryover. If it still falls outside the tolerance, it carries over to the following week. It will carryover until it can be absorbed into the forecast based on the tolerances for each period.

The Cumulative carryover is simply adding up any individual carryovers to keep track of the total amount of “catch-up” that is required.