| 1. Recurring Entry Setup |
| 1.1. Prerequisites for Recurring Entry Setup |
Users MUST have full rights to the "All Journal Activities" in Accounting Security . Users with “Accounting Security Supervisor” rights will automatically have access. |
| 1.2. Introduction for Recurring Entry |
Recurring Entries are similar to Standard Journal Entries but are interval based. The user can set Recurring Journal Entries to generate every x number of days or periods and save time and effort by avoiding reentering the same posting over and over again. A good example would be an accured interest on a bond. If you have outstanding bonds of $1,000,000 at 6% that will be paid off in one year, so each month for 12 months you would have to accrue the interest liability. In this case you would set up a Recurring Entry to debit the interest expense for $5000, and credit the liability account "Accured Interest Expense" for the same amount. |
| 1.3. Fields & Definitions for Recurring Entry Setup | ||||||||||||||||||||||||||
. |
| 1.4. How To ...... |
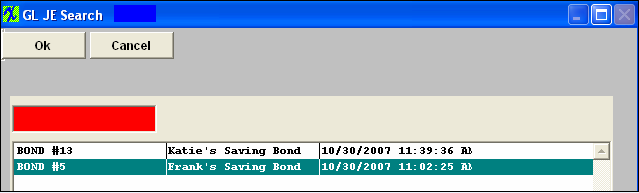
| 1.4.1. Find a Recurring Entry Setup | ||||
The following screen will appear:
Once selected the record information will appear on screen:
 |
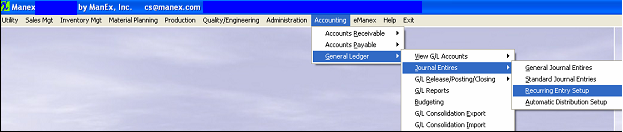
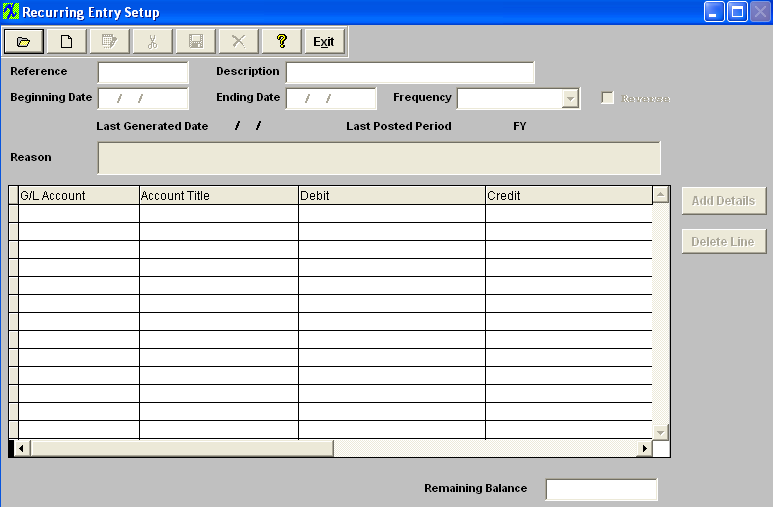
| 1.4.2. Add a Recurring Entry Setup | ||
The following screen will appear: Selecting the ADD record button will allow the user to enter information about a New Recurring Entry. Enter a unique Reference to this entry, Description, Beginning Date, and Ending Date. Depress the down arrow on the right of the Frequency field and select the desired frequency (Note: That there will be a blank listed in the pull down. This is the way VFP treats a combobox object. Otherwise the field will show some value even if the record is empty and no data has been selected. If this Blank is selected, the system will properly treat the field as still being empty and will prompt the user for the proper selection at the time the record is saved).
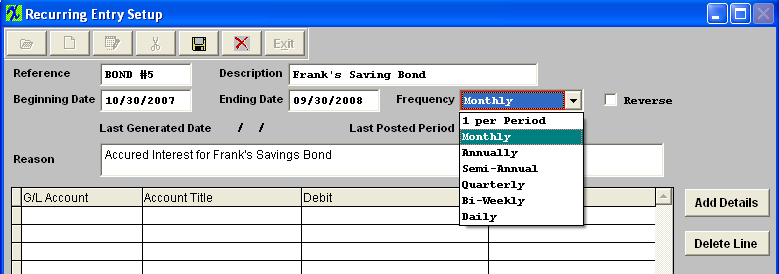 If a reversed entry check the Reverse entry box. Enter a default reason for the generated entry.
The actual data entry occurs in the middle section. Once you tab out of the Reason Field the system will default to the first GL Account Number to be entered. The user must enter a G/L Account directly by typing in the account number. The system will default to the nearest G/L Account match as you type. Then once you hit the Enter/Tab key the system will default in the Account Title Information. Then enter the Debit or Credit Amount. Depress the "Add Details" button to add another G/L Account. The user may choose to delete a line in the template by selecting the appropriate line and depressing the ‘Delete Line’ button. 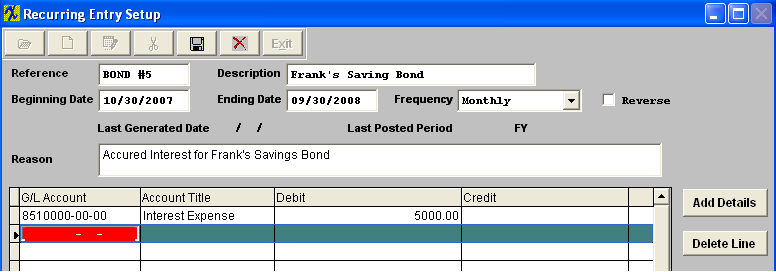 Enter the Debits and Credits until the Remaining Balance at the bottom of the screen equals 0.00.
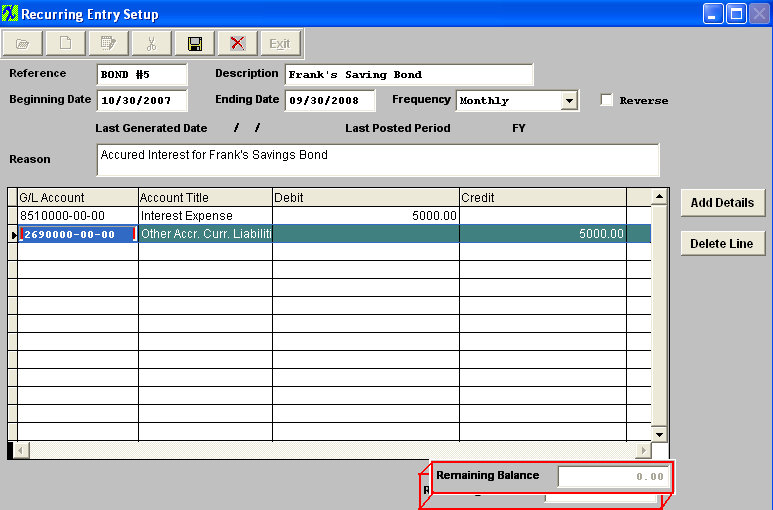 The Abandon changes action button is available at all times during an add operation. The Save record button will also show as available but will not allow you to save the record until the entier Recurring Entry Setup is in balance (debits = credits). Once the Entry is in Balance, the system will allow you to save the Recurring Entry. |
| 1.4.3. Post a Recurring Entry Setup | ||||||||
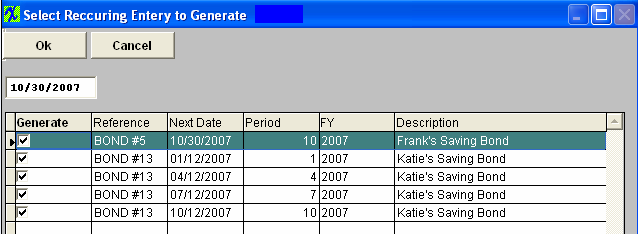
The following screen will appear: Depress the Generate Recurring Entries button.
The Last generated entry will display on screen as follows: Here you may edit the Recurring General Journal Entry by selecting the Edit button or delete the Recurring General Journal Entry by selecting the Delete button. Note: Once the Recurring General Journal Entry has been ‘Approved’ you will no longer be able to edit or delete the record. 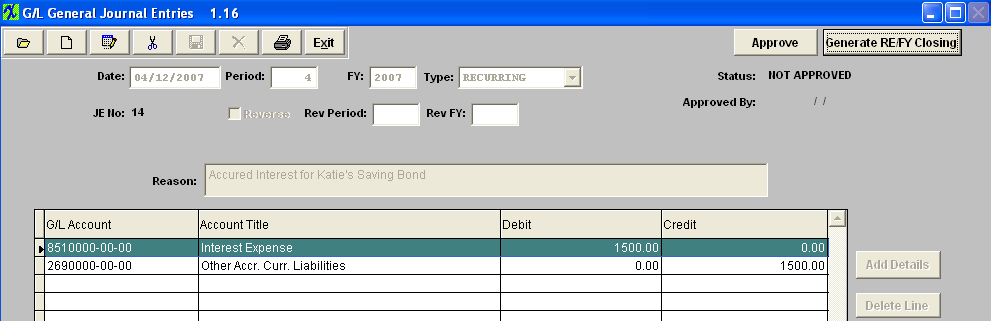 Or Depress the Find Record button, and select the appropriate Open Recurring Journal Entry from the list. 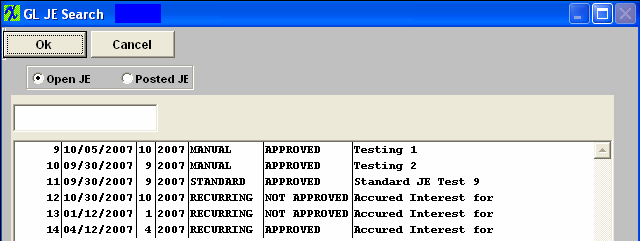 Depress the Approve button. You’ll be prompted for an authorized password. The Status will be changed to "APPROVED", and can now be posted to the General Ledger. 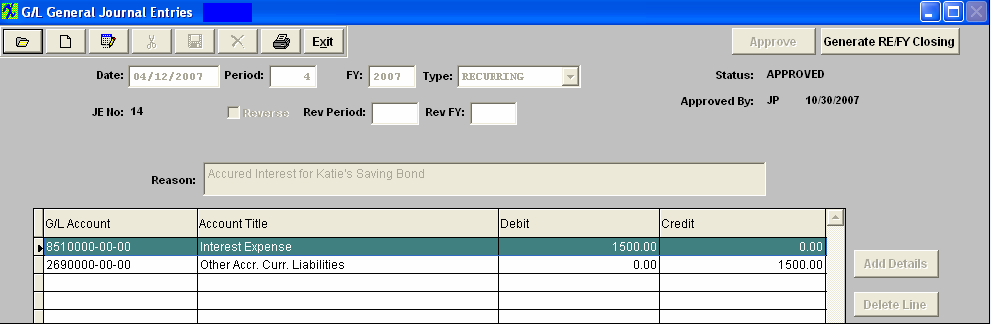 |


| 1.4.4. Edit a Recurring Entry Setup |
|
Remember that DEBITS must equal CREDITS in order to save.
|