| 1. Standard Cost Adjustment |
| 1.1. Prerequisites | ||
|
After activation, "Standard Cost Rollups" access for each user must be setup in the ManEx System Security module. Users with “Supervisor Rights” will automatically have access. Note: Users MUST have special access for the "Roll Costs" button to be activated. This access is assigned through Security/User Rights.
|
| 1.2. Introduction |
This module allows the user to change the Standard Cost, labor cost, overhead cost, other costs, and user defined costs. This screen also allows a roll up of standard costs into the appropriate Bill of Materials. The user has the ability to start a new cost roll up. The roll ups go to another screen where the user can select or modify the rollup.
(This module will consider Make/Buy inventory part numbers as BUY parts and will be rolled into the Buy portion of the Std Cost Adjustment module. Phantom parts are not rolled up and calculated costs assigned. The components will remain rolled up to the next higher assembly. The system will reset all the Phantom parts to 0.00 before saving it to the inventory. The standard cost adjustment module will just use their cost to calculate Top assembly costs. When the last rollup is reached, the system will reset all phantom standard costs to zero (since they should not have a cost), and also make sure that any phantoms at the lower level has the "Use calculated cost" checked so that it gets updated in order to roll into the next level up. Because users may have numerous phantom (not make/phantom) assemblies in the system, the module will automatically check the "Use calculated cost" for every phantom assembly at each cost roll level. Once satisfied, the user can roll the costs into the inventory tables and the General Ledger journal entries will be created. The user also has the ability to level make parts. All Make parts will be leveled. After the leveling has been completed, the user has the ability to roll up Make parts. All Make parts will be rolled up. If the same part appears more than once (used at different levels of BOM's throughout the system), the BOM will be leveled and considered at the lowest level that exists within the system. The user then go to the Modifications tab where he/she can evaluate the changes, accepting or modifying them. Once the user is satisfied, the Roll Costs button can be used. All inventory tables will be updated and records will be created for the General Ledger Journal entry. Note: A high level Accounting password is required to generate the Roll up. When standard cost adjustments are created against an inventory part number that contain both regular stock and In-store stock the module will only show the delta for the regular stock on hand. The Std Cost Adjustment module will filter out the in-store warehouse qty's when updating the costs within the Cost Adjustment Release to GL screen.
|
| 1.3. Fields & Definitions |
| 1.3.1. Selection Tab |
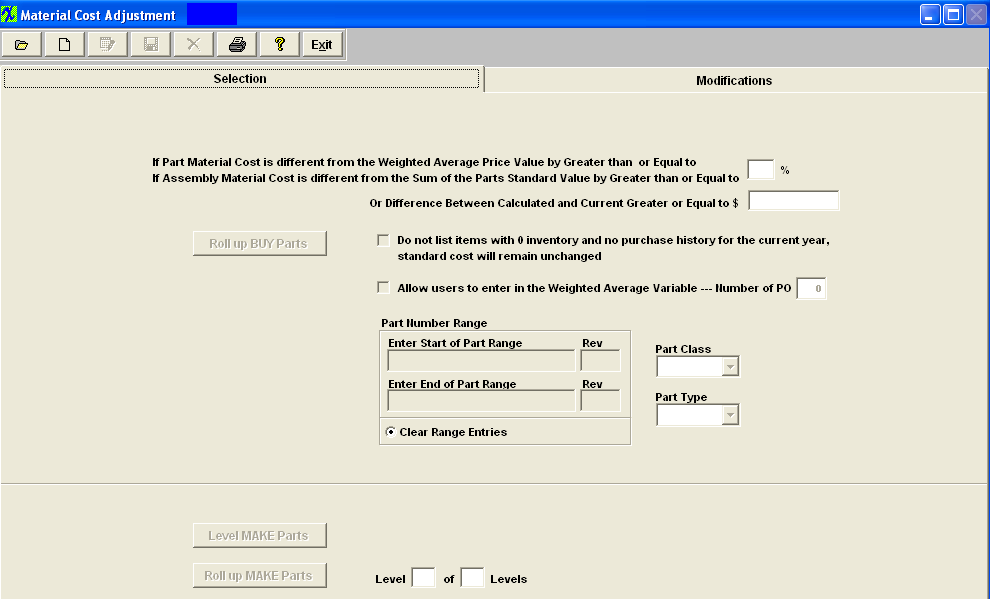
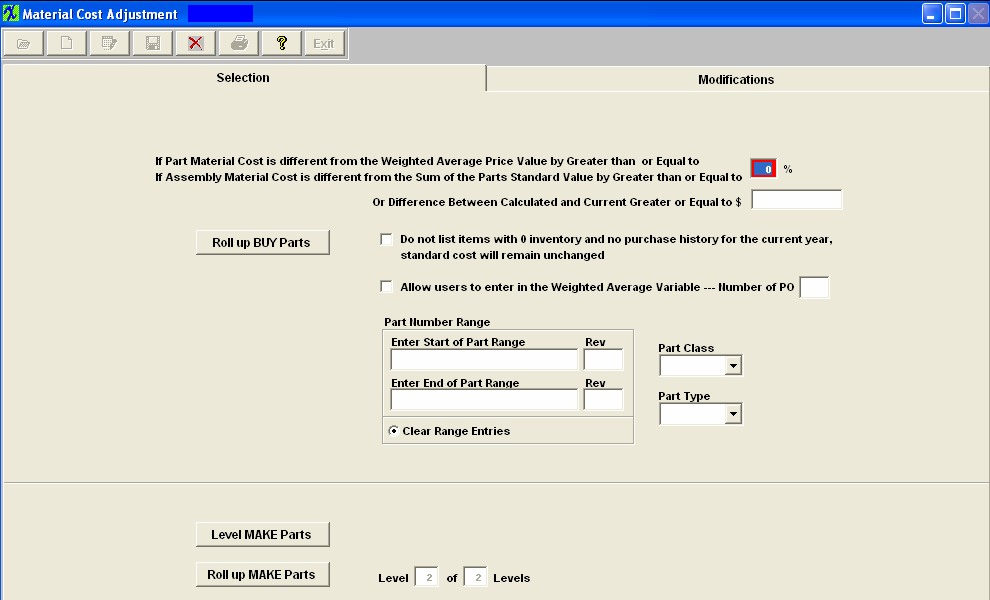
Enter the percentage to use if the part material cost is different from the Weighted Average Price Value by Greater than or Equal to or if the assembly material cost is different from the Sum of the parts standard value by Greater than or Equal to Or Difference between Calculated and Current Greater or Equal to $
Example: if there is a $2000.00 assembly in stock, and users apply the 1% criteria, a $19.00 difference won't be brought into the matrix to be checked. On the other users enter 0%, then every single part will be included. A Minimum dollar value has been added to the Standard Cost Adjustment screen that will be used to determine whether or not an item is included in the matrix. If left blank then the percentage rules. If value entered then it becomes the criteria for inclusion in the matrix.
Check box if you "Do not want items listed with 0 inventory and no purchase history for the current year", then the standard cost will remain unchanged Check this box if you want to "Allow user to enter in the Weighted Average Variable". Once this has been checked the users can then enter in the number of the most recent Purchase Orders they wish to have included in the Weighted Average Calculation. This give the user the option to eliminate the Quick Turn buys that may throw the calculations off. User also has the option to select the part number range , class, or type, on which part(s) to process. This will complete the adjustment process faster and user will be able to maintain more accurate records and also allow the users the ability to narrow the resulting filter of the Buy parts. NOTE: The Part Number range selection is available for only BUY parts. ManEx does not offer it for MAKE parts, because the system needs to roll ALL sub assemblies up to determine the top level costs. However, in the modifications tab, it is possible to sort by part number or class, to make it easier for the user to find specific items of interest.
To roll up the Buy Parts, depress the Roll up BUY Parts button. To roll up Make Parts, depress the Roll up MAKE Parts button. To Level Make Parts depress the Level MAKE Parts button.
|
| 1.3.2. Modification Tab | |||||||||||||||||||||||||||||||||||||||||||||||||||||||
Modifications tab field definitions 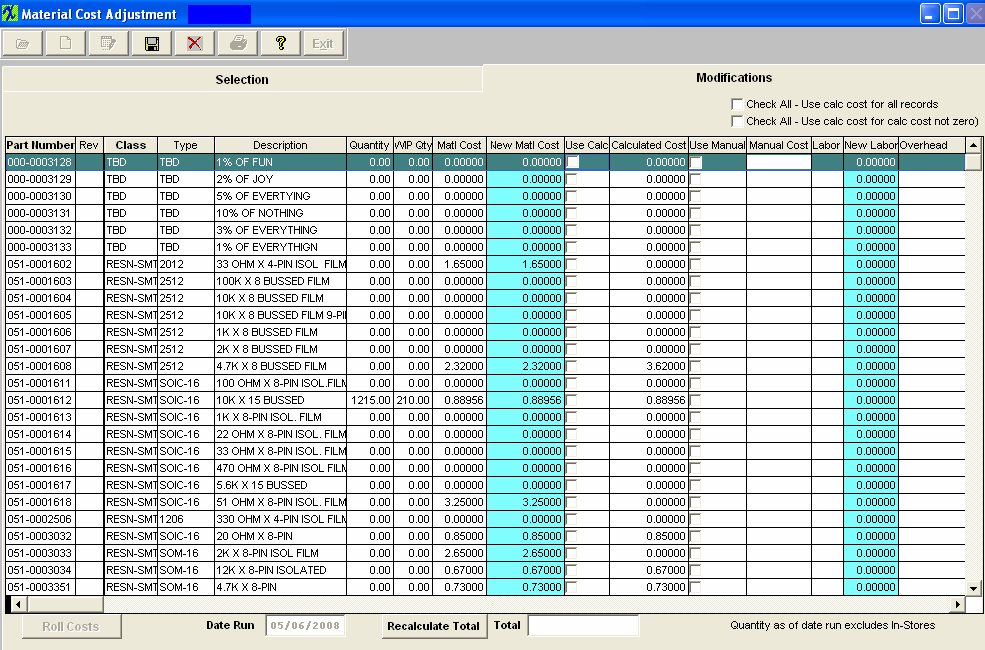
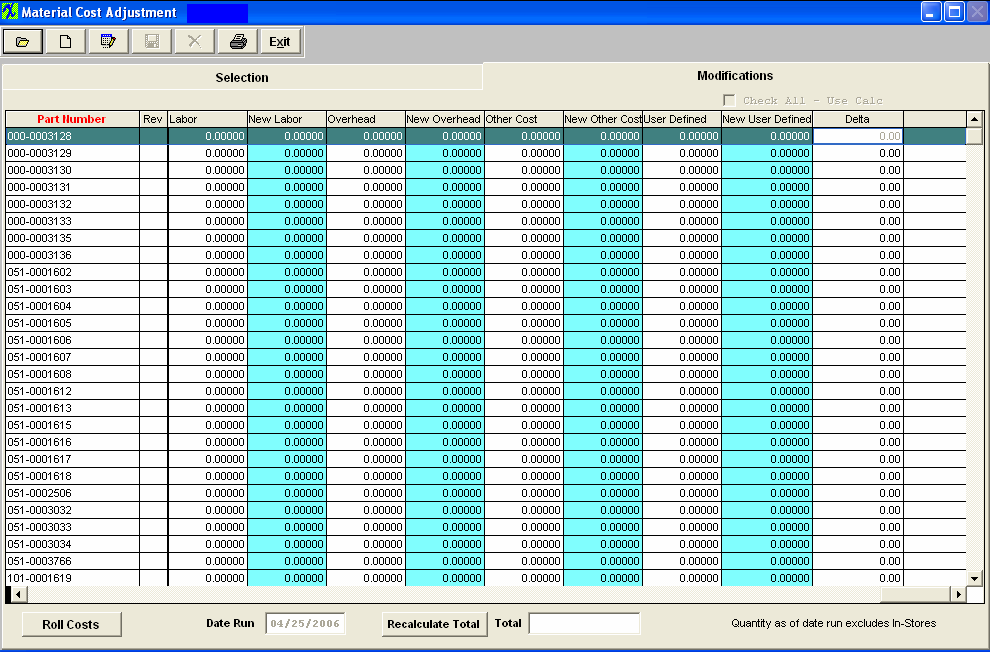
The number the user has assigned to the part within the ICM module. The revision number assigned to the Part Number within the ICM module. The classification to which the part belongs. The type within the classification to which the part number belongs. The description assigned to the Part Number within the ICM module. The quantity is the number of units currently owned. This excludes all un-purchased In-Stores Inventory. ( for explanation on In-Store Inventory See Purchasing Manual) See Article #1240 for more detail on why the system will not allow user to enter in a fraction of a number, and an alternative. This cost is defaulted in from the cost currently assigned to the part number through ICM or PO . ·Important Note - If accounting is installed: For all buy parts, the standard cost field must have data entered. If this data is missing (or wrong), the Raw Materials Inventory and the Work In Process (WIP) will be incorrect for the accounting records. All make parts which are not labor only (the customer brings you the kit and all you do is apply the labor), must have data entered in the standard cost field. Additionally, the data entered in the standard cost field for the make part must equal the sum of the Bill of Materials components.(Please refer to Bill of Materials Reports – Bill of Material With Standard Cost.) If the data is missing or wrong on a Make Part, the Work In Process, Cost of Goods Sold and Finished Goods Inventory will be wrong for the accounting records. If the sum of the Bill of Materials components does not equal the standard cost per the Item Master, a configuration variance will generate.
By moving the arrows (at the bottom of the screen) to the right the following fields are also available
|
| 1.4. How To .... |
| 1.4.1. Find a Standard Cost Adjustment | ||
|
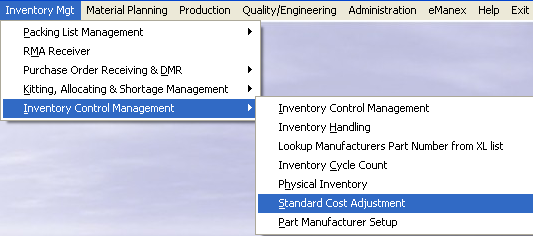
The following screen will appear:
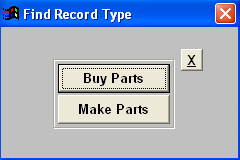
To find a Previously created Standard Cost Adjustment where the roll costs has not yet been performed, depress the Find action button. The following selection screen will appear:
If you select to find by Buy Parts, the following screen will appear:
|
| 1.4.2. Start New Roll Cost | ||
The following screen will appear:
Depress the Add action button (Start New Cost Roll) and the folloiwng items will become enabled:
Type in the percentage to use if the part material cost is different from the Weighted Average Price Value by Greater than or Equal to or if the assembly material cost is different from the Sum of the parts standard value by Greater than or Equal to Or Difference between Calculated and Current Greater or Equal to $ Example: if there is a $2000.00 assembly in stock, and users apply the 1% criteria, a $19.00 difference won't be brought into the matrix to be checked. On the other users enter 0%, then every single part will be included. A Minimum dollar value has been added to the Standard Cost Adjustment screen that will be used to determine whether or not an item is included in the matrix. If left blank then the percentage rules. If value entered then it becomes the criteria for inclusion in the matrix.
Check box if you "Do not want items listed with 0 inventory and no purchase history for the current year", then the standard cost will remain unchanged Check this box if you want to "Allow user to enter in the Weighted Average Variable" or you can type in the number of PO(s) to include in the calculated weighted cost. User also has the option to select the part number range , class, or type, on which part(s) to process. This will complete the adjustment process faster and user will be able to maintain more accurate records and also allow the users the ability to narrow the resulting filter of the Buy parts. NOTE: The Part Number range selection is offered only for BUY parts. ManEx does not offer it for MAKE parts, because the system needs to roll ALL sub assemblies up to determine the top level costs. However, in the modifications tab, it is possible to sort by part number or class, to make it easier for the user to find specific items of interest.
NOTE: Due to the fact that inventory records flagged as MAKE/BUY can not have Work Orders generated for them. The Standard Cost Adjustment module will consider MAKE/BUY inventory part numbers as BUY parts and will be rolled into the Buy portion of the Std Cost Adjustment module. To roll up the Buy Parts, depress the Roll up BUY Parts button. Upon rolling the records the system will now consider all of the Costs, and not just the material cost. After the calculation is complete, the following message will appear:
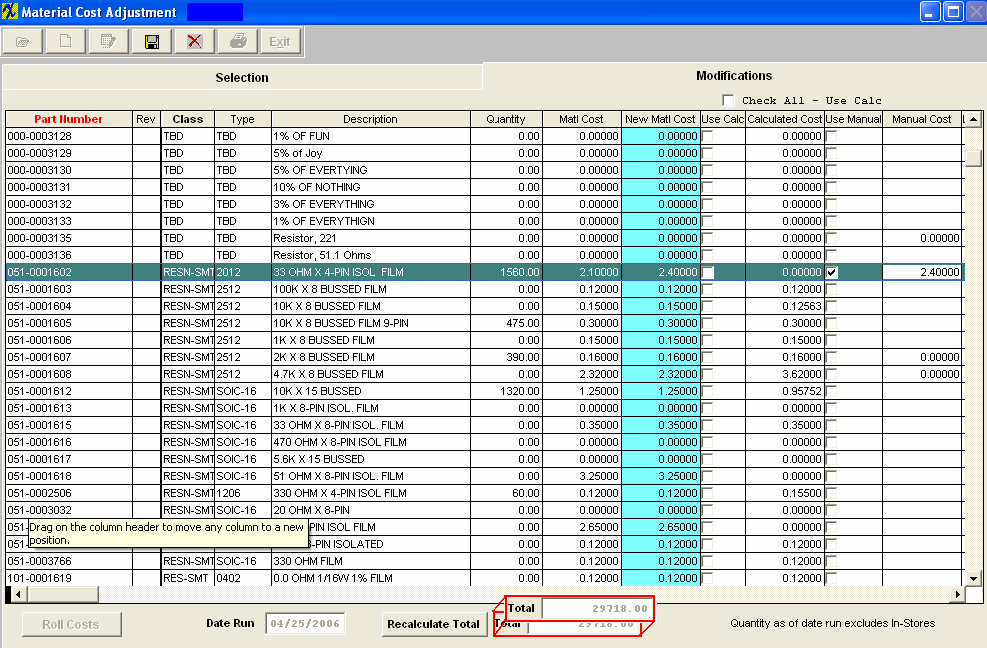
Depress the OK button. Depressing on the Modifications tab reveals the following:
Depress the Edit button. To effect a change, click on either the Use Calc column or the Use Manual column. If you choose Use Manual column, you must also enter a new manual, labor, overhead, other, or user defined cost:
Note that the Delta column updates automatically. This is the difference between the old Standard Cost and the New Standard Cost multiplied by the Quantity. (Note: The quantity may include setup scrap and/or run scrap if the box to exclude scrap from Cost Rollup is not checked in the Kit Default Setup screen). To Re-calculate the total change (Delta), depress Recalculate Total button.The Total will update, as illustrated:
Depress the Save record action button. To Post the changes to the Standard Cost and generate the General Ledger entries, depress the Roll Costs button. The system will update the "Last Change" field (within the ICM screen) for part numbers that actually had pricing information changed within the Std Cost Adjustment. Enter your password. Note: This requires a high level accounting password. The following message will appear once the update has been completed.
Depress the OK Button.
|
| 1.4.3. Level and Roll Up Make Parts | ||
The Level Make Parts button causes the system to find all Indented Bills of Materials. Then the system “tags” the lowest indenture. Users will NOT be able to add or edit any BOM during this process. If a user is already in the process of modifying a BOM and this process is started the user will NOT be allowed to save the changes until the leveling process is complete.
The following screen will appear:
Depress the Add Record (Start New Cost Roll) action button, enter password, then depress the Level MAKE Parts button. The following message will appear once the update has been completed. 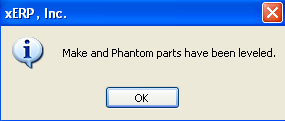 Depress the OK Button. The following screen will appear: 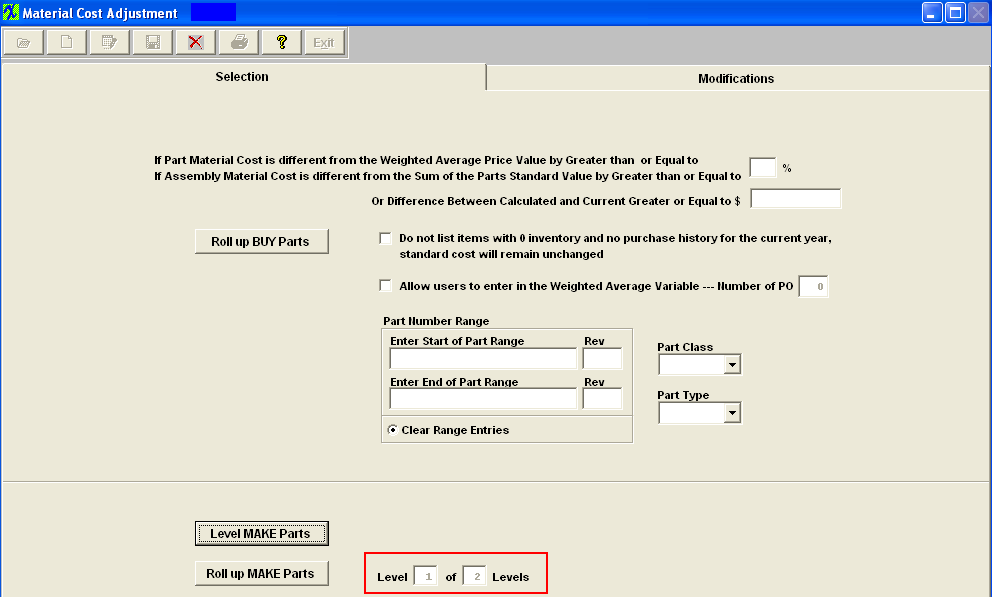 The Level of Levels information automatically updated to the next level that needs to be Rolled up.
Then depress the Roll up Make Part button. The following message will appear:
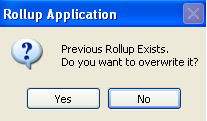
Depress "Yes" to continue. If a rollup already exists the following option screen will appear:
Depress "Yes" to continue. The following message will appear:
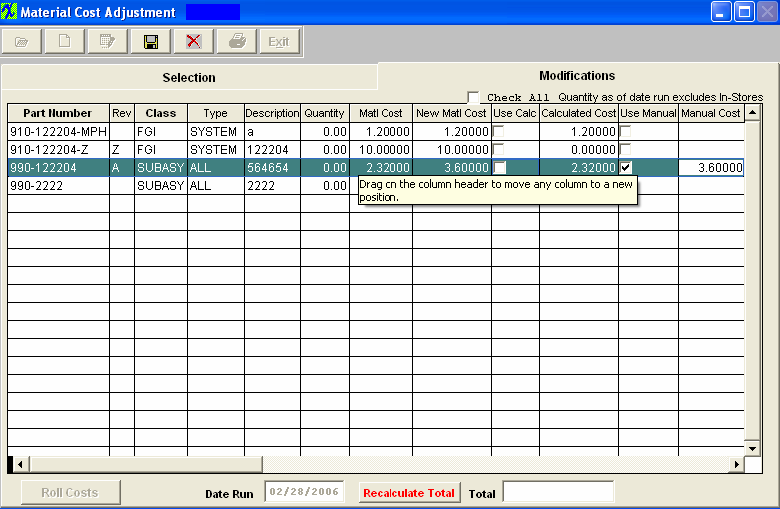
Enter into the Modification screen, only the Level 1 of 2 Levels assemblies will be displayed (sub-assemblies, etc). Depress the Edit Record action button and select the Use Calculated or Use manual to make any changes. If Use Manual is selected then you have to enter in the Manual Cost.
Save the changes and depress the “Roll Costs” button. The following message will appear:
Depress the OK Button, then return to the Selection screen.
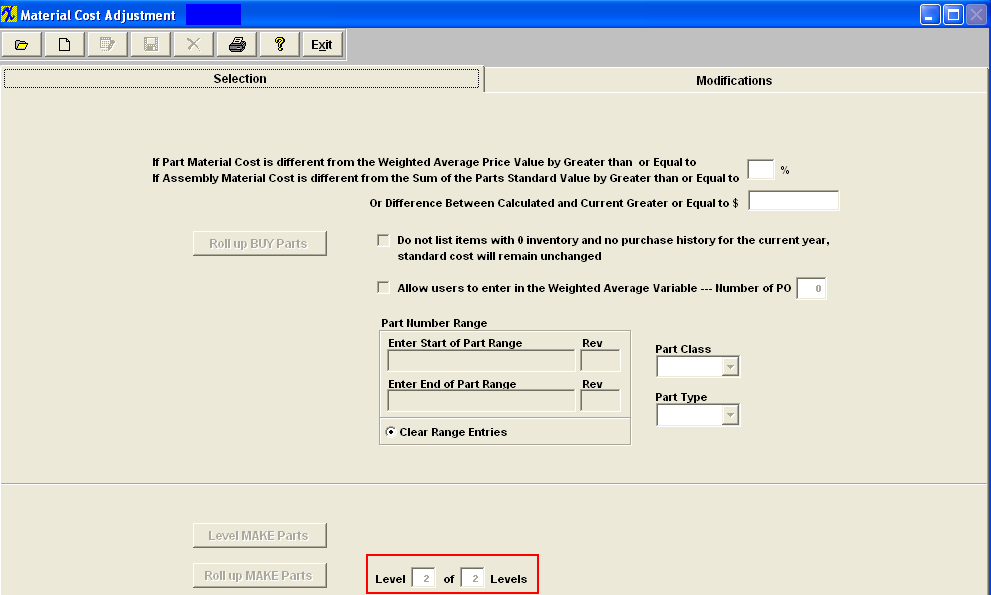 The Level of Levels information automatically updated to the next level that needs to be Rolled up.
Depress the Add Record (Start New Cost Roll) action button, enter password, then depress the Roll up MAKE Parts button to roll up Level 2 of 2 Levels. Continue this process to level all indents starting with the lowest to the highest.
Once the highest level has been reached the Modufications screen will be poplulated with all the Finished Goods Inevntory parts.
 a) For the PHANTOM parts the standard cost calculated is based on their components (SUM of component's qty * component standard cost). Once the standard cost is calculated for the PHANTOM part, the cost roll up will treat the PHANTOM part as a single entity on the top assembly BOM and proceed as it was a BUY part with the std cost already entered.
b) If one of the component parts on the top level is a MAKE (not MAKE_BUY) and HAVE components assigned to it, the cost roll up will NOT include the std cost of the parts itself, it will only include the std cost of its subcomponents. c) If one of the component parts on the top level is a MAKE (not MAKE_BUY) and does NOT HAVE parts assigned to it the cost roll up will include the std cost of the part itself. d) If one of the component parts on the top level is a MAKE and MAKE_BUY the cost roll up will included the std price for the part itself and will NOT include the std costs for the subcomponents. For an example see the Word attachment <<The Std Cost of the MAKE_BUY_081211.docx>>). e) If one of the component parts on the top level is a MAKE and a Phantom/Make the cost roll up will NOT include the std price for this part because the cost roll up will include the cost of this parts components. Note: The calculated cost will only include the costs for ACTIVE parts and subassemblies as of the date of the roll up and will NOT include any parts that may have been identified as inactive either in the item master or in the obsolete date of the part on the BOM. The values displayed should be in sync with the BOM with Std Cost Report values. The following may be why the Standard Cost Roll is different from the Cost BOM Reports. a) On the costed BOM Report for a Make/Buy assembly we display the value of the BOM in the costed report, but that total is NOT used in subsequent rollups to higher levels only the standard cost is.
b) In Kit Default Setup , user can exclude scrap and setup scrap in Kitting, MRP, and Cost Rollup, this will overwrite what user check in the BOM. Therefore, if user checks "Setup Scrap" checkbox in BOM, but checks to exclude in cost roll, the costroll will not calculate setup scrap cost, but BOM will always calculate setup scrap cost if the Setup Scrap checkbox in check in BOM. |
| 1.5. Std Cost Adjustment Reports | ||
To obtain the Standard Cost Adjustment report, select the Print button from the ManEx action buttons at the top of the screen.
The following screen will appear:
Standard Cost Rollup Report will print:
 Note: The calculated cost will only include the costs for ACTIVE parts and subassemblies as of the date of the roll up and will NOT include any parts that may have been identified as inactive either in the item master or in the obsolete date of the part on the BOM.
ManEx strives to make the Std Cost Rollup values be in sync with the "BOM with Std Cost" "Top Assembly Costed BOM" report and the "Indented Costed BOM" report. The following may be why the Standard Cost Roll is different from the Cost BOM Reports.
a) On the costed BOM Report for a Make/Buy assembly we display the value of the BOM in the costed report, but that total is NOT used in subsequent rollups to higher levels only the standard cost is. b) In Kit Default Setup , user can exclude scrap and setup scrap in Kitting, MRP, and Cost Rollup, this will overwrite what user check in the BOM. Therefore, if user checks "Setup Scrap" checkbox in BOM, but checks to exclude in cost roll, the costroll will not calculate setup scrap cost, but BOM will always calculate setup scrap cost if the Setup Scrap checkbox in check in BOM. |
| 1.6. FAQs - Standard Cost Adjustment |
| Facts and Questions for the Standard Cost Adjustment Module |
| 1.7. ManEx Minutes-Std Cost Adjustment |
