| 1. How To ..... for Production Work Centers & Activities |
| 1.1. Setup the Production Work Centers & Activities | |
|
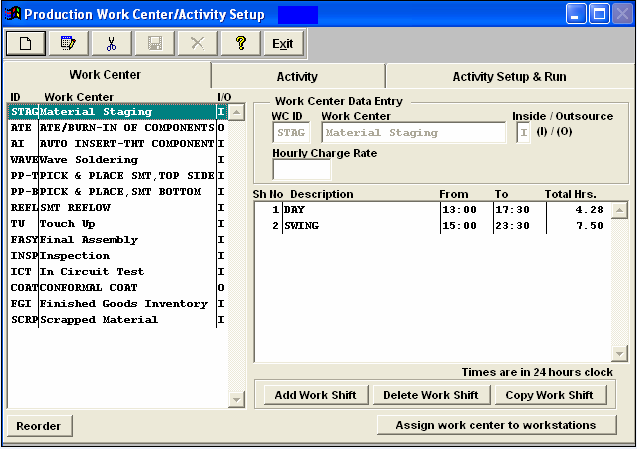
The following screen will appear:
For the highlighted Work Center, enter in the Hourly Charge Rate.
|
 |
|
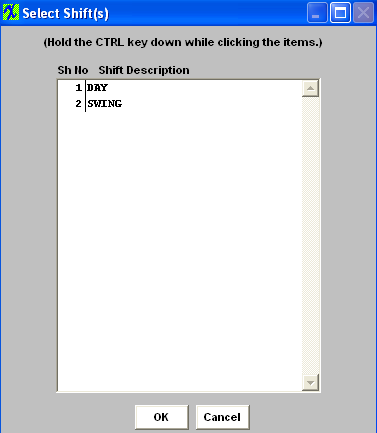
To add a Work Shift, highlight the Work Center, then depress the "Add Work Shift" button. The following popup screen will appear to select from. The work shifts listed on the popup screen have been setup in the Work Shift Setup module.
Highlight the work shift(s) and depress the "OK" button.
|
 |
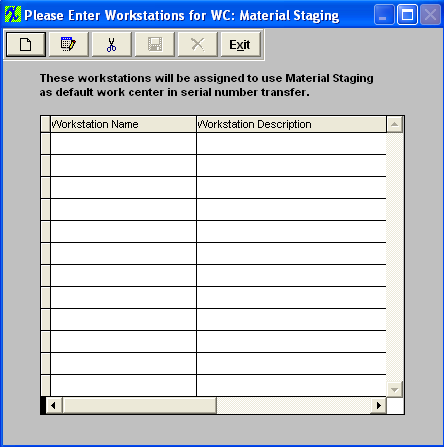
To Assign Work Center to Workstations In this screen, highlight the name of the Work Center. Depress the button at the bottom of the screen "Assign work center to workstations", the following assignment screen appears:
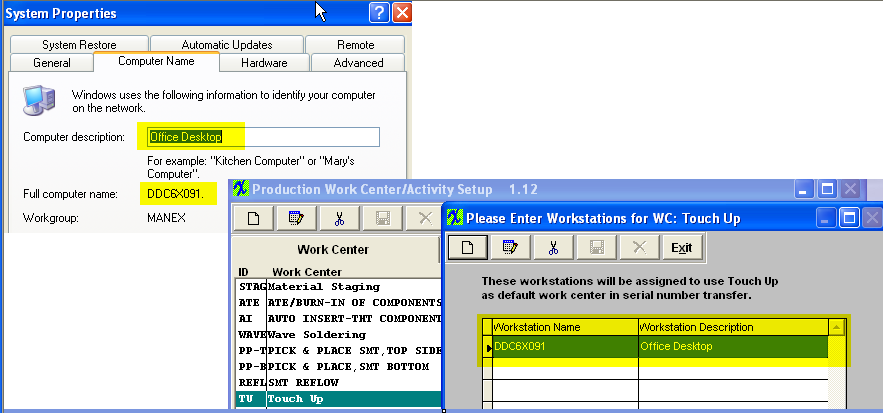
To enter a new assignment, depress the Add button. When setting up a workstation user must enter the Full computer name in the Workstation Name field and the Computer description in the Workstation Description field. See Example below.
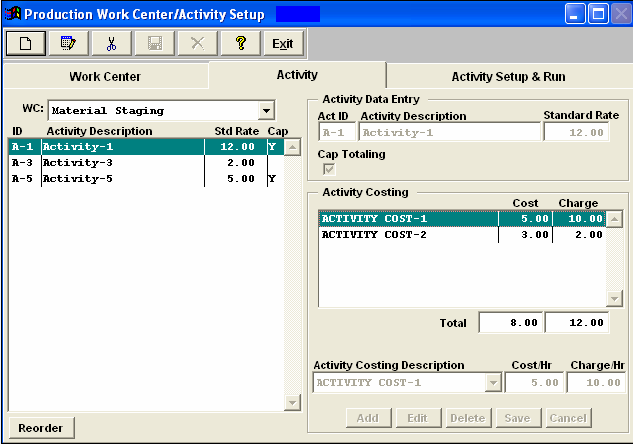
Depress the Activity tab.
The user may add Work Center Activities by selecting the Add button from the main tool bar.
|
 |
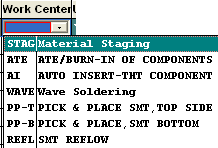
| To add an activity ID and related description, choose the applicable work center from the drop down menu: |
 |
Enter the Act ID, Activity Description.
Note: The system does NOT allow you to generate the same Activity ID in different Work Centers.
Click on the Cap Totaling box to elect calculating capacity.
Save changes or Abandon Changes.
|
 |
To attach a Cost Rate to an activity, click on the Edit button, then on the Add button (bottom of screen) in the Activity Costing Section.
|
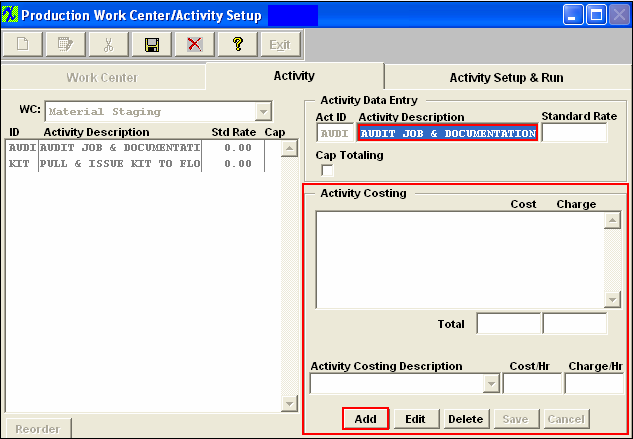 |
| To attach a Cost Rate to an activity, click on the Edit button, then on the Add button (bottom of screen) in the Activity Costing Section. |
 |
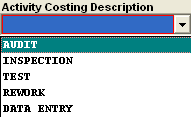
Select the activity from the pull down: (The activity costing descriptions are defaulted in from the Activity Costing & Setup Type Setup module)
Highlight the activity to which the Cost Rate will be attached.
Enter in the Cost/hr rate.
|
 |
Once the Activity ID and Description, Cap Totaling election and hourly charge rate have been entered, depress the Activity Setup & Run tab.
|
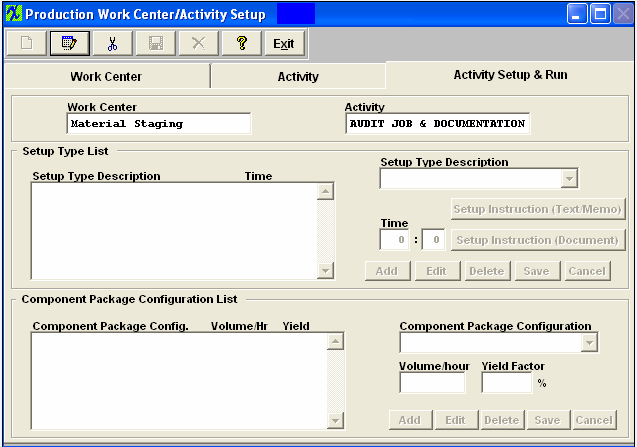 |
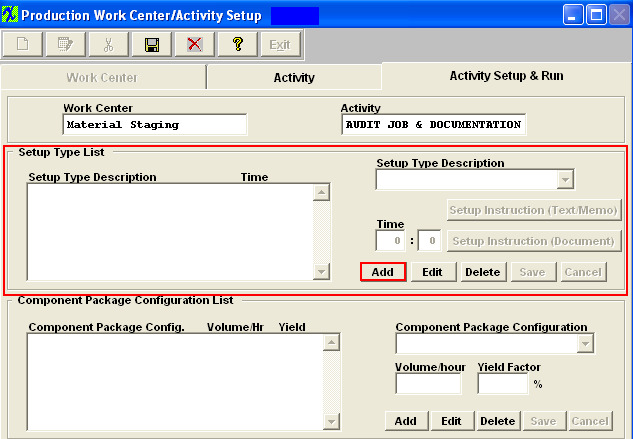
| Depress the Edit button. For the Setup Type Description section. Depress the Add button (on screen). |
 |
|
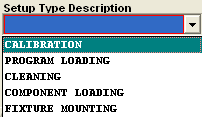
Select the Setup Type Description from the pull down: (These are defaulted in from the Activity Costing & Setup Type Setup module).
Enter the time in hours and minutes. Depress the Save button (on screen).
|
 |
 |
This button allows the user to enter instructions for setting up the Setup Type. |
 |
This button allows the user to load a photo for an instruction. The photo file should be in the ManEx directory, and should be BMP or TIF format.
|
| For Component Package Configuration, depress the Add button (on screen) |
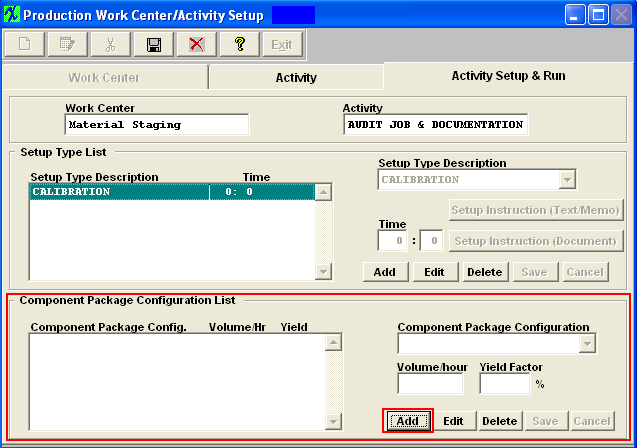 |
Select the Component Package Configuration from the pull down menu: (The Component Package Configuration(s) are defaulted in from the Package Configuration module).
Enter in the Volume per hour, and then the yield factor %.
Volume is the number of units per hour. This may be boards per hour, units per hour, connections per hour, etc.
The Yield factor affects the volume such that lower yield means it will take longer to make the same number of good parts.For example, if the standard volume is 100 parts per hour, and the total yield is 80%, then the effective yield would be 80 parts per hour.
Depress the Save button (on screen).
|
 |
Once all changes are complete depress Save or Abandon changes.
Where Used: In all Shop Floor related Activities.
«Mark as Completed in RoadMap in Section B Item 3-d»
|
|
