| 1. Fields & Definitions for Production Work Centers & Activities |
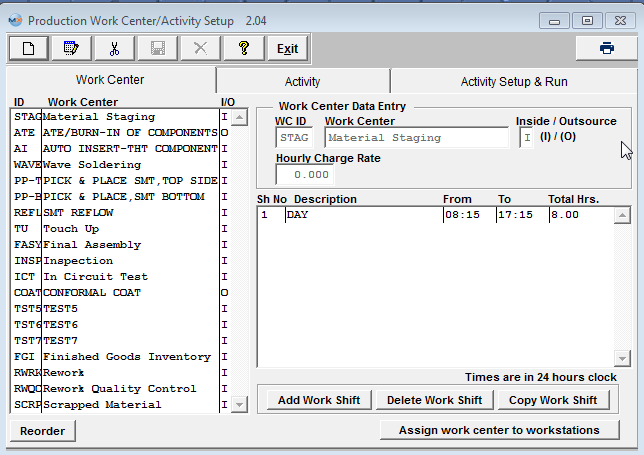
| 1.1. Work Center Tab | ||||||||||||||||||
Assign work center to workstations (button)
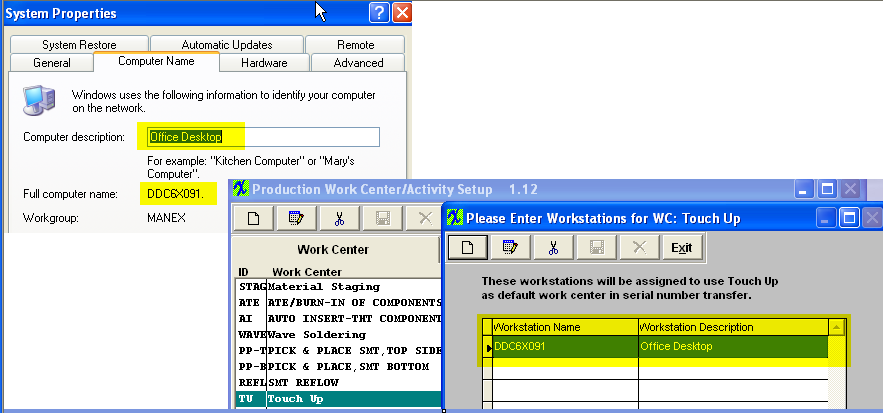
If a customer wants to install workstations along the production line, with scanners to read serial numbers as they passed down the line, this button provides the ability to limit a work station (specific computer) to be able to only transfer material “FROM” a certain Work Center on serialized Work Orders only. So, when a user first opens the "SFT by WO" or "Shop Floor Tracking by Bar Code" module, the module will use the default work center assigned for this workstation, but if user chooses to use a different work center, supervisor approval or a user that has the option "Allow Changing Default Work Center for Serial Number Transfer" box checked within the Security module is required to continue. After a supervisor's or user with this option’s password is entered, the default work center will be changed to the one that the supervisor entered password for. For Example: the workstation is assigned to use “TU” as default work center, now if user chooses to use “AI” to transfer, the system will ask for supervisor’s password, if user cancels the password, the default work center will still be “TU”, but if the supervisor enters his/her password on this machine, the default work center will be changed to “AI”. If now the user tried to transfer from “TU” again, the system will ask for supervisor’s password again. If user exits the module and come back, the default work center will be “TU” again.
When setting up a workstation user must enter the Full computer name in the Workstation Name field and the Computer description in the Workstation Description field. See Example below.
 Defect Code Entry In-Line Mode, the system will check to see if the serial number is currently in the Work Center which was set up here. If not, a special supervisor’s password is required to transfer the serial number FROM a different Work Center. After the supervisor password is entered, the system will use the new Work Center to be the default FROM Work Center until the user closes the screen. The next time the user opens the screen, the default FROM Work Center will be changed back to the one defined in Systems Setup. |
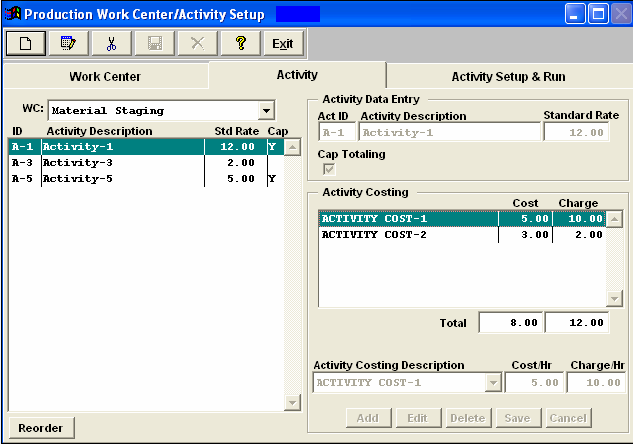
| 1.2. Activity Tab | ||||||||||||||
This is the description of the work center highlighted in the Work Center tab. Activity ID This is the abbreviated (4 character) code for the name of the activity. Activity Description This is the description of the activity being performed.It may take 25 characters in length. Standard Rate This is the standard hourly rate for the activity performed within the Work Center. Cap Click here for capacity totaling election.Capacity totaling means that if multiple activities are used in a work center, and if there are multiple resources in the activities, the capacity will be the sum of the resources rather than limited by just one resource. Activity Costing Description This field is selected from the available activity costing descriptions created in the Activity Costing & Setup module within system setup. This is the field used to enter hourly charge rates, for each activity. The formatting is three digits to the left of the decimal, and two to the right (999.99). If this optional field is entered, it will be used to determine the hourly charge rate of the activity to which it is assigned.
|
| 1.3. Activity Setup & Run Tab | ||||||||||||
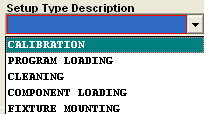
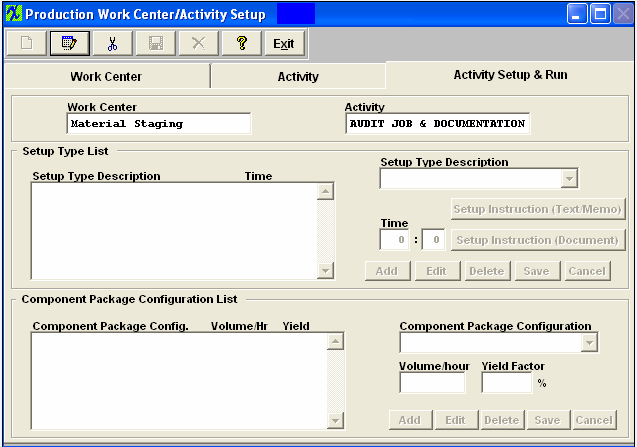 The information set up in this screen will be used in Capacity Planning & Dynamic Scheduling modules. Setup Type List The Setup Type description is input into a previous screen “Activity Costing & Setup Type Setup/Activity Setup Type Description”.
Component Package Configuration List The Component Package Configuration is set up in a prior screen. See Setup Package Configuration.
Note: In order to add Times in Routing, the Run and Setup Time MUST be selected in the Production Schedule Setup module.
Using Run and Setup Times in the Production Schedule Setup module is preferred when there is great variability in the products produced and the setup and run rates in each Work Center.
Using the Run and Setup Times in System Setup under this module, Work Center Setup, is preferred when the product flow is uniform, the machine rates are well established and the setup times very uniform regardless of product. Use of Run and Setup Times in the Production Schedule Setup module is optional unless either Job Costing or Capacity Planning Modules are in use. |
