| 1. Invoice Management |
| 1.1. Prerequisties for Invoice Mgmt | ||||
|
After activation, "Invoice" access for each user must be setup in the ManEx System Security module. Users with “Supervisor Rights” will automatically have access.
|
| 1.2. Introduction for Invoice Mgmt |
The Invoice Module is used to create Accounts Receivable for the details of shipments to customers. The Invoice is created when the user has completed AND PRINTED a Packing List. |
| 1.3. Fields & Definitions for Invoice Mgmt |
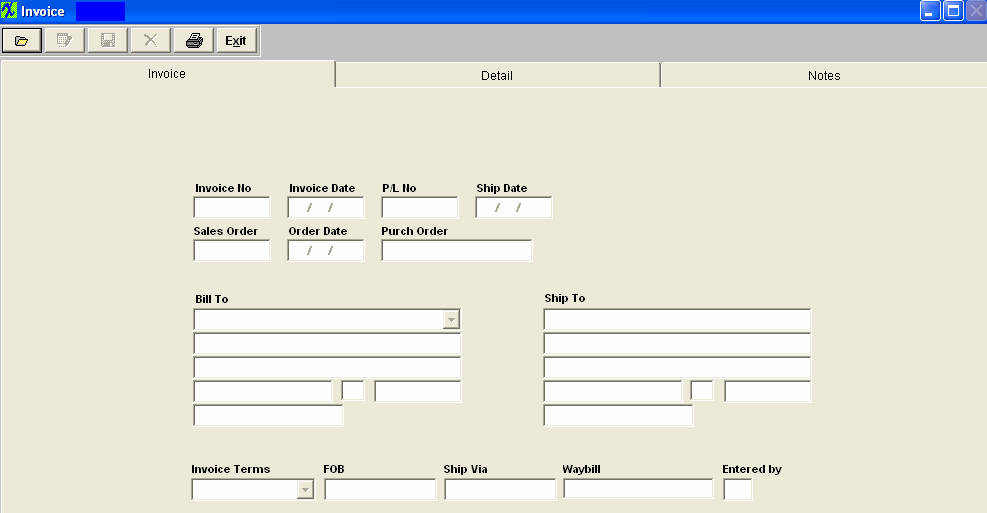
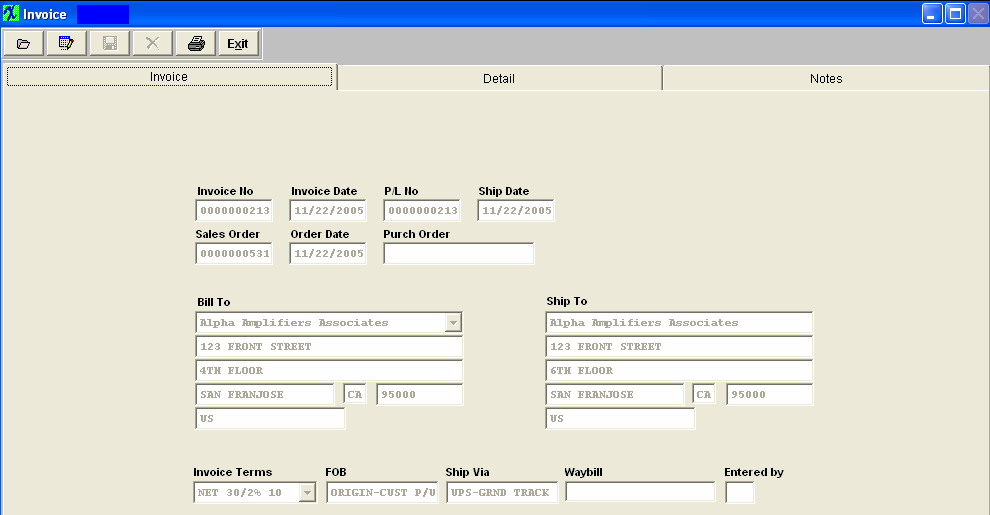
| 1.3.1. Invoice Tab | ||||||||||||||||||||||||||||
Invoice Tab Field Definitions
The number assigned to the invoice. The date of the invoice. The number assigned to the packing list. The date of shipment per the Packing List. The number of the Sales Order. The date of the Sales Order. The address where to Invoice will be sent. The address where the shipment was sent. The payment terms offered to the Customer by the user. The point at which title to the goods passed. The name of the shipment freight carrier. The number of the waybill for the shipment. The initials of the user. |
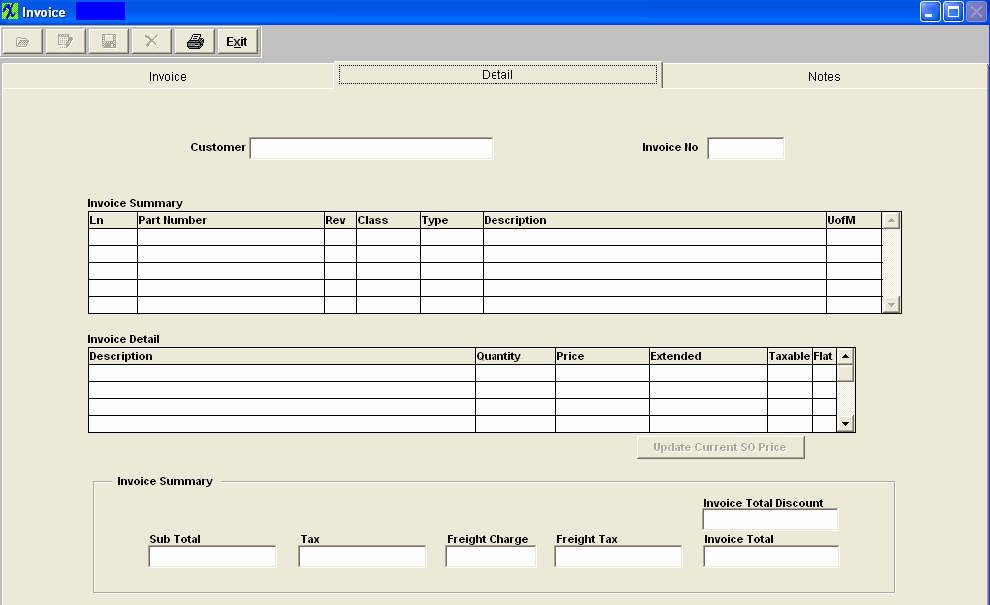
| 1.3.2. Detail Tab | ||||||||||||||||||||||||||||||||||||||||||||
|
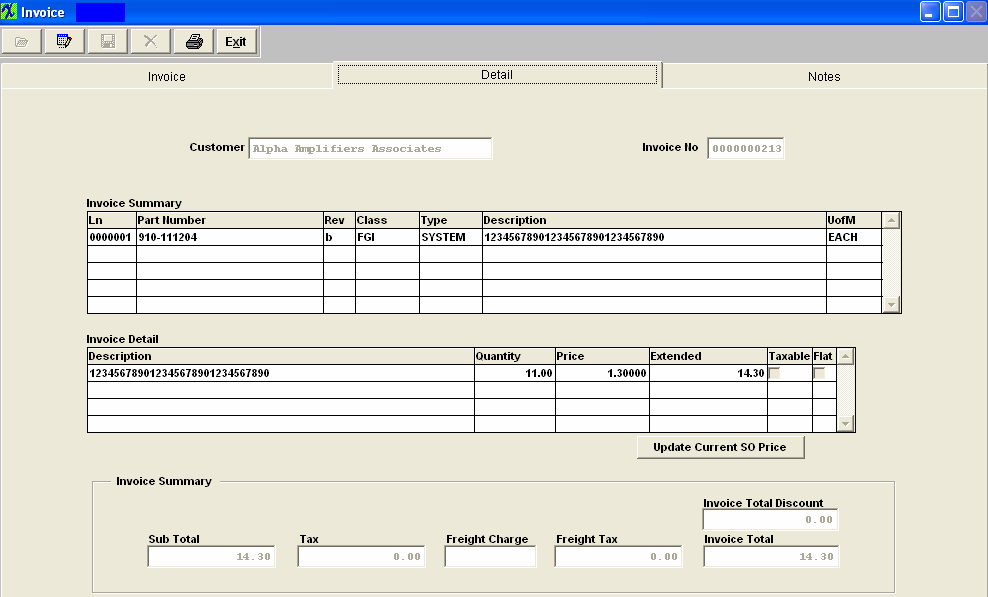
Detail Tab Field Definitions
This is the name of the customer as defined in Customer Setup. This is the invoice number assigned during the Packing List operation. Invoice Summary Section
This is the line number corresponding to the lines added during Sales Order addition. This is the part number ordered, then shipped. This is the Revision number of the Part. This is the Part Classification. This is the description of the part number. This is the unit of measure used for this part. Invoice Detail Section
This is the description of the part number. This is the quantity of the item shipped. This is the price of the item for the unit of measure listed. This is the extension of the quantity multiplied by the price. This box is whether or not the item is subject to sales tax. This box determines whether the pricing is a flat amount and not based upon a unit per arrangement.
Invoice Summary Section
Invoice Total Discount This is the net total AFTER subtracting any applicable Sales Discount. This is the extended or flat pricing. This is the amount of applicable Sales Tax. This is the amount of the freight charge per the packing list. This is any applicable Sales Tax applied to the Freight Charge. This is the grand total of the invoice, covering extended or flat pricing, sales tax on the product shipped, freight charges and sales tax applied to freight charges. |
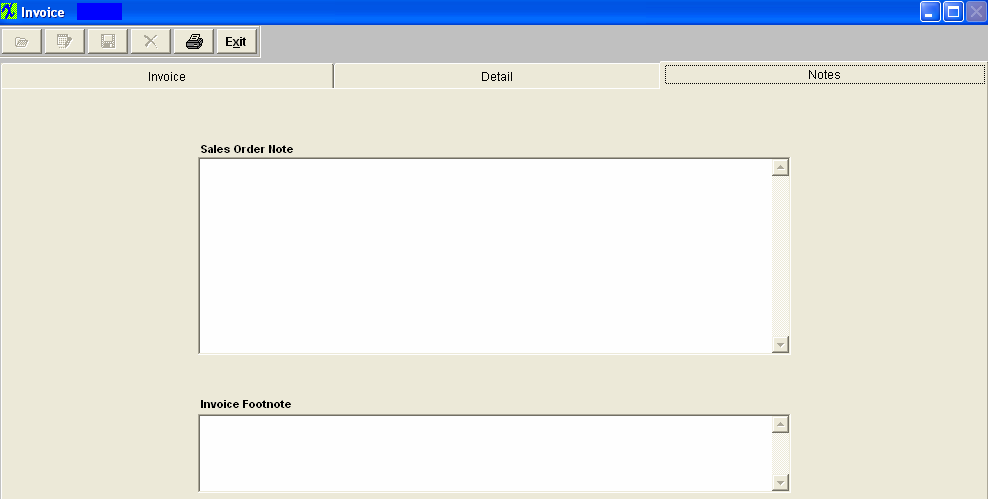
| 1.3.3. Notes Tab | ||||
|
| 1.4. How To ..... for Invoice Mgmt |
| 1.4.1. Find an Invoice | ||
The following screen will appear:
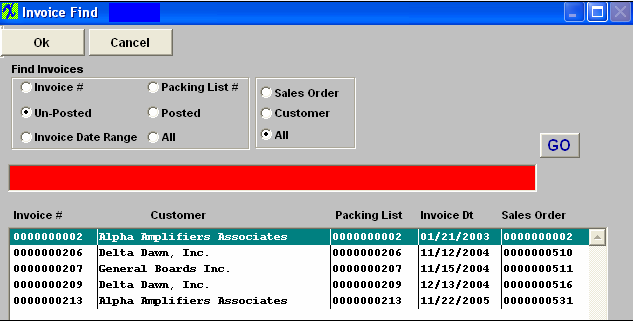
Pressing the Find Action Button displays the following screen:
Invoice # will require the user to enter in the invoice number desired into the field. Depress the “GO” button and the record will be pulled forward. Selecting the Un-Posted radial will bring up the following selections.
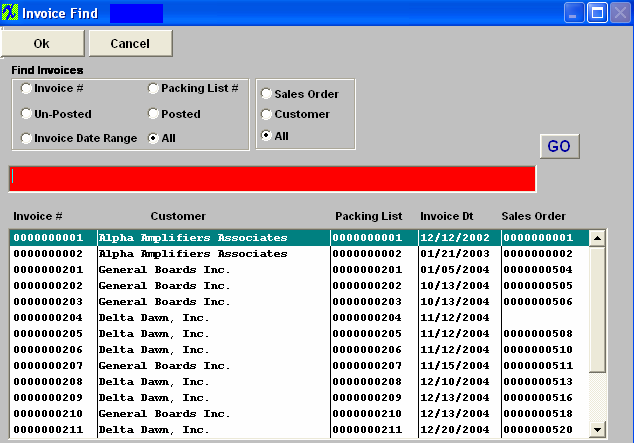
The user will then need to select Sales Order, Customer, or All. If user selects Sales Order, or Customer, then you must enter a Sales Order number or Customer Name in the Red Box. If user selects All and depresses the "GO" button the following information will be listed:
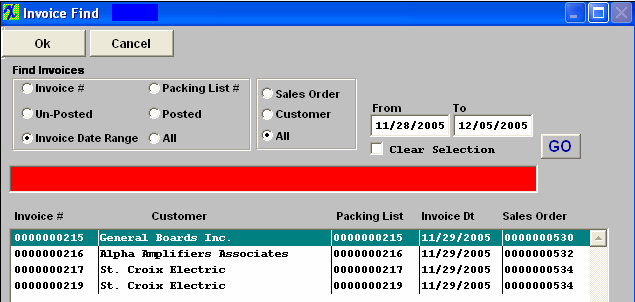
Selected the desired Invoice, by double-clicking on the listed record and the record will be pulled forward. Selecting the Invoice Date Range radial will bring up the following selections and fields.
Enter in the Sales Order number or Customer (depends on your selection) then select the desired date range. Enter All, then depress the “GO” Button and the following information will be listed. This find will bring up both Posted and Un-posted Invoice records.
Selected the desired Invoice, by double-clicking on the listed record and the record will be pulled forward. Selecting the Packing List radial will require the user to enter in the desired Packing List number. Depress the “GO” button and the record will be pulled forward. Selecting the Posted Radial will bring up the following screen:
The user will then need to select Sales Order, Customer, or All. If user selects Sales Order, or Customer, then you must enter a Sales Order number or Customer Name in the Red Box. If user selects All and depresses the "GO" button the following information will be listed:
Selected the desired Invoice, by double-clicking on the listed record and the record will be pulled forward.
Selecting the All will bring up the following screen: The user will then need to select Sales Order, Customer, or All. If user selects Sales Order, or Customer, then you must enter a Sales Order number or Customer Name in the Red Box. If user selects All and depresses the "GO" button the following information will be listed:
Selected the desired Invoice, by double-clicking on the listed record and the record will be pulled forward.
|
| 1.4.2. Edit an Invoice | ||
After pressing the Find Action Button the Edit button is available to modify certain fields on an un-posted invoice. Note: As soon as the Invoice is printed either via this screen or via the Reports button, it is considered to be “Posted” and therefore can’t be changed, even if it’s just printed to the screen or file output. Also, once the invoice is posted the packing list is no longer editable either. Once the desired Un-posted Invoice Record has been found, the screen will be populated as follows:
In the Invoice screen, the changeable fields are limited to the Invoice date, the Bill to Customer, and the Invoice Terms. Enter into the Detail screen:
In the Detail screen, the changeable fields are limited to the Price, Taxable box and Freight Charge. Enter into the Notes screen, and here the user may add Sales Order Note, or Invoice Footnote.
Because the Packing List has already been Posted and is usually on its way to the customer, other items within this module can not be modified.
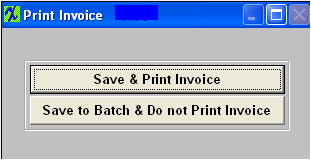
Depress the Save record icon. The following options will appear. If the user selects the “Save & Print Invoice,” the invoice WILL BE posted and printed to the Default Printer. The appropriate accounting entry will be created and will forward into the Accounting Module. If the User Selects the “Save to Batch & Do Not Print Invoice.” The invoice WILL NOT post and will be forward to the Invoice Batch to be printed/posted at a later time. |
| 1.4.3. Create a Manual Invoice |
Note: A manual invoice is NOT created in this module. Instead, it’s created in the Packing List module as a Stand-Alone Packing List. |
| 1.4.4. E-mail Invoice(s) | ||
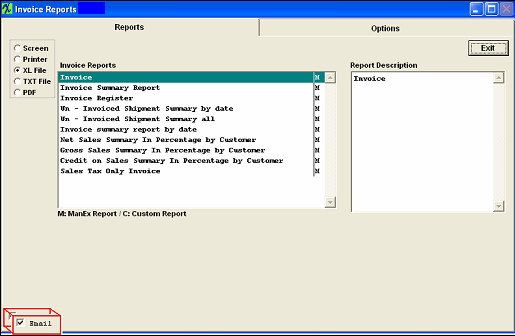
To e-mail an Invoice report(s), depress the Reports button.
Note: You MUST have the e-mail setup within the Trigger.exe setup and working before the
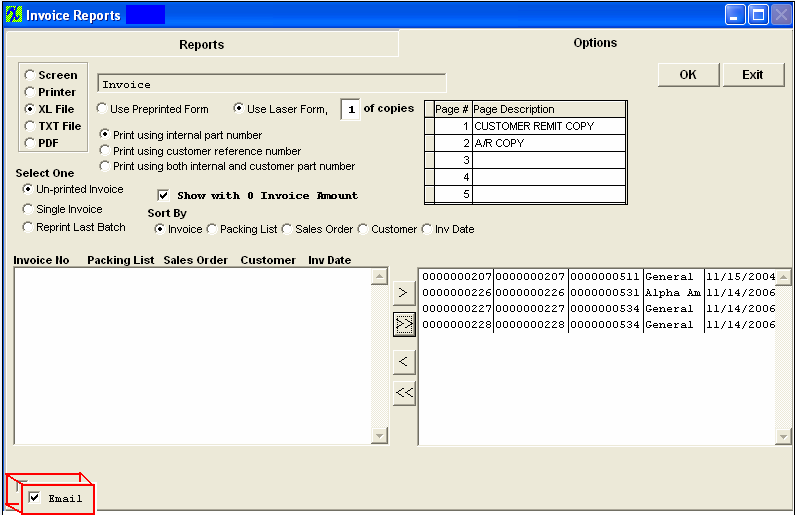
Complete the Option tab with the information required: Note: User has the option to check the Email box on the Options screen also.
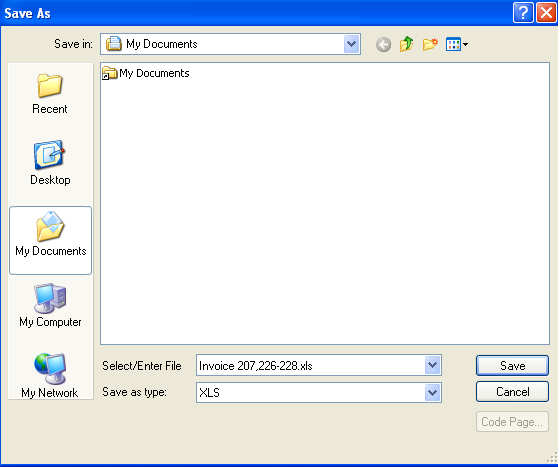
Depress OK. The following screen will appear. Select or Enter File Name.
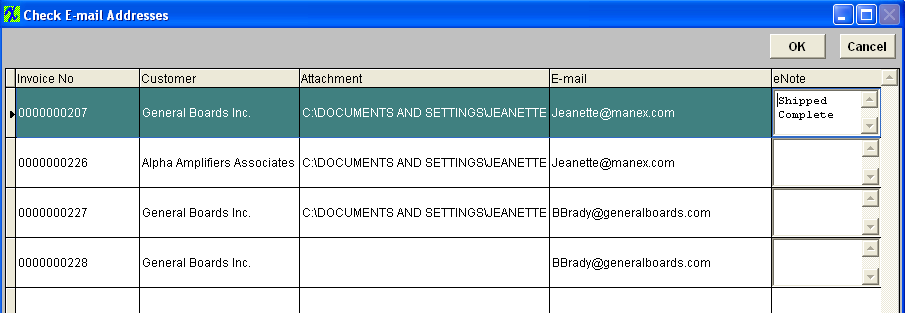
Depress Save, the following Check Email Addresses screen will appear. Within this screen you can enter an e-mail address (this e-mail address has to be listed in the Customer Information module) or add any special notes needed:
Depress OK and documents will be sent to e-mail addresses assigned. The following is what the receiver will receive:
|
| 1.5. Reports - Invoice Mgmt | ||||||||||||||||||
|
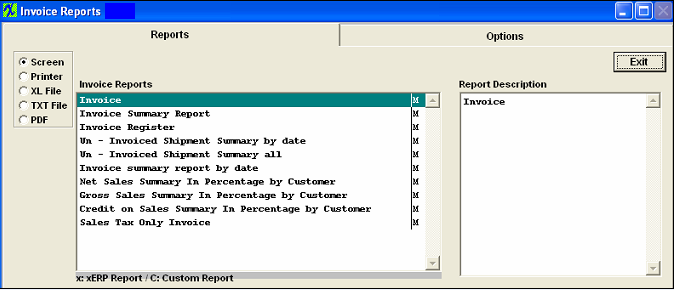
To obtain the Invoice reports, depress the Reports button. The reports screen will appear:
Select the output you desire by clicking on the radial. Choose from Screen, Printer, XL File, TXT File, or PDF. Highlight the report. Depress the option tab. Invoice Report
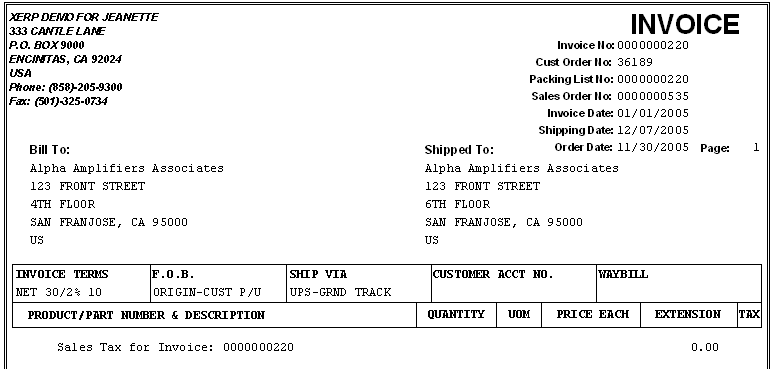
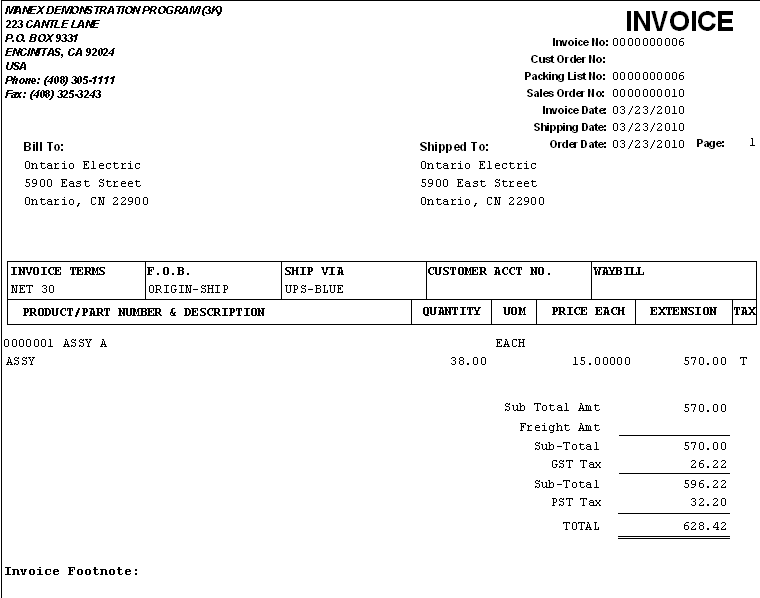
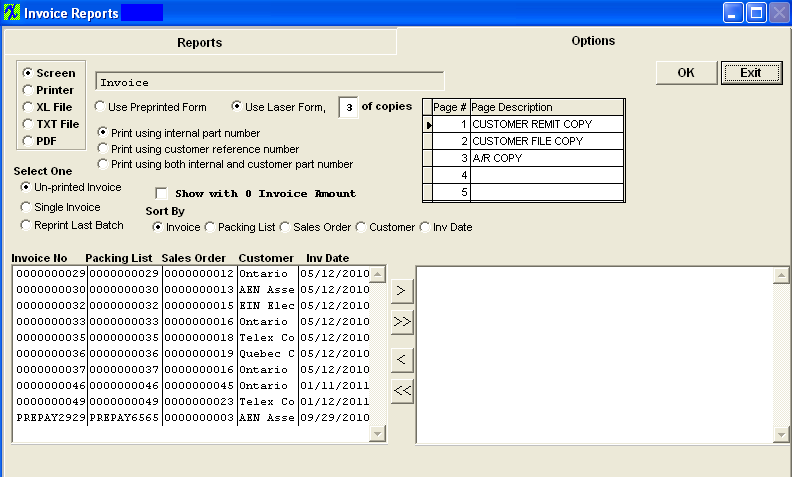 Some of the radial options/info is defaulted from the Print Packing List/Invoice Setup. The Use PrePrinted Form, Use Laser Form, and # of copies can be edited at this time. Select between Printing with the internal part number or printing using the customer reference number, or with both. Select the invoice type, either Unprinted Invoice, Single Invoice, or Reprint Last Batch. The appropriate records will populate the selection box. Check the box if you would like the report to display Invoices with zero amount. Select how you would like the Invoice list Sorted by: Invoice, Packing List, Sales Order, Customer, or Inv Date. Highlight the invoice you want to print and depress the > button.If you want all of the invoices printed, depress the >> button. Depress OK button. The following report will be displayed:
Invoice with Foreign Tax being displayed:
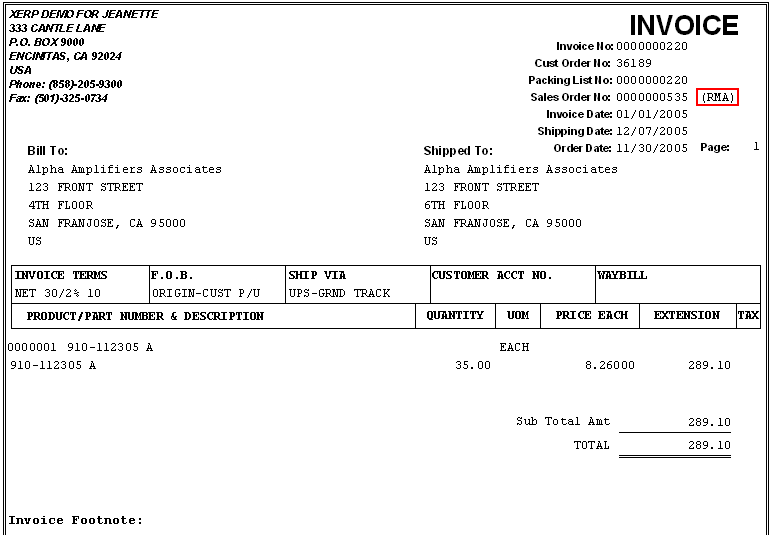
 Note: (RMA) will appear next to the Sales Order No. if the Invoice is being printed from an RMA order.
 Invoice Summary Report by Date
The following report will be displayed
Invoice Register Report
Enter the desired Date Range. Depress the OK Button. This report displays the Posted invoice total for the selected time period. The following report will be displayed
Un-Invoiced Shipment Summary by Date Report
Enter the desired Date Range. The following report will be displayed
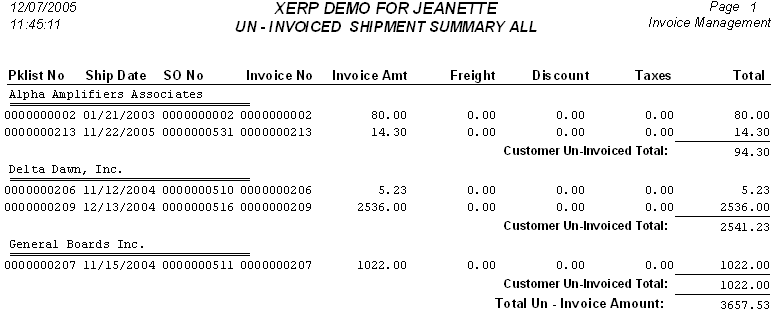
Un-invoiced Shipment Summary All Report Depress the OK button. The following report will be displayed:
Invoice Summary Report by Date
Enter the desired Date Range. Depress the OK Button. The following report will be displayed
Net Sales Summary in Percentage by Customer Report
The following report will be displayed
Gross Sales Summary in Percentage by Customer Report
Enter the desired Date Range. Depress the OK Button. This report displays the Posted invoice total - freight amount - tax - freight tax for the selected time period. The following Report will be displayed
Credit on Sales Summary In Percentage by Customer Report
Enter the desired Date Range. Depress the OK Button. This report displays the (Posted Credit memo total - freight amount - tax - freight tax for the selected time period) and a Total Sales amount (Posted invoice total - freight amount - tax - freight tax for selected time period) The following report will be displayed
Sales Tax Only Invoice Report
The following report will be displayed
|
| 1.6. FAQs - Invoice Mgmt |
| Facts and Questions for the Invoicing Module |
