| 1. Accounting Setup |
| 1.1. Prerequisites & Introduction for Accounting Setup |
The Importance of Set-upIn order for the ManEx General Ledger module to work correctly, it is very important that the Accounting and System setup screens are completed correctly.
Accounting Prerequistes
Training is REQUIRED for the Accounting Modules. If you decide not to take the training required by ManEx for the Accounting modules, then any data fixes required that could have been prevented from training will be an additional charge.
Users MUST have full rights to the "Accounting Setup Screens" in Accounting Security . Users with “Accounting Security Supervisor” rights will automatically have access. Accounting Pre-Installation Accounting Pre-Installation allows you to plan all information relating to company fiscal year, chart of accounts, and other standard defaults. These tables are put together by preparing tables and planning system defaults. To view the GL Account defaults go to Article #655 . Accounting System section covers: Sales Accounts, Purchase Accounts, Inventory Accounts, Bank Accounts, Chart of Accounts, and other standard defaults. Determine how each section is going to be designed. |
| 1.2. Access Levels |
| 1.2.1. Prerequisites for Access Level |
|
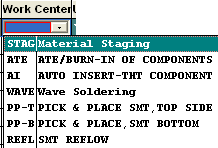
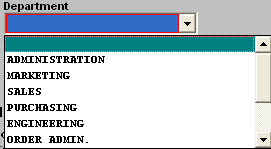
The Department Names (ManEx, Sales, Administrative Departments) and Work Centers (ManEx, Production, Production Work Centers & Activities) must have been entered prior to using this module.
To allow access to ManEx Accounting System, the attached worksheet has been provided for you to complete. When ManEx is first installed at your facility, user access security database tables are empty, except for the original ManEx password. If you need assistance in obtaining this master password, please email support@manex.com.
The attached worksheet will help you to organize the information that needs to be entered at a Security Manager level (i.e. ManEx system administrator) to populate the necessary security tables before ManEx is ready to be used.
Note: Make sure that once a password is issued, the System Administrator records and maintains these passwords in a secure location. There is NO way to view a password in MmanEx. All information relating to the actual passwords is encrypted and even the ManEx Systems cannot determine a password once it has been entered into the system. So, it is very highly recommended that the System Administrator record and maintain the passwords in a secure location.
Complete the attached worksheet and "Mark as Completed RoadMap Section C Item 1-a" before continuing the setup. |
| 1.2.2. Introduction for the Access Level |
When ManEx is first installed at your facility, user access security database tables are empty, except for the generic ACCT1 login to the system that has the Accounting Supervisor Security rights. If you need assistance in obtaining this master password, please email support@manex.com
An Accounting Supervisor person has the authority to control the access to ALL ACCOUNTING screens, including their own. They also have access to Accounting setup modules, accounting security and any speical accounting utilities. This person can assign someone else to also be an Accounting Security Supervisor and can assign rights only to accounting screens and no other screens. They do NOT have access to any of the production modules or the Security module for the production modules (unless individually assigned rights by a Production Supervisor ). Any individual user granted access to both areas (Accounting and Production) will have the same login screen, and will be able to open screens for both areas simultaneously without having to open a new ManEx License. The same person cannot be both a Supervisor and an Accounting Supervisor. The reason for this is if the controller of a business is paranoid about who sees accounting, they can monitor the access of the ManEx System Supervisor, and to whom the Accounting Supervisor privileges have been granted. |
| 1.2.3. Fields & Definitions for Security System |
| 1.2.3.1. Users | ||||||||||||||||||||||||||||||||||||||
Description of fields:
The module list settings will be set at no access by default when assigning a new person to the password system. This default setting can be changed to give user access rights as indicated above. We strongly suggest that the system manager have two passwords and access rights just in case the supervisor is locked out of one password. Then there is an alternate way to log in and manually log out your other password.
Note: There is NO way to view a password in ManEx. All information relating to the actual passwords is encrypted and even ManEx System cannot determine a password once it has been entered into the system. So, it is recommended that the System Administrator record and maintain the passwords in a secure location, as odds are nearly 100% that each user will forget their password, sooner or later.
|
| 1.2.3.2. Assign Rights | ||||||||||||||||||||
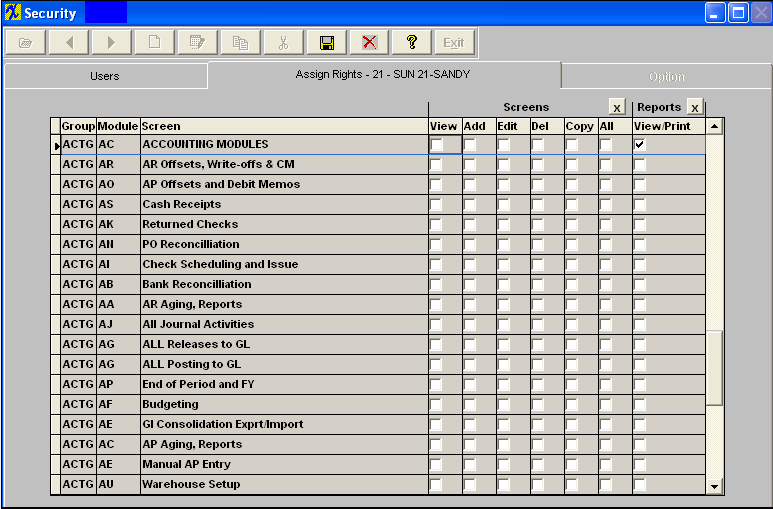 For users who will have full access to all modules, an “X” button at the top of the screen will populate all checks.
Screens
Reports
|
| 1.2.4. How To ..... for Security System |
| 1.2.4.1. Setup for Security Module |
Enter Min number of characters allowed in the password: Minimum 1 Maximum 10 (Defaults to 1) Enter number of days you want to warn the user in advance that their password is about to expire. This warning will only appear to the users, which have "User cannot change password" option enabled. |

| 1.2.4.2. Add New User | ||||||||||||||||
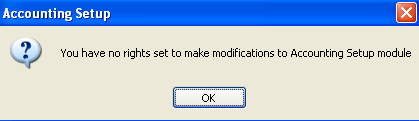
Select the ActSetup.exe ICON (within the Manex Root Directory) to begin the security setup. Users that do not have Accounting Security Supervisor rights, or Accounting Setup rights will receive the following message and system will abort.
Then selecting the Access Level menu, the following screen will display. Only an Accounting Security Supervisor will have Add or Edit rights. Other users will only have view rights.
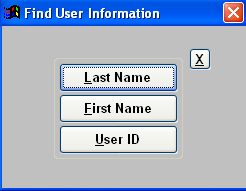
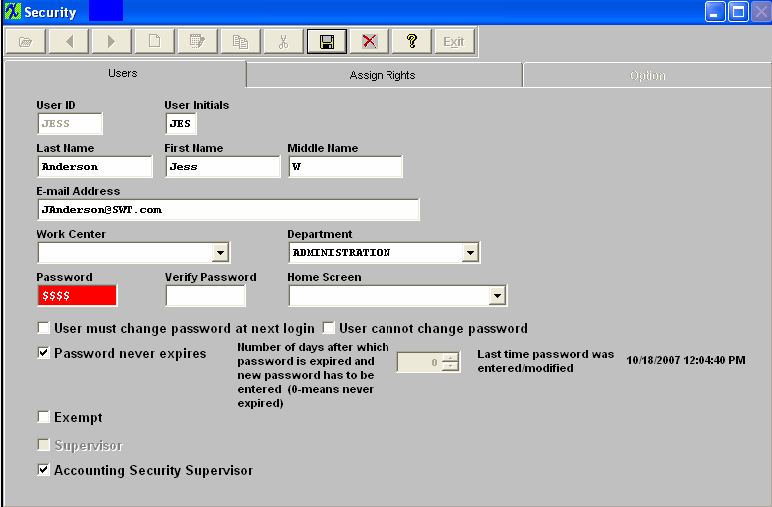
Each button performs a specific function. For a list of those functions, please refer to Button Description/Definitions Adding User Access Security: Press the Add icon, and then enter the user information on the User Screen. 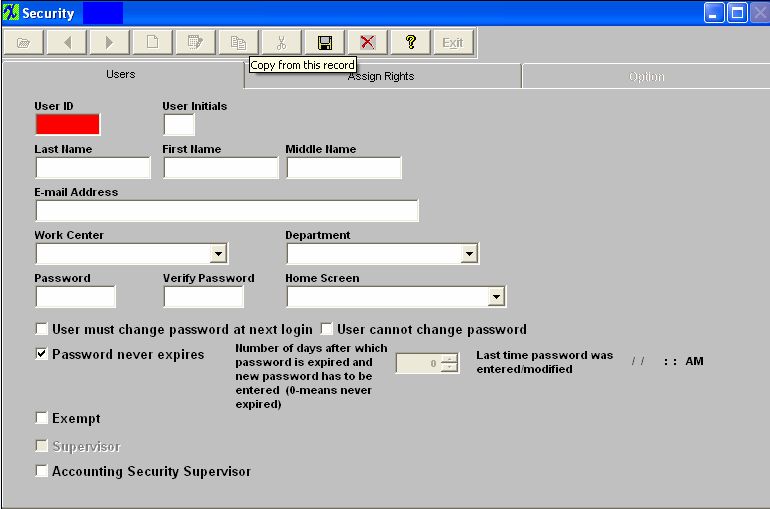 Enter User ID, Users Initial, Users Last Name, Users First Name, Users Middle Initial or name, and users e-mail address (if applicable). 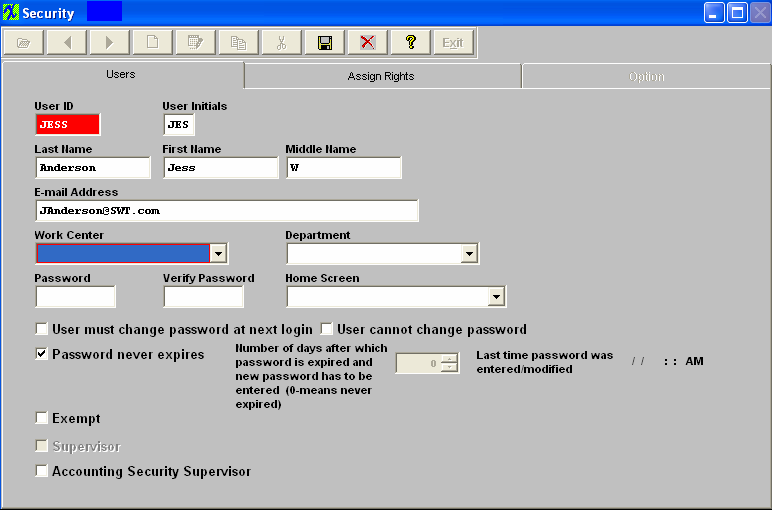
Assign user a password (number of characters will be based on Security Setup). The password used will identify the user and include their initials on each transaction processed. Verify password.
"User must change password at next login" At the login to ManEx the system will check if "User must change password at next login" is checked. If it is checked the system will show two new fields "New password" and "Confirm password" and ask user to enter new password, which has to be different from the one already entered. "User cannot change password" The next system check is for the password to expire and if "User cannot change password" is checked a warning will be displayed, (depending on the number of days setup in Security setup screen). Once password expires user will receive a warning notice that the password has expired and they must see the system administrator. "Password never exipires" This is the default when entering a new user. "Number of days after which password is expired and new password has to be entered (0-means never expired)" This field is used in conjunction with "User must change password at next login" and "User cannot change password" If N days is entered for password to expire and "User must change password at next login" is checked, this means that the user has to enter new password every N days. When the password expires the user will be prompt with two new fields (New and Confirm password) to enter new password. A new modified date will be saved along with new password. If N days is entered for password to expire and "User cannot change password" is checked, the user will receive a message that the password is to expire, once the password has expired they must report to the system administator for new password. If "Password never expires" is checked this field is disabled. Last time password was entered/modified This will record the date and time the password was entered/modified. Supervisor This field is for reference only. A supervisor can only be setup in the Security System module.
Exempt This field is for future use. Right now all it does is carry forward to the user shift setup screen, but does not affect any data.
Accounting Security Supervisor (aka ASS) By clicking your mouse on this field, you automatically assign the user full supervisory rights to all accounting modules in the system and the assign rights tab will be disabled). The same user cannot be a Supervisor and an ASS. An ASS can assign someone else to be an ASS also, and can assign accounting rights to other users.
Note: Use the scroll bar to move up or down and be sure to save before exiting this screen. For users who will have all rights to a module, the administrator may click on the “ALL” button to populate all screens or report access. For users who will have access to nearly all modules, an “X” button at the top of the screen will populate all checks, then the administrator can uncheck the “ALL” button on specific modules to remove access to those modules. Current users’ rights will not take effect until saving and exiting the ManEx System and re-entering the system. Note: The password to use upon saving is NOT the one you’ve just set up. Use an older Supervisor’s password or the master password. ManEx allows you to setup access levels by a module basis or by sub-module, depending on the module. The system allows a company to define specific rights within a module for a specific user, to control users’ rights within the program. With proper utilization, you can secure key information and at the same time maintain worker efficiency. The rights that are available are as follows:
See Article #53 for more information on the options available within some of the Security Line Items. |
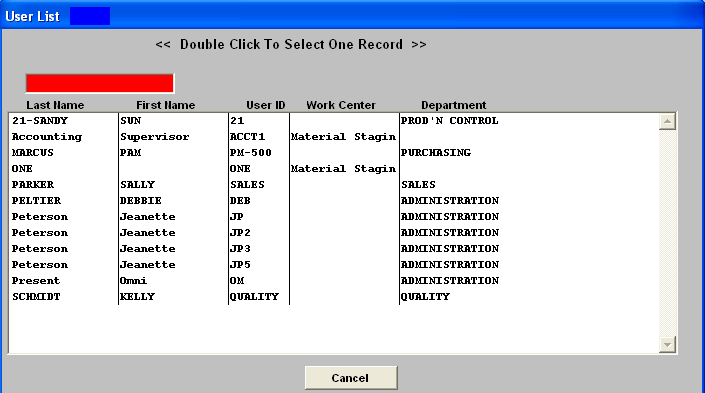
| 1.2.4.3. Find Existing User | ||||||||
This action will then prompt the user for the password, and display the following screen. Users that do not have Accounting Security Supervisor rights or Accounting Setup rights will receive the following message and system will abort.
Select Access Level and the following screen will display. Only an Accounting Security Supervisor will have Add or Edit rights. Other users will only have view rights.
Each button performs a specific function. For a list of those functions, please refer to Button Description/Definitions
|
| 1.2.4.4. Delete a User |
Find an Existing User
Depress the Delete button and the following messge will appear:
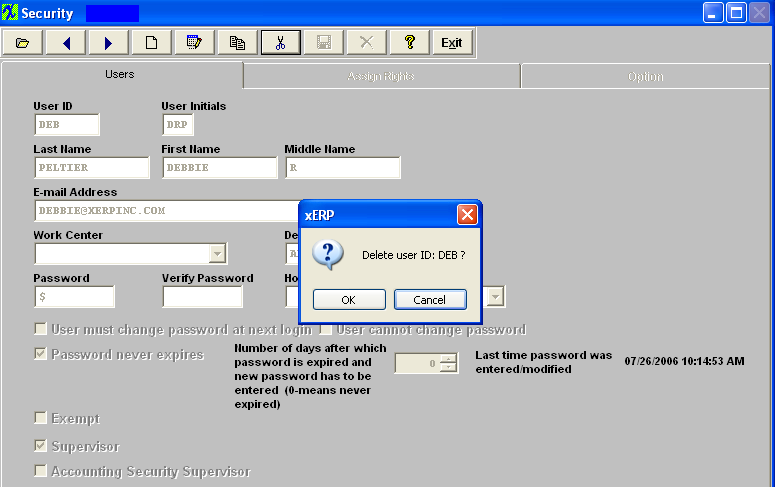 Depress OK and the User will be removed. Depress Cancel to abandon changes.
Removing a user should NOT affect the transfer history in SFT or the inventory transaction reports. The initials will remain intact after the removal of a user.
|
| 1.2.4.5. Change Users Security Rights |
Find a User The following screen will appear:
Depress the Edit action button. All fields within this screen become editable. Except for the Supervisor field, this field is only editable in the Security System module.
Depress the Assign Rights tab and you can change security rights for all accounting modules at this time. Security rights for all other System modules must be setup in the Security System module. When changes are complete depress the Save changes action button to save changes or the Abandon changes action button to abandon changes. |

| 1.3. General Ledger |
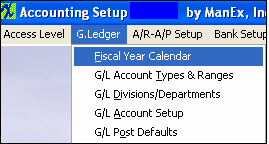
| 1.3.1. Fiscal Year Calendar |
| 1.3.1.1. Prerequisites for the Fiscal Year Calendar |
Complete the attached worksheet and "Mark as Completed RoadMap Section C Item 2-a" before continuing the setup.
There are no prerequisites required.
|
| 1.3.1.2. Introduction for the Fiscal Year Calendar |
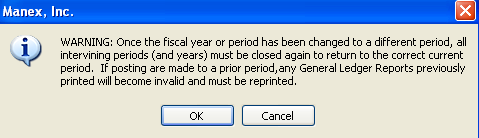
This is the section to enter fiscal year calendar information. The setup screen will allow user to setup Fiscal Years with any number of periods from 1 to 13, this will accommodate a short year if the users have to change their Fiscal Year ending. Multiple years may be entered in advance (ManEx suggests a Min/Max of 2 years). Once the required information is entered, the system calculates all necessary tables and enters months and ending dates for each month for all periods. Systems will automatically assign the FY year when beginning date and number of periods are selected. System will also assign the period description (January – December) if 12 periods is selected. Descriptions for each period must be entered if 13 periods are used. If your company uses a 4-4-5 week calendar, check the Irregular Ending Dates box and then you’ll be able to manually enter the month end dates. The system will allow users to edit any future fiscal years as long as there are NO POSTINGS to it, but if they have posted anything to the current fiscal year, then the system will NOT allow the changing of ending period dates for any period that have posting to or the period after it because some transactions may fall on the other side of the ending date.
User will be allowed to change the description of the periods for ANY of the Fiscal Years even if it is open. These fields are text only and are NOT used within any calculations throughout the system.
|
| 1.3.1.3. Fields and Definitiions for the Fiscal Year Calendar | ||||||||||||||||||||||||||||||||||||||||
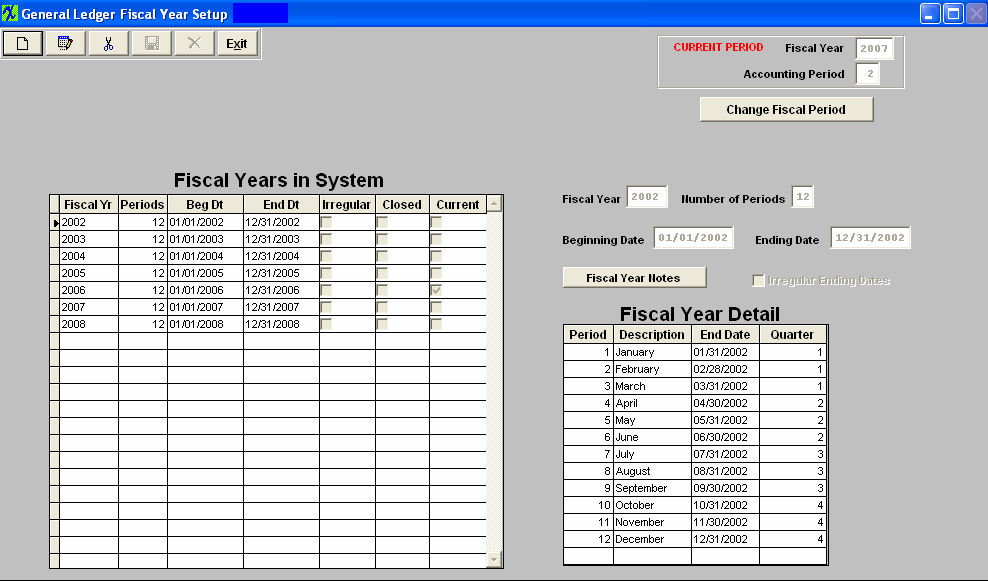 CURRENT PERIOD
Fiscal Years in System
Fiscal Year Detail
|
| 1.3.1.4. How To ...... |
| 1.3.1.4.1. Setup Fiscal Year Calendar | ||||
The following screen will appear:
 Clicking the ADD button activates the screen, and prompts for the beginning date and number of periods. Once entered, ManEx completes the rest of the fields. These may then be edited, if necessary, to match the worksheets. Notes may be added by pressing the NOTES button, and once added, the button will show red.
After Add or Edit is complete, depress the Save button to save the changes made or depress the Abandon Changes button to abandon the changes made. Repeat for as many years as needed. Where Used: Setup is required for every accounting and summary reports. After completing this section: «Mark as Completed in RoadMap in Section C Item 2-a»
|
| 1.3.2. General Ledger Account Types and Ranges |
| 1.3.2.1. Prerequisites for the GL Account Types & Ranges |
Complete the attached worksheet and "Mark as Completed RoadMap Section C Item 2-b" before continuing the setup.
There are no prerequisites for using this section. |
| 1.3.2.2. Fields and Definitions for the GL Account Types & Ranges | ||||||||||||||||
|
| 1.3.2.3. How To ...... |
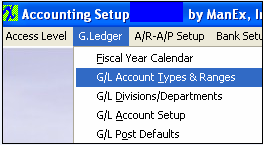
| 1.3.2.3.1. Setup GL Account Types and Ranges | ||
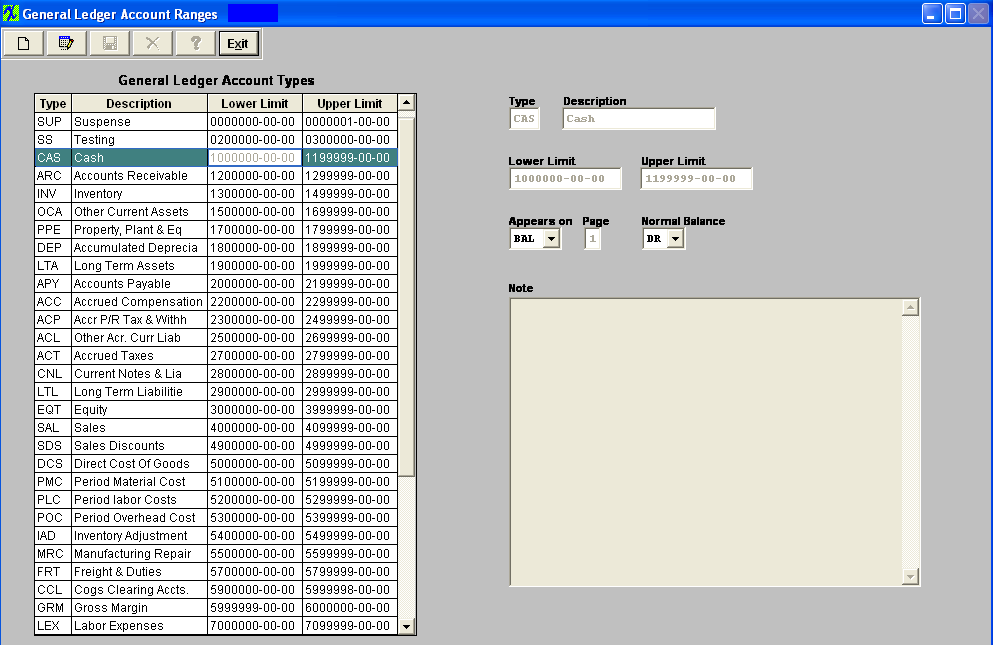
The following screen will appear:
Selecting the Add button allows the user to begin entry.
Prepare the General Ledger account types (current assets & long term assets) by establishing lower and upper ranges of the account numbers. For example, cash is a current asset and all current assets are within a range of accounts from 1000000-00-00 to 1199999-00-00. Therefore create the title “Cash”. This will be helpful later when searching for accounts in the accounting module. What will happen is that ManEx will display the account types clicked on, the type of account desired, and then it will list all the accounts under that classification. Once the ranges are created ManEx does NOT allow editing or changing the ranges. Also, user cannot create a range that is within another range. So, in setting up account ranges, it might be a consideration to leave some room between ranges in case there is a need for more at a later date (instead of setting it up so all possible account numbers are in some account type range, even if they are not yet created).
Selecting the Edit will allow the user to only modify the type of report in which it is included (Balance, Income) and the account signage (normally credit or debit) can be changed.
Chart of accounts are setup in the GL Account Setup module. In order for the sub-total Net Income Before Income Taxes to work correctly, a separate range must be set up and the Normal Balance must be defined as Credit, define the account as a CLOSING. This rule also applies to Total Revenue, Gross Margin, Total Other Income/Expense, Net Income Before Taxes and Net Income.
Once the changes have been completed, depress the Save button to save changes, or the Abandon Changes button to abandon changes.
Where Used: This Setup is required to be completed prior to establishing a Chart of Accounts, and for processing all other accounting functions. After completing this section: «Mark as Completed in RoadMap Section C Item 2-b» |
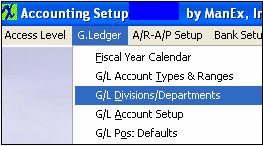
| 1.3.3. General Ledger Divisions/Departments |
| 1.3.3.1. Prerequisities for the G/L Divisions/Departments |
Complete the attached worksheet and "Mark as Completed RoadMap Section C Item 2-c" before continuing the setup.
There are no prerequisites for using this section. |
| 1.3.3.2. Introduction for the GL Divisions/Departments |
This section is to setup the Divisions and Departments if you are going to be using more than one independent ManEx system. For example one for the Main Company and one or more subsidiaries. There is a Consolidation system which must be Division 00. The Main Company would be Division 01, the Subsidiaries, Division 02, 03, etc. This information MUST be setup before using the GL Consolidation Export and GL Consolidation Import modules. This section is to setup Divisions and Departments to be used with account numbers. If desired, account numbers can be assigned to each department with multiple divisions. This also can be used as a means of tracking Non Recurring Expense charges or rework charges by assigning an account number to a Non Recurring Expense or Rework department. This will aid in account tracking in revenue analysis. |
| 1.3.3.3. Fields and Definitions for the GL Divisions/Departments | ||||||||||||||||||||||||||||||||
|
| 1.3.3.4. How To ...... |
| 1.3.3.4.1. Setup the GL Divisions/Departments for Headquarters | ||
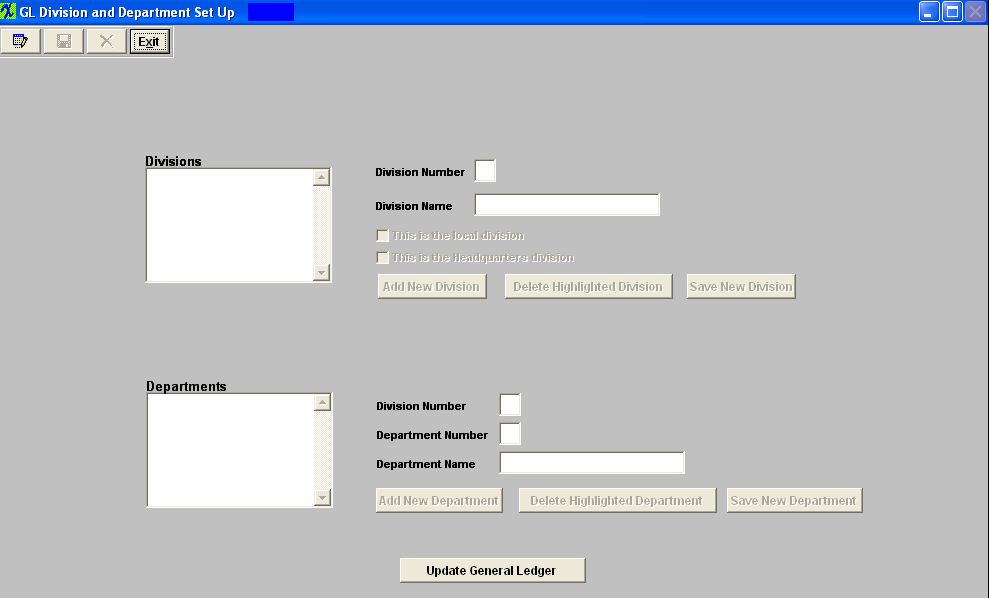
The following screen will appear:
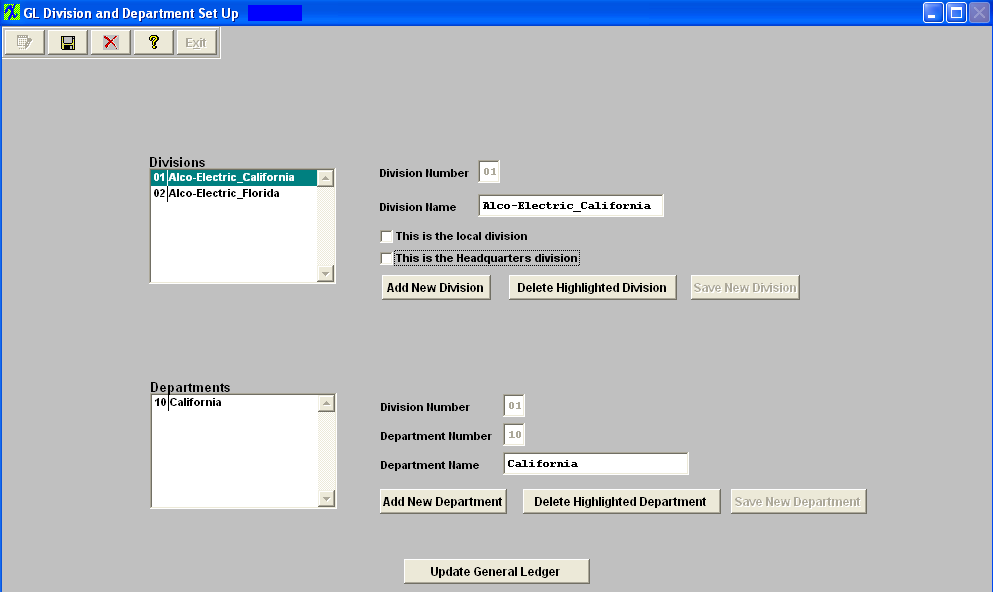
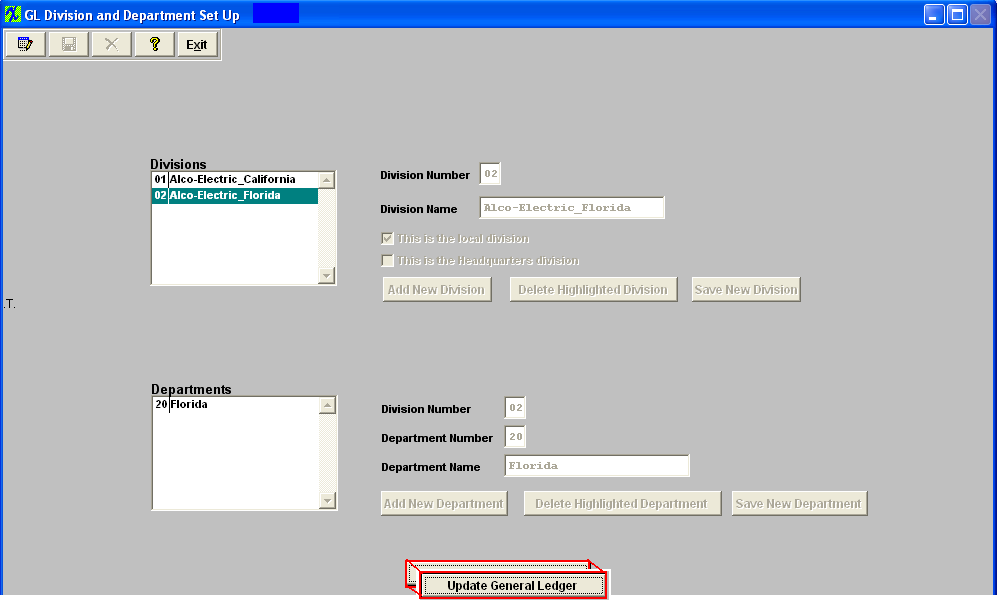
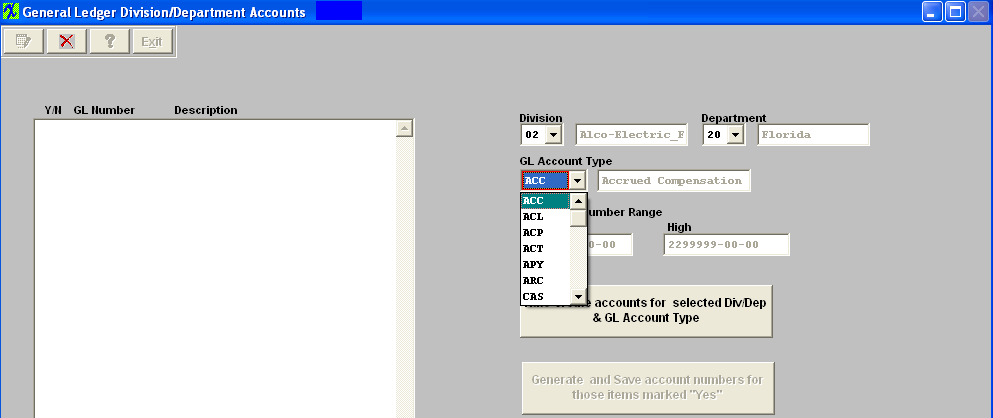
To setup the Headquarters ManEx System: First add the Headquarters Division. Depress the Edit button and the "Add New Division" button will become editable. Depress the "Add New Division" button Enter a Division Number (other than '00') and a Division Name in the fields provided. When setting up the Headquarters Division you MUST check both the "This is the local division" and "This is the Headquarters division" boxes. Depress the "Save New Division" button. To add a department depress the "Add New Department" button. The Division number will default in, user then can enter in a Department Number and a Department Name in the fields provided. There can be as many as 99 divisions. Each Division can have up to 99 departments. 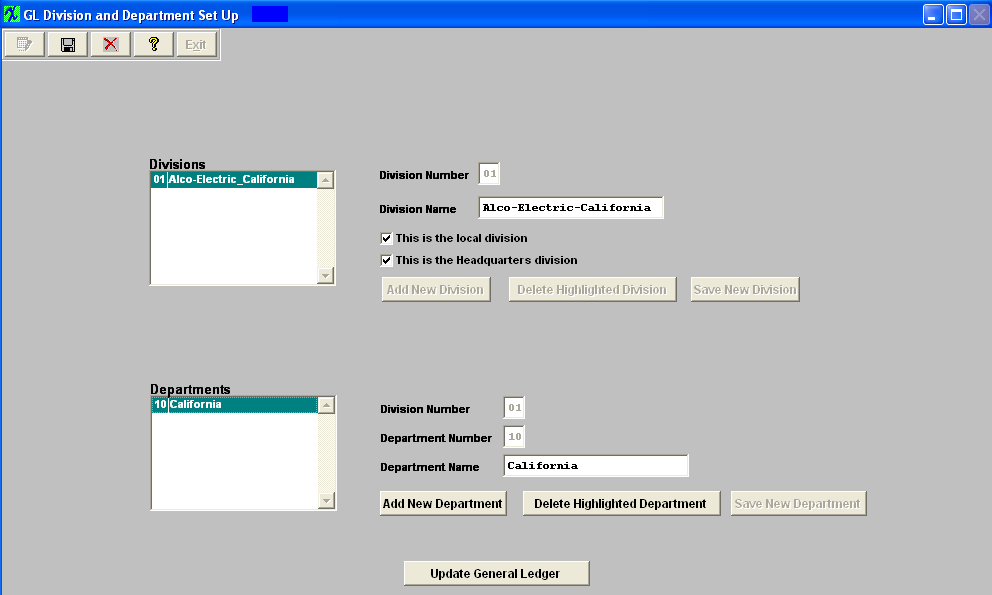 Depress the "Save New Department" button. The depress the Save button at the top of the screen. To add the Secondary divisions to the Headquarters ManEx System depress the Edit button and the "Add New Division" button will become editable. Depress the "Add New Division" button Enter a Division Number (other than '00' or the division number setup for the headquarters division) and a Division Name in the fields provided, when setting up the Secondary division to the Headquarters ManEx System you do NOT check either of the "This is the local division" or "This is the Headquarters division" boxes . Depress the "Save New Division" button. To add a department depress the "Add New Department" button. The Division number will default in and user may then enter a Department Number and a Department Name.  After one or more divisions have been added, the user may EDIT a division, or ADD a Department to a division. The division capability is intended to be used in conjunction with multi plant / division operations. It can also be used without Multi plant / division module, however. There can be as many as 99 divisions. Each Division can have up to 99 departments. Now user will need to "Update the General Ledger" information for the Headquarters Division number 01 and for the Secondary Divisions 02, 03, etc. Highlight the Headquarters Divison and depress the "Update General Ledger" button located at the bottom of the screen: 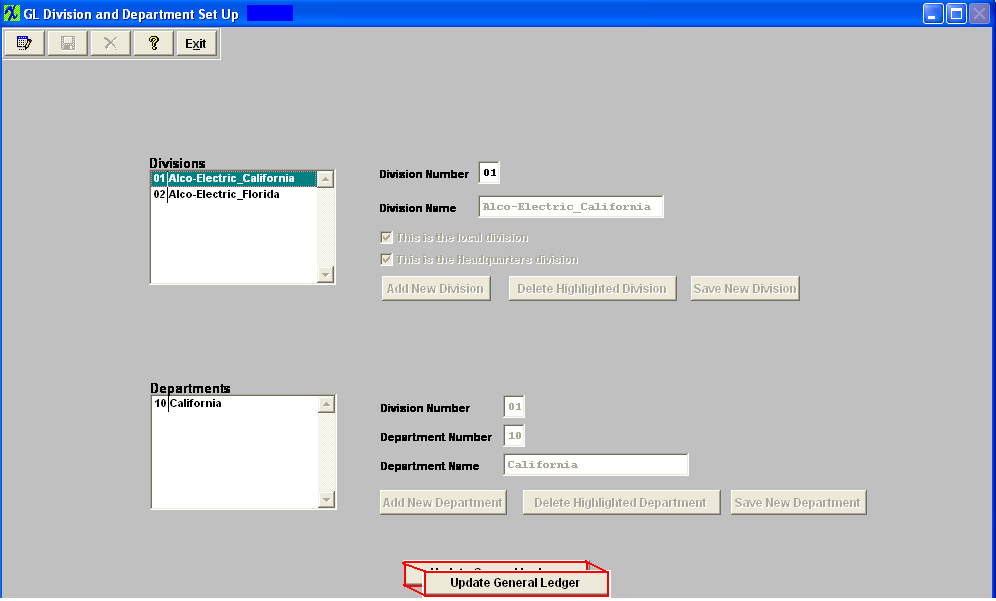 The following screen will appear: Depress the Edit button, select the Division, Department, and the GL Account Type from the pull downs.
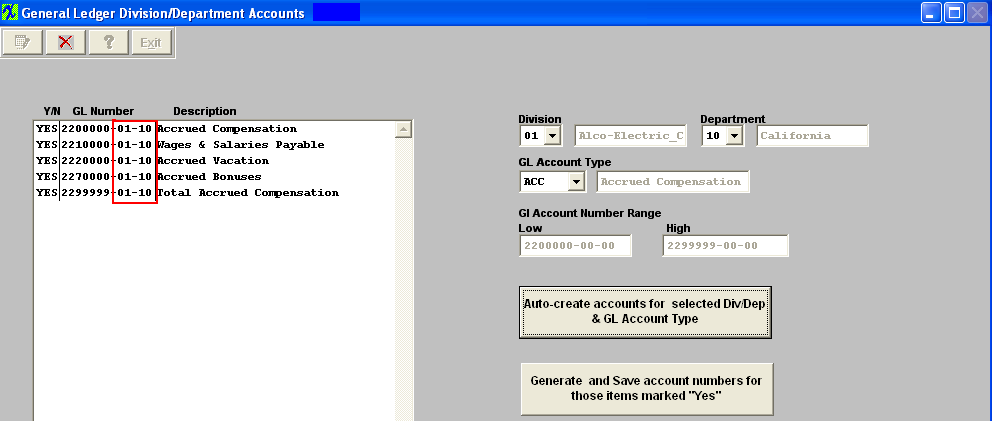
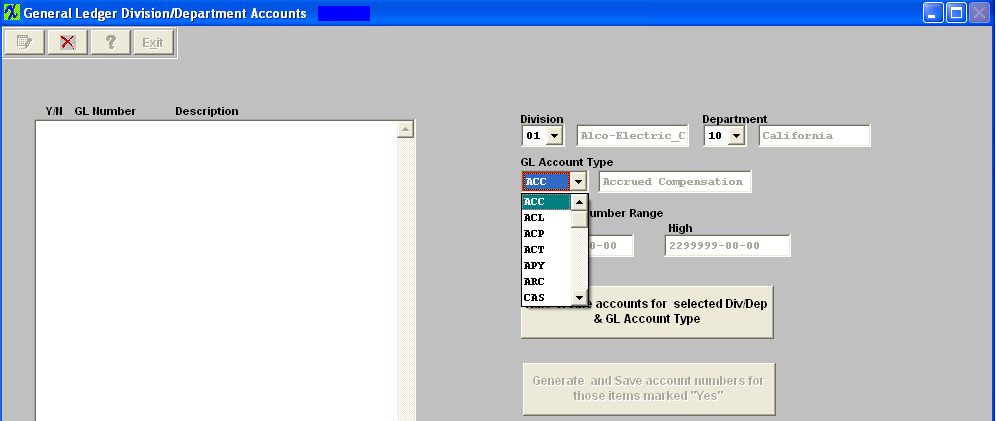 Once these items have been selected user may then depress the "Auto-create accounts for selected Div/Dep & GL Account Type" button, and the following screen will appear: 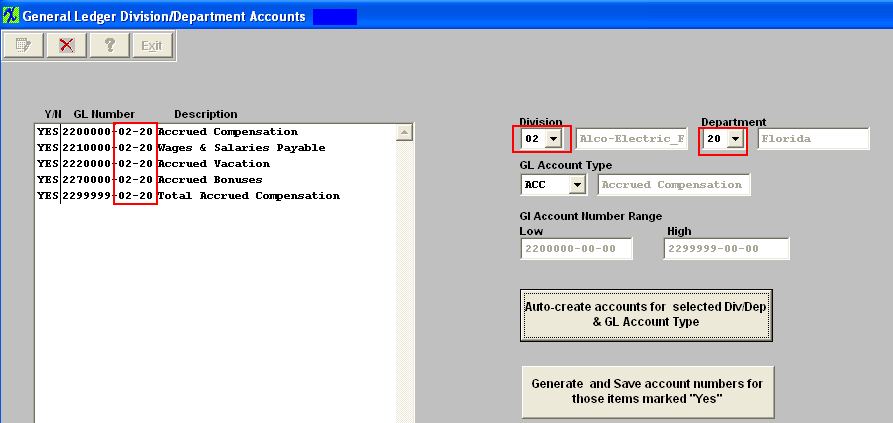 All of the accounts to be generated will appear on the screen for the new Divison and Department. If there are some accounts you want to exclude, turn the selection to “No”.
Note: You will want to exclude all Titles, Headings, Totals and Closing accounts, leaving only the Posting accounts. (Otherwise you will have duplicate titles, etc. on the reports.)
Depress the Abandon changes button to abandon the changes. Depress the "Generate and Save account numbers for those items marked "Yes" and the following message will be displayed:
 Continue the above steps, starting with "Auto Create Accounts ..." until ALL of the accounts have been created for all the New Divisions and/or New Departments. If the accounts have not been setup in the GL or the accounts for the department have been generated the following prompt will be displayed:
 User MUST then update AP accounts, with the correct account number for the Headquarter ManEx system.
 AR Accounts
 Bank Accounts
 Inventory Default Accounts
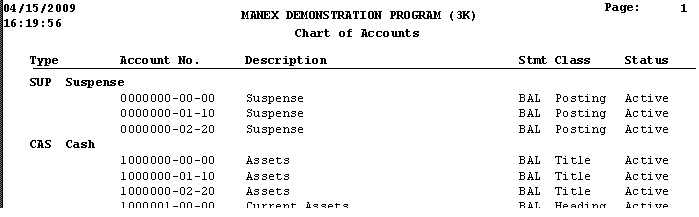
 After completing this section: Print the Chart of Accounts to be sure that all of the accounts desired were added. There should be account numbers xxxxxxx-00-00 for all of the accounts. Then there should be account numbers xxxxxxx-01-xx for all of the accounts created for the Headquarters division and xxxxxxx-02-xx for all of the accounts created for the Secondary divisions, etc.
 Where Used: This Setup is required to be completed prior to establishing a Chart of Accounts.
«Mark as Completed in RoadMap Section C Item 2-c» |
| 1.3.3.4.2. Setup the GL Divisions/Departments for Secondary Divisions | ||
To setup the Secondary ManEx System you can follow the steps in Article #288 along with the steps described below.
The following screen will appear:
First add the Headquarters Division. Depress the Edit button and the "Add New Division" button will become editable. Depress the "Add New Division" button Enter the Division Number and name for the Headquarters division in the fields provided. When setting up the Headquarters Division in the Secondary ManEx System "This is the local division" or "This is the Headquarters division" boxes are NOT to be checked.
Depress the "Save New Division" button. To add a department depress the "Add New Department" button. The Division number will default in, user then can enter in a Department Number and a Department Name in the fields provided. There can be as many as 99 divisions. Each Division can have up to 99 departments. Depress the "Save New Department" button. The depress the Save button at the top of the screen.
 To add the Secondary division to the Secondary ManEx System depress the Edit button and the "Add New Division" button will become editable. Depress the "Add New Division" button Enter a Division Number (other than '00' or the division number setup for the headquarters division) and a Division Name in the fields provided, when setting up the Secondary division to the Secondary ManEx System the "This is the local division" box MUST be checked. Depress the "Save New Division" button. After one or more divisions have been added, the user may EDIT a division, or ADD a Department to a division. The division capability is intended to be used in conjunction with multi plant / division operations. It can also be used without Multi plant / division module, however. There can be as many as 99 divisions. Each Division can have up to 99 departments.
Highlight the Secondary Division and Check the "This is the local division" box. This box MUST be checked when setting up the Secondary division in the Secondary ManEx System. 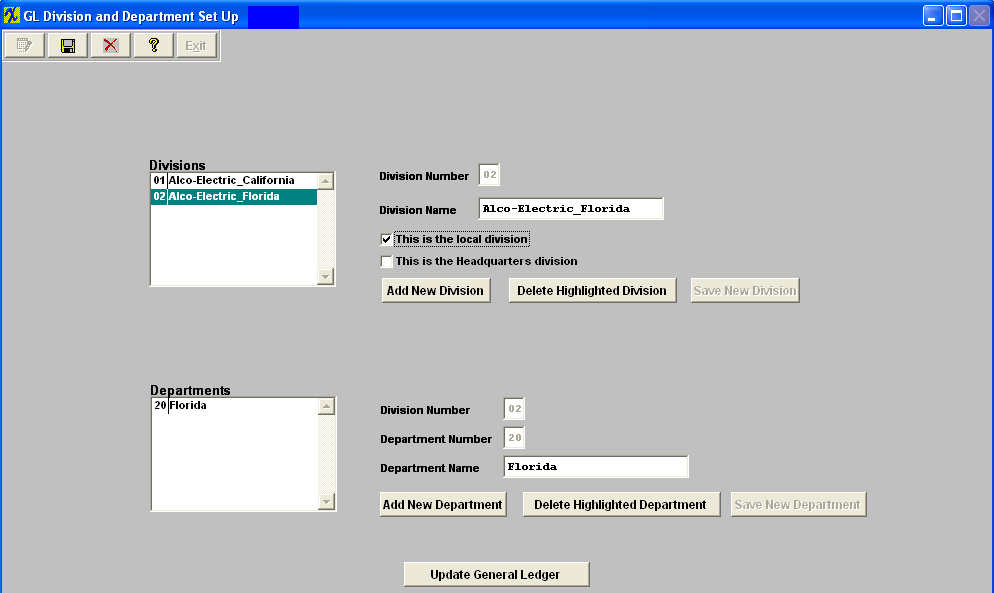 User will need to "Update the General Ledger" information for the Secondary Divisions 02, 03, etc. Highlight the Secondary Divison and depress the "Update General Ledger" button located at the bottom of the screen.
 Depress the Edit button, select the Division, Department, and the GL Account Type from the pull downs. Depress the Edit button, select the Division, Department, and the GL Account Type from the pull downs.
 Once these items have been selected user may then depress the "Auto-create accounts for selected Div/Dep & GL Account Type" button, and the following screen will appear:
 All of the accounts to be generated will appear on the screen for the new Divison and Department. If there are some accounts you want to exclude, turn the selection to “No”. Note: You will want to exclude all Titles, Headings, Totals and Closing accounts, leaving only the Posting accounts. (Otherwise you will have duplicate titles, etc. on the reports.) Depress the Abandon changes button to abandon the changes.
Depress the "Generate and Save account numbers for those items marked "Yes" and the following message will be displayed:
Continue the above steps, starting with "Auto Create Accounts ..." until ALL of the accounts have been created for all the New Divisions and/or New Departments. If the accounts have not been setup in the GL or the accounts for the department have been generated the following prompt will be displayed:
User MUST then update AP accounts, with the correct account number for the Secondary ManEx system.
 AR Accounts
 Bank Accounts
 Inventory Default Accounts
 After completing this section: Print the Chart of Accounts to be sure that all of the accounts desired were added. There should be account numbers xxxxxxx-00-00 for all of the accounts. Then there should be account numbers xxxxxxx-01-xx for all of the accounts created for the Headquarters division and xxxxxxx-02-xx for all of the accounts created for the Secondary divisions, etc.
Where Used: This Setup is required to be completed prior to establishing a Chart of Accounts.
«Mark as Completed in RoadMap Section C Item 2-c» |
| 1.3.4. General Ledger Account Setup |
| 1.3.4.1. Prerequisites for the GL Account Setup |
Complete the attached worksheet and "Mark as Completed RoadMap Section C Item 2-d" before continuing the setup.
G/L Account Types and Ranges must be completed before using this section. |
| 1.3.4.2. Introduction for the GL Account Setup |
This section is for preparing all general ledger account numbers for MANEX. If accounting is currently running within another software program, it may be helpful to print out the chart of accounts from the existing system. The “Txt and “Amt” columns are for the financial statements. This data is used to determine at what location on the page the Title of the account and the Amount of the account are to print out. The higher the number, the further to the right the information will be printed. You can leave these two boxes blank and set the report spacing up in the G/L Reports Setup. |
| 1.3.4.3. Fields & Defintions for the GL Account Setup | ||||||||||||||||||||||||||||||||
|
| 1.3.4.4. How To ......... |
| 1.3.4.4.1. Setup the GL Account Setup | ||||||
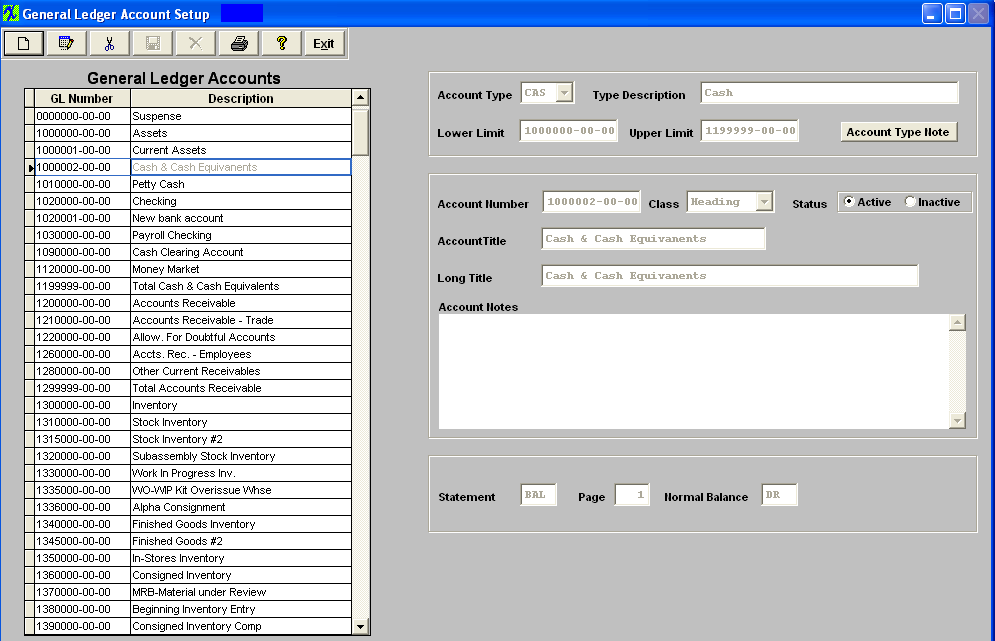
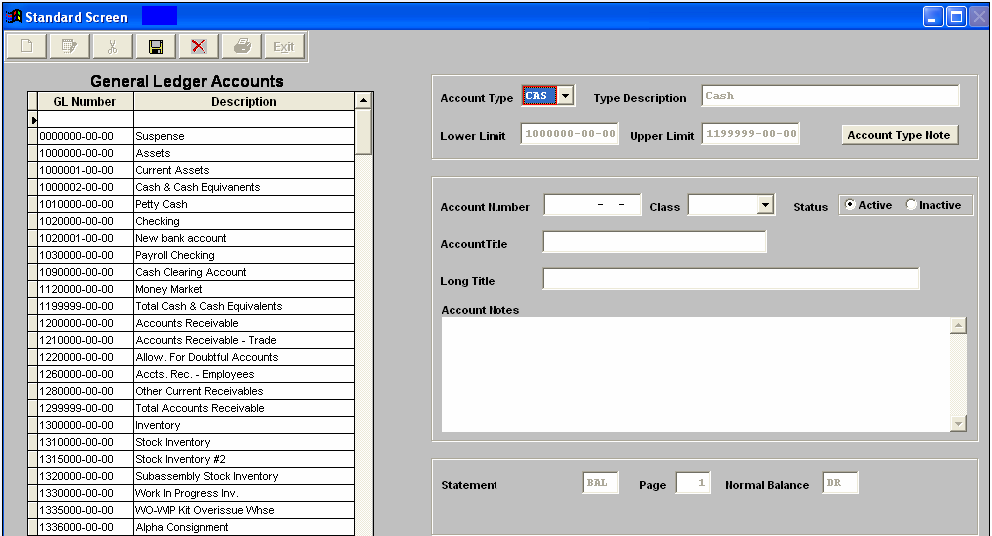
The following screen will appear:
Depress the Add action button.
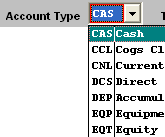
Once the Account Type has been selected, the Type Description, Lower Limit, Upper Limit, Statement, Page, and Normal Balance fields will default in:
 Make sure the Status is Active.
Enter a Short Account Title and a Long Title. Enter any notes required for this account.
The completed entry will appear as follows: 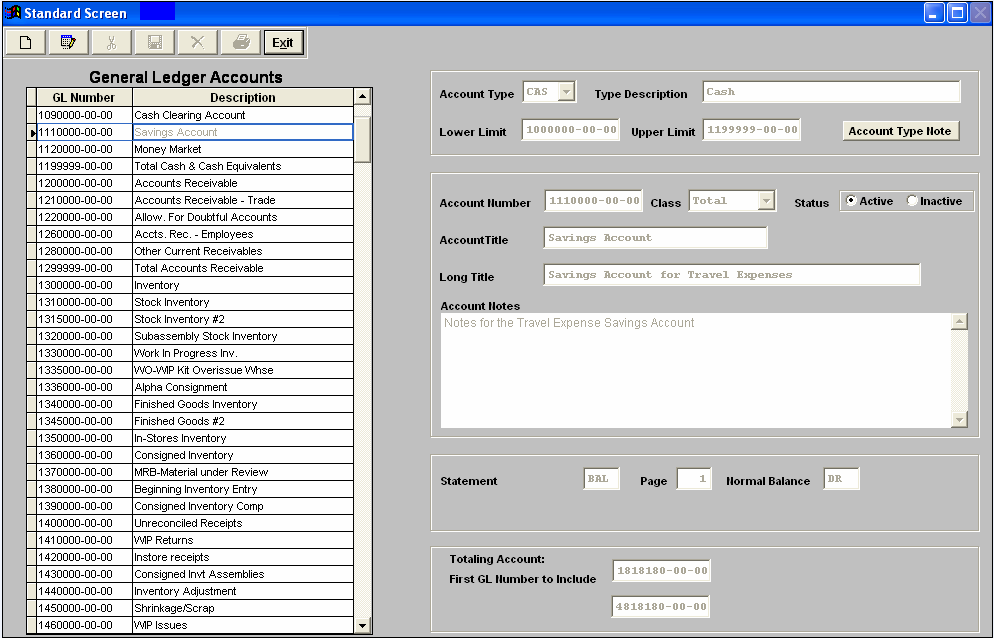 After establishment of one or more accounts, user may Edit or Delete the account Note: A user will NOT be allowed to delete or Inactivate an account which is used in any of the setup screens in System Setup or Accounting Setup. If it is necessary to delete or inactivate such an account, 1st go into the requisite set up screen and edit the account number, then the user can come back into this screen and delete or inactivate the account. You are also NOT allowed to delete an account which has been used within the last three years. However, you can change the status to Inactive. After Adding or Editing, the user must Save or Abandon the modifications. Please remember that you can’t add a natural debit account within a range where the Normal Balance was identified as a Credit, or visa versa.
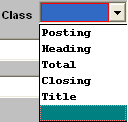
Users are allowed to change the Class of a GL number (Posting, Title, Total, etc) only if there is no activity, or if the only activity was in a period that started with a 0.00 balance, and has some activity but then ended with a 0.00 balance.
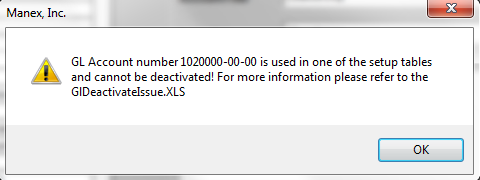
If a user tries to Inactivate an account which is used in any of the setup screens in System Setup or Accounting Setup they will receive the following message and a GlDeactivateIssue.XLS file will be created.
 Steps to Delete: Note: If you have any duplicate Titles, Headings, Totals or Closing accounts, please be sure to delete them. Otherwise, duplicate titles, etc. will appear on the reports. Delete the titles, etc. for Divs 01, 02, etc., but NOT for Div 00.
Highlight the account you want to delete. Depress the Delete button. The following confirmation message will appear:
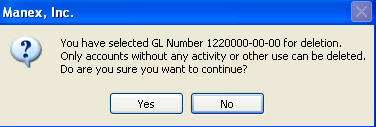 Depress Yes to continue, depress No to abort.
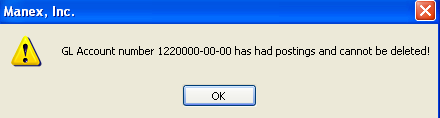
If the user depresses Yes to continue, the system will check all GLTRANS table for the existence of the account, as well as all tables used in the release and post transactions, and in any system setup default accounts (like inventotry, warehouse, etc) are using this account number. If yes, then the system will NOT allow it to be deleted from the system and users are suggested to change the description for that Account number to "Do Not Use" and change the status to Inactive.
Where Used: This Setup is required to be completed prior to establishing General Ledger numbers to inventory setups. After completing this section: «Mark as Completed in RoadMap in Section C Item 2-d» |

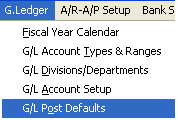
| 1.3.5. General Ledger Post Defaults |
| 1.3.5.1. Prerequisites for the G/L Post Defaults |
Complete the attached worksheet and "Mark as Completed RoadMap Section C Item 2-e" before continuing the setup.
General Ledger Accounts must be completed before using this section.
|
| 1.3.5.2. Introduction for the GL Post Defaults |
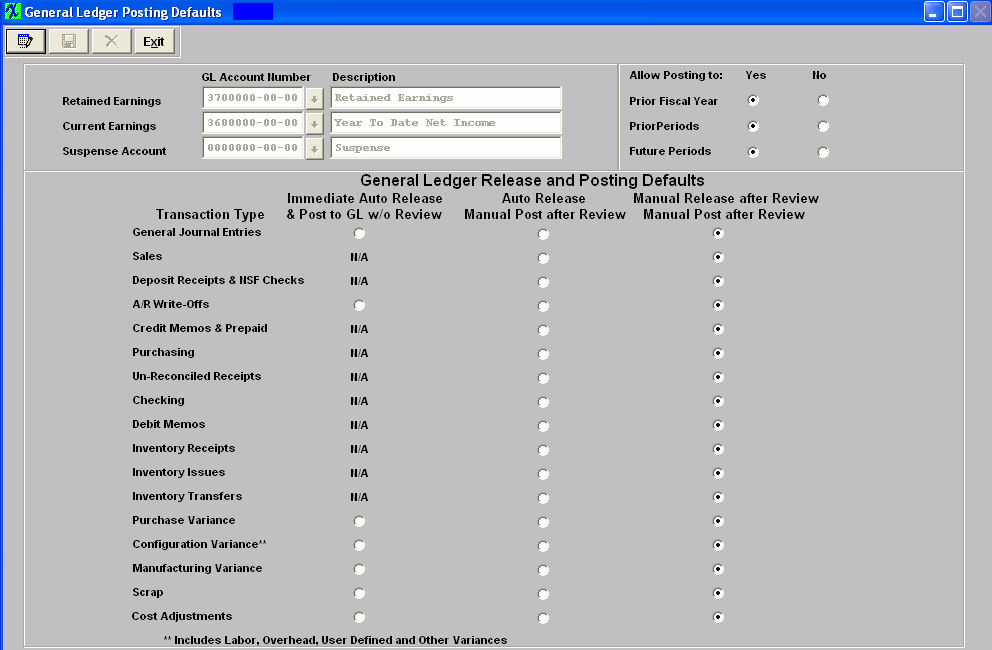
All GL default posting defaults for sales, inventory, earnings, etc. are set up here. User has three options to release and post records.
The first option is to Manually Release after Review and Manually Post after review for all items. Another option will be to AUTOMATICALLY Release transactions as they occur and Post after Review. And a third option will be to AUTOMATICALLY Release AND Post transactions as they occur. Furthermore, you will be able to make these selections for each of the 17 types of transactions involved in our General Ledger. On the same screen will be shown and be editable the ability to grant permission (or not) to allow posting to Prior Fiscal Years, Prior Periods and Future Periods, as well as assign account numbers for Retained Earnings, Current Earnings and Suspense Account. |
| 1.3.5.3. Fields & Definitions for the GL Post Defaults | ||||||||||||||||||
If users change the Posting Defaults they will receive a warning that they should make sure that ALL records have been released and posted before changing the posting default. ManEx strongly suggests NOT changing the Posting Defaults once they have been setup. NOTE: Changing the Posting Defaults could result in loss of records. |
| 1.3.5.4. How To ......... |
| 1.3.5.4.1. Setup the GL Post Defaults | ||
The following screen will appear: The user may modify this data by use of the Edit button. At the conclusion of any EDIT activity, the user must depress the Save button to save the changes or depress the Abandon changes ubtton to abandon the changes. If posting to Prior Fiscal Years, Prior Periods or Future periods is set to NO, then no types of transactions can be set to Immediate Release/Immeditate Posting. If any types of transactions are set to Immediate Release/Immediate Posting, then no restrictions can be placed on posting to Prior Fiscal Years, Prior Periods or Future periods. If users change the Posting Defaults they will receive a warning that they should make sure that ALL records have been released and posted before changing the posting default. ManEx strongly suggests NOT changing the Posting Defaults once they have been setup. NOTE: Changing the Posting Defaults could result in loss of records.
Note: That the Retained Earnings and Posting Suspense Posting accounts defined above must have the class of posting as determined in General Ledger Account Setup. The Current Earnings must be the YTD Net Income account from the Balance Sheet Equity section and must have the class of Closing. Where Used: This Setup is required to be completed prior to posting accounting activity. ManEx strongly suggests not changing the Posting Defaults once they have been setup. Changing the Posting Defaults could result in loss of records. After completing this section: «Mark as Completed in RoadMap in Section C Item 2-e» |
| 1.4. A/R-A/P Setup |
| 1.4.1. Sales - A/R Setup |
| 1.4.1.1. Prerequisites for the Sales - AR Setup |
| 1.4.1.2. Introduction for the Sales - AR Setup |
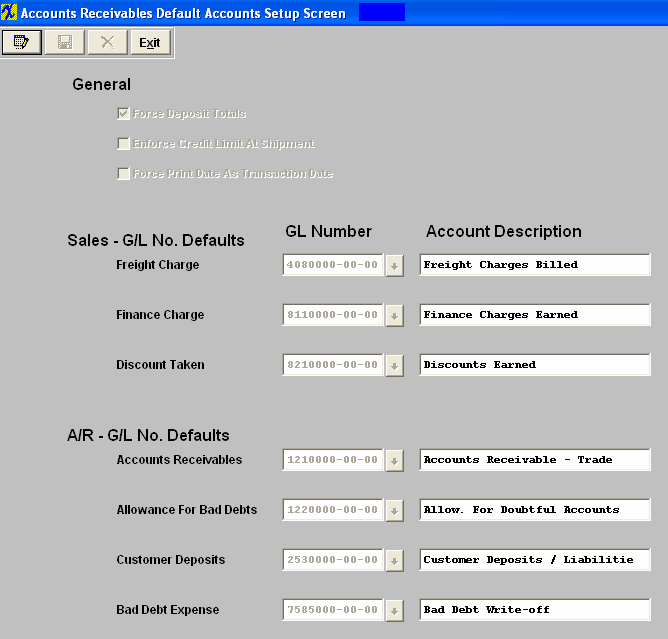
This is where user sets up the default Sales and A/R General Ledger numbers. By setting up default account numbers for Sales and A/R here, each time an entry is created for Sales or A/R, the accounts will already be assigned for posting.
Note: that the accounts selected as defaults must have the class of posting in the General Ledger Account Setup screen. If you have the Multi-Plant version of Manex, prepare defaults for each division set up previously in G/L Divisions /Departments screen. |
| 1.4.1.3. Fields & Definitions for the Sales AR Setup | ||||||||||||||||||||
 General
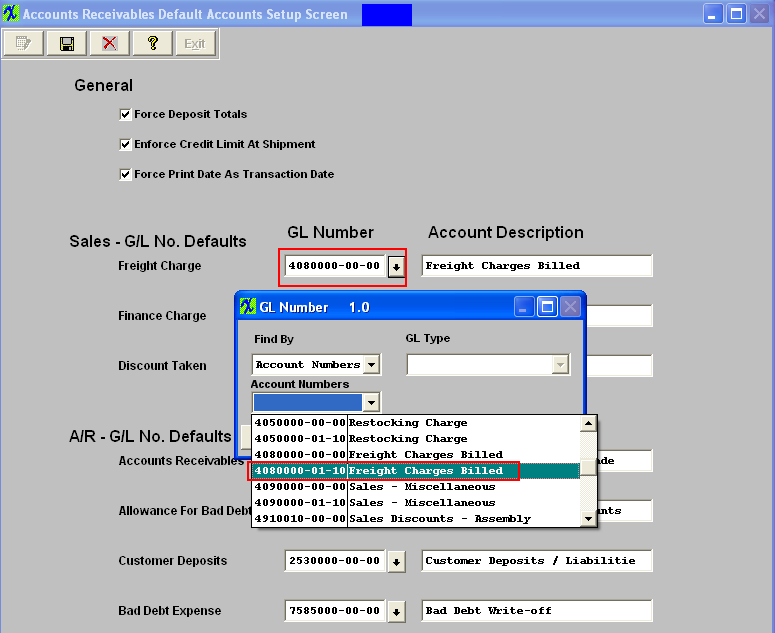
Sales - G/L No. Defaults
A/R - G/L No. Defaults
|
| 1.4.1.4. How To ........... |
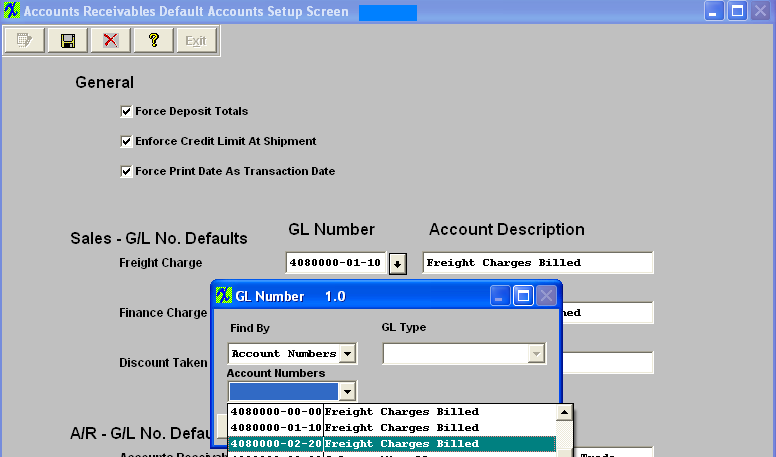
| 1.4.1.4.1. Sales/Accounts Receivable Setup | ||
The following screen will appear: The user may Edit information on this screen. At the conclusion of any modifications, the user must Save or Cancel to leave the screen.
If you are a Multi-Plant user, select the Division at the top of the screen. Enter the defaults for that division. Save the data. Repeat this process until all divisions are entered. Where Used: This Setup is used in Sales Orders and Invoicing. After completing this section: «Mark as Completed in RoadMap in Section C Item 3-a» |
| 1.4.2. Purchases - A/P Setup |
| 1.4.2.1. Prerequisites for the Purchases - A/P Setup |
General Ledger Accounts must be completed before using this section.
|
| 1.4.2.2. Introduction for the Purchases - A/P Setup |
This is where user sets up the default associated with Accounts Payable General Ledger numbers. By setting up default account numbers for Purchases and A/P here, each time an entry is created for Purchases or A/P, the accounts will already be assigned for posting.
Note: that the accounts selected as defaults must have the class of posting in the General Ledger Account Setup screen. If you have the Multi-Plant version of Manex, prepare defaults for each division set up previously in G/L Divisions /Departments screen. |
| 1.4.2.3. Fields & Definitions for the Purchases - A/P Setup | ||||||||||

|
| 1.4.2.4. How To ........... |
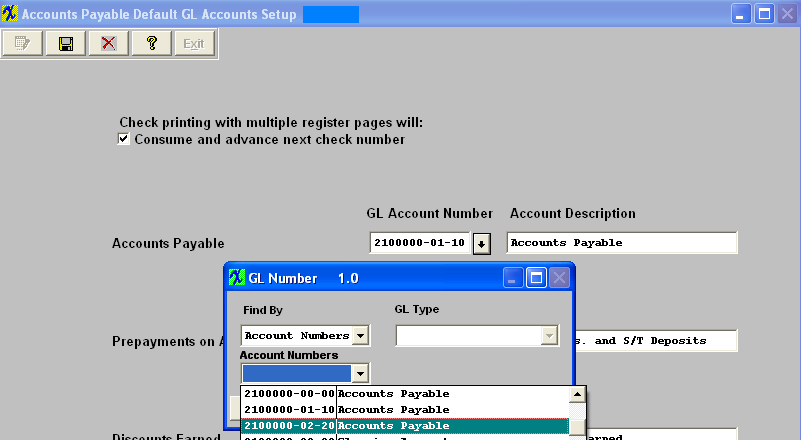
| 1.4.2.4.1. Purchase-Accounts Payable Setup | ||
The following screen will appear:
The user may Edit information on this screen. At the conclusion of any modifications, the user must Save or Abandon Changes to leave the screen.
When in Edit Mode user can select different GL Account Numbers from the pull downs. The GL Account Numbers MUST be setup in the GL Account Setup module.
Where Used: This Setup is used in Purchase Orders and Accounts Payable. After completing this section: «Mark as Completed in RoadMap in Sect. C Item 3b» |

| 1.5. Bank Setup |
| 1.5.1. Prerequisites for the Bank Accounts Setup |
Complete the attached worksheet and "Mark as Completed RoadMap Section C Item 4-a" before continuing the setup.
General Ledger Accounts must be completed before using this section. It is very important that the Bank Account number is unique. Same BANK ACCOUNT NUMBER CAN NOT be assigned to more than one bank name. This could cause incomplete or duplicate transactions. |
| 1.5.2. Introduction for the Bank Accounts Setup |
Enter all checking, savings, and other accounts where funds are deposited and disbursed. Each Bank account must have an individual general ledger number assigned to it. The Interest and Bank Charges from the bank accounts can be the same for each bank, if desired.
When setting up a new Bank Account the beginning balance will be 0.00. If the Bank Account being setup in the ManEx system carries a Balance the Bank Balance within the setup will be 0.00. Then, the user will be required to generate a so called "OPENING" Journal Entry which will Debit the Bank Account General Ledger number. Once the Journal Entry is posted to the General Ledger, both the Bank Setup Balance and the General Ledger Account number Balance will be updated and should match. Note that the accounts selected as defaults must have the class of posting in the General Ledger Account Setup screen.
|
| 1.5.3. Fields & Definitions for the Bank Accounts Setup | ||||||||||||||||||||||||||||||||
 Bank Accounts
|
| 1.5.4. How To ........... |
| 1.5.4.1. Bank Accounts Setup | ||
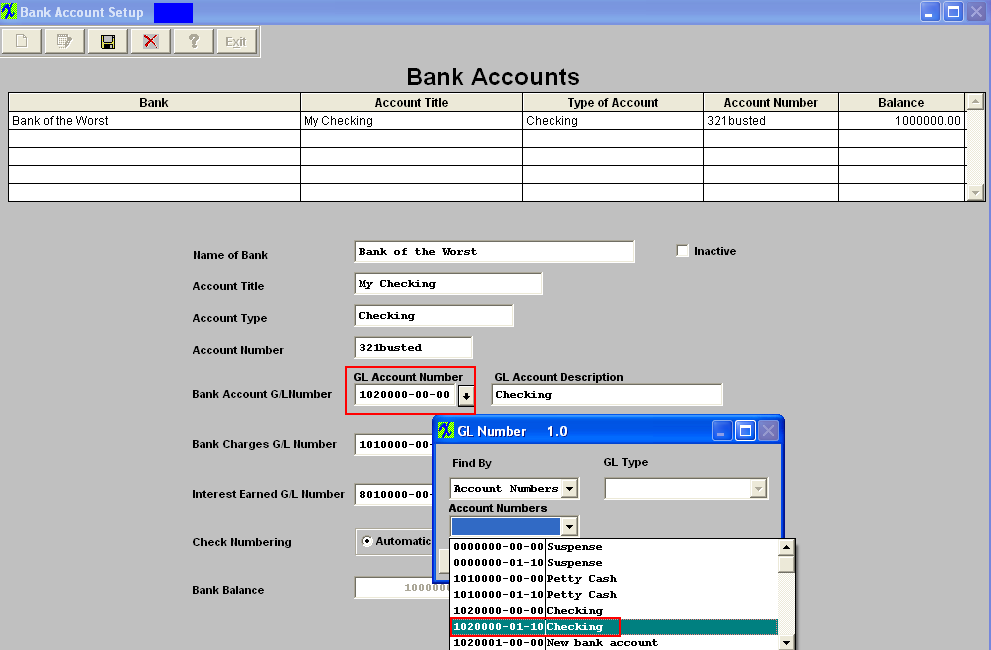
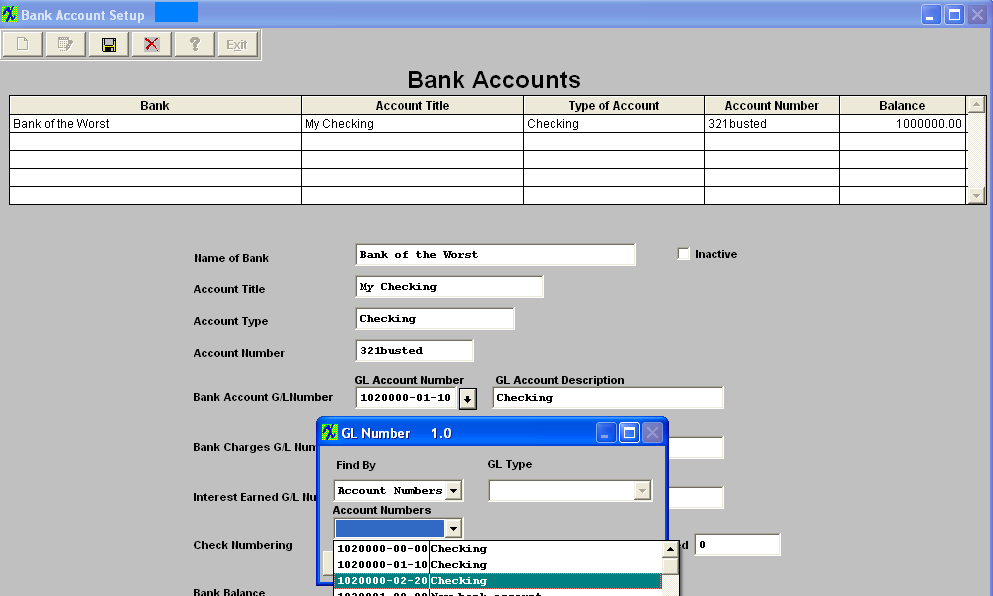
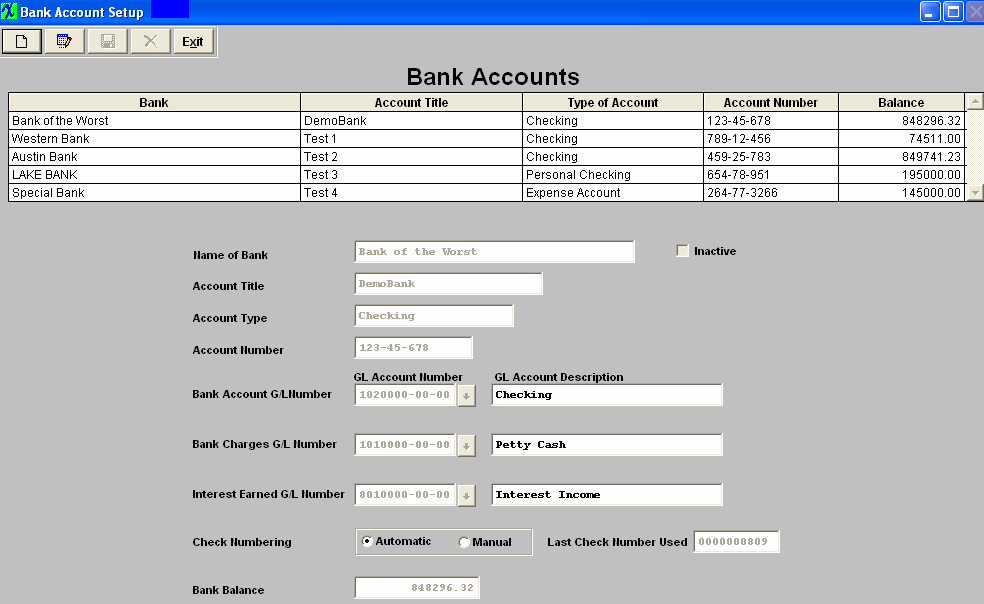
The following screen will appear: Banks may be added by pressing the Add button.
Enter all checking, savings, and other accounts where funds are deposited and disbursed. Each Bank account must have an individual general ledger number assigned to it. The Interest and Bank Charges from the bank accounts can be the same for each bank, if desired.
 NOTE: The GL account fields must be populated, if left blank this could cause incomplete transactions. Same GL account numbers cannot be used in more than one Bank account.
NOTE: The accounts selected as defaults must have the class of posting in the General Ledger Account Setup screen.
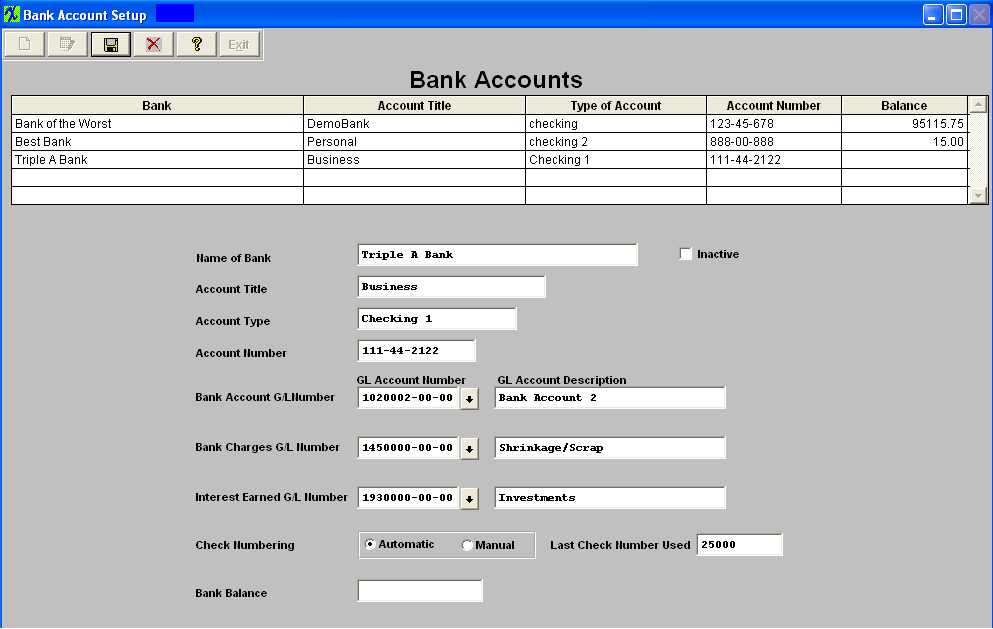
Depress the Save button to Save the New Bank Account, depress the Abandon Changes button to abandon the Changes.
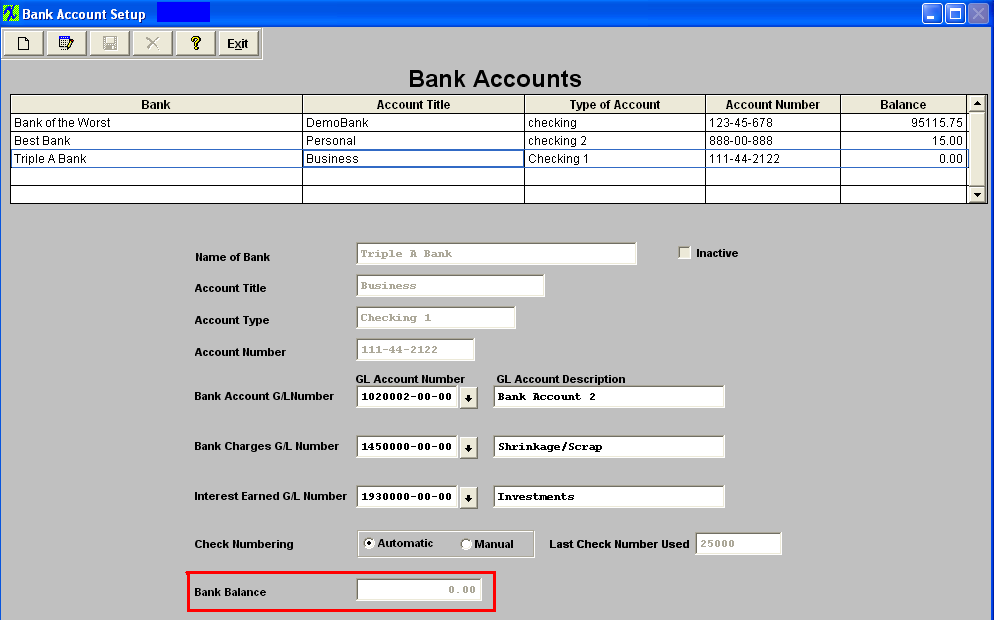 When setting up a new Bank Account that has never been used by the user, the Bank Balance needs to be 0.00 at initial setup and any Deposits or Checks written from this account (even though the data is not yet posted into the General Ledger) from this Point forward processed through the ManEx System will properly update the Bank Setup Balance at the same time it updates the General Ledger Account number balances, keeping the two balances in sync.
If the Bank Account being setup carries a balance, but has never been used in the ManEx system before, the Bank Balance within the Setup needs to be 0.00. Then the user will be required to generate an "OPENING" Journal Entry which will Debit the Bank Account General Ledger number. Once the Opening Journal Entry has been posted to the GL, both the Bank Setup Balance and the GL Account number Balance will be updated keeping the two balances in sync. The bank balance is maintained in a real-time mode by ManEx. This balance is updated for deposits to or checks written from the account even though the data is not yet posted into the General Ledger. The balance will also pick up any Journal Entry into the bank account once the Journal Entry is posted. Once one or more banks are entered, they may be edited or deleted by selecting the bank and pressing the Edit or Delete button. After using Add, Edit or Delete, the user must Save or Abandon changes.
User may inactivate a Bank, by selecting the bank and pressing the Edit button, then check the Inactive box. This will filter out the inactive bank accounts on all pulldown screens except for the pulldown located on the check register screen. User may view the check register for an inactive bank.
Where Used: This Setup is used in Accounts Payable, Check writing, Deposits and as the balance used in the Bank Reconciliation module.
After completing this section «Mark as Completed in RoadMap in Section C Item 4-a»
|

| 1.6. Inventory Setup |
| 1.6.1. Prerequisites for the Inventory Setup |
Complete the attached worksheet and "Mark as Completed RoadMap Section C Item 5-a" before continuing the setup.
General Ledger Accounts must be completed before using this section. |
| 1.6.2. Introduction for the Inventory Setup |
This is where user sets up the default Inventory General Ledger numbers. Enter the default accounts associated with Inventory and these numbers will be available during routine entry of data.
The inventory account should be an Asset account, normally under Current Assets. The Cost adjustment account should be an Income/Expense account, normally under Cost of Goods or Inventory Adjustments. Asset Accounts are Balance Sheet accounts and are shown on that statement, Income/Expense accounts are on the Income statement. So if you have a cost adjustment to reduce inventory by $500 you are saying that you have $500 less than you should so that has to be expensed and recognized in the Profit and Loss, the transaction would be: Debit Credit Cost Adjustment 500.00 Inventory 500.00 The Inventory account would be reduced by $500.00, the total of all of the inventory accounts (Raw Goods, Finished goods, etc) would be reduced by $500, the total Current Assets would be reduced by $500 and the Total Assets would be reduced by $500, Current earnings would be reduced by $500 and Total Liabilities would be reduced by $500. On the income statement, the Cost adjustments would be increased by $500, depending what category the put the account, the sub total of that group would increase by $500, gross income would be reduced by $500 and total income would be reduced by $500.00 |
| 1.6.3. Fields & Definitons for the Inventory Setup | ||||||||||||||||||||||||||||||||
|
| 1.6.4. How To .......... |
| 1.6.4.1. Inventory Setup | ||
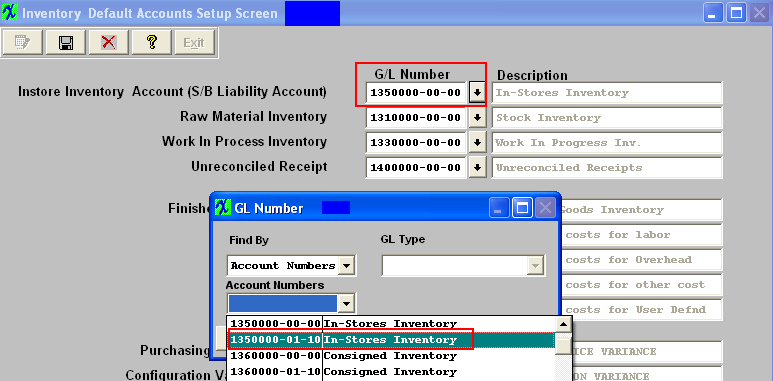
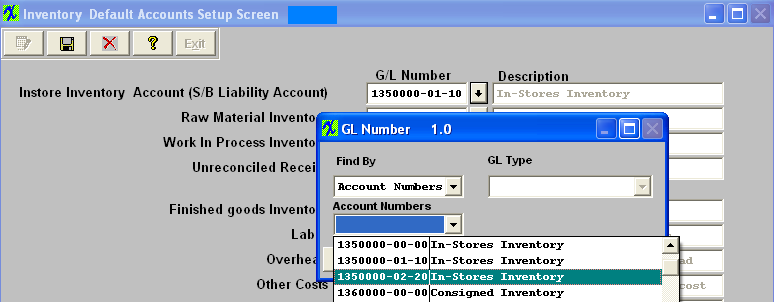
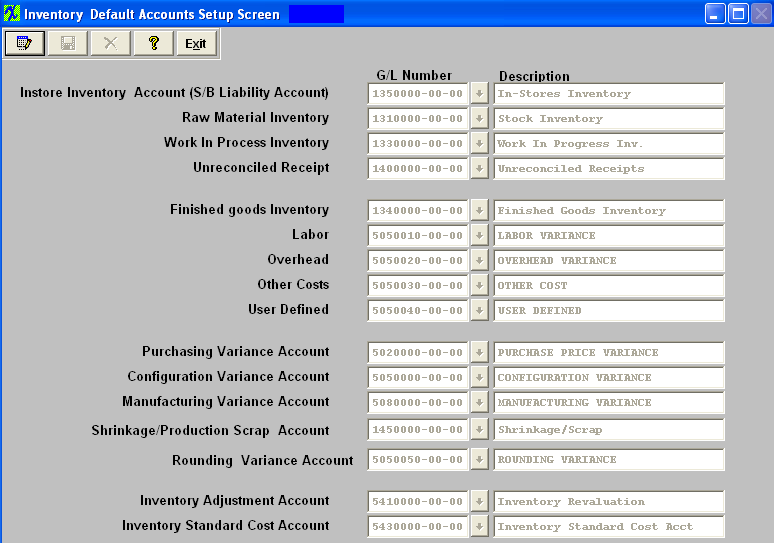
The following screen will appear: 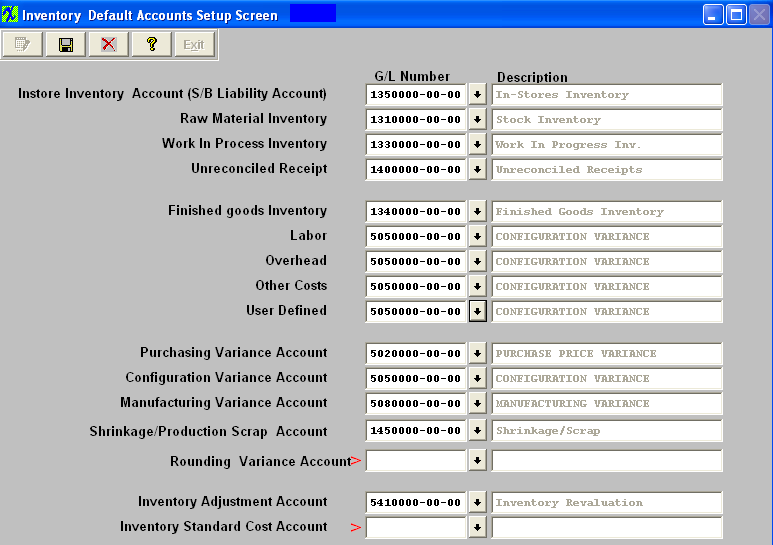 This screen is similar to the Sales-A/R and Purchases-A/P Setup screens. Enter the default accounts associated with Inventory, and these numbers will be available during routine entry of data.
If you have the Multi-Plant version of Manex, prepare defaults for each division set up previously in G/L Divisions /Departments . Note that the accounts selected as defaults must have the class of posting in the General Ledger Account Setup screen. Depress Edit , to change the defaults or setup new account number for the Labor, Overhead, Other Costs, and/or User Defined.
It is up to the users to establish a G/L account for the Rounding Variance account. A G/L account MUST be established for this account. If this field is left blank when users transfers product to/from the FGI or Scrap work center in Shop Floor Tracking they will receive the following message:
 It is up to the users to establish a G/L account for the Inventory Standard Cost account. This gives the user the option to have the Cost adjustment and Inventory adjustment broken out to hit two seperate G/L accounts. If this field is left blank any transaction made from the Std Cost Adj module will default in the same GL account number as the Inventory Adjustment account, so no data will be lost if the users neglect to populate this field with a new G/L account number. Once changes have been made depress the Save button to save changes or the Abandon Changes button to abandon changes.
The InStore Inventory Account should be a Liability Account. The IPS inventory does not carry any value until pulled to a kit. This is why it needs to be a Liability GL account. Because at the time you pull the inventory to a Kit, is the first time a transaction is created in the system and at that point in time the IPS stock that you issued to the kit becomes a liability that you owe to the Supplier per contract. See Article #3268 for further detail.
The inventory account should be an Asset account, normally under Current Assets. The Cost adjustment account should be an Income/Expense account, normally under Cost of Goods or Inventory Adjustments. Asset Accounts are Balance Sheet accounts and are shown on that statement, Income/Expense accounts are on the Income statement. So if you have a cost adjustment to reduce inventory by $500 you are saying that you have $500 less than you should so that has to be expensed and recognized in the Profit and Loss, the transaction would be: Debit Credit Cost Adjustment 500.00 Inventory 500.00 The Inventory account would be reduced by $500.00, the total of all of the inventory accounts (Raw Goods, Finished goods, etc) would be reduced by $500, the total Current Assets would be reduced by $500 and the Total Assets would be reduced by $500, Current earnings would be reduced by $500 and Total Liabilities would be reduced by $500. On the income statement, the Cost adjustments would be increased by $500, depending what category the put the account, the sub total of that group would increase by $500, gross income would be reduced by $500 and total income would be reduced by $500.00 |

| 1.7. FAQs - Accounting Setup |
| Facts and Questions for the Accounting Setup Modules |