| 1. Order Configurator (OPTIONAL Module) |
| 1.1. Prerequisites for Order Configurator | ||||||||||
|
ManEx’s standard module configuration allows most users to accomplish their daily tasks. For those users wanting to get more from ManEx by leveraging the total solutions, this is one of the optional modules available for purchase. This module is designed to aid the user in the formation of Sales Orders. To place an order or to learn more about this specific module or any of the other optional modules please contact us at http://manex.com\contactus.aspx
|
| 1.2. Introduction for Order Configurator |
This module is designed to aid the user in the formation of Sales Orders. First the user sets up the prospective customer in the Prospect tab of the Order Configuration module. This can be automatically forwarded to the Customer Information module. Then the user sets up the Order Configurator in the Order Configuration Setup module. Then the user enters the Price List Information module and selects the components of the configuration, and enters pricing for the Price breaks, for that new prospective customer. Once this is accomplished, the user enters the Order Configuration module and selects the class, type, description and part number. If it’s a new part number, the information will forward automatically to the Inventory Control module as a Make Part. The user may also elect to set up a Bill of Materials automatically, once the configuration is complete.
|
| 1.3. Fields & Definitions for Order Configurator |
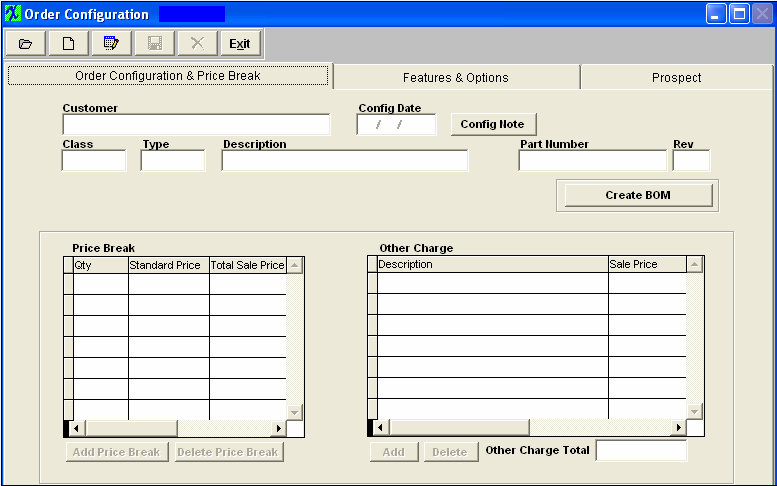
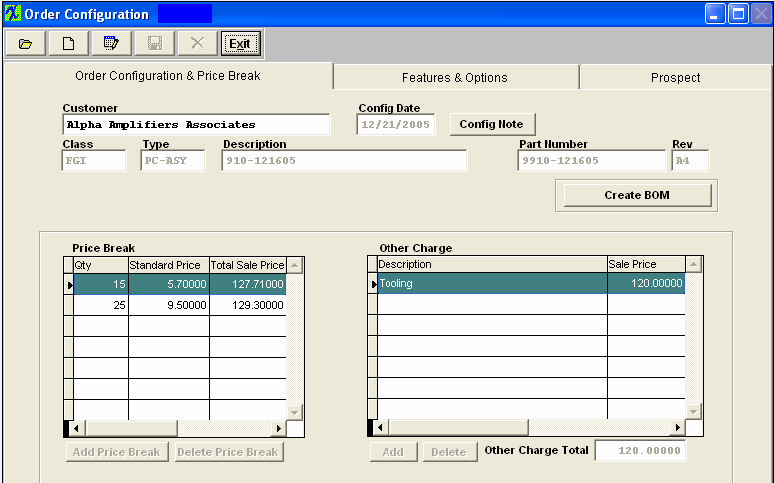
| 1.3.1. Order Configuration & Price Break Tab | ||||||||||||||||||||||||||||||||||||||
Order Configurator & Price Break tab Field Definitions |
| Customer |
The name of the customer for which the Order Configuration was created. |
| Config Date |
The date on which the Order Configuration was created. |
 |
If lit in red, depressing this button will display a note about the Order Configuration |
| Class |
This is the product classification. |
| Type |
This is the product type within the classification. |
| Description |
This is the description for theproduct. |
| Part Number |
This is the Order Configuration number assigned to the part. |
| Rev |
This is the revision number pertaining to the Part Number. |
 |
The user depresses this button to create a Bill of Materials for the Order Configuration. |
This is the quantity for the price break. This is the calculated Standard price from the Features and Options screen pertaining to the quantity per entered. This field is not editable. This is the calculated Sales Price pulled from the Feature & Option screen pertaining to the quantity per entered. It will also calculate in the price information from the Other Charge section. Every time you change or enter a new Option or Other Charge $ the Sales Price will recalculate. The user does have the option to re-enter/over-write this amount if needed. This is the button used to add a new Price Break. This is the button used to delete a Price Break.
Qty
Standard price
Sales Price
Add price Break (Button)
Delete Price Break (Button)
Other Charge section:
This is the description of the Other Charge. This is the Sales Price pertaining to the Other Charge. This is the button used to Add a new Other Charge. This is the button used to Delete an Other Charge. This is the total of Other Charges.
Description
Sales Price
Add (Button)
Delete (Button)
Other Charge Total
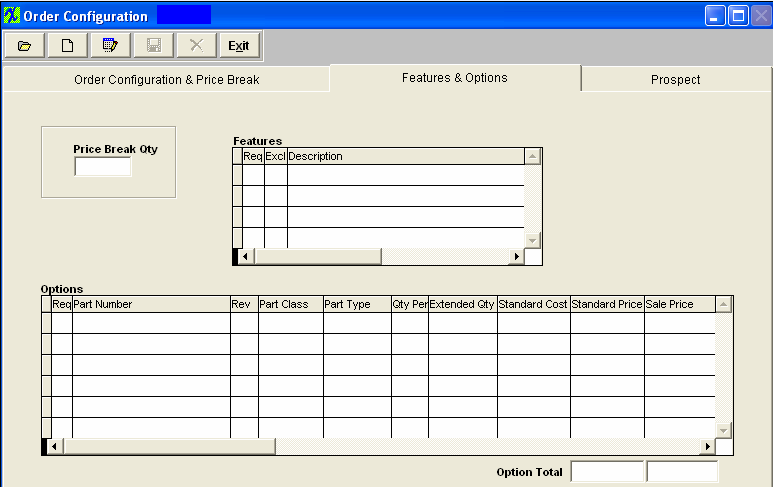
| 1.3.2. Features & Options Tab | ||||||||||||||||||||||||||||
Features & Options Tab Field Defintions |
| Req | A check in this box denotes that the feature is required |
| Excl | A check in this box denotes that this feature is not an option/excluded |
| Description |
This is a description of the feature. |
Options Section
| Req |
A check in this box denotes that the option is required. |
| Part Number |
This is the Part Number per the Inventory Master. |
| Rev |
This is the number of the revision pertaining to the Part Number. |
| Part Class |
This is the classification of the Part Number listed on this line. |
| Part Type |
This is the type within the classification pertaining to the Part Number listed on this line. |
| Qty Per |
The is the quantity number needed for the Part Number listed on this line. |
|
Extended Quantity |
This is the Price Break quantity highlighted in the Order Configurator & Price Break tab multiplied by the Quantity Per. |
| Standard Cost | This is the Standard Cost for the Part Number listed on this line item. This is defaulted in from the Inventory Control module. This field is read only. |
| Standard Price | This is the Standard Price for the Part Number listed on this line item. This is defaulted in from the price entered in the Sales Price List Information module for the price break quantity highlighted in the Order Configurator & Price Break tab multiplied by the extended qty. This field is read only. |
| Sale Price |
This is the Sales Price for the Part Number listed on this line item. This field is editable. |
| Option Total |
The total of the Standard Price and Sale Price columns. |
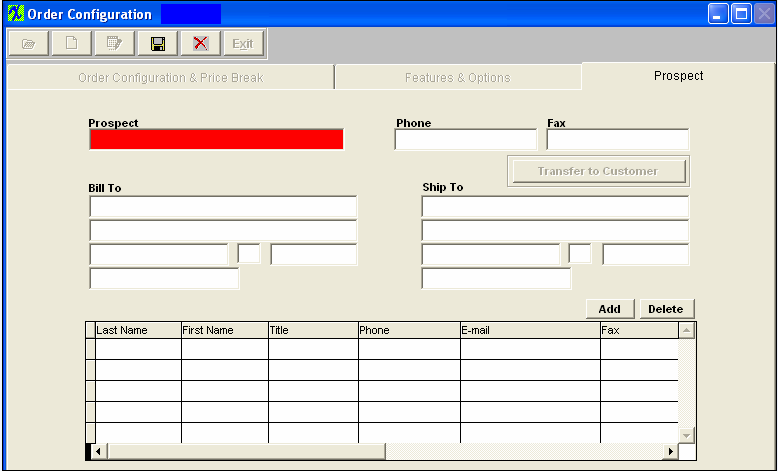
| 1.3.3. Prospect Tab | ||||||||||||||||||||||||||||
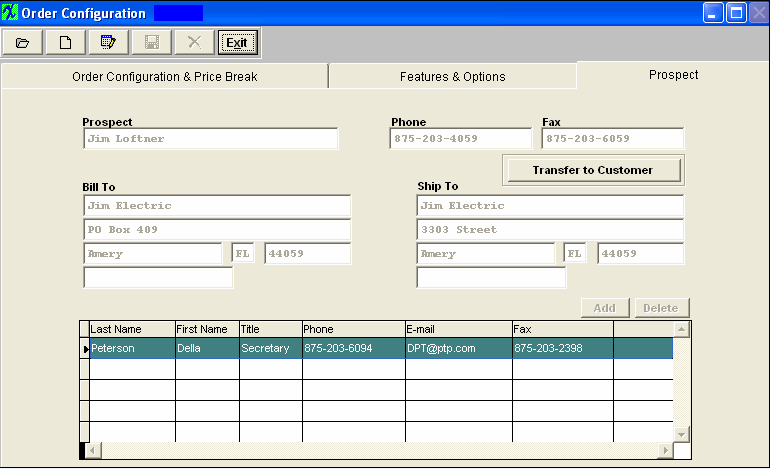
Prospect Tab Field Definitions Prospect screen is where you have the ability to set up a prospective Customer into the system. Then when needed Transfer the Customer information directly into the Customer Information module.
The is the fax number of the new prospective customer. This button is used to transfer the prospect information into the Customer Information module.Note:If you set up the customer in this way, you will still have to go into the Customer Information module to set up FOB, Ship Via, Ship Charge, Account Number, Transit Days, Delivery Time, Sales Tax, Shipping Charge Tax, Territory, Sales Discount Type, Reseller Number, Terms, Credit Status, Credit Limit, Shipping Instructions and Profile. This is the prospective customer’s billing address. This is the prospective customer’s ship to address. Depressing this button will allow the user to add a new customer contact. Depressing this button will allow the user to delete a customer contact. This is the last name of the customer contact. The first name of the customer contact. This is the title of the customer contact, such as Buyer, etc. This is the phone number of the customer contact.
|
| 1.4. How To ..... for Order Configurator |
| 1.4.1. Adding a New Prospect Customer | ||
The following screen will appear:
Depress the Prospect Tab. Depress the Add button. Enter your password.
Type in the Prospect name, Phone number and Fax number. Type in the Bill To and Ship to addresses. Depress the Add button in the middle of the screen to enter the customer contact. Depress the Save Action button.
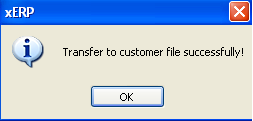
Depress the Transfer to Customer button to forward the Prospect information into the customer tables. The following message will appear:
Note:If you set up the customer in this way, you will still have to go into the Customer Information module to set up FOB, Ship Via, Ship Charge, Account Number, Transit Days, Delivery Time, Sales Tax, Shipping Charge Tax, Territory, Sales Discount Type, Reseller Number, Terms, Credit Status, Credit Limit, Shipping Instructions and Profile.
|
| 1.4.2. Add/Edit Order Configuration Setup | ||||||
|
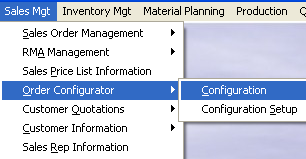
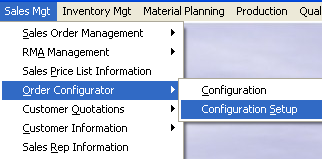
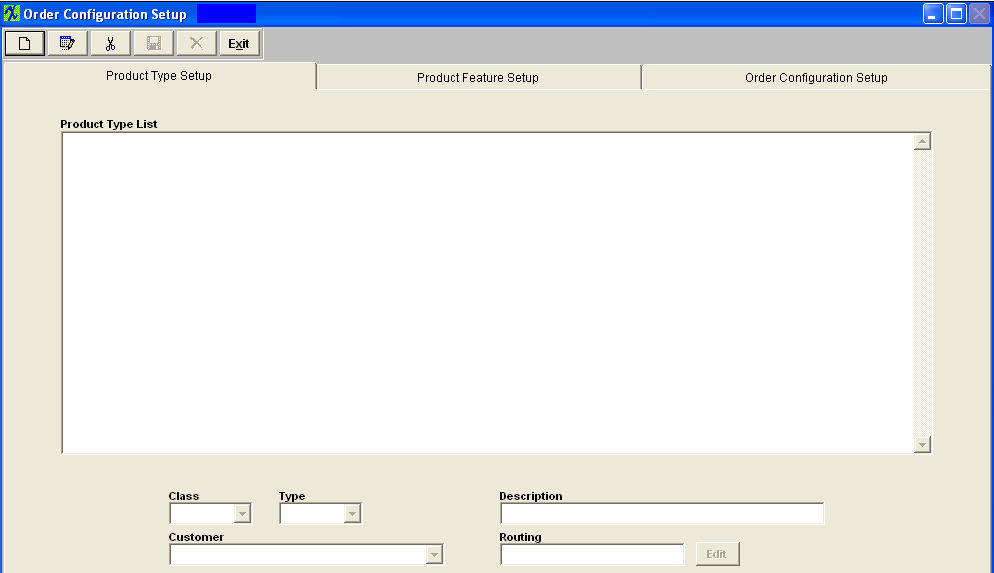
The following screen will be displayed:
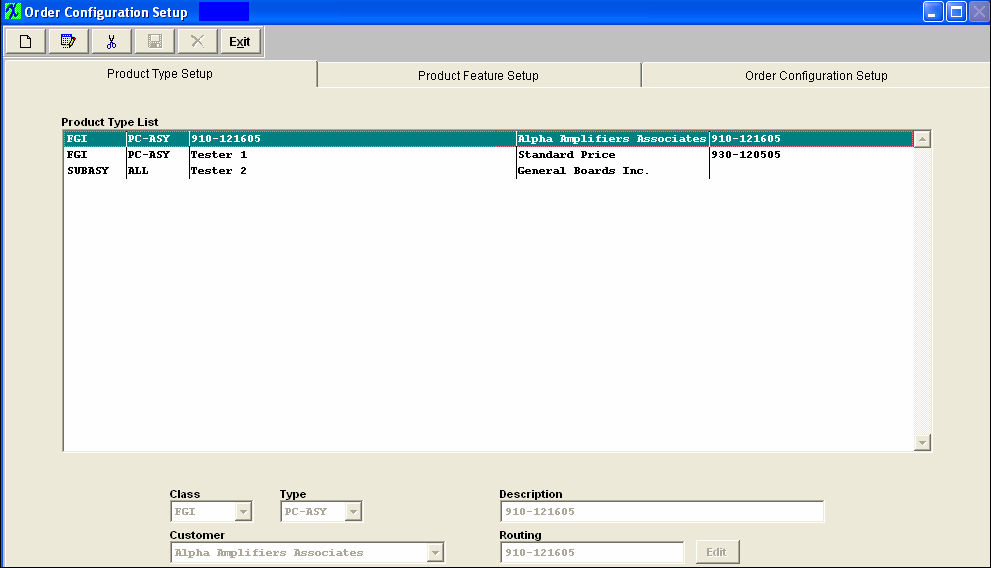
Depress the Add Record icon. The system is going to require you to enter in the Class, Type, Description and Customer. At this point the user has the option to leave the Routing field blank or the user can enter a part number of an existing assembly in inventory, by depressing the Edit button, select the desired assembly from the find screen. The system will then automatically copy the routing from the selected assembly when the “Create BOM” button has been activated within the Order Configuration module (see below section). Save the record and the completed screen will appears as follows:
To edit, highlight the desired Product Type. Depress the Edit Action button. The system will allow you to edit the Class, and Type. Depres the Save Action button to save changes or depress the Abandon changes Action button to abandon changes. To delete an item, highlight that item. Depress the Delete Action button.
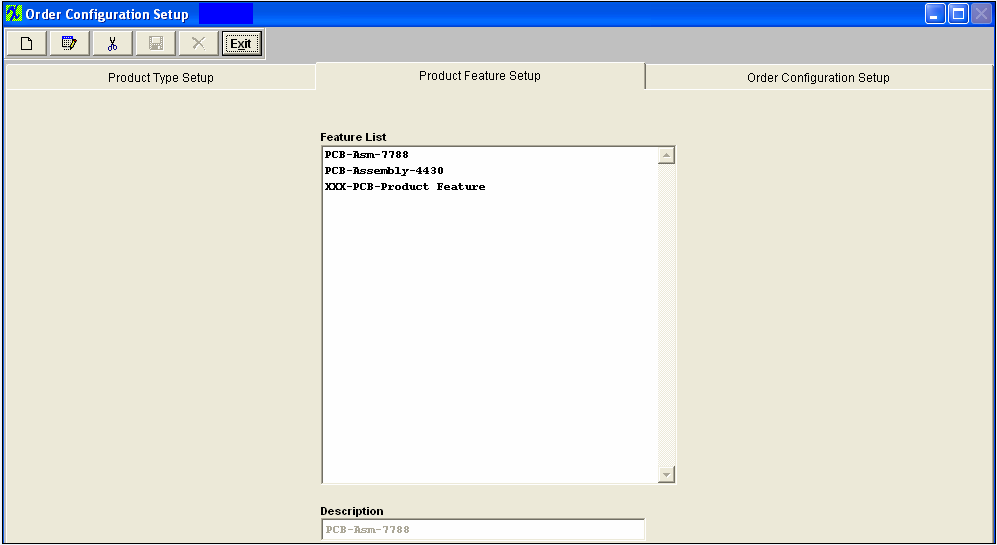
The second screen is the Product Feature Setup. This is where you will setup the Product Features List Descriptions. Depress the Add Record icon. Then enter in the desired Description. Depress the Save Record Action button and the completed screen will appear as follows:
To Edit, highlight the item, depress the Edit Action button, type in the desired changes and depress the Save Record Action button. To Delete, highlight the item, depress the Delete Record Action button.
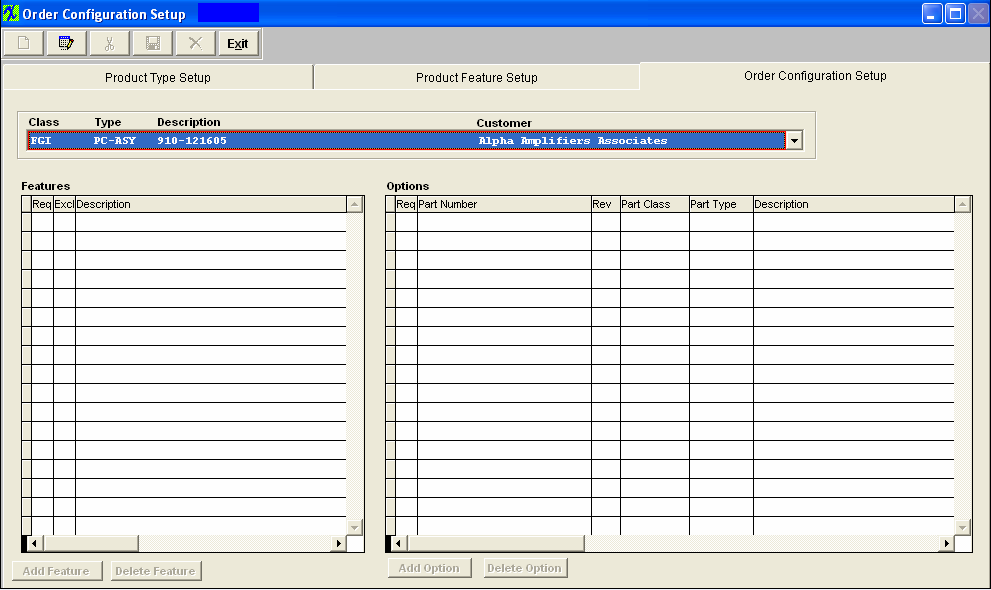
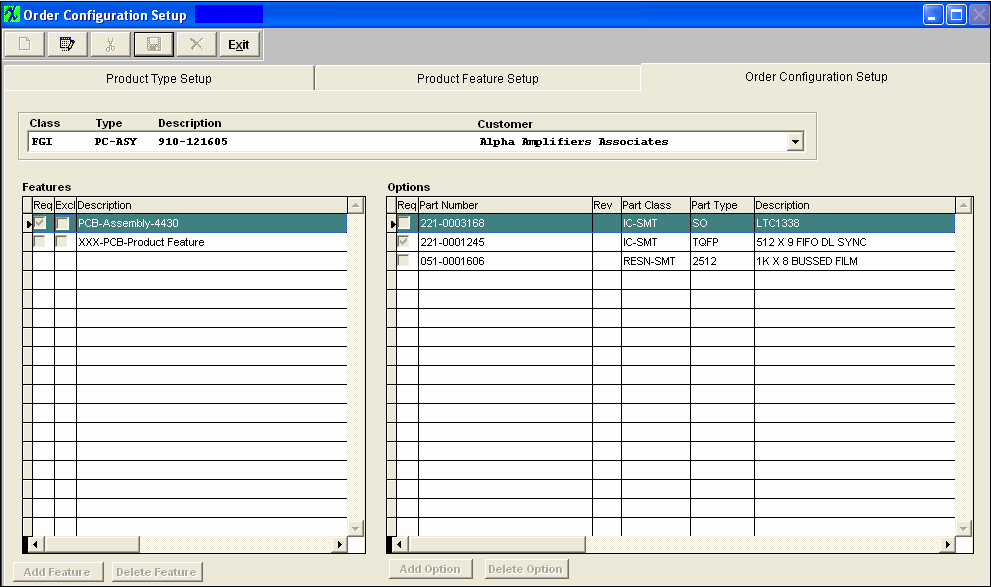
The third screen is the Order Configuration Setup. This is where you select what inventory part numbers will be assigned to each Product Type.
Depress the down arrow at the right of the Class, Type, Description field. All of the Product Types will then become available for selection. Select the desired Product Type. Then depress the Edit Record icon. The Add & Delete Feature and Add & Delete Option buttons will then become available.
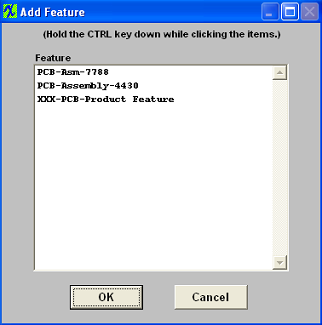
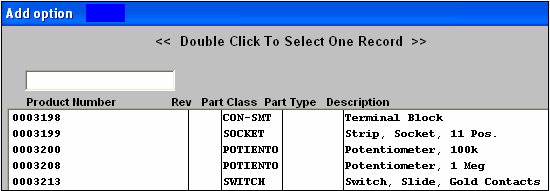
Depress the ‘Add Feature’ button. The available Product Features will be displayed. You may select more than one Feature at a time to add. Highlight the items, while holding the Control key down. Depress the OK button. The features you selected will populate the Feature side of the screen. The “Excl” column has been added to this screen. Meaning if the highlighted feature has Excl marked it can have only one option selected within right section. Selecting a second option would uncheck the first checked option. Highlight the Feature for which you want to add options.
Then mark which options are to be defaulted as Req. Scroll to the right of the Options sections and enter in the desired Qty Per. This will be the default Qty Per the user will see when they depress the ‘Edit Config” button within the Sales Order module (the user will be able to edit if needed). This amount will also default the Qty Per within the Order Configuration screen. The completed screen should appear as follows:
|
| 1.4.3. Finding an Order Configuration | ||||||||||
|
The following screen will appear:
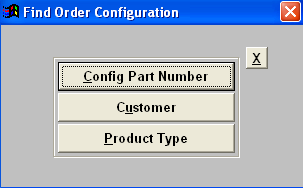
Depressing the Find button will bring up a selection screen, as follows:
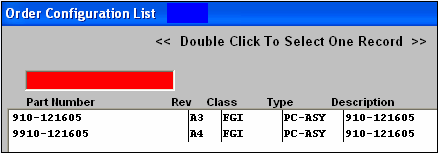
If the user selects Find by Config Part Number, an Order Configuration list will display: Type the Part Number into the red box or highlight and double click to select. If the user selects Find by Customer, a list of customers with Order Configurations will display: Type the Customer Name into the red box or highlight the selection and double click. A list of Order Configurations pertaining to that customer will display: Type the Part Number into the red box or highlight your selection and double click. If the user finds by Product Type, a list of products with Order Configurations will display: Type the Part Number into the red box or highlight your selection and double click.
|
| 1.4.4. Adding a New Order Configuration | ||
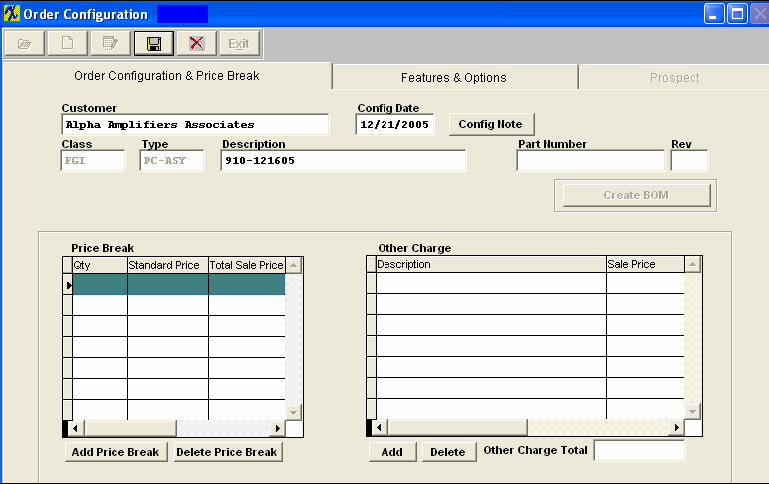
The following screen will appear:
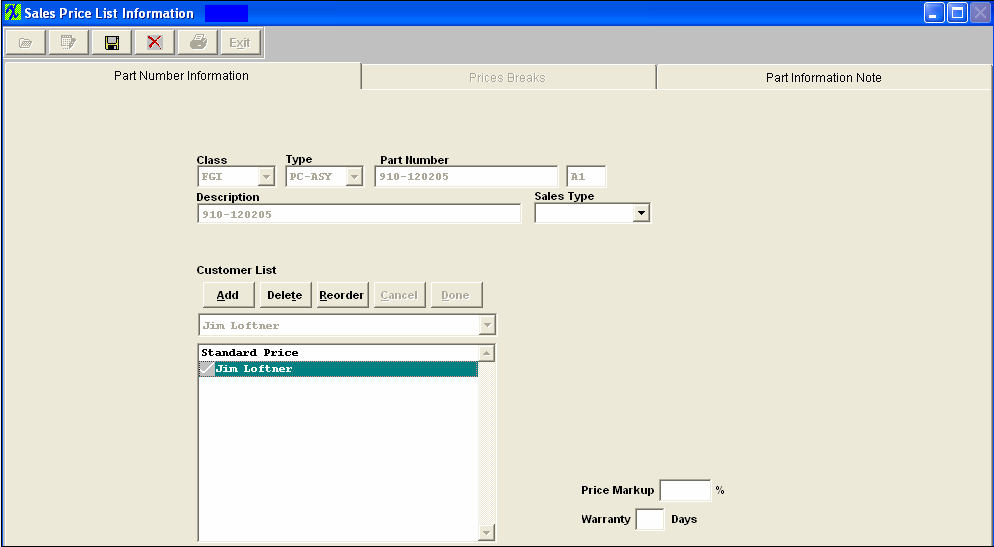
Go into the Sales Price List Information module. Using the Find Record Action button, find a Part Number. Depress the Edit Action button. You will be prompt for your password. Depress the Add Button located under the Customer List Section and add the prospective customer to this part number. Depress the Save record Action button.
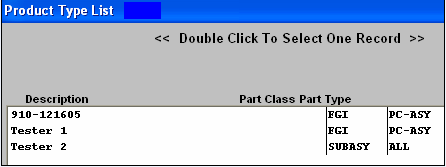
Note: If the product only has standard price without any other customer in the list, then the system will use the standard price to calculate price later in SO or in Order configuration modules. Add the applicable Price Breaks. Return to the Configurator module. Within the Order Configuration & Price Break tab, depress the Add Record Action button. You will be prompted for your password. A Product Type list as set up in Order Configuration Setup, will appear:
Highlight the Product Type you desire and double click. The following information will populate the screen based on what was entered within the Order Configuration Setup module.
Type in the Part Number. Type in the Revision number and depress the Enter key. If you want to record a note regarding this Order Configuration, depress the Config Note button.The following screen will appear:
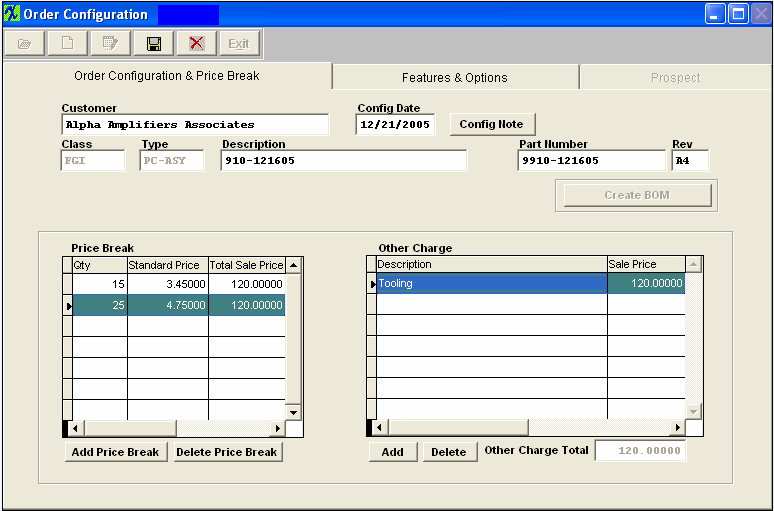
Depress the Edit Action button. Type in the note. Depress the Save Action button. Depress the Exit Action button. The Config Note button will light up in red. In the Price Break section, type in the Break Quantities. (The standard cost will default in from the Sales Price List Information module). The total Sale Price will default in from the Features & Options screen. To add another Price Break, depress the Add Price Break button. To add an Other Charge, depress the Add button at the bottom of the Other Charge section. Type in the Description of the Other Charge. Type in the Sales Price of the Other Charge. The completed tab will appear as follows:
Highlight the Price Break quantity you are interested in. Depress the Features & Options tab. The following screen will appear:
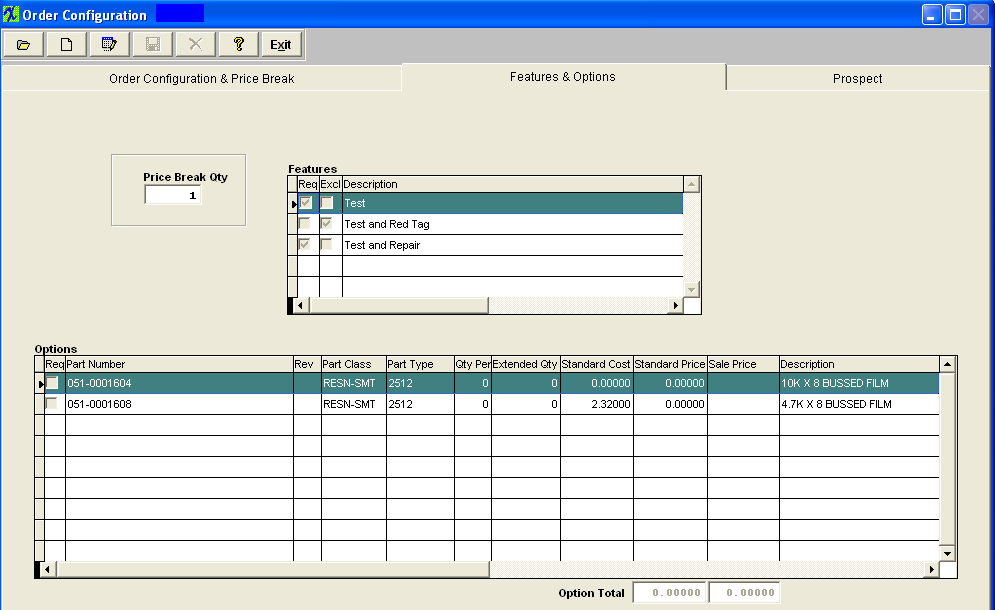 Highlight the feature in which you are interested. The part numbers and information assigned to that feature within the Order Configuration Setup will populate the screen. Type in the quantity per for each item. The extended quantity will automatically update. The Standard Price information will forward from the Sales Price List Information module for that particular part number. Then type in the Sales Price for each item. Repeat the above steps in the Order Configuration & Price Break tab and in the Features & Options tab until the Sales Price has been added to all of the Price Breaks. Depress the Order Configuration & Price Break tab, notice that the Standard Price updated in this tab. Depress the Save Action button. Note that the act of saving the Order Configuration has also created a new make Part number in the Inventory Control Master. Enter that module and complete the addition of the new part number. Please refer to the Inventory Control Management manual to assist you in this task. It is especially important that the standard cost and warehouse information be entered into the Inventory Master. The Create BOM button has now become available.
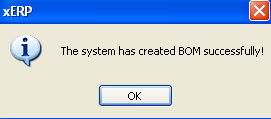
Depress the Create BOM button, the following message will then appear.
The system has now setup a new Bill of Materials for this Part number. |
| 1.4.5. Adding Configurations To Sales Orders |
The user would open a sales order, and select the button called “Add Config” to add a configurable product. Then they can select from an already established “configuration type” as created in the Configuration Setup. Once the configuration is completed, the components of the configuration then become line items on the sales order. The configured assembly will show as a miscellaneous line item. The pricing should be either:
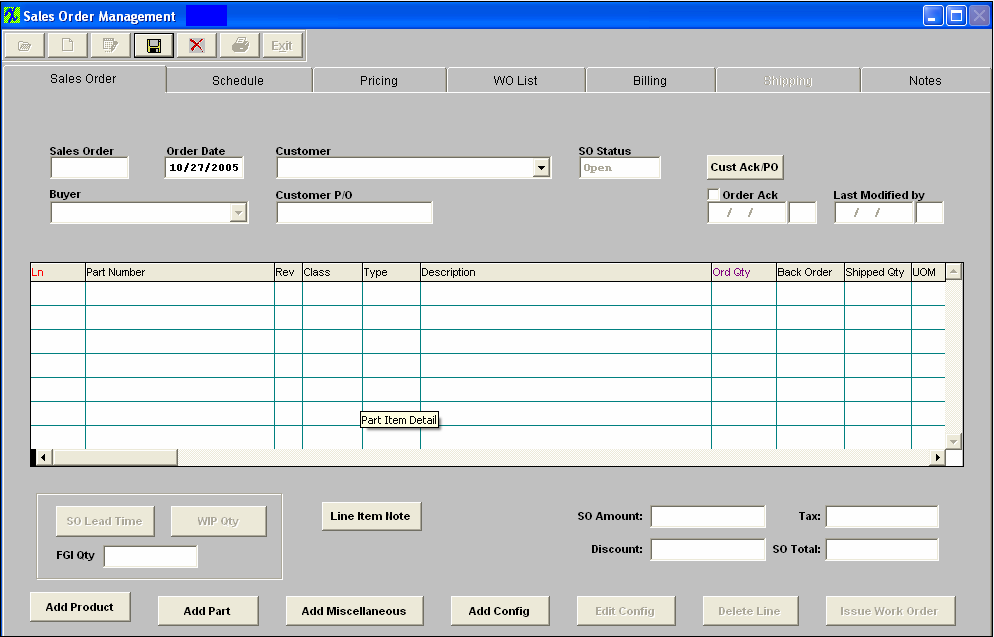
Once the Sales Order is saved, it will stand as a normal sales order, and any further changes would be made in the normal edit mode without further involvement with the configuration module. This would include the ability to delete the original Configuration Type, if desired, just leaving the selected components. Enter the Sales Order Management Module The following screen will be displayed:
Depress the Add Record Icon, enter your password. Begin processing the order as you would a normal Sales Order record. Select the Customer Name, Buyer, etc. . . Depress the ‘Add Config’ button located at the bottom of the screen. The following selection screen will appear.
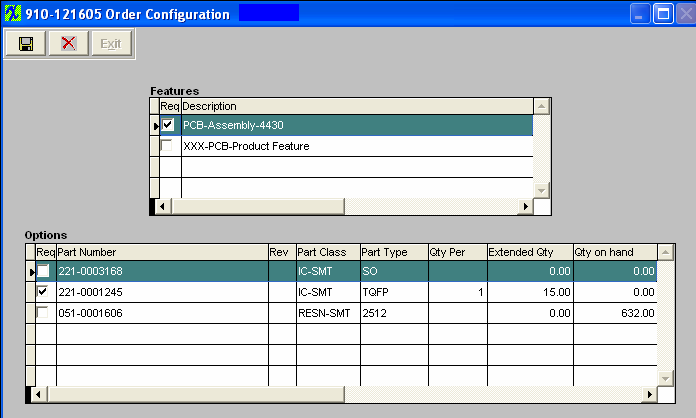
Note: that only Product Types associated with the selected Customer (or Standard Price) record within the Order Configuration Setup module will be pulled forward into this selection screen. Make your desired selection by double-clicking on the record. The following information will be pulled forward into the Sales Order module. Enter in the Order Qty. Enter in the Schedule information. Enter in the Pricing information. Return to the Sales order Main Screen. Depress the ‘Edit Config’ button located at the bottom of the screen. The associated Configuration information will be displayed.
Within this screen you will be able to make needed changes to the Qty Per and Req column if needed. The Extended Qty column will be calculated based on the Order Qty entered on the Sales Order. Once saved, the only editing possible is to the individual lines on the Sales Order, the same as on a regular Sales order. Depress the Save changes Action button and Exit the above screen. The system will then proceed to display the selection screen for each Part number.
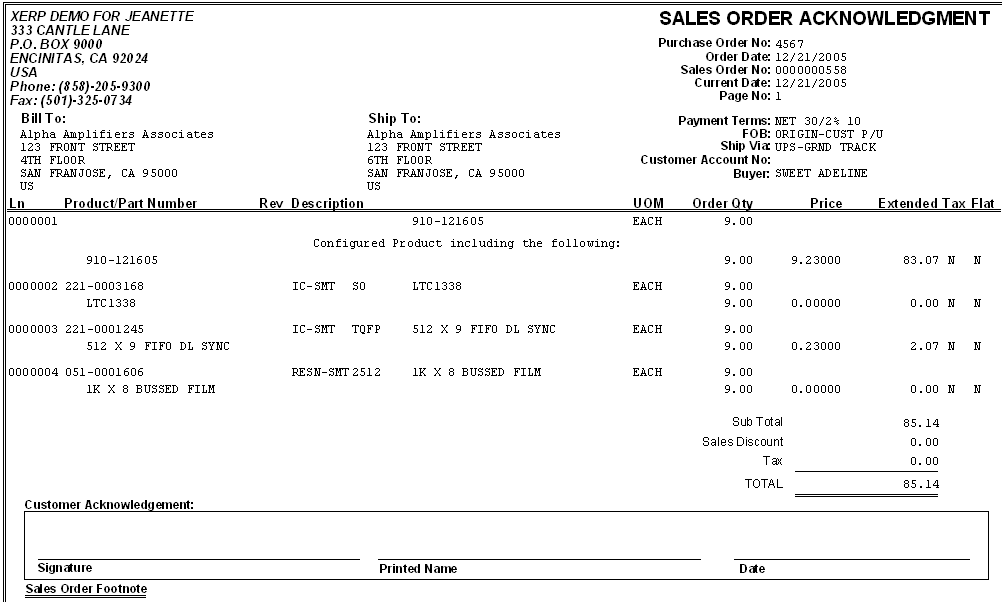
Select the desired AVL Location you wish inventory to be pulled from upon shipping. If no inventory is available a demand will be displayed in MRP. Note; each part number will be displayed in the Blue header bar. The Schedule information for each item will be the same as the added Config Line item. Each line item will pull the pricing information forward from the Sales Price List Information module. Note: While a user can include more than one configuration, it is not advised for ease of use during packing and shipping. Save the record. The Sales Order Acknowledgement report will display as follows:
|
| 1.4.6. Creating a Packing List for Configuration Sales Order |
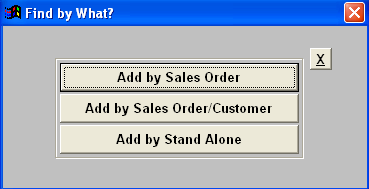
Using the Packing list to ship the configuration requires the shipping clerk to ship each item equally. If any of the items in the configuration are serialized, the user will have to enter the serial numbers for the line item(s) accordingly. So user will need to prepare for this by devising a system of capturing serial numbers before they are boxed up with the configuration. There can’t be a collection of serialization of the configuration part. Enter the Packing List Management module Depress the Add Record Action button. The following find selections will appear:
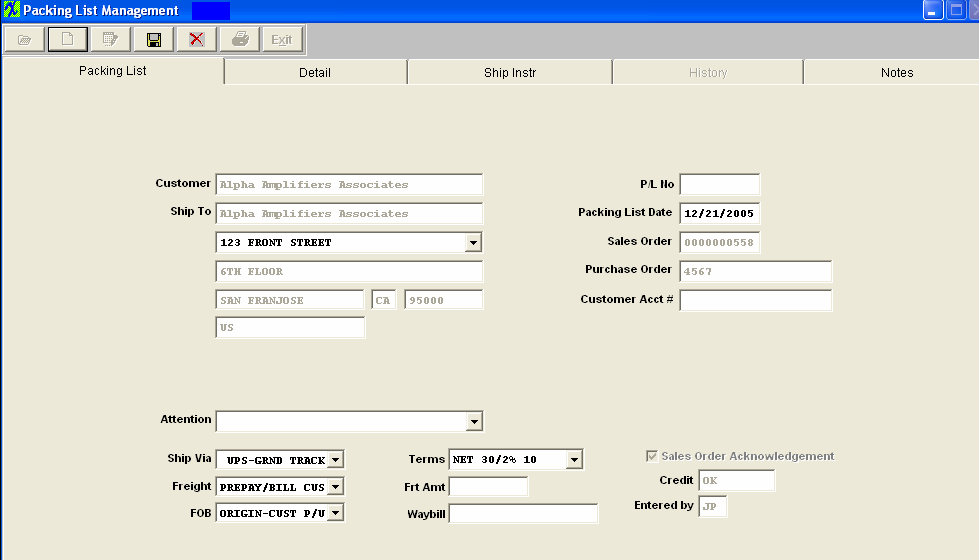
Depress the Add by Sales Order. Highlight the Sales Order Number or enter Sales Order Number in the Red box The Customer information will populate the Packing List main screen.
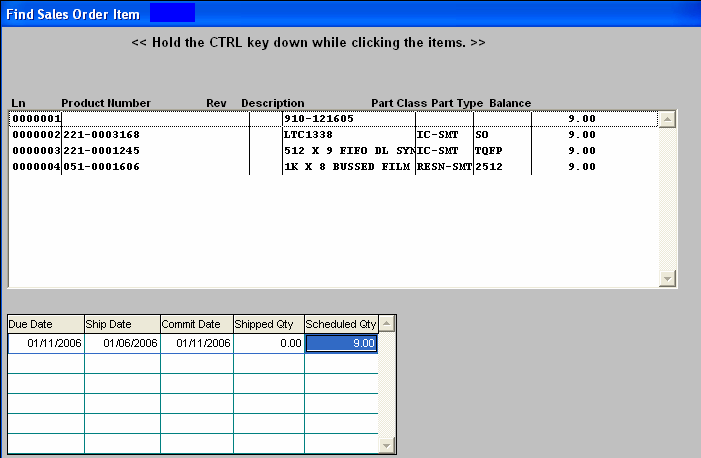
Enter the Detail tab. Depress the ‘Add sales order item(s)’ button. The following screen will be displayed.
Select configuration items desired. You can either enter in each ship qty individually, or use the ‘Ship Set’ button. If you depress the "Ship Set" button, the following message will display.
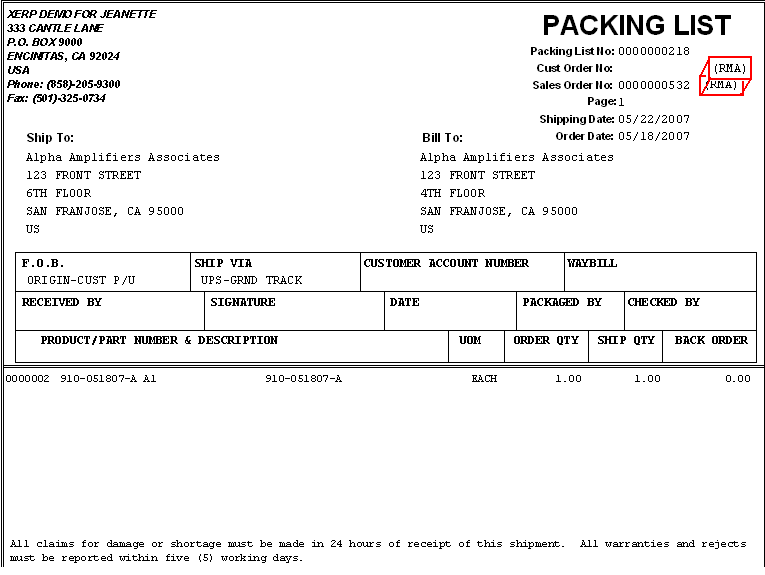
Select Yes, then enter in the desired Ship Set qty. The system will automatically calculate each Ship Qty based on the Qty per entered within the Sales Order module. If the ship quantity exceeds the backorder or available qty, the quantity would be reduced to that available. This ‘Ship Set’ button is only for purposes of populating the Qty field in the Detail sheet. The user still has the ability to edit or modify the Qty column before saving. Save the Packing List record. The Packing List form will appears as follows:
|
| 1.4.7. Invoicing for a Configuration Sales Order |
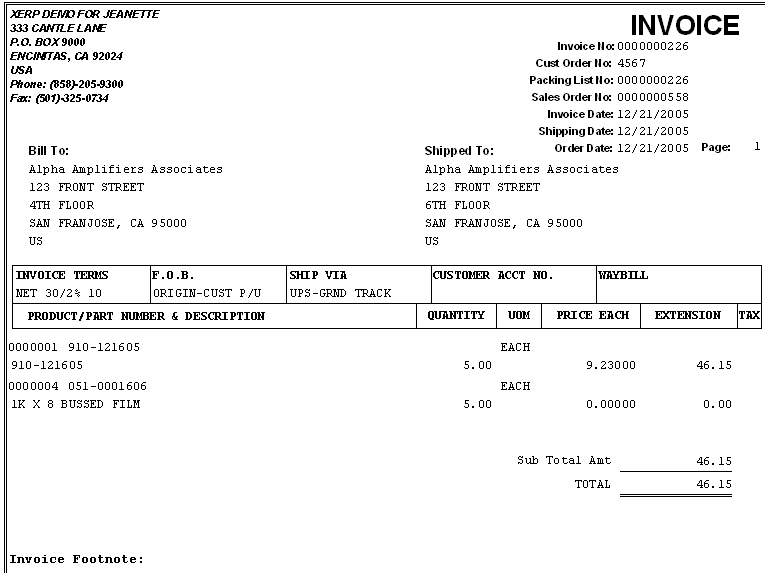
Enter the Invoice Management module Use one of the Record Find Features and Open the desired Invoice Number. The Invoice information will populate the screen. Enter the Detail Tab. The item information will appear as usual. You have the option to edit any Pricing information if needed before posting the record. The printed Invoice form will appear as follows:
|
