| 1. Work Order Serial Number Control |
| 1.1. Prerequisites for WO SN Control | ||||||||||
There must be a Work Order. The part number must exist for a product or part. The Bill of Materials must be entered (AVL optional). The method must have been set up in Shop Floor Tracking Defaults. The option must have been selected in the Inventory Control Management Module |
| 1.2. Introduction for WO SN Control |
The Work Order Serial Number Control Module is used to set up serial numbering for a particular Work Order. |
| 1.3. Fields & Definitions for WO SN Control |
| 1.3.1. Serial Number Setup Tab | ||||||||||||||||
Serial Number Setup Fields & Definitions
|
| 1.3.2. Detail Tab | ||||||||
|
| 1.4. How To ..... for WO SN Control |
| 1.4.1. Find a Work Order for Serial Number Setup | ||||||||||||||||||
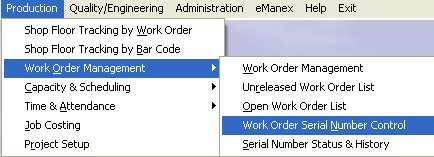
|
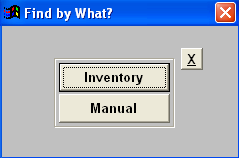
The following screen will apear:
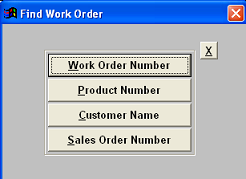
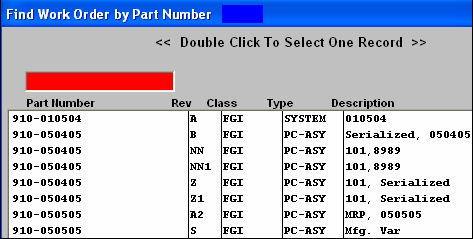
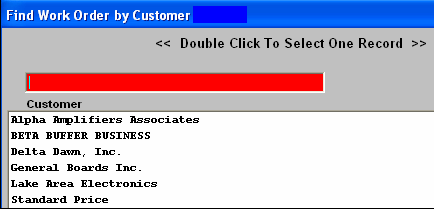
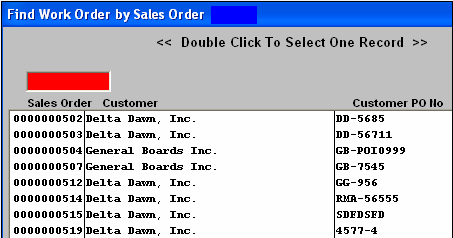
Pressing the Find Action Button displays the following sequences: User may choose to find or search for an existing order: by entering the Work Order Number, by entering a Product Number, by entering a Customer Name, or by entering a Sales Order Number.
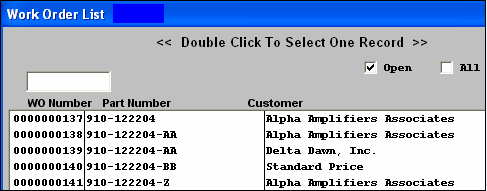
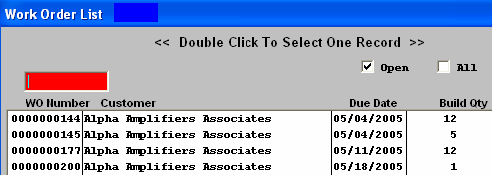
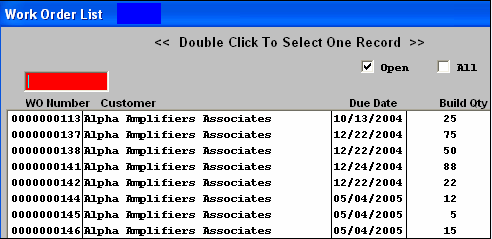
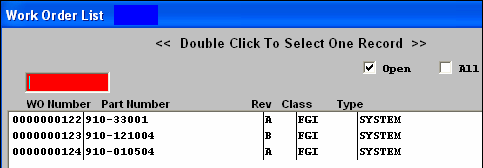
If the user elects to find an order by the Work Order Number, a screen appears listing work orders in numerical order, along with the Part Number and Customer name. User has the option to view Open orders only or All orders. The user selects the work order by either entering it into the red box, or scrolling down the list and clicking on the selected order.
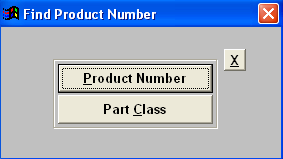
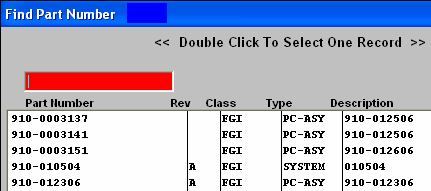
When the user elects to find an order by the Product Number, a screen appears listing part numbers in numerical order. The user selects the part number by either entering it into the red box, or scrolling down the list and clicking on the selected part.
|
| 1.4.2. Assigning Serial Numbers to Work Order | ||||||||||
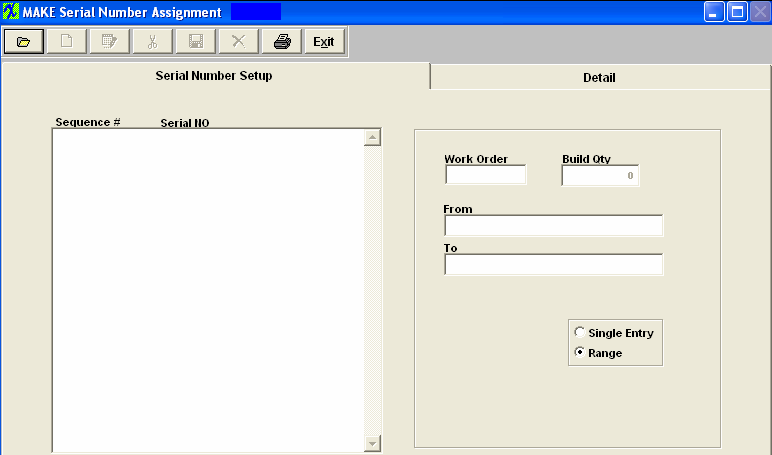
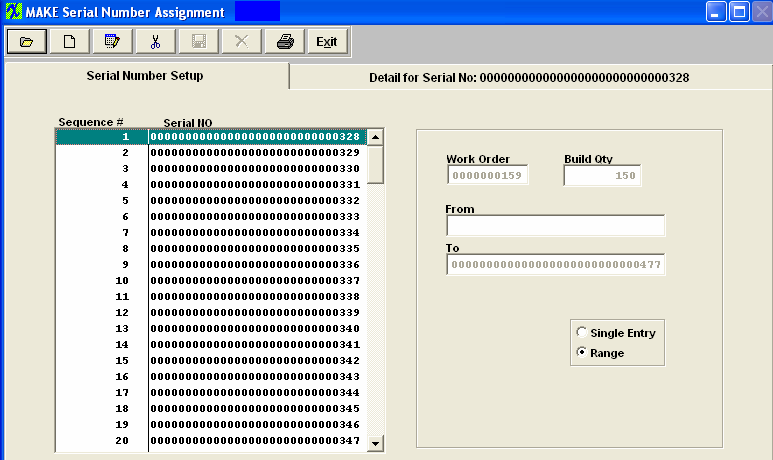
After Finding the Work Order. The following screen will appear, listing the Work Order and Build Qty. The Add record action button also becomes available.
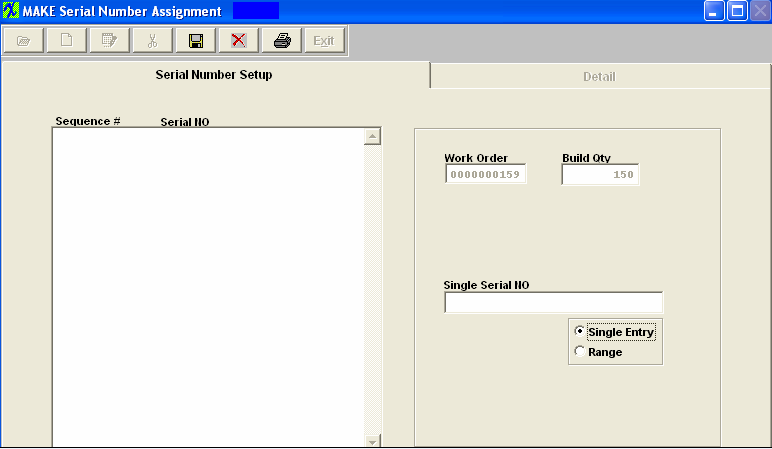
Depress the Add record action button. Type in the password. Select Single Entry or Range method of assigning serial numbers by choosing the appropriate radial. If you select Single Entry, the following screen will display, only allowing you to type in one Serial number at a time.
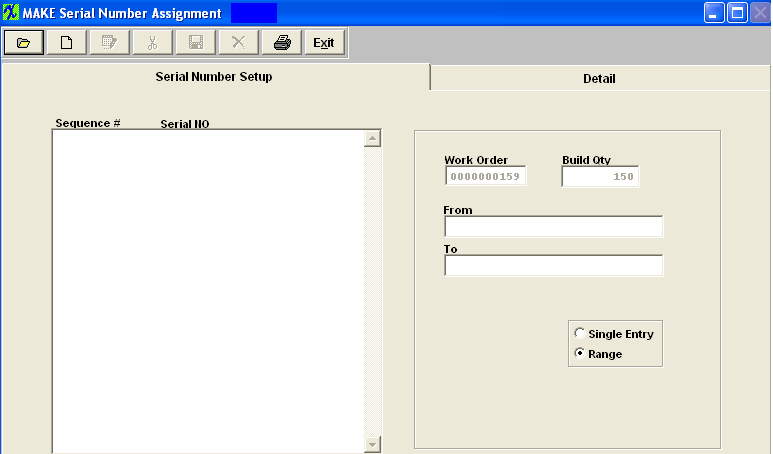
If you select Range, the following screen will display, allowing you to type in From and To Serial numbers. 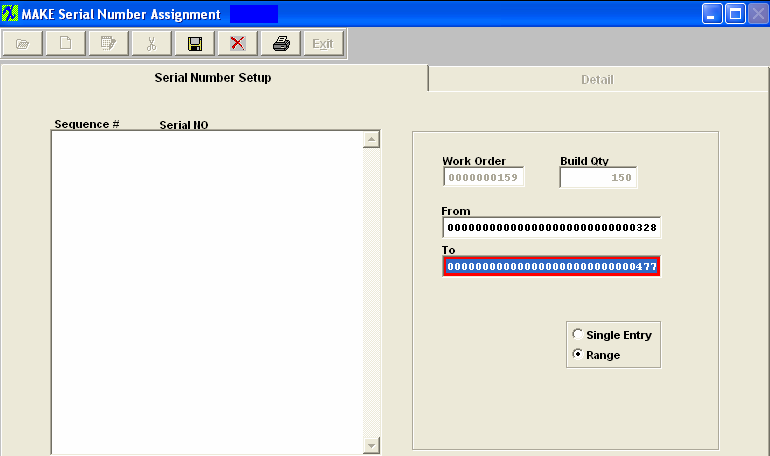
Note: The system will force individual entry for serial numbers with prefixes or characters. If user enters both character and number in one field, then it is hard to know which part (character or number) needs to be increased first. So the system cannot predict how the range is intended to increment: For Example if user enters a SN range of A101 to Z110. The system does not know how the user wants the range setup A101, B101, C101 or A101, B102, C103, etc.
Depress the Save record action button and the range of numbers will populate on the left side of the screen. As displayed below: If you depress the Abandon changes action button the screen will abort and the serial numbers will not be saved.
Whether or not the system will allow you to enter duplicate serial numbers will depend on the method for tracking serial numbers chosen in System Setup. At the beginning of a ManEx implementation the company must decide a method for tracking serial numbers. Once this decision has been made and set up in Shop Floor Tracking Defaults it cannot be changed. Detail for Serial Numbers To enter detail for serial numbers, highlight the pertinent serial number and then depress the Detail Tab. The following screen will appear:
Enter in Serial No and Comments if applicable.
Depress the Save record action button to save, or depress the Abandon changes action button to abandon changes.
|
| 1.4.3. Editing Serial Numbers |
Find an Existing Work Order.
Depress the Edit action button. Enter your password. Receive the following message:
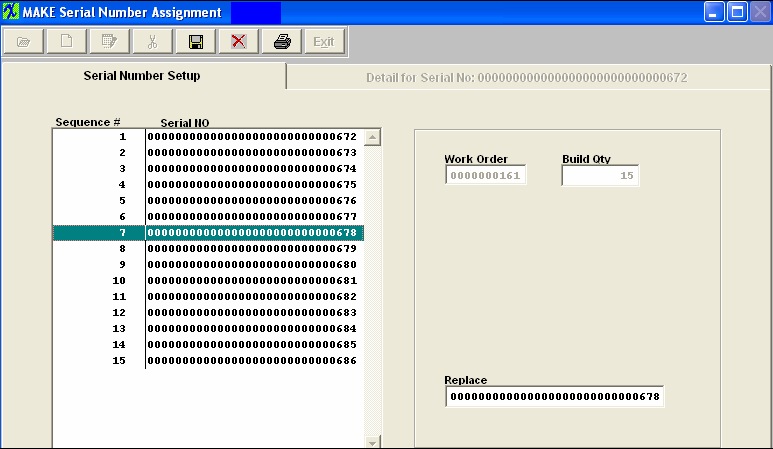
Depress OK and highlight the Serial number you would like to replace.
Type the correction into the Replace box. The Serial NO for that Sequence # will change. Depress the Save changes action button to save changes, or depress the Abandon changes action button to abandon changes. If you want to delete ALL of the Serial Numbers, depress the Delete action button. Then depress the Save changes action button. |
| 1.4.4. Invoking Serialization after the Work Order is Started |
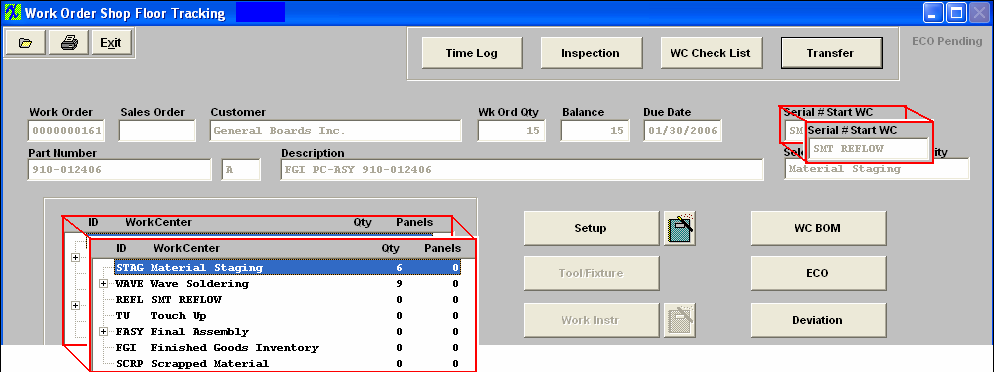
Invoking Serialization after the Work Order is Started If you already have a Work Order started and then decide to invoke serialization, in order to assign serialization to a product with an open work order, in the Shop Floor Tracking Module, the parts must all be in a Work Center which is PRIOR to the Work Center in which serialization is to be applied.
Then the Work Center can be updated and the product moved BACK to the appropriate Work Centers after the product is serialized. If the Work Order has been completed and the product is in the Finished Goods Work Center, the user may move the product back to a “non-serial Work Center” and then serialize and update the Work Order. Then the user should move the parts back into the Finished Goods Work Center. If the parts in Finished Goods were already shipped, the user can use the Inventory Handling module to temporarily increase the finished goods to the needed quantity. Then they can be backed into the Work Order. After running these parts back down the chain, the user would use Inventory Handling to take the parts back out of inventory. |
| 1.4.5. Serial Number Turn-On Process |
There is no easy way to have some work orders without serialization and some with for the SAME product. Turning on Serial Numbers on a product with OPEN Work Orders must be done carefully. Here are some processes: 1. Using the same product and the SAME Revision – ship all of the non-serial numbered product PRIOR to turning on serialization OR don’t turn on serialization until you are ready to serialize everything not shipped. To serialize everything not shipped, you will have to move product back to the Work Center where serialization is started, then turn on serialization in Work Order Traveler Setup (for further information see Article #1134) and click on the “Update Open Work Orders”. Be sure to update all of the open work orders. If you don’t, you won’t be able to ship anything that was not updated. (The items will be in a black hole and will need a programmer to get them out.) 2. Using the SAME Revision, but using the special character trick: a. Copy the product number to the new product in the Inventory Control item Master but put "00" in front of the Rev. See Article #1058 for further instructions on copying a product number. b. Then copy the existing product BOM to the new 00 revision product. See Article #1104 for further instructions on copying a BOM. c. Turn on serialization for the new 00 rev product and copy the routing from the old product. Be sure to select which Work Center you want serialization to start. See Article #1106 for further instructions on how to turn on the serialization. d. Enter all new Sales orders using the 00 revision product number. e. When you have shipped all of the old non-serialized product, inactivate the product number in the Inventory Control module. See Article #1058 for further instructions on how to inactivate a product number. 3. Using a different revision number: a. Copy the product number to the new product revision in the Inventory Control Item Master. See Article #1058 for further instructions on copying a product number. b. Then copy the existing product BOM to the new revision product. See Article #1104 for further instructions on copying a BOM. c. Turn on serialization for the new revision product and copy the routing from the old product. Be sure to select which Work Center where you want serialization to start. See Article #1106 for further instructions on how to turn on the serialization. d. Enter all new Sales Orders using the revision product number. 4. You may prefer to create new revisions using the ECO module. It can change the revision of product in Work orders in WIP, but DO NOT turn on the serialization in the ECO module. See Article #1133 for further instructions on the ECO module. a. First change the revision of the product using the ECO module b. Then move the product back to the Work Center where you want serialization to begin in the Shop Floor Tracking module. See Article #1106 for further instructions on how to turn on the serialization. c. Then turn on serialization and select “Update Open Work Orders” in the Work Order Traveler Setup and click on the “Update Open Work Orders”. Be sure to update all of the open work orders. If you don’t, you won’t be able to ship anything that was not updated.(The items will be in a black hole and will need a programmer to get them out.) |
| 1.4.6. Re-work Work Order Serial Numbers |
If the rework Work Order is created from RMA, then the user doesn’t need to assign the serial number for the Work Order. The system will automatically transfer all serial numbers to the new re-work Work Order when the user creates the RMA Receiver. For a complete discussion of the RMA process, please refer to Article #1610. If the user MANUALLY creates a re-work Work Order, the following conditions for assigning existing serial number to a re-work Work Order will be:
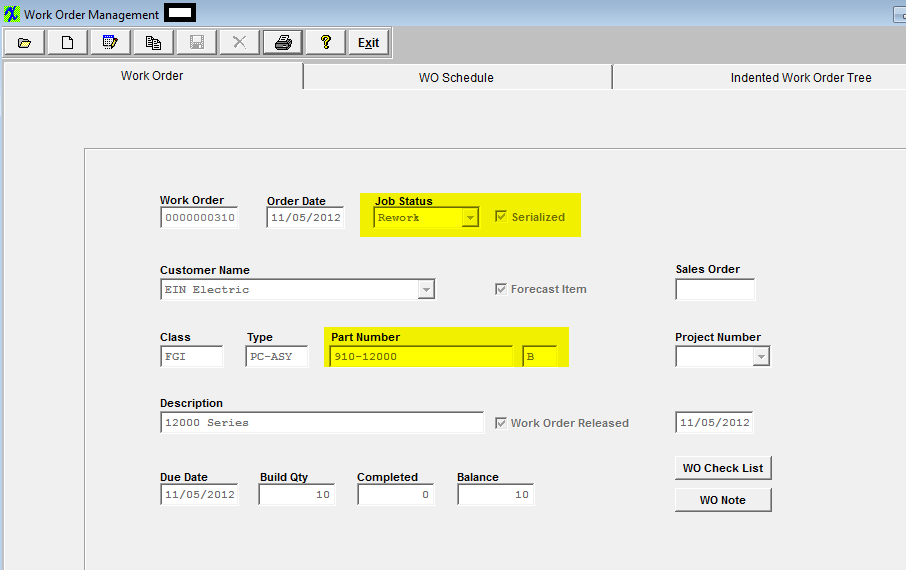
When a Re-work Work Order is established for a serialized product, the user may select existing serial numbers that are in inventory (finished goods) that are to be reworked. Rework Work orders will not accept NEW serial numbers. When a serial number is placed in the rework Work Order, the serial number must exist in finished goods, and the number of serial numbers transferred to the Work order must equal the quantity of assemblies for the Work order. The part number for the serial number that is moved into the rework Work Order does not need to be the SAME part number and revision as the rework Work Order. Thus, if a user wants to upgrade part number 123 rev A to part number 123 rev B, they can transfer the parts to the Work Order and identify the serial numbers transferred. Parts may also be changed to a new part number: Part Number 123 rev A can be placed into a re-work Work Order for part number 234 rev C. The only condition is that the quantity and number of serial numbers must match. Once the record is saved a line shortage for the rework work order will be created and serialized parts will be issued to the "Rework" work order and the old part number will be removed from FGI at the time the new part number is moved into WIP. See example below:
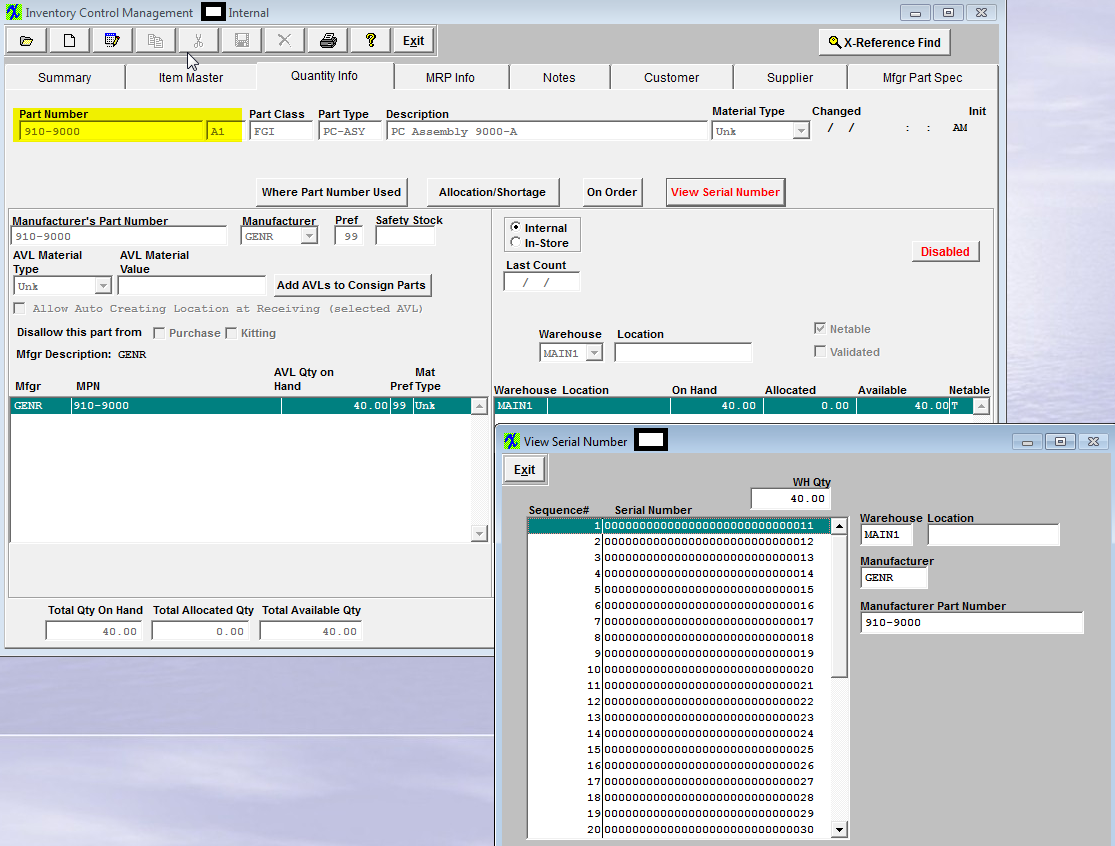
Serialized Inventory Parts (910-9000 Rev. A1) in FGI
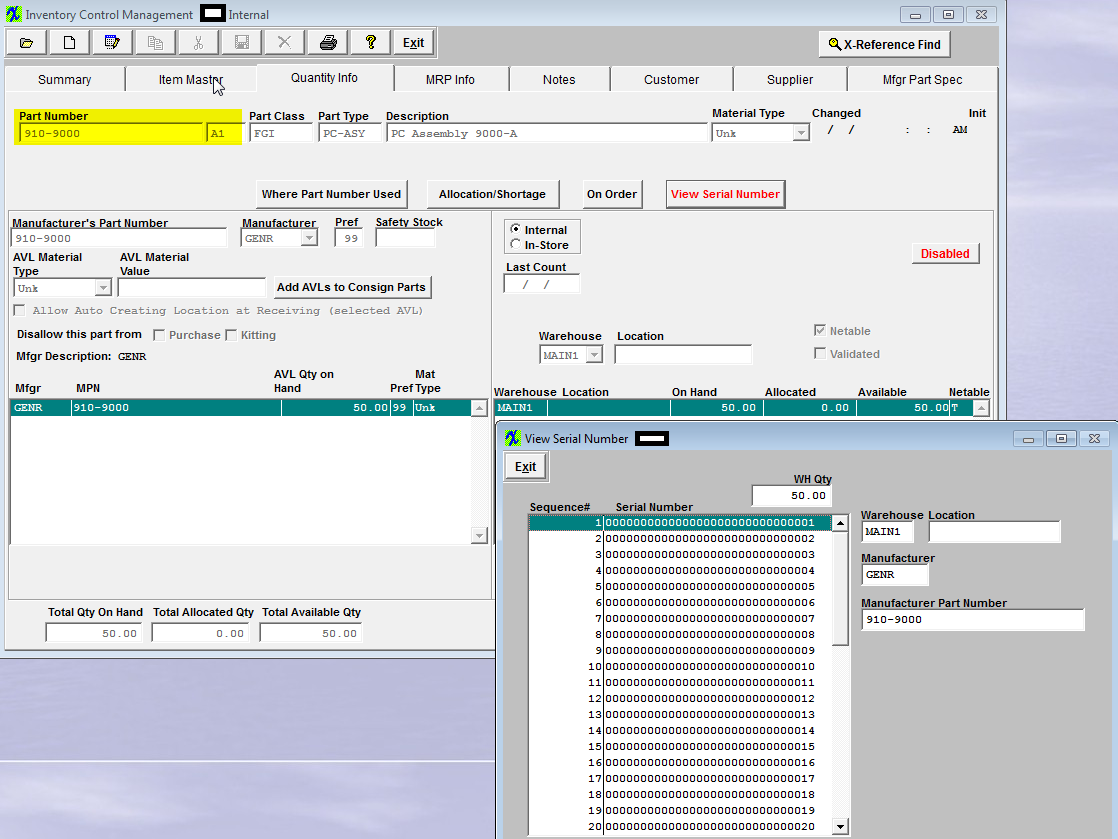 Create a Rework Work Order using a different Part Number (910-12000 Rev. B)
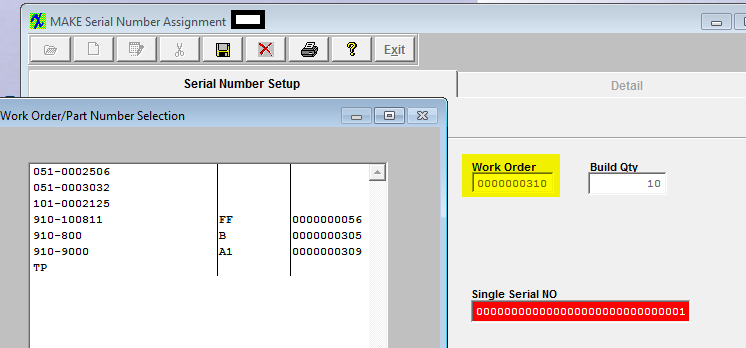
 Enter the Work Order Serial Number Control Module and enter in the SN's you want to rework, if the SN you entered is found in other locations a screen will appear displaying all the PN's that have this SN in FGI and user can select which PN they want to pull this SN from
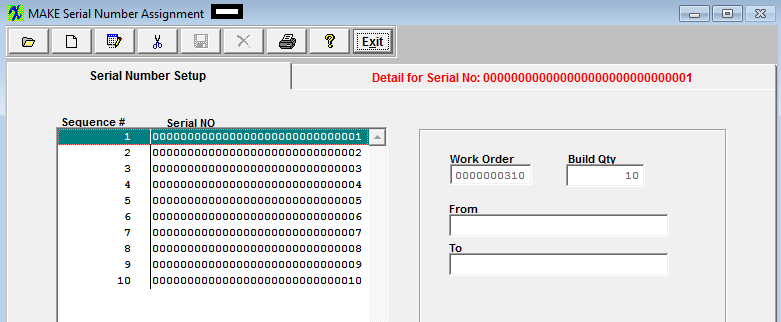
 Once user has assigned all the SN's to this WO, they should depress the Save button
 Now user can go to the Kitting Module and release the kit. The Make Parts #910-9000 Rev. A1) have already been issued to the Kit.
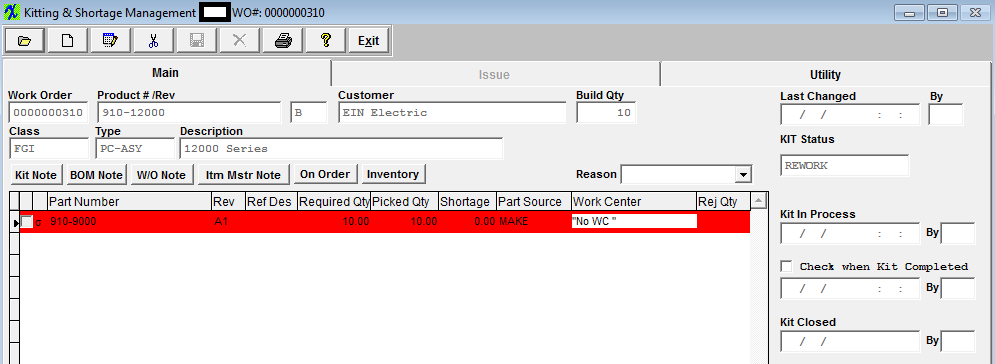 And Removed from FGI for the Old PN (#910-9000 Rev. A1)
 |
| 1.5. Reports - WO SN Control | ||
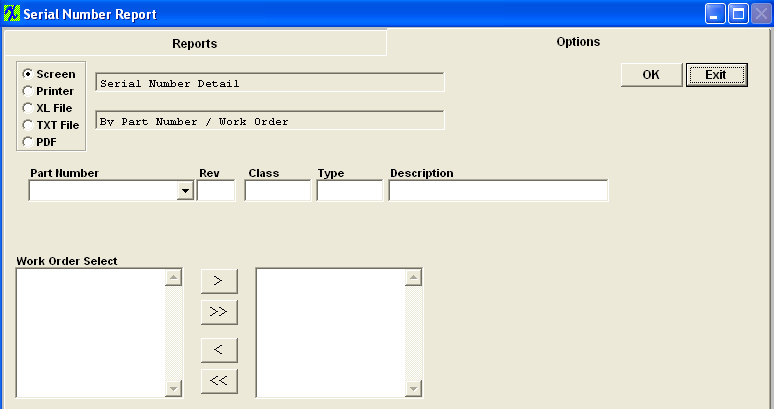
The Serial Number Setup Screen will appear. Depress the Report action button and the following report menu will appear: Decide upon the Output.Select Screen, Printer, XL File, TXT File, or PDF. Select the Detail Report you want by highlighting either By Part Number / Work Order or By Serial Number. Depress the Options Tab. The following screen will appear:
Depress the down arrow at the left of the Part Number field. A list of Part Numbers will appear. Select the appropriate Part Number. A list of all Work Orders pertaining to that Part number will display. Highlight the Work Order of interest and depress the > button. Depress the OK button. If you want all of the Work orders, depress the >> button. The leading zero's for SN's will be removed from Report. The following report will print:
|
