| 1. Shop Floor Tracking by Work Order |
| 1.1. Prerequisties for SFT by WO | ||||||||||||
Prerequisites Required for Shop Floor Tracking:
After activation, "Work Order Shop Tracking" access for each user must be setup in the ManEx System Security module. Users with “Supervisor Rights” will automatically have access.
The SHOP FLOOR TRACKING must refer to a Work Order, which includes the part numbers and description of the product being built. Note: If the "Status" field in the Work Order is set to Manufacturing Hold, the user will NOT be able to transfer product for that Work Oder. If the “Status” field in Sales Order or RMA is set to Administrative Hold, the user may finish transfering the product, but a Packing List can not be issued. The Routing must exist for the product, which includes the work centers and activities for the product being built. Optional Prerequisites for Shop Floor Tracking:
Required if Inspection data is to be entered. Work Instructions should be established if the user wishes to utilize setup and work instructions. The System Setup must define whether or not serialization is required for the part type. User Work Shift information and Time & Attendance features must be installed before you will be able to use the “Time Log” button within the Shop Floor Tracking module. |
| 1.2. Introduction for SFT by WO | ||||||||||||||||||||||||||||||||||||||||||||
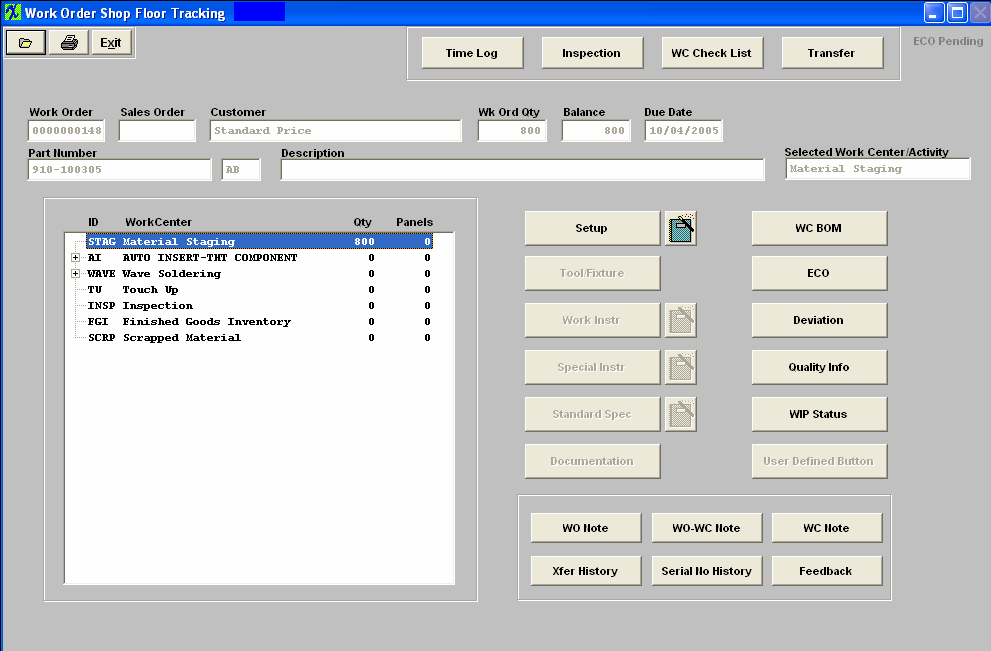
The Shop Floor Tracking Module is used to record detailed transactions of all of the user’s Work In Process (WIP) activity. This screen is a critical piece in the communication process. This allows production to update the system as products move through the shop floor. Production can add notes and indicators to identify current issues and delays. This information is readily available for program managers and others so they have important information when it is needed and without chasing it down in production. From within this module, the following functions are available, depending on the user’s configuration:
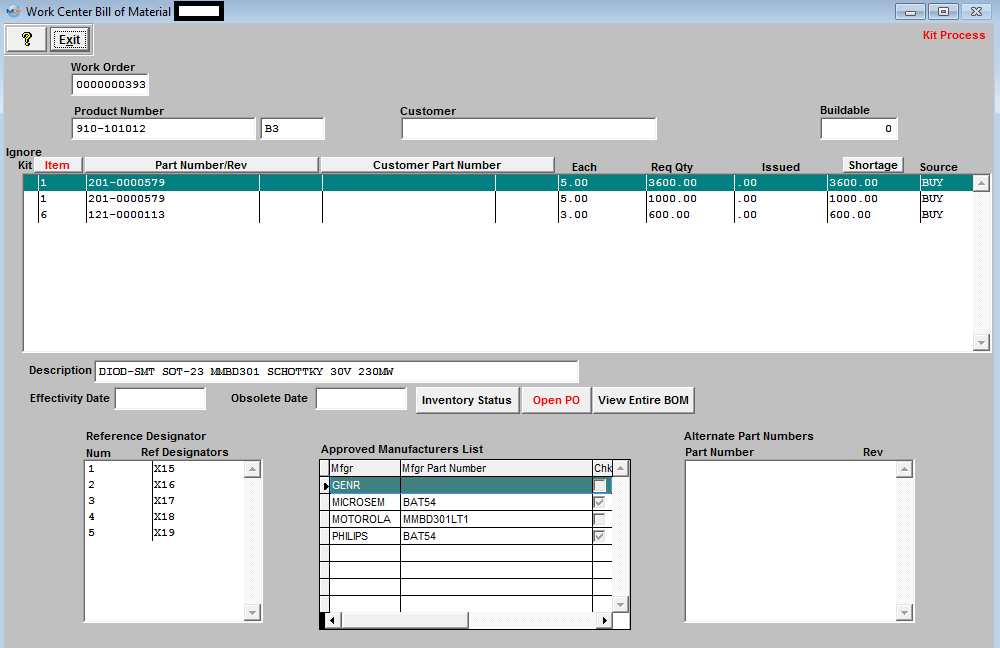
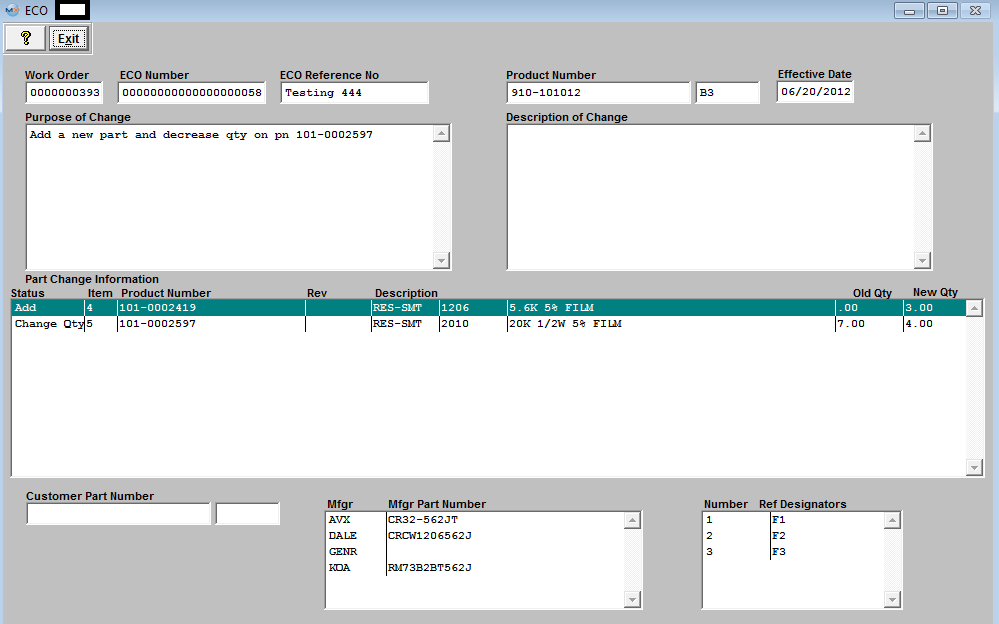
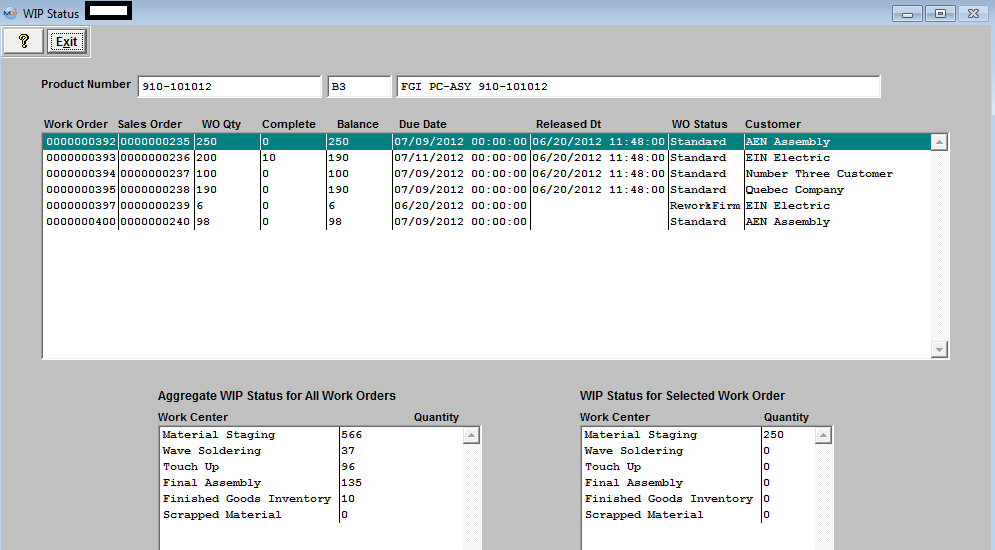
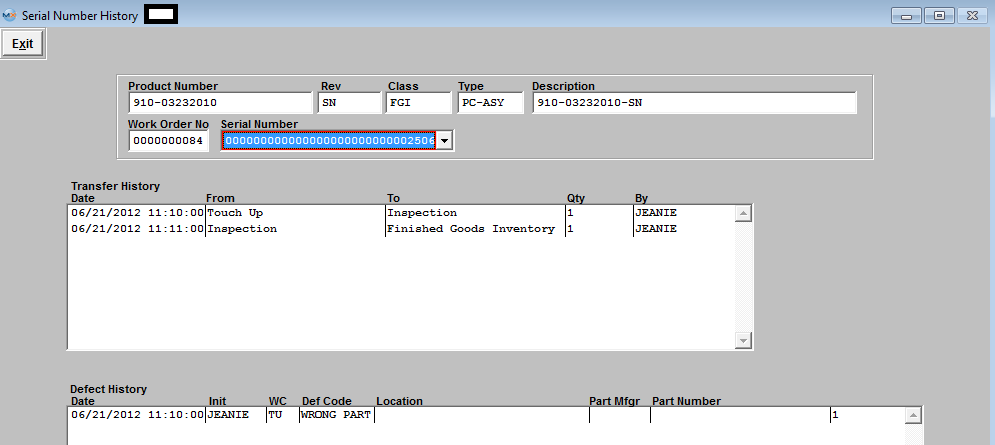
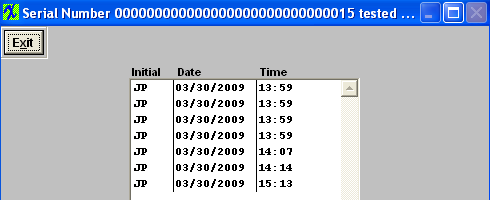
The Time Card module has two functions:1) to enter the worker coming in at the first of the shift and exiting for the day, and 2) to track time spent by each worker on each Work Order (Job), by date and time.This information will forward to the Time and Attendance module. A function for entering quality inspection results. Data may be used to track line quality based on customer, work center, product, location, etc. All Statistical Quality Control information and graphics are based on data entered here. A list of items defined to be checked as completed for the work order and work center. The users visit this screen, identify the items completed, and enter their password, marking the check list with their initials and date completed. Ths is the key function of this module. This is where the users identify the number of products being transfered from one work center to another during the production of the work order. When the Work Center Activity Setup and Run is entered in System Setup, clicking in this area will provide the user with both text and pictorial instructions for setting up the work center. Depressing this button will display any Tool/Fixture information which has been assigned to the Product through the Routing or Product Data Management (PDM) Module. When the PDM module is used, clicking in this area will provide the user with both text and pictorial instructions for processing the product in the work center. When the PDM module is used, clicking in this area will provide the user with both text and pictorial instructions for the product and work center. Identifies standard specifications relating to this product per the Standard Process Specification module. Provides a list of documents relating to the product being assembled. Displays the document number, revision, document date, and notes about the document. Will list all part number assigned to the specific Work Center within the BOM module. It will also allow the user to view the entire BOM if desired. This screen will list the detailed information pulled forward from the ECO Control Management module. This screen will list the detailed information pulled forward from the ECO Control Management module pertaining to any approved Deviations for the selected product. Will display the Quality information for the selected Work Center based on the information entered within the Inspection module. Show all the open work orders for this product and show where the quantities are in the shop floor This is an outside call program that ManEx has implemented into the system. The Users can have their own program to run when they scan their serial number inside of shop floor tracking by using the “User defined” button. Within the Outside Program Call Setup module, the user will have the ability to change the button name of the “User Defined” button and select which program (EXE) they want to run after the users scans specific Serial Numbers. Any notes entered for the work order on the shop floor tracking screen will cause the button to turn Red. Any comments in this area will be visible to all work centers which are included in the work order routing. Any notes entered specifically for the work order and the work center being viewed will cause the button to turn Red, calling the user’s attention to review notes that are applicable to the order. This button is sensitive to the work center being highlighted on the shop floor tracking screen. Any notes entered for the work center highlighted on the shop floor tracking screen will cause the button to turn Red. Any comments in this area will be visible to all products which include the work center in the routing. This button lists the history of transfers. This button will display Transfer History and Defect History by specific serial numbers. This is simply a note screen that may be used to record information about the product during the course of manufacturing. For further detail of these functions see Article #3107 . |
| 1.3. Fields & Definitions for SFT by WO |
| 1.3.1. Work Order Shop Floor Tracking | ||||||||||||||||||||||||||||
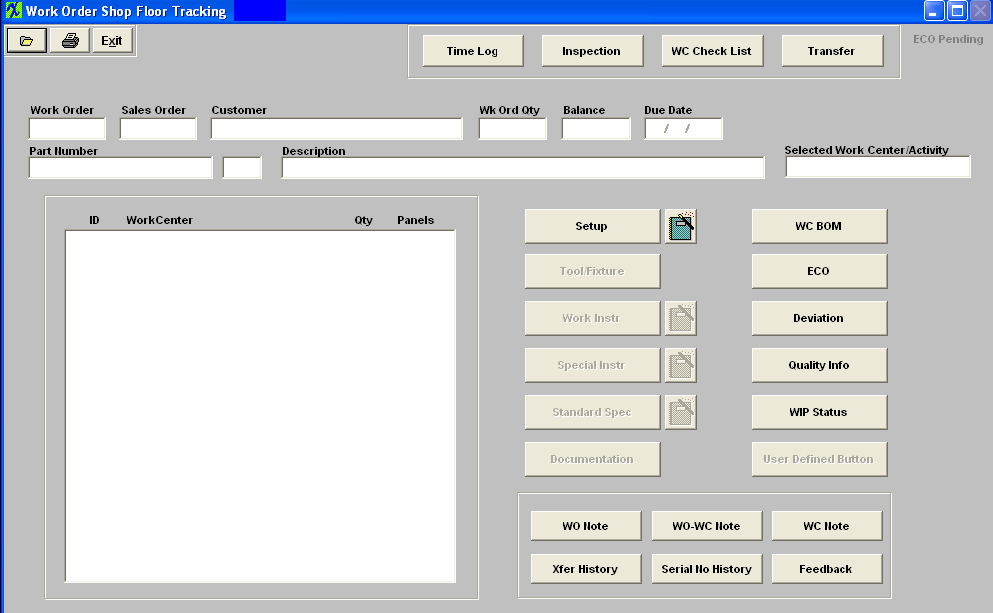 Work Order Shop Floor Tracking Fields and Definitions
See Article #3107 for the Directive Buttons fields and definitons
|
| 1.3.1.1. Directive Buttons | ||||||||||||||||||||||||||||||||||||||||||||
SFT by WO Directive Buttons
|
| 1.3.2. Transfer Screen | ||||||||||||||||||
|
| 1.4. How To ..... for SFT by WO |
| 1.4.1. Finding A Work Order | ||||
The Main Screen will appear.
Select the desired Work Order record. The Shop Floor Tracking screen is then populated with the appropriate data.
The Products will be listed in alpha-numerical order, along with the Revision, Class, Type and Description. Select the desired Product Number.
|
| 1.4.2. Shop Floor Tracking - Transfer | ||||||||
Find the desired Work Order record within the system.
Highlight the current Work Center where quantity is displayed, as illustrated:
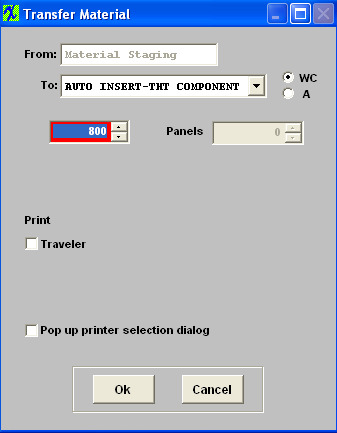
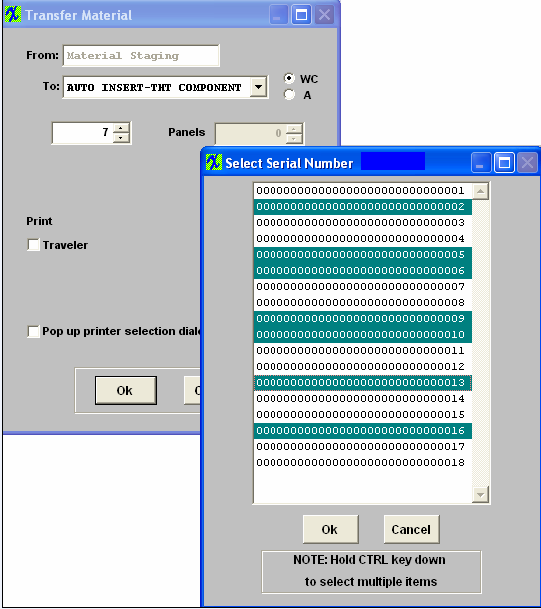
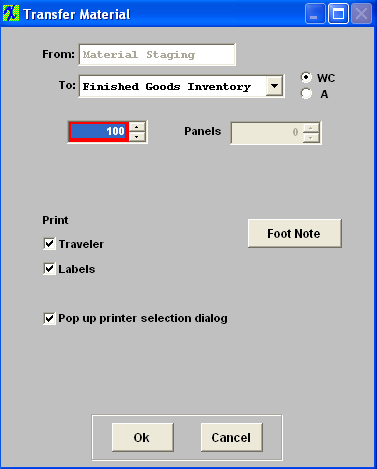
Depress the “Transfer” button. The system will prompt for a password. The following dialogue box will be displayed. The user may elect to transfer material within work centers (WC) or within activities (A) by pressing the appropriate radial button on the screen. Manex will determine the next area to transfer product based on the product routing, and enter the location in the “To:” field.
Next, Manex lists the number of products at the current location. The user may move all items, or select the quantity to be moved. This may be done by simply over-writing the quantity or by using the “arrows” to raise or lower the quantity shown. Depressing the Footnote button will bring up a note screen.
Depress the Edit button, Type in the footnote. Depress the Save button. Depress the Exit button. Depress the OK button. The material will transfer and the Traveler will go directly to the default printer. (This report requires that the user have the bar code font available).
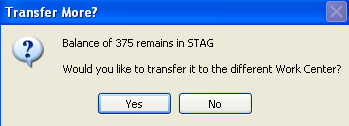
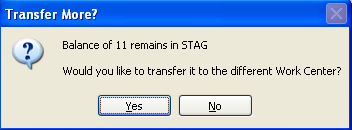
If a balance still remains in the selected work center then the system will prompt the user if they would like to transfer to a different Work Center. Yes – will bring up the Transfer Material screen again. No – will bring you back to the regular Shop Floor Tracking module. If the product is included in an active Cycle count, or Physical Inventory count, the following message will appear after depressing the OK button on the transfer screen anud user will not be allowed to transfer product until the count has been completed and posted.
 If user is transfering product into FGI and the Work Order has any item(s) that has short qty > 0 and the "Ignore Kit" box is NOT checked the following message will popup giving the user the option to continue moving the product or not.  Transferring Serialized product If the work station being used to transfered serialized material is assigned to use a default work center in Production Work Center/Activity Setup module, when the user first opens the module, the module will use the default work center assigned for this workstation, if the transfer is "FROM" a different work center other than the default and user is NOT a supervisor or has the option "Allow Changing Default Work Center for Serial Number Transfer" box checked within the Security module, they will receive the following message:
 When user depresses "OK" a supervisor approval is required to continue. After supervisor’s password is entered, the default work center will be changed to the one that the supervisor entered password for. For example: the workstation is assigned to use “TU” as default work center, now if user chooses to use “AI” to transfer, the system will ask for supervisor’s password, if user cancels the password, the default work center will still be “TU”, but if the supervisor enters his/her password on this machine, the default work center will be changed to “AI”. If now the user tried to transfer from “TU” again, the system will ask for supervisor’s password again. If user exits the module and come back, the default work center will be “TU” again.
If the user is tracking by serial numbers, and if the user is transferring a lesser quantity than displayed, Manex will display a screen from which to select the serial number(s) to be moved in the transaction.
The user may select one or more serial numbers to match the quantity being transferred, and then press the OK button. The user must select the proper number of serial numbers or the transaction will be cancelled.
Since less is being transferred, the following message will appear: Yes – will bring up the Transfer Material screen again. No – will bring you back to the regular Shop Floor Tracking module.
Discussion on the Accounting Entries If the user also has accounting installed, then the appropriate journal entries will forward to the Accounting “Release to General Ledger” screen. Briefly, assuming that the user has the material cost set up in the Inventory Control Item master, then when the product reaches the Work Center “Finished Goods Inventory”, the entry will be to debit Finished Goods Inventory (or the warehouse home general ledger number of the product) and to credit WIP .If the product ended up in the Work Station “Scrap”, then the debit would be to the default scrap general ledger account, as set up in the Accounting Set Up. Configuration Variance If the Material Cost per the product was not equal to the sum of the standard costs per the BOM components, then a configuration variance will be created. Please refer to the “Wip Value" Article #913 for further explanation. |
| 1.4.3. Use Work Center CheckList within SFT Module |
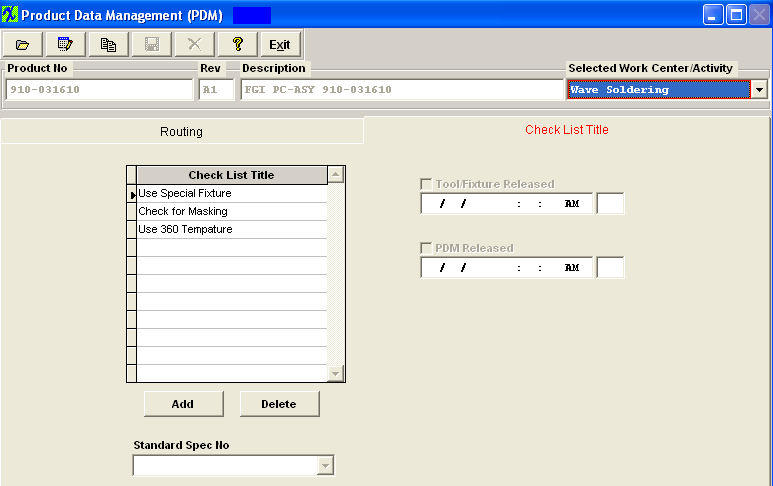
Create a Routing within the WO Traveler Setup module for Product. For further detail see Article #850 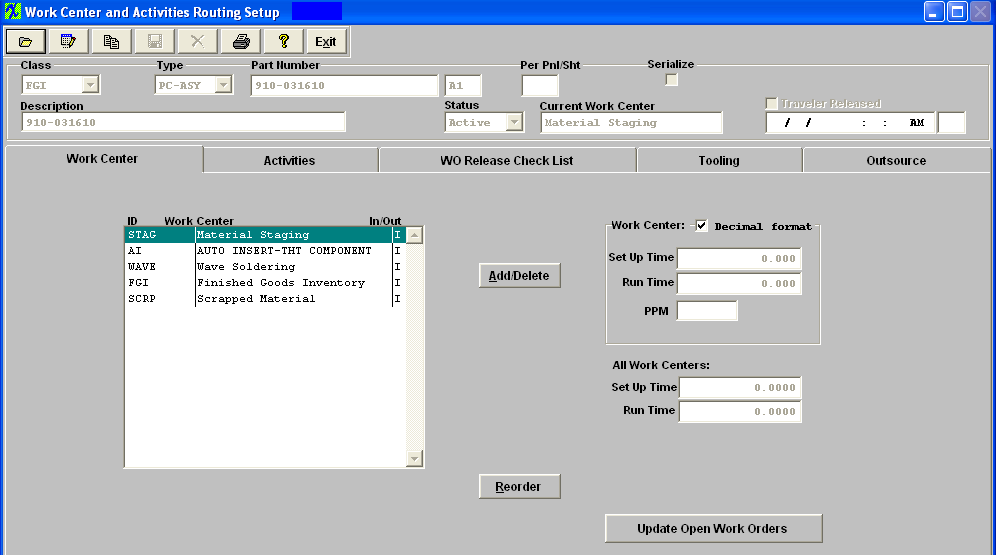 Create a Checklist for a Specific WC within the PDM module. For further detail see Article #2824 .
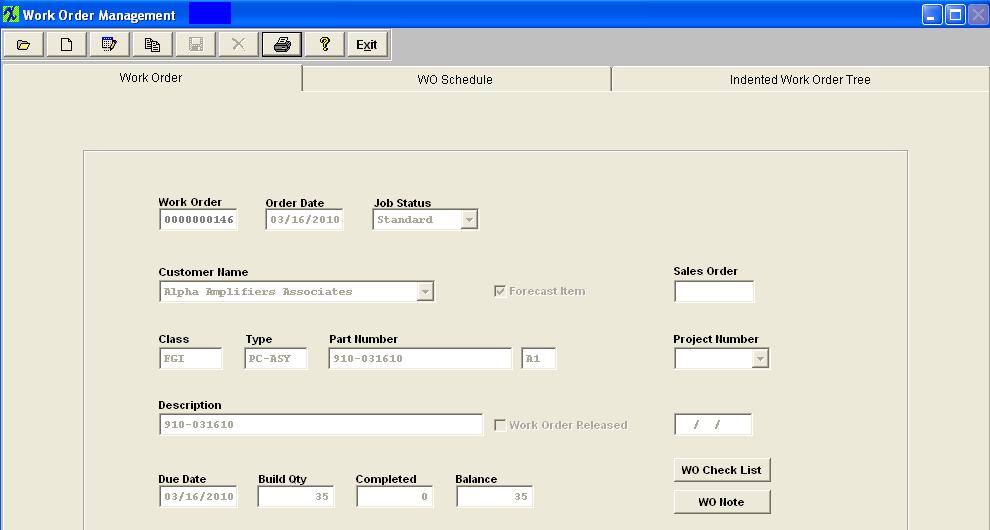
 Create a Work Order for the product within the Work Order module. For further detail see Article #1815.
 The Traveler Released box within the WO Traveler Setup MUST be checked.
The Tool/Fixture Released box and the PDM Released box within the PDM module MUST be checked.
The kit must be Released and the Kit Complete box within the Kitting module MUST be checked.
Transfer product through SFT when product reachs the Work Center with the checklist the "WC Check List" butoon will be displayed in Red (as displayed below).
 Click on the "WC Check List" button and the check list will appear (as displayed below):
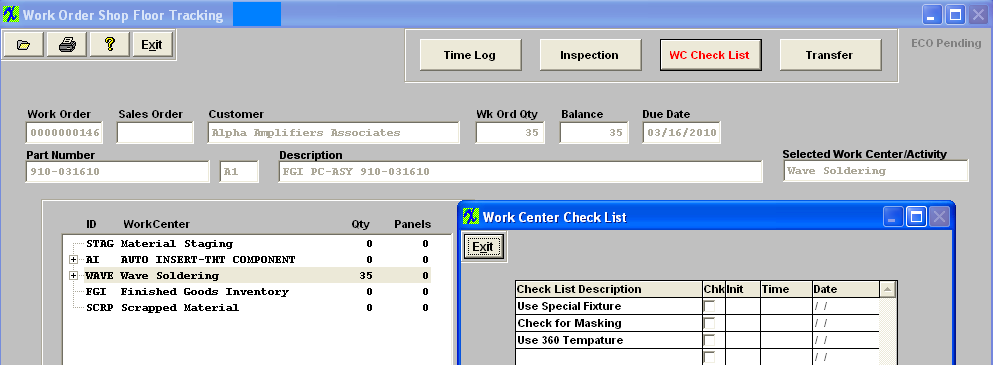 User must then review the list and check the box when task has been completed and their initials, time and date will default in (as displayed below): Note: This check List is for reference only and WILL allow the users to transfer product to the next Work Center if not all items have been checked off.
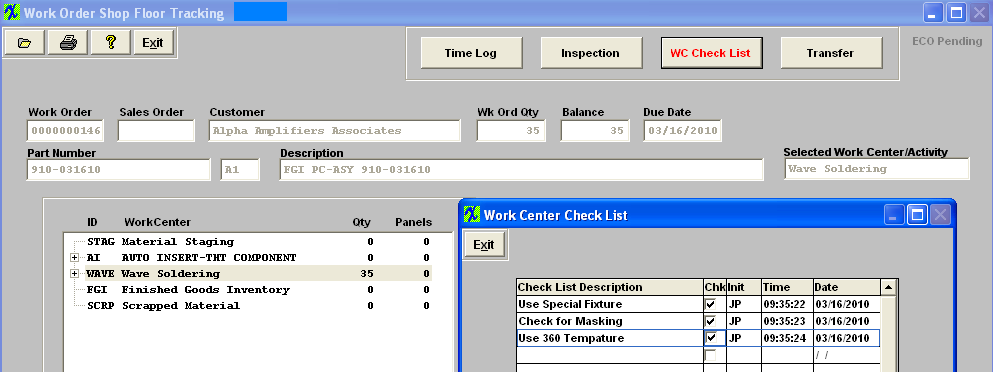 Once all the boxes have been checked within the Work Center CheckList user may complete the transfers. Note: This checklist is for users to check if they do all the necessary task, but it does NOT enforce the user to check all items before the user can transfter to next WC.
|
| 1.4.4. Enter Defect Data Entry |
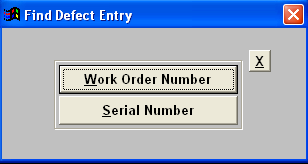
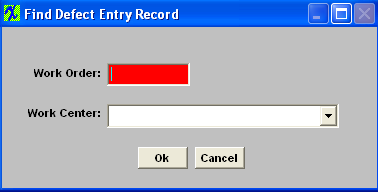
| Follow the Steps in Article #1769 to move product by using the Defect Entry Module. |
| 1.5. Reports - SFT by WO |
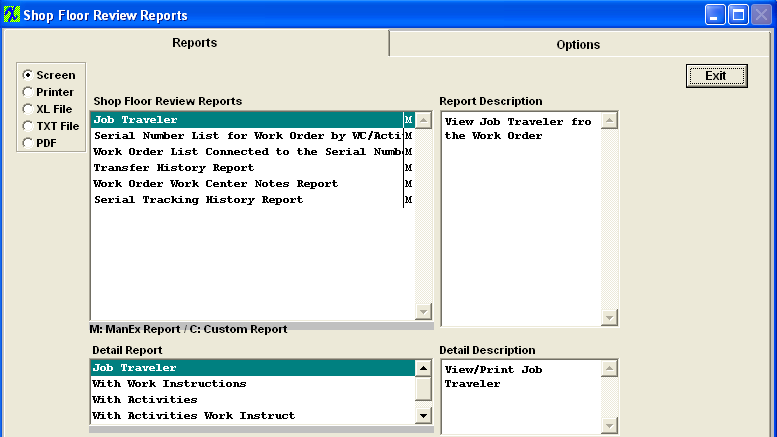
To obtain reports, depress the Report button. The following screen will appear:
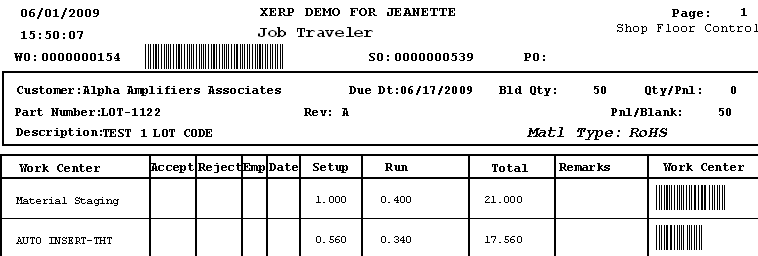
JOB TRAVELER REPORT Highlight the “Job Traveler” report. Make the desired selections in the Detail Report Section. Note: The Work Instruction may not appear in the Traveler if the user prints it to an Excel Worksheet file. Some of the reports are quite complex, with multiple relationships and filters. In this instance, the Work Instructions are in a different data base than the routing and therefore will not be available. Then depress the Options tab. The following screen will appear:
Select the desired radial selection:Customer, Product or Work Order. Select the desired Customer and Work Order by using the Down Arrows next to the fields. If you do not want time in decimal format, uncheck the box. The following reports will be displayed:
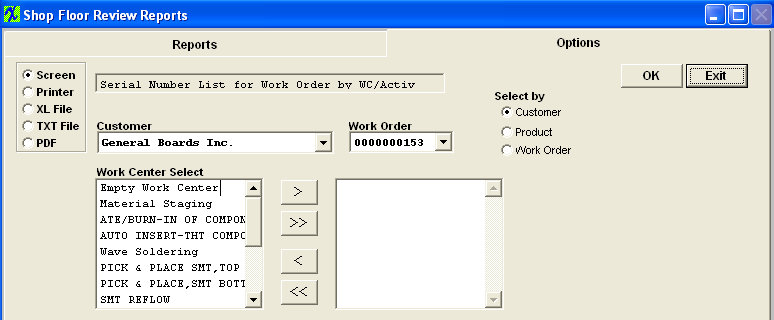
SERIAL NUMBER LIST FOR WORK ORDER BY WC/ACTIVITY REPORT Highlight the “Serial Number List for Work Order by WC/Activity” report. Depress the Options tab. The following screen will appear:
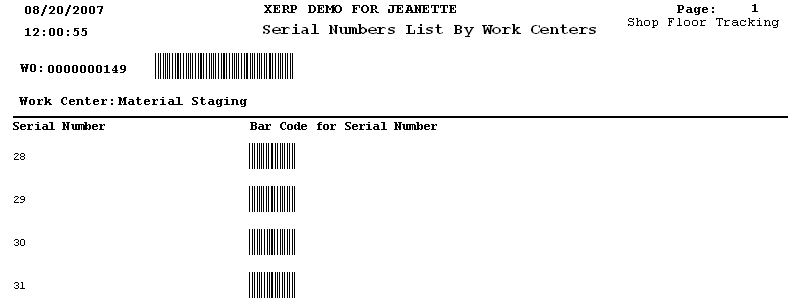
Select the desired radial selection:Customer, Product or Work Order. Select the desired Customer and Work Order by using the Down Arrows next to the fields. Highlight the Work Center and depress the > button. If you want all work centers, depress the >> button. The leading zero's for SN will be removed from Report.
The following report is available:
WORK ORDER LIST CONNECTED TO THE SERIAL NUMBER REPORT Highlight the “Work Order List Connected to the Serial Number” Report. Note:that this report is a View screen only – no report will be generated as an output. Depress the Options tab. Type in the Serial Number and the following will display.
Hitting the OK button will bring you back to the Shop Floor Tracking module. TRANSFER HISTORY REPORT
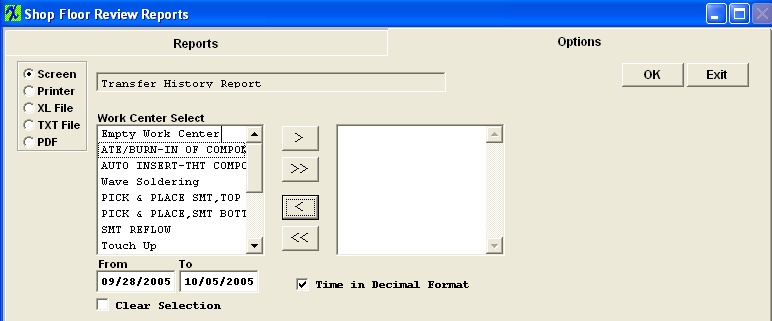
Highlight the “Transfer History” report. Depress the Options tab. The following screen will appear:
Select the Work Center by highlighting and depressing the > button. If all Work Centers are desired, depress the >> button. If you do not want time in decimal format, uncheck the box. Enter in the desired Date Range. Leading zero's for SN will be removed from report. The following Report will be displayed.
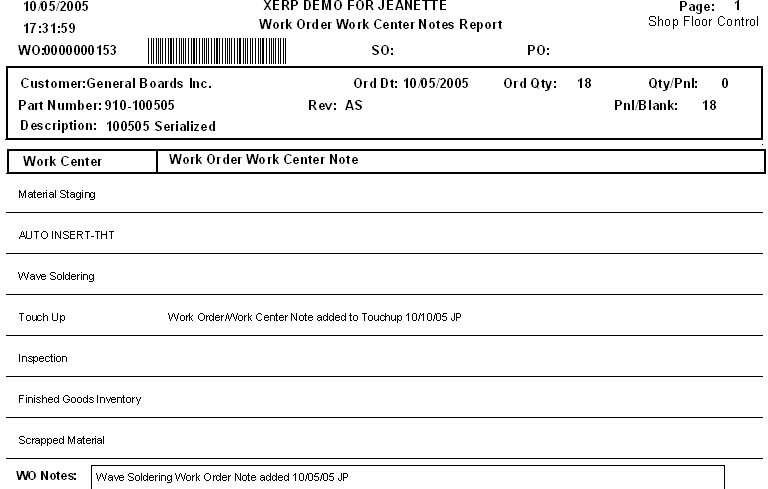
WORK ORDER WORK CENTER NOTES REPORT
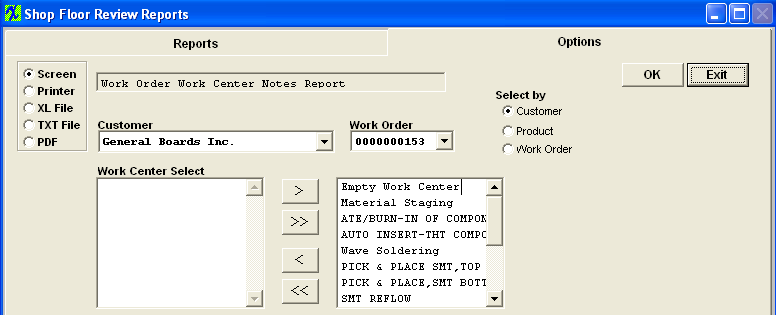
Highlight the “Work Order Work Center Notes” report. Depress the Options tab. The following screen will appear:
All Work Centers are selected by default. If you wish to deselect any Work Centers use the < Button. The following report will be displayed:
SERIAL NUMBER TRACKING HISTORY REPORT Highlight the “Serial Number Tracking History” report. Depress the Options tab.The following screen will appear:
Select the desired radial button: Single Entry or Range. Enter Serial Number. Leading zero's for SN will be removed from report. The following report will be displayed: This report will gather transfer history and defect history for those serial numbers that have been linked to more than one work order and display the transfer history and defect history for all those work orders.
|
| 1.6. FAQ's - SFT |
| Facts and Questions for the Shop Floor Tracking Modules |
| 1.7. Test & Repair (T & R) (OPTIONAL Module) |
| 1.7.1. Prerequisites for the T & R Module |
|
The Test & Repair is actually a separate OPTIONAL module, but has been included into the Defect Entry screen for ease of use for the operators. After activation, Work Order Shop Tracking, Defect Code Entry, and Test & Repai access for each user must be setup in the ManEx Security module. Users with “supervisor’s rights” will automatically have access. To use Test & Repair Management module, Serial Numbering is REQUIRED. This information is entered using the Work Order Management Serial Number Control module. |
| 1.7.2. Introduction for the T & R Module |
Test & Repair Management (T&R) has been designed to capture testing results and failure information such as: In-circuit Testing, Sub-Assembly Functional Testing and System Final Assembly Testing. Once this information has been entered this will allow the users the ability to see the Serial Number History and view all of the testing and repair results as well as when it had been shipped to customers. It will also keep track of any associated returns or warranty work that had been done against this particular Serial Number, continuing history as long as the unit is in service.
|
| 1.7.3. Fields & Definitions for the T & R Module |
| 1.7.3.1. Test & Repair Tab | ||||||||||||||||||||||||||||||||||||||||||||||||||||||||||||
Test & Repair Screen Field Definitions
The Test & Repair is actually a separate OPTIONAL module, but has been included into the Defect Entry screen for ease of use for the operators.
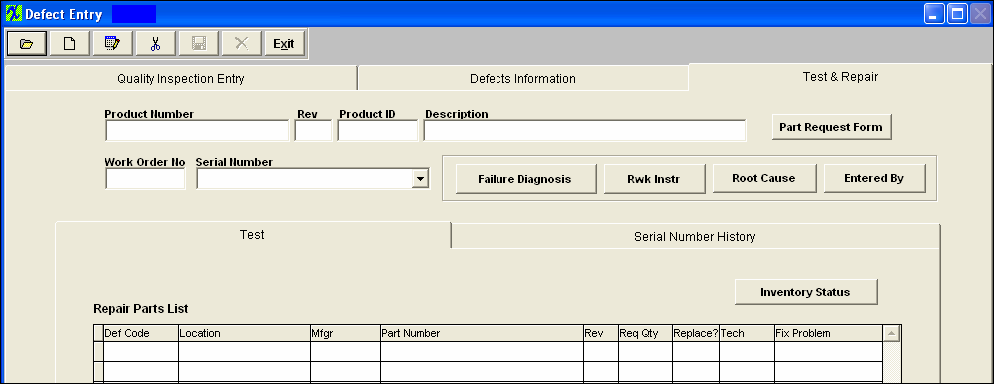
The internal number assigned to the assembly. The revision number associated with the Product Number. This field is no longer used and will be left blank. The description of the Product Number. The number of the work order which was inspected. The serial number of the assembly which failed inspection. Test Tab Field Defintions Repair Parts List
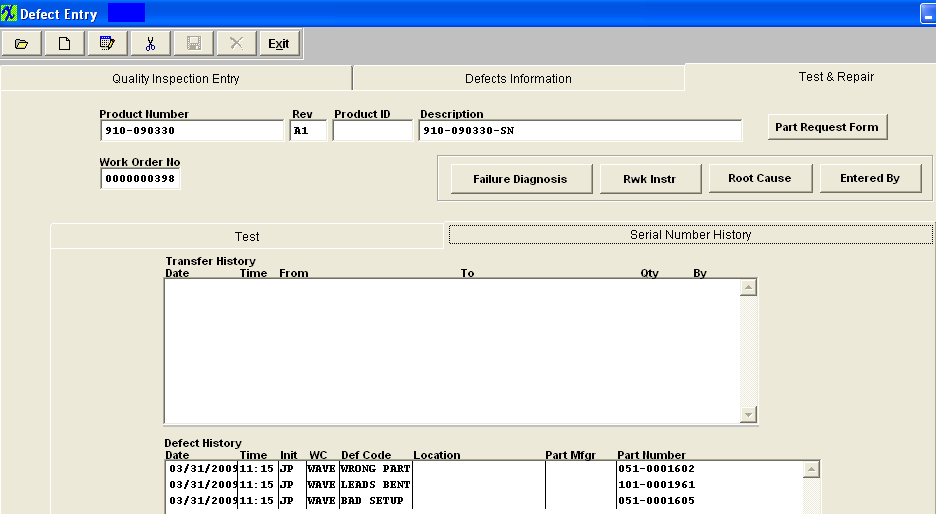
Serial Number History tab 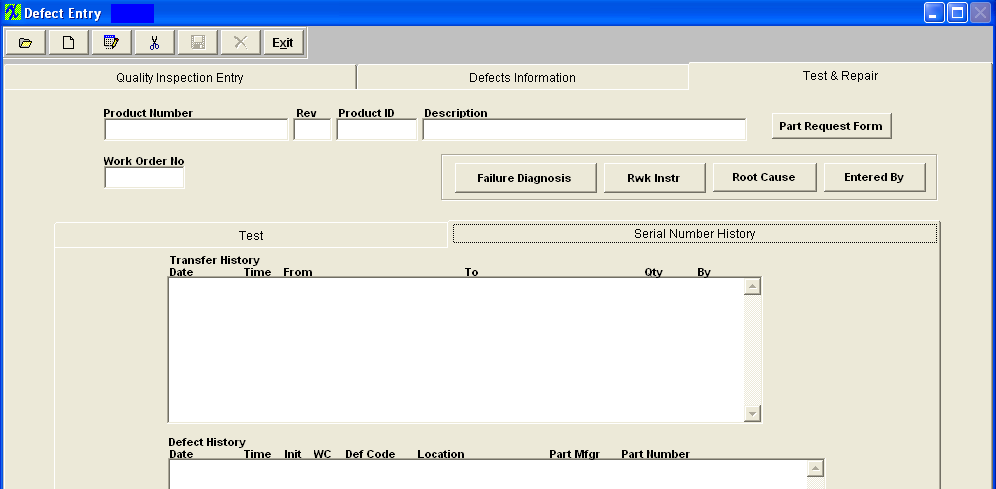 Transfer History Section
Defect History Section
|
| 1.7.4. How To ...... for the T & R Module |
| 1.7.4.1. Add Test and Repair Information | ||||||||||
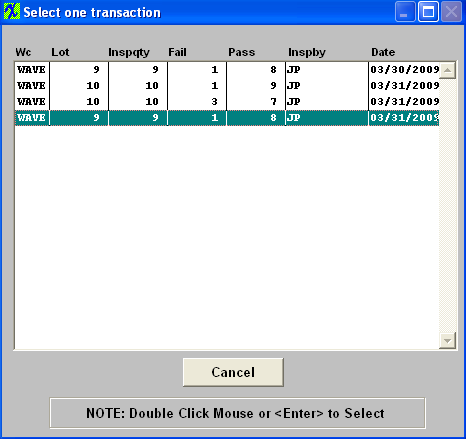
When the user has completed the Defect information, they may enter the Test & Repair tab to enter more information about the part, or may depress the Open/Find record button to find this information at a later time.

Once user has selected a transaction the following screen appears displaying the record you selected:
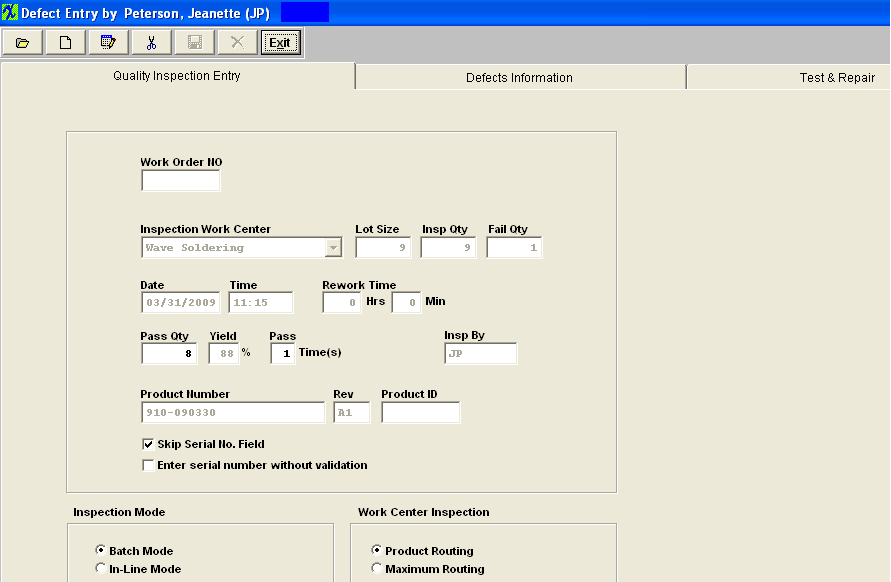 Depress the Edit button and enter your password, user may at this time edit the Quality Inspection Entry info, the Defects Information, or the Test & Repair info:
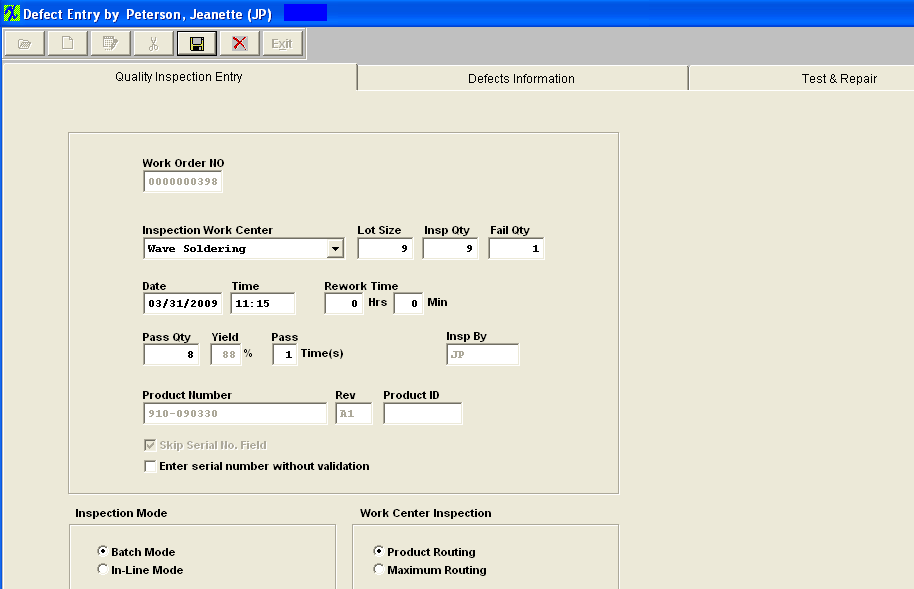 Depress the Test & Repair Tab: (System will only display information for one serial number at a time).
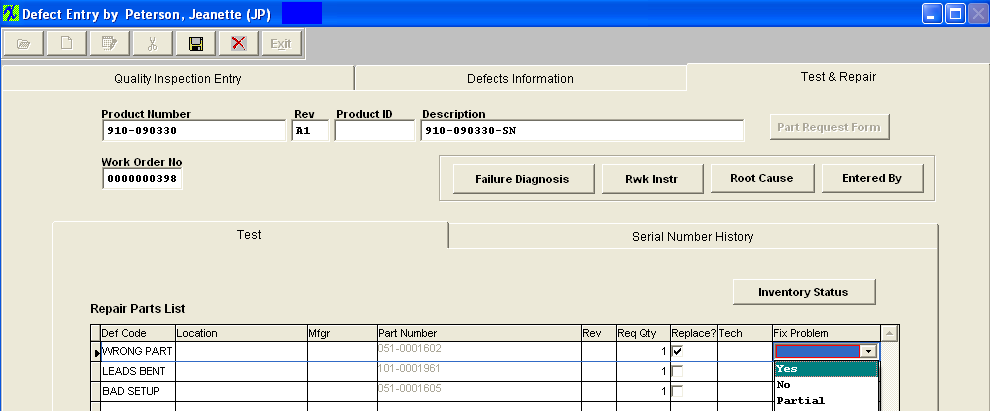
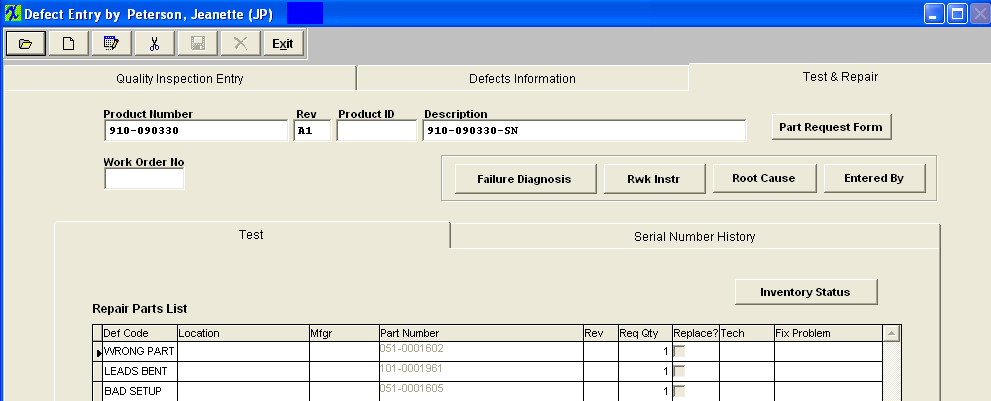 In the edit mode user can edit the required qty, check the Replace? box, or select to Fix Problem from the pull down:
NOTE: To have the initials of the technician who fixed the defect displayed, user must double click in the field.
Depress the Save button to save changes or Depress the Abandon changes button to abandon changes.
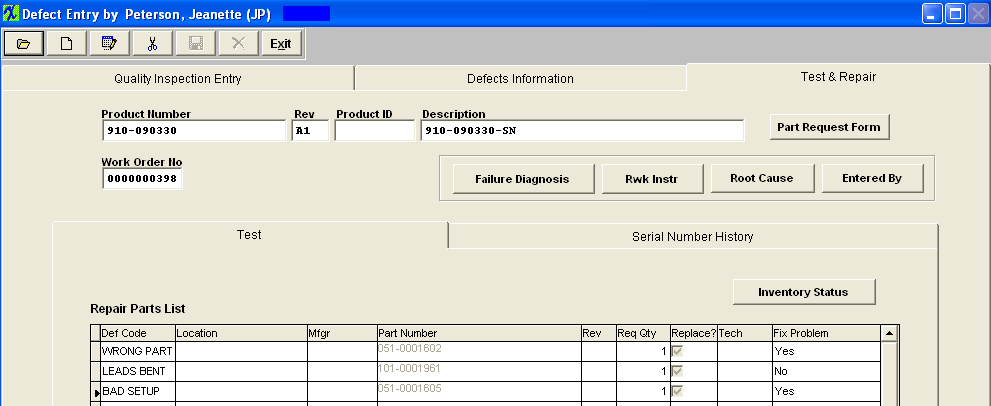 User may at this time print the "Part Request Form" which will need to be approved and hand delivered to the stockroom, so they may fill the shortage(s) and issue part(s) to the kit.
 To View the Serial Number History depress the "Serial Number History" tab
 |
