| Reports - Inventory Handling |
|
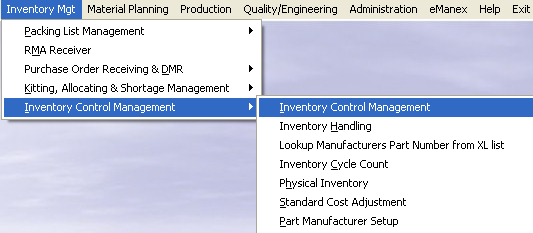
To obtain the Inventory Handling module transactions, enter the Inventory Control Management Module.
|
 |
The main screen will appear.

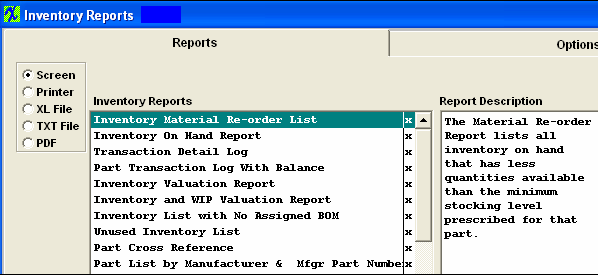
Select the Print button from the ManEx action buttons at the top of the screen.

The following screen will appear.
|
Select the appropriate radio for the output format you desire: Screen, Printer, XL File, TXT File, or PDF.
Highlight the Transaction Detail Log report or the Part Transaction Log With Balance report
|
 |
|
The following option screen will appear at the bottom of the screen, Select the type of Detail Report desired by highlighting it: All, Receipt, Issue, or Trans/Exp.
Depress the Options tab.
|
 |
|
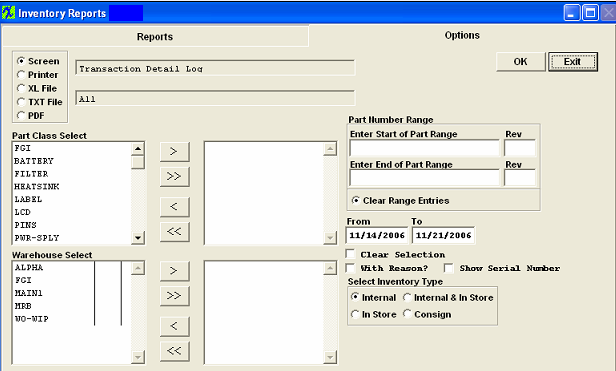
The following option screen will appear:
Highlight the Part Class you desire and depress the > button. If you want All, depress the >> button.
Highlight the Warehouse you want and depress the > button. If you want All, depress the >> button.
If you want a specific part number or range of part numbers, enter the first number and the last number in the Part Number Range fields.
Depress the Clear Range Entries to clear the Part Number Range fields.
Enter the date selection From and To. To clear selection check the Clear Selection box.
Check the With Reason box if you want the reason displayed on the report.
Check the Show Serial Number box if you want the serial numbers displayed onthe report.
Select the Inventory Type by depressing the appropriate radio button: Internal, Internal & In Store, In Store or Consign.
Depress the OK button.
|
 |
The one of the following reports will print depending on the report selected: Notice that the Issued qty's will be displayed as a negative and the Received qty's will be displayed as a postive.
|
|
|
|
|
|
|
|
|
| Article ID: 948 |