|
| Enter Material Planning/Master Production Schedule (MPS) & Forecast/Master Production Schedule Module |
 |
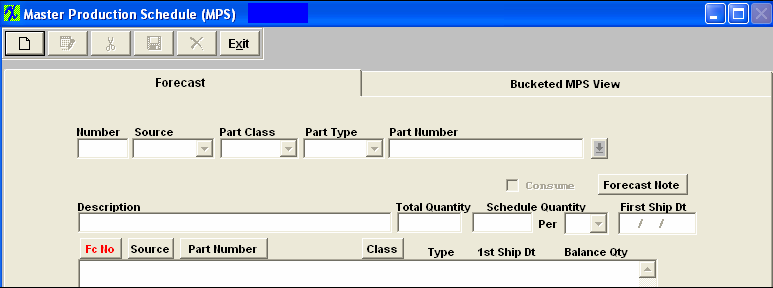
The following screen will appear:

To ADD a new Master Production Schedule, depress the Add action button. Enter your password.
Select the Source from the Drop down menu.
Select the Part Class from the Drop down menu.
Select the Part Type from the Drop down menu.
Select the Part Number from the Drop down menu.
Either type the Part Number into the red box or scroll down until the part number is located.Then, double click to select.
On the main screen, type in the total forecasted quantity for the part.Type in the scheduling parameters.For example, if the forecasted need is 1000 and your plant has the capacity to make 250 units per week, schedule 250 over the next 4 weeks.
Type in the first ship date or type a ? in the First Ship Date box and a calendar will appear on the screen:
Click on the date of interest.To advance into the next month, depress the right hand > button.To advance into the same month next year, depress the right hand >> button.
To go back to last month, depress the left hand < button.To go back a full year, depress the << button.
Click on the date desired.
Check the consume box if the forecast will eventually be replaced by a Sales Order.
If you want to add a Forecast note, depress that button.The following Forecast Item Note screen is available:
Depress the Edit button.Type in the note.Depress the Save button.Exit.
Once you’ve finished the data entry in this screen, depress the Save button |