|
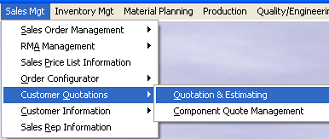
| Enter Sales Mgt/Customer Quotations/Quotation & Estimating |
 |
The following screen will appear:
Depress the Add button, and enter password
|
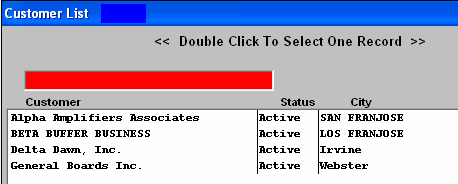
The following Customer List will appear:
Highlight the desired customer and double click.
The Customer name will transfer onto the screen.
|
 |
Enter in the Customer RFQ Number, Due Date, and Quoted Date.

Enter the Customer Tab
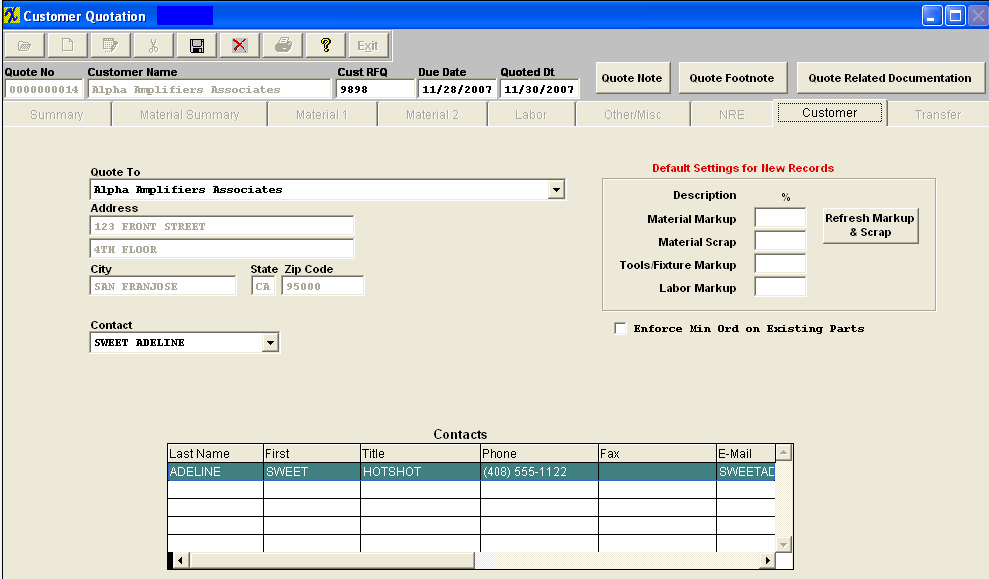
Select the desired Quote To address, (if different from the default) by depressing the down arrow next to the Quote To box. Enter the Default Settings for New Records. Check the box to Enforce Minimum Order on Existing Parts. Depress the Save button. The completed screen will appear:
|
Depress the Add button, enter password and the "Quotation Add Type" selection screen will appear:
Quote functions allow users to: Add New Quote; Define New Product for this Quote; Add Existing Product from Inventory to this Quote; or Add Product from another Quote to this Quote.
|
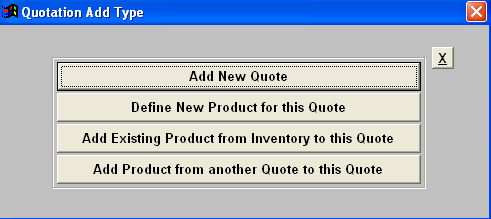 |
The selection to Add a New Quote will allow the user to start the new quote from scratch.
The selection to Define New Product for this Quote will allow the user to add a product from scratch to the Quote.(Detailed below)
The selection to Add Existing Product from Inventory to this Quote will bring up the following BOM Find screen:
|
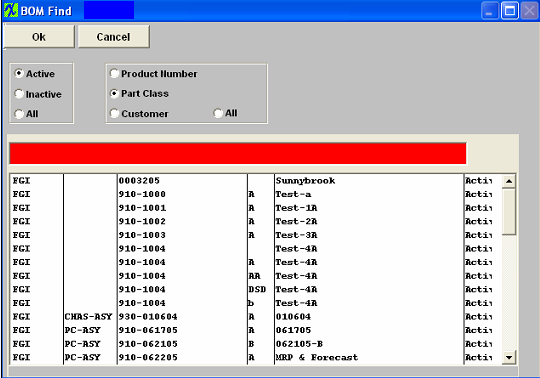
Select the BOM status, Active, Inactive or All, then select the BOM by Product Number; Part Class, Customer, or All by clicking on the appropriate radial.
If you know the product number type it into the red box. |
 |
|
To select by Part Class, click on that radial and type the Part Class into the red box. Depress the OK button. The following screen will appear:
Type in the Product Number and revision number if applicable
|
 |
|
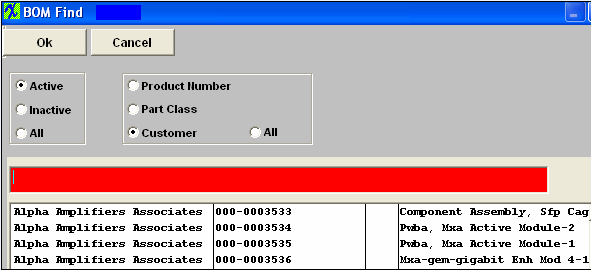
To select by Customer, depress the radial for Customer. Place the cursor in the red box. Type in the 1st letter of the customer. The following list will appear:
|
 |
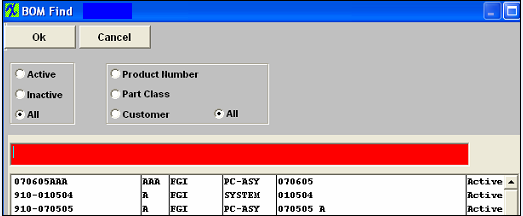
| To select by All, click on the All radial. The following list will appear:
If you know the product number type it into the red box. The following screen will appear:
|
 |
|
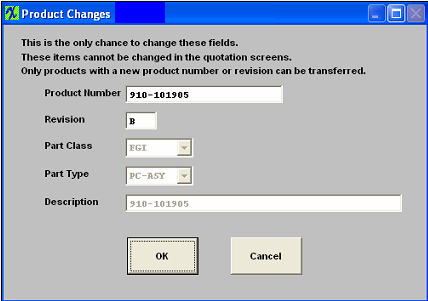
The following screen will appear. Once you have made your selection using one of the procedures above.
Type in any changes to the Product Number and or revision. Note: You must make the new product unique! Depress the OK button.
|
 |
The Summary screen will display the product, as follows:

The components for that Product will appear in the Material 1 window, as illustrated below: Note: If you Add existing product from Inventory to quote, quote having same customer as existing product, only the approved AVL’s in existing product will copy over. If you Add existing product from Inventory to quote, quote having different customer than the customer linked to the existing product or the existing product not linked to a customer, then the system will pull AVL’s from consigned data if that customer is linked to that part. If customer is not linked to the part then the AVL’s will be pulled from the Internal data.
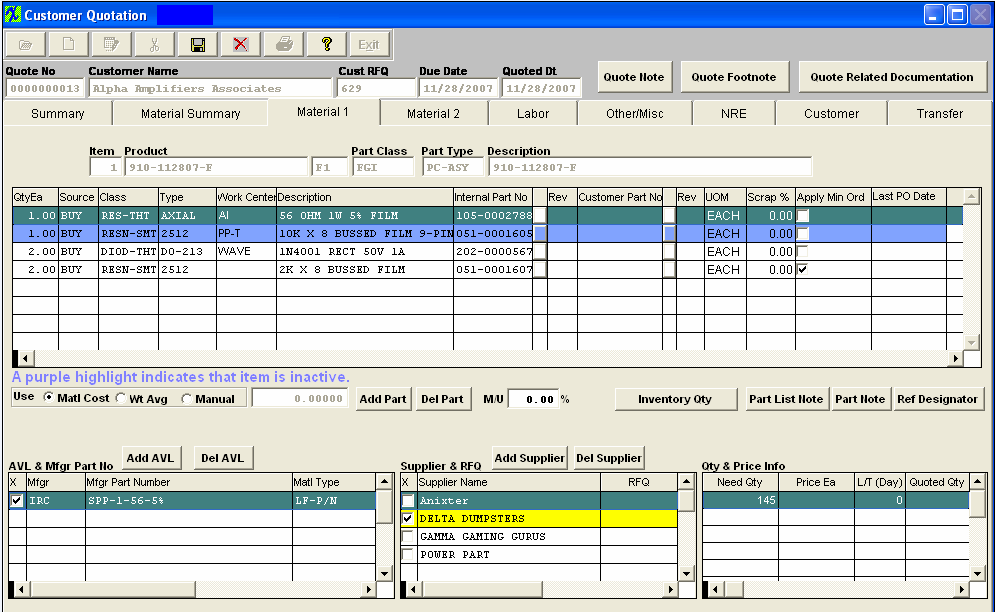
Edit the Material 1 screen as desired. The user may add new components, delete existing components and/or change quantities. Finish off the other screens, as detailed in Article #911 .
|
If you want to copy from another quotation, select the Add Product From Another Quote To This Quote:
|
 |
|
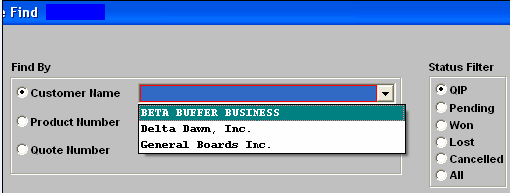
A Quotation Find screen will appear.
The user may find by Customer, by Product Number or by Quote Number.
The user may select the appropriate Status Filter radial button, to filter by Quotation in Process, Pending Quotation, Won Quotation, Lost Quotation, Cancelled Quotation or All.
|
 |
|
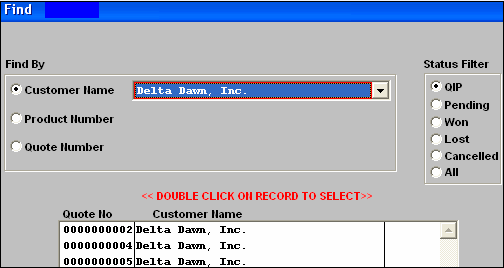
If the user selects Find by Customer Name, depressing the down arrow produces a list of Customer names from which to choose, as displayed in the screen above.If the customer has more than one quote, the user will be presented with the following screen. Select the appropriate quote number and double click:
|
|
|
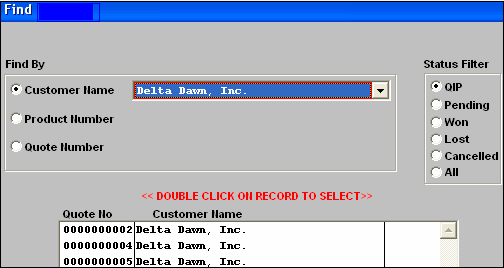
Find by Product Number prompts the user to enter the appropriate number.
|
 |
|
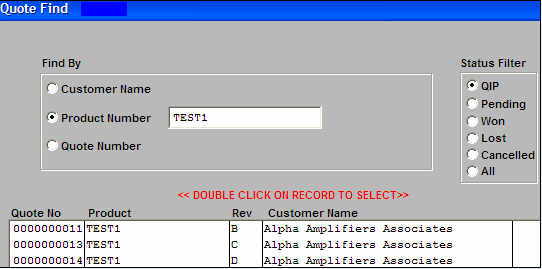
Once the Product number is typed in, the user is presented with another selection screen.
This screen displays the Quote Number, Product and Revision and the Customer name.
Double click on the record you want to select.The information for that quote will populate the screen.
|
 |
|
Find by Quotation Number prompts the user to enter the EXACT Quotation Number.
Once the number is typed in, the information regarding that quote populates the screen.
|
 |
Once the previous quote is selected and the product number is amended to make it unique, the user may edit any of the applicable screens as detailed below.
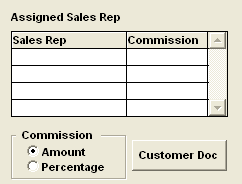
| The Customer Quotation Summary tab allows the addition of a sales representative, as illustrated. |
 |
| To add the Sales Representative, depress the Add button near the Assigned Sales Rep section. The following list of representatives will appear: |
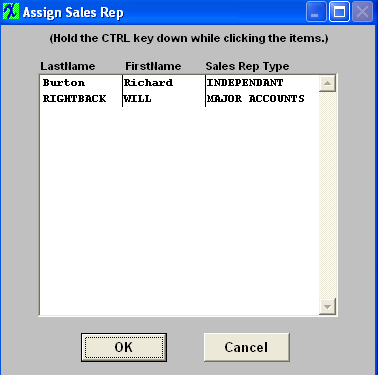 |
Depress the Ctrl key and click on the representative(s) of choice.
Depress the OK button.
Click on the appropriate Commission radial, either Amount or Percentage.Enter the number in the Commission column opposite the Sales Rep.
If you selected Define New Product for this Quote.
Enter the Product Number, Revision Number, if applicable. Select Class, Type, Source, Sales Type, and Material Type from the drop down lists.
Add Lead Time & Quantity
The user may elect up to seven quantity pricings.
Depress the  button. button.
|
The following two screens will appear. Fill in the Lead Time Days and the quantity and depress the enter key. Thelead times are being imported into the system/quote by Days.
|
 |
When all of the quantities have been entered, depress the Save button.
|
The Quantities and Lead Times will appear in the Quantity Table.
|
|
|